
KnillingRefGuide
59
STRING REFERENCE GUIDE your language W e speak STRING REFERENCE GUIDE
-
Upload
carlosbcn32 -
Category
Documents
-
view
49 -
download
9
Transcript of KnillingRefGuide

S T R I N G R E F E R E N C E
G U I D E
your languageWe speak
�
S T R I N G R E F E R E N C E
G U I D E

I ntroduction
This guide is dedicated to string
educators, students, and enthusiasts,
whose interest in, and love of the
orchestral string instrument
guarantees its continued position
of importance in our lives,
music, and culture.
Knilling String Instruments
extends its deep
gratitude and appreciation
to all who contributed their time,
expertise, and knowledge,
to bring this opus to life.
�
Copyright © 1996 by Knilling String Instruments

Founded in 1922, Knilling proudly
stands as the oldest violin company
in North Amercia still owned and
operated by its founding family.
PASSION HAS A VOICERivaled by the human voice alone, the violin is the most expressive of instruments. It possesses amazing powers of communication. It exudes, articulates, challenges and soothes.Each player can find in this remarkable instrument the means to reveal, to bring forth a most personal force.
Its range of expression is phenomenal. Sometimes fiery, exploding with energy, igniting as the bow first touches thestrings. Sometimes tender to the point of tears. Other times playful, tickling, giggling, as the bow dances from one string to another.
In the hands of a skilled and sensitive player, it is no mere tool. The violin truly gives passion a voice.
Over 80 years ago, this voice called to our founder, BernardKornblum, and out of his consuming passion for the violin,Knilling String Instruments was born. The voice continues toguide us today in our relationships with the violin makers andtheir families – relationships which now spans three generations.It expresses itself in every instrument we select, in every adjust-ment we perform, whether student or master, to give every instrument its amazing powers of communication.
So that new voices will continually be added to the old. Giving passion a voice for many generations to come.

Table of Contents
A Brief History of the Violin
3How a Violin Is Made
5Famous Makers of the Violin Family
11History of the Bow
17Famous Bow Makers
19Parts of the Violin and Bow
20Measurements and Other Useful Information
21An Ounce of Prevention
23Practice Tips
28Strings29
Tips, Tricks, and Troubleshooting32
Knilling Custom Shop Adjustment38
Knilling Support Materials43
Abridged Dictionary of Musical Terms45
Weights and Measures48
Index54
Bibliography56
One
�

Two
“The life of the arts, far from being an interruption, a distraction,
in the life of a nation, is close to the center of the nation’s purpose
— and is a test of the quality of the nation’s civilization.”
— John F. Kennedy

The study of sound and music can be
said to have begun nearly 2,500 years
ago, with the famous Greek scientist,
Pythagoras, who made observations
regarding the sounds of notes
plucked on a simple lyre with strings
at different lengths and tensions. �
In ancient Greek or Roman
times, stringed instru-
ments, such as the lyre or
harp, were plucked or
strummed. It was not until
3000 B.C. that the first true
stringed instrument played
with a bow appeared
— the ravanastron, an instrument
still played in India today. �
Other early bowed instruments
included the Indian-Arab rebab,
which was brought into Europe in
the thirteenth
century, about
the time of the
Crusades, probably via Spain.
(In France and other parts of Europe,
it was called the rebec.) The crwth or
crwd, was played in Brittany before
the Moorish invasions. This stringed
instrument actually had a tailpiece,
and sound holes, and was held like
a violin. �
In the nearly two thousand years
that followed, the forerunners of
the violin evolved rather slowly.
Many of the earliest
violins were structural
amalgams of various
stringed precursors,
such as the rebec,
lira da braccio, and
Renaissance fiddle. �
The full ancestry of the violin is
unclear. In particular, it remains
a mystery as to what individual or
group brought forth the violin in
its final form. It has even been
conjectured that the great
Florentine genius, Leonardo da Vinci
(b.1451 — d.1519) may have
contributed seminal concepts
regarding its form and mathematical
proportions. Suffice to say that by
the early 1500’s, a form of the violin
emerged which, in its shape, basic
dimensions, and final details, has
remained fundamentally unchanged
for nearly 400 years. �
ABrief History of the Violin�A
Three
Rebab Drawing
Ravanastron Drawing
Drawing of a rebecbeing played

Prior to around 1600, the violin
remained a rather minor
instrument, used by what was
regarded as a lower class, for their
dance music. Archangelo Corelli
(b.1653 —d.1713), a violinist as well
as teacher and noted Baroque
composer, may have been a
significant early influence in
popularizing the violin. �
As the violin has inspired changes in
music, changes in music have also
led to certain alterations in the violin.
Evolving performance requirements
eventually imposed further changes
on the violin; composers were
writing music that increased
technical demands on the performer
in both range and power. The
virtuosic compositions that were
the hallmarks of nineteenth-century
violin literature, would not have
been possible on the original
instruments made by Antonio
Stradivari. Violin makers, such
as Jean-Baptiste Vuillaume and firms
like Hill, were called upon to literally
disassemble and rebuild a majority
of the pre-existing instruments.
Adaptations included lengthening
the neck and changing its angle,
a longer bass bar, and new types of
bridges and strings. These changes
eventually resulted in the emergence
of the modern violin, and contributed
to its rise to prominence as
“the king of instruments”. �
Four
Three views of an inlaid violinby Antonio Stradivari, 1693
The violin is a true marvel
of balance and beauty. Its basic
form has defied most well meaning
attempts at improvement for nearly
four centuries. �
An understanding starts with the
wood, primarily maple and spruce.
The top plate of the violin is called
the soundboard (also called the top,
table or the belly). The soundboard
must resonate easily, so a relatively
light wood must be used. Because
of its resonant qualities and light
weight, the wood selected is almost
exclusively spruce. �
Arguably, the best wood for the
soundboard features generally
straight grain, and is free of knots.
Ideally, it comes from trees grown
where the onset of winter is quick,
in a climate and soil which does not
foster rapid growth. Under such
conditions, a tree of suitable
dimensions may easily be hundreds
of years old. Even then, the wood is
years, even decades from being
used. It must be properly cut and
stored to dry and cure naturally,
to mature for its next life. �
The best trees for making the
soundboard are typically 200 to 250
years old, found at higher elevations
in the Bavarian mountains. There,
the climate and soil conditions
promote slow growth. These trees
are harvested only in the middle of
winter when the sap has receded
back into the roots. �
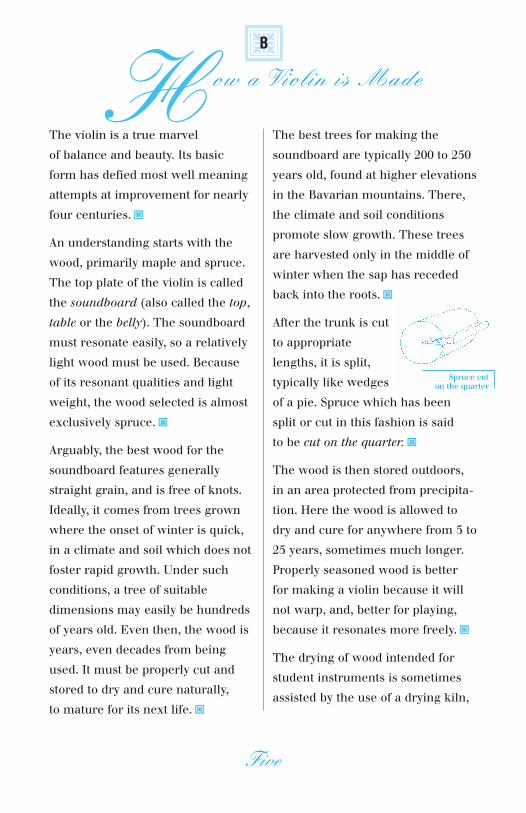
After the trunk is cut
to appropriate
lengths, it is split,
typically like wedges
of a pie. Spruce which has been
split or cut in this fashion is said
to be cut on the quarter. �
The wood is then stored outdoors,
in an area protected from precipita-
tion. Here the wood is allowed to
dry and cure for anywhere from 5 to
25 years, sometimes much longer.
Properly seasoned wood is better
for making a violin because it will
not warp, and, better for playing,
because it resonates more freely. �
The drying of wood intended for
student instruments is sometimes
assisted by the use of a drying kiln,
How a Violin is Made�B
Five
Spruce cut on the quarter

which allows the moisture in the
wood to be reduced more quickly
under controlled conditions.
However, there is no substitution
for time. �
Next, the wedges are split down the
center. The two halves are then
glued together like
bookends. The grain of
the wood, which
comes from the annual
growth rings, now
runs evenly across
both pieces. �
While spruce is used for the
soundboard because of its
tone-producing qualities and light
weight, maple is used on the back,
sides and neck because of its
density, strength and beauty. �
Because of its density, maple is ideal
for the back plate, which can be
either one piece, or, more
commonly, two. Though thinly
graduated (carved to desired
thickness), the back must act more
as a reflector than as a resonator,
making rigidity very important. �
Although other woods are some-
times used, traditionally, much
of the violin’s structural strength
and beauty comes from maple,
especially that found in certain
areas of Eastern Europe. Suitable
maple can be highly figured
(flamed) or quite plain. Highly
flamed maple is prized for its beauty
by both maker and player alike. After
all, the violin is intended to please
the eye as well as the ear. �
Sometimes, instead of being cut
on the quarter, book-matched and
glued, the maple for
the back is cut or
sawn longitudinally
in straight lengths.
Wood which has
been split or cut in this fashion is said
to be cut on the slab, and is often
used to highlight the figure on
one-piece backs. �
Today’s luthier still uses many
hand tools quite similar to those
employed by the old Italian masters.
These include various rasps, clamps,
knives, gouges, forms, templates
and other specialized tools. �
The thickness of the top and back
plates is determined by time-tested
patterns. The template is laid over
the plates, and the pattern drawn
on, leaving contour lines similar to
those found on a topographical map.
This helps the maker maintain the
proper thickness or graduation for
the top and back. The graduation
Six
Wood cut on the slab
Wood cut on the quarter, split, and book matched

will be
different in
different
areas of the
plates; the
center and
edges tend to
be thicker, while the central areas
above and below are much thinner.
Using hand tools to carve away the
excess wood, the violin maker
adjusts the final shape and dimen-
sions of the instrument based on
the template. �
For student violins, a few steps of
the process can be accelerated with
the help of specially designed
machinery. However, much of the
work must still be done by hand.
For finer instruments, the maker
painstakingly refines the graduation
based on the character of the
individual piece of wood, and based
on exactly how she/he wants the
instrument to look, feel and play. �
Certain features of orchestral string
instruments serve both ornamental
and practical purposes. Two fine
examples are the f-holes or sound
holes and the purfling. �
The f-holes, which lie on either side
of the bridge, reduce the stiffness of
the top, allowing it more freedom
to respond. Once the soundboard
has been contoured, the maker
measures for the positioning of
the f-holes. The size and precise
placement of the f-holes have a
distinct influence on the sound of
the instrument. The exact area of
the sound hole openings effects the
way the instrument and the air
inside can resonate. For the master
violin maker, it also serves as an
important artistic element, as
individualized as a signature. �
The purfling, which accentuates
the graceful outlines of the body,
is actually three fine strips of wood,
delicately sandwiched into narrow
channels on the top and back plates.
Its practical benefit is to strengthen
the plates, and prevent edge cracks
from extending into the body of
the instrument. �
Using a special tool, the maker cuts
a narrow channel around the edge
of the top and back plates. A thin,
flexible strip of purfling is then
inlaid; this strip is actually three
layers of wood: dark, light, and
dark, laminated together. Like the
f-hole, the purfling is more than
decorative. It actually helps to
protect the wood from splitting. �
Seven
Graduation for front and back of the violin

The neck, pegbox, and scroll
(the curled shape at the top of
the neck) are carved from a single
block of seasoned maple. In practi-
cal terms, the fingerboard will be
glued to the neck, and pegs to hold
the strings will go into the pegbox.
Yet this elegant part is also an
example of the violin’s unique blend
of function and beauty. �
The sides, or ribs of the violin, are
fashioned from strips of maple.
Since maple is strong, the ribs can
be quite thin. The ribs are fitted
around a mold and moistened.
Then a heated bending iron is used
to make them flexible enough to
conform to the mold. �
The internal architecture of the
string instrument should enhance
both its sound and soundness. Two
important features
which do this are
the blocks and
the lining. �
Once the mold is removed, the ribs
are ready to be glued to the spruce
corner and end-blocks. These blocks
– there are actually six; two end
blocks (top and bottom), and four
corner blocks – are usually made of
spruce or willow. The blocks hold
the ribs and plates in position, and
lend strength to the structure.
In addition, the neck is mortised into
the top block, while the bottom block
holds the end pin. �
The lining – twelve narrow strips
of wood, generally willow or spruce,
extend around the top and bottom
of the ribs, between the blocks,
carefully fitted and glued to both the
ribs and the plates. This strengthens
the sides, and adds surface area for
attaching the top and back plates.
Well fitted blocks and lining help
provide essential support for the
soundboard, allowing it to
respond properly. �
Normally hidden from view inside
the instrument is a small but
important piece of spruce, called
the bass bar. Cut from a slender
piece of spruce, the bass bar is
glued lengthwise underneath the
top plate, and extends along the
underside of the soundboard.
It adds structural strength, and also
enhances the volume, range and
projection of the lower tones. �
Finally, the violin can be assembled
and varnished. Over the centuries,
an exotic array of substances have
Eight
Fitting the corner blocks

been used to treat and color the
wood. Despite modern scientific
inquiry, mystery still surrounds
the varnish used by the masters of
Cremona. Intrigue still surrounds
the formula and methods used by
Stradivarius himself. Theories
abound regarding the exact
ingredients, their preparation,
and their application. Just how
much of the early formulas are still
in use may never be known. �
Today, the formulas and methods
are still highly individualized.
Master quality instruments are
finished with spirit-, oil-based, or
blended varnishes, in which some
mixture of common and exotic
compounds are dissolved or
suspended. Layer after translucent
layer is brushed on by hand, lending
the instrument the particular color
and luster the maker desires. �
Oil and spirit varnish take the
greatest amount of time and care
to apply and dry, and are relatively
soft, requiring rather delicate
handling. For certain student
instruments, more durable yet
flexible finishes have recently been
developed. Student (and some
step-up) instruments frequently
use a harder, more protective finish,
called nitrolac (nitrocellulose
lacquer). While attractive, they
offer student instruments the
combination of greater protection
and ease of maintenance. �
A varnished instrument is still
incomplete, needing a fingerboard,
nut, pegs, bridge, soundpost,
tailpiece, saddle, endpin, and
strings. The fingerboard, nut,
saddle, tailpiece, tuning pegs and
endpin are normally made of ebony
or other types of dense hardwood.
The strings are suspended by a
bridge, made of seasoned maple. �
The bridge transmits the vibrations
of the strings to the soundboard
itself. The quality of the maple
blank can significantly effect the
quality of response. This ornate,
intricate little wedge of maple does
far more than simply hold up the
strings. It transmits the vibrations
to the belly, which in turn starts the
sound resonating throughout the
body of the instrument. It works
closely with the soundpost, which is
located just beneath its treble foot.
According to some theories, this
leaves the other foot free to tap out
its rapid rhythm, magnifying the
vibrations of the strings. �
Nine

The finest bridges are carved from
“flecked” maple (called speigel in
German), with fairly horizontal
grain. Carving the bridge is as
much an art as a science. A poorly
cut bridge can impede performance
of even the best instrument. Of
great importance is that the feet are
fitted exactly to the belly of the vio-
lin, without gaps. This facilitates the
transfer of vibrations to the body. �
Strings are made from a wide range
of materials, from steel to gut to syn-
thetic (perlon, synlon, PET, or nylon)
cores. Each combination produces its
own performance characteristics
(see Strings section). �
The French term for the soundpost
is l’ame, the soul. This small dowel
of spruce is fitted between the top
and back plates, behind the foot
of the bridge on the treble side.
So critical is this seemingly
innocuous piece of wood, that even
slight changes in its position can
change the tone of an instrument
considerably, altering the way
vibrations are transmitted to the top
and back plates and to the bass bar.
Although both soundpost and
bass bar also help counter the
downwards tension of the strings,
so important is their combined
effect on the sound, that they have
been described as the “entire ner-
vous system” of the instrument. �
At this point, the violin is still far
from being ready to play. In fact,
the next stage of the violin’s life is
extremely important: the adjustment.
Each of the above mentioned
components must be hand–fitted
and adjusted for each individual
instrument. The quality of the
adjustment can determine
whether the instrument will
perform to its potential and play
with ease; it can even affect the
condition and longevity of the
instrument itself. (See Knilling
Custom Shop Adjustment). �
Ten
“Music, of all the liberal arts, has the greatest influence
over the passions, and it is that to which the legislator
ought to give the greatest encouragement.”
— Napoleon Bonaparte

Throughout the centuries, hundreds
of violin makers have risen to
prominence as masters of their art.
The selection presented here pays
tribute to some of the most famous
names, yet represents but a fraction
of distinguished luthiers who have
left their mark on the history of
violin-making. �
BRESCIAN SCHOOL
GASPARO DA SALO (b. 1540 — d. 1609)
Originally a maker of viols and
tenors, Gasparo da Salo’s violins
rose quickly to prominence,
surpassing all his contemporaries,
and he soon became the head of the
Brescian school. Many of his
instruments were made of
pearwood and sycamore,
especially his basses. The
scroll particularly reflects
the still primitive state
of the instrument. �
GIOVANNI PAOLO MAGGINI
(b. 1520 — d. 1580)
Maggini was a pupil of
Gasparo da Salo from age seven,
where he remained until
early adulthood.
His patterns are rather large and
broad in outline, but compact, with
flattish arching sloping
towards the purfling. The scrolls are
still somewhat unrefined. His instru-
ments are sometimes ornamented by
elegant curls of purfling, typically laid
in a double line. �
CREMONESE SCHOOL
The Cremonese school was founded
by Andreas Amati (b. 1525 — d. 1611),
who started out as a maker of rebecs
and viols. Some authorities have
suggested that Andreas started the
manufacture of violins contempora-
neously with Gasparo da Salo.
Noted makers of the Amati school
include Joseph Guarnerius,
Francesco Ruggieri, Jean Batiste
Grancino, Francisco Grancino,
Andreas Guarnerius,
and Sanctus Seraphino. �
NICOLAuS AMATI
(b.1596 — d. 1684) Nicolaus, the
grandson of Andreas Amati, was
considered the greatest maker of
this illustrious family. Numerous
masters of the first part of the
F amous Makers of the �C
Eleven
Violin Family
F-Hole by Gasparo da Salo
Label used byPaolo Maggini

eighteenth century
were his pupils. His
most celebrated vio-
lins are those known
as Grand Amati mod-
els. These were
comparatively large
instruments with long corners, bold
scrolls and beautiful varnish, and
although not powerful, were
brilliant in tone. Instruments made
by Nicolaus Amati are also notable
for their arching, which tends to be
rather high at the center. �
ANTONIO STRADIVARI
(b.1644 — d.1737)
Purported to have been a pupil of
Nicolaus Amati, Antonio Stradivari
is considered by many to be the
greatest violin-maker that ever lived.
Stradivari served his apprenticeship
with Amati, and stayed until 1670.
During this period, he is not thought
to have signed his work. �
Independently wealthy as a young
man, Stradivari was free to pursue
his quest and passion for perfection.
His work can be divided into
three periods:
Circa 1668 — 1686
The instruments made during the
first period are known as “Amatesé
Stradivari”, which resemble Amati’s
“Grand” model, but with modified
corners, and flatter arching. The
wood used during this period,
although acoustically sound, tends
to be less figured than his later
instruments. It has also been said
that Stradivari spent this time
procuring what he thought to
be the best wood. �
Circa 1686 — 1694
The second period is
characterized by graceful,
larger instruments with
even flatter arching,
elegant f-holes, and
beautiful golden or light red varnish.
Towards the end of this period,
Stradivari made instruments known
as “Long Pattern”, so-monikered for
the narrowness between the
f-holes, which gave the violins
a lanky appearance. �
Circa 1695 — 1725
Deep and brilliant in tone, the best
Stradivarius violins were made dur-
ing the third period, when Stradivari
was in his 50’s. The grace, beauty,
and faultless perfection of instru-
ments made during this period
Twelve
F-Hole by Antonio Stradivari
Label used byAntonio Stradivari
Scroll by Nicolaus Amati

reflect the greatest violin maker’s
powers at his peak, reaching its
zenith around 1714. Supple and
elastic, the glorious translucent
varnish applied by
Stradivari continues to
baffle experts. Over
the centuries, masterful
copies, perfect to the
smallest detail, still
fail to capture the soul that Strads
from this era radiate. Only after
1725, does the work of this great
master begin to show the effects
of age. �
Stradivari was a very prolific and
industrious maker, completing, on
the average, twenty five violins or ten
celli a year. In his sixty or seventy
years of activity, he must have com-
pleted well over a thousand instru-
ments. A surprising number have
survived to this day. However, as the
single most imitated maker, there is
little doubt that some of the surviving
“genuine” Strads may ultimately be
revealed as masterful copies. �
BARTOLOMEO
GIUSEPPE GUARNERI
(b.1698 — d.1744)
Bartolomeo Giuseppe
Guarneri (also
known as Joseph
Guarneri del Gesu) was the
greatest master of the celebrated
Guarneri family of violin makers.
He was the grandson of Andrea,
and son of Giuseppe Giovanni
Battista (who was known as
Joseph Guarnerius filius Andreae).
The term “del Gesu” comes from his
labels which always incorporated
the characters I.H.S.
(Iesu Hominum Salvator)
and a Roman cross. �
Although his work may be
divided into four peri-
ods, instruments from
the third period exhibit great
originality and superb varnish.
Instruments of this period are
broader in the waist, with long but
elegant inner bouts, long and per-
pendicular f-holes, perfect scrolls
and lovely varnish, said to equal
Stradivari’s. Deep and powerful in
tone, Guarneri instruments are said
to rival those made by Stradivari. �
During the latter part of his life,
many of Joseph del Gesu’s
instruments exhibited a noticeably
impetuous and personal character.
Contemporary research has
dispelled the apocrophyl tales
claiming that many of these
Thirteen
Scroll by Guarneri del Gesu
F-Hole by Guarneri del Gesu
Stradivari head showing oval shape

instruments were “prison fiddles”
or “drunken Josephs”, made in
prison, using wood, tools and
varnish smuggled in by sympathetic
jailers. On the contrary, these later
instruments show remarkably
accurate workmanship and
originality. The famed violin
virtuoso Nicolo Paganini’s favorite
instrument was a Guarneri del Gesu
violin from this era (1743). �
FRANCESCO Ruggieri
(b.1620 — d.1695)
Thought to be Nicolo
Amati’s first pupil,
Francesco Ruggieri is
increasingly becom-
ing recognized as a
great Cremonese
maker in his
own right. �
Although he left Amati’s shop
around 1641, Francesco Ruggieri
continued to craft instruments in
the Amati style, and often labeled
them as such. Ruggieri also made
a large number of celli, and
experimented with the pattern,
eventually developing a smaller,
more manageable model than the
typical large dimension standard
of the 17th century. �
CARLOS BERGONZI (b.1683 — d.1747)
Bergonzi is one of the greatest
Cremonese makers, overshadowed
only by Antonio Stradivari and
Giuseppe Guarneri del Gesu. Carlos
Bergonzi is thought to have learned
the art of violin making from
Giuseppe Guarneri filius Andreae,
and Guarneri del Gesu, and estab-
lished his own shop around 1720. �
Bergonzi’s work is characterized by
the delicacy of detail, especially his
scrolls, which are cleanly carved
and exceptionally symmetrical.
His finest instruments date from
1730 to 1740, and are made from
handsomely figured wood.
Bergonzi apparently made neither
violas nor celli. �
NEAPOLITAN SCHOOL
ALLESSANDRO GAGLIANO
(b. 1640 — d. 1725)
Allessandro was the
first of this long-lived
family of violin makers
from the region of
Napoli, whose mem-
bers span almost two centuries. �
Most of the Gagliano family made
instruments based on the Stradivari
model, except Allessandro.
Fourteen
Scroll by Francesco Ruggieri
F-Hole by Allessandro Gagliano

Best known for his fine celli, his
instruments exhibit great character
and originality, and even his varnish
was distinctive; rich, limpid and deep
red in color. �
Nicola and Gennaro Gagliano, sons
of Allesandro were fine craftsmen,
greatly influenced by Stradivari, and
Amati. The brothers also made celli
based on the Stradivari model, and
developed a narrower model which
was subsequently adopted by
a majority of Neapolitan makers. �
TYROLEAN SCHOOL
JACOBUS STAINER (b.1620 —d.1683)
The greatest maker of the
German school of violin-making,
Jacobus Stainer originally worked for
Herz, the famous organ builder,
before settling
on the profes-
sion for which he is
now famous. Few makers have been
more abundantly copied. �
Said to have been a pupil of Nicolaus
Amati, Stainer’s violins were first
offered for sale in the late 1630’s.
Pupils of note include Mattias Albani
(1654), and members of the Klotz
family (1670 — 1700). �
Highly original, Stainer’s instruments,
although typically small in pattern,
exhibit strong edges with purfling set
rather near them, well-cut f-holes,
and are far more highly arched than
Cremonese instruments, especially
between the upper bouts. The backs
reflect more curvature than the
bellies, with the summit of the arch
almost as wide in dimension as the
bridge. The scroll is often ornately
finished with a carved lion’s or
animal’s head, otherwise, they
were left blunt and rather short. �
MATTIAS KLOTZ (b.1656 — d.1743)
Considered by many to be the founder
of the violin
industry in
Mittenwald, Germany, a
statue of Mattias Klotz erected in 1890
can still be seen there to this day. �
He received his first lessons from
Jacobus Stainer, completing his
education in Padua, Italy, under the
aegis of Giovanni Railich, before
returning to Mittenwald in 1678. �
Although not always using the
best woods, his work is excellent,
and the tone of his instruments
noteworthy. A good number of
violins made by Mattias, and other
members of the prolific Klotz family,
are in existence. �
Fifteen
Label used by Mattias Klotz
Label used byJacobus Stainer

FRENCH SCHOOL
NICHOLAS LUPOT (b.1784 — d.1824)
Considered the best of the French
school, Nicholas Lupot has been
called the “French Stradivari”. �
Pupil of his father, François Lupot,
Nicholas came with him to Orleans
when he was eleven. In 1794,
Lupot went to Paris to work with
François-Louis Pique, before finally
opening his own shop in 1798. His
pupils include Bernardel and Gand. �
Reaching his zenith by
1810, Lupot copied
Strad almost exclusively, but his
copies of other great masters
are also excellent. �
JEAN-BAPTISTE VUILLAUME
(b.1798 — d.1875)
Son and pupil of Claude Vuillaume V,
Jean Baptiste Vuillaume is said to
have been one of the most perfect
imitators that ever lived. Vuillaume
is also reputed to have been the
only nineteenth century violin
maker who was able to equal the
varnish of the old Italians. �
Enormously talented, he worked, at
the age of nineteen, in the workshops
of Lébé in Paris, and also with
Francis Chanot.
The influence of
Lébé can be seen reflected in his
work, and although he was taken in
as a partner in 1825, Vuillaume left
Lébé in 1828 to open his own shop. �
Jean Baptiste Vuillaume was not
only a meticulous maker, but as
a dealer, handled many fine instru-
ments, and was very successful at
imitating other masters, especially
Antonio Stradivari. Many instru-
ments sold as genuine Stradivari,
may in fact have been the work of
Vuillaume. Vuillaume also engaged
workmen to make bows and had
pupils of his own as well. Out of his
shop have come some of the most
prominent French bow makers of
the nineteenth century, including
Eulry, Lenoble, Persois, Peccatte,
and Voirin. �
Sixteen
Label used by Jean Baptiste Vuillaume
Label used byNicholas Lupot
Photos and illustrations in this section reproduced with the permission of the Journal of the Violin Society of America, editor, Albert Mells.
Without the bow, the violin would be,
for all practical purposes, mute.
Therefore, an understanding of the
origin of the bow is equally as
important as an understanding of
the origin of the violin. �
The bow as a musical instrument,
was well–known among primitive
cultures around the world, and
throughout Islam and the Byzantine
Empire, but not introduced to Europe
until around the 11th century. �
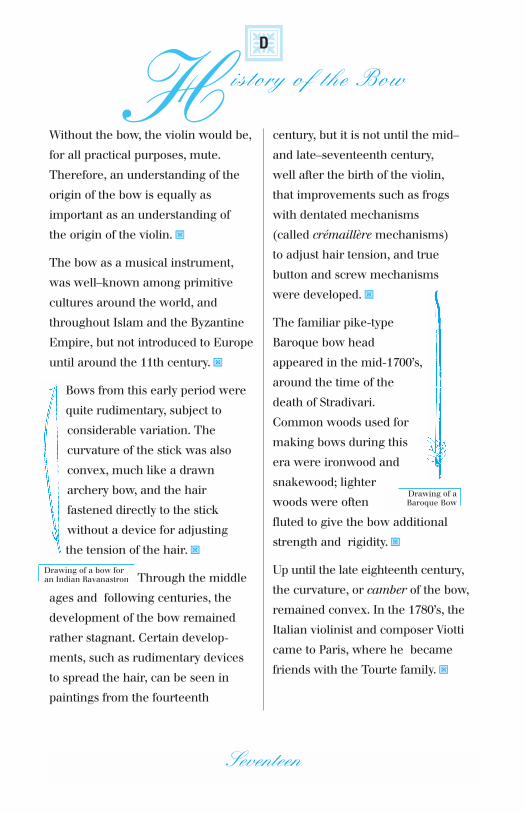
Bows from this early period were
quite rudimentary, subject to
considerable variation. The
curvature of the stick was also
convex, much like a drawn
archery bow, and the hair
fastened directly to the stick
without a device for adjusting
the tension of the hair. �
Through the middle
ages and following centuries, the
development of the bow remained
rather stagnant. Certain develop-
ments, such as rudimentary devices
to spread the hair, can be seen in
paintings from the fourteenth
century, but it is not until the mid–
and late–seventeenth century,
well after the birth of the violin,
that improvements such as frogs
with dentated mechanisms
(called crémaillère mechanisms)
to adjust hair tension, and true
button and screw mechanisms
were developed. �
The familiar pike-type
Baroque bow head
appeared in the mid-1700’s,
around the time of the
death of Stradivari.
Common woods used for
making bows during this
era were ironwood and
snakewood; lighter
woods were often
fluted to give the bow additional
strength and rigidity. �
Up until the late eighteenth century,
the curvature, or camber of the bow,
remained convex. In the 1780’s, the
Italian violinist and composer Viotti
came to Paris, where he became
friends with the Tourte family. �
History of the Bow�D
Seventeen
Drawing of a bow foran Indian Ravanastron
Drawing of aBaroque Bow

Perhaps as a result of experimenta-
tion and artistic collaboration, the
camber was changed from convex
to concave, the fluted bow and
pike’s head abandoned, and the
ferrule invented. �
During this period, the evolution of
the bow accelerated in response to
important changes in performance
practice, as music moved from the
court and salon to larger venues
and larger audiences. The new bow
enabled greater sonority, power,
and projection, sustained a wider
range of dynamic levels, and
articulated a greater variety of
new bowing techniques. �
The adoption of pernambuco as
the wood of choice for string
instrument bows is said to have
been, in part, a consequence of
expanding international trade. Ships
plying South America trade routes
would use pernambuco, which is
extremely heavy and dense, as
ballast on the return leg of their
voyages (ships from North America
used maple for similar purposes).
Pernambuco also was an important
source in dye manufacturing before
the advent of synthetic aniline dyes.
The ready availability of tremen-
dous quantities of pernambuco
wood eventually attracted the
attention of François Xavier Tourte
(b.1747 — d.1835), “the Stradivari
of the bow”. �
With the work
of the greatest
member of the
Tourte family,
the bow was
perfected. It was
François Xavier
Tourte who
settled on
pernambuco as
having the ideal
combination of
strength and
elasticity for
making bows,
and it was
he who mathe-
matically
established
the proper
proportions of
the bow,
measurements which are
still in use today. �
Eighteen
Chart for calculatingbow proportions

Although there are scores of
prominent names of renowned
makers scattered throughout the
history and evolution of the bow,
there are two, in particular, whose
impact on bow design and artistic
achievement continue to influence
makers to this day. �
FRANÇOIS XAVIER TOURTE
(b.1747 — d.1853)
The “Stradivari” of the art of bow
making, François Xavier Tourte was
originally a watchmaker, only joining
his father and brother in making
bows in the early 1700’s after
spending eight years at this trade.
Although at first he used staves of
old sugar barrels for his bows, which
sold for a pittance, Tourte rapidly
rose to prominence. At the height
of his career, a single Tourte bow
commanded princely sums. �
Like Stradivari, Tourte experiment-
ed with design and wood, seeking to
perfect his work, and is said to have
destroyed that work which failed to
meet his standards. During this
period, Tourte settled on pernambuco
as the ideal wood for bow making,
and afterwards, worked ceaselessly
to improve the design, ultimately
giving the bow its final form, which
we know today as the modern bow. �
DOMINIQUE PECATTE
(b.1810 — d.1874)
The most prominent member
of an illustrious family of bow
makers, Dominique Pecatte was
an apprentice of J.B. Vuillaume
from 1826 to 1837, whom he may
have worked with, after which he
took over the shop of François
Lupot. Returning to Mirecourt
in 1847, he remained there until
his death. �
Known for the great beauty and
elegance of his bows, Dominique
Pecatte had a great influence on
many of his contemporaries, such
as Nicolas Maire, Guillaume Maline,
and Joseph Henry, as well as many
of today's bow makers. �
F amous Bow Makers
�E
Nineteen

P arts of the Violin and Bow
�F
Twenty

MEASUREMENTS FOR GLASSER BOWS (in inches)
Size Violin Viola Cello Bass (French) Bass(German/Butler)4/4 29-1/8” 29-1/4” 28-1/8”3/4 27” 27” 26-5/8” 28-3/4” 29-1/2”1/2 24-1/2” 25-3/8” 26-5/8” 27-7/8”1/4 22-1/4” 23-5/8” 25-1/2” 26-3/4”1/8 19-1/2” 20-1/2”1/10 19-1/2” 17-3/8”1/16 16-7/8”
NOMINAL WEIGHTS FOR PERNAMBUCO BOWS
MENC STANDARDS FOR ADJUSTMENT (4/4 size)The Music Educators National Conference (MENC) has established a standard for the adjustment of violins, violas, celli and basses. (All Knilling instruments are adjusted to meet or exceed MENC specifications.) Bridge height* Stg spacing
Bridge Soundpost between strings (at the top
Instrument Fingerboard height thickness (top) diameter and fingerboard) of the bridge)
Violin 19-1/2 — 20-1/2 mm 1/16” 1/4” E — 1/8”; G — 3/16” 7/16”Viola 24 — 25 mm 1/16” 1/4” A — 3/16”; C — 1/4” 1/2”Cello 62 — 65 mm 3/32” 7/16” A — 1/4”; C — 5/16” 5/8”Bass 9-1/2 — 11 cm 3/16” 11/16” G — 7/16”; E — 11/16” 1-1/8”* for steel strings
DETERMINING CORRECT INSTRUMENT SIZEViolin/ViolaSupport the instrument under the chin in playing position. The instrument is of proper size if the palm and fingersof the left hand can comfortably cup the scroll with the elbow relaxed.
CelloSeat the student so that the knees are bent at a 90° angle. The instrument should rest such that the upper rim rests onthe sternum (breast bone) and the left knee contacts the curve below the lower bout corner. The C-string peg shouldbe near the left ear, with the neck a few inches from the shoulder. The left hand should be able to reach both ends ofthe fingerboard with ease, and the first and fourth fingers able to comfortably span a major third (E to G#) in firstposition on the D-string.
BassWhile standing behind the bass in playing position, the fingerboard nut should be opposite the forehead near eyelevel, and the right hand able to comfortably draw the bow from frog to tip. The first and fourth fingers of the lefthand should be able to easily span a whole tone (E to F#) in the D-string in first position.
Violin 55 — 65 gramsViola 68 — 74 gramsCello 78 — 88 grams
Bass (French) 138 — 145 gramsBass (German) 128 — 140 grams
Twenty-One
Measurements and Other�G
Useful Information

Twenty-Two
GENERAL AGE LEVEL GUIDESize Violin Viola Cello Bass4/4 9 - adult 12 - adult 12 - adult adult3/4 9-11 11-13 10-13 11-adult1/2 6-10 9-11 9-11 9-131/4 4-71/8 3-51/10 3-51/16 3-5
Age level guide subject to developmental variation among students of the same age.
AVERAGE BODY LENGTH IN INSTRUMENTS (in inches)The following measurements are taken by measuring the length of the back, excluding the button.Measurements may vary from manufacturer to manufacturer, and from instrument to instrument.
KnillingViolin MENC Summit Suzuki4/4 14” 14-1/8” 14”3/4 13-1/4” 13-1/4” 13”1/2 12-1/2” 12-1/2” 12-1/4”1/4 11” 11-1/8” 11-1/4”1/8 10” 10-1/8” 10-3/8”1/10 9” 9-1/8” 9-3/8”1/16 8-1/2” 8-1/4” 8-3/8”
KnillingViola* MENC Summit4/4 15”, 15-1/2”, 16”, 16-1/2” 15-1/8”, 15-5/8”, 16-1/8”, 16-5/8”3/4 (intermediate) 14” 14”1/2 (junior) 13” 13-1/4”
* Fractional size violins are sometimes strung up as violas for 14”, 13” and even 12” sizes. It would be appropriate to note that all violasare a proportional compromise in comparison to the violin; a truly proportional viola would have to be in excess of 18” to accommodateits tonal range. Of more importance is that the instruments have an appropriately “dark” tone.
Cello Knilling Summit EngelhardtMENC
4/4 29-5/8” 29-7/8”—30-1/8” 29-3/4”3/4 27-5/16” 27-1/2” 27-1/4”1/2 25-1/2” 25-5/8”—25-7/8” 24-3/4”1/4 22-7/8” 21”1/8 20” 17-7/8”1/10 15-7/8”
Bass Knilling Summit EngelhardtMENC
3/4 43-1/4” — 44-1/2” 43” 42-1/2”1/2 41-1/4” 39-3/4” 36” (Jr.)1/4 37-1/2” 37”1/8 33-1/2”
MAKING YOUR OWN SIZING STICK FOR VIOLIN AND VIOLATo help determine the correct size instrument for a student, make your own sizing stick by takingan ordinary yardstick, and marking off the following measurements:
Violin Viola4/4 23-5/8” 16-1/2” 27-1/4”3/4 22-1/4” 16” 26-3/8”1/2 20-3/8” 15-1/2” 25-5/8”1/4 18-1/2” 15” 24-7/8”1/8 16-7/8” 14” 23-1/4”1/10 15-3/8” 13” 21-6/8”1/16 14-1/4” 12” 20-3/8”
To use: place the stick under the chin, in playing position, and, with left arm extended, measureto the middle of the palm to determine the approximate correct size.
This section offers advice that will
help keep your instrument and bow
in good playing condition.
It is generally unwise to attempt to
adjust or repair an instrument or
bow yourself. Periodically take the
instrument and bow to an experi-
enced repair person for a check-up.
She/he can quickly look over your
instrument or bow; a small repair
or minor adjustment early on can
often prevent costly major repairs
and overhauls down the road.
GENERAL CARE
� Keep the instrument and bow
clean and in good repair. A little
preventive maintenance goes a
long way. An annual or bi-annual
check-up is well-advised.
� Protect the instrument and bow
from prolonged sun, or sudden
changes in temperature or
humidity. Care should also be
taken to keep them away from
heaters, radiators, and air
conditioning vents. Never leave
any instrument or bow in a car
for any length of time.
� Let an instrument or bow have
some time to adjust to changes in
temperature or humidity before the
case is opened. The more extreme
the temperature or humidity
difference, the longer the time
that should be allowed for the
instrument and bow to adjust to
the change.
� Avoid leaving instruments or
bows unattended, on a chair,
or hanging from a stand. Never
horseplay with or around an
instrument or bow.
� Don’t use alcohol or hot water
to clean either instrument or bow,
as these liquids can easily dissolve
the varnish and/or cause damage
to the wood.
� Always remove the shoulder rest
or pad from violins or violas before
putting them back into the case.
� Don’t cram music, folders, or
other personal items in the case
with the instrument, as they may
damage the instrument. Fit small
items into the accessory compart-
ments provided.
An Ounce of Prevention�H
Twenty-Three

INSTRUMENT CARE
� Handle violins or violas by the
neck and chinrest to minimize
varnish wear. Using a cloth or pad
between the instrument and the
player will also help protect the
varnish from perspiration.
� Violinists and violists who
perspire profusely can drape a
small cloth or pad over the chinrest;
cellists and bassists typically use a
cloth, or a bib fastened around the
neck of the instrument, and draped
between the back of the instrument
and player’s sternum.
� Be aware of jacket or shirt
buttons, dangling earrings,
bracelets, watches and jewelry;
they are often the cause of
scratches, dings and dents.
� Always wipe the body,
fingerboard, and strings clean
after playing, to remove rosin dust
and dirt. Pay particular attention
to wiping hand moisture off
strings and fingerboard, and
removing rosin dust from
underneath the strings.
� A 100% cotton cloth picks up dirt
most effectively. However, whatever
the material, make sure to launder
the cloth frequently.
� Placing a small blanket or cloth
over the top of the instrument will
help protect it, especially if it
doesn’t fit snugly in the case.
� Periodically check to make
sure that the feet of violin or viola
shoulder rests have not worn
through the protective rubber
tubing. Replacing the tubing
when necessary will help preserve
the areas where the feet contact
the instrument.
� Ideal humidity for string
instruments is around 55%;
anything below 40% may be cause
for concern, although appropriate
humidity levels may vary, depending
on different areas of the country.
� In winter, when artificial heat
drives down humidity levels, a
humidifier is advisable in rooms
where instruments are kept or stored,
to prevent cracking. Individual instru-
ment humidifiers can also be helpful,
when properly and consistently used,
during winter months when humidity
levels are low. However, if an
instrument humidifier is used, make
sure to wipe any excess moisture off
the humidifier before inserting it in
the f-hole.Moisture dripping down the
inside of the instrument can cause
regrettable damage.
Twenty-Four
� In areas where the humidity levels
are high, an arch protector can be
made to help inhibit possible arch
collapse. This small rectangular
block is typically made of folded
cardboard, faced on the exterior to
avoid damage to the varnish.
It is lightly wedged under the
fingerboard about halfway between
the end of the fingerboard and
where the neck joins the body
(where the arching is highest),
when the instrument is not
being played.
� Watch the edges on instruments,
especially celli; rough areas or tiny
splinters have a tendency to snag on
clothing or carpet and compound
any damage to the edges or corners.
� Occasionally check under the
tailpiece to make sure that the
string adjuster lever is not pressing
against the belly of the instrument.
Over extension of the lever can
damage the varnish and wood.
� When tuning strings, gently twist
the peg inwards as the peg is turned
to ensure firm contact between peg
and peg hole; this will minimize
peg slippage. A good visual image
is to twist the peg into the peg
hole as one would twist a cork
into a cork bottle, using gentle
but firm pressure.
� Each time an instrument is tuned,
the top of the bridge has a tendency
to be pulled slightly forward
(or backwards, when fine tuners
are used). Check the instrument
each time it is tuned, to make sure
the back of the bridge is still
perpendicular to the top of the
instrument and the bridge feet flush
against the belly.
� Should the soundpost fall, do not
continue to play the instrument;
the pressure of the strings could
collapse the unsupported top.
Immediately loosen the strings
and take the instrument to a repair
person at the earliest opportunity.
� Should a crack be discovered, or
a corner get knocked off, make sure
to keep the exposed edges clean, so
any repairs can be as unobtrusive
as possible. Do not attempt to glue
an open seam or crack; take the
instrument to a qualified repair
person at the earliest opportunity
to avoid further damage.
Twenty-Five

BOW CARE
� Always hold a bow by the frog,
not by the tip or hair, and carry it
with the tip raised, cradling the
fragile head; if the bow is dropped,
it is better that the bow falls on its
frog than on the delicate tip.
� Avoid contact between fingers
and bow hair; oils from the skin on
the hair will make it more difficult
to draw a clear, resonant tone.
� Always loosen the hair after
playing. This keeps it from
stretching unduly, preserves the
camber (sweep or curvature of
the bow) and helps keep the
bow from warping.
� Keep the bow clean by
wiping the stick with a soft, clean,
cotton cloth after playing. Pay
particular attention to the area
underneath the shaft between
hair and stick.
� Never tap or strike the head of the
bow against the stand, or swish the
bow through the air to remove
excess rosin.
� Make sure the bow hair is even
and full. When the ribbon of hair
becomes uneven due to broken
hairs, the bow becomes more
susceptible to warpage and needs
to be rehaired.
� Should the hair stretch to the
point that tightening does not allow
sufficient tension for the hair to
clear the stick, or if the hair
becomes so short that the stick is
under constant tension even when
the screw is fully loosened, the
hair will need to be shortened,
lengthened, or the bow rehaired.
� It is unnecessary to rosin the bow
every time an instrument is played;
too much rosin produces a gritty
sound. Apply rosin sparingly and
evenly, drawing the bow hair over
the rosin in even strokes. Rotating
the rosin cake will prevent deep
grooves from forming in it.
� To avoid damage from mites and
insects which can destroy bow hair,
keep your case off the floor,
especially carpeted areas or closets.
Where this problem is severe,
a cedar block placed in the accessory
compartment of the case may help
repel these pests. Mothballs
(napthalene) can be used, placed
only in the accessory compartment,
not the instrument case cavity.
Caution: mothballs may have an
adverse effect on the varnish of
the instrument.
Twenty-Six

� On any bow, there is a tendency
towards wearing out the edge of the
leather thumb grip near the frog,
causing the thumb to erode the
wood underneath (especially for
cellists). The leather thumb grip
should be replaced, or a protective
leather patch put on, to prevent
further damage. Some players use
a length of surgical rubber over this
area to protect the stick.
� Avoid playing on the side of the
stick, which will damage octagonal
facets, and wear the stick. Players
may vary the tension of the hair to
accommodate the type of piece
being played; an aggressive,
fortissimo passage may require a
slightly more tensioned stick.
“Providing music education for
our children is an essential part
of developing cultural
literacy in this country.
When people are culturally literate,
it means that they can think
about things on many
different levels, consider things
thoroughly, and make choices
based upon an understanding of
things spoken and unspoken.
It means that people can be
articulate about
their ideas and feelings.
It means they can promote
excellence in all areas. There is
no place that develops these skills
like the study of music. Music
enhances the education of
our children by helping them
make connections and
broadening the depth with
which they think and feel.
If we are to hope for a society of
culturally literate people, music
must be a vital part of our
children’s education.”
— Yo-Yo Ma, cellist
Twenty-Seven
In learning to play an instrument,
progress is a process of adding
new skills to ones already mastered.
The following are some suggestions
for students which may help them
practice and learn more effectively.
� Record daily practice times on
a chart.
� Schedule a regular time each day
and adhere to the schedule.
� Don’t put off practicing until the
end of the day.
� Make practice sessions a habit.
Consistent practice hastens and
maintains progress.
� Focus on progress and improve-
ment. Listen. Be calm and
patient; improvement comes
a step at a time.
� Don’t become discouraged; there
will be days when everything
suddenly comes together. Effort
and persistence are the keys.
� Review each lesson and set
objectives to work on before
each new practice session.
� Attend as many concerts and
performances as possible.
Watch how the performers play
and interact. Much can be
learned from performances
of all types, whether chamber
music, orchestra, opera, theater,
or solo performance.
� Records, video tapes and
compact discs can be valuable
learning aids. Listen or watch,
and learn different techniques
and interpretations.
� Music is like a language.
The greater the mastery of its
grammar and structure, the more
effectively musical interpretations
can be communicated.
� Play music with peers and learn
from each other. Read music with
friends; enjoy and use new skills.
� Be sure regular academic
classwork is maintained, and
assignments made up if a class
is missed to take a lesson or play
in a concert.
P ractice Tips�I
Twenty-Eight

This section contains information
on some of the different types of
string available, and the advantages
and/or disadvantages of each type
of material. String selection for an
instrument can be a very personal
decision, based not only on the
tonal characteristics of the instru-
ment, but also on individual
player preference. �
Which strings to use?
The four basic types of core
materials commonly used are:
solid steel, rope or cable core steel,
synthetic, and gut. Each type of core
material has distinctly different
tonal and playing characteristics. �
The outer wrapping can be made
from a wide variety of materials,
including nylon, aluminum,
chrome, steel, stainless steel, tinned
steel, tungsten, nickel-silver, silver,
silver-plate, and gold. Each material
provides its’ own unique tonal and
tactile characteristics, as well as
varying degrees of resistance to
wear and corrosion (primarily from
contact with the player’s fingers.) �
The selection of string type should
depend on the age, construction,
and individual characteristics of
each instrument, and the kind
of response and tonal qualities
required. Many musicians mix
different types and gauges of
strings to obtain the desired sound
and response. Gauge itself does not
determine weight or tension, as
gut strings are thicker than steel
strings, and silver wound strings
are thinner than aluminum
wound strings. �
Listed here are some of the
characteristics of various
popular types of strings. �
Steel core
Generally used on new instruments
because they are economical, and
produce a large, bright volume of
sound with a minimal break-in
period. These strings have a solid
steel core with an outer wrapping
of stainless steel, chrome, steel,
nickel–silver, or aluminum. �
S trings�J
Twenty-Nine

The advantages are:
1. Longer lasting than gut or
synthetic core strings.
2. Unaffected by changes in
temperature and humidity,
which affect not only pitch
retention, but also string life.
3. Bright, loud response with a
minimum of effort.
Rope or spiral core
Rope core, spiral (or cable) core
strings combine many of the virtues
of gut with the durability and
volume of steel core strings. The
central core of the string consists
of strands of fine wire twisted into a
cable. The wire unit is then overlaid
with a flatwrap of chrome steel,
nickel–silver, silver, or tungsten. �
The advantages are:
1. Exhibit much greater durability
than gut core strings.
2. Unaffected by fluctuations in
humidity or temperature.
3. More flexible in response and
range than steel core strings.
Synthetic core
Synthetic cores strings typically
have a nylon composition core,
sometimes referred to as perlon,
synlon, PET synthetic, or nylon
core. In addition to a generally
brighter and more focused
response, synthetic core strings
exhibit many of the characteristics
of gut core strings in terms of
subtlety and warmth, without gut’s
inherent sensitivity to external
factors. Natural gut reacts to
changes in humidity and
temperature by shrinking or
swelling, which not only causes the
winding to eventually loosen, but
affects the pitch and longevity of
the string itself. The synthetic core,
being inert, is practically unaffected
by environmental factors, thereby
greatly increasing the playing life
of the string. The outer wrap of
the string is typically flat wrapped
with aluminum, silver plate, nickel–
silver, or silver. �
The advantages are:
1. Much more durable than gut.
2. Unaffected by changes in
temperature and humidity.
3. Response and performance
more similar to gut than
either rope core or steel
core strings.
Thirty

Thirty-One
Gut
Gut core strings are associated
historically with the oldest type
of strings found on musical
instruments (and were used on the
original Amati, Stradivari and
Guarneri instruments). �
Strings made from sheep gut are
mentioned early in the history of
string instruments. Although other
materials such as tendons and
horsehair were used, the discovery of
an Egyptian lute dating from circa
1500 B.C. indicates that the Egyptians
were well acquainted with the tech-
nique of manufacturing gut strings. �
In the following centuries, twisted
gut strings were probably the most
common type of strings used.
It was during the middle of the
17th century – at the time of
Stradivari – that metal (initially
copper) wound strings started
gaining prominence. Eventually,
these strings evolved into the modern
metal wound strings in use today. �
Many professional musicians,
especially violinists, still prefer gut
core strings on all but the E-string
(which normally uses a plain or
wound solid steel core string),
however, perlon strings have
become increasingly popular. �
Players adhering to period
performance practice also continue
to use gut core strings to achieve
the correct sound for Baroque and
Classical performances.
The advantages are:
1. Excellent flexibility and feel.
2. Warm, brilliant tone without
harshness.
3. Sensitive response and subtlety.
Miscellaneous notes on strings:
• For any given tuning, the thicker the string, the higher the tension; the higher the tension, the louder the string tends to play. However, increased tension can alsoadversely affect the tone.
• The string diameter of silver wound stringsare thinner than corresponding aluminumwound strings, thus it is quite possible for a silver violin G-string to actually be thinnerthan an aluminum wound violin D-string.
• All 3/4 instruments can be equipped with 4/4 size strings, although strings made specifically for 3/4 size will, in general, beslightly thinner in diameter. Fractional sizestrings of one size can be utilized for the next smaller size, i.e. 3/4 can be used for both 3/4 and 1/2; 1/4 can be used for both 1/4 and 1/8, etc.
• The large size 4/4 viola tailpiece with built-in tuners can be used for 1/10 sizecello, provided that the strings have smallball ends.
• Solo bass strings can be substituted for orchestra bass strings when thin gauge is desired.

This section addresses some of
the more common problems
players may encounter, and
suggests some remedies. �
My pegs are sticking (or slipping).
What can I do?
Normal usage will eventually cause
both the peg and the peg hole to
wear, which may result in the pegs
slipping or sticking, making tuning
difficult. Ordinary chalk, applied to
the areas of contact between the peg
and peg box (which show up as shiny
areas on the peg shaft), can help
provide more grip. The operation of
pegs that stick or are difficult to
rotate may be improved by the use
of peg dope or lead from a soft
graphite pencil applied to the contact
areas. Eventually, pegs may wear to
the extent that replacement pegs
will need to be fitted by a qualified
repair person. �
How can I tell if the bridge is
on straight?
The feet of a properly cut bridge
should follow the contour of the top
perfectly, with no gaps. The fit of
the bridge feet is critical because
they serve as the conduit for
transmitting vibrations between
the strings and the rest of the
instrument. If a bridge is tipped,
the feet of the bridge will no longer
be flush and in full contact with
the top. �
The bridge should be positioned
so that the back side of the bridge
(the side facing the tailpiece) is
perpendicular to the top or belly of
the instrument. The slightly beveled
and breasted contour of the side
facing the tailpiece can impart the
illusion of the bridge being slightly
tipped backwards; however, the
back of the bridge should still be
perfectly straight. �
How can I tell if my bridge is in
the right place?
While there are more precise
methods of determining proper
bridge location, an approximate
placement can be achieved by align-
ing the feet of the bridge between the
inner notches of the f-holes. If the
bridge has been knocked off, the
instrument, do not attempt to
T ips, Tricks and Trouble Shooting�K
Thirty-Two

replace the bridge before first
checking to see that the instrument
is undamaged and that the sound-
post has not fallen. When in doubt,
have the instrument checked by a
qualified repair person. Never glue
the bridge to the instrument. �
How do I straighten my bridge?
A relatively safe technique for
straightening a bridge is to carefully
pinch the string right next to the
bridge between thumb and
forefinger. By squeezing the fingers
together and rolling them against
the bridge, lateral pressure is
applied against the top face of
the bridge, pushing it slightly
backwards (or forwards, depending
on which side the pressure needs
to be applied). Repeat with each
string, in turn, until the bridge is
once again perpendicular. If the
bridge is significantly warped, have
the instrument serviced promptly,
before the bridge collapses
or breaks. �
Better to have avoided this situation
in the first place, by having checked
that the bridge was perpendicular
after each tuning; it is easier
(and less traumatic) to correct a
slight bridge lean, than have to
address a situation where the
bridge is substantially tilted
and the feet are no longer
in full contact with the top. �
When do I need to
change strings?
Strings will eventually lose their
original responsiveness. Replace
aging strings at regular intervals,
commensurate with use. For some
players, it may be a few months;
for others, a few years. A general
rule of thumb is to change strings
every six months or so. �
How do I change the strings
on my instrument?
Replace strings one at a time, to
prevent the soundpost from falling,
and reduce stress on the instrument
itself. Before removing the old
strings, inspect the area around the
nut and bridge; if the strings are
being pinched, or have cut deeply
into the grooves (they may even
be flush with the top of the nut or
bridge!), take the instrument to a
qualified repair person for service.
The strings should rest roughly a
third of the way into the grooves. �
After removing the old string, check
the grooves in the nut and bridge
for wear or sharp edges. A bit of soft
pencil lead applied in the grooves
Thirty- Three

will reduce friction and help the
string slide smoothly over the
bridge or nut. �
When string adjusters are not being
used, pass replacement strings
through the tailpiece holes from
underneath the tailpiece. The string
should then extend straight from the
tailpiece hole, over the saddle or fret,
to the bridge — do not thread the
string back through the ball or loop
at the end of the string. Wind the
string on the pegs so that the string
passes over the peg and not under it,
and progresses from the peg hole
towards the peg box walls. Make
sure that the string does not overlap
or cross over itself, nor contact the
peg box wall. �
Whether steel, nylon, or gut, take the
time to gradually bring the string up
to pitch. Avoid over-tuning, which
may damage the strings, and guard
against the top of the bridge being
pulled forwards as new strings are
being brought up to pitch. �
Do I need to use string adjusters?
String adjusters, or fine tuners, need
only be used when steel core strings
are installed on an instrument. The
relative elasticity of gut and synthetic
core strings obviates the need for fine
tuners with these more pliant core
materials. E-strings in synthetic or
gut core violin sets typically have a
metal core, and E-string adjusters
should always be installed with
these strings. �
For ease of tuning, many educators
do request four fine tuners regardless
of the type of string being used.
Special wide slot string adjusters are
commonly available for synthetic
and gut core strings. Alternatively,
the slot on a standard string adjuster
may be carefully spread to
accommodate the slightly thicker
synthetic or gut core strings. �
My string adjusters are stuck!
Often, when a string adjuster screw
will no longer turn, it is because the
arm of the adjuster has been fully
extended. Care must be taken that
the arm of the adjuster below the
tailpiece is not pressing against the
top of the instrument itself. �
To remedy the situation, turn the
adjustment screw counter-clock-
wise, and then raise the string back
to pitch by using the peg. Usage of
string adjusters which have
protective sleeves (Buschmann
tuners), will help prevent damage
from the string adjuster. �
Thirty-Four
Another possibility is that the
adjuster simply needs to be lubri-
cated. The screw threads could also
be cross-threaded, or the screw
shaft may be bent; if so, the string
adjuster should be replaced. �
When does my fingerboard need
to be replaced?
Fingerboards can eventually wear
out or become warped, and need
to be replaned, scraped or replaced.
Signs of wear include pits from
fingers, longitudinal grooves from
string wear, or overall warpage.
The instrument may then buzz,
or intonation problems may
be experienced. �
There’s a buzz in my instrument.
Chances are, a buzz or rattling
sound in the instrument is not
caused by a loose bass bar, but
something much more prosaic.
Likely culprits include: loose sliding
(Si-Hon-style) mute or loose string
adjusters (don’t forget to check the
lock nuts, too), loose string winding,
loose purfling or decorative fittings,
loose or badly worn fingerboards
(these often open at the base of the
neck), and open seams or cracks. �
By holding the instrument by the
neck and gently rapping all around
the top and back, an open seam can
often be located by the slight rattle
it will emit. �
On celli, if too much of the endpin is
retracted in the body, the pin may
buzz when the instrument is played. �
When new violins are varnished,
sometimes a bit of varnish dries in
the narrow opening of the f-hole,
and when the instrument is played,
the dried varnish buzzes. �
What is a wolf tone?
Wolf tones occur when strong
sympathetic vibrations from the
instrument itself interfere with
string vibration. The sensation
may manifest itself in pulsation,
throbbing, roughness, jump in
frequency, or difficulty in drawing
the tone from the instrument. �
To a greater or lesser degree,
wolf tones are present on all
instruments, even the finest
Stradivari, caused by excess
tension, or an anomaly in design
or graduation. Typically, wolf tones
can be heard (and felt) when
playing B or B flat on the violin,
B flat or C on the viola, and E to
F sharp on the cello (especially in
fourth position on the G-string, ). �
Thirty-Five

Most good players learn to compen-
sate for the wolf tone; proper vibrato
can often make the wolf disappear;
cellists often simply squeeze the
lower bout with a knee when play-
ing in areas where the wolf lurks. �
What can I do if my instrument
has a bad wolf tone?
Adjusting or refitting the soundpost
or bridge, installing a thicker
soundpost, or fitting an internal
wolf resonator can help tame the
wolf, but, before taking drastic
steps, try the following options:
First, make sure that the instrument
has no open seams or areas that
have come unglued. A loose
soundpost can often be the culprit,
and may be caused by a loose
bottom seam on the treble side,
or even too much humidity, which
causes the instrument to swell. �
If the instrument is sound, try:
1. Changing the offending string
to a thinner gauge string.
2. Using a Si-Hon style mute, which
dampens the area around the
tailpiece, or twisting a Tourte-style
so it wedges between the strings.
3. Fitting a wolf-tone eliminator
on the string behind the bridge.
Moving the eliminator closer or
further from the bridge can alter
the pitch, and by placing it on a
quarter tone or less vital note,
reduce the frequency of the wolf
to some degree. Once the optimum
location is identified, the eliminator
can then be locked in position by
tightening the adjustment screw. �
4. Altering the sympathetic vibration
of the strings. One way is to frac-
tionally lengthen the tailpiece loop
(which will slightly shorten the
overall string length). �
5. Using a heavier tailpiece. Often,
switching from a synthetic tailpiece
to an ebony or metal tailpiece will
noticeably reduce a wolf tone. �
Can harmonics help tune
my instrument?
Bowing while lightly touching a
string at 1/2 its length, sounds a
pitch an octave higher; 1/3 its
length, an octave and a fifth;
1/4 its length, a double octave;
1/5 its length, two octaves and a
third; and 1/6 its length, two octaves
and a fifth. Familiarity with
harmonics often facilitates tuning,
especially for bass. Touching the
D-string at 1/3 its length sounds the
same pitch as touching the A-string
Thirty-Six
at 1/4 its length. This also applies
to the other adjacent strings. �
When should the bow be re-haired?
Generally, when the ribbon of hair
is so thin that there are not enough
to perform their function properly,
or when the ribbon has become
uneven, the bow should be rehaired.
Playing on a bow that has had too
many hairs broken on one side can
actually cause the stick to warp.
Caked or dirty hair can be cleaned
occasionally with mild liquid
detergent, but should only be done
with utmost care taken not to get
the bow wet — beware especially of
capillary action wicking moisture
into the mortises. �
In winter, bow hair may shrink due
to lack of humidity, preventing the
bow from being properly loosened.
Likewise, summer humidity may
cause the hair to stretch to such an
extent that the bow can no longer
be tightened. Either scenario is
reason enough to take the bow to a
qualified repair person to shorten,
lengthen, or even rehair the bow. �
Thirty-Seven
“Which of us, I wonder, has not pondered the great debt we owe
to those strong individuals who taught us
and the educational environment of our formative
years that allowed and encouraged our minds and
sensibilities to develop.
I fear for the generations to come in this increasingly
materialistic society if they are to be further deprived of those aspects of our culture that can enrich our lives and provide a background for enlightened
judgment in their later positions of responsibility.
All is not lost, but we must, all of us, exert ourselves to
make sure that it is not. The Philistines are among
us and would have us believe that the arts do not matter;
that vocational training is all that education is about.
They are damnably wrong.”
— Raymond Leppard, music director,Indianapolis Symphony Orchestra

Located in St. Louis, Missouri, the
Knilling Custom Shop is staffed by
dedicated men and women,
experienced and skilled craftspeople
committed to bringing out the best
each instrument has to offer. Knilling
standards of adjustment meet or
exceed those established by the
Music Educators National
Conference (MENC). When you
receive an instrument from us, you
know it has received precise,
painstaking attention to detail by
craftspeople who take pride in
their work. You are getting an
instrument that lives up to the
Knilling reputation. �
BASIC ADJUSTMENT
Bridge
Each bridge on a Knilling
instrument is hand carved for
precise fit, proper string height and
spacing. The soles of the bridge feet
should fit flush to the top; the better
the contact, the better the sound
transmission. Each bridge has to be
individually fit, because no two tops
are alike. �
Each bridge is also beveled or
“breasted” on the side facing the
fingerboard (the back of the bridge
should always be straight, and
perpendicular to the top), and the
bridge thickness precisely tapered
towards the top; properly removing
the excess wood allows the bridge
to vibrate more freely and improves
the sound without weakening the
bridge structurally. �
String height and spacing is also
important for proper playability;
Knilling instruments are all
adjusted to meet or exceed
specifications established by MENC,
the Music Educators National
Knilling Custom �L
Thirty-Eight
Shop Adjustment
Conference. Even the depths of the
string grooves in the bridge are
carefully maintained and lubricated
for easy string passage. �
Not only is the cut of the bridge
important, but the quality of the basic
blank itself is an important factor in
any instrument’s performance.
A cheap bridge blank not only does
not transmit vibrations well, but
quickly warps and wears, necessitat-
ing costly premature replacement. �
Pegs
Not only is every peg hand–fitted and
lubricated for smooth and easy tun-
ing, but the pegs ends are rounded,
and fit flush for a professional finish.
A superior grade of ebony is used for
greater durability, and a special
process employed when fitting the
pegs to ensure that they don’t shrink
in the peg holes. String holes are
drilled after the peg is fitted, and,
care is taken that each string is
wound on the pegs properly; over the
peg and towards the peg box wall. �
Buschmann tuners
On student violins, violas, and celli,
when steel core strings are
employed, Knilling installs four
Buschmann string adjusters. A
patented exclusive, the caps on the
Buschmann tuners protect the
instrument from tuner damage
should the bridge get knocked out of
place and the tailpiece collapse. Only
quality German-made string hard-
ware is used, to ensure long–term
reliability and smooth performance. �
Strings
While quality steel core strings are
standard on most Knilling student
instruments, substitutions are
welcome. Therefore, if other types
or brands of strings are desired,
these requests can be accommodated
without difficulty. �
Fingerboards and nuts
In order to ensure that the strings
will maintain proper clearance when
played, the fingerboard of a string
instrument must be precisely planed
and dressed for correct curvature,
and then refinished to produce a
smooth playing surface. Look for a
slight dish near the middle of the
fingerboard; that is what allows the
strings to be played in the upper
positions without buzzing. In
addition, each nut is carefully
shaped, grooved, radiused, and
lubricated so that the string passes
smoothly over the nut. Each groove
is spaced correctly and precisely
Thirty-Nine

cut so that the string rests at the
proper depth; one–third the diameter
of the string. �
The quality of ebony used is also
important when you consider that
instruments in a rental pool may
be in service for many decades.
We specify only superior quality
ebony for the pegs, nut, fingerboard
and tailpiece. �
Soundpost
If you look through the f-holes of a
violin, you will see the soundpost,
a slender dowel of wood, positioned
just under the treble foot of the
bridge. It is held in position only by
friction and string tension. Often
referred to as the soul of the
instrument, the fitting and placement
of this innocuous-looking piece of
spruce is critical to an instrument’s
performance. The soundpost for each
Knilling instrument is individually
cut, then custom fitted and positioned
for proper voicing. �
Synthetic tailpiece loop
More durable than gut, we only use
proven quality synthetic tailpiece
loops which are individually adjusted
to the correct length, trimmed and
then secured. �
Chinrest
An ebonite Dresden model chinrest
comes standard with most violins
and violas. The smooth, shallow
cup provides a comfortable
contact surface. �
Finally...
Before any Knilling instrument is
shipped, it goes through a final
inspection at a separate station
outside the violin shop, where it is
examined and polished before being
outfitted with case and bow. �
Forty
“Bach gave us God’s World; Mozart gave us God’s laughter;
Beethoven gave us God’s Fire; God gave us music that
we may pray without words”
— From the facade of a German
opera house

MASTER ADJUSTMENT
A step-up or master instrument
will show a much higher degree
of refinement in construction and
selection of woods than a student
instrument. However, even the
best instrument will not play well
unless it is set up well. �
Whether adjusting an instrument
that costs $500, $5,000, or $50,000,
certain basic requirements remain
the same: pegs must be properly
fitted and finished; the fingerboard
and nut correctly planed and dressed;
the bridge must fit precisely, with
correct height and string spacing;
the soundpost accurately cut
and positioned. �
Many of the steps that are required
to adjust a student instrument are
shared by step-up or master instru-
ments. However, here are a few
aspects of a step-up adjustment which
differentiates a Knilling Master
Adjustment from a Basic Adjustment. �
Bridge
One of the first things you are
likely to notice, when you look at
a master level Knilling instrument,
is the bridge. �
The Knilling Custom Shop uses only
genuine French Jeandel Aubert
bridge blanks on our step-up and
master instruments. Their Aubert à
Mirecourt Deluxe model bridge,
which we use on our fine master
violins, is the same model that can
be found on many of the rare instru-
ments played by soloists and sym-
phony musicians around the world. �
The carving of each bridge reflects
professional refinement, designed to
not only enhance the performance of
the instrument, but also add an aes-
thetic appeal. Things to note include
the elegant opening of the eyes and
heart, the way the feet are trimmed
to perfectly fit the contour of the top,
the graceful curves and beveled
edges of the sides, the slim taper and
subtle breasting of the bridge face,
decorative cuts above the feet and
around the heart, a protective circle
of parchment for the E-string, and
burnishing of the bridge. �
While all these distinctive touches
take time and a high degree of skill
(and talent), this devotion to detail
and perfection is part of what marks
Knilling as a genuine specialist in
string instruments. �
Strings
All Knilling step-up and master
violins and violas come standard with
premium perlon core strings.
Forty-One

Because synthetic core strings have
much greater elasticity than steel
core strings, string adjusters are
not typically used; only an E-string
adjuster is necessary. However, for
those who so desire, our Knilling
Custom Shop can install additional
string adjusters and, should particu-
lar strings be preferred, we can
accommodate almost any request. �
Celli and basses come with
premium chrome steel strings.
Because the standard strings do
have steel cores, all master celli
come with four patented
Buschmann fine tuners. Special
requests for strings are welcome;
for example, a popular substitution
for celli are Jargar A and
D strings. �
Pegs
Step-up and master instruments
present an opportunity to comple-
ment the premium tonewoods and
refined craftsmanship with tastefully
ornamented pegs, tailpiece, chinrest
and endpin, which add both visual
and aesthetic appeal. Hill-style,
Parisian eye, brass diamond inlay
ebony, rosewood, boxwood or tintul
wood components are a few of the
many options available. �
*Specifications subject to change without notice.
“The credit in life goes not to
the critic who stands
on the sidelines and points
out where the strong stumble.
But rather the real credit in
life goes to the person who’s
actually in the arena, whose
face is marred with sweat
and dust, who knows great
enthusiasm and devotion
for life and learns to spend
himself at a worthy cause.
If he wins, he knows the
thrill of great achievement,
and if he loses, at least he loses
while daring greatly so that his
place in life will never be with
those cold and timid souls who
know neither victory nor defeat.”
— Theodore Roosevelt
Forty-Two

Year–in and year–out, we present the breadth of the Knilling productline and educator support materialsto string teachers who attend state,regional and national MENC conven-tions throughout the United States. �
Since we are string specialists, theKnilling display is devoted exclusivelyto student and step-up string instru-ments, and to our excellent stringsupport materials. �
Knilling Educator and Training AidsNo company in the world offers asbroad a range of quality recruitingand educational materials targeted to the string student as is offered byKnilling. String educators deeplyappreciate the fact that their instruments are given the attentionand focus they deserve. As a result,the Knilling name is recognized bystring educators everywhere as rep-resenting strings and strings alone.
� KNILLING CUSTOM FOLIOS
Gorgeous, four color exterior withimprint space at the top. Interiorcontains a glossary of musicalterms, plus care of instrument andbow and practice tips imprinted onthe flaps.
No.KNOF87 - Large, full size (11-3/4” x 14”) concert folio features elegant string instrument scrolls set against a matte black background.
No.KNOFLT - Smaller, compact (9-1/2” x 12-1/2”) lite folio fits in any backpack. Exterior
graphic features a violin and bow set against a cascade ofsports paraphernalia.
� Knilling Clinics
Available from Knilling, throughauthorized dealers, are clinics and workshops for students and edu-cators, designed to open up theworld of string instruments, ignitestudent interest, and motivate themto learn in refreshing new ways.
� Knilling Videos
Knilling offers a number of exceptional videos, equally suitablefor dealer, educator or classroomuse. �
“Violin Revealed” Video What every educator wants everyparent to know, this 13 minutev-ideo wascreated to help familiesand students understand the dif-ferences between a genuinelysuitable instru ment and a “prob-lem-prone” look-alike.No.KNVRVHS - VHS formatNo.VRDVD - DVD format
“Perfection Pegs Revealed” VideoExplore one of the most revolu-tionary innovations ever devel-oped for the violin, viola andcello, the planetary gearedPerfection Peg. This 12 miniutevideo also includes commentaryfrom music educators.No. VHS - PRVHS formatNo. DVD - PRDVD format
Knilling Support Materials�M
Forty-Three
Forty-Four
“Music fosters learning, creativeand critical thinking, and self-
expression from early childhoodthrough adulthood. I believe thefull range of arts disciplines —
music, visual art, dance, and the-ater — should be part of the corecurriculum in public institutions
and the institutions of higher learn-ing and culture, e.g. colleges, muse-ums, and libraries, should be arts
education centers. The result will beincreased awareness and sensitivityto the world around us and how toenhance our lives and environment
through the arts.
In addition, stronger participationin arts education will lead to
world-class competitiveness on thepart of our citizenry at large, and
in the academic, business, and professional communities in
particular. Through the knowledgeand practice of the arts comes an
appreciation of multiple interpretations and an
understanding of standards ofexcellence. Inventiveness has been
the hallmark of American character; I believe comprehensive
and sequential instruction on musicand the other arts will enable ourchildren to cooperate and compete
more effectively with the othernations of the world.”
— Richard S. Gurin, President and CEO, Binney & Smith

Dynamics
Pianissimo (pp) — very soft
Piano (p) — soft
Mezzo piano (mp) — medium soft
Mezzo forte (mf) — medium loud
Forte (mf) — loud
Fortissimo (ff/fff) — very loud
Dynamic Modifiers
Calando — with decreasing volume
Crescendo (Cres., <) — gradually louder
Decrescendo (Decres., Diminuendo, >) —gradually softer
Morendo — dying away
Peine entendu — barely audible
Piu — more
Rinforzando (Sforzando, rfz, sfz) — suddensharp accent
Stinguendo — fading away
Tempi (from slow to fast)
Grave — with gravity; solemn; very slow
Largo — broadly; very slow
Larghetto — very slow, but a little faster than Largo
Lento — slow
Adagio — literally means at ease; slowly
Andante — literally means at a walking tempo; moderately
Andantino — a little faster than Andante
Moderato — moderately
Allegro — literally means cheerful; fast
Allegretto — a tempo in between Allegro and Andante
Presto — very fast
Prestissimo — as fast as possible
Tempo Modifiers
A tempo — return to normal tempo
Accelerando — accelerate; play faster
Allargando — slowing down and becoming broader
Appoggiando — drawing out, lengthening
Assai — much, as in Allegro Assai; much faster
Cedez — slow down
Con moto — with motion
Dopplo movimento (Doppelt so schnell) —double speed
L’Itesso — the same
Meno — less
Molto — very
Non troppo — not too much
Piu — more
Rallentando (Zuruckhalten, rallentir, ritardando) — slowing down
Rasch — quick
Ritenuto — suddenly slower
Rubato — elastic, flexible tempo
Schnell — faster
Sostenuto — sustained
Stringendo — quickening; with growing excitement
Tempo primo — resume the original or first tempo
Vivace — lively
Vivasissimo — very quick
Expressive Markings
Affabile — sweetly and gently
Affetuoso — affectionate, tender
Affretando — hurrying
Agitato — agitated
Animato — lively
Arioso — lyric and expressive
Attaca — attack
Aufgeregt — excited
Ausdrucksvoll — expressively
Bewegt — animated, with motion
Bravura — dash, brilliancy
Cantabile — singing
Abridged Dictionary of�N
Forty-Five
Musical Terms

Capriccioso — whimsical
Comodo — easy, comfortable
Con brio — with vigor
Con calore — with warmth
Con fuoco — with fire
Deutlich — clear, distinct
Dolce — sweet
Doucement — gently
Doulereux — sorrowful
Duramanente — harsh
Eclatante — brilliant, sparkling
Empfindung, mit — with emotion, with feeling
En dehors — emphasized
Entscheiden (Entschlossen) — resolute, determined
Expressivo — expressively
Fastoso — pompous
Fierlich — solemn
Fiero — high spirited; bold
Fleissend (Fleissender) — flowing, more flowing
Frei — free, with freedom
Frolich — joyful
Garbato (con garbo) — graceful, elegant
Gelassen — quiet, calm
Gemachlich — comfortable, leisurely
Gemendo — lamenting
Gesangvoll — songlike, cantabile
Gescgwing — quick, nimble
Giocoso — merry
Giusto — just right, as in Tempo Giusto; strict or fitting tempo
Grazioso — graceful
Gusto — with zest
Hastig — with haste, hurrying
Heftig — violent
Innig — heartfelt, tender
Kraftig — strong, vigorous
Lacrimoso — mournful
Langsam — slow
Lebhaft (Lebendig) — lively
Leidenschaftig — passionate
Legato — smooth
Leggiero — lightly
Liscio — smooth
Lourd — heavy
Lusingando — caressing
Lustig — merry, cheerful
Lutuoso — mourning
Maestoso — majestic
Marcato — stressed; with emphasis
Markiert — marked, stressed
Markig — vigorous
Mesto — sad
Mezzo — medium
Morendo — dying away
Munter — cheerful
Nachdrucklich — emphatic, expressive
Patetico — with great passion
Pesante — heavy, emphatic
Piacevole — pleasing, agreeable
Pianamente — smoothly, softly
Placido — tranquil; calm
Precipitando — rushing, impetuous
Ruhig — quiet
Scherzando — humorous
Scherzhaft — playful
Schwungvoll — animated, with spirit
Semplice — simple; unaffected
Sempre — always; still, as in Sempre Forte; still loud
Sfoggiando — ostentatious
Slancio, con — with dash
Snello — agile, nimble
Soave — gentle, sweet
Sospirando — sighing, plaintive
Staccato — detached, short
Straziante — anguished
Strepitoso — boisterous
Tenuto — held
Traumerisch — dreamy
Treibend — hurrying
Unruhig— restless
Forty-Six

Voile — veiled
Volante — flying, rushing
Zart — tender, soft
Bowings
Abstreich (tierez, tierer, tiere) — down bow
Aufstrich (poussez) — up bow
Am Steg — near the bridge
Am Frosch — near the frog
Am Griffbrett (sul tasto) — near or over the fingerboard
Arco — with the bow
Arpeggio — arpeggiated, so that the notes ofthe chord are played one after the otherinstead of simultaneously
Arrache — forceful pizzicato
Au chevalet — close to the bridge
Brise — short detached strokes of the bow
Col legno — with the wood of the bow
Col arco — with the bow
Detache — detached single bowing, with slightarticulation on each note
Flautando (flautato) — bowing lightly over thefingerboard to produce a flutelike effect
Glissando (strisciando) — sliding from onepitch to the other
Jete (ricochet) — “throwing” the upper part ofthe bow on the string so that it will bouncea series of rapid notes on the down bow
Loure — slight seperation of notes taken in a slur
Martele — “hammered” bowing, with a forceful, sudden release
Pizzicato — plucked
Saltando (sautille) — light, bouncing strokestaken in the middle of the bow
Staccato — short, detached strokes
Sul — on; as in Sul G; play on the G string
Sul ponticello — close to the bridge
Sul tasto (sur la touche) — near or over the fingerboard
Talon — at the frog
Tremolo — short, rapidly repeated strokes on one note
Tenuto — sustained
Miscellaneous terms
A piacere — at the performers discretion
Al fine — to the end
Al segno (a.s.) — to the sign
Alta — higher, as in 8va Alta; play one octave higher
Ancora — again, repeat (more), as in AncoraPiu Forte; still louder
Anfang — from the beginning
Attaca — attack; go to the next section or movement without a break
Aufstrich — up bow
Bassa — lower, as in 8va Bassa; play oneoctave lower
Begleitung — accompaniment
Bis — repeat
Cadenza — extended section, usually for a soloin a free, improvisatory style
Coda — closing section of a movement
Come prima — as at first
Con — with, as in con brio; with spirit
Da capo — from the beginning
Dal segno — from the sign
Dampfer — mute
Divisi (div.) — divided
Fine — end
GP — general pause
Luftpause — breathing rest
Oberstimme — upper part
Ossia — alternate passage, usually easier
Ottava (8va) — octave
Pocco — a little
Senza — without, as in Senza Sordino;play without the mute
Simile — continue in the same manner
Sordino — mute
Subito — suddenly
Sul — on, as in Sul G; play on the G string
Tacet — silent
Tutti — all
Volti — turn; as in Volti Subito; turn (the page) quickly
Forty-Seven

Customary U.S. Weights and
Measures
Linear Measure
12 inches (in.) = 1 foot (ft.)
3 feet = 1 yard (yd.)
5 1/2 yards = 1 rod (rd.), pole or perch (16-1/2 ft.)
40 rods = 1 furlong (fur.) = 220 yards = 660 feet
8 furlongs = 1 statute mile (mi.) = 1,760 yds = 5,280 ft.
3 land miles = 1 league
5,280 feet = 1 statute or land mile
6,076.11549 feet = 1 international nautical mile
Area Measure
144 square inches = 1 sq. ft.
9 square feet = 1 sq. yd.= 1,296 sq. in.
30-1/4 sq yds = 1 sq. rd. = 272 1/4 sq. ft.
160 square rods = 1 acre = 4,840 sq. yds. = 43,560 sq. ft.
640 acres = 1 sq. mile
1 mile square = 1 section (of land)
6 mile square = 1 township = 36 sections = 36 sq. mi.
Cubic Measurement1,728 cubic inches = 1 cu. ft.
27 cubic feet = 1 cu. yd.
Liquid Measure
When necessary to distinguish the liquid pint or quart
from the dry pint or quart, the word “liquid” or the
abbreviation “liq” should be used in combination with
the name or abbreviation of the liquid unit.
4 gills (gi.) = 1 pint (pt.) (= 28.875 cu. in.)
2 pints = 1 quart (qt.) (= 57.75 cu. in.)
4 quarts = 1 gallon (gal.) (231 cu. in.) = 8 pts. = 32 gills
Apothecaries Fluid Measure
60 minims (min.) = 1 fluid dram (fl. dr.) (= 0.2256 cu. in.)
8 fluid drams = 1 fluid oz. (fl. oz.) (= 1.8047 cu. in.)
16 fluid ounces = 1 pt. (= 28.785 cu. in.) = 128 fl. drs.
2 pints = 1 qt (= 57.75 cu. in.) = 32 fl. oz. = 256 fl. drs.
4 quarts = 1 gal (= 231 cu. in.) = 8 pts = 1,024 fl. drs.
Dry Measure
When necessary to distinguish the dry pint or quart
from the liquid pint or quart, the word “dry” should be
used in combination with the name or abbreviation of
the dry unit.
2 pints = 1 quart (qt.) (= 64.2006 cu. in.)
8 quarts = 1 peck (pk.) (= 537.605 cu. in.) = 16 pts
4 pecks = 1 bushel (bu.) (= 2,150.42 cu. in.) = 32 qts
Avoirdupois Weight
When necessary to distinguish the avoirdupois dram
from the apothecaries dram, or distinguish the
avoirdupois dram or ounce from the fluid dram or
ounce, or to distinguish the avoirdupois ounce or
pound from the troy or apothecaries ounce or pound,
the word “avoirdupois” or the abbreviation “avdp.”
should be used in combination with the name or
abbreviation of the avoirdupois unit. (The “grain” is the
same in avoirdupois, troy and apothecaries weights)
27 11/32 grains = 1 dram (dr)
16 drams = 1 oz = 437 1/2 grains
16 ounces = 1 pound (lb) = 256 drams = 7,000 grains
100 pounds = 1 hundred weight (cwt)*
20 hundredweights = 1 ton (tn) = 2,000 lbs.*
In “gross” or “long” measure, the following values
are recognized:
112 pounds = 1 gross or long cwt*
20 gross or long hundredweights = 1 gross or long ton
= 2,240 lbs.
* When the terms “hundredweight” and “ton” are usedunmodified, they are commonly understood to meanthe 100-pound hundredweight and the 2,000-poundton, respectively; these units may be designated “net”or “short” when necessary to distinguish them fromthe corresponding units in gross or long measure.
W eights and Measures�O
Forty-Eight

Circular MeasureSecond (“) = 1/60 minute
Minute (‘) = 60 seconds
Degree (°) = 60 minutes
Right angle = 90 degrees
Straight angle = 180 degrees
Circle = 360 degrees
Troy Weight24 grains = 1 pennyweight (dwt)
20 pennyweights = 1 ounce troy (oz t) = 480 grains
12 ounces troy = 1 pound troy (lb t) = 240 pennyweights= 5,760 grains
Forty-Nine
Customary Metric Conversions (approximate)
Customary MetricInches (in) x 25.4 = millimeters Millimeters (mm) x .04 = inch
Feet (ft) x .3 = meter Meters x 3.3 = feet
Yards (yd) x .9 = meters Meters (m) x 1.1 = yards
Miles (mi) x 1.6 = kilometers Kilometers x .6 = mile
Square inches (in2) x 6.5 = sq centimeters Sq centimeters (cm2) x .2 = sq inch
Spuare Feet (ft2) x .1 = sq meter Sq meter (m2) x 10.8 = sq feet
Square yards (yd2) x .8 = sq meter Sq meter (m2) x 1.2 = sq yards
Acres x .4 = hectare Hectare (ha) x 2.5 = acres
Cubic Feet (ft3) x .03 = cu meter Cu meters (m3) x 35.3 = cu feet
Cord (cd) x 3.6 = cu mete Liters (l) x 1.1 = quarts (lq)
Quarts (lq) (qt) x .9 = liter Cu meters (m3) x 284.2 = gallons
Gallons (gal) x .004 = cu meters Grams (g) x .04 = ounce (avdp)
Ounces (oz) (avdp) x 28.4 = grams Kilograms (kg) x 2.2 lbs (avdp)
Pounds (lb) (avdp) x .5 = kilogram Kilowatts (kW) x 1.3 = horsepower
Horsepower (hp) x .7 = kilowatt Degrees Celsius x 9/5 + 32 = degrees Fahrenheit
Degrees Fahrenheit (-32) x 5/9 = degrees Celsius
Units of Length and AreaCustomary Metric Metric CustomaryInch (in) = 25.4 millimeters Millimeter (mm) = .001 meter = .039 inch
Foot (ft) = 12 in - .305 meter Centimeter (cm) = .01 meter = .394 inch
Yard (yd) = 36 in or 3 ft = .914 meter Decimeter (dm) = .1 meter = 3.937 inch
Mile (mi) = 5,280 ft = 1.609 kilometer Meter (m) = 3.281 feet
In2 (sq in) = 6.453 cm2 Kilometer (km) = 1,000 meters = .621 mile
Ft2 (sq ft) = 144 sq in = .093 m2 Sq millimeter (mm2) = .000001 m2 = .002 sq in
Yd2 (sq yd) = 1,296 sq in = .836 m2 = 9 sq ft Sq centimeter (cm2) = .0001 m2 = .155 sq in
Acre = 43,560 sq ft = .405 ha Sq decimeter (dm2) = .01 m2 = 15.5 sq in
Mile2 (sq mi) = 640 acres = 2.59 km2 Sq meter (m2) = 10.764 sq ft
Hectare (ha) = 10,000 m2 = 2.471 acres
Sq kilometer (km)2 = 1,000,000 m2 = .386 sq miles
Apothecaries Weights20 grains = 1 scruple (s ap)
3 scruples = 1 dram apothecaries (dr ap) = 60 grains
8 drams apothecaries = 1 ounce apothecaries (oz ap) = 24 scruples = 480 grains
12 ounces apothecaries = 1 pound apothecaries (lb ap) = 96 drams apothecaries = 288 scruples = 5, 760 grains

Fifty
Metric Weights and Measures Approximate U.S. Equivalent10 millimeters (mm) = 1 centimeter (cm) 0.39 in
10 centimeters = 1 decimeter (dm) = 100 millimeters 3.94 in
10 decimeters = 1 meter (m) = 1,000 millimeters 39.37 in
10 meters = 1 dekameter (dam) 32.81 ft
10 dekameters = hectometer (hm) = 100 meters 109.36 yds
10 hectometers = 1 kilometer (km) = 1,000 meters .62 mi
10 kilometers = 1 myriameter (mym) = 10,000 meters 6.2 mi
Area Measure Approximate U.S. Equivalent100 square millimeters (mm2) = 1 sq centimeter (cm2) 0.155 sq in
10,000 square centimeters = 1 sq meter (m2) = 1,000,000 sq millimeters 10.76 sq ft
100 square meters = 1 are (a) 119.60 sq yds
100 ares = 1 hectare (ha) = 10,000 sq meters 2.47 acres
100 hectares = 1 sq kilometer (km2) = 1,000,000 sq meters 0.3861 sq mi.
Volume Measure Approximate U.S. Equivalentcubic dry liquid
10 milliliters = 1 centiliter (cl) 0.6 cu in 0.338 fl oz
10 centiliters = 1 deciliter (dl) = 100 milliliters 6.1 cu in 0.18 pt 0.21 pt
10 deciliters = 1 liter (l) = 1,000 milliliters 61.02 cu in 0.908 qt 1.057 qts
10 liters = 1 dekaliter (dal) 0.35 cu ft 1.14 pk 2.64 gal
10 dekaliters = 1 hectoliter (hl) = 100 liters 3.3 cu ft 2.84 bu
10 hectoliters = 1 kiloliter (kl) = 1,000 liters 1.31 cu yds
Cubic Measure1,000 cubic millimeters (mm3) = 1 cu centimeter (cm3 or cc) 0.061 cu in
1,000 cubic centimeters = 1 cu decimeter (dm3) = 1,000,000 cu millimeters 3.53 cu ft
1,000 cubic decimeters = 1 cu meter (m3) = 1 stere = 1,000,000 cu centimeters = 1,000,000,000 cu millimeters 1.31 cu yds
Weight10 milligrams = 1 centigram (cg) 0.154 gr
10 centigrams = 1 decigram (dc) = 100 milligrams 1.543 gr
10 decigrams = 1 gram (g) = 1,000 milligrams 0.035 oz
10 grams = 1 dekagram (dag) 0.353 oz
10 dekagrams = 1 hectogram (hg) = 100 grams 3.527 oz
10 hectograms = 1 kilogram (kg) = 1,000 grams 2.2046 lbs
100 kilograms = 1 quintal = 100,000 grams 220.46 lbs
1,000 kilograms = 1 metric ton (t) 1.1 tn
Gunter’s or Surveyor’s Chain Measure7.92 inches =1 link (li)
100 links = 1 chain (ch) = 4 rods = 66 feet
80 chains = 1 statute mile = 320 rods = 5.280 feet

Units of Weight (or Mass)
Customary Metric
Avoirdupois1
Grain = .065 gram Gram(g) = .035 oz avdp = 0.32 oz troy
Ounce (oz avdp) = 437.5 grains = 28.350 grams = 16 drams Dekagram (dag) = 10 g = .353 oz avdp = .322 oz troy
Pound (lb avdp) = 7,000 grains = .454 kilograms = 16 ounces Hectogram (hg) = 10 g = 3.527 oz avdp = 3.215oz troy
Hundredweight (cwt) = 100 pounds = 45.359 kg Kilogram (kg) = 1,000 g = 2.205 lb avdp = 2.679 lb troy
Ton, short (tn) = 2,000 pounds = .907 metric tons Metric ton = 1,000 kg = 1.102 short tons = .984 long ton
Ton, long or gross = 2,240 pounds = 1.016 metric tons
Ounce (oz troy)3 = 480 grains = 31.104 grams
Pound (lb troy) = 5,760 grains = .373 kilogram = 12 ounces
1 For weighing ordinary commodities2 For weighing precious metals, jewels, etc.3 Also known as fine ounces
Fifty-One
Units of Capacity
Liquid Dry
Fluid ounce (fl oz) = 29.573 ml Pint (pt) = .551 dm3
Pint (pt) = 16 fl oz = .473 liter Quart (qt) = 2 pints - 1.101 dm3
Quart (qt) = 32 fl oz = 2 pt = .946 liter Peck (pk) = 8 quarts = 8.810 dm3
Gallon (gal) = 8 pt = 4 qt = 3.785 liters Bushel (bu) = 32 quarts = 35.238 dm 3
Metric CustomaryMilliliter (ml) = .001 liter = .034 fl oz (liquid) = .002 pt (dry)
Liter (l) = 1.057 qt (liquid) = .908 qt (dry)
Hectoliter (hl) = 100 liters = 26.418 gal (liquid) = 2.838 qt (dry)
Customary/Metric Equivalents
Length1 angstrom (light wave measurement)1 0.1 millimicron = 0.0001 micron = 0.000 000 1
millimeter = 0.000 000 004 inch
1 cable length 120 fathoms = 720 feet = 219.456 meters
1 centimeter 0.3937 inch
1 chain (Gunter’s or surveyor’s) 66 feet = 20.1168 meters
1 decimeter 3.937 inches
1 dekameter 32.808 feet
1 fathom 6 feet = 1.8288 meters
1 foot 0.3048 meters
1 furlong 10 chains (surveyor’s) = 660 feet = 200 yards = 1/8 statute miles = 201.168 meters
1 inch 2.43 centimeters
1 kilometers 0.621 mile
1 league (land) 3 statute miles = 4.828 kilometers
1 link (Gunter’s or surveyor’s) 7.92 inches = 0.201 168 meter
1 meter 39.37 inches = 1.094 yards

Fifty-Two
1 mil 0.001 inch = 0.025 4 millimeter
1 mile (statute or land) 5,280 feet = 1.609 kilometers
1 mile (nautical international) 1.852 kilometers = 0.999 U.S. nautical miles
1 millimeter 0.03937 inch
1 millimicron (mµ) 0.001 micron = 0.000 000 03937 inch
1 nanometer 0.001 micrometer = 0.000 000 039 37 inch
1 point (typography) 0.013 837 inch = 1/72 inch(approximately) = 0.351 millimeter
1 rod, pole or perch 16-1/2 feet = 5.0292 meters
1 yard 0.9144 meter
Capacities or Volumes1 barrel, liquid 31 to 42 gallons2
1 barrel, standard for fruit, vegetables and other dry commodities except cranberries 7,056 cubic inches = 105 dry quarts =
3.281 bushels, struck measure1 barrel, standard, cranberry 5.286 cubic inches = 86 45/64 dry quarts = 2.709
bushels, struck measure
1 bushel (U.S.), struck measure 2,150.42 cubic inches = 35.238 liters
1 bushel (U.S.), heaped 2,747.715 cubic inches = 1.278 bushels, struck measure3
1 cord (firewood) 128 cubic feet
1 cubic centimeter 0.061 cubic inches
1 cubic decimeter 61.024 cubic inches
1 cubic foot 7.481 gallons = 28.316 cubic decimeters
1 cubic inch 0.554 fluid ounces = 4.433 fluid drams = 16.387 cubic centimeters
1 cubic meter 1.308 cubic yards
1 cubic yard 0.765 cubic meters
1 cup, measuring 8 fluid ounces = 1/2 liquid pint
1 dram, fluid or liquid (U.S.) 1/8 fluid ounces = 0.226 cubic inch = 3.697 milliliters = 1.041 British fluid drachms
1 dekaliter 2.642 gallons = 1.135 pecks
1 gallon (U.S.) 231 cubic inches = 3.785 liters = 0.833 British gallon = 128 US fluid ounces
1 gallon (British Imperial) 277.42 cubic inches =1.201 US gallons = 4.546 liters = 160 British fluid ounces
1 gill 7.219 cubic inches = 4 fluid ounces = 0.118 liter
1 hectoliter 26.418 gallons = 2.838 bushels
1 liter 1.057 liquid quarts = 0.908 dry quarts = 61.024 cubic inches
1 milliliter 0.271 fluid drams = 16.231 minims = 0.061 cubic inches
1 ounce, fluid or dry (U.S.) 1.805 cubic inches = 29.574 milliliters = 1.041 British fluid ounces
1 peck 8.810 liters
1 pint, dry 33.600 cubic inches = 0.551 liters
1 pint, liquid 28.875 cubic inches = 0.473 liter
1 quart, dry (U.S.) 67.201 cubic inches = 1.101 liters = 0.969 British quart
1 quart, liquid (U.S.) 57.75 cubic inches = 0.946 liters = 0.833 British quart
1 quart (British) 69.354 cubic inches = 1.032 U.S. dry quarts = 1.201 U.S. liquid quarts

1 tablespoon, measuring 3 teaspoons = 4 fluid drams = 1/2 fluid ounce
1 teaspoon, measuring 1/3 tablespoon = 1 1/3 fluid drams
1 assay ton4 29.167 grams
1 carat 200 milligrams = 3.086 grains
1 dram, apothecaries 60 grains = 3.888 grams
1 dram, avoirdupois 22 11/32 (= 27.344) grains = 1.772 grams
1 grain 64.798 91 milligrams
1 gram 15.432 grains = 0.035 ounce, avoirdupois
1 hundredweight, gross or long5 112 pounds = 50.802 kilograms
1 hundredweight, net or short 100 pounds = 45.359 kilograms
1 kilogram 2.205 pounds
1 microgram [µg (the Greek letter mu in combination 0.000 001 gram with the letter g)]
1 milligram 0.015 grain
1 ounce, avoirdupois 437.5 grains = 0.911 troy or apothecaries ounces = 28.350 grams
1 ounce, troy or apothecaries 480 grains = 1.097 avoirdupois ounces = 31.103 grams
1 pennyweight 1.555 grams
1 point 0.01 carat = 2 milligrams
1 pound, avoirdupois 7,000 grains = 1.215 troy or apothecaries pound = 453.592 37 grams
1 pound, troy or apothecaries 5,760 grains = 0.823 avoirdupois pound = 373.242 grams
1 ton, gross or long 2,240 pounds = 1.12 net tons = 1.016 metric tons
1 ton, metric 2,204.623 pounds = 0.984 gross tons = 1.102 net tons
1 ton, net or short 2,000 ponds = 0.893 gross ton = 0.907 metric ton
Areas of Surfaces1 acre 43,560 square feet = 4,850 square yards = 0.405 hectare
1 are 119.599 square yards = 0.025 acre
1 hectare 2.471 acre
1 square centimeter 0.155 square inch
1 square decimeter 15.5 square inches
1 square foot 929.030 square centimeters
1 square inch 6.4516 square centimeters
1 square kilometer 0.386 square mile = 247.105 acres
1 square meter 1.196 square yards = 10.764 square feet
1 square mile 258.999 hectares
1 square millimeter 0.002 square inch
1 square rod (sq pole or sq perch) 25.293 square meters
1 square rod (sq pole or sq perch) 0.836 square meters
1 The angstrom is basically defined as 1010 meter
2 There are a variety of “barrels” established by law or usage. For example, federal taxes on fermented liquors are based on a barrel of 31 gallons; many state laws fix the “barrel for liquids” at 31 1/2 gallons; one state fixes a 36-gallon barrel for cistern measurements; federal law recognizes a 40-gallon barrel for “proof spirits”; by custom, 42 gallons comprise a barrel of crude oil or petroleum productsfor statistical purposes, and this equivalent is recognized “for liquids” by four states.
3 Frequently recognized as 1 1/4 bushels, struck measure.
4 Used in assaying. The assay ton bears the same relation to the milligram that a ton of 2,000 pounds avoirdupois bears to the troy ounce;hence the weight of in milligrams of precious metal obtained from one assay ton of ore gives directly the number of troy ounces to thenet ton.
5 The gross or long ton and hundredweight are used commercially in the Untied States to only a limited extent, usually in restrictedindustrial fields. These units are the same as the British “ton” and “hundredweight”.
Fifty-Three

adjustment 10, 38-42adjustment standards, MENC 21, 38age level guide for instruments 22aging, wood 5Albani, Mattias 15“Amatesé Stradivari” 12Amati, Andreas 11Amati, Nicolaus 11-12, 14, 15anatomy
bow frog 20violin 20
Baroque bow 17basic shop adjustment 38-40bass bar 4, 8, 35belly, violin 5Bergonzi, Carlos 14Bernardel, Auguste Sebastien Phillipe 16blocks 8body length of instruments 22bow frog, anatomy of 20bow makers
Henry, Joseph 19Maire, Nicolas 19Maline, Guillaume 19Pecatte, Dominique 19Tourte, François Xavier 18, 19
bow, care of 26-27bow, history of 17-18Brescian School 11bridge 9, 25, 32-33, 34, 38-39, 41
determining correct location 32how to straighten 33
buzz, instrument 35Byzantine Empire 17care of instrument and bow 23-27Chanot, François 16clinics and clinicians 44Corelli, Archangelo 4correct instrument size, determining 21crémaillère mechanisms 17Cremonese School 11Crusades, 3crwd 3crwth 3da Salo, Gasparo 11“del Gesu” 13del Gesu, Joseph Guarneri 11Dictionary of Musical Terms 45-47“drunken Josephs” 14dye manufacturing 18educator aids 43-44f-holes, violin 7fingerboard
care of 24, 25historical changes 4planing and dressing 39, 41when to replace 35
folios 44French School 16Gagliano, Allessandro 15Gagliano, Gennaro 15Gagliano, Nicola 15Gand, Charles François 16general care 23Glasser bow measurements 21graduation 6-7, 35Grancino, Francesco 11Grancino, Giovanni Battista 11Guarneri, Bartolomeo Giuseppe (also known as
Joseph Guarneri del Gesu) 11, 13-14Guarnerius, Andreas 11Guarnerius, Joseph 11harmonics, use of 36Herz 15Hill & Sons 4History of
the bow 17-18the violin 3-4
how a violin is made 5-10instrument
care of 23-25how to determine correct size 21
ironwood 17Klotz family 15Klotz, Mattias 15Knilling Custom Shop Adjustment 38-42Knilling support materials 43-44
clinics and clinicians 44educator aids 43folios 44posters 43training aids 43videos 43
Leonardo da Vinci 3lining 8lira da braccio 3“Long Pattern Strads” 12Lupot, François 16, 19Lupot, Nicolas 16Maggini, Paolo 11making a sizing stick 22master shop adjustment 41-42measurements for Glasser bows 21MENC standards for adjustment 21, 38Moorish invasions 3Music Educators National Conference 21, 38
I ndex
�P
Fifty-Four
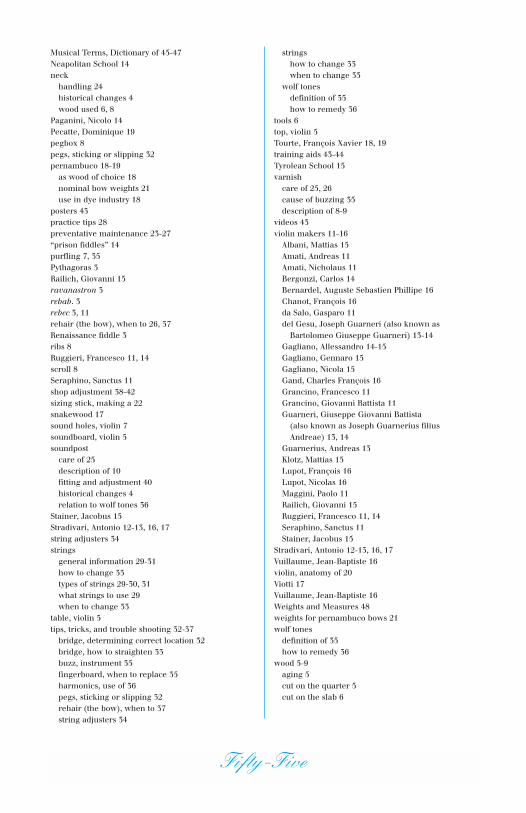
Musical Terms, Dictionary of 45-47Neapolitan School 14neck
handling 24historical changes 4wood used 6, 8
Paganini, Nicolo 14Pecatte, Dominique 19pegbox 8pegs, sticking or slipping 32pernambuco 18-19
as wood of choice 18nominal bow weights 21use in dye industry 18
posters 43practice tips 28preventative maintenance 23-27“prison fiddles” 14purfling 7, 35Pythagoras 3Railich, Giovanni 15ravanastron 3rebab. 3rebec 3, 11rehair (the bow), when to 26, 37Renaissance fiddle 3ribs 8Ruggieri, Francesco 11, 14scroll 8Seraphino, Sanctus 11shop adjustment 38-42sizing stick, making a 22snakewood 17sound holes, violin 7soundboard, violin 5soundpost
care of 25description of 10fitting and adjustment 40historical changes 4relation to wolf tones 36
Stainer, Jacobus 15Stradivari, Antonio 12-13, 16, 17string adjusters 34strings
general information 29-31how to change 33types of strings 29-30, 31what strings to use 29when to change 33
table, violin 5tips, tricks, and trouble shooting 32-37
bridge, determining correct location 32bridge, how to straighten 33buzz, instrument 35fingerboard, when to replace 35harmonics, use of 36pegs, sticking or slipping 32rehair (the bow), when to 37string adjusters 34
stringshow to change 33when to change 33
wolf tonesdefinition of 35how to remedy 36
tools 6top, violin 5Tourte, François Xavier 18, 19training aids 43-44Tyrolean School 15varnish
care of 25, 26cause of buzzing 35description of 8-9
videos 43violin makers 11-16
Albani, Mattias 15Amati, Andreas 11Amati, Nicholaus 11Bergonzi, Carlos 14Bernardel, Auguste Sebastien Phillipe 16Chanot, François 16da Salo, Gasparo 11del Gesu, Joseph Guarneri (also known as
Bartolomeo Giuseppe Guarneri) 13-14Gagliano, Allessandro 14-15Gagliano, Gennaro 15Gagliano, Nicola 15Gand, Charles François 16Grancino, Francesco 11Grancino, Giovanni Battista 11Guarneri, Giuseppe Giovanni Battista
(also known as Joseph Guarnerius filius Andreae) 13, 14
Guarnerius, Andreas 13Klotz, Mattias 15Lupot, François 16Lupot, Nicolas 16Maggini, Paolo 11Railich, Giovanni 15Ruggieri, Francesco 11, 14Seraphino, Sanctus 11Stainer, Jacobus 15
Stradivari, Antonio 12-13, 16, 17Vuillaume, Jean-Baptiste 16violin, anatomy of 20Viotti 17Vuillaume, Jean-Baptiste 16Weights and Measures 48weights for pernambuco bows 21wolf tones
definition of 35how to remedy 36
wood 5-9aging 5cut on the quarter 5cut on the slab 6
Fifty-Five
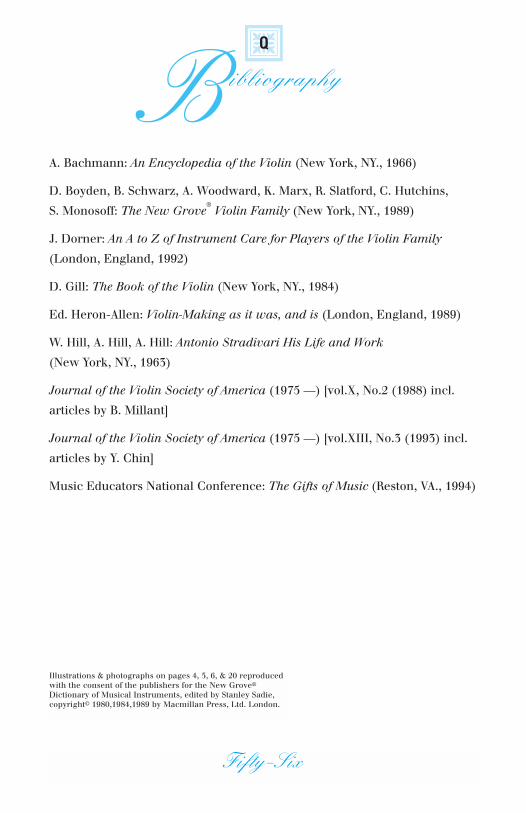
A. Bachmann: An Encyclopedia of the Violin (New York, NY., 1966)
D. Boyden, B. Schwarz, A. Woodward, K. Marx, R. Slatford, C. Hutchins,
S. Monosoff: The New Grove®
Violin Family (New York, NY., 1989)
J. Dorner: An A to Z of Instrument Care for Players of the Violin Family
(London, England, 1992)
D. Gill: The Book of the Violin (New York, NY., 1984)
Ed. Heron-Allen: Violin-Making as it was, and is (London, England, 1989)
W. Hill, A. Hill, A. Hill: Antonio Stradivari His Life and Work
(New York, NY., 1963)
Journal of the Violin Society of America (1975 —) [vol.X, No.2 (1988) incl.
articles by B. Millant]
Journal of the Violin Society of America (1975 —) [vol.XIII, No.3 (1993) incl.
articles by Y. Chin]
Music Educators National Conference: The Gifts of Music (Reston, VA., 1994)
Bibliography�Q
Fifty-Six
Illustrations & photographs on pages 4, 5, 6, & 20 reproducedwith the consent of the publishers for the New Grove®
Dictionary of Musical Instruments, edited by Stanley Sadie,copyright© 1980,1984,1989 by Macmillan Press, Ltd. London.


