
kinera
15
he Features of ABAP New Editor Part 2 By Suresh Kumar Parvathaneni Working with Colors and Fonts: Switch to the new editor (if the default editor shown is the old editor). In the New ABAP editor, click on the button “options” available at the bottom of the right hand side, as shown in the below screen shot: Following pop-up appears:
description
fdfdffffgjgffjgd
Transcript of kinera

he Features of ABAP New Editor Part 2
By Suresh Kumar Parvathaneni
Working with Colors and Fonts:
Switch to the new editor (if the default editor shown is the old editor).
In the New ABAP editor, click on the button “options” available at the bottom of the right hand side, as shown in the below screen shot:
Following pop-up appears:

Now select “Fonts and Colors” available on the left side.
Using this, you can design how the screen should look like, For example, you can dictate how the comments should appear (like Font, size, foreground color and background color). Let us take the same “comments” section for our scenario here.
Comments are currently displayed as shown below:

Now click on the options button and select “Fonts and Colors”. Select “Comments” from the list box:
Now change the way you would like the options to appear in this section:
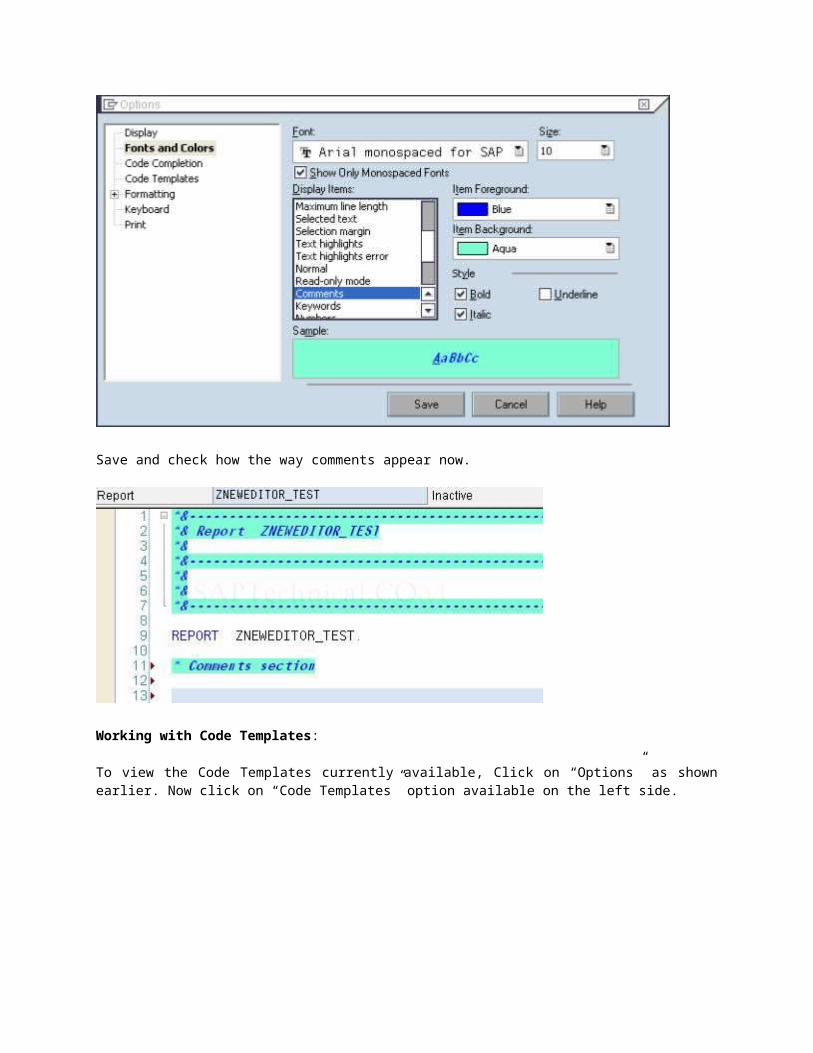
Save and check how the way comments appear now.
Working with Code Templates:
To view the Code Templates currently available, Click on “Options” as shown earlier. Now click on “Code Templates” option available on the left side.

You would observe the code templates available for use with the editor. Click on any code template to understand further.
Above screenshot is for “DO”. We would use this for our demo purpose to better understand the code template.
Write some sample code in your editor.

Now select your program code and click the right button of the mouse. Select -> Format -> Surround by template -> Do () (as shown in the following screenshot)
Now observe your code:
Your code is now surrounded by the code template “DO”.

Creating custom code template:
Now we would work on creating our own code template for our future use.
As observed in the earlier screenshots, there is no code template available for subroutine. Let us create a code template for the same.
Select your code and click on right button. Select Format -> Extract template
Enter the name for your code template.

Click on OK.
Now we need to define the position where the selected text (surrounded text) to appear.

Click on the empty line between “form” and “endform” and click on “Insert tag”
Select Surrounded Text from the given options.
Save and exit.
To test our code template, write a sample code in our program.

Right click and select our code template.
Our code template is displayed as below:
Now just enter the form name to complete your subroutine definition.
Setting Break-points:
Open the new ABAP editor and write some sample code in it.

Activate your program.
To set the break-point, click on indicator margin, available on the left side of the line numbers. (See the screenshot below):
Break-point in set now.
This article, the first part of a two-article series, takes you on a brief tour of the features available in the new ABAPTM editor (step by step with screenshots)
Pre-requisites
The new ABAPTM editor is available with SAP® GUI for windows 6.40 patch level 10 or higher. However this new editor is supported from the SAP® Version SAP® Netweaver 2004s.
Shifting to ABAP TM New Editor
Start any of the following transaction codes to access the ABAPTM workbench:
SE38 SE37

SE24 SE37
We would use SE38 for our demo purposes.
Procedure to shift between Old ABAPTM Editor and New ABAPTM Editor:
Go to Utilities à Settings Click on Front-end Editor (New) as shown below
Click for changes to effect.
Features in ABAP TM New Editor
First Look:
View of the new ABAPTM Editor (from SE38):
Display Features
Following are some of the features that could be observed while writing the code:
Line Numbers
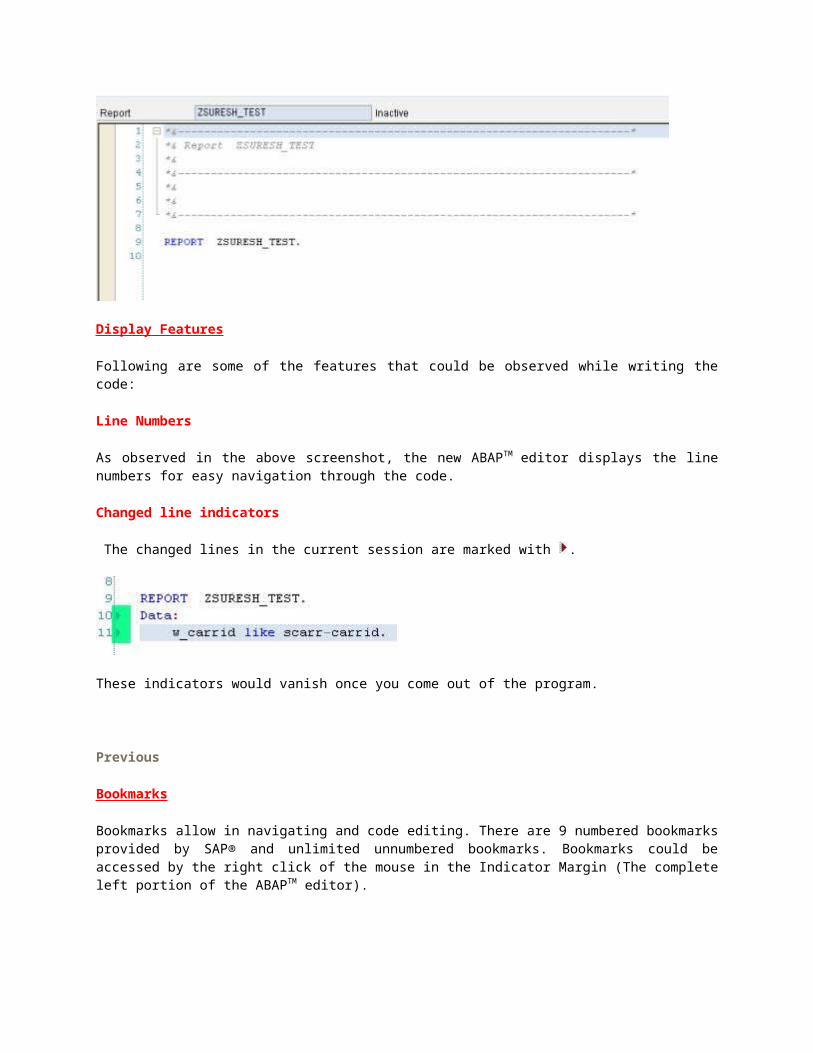
As observed in the above screenshot, the new ABAPTM editor displays the line numbers for easy navigation through the code.
Changed line indicators
The changed lines in the current session are marked with .
These indicators would vanish once you come out of the program.
Previous
Bookmarks
Bookmarks allow in navigating and code editing. There are 9 numbered bookmarks provided by SAP® and unlimited unnumbered bookmarks. Bookmarks could be accessed by the right click of the mouse in the Indicator Margin (The complete left portion of the ABAPTM editor).

To set a bookmark, right click on the Indicative Margin, click on Bookmarks --> Bookmark 0 (Bookmarks are numbered 0 to 9). A Blue flag with the bookmark number would appear on the Indicative Margin.
To navigate to any bookmark marked earlier, right click on the Indicative Margin, Go to Bookmark --> Bookmark 0.
Code Hints
Code hints appear as you type in ABAPTM editor. For example, if you start typing for Parameters, following occurs:
When typed P, nothing appears. When typed PA, code hint PACK appears. When typed PAR, code hint PARAMETERS appears.
Press TAB to choose the given code hint.
Changing the Font and Colors of coding environment
Click on , available at the right side bottom of the editor. Click on “Fonts and Colors” on the left side of the window that is appeared after clicking. From here, we can set different colors and fonts for different elements on the editor.
Window Splitter
The window splitter allows you to work on different parts of the code simultaneously.
The window could be set to splitter mode by double clicking the splitter line above the vertical scrollbar (shown below).

The split screen is seen as below:


