KEGGINGamericanbrewmaster.com/Instructions/kegging.pdfone liter of beer. Different styles of beer...
20
Page | 1 KEGGING Why Keg your beer? Probably the most common reason homebrewers want to keg their beer is to save time and labor over cleaning and sanitizing 50 or so bottles each time they brew. While bottles are classic and are very nice to have, one must admit, that they can be a challenge on bottling day. The second reason is that it is very nice to have fresh homebrewed draft beer on tap every night. You make friends fast, when they learn you have draft beer in the garage. The Essentials: Keg – This will usually be a ―Cornelius‖ or ―Corny‖ keg made by Cornelius or Spartanburg Steel (Firestone Brand). Kegs can have either a Ball lock post, made for Pepsi products, or a Pin Lock post, made for Coke Products. Comes with O-Rings used for the lid and posts. CO2 Cylinder – This is a steel or aluminum cylinder designed for high pressure gas. Typical pressures are 800 psi. New tanks are stamped with an inspection date and must be re-inspected every 5 years. Regulator – Regulators are necessary to reduce the CO2 tank pressure from around 800 psi to a useful pressure between 5 – 18 psi. Regulators come with either a single low pressure gauge which indicates the pressure of the beer, or a low pressure gauge and a high pressure gauge, which indicates the pressure in the CO2 Cylinder. Tubing – Will connect the regulator to the Gas Side Quick Disconnect. Quick disconnects or Sanke coupler – Used to connect the CO2 from the regulator to the keg as well as the beer side of the keg to your dispensing tap. The coupler is used for commercial kegs. Dispensing Tap – usually either a squeeze faucet attached to 5 feet of commercial beverage tubing, a faucet on a draft tower, or through the door of a refrigerator. Hose Clamps for tubing and Keg Lube (food grade Lubricant for O-Rings)
Transcript of KEGGINGamericanbrewmaster.com/Instructions/kegging.pdfone liter of beer. Different styles of beer...

Page | 1
KEGGING
Why Keg your beer?
Probably the most common reason homebrewers want to keg their beer is to save time
and labor over cleaning and sanitizing 50 or so bottles each time they brew. While bottles
are classic and are very nice to have, one must admit, that they can be a challenge on
bottling day.
The second reason is that it is very nice to have fresh homebrewed draft beer on tap every
night. You make friends fast, when they learn you have draft beer in the garage.
The Essentials:
Keg – This will usually be a ―Cornelius‖ or ―Corny‖ keg made by Cornelius or
Spartanburg Steel (Firestone Brand). Kegs can have either a Ball lock post, made
for Pepsi products, or a Pin Lock post, made for Coke Products. Comes with O-Rings
used for the lid and posts.
CO2 Cylinder – This is a steel or aluminum cylinder designed for high pressure gas.
Typical pressures are 800 psi. New tanks are stamped with an inspection date and
must be re-inspected every 5 years.
Regulator – Regulators are necessary to reduce the CO2 tank pressure from around
800 psi to a useful pressure between 5 – 18 psi. Regulators come with either a
single low pressure gauge which indicates the pressure of the beer, or a low
pressure gauge and a high pressure gauge, which indicates the pressure in the CO2
Cylinder.
Tubing – Will connect the regulator to the Gas Side Quick Disconnect.
Quick disconnects or Sanke coupler – Used to connect the CO2 from the regulator
to the keg as well as the beer side of the keg to your dispensing tap. The coupler is
used for commercial kegs.
Dispensing Tap – usually either a squeeze faucet attached to 5 feet of commercial
beverage tubing, a faucet on a draft tower, or through the door of a refrigerator.
Hose Clamps for tubing and Keg Lube (food grade Lubricant for O-Rings)

Page | 2
Optional Equipment:
Regulator Gauge Protector, or Gauge Cage – Protects the high pressure gauge in
the event the CO2 cylinder is knocked over.
Secondary (often an ―inline‖) Regulator – Use to carbonate beer or serve a different
style beer at a different pressure at the same time.
Splitters and/or air distributors – Use to serve more than one keg from the same
CO2 cylinder.
~~~
Cleaning and Sanitizing
As with bottling, cleaning and sanitizing your keg and kegging equipment is crucial to
serving great beer and keeping your beer fresh for months. It is not recommended to
use bleaching products on stainless steel, as the chlorine can react with the bi-metals
(iron, chromium ~ 18% and nickel), and can eventually pit the stainless steel. This section
will cover both how to sanitize a homebrew kegging system and a commercial kegging
system.
Homebrew Kegging System with Squeeze faucet tap:
When you clean and sanitize your homebrew kegging system, it is recommended that you
remove the posts from the keg, and thoroughly clean and sanitize them by soaking them
in Beer-Brite. An effective method that seems to work well is to fill your keg partially full
with a gallon or two of Beer-Brite solution, and shake it vigorously about the keg. Let it
soak in the keg for a while. I like to lay the keg on the side and let it rest upside down for
a several minutes in order to sanitize the top of the keg. Remove the sanitizer by using
CO2 to push the sanitizer through the kegging hardware, such as your beverage tubing,
squeeze faucet, tower, shanks or other dispensing devices. This will ensure these
components are clean and sanitized as well. Repeat this procedure with a warm water and
cool water rinse.
Now that your keg is sanitary, you can simply siphon your beer into the keg, following
careful siphoning rules of not splashing your beer to avoid aeration.
Commercial Kegging System or Homebrew System with tower/shank faucet:
Chances are if you are serving beer out of a kegerator or chest freezer your efforts of
sanitation may be a little bit tricky to maneuver around the barbs and couplers, but there
is a tap cleaning system that can help you out so that you don’t have to disconnect
everything. An example of the system is provided below as well as directions.

Page | 3
First, shut off the CO2 at the regulator, remove the coupler at the keg, and disconnect all
tubing from the keg coupler. Then remove the faucet from the tower or shank using a
faucet wrench, and disassemble the faucet to soak it in a sanitizer solution. You may want
to brush out the hole where the faucet attaches to the tower or shank before pumping to
dislodge any particles.
Now you are ready to use your Tap Cleaning System pump. Put a capful of cleaning
solution in the pump bottle and attach the end of the cleaning hose to the faucet shank.
Commence to pumping the cleaning solution through the line and rinse with one or two
bottles full of water. At this point you can reassemble the faucet and reattach it to the
shank and tighten back down just enough so it doesn't leak.
Now you must brush out your coupler, if you are using one. Soak it in sanitizer,
reassemble it and reconnect it to your keg. You are now clean and ready to go.

Page | 4
Getting Your Kegging Equipment from American Brewmaster
If you so choose to get your equipment from us here are a few things that we do to make
sure that your first encounter with kegging is an enjoyable one:
Your keg has been checked to ensure it will hold pressure.
Your keg has been cleaned (sprayed out) and dosed with Sanitizer (Star San).
However, it is not beer/brewing clean...please refer to the sanitation section above ofr
those tips.
Connecting your homebrew kegging system:
A word on disconnects - The Gray is GAS, the Black is BEER (liquid).
The top of the keg near the post is marked with the words IN/Out or Liquid/GAS or
LIQ/GAS or something similar. Connect the Gray one to the gas side, and the black one to
the liquid side.
The posts can be removed with an 11/16 or 7/8-deep socket wrench., depending on the
style of posts you have. If one of your posts has a 12 point "star" pattern on it, you will
need to get a socket at an auto store, or a hardware stores. Because of the limited space,
socket sets are much easier to use than open ended or box wrenches.
Note that the two posts are NOT IDENTICAL. The Gas side is usually notched on the hex
part, the liquid post is not notched. These should not be interchanged. The notched one
needs to be returned to the GAS/IN post on the keg. This is because the design of the
flare that catches the ball bearings on the disconnect on each of the posts is slightly
different. If you accidentally put the gas disconnect on the liquid post or vice versa, you
will have a very difficult time removing the disconnects. If this happens, use a crescent
wrench to pry the disconnect off.
The regulator screws onto the valve of your CO2 cylinder. Be sure to put the plastic gasket
in place between the brass connector on the regulator and the co2 cylinder valve.
Use the 3‖ 1/4 inch clear tubing to connect to the barb on the regulator.
Use the stainless steel worm clamp to securely tighten the tubing to the barb. The other
end of this tube will connect to your Gray disconnect via the swivel nut/tail piece. Put the
tailpiece on the threaded quarter-inch male flare fitting built into the gray disconnect, and
slide the free end of the 1/4 tubing over it. Again, use the hose clamp to ensure a tight,
leak-free fit. Use a wrench to tighten down the swivel nut on the 1/4 male flare fitting on
the disconnect.

Page | 5
Attach the Picnic tap, or squeeze faucet, to the black disconnect. Make sure this is
connected before connecting the disconnect to the liquid post, or whatever is in the keg
will spray out across the room and onto your floor, wall, or all over you...
The O-rings included with the kit are new, and can be used to replace the existing O-rings.
O-rings can hold a lot of the smell of the prior product (Mountain Dew, Pepsi, 7-up, Root
Beer, homebrew...etc.). Changing them is not necessarily in order to make the keg hold
pressure, but to ensure a clean, sanitary and odor-free keg it is recommended to change
the O-rings. It is not "necessary" to replace the o-rings, and many people only replace the
Dip Tube O-ring when they take posts off to inspect the poppets.
The O-rings are the Keg O-Ring (KOR) - this is the large O-ring and fits between the lid
and the opening in the top of the keg. The Post O-Ring (POR) is the larger of the small O-
rings. It fits on the outside of the post to ensure a tight disconnect fit. The Dip Tube O-
Rings (DTOR) are the smallest O-rings. They are fit over the dip tubes under the posts.
Keg Lube is a sanitary, food-grade lubricant that will provide an air-tight seal in your keg.
Make sure to use it on all of the O-rings. Just a light coating will suffice.
Homebrew Keg-filling Procedure
When you are ready to put your beer in the keg, assuming it is soon after you cleaned and
sanitized it, your keg will need to be purged of air and full of CO2 gas, which prevents
oxygen from harming your beer. This is an important step.
If you are going to naturally carbonate your beer, use approximately 1/3 cup of
corn sugar per 5 gallon batch. This is about half the amount used when bottling.
Carefully siphon your beer into the keg making sure to put the siphon tube on the bottom
of the keg to minimize splashing. After the keg is full, purge the air out of the keg by
adding gas and pulling the relief tab or ring on the lid a couple of times. Put about 6 - 10
psi on your beer and set aside to condition.
If you are artificially carbonating, you will have an easier time and use less gas if the
beer is cold so the CO2 gas will dissolve into solution in the beer better. You can carbonate
as room temperature but CO2 gas levels will vary greatly and you will need more gas.
There are various methods to accomplish this, the best way is to adjust the temperature
of the beer and the pressure on the regulator to carbonate the beer to a specific level,
expressed in volumes of CO2. One volume CO2 is equal to one liter of CO2 dissolved in
one liter of beer. Different styles of beer have different carbonation levels. For example a
British bitter may have 1.6 volumes, while a Hefeweizen may be carbonated to around 3.5
volumes. Below is a chart that will help you determine the proper pressure.

Page | 6
T
E
M
P
CO2 Pounds Per Square Inch (PSI)
7 8 9 10 11 12 13 14 15 16 17 18 19 20 21 22 23 24 25 26 27 28 29 30
37 2.15 2.24 2.34 2.42 2.52 2.62 2.72 2.80 2.90 3.00
38 2.10 2.20 2.29 2.38 2.47 2.57 2.67 2.75 2.85 2.94
39 2.05 2.15 2.25 2.34 2.43 2.52 2.61 2.70 2.80 2.89 2.98
40 2.01 2.10 2.20 2.30 2.39 2.47 2.56 2.66 2.75 2.84 2.93 3.01
41 1.97 2.06 2.16 2.25 2.35 2.43 2.52 2.60 2.70 2.79 2.87 2.96
42 1.93 2.02 2.12 2.21 2.30 2.39 2.47 2.56 2.65 2.74 2.82 2.91 3.00
43 1.9 1.99 2.08 2.17 2.25 2.34 2.43 2.52 2.60 2.69 2.78 2.86 2.95
44 1.86 1.95 2.04 2.13 2.21 2.30 2.39 2.47 2.56 2.64 2.73 2.81 2.90 2.99
45 1.82 1.91 2.00 2.08 2.17 2.26 2.34 2.42 2.51 2.60 2.68 2.77 2.85 2.94 3.02
46 1.88 1.96 2.04 2.13 2.22 2.30 2.38 2.47 2.55 2.63 2.72 2.80 2.89 2.98
47 1.84 1.92 2.00 2.09 2.18 2.25 2.34 2.42 2.50 2.59 2.67 2.75 2.84 2.93 3.02
48 1.80 1.88 1.96 2.05 2.14 2.21 2.30 2.38 2.46 2.55 2.62 2.70 2.79 2.87 2.96
49 1.85 1.93 2.01 2.10 2.18 2.25 2.34 2.42 2.50 2.58 2.66 2.75 2.83 2.91 2.99
50 1.82 1.90 1.98 2.06 2.14 2.21 2.30 2.38 2.45 2.54 2.62 2.70 2.78 2.86 2.94 3.02
51 1.87 1.95 2.02 2.10 2.18 2.25 2.34 2.41 2.49 2.57 2.65 2.73 2.81 2.89 2.97
52 1.84 1.91 1.99 2.06 2.14 2.22 2.30 2.37 2.45 2.54 2.61 2.69 2.76 2.84 2.93 3.00
53 1.80 1.88 1.96 2.03 2.10 2.18 2.26 2.33 2.41 2.48 2.57 2.64 2.72 2.80 2.88 2.95 3.03
54 1.85 1.93 2.00 2.07 2.15 2.22 2.29 2.37 2.44 2.52 2.60 2.67 2.75 2.83 2.90 2.98
55 1.82 1.89 1.97 2.04 2.11 2.19 2.25 2.33 2.40 2.47 2.55 2.63 2.70 2.78 2.85 2.93 3.01
56 1.86 1.93 2.00 2.07 2.15 2.21 2.29 2.36 2.43 2.50 2.58 2.65 2.73 2.80 2.88 2.96
57 1.83 1.90 1.97 2.04 2.11 2.18 2.25 2.33 2.40 2.47 2.54 2.61 2.69 2.76 2.84 2.91 2.99
58 1.80 1.86 1.94 2.00 2.07 2.14 2.21 2.29 2.36 2.43 2.50 2.57 2.64 2.72 2.80 2.86 2.94 3.01
59 1.83 1.90 1.97 2.04 2.11 2.18 2.25 2.32 2.39 2.46 2.53 2.60 2.67 2.75 2.81 2.89 2.96 3.03
60 1.80 1.87 1.94 2.01 2.08 2.14 2.21 2.28 2.35 2.42 2.49 2.56 2.63 2.70 2.77 2.84 2.91 2.98

Page | 7
Beer styles and their corresponding CO2 Volumes
American Lager - Light/Standard/Premium (2.57-2.73)
American Lager - Dark (2.5-2.7)
American Lager - Classic American Pilsner (2.3-2.5)
European Pale Lager - Bohemian Pilsner (2.3-2.5)
European Pale Lager - Northern German Pilsner (2.52)
European Pale Lager - Dortmunder Export (2.57)
European Pale Lager - Muenchner Helles (2.26-2.68)
Light Ale - Blond Ale (2.3-2.6)
Light Ale - American Wheat (2.3-2.6)
Light Ale - Cream Ale (2.6-2.7)
Bitter And English Pale Ale - Ordinary Bitter (.75-1.3)
Bitter And English Pale Ale - Special or Best Bitter (.75-1.3)
Bitter And English Pale Ale - Strong Bitter / English Pale Ale
(.75-1.3)
Scottish Ales - Light 60/- (.75-1.3)
Scottish Ales - Heavy 70/- (.75-1.3)
Scottish Ales - Export 80/- (.75-1.3)
American Pale Ales - American Pale Ale (2.26-2.78)
American Pale Ales - American Amber Ale (2.26-2.78)
American Pale Ales - California Common Beer (2.4-2.8)
India Pale Ale - India Pale Ale (1.5-2.3)
Koelsch And Altbier - Koelsch-Style Ale (2.42-2.73)
Koelsch And Altbier - Düsseldorf Altbier (2.16-3.09)
Koelsch And Altbier - Northern German Altbier (2.16-3.09)
German Amber Lager - Oktoberfest/Maerzen (2.57-2.73)
German Amber Lager - Vienna Lager (2.4-2.6)
Brown Ale - Mild (1.3-2.0)
Brown Ale - Northern English Brown Ale (1.5-2.3)
Brown Ale - Southern English Brown (1.5-2.3)
Brown Ale - American Brown Ale (1.5-2.5)
English And Scottish Strong Ale - Old Ale (1.5-2.3)
English And Scottish Strong Ale - Strong Scotch Ale (Wee
Heavy) (1.5-2.3)
Barleywine And Imperial Stout - English-style Barleywine
(1.3-2.3)
Barleywine And Imperial Stout - American-Style Barleywine
(1.3-2.3)
Barleywine And Imperial Stout - Russian Imperial Stout (1.5-
2.3)
European Dark Lager - Munich Dunkel (2.21-2.66)
European Dark Lager - Schwarzbier (Black Beer) (2.2-2.6)
Bock - Traditional Bock (2.2-2.7)
Bock - Helles Bock/Maibock (2.16-2.73)
Bock - Doppelbock (2.26-2.62)
Bock - Eisbock (2.37)
Porter - Robust Porter (1.8-2.5)
Porter - Brown Porter (1.7-2.5)
Stout - Dry Stout (1.6-2.0)
Stout - Sweet Stout (2.0-2.4)
Stout - Oatmeal Stout (2.0-2.4)
Stout - Foreign Extra Stout (2.3-2.6)
Wheat Beer - Bavarian Weizen (3.6-4.48)
Wheat Beer - Bavarian Dunkelweizen (3.6-4.48)
Wheat Beer - Berliner Weisse (3.45)
Wheat Beer - Weizenbock (3.71-4.74)
Strong Belgian Ale - Dubbel (1.9-2.4)
Strong Belgian Ale - Tripel (1.9-2.4)
Strong Belgian Ale - Belgian Strong Golden Ale (1.9-2.4)
Strong Belgian Ale - Belgian Strong Dark Ale (1.9-2.5)
Belgian And French Ale - Belgian Pale Ale (1.9-2.5)
Belgian And French Ale - Witbier (2.1-2.6)
Belgian And French Ale - Biere de Garde (1.9-2.5)
Belgian And French Ale - Saison (1.9-2.4)
Belgian And French Ale - Belgian Specialty Ale (1.9-2.4)
Lambic And Belgian Sour Ale - Straight (Unblended)
Lambic-Style (3.0-4.5)
Lambic And Belgian Sour Ale - Gueuze/Gueuze-Style Ale
(3.0-4.5)
Lambic And Belgian Sour Ale - Fruit Lambic-Style Ale (2.6-
4.5)
Lambic And Belgian Sour Ale - Oud Bruin (1.9-2.5)
Lambic And Belgian Sour Ale - Flanders Red Ale (1.9-2.5)
Fruit Beer - Fruit Beer (2.0-3.0)
Spice/Herb/Vegetable Beer - Spice/Herb/Vegetable (2.0-3.0)
Smoke-flavored Beer - Classic Rauchbier (2.16-2.57)
Smoke-flavored Beer - Other Smoked Beer (2.16-2.57)
zSpecialty/Experimental/Historical (2.2-2.5)
Mead - Traditional Mead (1.0-3.5)
Mead - Varietal Honey Traditional Mead (1.0-3.5)
Mead - Cyser (Apple Melomel) (1.0-3.5)
Mead - Pyment (Grape Melomel) (1.0-3.5)
Mead - Other Fruit Melomel (1.0-3.5)
Mead - Metheglin (1.0-3.5)
Mead - Braggot (1.0-3.5)
Mead - Mixed Category Mead (1.0-3.5)
Cider - Standard Cider and Perry (1.0-3.5)
Cider - New England-Style Cider (1.0-3.5)

Page | 8
Another method is the "shake" method, which involves getting the beer cold,
cranking the pressure to about 25psi, and shaking the keg for 5 or so minutes while
co2 goes into solution. I find this way works, is quick and easy, but doesn't provide
any control over the amount of CO2 dissolved into your beer and can cause
excessive foaming.
The quickest, and arguably the best method is to use a Carbonating Stone. The
Stone forces tiny (2 micron) CO2 bubbles into the beer, which readily dissolve in
cold beer.
The Carbonation Stone is attached to the gas side dip tube via a 22‖ length of ¼‖
tubing.
Once the beer is cold, connect the gas disconnect to the post and set the regulator
pressure to 4 psi. Let the gas diffuse into the beer for several minutes, until gas is
no longer heard entering the keg. Repeat this process by adjusting the regulator in
2 psi increments until you reach the desired carbonation level determined by the
type of beer and the temperature of the beer. Voila, ―instant carbonation‖ !
“ Cheers To Beer!” ~ Everyone at some point

Page | 9
Setting up a Kegerator used to serve commercially
available beer, such as Budweiser
Setting up your kegerator:
Components:
Refrigeration unit, which is to say, the big box the kegs go in. Draft Tower, or commercial draft arm. Aka; Tap Tower
Faucet Shanks, if going through a door or wall. Faucets, tubing and fittings Keg coupler or keg tapper. (e.g.: American Sanke Tap)
CO2 cylinder Regulator
Setting up your kegerator is usually quite intuitive and relatively straight forward.
First, check all components to ensure there is no damage to any of the parts. Check
the electric cord in the back for damage, and make sure there are no holes in any
of the tubing; this would be highly unlikely.
To set up your kegerator, first determine if the pre drilled holes for mounting the
tower fit your tower's mounting bracket pattern. If so, pass the beverage tubing
with hex nut and barb fitting from the tower through the hole in the top of the
kegerator and simply place the tower on top of the kegerator (or if mounting on a
counter in the case of a built in model, align above hole in kegerator), align the
holes and insert screws in the pre-drilled holes.
Attach the faucet to the shank assembly at the top of the tower by lining up the
splines in the faucet assembly with those in the shank adapter. Screw the faucet
coupling ring onto the threaded faucet. From the front, you will pull the coupling
ring toward you slightly, while turning it to the left. This is actually righty-tighty; if
you do this from the back side of the faucet, it will then feel correct.
If your tower has a base plate cover, a rubber band can be used to hold it up and
out of the way while you screw the tower down. If you have a standalone unit, the
kegerator comes with a metal railing and mounting screws. You can place that on
top of the kegerator at this time. Use the screws to attach railing.
In the back inside of your kegerator, there is often is a small shelf designed to hold
the CO2 cylinder that comes with your system. Above the small shelf are two small
pre-tapped holes to attach the CO2 cylinder mounting bracket. Screw the mounting
bracket in using the screws provided. Some kegerators provide a mounting cage on
the back of the kegerator. Follow the specific instructions with your kegerator.

Page | 10
Attach your regulator to the CO2 cylinder using the regulator wrench or an
adjustable wrench. Be sure not to forget the Regulator washer provided with your
system. It is a small white plastic washer that is critical to prevent a leak between
your co2 cylinder and regulator. A good snug fit is all that is needed. There is no
need to crank down as hard as you can.
Attach the end of the ¼ inch (or 5/16 for a commercial beer setup) diameter clear
plastic tubing that came with your kit to the regulator hose barb. Place the shut off
valve in the off position. Use stainless steel hose clamp to tighten tubing to barb.
Slide your CO2 cylinder into the mounting bracket and rest it on the shelf. Secure
the cylinder in the bracket using the bracket wing nut and screw.
Connect the tubing from the tower to the top of the Sanke tap (keg coupler), which
will connect to the keg. Be sure to use the black rubber gasket (beer washer). Hand
tighten, and then give it about a ¼ to ½ turn with a wrench. Or just hand tighten if
your system has shank wing nuts.
Ensure the keg coupler handle is up, or the wing handles (if you have wing handle
style) are turned all the way to the left. This is the disengaged position, and will
allow you to connect your keg to your faucet via the coupler and tubing.
You are now basically done. It is time to get a keg! To connect the Sanke Tap (keg
coupler) to your keg, place the coupler in the seat valve of the keg. Turn it to the
right (righty tighty) until it engages in the keg valve connector. The rubber gasket
seal on the bottom of the coupler will seal the coupler to the keg. Hand tighten,
then pull out the handle slightly and push down until it clicks in place. Using a wing
handle sanke, push down and turn to the right, until it clicks in place.
Make sure the faucet is closed. Turn the handle on your CO2 cylinder all the way to
the left to turn the gas on all the way, open the gas shut off valve, and adjust your
regulator gas pressure using the set screw on the front of the regulator body cover.
Lock pressure screw in place with the lock nut.
Tilt the keg up on its edge and work it onto the floor plate in your kegerator. Slide
your keg in and close the door.
If your beer is cold (38 F), you are now ready, and probably anxious, to give it a
try and pour your first pint. If the beer is still warm it will behoove you to wait until
your beer is fairly cold before serving.
Using Beer Gas Mixture – Beer Gas Mixture is a gas blend consisting of CO2 and
Nitrogen. The usual blend is 25% CO2 and 75% N. This blend is usually used to
serve Nitrogeneous beer such as Guinness. A special regulator and tank are needed
for this set up. Because it is difficult to dissolve Nitrogen into a solution, mixed Gas
is useful when it is necessary to push ales and lagers long distances.

Page | 11
Tips for Your Kegging System
Tighten hose clamps after a day or two.
Temperature changes can cause tubing to contract and expand.
Spray connections with soapy water to check for leaks.
Ensure beer is 38 F by taking a temperature reading of a freshly poured
beer.
If you've just come home from the beer store with a fresh keg of beer,
chances are, it has warmed up a bit after being in the back of your vehicle
for a while...lowering the pressure may reduce foaming, but the beer will go
flat faster. It is best to be absolutely certain the beer is cold.
Beer foam is 1/3 beer! Don't pour it down the drain. Instead control foaming
by using the proper temperature and pressure, correct pouring technique,
and by keeping your draft system clean.
Adjust the temperature and pressure depending on style of beer being
served.
Clean your lines using a beverage cleaning kit between kegs, or more often if
your keg is lasting more than several weeks. Clean lines mean clean beer.
High pressure gauge reading will vary depending on temperature.
Compressed CO2 is a liquid that comes out as a gas. Never use your cylinder
on its side or upside down. Always use it in an upright position.
An aluminum CO2 cylinder weighs about 7.5 lbs empty, if you need to
determine how much co2 you have left, remove the cylinder from your
kegerator, turn the valve handle off (completely to the right), remove the
regulator. You can now weigh your cylinder. Anything over 7.5
(approximately) is how much CO2 you have left.
A 5 lb CO2 cylinder will normally dispense between 8 and 10 half barrel kegs.
A half barrel keg is the common keg you will get at the store it is 15.5
gallons. It contains 1984 ounces, or 165.3 12 oz beers. Relish each sip as if
something magic has occurred, because it has. Enjoy!

Page | 12
ALTERNATIVE Keg-to-BOTTLe TECHNIQUES
What is the Carbonater™ valve coupling?
The Carbonater™ is a patented screw-on cap with an integrated "Pepsi-
Style" ball lock fitting. Designed to fit most one and two liter soda or P.E.T
bottles, the Carbonater™ provides a highly effective method to add and
maintain carbonation in beverages for extended periods of time. Made of a special
high strength plastic known only to Liquid Bread®, the Carbonater™ can provide years
of trouble free service.
What can you do with the Carbonater™ valve coupling?
The Carbonater™ provides an easy way of carbonating or preserving a carbonated
beverage. All you need is a CO2 system, the Carbonater™ and an empty 2-liter plastic
soda bottle (P.E.T. bottle).
Where can I get the Carbonater™?
The Carbonater™ can be purchased at your local Home Brew store. Click here to look
for one in your area. We do not retail the Carbonater ™. Wholesale and dealer
inquiries are encouraged.
Why should you use the Carbonater™ valve coupling?
The Carbonater™ can be used either to maintain carbonation in already
carbonated beverages or to force-carbonate still beverages. This means when
a 2-liter bottle of soda goes flat, you can put the fizz back into it. You can
make your own flavored water for less or carbonate fruit juices or powdered
drinks!
Why should the home brewer use the Carbonater™ valve coupling?
For the home brewer, the Carbonater™ can be especially valuable. The use of two liter
P.E.T. bottles can be a highly effective bottling method that can save time and add
convenience. Want to keg but don't have the refrigerator space? Use the Carbonater™!
Want to force carbonate that new beer for the tasting tonight? Use the Carbonater™!
Want to take a sample of your finest brew to the tasting without taking a whole keg?
Use the Carbonater™. Tired of dragging a 5-gallon soda keg and everything else you
need to a party or picnic, then home again? Use the Carbonater™! All you need to tote
are a couple of 2-liter bottles. After you're finished, the Carbonater™ fits in your
pocket.
How does the Carbonater™ valve coupling work?
The Carbonater™ fits on a standard 2 liter plastic soda bottle in place of the
original cap. It uses a standard beverage fitting (the kind found on Pepsi style
soda kegs). This allows for the purging of air, after gently filling from your tap, then injecting up to 30 psi (max), giving you a 100% CO2 head-space. This
method gives you a shelf life similar to the beer remaining in your keg. To simply
maintain carbonation in an already carbonated product, set your pressure at between
5 and 10 psi. To carbonate an uncarbonated beverage, set for 30 psi. PET bottle
designed to burst around 180 psi

Page | 13
Balancing your Draft System
The purpose of balancing your draft system is so you can enjoy fresh brewed beer,
either commercially brewed or homebrewed, as the brewer intended the beer to be
enjoyed. You will need to ―balance‖ the system so the beer remains properly
carbonated and doesn’t become flat or over carbonated. To this end, it is important
to know a little bit about the beer and some basic parameters that will affect how
the beer pours into the glass.
What is there to know about the beer? Generally speaking, you will need to know
what the carbonation rate of the beer is. This can often be found by asking the
retailer. More often than not, the answer will be distilled down to what is the best
temperature and pressure to serve the beer. If the retailer cannot provide the
information you are seeking, usually an email or phone call to the brewery will
prove beneficial. These days, an internet search will almost always provide you with
the information you need. While knowing the exact Volumes of CO2 isn’t critical, it
is helpful, but keep in mind that this is brewery specific information that can be
considered part of the beer ―recipe‖, and the brewery may not give you an exact
answer. Generally knowing the different carbonation rates of different beer styles
will help you dial in your system.
Page | 14
Since different styles of beer have different carbonation rates, expressed a Volumes
of CO2, different beers will need to be served at different pressures. As a general
rule of thumb, begin by setting the temperature of your cooler or kegerator to 38°
F. While this may be too cold for many styles of craft beer and home brew, it will
satisfy most commercial applications.
In a retail relocation, such as a bar, 2-3 lbs of applied pressure will be needed to
dispense the beer. This is known as the ―push factor‖. At home, the push factor will
be about 1 psi, which should prevent the keg from becoming over carbonated.
Homebrewers, on the other hand will need to reference the data below and the
carbonation chart to determine the proper volumes for the particular beer style,
and adjust pressure from there. 45 – 50 with 6-10 psi and 5’ 3/16 beverage line
seems to be a good setup. Your mileage may vary.
Key Points:
Maintain 38° F – use a calibrated thermometer in a cup of water in the cooler
Perform a Leak Test – use a soapy solution to spray all connections
Maintain Temperature from the keg to the faucet – insulate your lines
Know the CO2 Volumes – use carbonation chart
Resistance=Applied Pressure.
Resistance is the sum of all the restrictive values in the system. These are Draught
System Equipment, Gravity (lift or drop), Altitude and Beer Line.
System Equipment: Fittings and Faucets – usually add about 1 psi
Gravity: Lift or Drop – add or subtract 0.5 psi per foot up or down
Altitude: Add One PSI of restriction for each 2000’ above sea level
Beer Line: 3/16‖ Vinyl Beer line adds approximately 3.0 psi per foot
(lengthen the line to reduce the flow rate)
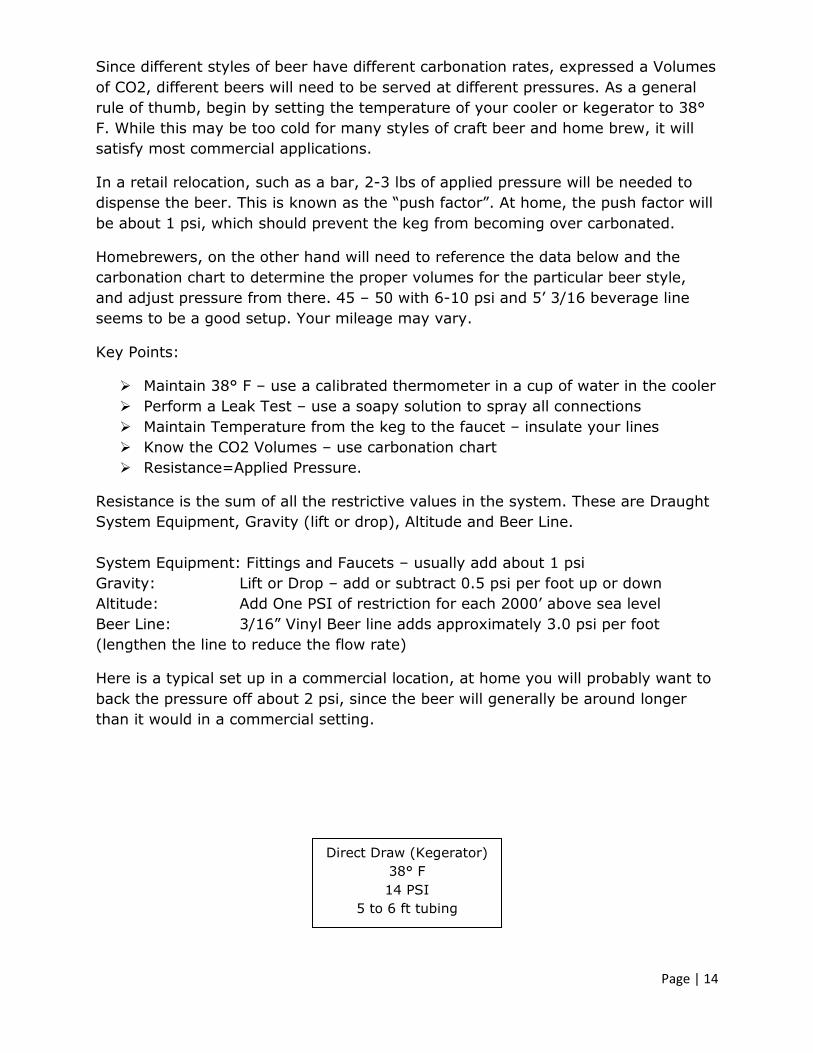
Here is a typical set up in a commercial location, at home you will probably want to
back the pressure off about 2 psi, since the beer will generally be around longer
than it would in a commercial setting.
Direct Draw (Kegerator)
38° F
14 PSI
5 to 6 ft tubing

Page | 15
Fat Tire: A Real Life Example
Temperature and Pressure:
Below is a chart to determine the ideal applied pressure for a particular's beer's recipe and temperature:
Temperature 2.5 Volumes 2.6 Volumes 2.7 Volumes 2.8 Volumes
36 10.2 11.2 12.3 13.3
38 11.2 12.3 13.3 14.4
40 12.3 13.3 14.4 15.4
42 13.3 14.4 15.4 16.5
44 14.4 15.4 16.5 17.7
46 15.4 16.5 17.7 18.9
48 16.5 17.7 18.9 20.1
These numbers assume sea-level (add .5psi for every 1000ft above sea-level that you may be)
The highlighted numbers are your ideal settings
New Belgium Products (and most breweries) are 2.5 to 2.6 Volumes. Coors Products (Blue Moon) are closer to 2.8 Volumes and will require a higher pressure
The further away from 38°F that you are, the more volatile the beer will become, and the less likely you will be able to avoid CO2 breaking away from the liquid (i.e. foam)
The goal here is to BALANCE the CO2 in the beer with the CO2 you are applying from your regulator.
Pressure that is too high will force too much CO2 into the beer, causing foam - this happens over time
Pressure that is too low allows CO2 to break-out of the beer, causing foam - this will happen immediately
Line Length:
How fast the beer comes out of the faucet is based on your Line Length, NOT your regulator setting. This is
commonly misunderstood. Industry standard is 1 gallon of beer dispensed per minute (or about 2 ounces per
second). To achieve this, you will want 1 foot of 3/16” ID (Inner Diameter) tubing for every 2.5 pounds on your
regulator setting. For example, at “13psi”, you would need 5.2 feet of 3/16” ID tubing (13 ÷ 2.5 = 5.2). I personally
recommend pouring a little slower to make the pouring easier, so you can add a foot to that and still be safe.
• Line that is too long can create “cupping” out of the faucet and can cause pouring problems
• Line that is too short (or too large of an ID) will come out too fast, and will “explode” when the beer contacts
the glass
Side note: If you plan to go through a keg in one night, feel free to crank the pressure up to 20+, and add enough
beer line to accommodate your new pressure. This high pressure will combat any temperature issues you have,
and because you plan to use the whole keg that night, there will not be any issue of over-carbonating your keg.

Page | 16
The Kegerator Flashlight Test,
by Scott “The Draft Master” Zuhse of Micromatic
If you are not quite certain as to your beer’s carbonation level or temperature and
find yourself without a thermometer, there is still hope in determining your keg
pressure. A flashlight can be used to determine if your beer’s gas content is staying
put with the applied CO2 pressure to the keg.
It is not an exact science although you will be surprised to how accurate it can be.
It will not correct a warm tower issue. This test works best on a fresh keg that has
acclimated to your kegerator. A risk would be to go overboard and increase the
pressure to far, causing over carbonation of your beer. A dim flashlight will not cut
it.
Follow these steps:
1. After turning your regulator shut- off to the off position, reduce your pressure to a low five to six PSIG (pounds per square inch gauge).
2. Couple your keg and then relieve the keg head pressure using the coupler’s safety relief valve.
3. Turn the regulator shut-off on pressurizing the keg.
4. Open the faucet for one second and close. Immediately shine your flashlight through your beer line just above the coupler. You may see a couple of large
bubbles rising. Do not pay much attention to these. Look for very fine, small bubbles that are rising out of the top of the coupler through your line. This is the actual gas in the beer breaking out.
5. Raise your pressure one to two pounds and after a few minutes, repeat step four. You should notice that the break out of the gas bubbles are becoming
less frequent. You are becoming close to what is called gas equilibrium. But if you still see the bubbles, you are not quite there.
6. Repeat step five and continue this procedure until gas bubbles no longer rise
out of the top of the coupler. Be careful not to raise the pressure to high. Once the gas bubbles disappear, you can be assured that the pressure you
are applying to the keg is keeping the beer’s carbonation where it belongs - in the beer!
You will be surprised to find out that you will stop raising pressure right around 13
to 14 PSIG if your beer temperature is 38 degrees Fahrenheit and you are working
with a 2.6 gas volume beer. Most certainly it would be much easier knowing your
beer temperature using a calibrated thermometer and the carbonation level. Not
necessarily the case all of the time.
As usual, the keg must be acclimated to your system before you perform this test.
Be aware that it can take hours for a keg’s temperature to drop - even a couple of
degrees. If you attempt this test, let us know how it worked out.

Page | 17
Troubleshooting draft problems:
A guide for bartenders
by John Kater, Brewmaster Southside Cellar Brewing Co., Birmingham, AL.
In the bar business draft problems often develop when the house is packed and
there is absolutely no possibility of reaching the one or two staff draft experts. The best way to tackle draft problems is to be prepared. It is prudent to create a troubleshooting guide to your draft system and educate your staff in the basics of
dealing with draft beer. A guide can be a helpful training aid as well as a critical reference manual for answering mechanical questions and enabling other staff to
temporarily repair the system until your draft expert is available.
Draft theory Carbon dioxide is a critical component of beer. The lovely, lacy head; the tingle on the tongue; the sound of the bubbles are all integral to the enjoyment of beer.
Maintaining the carbon dioxide at the desired level is crucial to a draft dispense system. To understand how to keep this balance, a basic knowledge of the factors
that affect carbonation is necessary.
A brewer, when asked about draft line problems such as excessive foaming, will start talking about ―universal gas laws‖ and reciting formulas such as ―pressure
times volume is proportional to temperature.‖ The standard reaction to this type of comment is a glazing of the eyes and a slow nodding of the head until 25 minutes later when the brewers gets to the part where he says ―turn the regulator down to
12 PSI and vent the excess pressure from the keg,‖ at which point the nodding and glazing are replaced by an under-the-breath mumbling of, ―Why didn’t you just say
so?‖
Understanding carbonation comes down to a matter of a few simple concepts in chemistry and physics.
• The colder the beer is, the more carbon dioxide it can dissolve. The opposite is
demonstrated by opening a warm beer and watching it fob all over the place.
• The higher the pressure in the dispense container, the more carbon dioxide will dissolve in the beer. Common sense; if you want to fit more in there, push harder.
• The smoother the surface in contact with the beer, the more likely the carbon
dioxide will stay in the beer. Take two glasses. Sand the inside of one with 100 grit (fairly coarse) sandpaper. Pour beer into both. Which one foams up more? What is happening is that dissolved carbon dioxide needs a rough spot called a nucleation
site to form a bubble. Clean beer lines and beer-clean glasses (see Beer-Clean Glasses, page 12) have fewer nucleation sites and therefore keep the carbon
dioxide dissolved in the beer, where it belongs.
• Mechanical agitation can cause carbon dioxide to come out of solution. If you tap a keg right after it is delivered, the first few pints will be foamy, just like beer from a shaken can.
Page | 18
• Cellar pressure changes take time to take effect. These basic concepts will help you understand the problems that occur with a draft beer dispense system. But it’s
also helpful to know what the ideal properties are.
How much fizz? The proper level of carbonation, in addition to its sensory augmentation of a beer,
is critical to a good pour. Brewers measure carbonation as volumes of carbon dioxide. If a beer has two volumes of carbon dioxide, this simply means that if all of
the carbon dioxide were removed from a beer at 68° F (room temperature) at sea level under normal atmospheric pressure, the space taken up by the carbon dioxide removed would be twice that of the beer.
An ideal pour is best achieved at 2.55 to 2.65 volumes of dissolved carbon dioxide, although certain beer styles demand carbonation at different levels. A fresh, untapped keg starts with the correct amount of dissolved carbon dioxide. To keep
the right amount after tapping, a balance between the temperature of the beer and the pressure of the carbon dioxide must be maintained. It does get more complicated than that, however. If the dispense equipment has been correctly
installed, then a certain pressure is necessary to overcome the resistance of the dispense lines and taps. If the pressure is maintained properly, the carbonation
level of the beer remains stable. If the pressure is too high, the beer will overcarbonate. If the pressure is too low, the beer loses carbonation.
Common problems and how to solve them
Troubleshooting the problems that can occur is an important part of maintaining a draft system. Start by placing a rinsed, beer-clean glass at a 45° angle under the faucet, open the tap all the way, and...
• No beer is coming out. When troubleshooting, always check the most obvious thing first. Is the keg empty? If it is, you will feel a rush of gas coming from the faucet as gas escapes from the keg through the line. Is the coupler on the keg
correctly? Is the carbon dioxide tank connected, is it full, and are the toggle valves open? Is the line frozen?
• Flat, headless beer comes out. The head goes away too quickly or doesn’t form to begin with. Check the regulator gauge for proper setting. Is the beer glass clean? If
the head forms, then quickly disappears, the chances are that the glass is to blame. Head on beer is quickly destroyed by oils, so greasy food and lipstick can ruin beer
foam. Did you pour properly?
• Foamy, overcarbonated beer comes out. Is the keg empty? Is the regulator set to the proper pressure? Is the keg storage temperature at the proper temperature of
36° to 40° F? Has the keg had time to settle? Did you open the tap all the way? On a long-draw system, is the coolant cold enough? The glycol reservoir for the coolant should stay right around freezing, plus or minus two degrees.
• The beer starts out fine, but then the line ―burps.‖ There is a warm spot, kink, pinhole, soil deposit, or bad seal somewhere between the keg and the faucet. A full keg might be sitting on the hose in the walk-in, crimping the line. Get the lines
cleaned. Check insulation and seals.

Page | 19
• The beer doesn’t taste right. Have the lines been cleaned recently? Beer lines should be cleaned at least every three weeks, preferably weekly. Are the glasses
beer-clean? Is air being introduced to the beer somewhere?
• The beer is darker than usual or cloudy, and it doesn’t taste right. Clean the lines. Check the expiration date on the keg. Has the keg been tapped for more than three
weeks? Is the keg getting warmer than about 45° F during storage?
• There are little black flakes or slimy chunks in the beer. Clean the lines. Clean and maintain the faucets. Don’t panic, though; these flakes and slimy chunks aren’t
harmful — just disgusting. Sometimes a line cleaning will loosen deposits that appear in subsequent beers.
• The first few pours of the day are all foam, but then it’s okay. This means that your pressure and temperature are not staying the same. If your beer cooler gets a
lot of traffic during the day, the temperature will rise. Your gas regulator is set to give a good pour at the daytime temperature. Overnight the beer dissolves more
CO2 because the gas pressure stays the same but the beer gets colder.
If you can limit traffic by storing only kegs in your keg cooler, this will fix the problem. If you can’t do that, try hanging a slatted plastic air-barrier screen in the
doorway to minimize cold-air loss. If this isn’t possible, try turning off the valve from the carbon dioxide regulator at night. Just don’t forget to turn it back on in the morning.
• The last third of a keg is foamy. This is the same problem as above. As the beer is replaced by carbon dioxide in the keg, the area of contact between the gas and the beer stays the same, but the volume of beer is smaller. This allows the beer to
dissolve the gas more quickly.
Line Cleaning When thinking about getting your beer lines cleaned, remember this important rule:
Beer lines should be replaced at least every five years. No amount of cleaning or servicing will help lines that are totally shot.
Ideally, beer lines should be cleaned between each keg, and once every three weeks at the minimum. Over time beer will produce mineral and protein deposits in
the draft lines. Bacteria and molds can work their way into the lines, and yeast can form colonies as well. The responsibility for line cleaning is ultimately yours, but the
distributors, brewers, and even independent contractors might be involved. Line cleaning can be done with several solutions and contraptions. The equipment is available relatively inexpensively through draft suppliers.
One cleaning option is to use a chlorinated alkaline cleaning solution dissolved in hot water as a cleaner and a rinse with baking soda and food coloring dissolved in cold water. This colored baking-soda rinse is ideal because the baking soda
provides a buffer between the heavily alkaline cleaner and the acidic beer. The baking soda also helps to remove odors. And it releases carbon dioxide when in
contact with beer, which forms a barrier between the beer and the rinse solution and helps purge the solution out of the lines. The food color and salty flavor of the baking soda let you know when the lines have been completely rinsed and you are
pouring pure beer again. Just to prove that this isn’t a waste of time, pour a glass

Page | 20
of beer before and after line cleaning and compare them. If your lines needed cleaning, you will taste a huge difference. If you’re cleaning them often enough,
there shouldn’t be much of a difference.
The faucets should be cleaned at the same time as the lines. You also need to keep a spray bottle filled with either a) your glass sanitizer mixed according to
manufacturer’s instructions or b) a solution of one part bleach to nine parts water. As part of your closing ritual, spray out all of the beer faucets with this spray bottle.
Doing this will prevent unwanted bacteria, mold, and yeast growth.
Price, presentation, and variety are compelling reasons to sell draft beer over bottles. Remember that draft system problems are generally fixable or preventable with minimal maintenance. Many of these problems are only encountered early and
go away when you get your system properly tweaked.
Beer-Clean Glasses In a clean sink, wash the glasses with a low-foam glass cleaner. Rinse thoroughly
with fresh water. Sanitize with the minimum amount of sanitizer required (according to label instructions). Use test strips to ensure the proper level of sanitizer.
Dry the glasses in a way that allows airflow inside the glasses, such as on a drying rack. Finally, rinse the glasses with cold water before filling them with beer.
To be sure if your glasses are beer-clean, check these three indicators: • Bubbles will not form on the sides of a beer-clean glass.
• Lacing from the head will only form on a beer-clean glass. • Wet the inside of a glass and place it upside down on the bar. If drops cling to the
glass, it isn’t beer-clean.
Pouring the perfect pint A perfect pint of beer starts with a just-rinsed, beer-clean glass held a half-inch to
an inch below the faucet.
Tilt the glass 45° and open the faucet all the way, pouring down the side of the glass. When the glass is half full, stand it straight up and continue pouring directly into the center of the glass. Quickly close the faucet, leaving a three-quarter-inch
head at the top of the glass. This thick, creamy head should leave lacing on the glass as the beer is enjoyed.
Beer faucets are designed to be opened all the way every time. Opening a faucet only partway makes the flow turbulent, supplying nucleation sites and making the beer fizz up.
Achieving the ideal pour depends on starting with beer from a fresh, cold, properly
carbonated keg. The beer must then be pushed by clean, appropriately pressurized carbon dioxide through a coupler with good seals that connects to a smooth, recently cleaned, temperature-stabilized, leak-free line through a clean faucet, and
out into a beer-clean glass.
Thanks for coming and Happy Bottling/Kegging!!