![[Facilitator’s Name] [Date]](https://static.fdocuments.us/doc/165x107/56815d4a550346895dcb5375/facilitators-name-date.jpg)
Junior Farmer Field and Life School Facilitator’s guide ... · Junior Farmer Field and Life...
42
Protection Junior Farmer Field and Life School - Facilitator’s guide 5
Transcript of Junior Farmer Field and Life School Facilitator’s guide ... · Junior Farmer Field and Life...

ProtectionJunior Farmer Field and Life School - Facilitator’s guide
5
The designations employed and the presentation of material in this information product do not imply the expression of any opinion whatsoever on the part of the Food and Agriculture Organization of the United Nations concerning the legal or development status of any country, territory, city or area or of its authorities, or concerning the delimitation of its frontiers or boundaries. The mention of specific companies or products of manufacturers, whether or not these have been patented, does not imply that these have been endorsed or recommended by the Food and Agriculture Organization of the United Nations in preference to others of a similar nature that are not mentioned.
All rights reserved. Reproduction and dissemination of material in this information product for educational or other non-commercial purposes are authorized without any prior written permission from the copyright holders provided the source is fullyacknowledged. Reproduction of material in this information product for resale or other commercial purposes is prohibited without written permission of the copyright holders. Applications for such permission should be addressed to: Chief Electronic Publishing Policy and Support BranchCommunication Division FAO Viale delle Terme di Caracalla, 00153 Rome, Italy or by e-mail to: [email protected]
Photos: © FAO/G.Bizzarri© FAO 2011
Module 5: ProtectionJunior Farmer Field and Life School – Facilitator’s guide

TABLE OF CONTENTS
Introduction VI
Objectives VII
Getting Started with “Energizers” 8
Protecting the land and soil 12EXERCISE 1 - umbrella! 13EXERCISE 2 - protecting the soil and water runoff by soil cover 14FACILITATORS’ NOTES 1 - some ways of managing soil and water 16EXERCISE 3 - loss of farm nutrients - the bottle game 17
Managing waste 19EXERCISE 1 - banana breakdown 20EXERCISE 2 - can everything be turned into compost? 22
Protecting our field 23EXERCISE 1 - protecting ourselves and the things around us 24EXERCISE 2 - protecting our field 25EXERCISE 3 - building fences 26FACILITATORS’ NOTES 1 - examples of proper fences 28
Protecting our small livestock 29EXERCISE 1 - protecting small livestock through good housing 30FACILITATORS’ NOTES 1 - housing of young stock 31EXERCISE 2 - protecting chickens by using baskets 32
Protecting biodiversity 33EXERCISE 1 - protecting biodiversity 34EXERCISE 2 - controlled burning 35FACILITATORS’ NOTES 1 - fires-pros and cons 36
Cultural activities 47ACTIVITY 1 - the protection song 47ACTIVITY 2 - the wash song - hygiene for protection 47ACTIVITY 3 - IPM story 48
Assessing Progress 49EXERCISE 1 - mapping protection structures 49


Module 5: Protection
VI
INTRODUCTION
Protecting soils, crops and animals from threats such as erosions, pests, diseases etc is a constant concern in agriculture, but the idea of “protection” goes much further than that. For example in agriculture ones fields must be protected, the soil must be protected, and sources of water must be protected as well. Similarly biodiversity and natural resources must also be protected. Beyond the learning field and environment, the animals that a farmer raise must be protected and, perhaps most important, one must protect oneself. The “3 Hs” − Health of humans, Health of animals and Health of plants – are all vital to the well-being of the participants and their communities. While participants learn how to protect their crops from pests and disease the link to life will enable them to also learn how to protect themselves from threats such as HIV. This module can be complemented with some exercises from the “Threats and loss” module.
This module contains sample exercises for each of the learning activities, plus a number of sample energizers and cultural activities that can be used to keep the participants engaged and reinforce their learning. The provided activities should serve as samples to be modifies and applied as appropriate. The important thing is that all main building blocks of a typical JFFLS session are included in each learning session.
By the end of this module participants should:
• Identify and explain the different ways of protecting soil, field, crop, animals and humans;
• Describe different methods of protection;
• Understand what biodiversity is and why one should protect it;
• Relate protection of crops and animals to gender roles and human safety.
VIIProtection
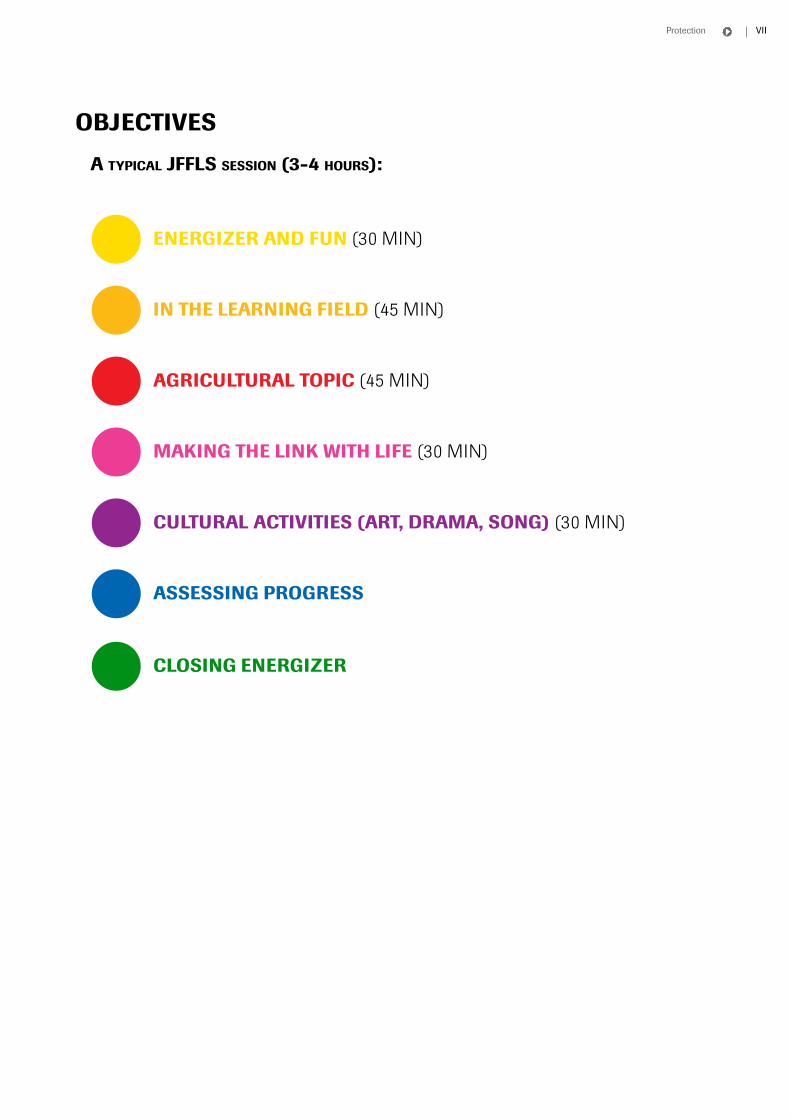
OBjECTIVES
A typicAl JFFlS SeSSion (3-4 hourS):
ENERGIzER AND FUN (30 min)
IN ThE LEARNING FIELD (45 min)
AGRICULTURAL TOPIC (45 min)
MAkING ThE LINk wITh LIFE (30 min)
CULTURAL ACTIVITIES (ART, DRAMA, SONG) (30 min)
ASSESSING PROGRESS
CLOSING ENERGIzER
VIII
GETTING STARTED wITh “ENERGIzERS”
Some sample energizers that will also help to “break the ice” and make participants feel comfortable while at the same time introduce the module focus are provided below.
Energizer: Natural enemies, pests and diseases
OBjECTIVE:To recall names of natural enemies, pests and diseases.
TIME:15 minutes
MATERIALS:Chairs.
STEPS:
1. Ask the participants to arrange their chairs in a circle formation.
2. When they are settled, give the following directions:
• When the name of a natural enemy is mentioned, everybody should sit at attention.
• When the name of a pest is called out, everybody should change seats.
• When the name of a disease is said, everybody should stand at attention, their faces showing an expression of shock.
3. Execute actions quickly. Eliminate participants who are not able to do the actions at the count of three.
Energizer: Protecting one’s self
OBjECTIVES:
• To discuss why people protect themselves;
• To discuss the importance of the environment for the kind of behaviour a person develops.
TIME:15 minutes
MATERIALS:As many numbers as there are participants written on pieces of paper, tape.
STEPS:
1. Ask the group to form one big circle. Give each participant a number which she should tape to his/her back.
2. The object of the game is for each participant to protect her number. (Note: It should be explained that the number represents the person. The participant should by all means protect her number!) At the same time, the object of the game is to collect as many numbers as possible since the person who collects the most numbers wins. The game starts when the
IXProtection
signal is given. People then move from their places.
3. Discuss the following questions:
• How did you feel about other people “attacking” you? (Remind them that their numbers were their persons. People trying to get their numbers were “attacking” them).
• How did you protect yourself?
• Did you feel that there was any person in the group who would not “attack” you?
• Why do people protect themselves? What happens when people live in an environment where they always feel that others would hurt/harm them?
Energizer: Protecting chicks
OBjECTIVE:To discuss why people protect themselves.
TIME:15 minutes
STEPS:
1. Ask the participants to divide into subgroups of boys only and girls only.
2. Ask them to hold hands to enclose in a circle one the youngest.
3. Each team to choose the strongest person who will be sent to attack the opponent camp to try and snatch the young person. The team will do all they can to stop the opponent from touching any part of the young person who is in the centre of the cycle.
4. In plenary let the participants sketch the shape of shelter they created that provided safety and comfort for the young person.
5. Participants will discuss threats they are facing and ways to improve their protection.

X
XIProtection
Exercises
12
Protecting the land and soil
Large and intensive rains often produce high amounts of runoff. Runoff causes erosion as soil particles are detached and transported by the moving water. There are different ways that farmers can try to control runoff and erosion for example physical measures such as terraces, buns, barriers etc. and farming practices such as agro-forestry, minimal tillage etc. In this section participants will learn to understand the importance of soil protection and various methods and practices for it.
13Protection
wATER: A FRIEND AND FOE
Water is our friend because it gives life to the crops and the trees and it fills the rivers and streams with the water we need. But fast flowing water is our enemy, because it steals our soil and disappears very quickly. We want the water to stay with us; we do not want it to run away with the soil.
Mr Mafuta, farmer in Zaka, Masvingo exercise 1
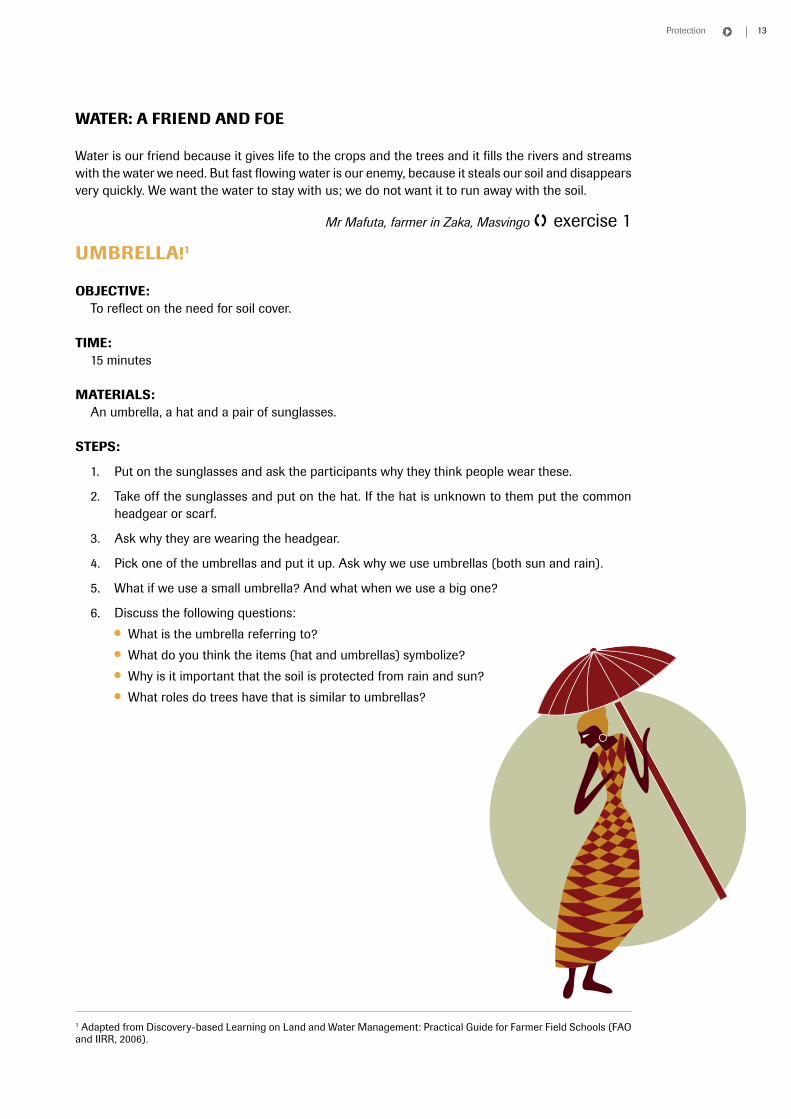
UMBRELLA!1
OBjECTIVE:To reflect on the need for soil cover.
TIME:15 minutes
MATERIALS:An umbrella, a hat and a pair of sunglasses.
STEPS:
1. Put on the sunglasses and ask the participants why they think people wear these.
2. Take off the sunglasses and put on the hat. If the hat is unknown to them put the common headgear or scarf.
3. Ask why they are wearing the headgear.
4. Pick one of the umbrellas and put it up. Ask why we use umbrellas (both sun and rain).
5. What if we use a small umbrella? And what when we use a big one?
6. Discuss the following questions:
• What is the umbrella referring to?
• What do you think the items (hat and umbrellas) symbolize?
• Why is it important that the soil is protected from rain and sun?
• What roles do trees have that is similar to umbrellas?
1 Adapted from Discovery-based Learning on Land and Water Management: Practical Guide for Farmer Field Schools (FAO and IIRR, 2006).
14
exercise 2
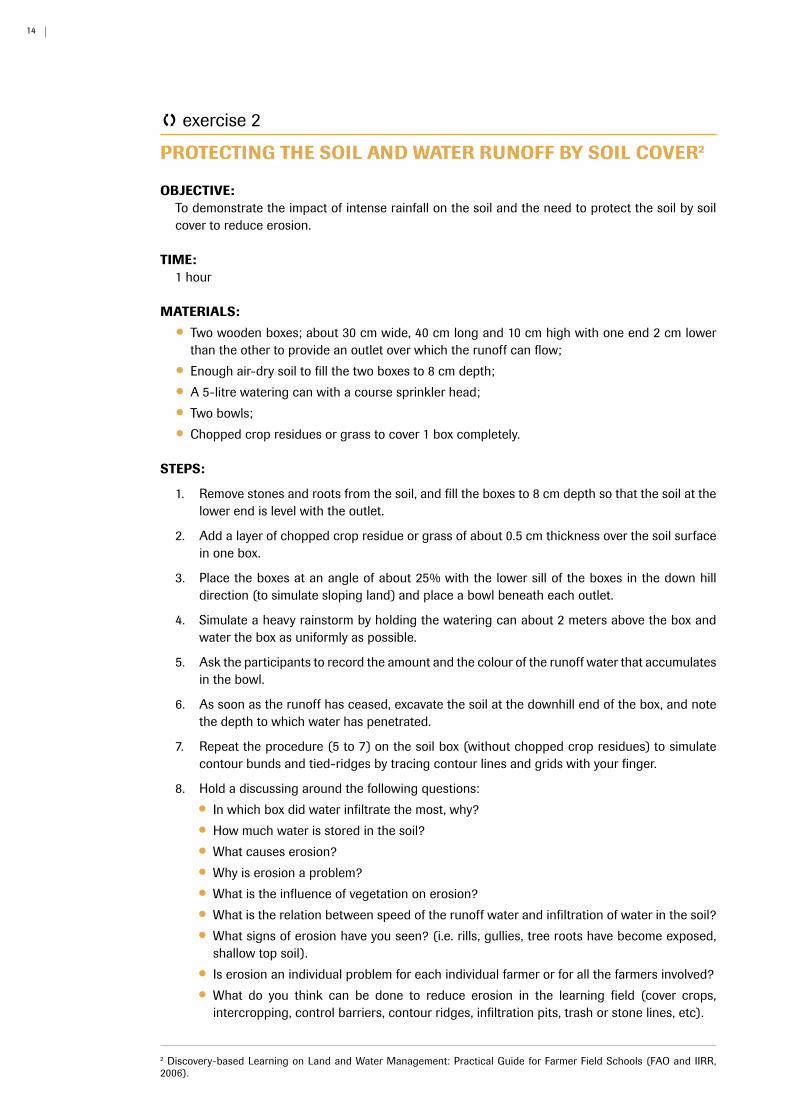
PROTECTING ThE SOIL AND wATER RUNOFF BY SOIL COVER2
OBjECTIVE:To demonstrate the impact of intense rainfall on the soil and the need to protect the soil by soil cover to reduce erosion.
TIME:1 hour
MATERIALS:
• Two wooden boxes; about 30 cm wide, 40 cm long and 10 cm high with one end 2 cm lower than the other to provide an outlet over which the runoff can flow;
• Enough air-dry soil to fill the two boxes to 8 cm depth;
• A 5-litre watering can with a course sprinkler head;
• Two bowls;
• Chopped crop residues or grass to cover 1 box completely.
STEPS:
1. Remove stones and roots from the soil, and fill the boxes to 8 cm depth so that the soil at the lower end is level with the outlet.
2. Add a layer of chopped crop residue or grass of about 0.5 cm thickness over the soil surface in one box.
3. Place the boxes at an angle of about 25% with the lower sill of the boxes in the down hill direction (to simulate sloping land) and place a bowl beneath each outlet.
4. Simulate a heavy rainstorm by holding the watering can about 2 meters above the box and water the box as uniformly as possible.
5. Ask the participants to record the amount and the colour of the runoff water that accumulates in the bowl.
6. As soon as the runoff has ceased, excavate the soil at the downhill end of the box, and note the depth to which water has penetrated.
7. Repeat the procedure (5 to 7) on the soil box (without chopped crop residues) to simulate contour bunds and tied-ridges by tracing contour lines and grids with your finger.
8. Hold a discussing around the following questions:
• In which box did water infiltrate the most, why?
• How much water is stored in the soil?
• What causes erosion?
• Why is erosion a problem?
• What is the influence of vegetation on erosion?
• What is the relation between speed of the runoff water and infiltration of water in the soil?
• What signs of erosion have you seen? (i.e. rills, gullies, tree roots have become exposed, shallow top soil).
• Is erosion an individual problem for each individual farmer or for all the farmers involved?
• What do you think can be done to reduce erosion in the learning field (cover crops, intercropping, control barriers, contour ridges, infiltration pits, trash or stone lines, etc).
2 Discovery-based Learning on Land and Water Management: Practical Guide for Farmer Field Schools (FAO and IIRR, 2006).
15Protection
16
facilitators’ notes 1
SOME wAYS OF MANAGING SOIL AND wATER3
3 Adapted from A Study Guide for Farmer Field Schools: Water Harvesting and Soil Moisture Retention (Duveskog, 2001).
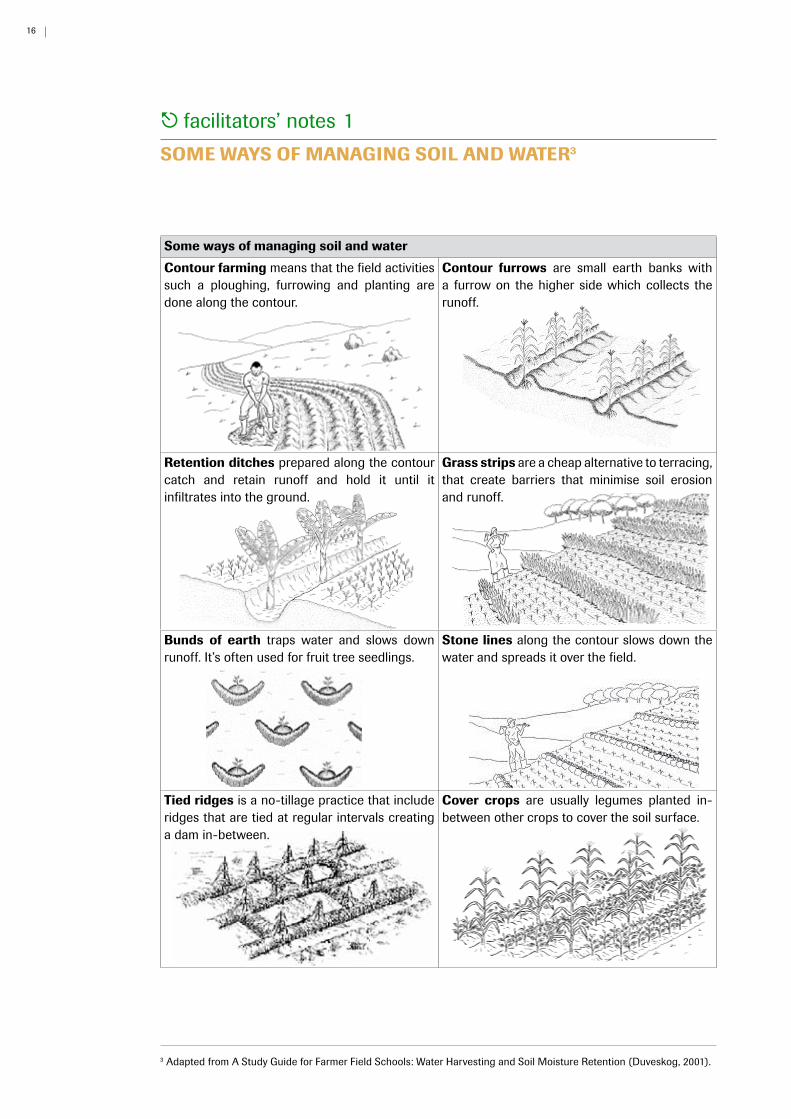
Some ways of managing soil and water
Contour farming means that the field activities such a ploughing, furrowing and planting are done along the contour.
Contour furrows are small earth banks with a furrow on the higher side which collects the runoff.
Retention ditches prepared along the contour catch and retain runoff and hold it until it infiltrates into the ground.
Grass strips are a cheap alternative to terracing, that create barriers that minimise soil erosion and runoff.
Bunds of earth traps water and slows down runoff. It’s often used for fruit tree seedlings.
Stone lines along the contour slows down the water and spreads it over the field.
Tied ridges is a no-tillage practice that include ridges that are tied at regular intervals creating a dam in-between.
Cover crops are usually legumes planted in-between other crops to cover the soil surface.
17Protection
exercise 3
LOSS OF FARM NUTRIENTS - ThE BOTTLE GAME4
Nutrients and organic resources on a farm are like money in the bank. They support the farmer’s livelihood and the more resources are built up the better the quality of living and ability to cope with economic or climatic disasters. However, if we only draw on our capital without investing even the richest person will eventually become poor. The same is true for the nutrient capital on the farm in soils and organic resources. No matter how efficiently materials are recycled there are inevitable losses (including down the pit latrine) and when products are taken to the market. Unless these losses are restored the productivity of the farm will continuously go down. This exercise provides an excellent icebreaker for discussions about ways of managing resources efficiently, the economic value of different resources coupled to their nutrient content.
OBjECTIVES:
• To understand the major nutrient flows in a farm;
• To understand how losses of farm nutrients might occur on the farm.
TIME:1 hour
MATERIALS:
• 2 or 3 small plastic water bottles or soda bottles (these represent “crop and forage fields”);
• 2 or 3 plastic bottles with the neck cut off (or plastic cups), one represents “the livestock pen”, one the “market” and one the “homestead” (the livestock pen and homestead containers should have a small hole drilled in the bottom to represent leakage of nutrients as urine from cattle and human excreta down the latrine);
• A pot containing about 2 litres of water (not a jug so that water has to be poured out carefully to avoid spillage). This represents nutrient resources managed by the farmer (e.g. compost or livestock manure).
STEPS:
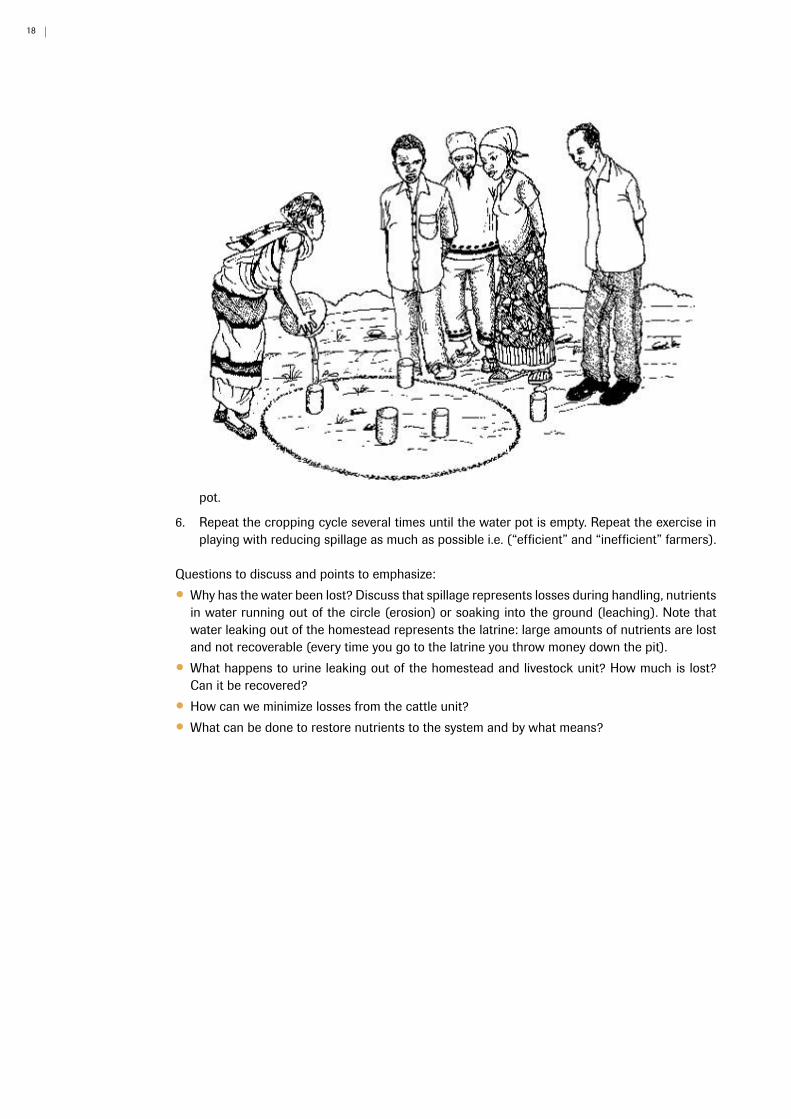
1. Draw a circle on the ground, about a 2 meters in diameter, to represent a farm or delimit boundaries with sticks or stones.
2. Place the bottles representing fields (and livestock) and homestead inside the circle; place the bottle representing the market outside the circle.
3. The pot of water represents the nutrient in compost or farmyard manure that is managed by the farmer.
4. The facilitator or a volunteer fills the field bottles from the pot to simulate that at the start of the cropping season nutrients are taken to the fields.
5. Harvest and marketing. About half of the nutrients in maize are in the grain and half in the stover. Decide how much grain goes to the market and household, and stover to livestock. Pour the rest of the water back into the pot (crop residues composted). About 0-20% of nutrients consumed by livestock are converted into milk or meat, depending on productivity, and can be consumed or sold. The remaining water represents nutrients in manure and household residues (like vegetable waste). The part not lost from the manure heap or as urine or from the pit latrine, can be returned to the pot with water (nutrient stock); also water from the household (vegetable waste) and from the livestock (manure) goes back into the
4 Adapted from discovery-based Learning on Land and Water Management: Practical Guide for Farmer Field Schools (FAO and IIRR, 2006).
18
pot.
6. Repeat the cropping cycle several times until the water pot is empty. Repeat the exercise in playing with reducing spillage as much as possible i.e. (“efficient” and “inefficient” farmers).
Questions to discuss and points to emphasize:
• Why has the water been lost? Discuss that spillage represents losses during handling, nutrients in water running out of the circle (erosion) or soaking into the ground (leaching). Note that water leaking out of the homestead represents the latrine: large amounts of nutrients are lost and not recoverable (every time you go to the latrine you throw money down the pit).
• What happens to urine leaking out of the homestead and livestock unit? How much is lost? Can it be recovered?
• How can we minimize losses from the cattle unit?
• What can be done to restore nutrients to the system and by what means?
19Protection
managing waste
When protecting the environment you live in, it is also important to consider what is done with the waste you produce, whether it is agricultural or household waste. This is especially important if the waste is hazardous and no local procedures are available to process this hazardous waste. Hazardous waste includes items that are dangerous for the human health – it can be flammable, reactive, corrosive or toxic. One need to prevent that this waste enters into the food chain. Hazardous waste should not be mixed with compost heaps nor end up in agricultural fields. In rural areas non-recyclable waste is normally dumped in rubbish pits on the own plot. It is important to prevent that these pits are too close to wells used for drinking water. Hazardous waste should not be dumped in these rural rubbish pits to prevent human contact. Such wastes are best brought to urban waste collection centres.Agricultural and organic household waste can normally easily be recycled through a compost heap. Materials to be added to the compost heap from the household could be fruit and vegetable remainders.
20
exercise 1
BANANA BREAkDOwN5
Decomposition is performed mostly by bacteria. This activity will help participants to understand the conditions bacteria need to do their work. Like humans, bacteria are living organisms that need food, air and water to live. Banana peel is readily compostable. In general such food scraps decompose readily as they contain high nitrogen levels. When disposed of in a landfill, food scraps are among the first materials to decompose. If you have an existing compost heap, use this as a resource. Look inside and make observations. Fork through to see how different it looks underneath the top layer.
OBjECTIVE:To demonstrate the decomposition of an easily composted material.
TIME:1 hour
MATERIALS: 5 equal pieces of banana peel (each about one-inch square), 5 small see through containers, Cling film, Sellotape, Water, Moist garden soil, record sheets.
STEPS:
1. Set up the five trials by applying different treatments to the banana peel.
• Trial 1 – water: place the peel in a container, cover with water
• Trial 2 – soil: place the peel in a container, cover with moist garden soil
• Trial 3 – sun: place the peel in a container and put in a sunny spot
• Trail 4 – without air: wrap the peel with cling film and tape closed, place in a container and seal.
• Trail 5 – in the dark: place the peel in a container and put in a dark cupboard
2. At the end of one week, observe all the jars.
• Has the colour changed?
• Has the texture changed?
• What else has changed?
3. Record your observations on a records chart.
4. At the end of the second week, repeat the observations.
5. Record your observations.
• Decide with the participants which, if any, trials to continue.
• What conclusions can you draw about the needs of bacteria?
5 Source: http://www.littlerotters.org.uk/
21Protection
6. Questions/discussion:
• Did the peels change in the same way?
• Which changed the most?
• What do you think caused it to decay the most?
• Is the school compost bin in the best place?
exercise 2
CAN EVERYThING BE TURNED INTO COMPOST?
Materials decompose at different speed depending on their content. Some change faster than others, and for example plastic does not change at all. Anything that was once living is called organic and will breakdown. Organic things can be used to make compost. This exercise helps in distinguish between organic and non-organic waste.
OBjECTIVE:To observe how different materials decay over a period of 2 weeks.
TIME:30 minutes the 1st session then 15 minutes daily for 2 weeks.
MATERIALS: Banana peel, apple core, newspaper, leaves, crisp packet and other items chosen by the group.
STEPS:
1. Look at the different items and brainstorm on how participants think the items break down or decompose.
2. Place each of the items in different containers, cover with soil and put a lid on the container.
3. Ask for a volunteer, who will water the soil in each container every day (just enough to keep the soil damp), don’t let it dry out. While watering he/she should also dig carefully in the soil to observe any changes in how the material looks, and take note of these.
4. After two weeks, divide participants in subgroups so that each group get one container.
5. Ask each group to observe their materials and also consult with the volunteer about what happened during the two weeks.
6. Each group thereafter present their findings for the other participants, followed by a discussion on how fast and to what extent various types of materials decompose.
7. Discuss the various forms of waste. Emphasize the difference between hazardous and non-hazardous waste. Also emphasize the difference between household recyclable and non-recyclable waste.
22
Protecting our field
The learning field provides the cornerstone of the JFFLS approach and is an important parts of the participants lives. They therefore need to learn to protect it. In this module, the participants will learn to build a fence around their garden among other ways of protection. It is very important to work with the community leaders and the Primary School Director and ask for their help in making sure the learning field is protected properly. If they are convinced of the importance of the project, the protection of the field/garden will be successful and problems like robberies and animal intrusion will be more easily avoided. If security problems appear related to the JFFLS learning field, it might be necessary with a community meeting and get the leaders to discuss the matter and help in dealing with the issue.
23Protection
ExAMPLE OF FIELD PROTECTION IN A jFFLS
One JFFLS came up with the following measures to protect its field and nursery: The school informed the community (with the agreement and support of the community leader) that the owners of cattle and other domestic animals had to keep their animals far away from the JFFLS field and if these animals were found inside and caught, the animals would be held for 15 days. At the end of this period, if the owner did not pay the fine for the damages caused, or if he/she did not offer to do some work instead of the fine, the JFFLS group would be allowed to keep the animal as theirs.
exercise 1
PROTECTING OURSELVES AND ThE ThINGS AROUND US
OBjECTIVES:
• To brainstorm about protection of oneself and things around us;
• To realise that protection is about much more than just the field in which they grow their crops.
TIME:About 1.5 hour
MATERIALS: Flipchart and markers.
STEPS:
1. Divide the participants into three groups. Name the three groups by: 1) Humans; 2) Animals; and 3) Plants.
2. Ask each group to make a list of at least five different things that they might need to protect themselves from to ensure that they stay safe and healthy.
3. Ask one member from each group come to the front of the large group to present his or her list. After each group has presented, ask the other participants if they would like to add anything to the list.
4. Ask the participants to go back into their groups and to think about how they might protect themselves from the items they have listed. For example, if the “Plant” group listed “wind” as something they need to protect themselves from, they should now try to write down how they might be able to protect themselves from the wind.
5. Ask a different member from each group to come to present his or her list for the large group. After each group has presented, ask the other participants if they would like to add anything to the list.
6. Hold a general discussion in which you ask the participants what they have learned about protection.
24
exercise 2
PROTECTING OUR FIELD
OBjECTIVE:To understand the importance of protecting the agricultural field.
TIME:About 2 hours
MATERIALS: Flipchart and markers.
STEPS:
1. Hold a brief discussion among the participants to review all of the items that they had come up with before about what they need to protect their fields from. To help them remember, you may want to ask the following questions:
• Why do we have to protect our field?
• What might happen if we don’t protect the fields well?
• How can we improve this situation?
2. Divide the participants into four groups. Ask each group to write or to draw:
• Two ways of protecting the field against animals who eat plants ;
• One way of protecting it against drought;
• Two ways of dealing with pests;
• Two ways of protecting against robbery.
3. Have two members from each group present and explain the measures they planned together.
Examples of problems in non-protected fields
• Goats come in and destroy, and eat the plants.
• Cows come in and eat everything.
• Rabbits enter and eat young lettuce and cabbage.
• Rats enter and eat sunflower seeds.
• The harvest can be stolen during the night.
• The plants die due to the drought, insects or pests.
25Protection
exercise 3
BUILDING FENCES
OBjECTIVES:To agree on what type of fence are suitable for the JFFLS field.
TIME:1st session about one hour, and 2nd session about half a day
MATERIALS: Flipchart and markers, paper and pencils.
Note: Before conducting the 2nd session of this activity, you will probably need to talk with village leaders or committee members to make sure you have all the material needed to build the fence. Make sure that you use materials that you can find locally and that can be replaced and repaired easily.
STEPS:
1st session
1. Take the participants for a walk around the community and ask them to observe the different kinds of fences and enclosures that they see.
2. Ask them to interview some of the farmers that they come across during their walk. Some of the questions they may ask the farmers are:
• Why did you choose that kind of fence?
• What are the advantages and disadvantages of the fence you have?
• What materials did you use to build the fence?
• How did you build it?
• How long did it take to build?
• Are you happy with the fence?
• Would you prefer to have a different kind of fence? Why or why not?
3. After the walk and the interviews, find a shady place to sit with down and hold a general discussion about what they have learned.
4. Discuss the JFFLS learning field and agree on what types of fences might be most suitable for protecting this field. Make a plan for how to find the materials that you will need to build a fence for the JFFLS field and if possible ask the participants to bring material for the fence from their home for the next session.
2nd session
5. For building the fences divide the participants into groups, making sure to mix their age and gender. Each group will have different responsibilities. For example, one group may be in charge of cutting wood to make stakes, another group may be in charge of weeding etc. However, make sure that all of the boys and girls get to do each of the tasks involved but remember that the younger ones may not be as strong for certain things. Also keep in mind the weight and the health of the participants when asking them to do different tasks.
6. It is now time to build the fence!
26
facilitators’ notes 1
ExAMPLES OF PROPER FENCES
Using living plants or shrubs.
• It takes time to close the initial gaps well ==> Choose plants that grow quickly that will close the fence quickly.
• They give good protection against animals, if well built ==> Choose plants that sting and that animals do no like (i.e.: cactus, sisal, etc.)
• They give shade ==> This is an advantage but it needs to be pruned so it doesn’t grow too much and prevent the crops from growing well.
Local materials such as: wooden stakes, weeds, etc.
• Economic, if locally available;
• Good protection against animals, if well built and maintained;
• It need to be repaired often.
Materials such as: nets, barbed wire, etc.
• Permanent materials;
• Expensive materials and not usually available locally.
27Protection
Protecting our small livestock
Just like crops, livestock has to be protected against pests, predators and harsh weather conditions. Often housing or shelters for small livestock are not well prepared and as a result often small, overcrowded, poorly ventilated and unhygienic. This can result in high mortality rates in young stock due to disease, trampling by larger animals, or exposure to adverse weather conditions. In the following exercises the participants will discuss what can be done to protect their small livestock, and chickens. They will also appreciate the importance of protecting their animals.
28
exercise 1
PROTECTING SMALL LIVESTOCk ThROUGh GOOD hOUSING6
OBjECTIVE:To understand how different types of housing might affect the health of small animals.
TIME:About 1.5 hour
MATERIALS: Large sheets of paper and markers.
STEPS:
1. Divide the group into subgroups and ask them to walk through the community, noting as they walk the different approaches that are being used for providing shelter or housing for young stock.
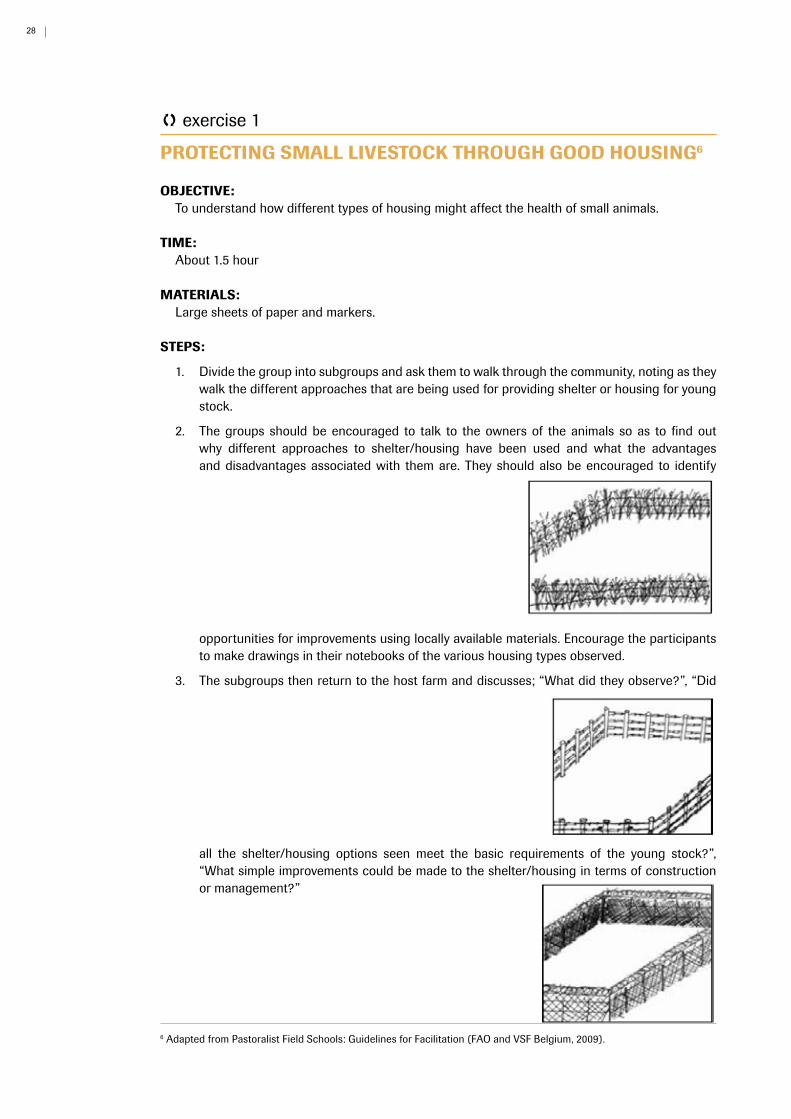
2. The groups should be encouraged to talk to the owners of the animals so as to find out why different approaches to shelter/housing have been used and what the advantages and disadvantages associated with them are. They should also be encouraged to identify
opportunities for improvements using locally available materials. Encourage the participants to make drawings in their notebooks of the various housing types observed.
3. The subgroups then return to the host farm and discusses; “What did they observe?”, “Did
all the shelter/housing options seen meet the basic requirements of the young stock?”, “What simple improvements could be made to the shelter/housing in terms of construction or management?”
6 Adapted from Pastoralist Field Schools: Guidelines for Facilitation (FAO and VSF Belgium, 2009).
29Protection
facilitators’ notes 1
hOUSING OF YOUNG STOCk
Reasons for sheltering small livestock:
• To protect the birds against predators;
• To protect from bad weather;
• To manage disease and pest;
• To increase production through saving energy (walking);
• To manure collection for making farm yard manure;
• To improve management and efficiency e.g. feeding, watering and population;
• To increase egg/milk/meat production;
• To immediate detection and removal of sick animals;
• To clean egg/milk production;
• To control breeding.
Features of good housing for young stock include:
• Adequate space for the number of animals;
• Good ventilation;
• Slanting floor to allow drainage;
• Sloping roof to channel water away and prevent leaks;
• Hygiene achieved by regular cleaning.
ways to keep housing clean?
• Avoid wetting the floor;
• Frequent turning, of litter;
• Ideal and clean equipment;
• The surrounding of the unit must be clean;
• Roof, walls and floor should be cleaned;
• Regular removal of droppings.
30
exercise 2
PROTECTING ChICkENS BY USING BASkETS
OBjECTIVE:To understand how different types of housing might affect the health of small animals.
TIME:About 1.5 hour
MATERIALS: Large sheets of paper and markers.
STEPS:
1. Refer to the energizer on protecting chicks earlier in the module.
2. Divide the participants in subgroups of about 6 persons each.
3. Ask the sub-groups to draw a picture of a happy hen with a bunch of healthy nice chicks recently hatched.
4. Then ask them to add in the drawing all the threats for the chicks that they can think of in terms of predators, such as birds, snakes, wild dogs etc.
5. Brainstorm in the group about what could be done to protect the small chicks.
6. Introduce the idea of the chicken basket and explain how it works.
7. Now ask participants to draw a chicken basket around the chicks signifying protection of the chicks.
8. Summarise the exercise and discuss the advantages and disadvantages of the basket system.Chicks may be protected from animals or bigger chicken by confining them during the day. A good
way to do this is to cover them in a special basket which can be moved around for feeding.
31Protection
Protecting biodiversity
A very serious problem that rural farmers face is the decline of biodiversity and natural resources. For the health of the planet and future generations it is important that one protect biodiversity and natural resources in the world, starting from ones own environment. The participants will need to understand and appreciate the variety of life forms around them, and how each form brings something good to their environment. They will also need to begin to understand some of the practices that are harmful to their environment, as well as good practices that they should adopt to protect the natural resources around them.
32
exercise 1
PROTECTING BIODIVERSITY
OBjECTIVES:
• To define bio-diversity;
• To understand the need for protection of biodiversity.
TIME:About 1 hour
MATERIALS: Flipchart paper and markers.
STEPS:
1. Ask the participants what they think the word biodiversity means and what natural resources are. List the definitions down on a large sheet of paper.
2. Introduce the topic of the need to protect biodiversity.
3. Ask the participants why it is important to protect biodiversity. List the reasons given on a large sheet of paper.
4. Divide the participants in small groups and ask each group to discuss what threatens biodiversity and what they could do to protect biodiversity.
5. Ask the groups to present the results of their discussions.
6. Discuss the results of the presentations.
7. Discuss the following questions:
• How do we benefit from our biodiversity?
• What do we all collect from our biodiversity?
• Have certain species disappeared during the last few years in the area?
8. What happened? Should this be stopped? How can we stop this?
9. Summarize the importance of protecting biodiversity and what farmers can do or should not do in order to protect biodiversity in their own area.
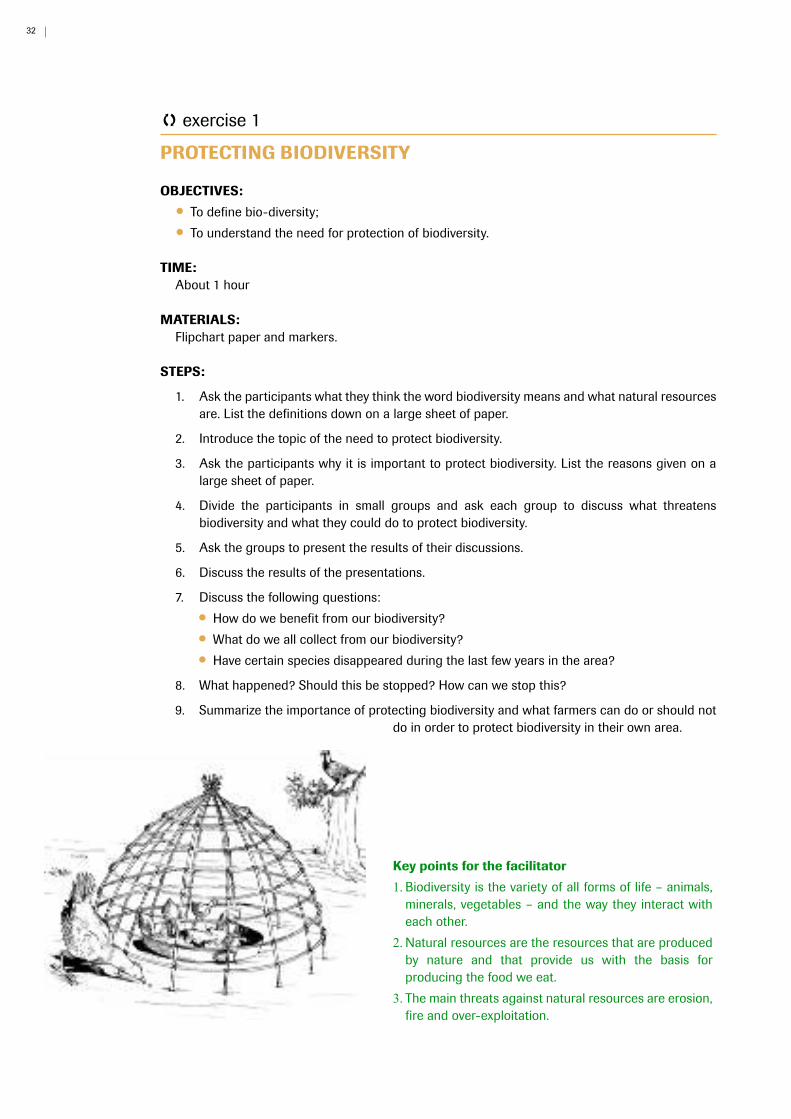
key points for the facilitator
1. Biodiversity is the variety of all forms of life – animals, minerals, vegetables – and the way they interact with each other.
2. Natural resources are the resources that are produced by nature and that provide us with the basis for producing the food we eat.
3. The main threats against natural resources are erosion, fire and over-exploitation.
33Protection
exercise 2
CONTROLLED BURNING
A major problem that happens in and around the fields are the uncontrolled fires that destroy so much valuable vegetation – and even animals – each year. Often these fires are the result of uncontrolled burning of agricultural fields. Children frequently help their parents in burning their field.
OBjECTIVE:To understand why it is important to control the burning of fields.
TIME:About 1 hour
MATERIALS: Flipchart paper and markers.
STEPS:
1. Introduce the topic of controlled burning. Discuss the topic of controlled burning in relation to protecting biodiversity and natural resources.
2. Explain to the participants that a part of the fertility of a field is concentrated in the vegetation and that after a field is burned, that fertility will not return to the soil and will lost for the crops the farmer would like to grow. Ask the participants why farmers still choose to burn vegetation. List the reasons on a large sheet of paper.
3. Discuss all reasons given by the participants and ask them how farmers could deal with all these reasons for burning without burning the field.
4. Go with the participants to the learning field. Ask them what the farmer should consider first when he/she still would like to burn the field as part of land preparation.
5. Ask and discuss what can be done to minimize the risk of fire spreading outside the boundaries of the field.
6. Ask the participants to show, without actually burning, what needs to be done to burn the field in a controlled way.
7. Summarize what needs to be done to burn the field in a controlled way.
facilitators’ notes 1
FIRES-PROS AND CONS
Using fire is an easy answer to the problem of clearing plant debris. However, the practice of bush burning has certain serious adverse consequences:
• Most of the nutrient nitrogen and sulphur present in the debris are lost to the atmosphere.
• Burning may destroy beneficial micro-organism.
• Burning may have adverse effects on soil structure.
On the other hand, burning may also be of some benefit:
• Burning is an easy and inexpensive way to get rid of plant debris.

34
• It may serve to kill pests, pathogens and weed seeds.
• Alkaline ash left on the soil after burning serves as a good soil amendment on acid soils.
• Ash also serves as an immediate source of certain mineral nutrients such as potassium and calcium.
In order to be able to control fire:
• Only burn when there is hardly any wind.
• Clear a fire break, i.e a few meters cleared of all vegetation and material that easily burns, around the field that is at least as wide as the vegetation is high.
35Protection
cultural activities
The following activities will help the participants to reflect on what they have done or learned by a creative outlet for expressing it such as singing, drawing, poetry, drama, Of course, you can also use cultural activities of your own choice or you may want to ask the participants if they have any activities of their own that they enjoy!
36
ACTIVITY 1 - the protection song
TIME:About 30 minutes
STEPS:
1. Divide the participants into three groups: plants, livestock, people
2. Ask each group to make up a song about what they need to stay healthy.
3. Have each group perform their song in front of everyone.
ACTIVITY 2 - the wash song - hygiene for protection
TIME:About 30 minutes
STEPS:
1. For young participants, create a simple song about hygiene habits that will prevent locally prevalent diseases, such as eye diseases (trachoma and conjunctivitis), skin disease (scabies), diarrhoea, intestinal worms and hookworm (feet).The song should include the names of those parts of the body that may be infected by a waterborne disease (eyes, skin, stomach, bottom, feet) and the parts of the body involved in transmission or prevention (hands, feet).
2. Ask older participants to make their own song, individually or in small groups. Tell them the parts of the body that should be mentioned in the song.
3. Teach the young group the song. Ask them to point at, move or shake the relevant parts of the body.
4. Ask older participants to present their songs with accompanying body movements.
5. Ask volunteers to list on the blackboard the critical parts of the body (affected and transmitting).
6. After singing, start a discussion about the different diseases and their symptoms, transmission, prevention and treatment. For example, ask the participants if they, or their family or friends, have ever had an eye (skin, worm, etc.) infection.
ACTIVITY 3 - IPM story
TIME:15 minutes
STEPS:
1. Whoever leads the activity may make up his/her own story. The principle behind the game is that members of the big group participate and therefore are active players in the story.
2. Divide participants into four groups. Assign each group to be one of the characters in the story. Assign a corresponding sound or action to each character. Group members should execute the action and make the sound of their respective character. For example:
Group 1: Farmer whistle
Group 2: Field clap hands
Group 3: Insect pests stamp feet
Group 4: Natural enemies laugh aloud
37Protection
3. The facilitator may make up stories. For example:
4. One day, a farmer (group assigned whistles) was walking to his field (group assigned clap hands). He wanted to see what insect pests (group assigned stamp feet) and natural enemies (group assigned laughs aloud) were in his field (group assigned clap hands). While the farmer (group assigned whistles) was walking, he remembered that he forgot his sprayer. The farmer (group assigned whistles) decided to back to his house. The farmer ( ) did not know that in his field ( ) there were many natural enemies ( ) and only a few insect pests ( ). On his way to his field ( ), the farmer ( ) thought about looking at his field ( ) first. He saw that there were many natural enemies ( ). The farmer saw that there were only a few insect pests ( ). However, the farmer ( ) wanted to spray his field ( ). The farmer ( ) sprayed his field ( ) and killed all the insect pests ( ) and natural enemies ( ).

38
assessing Progress
39Protection
exercise 1
MAPPING PROTECTION STRUCTURES
Pictures can be understood by all, and can be used to visualise the types of changes in the area. Sketches (and maps) can be made by the participants at the beginning of the JFFLS season (for assessment and planning purposes), during the JFFLS (for monitoring purposes) and at the end of the JFFLS (for evaluation purposes) in order to locate changes taken place and to analyse their causes and effects.
OBjECTIVE:
To provide an example of how a map or sketch can be used to measure level of protection mechanisms in place.
TIME:1 hour
MATERIALS: Sheets of paper and coloured pens.
STEPS:
1. Ask each participant to take a sheet of paper and a few pens.
2. Each person will now draw a sketch of their household and farm indicating houses, buildings, crop fields etc.
3. When the sketch is done ask the participants to draw the protection mechanisms in place for crops, seedlings, animals etc. Tell the participants that they can discuss among each others in order to make sure they don’t forget some structures or mechanisms.
4. Then ask them to draw or indicate the protection mechanisms they have in place for them self or for family members. Aspects that are not easily drawn should be indicated with a symbol on the drawing.
5. Ask the participants to explain to each others their drawings in groups of 4-5 persons and to explain any symbols they might have indicate for human protection.
6. Store the final drawings in a safe place for future use.
7. To monitor change in protection mechanisms, this exercise should be repeated at the end of the JFFLS cycle, followed by a discussion in the group, in order to identify the changes that have take place in participants’ households over the period, in terms of protection of crops, animals and family members.

Food and Agriculture Organization of the United Nations
Viale delle Terme di Caracalla00153 Rome, Italy
Phone: + 39 0657051www.fao.org