
jEdit 4.2 User's Guide - Aalto University · Chapter 2. Starting jEdit Exactly how jEdit is started...
129
jEdit 4.2 User's Guide
-
Upload
duonghuong -
Category
Documents
-
view
213 -
download
0
Transcript of jEdit 4.2 User's Guide - Aalto University · Chapter 2. Starting jEdit Exactly how jEdit is started...

jEdit 4.2 User's Guide

jEdit 4.2 User's GuideCopyright © 1999, 2004 Slava PestovCopyright © 2001, 2002 John Gellene
Legal Notice
Permission is granted to copy, distribute and/or modify this document under the terms of the GNU Free DocumentationLicense, Version 1.1 or any later version published by the Free Software Foundation; with no “Invariant Sections”,“Front-Cover Texts” or “Back-Cover Texts”, each as defined in the license. A copy of the license can be found in the fileCOPYING.DOC.txt included with jEdit.


Table of ContentsI. Using jEdit ........................................................................................................ 1
1. Conventions ............................................................................................. 22. Starting jEdit ............................................................................................ 3
Command Line Usage ............................................................................ 3Miscellaneous Options ................................................................... 4Configuration Options .................................................................... 4Edit Server Options ....................................................................... 4
3. jEdit Basics .............................................................................................. 6Interface Overview ................................................................................ 6Switching Buffers ................................................................................. 6Multiple Views ..................................................................................... 7Window Docking .................................................................................. 7The Status Bar ...................................................................................... 8The Action Bar ..................................................................................... 9
4. Working With Files ...................................................................................11Creating New Files ...............................................................................11Opening Files ......................................................................................11Saving Files ........................................................................................11
Two-Stage Save ...........................................................................12Autosave and Crash Recovery ........................................................12Backups .....................................................................................12
Line Separators ....................................................................................13Character Encodings .............................................................................13
Commonly Used Encodings ...........................................................14The File System Browser .......................................................................14
Navigating the File System ............................................................14The Tool Bar ...............................................................................15The Commands Menu ...................................................................15The Plugins Menu ........................................................................15The Favorites Menu ......................................................................15Keyboard Shortcuts ......................................................................16
Reloading From Disk ............................................................................16Multi-Threaded I/O ..............................................................................16Printing ..............................................................................................16Closing Files and Exiting jEdit ...............................................................17
5. Editing Text .............................................................................................18Moving The Caret ................................................................................18Selecting Text .....................................................................................19
Range Selection ...........................................................................19Rectangular Selection ...................................................................19Multiple Selection ........................................................................19
Inserting and Deleting Text ....................................................................20Undo and Redo ....................................................................................20Working With Words ............................................................................21
What's a Word? ...........................................................................21Working With Lines .............................................................................21Working With Paragraphs ......................................................................22Wrapping Long Lines ...........................................................................22
Soft Wrap ...................................................................................23Hard Wrap ..................................................................................23
Scrolling ............................................................................................23Transferring Text .................................................................................23
The Clipboard .............................................................................24Quick Copy ................................................................................24General Register Commands ..........................................................24
Markers ..............................................................................................25Search and Replace ..............................................................................26
iv

Searching For Text .......................................................................26Replacing Text ............................................................................26HyperSearch ...............................................................................28Multiple File Search .....................................................................28The Search Bar ............................................................................28
6. Editing Source Code ..................................................................................30Edit Modes .........................................................................................30
Mode Selection ............................................................................30Syntax Highlighting ......................................................................30
Tabbing and Indentation ........................................................................30Soft Tabs ....................................................................................31Automatic Indent .........................................................................31
Commenting Out Code ..........................................................................32Bracket Matching .................................................................................32Abbreviations ......................................................................................33
Positional Parameters ....................................................................33Folding ..............................................................................................34
Collapsing and Expanding Folds .....................................................35Navigating Around With Folds .......................................................35Miscellaneous Folding Commands ..................................................35Narrowing ..................................................................................36
7. Customizing jEdit .....................................................................................37The Buffer Options Dialog Box ..............................................................37Buffer-Local Properties .........................................................................37The Global Options Dialog Box ..............................................................38
The Abbreviations Pane ................................................................38The Appearance Pane ...................................................................39The Autosave and Backup Pane ......................................................39The Context Menu Pane ................................................................39The Docking Pane ........................................................................39The Editing Pane ..........................................................................39The General Pane .........................................................................39The Gutter Pane ...........................................................................39The Mouse Pane ..........................................................................39The Printing Pane .........................................................................39The Plugin Manager Pane ..............................................................40The Proxy Servers Pane .................................................................40The Shortcuts Pane .......................................................................40The Status Bar Pane ......................................................................40The Syntax Highlighting Pane ........................................................40The Text Area Pane ......................................................................40The Tool Bar Pane .......................................................................40The View Pane ............................................................................40The File System Browser Panes ......................................................40
The jEdit Settings Directory ...................................................................408. Using Macros ...........................................................................................43
Recording Macros ................................................................................43Running Macros ..................................................................................44How jEdit Organizes Macros ..................................................................44
9. Installing and Using Plugins .......................................................................45The Plugin Manager .............................................................................45Installing and Updating Plugins ..............................................................45
A. Keyboard Shortcuts ..................................................................................46B. The Activity Log ......................................................................................51C. History Text Fields ...................................................................................52D. Glob Patterns ..........................................................................................53E. Regular Expressions .................................................................................54F. Macros Included With jEdit ........................................................................57
Clipboard Macros .................................................................................57Editing Macros ....................................................................................57File Management Macros ......................................................................58User Interface Macros ...........................................................................59Java Code Macros ................................................................................60
jEdit 4.2 User's Guide
v

Miscellaneous Macros ...........................................................................61Property Macros ..................................................................................62Text Macros ........................................................................................62
II. Writing Edit Modes ..........................................................................................6410. Mode Definition Syntax ...........................................................................65
An XML Primer ..................................................................................65The Preamble and MODE tag .................................................................66The PROPS Tag ..................................................................................66The RULES Tag ..................................................................................67
Highlighting Numbers ...................................................................68Rule Ordering Requirements ..........................................................68Per-Ruleset Properties ...................................................................69
The TERMINATE Tag .........................................................................69The SPAN Tag ....................................................................................69The SPAN_REGEXP Tag .....................................................................70The EOL_SPAN Tag ............................................................................71The EOL_SPAN_REGEXP Tag .............................................................71The MARK_PREVIOUS Tag .................................................................72The MARK_FOLLOWING Tag .............................................................72The SEQ Tag ......................................................................................72The SEQ_REGEXP Tag ........................................................................73The IMPORT Tag ................................................................................73The KEYWORDS Tag ..........................................................................74Token Types .......................................................................................74
11. Installing Edit Modes ...............................................................................7612. Updating Edit Modes for jEdit 4.1/4.2 .........................................................77
III. Writing Macros ..............................................................................................7813. Macro Basics .........................................................................................79
Introducing BeanShell ...........................................................................79Single Execution Macros .......................................................................79The Mandatory First Example ................................................................80Predefined Variables in BeanShell ...........................................................82Helpful Methods in the Macros Class .......................................................82BeanShell Dynamic Typing ...................................................................84Now For Something Useful ....................................................................84
14. A Dialog-Based Macro .............................................................................86Use of the Macro .................................................................................86Listing of the Macro .............................................................................86Analysis of the Macro ...........................................................................88
Import Statements ........................................................................88Create the Dialog .........................................................................88Create the Text Fields ...................................................................89Create the Buttons ........................................................................89Register the Action Listeners ..........................................................90Make the Dialog Visible ................................................................90The Action Listener ......................................................................90Get the User's Input ......................................................................91Call jEdit Methods to Manipulate Text .............................................91The Main Routine ........................................................................92
15. Macro Tips and Techniques ......................................................................93Getting Input for a Macro ......................................................................93
Getting a Single Line of Text ..........................................................93Getting Multiple Data Items ...........................................................93Selecting Input From a List ............................................................95Using a Single Keypress as Input ....................................................96
Startup Scripts .....................................................................................97Running Scripts from the Command Line .................................................98Advanced BeanShell Techniques ............................................................99
BeanShell's Convenience Syntax .....................................................99Special BeanShell Keywords ..........................................................99Implementing Classes and Interfaces .............................................. 100
Debugging Macros ............................................................................. 100Identifying Exceptions ................................................................ 100
jEdit 4.2 User's Guide
vi

Using the Activity Log as a Tracing Tool ........................................ 10116. BeanShell Commands ............................................................................ 102
Output Commands ............................................................................. 102File Management Commands ............................................................... 102Component Commands ....................................................................... 103Resource Management Commands ........................................................ 103Script Execution Commands ................................................................ 103BeanShell Object Management Commands ............................................. 104Other Commands ............................................................................... 105
IV. Writing Plugins ............................................................................................ 10617. Introducing the Plugin API ..................................................................... 10718. Implementing a Simple Plugin ................................................................. 109
How Plugins are Loaded ...................................................................... 109The QuickNotepadPlugin Class ............................................................ 110The EditBus ...................................................................................... 111The Property File ............................................................................... 111The Action Catalog ............................................................................ 113The Dockable Window Catalog ............................................................ 114The QuickNotepad Class ..................................................................... 114The QuickNotepadToolBar Class .......................................................... 117The QuickNotepadOptionPane Class ..................................................... 117Plugin Documentation ......................................................................... 119Compiling the Plugin .......................................................................... 119Reloading the Plugin ........................................................................... 120
19. Plugin Tips and Techniques .................................................................... 122Bundling Additional Class Libraries ...................................................... 122
jEdit 4.2 User's Guide
vii

Part I. Using jEditThis part of the user's guide covers jEdit's text editing commands, along with basic usage of macrosand plugins.
This part of the user's guide was written by Slava Pestov <[email protected]>.

Chapter 1. ConventionsSeveral conventions are used throughout jEdit's user interface and this manual. They will bedescribed here. Macintosh users should note how their modifier keys map to the terms used in themanual.
View>Scrolling>Scroll to Current Line The Scroll to Current Line command containedin the Scrolling submenu of the View menu.
Edit>Go to Line... Menu items that end with ellipsis (...) displaydialog boxes.
C The primary modifier key in jEdit. On MacOSX, this is actually the key known as“Command”. On most other keyboards, this keyis labelled “Control”.
A The secondary modifier key in jEdit. On MacOSX, this is actually the key labelled “Control”. Onmost other keyboards, this key is labelled “Alt”.
S The standard “Shift” key.
C+o Refers to pressing and holding the Controlkey, pressing and releasing O, and finallyreleasing the Control key.
C+e C+j Refers to holding down Control, pressing E,pressing J, and releasing Control.
Default buttons In many dialog boxes, the default button (it has aheavy outline, or a special border, depending onthe current Swing look and feel) can be activatedby pressing Enter. Similarly, pressing Escapewill usually close a dialog box.
Alt-key mnemonics Some user interface elements (menus, menuitems, buttons) have a certain letter in their labelunderlined. Pressing this letter in combinationwith the Alt key activates the associated userinterface widget. Note that this functionality isnot available on MacOS X with the “MacOSAdaptive” look and feel. See the section called“The Appearance Pane” for information onchanging the look and feel.
Right mouse button Used in jEdit to show context-sensitive menus. Ifyou have a one button Macintosh mouse, aControl-click has the same effect.
Middle mouse button Used by the quick copy feature (see the sectioncalled “Quick Copy”). True 3-button mice arerare these days. If you have a wheel mouse, pressdown on the wheel without rolling it. On aMacintosh with a one-button mouse,Option-click. On other platforms without athree-button mouse, Alt-click.
2
Chapter 2. Starting jEditExactly how jEdit is started depends on the operating system. For example, on Unix you can run“jedit” at the command line, or select jEdit from a menu; on Windows, you can double-click on thejEdit icon or select it from the Start menu.
If jEdit is started while another copy is already running, control is transferred to the running copy,and a second instance is not loaded. This saves time and memory if jEdit is started multiple times.Communication between instances of jEdit is implemented using TCP/IP sockets; the initialinstance is known as the server, and subsequent invocations are clients.
If you find yourself launching and exiting jEdit a lot, the startup time can get a bit bothersome. If the-background command line switch is specified, jEdit will continue running and waiting for clientrequests even after all editor windows are closed. When run in background mode, you can open andclose jEdit any number of times, only having to wait for it to start the first time. The downside ofthis is increased memory usage.
When running on MacOS X, the -background command-line switch is active by default, so thatjEdit conforms to the platform convention that programs should stay open until the Quit commandis explicitly invoked by the user, even if all windows are closed. To disable background mode onMacOS X, use the -nobackground switch.
For more information about command line switches that control the server feature, see the sectioncalled “Command Line Usage”.
jEdit remembers open buffers, views and split window configurations between editing sessions, soyou can get back to work immediately after starting jEdit. This feature can be disabled in theGeneral pane of the Utilities>Global Options dialog box see the section called “The GeneralPane”.
The edit server and security
Since Java does not provide any interprocess communication facility other than TCP/IP, jEdit takesextra precautions to prevent remote attacks.
Not only does the edit server pick a random TCP port number on startup, it also requires that clientsprovide an authorization key; a randomly-generated number only accessible to processes running onthe local machine. So not only will “bad guys” have to guess a 64-bit integer, they will need to get itright on the first try; the edit server shuts itself off upon receiving an invalid packet.
In environments that demand absolute security, the edit server can be disabled by specifying the-noserver command line switch.
Command Line UsageOn operating systems that support a command line, jEdit can be passed various arguments to controlits behavior.
When opening files from the command line, a line number or marker to position the caret on can bespecified like so:
$ jedit MyApplet.java +line:10$ jedit thesis.tex +marker:c
Command-line switches begin with a "-". Some take a parameter. A file whose name begins with "-"can be opened like so:
$ jedit -- -myfile
3
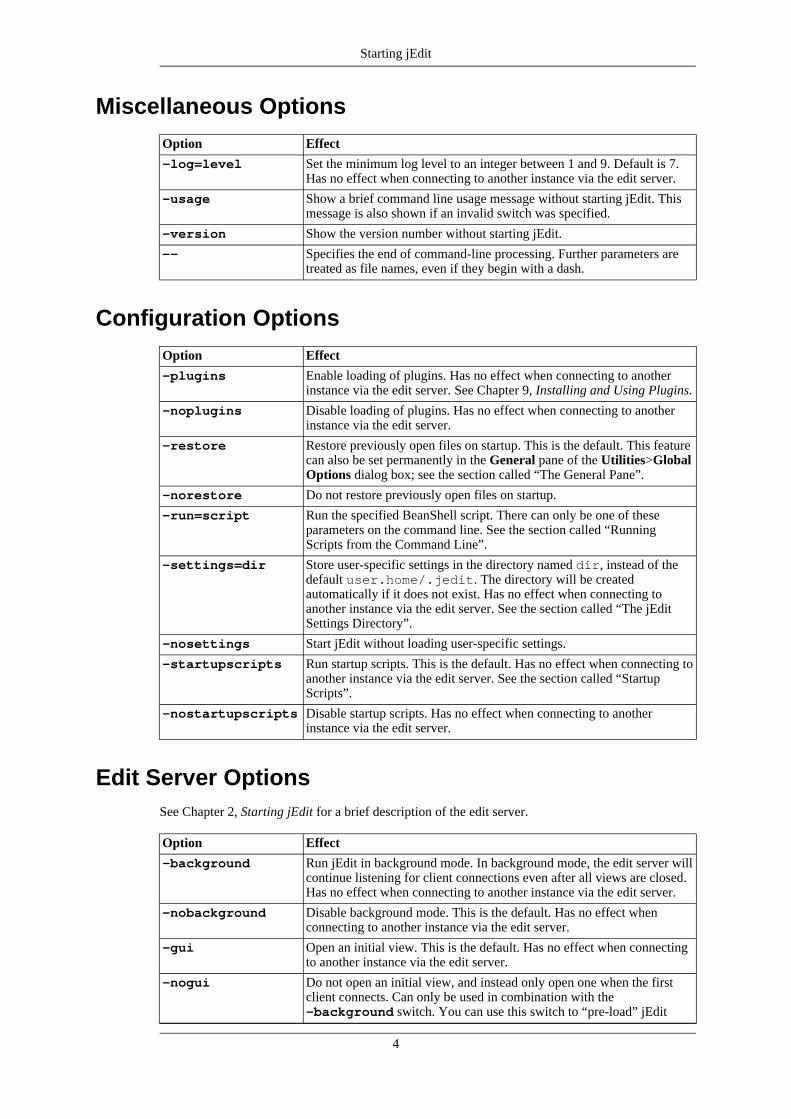
Miscellaneous OptionsOption Effect
-log=level Set the minimum log level to an integer between 1 and 9. Default is 7.Has no effect when connecting to another instance via the edit server.
-usage Show a brief command line usage message without starting jEdit. Thismessage is also shown if an invalid switch was specified.
-version Show the version number without starting jEdit.
-- Specifies the end of command-line processing. Further parameters aretreated as file names, even if they begin with a dash.
Configuration OptionsOption Effect
-plugins Enable loading of plugins. Has no effect when connecting to anotherinstance via the edit server. See Chapter 9, Installing and Using Plugins.
-noplugins Disable loading of plugins. Has no effect when connecting to anotherinstance via the edit server.
-restore Restore previously open files on startup. This is the default. This featurecan also be set permanently in the General pane of the Utilities>GlobalOptions dialog box; see the section called “The General Pane”.
-norestore Do not restore previously open files on startup.
-run=script Run the specified BeanShell script. There can only be one of theseparameters on the command line. See the section called “RunningScripts from the Command Line”.
-settings=dir Store user-specific settings in the directory named dir, instead of thedefault user.home/.jedit. The directory will be createdautomatically if it does not exist. Has no effect when connecting toanother instance via the edit server. See the section called “The jEditSettings Directory”.
-nosettings Start jEdit without loading user-specific settings.
-startupscripts Run startup scripts. This is the default. Has no effect when connecting toanother instance via the edit server. See the section called “StartupScripts”.
-nostartupscripts Disable startup scripts. Has no effect when connecting to anotherinstance via the edit server.
Edit Server OptionsSee Chapter 2, Starting jEdit for a brief description of the edit server.
Option Effect
-background Run jEdit in background mode. In background mode, the edit server willcontinue listening for client connections even after all views are closed.Has no effect when connecting to another instance via the edit server.
-nobackground Disable background mode. This is the default. Has no effect whenconnecting to another instance via the edit server.
-gui Open an initial view. This is the default. Has no effect when connectingto another instance via the edit server.
-nogui Do not open an initial view, and instead only open one when the firstclient connects. Can only be used in combination with the-background switch. You can use this switch to “pre-load” jEdit
Starting jEdit
4

Option Effect
when you log in to your computer, for example. Has no effect whenconnecting to another instance via the edit server.
-newplainview Opens the specified files in a new plain view. For more informationabout views, see the section called “Multiple Views”.
-newview Opens the specified files in a new view.
-reuseview Opens the specified files in an existing view.
-quit Exits the currently running editor instance.
-server Store the server port info in the file named server inside the settingsdirectory.
-server=name Store the server port info in the file named name. File names for thisparameter are relative to the settings directory.
-noserver Do not attempt to connect to a running edit server, and do not start oneeither.
-wait Keeps the client open until the user closes the specified buffer in theserver instance. Does nothing if passed to the initial jEdit instance. Usethis switch if jEdit is being invoked by another program as an externaleditor; otherwise the client will exit immediately and the invokingprogram will assume you have finished editing the given file.
Starting jEdit
5

Chapter 3. jEdit BasicsInterface Overview
A view is the jEdit term for an editor window. It is possible to have multiple views open at once, andeach view can be split into multiple panes. jEdit remembers the state of open views between editingsessions.
An open file is referred to as a buffer. Unlike some editors where each buffer gets its own view,jEdit completely separates the two concepts. A buffer might be visible in several views, or none atall.
The drop-down list at the top of the view shows all open buffers; selecting one will make it visiblein the view's text area. Different emblems are displayed next to buffer names in the list, dependingthe buffer's state; a red disk is shown for buffers with unsaved changes, a lock is shown forread-only buffers, and a spark is shown for new buffers which don't yet exist on disk.
As with most other graphical applications, there is a tool bar at the top of the view which providesquick access to frequently-used commands. Also, clicking the text area with the right mouse buttondisplays a popup menu which also facilitates quick access to various commands. Both the tool barand the right-click menu can be completely customized to suit your tastes in the Utilities>GlobalOptions dialog box; see the section called “The Context Menu Pane” and the section called “TheTool Bar Pane”.
Most of the view is taken up by the text area. If you've ever used a graphical user interface before,the text area will be instantly familiar. Text can be inserted simply by typing. More details on textinsertion and deletion can be found in the section called “Inserting and Deleting Text”.
The strip on the left of the text area is called a gutter. The gutter displays marker and registerlocations, as well as folding arrows; it will also display line numbers if the View>Line Numbers(shortcut: C+e C+t) command is invoked. Note this command only takes effect until the view isclosed. To have line numbers visible all the time, enable the appropriate setting in the Gutter paneof the Utilities>Global Options dialog box.
Switching BuffersIn addition to using the drop-down list at the top of the view, as documented in the previous section,the current buffer can also be switched using menu item commands and their keyboard shortcuts.
View>Go to Previous Buffer (keyboard shortcut: C+PAGE_UP) switches to the previous buffer inthe list.
View>Go to Next Buffer (keyboard shortcut: C+PAGE_DOWN) switches to the next buffer in thelist.
View>Go to Recent Buffer (keyboard shortcut: C+BACK_QUOTE) flips between the two mostrecently edited buffers.
View>Show Buffer Switcher (keyboard shortcut: A+BACK_QUOTE) has the same effect asclicking on the buffer switcher combo box.
If you prefer an alternative graphical paradigm for switching buffers, take a look at one of theseplugins:
• BufferList
• BufferSelector
• BufferTabs
6
If you decide to use one of these plugins, you can hide the popup menu buffer switcher in the Viewpane of the Utilities>Global Options dialog box.
A number of plugins that implement fast keyboard-based buffer switching are available as well:
• FastOpen
• OpenIt
• SwitchBuffer
Multiple ViewsAs documented at the beginning of this chapter, multiple views can be opened at once, and viewscan be split into multiple panes.
View>New View creates a new view.
View>New Plain View creates a new view but without any tool bars or docked windows. This canbe used to open a small window for taking notes and so on.
View>Close View closes the current view. If only one view is open, closing it will exit jEdit, unlessbackground mode is on; see Chapter 2, Starting jEdit for information about starting jEdit inbackground mode.
View>Split Horizontally (shortcut: C+2) splits the view into two text areas, placed above eachother.
View>Split Vertically (shortcut: C+3) splits the view into two text areas, placed next to each other.
View>Unsplit Current (shortcut: C+0) removes the split containing the current text area only.
View>Unsplit All (shortcut: C+1) removes all splits from the view.
When a view is split, editing commands operate on the text area that has keyboard focus. To give atext area keyboard focus, click in it with the mouse, or use the following commands.
View>Go to Previous Text Area (shortcut: A+PAGE_UP) shifts keyboard focus to the previoustext area.
View>Go to Next Text Area (shortcut: A+PAGE_DOWN) shifts keyboard focus to the next textarea.
Window DockingVarious jEdit and plugin windows can be docked into the view for convenience. Dockable windowshave a popup button in their top-left corner. Clicking this button displays a menu with commandsfor docking the window in one of four sides of the view.
On each side of the text area where there are docked windows, a strip of buttons is shown. There is abutton for activating each docked window, as well as a close box and a popup menu button, whichwhen clicked shows a menu for moving or undocking the currently selected window. The popupmenu also contains a command for opening a new floating instance of the current window.
The commands in the View>Docking menu move keyboard focus between docking areas.
Dockable windows can also be configured in the Docking pane of the Utilities>Global Optionsdialog box.
jEdit Basics
7
For power users
Each dockable has three commands associated with it; one is part of the menu bar and opens thedockable. The other two commands are:
• Window Name (Toggle) - opens the dockable window if it is hidden, and hide it if its alreadyopen.
• Window Name (New Floating Instance) - opens a new instance of the dockable in a floatingwindow, regardless of the docking configuration. For example, this can be used to view twodifferent directories side-by-side in two file system browser windows.
A new floating instance can also be opened from the dockable window's popup menu.
These commands cannot be invoked from the menu bar. However, they can be added to the tool baror context menu, and given keyboard shortcuts; see the section called “The Global Options DialogBox”.
The Status BarThe status bar at the bottom of the view consists of the following components, from left to right:
• The line number containing the caret
• The column position of the caret, with the leftmost column being 1.
If the line contains tabs, the file position (where a hard tab is counted as one column) is shownfirst, followed by the screen position (where each tab counts for the number of columns until thenext tab stop).
Double-clicking on the caret location indicator displays the Edit>Go to Line dialog box; see thesection called “Working With Lines”.
• A message area where various prompts and status messages are shown.
• The current buffer's edit mode, fold mode, and character encoding. Double-clicking one of thesedisplays the Utilities>Buffer Options dialog box. For more information about these settings,see:
• the section called “The Buffer Options Dialog Box”
• the section called “Edit Modes”
• the section called “Folding”
• the section called “Character Encodings”
• A set of flags which indicate various editor features and settings. Clicking each flag will togglethe feature in question; hovering the mouse over a flag will show a tool tip with an explanation:
• Word wrap - see the section called “Wrapping Long Lines”.
• Multiple selection - see the section called “Multiple Selection”.
• Rectangular selection - see the section called “Rectangular Selection”.
jEdit Basics
8

• Overwrite mode - see the section called “Inserting and Deleting Text”.
• Line separator - see the section called “Line Separators”.
• A Java heap memory usage indicator, that shows used and total heap memory, in megabytes.Double-clicking this indicator opens the Utilities>Troubleshooting>Memory Status dialogbox.
The visibility of each of the above items can be controlled in the Status Bar pane of theUtilities>Global Options dialog box; see the section called “The Status Bar Pane”.
The Action BarThe action bar allows almost any editor feature to be accessed from the keyboard.
Utilities>Action Bar (shortcut: C+ENTER) displays the action bar at the bottom of the view andgives it keyboard focus. The action bar remembers previously entered strings; see Appendix C,History Text Fields for details.
To use the action bar, input a command and press Enter. The following commands are supported:
Action invocations
Each menu item and tool bar button is bound to an action. To find out the name of an action, invokethe menu item or click the tool bar button, and look in the action bar's history.
If a substring or an action name is entered, pressing Tab shows a popup listing matching actions.An action can be selected using the Up and Down arrow keys, or by entering more characters of itsname.
Pressing Enter with an incomplete substring invokes the action that would be first in thecompletion popup's list.
For example, entering l-o will match global-options, which has the same effect as invokingUtilities>Global Options.
Buffer-local properties
Entering buffer.property=value sets the value of the buffer-local property namedproperty to value. Buffer-local properties are documented in the section called “Buffer-LocalProperties”.
For example, entering buffer.tabSize=4 changes the current buffer's tab size to 4.
See the section called “Buffer-Local Properties” for information about buffer-local properties.
Global properties
Entering property=value sets the value of the global property named property to value.This feature is primarily intended to help plugin developers, since the properties jEdit uses to storeits settings are not currently documented.
Command repetition
To repeat a command multiple times, enter a number in the action bar, then invoke the command.For example, “C+ENTER 1 4 C+d” will delete 14 lines; “C+ENTER 9 #” will insert “#########”in the buffer.
jEdit Basics
9

If you specify a repeat count greater than 20, a confirmation dialog box will be displayed, asking ifyou really want to perform the action. This prevents you from hanging jEdit by executing acommand too many times.
jEdit Basics
10
Chapter 4. Working With FilesCreating New Files
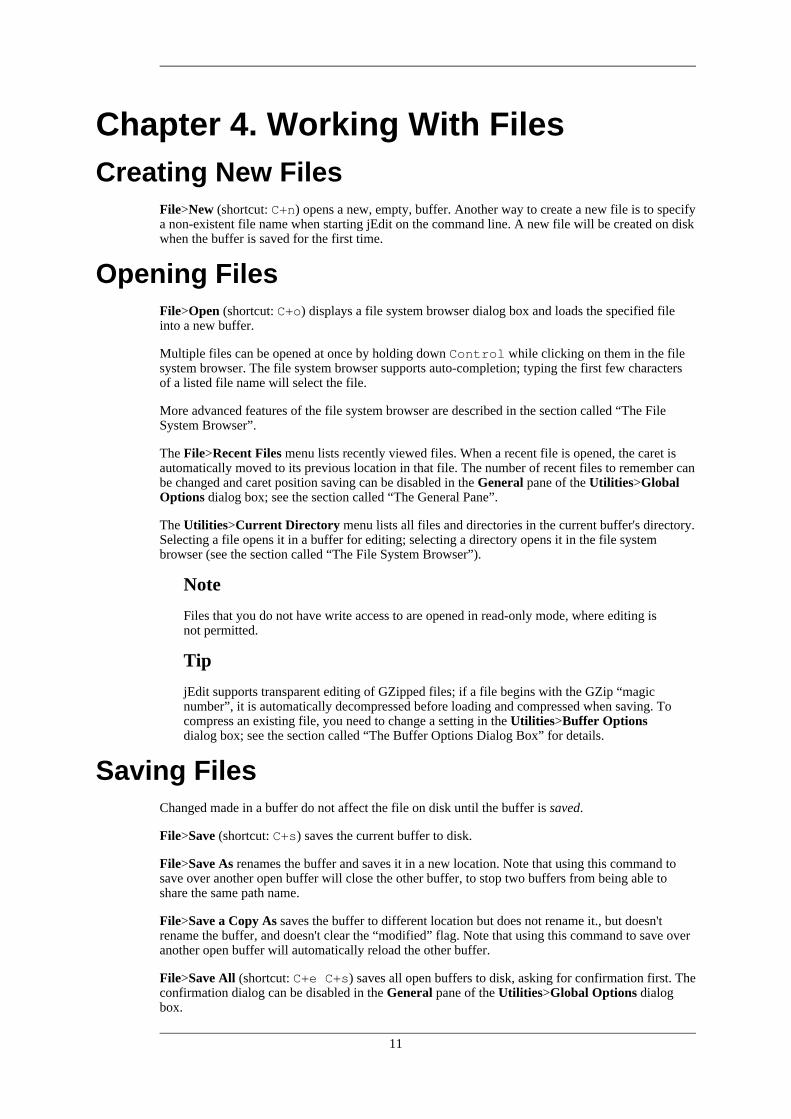
File>New (shortcut: C+n) opens a new, empty, buffer. Another way to create a new file is to specifya non-existent file name when starting jEdit on the command line. A new file will be created on diskwhen the buffer is saved for the first time.
Opening FilesFile>Open (shortcut: C+o) displays a file system browser dialog box and loads the specified fileinto a new buffer.
Multiple files can be opened at once by holding down Control while clicking on them in the filesystem browser. The file system browser supports auto-completion; typing the first few charactersof a listed file name will select the file.
More advanced features of the file system browser are described in the section called “The FileSystem Browser”.
The File>Recent Files menu lists recently viewed files. When a recent file is opened, the caret isautomatically moved to its previous location in that file. The number of recent files to remember canbe changed and caret position saving can be disabled in the General pane of the Utilities>GlobalOptions dialog box; see the section called “The General Pane”.
The Utilities>Current Directory menu lists all files and directories in the current buffer's directory.Selecting a file opens it in a buffer for editing; selecting a directory opens it in the file systembrowser (see the section called “The File System Browser”).
Note
Files that you do not have write access to are opened in read-only mode, where editing isnot permitted.
Tip
jEdit supports transparent editing of GZipped files; if a file begins with the GZip “magicnumber”, it is automatically decompressed before loading and compressed when saving. Tocompress an existing file, you need to change a setting in the Utilities>Buffer Optionsdialog box; see the section called “The Buffer Options Dialog Box” for details.
Saving FilesChanged made in a buffer do not affect the file on disk until the buffer is saved.
File>Save (shortcut: C+s) saves the current buffer to disk.
File>Save As renames the buffer and saves it in a new location. Note that using this command tosave over another open buffer will close the other buffer, to stop two buffers from being able toshare the same path name.
File>Save a Copy As saves the buffer to different location but does not rename it., but doesn'trename the buffer, and doesn't clear the “modified” flag. Note that using this command to save overanother open buffer will automatically reload the other buffer.
File>Save All (shortcut: C+e C+s) saves all open buffers to disk, asking for confirmation first. Theconfirmation dialog can be disabled in the General pane of the Utilities>Global Options dialogbox.
11

Two-Stage SaveTo prevent data loss in the unlikely case that jEdit should crash in the middle of saving a file, filesare first saved to a temporary file named #filename#save#. If this operation is successful, theoriginal file is replaced with the temporary file.
However, in some situations, this behavior is undesirable. For example, on Unix this creates a newi-node so while jEdit retains file permissions, the owner and group of the file are reset, and if it is ahard link the link is broken. The “two-stage save” feature can be disabled in the General pane of theUtilities>Global Options dialog box; see the section called “The General Pane”.
Autosave and Crash RecoveryThe autosave feature protects your work from computer crashes and such. Every 30 seconds, allbuffers with unsaved changes are written out to their respective file names, enclosed in hash (“#”)characters. For example, program.c will be autosaved to #program.c#.
Saving a buffer using one of the commands in the previous section automatically deletes theautosave file, so they will only ever be visible in the unlikely event of a jEdit (or operating system)crash.
If an autosave file is found while a buffer is being loaded, jEdit will offer to recover the autosaveddata.
The autosave interval can be changed in the Autosave and Backup pane of the Utilities>GlobalOptions dialog box; see the section called “The Autosave and Backup Pane”.
BackupsThe backup feature can be used to roll back to the previous version of a file after changes weremade. When a buffer is saved for the first time after being opened, its original contents are “backedup” under a different file name.
The behavior of the backup feature is specified in the Autosave and Backup pane of theUtilities>Global Options dialog box; see the section called “The Autosave and Backup Pane”.`
The default behavior is to back up the original contents to the buffer's file name suffixed with a tilde(“~”). For example, a file named paper.tex is backed up to paper.tex~.
• The Max number of backups setting determines the number of backups to save. Setting this tozero disables the backup feature. Settings this to more than one adds numbered suffixes to filenames. By default only one backup is saved.
• If the Backup directory setting is non-empty, backups are saved in that location. Otherwise,they are saved in the same directory as the original file. The latter is the default behavior.
• The Backup filename prefix setting is the prefix that is added to the backed-up file name. Thisis empty by default.
• The Backup filename suffix setting is the suffix that is added to the backed-up file name. Thisis “~” by default.
• Backups can optionally be saved in a specified backup directory, instead of the directory of theoriginal file. This can reduce clutter.
• The Backup on every save option is off by default, which results in a backup only being createdthe first time a buffer is saved in an editing session. If switched on, backups are created everytime a buffer is saved.
Working With Files
12
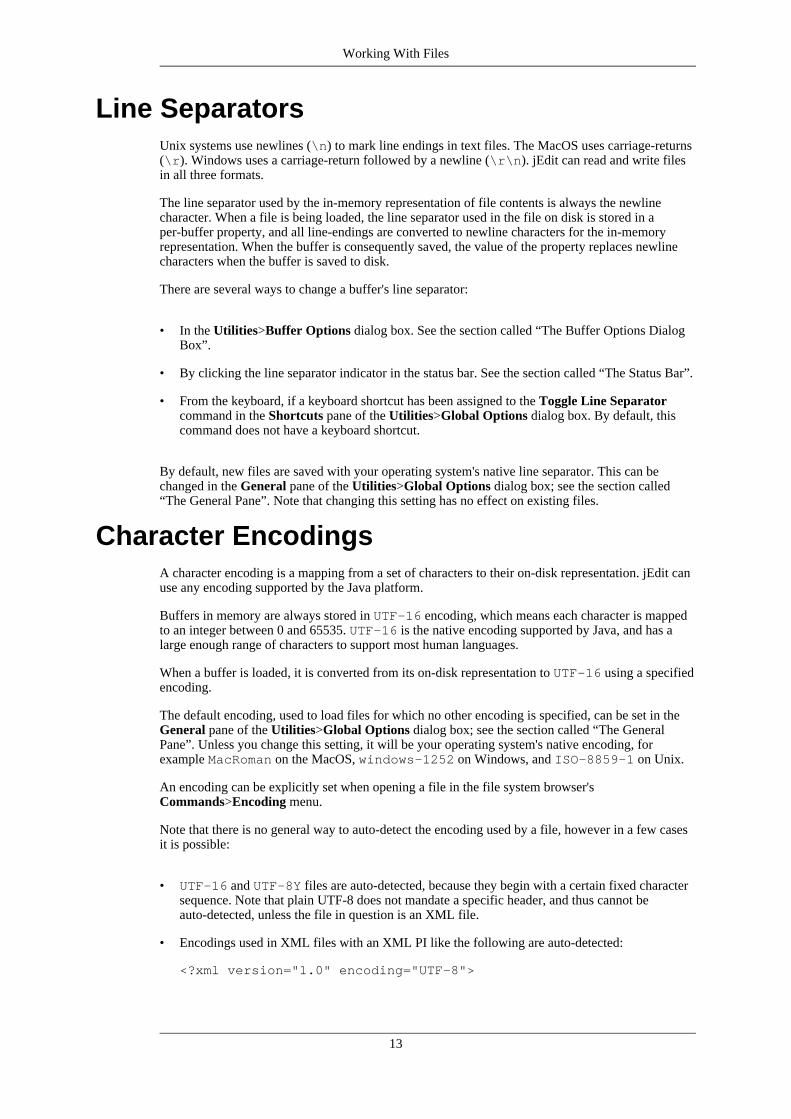
Line SeparatorsUnix systems use newlines (\n) to mark line endings in text files. The MacOS uses carriage-returns(\r). Windows uses a carriage-return followed by a newline (\r\n). jEdit can read and write filesin all three formats.
The line separator used by the in-memory representation of file contents is always the newlinecharacter. When a file is being loaded, the line separator used in the file on disk is stored in aper-buffer property, and all line-endings are converted to newline characters for the in-memoryrepresentation. When the buffer is consequently saved, the value of the property replaces newlinecharacters when the buffer is saved to disk.
There are several ways to change a buffer's line separator:
• In the Utilities>Buffer Options dialog box. See the section called “The Buffer Options DialogBox”.
• By clicking the line separator indicator in the status bar. See the section called “The Status Bar”.
• From the keyboard, if a keyboard shortcut has been assigned to the Toggle Line Separatorcommand in the Shortcuts pane of the Utilities>Global Options dialog box. By default, thiscommand does not have a keyboard shortcut.
By default, new files are saved with your operating system's native line separator. This can bechanged in the General pane of the Utilities>Global Options dialog box; see the section called“The General Pane”. Note that changing this setting has no effect on existing files.
Character EncodingsA character encoding is a mapping from a set of characters to their on-disk representation. jEdit canuse any encoding supported by the Java platform.
Buffers in memory are always stored in UTF-16 encoding, which means each character is mappedto an integer between 0 and 65535. UTF-16 is the native encoding supported by Java, and has alarge enough range of characters to support most human languages.
When a buffer is loaded, it is converted from its on-disk representation to UTF-16 using a specifiedencoding.
The default encoding, used to load files for which no other encoding is specified, can be set in theGeneral pane of the Utilities>Global Options dialog box; see the section called “The GeneralPane”. Unless you change this setting, it will be your operating system's native encoding, forexample MacRoman on the MacOS, windows-1252 on Windows, and ISO-8859-1 on Unix.
An encoding can be explicitly set when opening a file in the file system browser'sCommands>Encoding menu.
Note that there is no general way to auto-detect the encoding used by a file, however in a few casesit is possible:
• UTF-16 and UTF-8Y files are auto-detected, because they begin with a certain fixed charactersequence. Note that plain UTF-8 does not mandate a specific header, and thus cannot beauto-detected, unless the file in question is an XML file.
• Encodings used in XML files with an XML PI like the following are auto-detected:
<?xml version="1.0" encoding="UTF-8">
Working With Files
13
The encoding that will be used to save the current buffer is shown in the status bar, and can bechanged in the Utilities>Buffer Options dialog box. Note that changing this setting has no effect onthe buffer's contents; if you opened a file with the wrong encoding and got garbage, you will need toreload it.
If a file is opened without an explicit encoding specified and it appears in the recent file list, jEditwill use the encoding last used when working with that file; otherwise the default encoding will beused.
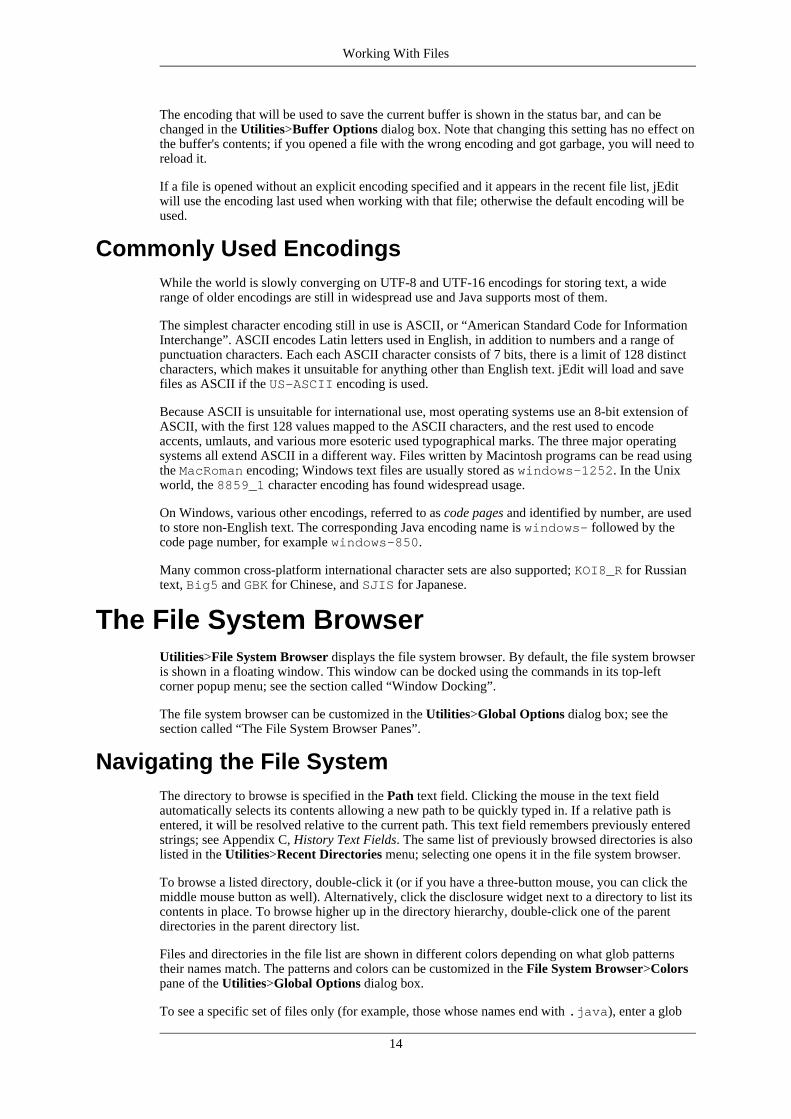
Commonly Used EncodingsWhile the world is slowly converging on UTF-8 and UTF-16 encodings for storing text, a widerange of older encodings are still in widespread use and Java supports most of them.
The simplest character encoding still in use is ASCII, or “American Standard Code for InformationInterchange”. ASCII encodes Latin letters used in English, in addition to numbers and a range ofpunctuation characters. Each each ASCII character consists of 7 bits, there is a limit of 128 distinctcharacters, which makes it unsuitable for anything other than English text. jEdit will load and savefiles as ASCII if the US-ASCII encoding is used.
Because ASCII is unsuitable for international use, most operating systems use an 8-bit extension ofASCII, with the first 128 values mapped to the ASCII characters, and the rest used to encodeaccents, umlauts, and various more esoteric used typographical marks. The three major operatingsystems all extend ASCII in a different way. Files written by Macintosh programs can be read usingthe MacRoman encoding; Windows text files are usually stored as windows-1252. In the Unixworld, the 8859_1 character encoding has found widespread usage.
On Windows, various other encodings, referred to as code pages and identified by number, are usedto store non-English text. The corresponding Java encoding name is windows- followed by thecode page number, for example windows-850.
Many common cross-platform international character sets are also supported; KOI8_R for Russiantext, Big5 and GBK for Chinese, and SJIS for Japanese.
The File System BrowserUtilities>File System Browser displays the file system browser. By default, the file system browseris shown in a floating window. This window can be docked using the commands in its top-leftcorner popup menu; see the section called “Window Docking”.
The file system browser can be customized in the Utilities>Global Options dialog box; see thesection called “The File System Browser Panes”.
Navigating the File SystemThe directory to browse is specified in the Path text field. Clicking the mouse in the text fieldautomatically selects its contents allowing a new path to be quickly typed in. If a relative path isentered, it will be resolved relative to the current path. This text field remembers previously enteredstrings; see Appendix C, History Text Fields. The same list of previously browsed directories is alsolisted in the Utilities>Recent Directories menu; selecting one opens it in the file system browser.
To browse a listed directory, double-click it (or if you have a three-button mouse, you can click themiddle mouse button as well). Alternatively, click the disclosure widget next to a directory to list itscontents in place. To browse higher up in the directory hierarchy, double-click one of the parentdirectories in the parent directory list.
Files and directories in the file list are shown in different colors depending on what glob patternstheir names match. The patterns and colors can be customized in the File System Browser>Colorspane of the Utilities>Global Options dialog box.
To see a specific set of files only (for example, those whose names end with .java), enter a glob
Working With Files
14
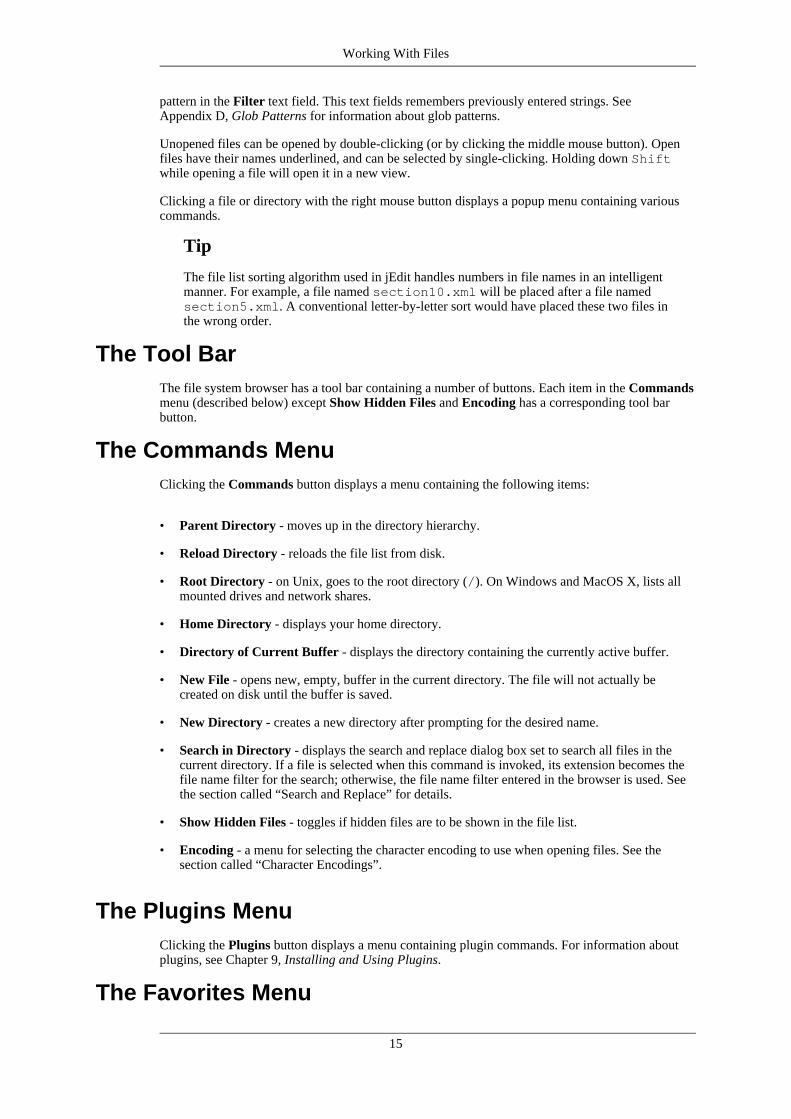
pattern in the Filter text field. This text fields remembers previously entered strings. SeeAppendix D, Glob Patterns for information about glob patterns.
Unopened files can be opened by double-clicking (or by clicking the middle mouse button). Openfiles have their names underlined, and can be selected by single-clicking. Holding down Shiftwhile opening a file will open it in a new view.
Clicking a file or directory with the right mouse button displays a popup menu containing variouscommands.
Tip
The file list sorting algorithm used in jEdit handles numbers in file names in an intelligentmanner. For example, a file named section10.xml will be placed after a file namedsection5.xml. A conventional letter-by-letter sort would have placed these two files inthe wrong order.
The Tool BarThe file system browser has a tool bar containing a number of buttons. Each item in the Commandsmenu (described below) except Show Hidden Files and Encoding has a corresponding tool barbutton.
The Commands MenuClicking the Commands button displays a menu containing the following items:
• Parent Directory - moves up in the directory hierarchy.
• Reload Directory - reloads the file list from disk.
• Root Directory - on Unix, goes to the root directory (/). On Windows and MacOS X, lists allmounted drives and network shares.
• Home Directory - displays your home directory.
• Directory of Current Buffer - displays the directory containing the currently active buffer.
• New File - opens new, empty, buffer in the current directory. The file will not actually becreated on disk until the buffer is saved.
• New Directory - creates a new directory after prompting for the desired name.
• Search in Directory - displays the search and replace dialog box set to search all files in thecurrent directory. If a file is selected when this command is invoked, its extension becomes thefile name filter for the search; otherwise, the file name filter entered in the browser is used. Seethe section called “Search and Replace” for details.
• Show Hidden Files - toggles if hidden files are to be shown in the file list.
• Encoding - a menu for selecting the character encoding to use when opening files. See thesection called “Character Encodings”.
The Plugins MenuClicking the Plugins button displays a menu containing plugin commands. For information aboutplugins, see Chapter 9, Installing and Using Plugins.
The Favorites Menu
Working With Files
15
Clicking the Favorites button displays a menu showing all files and directories in the favorites list.The Add to Favorites item adds the currently selected file to the favorites list. If nothing is selected,the current directory is added. To remove a file from the favorites, invoke Edit Favorites, whichwill show the favorites list in the file system view, then select Delete from the right-click menu ofthe entry you want to remove.
Keyboard ShortcutsCompletion behaves differently in file dialogs than in the stand-alone file system browser window.
In the file dialog, keyboard input goes in the file name field by default. Pressing Enter opens thefile or directory path that is either fully or partially entered in the file name field. Typing the firstfew characters of a file's name selects that file. If the file name field is empty and nothing isselected, / lists the root directory on Unix and the list of drives on Windows. There are two handyabbreviations that may be used in file paths: ~ expands to the home directory, and - expands to thecurrent buffer's directory.
For example, to open a file /home/slava/jEdit/doc/TODO.txt, you might enter~/j/d/to.
In the stand-alone file system browser, keyboard input is handled slightly differently. There is nofile name field, instead shortcuts are active when the file tree has keyboard focus. Additionally,pressing /, ~ or - always immediately goes to the root, home and current buffer's directory,respectively.
Reloading From DiskWhen a view is brought to the foreground, jEdit checks if any open buffers were modified on diskby another application. All affected buffers are listed in a dialog box. By default, buffers withoutunsaved changes are automatically reloaded. This feature can be disabled, or changed to prompt iffiles should be reloaded first, in the General pane of the Utilities>Global Options dialog box; seethe section called “The Global Options Dialog Box”.
File>Reload can be used to reload the current buffer from disk at any other time; a confirmationdialog box will be displayed first if the buffer has unsaved changes.
File>Reload All discards unsaved changes in all open buffers and reload them from disk, asking forconfirmation first.
Multi-Threaded I/OTo improve responsiveness and perceived performance, jEdit executes all buffer input/outputoperations asynchronously. While I/O is in progress, the status bar displays the number of remainingI/O operations.
The Utilities>Troubleshooting>I/O Progress Monitor command displays a window with moredetailed status information and progress meters. By default, the I/O Progress Monitor is shown in afloating window. This window can be docked using the commands in its top-left corner popupmenu; see the section called “Window Docking”. I/O requests can also be aborted in this window,however note that aborting a buffer save can result in data loss.
PrintingFile>Print (shortcut: C+p) prints the current buffer.
File>Page Setup displays a dialog box for changing your operating system's print settings, such asmargins, page size, print quality, and so on.
The print output can be customized in the Printing pane of the Utilities>Global Options dialog
Working With Files
16
box; see the section called “The Printing Pane”. The following settings can be changed:
• The font to use when printing.
• If a header with the file name should be printed on each page.
• If a footer with the page number and current date should be printed on each page.
• If line numbers should be printed.
• If the output should be color or black and white.
• The tab size to use when printing - this will usually be less than the text area tab size, toconserve space in the printed output.
Closing Files and Exiting jEditFile>Close (shortcut: C+w) closes the current buffer. If it has unsaved changes, jEdit will ask if theyshould be saved first.
File>Close All (shortcut: C+e C+w) closes all buffers. If any buffers have unsaved changes, theywill be listed in a dialog box where they can be saved or discarded. In the dialog box, multiplebuffers to operate on at once can be selected by clicking on them in the list while holding downControl. After all buffers have been closed, a new untitled buffer is opened.
File>Exit (shortcut: C+q) will completely exit jEdit, prompting if unsaved buffers should be savedfirst.
Working With Files
17

Chapter 5. Editing TextMoving The Caret
The simplest way to move the caret is to click the mouse at the desired location in the text area. Thecaret can also be moved using the keyboard.
The LEFT, RIGHT, UP and DOWN keys move the caret in the respective direction, and thePAGE_UP and PAGE_DOWN keys move the caret up and down one screenful, respectively.
When pressed once, the HOME key moves the caret to the first non-whitespace character of thecurrent screen line. Pressing it a second time moves the caret to the beginning of the current bufferline. Pressing it a third time moves the caret to the first visible line.
The END key behaves in a similar manner, going to the last non-whitespace character of the currentscreen line, the end of the current buffer line, and finally to the last visible line.
If soft wrap is disabled, a “screen line” is the same as a “buffer line”. If soft wrap is enabled, ascreen line is a section of a newline-delimited buffer line that fits within the wrap margin width. Seethe section called “Wrapping Long Lines”.
C+HOME and C+END move the caret to the beginning and end of the buffer, respectively.
More advanced caret movement is covered in the section called “Working With Words”, the sectioncalled “Working With Lines” and the section called “Working With Paragraphs”.
The Home and End keys
If you prefer more traditional behavior for the HOME and END keys, you can reassign the respectivekeyboard shortcuts in the Shortcuts pane of the Utilities>Global Options; see the section called“The Shortcuts Pane”.
By default, the shortcuts are assigned as follows:
• HOME is bound to Smart Home.
• END is bound to Smart End.
• S+HOME is bound to Select to Smart Home Position.
• S+END is bound to Select to Smart End Position.
However you can rebind them to anything you want, for example, various combinations of thefollowing, or indeed any other command or macro:
• Go to Start/End of White Space.
• Go to Start/End of Line.
• Go to Start/End of Buffer.
• Select to Start/End of White Space .
• Select to Start/End of Line.
• Select to Start/End of Buffer.
18

Selecting TextA selection is a block of text marked for further manipulation. Range selections are equivalent toselections in most other text editors; they cover text between two points in a buffer. jEdit also allowsrectangular selections that cover a rectangular area (some text editors refer to these as “columnselections”). Furthermore, several chunks of text can be selected and operated on simultaneously.
Range SelectionDragging the mouse creates a range selection from where the mouse was pressed to where it wasreleased. Holding down Shift while clicking a location in the buffer will create a selection fromthe caret position to the clicked location.
Holding down Shift in addition to a caret movement key (LEFT, UP, HOME, etc) will extend aselection in the specified direction.
Edit>Select All (shortcut: C+a) selects the entire buffer.
Edit>More Selection>Select None (shortcut: ESCAPE) deactivates the selection.
Rectangular SelectionDragging with the Control key held down will create a rectangular selection. Holding downShift and Control while clicking a location in the buffer will create a rectangular selectionfrom the caret position to the clicked location.
Alternatively, invoking Edit>More Selection>Rectangular Selection (shortcut: A+\) togglesrectangular selection mode. In rectangular selection mode, dragging the mouse always creates arectangular selection, and keyboard commands that would normally create a range selection create arectangular selection instead. A status bar indicator is shown when this mode is enabled.
It is possible to select a rectangle with zero width but non-zero height. This can be used to insert anew column between two existing columns, for example. Such zero-width selections are shown as athin vertical line.
Inserting text into a rectangular selection repeats the text going down as many times as necessary,and shifts the selection to the right. This makes it behave like a “tall” caret.
Rectangles can be deleted, copied, pasted, and operated on using ordinary editing commands. Ifnecessary, rectangular selections are automatically filled in with whitespace to maintain alignment.
Rectangular selections can extend beyond the end of a line into “virtual space”. Furthermore, ifkeyboard rectangular selection mode is on or if the Control key is being held down, clickingbeyond the end of a line will insert the appropriate amount of whitespace in order to position thecursor at the clicked location.
Note
Rectangular selections are implemented using character offsets, not absolute screenpositions, so they might not behave as you might expect if a proportional-width font isbeing used or if soft wrap is enabled. The text area font can be changed in the Text Areapane of the Utilities>Global Options dialog box. For information about soft wrap, see thesection called “Wrapping Long Lines”.
Multiple SelectionEdit>More Selection>Multiple Selection (keyboard shortcut: C+\) turns multiple selection modeon and off. In multiple selection mode, multiple fragments of text can be selected and operated onsimultaneously, and the caret can be moved independently of the selection. The status bar indicatesif multiple selection mode is active; see the section called “The Status Bar”.
Editing Text
19
Various jEdit commands behave differently with multiple selections:
• Commands that copy text place the contents of each selection, separated by line breaks, in thespecified register.
• Commands that insert (or paste) text replace each selection with the entire text that is beinginserted.
• Commands that filter text (such as Spaces to Tabs, Range Comment, Replace in Selection,and so on) behave as if each block was selected independently, and the command invoked oneach in turn.
• Line-based commands (such as Shift Indent Left, Shift Indent Right, and Line Comment)operate on each line that contains at least one selection.
• Caret movement commands that would normally deactivate the selection (such as the arrowkeys, while Shift is not being held down), move the caret, leaving the selection as-is.
• Some older plugins may not support multiple selection at all.
Edit>More Selection>Select None (shortcut: ESCAPE) deactivates the selection containing thecaret, if there is one. Otherwise it deactivates all active selections.
Edit>More Selection>Invert Selection (shortcut: C+e C+i) selects a set of text chunks such thatall text that was formerly part of a selection is now unselected, and all text that wasn't, is selected.
Note
Deactivating multiple selection mode while multiple blocks of text are selected will leavethe selections in place, but you will not be able to add new selections until multipleselection mode is reactivated.
Inserting and Deleting TextText entered at the keyboard is inserted into the buffer. In overwrite mode, which can be toggled bypressing INSERT, one character is deleted from in front of the caret position for every character thatis inserted. The caret is drawn as horizontal line while overwrite mode is active. The status bar alsoindicates if overwrite mode is active; see the section called “The Status Bar” for details.
Inserting text while there is a selection will replace the selection with the inserted text.
When inserting text, the TAB and ENTER keys might not behave entirely like you expect because ofvarious indentation features; see the section called “Tabbing and Indentation” for details.
The simplest way to delete text is with the BACKSPACE and DELETE keys. If nothing is selected,they delete the character before or after the caret, respectively. If a selection exists, both delete theselection.
More advanced deletion commands are described in the section called “Working With Words”, thesection called “Working With Lines” and the section called “Working With Paragraphs”.
Undo and RedoEdit>Undo (shortcut: C+z) reverses the most recent editing command. For example, this can beused to restore unintentionally deleted text. More complicated operations, such as a search andreplace, can also be undone.
If you undo too many changes, Edit>Redo (shortcut: C+e C+z) can restore the changes again. Forexample, if some text was inserted, Undo will remove it from the buffer. Redo will insert it again.
Editing Text
20
By default, the last 100 edits is retained; older edits cannot be undone. The maximum number ofundos can be changed in the Editing pane of the Utilities>Global Options dialog box; see thesection called “The Editing Pane”.
Working With WordsC+LEFT and C+RIGHT move the caret a word at a time. Holding down Shift in addition to theabove extends the selection a word at a time.
A single word can be selected by double-clicking with the mouse, or using the Edit>MoreSelection>Select Word command (shortcut: C+e w). A selection that begins and ends on wordboundaries can be created by double-clicking and dragging.
C+BACKSPACE and C+DELETE delete the word before or after the caret, respectively.
Edit>Complete Word (shortcut: C+b) locates possible completions for the word at the caret, firstby looking in the current edit mode's syntax highlighting keyword list, and then in the current bufferfor words that begin with the word at the caret. This serves as a very basic code completion feature.
If there is only one completion, it will be inserted into the buffer immediately.
If multiple completions were found, the longest common prefix is inserted into the buffer, and apopup is shown below the caret position listing the completions.
To insert a completion from the list, either select it using the UP and DOWN keys and press ENTER,press a digit to insert one of the first ten completions (1 is the first completion; 9 is the 9th; 0 is the10th), or click the desired completion with the mouse. To close the popup without inserting acompletion, press ESCAPE.
Typing while the popup is visible will automatically update the popup and narrow the set ofcompletions as necessary.
Edit>Word Count displays a dialog box with the number of characters, words and lines in thecurrent buffer.
What's a Word?The default behavior of the C+LEFT, C+RIGHT, C+BACKSPACE and C+DELETE commands is tostop both at the beginning and the end of each word. However this can be changed by remappingthese keystrokes to alternative actions whose names end with (Eat Whitespace) in the Shortcutspane of the Utilities>Global Options dialog box; see the section called “The Shortcuts Pane”.
Working With LinesAn entire line can be selected by triple-clicking with the mouse, or using the Edit>MoreSelection>Select Line command (shortcut: C+e l). A selection that begins and ends on lineboundaries can be created by triple-clicking and dragging.
Edit>Go to Line (shortcut: C+l) prompts for a line number and moves the caret there.
Edit>More Selection>Select Line Range (shortcut: C+e C+l) prompts for two line numbers andselects all text between them.
Edit>Text>Delete Line (shortcut: C+d) deletes the current line.
Edit>Text>Delete to Start Of Line (shortcut: CS+BACK_SPACE) deletes all text from the start ofthe current line to the caret.
Edit>Text>Delete to End Of Line (shortcut: CS+DELETE) deletes all text from the caret to theend of the current line.
Editing Text
21
Edit>Text>Join Lines (shortcut: C+j) removes any whitespace from the start of the next line andjoins it with the current line. The caret is moved to the position where the two lines were joined. Forexample, if you invoke Join Lines with the caret on the first line of the following Java code:
new Widget(Foo.createDefaultFoo());
It will be changed to:
new Widget(Foo.createDefaultFoo());
Working With ParagraphsAs far as jEdit is concerned, “paragraphs” are delimited by double newlines. This is also how TeXdefines a paragraph. Note that jEdit doesn't parse HTML files for “<P>” tags, nor does it supportparagraphs delimited only by a leading indent.
C+UP and C+DOWN move the caret to the previous and next paragraph, respectively. Holding downShift in addition to the above extends the selection a paragraph at a time.
Edit>More Selection>Select Paragraph (shortcut: C+e p) selects the paragraph containing thecaret.
Edit>Text>Format Paragraph (shortcut: C+e f) splits and joins lines in the current selection tomake it fit within the wrap column position. If nothing is selected, the paragraph containing thecaret is formatted instead. See the section called “Wrapping Long Lines” for information and wordwrap and changing the wrap column.
Edit>Text>Delete Paragraph (shortcut: C+e d) deletes the paragraph containing the caret.
Wrapping Long LinesThe word wrap feature splits lines at word boundaries in order to fit text within a specified wrapmargin. The wrap margin position is indicated in the text are as a faint blue vertical line. There aretwo “wrap modes”, “soft” and “hard”; they are described below. The current wrap mode is shown inthe status bar; see the section called “The Status Bar”. The wrap mode can be changed in one of thefollowing ways:
• On a global or mode-specific basis in the Editing pane of the Utilities>Global Options dialogbox. See the section called “The Editing Pane”.
• In the current buffer for the duration of the editing session,
• By clicking the status bar indicator.
• In the Utilities>Buffer Options dialog box. See the section called “The Buffer OptionsDialog Box”.
• From the keyboard, if a keyboard shortcut has been assigned to the Toggle Word Wrapcommand in the Shortcuts pane of the Utilities>Global Options dialog box. By default, thiscommand does not have a keyboard shortcut.
• In the current buffer for future editing sessions by placing the following in one of the first or last10 lines of the buffer, where mode is either “none”, “soft” or “hard”, and column is the desiredwrap margin:
:wrap=mode:maxLineLen=column:
Editing Text
22

Soft WrapIn soft wrap mode, lines are automatically wrapped when displayed on screen. Newlines are notinserted at the wrap positions, and the wrapping is automatically updated when text is inserted orremoved.
If end of line markers are enabled in the Text Area pane of the Utilities>Global Options dialogbox, a colon (“:”) is painted at the end of wrapped lines. See the section called “The Text AreaPane”.
Hard WrapIn hard wrap mode, inserting text at the end of a line will automatically break the line if it extendsbeyond the wrap margin. Inserting or removing text in the middle of a line has no effect, howevertext can be re-wrapped using the Edit>Text>Format Paragraph command. See the section called“Working With Paragraphs”.
Hard wrap is implemented using character offsets, not screen positions, so it might not behave likeyou expect if a proportional-width font is being used. The text area font can be changed in the TextArea pane of the Utilities>Global Options dialog box.
ScrollingIf you have a mouse with a scroll wheel and are running Java 2 version 1.4, you can use the wheel toscroll up and down in the text area. Various modifier keys change the action of the wheel:
• Shift - scrolls an entire page at a time.
• Control - scrolls a single line at a time.
• Alt - moves the caret up and down instead of scrolling.
• Alt-Shift - extends the selection up and down instead of scrolling.
Keyboard commands for scrolling the text area are also available.
View>Scrolling>Scroll to Current Line (shortcut: C+e C+j) scrolls the text area in order tomake the caret visible, if necessary. It does nothing if the caret is already visible.
View>Scrolling>Center Caret on Screen (shortcut: C+e C+n) moves the caret to the line in themiddle of the screen.
View>Scrolling>Line Scroll Up (shortcut: C+QUOTE) scrolls the text area up by one line.
View>Scrolling>Line Scroll Down (shortcut: C+SLASH) scrolls the text area down by one line.
View>Scrolling>Page Scroll Up (shortcut: A+QUOTE) scrolls the text area up by one screenful.
View>Scrolling>Page Scroll Down (shortcut: A+SLASH) scrolls the text area down by onescreenful.
The above scrolling commands differ from the caret movement commands in that they don't actuallymove the caret; they just change the scroll bar position.
Transferring TextjEdit provides a rich set of commands for moving and copying text. Commands are provided formoving chunks of text from buffers to registers and vice-versa. A register is a holding area for anarbitrary length of text, with a single-character name. Most other programs can only transfer text to
Editing Text
23
and from the system clipboard; in jEdit, the system clipboard is just another register, with thespecial name $.
The ClipboardjEdit offers the usual text transfer operations, that operate on the $ register.
Edit>Cut (shortcut: C+x) places the selected text in the clipboard and removes it from the buffer.
Edit>Copy (shortcut: C+c) places the selected text in the clipboard and leaves it in the buffer.
Edit>Paste (shortcut: C+v) inserts the clipboard contents in place of the selection (or at the caretposition, if there is no selection).
The Cut and Copy commands replace the old clipboard contents with the selected text. There aretwo alternative commands which add the selection at the end of the existing clipboard contents,instead of replacing it.
Edit>More Clipboard>Cut Append (shortcut: C+e C+u) appends the selected text to theclipboard, then removes it from the buffer. After this command has been invoked, the clipboard willconsist of the former clipboard contents, followed by a newline, followed by the selected text.
Edit>More Clipboard>Copy Append (shortcut: C+e C+a) is the same as Cut Append except itdoes not remove the selection from the buffer.
Quick CopyThe quick copy feature is usually found in Unix text editors. Quick copy is disabled by default, butit can be enabled in the Mouse pane of the Utilities>Global Options dialog box.
The quick copy feature is accessed using the middle mouse button. If you do not have a three-buttonmouse, then either Alt-click (on Windows and Unix) or Option-click (on MacOS X). The quickcopy feature enables the following behavior:
• Clicking the middle mouse button in the text area inserts the most recently selected text at theclicked location. If you only have a two-button mouse, you can click the left mouse button whileholding down Alt instead of middle-clicking.
• Dragging with the middle mouse button creates a selection without moving the caret. As soon asthe mouse button is released, the selected text is inserted at the caret position and the selection isdeactivated. A message is shown in the status bar while text is being selected to remind you thatthis is not an ordinary selection.
• Holding down Shift while clicking the middle mouse button will duplicate text between thecaret and the clicked location.
• Holding down Control while clicking the middle mouse button on a bracket will insert all textin that bracket's scope at the caret position.
The most recently selected text is stored in the % register.
If jEdit is being run under Java 2 version 1.4 on Unix, you will be able to transfer text with other XWindows applications using the quick copy feature. On other platforms and Java versions, thecontents of the quick copy register are only accessible from within jEdit.
General Register CommandsThese commands require more keystrokes than the two methods shown above, but they can operateon any register, allowing an arbitrary number of text chunks to be retained at a time.
Each command prompts for a single-character register name to be entered after being invoked.
Editing Text
24

Pressing ESCAPE instead of specifying a register name cancels the operation.
Note that the content of registers other than the clipboard and quick copy register are automaticallysaved between jEdit sessions.
Edit>More Clipboard>Cut to Register (shortcut: C+r C+x key) stores the selected text in thespecified register, removing it from the buffer.
Edit>More Clipboard>Copy to Register (shortcut: C+r C+c key) stores the selected text in thespecified register, leaving it in the buffer.
Edit>More Clipboard>Cut Append to Register (shortcut: C+r C+u key) adds the selected textto the existing contents of the specified register, and removes it from the buffer.
Edit>More Clipboard>Copy Append to Register (shortcut: C+r C+a key) adds the selectedtext to the existing contents of the specified register, without removing it from the buffer.
Edit>More Clipboard>Paste from Register (shortcut: C+r C+v key) replaces the selectionwith the contents of the specified register.
The following three commands display dialog boxes instead of prompting for a register name.
Edit>More Clipboard>Paste Previous (shortcut: C+e C+v) displays a dialog box listing the 20most recently copied and pasted text strings.
Edit>More Clipboard>Paste Deleted (shortcut: C+e C+y) is not really a register command; itdisplays a dialog box listing the 20 most recently deleted text strings.
Edit>More Clipboard>View Registers displays a dialog box for viewing register contents,including the clipboard and the quick copy.
MarkersA marker is a pointer to a specific location within a buffer, which may or may not have asingle-character shortcut associated with it. Markers are persistent; they are saved to.filename.marks, where filename is the name of the buffer. (The dot prefix makes themarkers file hidden on Unix systems.) Marker saving can be disabled in the General pane of theUtilities>Global Options dialog box; see the section called “The General Pane”.
Markers>Add/Remove Marker (shortcut: C+e C+m) adds a marker without a shortcut pointing tothe current line. If a marker is already set on the current line, the marker is removed instead. If textis selected, markers are added to the first and last line of each selection.
Markers are listed in the Markers menu; selecting a marker from this menu will move the caret toits location.
Markers>Go to Previous Marker (shortcut: C+e C+COMMA) goes to the marker immediatelybefore the caret position.
Markers>Go to Next Marker (shortcut: C+e C+PERIOD) goes to the marker immediately afterthe caret position.
Markers>Remove All Markers removes all markers set in the current buffer.
Markers with shortcuts allow for quicker keyboard-based navigation. The following commands allprompt for a single-character shortcut when invoked. Pressing ESCAPE instead of specifying ashortcut will cancel the operation.
Markers>Add Marker With Shortcut (shortcut: C+t key) adds a marker with the specifiedshortcut. If marker with that shortcut already exists, it will remain in the buffer but lose its shortcut.
Markers>Go to Marker (shortcut: C+y key) moves the caret to the location of the marker withthe specified shortcut.
Editing Text
25

Markers>Select to Marker (shortcut: C+u key) creates a selection from the caret location to themarker with the specified shortcut.
Markers>Swap Caret and Marker (shortcut: C+k key) moves the caret to the location of themarker with the specified shortcut, and moves the marker to the former caret position. Invoke thiscommand multiple times to flip between two locations in the buffer.
Lines which contain markers are indicated in the gutter with a highlight. Moving the mouse over thehighlight displays a tool tip showing the marker's shortcut, if it has one. See the section called“Interface Overview” for information about the gutter.
Search and ReplaceSearching For Text
Search>Find (shortcut: C+f) displays the search and replace dialog box.
The search string can be entered in the Search for text field. This text field remembers previouslyentered strings; see Appendix C, History Text Fields for details.
If text was selected in the text area and the selection does not span a line break, the selected textbecomes the default search string.
If the selection spans a line break, the Search in Selection and HyperSearch buttons will bepre-selected, and the search string field will be initially blank. (See the section called “HyperSearch”for information about the HyperSearch feature.)
Selecting the Ignore case check box makes the search case insensitive - for example, searching for“Hello” will match “hello”, “HELLO” and “HeLlO”.
Selecting the Regular expressions check box allows a regular expression to be used in the searchstring. Regular expressions can match inexact sequences of text that optionally span more than oneline. Regular expression syntax is described in Appendix E, Regular Expressions.
The Backward and Forward buttons specify the search direction. Note that regular expressions canonly be used when searching in a forward direction.
Clicking Find will locate the next occurrence of the search string (or previous occurrence, ifsearching backwards). If the Keep dialog check box is selected, the dialog box will remain openafter the search string has been located; otherwise, it will close.
If no occurrences could be found and the Auto wrap check box is selected, the search willautomatically restart from the beginning of the buffer (or the end, if searching backwards). If Autowrap is not selected, a confirmation dialog box is shown before restarting the search.
Search>Find Next (shortcut: C+g) locates the next occurrence of the most recent search stringwithout displaying the search and replace dialog box.
Search>Find Previous (shortcut: C+h) locates the previous occurrence of the most recent searchstring without displaying the search and replace dialog box.
Replacing TextThe replace string text field of the search dialog remembers previously entered strings; seeAppendix C, History Text Fields for details.
Clicking Replace & Find will perform a replacement in the current selection and locate the nextoccurrence of the search string. Clicking Replace All will replace all occurrences of the searchstring with the replacement string in the current search scope (which is either the selection, thecurrent buffer, or a set of buffers, as specified in the search and replace dialog box).
Editing Text
26
Occurrences of the search string can be replaced with either a replacement string, or the return valueof a BeanShell script snippet. Two radio buttons in the search and replace dialog box select betweenthe two replacement modes, which are described in detail below.
Text Replace
If the Text button is selected, the search string is simply replaced with the replacement string.
If regular expressions are enabled, positional parameters ($0, $1, $2, and so on) can be used toinsert the contents of matched subexpressions in the replacement string; see Appendix E, RegularExpressions for more information.
If the search is case-insensitive, jEdit attempts to modify the case of the replacement string to matchthat of the particular instance of the search string being replaced. For example, searching for “label”and replacing it with “text”, will perform the following replacements:
• “String label” would become “String text”
• “setLabel” would become “setText”
• “DEFAULT_LABEL” would become “DEFAULT_TEXT”
BeanShell Replace
In BeanShell replacement mode, the search string is replaced with the return value of a BeanShellsnippet. The following predefined variables can be referenced in the snippet:
• _0 -- the text to be replaced
• _1 - _9 -- if regular expressions are enabled, these contain the values of matchedsubexpressions.
BeanShell syntax and features are covered in great detail in Part III, “Writing Macros”, but here aresome examples:
To replace each occurrence of “Windows” with “Linux”, and each occurrence of “Linux” with“Windows”, search for the following regular expression:
(Windows|Linux)
Replacing it with the following BeanShell snippet:
_1.equals("Windows") ? "Linux" : "Windows"
To convert all HTML tags to lower case, search for the following regular expression:
<\S+
Replacing it with the following BeanShell snippet:
_0.toLowerCase()
To replace arithmetic expressions contained in curly braces with the result of evaluating theexpression, search for the following regular expression:
\{(.+?)\}
Editing Text
27

Replacing it with the following BeanShell snippet:
eval(_1)
These examples only scratch the surface; the possibilities are endless.
HyperSearchIf the HyperSearch check box in the search and replace dialog box is selected, clicking Find listsall occurrences of the search string, instead of locating the next match.
By default, HyperSearch results are shown in a floating window. This window can be docked usingthe commands in its top-left corner popup menu; see the section called “Window Docking”.
If the Multiple results check box is selected in the results window, past search results are retained.
Running searches can be stopped in the Utilities>Troubleshooting>I/O Progress Monitor dialogbox.
Multiple File SearchSearch and replace commands can be performed over an arbitrary set of files in one step. The set offiles to search is selected with a set of buttons in the search dialog box.
If the Current buffer button is selected, only the current buffer is searched. This is the defaultbehavior.
If the All buffers button is selected, all open buffers whose names match the glob pattern entered inthe Filter text field will be searched. See Appendix D, Glob Patterns for more information aboutglob patterns.
If the Directory radio button is selected, all files contained in the specified directory whose namesmatch the glob will be searched. The directory to search in can either be entered in the Directorytext field, or chosen in a file selector dialog box by clicking the Choose button next to the field. Ifthe Search subdirectories check box is selected, all subdirectories of the specified directory willalso be searched. Keep in mind that searching through directories containing many files can take along time.
The Directory and Filter text fields remember previously entered strings; see Appendix C, HistoryText Fields for details.
When the search and replace dialog box is opened, the directory and file name filter fields are set totheir previous values. They can be set to match the current buffer's directory and file name extensionby clicking Synchronize.
Note that clicking the All Buffers or Directory radio buttons also selects the HyperSearch checkbox since that is what you would want, most of the time. However, the HyperSearch check box canbe unchecked, for stepping through search results in multiple files one at a time.
Two convenience commands are provided for performing multiple file searches.
Search>Search in Open Buffers (shortcut: C+e C+b) displays the search dialog box and selectsthe All buffers button.
Search>Search in Directory (shortcut: C+e C+d) displays the search dialog box and selects theDirectory button.
The Search BarThe search bar feature provides a convenient way to search in the current buffer without opening thesearch dialog box. The search bar does not support replacement or multiple file search. Previously
Editing Text
28
entered strings can be recalled in the search bar with the Up and Down arrow keys; see Appendix C,History Text Fields.
By default, the search bar remains hidden until one of the quick search commands (described below)is invoked; however you can choose to have it always visible in the View pane of theUtilities>Global Options dialog box; see the section called “The View Pane”.
Search>Incremental Search Bar (shortcut: C+COMMA) displays the search bar if necessary, andgives it keyboard focus. If this command is invoked while there is a selection, the selection is placedin the search string field.
Search>Incremental Search for Word (shortcut: A+COMMA) behaves like the above commandexcept it places the word at the caret in the search string field.
Unless the HyperSearch check box is selected, the search bar will perform an incremental search.In incremental search mode, the first occurrence of the search string is located in the current bufferas it is being typed. Pressing ENTER and S+ENTER searches for the next and previous occurrence,respectively. Once the desired occurrence has been located, pressing ESCAPE returns keyboardfocus to the text area. Unless the search bar is set to be always visible (see above), pressing ESCAPEwill also hide the search bar.
Note
Incremental searches cannot be not recorded in macros. If your macro needs to perform asearch, use the search and replace dialog box instead. See Chapter 8, Using Macros forinformation about macros.
Search>HyperSearch Bar (shortcut: C+PERIOD) displays the search bar if necessary, gives itkeyboard focus, and selects the HyperSearch check box. If this command is invoked while there isa selection, the selected text will be searched for immediately and the search bar will not be shown.
If the HyperSearch check box is selected, pressing Enter in the search string field will perform aHyperSearch in the current buffer.
Search>HyperSearch for Word (shortcut: A+PERIOD) performs a HyperSearch for the word atthe caret. This command does not show the search bar or give it keyboard focus.
Editing Text
29

Chapter 6. Editing Source CodeEdit Modes
An edit mode specifies syntax highlighting rules, auto indent behavior, and various othercustomizations for editing a certain file type. This section only covers using existing edit modes;information about writing your own can be found in Part II, “Writing Edit Modes”.
When a file is opened, jEdit first checks the file name against a list of known patterns. For example,files whose names end with .c are opened with C mode, and files named Makefile are openedwith Makefile mode. If a suitable match based on file name cannot be found, jEdit checks the firstline of the file. For example, files whose first line is #!/bin/sh are opened with shell scriptmode.
Mode SelectionFile name and first line matching is done using glob patterns similar to those used in Unix shells.Glob patterns associated with edit modes can be changed in the Editing pane of theUtilities>Global Options dialog box. Note that the glob patterns must match the file name or firstline exactly; so to match files whose first line contains begin, you must use a first line glob of*begin*. See Appendix D, Glob Patterns for a description of glob pattern syntax.
The default edit mode for files which do not match any pattern can be set in the Editing pane aswell.
The edit mode can be specified manually as well. The current buffer's edit mode can be set on aone-time basis in the Utilities>Buffer Options dialog box; see the section called “The BufferOptions Dialog Box”. To set a buffer's edit mode for future editing sessions, place the following inone of the first or last 10 lines of the buffer, where edit mode is the name of the desired editmode:
:mode=edit mode:
Syntax HighlightingSyntax highlighting is the display of programming language tokens using different fonts and colors.This makes code easier to follow and errors such as misplaced quotes easier to spot. All edit modesexcept for the plain text mode perform some kind of syntax highlighting.
The colors and styles used to highlight syntax tokens can be changed in the Syntax Highlightingpane of the Utilities>Global Options dialog box; see the section called “The Syntax HighlightingPane”.
Tabbing and IndentationjEdit makes a distinction between the tab width, which is is used when displaying hard tabcharacters, and the indent width, which is used when a level of indent is to be added or removed, forexample by mode-specific auto indent routines. Both can be changed in one of several ways:
• On a global or mode-specific basis in the Editing pane of the the Utilities>Global Optionsdialog box. See the section called “The Editing Pane”.
• In the current buffer for the duration of the editing session in the Utilities>Buffer Optionsdialog box. See the section called “The Buffer Options Dialog Box”.
• In the current buffer for future editing sessions by placing the following in one of the first or last
30
10 lines of the buffer, where n is the desired tab width, and m is the desired indent width:
:tabSize=n:indentSize=m:
Edit>Indent>Shift Indent Left (shortcut: S+TAB or A+LEFT) adds one level of indent to eachselected line, or the current line if there is no selection.
Edit>Indent>Shift Indent Right (shortcut: A+RIGHT) removes one level of indent from eachselected line, or the current line if there is no selection. Pressing Tab while a multi-line selection isactive has the same effect.
Edit>Indent>Remove Trailing Whitespace (shortcut: C+e r) removes all whitespace from theend of each selected line, or the current line if there is no selection.
Soft TabsFiles containing hard tab characters may look less than ideal if the default tab size is changed, sosome people prefer using multiple space characters instead of hard tabs to indent code.
This feature is known as soft tabs. Soft tabs can be enabled or disabled in one of several ways:
• On a global or mode-specific basis in the Editing pane of the Utilities>Global Options dialogbox. See the section called “The Editing Pane”.
• In the current buffer for the duration of the editing session in the Utilities>Buffer Optionsdialog box. See the section called “The Buffer Options Dialog Box”.
• In the current buffer for future editing sessions by placing the following in one of the first or last10 lines of the buffer, where flag is either “true” or “false”:
:noTabs=flag:
Changing the soft tabs setting has no effect on existing tab characters; it only affectssubsequently-inserted tabs.
Edit>Indent>Spaces to Tabs converts soft tabs to hard tabs in the current selection, or the entirebuffer if nothing is selected.
Edit>Indent>Tabs to Spaces converts hard tabs to soft tabs in the current selection, or the entirebuffer if nothing is selected.
Automatic IndentThe auto indent feature inserts the appropriate number of tabs or spaces at the beginning of a line bylooking at program structure.
In the default configuration, pressing ENTER will create a new line with the appropriate amount ofindent automatically, and pressing TAB at the beginning of, or inside the leading whitespace of aline will insert the appropriate amount of indentation. Pressing it again will insert a tab character.
The behavior of the ENTER and TAB keys can be configured in the Shortcuts pane of theUtilities>Global Options dialog. box, just as with any other key. The ENTER key can be bound toone of the following, or indeed any other command or macro:
• Insert Newline.
• Insert Newline and Indent, which is the default.
Editing Source Code
31
The TAB can be bound to one of the following, or again, any other command or macro:
• Insert Tab.
• Insert Tab or Indent, which is the default.
• Indent Selected Lines.
See the section called “The Shortcuts Pane” for details.
Auto indent behavior is mode-specific. In most edit modes, the indent of the previous line is simplycopied over. However, in C-like languages (C, C++, Java, JavaScript), curly brackets and languagestatements are taken into account and indent is added and removed as necessary.
Edit>Source>Indent Selected Lines (shortcut: C+i) indents all selected lines, or the current line ifthere is no selection.
To insert a literal tab or newline without performing indentation, prefix the tab or newline with C+ev. For example, to create a new line without any indentation, type C+e v ENTER.
Commenting Out CodeMost programming and markup languages support the notion of “comments”, or regions of codewhich are ignored by the compiler/interpreter. jEdit has commands which make inserting commentsmore convenient.
Comment strings are mode-specific, and some in some modes such as HTML different parts of abuffer can have different comment strings. For example, in HTML files, different comment stringsare used for HTML text and inline JavaScript.
Edit>Source Code>Range Comment (shortcut: C+e C+c) encloses the selection with commentstart and end strings, for example /* and */ in Java mode.
Edit>Source Code>Line Comment (shortcut: C+e C+k) inserts the line comment string, forexample // in Java mode, at the start of each selected line.
Bracket MatchingMisplaced and unmatched brackets are one of the most common syntax errors encountered whenwriting code. jEdit has several features to make brackets easier to deal with.
Positioning the caret immediately after a bracket will highlight the corresponding closing or openingbracket (assuming it is visible), and draw a scope indicator in the gutter. If the highlighted bracket isnot visible, the text of the matching line will be shown in the status bar. If the matching line consistsof only whitespace and the bracket itself, the previous line is shown instead. This feature is veryuseful when your code is indented as follows, with braces on their own lines:
public void someMethod(){
if(isOK){
doSomething();}
}
Invoking Edit>Source>Go to Matching Bracket (shortcut: C+]) or clicking the scope indicator inthe gutter moves the caret to the matching bracket.
Edit>Source>Select Code Block (shortcut: C+[) selects all text between the closest two brackets
Editing Source Code
32

surrounding the caret.
Holding down Control while clicking the scope indicator in the gutter or a bracket in the text areawill select all text between the two matching brackets.
Edit>Source>Go to Previous Bracket (shortcut: C+e C+[) moves the caret to the previousopening bracket.
Edit>Source>Go to Next Bracket (shortcut: C+e C+]) moves the caret to the next closingbracket.
Bracket highlighting in the text area and bracket scope display in the gutter can be customized in theText Area and Gutter panes of the Utilities>Global Options dialog box; see the section called“The Global Options Dialog Box”.
Tip
jEdit's bracket matching algorithm only checks syntax tokens with the same type as theoriginal bracket, so for example unmatched brackets inside string literals and commentswill be skipped when matching brackets that are part of program syntax.
AbbreviationsUsing abbreviations reduces the time spent typing long but commonly used strings. For example, inJava mode, the abbreviation “sout” is defined to expand to “System.out.println()”, so to insert“System.out.println()” in a Java buffer, you only need to type “sout” followed by C+;. Anabbreviation can either be global, in which case it can be used in all edit modes, or specific to asingle mode.
Abbreviations can be edited in the Abbreviations pane of the Utilities>Global Options dialog box;see the section called “The Abbreviations Pane”. The Java, VHDL. XML and XSL edit modesinclude some pre-defined abbreviations you might find useful. Other modes do not have anyabbreviations defined by default.
Edit>Expand Abbreviation (keyboard shortcut: C+;) attempts to expand the abbreviation namedby the word before the caret. If no expansion could be found, it will offer to define one.
Automatic abbreviation expansion can be enabled in the Abbreviations pane of theUtilities>Global Options dialog box. If enabled, pressing the space bar after entering anabbreviation will automatically expand it.
If automatic expansion is enabled, a space can be inserted without expanding the word before thecaret by pressing Control-E V Space.
Positional ParametersPositional parameters are an advanced feature that make abbreviations much more useful. The bestway to describe them is with an example.
Java mode defines an abbreviation “F” that is set to expand to the following:
for(int $1 = 0; $1 < $2; $1++)
Expanding F#j#array.length# will insert the following text into the buffer:
for(int j = 0; j < array.length; j++)
Expansions can contain up to nine positional parameters. Note that a trailing hash character (“#”)must be entered when expanding an abbreviation with parameters.
If you do not specify the correct number of positional parameters when expanding an abbreviation,
Editing Source Code
33
any missing parameters will be blank in the expansion, and extra parameters will be ignored. Astatus bar message will be shown stating the required number of parameters.
FoldingProgram source code and other structured text files can be thought of as containing a hierarchy ofsections, which themselves might contain sub-sections. The folding feature lets you selectively hideand show these sections, replacing hidden ones with a single line that serves as an “overview” ofthat section. Folding is disabled by default. To enable it, you must choose one of the availablefolding modes.
“Indent” mode creates folds based on a line's leading whitespace; the more leading whitespace ablock of text has, the further down it is in the hierarchy. For example:
This is a sectionThis is a sub-sectionThis is another sub-sectionThis is a sub-sub-section
Another top-level section
“Explicit” mode folds away blocks of text surrounded with “{{{” and “}}}”. For example:
{{{ The first line of a fold.When this fold is collapsed, only the above line will be visible.
{{{ A sub-section.With text inside it.}}}
{{{ Another sub-section.}}}
}}}
Both modes have distinct advantages and disadvantages; indent folding requires no changes to bemade to a buffer's text and does a decent job with most program source. Explicit folding requires“fold markers” to be inserted into the text, but is more flexible in exactly what to fold away.
Some plugins might add additional folding modes; see Chapter 9, Installing and Using Plugins forinformation about plugins.
Folding can be enabled in one of several ways:
• On a global or mode-specific basis in the Editing pane of the Utilities>Global Options dialogbox. See the section called “The Editing Pane”.
• In the current buffer for the duration of the editing session in the Utilities>Buffer Optionsdialog box. See the section called “The Buffer Options Dialog Box”.
• In the current buffer for future editing sessions by placing the following in the first or last 10lines of a buffer, where mode is either “indent”, “explicit”, or the name of a plugin foldingmode:
:folding=mode:
Warning
When using indent folding, portions of the buffer may become inaccessible if you changethe leading indent of the first line of a collapsed fold. If you experience this, you can use
Editing Source Code
34
the Expand All Folds command to make the text visible again.
Collapsing and Expanding FoldsThe first line of each fold has a triangle drawn next to it in the gutter (see the section called“Interface Overview” for more information about the gutter). The triangle points toward the linewhen the fold is collapsed, and downward when the fold is expanded. Clicking the triangle collapsesand expands the fold. To expand all sub-folds as well, hold down the Shift while clicking.
The first line of a collapsed fold is drawn with a background color that depends on the fold level,and the number of lines in the fold is shown to the right of the line's text.
Folds can also be collapsed and expanded using menu item commands and keyboard shortcuts.
Folding>Collapse Fold (shortcut: A+BACK_SPACE) collapses the fold containing the caret.
Folding>Expand Fold One Level (shortcut: A+ENTER) expands the fold containing the caret.Nested folds will remain collapsed, and the caret will be positioned on the first nested fold (if any).
Folding>Expand Fold Fully (shortcut: AS+ENTER) expands the fold containing the caret, alsoexpanding any nested folds.
Folding>Collapse All Folds (shortcut: C+e c) collapses all folds in the buffer.
Folding>Expand All Folds (shortcut: C+e x) expands all folds in the buffer.
Navigating Around With FoldsFolding>Go to Parent Fold (shortcut: C+e u) moves the caret to the fold containing the one at thecaret position.
Folding>Go to Previous Fold (shortcut: A+UP) moves the caret to the fold immediately before thecaret position.
Folding>Go to Next Fold (shortcut: A+DOWN) moves the caret to the fold immediately after thecaret position.
Miscellaneous Folding CommandsFolding>Add Explicit Fold (shortcut: C+e a) surrounds the selection with “{{{” and “}}}”. If thecurrent buffer's edit mode defines comment strings (see the section called “Commenting Out Code”)the explicit fold markers will automatically be commented out as well.
Folding>Select Fold (shortcut: C+e s) selects all lines within the fold containing the caret.Control-clicking a fold expansion triangle in the gutter has the same effect.
Folding>Expand Folds With Level (shortcut: C+e ENTER key) reads the next character enteredat the keyboard, and expands folds in the buffer with a fold level less than that specified, whilecollapsing all others.
Sometimes it is desirable to have files open with folds initially collapsed. This can be configured asfollows:
• On a global or mode-specific basis in the Editing pane of the Utilities>Global Options dialogbox. See the section called “The Editing Pane”.
• In the current buffer for future editing sessions by placing the following in the first or last 10lines of a buffer, where level is the desired fold level:
:collapseFolds=level:
Editing Source Code
35

NarrowingThe narrowing feature temporarily “narrows” the display of a buffer to a specified region. Textoutside the region is not shown, but is still present in the buffer.
Holding down Alt while clicking a fold expansion triangle in the gutter will hide all lines the bufferexcept those contained in the clicked fold.
Folding>Narrow Buffer to Fold (shortcut: C+e n n) hides all lines the buffer except those in thefold containing the caret.
Folding>Narrow Buffer to Selection (shortcut: C+e n s) hides all lines the buffer except thosein the selection.
Folding>Expand All Folds (shortcut: C+e x) shows lines that were hidden as a result ofnarrowing.
Editing Source Code
36

Chapter 7. Customizing jEditThe Buffer Options Dialog Box
Utilities>Buffer Options displays a dialog box for changing editor settings on a per-buffer basis.Changes made in this dialog box are not retained after the buffer is closed.
The following settings can be changed here:
• The line separator (see the section called “Line Separators”)
• The character encoding (see the section called “Character Encodings”)
• If the file should be GZipped on disk (see the section called “Opening Files”)
• The edit mode (see the section called “Edit Modes”)
• The fold mode (see the section called “Folding”)
• The wrap mode and margin (see the section called “Wrapping Long Lines”)
• The tab width (see the section called “Tabbing and Indentation”)
• The indent width
• If soft tabs should be used (see the section called “Tabbing and Indentation”)
Buffer-Local PropertiesBuffer-local properties provide an alternate way to change editor settings on a per-buffer basis.While changes made in the Buffer Options dialog box are lost after the buffer is closed,buffer-local properties take effect each time the file is opened, because they are embedded in the fileitself.
When jEdit loads a file, it checks the first and last 10 lines for colon-enclosed name/value pairs. Forexample, placing the following in a buffer changes the indent width to 4 characters, enables softtabs, and activates the Perl edit mode:
:indentSize=4:noTabs=true:mode=perl:
Adding buffer-local properties to a buffer takes effect after the next time the buffer is saved.
The following table describes each buffer-local property in detail.
Property name Description
collapseFolds Folds with a level of this or higher will be collapsed when the buffer isopened. If set to zero, all folds will be expanded initially. See the sectioncalled “Folding”.
deepIndent When set to “true”, multiple-line expressions delimited by parenthesesare aligned like so:
retVal.x = (int)(horizontalOffset+ Chunk.offsetToX(info.chunks,
offset));
With this setting disabled, the text would look like so:
37

Property name Description
retVal.x = (int)(horizontalOffset+ Chunk.offsetToX(info.chunks,offset));
folding The fold mode; one of “none”, “indent”, “explicit”, or the name of aplugin folding mode. See the section called “Folding”.
indentSize The width, in characters, of one indent. Must be an integer greater than0. See the section called “Tabbing and Indentation”.
maxLineLen The maximum line length and wrap column position. Inserting textbeyond this column will automatically insert a line break at theappropriate position. See the section called “Inserting and DeletingText”.
mode The default edit mode for the buffer. See the section called “EditModes”.
noTabs If set to “true”, soft tabs (multiple space characters) will be used insteadof “real” tabs. See the section called “Tabbing and Indentation”.
noWordSep A list of non-alphanumeric characters that are not to be treated as wordseparators. Global default is “_”.
tabSize The tab width. Must be an integer greater than 0. See the section called“Tabbing and Indentation”.
wordBreakChars Characters, in addition to spaces and tabs, at which lines may be splitwhen word wrapping. See the section called “Inserting and DeletingText”.
wrap The word wrap mode; one of “none”, “soft”, or “hard”. See the sectioncalled “Wrapping Long Lines”.
The Global Options Dialog BoxUtilities>Global Options displays the global options dialog box. The dialog box is divided intoseveral panes, each pane containing a set of related options. Use the list on the left of the dialog boxto switch between panes. Only panes created by jEdit are described here; some plugins add theirown option panes, and information about them can be found in the documentation for the plugins inquestion.
The Abbreviations PaneThe Abbreviations option pane can be used to enable or disable automatic abbreviation expansion,and to edit currently defined abbreviations.
The combo box labelled “Abbrev set” selects the abbreviation set to edit. The first entry, “global”,contains abbreviations available in all edit modes. The subsequent entries correspond to each mode'slocal set of abbreviations.
To change an abbreviation or its expansion, either double-click the appropriate table entry, or click atable entry and then click the Edit button. This will display a dialog box for modifying theabbreviation.
The Add button displays a dialog box where you can define a new abbreviation. The Removebutton removes the currently selected abbreviation from the list.
See the section called “Positional Parameters” for information about positional parameters inabbreviations.
Customizing jEdit
38

The Appearance PaneThe Appearance pane can be used to change the appearance of user interface controls such asbuttons, labels and menus. The number of items retained in history text fields can also be set here;see Appendix C, History Text Fields.
Note that changes to certain settings such as the Swing look and feel require a restart of jEdit to takeeffect.
The Autosave and Backup PaneThe Autosave option pane contains settings for the autosave and backup features. See the sectioncalled “Autosave and Crash Recovery” and the section called “Backups”.
The Context Menu PaneThe Context Menu option pane edits the text area's right-click context menu. See the section called“Multiple Views”.
The Docking PaneThe Docking option pane specifies docking location for various dockable windows. Another way tospecify docking locations is to use the popup menus associated with each dockable window; see thesection called “Window Docking”.
The Editing PaneThe Editing option pane contains settings such as the tab size, syntax highlighting and soft tabs on aglobal or mode-specific basis.
When changing mode-specific settings, the File name glob and First line glob text fields let youspecify a glob pattern that names and first lines of buffers will be matched against to determine theedit mode. See Appendix D, Glob Patterns for information about glob patterns.
This option pane does not change XML mode definition files on disk; it merely writes values to theuser properties file which override those set in mode files. To find out how to edit mode filesdirectly, see Part II, “Writing Edit Modes”.
The General PaneThe General pane contains various miscellaneous settings, such as the default line separator and fileencoding, the number of recent files to remember, if the buffer list should be sorted, and so on.
The Gutter PaneThe Gutter option pane contains settings to customize the appearance of the gutter. See the sectioncalled “Interface Overview”.
The Mouse PaneThe Mouse option pane contains settings for toggling drag and drop of text, as well as gutter mouseclick behavior.
The Printing PaneThe Printing option pane contains settings to control the appearance of printed output.Workarounds that might be needed for your Java version to print correctly can also be enabled here.See the section called “Printing”.
Customizing jEdit
39
The Plugin Manager PaneThe Plugin Manager pane contains a chooser for the desired download mirror, as well as varioussettings such as the directory where plugins are to be installed. See Chapter 9, Installing and UsingPlugins.
The Proxy Servers PaneThe Proxy Servers option pane lets you specify HTTP and SOCKS proxy servers to use when jEditmakes network connections, for example when downloading plugins.
The Shortcuts PaneThe Shortcuts option pane associates keyboard shortcuts with commands. Each command can haveup to two shortcuts associated with it.
The combo box at the top of the option pane selects the command set to edit. Command sets includethe set of all built-in commands, the commands of each plugin, and the set of macros.
To change a shortcut, click the appropriate table entry and press the keys you want associated withthat command in the resulting dialog box. The dialog box will warn you if the shortcut is alreadyassigned.
The Status Bar PaneThe Status Bar option pane contains settings to customize the status bar, or disable it completely.See the section called “The Status Bar”.
The Syntax Highlighting PaneThe Syntax Highlighting pane can be used to customize the fonts and colors for syntaxhighlighting. See the section called “Syntax Highlighting”.
The Text Area PaneThe Text Area pane contains settings to customize the appearance of the text area. See the sectioncalled “Interface Overview”.
The Tool Bar PaneThe Tool Bar option pane lets you edit the tool bar, or disable it completely. See the section called“Multiple Views”.
The View PaneThe View option pane lets you change various settings related to the editor window's appearance,including the arrangement of dockable windows, and if the search bar and buffer switcher should bevisible. See the section called “Multiple Views”.
The File System Browser PanesThe File System Browser group contains two option panes, General and Colors. The formercontains various file system browser settings. The latter configures glob patterns used for coloringthe file list. See the section called “The File System Browser” for more information.
The jEdit Settings Directory
Customizing jEdit
40
jEdit stores settings, macros, and plugins as files inside the settings directory. In most cases, editingthese files by hand is not necessary, since graphical tools and editor commands can do the job.However, being familiar with the structure of the settings directory still comes in handy in certainsituations, for example when you want to copy jEdit settings between computers.
The location of the settings directory is system-specific; it is printed to the activity log(Utilities>Troubleshooting>Activity Log). For example:
[message] jEdit: Settings directory is /home/slava/.jedit
Specifying the -settings switch on the command line instructs jEdit to store settings in adirectory other than the default. For example, the following command will instruct jEdit to store allsettings in the jedit subdirectory of the C: drive:
C:\jedit> jedit -settings=C:\jedit
The -nosettings switch will force jEdit to not look for or create a settings directory; defaultsettings will be used instead.
jEdit creates the following files and directories inside the settings directory; plugins may add more:
• abbrevs - a plain text file which stores all defined abbreviations. See the section called“Abbreviations”.
• activity.log - a plain text file which contains the full activity log. See Appendix B, TheActivity Log.
• history - a plain text file which stores history lists, used by history text fields and theEdit>Paste Previous command. See the section called “Transferring Text” and Appendix C,History Text Fields.
• jars - this directory contains plugins. See Chapter 9, Installing and Using Plugins.
• jars-cache - this directory contains plugin cache files which decrease the time to start jEdit.They are automatically updated when plugins are installed or updated.
• killring.xml - stores recently deleted text. See the section called “Transferring Text”.
• macros - this directory contains macros. See Chapter 8, Using Macros.
• modes - this directory contains custom edit modes. See Part II, “Writing Edit Modes”.
• perspective.xml - an XML file that stores the list of open buffers and views used tomaintain editor state between sessions.
• PluginManager.download - this directory is usually empty. It only contains files while theplugin manager is downloading a plugin. For information about the plugin manager, seeChapter 9, Installing and Using Plugins.
• printspec - a binary file that stores printing settings when running under Java 2 version 1.4.
• properties - a plain text file that stores the majority of jEdit's settings.
• recent.xml - an XML file which stores the list of recently opened files. jEdit remembers thecaret position and character encoding of each recent file, and automatically restores those valueswhen one of the files is opened.
• registers.xml - an XML file that stores register contents. See the section called “GeneralRegister Commands” for more information about registers.
• server - a plain text file that only exists while jEdit is running. The edit server's port number
Customizing jEdit
41

and authorization key is stored here. See Chapter 2, Starting jEdit.
• settings-backup - this directory contains numbered backups of all automatically-writtensettings files.
Customizing jEdit
42

Chapter 8. Using MacrosMacros in jEdit are short scripts written in a scripting language called BeanShell. They provide aneasy way to automate repetitive keyboard and menu procedures, as well as access to the objects andmethods created by jEdit. Macros also provide a powerful facility for customizing jEdit andautomating complex text processing and programming tasks. This section describes how to recordand run macros. A detailed guide on writing macros appears later; see Part III, “Writing Macros”.
Other scripting languages
A number of jEdit plugins provide support for writing scripts in alternative programming languages,like Python and Prolog. Consult the documentation for the appropriate plugins for more information.
Recording MacrosThe simplest use of macros is to record a series of key strokes and menu commands as a BeanShellscript, and play them back later. While this doesn't let you take advantage of the full power ofBeanShell, it is still a great time saver and can even be used to “prototype” more complicatedmacros.
Macros>Record Macro (shortcut: C+m C+r) prompts for a macro name and begins recording.
While recording is in progress, the string “Macro recording” is displayed in the status bar. jEditrecords the following:
• Key strokes
• Menu item commands
• Tool bar clicks
• All search and replace operations, except incremental search
Mouse clicks in the text area are not recorded; use text selection commands or arrow keys instead.
Macros>Stop Recording (shortcut: C+m C+s) stops recording. It also switches to the buffercontaining the recorded macro, giving you a chance to check over the recorded commands and makeany necessary changes. When you are happy with the macro, save the buffer and it will appear in theMacros menu. To discard the macro, close the buffer without saving it.
The file name extension .bsh is automatically appended to the macro name, and all spaces areconverted to underscore characters, in order to make the macro name a valid file name. These twooperations are reversed when macros are displayed in the Macros menu; see the section called“How jEdit Organizes Macros” for details.
If a complicated operation only needs to be repeated a few times, using the temporary macro featureis quicker than saving a new macro file.
Macros>Record Temporary Macro (shortcut: C+m C+m) begins recording to a buffer namedTemporary_Macro.bsh. Once recording of a temporary macro is complete, jEdit does notdisplay the buffer containing the recorded commands, but the name Temporary_Macro.bshwill be visible on any list of open buffers. By switching to that buffer, you can view the commands,edit them, and save them if you wish to a permanent macro file. Whether or not you look at or savethe temporary macro contents, it is immediately available for playback.
Macros>Run Temporary Macro (shortcut: C+m C+p) plays the macro recorded to theTemporary_Macro.bsh buffer.
43

Only one temporary macro is available at a time. If you begin recording a second temporary macro,the first is erased and cannot be recovered unless you have saved the contents to a file with a nameother than Temporary_Macro.bsh. If you do not save the temporary macro, you must keep thebuffer containing the macro script open during your jEdit session. To have the macro available foryour next jEdit session, save the buffer Temporary_Macro.bsh as an ordinary macro with adescriptive name of your choice. The new name will then be displayed in the Macros menu.
Running MacrosMacros supplied with jEdit, as well as macros that you record or write, are displayed under theMacros menu in a hierarchical structure. The jEdit installation includes about 30 macros dividedinto several major categories. Each category corresponds to a nested submenu under the Macrosmenu. An index of these macros containing short descriptions and usage notes is found inAppendix F, Macros Included With jEdit.
To run a macro, choose the Macros menu, navigate through the hierarchy of submenus, and selectthe name of the macro to execute. You can also assign execution of a particular macro to a keyboardshortcut, toolbar button or context menu using the Macro Shortcuts, Tool Bar or Context Menupanes of the Utilities>Global Options dialog; see the section called “The Global Options DialogBox”.
How jEdit Organizes MacrosEvery macro, whether or not you originally recorded it, is stored on disk and can be edited as a textfile. The file name of a macro must have a .bsh extension in order for jEdit to be aware of it. Bydefault, jEdit associates a .bsh file with the BeanShell edit mode for purposes of syntaxhighlighting, indentation and other formatting. However, BeanShell syntax does not impose anyindentation or line break requirements.
The Macros menu lists all macros stored in two places: the macros subdirectory of the jEdit homedirectory, and the macros subdirectory of the user-specific settings directory (see the section called“The jEdit Settings Directory” for information about the settings directory). Any macros you recordwill be stored in the user-specific directory.
Macros stored elsewhere can be run using the Macros>Run Other Macro command, whichdisplays a file chooser dialog box, and runs the specified file.
The listing of individual macros in the Macros menu can be organized in a hierarchy usingsubdirectories in the general or user-specific macro directories; each subdirectory appears as asubmenu. You will find such a hierarchy in the default macro set included with jEdit.
When jEdit first loads, it scans the designated macro directories and assembles a listing ofindividual macros in the Macros menu. When scanning the names, jEdit will delete underscorecharacters and the .bsh extension for menu labels, so that List_Useful_Information.bsh,for example, will be displayed in the Macros menu as List Useful Information.
You can browse the user and system macro directories by opening the macros directory from theUtilities>jEdit Home Directory and Utilities>Settings Directory menus.
Macros can be opened and edited much like ordinary files from the file system browser. Editingmacros from within jEdit will automatically update the macros menu; however, if you modifymacros from another program or add macro files to the macro directories, you should run theMacros>Rescan Macros command to update the macro list.
Using Macros
44
Chapter 9. Installing and UsingPlugins
A plugin is an application which is loaded and runs as part of another, host application. Pluginsrespond to user commands and perform tasks that supplement the host application's features.
This chapter covers installing, updating and removing plugins. Documentation for the pluginsthemselves can be found in Help>jEdit Help, and information about writing plugins can be foundin Part IV, “Writing Plugins”.
The Plugin ManagerPlugins>Plugin Manager displays the plugin manager window. The plugin manager lists allinstalled plugins; clicking on a plugin in the list will display information about it.
To remove plugins, select them (multiple plugins can be selected by holding down Control) andclick Remove. This will display a confirmation dialog box first.
To view plugin documentation, select a plugin and click Help. Note that plugin documentation canalso be accessed by invoking Help>jEdit Help.
Plugins>Plugin Options displays a dialog box for changing plugin settings.
Installing and Updating PluginsPlugins can be installed in two ways; manually, and from the plugin manager. In most cases, pluginsshould be installed from the plugin manager. It is easier and more convenient.
To install plugins manually, go to http://plugins.jedit.org in a web browser and follow the directionson that page.
To install plugins from the plugin manager, make sure you are connected to the Internet and clickthe Install tab in the plugin manager window. The plugin manager will then download informationabout available plugins from the jEdit web site, and present a list of plugins compatible with yourjEdit release.
Click on a plugin in the list to see some information about it. To select plugins for installation, clickthe check box next to their names in the list.
The Total size field shows the total size of all plugins chosen for installation, along with anyplugins that will be automatically downloaded in order to fulfill dependencies.
Once you have specified plugins to install, click Install to begin the download process.
By default, the plugin manager does not download plugin source code, and installs the downloadedplugins in the jars subdirectory of the user-specific settings directory. These settings can bechanged in Plugin Manager pane of the Utilities>Global Options dialog box; see the sectioncalled “The Plugin Manager Pane”.
The Update tab of the plugin manager is very similar to the Install tab. It lists plugins for whichupdated versions are available. It will also offer to delete any obsolete plugins.
Proxy Servers and Firewalls
If you are connected to the Internet through an HTTP proxy or SOCKS firewall, you will need tospecify the relevant details in the Proxy Servers pane of the Utilities>Global Options dialog box;see the section called “The Proxy Servers Pane”.
45

Appendix A. Keyboard ShortcutsThis appendix documents the default set of keyboard shortcuts. They can be customized to suit yourtaste in the Shortcuts pane of the Utilities>Global Options dialog box; see the section called “TheGlobal Options Dialog Box”.
FilesFor details, see the section called “Switching Buffers”, the section called “Multiple Views” andChapter 4, Working With Files.
C+n New file.
C+o Open file.
C+w Close buffer.
C+e C+w Close all buffers.
C+s Save buffer.
C+e C+s Save all buffers.
C+p Print buffer.
C+PAGE_UP Go to previous buffer.
C+PAGE_DOWN Go to next buffer.
C+` Go to recent buffer.
A+` Show buffer switcher.
C+q Exit jEdit.
ViewsFor details, see the section called “Multiple Views”.
C+e C+t Turn gutter (line numbering) on and off.
C+0 Remove split containing current text area only.
C+1 Remove all splits.
C+2 Split view horizontally.
C+3 Split view vertically.
A+PAGE_UP Send keyboard focus to previous text area.
A+PAGE_DOWN Send keyboard focus to next text area.
C+e UP; LEFT; DOWN; RIGHT Send keyboard focus to top; bottom; left; right dockingarea.
C+e C+` Close currently focused docking area.
Action BarFor details, see the section called “The Action Bar”.
C+ENTER Display the action bar and give it keyboard focus.
C+SPACE Repeat last editor action.
46
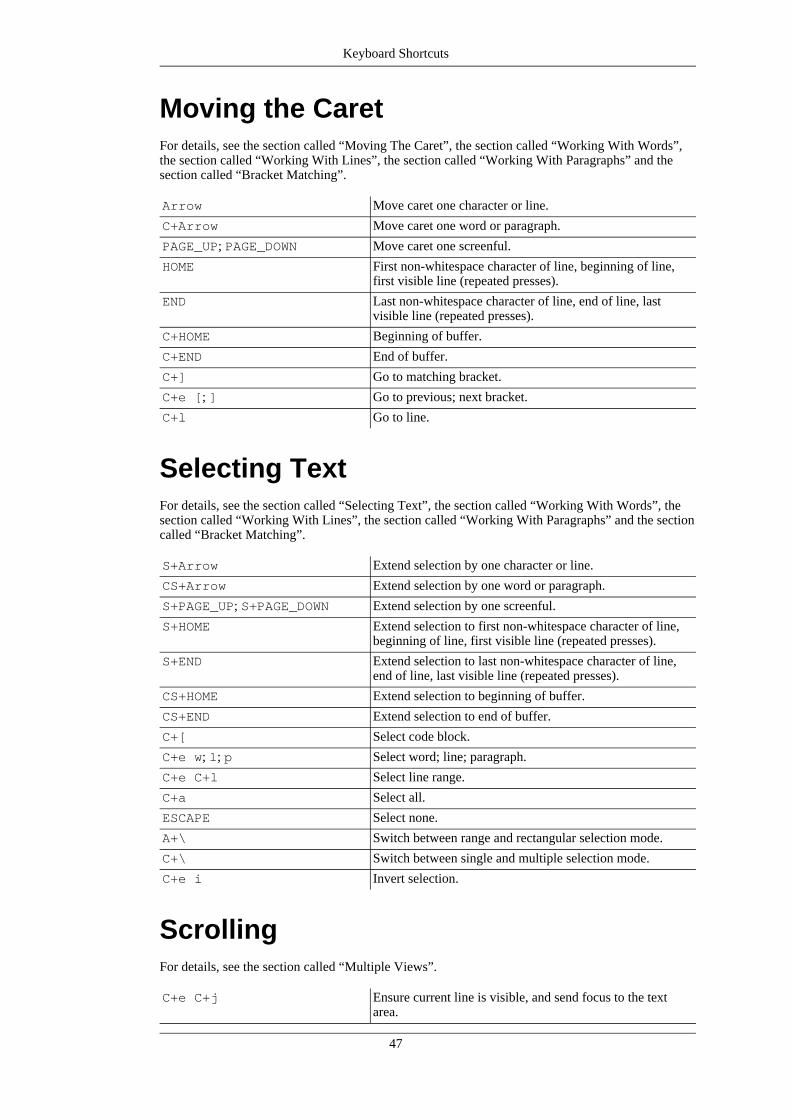
Moving the CaretFor details, see the section called “Moving The Caret”, the section called “Working With Words”,the section called “Working With Lines”, the section called “Working With Paragraphs” and thesection called “Bracket Matching”.
Arrow Move caret one character or line.
C+Arrow Move caret one word or paragraph.
PAGE_UP; PAGE_DOWN Move caret one screenful.
HOME First non-whitespace character of line, beginning of line,first visible line (repeated presses).
END Last non-whitespace character of line, end of line, lastvisible line (repeated presses).
C+HOME Beginning of buffer.
C+END End of buffer.
C+] Go to matching bracket.
C+e [; ] Go to previous; next bracket.
C+l Go to line.
Selecting TextFor details, see the section called “Selecting Text”, the section called “Working With Words”, thesection called “Working With Lines”, the section called “Working With Paragraphs” and the sectioncalled “Bracket Matching”.
S+Arrow Extend selection by one character or line.
CS+Arrow Extend selection by one word or paragraph.
S+PAGE_UP; S+PAGE_DOWN Extend selection by one screenful.
S+HOME Extend selection to first non-whitespace character of line,beginning of line, first visible line (repeated presses).
S+END Extend selection to last non-whitespace character of line,end of line, last visible line (repeated presses).
CS+HOME Extend selection to beginning of buffer.
CS+END Extend selection to end of buffer.
C+[ Select code block.
C+e w; l; p Select word; line; paragraph.
C+e C+l Select line range.
C+a Select all.
ESCAPE Select none.
A+\ Switch between range and rectangular selection mode.
C+\ Switch between single and multiple selection mode.
C+e i Invert selection.
ScrollingFor details, see the section called “Multiple Views”.
C+e C+j Ensure current line is visible, and send focus to the textarea.
Keyboard Shortcuts
47

C+e C+n Center caret on screen.
C+'; C+/ Scroll up; down one line.
A+'; A+/ Scroll up; down one page.
Text EditingFor details, see the section called “Undo and Redo”, the section called “Inserting and DeletingText”, the section called “Working With Words”, the section called “Working With Lines” and thesection called “Working With Paragraphs”.
C+z Undo.
C+e C+z Redo.
BACK_SPACE; DELETE Delete character before; after caret.
C+BACK_SPACE; C+DELETE Delete word before; after caret.
C+d; C+e d Delete line; paragraph.
CS+BACK_SPACE; CS+DELETE Delete from caret to beginning; end of line.
C+e r Remove trailing whitespace from the current line (or allselected lines).
C+j Join lines.
C+b Complete word.
C+e f Format paragraph (or selection).
Clipboard and RegistersFor details, see the section called “Transferring Text”.
C+x or S+DELETE Cut selected text to clipboard.
C+c or C+INSERT Copy selected text to clipboard.
C+e C+u Append selected text to clipboard, removing it from thebuffer.
C+e C+a Append selected text to clipboard, leaving it in the buffer.
C+v or S+INSERT Paste clipboard contents.
C+e C+p Vertically paste clipboard contents.
C+r C+x key Cut selected text to register key.
C+r C+c key Copy selected text to register key.
C+r C+u key Append selected text to register key, removing it from thebuffer.
C+r C+a key Append selected text to register key, leaving it in thebuffer.
C+r C+v key Paste contents of register key.
C+r C+p key Vertically paste contents of register key.
C+e C+v Paste previous.
C+e C+y Paste deleted.
Markers
Keyboard Shortcuts
48
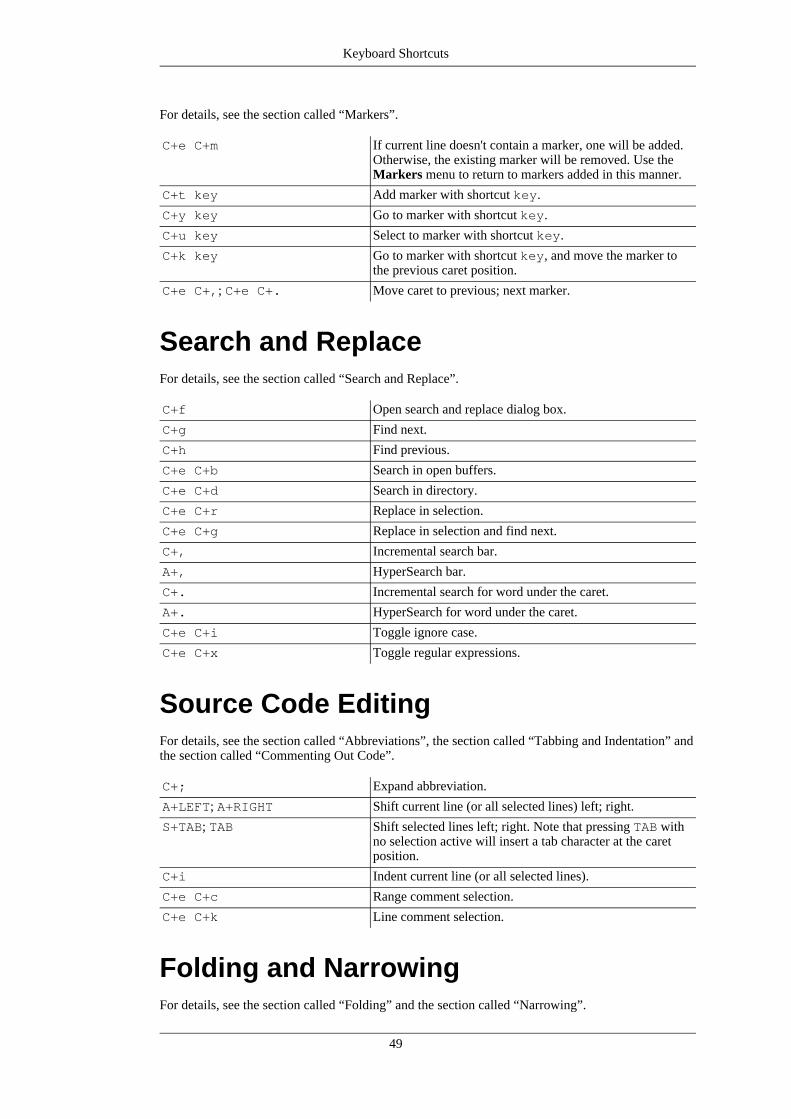
For details, see the section called “Markers”.
C+e C+m If current line doesn't contain a marker, one will be added.Otherwise, the existing marker will be removed. Use theMarkers menu to return to markers added in this manner.
C+t key Add marker with shortcut key.
C+y key Go to marker with shortcut key.
C+u key Select to marker with shortcut key.
C+k key Go to marker with shortcut key, and move the marker tothe previous caret position.
C+e C+,; C+e C+. Move caret to previous; next marker.
Search and ReplaceFor details, see the section called “Search and Replace”.
C+f Open search and replace dialog box.
C+g Find next.
C+h Find previous.
C+e C+b Search in open buffers.
C+e C+d Search in directory.
C+e C+r Replace in selection.
C+e C+g Replace in selection and find next.
C+, Incremental search bar.
A+, HyperSearch bar.
C+. Incremental search for word under the caret.
A+. HyperSearch for word under the caret.
C+e C+i Toggle ignore case.
C+e C+x Toggle regular expressions.
Source Code EditingFor details, see the section called “Abbreviations”, the section called “Tabbing and Indentation” andthe section called “Commenting Out Code”.
C+; Expand abbreviation.
A+LEFT; A+RIGHT Shift current line (or all selected lines) left; right.
S+TAB; TAB Shift selected lines left; right. Note that pressing TAB withno selection active will insert a tab character at the caretposition.
C+i Indent current line (or all selected lines).
C+e C+c Range comment selection.
C+e C+k Line comment selection.
Folding and NarrowingFor details, see the section called “Folding” and the section called “Narrowing”.
Keyboard Shortcuts
49

A+BACK_SPACE Collapse fold containing caret.
A+ENTER Expand fold containing caret one level only.
AS+ENTER Expand fold containing caret fully.
C+e x Expand all folds.
C+e a Add explicit fold.
C+e s Select fold.
C+e ENTER key Expand folds with level less than key, collapse all others.
C+e n n Narrow to fold.
C+e n s Narrow to selection.
A+UP; A+DOWN Moves caret to previous; next fold.
C+e u Moves caret to the parent fold of the one containing thecaret.
MacrosFor details, see Chapter 8, Using Macros.
C+m C+r Record macro.
C+m C+m Record temporary macro.
C+m C+s Stop recording.
C+m C+p Run temporary macro.
Alternative ShortcutsA few frequently-used commands have alternative shortcuts intended to help you keep your handsfrom moving all over the keyboard.
A+j; A+l Move caret to previous, next character.
A+i; A+k Move caret up, down one line.
A+q; A+a Move caret up, down one screenful.
A+z First non-whitespace character of line, beginning of line,first visible line (repeated presses).
A+x Last non-whitespace character of line, end of line, lastvisible line (repeated presses).
Keyboard Shortcuts
50

Appendix B. The Activity LogThe activity log is very useful for troubleshooting problems, and helps when developing plugins.
Utilities>Troubleshooting>Activity Log displays the last 500 lines of the activity log. By default,the activity log is shown in a floating window. This window can be docked using the commands inits top-left corner popup menu; see the section called “Window Docking”.
The complete log can be found in the activity.log file inside the jEdit settings directory, thepath of which is shown inside the activity log window.
jEdit writes the following information to the activity log:
• Information about your Java implementation (version, operating system, architecture, etc).
• All error messages and runtime exceptions (most errors are shown in dialog boxes as well, butthe activity log usually contains more detailed and technical information).
• All sorts of debugging information that can be helpful when tracking down bugs.
• Information about loaded plugins.
While jEdit is running, the log file on disk may not always accurately reflect what has been logged,due to buffering being done for performance reasons. To ensure the file on disk is up to date, invokethe Utilities>Troubleshooting>Update Activity Log on Disk command. The log file is alsoautomatically updated on disk when jEdit exits.
51

Appendix C. History Text FieldsThe text fields in the search and replace dialog box and the file system browser remember the last 20entered strings by default. The number of strings to remember can be changed in the Appearancepane of the Utilities>Global Options dialog box; see the section called “The Appearance Pane”.
Pressing UP recalls previous strings. Pressing DOWN after recalling previous strings recalls laterstrings.
Pressing S+UP or S+DOWN will search backwards or forwards, respectively, for strings beginningwith the text already entered in the text field.
Clicking the triangle to the right of the text field, or clicking with the right-mouse button anywhereelse will display a pop-up menu of all previously entered strings; selecting one will input it into thetext field. Holding down Shift while clicking will display a menu of all previously entered stringsthat begin with the text already entered.
52

Appendix D. Glob PatternsjEdit uses glob patterns similar to those in the various Unix shells to implement file name filters inthe file system browser. Glob patterns resemble regular expressions somewhat, but have a muchsimpler syntax. The following character sequences have special meaning within a glob pattern:
• ? matches any one character
• * matches any number of characters
• {!glob} Matches anything that does not match glob
• {a,b,c} matches any one of a, b or c
• [abc] matches any character in the set a, b or c
• [^abc] matches any character not in the set a, b or c
• [a-z] matches any character in the range a to z, inclusive. A leading or trailing dash will beinterpreted literally
In addition to the above, a number of “character class expressions” may be used as well:
• [[:alnum:]] matches any alphanumeric character
• [[:alpha:]] matches any alphabetical character
• [[:blank:]] matches a space or horizontal tab
• [[:cntrl:]] matches a control character
• [[:digit:]] matches a decimal digit
• [[:graph:]] matches a non-space, non-control character
• [[:lower:]] matches a lowercase letter
• [[:print:]] same as [[:graph:]], but also space and tab
• [[:punct:]] matches a punctuation character
• [[:space:]] matches any whitespace character, including newlines
• [[:upper:]] matches an uppercase letter
• [[:xdigit:]] matches a valid hexadecimal digit
Here are some examples of glob patterns:
• * - all files.
• *.java - all files whose names end with “.java”.
• *.[ch] - all files whose names end with either “.c” or “.h”.
• [^#]* - all files whose names do not start with “#”.
53

Appendix E. Regular ExpressionsjEdit uses regular expressions to implement inexact search and replace. A regular expressionconsists of a string where some characters are given special meaning with regard to patternmatching.
Within a regular expression, the following characters have special meaning:
Positional Operators
• ^ matches at the beginning of a line
• $ matches at the end of a line
• \b matches at a word break
• \B matches at a non-word break
• \< matches at the start of a word
• \> matches at the end of a word
One-Character Operators
• . matches any single character
• \d matches any decimal digit
• \D matches any non-digit
• \n matches the newline character
• \s matches any whitespace character
• \S matches any non-whitespace character
• \t matches a horizontal tab character
• \w matches any word (alphanumeric) character
• \W matches any non-word (alphanumeric) character
• \\ matches the backslash (“\”) character
Character Class Operator
• [abc] matches any character in the set a, b or c
• [^abc] matches any character not in the set a, b or c
• [a-z] matches any character in the range a to z, inclusive. A leading or trailing dash will beinterpreted literally
• [[:alnum:]] matches any alphanumeric character
• [[:alpha:]] matches any alphabetical character
54

• [[:blank:]] matches a space or horizontal tab
• [[:cntrl:]] matches a control character
• [[:digit:]] matches a decimal digit
• [[:graph:]] matches a non-space, non-control character
• [[:lower:]] matches a lowercase letter
• [[:print:]] same as [[:graph:]], but also space and tab
• [[:punct:]] matches a punctuation character
• [[:space:]] matches any whitespace character, including newlines
• [[:upper:]] matches an uppercase letter
• [[:xdigit:]] matches a valid hexadecimal digit
Subexpressions and Backreferences
• (abc) matches whatever the expression abc would match, and saves it as a subexpression.Also used for grouping
• (?:...) pure grouping operator, does not save contents
• (?#...) embedded comment, ignored by engine
• (?=...) positive lookahead; the regular expression will match if the text in the bracketsmatches, but that text will not be considered part of the match
• (?!...) negative lookahead; the regular expression will match if the text in the brackets doesnot match, and that text will not be considered part of the match
• \n where 0 < n < 10, matches the same thing the nth subexpression matched. Can only be usedin the search string
• $n where 0 < n < 10, substituted with the text matched by the nth subexpression. Can only beused in the replacement string
Branching (Alternation) Operator
• a|b matches whatever the expression a would match, or whatever the expression b wouldmatch.
Repeating Operators
These symbols operate on the previous atomic expression.
• ? matches the preceding expression or the null string
• * matches the null string or any number of repetitions of the preceding expression
• + matches one or more repetitions of the preceding expression
• {m} matches exactly m repetitions of the one-character expression
Regular Expressions
55

• {m,n} matches between m and n repetitions of the preceding expression, inclusive
• {m,} matches m or more repetitions of the preceding expression
Stingy (Minimal) Matching
If a repeating operator (above) is immediately followed by a ?, the repeating operator will stop atthe smallest number of repetitions that can complete the rest of the match.
Regular Expressions
56

Appendix F. Macros Included WithjEdit
jEdit comes with a large number of sample macros that perform a variety of tasks. The followingindex provides short descriptions of each macro, in some cases accompanied by usage notes.
In addition to the macros included with jEdit, a very large collection of user-contributed macros isavailable in the “Downloads” section of the community.jedit.org web site. There are detaileddescriptions for each macro as well as a search facility.
Clipboard MacrosThese macros copy or cut text to the clipboard.
• Copy_Lines_Containing.bsh
Copies all lines from the current buffer, containing a user-supplied string, to the clipboard.
• Cut_Lines_Containing.bsh
Cuts all lines from the current buffer, containing a user-supplied string, to the clipboard.
• Copy_Selection_or_Line.bsh
If no text is selected, the current line is copied to the clipboard, otherwise the selected text iscopied to the clipboard. Some editors have this has the default copy behavior. To achieve thesame effect in jEdit, bind this macro to C+c in the Shortcuts pane of the Utilities>GlobalOptions dialog box.
• Cut_Selection_or_Line.bsh
If no text is selected, the current line is cut to the clipboard, otherwise the selected text is cut tothe clipboard. Some editors have this has the default cut behavior. To achieve the same effect injEdit, bind this macro to C+x in the Shortcuts pane of the Utilities>Global Options dialog box.
• Copy_Visible_Lines.bsh
Copies the visible lines from the current buffer to the Clipboard. Lines that are not visiblebecuase they are folded are not copied.
Editing MacrosThese macros automate various text editing tasks.
• Emacs_Next_Line.bsh
Moves the cursor to the next line, centering the current line in the middle of the text area if thecursor is at the bottom of the text area.
• Emacs_Previous_Line.bsh
Moves the cursor to the previous line, centering the current line in the middle of the text area ifthe cursor is at the top of the text area.
• Go_to_Column.bsh
57
Prompts the user for a column position on the current line, then moves the caret there.
• Greedy_Backspace.bsh
If buffer is using soft tabs, this macro will backspace to the previous tab stop, if all charactersbetween the caret and the tab stop are spaces. In all other cases a single character is removed.
• Greedy_Delete.bsh
If a buffer is using soft tabs, this macro will delete tabSize number of spaces, if all the charactersbetween the caret and the next tab stop are spaces. In all other cases a single character is deleted.
• Greedy_Left.bsh
If a buffer is using soft tabs, this macro will move the caret tabSize spaces to the left, if all thecharacters between the caret and the previous tab stop are all spaces. In all other cases, the caretis moved a single character to the left.
• Greedy_Right.bsh
If a buffer is using soft tabs, this macro will move the caret tabSize spaces to the right, if all thecharacters between the caret and the next tab stop are all spaces. In all other cases, the caret ismoved a single character to the right.
• Keywords_to_Upper_Case.bsh
Converts all keywords in the current buffer to upper case.
• Mode_Switcher.bsh
Displays a modal dialog with the current buffer's mode in a text field, allowing one to changethe mode by typing in its name.
ENTER selects the current mode; if the text is not a valid mode, the dialog still dismisses, but awarning is logged to the activity log. ESACPE closes the dialog with no further action. TABattempts to auto-complete the mode name. Pressing TAB repeatedly cycles through the possiblecompletions. SHIFT-TAB cycles through the completions in reverse.
• Move_Line_Down.bsh
Moves the current line down one, with automatic indentation.
• Move_Line_Up.bsh
Moves the current line up one, with automatic indentation.
File Management MacrosThese macros automate the opening and closing of files.
• Browse_Directory.bsh
Opens a directory supplied by the user in the file system browser.
• Buffer_Switcher.bsh
Displays a modal dialog listing all open buffers, allowing one to switch to and/or close buffers.ENTER switches to a buffer and closes the dialog, DELETE closes a buffer, SPACE switches to abuffer but does not close the dialog.
Macros Included With jEdit
58

• Close_All_Except_Active.bsh
Closes all files except the current buffer.
Prompts the user to save any buffer containing unsaved changes.
• Copy_Path_to_Clipboad.bsh
Copies the current buffer's path to the clipboard.
• Copy_Name_to_Clipboad.bsh
Copies the current buffer's filename to the clipboard.
• Delete_Current.bsh
Deletes the current buffer's file on disk, but doesn't close the buffer.
• Glob_Close.bsh
Closes all open buffers matching a given glob pattern.
• Insert_Selection.bsh
Assumes the current selection is file path and tries replaces the selection with the contents of thefile. Does nothing if no text is selected or the selection spans multiple lines.
• Next_Dirty_Buffer.bsh
Switches to the next dirty buffer, if there is one.
• Open_Path.bsh
Opens the file supplied by the user in an input dialog.
• Open_Selection.bsh
Opens the file named by the current buffer's selected text.
• Toggle_ReadOnly.bsh
Toggles a local file's read-only flag. Uses platform-specific commands, so it only works onWindows, Unix and MacOS X.
User Interface MacrosDescription.
• Decrease_Font_Size.bsh
Decreases the font size in the gutter and text area by 1 point.
• Increase_Font_Size.bsh
Increases the font size in the gutter and text area by 1 point.
• Open_Context_Menu.bsh
Opens the text area context menu just below and to the right of the caret.
• Toggle_Bottom_Docking_Area.bsh
Macros Included With jEdit
59
Expands or collapses the bottom docking area, depending on it's current state.
• Toggle_Left_Docking_Area.bsh
Expands or collapses the left docking area, depending on it's current state.
• Toggle_Right_Docking_Area.bsh
Expands or collapses the right docking area, depending on it's current state.
• Toggle_Top_Docking_Area.bsh
Expands or collapses the top docking area, depending on it's current state.
Java Code MacrosThese macros handle text formatting and generation tasks that are particularly useful in writing Javacode.
• Create_Constructor.bsh
Inserts constructor for the class at the current caret position.
• Get_Class_Name.bsh
Inserts a Java class name based upon the buffer's file name.
• Get_Package_Name.bsh
Inserts a plausible Java package name for the current buffer.
The macro compares the buffer's path name with the elements of the classpath being used by thejEdit session. An error message will be displayed if no suitable package name is found. Thismacro will not work if jEdit is being run as a JAR file without specifying a classpath; in thatcase the classpath seen by the macro consists solely of the JAR file.
• Java_File_Save.bsh
Abstract
Acts as a wrapper script to the Save As action. If the buffer is a new file, it scans the first 250lines for a Java class or interface declaration. On finding one, it extracts the appropriate filenameto be used in the Save As dialog.
• Make_Get_and_Set_Methods.bsh
Creates getXXX() or setXXX() methods that can be pasted into the buffer text.
This macro presents a dialog that will “grab” the names of instance variables from the caret lineof the current buffer and paste a corresponding getXXX() or setXXX() method to one of twotext areas in the dialog. The text can be edited in the dialog and then pasted into the currentbuffer using the Insert... buttons. If the caret is set to a line containing something other than aninstance variable, the text grabbing routine is likely to generate nonsense.
As explained in the notes accompanying the source code, the macro uses a global variable whichcan be set to configure the macro to work with either Java or C++ code. When set for use withC++ code, the macro will also write (in commented text) definitions of getXXX() orsetXXX() suitable for inclusion in a header file.
Macros Included With jEdit
60
• Preview_Javadoc_of_Buffer.bsh
Create and display API documentation for the current buffer.
The macro includes various configuration variables you can change; see the comment at thebeginning of the macro source for details.
Miscellaneous MacrosWhile these macros do not fit easily into the other categories, they all provide interesting and usefulfunctions.
• Display_Abbreviations.bsh
Displays the abbreviations registered for each of jEdit's editing modes.
The macro provides a read-only view of the abbreviations contained in the “Abbreviations”option pane. Pressing a letter key will scroll the table to the first entry beginning with that letter.A further option is provided to write a selected mode's abbreviations or all abbreviations in atext buffer for printing as a reference. Notes in the source code listing point out some displayoptions that are configured by modifying global variables.
• Display_Actions.bsh
Displays a list of all the actions known to jEdit categorised by their action set.
This macro can be a useful reference if you want to use the jEdit 4.2 action bar.
• Display_Character_Code.bsh
Display int and hex values for the character at the caret, in the status bar.
• Display_Shortcuts.bsh
Displays a sorted list of the keyboard shortcuts currently in effect.
The macro provides a combined read-only view of command, macro and plugin shortcuts.Pressing a letter key will scroll the table to the first entry beginning with that letter. A furtheroption is provided to write the shortcut assignments in a text buffer for printing as a reference.Notes in the source code listing point out some display options that are configured by modifyingglobal variables.
• Evaluate_Buffer_in_BeanShell.bsh
Evaluates contents of current buffer as a BeanShell script, and opens a new buffer to receive anytext output.
This is a quick way to test a macro script even before its text is saved to a file. Opening a newbuffer for output is a precaution to prevent the macro from inadvertently erasing or overwritingitself. BeanShell scripts that operate on the contents of the current buffer will not workmeaningfully when tested using this macro.
• Hex_Convert.bsh
Converts byte characters to their hex equivalent, and vice versa.
• HyperSearch_Results_to_Buffer.bsh
Writes HyperSeach results to a new buffer.
• Include_Guard.bsh
Macros Included With jEdit
61

Intended for C/C++ header files, this macro inserts a preprocessor directive in the current bufferto ensure that the header is included only once per compilation unit.
To use the macro, first place the caret at the beginning of the header file before anyuncommented text. The macro will return to this position upon completion. The defined termthat triggers the “include guard” is taken from the buffer's name.
• Make_Bug_Report.bsh
Creates a new buffer with installation and error information extracted from the activity log.
The macro extracts initial messages written to the activity log describing the user's operatingsystem, JDK, jEdit version and installed plugins. It then appends the last set of error messageswritten to the activity log. The new text buffer can be saved and attached to an email message ora bug report made on SourceForge.
• Run_Script.bsh
Runs script using interpreter based upon buffer's editing mode (by default, determined using fileextension). You must have the appropriate interpreter (such as Perl, Python, or Windows ScriptHost) installed on your system.
• Show_Threads.bsh
Displays in a tree format all running Java threads of the current Java Virtual Machine.
Property MacrosThese macros produce lists or tables containing properties used by the Java platform or jEdit itself.
• Insert_Buffer_Properties.bsh
Inserts buffer-local properties into the current buffer.
If the buffer's mode has a line comment defined, or comment start and end defined, the insertedproperties will be commented out.
• jEdit_Properties.bsh
Writes an unsorted list of jEdit properties in a new buffer.
• Look_and_Feel_Properties.bsh
Writes an unsorted list of the names of Java Look and Feel properties in a new buffer.
• System_Properties.bsh
Writes an unsorted list of all Java system properties in a new buffer.
Text MacrosThese macros generate various forms of formatted text.
• Add_Prefix_and_Suffix.bsh
Adds user-supplied “prefix” and “suffix” text to each line in a group of selected lines.
Macros Included With jEdit
62

Text is added after leading whitespace and before trailing whitespace. A dialog window receivesinput and “remembers” past entries.
• Color_Picker.bsh
Displays a color picker and inserts the selected color in hexadecimal format, prefixed with a “#”.
• Duplicate_Line.bsh
Duplicates the line on which the caret lies immediately beneath it and moves the caret to the newline.
• Insert_Date.bsh
Inserts the current date and time in the current buffer.
The inserted text includes a representation of the time in the “Internet Time” format.
• Insert_Tag.bsh
Inserts a balanced pair of HTML/SGML/XML markup tags as supplied in an input dialog. Thetags will surround any selected text.
• Next_Char.bsh
Finds next occurrence of character on current line.
The macro takes the next character typed after macro execution as the character being searched.That character is not displayed. If the character does not appear in the balance of the current line,no action occurs.
This macro illustrates the use of InputHandler.readNextChar() as a means ofobtaining user input. See the section called “Using a Single Keypress as Input”.
• Reverse_Lines.bsh
Reverses the selected lines or the entire buffer if no lines are selected. Does not supportRectangular Selections.
• Single_Space_Buffer.bsh
Removes every second line, if they are all blank.
Macros Included With jEdit
63
Part II. Writing Edit ModesThis part of the user's guide covers writing edit modes for jEdit.
Edit modes specify syntax highlighting rules, auto indent behavior, and various other customizationsfor editing different file types. For general information about edit modes, see the section called “EditModes”.
This part of the user's guide was written by Slava Pestov <[email protected]>.

Chapter 10. Mode Definition SyntaxEdit modes are defined using XML, the extensible markup language; mode files have the extension.xml. XML is a very simple language, and as a result edit modes are easy to create and modify.This section will start with a short XML primer, followed by detailed information about eachsupported tag and highlighting rule.
Editing a mode or a mode catalog file within jEdit will cause the changes to take effect immediately.If you edit modes using another application, the changes will take effect after the Utilities>ReloadEdit Modes command is invoked.
An XML PrimerA very simple XML file (which also happens to be an edit mode) looks like so:
<?xml version="1.0"?>
<!DOCTYPE MODE SYSTEM "xmode.dtd">
<MODE><PROPS>
<PROPERTY NAME="commentStart" VALUE="/*" /><PROPERTY NAME="commentEnd" VALUE="*/" />
</PROPS>
<RULES><SPAN TYPE="COMMENT1">
<BEGIN>/*</BEGIN><END>*/</END>
</SPAN></RULES>
</MODE>
Note that each opening tag must have a corresponding closing tag. If there is nothing between theopening and closing tags, for example <TAG></TAG>, the shorthand notation <TAG /> may beused. An example of this shorthand can be seen in the <PROPERTY> tags above.
XML is case sensitive. Span or span is not the same as SPAN.
To insert a special character such as < or > literally in XML (for example, inside an attribute value),you must write it as an entity. An entity consists of the character's symbolic name enclosed with “&”and “;”. The most frequently used entities are:
• < - The less-than (<) character
• > - The greater-than (>) character
• & - The ampersand (&) character
For example, the following will cause a syntax error:
<SEQ TYPE="OPERATOR">&</SEQ>
Instead, you must write:
<SEQ TYPE="OPERATOR">&</SEQ>
Now that the basics of XML have been covered, the rest of this section will cover each construct in
65
detail.
The Preamble and MODE tagEach mode definition must begin with the following:
<?xml version="1.0"?><!DOCTYPE MODE SYSTEM "xmode.dtd">
Each mode definition must also contain exactly one MODE tag. All other tags (PROPS, RULES)must be placed inside the MODE tag. The MODE tag does not have any defined attributes. Here is anexample:
<MODE>... mode definition goes here ...
</MODE>
The PROPS TagThe PROPS tag and the PROPERTY tags inside it are used to define mode-specific properties. EachPROPERTY tag must have a NAME attribute set to the property's name, and a VALUE attribute withthe property's value.
All buffer-local properties listed in the section called “Buffer-Local Properties” may be given valuesin edit modes.
The following mode properties specify commenting strings:
• commentEnd - the comment end string, used by the Range Comment command.
• commentStart - the comment start string, used by the Range Comment command.
• lineComment - the line comment string, used by the Line Comment command.
When performing auto indent, a number of mode properties determine the resulting indent level:
• The line and the one before it are scanned for brackets listed in the indentCloseBracketsand indentOpenBrackets properties. Opening brackets in the previous line increase indent.
If lineUpClosingBracket is set to true, then closing brackets on the current line willline up with the line containing the matching opening bracket. For example, in Java modelineUpClosingBracket is set to true, resulting in brackets being indented like so:
{// Code{
// More code}
}
If lineUpClosingBracket is set to false, the line after a closing bracket will be lined upwith the line containing the matching opening bracket. For example, in Lisp modelineUpClosingBracket is set to false, resulting in brackets being indented like so:
(foo 'a-parameter(crazy-p)(bar baz ()))
Mode Definition Syntax
66

(print "hello world")
• If the previous line contains no opening brackets, or if the doubleBracketIndent propertyis set to true, the previous line is checked against the regular expressions in theindentNextLine and indentNextLines properties. If the previous line matches theformer, the indent of the current line is increased and the subsequent line is shifted back again. Ifthe previous line matches the latter, the indent of the current and subsequent lines is increased.
In Java mode, for example, the indentNextLine property is set to match control structuressuch as “if”, “else”, “while”, and so on.
The doubleBracketIndent property, if set to the default of false, results in codeindented like so:
while(objects.hasNext()){
Object next = objects.hasNext();if(next instanceof Paintable)
next.paint(g);}
On the other hand, settings this property to “true” will give the following result:
while(objects.hasNext()){
Object next = objects.hasNext();if(next instanceof Paintable)
next.paint(g);}
Here is the complete <PROPS> tag for Java mode:
<PROPS><PROPERTY NAME="commentStart" VALUE="/*" /><PROPERTY NAME="commentEnd" VALUE="*/" /><PROPERTY NAME="lineComment" VALUE="//" /><PROPERTY NAME="wordBreakChars" VALUE=",+-=<>/?^&*" />
<!-- Auto indent --><PROPERTY NAME="indentOpenBrackets" VALUE="{" /><PROPERTY NAME="indentCloseBrackets" VALUE="}" /><PROPERTY NAME="indentNextLine"
VALUE="\s*(((if|while)\s*\(|else\s*|else\s+if\s*\(|for\s*\(.*\))[^{;]*)" /><!-- set this to 'true' if you want to use GNU coding style --><PROPERTY NAME="doubleBracketIndent" VALUE="false" /><PROPERTY NAME="lineUpClosingBracket" VALUE="true" />
</PROPS>
The RULES TagRULES tags must be placed inside the MODE tag. Each RULES tag defines a ruleset. A rulesetconsists of a number of parser rules, with each parser rule specifying how to highlight a specificsyntax token. There must be at least one ruleset in each edit mode. There can also be more than one,with different rulesets being used to highlight different parts of a buffer (for example, in HTMLmode, one rule set highlights HTML tags, and another highlights inline JavaScript). For informationabout using more than one ruleset, see the section called “The SPAN Tag”.
The RULES tag supports the following attributes, all of which are optional:
Mode Definition Syntax
67

• SET - the name of this ruleset. All rulesets other than the first must have a name.
• IGNORE_CASE - if set to FALSE, matches will be case sensitive. Otherwise, case will notmatter. Default is TRUE.
• NO_WORD_SEP - any non-alphanumeric character not in this list is treated as a word separatorfor the purposes of syntax highlighting.
• DEFAULT - the token type for text which doesn't match any specific rule. Default is NULL. Seethe section called “Token Types” for a list of token types.
• HIGHLIGHT_DIGITS
• DIGIT_RE - see below for information about these two attributes.
Here is an example RULES tag:
<RULES IGNORE_CASE="FALSE" HIGHLIGHT_DIGITS="TRUE">... parser rules go here ...
</RULES>
Highlighting NumbersIf the HIGHLIGHT_DIGITS attribute is set to TRUE, jEdit will attempt to highlight numbers inthis ruleset.
Any word consisting entirely of digits (0-9) will be highlighted with the DIGIT token type. A wordthat contains other letters in addition to digits will be highlighted with the DIGIT token type only ifit matches the regular expression specified in the DIGIT_RE attribute. If this attribute is notspecified, it will not be highlighted.
Here is an example DIGIT_RE regular expression that highlights Java-style numeric literals(normal numbers, hexadecimals prefixed with 0x, numbers suffixed with various type indicators,and floating point literals containing an exponent):
DIGIT_RE="(0x[[:xdigit:]]+|[[:digit:]]+(e[[:digit:]]*)?)[lLdDfF]?"
Regular expression syntax is described in Appendix E, Regular Expressions.
Rule Ordering RequirementsYou might encounter this very common pitfall when writing your own modes.
Since jEdit checks buffer text against parser rules in the order they appear in the ruleset, morespecific rules must be placed before generalized ones, otherwise the generalized rules will catcheverything.
This is best demonstrated with an example. The following is incorrect rule ordering:
<SPAN TYPE="MARKUP"><BEGIN>[</BEGIN><END>]</END>
</SPAN>
<SPAN TYPE="KEYWORD1"><BEGIN>[!</BEGIN><END>]</END>
</SPAN>
If you write the above in a rule set, any occurrence of “[” (even things like “[!DEFINE”, etc) will be
Mode Definition Syntax
68
highlighted using the first rule, because it will be the first to match. This is most likely not theintended behavior.
The problem can be solved by placing the more specific rule before the general one:
<SPAN TYPE="KEYWORD1"><BEGIN>[!</BEGIN><END>]</END>
</SPAN>
<SPAN TYPE="MARKUP"><BEGIN>[</BEGIN><END>]</END>
</SPAN>
Now, if the buffer contains the text “[!SPECIAL]”, the rules will be checked in order, and the firstrule will be the first to match. However, if you write “[FOO]”, it will be highlighted using thesecond rule, which is exactly what you would expect.
Per-Ruleset PropertiesThe PROPS tag (described in the section called “The PROPS Tag”) can also be placed inside theRULES tag to define ruleset-specific properties. The following properties can be set on a per-rulesetbasis:
• commentEnd - the comment end string.
• commentStart - the comment start string.
• lineComment - the line comment string.
This allows different parts of a file to have different comment strings (in the case of HTML, forexample, in HTML text and inline JavaScript). For information about the commenting commands,see the section called “Commenting Out Code”.
The TERMINATE TagThe TERMINATE rule, which must be placed inside a RULES tag, specifies that parsing should stopafter the specified number of characters have been read from a line. The number of characters toterminate after should be specified with the AT_CHAR attribute. Here is an example:
<TERMINATE AT_CHAR="1" />
This rule is used in Patch mode, for example, because only the first character of each line affectshighlighting.
The SPAN TagThe SPAN rule, which must be placed inside a RULES tag, highlights text between a start and endstring. The start and end strings are specified inside child elements of the SPAN tag. The followingattributes are supported:
• TYPE - The token type to highlight the span with. See the section called “Token Types” for a listof token types.
• AT_LINE_START - If set to TRUE, the span will only be highlighted if the start sequenceoccurs at the beginning of a line.
Mode Definition Syntax
69
• AT_WHITESPACE_END - If set to TRUE, the span will only be highlighted if the start sequenceis the first non-whitespace text in the line.
• AT_WORD_START - If set to TRUE, the span will only be highlighted if the start sequenceoccurs at the beginning of a word.
• DELEGATE - text inside the span will be highlighted with the specified ruleset. To delegate to aruleset defined in the current mode, just specify its name. To delegate to a ruleset defined inanother mode, specify a name of the form mode::ruleset. Note that the first (unnamed)ruleset in a mode is called “MAIN”.
• EXCLUDE_MATCH - If set to TRUE, the start and end sequences will not be highlighted, only thetext between them will.
• NO_ESCAPE - If set to TRUE, the ruleset's escape character will have no effect before the span'send string. Otherwise, the presence of the escape character will cause that occurrence of the endstring to be ignored.
• NO_LINE_BREAK - If set to TRUE, the span will not cross line breaks.
• NO_WORD_BREAK - If set to TRUE, the span will not cross word breaks.
Note that the AT_LINE_START, AT_WHITESPACE_END and AT_WORD_START attributes canalso be used on the BEGIN and END elements. Setting these attributes to the same value on bothelements has the same effect as setting them on the SPAN element.
Here is a SPAN that highlights Java string literals, which cannot include line breaks:
<SPAN TYPE="LITERAL1" NO_LINE_BREAK="TRUE"><BEGIN>"</BEGIN><END>"</END>
</SPAN>
Here is a SPAN that highlights Java documentation comments by delegating to the “JAVADOC”ruleset defined elsewhere in the current mode:
<SPAN TYPE="COMMENT2" DELEGATE="JAVADOC"><BEGIN>/**</BEGIN><END>*/</END>
</SPAN>
Here is a SPAN that highlights HTML cascading stylesheets inside <STYLE> tags by delegating tothe main ruleset in the CSS edit mode:
<SPAN TYPE="MARKUP" DELEGATE="css::MAIN"><BEGIN><style></BEGIN><END></style></END>
</SPAN>
The SPAN_REGEXP TagThe SPAN_REGEXP rule is similar to the SPAN rule except the start sequence is taken to be aregular expression. In addition to the attributes supported by the SPAN tag, the HASH_CHARattribute must be specified. It must be set to the first character that the regular expression matches.This rules out using regular expressions which can match more than one character at the startposition. The regular expression match cannot span more than one line, either.
Any text matched by groups in the BEGIN regular expression is substituted in the END string. Seebelow for an example of where this is useful.
Mode Definition Syntax
70

Regular expression syntax is described in Appendix E, Regular Expressions.
Here is a SPAN_REGEXP rule that highlights “read-ins” in shell scripts:
<SPAN_REGEXP HASH_CHAR="<" TYPE="LITERAL1" DELEGATE="LITERAL"><BEGIN><![CDATA[<<[[:space:]'"]*([[:alnum:]_]+)[[:space:]'"]*]]></BEGIN><END>$1</END>
</SPAN_REGEXP>
Here is a SPAN_REGEXP rule that highlights constructs placed between <#ftl and >, as long asthe <#ftl is followed by a word break:
<SPAN_REGEXP TYPE="KEYWORD1" HASH_CHAR="<" DELEGATE="EXPRESSION"><BEGIN><#ftl\></BEGIN><END>></END>
</SPAN_REGEXP>
The EOL_SPAN TagAn EOL_SPAN is similar to a SPAN except that highlighting stops at the end of the line, and no endsequence needs to be specified. The text to match is specified between the opening and closingEOL_SPAN tags. The following attributes are supported:
• TYPE - The token type to highlight the span with. See the section called “Token Types” for a listof token types.
• AT_LINE_START - If set to TRUE, the span will only be highlighted if the start sequenceoccurs at the beginning of a line.
• AT_WHITESPACE_END - If set to TRUE, the span will only be highlighted if the sequence isthe first non-whitespace text in the line.
• AT_WORD_START - If set to TRUE, the span will only be highlighted if the start sequenceoccurs at the beginning of a word.
• DELEGATE - text inside the span will be highlighted with the specified ruleset. To delegate to aruleset defined in the current mode, just specify its name. To delegate to a ruleset defined inanother mode, specify a name of the form mode::ruleset. Note that the first (unnamed)ruleset in a mode is called “MAIN”.
• EXCLUDE_MATCH - If set to TRUE, the start and end sequences will not be highlighted, only thetext between them will.
Here is an EOL_SPAN that highlights C++ comments:
<EOL_SPAN TYPE="COMMENT1">//</EOL_SPAN>
The EOL_SPAN_REGEXP TagThe EOL_SPAN_REGEXP rule is similar to the EOL_SPAN rule except the match sequence is takento be a regular expression. In addition to the attributes supported by the EOL_SPAN tag, theHASH_CHAR attribute must be specified. It must be set to the first character that the regularexpression matches. This rules out using regular expressions which can match more than onecharacter at the start position. The regular expression match cannot span more than one line, either.
Regular expression syntax is described in Appendix E, Regular Expressions.
Here is an EOL_SPAN_REGEXP that highlights MS-DOS batch file comments, which start with
Mode Definition Syntax
71

REM, followed by any whitespace character, and extend until the end of the line:
<EOL_SPAN_REGEXP AT_WHITESPACE_END="TRUE" HASH_CHAR="R" TYPE="COMMENT1">REM\s</EOL_SPAN_REGEXP>
The MARK_PREVIOUS TagThe MARK_PREVIOUS rule, which must be placed inside a RULES tag, highlights from the end ofthe previous syntax token to the matched text. The text to match is specified between opening andclosing MARK_PREVIOUS tags. The following attributes are supported:
• TYPE - The token type to highlight the text with. See the section called “Token Types” for a listof token types.
• AT_LINE_START - If set to TRUE, the sequence will only be highlighted if it occurs at thebeginning of a line.
• AT_WHITESPACE_END - If set to TRUE, the sequence will only be highlighted if it is the firstnon-whitespace text in the line.
• AT_WORD_START - If set to TRUE, the sequence will only be highlighted if it occurs at thebeginning of a word.
• EXCLUDE_MATCH - If set to TRUE, the match will not be highlighted, only the text before itwill.
Here is a rule that highlights labels in Java mode (for example, “XXX:”):
<MARK_PREVIOUS AT_WHITESPACE_END="TRUE"EXCLUDE_MATCH="TRUE">:</MARK_PREVIOUS>
The MARK_FOLLOWING TagThe MARK_FOLLOWING rule, which must be placed inside a RULES tag, highlights from the startof the match to the next syntax token. The text to match is specified between opening and closingMARK_FOLLOWING tags. The following attributes are supported:
• TYPE - The token type to highlight the text with. See the section called “Token Types” for a listof token types.
• AT_LINE_START - If set to TRUE, the sequence will only be highlighted if it occurs at thebeginning of a line.
• AT_WHITESPACE_END - If set to TRUE, the sequence will only be highlighted if it is the firstnon-whitespace text in the line.
• AT_WORD_START - If set to TRUE, the sequence will only be highlighted if it occurs at thebeginning of a word.
• EXCLUDE_MATCH - If set to TRUE, the match will not be highlighted, only the text after it will.
Here is a rule that highlights variables in Unix shell scripts (“$CLASSPATH”, “$IFS”, etc):
<MARK_FOLLOWING TYPE="KEYWORD2">$</MARK_FOLLOWING>
The SEQ Tag
Mode Definition Syntax
72

The SEQ rule, which must be placed inside a RULES tag, highlights fixed sequences of text. Thetext to highlight is specified between opening and closing SEQ tags. The following attributes aresupported:
• TYPE - the token type to highlight the sequence with. See the section called “Token Types” fora list of token types.
• AT_LINE_START - If set to TRUE, the sequence will only be highlighted if it occurs at thebeginning of a line.
• AT_WHITESPACE_END - If set to TRUE, the sequence will only be highlighted if it is the firstnon-whitespace text in the line.
• AT_WORD_START - If set to TRUE, the sequence will only be highlighted if it occurs at thebeginning of a word.
• DELEGATE - if this attribute is specified, all text after the sequence will be highlighted usingthis ruleset. To delegate to a ruleset defined in the current mode, just specify its name. Todelegate to a ruleset defined in another mode, specify a name of the form mode::ruleset.Note that the first (unnamed) ruleset in a mode is called “MAIN”.
The following rules highlight a few Java operators:
<SEQ TYPE="OPERATOR">+</SEQ><SEQ TYPE="OPERATOR">-</SEQ><SEQ TYPE="OPERATOR">*</SEQ><SEQ TYPE="OPERATOR">/</SEQ>
The SEQ_REGEXP TagThe SEQ_REGEXP rule is similar to the SEQ rule except the match sequence is taken to be a regularexpression. In addition to the attributes supported by the SEQ tag, the HASH_CHAR attribute mustbe specified. It must be set to the first character that the regular expression matches. This rules outusing regular expressions which can match more than one character at the start position. The regularexpression match cannot span more than one line, either.
Here is an example of a SEQ_REGEXP rule that highlights Perl's matcher constructions such asm/(.+):(\d+):(.+)/:
<SEQ_REGEXP TYPE="MARKUP"HASH_CHAR="m"AT_WORD_START="TRUE"
>m([[:punct:]])(?:.*?[^\\])*?\1[sgiexom]*</SEQ_REGEXP>
Regular expression syntax is described in Appendix E, Regular Expressions.
The IMPORT TagThe IMPORT tag, which must be placed inside a RULES tag, loads all rules defined in a givenruleset into the current ruleset; in other words, it has the same effect as copying and pasting theimported ruleset.
The only required attribute DELEGATE must be set to the name of a ruleset. To import a rulesetdefined in the current mode, just specify its name. To import a ruleset defined in another mode,specify a name of the form mode::ruleset. Note that the first (unnamed) ruleset in a mode iscalled “MAIN”.
One quirk is that the definition of the imported ruleset is not copied to the location of the IMPORT
Mode Definition Syntax
73

tag, but rather to the end of the containing ruleset. This has implications with rule-ordering; see thesection called “Rule Ordering Requirements”.
Here is an example from the PHP mode, which extends the inline JavaScript highlighting to supportembedded PHP:
<RULES SET="JAVASCRIPT+PHP">
<SPAN TYPE="MARKUP" DELEGATE="php::PHP"><BEGIN><?php</BEGIN><END>?></END>
</SPAN>
<SPAN TYPE="MARKUP" DELEGATE="php::PHP"><BEGIN><?</BEGIN><END>?></END>
</SPAN>
<SPAN TYPE="MARKUP" DELEGATE="php::PHP"><BEGIN><%=</BEGIN><END>%></END>
</SPAN>
<IMPORT DELEGATE="javascript::MAIN"/></RULES>
The KEYWORDS TagThe KEYWORDS tag, which must be placed inside a RULES tag and can only appear once, specifiesa list of keywords to highlight. Keywords are similar to SEQs, except that SEQs match anywhere inthe text, whereas keywords only match whole words. Words are considered to be runs of textseparated by non-alphanumeric characters.
The KEYWORDS tag does not define any attributes.
Each child element of the KEYWORDS tag is an element whose name is a token type, and whosecontent is the keyword to highlight. For example, the following rule highlights the most commonJava keywords:
<KEYWORDS><KEYWORD1>if</KEYWORD1><KEYWORD1>else</KEYWORD1><KEYWORD3>int</KEYWORD3><KEYWORD3>void</KEYWORD3>
</KEYWORDS>
Token TypesParser rules can highlight tokens using any of the following token types:
• NULL - no special highlighting is performed on tokens of type NULL
• COMMENT1
• COMMENT2
• COMMENT3
• COMMENT4
• FUNCTION
Mode Definition Syntax
74

• INVALID
• KEYWORD1
• KEYWORD2
• KEYWORD3
• KEYWORD4
• LABEL
• LITERAL1
• LITERAL2
• LITERAL3
• LITERAL4
• MARKUP
• OPERATOR
Mode Definition Syntax
75
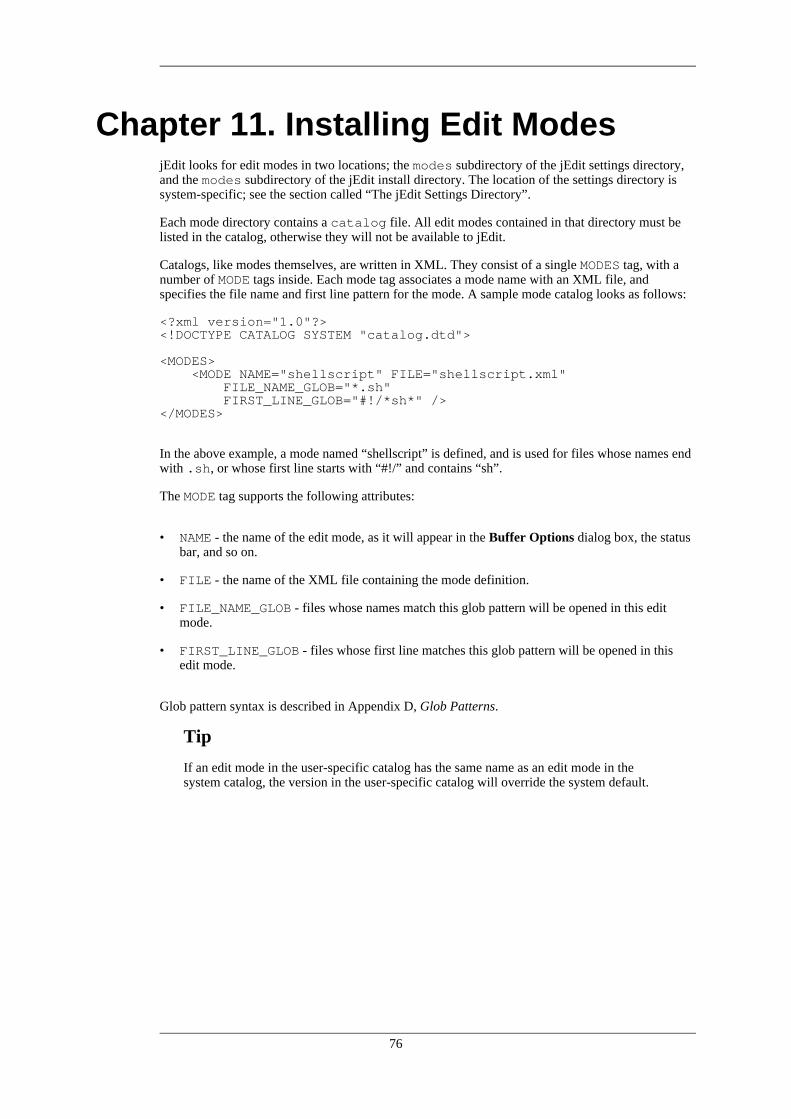
Chapter 11. Installing Edit ModesjEdit looks for edit modes in two locations; the modes subdirectory of the jEdit settings directory,and the modes subdirectory of the jEdit install directory. The location of the settings directory issystem-specific; see the section called “The jEdit Settings Directory”.
Each mode directory contains a catalog file. All edit modes contained in that directory must belisted in the catalog, otherwise they will not be available to jEdit.
Catalogs, like modes themselves, are written in XML. They consist of a single MODES tag, with anumber of MODE tags inside. Each mode tag associates a mode name with an XML file, andspecifies the file name and first line pattern for the mode. A sample mode catalog looks as follows:
<?xml version="1.0"?><!DOCTYPE CATALOG SYSTEM "catalog.dtd">
<MODES><MODE NAME="shellscript" FILE="shellscript.xml"
FILE_NAME_GLOB="*.sh"FIRST_LINE_GLOB="#!/*sh*" />
</MODES>
In the above example, a mode named “shellscript” is defined, and is used for files whose names endwith .sh, or whose first line starts with “#!/” and contains “sh”.
The MODE tag supports the following attributes:
• NAME - the name of the edit mode, as it will appear in the Buffer Options dialog box, the statusbar, and so on.
• FILE - the name of the XML file containing the mode definition.
• FILE_NAME_GLOB - files whose names match this glob pattern will be opened in this editmode.
• FIRST_LINE_GLOB - files whose first line matches this glob pattern will be opened in thisedit mode.
Glob pattern syntax is described in Appendix D, Glob Patterns.
Tip
If an edit mode in the user-specific catalog has the same name as an edit mode in thesystem catalog, the version in the user-specific catalog will override the system default.
76
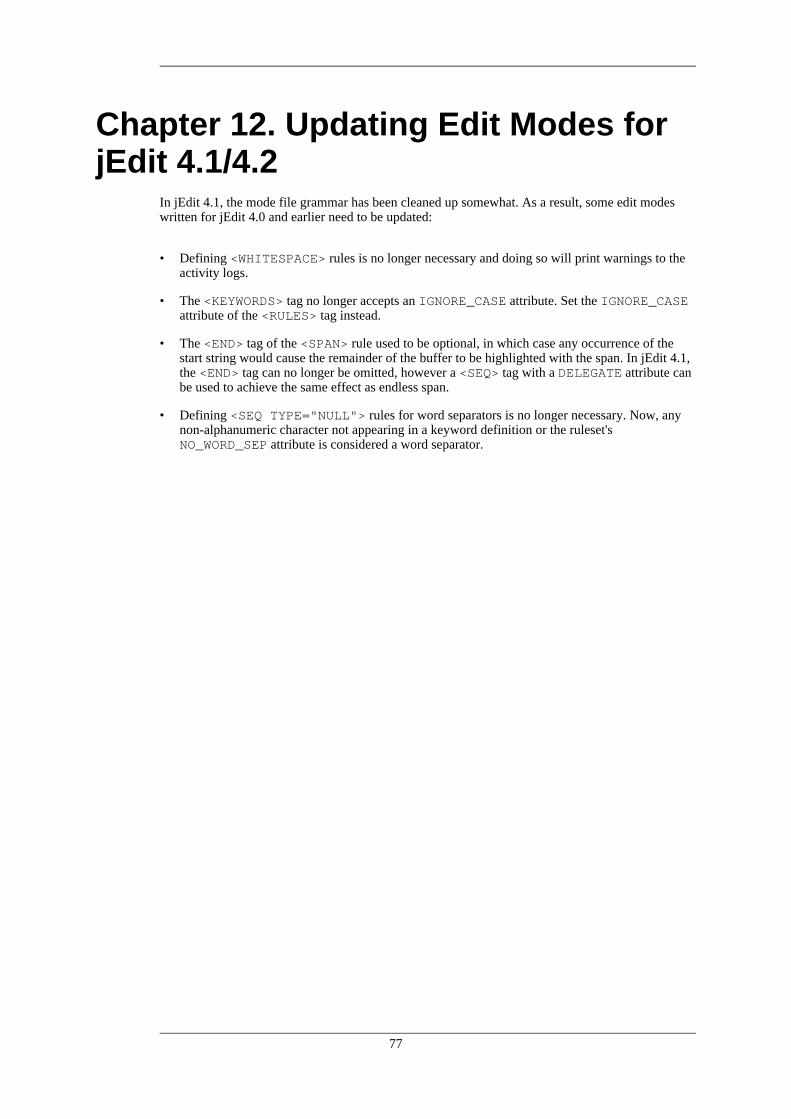
Chapter 12. Updating Edit Modes forjEdit 4.1/4.2
In jEdit 4.1, the mode file grammar has been cleaned up somewhat. As a result, some edit modeswritten for jEdit 4.0 and earlier need to be updated:
• Defining <WHITESPACE> rules is no longer necessary and doing so will print warnings to theactivity logs.
• The <KEYWORDS> tag no longer accepts an IGNORE_CASE attribute. Set the IGNORE_CASEattribute of the <RULES> tag instead.
• The <END> tag of the <SPAN> rule used to be optional, in which case any occurrence of thestart string would cause the remainder of the buffer to be highlighted with the span. In jEdit 4.1,the <END> tag can no longer be omitted, however a <SEQ> tag with a DELEGATE attribute canbe used to achieve the same effect as endless span.
• Defining <SEQ TYPE="NULL"> rules for word separators is no longer necessary. Now, anynon-alphanumeric character not appearing in a keyword definition or the ruleset'sNO_WORD_SEP attribute is considered a word separator.
77

Part III. Writing MacrosThis part of the user's guide covers writing macros for jEdit.
First, we will tell you a little about BeanShell, jEdit's macro scripting language. Next, we will walkthrough a few simple macros. We then present and analyze a dialog-based macro to illustrateadditional macro writing techniques. Finally, we discuss several tips and techniques for writing anddebugging macros.
This part of the user's guide was written by John Gellene <[email protected]>.

Chapter 13. Macro BasicsIntroducing BeanShell
Here is how BeanShell's author, Pat Niemeyer, describes his creation:
“BeanShell is a small, free, embeddable, Java source interpreter with objectscripting language features, written in Java. BeanShell executes standard Javastatements and expressions, in addition to obvious scripting commands andsyntax. BeanShell supports scripted objects as simple method closures like thosein Perl and JavaScript.”
You do not have to know anything about Java to begin writing your own jEdit macros. But if youknow how to program in Java, you already know how to write BeanShell scripts. The major strengthof using BeanShell with a program written in Java is that it allows the user to customize theprogram's behavior using the same interfaces designed and used by the program itself. BeanShellcan turn a well-designed application into a powerful, extensible toolkit.
This guide focuses on using BeanShell in macros. If you are interested in learning more aboutBeanShell generally, consult the BeanShell web site. Information on how to run and organizemacros, whether included with the jEdit installation or written by you, can be found in Chapter 8,Using Macros.
Single Execution MacrosAs noted in the section called “How jEdit Organizes Macros”, you can save a BeanShell script ofany length as a text file with the .bsh extension and run it from the Macros menu. There are threeother ways jEdit lets you use BeanShell quickly, without saving a script to storage, on a “one timeonly” basis. You will find them in the Utilities menu.
Utilities>BeanShell>Evaluate BeanShell Expression displays a text input dialog that asks you totype a single line of BeanShell commands. You can type more than one BeanShell statement so longas each of them ends with a semicolon. If BeanShell successfully interprets your input, a messagebox will appear with the return value of the last statement.
Utilities>BeanShell>Evaluate For Selected Lines displays a text input dialog that asks you to typea single line of BeanShell commands. The commands are evaluated for each line of the selection. Inaddition to the standard set of variables described in the section called “Predefined Variables inBeanShell”, this command defines the following:
• line - the line number, from the start of the buffer. The first line is numbered 0.
• index - the line number, from the start of the selection. The first line is numbered 0.
• text - the text of the line.
Try typing an expression like (line + 1) + ": " + text in the Evaluate For SelectedLines dialog box. This will add a line number to each selected line beginning with the number 1.
The BeanShell expression you enter will be evaluated and substituted in place of the entire text of aselected line. If you want to leave the line's current text as an element of the modified line, you mustinclude the defined variable text as part of the BeanShell expression that you enter.
Utilities>BeanShell>Evaluate Selection evaluates the selected text as a BeanShell script andreplaces it with the return value of the statement.
Using Evaluate Selection is an easy way to do arithmetic calculations inline while editing.
79

BeanShell uses numbers and arithmetic operations in an ordinary, intuitive way.
Try typing an expression like (3745*856)+74 in the buffer, select it, and chooseUtilities>BeanShell>Evaluate Selection. The selected text will be replaced by the answer,3205794.
Console plugin
You can also do the same thing using the BeanShell interpreter option of the Console plugin.
The Mandatory First ExampleMacros.message(view, "Hello world!");
Running this one line script causes jEdit to display a message box (more precisely, aJOptionPane object) with the traditional beginner's message and an OK button. Let's see what ishappening here.
This statement calls a static method (or function) named message in jEdit's Macros class. If youdon't know anything about classes or static methods or Java (or C++, which employs the sameconcept), you will need to gain some understanding of a few terms. Obviously this is not the placefor academic precision, but if you are entirely new to object-oriented programming, here are a fewskeleton ideas to help you with BeanShell.
• An object is a collection of data that can be initialized, accessed and manipulated in certaindefined ways.
• A class is a specification of what data an object contains and what methods can be used to workwith the data. A Java application consists of one or more classes (in the case of jEdit ,over 600classes) written by the programmer that defines the application's behavior. A BeanShell macrouses these classes, along with built-in classes that are supplied with the Java platform, to defineits own behavior.
• A subclass (or child class) is a class which uses (or “inherits”) the data and methods of its parentclass along with additions or modifications that alter the subclass's behavior. Classes aretypically organized in hierarchies of parent and child classes to organize program code, to definecommon behavior in shared parent class code, and to specify the types of similar behavior thatchild classes will perform in their own specific ways.
• A method (or function) is a procedure that works with data in a particular object, other data(including other objects) supplied as parameters, or both. Methods typically are applied to aparticular object which is an instance of the class to which the method belongs.
• A static method differs from other methods in that it does not deal with the data in a particularobject but is included within a class for the sake of convenience.
Java has a rich set of classes defined as part of the Java platform. Like all Java applications, jEdit isorganized as a set of classes that are themselves derived from the Java platform's classes. We willrefer to Java classes and jEdit classes to make this distinction. Some of jEdit's classes (such as thosedealing with regular expressions and XML) are derived from or make use of classes in otheropen-source Java packages. Except for BeanShell itself, we won't be discussing them in this guide.
In our one line script, the static method Macros.message() has two parameters because that isthe way the method is defined in the Macros class. You must specify both parameters when you callthe function. The first parameter, view, is a variable naming the current, active View object.Information about pre-defined variables can be found in the section called “Predefined Variables inBeanShell”.
Macro Basics
80
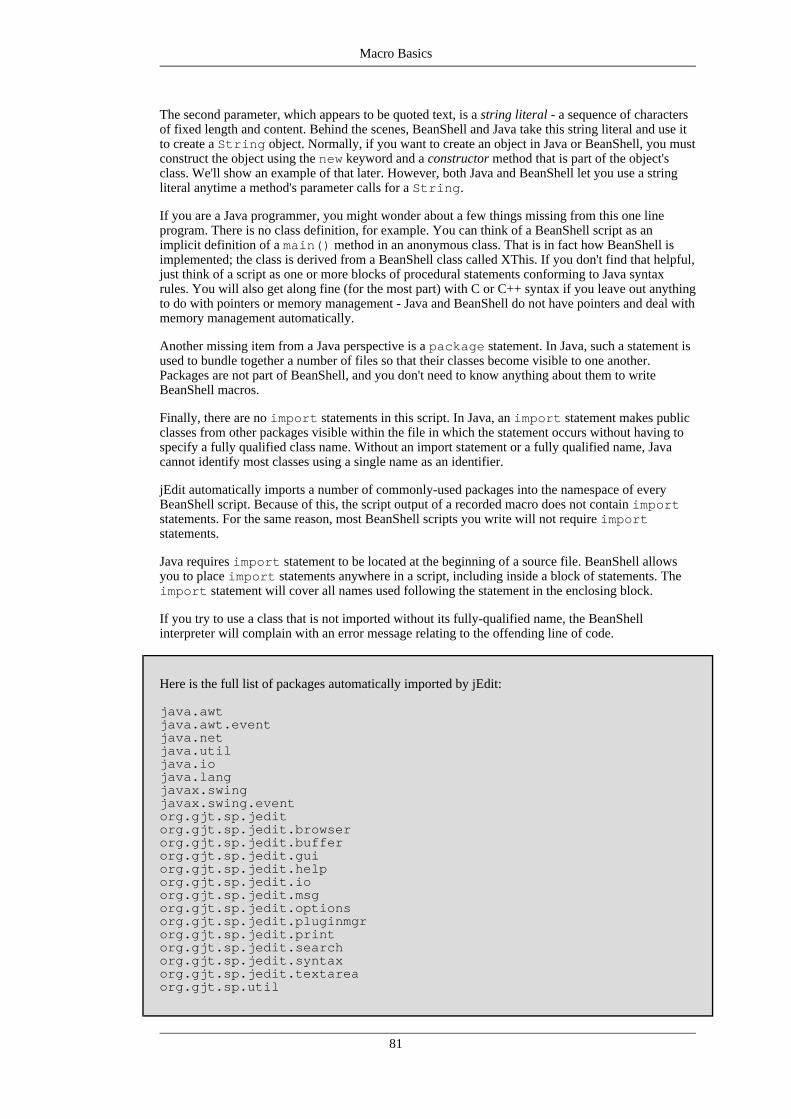
The second parameter, which appears to be quoted text, is a string literal - a sequence of charactersof fixed length and content. Behind the scenes, BeanShell and Java take this string literal and use itto create a String object. Normally, if you want to create an object in Java or BeanShell, you mustconstruct the object using the new keyword and a constructor method that is part of the object'sclass. We'll show an example of that later. However, both Java and BeanShell let you use a stringliteral anytime a method's parameter calls for a String.
If you are a Java programmer, you might wonder about a few things missing from this one lineprogram. There is no class definition, for example. You can think of a BeanShell script as animplicit definition of a main() method in an anonymous class. That is in fact how BeanShell isimplemented; the class is derived from a BeanShell class called XThis. If you don't find that helpful,just think of a script as one or more blocks of procedural statements conforming to Java syntaxrules. You will also get along fine (for the most part) with C or C++ syntax if you leave out anythingto do with pointers or memory management - Java and BeanShell do not have pointers and deal withmemory management automatically.
Another missing item from a Java perspective is a package statement. In Java, such a statement isused to bundle together a number of files so that their classes become visible to one another.Packages are not part of BeanShell, and you don't need to know anything about them to writeBeanShell macros.
Finally, there are no import statements in this script. In Java, an import statement makes publicclasses from other packages visible within the file in which the statement occurs without having tospecify a fully qualified class name. Without an import statement or a fully qualified name, Javacannot identify most classes using a single name as an identifier.
jEdit automatically imports a number of commonly-used packages into the namespace of everyBeanShell script. Because of this, the script output of a recorded macro does not contain importstatements. For the same reason, most BeanShell scripts you write will not require importstatements.
Java requires import statement to be located at the beginning of a source file. BeanShell allowsyou to place import statements anywhere in a script, including inside a block of statements. Theimport statement will cover all names used following the statement in the enclosing block.
If you try to use a class that is not imported without its fully-qualified name, the BeanShellinterpreter will complain with an error message relating to the offending line of code.
Here is the full list of packages automatically imported by jEdit:
java.awtjava.awt.eventjava.netjava.utiljava.iojava.langjavax.swingjavax.swing.eventorg.gjt.sp.jeditorg.gjt.sp.jedit.browserorg.gjt.sp.jedit.bufferorg.gjt.sp.jedit.guiorg.gjt.sp.jedit.helporg.gjt.sp.jedit.ioorg.gjt.sp.jedit.msgorg.gjt.sp.jedit.optionsorg.gjt.sp.jedit.pluginmgrorg.gjt.sp.jedit.printorg.gjt.sp.jedit.searchorg.gjt.sp.jedit.syntaxorg.gjt.sp.jedit.textareaorg.gjt.sp.util
Macro Basics
81

Predefined Variables in BeanShellThe following variables are always available for use in BeanShell scripts:
• buffer - a Buffer object represents the contents of the currently visible open text file.
• view - A View represents the current top-level editor window, extending Java's JFrame class,that contains the various visible components of the program, including the text area, menu bar,toolbar, and any docked windows.
This variable has the same value as the return value of:
jEdit.getActiveView()
• editPane - an EditPane object contains a text area and buffer switcher. A view can be split todisplay edit panes. Among other things, the EditPane class contains methods for selecting thebuffer to edit.
Most of the time your macros will manipulate the buffer or the textArea. Sometimes youwill need to use view as a parameter in a method call. You will probably only need to useeditPane if your macros work with split views.
This variable has the same value as the return value of:
view.getEditPane()
• textArea - a JEditTextArea is the visible component that displays the current buffer.
This variable has the same value as the return value of:
editPane.getTextArea()
• wm - a DockableWindowManager is the visible component that manages dockable windows inthe current view. This class is discussed in detail in Part IV, “Writing Plugins”. This object isuseful for writing macros that interface with, open, or close plugin windows.
This variable has the same value the return value of:
view.getDockableWindowManager()
• scriptPath - set to the full path of the script currently being executed.
• scriptPath - set to the full path of the script currently being executed.
Note that these variables are set at the beginning of macro execution. If the macro switches views,buffers or edit panes, the variable values will be out of date. In that case, you can use the equivalentmethod calls.
Helpful Methods in the Macros ClassIncluding message(), there are five static methods in the Macros class that allow you to converseeasily with your macros. They all encapsulate calls to methods of the Java platform'sJOptionPane class.
• public static void message(Component comp, String message);
• public static void error(Component comp, String message);
Macro Basics
82
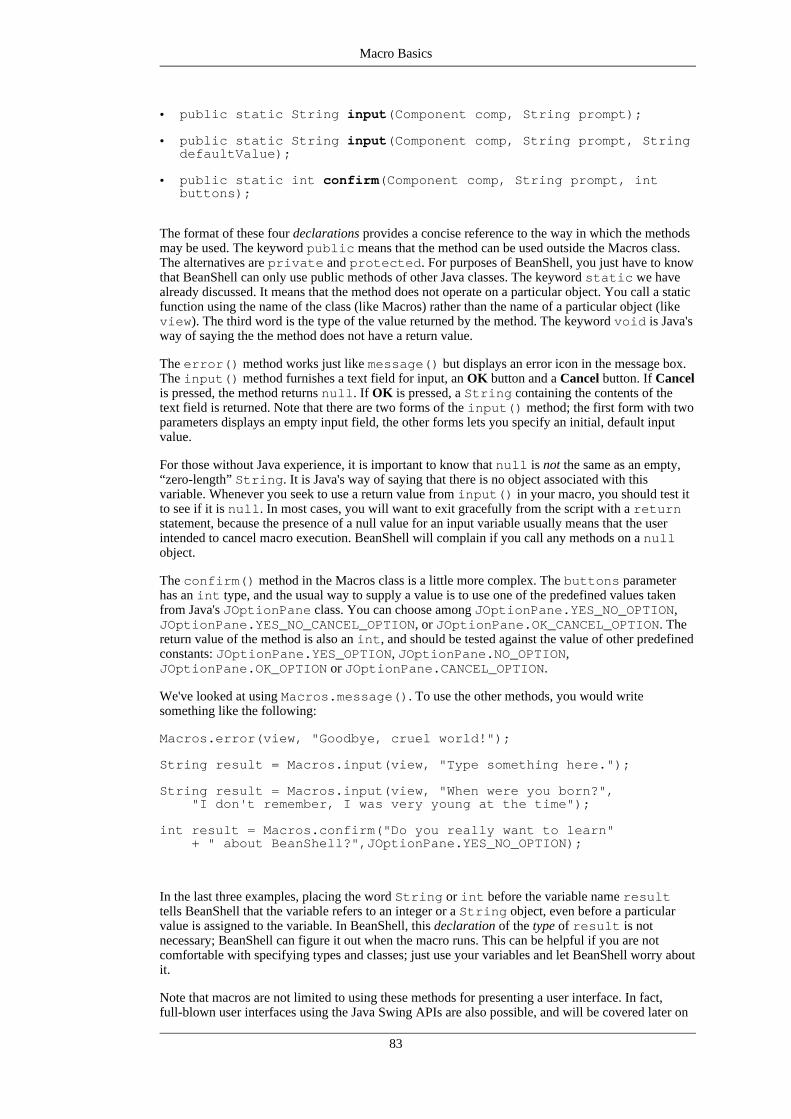
• public static String input(Component comp, String prompt);
• public static String input(Component comp, String prompt, StringdefaultValue);
• public static int confirm(Component comp, String prompt, intbuttons);
The format of these four declarations provides a concise reference to the way in which the methodsmay be used. The keyword public means that the method can be used outside the Macros class.The alternatives are private and protected. For purposes of BeanShell, you just have to knowthat BeanShell can only use public methods of other Java classes. The keyword static we havealready discussed. It means that the method does not operate on a particular object. You call a staticfunction using the name of the class (like Macros) rather than the name of a particular object (likeview). The third word is the type of the value returned by the method. The keyword void is Java'sway of saying the the method does not have a return value.
The error() method works just like message() but displays an error icon in the message box.The input() method furnishes a text field for input, an OK button and a Cancel button. If Cancelis pressed, the method returns null. If OK is pressed, a String containing the contents of thetext field is returned. Note that there are two forms of the input() method; the first form with twoparameters displays an empty input field, the other forms lets you specify an initial, default inputvalue.
For those without Java experience, it is important to know that null is not the same as an empty,“zero-length” String. It is Java's way of saying that there is no object associated with thisvariable. Whenever you seek to use a return value from input() in your macro, you should test itto see if it is null. In most cases, you will want to exit gracefully from the script with a returnstatement, because the presence of a null value for an input variable usually means that the userintended to cancel macro execution. BeanShell will complain if you call any methods on a nullobject.
The confirm() method in the Macros class is a little more complex. The buttons parameterhas an int type, and the usual way to supply a value is to use one of the predefined values takenfrom Java's JOptionPane class. You can choose among JOptionPane.YES_NO_OPTION,JOptionPane.YES_NO_CANCEL_OPTION, or JOptionPane.OK_CANCEL_OPTION. Thereturn value of the method is also an int, and should be tested against the value of other predefinedconstants: JOptionPane.YES_OPTION, JOptionPane.NO_OPTION,JOptionPane.OK_OPTION or JOptionPane.CANCEL_OPTION.
We've looked at using Macros.message(). To use the other methods, you would writesomething like the following:
Macros.error(view, "Goodbye, cruel world!");
String result = Macros.input(view, "Type something here.");
String result = Macros.input(view, "When were you born?","I don't remember, I was very young at the time");
int result = Macros.confirm("Do you really want to learn"+ " about BeanShell?",JOptionPane.YES_NO_OPTION);
In the last three examples, placing the word String or int before the variable name resulttells BeanShell that the variable refers to an integer or a String object, even before a particularvalue is assigned to the variable. In BeanShell, this declaration of the type of result is notnecessary; BeanShell can figure it out when the macro runs. This can be helpful if you are notcomfortable with specifying types and classes; just use your variables and let BeanShell worry aboutit.
Note that macros are not limited to using these methods for presenting a user interface. In fact,full-blown user interfaces using the Java Swing APIs are also possible, and will be covered later on
Macro Basics
83

in Chapter 14, A Dialog-Based Macro.
BeanShell Dynamic TypingWithout an explicit type declaration like String result, BeanShell variables can change theirtype at runtime depending on the object or data assigned to it. This dynamic typing allows you towrite code like this (if you really wanted to):
// note: no type declarationresult = Macros.input(view, “Type something here.”);
// this is our predefined, current Viewresult = view;
// this is an “int” (for integer);// in Java and BeanShell, int is one of a small number// of “primitive” data types which are not classesresult = 14;
However, if you first declared result to be type String and and then tried these reassignments,BeanShell would complain. While avoiding explicit type declaration makes writing macro codesimpler, using them can act as a check to make sure you are not using the wrong variable type ofobject at a later point in your script. It also makes it easier (if you are so inclined) to take aBeanShell “prototype” and incorporate it in a Java program.
One last thing before we bury our first macro. The double slashes in the examples just above signifythat everything following them on that line should be ignored by BeanShell as a comment. As inJava and C/C++, you can also embed comments in your BeanShell code by setting them off withpairs of /* */, as in the following example:
/* This is a long comment that covers several linesand will be totally ignored by BeanShell regardless of howmany lines it covers */
Now For Something UsefulHere is a macro that inserts the path of the current buffer in the text:
String newText = buffer.getPath();textArea.setSelectedText(newText);
Unlike in our first macro example, here we are calling class methods on particular objects. First, wecall getPath() on the current Buffer object to get the full path of the text file currently beingedited. Next, we call setSelectedText() on the current text display component, specifying thetext to be inserted as a parameter.
In precise terms, the setSelectedText() method substitutes the contents of the Stringparameter for a range of selected text that includes the current caret position. If no text is selected atthe caret position, the effect of this operation is simply to insert the new text at that position.
Here's a few alternatives to the full file path that you could use to insert various useful things:
// the file name (without full path)String newText = buffer.getName();
// today's dateimport java.text.DateFormat;
String newText = DateFormat.getDateInstance().format(new Date());
Macro Basics
84
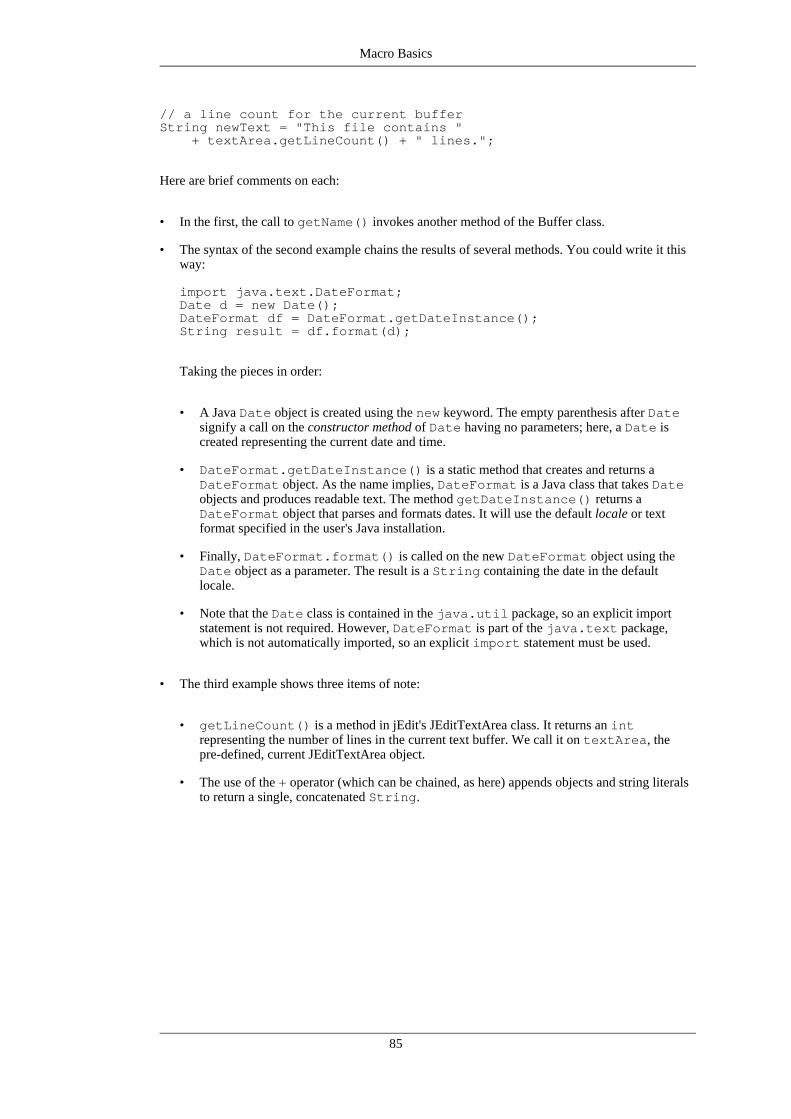
// a line count for the current bufferString newText = "This file contains "
+ textArea.getLineCount() + " lines.";
Here are brief comments on each:
• In the first, the call to getName() invokes another method of the Buffer class.
• The syntax of the second example chains the results of several methods. You could write it thisway:
import java.text.DateFormat;Date d = new Date();DateFormat df = DateFormat.getDateInstance();String result = df.format(d);
Taking the pieces in order:
• A Java Date object is created using the new keyword. The empty parenthesis after Datesignify a call on the constructor method of Date having no parameters; here, a Date iscreated representing the current date and time.
• DateFormat.getDateInstance() is a static method that creates and returns aDateFormat object. As the name implies, DateFormat is a Java class that takes Dateobjects and produces readable text. The method getDateInstance() returns aDateFormat object that parses and formats dates. It will use the default locale or textformat specified in the user's Java installation.
• Finally, DateFormat.format() is called on the new DateFormat object using theDate object as a parameter. The result is a String containing the date in the defaultlocale.
• Note that the Date class is contained in the java.util package, so an explicit importstatement is not required. However, DateFormat is part of the java.text package,which is not automatically imported, so an explicit import statement must be used.
• The third example shows three items of note:
• getLineCount() is a method in jEdit's JEditTextArea class. It returns an intrepresenting the number of lines in the current text buffer. We call it on textArea, thepre-defined, current JEditTextArea object.
• The use of the + operator (which can be chained, as here) appends objects and string literalsto return a single, concatenated String.
Macro Basics
85

Chapter 14. A Dialog-Based MacroNow we will look at a more complicated macro which will demonstrate some useful techniques andBeanShell features.
Use of the MacroOur new example adds prefix and suffix text to a series of selected lines. This macro can be used toreduce typing for a series of text items that must be preceded and following by identical text. InJava, for example, if we are interested in making a series of calls to StringBuffer.append()to construct a lengthy, formatted string, we could type the parameter for each call on successivelines as follows:
profileString_1secretThing.toString()nameaddressaddressSuppcity“state/province”country
Our macro would ask for input for the common “prefix” and “suffix” to be applied to each line; inthis case, the prefix is ourStringBuffer.append( and the suffix is );. After selecting theselines and running the macro, the resulting text would look like this:
ourStringBuffer.append(profileString_1);ourStringBuffer.append(secretThing.toString());ourStringBuffer.append(name);ourStringBuffer.append(address);ourStringBuffer.append(addressSupp);ourStringBuffer.append(city);ourStringBuffer.append(“state/province”);ourStringBuffer.append(country);
Listing of the MacroThe macro script follows. You can find it in the jEdit distribution in the Text subdirectory of themacros directory. You can also try it out by invoking Macros>Text>Add Prefix and Suffix.
// beginning of Add_Prefix_and_Suffix.bsh
// import statement (see the section called “Import Statements”)import javax.swing.border.*;
// main routinevoid prefixSuffixDialog(){
// create dialog object (see the section called “Create the Dialog”)title = “Add prefix and suffix to selected lines”;dialog = new JDialog(view, title, false);content = new JPanel(new BorderLayout());content.setBorder(new EmptyBorder(12, 12, 12, 12));content.setPreferredSize(new Dimension(320, 160));dialog.setContentPane(content);
// add the text fields (see the section called “Create the Text Fields”)
fieldPanel = new JPanel(new GridLayout(4, 1, 0, 6));prefixField = new HistoryTextField(“macro.add-prefix”);prefixLabel = new JLabel(“Prefix to add:”);
86

suffixField = new HistoryTextField(“macro.add-suffix”);suffixLabel = new JLabel(“Suffix to add:”);fieldPanel.add(prefixLabel);fieldPanel.add(prefixField);fieldPanel.add(suffixLabel);fieldPanel.add(suffixField);content.add(fieldPanel, “Center”);
// add a panel containing the buttons (see the section called “Create the Buttons”)
buttonPanel = new JPanel();buttonPanel.setLayout(new BoxLayout(buttonPanel,
BoxLayout.X_AXIS));buttonPanel.setBorder(new EmptyBorder(12, 50, 0, 50));buttonPanel.add(Box.createGlue());ok = new JButton(“OK”);cancel = new JButton(“Cancel”);ok.setPreferredSize(cancel.getPreferredSize());dialog.getRootPane().setDefaultButton(ok);buttonPanel.add(ok);buttonPanel.add(Box.createHorizontalStrut(6));buttonPanel.add(cancel);buttonPanel.add(Box.createGlue());content.add(buttonPanel, “South”);
// register this method as an ActionListener for// the buttons and text fields (see the section called “Register the Action Listeners”)ok.addActionListener(this);cancel.addActionListener(this);prefixField.addActionListener(this);suffixField.addActionListener(this);
// locate the dialog in the center of the// editing pane and make it visible (see the section called “Make the Dialog Visible”)dialog.pack();dialog.setLocationRelativeTo(view);dialog.setDefaultCloseOperation(JDialog.DISPOSE_ON_CLOSE);dialog.setVisible(true);
// this method will be called when a button is clicked// or when ENTER is pressed (see the section called “The Action Listener”)void actionPerformed(e){
if(e.getSource() != cancel){
processText();}dialog.dispose();
}
// this is where the work gets done to insert// the prefix and suffix (see the section called “Get the User's Input”)void processText(){
prefix = prefixField.getText();suffix = suffixField.getText();if(prefix.length() == 0 && suffix.length() == 0)
return;prefixField.addCurrentToHistory();suffixField.addCurrentToHistory();
// text manipulation begins here using calls// to jEdit methods (see the section called “Call jEdit Methods to Manipulate Text”)buffer.beginCompoundEdit();selectedLines = textArea.getSelectedLines();for(i = 0; i < selectedLines.length; ++i){
offsetBOL = textArea.getLineStartOffset(selectedLines[i]);
textArea.setCaretPosition(offsetBOL);
A Dialog-Based Macro
87
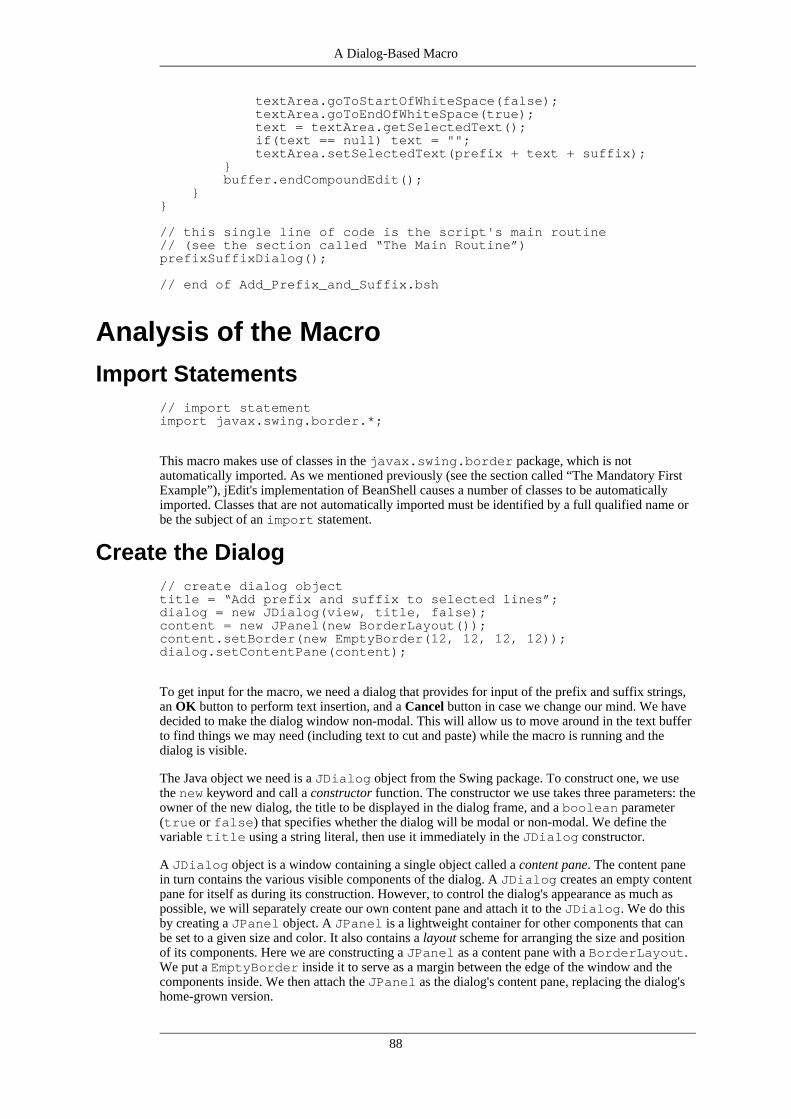
textArea.goToStartOfWhiteSpace(false);textArea.goToEndOfWhiteSpace(true);text = textArea.getSelectedText();if(text == null) text = "";textArea.setSelectedText(prefix + text + suffix);
}buffer.endCompoundEdit();
}}
// this single line of code is the script's main routine// (see the section called “The Main Routine”)prefixSuffixDialog();
// end of Add_Prefix_and_Suffix.bsh
Analysis of the MacroImport Statements
// import statementimport javax.swing.border.*;
This macro makes use of classes in the javax.swing.border package, which is notautomatically imported. As we mentioned previously (see the section called “The Mandatory FirstExample”), jEdit's implementation of BeanShell causes a number of classes to be automaticallyimported. Classes that are not automatically imported must be identified by a full qualified name orbe the subject of an import statement.
Create the Dialog// create dialog objecttitle = “Add prefix and suffix to selected lines”;dialog = new JDialog(view, title, false);content = new JPanel(new BorderLayout());content.setBorder(new EmptyBorder(12, 12, 12, 12));dialog.setContentPane(content);
To get input for the macro, we need a dialog that provides for input of the prefix and suffix strings,an OK button to perform text insertion, and a Cancel button in case we change our mind. We havedecided to make the dialog window non-modal. This will allow us to move around in the text bufferto find things we may need (including text to cut and paste) while the macro is running and thedialog is visible.
The Java object we need is a JDialog object from the Swing package. To construct one, we usethe new keyword and call a constructor function. The constructor we use takes three parameters: theowner of the new dialog, the title to be displayed in the dialog frame, and a boolean parameter(true or false) that specifies whether the dialog will be modal or non-modal. We define thevariable title using a string literal, then use it immediately in the JDialog constructor.
A JDialog object is a window containing a single object called a content pane. The content panein turn contains the various visible components of the dialog. A JDialog creates an empty contentpane for itself as during its construction. However, to control the dialog's appearance as much aspossible, we will separately create our own content pane and attach it to the JDialog. We do thisby creating a JPanel object. A JPanel is a lightweight container for other components that canbe set to a given size and color. It also contains a layout scheme for arranging the size and positionof its components. Here we are constructing a JPanel as a content pane with a BorderLayout.We put a EmptyBorder inside it to serve as a margin between the edge of the window and thecomponents inside. We then attach the JPanel as the dialog's content pane, replacing the dialog'shome-grown version.
A Dialog-Based Macro
88
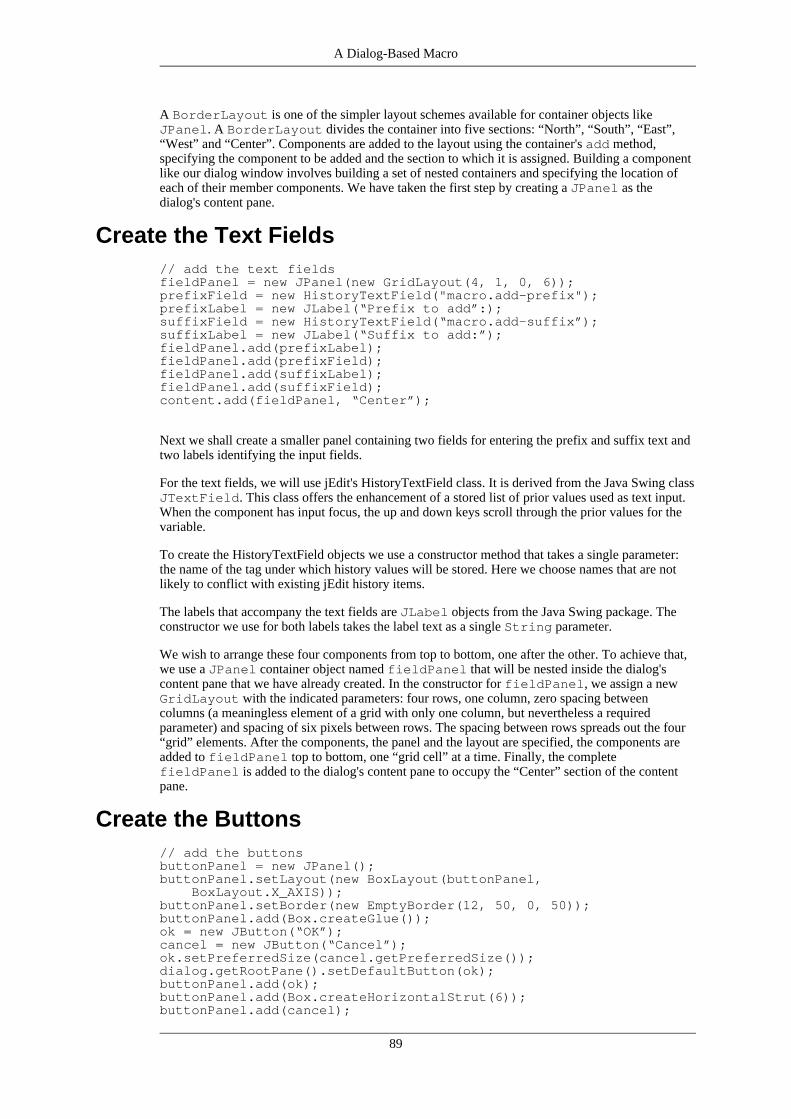
A BorderLayout is one of the simpler layout schemes available for container objects likeJPanel. A BorderLayout divides the container into five sections: “North”, “South”, “East”,“West” and “Center”. Components are added to the layout using the container's add method,specifying the component to be added and the section to which it is assigned. Building a componentlike our dialog window involves building a set of nested containers and specifying the location ofeach of their member components. We have taken the first step by creating a JPanel as thedialog's content pane.
Create the Text Fields// add the text fieldsfieldPanel = new JPanel(new GridLayout(4, 1, 0, 6));prefixField = new HistoryTextField("macro.add-prefix");prefixLabel = new JLabel(“Prefix to add”:);suffixField = new HistoryTextField(“macro.add-suffix”);suffixLabel = new JLabel(“Suffix to add:”);fieldPanel.add(prefixLabel);fieldPanel.add(prefixField);fieldPanel.add(suffixLabel);fieldPanel.add(suffixField);content.add(fieldPanel, “Center”);
Next we shall create a smaller panel containing two fields for entering the prefix and suffix text andtwo labels identifying the input fields.
For the text fields, we will use jEdit's HistoryTextField class. It is derived from the Java Swing classJTextField. This class offers the enhancement of a stored list of prior values used as text input.When the component has input focus, the up and down keys scroll through the prior values for thevariable.
To create the HistoryTextField objects we use a constructor method that takes a single parameter:the name of the tag under which history values will be stored. Here we choose names that are notlikely to conflict with existing jEdit history items.
The labels that accompany the text fields are JLabel objects from the Java Swing package. Theconstructor we use for both labels takes the label text as a single String parameter.
We wish to arrange these four components from top to bottom, one after the other. To achieve that,we use a JPanel container object named fieldPanel that will be nested inside the dialog'scontent pane that we have already created. In the constructor for fieldPanel, we assign a newGridLayout with the indicated parameters: four rows, one column, zero spacing betweencolumns (a meaningless element of a grid with only one column, but nevertheless a requiredparameter) and spacing of six pixels between rows. The spacing between rows spreads out the four“grid” elements. After the components, the panel and the layout are specified, the components areadded to fieldPanel top to bottom, one “grid cell” at a time. Finally, the completefieldPanel is added to the dialog's content pane to occupy the “Center” section of the contentpane.
Create the Buttons// add the buttonsbuttonPanel = new JPanel();buttonPanel.setLayout(new BoxLayout(buttonPanel,
BoxLayout.X_AXIS));buttonPanel.setBorder(new EmptyBorder(12, 50, 0, 50));buttonPanel.add(Box.createGlue());ok = new JButton(“OK”);cancel = new JButton(“Cancel”);ok.setPreferredSize(cancel.getPreferredSize());dialog.getRootPane().setDefaultButton(ok);buttonPanel.add(ok);buttonPanel.add(Box.createHorizontalStrut(6));buttonPanel.add(cancel);
A Dialog-Based Macro
89

buttonPanel.add(Box.createGlue());content.add(buttonPanel, “South”);
To create the dialog's buttons, we follow repeat the “nested container” pattern we used in creatingthe text fields. First, we create a new, nested panel. This time we use a BoxLayout that placescomponents either in a single row or column, depending on the parameter passed to its constructor.This layout object is more flexible than a GridLayout in that variable spacing between elementscan be specified easily. We put an EmptyBorder in the new panel to set margins for placing thebuttons. Then we create the buttons, using a JButton constructor that specifies the button text.After setting the size of the OK button to equal the size of the Cancel button, we designate the OKbutton as the default button in the dialog. This causes the OK button to be outlined when the dialogif first displayed. Finally, we place the buttons side by side with a 6 pixel gap between them (foraesthetic reasons), and place the completed buttonPanel in the “South” section of the dialog'scontent pane.
Register the Action Listeners// register this method as an ActionListener for// the buttons and text fieldsok.addActionListener(this);cancel.addActionListener(this);prefixField.addActionListener(this);suffixField.addActionListener(this);
In order to specify the action to be taken upon clicking a button or pressing the Enter key, wemust register an ActionListener for each of the four active components of the dialog - the twoHistoryTextField components and the two buttons. In Java, an ActionListener is an interface -an abstract specification for a derived class to implement. The ActionListener interfacecontains a single method to be implemented:public void actionPerformed(ActionEvent e);
BeanShell does not permit a script to create derived classes. However, BeanShell offers a usefulsubstitute: a method can be used as a scripted object that can include nested methods implementinga number of Java interfaces. The method prefixSuffixDialog() that we are writing can thusbe treated as an ActionListener object. To accomplish this, we calladdActionListener() on each of the four components specifying this as theActionListener. We still need to implement the interface. We will do that shortly.
Make the Dialog Visible// locate the dialog in the center of the// editing pane and make it visibledialog.pack();dialog.setLocationRelativeTo(view);dialog.setDefaultCloseOperation(JDialog.DISPOSE_ON_CLOSE);dialog.setVisible(true);
Here we do three things. First, we activate all the layout routines we have established by calling thepack() method for the dialog as the top-level window. Next we center the dialog's position in theactive jEdit view by calling setLocationRelativeTo() on the dialog. We also call thesetDefaultCloseOperation() function to specify that the dialog box should beimmediately disposed if the user clicks the close box. Finally, we activate the dialog by callingsetVisible()with the state parameter set to true.
At this point we have a decent looking dialog window that doesn't do anything. Without more code,it will not respond to user input and will not accomplish any text manipulation. The remainder of thescript deals with these two requirements.
The Action Listener
A Dialog-Based Macro
90

// this method will be called when a button is clicked// or when ENTER is pressedvoid actionPerformed(e){
if(e.getSource() != cancel){
processText();}dialog.dispose();
}
The method actionPerformed() nested inside prefixSuffixDialog() implements theimplicit ActionListener interface. It looks at the source of the ActionEvent, determined bya call to getSource(). What we do with this return value is straightforward: if the source is notthe Cancel button, we call the processText() method to insert the prefix and suffix text. Thenthe dialog is closed by calling its dispose() method.
The ability to implement interfaces like ActionListener inside a BeanShell script is one of themore powerful features of the BeanShell package. this technique is discussed in the next chapter; seethe section called “Implementing Classes and Interfaces”.
Get the User's Input// this is where the work gets done to insert// the prefix and suffixvoid processText(){
prefix = prefixField.getText();suffix = suffixField.getText();if(prefix.length() == 0 && suffix.length() == 0)
return;prefixField.addCurrentToHistory();suffixField.addCurrentToHistory();
The method processText() does the work of our macro. First we obtain the input from the twotext fields with a call to their getText() methods. If they are both empty, there is nothing to do,so the method returns. If there is input, any text in the field is added to that field's stored history listby calling addCurrentToHistory(). We do not need to test the prefixField orsuffixField controls for null or empty values because addCurrentToHistory() doesthat internally.
Call jEdit Methods to Manipulate Text// text manipulation begins here using calls// to jEdit methodsbuffer.beginCompoundEdit();selectedLines = textArea.getSelectedLines();for(i = 0; i < selectedLines.length; ++i){
offsetBOL = textArea.getLineStartOffset(selectedLines[i]);
textArea.setCaretPosition(offsetBOL);textArea.goToStartOfWhiteSpace(false);textArea.goToEndOfWhiteSpace(true);text = textArea.getSelectedText();if(text == null) text = "";textArea.setSelectedText(prefix + text + suffix);
}buffer.endCompoundEdit();
}
The text manipulation routine loops through each selected line in the text buffer. We get the loop
A Dialog-Based Macro
91

parameters by calling textArea.getSelectedLines(), which returns an array consisting ofthe line numbers of every selected line. The array includes the number of the current line, whetheror not it is selected, and the line numbers are sorted in increasing order. We iterate through eachmember of the selectedLines array, which represents the number of a selected line, and applythe following routine:
• Get the buffer position of the start of the line (expressed as a zero-based index from the start ofthe buffer) by calling textArea.getLineStartOffset(selectedLines[i]);
• Move the caret to that position by calling textArea.setCaretPosition();
• Find the first and last non-whitespace characters on the line by callingtextArea.goToStartOfWhiteSpace() andtextArea.goToEndOfWhiteSpace();
The goTo... methods in JEditTextArea take a single parameter which tells jEdit whether thetext between the current caret position and the desired position should be selected. Here, we calltextArea.goToStartOfWhiteSpace(false) so that no text is selected, then calltextArea.goToEndOfWhiteSpace(true) so that all of the text between the beginningand ending whitespace is selected.
• Retrieve the selected text by storing the return value of textArea.getSelectedText()in a new variable text.
If the line is empty, getSelectedText() will return null. In that case, we assign an emptystring to text to avoid calling methods on a null object.
• Change the selected text to prefix + text + suffix by callingtextArea.setSelectedText(). If there is no selected text (for example, if the line isempty), the prefix and suffix will be inserted without any intervening characters.
Compound edits
Note the beginCompoundEdit() and endCompoundEdit() calls. These ensure that all editsperformed between the two calls can be undone in one step. Normally, jEdit automatically wraps amacro call in these methods; however if the macro shows a non-modal dialog box, as far as jEdit isconcerned the macro has finished executing by the time the dialog is shown, since control returns tothe event dispatch thread.
If you do not understand this, don't worry; just keep it in mind if your macro needs to show anon-modal dialog box for some reason; Most macros won't.
The Main Routine// this single line of code is the script's main routineprefixSuffixDialog();
The call to prefixSuffixDialog()is the only line in the macro that is not inside an enclosingblock. BeanShell treats such code as a top-level main method and begins execution with it.
Our analysis of Add_Prefix_and_Suffix.bsh is now complete. In the next section, we lookat other ways in which a macro can obtain user input, as well as other macro writing techniques.
A Dialog-Based Macro
92
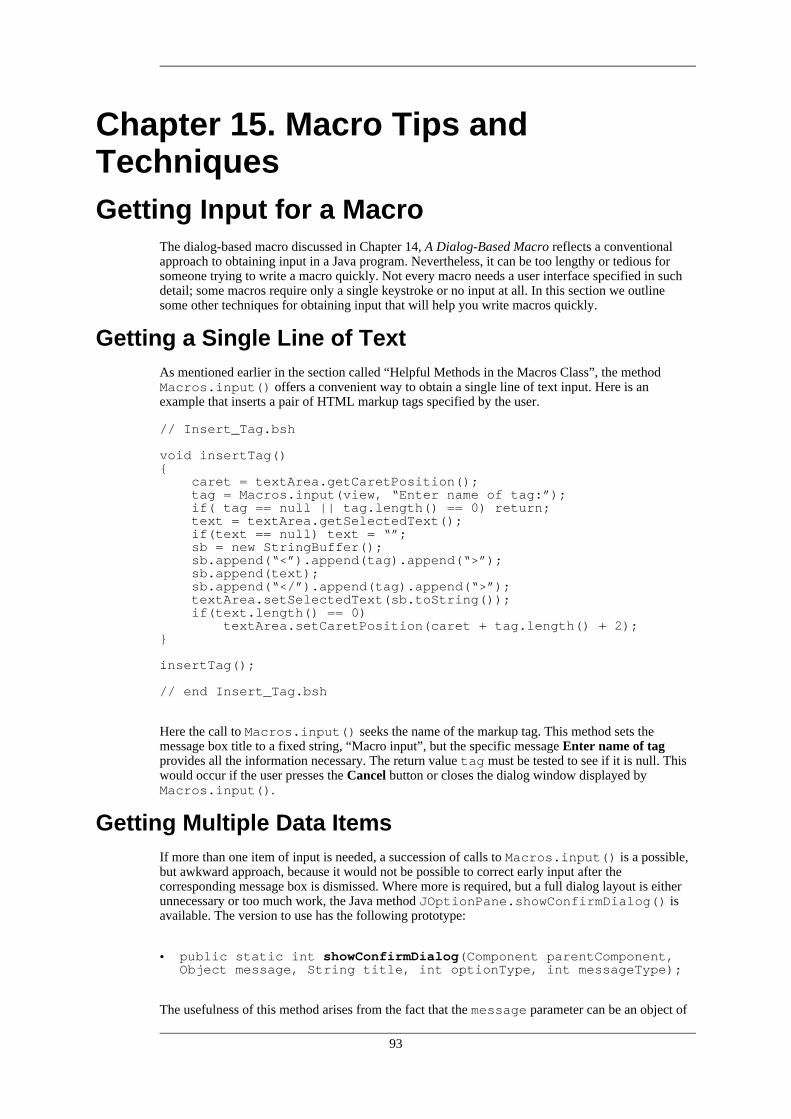
Chapter 15. Macro Tips andTechniquesGetting Input for a Macro
The dialog-based macro discussed in Chapter 14, A Dialog-Based Macro reflects a conventionalapproach to obtaining input in a Java program. Nevertheless, it can be too lengthy or tedious forsomeone trying to write a macro quickly. Not every macro needs a user interface specified in suchdetail; some macros require only a single keystroke or no input at all. In this section we outlinesome other techniques for obtaining input that will help you write macros quickly.
Getting a Single Line of TextAs mentioned earlier in the section called “Helpful Methods in the Macros Class”, the methodMacros.input() offers a convenient way to obtain a single line of text input. Here is anexample that inserts a pair of HTML markup tags specified by the user.
// Insert_Tag.bsh
void insertTag(){
caret = textArea.getCaretPosition();tag = Macros.input(view, “Enter name of tag:”);if( tag == null || tag.length() == 0) return;text = textArea.getSelectedText();if(text == null) text = “”;sb = new StringBuffer();sb.append(“<”).append(tag).append(“>”);sb.append(text);sb.append(“</”).append(tag).append(“>”);textArea.setSelectedText(sb.toString());if(text.length() == 0)
textArea.setCaretPosition(caret + tag.length() + 2);}
insertTag();
// end Insert_Tag.bsh
Here the call to Macros.input() seeks the name of the markup tag. This method sets themessage box title to a fixed string, “Macro input”, but the specific message Enter name of tagprovides all the information necessary. The return value tag must be tested to see if it is null. Thiswould occur if the user presses the Cancel button or closes the dialog window displayed byMacros.input().
Getting Multiple Data ItemsIf more than one item of input is needed, a succession of calls to Macros.input() is a possible,but awkward approach, because it would not be possible to correct early input after thecorresponding message box is dismissed. Where more is required, but a full dialog layout is eitherunnecessary or too much work, the Java method JOptionPane.showConfirmDialog() isavailable. The version to use has the following prototype:
• public static int showConfirmDialog(Component parentComponent,Object message, String title, int optionType, int messageType);
The usefulness of this method arises from the fact that the message parameter can be an object of
93

any Java class (since all classes are derived from Object), or any array of objects. The followingexample shows how this feature can be used.
// excerpt from Write_File_Header.bsh
title = “Write file header”;
currentName = buffer.getName();
nameField = new JTextField(currentName);authorField = new JTextField(“Your name here”);descField = new JTextField(“”, 25);
namePanel = new JPanel(new GridLayout(1, 2));nameLabel = new JLabel(“Name of file:”, SwingConstants.LEFT);saveField = new JCheckBox(“Save file when done”,
!buffer.isNewFile());namePanel.add(nameLabel);namePanel.add(saveField);
message = new Object[9];message[0] = namePanel;message[1] = nameField;message[2] = Box.createVerticalStrut(10);message[3] = “Author's name:”;message[4] = authorField;message[5] = Box.createVerticalStrut(10);message[6] = “Enter description:”;message[7] = descField;message[8] = Box.createVerticalStrut(5);
if( JOptionPane.OK_OPTION !=JOptionPane.showConfirmDialog(view, message, title,
JOptionPane.OK_CANCEL_OPTION,JOptionPane.QUESTION_MESSAGE))
return null;
// *****remainder of macro script omitted*****
// end excerpt from Write_File_Header.bsh
This macro takes several items of user input and produces a formatted file header at the beginning ofthe buffer. The full macro is included in the set of macros installed by jEdit. There are a number ofinput features of this excerpt worth noting.
• The macro uses a total of seven visible components. Two of them are created behind the scenesby showConfirmDialog(), the rest are made by the macro. To arrange them, the scriptcreates an array of Object objects and assigns components to each location in the array. Thistranslates to a fixed, top-to-bottom arrangement in the message box created byshowConfirmDialog().
• The macro uses JTextField objects to obtain most of the input data. The fields nameFieldand authorField are created with constructors that take the initial, default text to bedisplayed in the field as a parameter. When the message box is displayed, the default text willappear and can be altered or deleted by the user.
• The text field descField uses an empty string for its initial value. The second parameter in itsconstructor sets the width of the text field component, expressed as the number of characters of“average” width. When showConfirmDialog() prepares the layout of the message box, itsets the width wide enough to accommodate the designated with of descField. Thistechnique produces a message box and input text fields that are wide enough for your data withone line of code.
• The displayed message box includes a JCheckBox component that determines whether thebuffer will be saved to disk immediately after the file header is written. To conserve space in the
Macro Tips and Techniques
94

message box, we want to display the check box to the right of the label Name of file:. To dothat, we create a JPanel object and populate it with the label and the checkbox in a left-to-rightGridLayout. The JPanel containing the two components is then added to the beginning ofmessage array.
• The two visible components created by showConfirmDialog() appear at positions 3 and 6of the message array. Only the text is required; they are rendered as text labels.
• There are three invisible components created by showConfirmDialog(). Each of theminvolves a call to Box.createVerticalStrut(). The Box class is a sophisticated layoutclass that gives the user great flexibility in sizing and positioning components. Here we use astatic method of the Box class that produces a vertical strut. This is a transparent componentwhose width expands to fill its parent component (in this case, the message box). The singleparameter indicates the height of the strut in pixels. The last call tocreateVerticalStrut() separates the description text field from the OK and Cancelbuttons that are automatically added by showConfirmDialog().
• Finally, the call to showConfirmDialog() uses defined constants for the option type andthe message type. The constants are the same as those used with the Macros.confirm()method; see the section called “Helpful Methods in the Macros Class”. The option type signifiesthe use of OK and Cancel buttons. The QUERY_MESSAGE message type causes the messagebox to display a question mark icon.
The return value of the method is tested against the value OK_OPTION. If the return value issomething else (because the Cancel button was pressed or because the message box windowwas closed without a button press), a null value is returned to a calling function, signaling thatthe user canceled macro execution. If the return value is OK_OPTION, each of the inputcomponents can yield their contents for further processing by calls toJTextField.getText() (or, in the case of the check box,JCheckBox.isSelected()).
Selecting Input From a ListAnother useful way to get user input for a macro is to use a combo box containing a number ofpre-set options. If this is the only input required, one of the versions of showInputDialog() inthe JOptionPane class provides a shortcut. Here is its prototype:
• public static Object showInputDialog(Component parentComponent,Object message, String title, int messageType, Icon icon,Object[] selectionValues, Object initialSelectionValue);
This method creates a message box containing a drop-down list of the options specified in themethod's parameters, along with OK and Cancel buttons. Compared toshowConfirmDialog(), this method lacks an optionType parameter and has threeadditional parameters: an icon to display in the dialog (which can be set to null), an array ofselectionValues objects, and a reference to one of the options as theinitialSelectionValue to be displayed. In addition, instead of returning an intrepresenting the user's action, showInputDialog() returns the Object corresponding to theuser's selection, or null if the selection is canceled.
The following macro fragment illustrates the use of this method.
// fragment illustrating use of showInputDialog()options = new Object[5];options[0] = "JLabel";options[1] = "JTextField";options[2] = "JCheckBox";options[3] = "HistoryTextField";options[4} = "-- other --";
Macro Tips and Techniques
95

result = JOptionPane.showInputDialog(view,"Choose component class","Select class for input component",JOptionPane.QUESTION_MESSAGE,null, options, options[0]);
The return value result will contain either the String object representing the selected text itemor null representing no selection. Any further use of this fragment would have to test the value ofresult and likely exit from the macro if the value equaled null.
A set of options can be similarly placed in a JComboBox component created as part of a largerdialog or showMessageDialog() layout. Here are some code fragments showing this approach:
// fragments from Display_Abbreviations.bsh// import statements and other code omitted
// from main routine, this method call returns an array// of Strings representing the names of abbreviation sets
abbrevSets = getActiveSets();
...
// from showAbbrevs() method
combo = new JComboBox(abbrevSets);// set width to uniform size regardless of combobox contentsDimension dim = combo.getPreferredSize();dim.width = Math.max(dim.width, 120);combo.setPreferredSize(dim);combo.setSelectedItem(STARTING_SET); // defined as "global"
// end fragments
Using a Single Keypress as InputSome macros may choose to emulate the style of character-based text editors such as emacs or vi.They will require only a single keypress as input that would be handled by the macro but notdisplayed on the screen. If the keypress corresponds to a character value, jEdit can pass that value asa parameter to a BeanShell script.
The jEdit class InputHandler is an abstract class that that manages associations between keyboardinput and editing actions, along with the recording of macros. Keyboard input in jEdit is normallymanaged by the derived class DefaultInputHandler. One of the methods in the InputHandler classhandles input from a single keypress:
• public void readNextChar(String prompt, String code);
When this method is called, the contents of the prompt parameter is shown in the view's status bar.The method then waits for a key press, after which the contents of the code parameter will be runas a BeanShell script, with one important modification. Each time the string __char__ appears inthe parameter script, it will be substituted by the character pressed. The key press is “consumed” byreadNextChar(). It will not be displayed on the screen or otherwise processed by jEdit.
Using readNextChar() requires a macro within the macro, formatted as a single, potentiallylengthy string literal. The following macro illustrates this technique. It selects a line of text from thecurrent caret position to the first occurrence of the character next typed by the user. If the characterdoes not appear on the line, no new selection occurs and the display remains unchanged.
// Next_Char.bsh
Macro Tips and Techniques
96
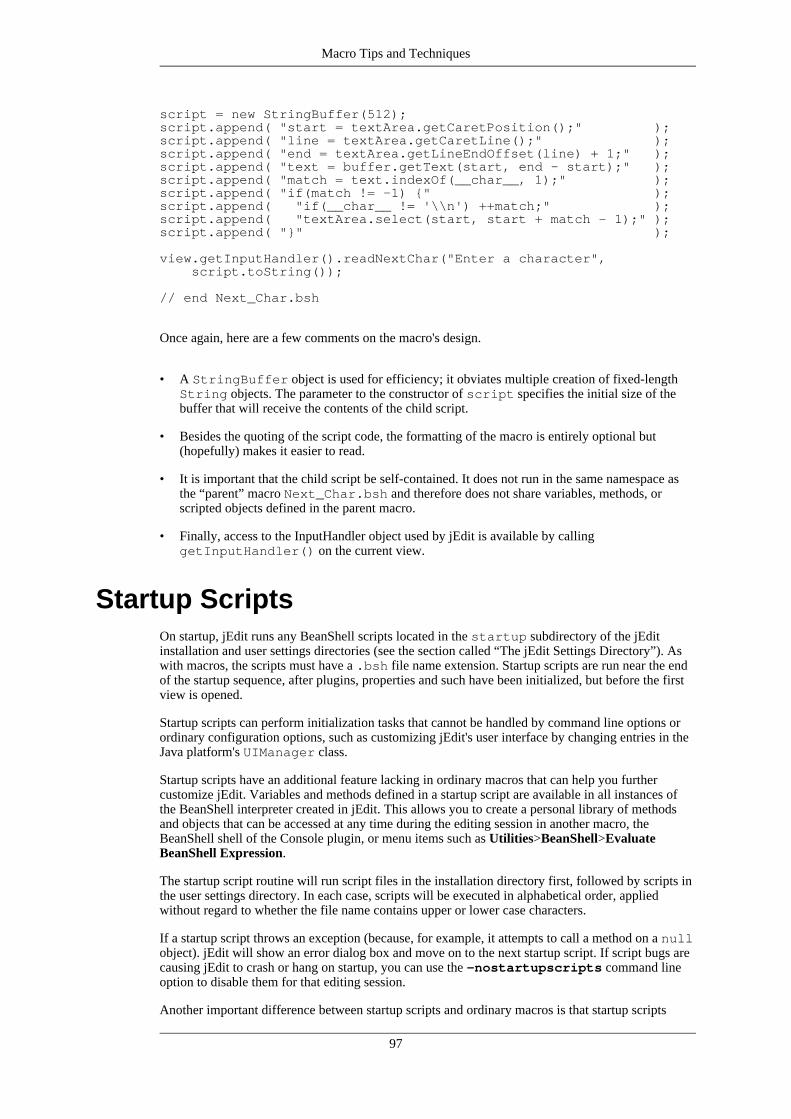
script = new StringBuffer(512);script.append( "start = textArea.getCaretPosition();" );script.append( "line = textArea.getCaretLine();" );script.append( "end = textArea.getLineEndOffset(line) + 1;" );script.append( "text = buffer.getText(start, end - start);" );script.append( "match = text.indexOf(__char__, 1);" );script.append( "if(match != -1) {" );script.append( "if(__char__ != '\\n') ++match;" );script.append( "textArea.select(start, start + match - 1);" );script.append( "}" );
view.getInputHandler().readNextChar("Enter a character",script.toString());
// end Next_Char.bsh
Once again, here are a few comments on the macro's design.
• A StringBuffer object is used for efficiency; it obviates multiple creation of fixed-lengthString objects. The parameter to the constructor of script specifies the initial size of thebuffer that will receive the contents of the child script.
• Besides the quoting of the script code, the formatting of the macro is entirely optional but(hopefully) makes it easier to read.
• It is important that the child script be self-contained. It does not run in the same namespace asthe “parent” macro Next_Char.bsh and therefore does not share variables, methods, orscripted objects defined in the parent macro.
• Finally, access to the InputHandler object used by jEdit is available by callinggetInputHandler() on the current view.
Startup ScriptsOn startup, jEdit runs any BeanShell scripts located in the startup subdirectory of the jEditinstallation and user settings directories (see the section called “The jEdit Settings Directory”). Aswith macros, the scripts must have a .bsh file name extension. Startup scripts are run near the endof the startup sequence, after plugins, properties and such have been initialized, but before the firstview is opened.
Startup scripts can perform initialization tasks that cannot be handled by command line options orordinary configuration options, such as customizing jEdit's user interface by changing entries in theJava platform's UIManager class.
Startup scripts have an additional feature lacking in ordinary macros that can help you furthercustomize jEdit. Variables and methods defined in a startup script are available in all instances ofthe BeanShell interpreter created in jEdit. This allows you to create a personal library of methodsand objects that can be accessed at any time during the editing session in another macro, theBeanShell shell of the Console plugin, or menu items such as Utilities>BeanShell>EvaluateBeanShell Expression.
The startup script routine will run script files in the installation directory first, followed by scripts inthe user settings directory. In each case, scripts will be executed in alphabetical order, appliedwithout regard to whether the file name contains upper or lower case characters.
If a startup script throws an exception (because, for example, it attempts to call a method on a nullobject). jEdit will show an error dialog box and move on to the next startup script. If script bugs arecausing jEdit to crash or hang on startup, you can use the -nostartupscripts command lineoption to disable them for that editing session.
Another important difference between startup scripts and ordinary macros is that startup scripts
Macro Tips and Techniques
97
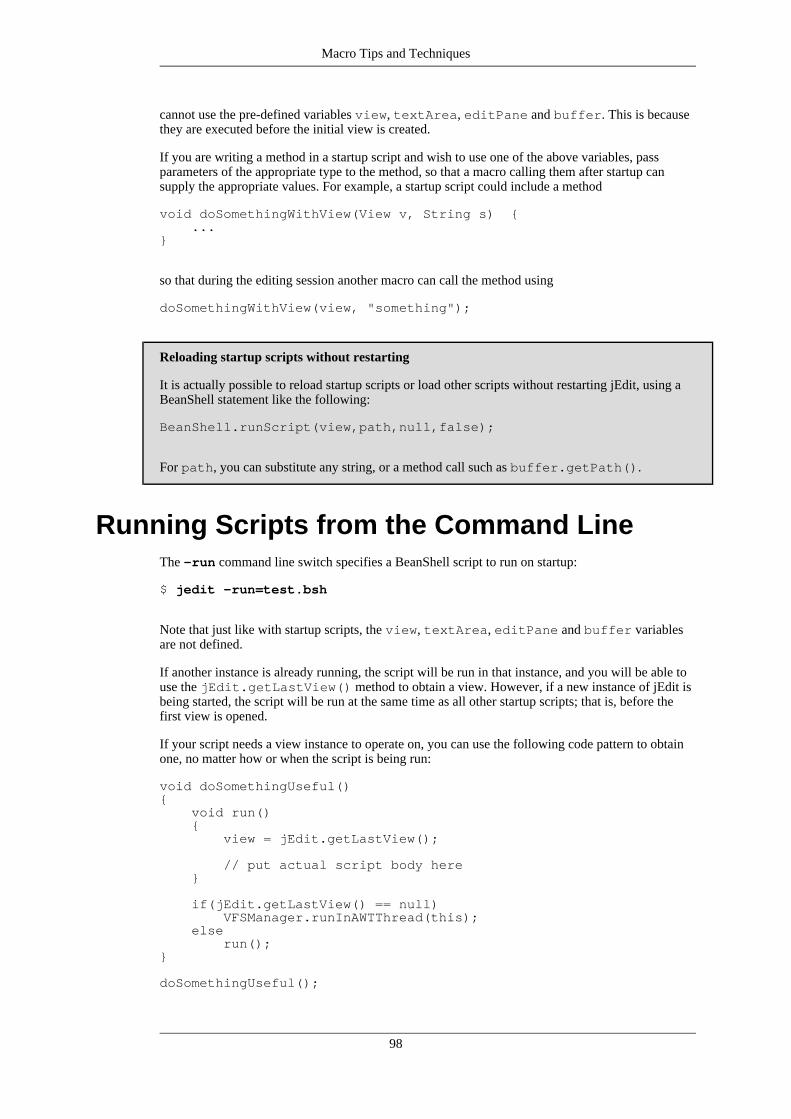
cannot use the pre-defined variables view, textArea, editPane and buffer. This is becausethey are executed before the initial view is created.
If you are writing a method in a startup script and wish to use one of the above variables, passparameters of the appropriate type to the method, so that a macro calling them after startup cansupply the appropriate values. For example, a startup script could include a method
void doSomethingWithView(View v, String s) {...
}
so that during the editing session another macro can call the method using
doSomethingWithView(view, "something");
Reloading startup scripts without restarting
It is actually possible to reload startup scripts or load other scripts without restarting jEdit, using aBeanShell statement like the following:
BeanShell.runScript(view,path,null,false);
For path, you can substitute any string, or a method call such as buffer.getPath().
Running Scripts from the Command LineThe -run command line switch specifies a BeanShell script to run on startup:
$ jedit -run=test.bsh
Note that just like with startup scripts, the view, textArea, editPane and buffer variablesare not defined.
If another instance is already running, the script will be run in that instance, and you will be able touse the jEdit.getLastView() method to obtain a view. However, if a new instance of jEdit isbeing started, the script will be run at the same time as all other startup scripts; that is, before thefirst view is opened.
If your script needs a view instance to operate on, you can use the following code pattern to obtainone, no matter how or when the script is being run:
void doSomethingUseful(){
void run(){
view = jEdit.getLastView();
// put actual script body here}
if(jEdit.getLastView() == null)VFSManager.runInAWTThread(this);
elserun();
}
doSomethingUseful();
Macro Tips and Techniques
98
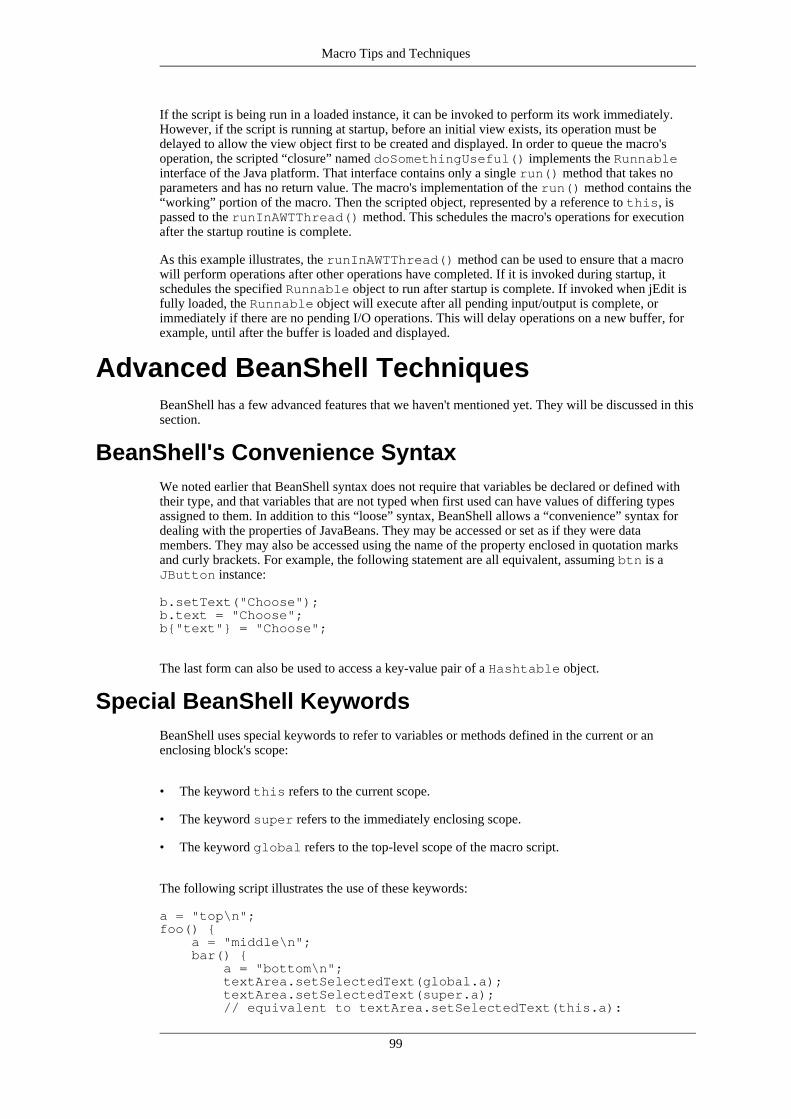
If the script is being run in a loaded instance, it can be invoked to perform its work immediately.However, if the script is running at startup, before an initial view exists, its operation must bedelayed to allow the view object first to be created and displayed. In order to queue the macro'soperation, the scripted “closure” named doSomethingUseful() implements the Runnableinterface of the Java platform. That interface contains only a single run() method that takes noparameters and has no return value. The macro's implementation of the run() method contains the“working” portion of the macro. Then the scripted object, represented by a reference to this, ispassed to the runInAWTThread() method. This schedules the macro's operations for executionafter the startup routine is complete.
As this example illustrates, the runInAWTThread() method can be used to ensure that a macrowill perform operations after other operations have completed. If it is invoked during startup, itschedules the specified Runnable object to run after startup is complete. If invoked when jEdit isfully loaded, the Runnable object will execute after all pending input/output is complete, orimmediately if there are no pending I/O operations. This will delay operations on a new buffer, forexample, until after the buffer is loaded and displayed.
Advanced BeanShell TechniquesBeanShell has a few advanced features that we haven't mentioned yet. They will be discussed in thissection.
BeanShell's Convenience SyntaxWe noted earlier that BeanShell syntax does not require that variables be declared or defined withtheir type, and that variables that are not typed when first used can have values of differing typesassigned to them. In addition to this “loose” syntax, BeanShell allows a “convenience” syntax fordealing with the properties of JavaBeans. They may be accessed or set as if they were datamembers. They may also be accessed using the name of the property enclosed in quotation marksand curly brackets. For example, the following statement are all equivalent, assuming btn is aJButton instance:
b.setText("Choose");b.text = "Choose";b{"text"} = "Choose";
The last form can also be used to access a key-value pair of a Hashtable object.
Special BeanShell KeywordsBeanShell uses special keywords to refer to variables or methods defined in the current or anenclosing block's scope:
• The keyword this refers to the current scope.
• The keyword super refers to the immediately enclosing scope.
• The keyword global refers to the top-level scope of the macro script.
The following script illustrates the use of these keywords:
a = "top\n";foo() {
a = "middle\n";bar() {
a = "bottom\n";textArea.setSelectedText(global.a);textArea.setSelectedText(super.a);// equivalent to textArea.setSelectedText(this.a):
Macro Tips and Techniques
99
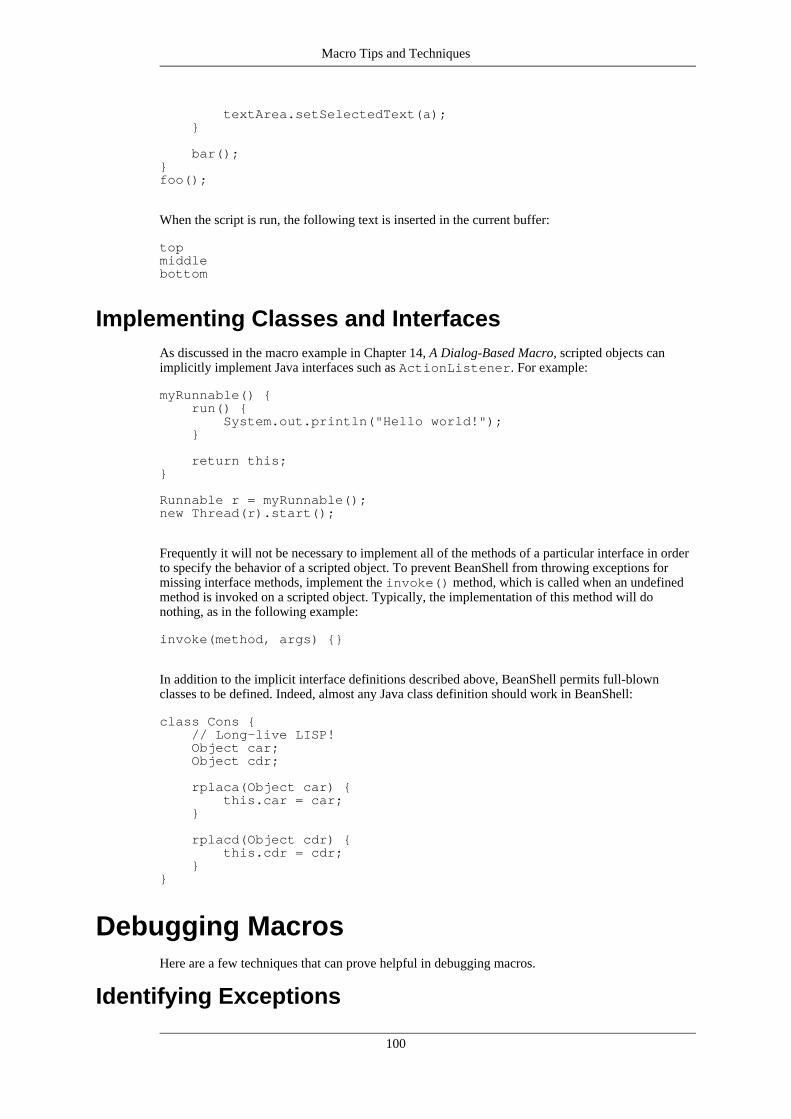
textArea.setSelectedText(a);}
bar();}foo();
When the script is run, the following text is inserted in the current buffer:
topmiddlebottom
Implementing Classes and InterfacesAs discussed in the macro example in Chapter 14, A Dialog-Based Macro, scripted objects canimplicitly implement Java interfaces such as ActionListener. For example:
myRunnable() {run() {
System.out.println("Hello world!");}
return this;}
Runnable r = myRunnable();new Thread(r).start();
Frequently it will not be necessary to implement all of the methods of a particular interface in orderto specify the behavior of a scripted object. To prevent BeanShell from throwing exceptions formissing interface methods, implement the invoke() method, which is called when an undefinedmethod is invoked on a scripted object. Typically, the implementation of this method will donothing, as in the following example:
invoke(method, args) {}
In addition to the implicit interface definitions described above, BeanShell permits full-blownclasses to be defined. Indeed, almost any Java class definition should work in BeanShell:
class Cons {// Long-live LISP!Object car;Object cdr;
rplaca(Object car) {this.car = car;
}
rplacd(Object cdr) {this.cdr = cdr;
}}
Debugging MacrosHere are a few techniques that can prove helpful in debugging macros.
Identifying Exceptions
Macro Tips and Techniques
100

An exception is a condition reflecting an error or other unusual result of program execution thatrequires interruption of normal program flow and some kind of special handling. Java has a rich(and extensible) collection of exception classes which represent such conditions.
jEdit catches exceptions thrown by BeanShell scripts and displays them in a dialog box. In addition,the full traceback is written to the activity log (see Appendix B, The Activity Log for moreinformation about the activity log).
There are two broad categories of errors that will result in exceptions:
• Interpreter errors, which may arise from typing mistakes like mismatched brackets or missingsemicolons, or from BeanShell's failure to find a class corresponding to a particular variable.
Interpreter errors are usually accompanied by the line number in the script, along with the causeof the error.
• Execution errors, which result from runtime exceptions thrown by the Java platform whenmacro code is executed.
Some exceptions thrown by the Java platform can often seem cryptic. Nevertheless, examiningthe contents of the activity log may reveals clues as to the cause of the error.
Using the Activity Log as a Tracing ToolSometimes exception tracebacks will say what kind of error occurred but not where it arose in thescript. In those cases, you can insert calls that log messages to the activity log in your macro. If thelogged messages appear when the macro is run, it means that up to that point the macro is fine; butif an exception is logged first, it means the logging call is located after the cause of the error.
To write a message to the activity log, use the following method of the Log class:
• public static void log(int urgency, Object source, Objectmessage);
See the documentation for the Log class for information about the method's parameters.
The following code sends a typical debugging message to the activity log:
Log.log(Log.DEBUG, BeanShell.class,"counter = " + counter);
The corresponding activity log entry might read as follows:
[debug] BeanShell: counter = 15
Using message dialog boxes as a tracing tool
If you would prefer not having to deal with the activity log, you can use the Macros.message()method as a tracing tool. Just insert calls like the following in the macro code:
Macros.message(view,"tracing");
Execution of the macro is halted until the message dialog box is closed. When you have finisheddebugging the macro, you should delete or comment out the debugging calls toMacros.message() in your final source code.
Macro Tips and Techniques
101
Chapter 16. BeanShell CommandsBeanShell includes a set of commands; subroutines that can be called from any script or macro. Thefollowing is a summary of those commands which may be useful within jEdit.
Note
Java classes in plugins cannot make use of BeanShell commands directly. However, thesecommands can be called from BeanShell code that is part of a plugin, for example thesnippets in actions.xml, or any BeanShell scripts shipped with the plugin and loadedon startup.
Output Commands
• void cat(String filename);
Writes the contents of filename to the activity log.
• void javap(String | Object | Class target);
Writes the public fields and methods of the specified class to the output stream of the currentprocess. Requires Java 2 version 1.3 or greater.
• void print(arg);
Writes the string value of the argument to the activity log, or if run from the Console plugin, tothe current output window. If arg is an array, print runs itself recursively on the array'selements.
File Management Commands
• void cd(String dirname);
Changes the working directory of the BeanShell interpreter to dirname.
• void cp(String fromFile, String toFile);
Copy fromFile to toFile.
• void dir(String dirname);
Displays the contents of directory dirname. The format of the display is similar to the Unix ls-l command.
• void mv(String fromFile, String toFile);
Moves the file named by fromFile to toFile.
• File pathToFile(String filename);
Create a File object corresponding to filename. Relative paths are resolved with referenceto the BeanShell interpreter's working directory.
• void pwd(void);
Writes the current working directory of the BeanShell interpreter to the output stream of thecurrent process.
102
• void rm(String pathname);
Deletes the file name by pathname.
Component Commands
• JFrame frame(Component frame);
Displays the component in a top-level JFrame, centered and packed. Returns the JFrameobject.
• Object load(String filename);
Loads and returns a serialized Java object from filename.
• void save(Component component, String filename);
Saves component in serialized form to filename.
• Font setFont(Component comp, int ptsize);
Set the font size of component to ptsize and returns the new font.
Resource Management Commands
• URL getResource(String path);
Returns the resource specified by path. An absolute path must be used to return any resourceavailable in the current classpath.
Script Execution Commands
• Thread bg(String filename);
Run the BeanShell script named by filename in a copy of the existing namespace and in aseparate thread. Returns the Thread object so created.
• void exec(String cmdline);
Start the external process by calling Runtime.exec() on cmdline. Any output is directedto the output stream of the calling process.
• Object eval(String expression);
Evaluates the string expression as a BeanShell script in the interpreter's current namespace.Returns the result of the evaluation of null.
• bsh.This run(String filename);
Run the BeanShell script named by filename in a copy of the existing namespace. The returnvalue represent the object context of the script, allowing you to access its variables and methods.
• void setAccessibility(boolean flag);
If flag is true, BeanShell scripts are allowed to change and modify private variables, and callprivate methods. The default is false.
BeanShell Commands
103

• void setStrictJava(boolean flag);
If flag is true, BeanShell scripts must follow a much more strict, Java-like syntax, and arenot able to use the convenience features described in the section called “BeanShell'sConvenience Syntax”.
• void source(String filename);
Evaluates the contents of filename as a BeanShell script in the interpreter's currentnamespace.
BeanShell Object Management Commands
• bind(bsh.This ths, bsh.Namespace namespace);
Binds the scripted object ths to namespace.
• void clear(void);
Clear all variables, methods, and imports from this namespace. If this namespace is the root, itwill be reset to the default imports.
• bsh.This extend(bsh.This object);
Creates a new BeanShell This scripted object that is a child of the parameter object.
• void importObject(Object object);
Import an object into this namespace. This is somewhat similar to Java 1.5 static class imports,except you can import the methods and fields of a Java object instance into a BeanShellnamespace, for example:
Map map = new HashMap();importObject( map );put("foo", "bar");print( get("foo") ); // "bar"
• bsh.This object(void);
Creates a new BeanShell This scripted object which can hold data members. You can use thisto create an object for storing miscellaneous crufties, like so:
crufties = object();crufties.foo = "hello world";crufties.counter = 5;...
• setNameSpace(bsh.Namespace namespace);
Set the namespace of the current scope to namespace.
• bsh.This super(String scopename);
Returns a reference to the BeanShell This object representing the enclosing method scopespecified by scopename. This method work similar to the super keyword but can refer toenclosing scope at higher levels in a hierarchy of scopes.
• void unset(String name);
Removes the variable named by name from the current interpreter namespace. This has theeffect of “undefining” the variable.
BeanShell Commands
104

Other Commands
• void debug(void);
Toggles BeanShell's internal debug reporting to the output stream of the current process.
• getSourceFileInfo(void);
Returns the name of the file or other source from which the BeanShell interpreter is reading.
BeanShell Commands
105

Part IV. Writing PluginsThis part of the user's guide covers writing plugins for jEdit.
Like jEdit itself, plugins are written primarily in Java. While this guide assumes some workingknowledge of the language, you are not required to be a Java wizard. If you can write a usefulapplication of any size in Java, you can write a plugin.
This part of the user's guide was written by John Gellene <[email protected]>.
Chapter 17. Introducing the PluginAPI
The jEdit Plugin API provides a framework for hosting plugin applications without imposing anyrequirements on the design or function of the plugin itself. You could write an application thatperforms spell checking, displays a clock or plays chess and turn it into a jEdit plugin. There arecurrently over 50 released plugins for jEdit. While none of them play chess, they perform a widevariety of editing and file management tasks.
A detailed listing of available plugins is available at plugins.jedit.org. You can also find betaversions of new plugins in the “Downloads” area of community.jedit.org.
Using the “Plugin Manager” feature of jEdit, users with an Internet connection can check for new orupdated plugins and install and remove them without leaving jEdit. See Chapter 9, Installing andUsing Plugins for details.
Requirements for “plugging in” to jEdit are as follows:
• This plugin must supply information about itself, such as its name, version, author, andcompatibility with versions of jEdit.
• The plugin must provide for activating, displaying and deactivating itself upon direction fromjEdit, typically in response to user input.
• The plugin may define actions, both explicitly with an action definition file, or implicitly byproviding dockable windows. Actions are small blocks of BeanShell code that jEdit will performon behalf of the plugin upon user request. They provide the “glue” between user input andspecific plugin routines.
By convention, plugins display their available actions in submenus of jEdit's Plugins menu;each menu item corresponds to an action. The user can also assign actions to keyboard shortcuts,toolbar buttons or entries in the text area's right-click menu.
• The plugin may, but need not, provide a user interface.
If the plugin has a visible interface, it can be shown in any object derived from one of Javatop-level container classes: JWindow, JDialog, or JFrame. jEdit also provides a dockablewindow API, which allows plugin windows derived from the JComponent class to be dockedinto views or shown in top-level frames, at the user's request.
Plugins can also act directly upon jEdit's text area. They can add graphical elements to the textdisplay (like error highlighting in the case of the ErrorList plugin) or decorations surroundingthe text area (like the JDiff plugin's summary views).
• Plugins may provide a range of options that the user can modify to alter their configuration.
If a plugin provides configuration options in accordance with the plugin API, jEdit will makethem available in the Global Options dialog box.
• While it is not required, plugins are encouraged to provide documentation.
As noted, many of these features are optional; it is possible to write a plugin that does not provideactions, configuration options, or dockable windows. The majority of plugins, however, providemost of these services.
Plugins and different jEdit versions
107

As jEdit continues to evolve and improve, elements of the plugin API may change with a new jEditrelease.
On occasion an API change will break code used by plugins, although efforts are made to maintainor deprecate plugin-related code on a transitional basis. While the majority of plugins are unaffectedby most changes and will continue working, it is a good idea to monitor the jEdit change log, themailing lists and community.jedit.org for API changes so that you can update your plugin ifnecessary.
Introducing the Plugin API
108

Chapter 18. Implementing a SimplePlugin
There are many applications for the leading operating systems that provide a “scratch-pad” or“sticky note” facility for the desktop display. A similar type of facility operating within the jEditdisplay would be a convenience. The use of dockable windows would allow the notepad to bedisplayed or hidden with a single mouse click or keypress (if a keyboard shortcut were defined). Thecontents of the notepad could be saved at program exit (or, if earlier, deactivation of the plugin) andretrieved at program startup or plugin activation.
We will keep the capabilities of this plugin modest, but a few other features would be worthwhile.The user should be able to write the contents of the notepad to storage on demand. It should also bepossible to choose the name and location of the file that will be used to hold the notepad text. Thiswould allow the user to load other files into the notepad display. The path of the notepad file shouldbe displayed in the plugin window, but will give the user the option to hide the file name. Finally,there should be an action by which a single click or keypress would cause the contents of thenotepad to be written to the new text buffer for further processing.
The full source code for QuickNotepad is contained in jEdit's source code distribution. We willprovide excerpts in this discussion where it is helpful to illustrate specific points. You are invited toobtain the source code for further study or to use as a starting point for your own plugin.
How Plugins are LoadedWe will discuss the implementation of the QuickNotepad plugin, along with the jEdit APIs it makesuse of. But first, we describe how plugins are loaded.
As part of its startup routine, jEdit's main method calls various methods to load and initializeplugins.
Additionally, plugins using the new jEdit 4.2 plugin API can be loaded and unloaded at any time.This is a great help when developing your own plugins -- there is no need to restart the editor aftermaking changes (see the section called “Reloading the Plugin” ).
Note that plugins using the older jEdit 4.1 API are still only loaded on editor startup, and unloadedon editor exit. The jEdit 4.1 API is deprecated and will not be described in this guide.
Plugins are loaded from files with the .jar filename extension located in the jars subdirectoriesof the jEdit installation and user settings directories (see the section called “The jEdit SettingsDirectory”).
For each JAR archive file it finds, jEdit scans its entries and performs the following tasks:
• Adds to a collection maintained by jEdit a new object of type PluginJAR. This is a datastructure holding the name of the JAR archive file, a reference to the JARClassLoader, and acollection of plugins found in the archive file.
• Loads any properties defined in files ending with the extension .props that are contained inthe archive. See the section called “The Property File”.
• Reads action definitions from any file named actions.xml in the archive (the file need notbe at the top level). See the section called “The Action Catalog”.
• Parses and loads the contents of any file named dockables.xml in the archive (the file neednot be at the top level). This file contains BeanShell code for creating docking or floatingwindows that will contain the visible components of the plugin. Not all plugins define dockablewindows, but those that do need a dockables.xml file. See the section called “The DockableWindow Catalog”.
109
• Checks for a class name with a name ending with Plugin.class.
Such a class is known as a plugin core class and must extend jEdit's abstract EditPluginclass. The initialization routine checks the plugin's properties to see if it is subject to anydependencies. For example, a plugin may require that the version of the Java runtimeenvironment or of jEdit itself be equal to or above some threshold version. A plugin can alsorequire the presence of another plugin.
If any dependency is not satisfied, the loader marks the plugin as “broken” and logs an errormessage.
After scanning the plugin JAR file and loading any resources, a new instance of the plugin coreclass is created and added to the collection maintained by the appropriate PluginJAR. jEdit thencalls the start() method of the plugin core class. The start() method can performinitialization of the object's data members. Because this method is defined as an empty “no-op” inthe EditPlugin abstract class, a plugin need not provide an implementation if no uniqueinitialization is required.
Updating 4.1 plugins
Note that while jEdit 4.1 plugins were only loaded on startup, jEdit 4.2 plugins can be loaded at anytime. As a result, the start() method needs to cope with being called at any time, and stop()needs to fully clean up after the plugin. See the API documentation for the EditPlugin class fordetails.
The QuickNotepadPlugin ClassThe major issues encountered when writing a plugin core class arise from the developer's decisionson what features the plugin will make available. These issues have implications for other pluginelements as well.
• Will the plugin provide for actions that the user can trigger using jEdit's menu items, toolbarbuttons and keyboard shortcuts?
• Will the plugin have its own visible interface?
• Will the plugin have settings that the user can configure?
• Will the plugin respond to any messages reflecting changes in the host application's state?
Recall that the plugin core class must extend EditPlugin. In QuickNotepad's plugin core class,there are no special initialization or shutdown chores to perform, so we will not need a start() orstop() method.
The resulting plugin core class is lightweight and straightforward to implement:
•public class QuickNotepadPlugin extends EditPlugin {
public static final String NAME = "quicknotepad";public static final String MENU = "quicknotepad.menu";public static final String PROPERTY_PREFIX
= "plugin.QuickNotepadPlugin.";public static final String OPTION_PREFIX
= "options.quicknotepad.";
First we define a few static String data members to enforce consistent syntax for the name of
Implementing a Simple Plugin
110
properties we will use throughout the plugin.
•
public void createMenuItems(Vector menuItems) {menuItems.addElement(GUIUtilities.loadMenu(MENU));
}
This implementation of the EditPlugin.createMenuItems() method is very typical. Ituses a jEdit utility function to create the menu, taking the list of actions from thequicknotepad property, and the label from quotenotepad.label.
If the plugin only had a single menu item (for example, an item activating a dockable window),we would call GUIUtilities.loadMenuItem() instead ofGUIUtilities.loadMenu().
•public void createOptionPanes(OptionsDialog od) {
od.addOptionPane(new QuickNotepadOptionPane());}
}
This implementation of the EditPlugin.createOptionPanes() method adds a newinstance of QuickNotepadOptionPane to the given instance of the Global Options dialogbox.
The EditBusPlugins register EBComponent instances with the EditBus to receive messages reflectingchanges in jEdit's state.
The message classes derived from EBMessage cover the opening and closing of the application,changes in the status of buffers and views, changes in user settings, as well as changes in the state ofother program features. A full list of messages can be found in the org.gjt.sp.jedit.msg package.
EBComponents are added and removed with the EditBus.addToBus() andEditBus.removeFromBus() methods.
Typically, the EBComponent.handleMessage() method is implemented with one or more ifblocks that test whether the message is an instance of a derived message class in which thecomponent has an interest.
if(msg instanceof BufferUpdate) {// a buffer's state has changed!
}else if(msg instanceof ViewUpdate) {
// a view's state has changed!}// ... and so on
If a plugin core class will respond to EditBus messages, it can be derived from EBPlugin, inwhich case no explicit addToBus() call is necessary. Otherwise, EditPlugin will suffice as aplugin base class. Note that QuickNotepad uses the latter.
The Property FilejEdit maintains a list of “properties”, which are name/value pairs used to store human-readable
Implementing a Simple Plugin
111

strings, user settings, and various other forms of meta-data. During startup, jEdit loads the defaultset of properties, followed by plugin properties stored in plugin JAR files, finally followed by userproperties.
Some properties are used by the plugin API itself. Others are accessed by the plugin using methodsin the jEdit class.
Property files contained in plugin JARs must end with the filename extension .props, and have avery simple syntax, which the following example illustrates:
# Lines starting with '#' are ignored.name=valueanother.name=another valuelong.property=Long property value, split over \
several linesescape.property=Newlines and tabs can be inserted \
using the \t and \n escapesbackslash.property=A backslash can be inserted by writing \\.
Now we look at the QuickNotepad.props file which contains properties for the QuickNotepadplugin. The first type of property data is information about the plugin itself; these are the onlyproperties that must be specified in order for the plugin to load:
# general plugin informationplugin.QuickNotepadPlugin.activate=deferplugin.QuickNotepadPlugin.name=QuickNotepadplugin.QuickNotepadPlugin.author=John Gelleneplugin.QuickNotepadPlugin.version=4.1plugin.QuickNotepadPlugin.docs=QuickNotepad.htmlplugin.QuickNotepadPlugin.depend.0=jedit 04.02.10.00
These properties are described in detail in the documentation for the EditPlugin class and do notrequire further discussion here.
Next in the file comes a property that sets the title of the plugin's dockable window. Dockablewindows are discussed in detail in the section called “The Dockable Window Catalog”.
# dockable window namequicknotepad.title=QuickNotepad
Next, we see menu item labels for the plugin's actions. Actions are discussed in detail in the sectioncalled “The Action Catalog”.
# action labelsquicknotepad.label=QuickNotepadquicknotepad.choose-file.label=Choose notepad filequicknotepad.save-file.label=Save notepad filequicknotepad.copy-to-buffer.label=Copy notepad to buffer
Next, the plugin's menu is defined. See the section called “The QuickNotepadPlugin Class”.
# application menu itemsquicknotepad.menu.label=QuickNotepadquicknotepad.menu=quicknotepad - quicknotepad.choose-file \quicknotepad.save-file quicknotepad.copy-to-buffer
We have created a small toolbar as a component of QuickNotepad, so file names for the button iconsfollow:
# plugin toolbar buttonsquicknotepad.choose-file.icon=Open.pngquicknotepad.save-file.icon=Save.png
Implementing a Simple Plugin
112

quicknotepad.copy-to-buffer.icon=Edit.png
The menu item labels corresponding to these icons will also serve as tooltip text.
Finally, the properties file set forth the labels and settings used by the option pane:
# Option pane labelsoptions.quicknotepad.label=QuickNotepadoptions.quicknotepad.file=File:options.quicknotepad.choose-file=Chooseoptions.quicknotepad.choose-file.title=Choose a notepad fileoptions.quicknotepad.choose-font=Font:options.quicknotepad.show-filepath.title=Display notepad file path
# Initial default font settingsoptions.quicknotepad.show-filepath=trueoptions.quicknotepad.font=Monospacedoptions.quicknotepad.fontstyle=0options.quicknotepad.fontsize=14
# Setting not defined but supplied for completenessoptions.quicknotepad.filepath=
Updating 4.1 plugins
jEdit 4.2 plugins are distinguished from jEdit 4.1 plugins by the presence of theplugin.name.activate property. If this property is set, the plugin is treated like a jEdit 4.2plugin. Usually, this property should be set to defer. See the API documentation for theEditPlugin class for details.
The Action CatalogActions define procedures that can be bound to a menu item, a toolbar button or a keyboardshortcut. Actions are short scripts written in BeanShell, jEdit's macro scripting language. Thesescripts either direct the action themselves, delegate to a method in one of the plugin's classes thatencapsulates the action, or do a little of both. The scripts are usually short; elaborate action protocolsare usually contained in compiled code, rather than an interpreted macro script, to speed execution.
Actions are defined by creating an XML file entitled actions.xml and placing it in the pluginJAR file.
The actions.xml file from the QuickNotepad plugin looks as follows:
<?xml version="1.0"?>
<!DOCTYPE ACTIONS SYSTEM "actions.dtd">
<ACTIONS><ACTION NAME="quicknotepad.choose-file">
<CODE>wm.getDockable(QuickNotepadPlugin.NAME).chooseFile();
</CODE></ACTION>
<ACTION NAME="quicknotepad.save-file"><CODE>
wm.getDockable(QuickNotepadPlugin.NAME).saveFile();</CODE>
</ACTION>
<ACTION NAME="quicknotepad.copy-to-buffer">
Implementing a Simple Plugin
113

<CODE>wm.getDockable(QuickNotepadPlugin.NAME).copyToBuffer();
</CODE></ACTION>
</ACTIONS>
This file defines three actions. They use the current view's DockableWindowManager objectand the method getDockable() to find the QuickNotepad plugin window and call the desiredmethod.
When an action is invoked, the BeanShell scripts address the plugin through static methods, or ifinstance data is needed, the current View, its DockableWindowManager, and the plugin objectreturn by the getDockable() method.
If you are unfamiliar with BeanShell code, you may nevertheless notice that the code statementsbear a strong resemblance to Java code, with one exception: the variable view is never assignedany value.
For complete answers to this and other BeanShell mysteries, see Part III, “Writing Macros”; twoobservations will suffice here. First, the variable view is predefined by jEdit's implementation ofBeanShell to refer to the current View object. Second, the BeanShell scripting language is basedupon Java syntax, but allows variables to be typed at run time, so explicit types for variables neednot be declared.
A formal description of each element of the actions.xml file can be found in the documentationof the ActionSet class.
The Dockable Window CatalogThe jEdit plugin API uses BeanShell to create the top-level visible container of a plugin's interface.The BeanShell code is contained in a file named dockables.xml. It usually is quite short,providing only a single BeanShell expression used to create a visible plugin window.
The following example from the QuickNotepad plugin illustrates the requirements of the data file:
<?xml version="1.0"?>
<!DOCTYPE DOCKABLES SYSTEM "dockables.dtd">
<DOCKABLES><DOCKABLE NAME="quicknotepad">
new QuickNotepad(view, position);</DOCKABLE>
</DOCKABLES>
In this example, the <DOCKABLE> element has a single attribute, the dockable window's identifier.This attribute is used to key a property where the window title is stored; see the section called “TheProperty File”.
The contents of the <DOCKABLE> element itself is a BeanShell expression that constructs a newQuickNotepad object. The view and position are predefined by the plugin API as the viewin which the plugin window will reside, and the docking position of the plugin.
A formal description of each element of the dockables.xml file can be found in thedocumentation of the DockableWindowManager class.
The QuickNotepad ClassHere is where most of the features of the plugin will be implemented. To work with the dockablewindow API, the top level window will be a JPanel. The visible components reflect a simplelayout. Inside the top-level panel we will place a scroll pane with a text area. Above the scroll pane
Implementing a Simple Plugin
114
we will place a panel containing a small tool bar and a label displaying the path of the currentnotepad file.
We have identified three user actions that need implementation here: chooseFile(),saveFile(), and copyToBuffer(). As noted earlier, we also want the text area to change itsappearance in immediate response to a change in user options settings. In order to do that, thewindow class must respond to a PropertiesChanged message from the EditBus.
Unlike the EBPlugin class, the EBComponent interface does not deal with the component'sactual subscribing and unsubscribing to the EditBus. To accomplish this, we use a pair of methodsinherited from the Java platform's JComponent class that are called when the window is madevisible, and when it is hidden. These two methods, addNotify() and removeNotify(), areoverridden to add and remove the visible window from the list of EditBus subscribers.
We will provide for two minor features when the notepad is displayed in the floating window. First,when a floating plugin window is created, we will give the notepad text area input focus. Second,when the notepad if floating and has input focus, we will have the Escape key dismiss the notepadwindow. An AncestorListener and a KeyListener will implement these details.
Here is the listing for the data members, the constructor, and the implementation of theEBComponent interface:
public class QuickNotepad extends JPanelimplements EBComponent
{private String filename;private String defaultFilename;private View view;private boolean floating;
private QuickNotepadTextArea textArea;private QuickNotepadToolPanel toolPanel;
//// Constructor//
public QuickNotepad(View view, String position){
super(new BorderLayout());
this.view = view;this.floating = position.equals(
DockableWindowManager.FLOATING);
this.filename = jEdit.getProperty(QuickNotepadPlugin.OPTION_PREFIX+ "filepath");
if(this.filename == null || this.filename.length() == 0){
this.filename = new String(jEdit.getSettingsDirectory()+ File.separator + "qn.txt");
jEdit.setProperty(QuickNotepadPlugin.OPTION_PREFIX+ "filepath",this.filename);
}this.defaultFilename = new String(this.filename);
this.toolPanel = new QuickNotepadToolPanel(this);add(BorderLayout.NORTH, this.toolPanel);
if(floating)this.setPreferredSize(new Dimension(500, 250));
textArea = new QuickNotepadTextArea();textArea.setFont(QuickNotepadOptionPane.makeFont());textArea.addKeyListener(new KeyHandler());textArea.addAncestorListener(new AncestorHandler());JScrollPane pane = new JScrollPane(textArea);
Implementing a Simple Plugin
115

add(BorderLayout.CENTER, pane);
readFile();}
//// Attribute methods//
// for toolBar displaypublic String getFilename(){
return filename;}
//// EBComponent implementation//
public void handleMessage(EBMessage message){
if (message instanceof PropertiesChanged){
propertiesChanged();}
}
private void propertiesChanged(){
String propertyFilename = jEdit.getProperty(QuickNotepadPlugin.OPTION_PREFIX + "filepath");
if(!defaultFilename.equals(propertyFilename)){
saveFile();toolPanel.propertiesChanged();defaultFilename = propertyFilename.clone();filename = defaultFilename.clone();readFile();
}Font newFont = QuickNotepadOptionPane.makeFont();if(!newFont.equals(textArea.getFont())){
textArea.setFont(newFont);textArea.invalidate();
}}
// These JComponent methods provide the appropriate points// to subscribe and unsubscribe this object to the EditBus
public void addNotify(){
super.addNotify();EditBus.addToBus(this);
}
public void removeNotify(){
saveFile();super.removeNotify();EditBus.removeFromBus(this);
}
...
}
Implementing a Simple Plugin
116

This listing refers to a QuickNotebookTextArea object. It is currently implemented as aJTextArea with word wrap and tab sizes hard-coded. Placing the object in a separate class willsimply future modifications.
The QuickNotepadToolBar ClassThere is nothing remarkable about the toolbar panel that is placed inside the QuickNotepadobject. The constructor shows the continued use of items from the plugin's properties file.
public class QuickNotepadToolPanel extends JPanel{
private QuickNotepad pad;private JLabel label;
public QuickNotepadToolPanel(QuickNotepad qnpad){
pad = qnpad;JToolBar toolBar = new JToolBar();toolBar.setFloatable(false);
toolBar.add(makeCustomButton("quicknotepad.choose-file",new ActionListener() {
public void actionPerformed(ActionEvent evt) {QuickNotepadToolPanel.this.pad.chooseFile();
}}));
toolBar.add(makeCustomButton("quicknotepad.save-file",new ActionListener() {
public void actionPerformed(ActionEvent evt) {QuickNotepadToolPanel.this.pad.saveFile();
}}));
toolBar.add(makeCustomButton("quicknotepad.copy-to-buffer",new ActionListener() {
public void actionPerformed(ActionEvent evt) {QuickNotepadToolPanel.this.pad.copyToBuffer();
}}));
label = new JLabel(pad.getFilename(),SwingConstants.RIGHT);
label.setForeground(Color.black);label.setVisible(jEdit.getProperty(
QuickNotepadPlugin.OPTION_PREFIX+ "show-filepath").equals("true"));
this.setLayout(new BorderLayout(10, 0));this.add(BorderLayout.WEST, toolBar);this.add(BorderLayout.CENTER, label);this.setBorder(BorderFactory.createEmptyBorder(0, 0, 3, 10));
}
...
}
The method makeCustomButton() provides uniform attributes for the three toolbar buttonscorresponding to three of the plugin's use actions. The menu titles for the user actions serve doubleduty as tooltip text for the buttons. There is also a propertiesChanged() method for thetoolbar that sets the text and visibility of the label containing the notepad file path.
The QuickNotepadOptionPane ClassUsing the default implementation provided by AbstractOptionPane reduces the preparation ofan option pane to two principal tasks: writing a _init() method to layout and initialize the pane,and writing a _save() method to commit any settings changed by user input. If a button on the
Implementing a Simple Plugin
117

option pane should trigger another dialog, such as a JFileChooser or jEdit's own enhancedVFSFileChooserDialog, the option pane will also have to implement the ActionListenerinterface to display additional components.
The QuickNotepad plugin has only three options to set: the path name of the file that will store thenotepad text, the visibility of the path name on the tool bar, and the notepad's display font. Using theshortcut methods of the plugin API, the implementation of _init() looks like this:
public class QuickNotepadOptionPane extends AbstractOptionPaneimplements ActionListener
{private JTextField pathName;private JButton pickPath;private FontSelector font;
...
public void _init(){
showPath = new JCheckBox(jEdit.getProperty(QuickNotepadPlugin.OPTION_PREFIX+ "show-filepath.title"),
jEdit.getProperty(QuickNotepadPlugin.OPTION_PREFIX + "show-filepath").equals("true"));
addComponent(showPath);
pathName = new JTextField(jEdit.getProperty(QuickNotepadPlugin.OPTION_PREFIX+ "filepath"));
JButton pickPath = new JButton(jEdit.getProperty(QuickNotepadPlugin.OPTION_PREFIX+ "choose-file"));
pickPath.addActionListener(this);
JPanel pathPanel = new JPanel(new BorderLayout(0, 0));pathPanel.add(pathName, BorderLayout.CENTER);pathPanel.add(pickPath, BorderLayout.EAST);
addComponent(jEdit.getProperty(QuickNotepadPlugin.OPTION_PREFIX + "file"),pathPanel);
font = new FontSelector(makeFont());addComponent(jEdit.getProperty(
QuickNotepadPlugin.OPTION_PREFIX + "choose-font"),font);
}
...
}
Here we adopt the vertical arrangement offered by use of the addComponent() method with oneembellishment. We want the first “row” of the option pane to contain a text field with the currentnotepad file path and a button that will trigger a file chooser dialog when pressed. To place both ofthem on the same line (along with an identifying label for the file option), we create a JPanel tocontain both components and pass the configured panel to addComponent().
The _init() method uses properties from the plugin's property file to provide the names of labelfor the components placed in the option pane. It also uses a property whose name begins withPROPERTY_PREFIX as a persistent data item - the path of the current notepad file. The elementsof the notepad's font are also extracted from properties using a static method of the option paneclass.
The _save() method extracts data from the user input components and assigns them to theplugin's properties. The implementation is straightforward:
Implementing a Simple Plugin
118

public void _save(){
jEdit.setProperty(QuickNotepadPlugin.OPTION_PREFIX+ "filepath", pathName.getText());
Font _font = font.getFont();
jEdit.setProperty(QuickNotepadPlugin.OPTION_PREFIX+ "font", _font.getFamily());
jEdit.setProperty(QuickNotepadPlugin.OPTION_PREFIX+ "fontsize", String.valueOf(_font.getSize()));
jEdit.setProperty(QuickNotepadPlugin.OPTION_PREFIX+ "fontstyle", String.valueOf(_font.getStyle()));
jEdit.setProperty(QuickNotepadPlugin.OPTION_PREFIX+ "show-filepath", String.valueOf(showPath.isSelected()));
}
The class has only two other methods, one to display a file chooser dialog in response to user action,and the other to construct a Font object from the plugin's font properties. They do not requirediscussion here.
Plugin DocumentationWhile not required by the plugin API, a help file is an essential element of any plugin written forpublic release. A single web page is often all that is required. There are no specific requirements onlayout, but because of the design of jEdit's help viewer, the use of frames should be avoided. Topicsthat would be useful include the following:
• a description of the purpose of the plugin;
• an explanation of the type of input the user can supply through its visible interface (such asmouse action or text entry in controls);
• a listing of available user actions that can be taken when the plugin does not have input focus;
• a summary of configuration options;
• information on development of the plugin (such as a change log, a list of “to do” items, andcontact information for the plugin's author); and
• licensing information, including acknowledgments for any library software used by the plugin.
The location of the plugin's help file is stored in the plugin.QuickNotepad.docs property;see the section called “The Property File”.
Compiling the PluginWe have already outlined the contents of the user action catalog, the properties file and thedocumentation file in our earlier discussion. The final step is to compile the source file and build thearchive file that will hold the class files and the plugin's other resources.
Publicly released plugins include with their source a makefile in XML format for the Ant utility.The format for this file requires few changes from plugin to plugin. Here is the version ofbuild.xml used by QuickNotepad and many other plugins:
<project name="QuickNotepad" default="dist" basedir=".">
<property name="jedit.install.dir" value="../.."/><property name="jar.name" value="QuickNotepad.jar"/>
<property name="install.dir" value=".."/>
Implementing a Simple Plugin
119

<path id="project.class.path"><pathelement location="${jedit.install.dir}/jedit.jar"/><pathelement location="."/>
</path>
<target name="compile"><javacsrcdir="."deprecation="on"includeJavaRuntime="yes"
><classpath refid="project.class.path"/>
</javac></target>
<target name="dist" depends="compile"><mkdir dir="${install.dir}"/><jar jarfile="${install.dir}/${jar.name}"><fileset dir="."><include name="**/*.class"/><include name="**/*.props"/><include name="**/*.html"/><include name="actions.xml"/><include name="dockables.xml"/>
</fileset></jar>
</target></project>
For a full discussion of the Ant file format and command syntax, you should consult the Antdocumentation site. Modifying this makefile for a different plugin will likely only require threechanges:
• the name of the plugin;
• the choice of compiler (made by inserting and deleting the comment character '#'); and
• the classpath variables for jedit.jar any plugins this one depends on.
Reloading the PluginOnce you have compiled your plugin using the 4.2 API you will need to reload it to test it. Followthese steps to reload your plugin without restarting jEdit:
• From the Plugins menu open the Plugin Manager.
• On the Manage tab uncheck Hide libraries. This will allow you to see plugins that are notloaded.
• Find the plugin on the Manage tab and uncheck it. This will unload the plugin. You will get awarning if this plugin does not support dynamic reloading. If you get that warning you will needto restart jEdit to reload the plugin until the plugin is converted over to the 4.2 API.
• Recheck the plugin to reload it.
The jEdit web site contains a macro and an Ant task that can be used as an alternative method fordynamically reloading plugins.
Implementing a Simple Plugin
120

If you have reached this point in the text, you are probably serious about writing a plugin for jEdit.Good luck with your efforts, and thank you for contributing to the jEdit project.
Implementing a Simple Plugin
121
Chapter 19. Plugin Tips andTechniquesBundling Additional Class Libraries
Recall that any class whose name ends with Plugin.class is called a plugin core class. JARfiles with no plugin core classes are also loaded by jEdit; the classes they contain are made availableto other plugins. Many plugins that rely on third-party class libraries ship them as separate JARfiles. The libraries will be available inside the jEdit environment but are not part of a generalclasspath or library collection when running other Java applications.
A plugin that bundles extra JAR files must list them in the plugin.class name.jarsproperty. See the documentation for the EditPlugin class for details.
122