Jass.Performance Low Profiles Installation Manual · Jass.Performance Low Profiles Installation...
10
Jass.Performance Low Profiles Installation Manual Jass.Performance Low Profiles Installation Manual The Jass.Performance Low Profiles are featuring: Fully reversible upgrade of the stock headlight bodies. Premium branded E-signed, TÜV aprooved Hella Headlights with integrated low/high beam. Significantly improved light output to the US headlights. Extremely low profile design of only 9cm maximum lift. Optimized aerodynamics with headlights on, improved top speed. Significantly enhanced and sportier look Full manual adjustability – top, bottom, left right. Preserving the MOT/TÜV relevant el. height adjustability.
-
Upload
hoangkhanh -
Category
Documents
-
view
223 -
download
2
Transcript of Jass.Performance Low Profiles Installation Manual · Jass.Performance Low Profiles Installation...
Jass.Performance Low Profiles Installation Manual
Jass.Performance Low Profiles
Installation Manual
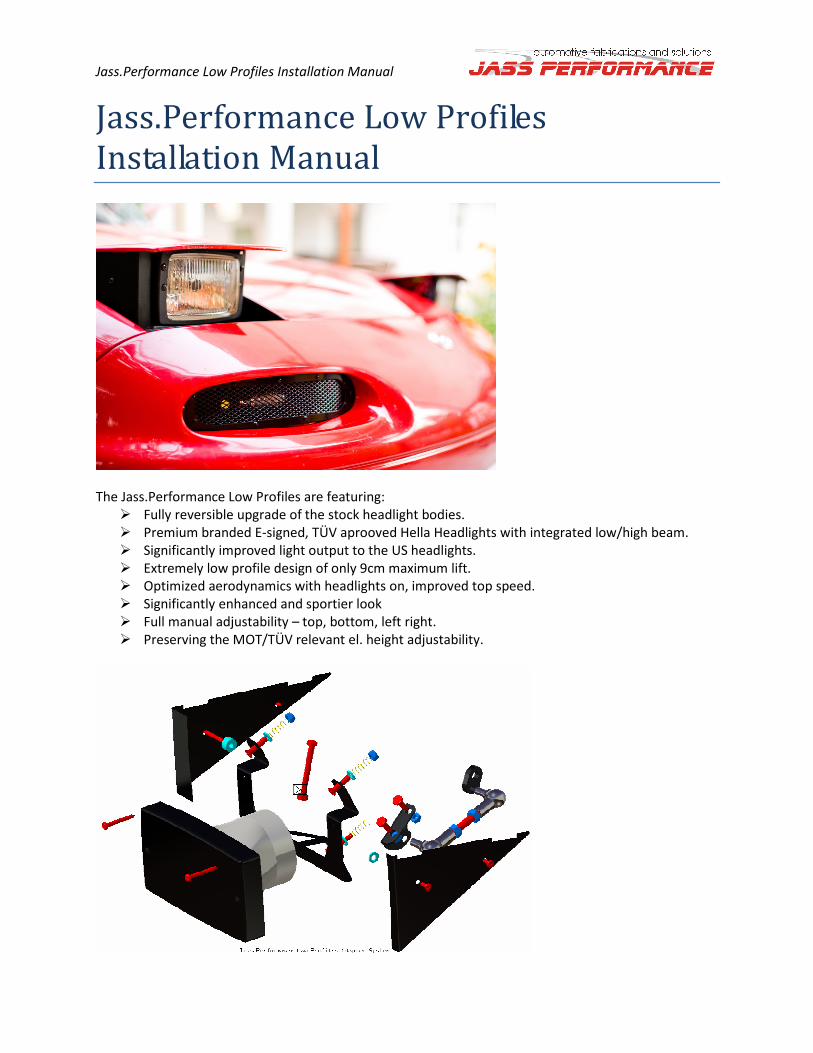
The Jass.Performance Low Profiles are featuring:
� Fully reversible upgrade of the stock headlight bodies.
� Premium branded E-signed, TÜV aprooved Hella Headlights with integrated low/high beam.
� Significantly improved light output to the US headlights.
� Extremely low profile design of only 9cm maximum lift. � Optimized aerodynamics with headlights on, improved top speed.
� Significantly enhanced and sportier look
� Full manual adjustability – top, bottom, left right.
� Preserving the MOT/TÜV relevant el. height adjustability.
Jass.Performance Low Profiles Installation Manual
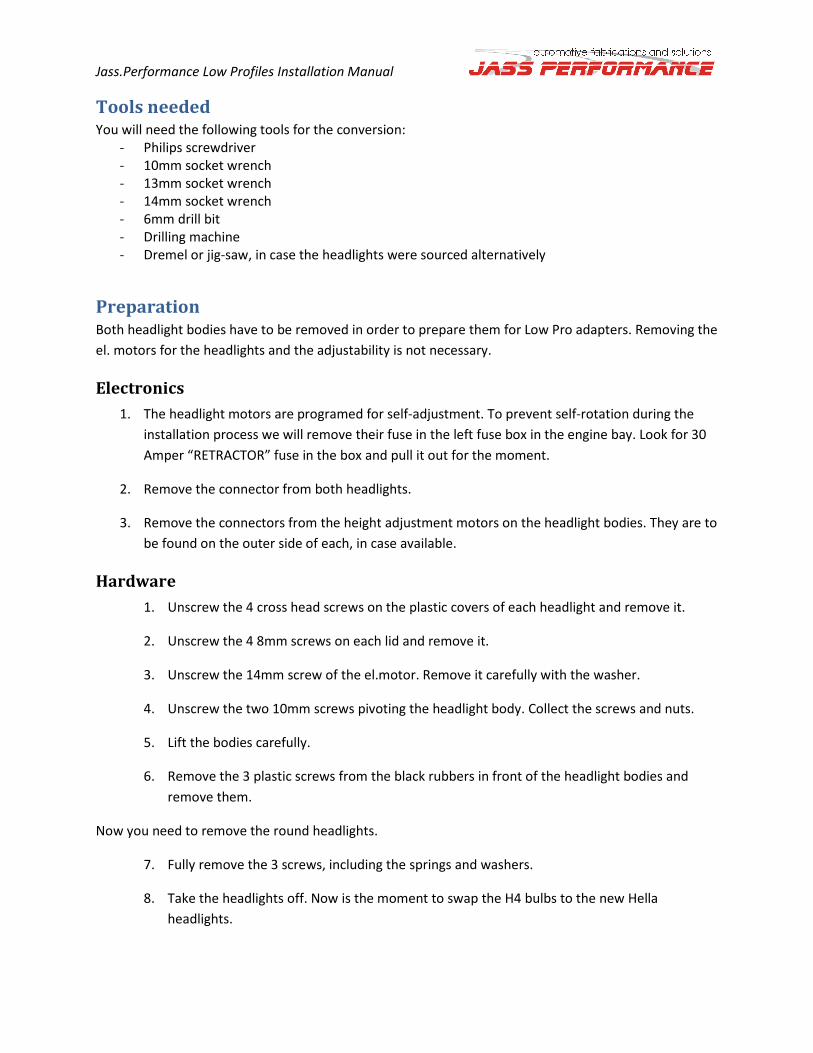
Tools needed You will need the following tools for the conversion:
- Philips screwdriver
- 10mm socket wrench
- 13mm socket wrench
- 14mm socket wrench
- 6mm drill bit
- Drilling machine
- Dremel or jig-saw, in case the headlights were sourced alternatively
Preparation Both headlight bodies have to be removed in order to prepare them for Low Pro adapters. Removing the
el. motors for the headlights and the adjustability is not necessary.
Electronics
1. The headlight motors are programed for self-adjustment. To prevent self-rotation during the
installation process we will remove their fuse in the left fuse box in the engine bay. Look for 30
Amper “RETRACTOR” fuse in the box and pull it out for the moment.
2. Remove the connector from both headlights.
3. Remove the connectors from the height adjustment motors on the headlight bodies. They are to
be found on the outer side of each, in case available.
Hardware
1. Unscrew the 4 cross head screws on the plastic covers of each headlight and remove it.
2. Unscrew the 4 8mm screws on each lid and remove it.
3. Unscrew the 14mm screw of the el.motor. Remove it carefully with the washer.
4. Unscrew the two 10mm screws pivoting the headlight body. Collect the screws and nuts.
5. Lift the bodies carefully.
6. Remove the 3 plastic screws from the black rubbers in front of the headlight bodies and
remove them.
Now you need to remove the round headlights.
7. Fully remove the 3 screws, including the springs and washers.
8. Take the headlights off. Now is the moment to swap the H4 bulbs to the new Hella
headlights.

Jass.Performance Low Profiles Installation Manual
9. Remove the pushrod from the headlights bodies, by evenly pulling it out of the pivoting ball.
10. Remove the bracket on the inner top side, held by 3 cross head screws.
Installation
Pushrod & brackets
To have the Low Profiles installation fully reversible, we will preserve the original pivoting point and
install new ones (picture above) on a new bracket (picture below).
It is essential to position the bracket correctly. The brackets for the new pivoting point needs to be
positioned as shown on the picture with the rivet centered in the middle of the bracket hole. The rivet is
the rear part of the original ball joint head.
The front of the bracket aligns with the metal edge as shown on the next picture:
118mm

Jass.Performance Low Profiles Installation Manual
Mark the centers of the fixing points to the headlight body and carefully drill two 6mm holes. The
bracket is secured with the provided 2x M6x12mm screws (10mm head). Repeat on the other headlight.
Having the brackets installed, you need to screw the pushrod with the two ball joints with the provided
M8 securing screw to the bracket.
The other side of the pushrod with the lever will be later adjusted and screwed to the headlight
retracting motor shaft. The outer length of the pushrod assembled has to be 118mm, the distance
between the inner of the ball joints 40mm. The bottom picture shows the installed position of the nuts.
40m

Jass.Performance Low Profiles Installation Manual
Installing the adapter frame
The adapter frame uses 3 points for the installation – at the bottom the el. motor or original mounting
point. At the top the leftmost and rightmost holes. The installation sequence is as shown on the picture
with the headlight body between the adapter and washer:
Other than the stock, the springs need to be fitted behind the headlight body. Secure the both top
screws with the provided locknuts with plastic inserts. Do not fully tighten the springs, as they are
allowing the pivoting of the headlight frame and the automatic height adjustment. 3-5mm thread left
behind the nut (as shown) should be fine.
The adapter frame mounted below.

Jass.Performance Low Profiles Installation Manual
Installing the headlights
Having the adapter in place, the headlights can be installed. They are screwed on both sides with the
provided self-taping screws.
Fully tighten them. In case the headlight doesn’t lie perfectly on the frame, refer to the next topic.
Jass.Performance Low Profiles Installation Manual
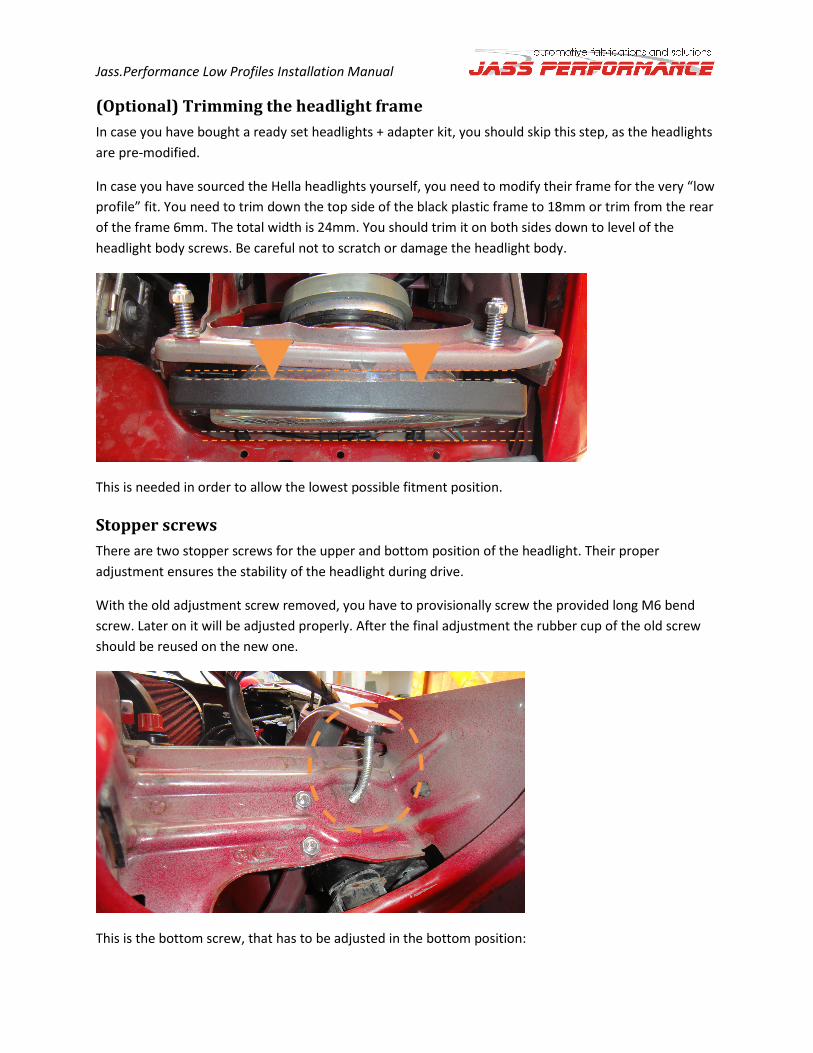
(Optional) Trimming the headlight frame
In case you have bought a ready set headlights + adapter kit, you should skip this step, as the headlights
are pre-modified.
In case you have sourced the Hella headlights yourself, you need to modify their frame for the very “low
profile” fit. You need to trim down the top side of the black plastic frame to 18mm or trim from the rear
of the frame 6mm. The total width is 24mm. You should trim it on both sides down to level of the
headlight body screws. Be careful not to scratch or damage the headlight body.
This is needed in order to allow the lowest possible fitment position.
Stopper screws
There are two stopper screws for the upper and bottom position of the headlight. Their proper
adjustment ensures the stability of the headlight during drive.
With the old adjustment screw removed, you have to provisionally screw the provided long M6 bend
screw. Later on it will be adjusted properly. After the final adjustment the rubber cup of the old screw
should be reused on the new one.
This is the bottom screw, that has to be adjusted in the bottom position:

Jass.Performance Low Profiles Installation Manual
To adjust the screws correctly, you need to move the headlight body to its highest and lowest positions
with the red screw on the headlight motor. It is hidden behind the black cap on top of the motor.
You would optimally adjust them to have slight push, when in furthest positions to ensure a very stable
fix and no shake.
After adjustment tighten the screws at the back and refit the black cups.
Installation of the headlight body
Having everything assembled you need now to reinstall the body using the two side screws and M6 nuts.
Make sure you have reconnected the height adjustment connector on the side of the body.
Once reinstalled you will end up with this and need now to connect loose end of the push rod with the
lever to the el.motor:

Jass.Performance Low Profiles Installation Manual
It is held with the original 14mm flat nut.
Order of fitting:
- Fit the lever to the motor shaft.
- Fit the nut and tighten loose.
- Connect the RETRACTOR fuse.
- Pop the headlight up.
- Lift the headlight body in its highest position – lever and rod should be in a straight line.
- Tighten the nut as much as possible. Once the nut is holding the body, you can turn to red
motor cup to make the screwing easier.
Now you have installed the headlights and need to ensure they are in the correct height. The tolerances
are very narrow due to the extreme low profile of the lights. How to check the position:
- Lights popped up: the bottom of the headlight (not the black frame) is above the top edge of the
bumper.
- Lights down: The headlight lid slips in and fall below the bonnet/bumper.
If adjustment is needed, you need to remove the nut from the headlight motor shaft and change the
distance between the ball joint is steps of 1 rotation in the desired direction. Longer to lift the lights,
shorter to have the lower.
After all is adjusted and screwed back in place you should connect the power connector to the headlight
(its plug and play to the stock connector).
Adjust the lid in height as a next step as used with the stock headlights.
Installation of the side panels
Once everything is done so far you can install the black side panels. As a general rule, the panels should
be approx. 1mm away from the headlight. This allows the movement of the adjustable headlight.
The outer panel is held with a short screw (12mm) at the back. At the front it is held with the longer
black screw and needs the plastic spacer on the inner side to keep its parallel position.
The inner panel is held with two 12mm screws. You might find necessary to offset the front of the panel
with the provided 6mm washer.
Jass.Performance Low Profiles Installation Manual
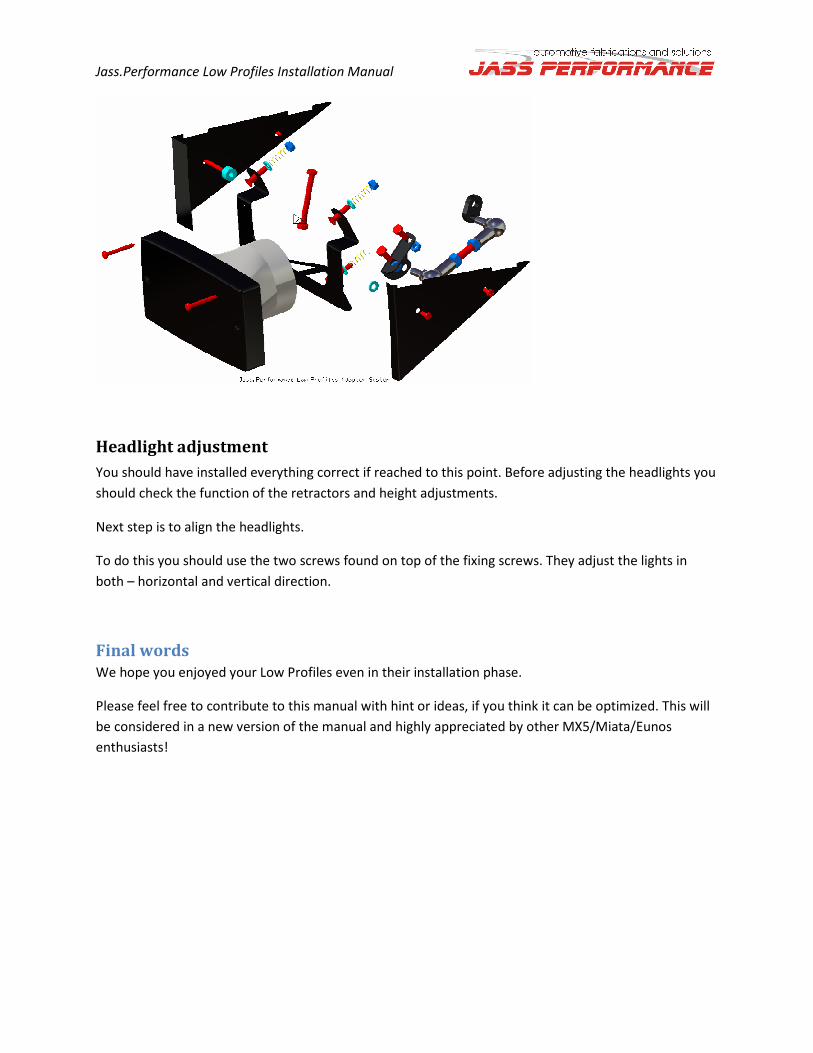
Headlight adjustment
You should have installed everything correct if reached to this point. Before adjusting the headlights you
should check the function of the retractors and height adjustments.
Next step is to align the headlights.
To do this you should use the two screws found on top of the fixing screws. They adjust the lights in
both – horizontal and vertical direction.
Final words
We hope you enjoyed your Low Profiles even in their installation phase.
Please feel free to contribute to this manual with hint or ideas, if you think it can be optimized. This will
be considered in a new version of the manual and highly appreciated by other MX5/Miata/Eunos
enthusiasts!