
I've thought for a long time that there was …...I've thought for a long time that there was...
9
I've thought for a long time that there was something wrong with my headlight alignment. On dipped beam, it looked all right but on main beam the left and right "hotspots" almost touched each other when shone on my garage door. When I had a look at the headlights, the LH one seemed to line up OK with the wing and bumper but the RH one was way out of whack. It was sticking out at the wing end and was too far in at the other. Provided by 406 Coupe Club http://www.406coupeclub.org
Transcript of I've thought for a long time that there was …...I've thought for a long time that there was...
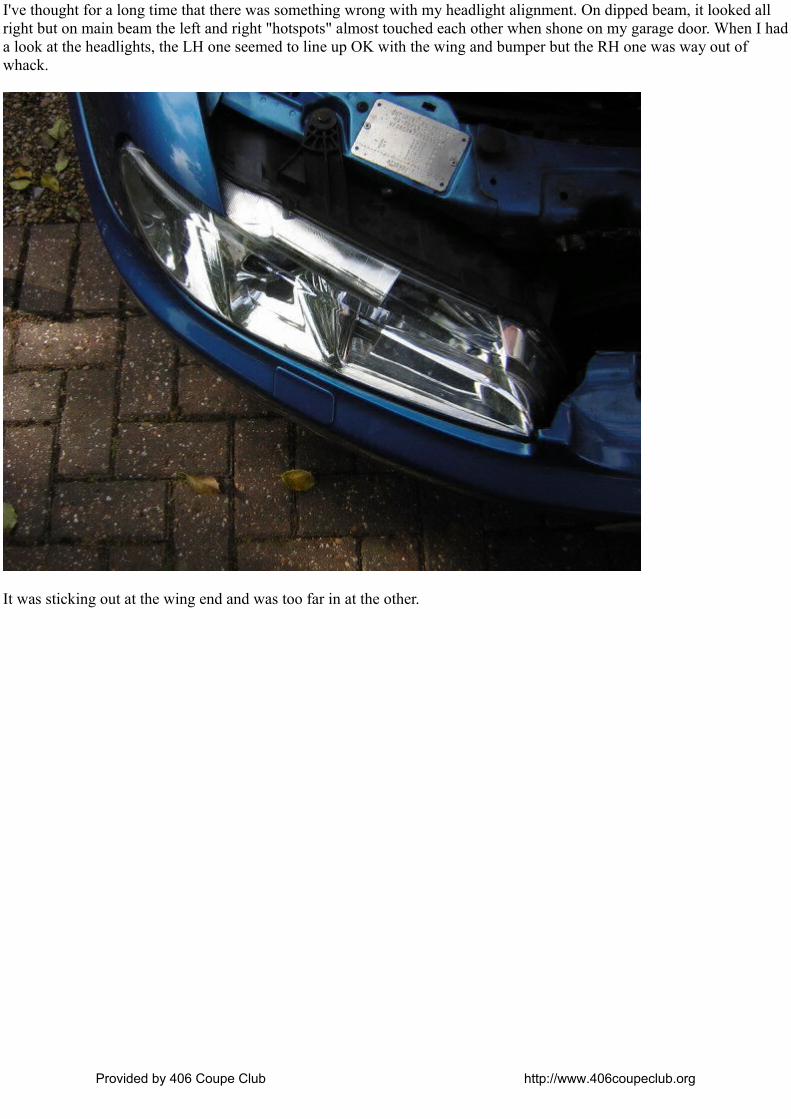
I've thought for a long time that there was something wrong with my headlight alignment. On dipped beam, it looked all right but on main beam the left and right "hotspots" almost touched each other when shone on my garage door. When I had a look at the headlights, the LH one seemed to line up OK with the wing and bumper but the RH one was way out of whack.
It was sticking out at the wing end and was too far in at the other.
Provided by 406 Coupe Club http://www.406coupeclub.org

Provided by 406 Coupe Club http://www.406coupeclub.org

I wondered whether it had been done to make the dip beam point where it should but might be why the RH main was slewed over. Also, a guy in a 4x4 had backed into me last year and his towing ball had contacted the bumper in this area.
Anyway, having made sure both bulbs were seated correctly, I set about taking out the light to see what was what.
Having removed the plastic panel over the grill, I did as the Peugeot manual says and loosened the two 10mm nuts holding the radiator/cooling fan assembly so it could lean back. This is supposed to improve access to the "mythical" lower mount but it didn't move far enough to be much help.
I removed the top mounting bolt then had a go at the outer one. This is a 10mm nut that screws on to a stud on the inner flitch panel. I found that a 1/4" drive ratchet and extension would fit between the wing and the ECU box.
You can get a bit more room to work by unscrewing the washer bottle filler pipe but be sure to stuff a rag into the hole in case you drop the nut or worse still the ratchet. ( I only just thought of that, I didn't do it at the time!!!)
Now for the dreaded third nut. I had read up on other threads which talked about bending the bumper down and sticking a ratchet through the gap but this sounded horrible. I found I could stick my arm down between the bumper and the fan and could feel the nut well enough to get a spanner on it. However it was a tight squeeze and is the part of the job where skin was lost.
Provided by 406 Coupe Club http://www.406coupeclub.org

The other snag was that the spanner could only turn about 1 or 2 flats at a time and the nut was stiff. It also difficult to relocate the spanner on the nut each time. So I turned to my secret weapon!!
For those of you unfamiliar with this, it's called a Gearwrench and is a ring spanner with a ratchet mechanism built in. I've had a set of these for some time but this is the first time I've used one. Magic!!Provided by 406 Coupe Club http://www.406coupeclub.org

Eventually the third mount was free. I disconnected the plugs and wiggled the unit out. It came out best by swinging the inner end out first.
Also it helped to twist the levelling motor about 1/4 of a turn (I didn't need to take it right off). After some fiddling about the light came off in my hand!! It was then possible to get a good look at the two hidden mounting studs and the appropriate lugs on the headlight.
First the inner wing.
Provided by 406 Coupe Club http://www.406coupeclub.org
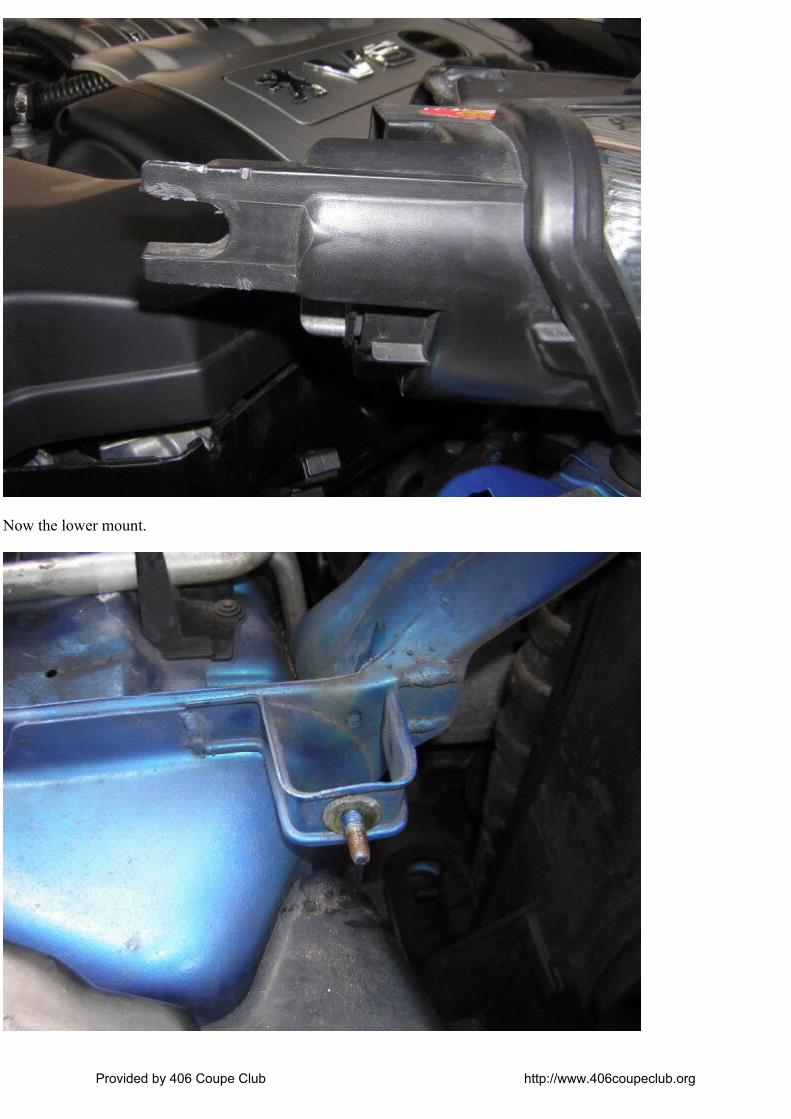
Now the lower mount.
Provided by 406 Coupe Club http://www.406coupeclub.org

The lower one looked a bit bent to me so I put the nut back on and tapped it straight. However it also seemed to me that, with the nut done up tight, the light would go back to its old crooked position, so I cut down an old rubber grommet to act as a packing piece. After a couple of goes, I got the right thickness and decided to put the light back. A tip here is to put some oil or grease on the studs and run the nuts up and down a couple of times so you will be able to hand tighten the nuts as much as poss before needing a spanner.
I retightened the mounts starting with the lower, then the outer then top. Because the outer lug on the light is slotted, this allows you to match the light position to the bumper. I had to hold the light in with my knee so I could use both hands on the ratchet for the outer mount. However as it tightened up the last bit, the light swung out again. I found that there was a gap between the mounting lug and the wing so that the light would not stay put. Another rubber grommet fixed that!!
Once the unit was back in the alignment with the body was much better. It is still not perfect, it needs a bit more packing on the lower mount but I have a feeling it may have to come out again anyway so this will do for now.
Provided by 406 Coupe Club http://www.406coupeclub.org
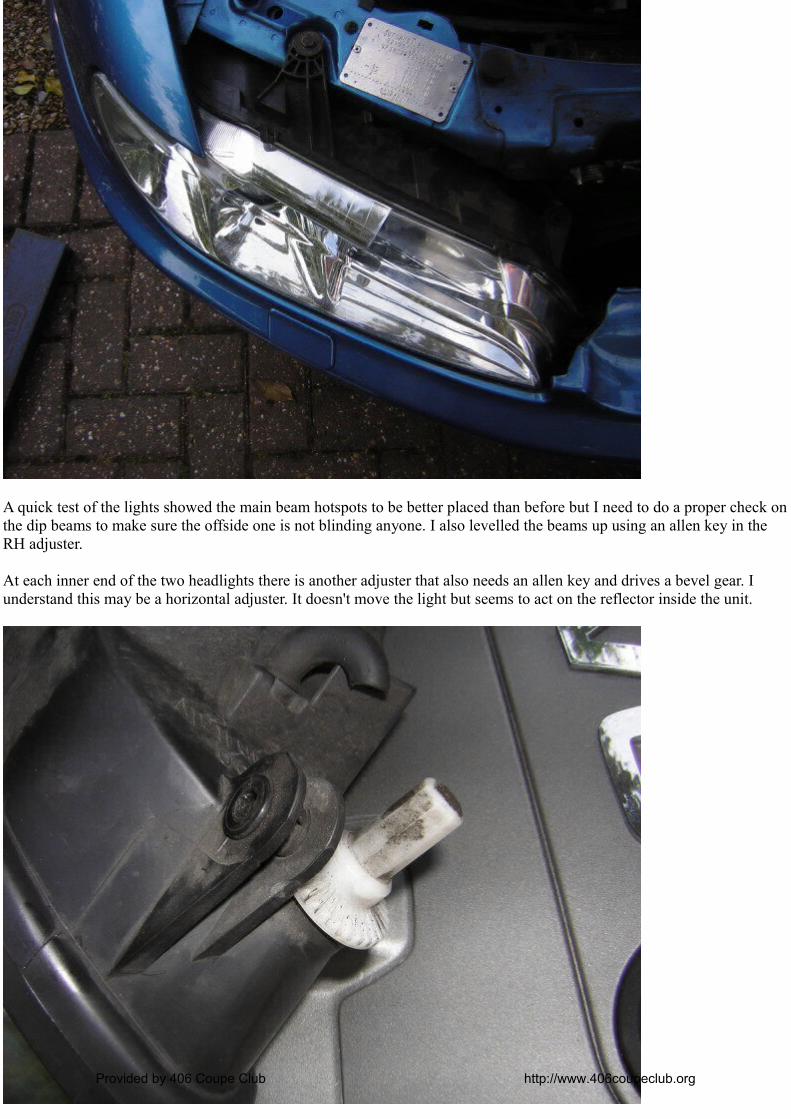
A quick test of the lights showed the main beam hotspots to be better placed than before but I need to do a proper check on the dip beams to make sure the offside one is not blinding anyone. I also levelled the beams up using an allen key in the RH adjuster.
At each inner end of the two headlights there is another adjuster that also needs an allen key and drives a bevel gear. I understand this may be a horizontal adjuster. It doesn't move the light but seems to act on the reflector inside the unit.
Provided by 406 Coupe Club http://www.406coupeclub.org
I need to play with it some more to see what it does. Note that you can only get at this, or even see it, by removing the black trim panel. If anyone knows more about this thing, please let me know.
Provided by 406 Coupe Club http://www.406coupeclub.org


![MQL5 · 2012. 4. 30. · been in marketing. Being a long-term sys- tem [trader], I've had some fairly large drawdowns — my maximum is probably although I've never close to 40 percent](https://static.fdocuments.us/doc/165x107/5fd213e31cfe511b485b485a/mql5-2012-4-30-been-in-marketing-being-a-long-term-sys-tem-trader-ive.jpg)