IT2.weebly.com Applied ICT 9713it2.weebly.com/uploads/1/4/7/2/1472680/microsoft_word_-_as_ict... ·...
38
IT2.weebly.com Applied ICT 9713 1 Software selection 8 Chapter You are already now how to: Open and use a variety of software packages : In this chapter you will learn how to Select the most appropriate software for a task 8.1 Software uses Different software packages are used to perform different tasks on a computer. Sometimes it is easy to decide which program (applications software) is the most appropriate for a given task. At other times some tasks could be completed using two different pieces of software. In order to make the right choices you need to understand the strengths and limitations of each type of software. To help you, here is a list of the most common software types: •text editor •word processor •desktop publisher •database package •spreadsheet package •charting package •presentation authoring package •web browser •e-mail editor •graphics package •programming languages . This section will help you to decide between one type of software and another for any given task A Text editor A allows you to type and edit plain text. It has few or no features that allow you to format a document. Text editors can be used to write some programming code (like HTML) and to edit system files within the computer and are often supplied with the computer’s operating system. Examples of text editors are Notepad and WordPad within Microsoft Windows.
Transcript of IT2.weebly.com Applied ICT 9713it2.weebly.com/uploads/1/4/7/2/1472680/microsoft_word_-_as_ict... ·...
IT2.weebly.com Applied ICT 9713
1
Software selection 8 Chapter You are already now how to: Open and use a variety of software packages
:In this chapter you will learn how to
Select the most appropriate software for a task
8.1 Software uses Different software packages are used to perform different tasks on a computer.
Sometimes it is easy to decide which program (applications software) is the most appropriate for a given task. At other times some tasks could be completed using two different pieces of software.
In order to make the right choices you need to understand the strengths and limitations of each type of software. To help you, here is a list of the most common software types:
•text editor •word processor •desktop publisher •database package •spreadsheet package •charting package •presentation authoring package •web browser •e-mail editor •graphics package •programming languages . This section will help you to decide between one type of software and another for any given task A Text editor A allows you to type and edit plain text. It has few or no features that allow you to format a document. Text editors can be used to write some programming code (like HTML) and to edit system files within the computer and are often supplied with the computer’s operating system. Examples of text editors are Notepad and WordPad within Microsoft Windows.

IT2.weebly.com Applied ICT 9713
2
Word processor Allows you to create, edit and format documents. This can include defining page layout and document formatting. Many current word processors have additional features including file management and the ability to integrate data from a data file into a document using a process called mail merge. Desktop publisher Desktop publisher has most of the features of a word-processing system, although it may not always include mail merge. A desktop publisher has the ability to manipulate images and text (as have many current word processors), but often offers more features and flexibility when dealing with images Database package A Database package is a collection of data items and the links between them. The database gives structure to (organises) the data items and gives you the tools that you can use to search (interrogate) the data. This is managed by a database management system : (often called a DBMS ). Data in a database can be searched (interrogated) and the results presented as information for the user. One example of a database package is Microsoft Access. Spreadsheet package A is a grid of information often used to display financial or statistical information. Data is arranged in rows and columns. Spreadsheets are very good at performing calculations and modeling situations. This involves changing data and examining the effect that this has on other data, One of the most common types of modelling is financial modeling. . One example of a spreadsheet package is Microsoft Excel, which has many of the features of a flat file database (not relational). Charting package A Charting package allows you to create a variety of different graphs and charts. These are sometimes separate packages or can be included in spreadsheets (Excel)or databases(access). Presentation authoring package allows you to create multimedia presentations and displays. Text, images, animations, sound and video clips can be included. This software is often used to support a speech or presentation of information to an audience. One example of a presentation authoring package is Microsoft PowerPoint. Web browser allows you to display web pages from an internet - (within an organization or a local area network) or the internet (on the worldwide web).Text, images, animations, sound and video clips can be included on these web pages. One example of a web browser is Microsoft Internet Explorer.
IT2.weebly.com Applied ICT 9713
3
E-mail editor Allows you to prepare, create, edit and send messages and to read e-mail messages from other users. It enables you to access your mailbox using your e-mail address. E-mail messages can be sent to many people at the same time and can be used to send files attached to the e-mail from one location to another almost instantly. Some e-mail editors operate within a web browser (e.g. Hotmail) and can be accessed from almost anywhere. Others are dedicated programs (e.g. Microsoft Outlook) and can only be accessed from a computer on which it is installed and configured. Graphics package Allows you to create and manipulate images. There are two types of graphics package. A vector package draws points, lines, curves and polygons using mathematical equations. This means that when an image is enlarged there is little loss of quality. The second type of graphics package uses bit graphic, which stores the details of each pixel (or dot) of a drawing, so if an image is enlarged or reduced the image can appear pixelated (it looks like a series of blocks, often with jagged edges). Programming languages is used to write code that will perform a task within the computer. A computer program follows a sequence of instructions to perform pre-defined function Small elements of some programming languages can be used within many of the applications packages listed above (e.g. macros within a word processor, spreadsheet or database package) or as underlying code (e.g. Visual Basic for Applications within Microsoft Word, Excel or Access).
Document and presentation production10 Chapter You are already now how to:
· open and close documents and presentations · download and save information from the Internet · create and edit documents in a word processor · create and edit presentations · enter and edit text · evaluate information found on the Internet · evaluate whether information is relevant and fit for purpose · Proofread and spell check your work.
:ou will learn how to In this chapter y
· enter and edit data from a variety of sources

IT2.weebly.com Applied ICT 9713
4
· understand the importance of accurate data entry · check and correct data entry using appropriate software tools · manually proofread and correct data entry · place and manipulate images and other objects into documents and presentations · create a link from a document or slide · control a document to be edited by multiple users · create and edit a master document/slide · create styles to be used in documents and presentations · create and edit headers and footers · set breaks and amend document sections · understand the need for corporate house styles and apply them consistently · Create and edit tables within documents and presentations. For this chapter you will need these source files from the accompanying CD: BOARDER.JPG NURSE.RTF CLIENT.CSV SHARKS.RTF ENTER.TXT SILOGO.JPG EVALUATE. RTF SIMC.RTF IMAGE.RTF SLOGAN.JPG CD:\source data\chapter 10 Three packages used within this chapter: Word, Publisher and PowerPoint The major difference between them is that the word processor does not need a text box in order to add text while publisher and presentation software a text box is needed . 10.1 Entering and editing data from different sources: Generic file types: • Text: these files have a .txt file extension. A text file is an unformatted ASCII file that can be opened in any word processor. Some software vendors use text files as data sources for other applications. They contain data fields that are separated by tabs, commas etc. • Rich text format: These files have a .rtf file extension. This is a file type that saves formatting within the document, so allowing some formatting to be passed from one applications package to another.
IT2.weebly.com Applied ICT 9713
5
• Comma separated values: these files have a .csv file extension. This file type takes tabular data (e.g. from a spreadsheet) and saves it in text format, separating data items with commas. Import a text file into Word These include .doc (Word documents), .rtf and .txt formats. There are many forms of .txt file: they may be typed text similar to this, or could be text files exported from databases and spreadsheets be used as data sources for mail merging or databases. These formats are imported into a word-processed document like this:
1. Position the cursor where you wish to place the file 2. Select the Insert menu (an alternative method is to press the <Alt> and <I>
keys together), then File.... The Insert File window will appear. 3. Select the file type in the Files of Type: box; if you do not know the file
type, select All Files (*,*), which will show all available files in the current folder.
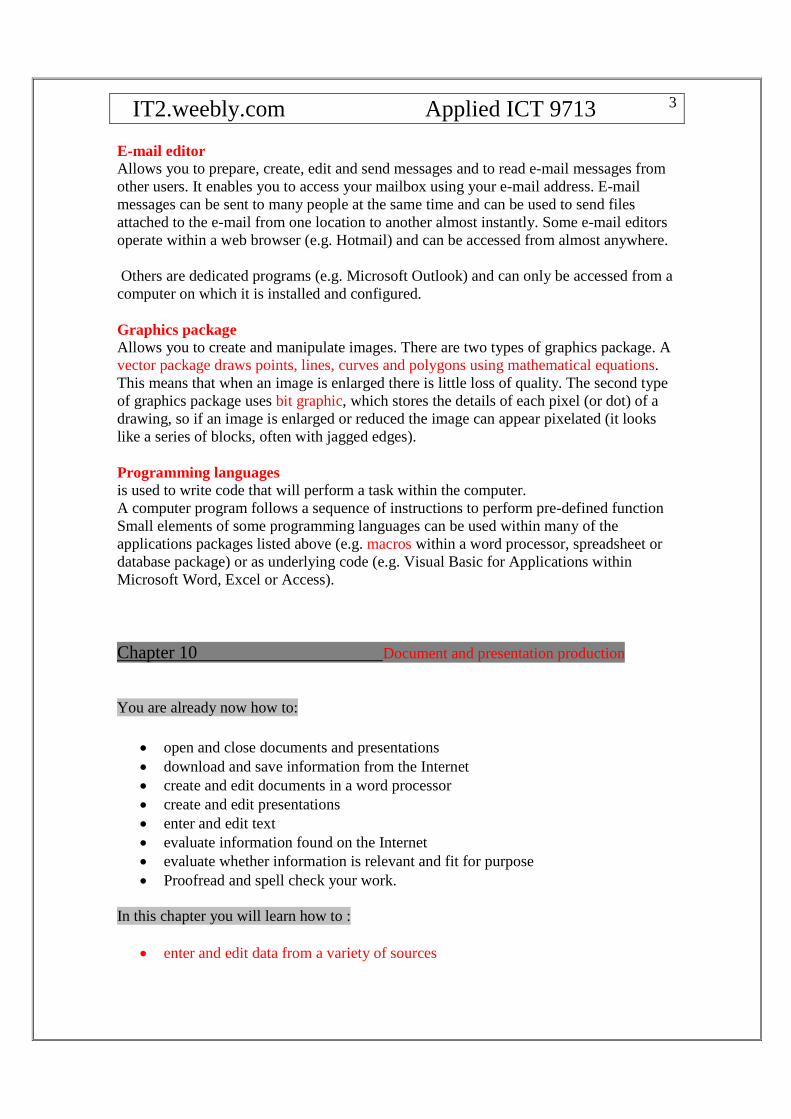
4. Select the required file by clicking on the filename followed by Insert Import a .csv file into Word To import a .csv file into a word-processed document, follow Steps 1 to4 above. Note that .csv is not shown as a file type in the initial list box, so ensure that the file type is set to All Files (*.*). When you insert the file, it will not be in tabular format, as it was originally saved. If you wish to do this you should highlight all of the inserted data,-then select the Table menu, followed by Convert, then Text to Table.... Use the Convert Text to Table window to change the settings if needed. Import a .txt file into PowerPoint 1. To place a .txt file into an existing PowerPoint presentation select the Outline tab.
2. If this tab is not visible click on the Normal View (Restore panes) button in the bottom left corner. 3. Select the slide that you wish to place the text in, and then the Insert menu, followed by Slides from Outline..., and followed by the filename. This will
IT2.weebly.com Applied ICT 9713
6
place the text into a number of new slides. Each paragraph with no initial tab becomes a slide title. Tabs at the beginning of a paragraph determine the structure: One tab creates Level 1 body text, two tabs Level 2,and soon.
Import a .rtf file into PowerPoint: This uses a similar method to .txt format, with Insert, then Slides from Outline..., before selecting the filename. With rich text format, the styles saved within the document apply to the presentation. For example, style Heading 1 becomes the slide title; style Heading 2 creates Level 1 body text, and so on. Import a .txt. .rtf or .doc file into Publisher: 1 .To insert a .txt, .rtf or .doc file into Publisher, create a text box using the button (on the left side of the window) and place the cursor inside the text box. 2. From the Insert menu, select the Text File... option, before selecting the correct file type and filename and clicking on OK Import a .csv file into Publisher: To import a .csv file into the desktop publisher, import it as an object (see Section 10.3). 10.2 Using special characters and editing text special characters (including mathematical symbols and accents), superscripts, subscripts and automated text, as well as looking at efficient ways of editing text that has already been entered. Use special characters in Word 1. To insert a special character, move the cursor to where the character is to be placed and select the Insert menu, then Symbol.... The Symbol window appears. This gives a wide array of commonly used symbols.

IT2.weebly.com Applied ICT 9713
7
2. If the symbol that you are looking for is not visible select a new option from the Subset box. This is where commonly used symbols are grouped together, for example mathematical symbols and arrows. Some fonts contain only symbols. Browse the Font: list to identify these (e.g. Wingdings and Zapf Dingbats ). 3. You will sometimes need to use special characters with accents that are needed for specific languages (e.g. è é ê ë ü U). You can select these by clicking on the symbol then Insert. 4. Other special characters can be found by selecting the Special Characters tab. This is useful for characters like the ellipsis (three dots used to show that there was text before or after the current text) and copyright symbols. Use special characters in PowerPoint: This is identical to using special characters in the word processor (using Insert, then Symbol...), but the Symbol window does not contain the Special Characters tab. Use special characters in Publisher: If your cursor is in a text box, then the process is identical to using special characters in the word processor (using Insert, then Symbol...). Use superscript and subscript characters in Word, PowerPoint and Publisher Superscript characters are those that sit above the baseline (e.g. m2), and subscript characters are those that sit below the baseline (e.g. x1). These are often used in dates as well as mathematical and scientific formulae. In recent versions of Word, dates are automatically superscripted for you. If you enter a date like this, 18th December, as you enter the text, the ‘th’ is automatically reduced in size and superscripted to produce 18th December. If you wanted to enter text like 16 metres2, you need to manually superscript the ‘2’ like this: 1. Type in the text for the whole line, for example: ‘... if the volume was 16 metres2, what 2. Highlight only the character(s) to be superscripted, in this case the number ‘2 3. Select the Format menu, then Font..., and select the Superscript tick box before clicking on OK. Use AutoText in Word: AutoText is a collection of pre-defined text of commonly used phrases that can be inserted into a document to save time repeatedly typing them.

IT2.weebly.com Applied ICT 9713
8
They are simply entered by selecting the Insert menu, then AutoText, and then selecting from the sub-menu the phrase that you want to insert. Use automated date and time values in Word To insert a date or time variable: 1. Place the cursor where you wish to place the date and/or time. 2. Select the Insert menu, then Date and Time.... 3. There are options in the Date and Time window to select the format that you require by clicking on it. 4. Setting the Update automatically tick box will ensure that this information is updated every time the document is opened or printed.
Use automated date and time values in PowerPoint and Publisher: This is similar to inserting the date and time in the word processor. Make sure that
you have placed the cursor within a text box, in order for the Insert, then Date and Time... to function correctly. If you require the date and/ or time on every slide, make sure that you place this text box on the master slide.
Tips for editing text in Word, PowerPoint and Publisher You are already familiar with how to highlight areas of the text using the mouse,
but within Word there are several shortcuts that make editing easier. The table below gives some of the most useful.

IT2.weebly.com Applied ICT 9713
9

IT2.weebly.com Applied ICT 9713
10
10.3 Importing an image or other object from an external source: Import files and link and embed objects Remember that the majority of files (including images, sound files and other objects) To import a file means to take a file that has been created in a different piece of software, and to accept it (read it) in the current software. To embed an object is to take data about a file — such as the source software, its location and format — and store this within the current application. An example would be to take information from a spreadsheet (in this case the object) and place it within a word-processed document. There are different methods of storing such information in your document: • Embedded files: these are created by inserting them into a document or presentation. It takes the contents of the file at that moment in time and adds it to the document or presentation. Later changes made to the original file do not appear in the document or presentation. However, the data in the document or presentation can be changed by double clicking on the embedded object to open the original application. • Linked objects: these are stored separately and loaded only when they are needed. They require less memory as only the file details (e.g. the filename) are stored within the

IT2.weebly.com Applied ICT 9713
11
document or presentation. Changes made to the original data are automatically made to the corresponding data in the document or presentation. If the document or presentation is not open when the changes are made, you will be requested to update this data as soon as you re-open the file. • Object linking and embedding: this is where a file is embedded and linked at the same time. The following section describes how to do this. Embed a stored file as an object into Word or Publisher Stored files can be in almost any format: they may include text, images, tables, spreadsheets, database extracts, graphs, charts, sound files and video clips. Embedding works with all of these file types, except for text and images. If a file is stored on storage media like a hard drive, network drive or external storage media (like a CD, floppy disk, etc.), then it is imported into a word- processed document like this: 1. Position the cursor where you wish to place the file. If you wish to wrap text around the image, you must open a text box first (using Insert, then Text Box and drawing the text box onto the page before placing the cursor inside the text box). 2. Select the Insert menu, then Object.... The Object window will appear . 3. Select the Create from File tab. 4. Either type in the filename and its path or use the [ browse] button to help you find the object to embed. 5 Select the required file by clicking on the filename followed by [ insert]. In this example, the file D:\test.xls has been selected. The Object window will now look similar to this.
5. Click on [OK] if you only require the object to be embedded but not linked, or select the Link to file tick box if you wish to have the file object link embedded into the document.
Import an image from a file into Word, Power Point and Publisher: . 1. Position the cursor where you wish to place the image. 2. Select the Insert menu, Picture, then From File. This opens the Insert Picture window. 3. Click on the required image, then insert.

IT2.weebly.com Applied ICT 9713
12
Import an image from a Clip art into Word, Power Point and Publisher: 1. Position the cursor where you wish to place the image. 2 Select the Insert menu, Picture, then Clip Art.... This opens the Insert Clip Art pane within the window. 3. Use the search engine to locate the required image, and click once on the image to place it into the document. Import an image file from a digital source into Word, PowerPoint or Publisher In the context of this syllabus a digital source is a scanner or digital camera. I. To use either of these peripherals, select the Insert menu, then Picture and From Scanner or Camera.... 2 Select the device that you wish to use from the drop-down list. The options available will vary depending upon the hardware installed in your computer.

IT2.weebly.com Applied ICT 9713
13
3. To scan or import low-resolution images with a small file size, perhaps to use on a web page, select the Web Quality radio button. If the image is to be higher quality; select the
Print Quality button. 4. Make sure that the image is placed on the scanner before you click on [ insert]. The image will be placed within your document. Import an image file from a web page into Word, Power Point and Publisher: 1. Position the cursor where you wish to place the image. 2. Open your web browser; select the image that you wish to use and right mouse click on the image. There are two alternative methods:
· Select Copy and then Paste the image into the word-processed document. · Use Save Picture As..., then save the file in a storage location before using the
Insert menu, Picture, then From File from within the wordprocessor. Insert a table into PowerPoint A new table can be created using Insert, then Table and specifying the number of rows and columns to be used in its construction. To insert an existing table —including those created in a word processor, spreadsheet or a data table (this can include queries) from a database — it is easier to Copy the required data from an open application and Paste it onto the slide. An alternative is to save an object like a table as a separate file. To embed this file into the presentation select insert, Object... and click in the Create from file radio button. Either type in the filename (and path) or use the [ browse] button to select the file. If the table is a working document and you wish to update the original data from within the presentation, click on the Link tick box. Import a chart into PowerPoint: A new chart can be created using Insert, then Chart and specifying the data to be used for the chart in the datasheet provided. Several of the chart features available in Microsoft Excel can be used. By right mouse clicking on the chart, the chart type and data series can be amended (see Section 11.11 for further details). An Excel chart can be created by selecting Insert, then Object and Microsoft Excel Chart. Import a media file into PowerPoint:
IT2.weebly.com Applied ICT 9713
14
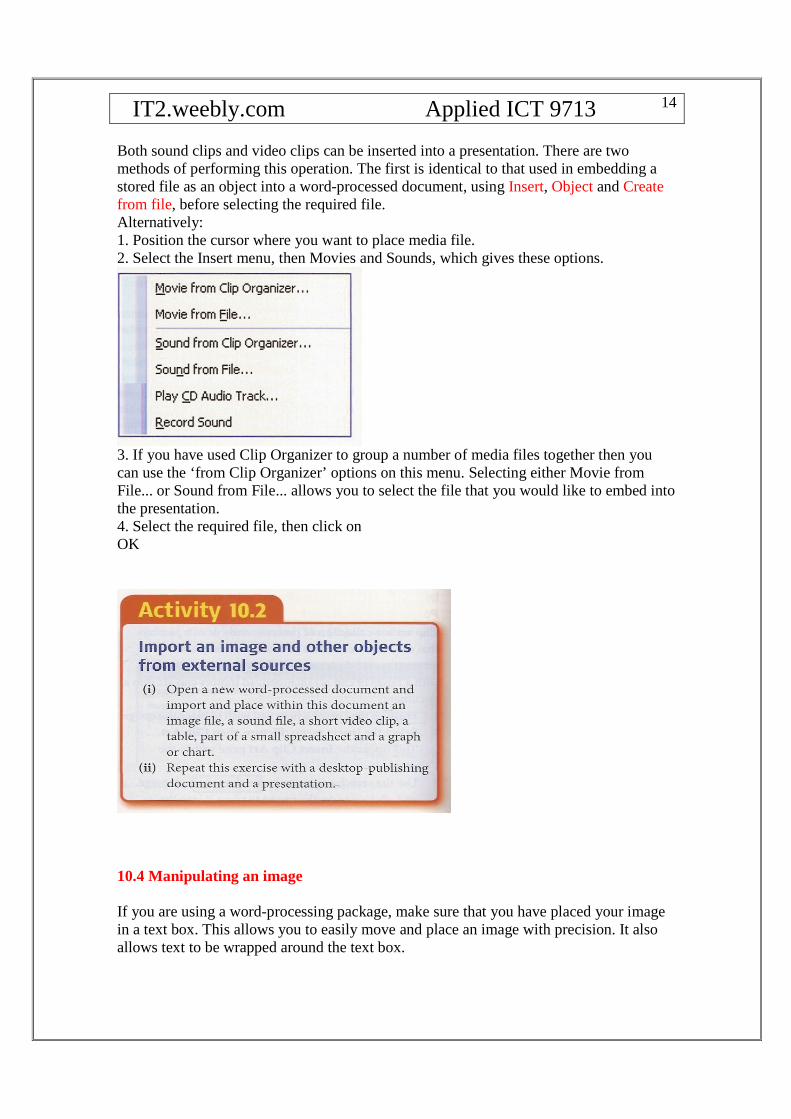
Both sound clips and video clips can be inserted into a presentation. There are two methods of performing this operation. The first is identical to that used in embedding a stored file as an object into a word-processed document, using Insert, Object and Create from file, before selecting the required file. Alternatively: 1. Position the cursor where you want to place media file. 2. Select the Insert menu, then Movies and Sounds, which gives these options.
3. If you have used Clip Organizer to group a number of media files together then you can use the ‘from Clip Organizer’ options on this menu. Selecting either Movie from File... or Sound from File... allows you to select the file that you would like to embed into the presentation. 4. Select the required file, then click on OK
10.4 Manipulating an image If you are using a word-processing package, make sure that you have placed your image in a text box. This allows you to easily move and place an image with precision. It also allows text to be wrapped around the text box.

IT2.weebly.com Applied ICT 9713
15
Use a text box with an image in Word To create a new text box select Insert, then Text Box and use the cursor to position the approximate size and position of the text box on the page. Insert the image into the text box (as described in the previous sections). With the text box still highlighted, select Format, then Text Box to open the Format Text Box window. Select the line colour in the Colors and Lines tab: selecting a
Line the same colour as the background (it may show 'No line' in the box) will make the text box invisible. Go to the layout tab for text wrapping. To make the text wrap around the text box use tight or square (depending upon the shape of the image files). There are other options for text wrap. The text can be wrapped above and below an image but not alongside it or the image can be placed at front the text, or behind the text. It is vital that you place the image with absolute precision in relation to the page or column margins and other objects upon the page. This process is called precision framing. If you are asked to place an object within a column or at the top of a page, there is an expectation that the image will be within one or two millimetres of the margin settings. This is an example of precision framing, with the right text margin and the edge of the image perfectly aligned. To move an image, select the text box (positioned just outside the image) and drag the text box to the required place. If an image has been placed inside a text box, to resize the image select the image (not the text box) and drag the handles in the corners of the image to stretch or shrink the image. Using the corners will maintain the aspect ratio of the image (its proportion), whereas using the handles in the centre of any side will distort the image. If you wish to crop an image (cut off part of it), click on the image, then select the Crop button from the Picture toolbar. (If the Picture toolbar is not visible, right click on the image and select Show Picture Toolbar.)
IT2.weebly.com Applied ICT 9713
16
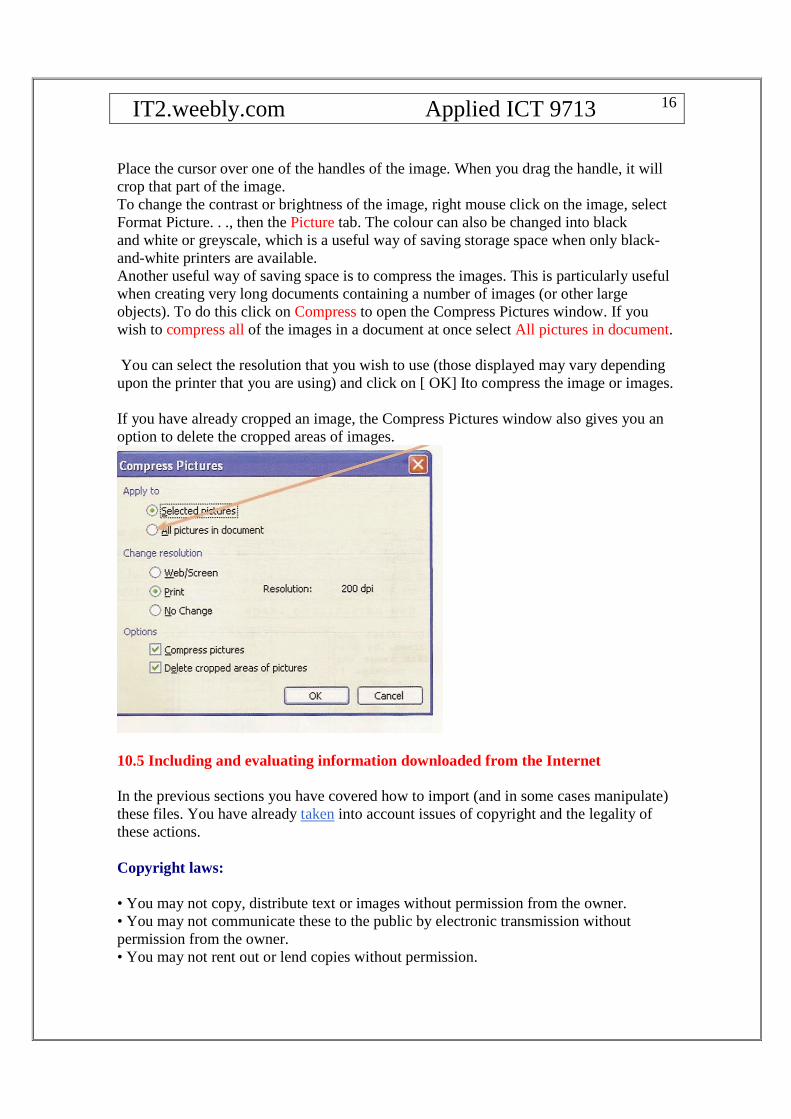
Place the cursor over one of the handles of the image. When you drag the handle, it will crop that part of the image. To change the contrast or brightness of the image, right mouse click on the image, select Format Picture. . ., then the Picture tab. The colour can also be changed into black and white or greyscale, which is a useful way of saving storage space when only black-and-white printers are available. Another useful way of saving space is to compress the images. This is particularly useful when creating very long documents containing a number of images (or other large objects). To do this click on Compress to open the Compress Pictures window. If you wish to compress all of the images in a document at once select All pictures in document. You can select the resolution that you wish to use (those displayed may vary depending upon the printer that you are using) and click on [ OK] Ito compress the image or images. If you have already cropped an image, the Compress Pictures window also gives you an option to delete the cropped areas of images.
10.5 Including and evaluating information downloaded from the Internet In the previous sections you have covered how to import (and in some cases manipulate) these files. You have already taken into account issues of copyright and the legality of these actions. Copyright laws: • You may not copy, distribute text or images without permission from the owner. • You may not communicate these to the public by electronic transmission without permission from the owner. • You may not rent out or lend copies without permission.

IT2.weebly.com Applied ICT 9713
17
• You may not perform them in public without the owner’s permission. For evaluating information downloaded from the internet you should ask yourself the following : 1. Are they fact or opinion? 2. Are they biased? 3. How reliable is the source? 4. How accurate is the source? 5. How current is the material and is it suitable (including readability) for your audience? 10.6 Creating a link from a document or slide What is a hyperlink? A hyperlink is a reference within an electronic document to another place in the same document (often to a heading or a bookmark) or to a different document. A hyperlink is often referred to simply as a link. What type of hyperlink do you require? There are a number of possible links. • open an existing word-processing document • open an existing file of a different type, for example a spreadsheet, database or web page • Move to another place in the existing document (bookmarks) • create a new document • send an e-mail message to another person. Create a hyperlink in Word or Publisher 1 Open an existing word-processing document. 2 Enter the text or place the image that you to set the hyperlink. Select this text or image by highlighting it. 3 Select the Insert menu, and then click on Hyperlink.... This opens the Insert Hyperlink window. (Ctrol+ K) 4. The text displayed for the hyperlink is shown in the Text to display 5. Select from the Link to: box on the left side of the window the type of link that you wish to create:
· Link to an existing file or web page: this will allow you to open an existing document, external file or web page. To select a document or other file type,

IT2.weebly.com Applied ICT 9713
18
browse using the Look in: window, select the file to open, then click on [ OK]. If the file to link to is a web page, enter the web address (URL) in the Address box, and then click OK.
· Link to a place in the existing document: this will allow you to jump to a section
of the current document. In the case of a word-processed document, this could be to the top of the document, any headings within the document or any bookmarks that you have placed within the document
· Link to create a new document: this will allow you to type in the pathway and
filename for the document that you wish to create.
· Link to send an e-mail: this will allow you to define an e-mail address for the
recipient and the subject line for the e-mail. Test hyperlink in Word or Publisher: to use an existing hyperlink hold down the <Ctrl> key and press the left mouse button on the text or image containing the hyperlink. Hide a hyperlink in Word: Highlight the hyperlinked text and then select the Underline button which will remove the underlining from the link. Change the font colour back to the same colour as the body text (usually black). Use bookmarks A bookmark is a point in a document that has been given a name. Add a bookmark in Word To insert a bookmark, place the cursor where the bookmark is required, press the left mouse button, then from the Insert menu selects Bookmark.... This will open the Bookmark window Type in a name for the bookmark in the Bookmark name: box then click OK

IT2.weebly.com Applied ICT 9713
19
The bookmark name can contain numbers (but not start with a number) and spaces are not allowed.
Create a hyperlink in PowerPoint This works in a similar way to inserting a hyperlink in Word or Publisher. The option that is slightly different is: • link to a place in this document: this will allow you to link to any individual slide within the presentation. Select the required slide from the list and then click on OK . This will build the link so that when the text or image which has been selected is clicked on, it will jump to the appropriate slide.

IT2.weebly.com Applied ICT 9713
20
10.7 Controlling a document to be edited by multiple users Document control There are times in the creation of a large document when more than one user will
work on the same document at the same time. This can lead to a lot of potential problems, especially if two people working at the same time make different changes to the same document. If they then save their amended version with the same filename, the first file is overwritten by the second and the first person’s work will be lost. To avoid this,
Version control is needed. The simplest type of version control involves using a
systematic numbering system, with the files held in a single storage area called a file repository. The first person would save the file as ‘file1 the second as ‘file2’ and the number is incremented each time it is revised.
There are other, more complex forms of version control involving locking and
file merging. It is usual for a document to have a person called the editor who is responsible for
it. This person is sometimes one of the original authors of the document.
Protect a document for editing in Word
1. To protect all of the document, select the Tools menu, then Protect Document.... This will open the Protect Document task pane.
IT2.weebly.com Applied ICT 9713
21
Select Editing restrictions, and tick the box for Allow only this type of editing in the document.
Possible options are:
· Tracked changes: this allows another user to edit the document and to make changes. Each change is recorded within the document for approval
or deletion by the original author or by the person assigned to perform the final editing on a document.
· Read only: this allows another user to read the document but not to make changes to it.
· Comments only: this allows another user to add comments to the document but not change the text or layout.
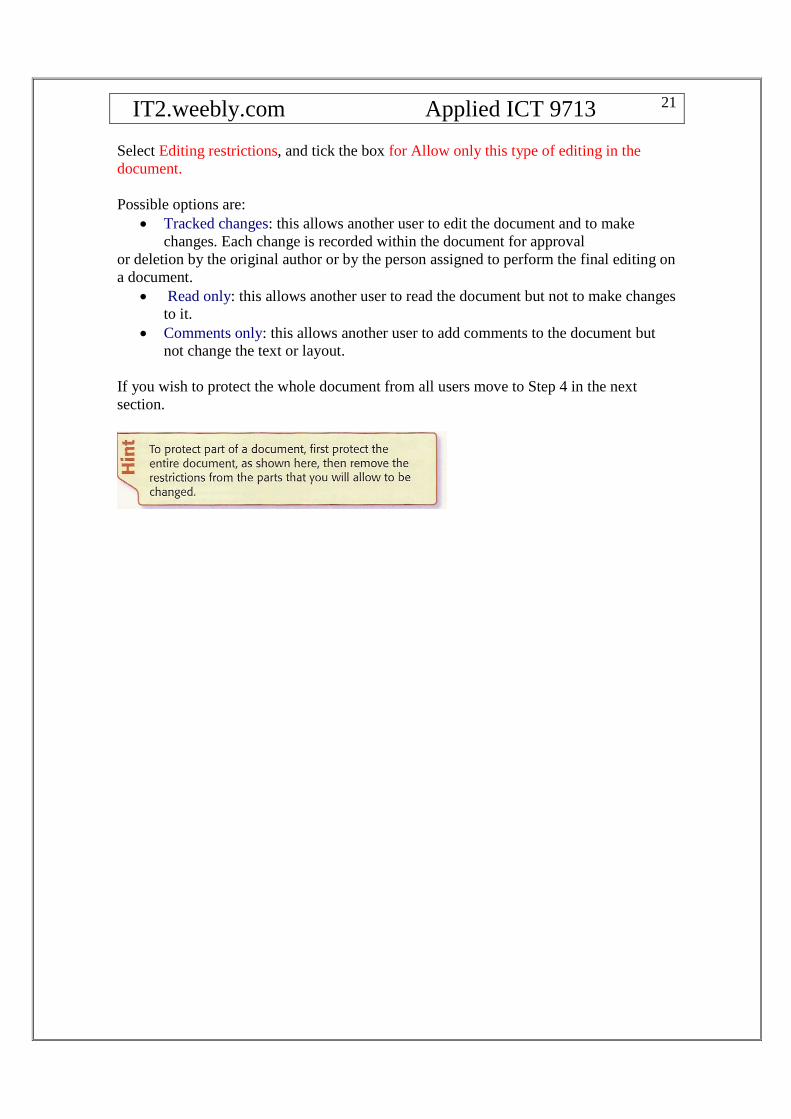
If you wish to protect the whole document from all users move to Step 4 in the next section.
IT2.weebly.com Applied ICT 9713
22
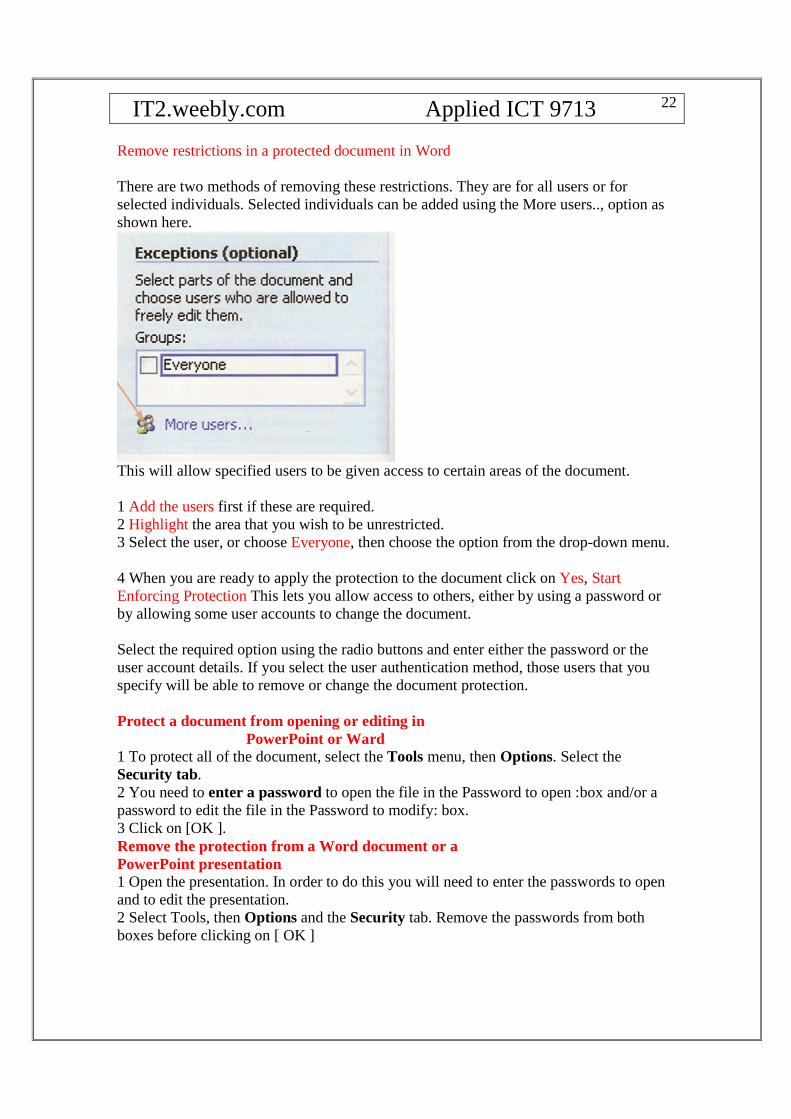
Remove restrictions in a protected document in Word There are two methods of removing these restrictions. They are for all users or for selected individuals. Selected individuals can be added using the More users.., option as shown here.
This will allow specified users to be given access to certain areas of the document. 1 Add the users first if these are required. 2 Highlight the area that you wish to be unrestricted. 3 Select the user, or choose Everyone, then choose the option from the drop-down menu. 4 When you are ready to apply the protection to the document click on Yes, Start Enforcing Protection This lets you allow access to others, either by using a password or by allowing some user accounts to change the document. Select the required option using the radio buttons and enter either the password or the user account details. If you select the user authentication method, those users that you specify will be able to remove or change the document protection. Protect a document from opening or editing in
PowerPoint or Ward 1 To protect all of the document, select the Tools menu, then Options. Select the Security tab. 2 You need to enter a password to open the file in the Password to open :box and/or a password to edit the file in the Password to modify: box. 3 Click on [OK ]. Remove the protection from a Word document or a PowerPoint presentation 1 Open the presentation. In order to do this you will need to enter the passwords to open and to edit the presentation. 2 Select Tools, then Options and the Security tab. Remove the passwords from both boxes before clicking on [ OK ]

IT2.weebly.com Applied ICT 9713
23
Track changes Tracking changes is keeping a record of all the changes made to a document during its revision and final editing. Before the most recent word processors were developed. Identify changes in Word Track Changes needs to be turned on before you can see this feature. To turn on Tracking go to the Tools menu and select Track Changes.
There is also a Reviewing toolbar which makes the revising and editing easier. If this is visible it will look similar to this.
Display for Review box on the left allows you to select from a drop-down menu what is visible on the screen whilst you are working. Select Final Showing Markup from this drop-down list so that the finished document with all changes can be viewed. If Final Showing Markup has been selected, the visible annotation includes any comments that have been inserted and revisions of the text. With each comment or revision is a note as to who made the changes and the date and time that they were made. An outline of some of the revisions are visible in the margin (usually the right margin, although this can be changed). Further details of this can be found by holding the mouse over the revision. Accept or reject revision changes in Word The mouse is held over the first revision to show the details of the revision. If the right mouse button is clicked on the revision, a drop-down menu appears. Select Accept Insertion to allow this or Reject Insertion to remove the insertion. Reviewing toolbar If a number of revisions have been made to a document they can be edited by clicking on the Previous or Next button to find the correct revision, then using the Accept Change or Reject Change/Delete Comment button.

IT2.weebly.com Applied ICT 9713
24
Insert or remove revision comments in Word Revision comments are notes added to but not included in the text of the document and are used where a reviser does not want to change the text but wishes to draw an editor’s attention to something within the text. They can be printed with the document. They are also useful for leaving notes when writing long documents. To insert a comment: 1. Place the cursor where the comment is required, or highlight a section of text. In the example above, the highlighted text has been shown within the blue brackets. 2. Click on the Insert Comment button. Type the comment within the text box in the margin (shown in blue above) and click the cursor back onto the text of the document when you have finished. 3. To delete a comment, click the left mouse button on the text box containing the comment, then click on the Reject Change/Delete Comment button. Compare and merge documents This allows two versions of the same document to be compared, and merged together. It is especially useful when a document has been revised by a number of people at the same time, and all of the changes need to be placed in the same document for editing. Each difference between the files is identified, and noted in the final document as tracked changes. Comments from the two files are also merged into a single document. In order to keep the original documents intact, it is recommended that when ‘compare and merge’ features are used they are merged to a new document, rather than into an existing one. Compare and merge documents in Word 1. Save your document and select the Tools menu, then Compare and Merge Documents. The Compare and Merge Documents window will open. 2. Select from the list the document that you wish merge with your open file and select the drop-down menu for the Merge button by using the symbol.

IT2.weebly.com Applied ICT 9713
25
3. From the drop-down menu select the Merge into new document option. The formatting style of one document can be kept during the merge. Select the document that you wish to use as the master documents for this formatting using the radio button, then click on Continue with Merge. The merge will take place and the word processor will allocate the new document a name. Save this document with your own filename before making further changes. 10.8 Setting up the format for a document, page or slide What is a master document or master slide? These are referred to by different names in different software packages, But the idea is to design the layout of your document or slides before you start. The page or slide you do this on is called a master document or master slide. The page layout and document structure are set up in a master page or master slide. This can include the page layout, paper (or display) size and orientation, margin settings, gutter settings, column settings, corporate logos and colour schemes. Set up the page layout in Word

IT2.weebly.com Applied ICT 9713
26
Additional white space is allowed on one side of the page This is called a gutter. This will. This will usually be on the left side of odd-numbered pages and on the right side of even-numbered pages.
2 1. Create a new document. Select the File menu followed by Page Setup. 2. The Page Setup window has three tabs. To select the paper size for the document, select the Paper tab. 3. Select the Paper Size: using the drop-down menu; for this task you need to set this to A4. The width and height of the paper changes - automatically. 4 Make sure that the settings are applied to the Whole document. This is found in the Preview area. 6. Select the Margins tab, 7 Use the Orientation area to set the page orientation to landscape by pressing the left 8. In the Margins area, change the top margin to 5 centimeters, the bottom margin to 3 centimetres, and the left and right margins to 2 centimeters. Change the Gutter selling to 2 centimetres. The the Multiple pages: box to select Mirror margins. This makes sure that the gutter is in the correct place on facing pages. Check that it looks like this before clicking on [ OK ]. 10 To set the document into three columns select the Format menu, then Columns... to open the Columns window. 11 Select Three columns .

IT2.weebly.com Applied ICT 9713
27
12 Change the spacing between the columns to 1 centimetre. 13 Column widths can be adjusted here if you wish. These columns can apply to the whole document or to a section of the document. 14 Gick on[ OK ] 15 Make sure that you save the page layout before starting any other work on this document.
Set up a master document in Publisher page 185
1. Create a New publication. 2. Select from the task pane the option for Blank Publications and then select Full Page. 3. Select the File menu, followed by Page Setup.... The Page Setup window has two tabs. 4.To select the paper sizes for the document select the Printer and Paper tab. Select the Paper Size: for the document using the drop-down menu. For this task, you need to set this to be A4.

IT2.weebly.com Applied ICT 9713
28
6. Use the Orientation area to set the page orientation to landscape, using the radio button for landscape, then click on OK . 7. To change the margin settings, use the Arrange menu, and then select Layout Guides.... 8. For this task you need to set a gutter, so select Two- page master. The margin guides will then change from left and right to inside and outside margin guides 9. To work out the value so that you can set the inside margin, add the gutter width to the width of the side margin. 10. To set the three columns, first select the Grid Guides tab. select three columns and a 1 centimeter space between the columns in the Column Guides section.

IT2.weebly.com Applied ICT 9713
29
In your book page 189

IT2.weebly.com Applied ICT 9713
30
10.9 Using and applying styles You have already used many different features in your documents, for example different fonts, point sizes, enhancements (like bold, italic and underline), paragraph sitting and line spacing . For saving the time is recommended that you define a number of pre-set styles for the text and apply them consistently throughout a document. Define styles in Word

IT2.weebly.com Applied ICT 9713
31
1 To define a style, select the Format menu, then Style and Formatting.... This will open the Styles and Formatting pane. You can identify information about each style by holding the cursor over the style name. Be careful not to press the left mouse button, or this will overwrite your current style with the style that you are looking at. 3. To create a new style, click on New Style. . Apply styles in Word 1 Move the cursor into the text to be formatted. 2 Go to the style box in the Formatting toolbar andselect the correct style from the drop-down list. Hyphenation in Word 1 Word will automatically hyphenate words for you. If you wish to set hyphenation to manual, in order to have more control over the process, select Tools, then Language, then Hyphenation. 2 Click on [ manual ] and this will automatically run through a manual hyphenation check in your current document. Tabulation in Word

IT2.weebly.com Applied ICT 9713
32
Tab stops appear on the ruler in Word. To place a tab stop select the type of tab stop re-quired. They are left tab, centre tab, R right tab, decimal tab (where numbers are aligned on the decimal point) and bar tab (which places a vertical bar at that point rather than placing text). Format à Tabs
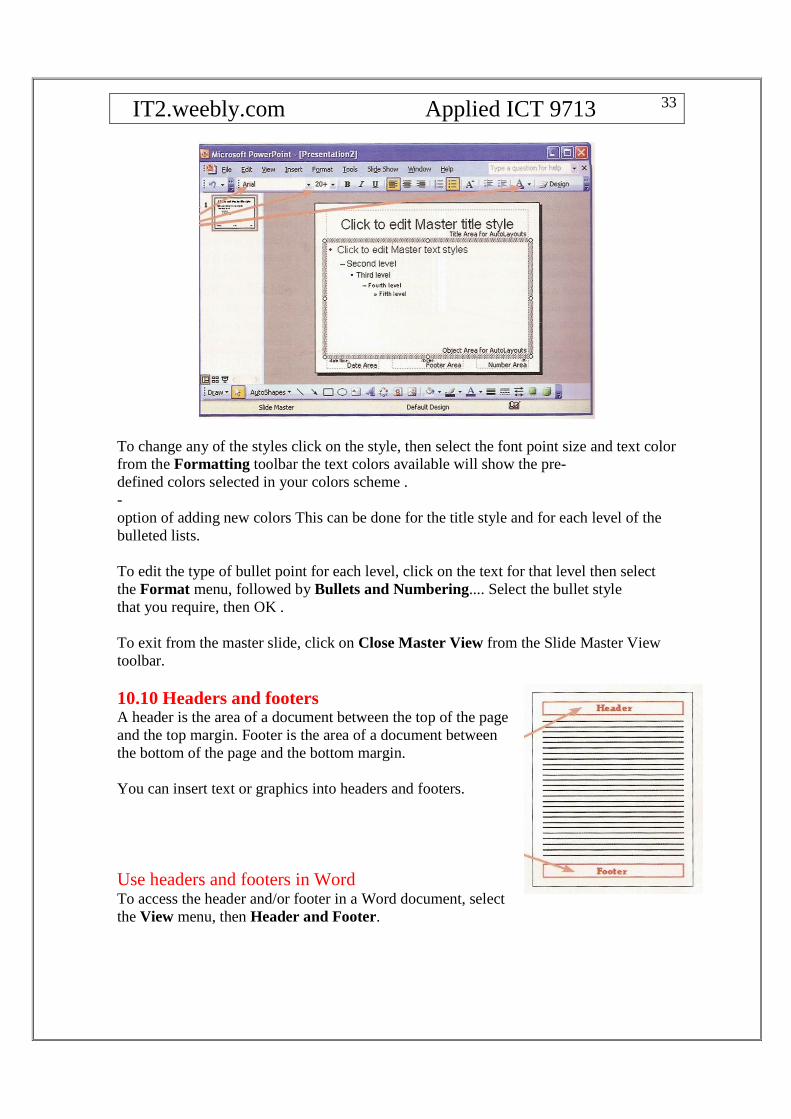
Define styles in PowerPoint: The first part of defining styles is to set the slide scheme, All other elements that make up a style can be found in the master slide section within PowerPoint. To change the master slide details, Select the View menu then Master the slide Master This Will look similar to this:
IT2.weebly.com Applied ICT 9713
33
To change any of the styles click on the style, then select the font point size and text color from the Formatting toolbar the text colors available will show the pre- defined colors selected in your colors scheme . - option of adding new colors This can be done for the title style and for each level of the bulleted lists. To edit the type of bullet point for each level, click on the text for that level then select the Format menu, followed by Bullets and Numbering.... Select the bullet style that you require, then OK . To exit from the master slide, click on Close Master View from the Slide Master View toolbar. 10.10 Headers and footers A header is the area of a document between the top of the page and the top margin. Footer is the area of a document between the bottom of the page and the bottom margin. You can insert text or graphics into headers and footers. Use headers and footers in Word To access the header and/or footer in a Word document, select the View menu, then Header and Footer.

IT2.weebly.com Applied ICT 9713
34
If a document is split into separate sections using a section break (see the next section), the headers and footers of each section can be linked together. If they are linked together they will be the same. If the header or footer does not say 'Same as Previous' on the right-hand side and you wish to keep the header or footer the same as the previous section click on the Link to Previous button. This will link the two sections together. Similarly, if the two sections are already linked together and you want to remove the link, click on the Link to Previous button. This button acts as a toggle to turn this feature on and off If this feature is turned off, then any changes that you make to the header or footer will not be made to the other sections of the document. Headers and footers in Publisher To access the header and/or footer in a Publisher document select the View menu, then Header and Footer. This will move the cursor into the header and open the Header and Footer toolbar. This toolbar contains fewer features than the toolbar in Word.1
10.11 Footnotes
A footnote is text added to a document and is used to make a comment or to provide a reference source. Footnotes can be seen in the printed document, unlike comments. A footnote contains two parts. The first is the reference mark, which looks like this2. The second part is the text which is placed at the bottom of the page (see below).
Add a footnote in Word To insert a footnote, place the cursor where the reference mark is required. Select
the Insert menu, followed by Reference, then Footnote.... This will open the Footnote and Endnote window.
An endnote will place all of the references at the end of the section or the end of the document.
A footnote will place them at the bottom of the page you are working on.
Footnotes and endnotes can be numbered or lettered in a variety of styles.
Move or duplicate a footnote in Ward To move a footnote or endnote, highlight the reference mark in the text, then use
drag and drop or cut and paste. Use copy and paste to duplicate a footnote.
1
2 ‘ This is the text for the footnote in the section above it usually contains comments or references to other sources

IT2.weebly.com Applied ICT 9713
35
10.12 Sections A section is the area of a document which has common page formatting.
Examples of this would be a document where one section is in portrait orientation, then another section in landscape orientation, or a change of layout within a page from one column to three columns.
A break is a split between two pages, sections or columns, or it can be inserted to force text wrapping. Breaks are usually used to separate two areas of a document with different formatting.
Use breaks and sections in Word: To insert a break in Word, select the Insert menu, then Break.... This will open
the Break window. The three options under Break types will insert a break without creating a new
section of the document. You can use the Page break option to move to the start of a new page; this is much easier than trying to arrange page breaks by repeatedly pressing the <Enter> key. The Column break option allows you to move to the top of the next column, which is useful for documents with multiple columns.
The Text wrapping break is used to force a line break (like a carriage return), but
if used with fully justified text will keep the left and right alignment and add additional spaces in the centre of the text.
The section breaks allow a document to have different margin settings and/or
split page orientation using the Next page option. The Continuous option allows you to have different sections on the same page and is useful for having different column layouts on the same page.
To remove a break in Word, click on the Show/Hide button; this will make the break (and its type) visible on the page. Highlight the break and use the <Delete> key.
Task 10.8 page 197 Activity 10.16 page 198 Insert a section break in Publisher: In Publisher you can only have a section break between pages, unlike
Word where you can have a section break within a page. To insert a section break between pages in Publisher, select the page
where you want to start a new section by pressing the right mouse button on the page in the page sorter (at the bottom left of the window). This may look similar to this.

IT2.weebly.com Applied ICT 9713
36
Select Insert, then Section... from the drop-down menu to open the
Section window. Choose the options that you require before clicking on [OK]. The page section will be shown in the Page sorter like this (just space between two pages).
Insert a column break in Publisher: To insert a column break within a text box in Publisher, move the cursor to
the point where you want to insert the column break and click the left mouse button. Hold down the <Ctrl> and <Shift> keys and press <Enter>.
10.13 Widows and orphans if you start a paragraph of text on one page but there isn’t enough room on
the page to fit the last line, the single line of text which appears at the top of the next page is called a widow. Similarly, sometimes you start a paragraph at the bottom of a page but you can only type in one line before the rest of the text goes onto the next page.
The first line of the paragraph at the bottom of the page is called an orphan. These
lines should be avoided when producing a document and you are likely to be penalized if you include these in any submission for the practical examinations. These can be manually avoided by inserting a Page Break or a Text Wrapping Break, which does not show the reader that you have forced the page break at this point.
Automatically avoid widows and orphans in Word and Publisher In both Word and Publisher, you can automatically avoid widows and orphans using
paragraph options. Select the paragraph or paragraphs that you wish to set this feature for. Go to the Format menu, followed by Paragraph..., then select the Line and Page Breaks tab. Select the Widow/Orphan control tick box.
10.14 Applying house styles Most organizations have a corporate house style. This can be seen on letter heads,
business cards, advertising, websites, and their products. House style can range from company logos to recognize color schemes, fonts, point sizes, etc.
You will probably recognize many international companies’ advertising by the color scheme or other stylistic features that they use.
10.15 Tables Insert a table in Word

IT2.weebly.com Applied ICT 9713
37
1 Select the Table menu, followed by Insert, then Table.... This opens the Insert Table window. 2 Enter the number of rows and columns required for the table. 3 If you want to select from a range of predefined table formats including color
schemes, gridlines and three-dimensional effects you can use [AutoFormat].When you have selected the sizes and formatting that you want,
click on [ OK] Insert a row or column into a table in Word 1 Move the cursor into the table and left mouse click. The cursor must be placed in a cell where the row or column is to be inserted. 2 Select the Table menu, followed by Insert. This opens this sub-menu. 3 A row or column can be added to the left, to the right, above or below the currently
selected cell. Delete cells from a table in Word 1. Move the cursor into the table and left mouse click. The cursor must be placed in the cell to be deleted. If a number of cells are to be
deleted at the same time highlight all of the cells. 2. Select the Table menu, followed by Delete. From the Sub-menu select Cells.... This
will open the Delete Cells window. 3 This will allow you to delete rows or columns or to shift all the cells in that row or
column (with their contents) either up or left (depending upon your choice) Using gridlines and borders within a table in Word Gridlines within a table can be visible or hidden. These can only be viewed on the
screen and are never visible when a document is printed. They can be made visible or invisible using the Hide Gridlines and Show Gridlines options from the table toolbar.
If you wish to make the gridlines visible when printed you must use borders. 1 Move the cursor into the table and left mouse click. 2 Select the Format menu, followed by Borders and Shading... to open the Borders
and Shading window. 3. Select the Borders tab.

IT2.weebly.com Applied ICT 9713
38
4. To place borders on all of the gridlines select either All or Grid. The option for All
will place identical thickness borders on the gridlines, while the option Grid will emphasize the outer border.
Merging cells within a table in Word 1. Highlight the cells to be merged together. These cells must be next to each other. 2. Select the Table menu, then Merge Cells. This action will change a table from:
Insert a table in Publisher and power point: This operates in a similar way to MS word. 10.16 Proofreading and error correction: Self reading page 202
Done by:
IT Instructor Ahmad Hirzallh
Abdul Hamid Sharaf School