ISACS Assessment Tool Advanced Guide 2015. About this guide This guide is designed to detail this...
70
ISACS Assessment Tool Advanced Guide 2015
-
Upload
edwin-cannon -
Category
Documents
-
view
213 -
download
1
Transcript of ISACS Assessment Tool Advanced Guide 2015. About this guide This guide is designed to detail this...
ISACS Assessment Tool Advanced Guide
2015
About this guideThis guide is designed to detail this software’s functions and
features. Before getting started please note the instructions below:
• Please read this guide before using the software to ensure its proper use.
• Please make sure you have already reviewed the ISACS-AT Basics guide prior to reading this guide.
• Descriptions are based on the software’s default settings.• Images and screenshots may differ in appearance from the
actual product.• Content in this guide may differ from the final product and
is subject to change without prior notice. For the latest version of the software and the guide, refer to the ISACS website, www.smallarmsstandards.org
• The computer operating system may affect the overall performance of the software. Software may not work properly depending on the computer hardware specifications and the environment that it is used in.
• The software and this guide are currently available in English only.
• UNIDIR is not liable for performance issues or incompatibilities caused by efforts to modify the software. Attempting to customize the operating system may cause the software to work improperly.
Purpose of the ISACS-AT: Advanced
To provide guidance on advanced functions of the ISACS-AT, in order to:– support the practical application of the
International Small Arms Control Standards (ISACS)
– conduct self-assessment on the implementation of small arms control commitments in line with the standards
– establish baselines on small arms control policy, programmes, and practices in line with the standards
– promote the ISACS for educational and awareness-raising purposes
Lesson overview
Four lessons:1. Additional customized questions• Add customized questions• Answer customized questions• Generate report
2. Compare results3. Export assessment data4. Import assessment data
Lesson 1: Additional questions
Learning objectives• To familiarize users with generating customized
questions in addition to the ISACS indicators, in order to supplement the questionnaire for the needs and priorities of the local context
Expected outcomes• Users are able to add, answer, and report on the
additional questions that address their local/national/regional needs
• Users are able to supplement analysis of the ISACS assessments with qualitative inputs
Step one: Add additional question - Design
Design a questionnaire that reflects your local priorities and needs
Purpose• To allow users to provide customized
questions in addition to the ISACS indicators, in order to supplement the questionnaire for the needs and priorities of the local context.
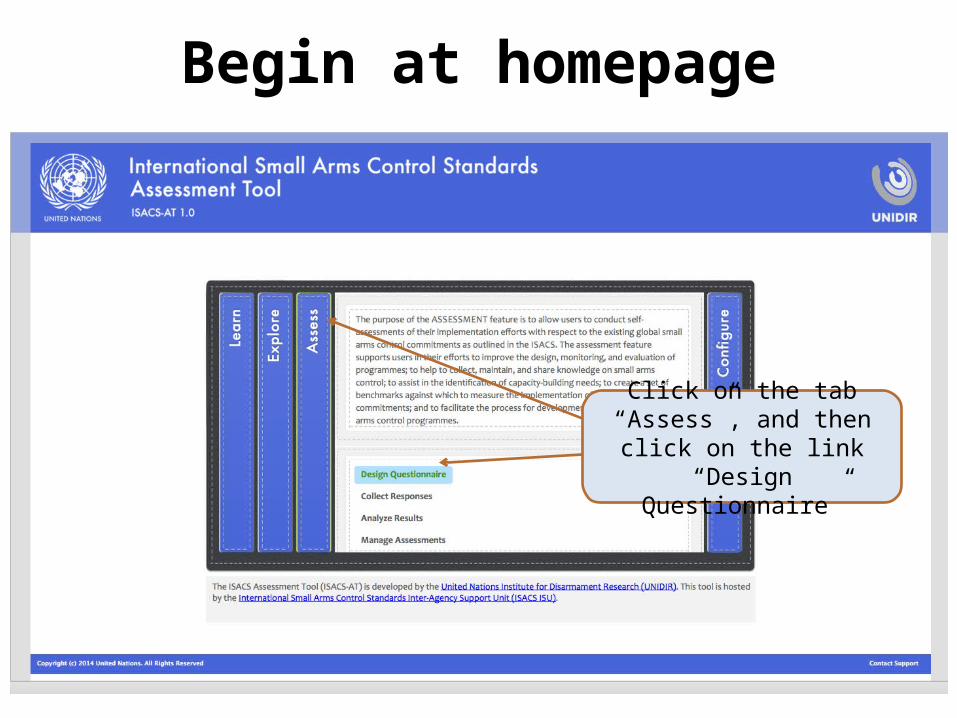
Begin at homepage
Click on the tab “Assess”, and then click on the link “Design
Questionnaire”

Enter creator information
Enter creator information and click continue to create a
questionnaire

Select and load an ISACS module
Select the module to load here. Once selected,
indicators will be loaded on the left-hand side column
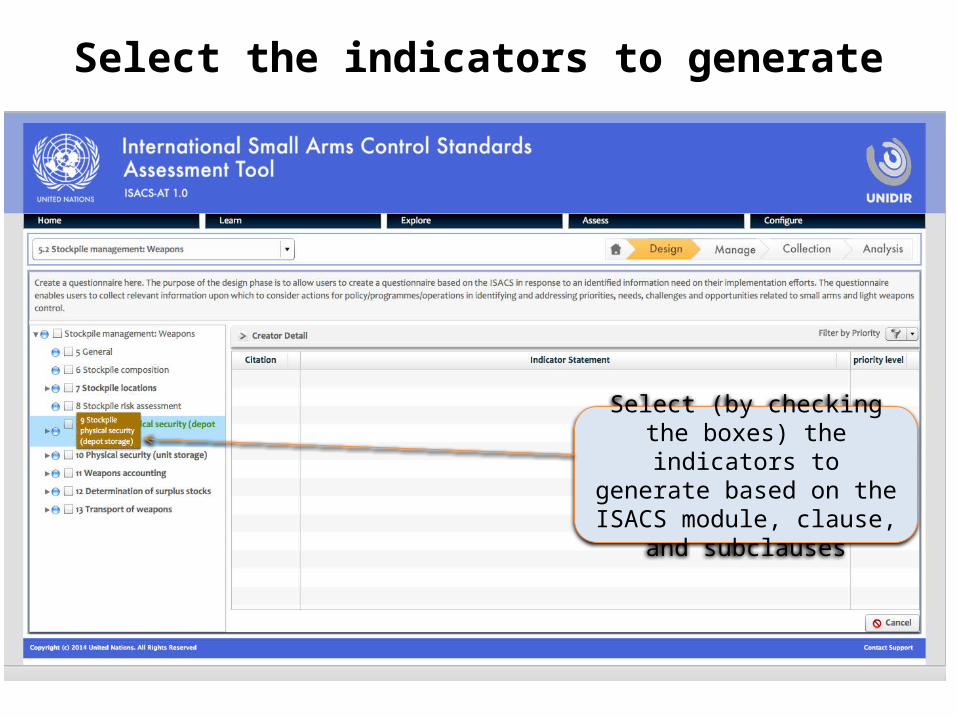
Select the indicators to generate
Select (by checking the boxes) the indicators to generate
based on the ISACS module, clause, and subclauses

Generate indicators
Checking relevant boxes will generate indicators in the content
panel.

Add additional questions
Click on “Add Additional Questions” icon to continue

Additional questions overview
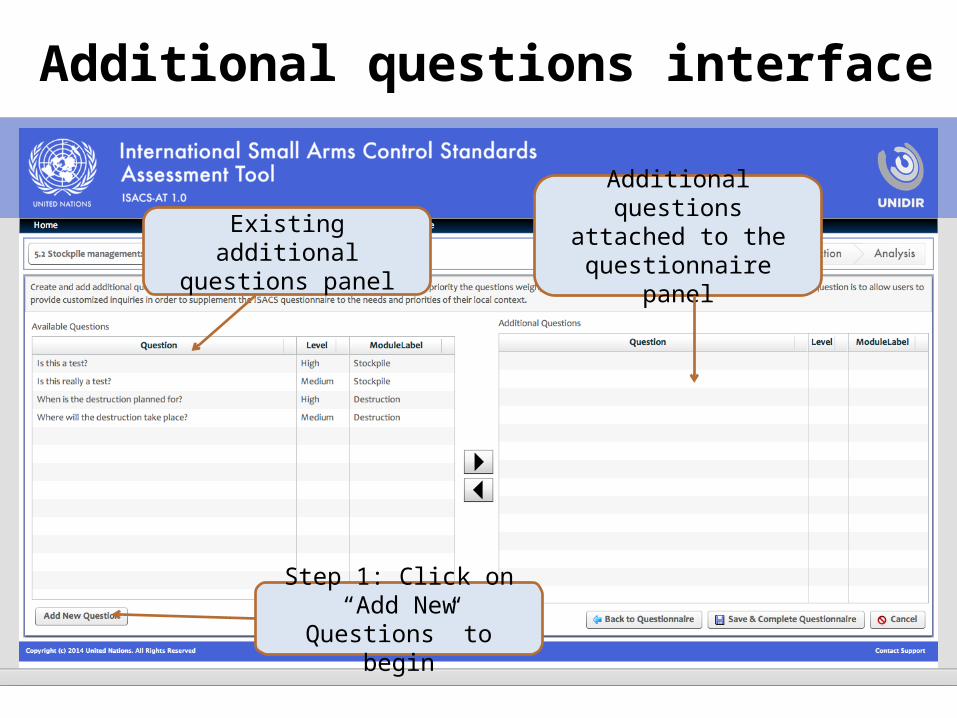
Additional questions interface
Additional questions attached to the
questionnaire panelExisting additional
questions panel
Step 1: Click on “Add New Questions” to begin
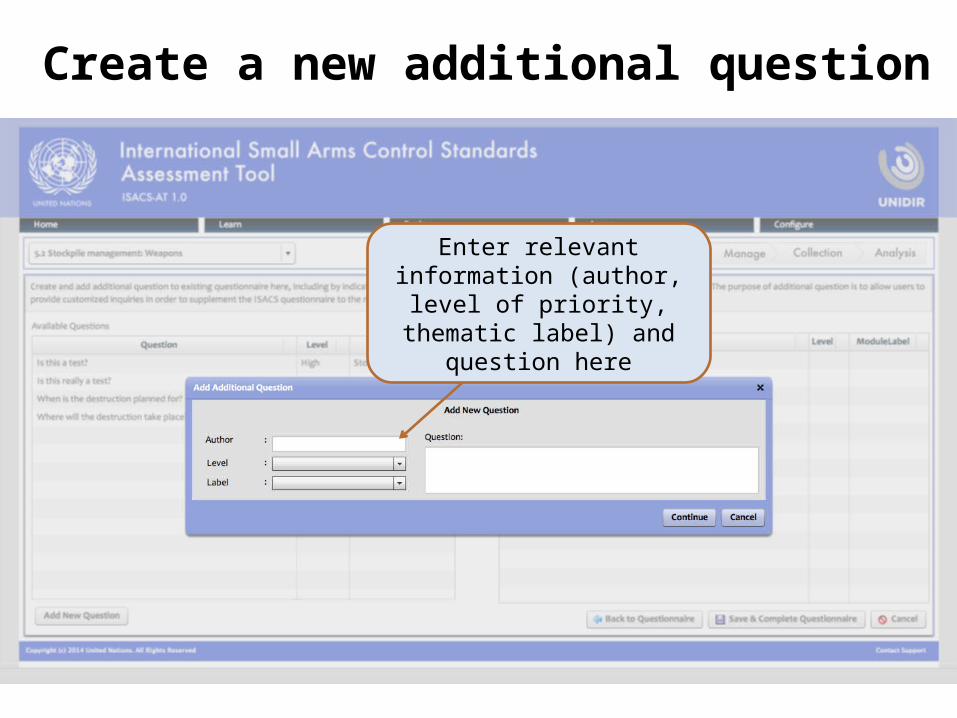
Create a new additional question
Enter relevant information (author, level of priority,
thematic label) and question here

Attach additional questions
Questions listed on this panel reflect attached additional questions
Select questions you wish to attach then click on
transfer button
Once attached, click on “Save & Complete”

Lesson tip
Additional questions are attached to an ISACS questionnaire
• The adding additional question function is accessible only through the design questionnaire function, after ISACS indicators have been generated.
Created additional questions are stored in the storage file
• The customized questions created during the design phase are stored in the user storage file. This allows users to store on file existing customized questions, which they can later select and attach to other questionnaires.
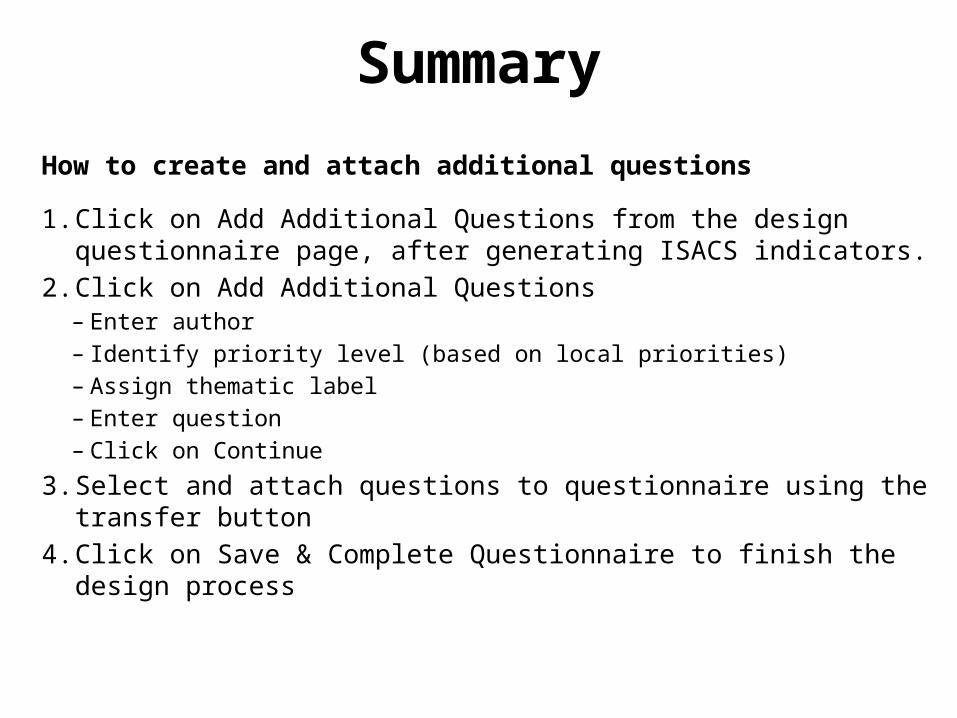
Summary
How to create and attach additional questions
1. Click on Add Additional Questions from the design questionnaire page, after generating ISACS indicators.
2. Click on Add Additional Questions– Enter author – Identify priority level (based on local priorities)– Assign thematic label – Enter question – Click on Continue
3. Select and attach questions to questionnaire using the transfer button
4. Click on Save & Complete Questionnaire to finish the design process
Step two: Answer additional questions - Collect
Provide detailed inputs to add context to the assessment
Purpose• to allow users to provide responses to
additional questions that were created in order to capture the context in which the assessment is being carried out.
Lesson tip
Provide as much detail as possible• It is recommended that users provide
responses that are detailed and comprehensive, in order to supplement the ISACS questions and to add context to the assessment. Note that the additional questions answer function is supported by a text box, which allows users to provide detailed qualitative inputs.

Begin at homepage
Click on the tab “Assess”, and then click on the link “Collect
Responses”
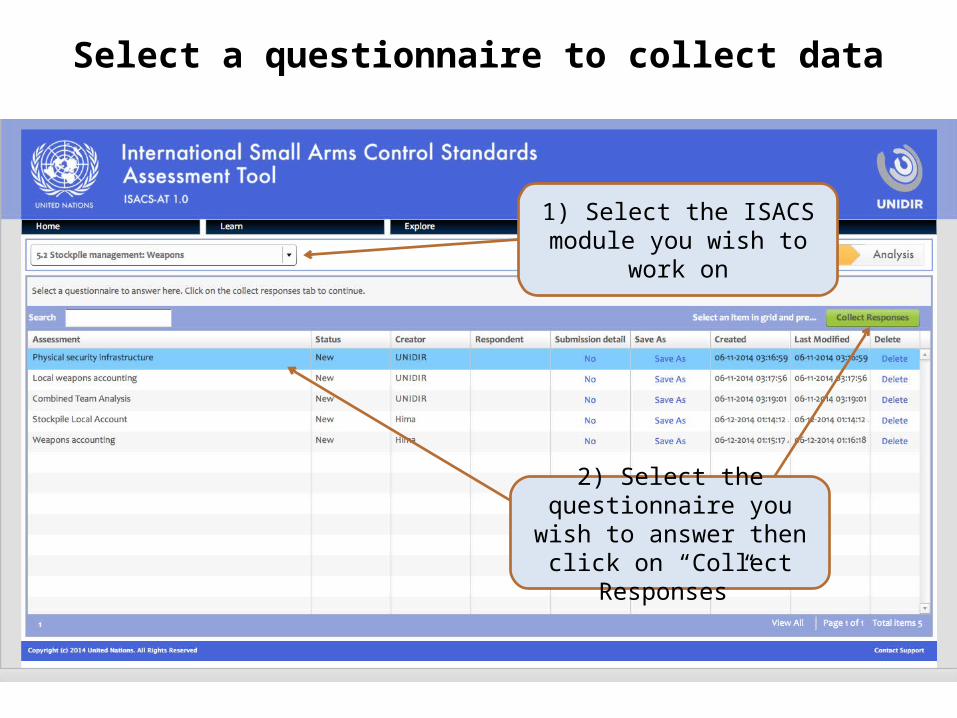
Select a questionnaire to collect data
2) Select the questionnaire you wish to answer then click
on “Collect Responses”
1) Select the ISACS module you wish to work on
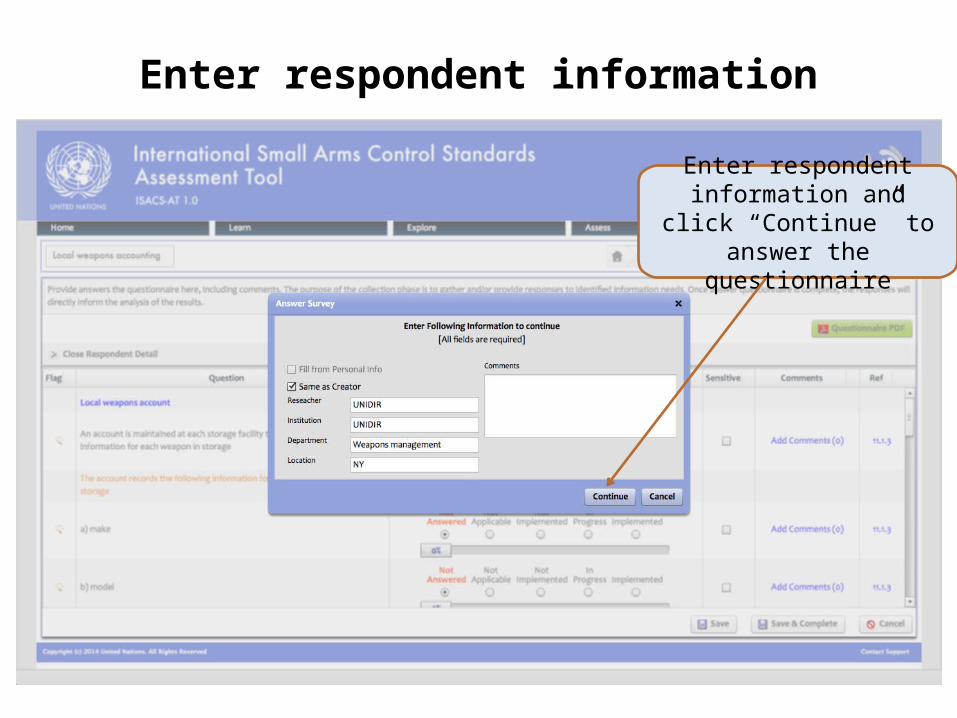
Enter respondent information
Enter respondent information and click
“Continue” to answer the questionnaire
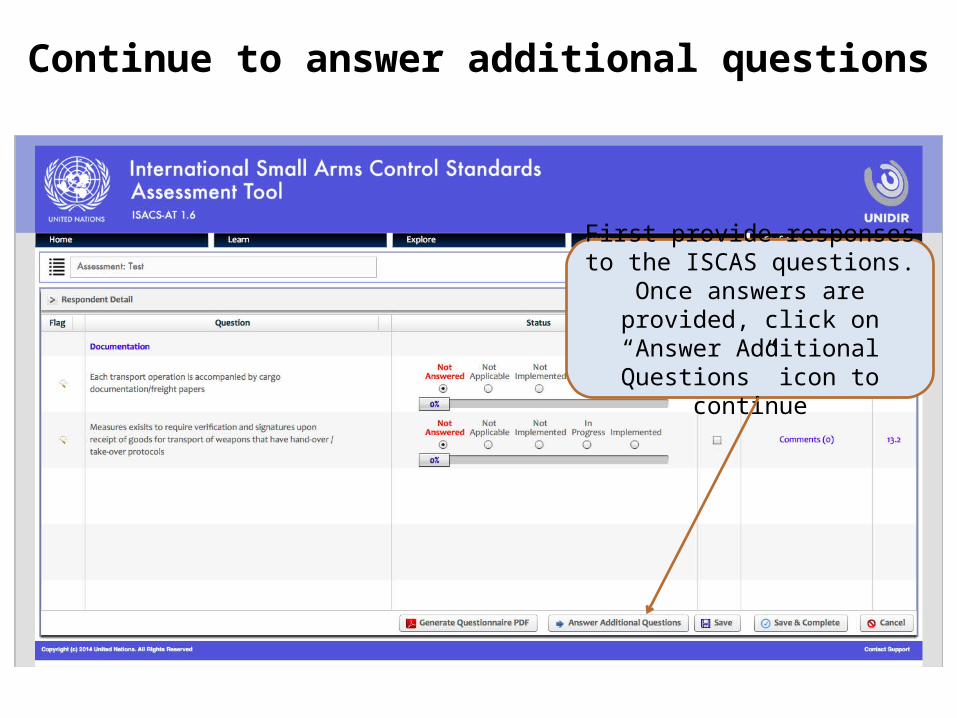
Continue to answer additional questions
First provide responses to the ISCAS questions. Once answers are provided, click on “Answer Additional Questions” icon to
continue

Provide data to additional questions
Provide response to additional questions to supplement the ISACS
questionnaire
Once complete, click on Save & Complete
Collect data using paper formatExport additional questions to PDF
Collect data in paper format and feed back into the tool
Purpose• To allow users to export the additional
questions in paper format, in order to distribute the questions to those who may have limited access to computers and/or may not own an ISACS-AT, as well as for those who are less favorable to using software platforms

Export additional questions to PDF
Click on the PDF icon to export questions in paper
format

Step three: View results – Analysis
Examine how data from customized questions support implementation of small arms control commitments
Purpose• To allow users to view the responses
provided to additional questions, in order to supplement the results presented by ISACS-based questionnaires and to better support users in the analysis process

Begin at homepage
Click on the tab “Assess”, and then click on the link,
“Analyze Results”
DRAFT
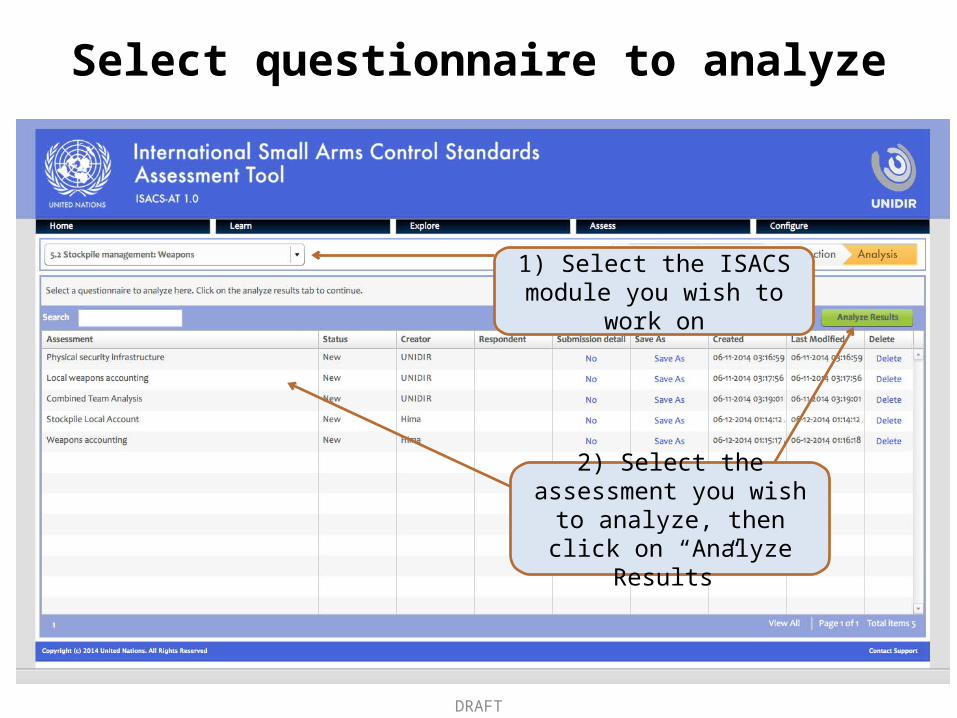
Select questionnaire to analyze
2) Select the assessment you wish to analyze, then click on
“Analyze Results”
DRAFT
1) Select the ISACS module you wish to work on
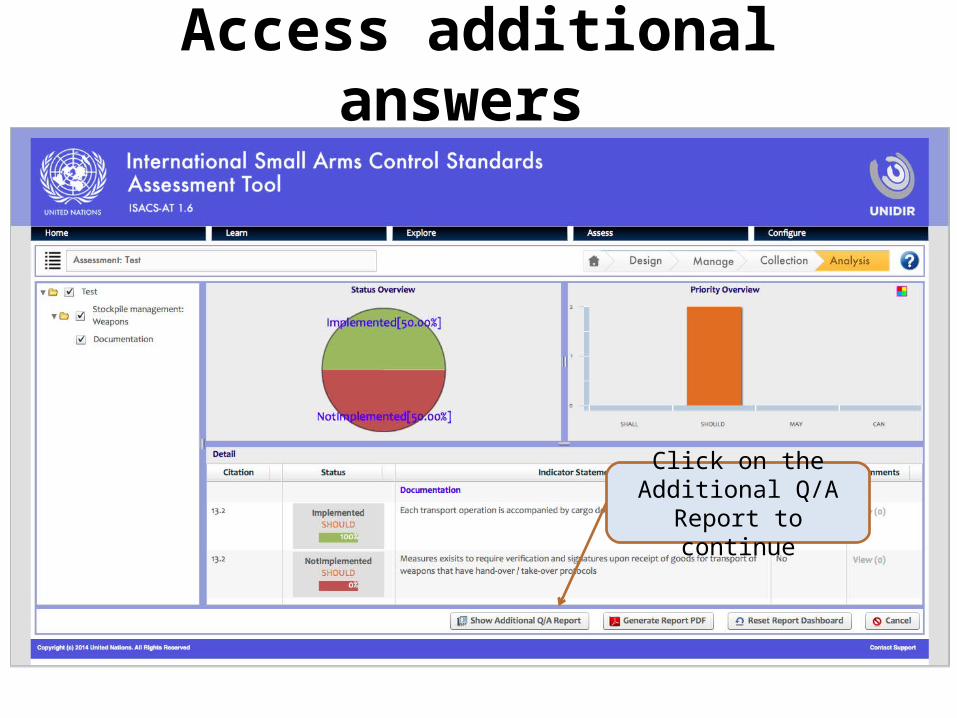
Access additional answers
Click on the Additional Q/A Report to continue

Additional answers report
Answers are provided here
Questions are listed here
Status and priority is provided here
View results in paper formatExport customized answers to PDF
View and analyze results in paper format and feed back into the tool
Purpose• To allow users to export the results of the
customized questions in paper format in order to distribute the responses to those who may have limited access to computers and/or may not own an ISACS-AT, as well as for those who are less favorable to using software platforms. In essence, the generation of analysis in paper format serves as a reporting mechanism in the tool.

Export additional results to PDF
Click on the Additional Q/A Report icon to
continue

Generate report in PDF
Click on the PDF icon to generate additional
questions report

Lesson 2: Compare results
Learning objective• Become familiar with how to compare and
analyze results from two different assessments
Expected outcome• Users will have a better understanding of
implementation progress made on their small arms control programmes/practices over time
• Users are able to compare and analyze priorities, challenges, and opportunities between two assessments, in order to make informed decisions for follow-up action
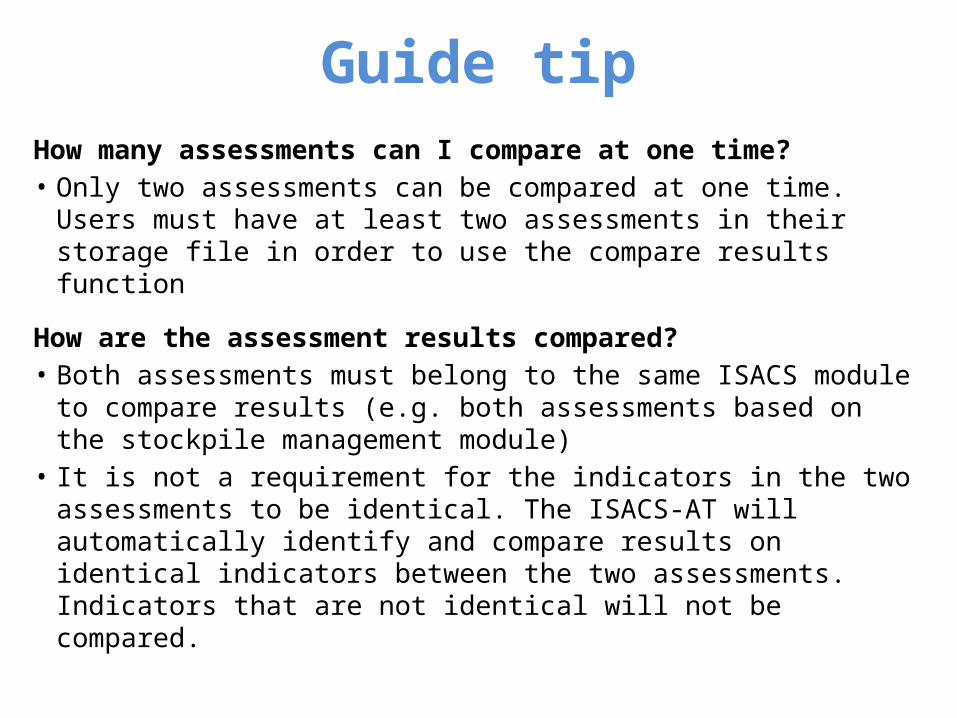
Guide tipHow many assessments can I compare at one time?• Only two assessments can be compared at one time.
Users must have at least two assessments in their storage file in order to use the compare results function
How are the assessment results compared?• Both assessments must belong to the same ISACS
module to compare results (e.g. both assessments based on the stockpile management module)
• It is not a requirement for the indicators in the two assessments to be identical. The ISACS-AT will automatically identify and compare results on identical indicators between the two assessments. Indicators that are not identical will not be compared.
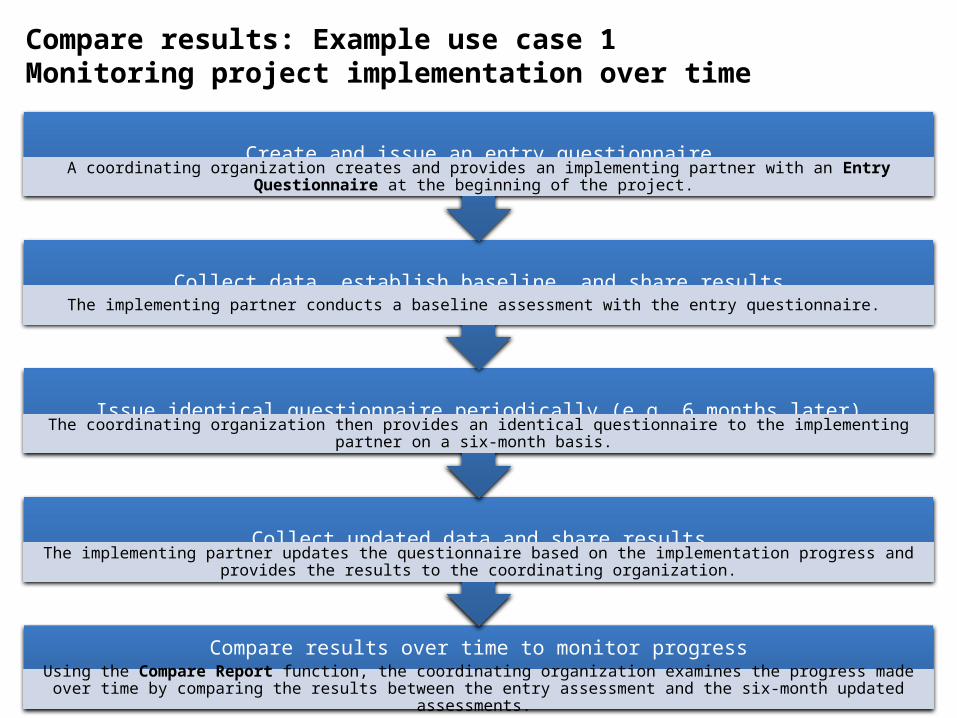
Compare results: Example use case 1Monitoring project implementation over time
Compare results over time to monitor progress
Using the Compare Report function, the coordinating organization examines the progress made over time by comparing the results between the entry assessment and the six-month updated assessments.
Collect updated data and share resultsThe implementing partner updates the questionnaire based on the implementation progress and provides the results to the coordinating
organization.
Issue identical questionnaire periodically (e.g. 6 months later)The coordinating organization then provides an identical questionnaire to the implementing partner on a six-month basis.
Collect data, establish baseline, and share resultsThe implementing partner conducts a baseline assessment with the entry questionnaire.
Create and issue an entry questionnaireA coordinating organization creates and provides an implementing partner with an Entry Questionnaire at the beginning of the project.

Compare results: Example use case 2Assisting in decision-making on implementation
Compare results and conduct analysis on findings from the two sites
Using the Compare Report function, the agency examines the implementation status at the two sites to determine which site requires more attention with regards to capacity-building and funding.
Each site collects data, establishes baselines, and shares resultsThe two border sites conduct baseline assessments with the questionnaire and shares results.
Create and issue identical questionnaires to two assessment sitesAn agency creates and provides identical questionnaires to two border sites for assessment.

Begin at homepage
Click on the tab “Assess”, and then click on the link,
“Manage Assessments”
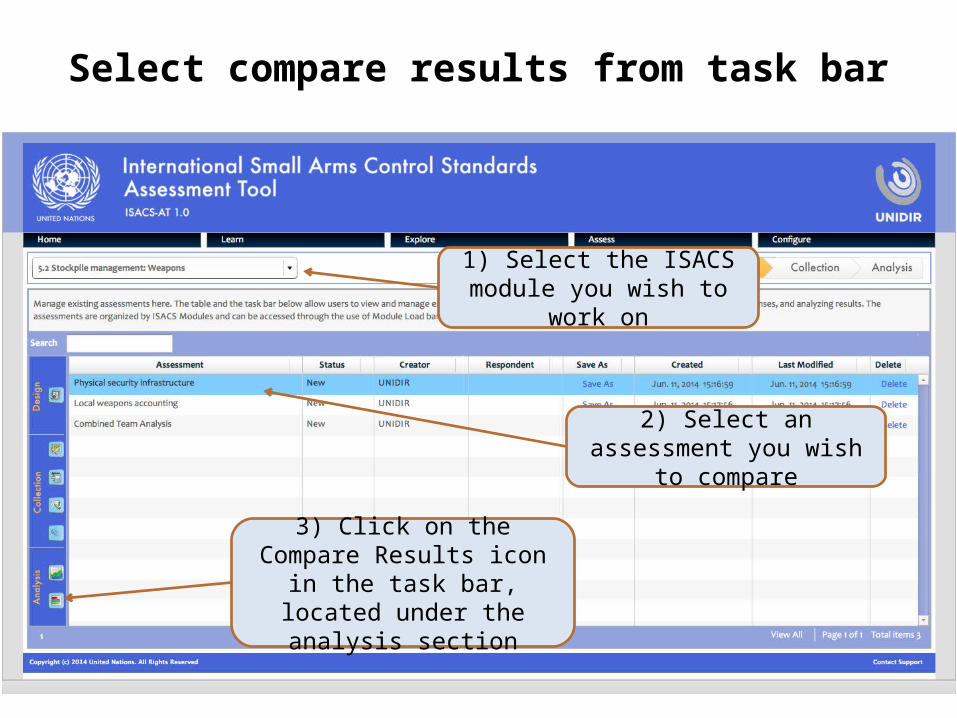
Select compare results from task bar
3) Click on the Compare Results icon in the task bar, located under the analysis section
1) Select the ISACS module you wish to work on
2) Select an assessment you wish to compare
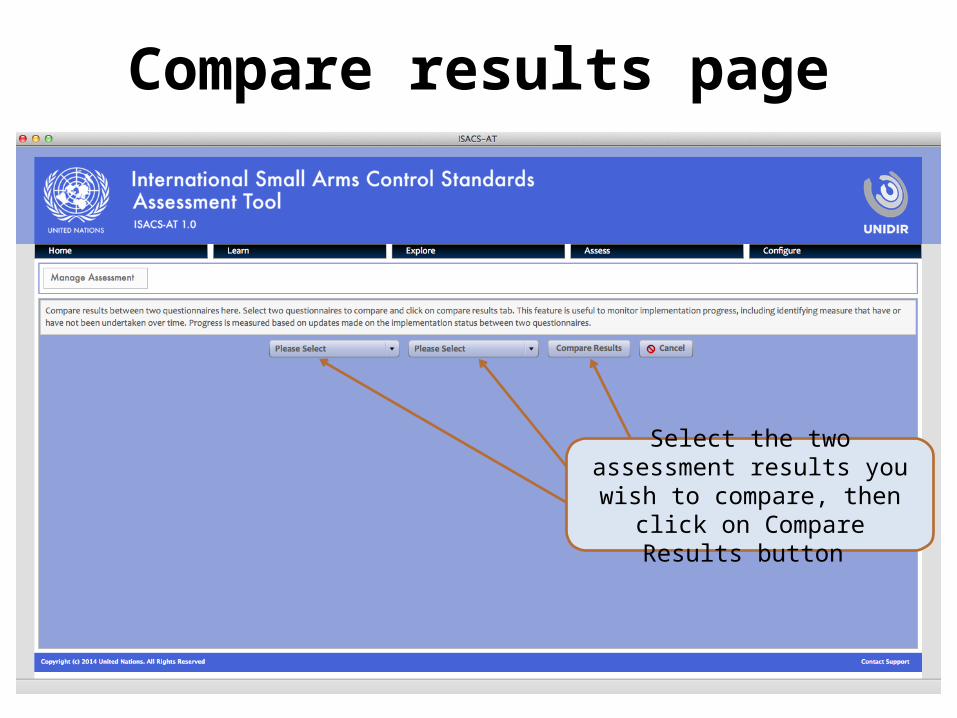
Compare results page
Select the two assessment results you wish to compare, then click on
Compare Results button

Compare results dashboard

Compare results dashboard
The bar graph demonstrates the progress made in
implementation by status and priority levels
The static information here present the number of
identical indicators that are being compared
The table below list the indicators, their priorities, and their
implementation progress status

Lesson 3: Export assessment
Learning objective• To become familiar with how to share and
distribute questionnaires as well as their assessment results to other users for data collection and analysis
Expected outcome• Users demonstrate competency in exporting
questionnaires/assessment results electronically to other users who own an ISACS-AT, as well as in paper format to those users who do not have the tool or a computer system
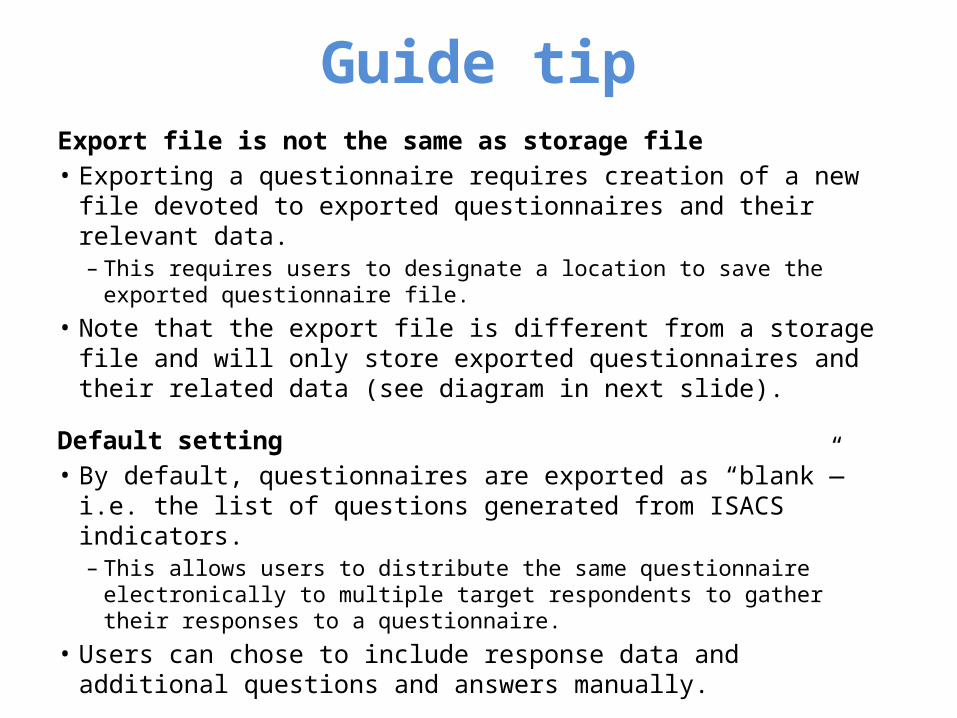
Guide tipExport file is not the same as storage file• Exporting a questionnaire requires creation of a new file
devoted to exported questionnaires and their relevant data.– This requires users to designate a location to save the
exported questionnaire file.
• Note that the export file is different from a storage file and will only store exported questionnaires and their related data (see diagram in next slide).
Default setting• By default, questionnaires are exported as “blank”—i.e.
the list of questions generated from ISACS indicators. – This allows users to distribute the same questionnaire
electronically to multiple target respondents to gather their responses to a questionnaire.
• Users can chose to include response data and additional questions and answers manually.

How the export function works
User 1Storage file
(ISACSAT.db)
Exported file(export.db)
User 2Storage file
(ISACSAT.db)
1) Storage file hosts multiple questionnaires and assessments. User 1 chooses specifically which questionnaires/ assessments to export to User 2
3) User 2 imports the questionnaires/assessments from the User 1’s exported file into their own storage file2) Exported
questionnaires/assessments are hosted in a new independent export file.
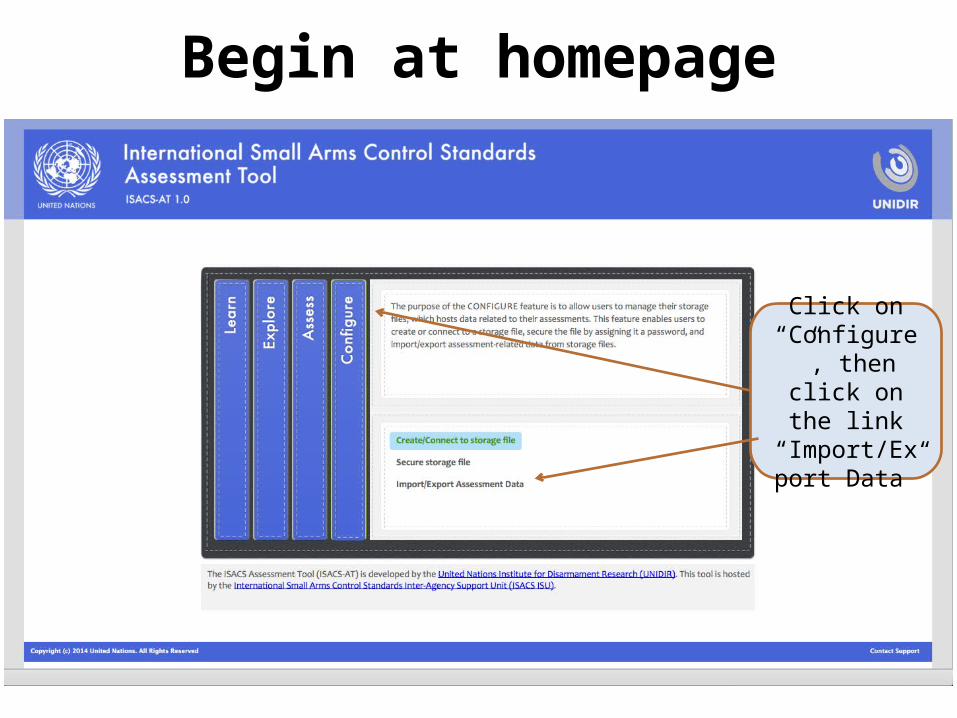
Begin at homepage
Click on “Configure”, then click on
the link “Import/Export
Data”

Export assessments page
Make sure you are on the Assessment
Data tab for export/import
function
Click on the Export Assessments tab, then click on the Browse button to
select a location to create an export file

Select save location and data to export
Select a location to save export
file, then click on save
By default just the questions are exported. Users can select whether they would like to include: 1)
answers, 2) comments, 3) additional questions, and 4) additional answers

Select assessments to export
Select the assessments to export and then click on “Continue”
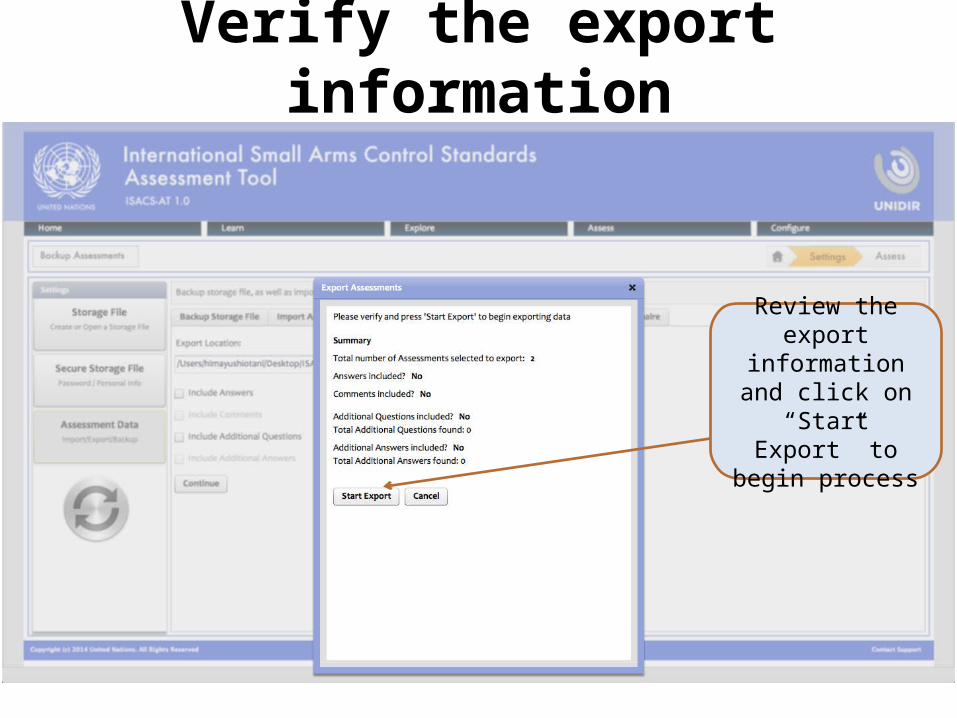
Verify the export information
Review the export information and
click on “Start Export” to begin
process
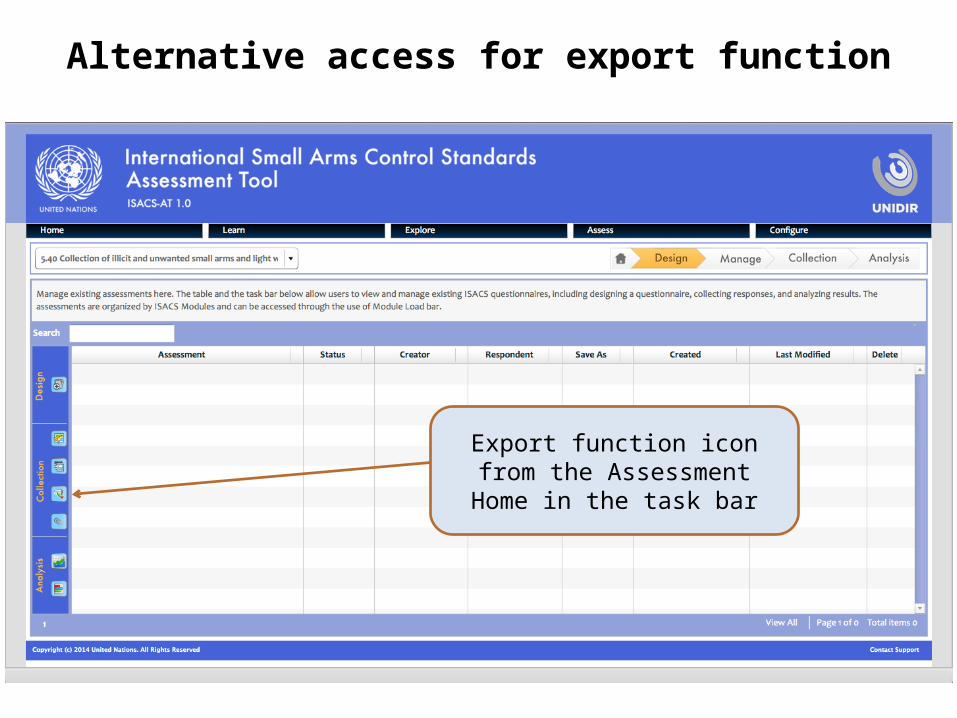
Alternative access for export function
Export function icon from the Assessment Home in the task bar
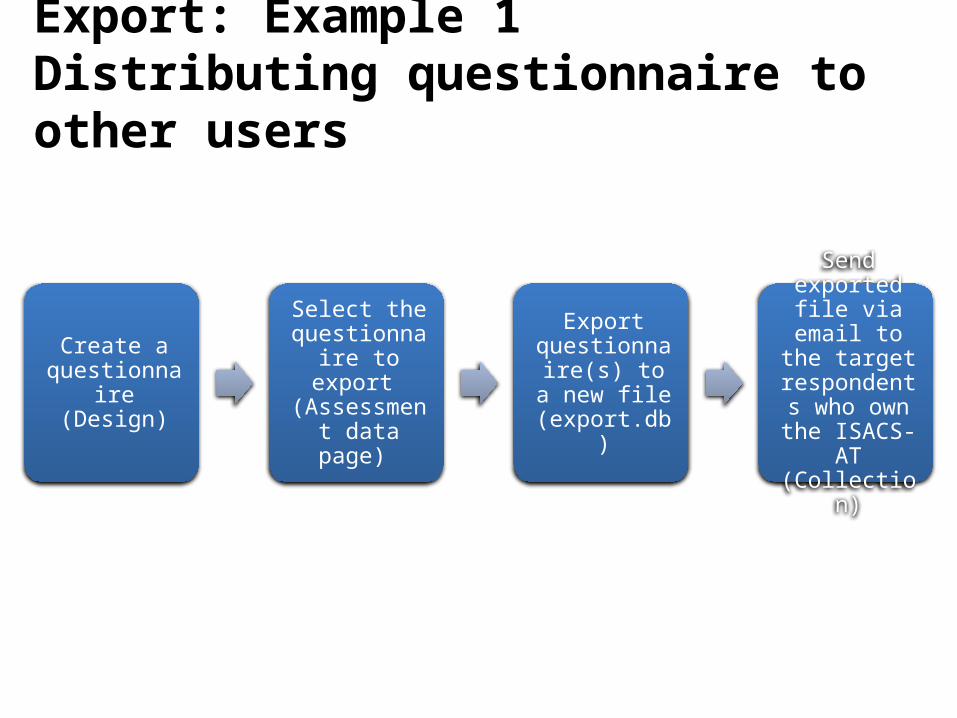
Export: Example 1Distributing questionnaire to other users
Create a questionnaire
(Design)
Select the questionnaire
to export (Assessment data page)
Export questionnaire(s)
to a new file (export.db)
Send exported file via email to
the target respondents who own the
ISACS-AT (Collection)
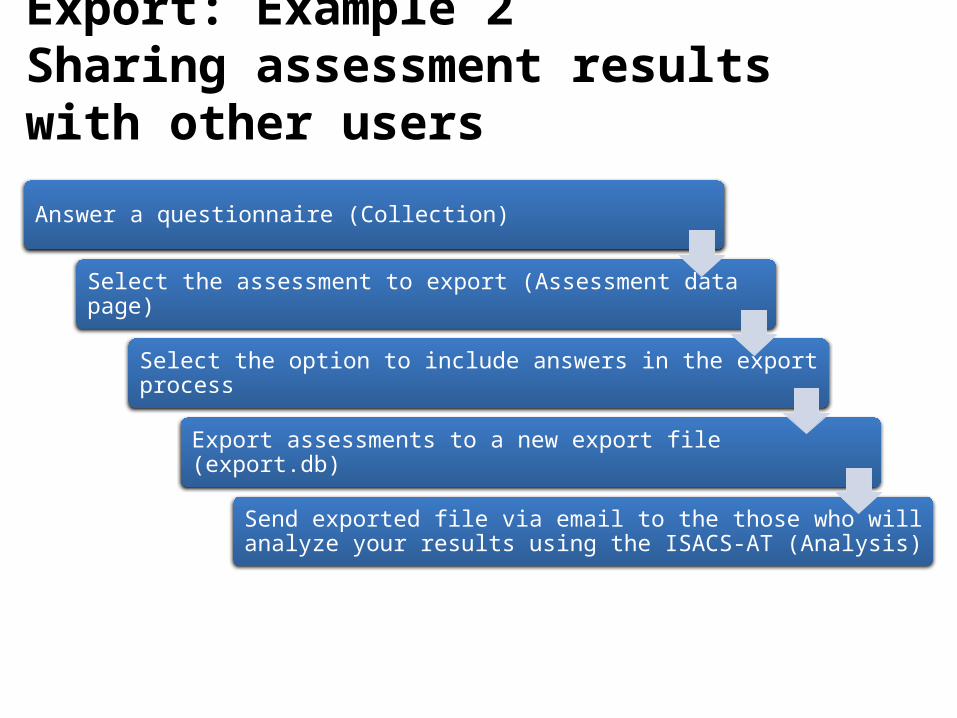
Export: Example 2Sharing assessment results with other users
Answer a questionnaire (Collection)
Select the assessment to export (Assessment data page)
Select the option to include answers in the export process
Export assessments to a new export file (export.db)
Send exported file via email to the those who will analyze your results using the ISACS-AT (Analysis)

SummaryHow to export a questionnaires / assessment results
1. Start from Homepage under the Configure box2. Click on Import/Export Assessment data link3. Click on the Export Assessments tab4. Select a location to export questionnaires by clicking on
Browse – this will create a new file where exported data are stored
5. Once selecting the location, select what you wish to export:– Questionnaire (only)– Include Answers (with response data)– Include Additional Questions– Include Additional Answers (with response data)
6. Click on Continue7. Select the questionnaires / assessments you wish to export8. Click on Continue after selecting the questionnaires9. Verify that the export information is accurate10. Click on Start Export to begin the export process

Lesson 4: Import Learning objective• To become familiar with how to obtain
questionnaires and assessment results from other users
Expected outcome• Users demonstrate competence in
using the ISACS-AT to import questionnaires as well as assessment results electronically from other users

Guide tipConnect to an existing export file• Users must have an existing export file in order to
import questionnaires/assessments from other users. – Make sure to connect to an export file when importing.
Connecting to a storage file (ISACSAT.db) will result in an error in the import process.
Default setting• By default questionnaires are imported as
“blank”—i.e. the list of questions generated by ISACS indicators. – This allows users to import blank questionnaires
electronically to distribute it to multiple target respondents to gather their responses.
• Users can choose to import response data, additional questions, and their answers manually.

Begin at homepage
Click on “Configure”, then click on the link “Import/Export
Assessment Data”

Export assessments page
Make sure you are on the Assessment
Data tab for export/import
function
Click on the Import Assessments tab, then
click on the Browse button to locate and
connect to an export file

Select an export file and data to import
Select the export file you
wish to connect to
DRAFT
By default, only the questionnaires are imported. Users can select whether they would like to import: 1) answers, 2) comments, 3) additional questions,
and 4) additional answers.

Connect to export file
Once file is selected, click on “Continue” to connect to
export file
DRAFT

Select what to import
Select the questionnaires/ assessments to
import into ISACS-AT, then click on “Continue”

Verify import information
Verify the import information and then
click on “Start Import” to begin
process

Imported materials
Imported questionnaires/ assessments will show up in the
Assessment Home
To verify the import, start at Assessment Home. Make sure you have
selected the ISACS module you wish to work on

Alternative access for import function
Access the import function from the Assessment Home in the task bar
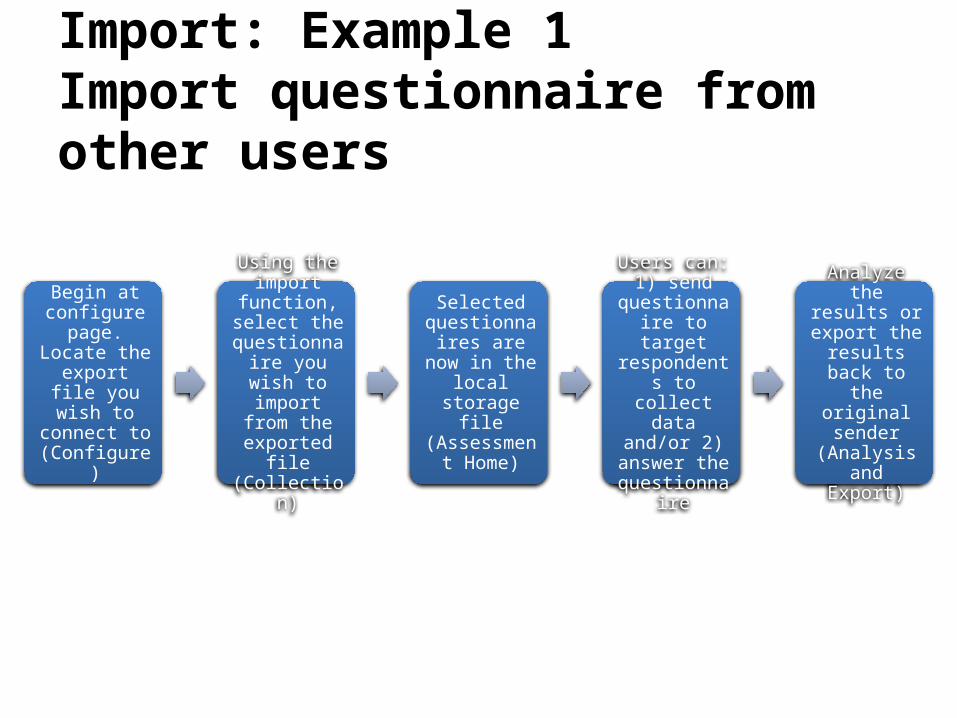
Import: Example 1Import questionnaire from other users
Begin at configure page.
Locate the export file you
wish to connect to (Configure)
Using the import
function, select the
questionnaire you wish to import from the exported
file (Collection)
Selected questionnaires are now in the local storage
file (Assessment
Home)
Users can: 1) send
questionnaire to target
respondents to collect data and/or 2)
answer the questionnaire
Analyze the results or export the
results back to the original
sender (Analysis and
Export)
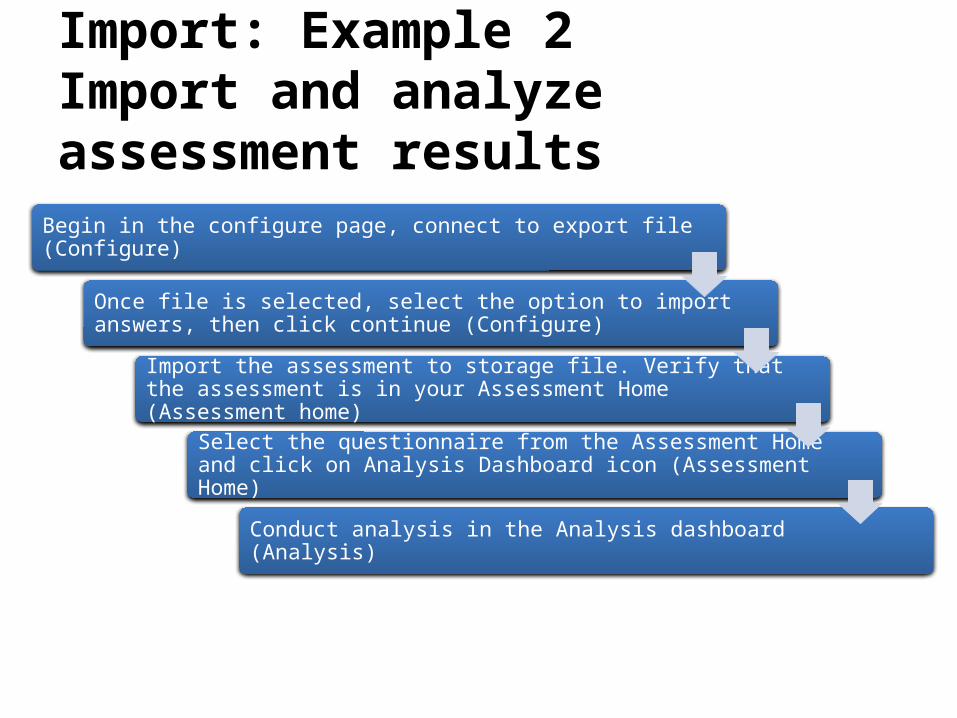
Import: Example 2Import and analyze assessment results
Begin in the configure page, connect to export file (Configure)
Once file is selected, select the option to import answers, then click continue (Configure)
Import the assessment to storage file. Verify that the assessment is in your Assessment Home (Assessment home)
Select the questionnaire from the Assessment Home and click on Analysis Dashboard icon (Assessment Home)
Conduct analysis in the Analysis dashboard (Analysis)

SummaryHow to import a questionnaire / assessment
1. Start at Homepage with the Configure box expanded2. Click on the Import/Export Assessment data link3. Click on the Import Assessments tab4. Select a location of the exported file you wish to connect with by
clicking on Browse – this will link your local storage file with the exported file where exported data are stored
5. Once selecting the file, select whether you wish to import– Questionnaire (only)– Include Answers with response data– Include Additional Questions– Include Additional Answers
6. Click on Continue7. Select the questionnaires/assessments you wish to import8. Click on Continue after selecting the
questionnaires/assessments9. Verify that the import information is accurate10. Click on Start Import to begin the import process

What’s next?
Start practicing with the ISACS-AT