iPECS eMG80 Startup Procedure eMG80 Startup.pdf · iPECS eMG80 Startup Guide Version R2.1.2...
19
iPECS eMG80 Startup Guide Version R2.1.2 (11/15/17) iPECS eMG80 Startup Procedure To ensure that the iPECS eMG80 is correctly installed and initialized correctly please follow these instructions carefully. This will ensure that when you commence programming that the correct settings are applied and that the database is as ‘error free’ as possible. - INDEX - Step 1 – eMG80 Hardware Setup ..................................2 Expansion Cards / EKSU:......................................................................................................................................................................... 2 DIP Switches: ................................................................................................................................................................................................ 2 Step 2 – Connecting to the eMG80 ...............................3 Web Browsers: ............................................................................................................................................................................................. 3 Step 3 – Install Wizard ................................................5 Software Upgrade: ..................................................................................................................................................................................... 5 Nation Code and VOIU/VMIU Settings: ............................................................................................................................................. 6 Date and Time:............................................................................................................................................................................................. 7 Station Numbering: ................................................................................................................................................................................... 8 Flexible Numbering: .................................................................................................................................................................................. 8 Ring Assignment: ........................................................................................................................................................................................ 9 License Upload: ......................................................................................................................................................................................... 10 User Management: .................................................................................................................................................................................. 11 IP Address Settings: ................................................................................................................................................................................ 12 Step 4 – Initializing the system .................................. 14 System Login:............................................................................................................................................................................................. 14 Software Upgrading: .............................................................................................................................................................................. 15 Software Releases: ................................................................................................................................................................................... 15 System (MPB) Software Upgrade: .................................................................................................................................................... 15 Expansion Board Firmware Upgrade: ............................................................................................................................................ 16 Initialize the Database: ......................................................................................................................................................................... 18 Final Reset: ................................................................................................................................................................................................. 19
Transcript of iPECS eMG80 Startup Procedure eMG80 Startup.pdf · iPECS eMG80 Startup Guide Version R2.1.2...
iPECS eMG80 Startup Guide Version R2.1.2 (11/15/17)
iPECS eMG80 Startup Procedure To ensure that the iPECS eMG80 is correctly installed and initialized correctly please follow these instructions carefully. This will ensure that when you commence programming that the correct settings are applied and that the database is as ‘error free’ as possible.
- INDEX -
Step 1 – eMG80 Hardware Setup .................................. 2ExpansionCards/EKSU:.........................................................................................................................................................................2DIPSwitches:................................................................................................................................................................................................2
Step 2 – Connecting to the eMG80 ............................... 3WebBrowsers:.............................................................................................................................................................................................3
Step 3 – Install Wizard ................................................ 5SoftwareUpgrade:.....................................................................................................................................................................................5NationCodeandVOIU/VMIUSettings:.............................................................................................................................................6DateandTime:.............................................................................................................................................................................................7StationNumbering:...................................................................................................................................................................................8FlexibleNumbering:..................................................................................................................................................................................8RingAssignment:........................................................................................................................................................................................9LicenseUpload:.........................................................................................................................................................................................10UserManagement:..................................................................................................................................................................................11IPAddressSettings:................................................................................................................................................................................12
Step 4 – Initializing the system .................................. 14SystemLogin:.............................................................................................................................................................................................14SoftwareUpgrading:..............................................................................................................................................................................15SoftwareReleases:...................................................................................................................................................................................15System(MPB)SoftwareUpgrade:....................................................................................................................................................15ExpansionBoardFirmwareUpgrade:............................................................................................................................................16InitializetheDatabase:.........................................................................................................................................................................18FinalReset:.................................................................................................................................................................................................19

iPECS eMG80 Startup Guide Version R2.1.2 (11/15/17)
Step 1 – eMG80 Hardware Setup
ExpansionCards/EKSU: Install and connect ALL expansion cards and EKSU with the system powered DOWN. No cards on the eMG80 are hot swappable and doing so will void your warranty.
DIPSwitches: Make sure that the DIP switches on the KSU below are set correctly once the system has been powered UP. This will ensure the programming is not lost on power failure / system reset. DIP 1 – Admin database protect ON = stops any changes to be made to the configuration database OFF = Allows changes to the configuration database DIP 2 – Database Selection ON = Loads factory default configuration database (clears your programming) OFF = Loads stored configuration database (your programming)
This setting is WRONG .. Your database will NOT be saved on power failure!
This setting is CORRECT .. Your database WILL be saved on power failure!

iPECS eMG80 Startup Guide Version R2.1.2 (11/15/17)
Step 2 – Connecting to the eMG80 The install wizard allows you to set some basic parameters on the eMG80 before you commence your installation. Connect the system to the customers network or connect directly to the eMG80 direct via your network card. The systems default IP address is 10.10.10.2 / 255.255.255.0 so your Ethernet card should be set to 10.10.10.254 to ensure correct connectivity.
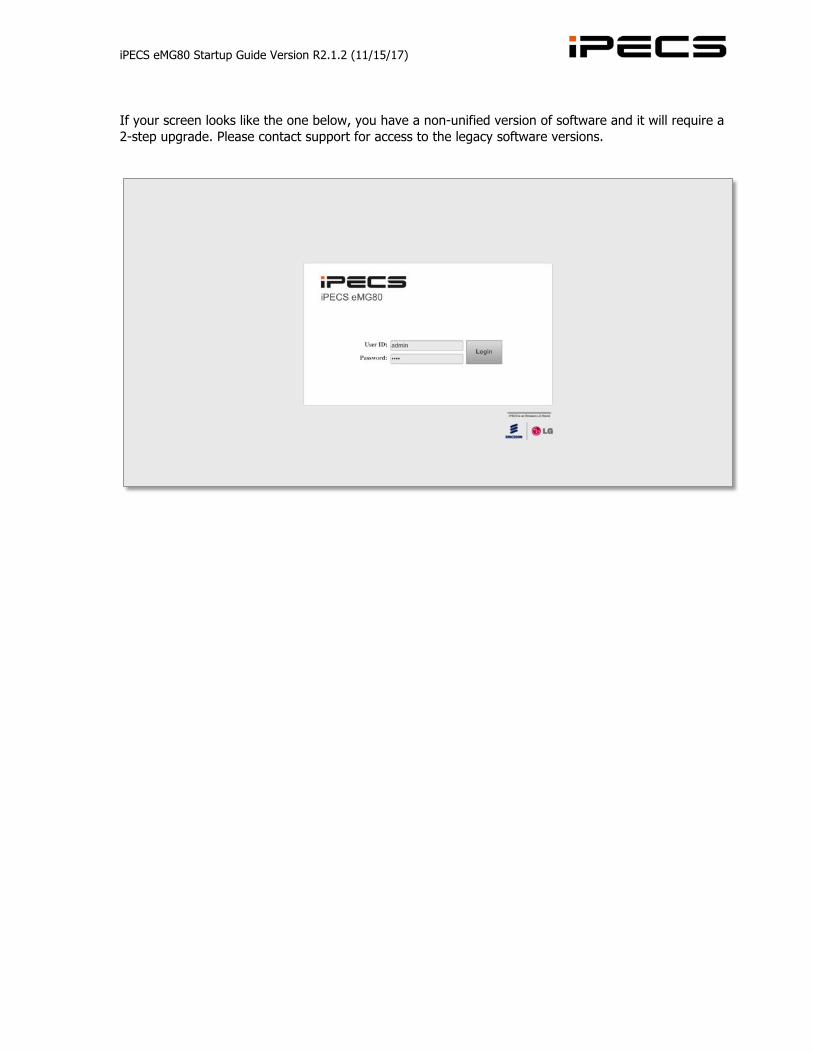
WebBrowsers: The recommended web browsers are Firefox or Chrome as they are the most HTML5 compliant browsers on the market today. Internet Explorer 11 can be used but be aware that this may cause issues in displaying the web interface. If you are an Apple Mac user then Safari will work fine. When connected, open your browser and open http://10.10.10.2 and you will be presented with this screen.
The default username is “admin” with a password of “1234”
iPECS eMG80 Startup Guide Version R2.1.2 (11/15/17)
If your screen looks like the one below, you have a non-unified version of software and it will require a 2-step upgrade. Please contact support for access to the legacy software versions.

iPECS eMG80 Startup Guide Version R2.1.2 (11/15/17)
Step 3 – Install Wizard Once you have entered the default username/password you are ready to begin the setup wizard.
SoftwareUpgrade: I highly recommend skipping this step and hold off upgrading the system UNTIL the wizard is completed. Press NEXT.
iPECS eMG80 Startup Guide Version R2.1.2 (11/15/17)
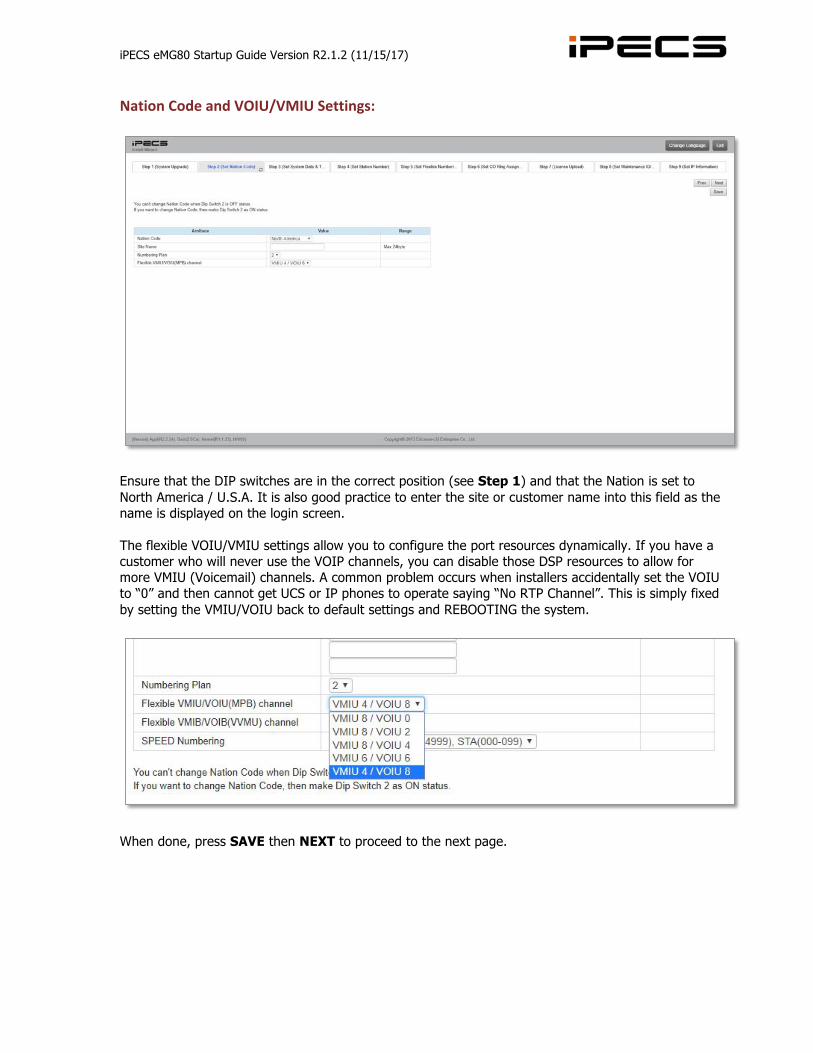
NationCodeandVOIU/VMIUSettings:
Ensure that the DIP switches are in the correct position (see Step 1) and that the Nation is set to North America / U.S.A. It is also good practice to enter the site or customer name into this field as the name is displayed on the login screen. The flexible VOIU/VMIU settings allow you to configure the port resources dynamically. If you have a customer who will never use the VOIP channels, you can disable those DSP resources to allow for more VMIU (Voicemail) channels. A common problem occurs when installers accidentally set the VOIU to “0” and then cannot get UCS or IP phones to operate saying “No RTP Channel”. This is simply fixed by setting the VMIU/VOIU back to default settings and REBOOTING the system.
When done, press SAVE then NEXT to proceed to the next page.
iPECS eMG80 Startup Guide Version R2.1.2 (11/15/17)
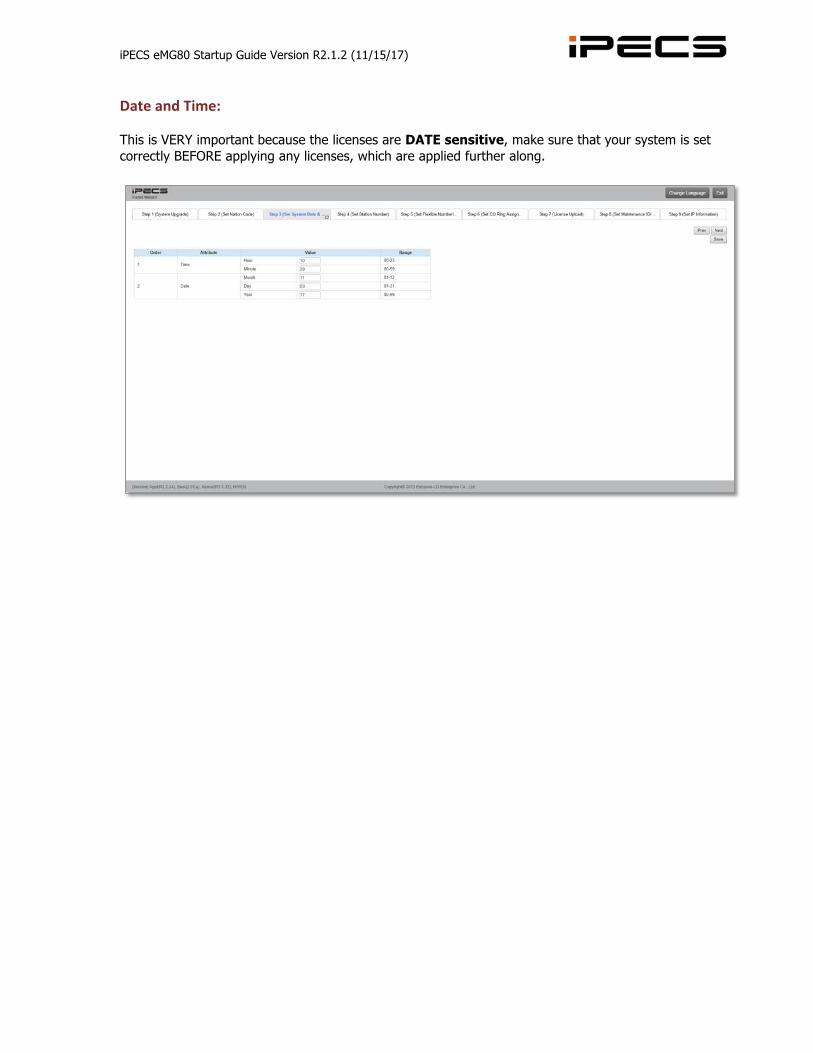
DateandTime: This is VERY important because the licenses are DATE sensitive, make sure that your system is set correctly BEFORE applying any licenses, which are applied further along.
iPECS eMG80 Startup Guide Version R2.1.2 (11/15/17)
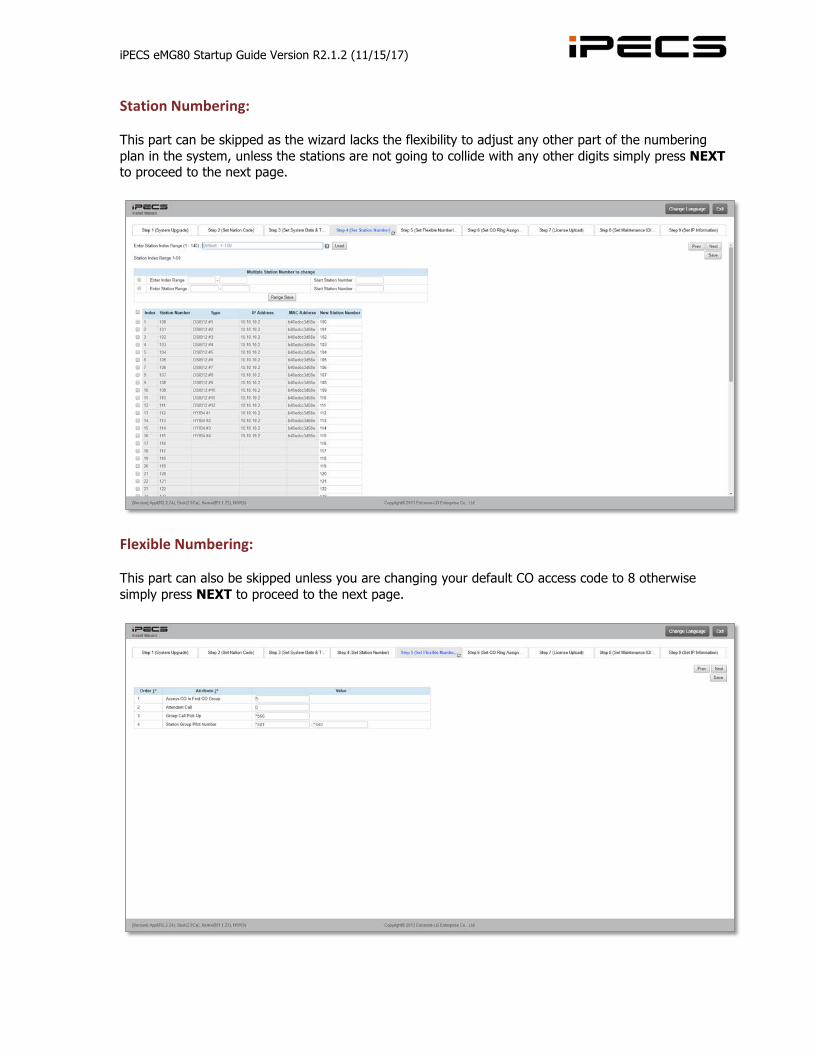
StationNumbering: This part can be skipped as the wizard lacks the flexibility to adjust any other part of the numbering plan in the system, unless the stations are not going to collide with any other digits simply press NEXT to proceed to the next page.
FlexibleNumbering: This part can also be skipped unless you are changing your default CO access code to 8 otherwise simply press NEXT to proceed to the next page.
iPECS eMG80 Startup Guide Version R2.1.2 (11/15/17)
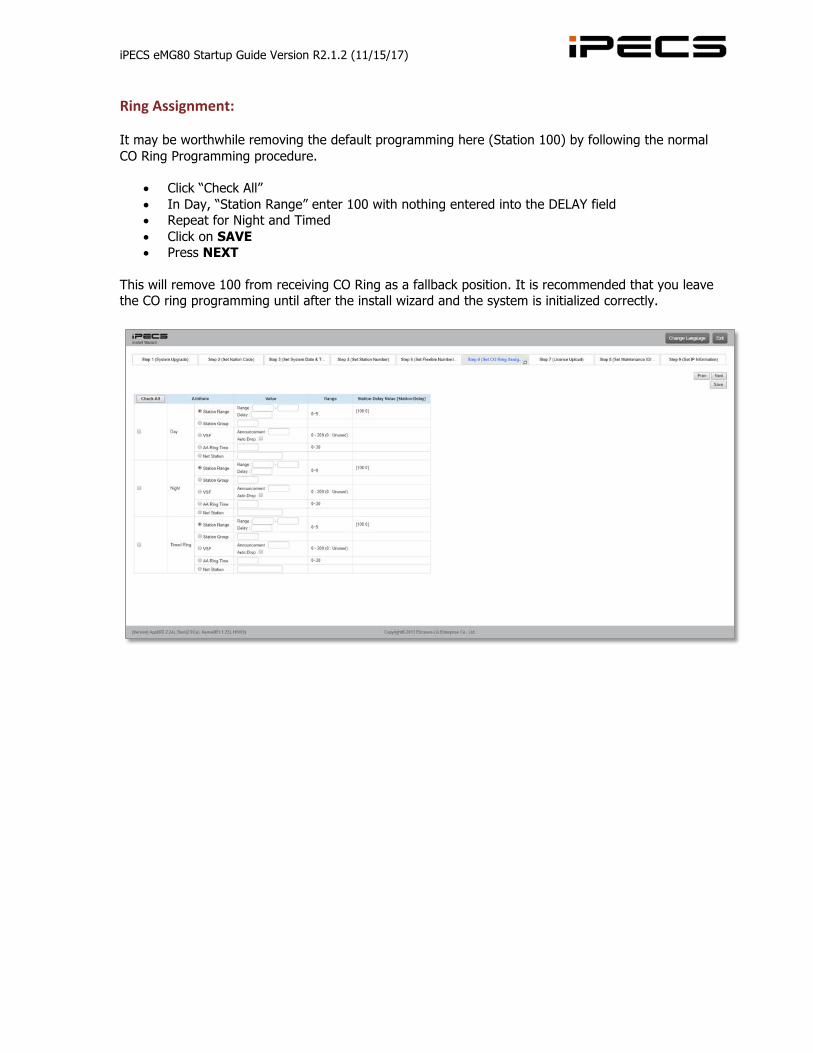
RingAssignment: It may be worthwhile removing the default programming here (Station 100) by following the normal CO Ring Programming procedure.
• Click “Check All” • In Day, “Station Range” enter 100 with nothing entered into the DELAY field • Repeat for Night and Timed • Click on SAVE • Press NEXT
This will remove 100 from receiving CO Ring as a fallback position. It is recommended that you leave the CO ring programming until after the install wizard and the system is initialized correctly.
iPECS eMG80 Startup Guide Version R2.1.2 (11/15/17)
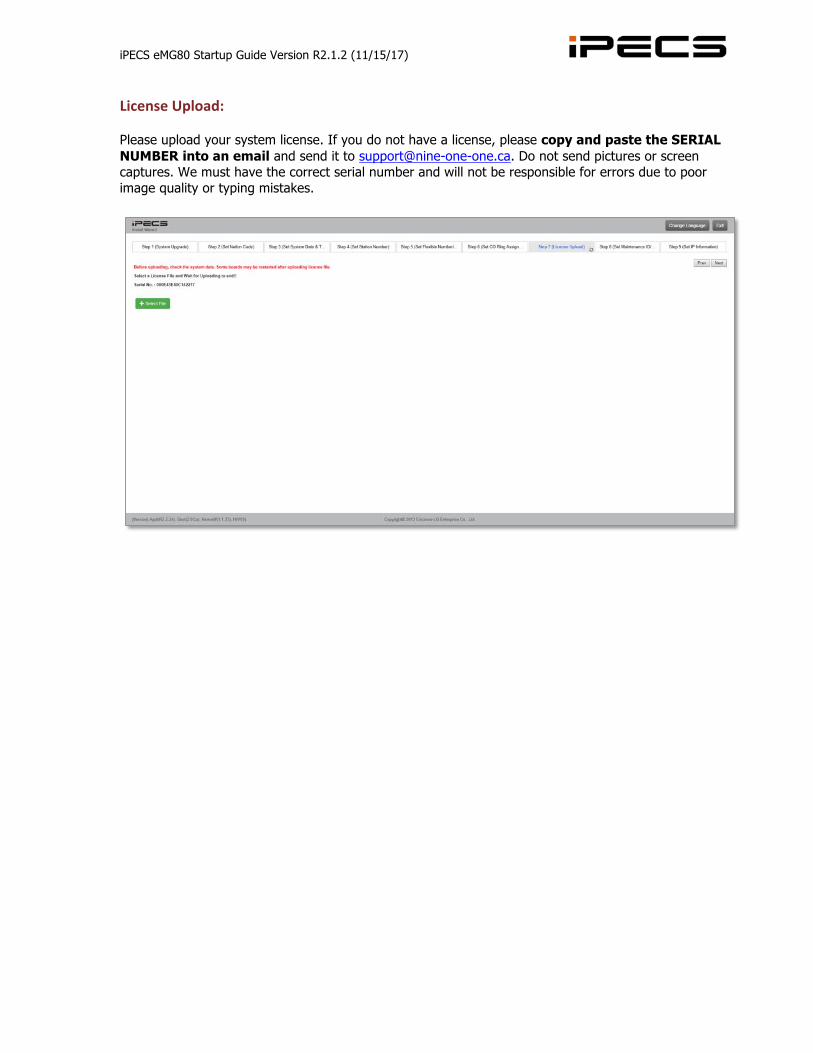
LicenseUpload: Please upload your system license. If you do not have a license, please copy and paste the SERIAL NUMBER into an email and send it to [email protected]. Do not send pictures or screen captures. We must have the correct serial number and will not be responsible for errors due to poor image quality or typing mistakes.
iPECS eMG80 Startup Guide Version R2.1.2 (11/15/17)
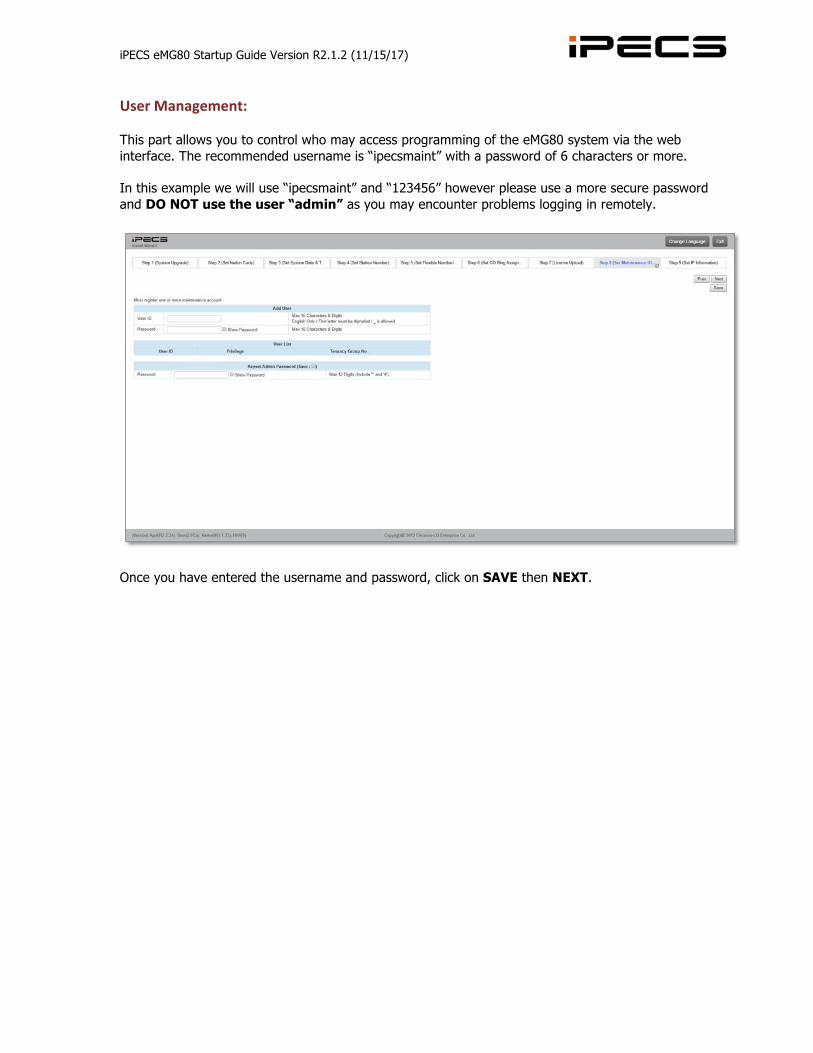
UserManagement: This part allows you to control who may access programming of the eMG80 system via the web interface. The recommended username is “ipecsmaint” with a password of 6 characters or more. In this example we will use “ipecsmaint” and “123456” however please use a more secure password and DO NOT use the user “admin” as you may encounter problems logging in remotely.
Once you have entered the username and password, click on SAVE then NEXT.
iPECS eMG80 Startup Guide Version R2.1.2 (11/15/17)
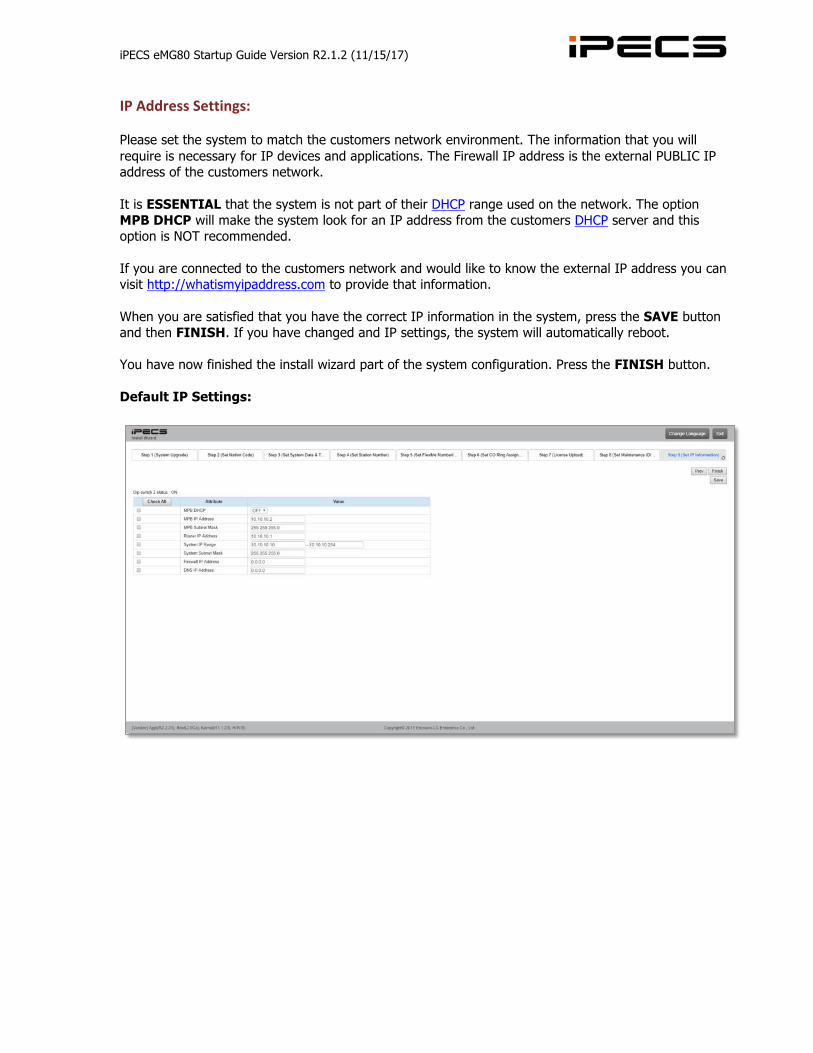
IPAddressSettings: Please set the system to match the customers network environment. The information that you will require is necessary for IP devices and applications. The Firewall IP address is the external PUBLIC IP address of the customers network. It is ESSENTIAL that the system is not part of their DHCP range used on the network. The option MPB DHCP will make the system look for an IP address from the customers DHCP server and this option is NOT recommended. If you are connected to the customers network and would like to know the external IP address you can visit http://whatismyipaddress.com to provide that information. When you are satisfied that you have the correct IP information in the system, press the SAVE button and then FINISH. If you have changed and IP settings, the system will automatically reboot. You have now finished the install wizard part of the system configuration. Press the FINISH button. Default IP Settings:

iPECS eMG80 Startup Guide Version R2.1.2 (11/15/17)
Customer Site Configuration Example:
Remember, if you have changed the IP address settings of the system it will require a RESET, you will also have to change the settings on your Ethernet card back to DHCP or static. Please make sure that you CLOSE your browser once these settings are changed. It is worthwhile checking that the connection is working by a simple PING test. In this example we will ping the system IP address of 10.1.42.1. If the ping reply is good, then you know the changes have been applied.
+ R then “cmd” in Windows to open a command line

iPECS eMG80 Startup Guide Version R2.1.2 (11/15/17)
Step 4 – Initializing the system
SystemLogin: Log into the system at the IP address, using the username/password combination that you set in the previous wizard.
iPECS eMG80 Startup Guide Version R2.1.2 (11/15/17)
SoftwareUpgrading: Now that the wizard component is complete we must now make sure that the configuration database is completely clean prior to programming. Please make sure that the system is upgraded to the latest firmware prior to installation on site. To check what version you are running, simply dial the following code from any keyset: TRANS/PGM 72 To download the latest software, simply log into the Cloud server and look under Unified Software The version on the Cloud is always the most current stable release. If you cannot login to the Cloud server please contact us so we can check your account details. Please make sure that you upgrade all IP-Phones, Boards and Expansion Cards PRIOR to installation.
SoftwareReleases: Do not assume that the system has the latest software when you buy it or that the version on your laptop is current. New software is released monthly to correct bugs or enhance and add features. If you submit a trouble ticket, the first thing that will be asked is “What version of software are you on and have you upgraded it”.
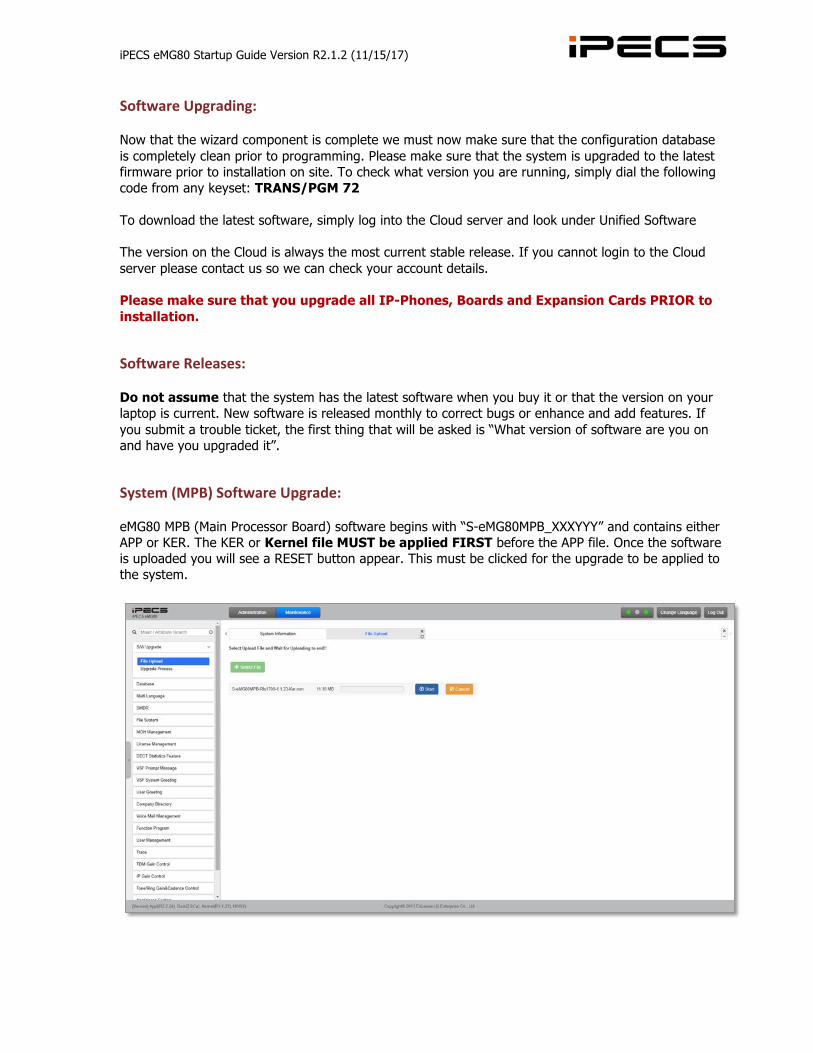
System(MPB)SoftwareUpgrade: eMG80 MPB (Main Processor Board) software begins with “S-eMG80MPB_XXXYYY” and contains either APP or KER. The KER or Kernel file MUST be applied FIRST before the APP file. Once the software is uploaded you will see a RESET button appear. This must be clicked for the upgrade to be applied to the system.
iPECS eMG80 Startup Guide Version R2.1.2 (11/15/17)
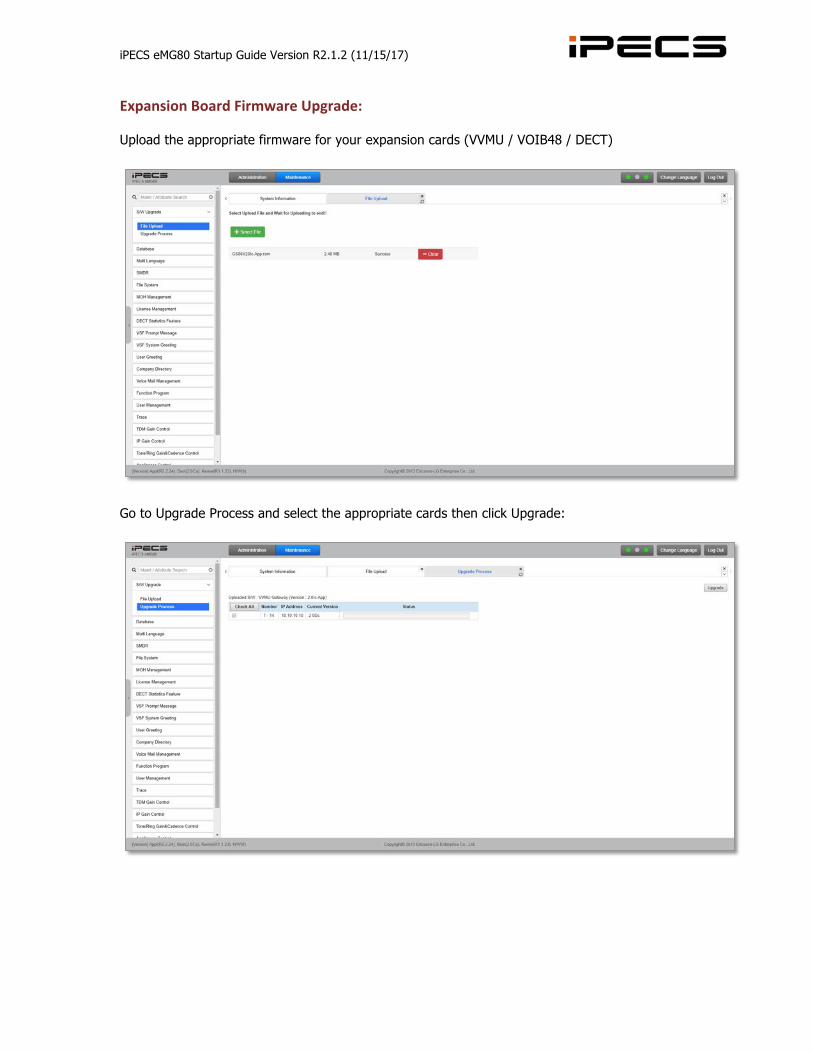
ExpansionBoardFirmwareUpgrade: Upload the appropriate firmware for your expansion cards (VVMU / VOIB48 / DECT)
Go to Upgrade Process and select the appropriate cards then click Upgrade:
iPECS eMG80 Startup Guide Version R2.1.2 (11/15/17)
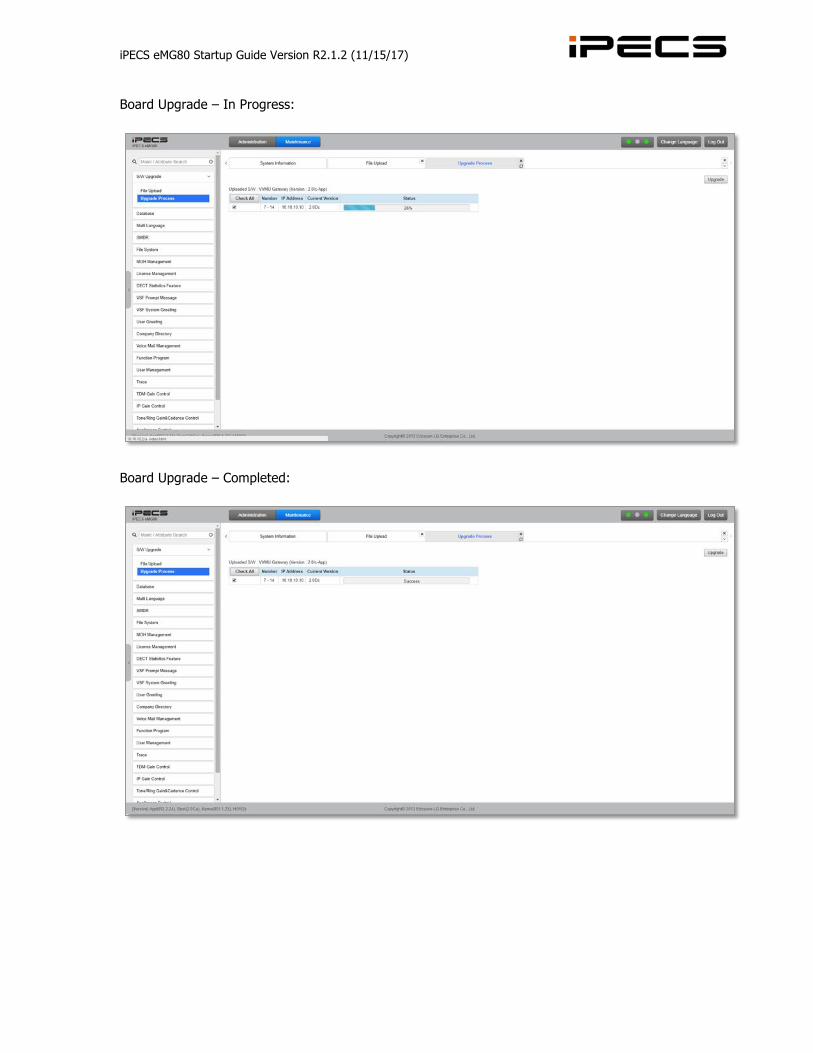
Board Upgrade – In Progress:
Board Upgrade – Completed:
iPECS eMG80 Startup Guide Version R2.1.2 (11/15/17)
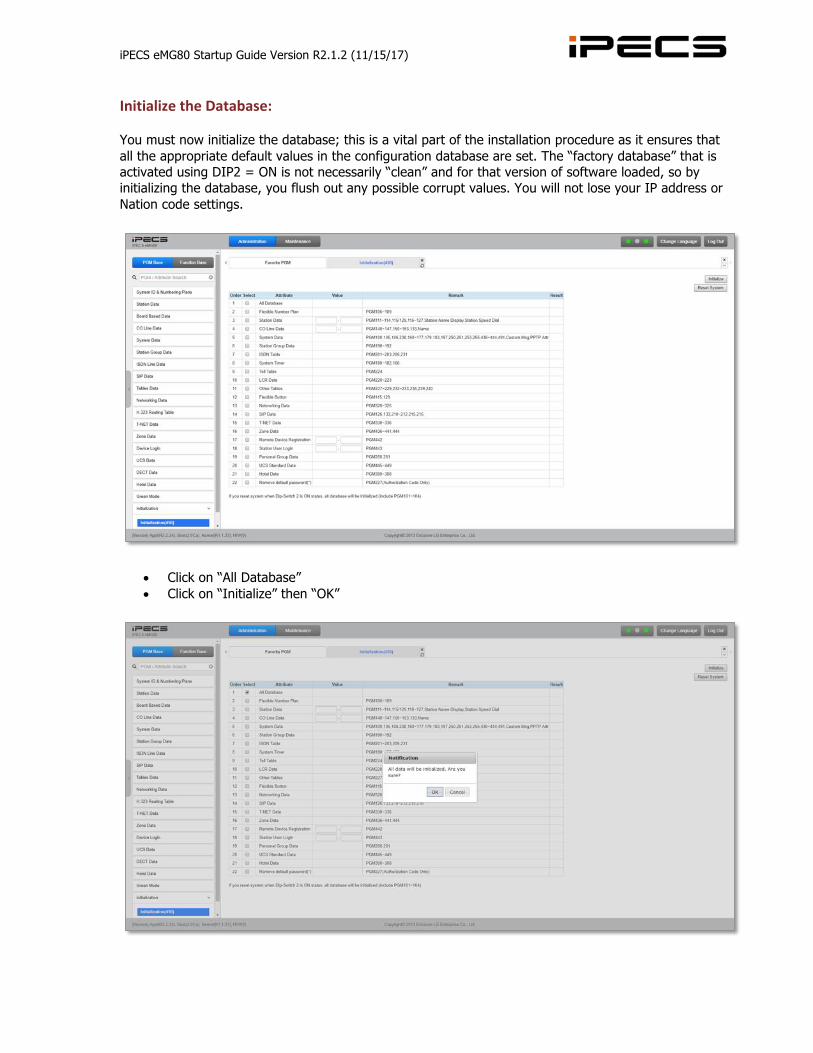
InitializetheDatabase: You must now initialize the database; this is a vital part of the installation procedure as it ensures that all the appropriate default values in the configuration database are set. The “factory database” that is activated using DIP2 = ON is not necessarily “clean” and for that version of software loaded, so by initializing the database, you flush out any possible corrupt values. You will not lose your IP address or Nation code settings.
• Click on “All Database” • Click on “Initialize” then “OK”
iPECS eMG80 Startup Guide Version R2.1.2 (11/15/17)
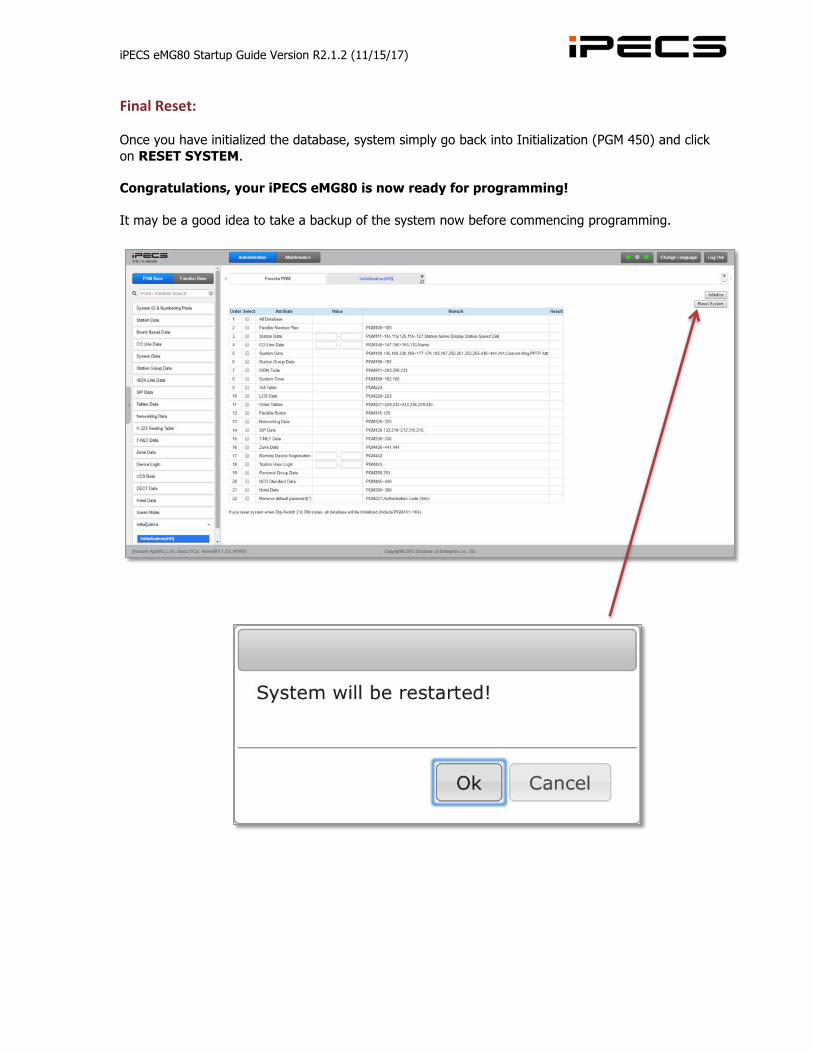
FinalReset: Once you have initialized the database, system simply go back into Initialization (PGM 450) and click on RESET SYSTEM. Congratulations, your iPECS eMG80 is now ready for programming! It may be a good idea to take a backup of the system now before commencing programming.