READ 7140 Dr. Tonja Root Summer 2008 2 nd Grade Interdisciplinary Writing Unit.
Upload
karin-christine-manningCategory
view
217download
1
Interdisciplinary Writing Unit
Summer 2007READ 7140
Amanda Eutzler

Narrative Writing
• 2nd Grade
• Language Arts/Literature
• Response to Literature

Georgia Writing Test
• Types of WritingThe Georgia Grade Three Writing Assessment covers four types of writing: narrative, informational, persuasive, and response to literature.
• Narrative:– Relating Personal Experience- Writing assignments should
direct students to recount an event grounded in their own experiences. The assignment should elicit a story with a plot and characters rather than a list.
– Creating an Imaginative Story- Writing Assignments should direct students to produce stories that are grounded in imagination or fantasy.
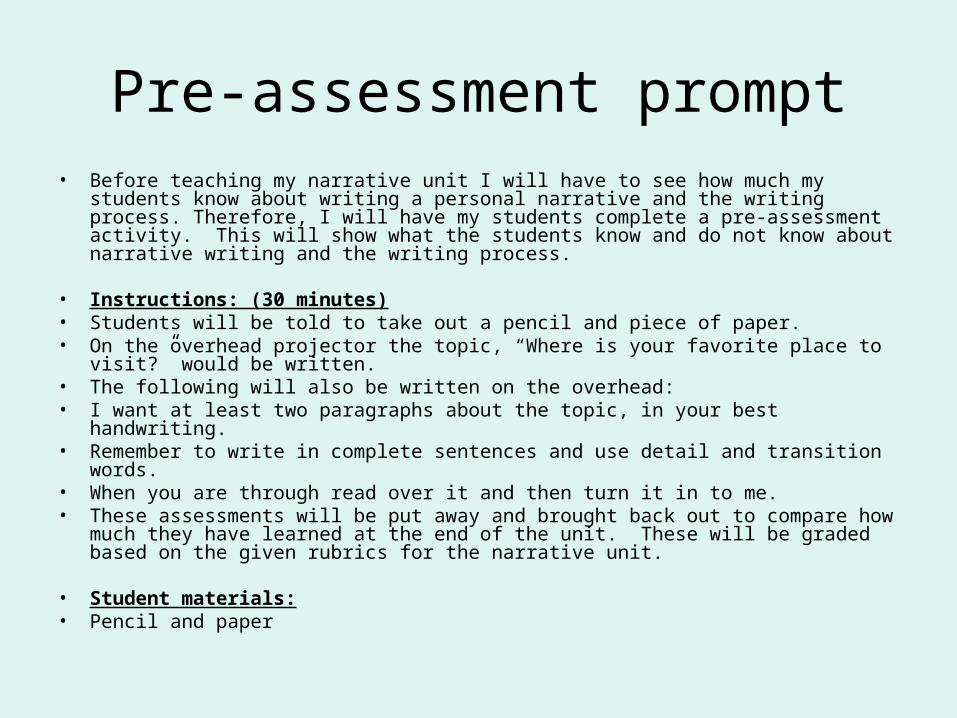
Pre-assessment prompt• Before teaching my narrative unit I will have to see how much my students know
about writing a personal narrative and the writing process. Therefore, I will have my students complete a pre-assessment activity. This will show what the students know and do not know about narrative writing and the writing process.
• Instructions: (30 minutes)• Students will be told to take out a pencil and piece of paper.• On the overhead projector the topic, “Where is your favorite place to visit?” would be
written.• The following will also be written on the overhead: • I want at least two paragraphs about the topic, in your best handwriting.• Remember to write in complete sentences and use detail and transition words.• When you are through read over it and then turn it in to me. • These assessments will be put away and brought back out to compare how much
they have learned at the end of the unit. These will be graded based on the given rubrics for the narrative unit.
• Student materials:• Pencil and paper

Prewriting:Grouping options related to the teacher
• The instructional group arrangement I have chosen is whole-class instruction. Whole-class instruction has demonstrated to be time efficient, all students get the same information, there are less distractions, and chances for students to be off task, because I will be working with the whole group and students who are off task will be easy to identify. Therefore, it will be effective in teaching the concept of prewriting in this form.

Prewriting: Grouping options related to student’s needs
• By using whole group arrangement students with learning developmental needs will be able to hear everything that is being said. They are able to hear all information and instruction, questions, and answers stated that they may not have known to ask. This will help them feel more comfortable and hopefully give them the confidence to ask questions themselves and participate. In addition, this helps this activity from becoming overwhelming for them. As for addressing cultural and linguistic needs, I will make sure that I reinforce proper usage of subject verb agreement, this way the child hears how to speak properly which will than correlate to the child’s writing.

Prewriting:Instructional procedures
• There are five stages in the writing process. They are prewriting, drafting, revising, editing, and publishing. In order to correctly write any kind of story you must follow these steps in this order. Today we will be working on the prewriting stage. The prewriting stage is the first stage of writing. It’s where you will get all of your information together to write your paper. This is the getting ready stage of writing. This is where you will write down the information that you want in your story and where you organize your ideas. This is where you decide who your audience is, this means who is going to be reading this and for what purpose. Our purpose is going to be to entertain our audience.This is a story map. We are going to use this to help organize and lay out the ideas in our head. It helps you figure out the main characters, the problem, the events, and the solution and organize the entire story. We are going to fill in this story map and when we are through you will have an outline of the story you will write. The story map is just an outline with ideas on it, you will have to use what we have learned about details, and transition words to make the ideas on the story map into a story.

Assessment:• Since we have seen a completed Story Map and helped me and
your other classmates fill one out, I think it is time you tried one on your own. I want you to think about what you would do in the land of the Wild Things. I am going to hand you out a blank Story Map just like the one we filled out as a group. This time I want you to fill it out based on what you would want to do or have happen while you are in the land of the wild things. You will be completing this by yourself. I will be here for if anyone has any questions but you are to complete this Story Map on your own. If you have any questions raise your hand and I will come around and help you. I will also be handing out a checklist. You will use this to make sure you have everything I am looking for in your Story Map. You may also use the example of the completed story map we did as a class. Do not copy the other Story Map. If there are no questions lets get started.

Assessment:Checklist and Rubric
Checklist for Narrative Prewrite process• ____ Did I decide on a title?• _____ Did I fill out the graphic organizer?• _____ Did I list and describe at least 2 characters?• _____ Did I develop a setting and describe at least 2
elements of the setting?• _____ Did I list the problem?• _____ Did I list at least 3 events and give details about
each?• _____ Did I describe the outcome for story?Modified by Eutzler, A. from: Root, T (2007). Narrative process writing checklist. Unpublished manuscript, Valdosta State University, GA.

Category Exceptionally Met3 Points
Met2 Points
Partially Met1 Point
Not Met0 Points
Student Score/Comme
nts
Teacher Score/ Comments
Graphic Organizer The graphic organizer was filled out completely
and additional details were
added.
The graphic organizer was filled out
completely (all parts).
The graphic organizer was partially completed.
The graphic organizer was not filled
out.
Characters The student listed and thoroughly
described at least 2-3
characters.
The student listed and described at
least 2 characters.
The student listed and described only
1 character.
The student did not list or describe
any characters.
Setting The student listed and thoroughly
described at least 2-3
elements of the setting.
The student listed and described at
least 2 elements of the setting.
The student only listed and
described 1 element of the
setting.
The student did not list or describe any elements of the setting.
Problem The student listed an exceptional problem for
the story and added many
details.
The student listed a problem for
the story and added details.
The student partially listed a
problem that will occur in
the story, but they did not
add any details.
The student did not develop a problem.
Events The student listed 4 events and details that
would happen in their story.
The student listed 3 events that
would happen in their story.
The student listed 1-2 events that occurred in their story.
The student did not list any events.
Outcome The student developed an outcome for their story.
The student partially developed an outcome for their story.
The student did not develop an outcome for their story.

Accommodations/modifications For differing stages of development
– In this class there is a child with visual impairment. I will have this child sit in the front of the classroom. This is where it will be easier to see the board/ screen. I will also provide an enlarged copy of the class’ graphic organizer that was completed on word processor so that he will be able to read what was discussed in class. The class’ graphic organizer will be given to him the next day after I type it up.
– For my child who is OHI he will be sat next to me in order to keep him on track.
– The students with learning disabilities will be allowed to use the word processor if their fine motor skills are too weak to write all of the information from the graphic organizer into a rough draft. They will have additional time to type or write their rough drafts if they need it, and I will also monitor their attention to make recommendations to assist in their introduction. I will monitor their work more than I do the other students just because I do not want them practicing mistakes.

Accommodations and/or modifications: for students from differing cultural and linguistic
backgrounds:
• For my students with differing cultural and linguistic backgrounds I will make sure that I model proper English/ grammar. As well as providing them with help with brainstorming. It is important for them to just get their ideas down but still see and hear proper English.

Drafting: Instructional Procedures
• The writing process is broken up into five stages. The five stages are prewriting, drafting, revising, editing, and publishing. To correctly write any kind of paper of story you must do each of these stages in this order. We learned about the prewriting stage the other day. Today we are going to take the next step in the writing process; we will be starting the drafting stage.The drafting stage is where you will take your completed graphic organizer and make complete sentences out of the ideas you have written in the graphic organizer. The sentences will go together and form a paragraph. The paragraphs will be the answer to the question you are trying to answer. You are not just taking the information off of your graphic organizer and writing them down.

Instructional procedures Con’t:
You are also adding more information to help your paragraph to completely answer your given question. You will be adding extra information that will make your paragraph informative more interesting to read. The transition words that we have been learning about and using will come into great use now in helping you. The details you are adding are not from the organizer they are extra things that help explain what you are talking about. When you begin to draft your narrative you will write your sentences on wide ruled paper, skipping every other line. If you need more help with what goes into the drafting stage you can go to the computers and I have pulled up a website that will help you with the drafting stage. It also has activities that you and your parent can work on to help you with drafting at home.

Assessment:
• For your assignment you will use the prewriting graphic organizer that you filled out yesterday on the story you chose to write about being in the land of the Wild Things. To begin I want you to look over your graphic organizer carefully. I want you to try to be creative on creating an original story about whoever you chose. You will be graded on how well you establish the title, beginning; this includes characters, setting, events, problem and solution. Also keep in mind the point-of-view. Remember do not worry about spelling, punctuation, or grammar errors; just get your thoughts on paper. If you do not complete this in the amount of time that I will give you; please take it home and complete it. I have included a drafting checklist and your scoring guide for you to go by.

Assessment: Checklist and Rubric
Checklist for the Drafting Process• ______ Did I use the ideas from my prewriting graphic organizer?• ______ Did I skip lines while writing to leave space for corrections
later?• ______ Did I make sure that I used complete sentences?• ______ Did I begin with an introduction, using the characters,
setting, and problem?• ______ Did I draft each event adding details that may not have
been listed on the graphic organizer?• ______ Did the draft end with a conclusion or ending to the story?• ______ Is my story organized?
Modified by Eutzler, A. from: Root, T (2007). Narrative process writing checklist. Unpublished manuscript, Valdosta State University, GA.

Category Exceptionally Met3 Points
Met2 Points
Partially Met1 Point
Not Met0 Points
Ideas from prewriting graphic organizer
Thoroughly used all elements of the
graphic organizer in their rough draft.
Used some elements of the graphic
organizer in their rough draft.
Used little to no elements from the graphic
organizer
Did not use any of the elements of the
graphic organizer in their rough draft.
Beginning of the Story In the introduction the student thoroughly
described the characters, the setting, and the
problem.
In the introduction the student described the characters, the
setting, and the problem.
In the introduction the student partially described the
characters, the setting, and the
problem.
In the introduction the student did not described the
characters, the setting, or the
problem.
Events Thoroughly used at least 4 events in the
rough draft of their story.
Used 3 events in the rough draft of their
story.
Used less than 2 events in the rough draft of
their story.
Did not use any events in the rough draft
of their story.
Conclusion Had a conclusion in their rough draft.
Had a partially developed conclusion in their
rough draft.
Did not have a conclusion in their
rough draft.
Skip lines Skips lines during their rough draft.
Partially skips lines during their rough draft.
Did not skip lines during their rough draft.
Complete Sentences The student made sure that all of their
sentences were completed
The student partially made sure that all of
their sentences were completed
The student did not make sure that all of their sentences were completed

Revising: Instructional Procedures
• The writing process is broken up into five stages. The five stages are prewriting, drafting, revising, editing, and publishing. To correctly write any kind of paper of story you must do each of these stages in this order. We learned about the prewriting stage and the drafting stage so far. Today we are going to take the next step in the writing process; we will be starting the revising stage.The revising stage is where you look over your draft and see if it makes sense. There are a few things that you do in the revising stage. You will first read your paper. After you have read your paper you will go back and reread it looking to see if you need to add, delete, or move (rearrange) any information. During this stage you do not worry about grammar. This stage you just look at your paper and make sure it makes sense. You can add details that will help explain more about your story. You can delete unneeded information. You can also rearrange the information to make it more effective. There are marks that a writer uses to during revision that help with revising. They are called “proofreading marks”.

Instructional Procedures Con’t:
• I will explain and show you what these are and look like. These marks help you and other authors understand what you are doing with your writing. In this stage you will read your own draft and decide what revisions you would like do to your paper. After you have completed revising your paper, you will read your draft to your partner. Your partner will give you suggestions and compliments. Your partner can tell you questions they would like answered, tell you things that do not make sense, and any general comments or suggestions about your paper. However, you are the only one that should write on your drafted story.

Assessment:
• Alright, you have seen the drafting process modeled, we have worked on one together, and the class has no more questions, so it is now time for you to begin work on your papers. Remember to read over it first taking your time. Then go back over it and listen for anything that doesn’t make sense, needs detail, or could be moved around. I will be walking around and conferencing with you individually.

Assessment: Checklist and Rubric
Checklist for Revising Personal Narrative• ___ added details• ___ deleted unneeded information• ___ rearranged information• ___ used correct proofreading marks• ___ read my paper to my paper to my partner• ___ I only marked on my paper• ___ given suggestions• ___ I gave my partner complimentsEutzler, A. (2006). Checklist for revising personal narrative. Unpublished manuscript. Valdosta State University, GA

Exceeds Standards4
Meets Standards3
Partially MeetsStandards
2
Needs Improvement1
Added information Student added information rich in
detail
Student added needed information
Student addedSome needed information
Student did not add information
Deleted information Student deleted information that was not needed
Student deleted some unneeded
information
Student did not delete unneeded information
Rearranged information Student rearranged information in order
to make more sense
Student rearranged some information that needed to be rearranged
Student did not rearrange information
Proofreading Marks Student always used correct
proofreading marks
Student mostly used correct
proofreading marks
Student used some correct
proofreading marks
Student did not use proofreading marks
Suggestions Student got suggestions from partner
Student did not get suggestions from partner
Mark on Paper Writer was the only one who wrote on draft
Writer was not the only one who wrote on
draft
Compliments Student gave and received
compliments
Student did one of the following; gave or
received compliments
Student did not give or receive compliments

Editing: Instructional Procedures
• The writing process is broken up into five stages. The five stages are prewriting, drafting, revising, editing, and publishing. To correctly write any kind of paper of story you must do each of these stages in this order. We learned about the prewriting stage, the drafting stage, and the revising stage so far. Today we are going to take the next step in the writing process; we will be starting the editing stage.The editing stage is where you look at your revised draft and make changes in grammar mistakes. There are a few things you look for in the editing stage. They are punctuation, capitalization, sentence structure, and spellings. You will also be taught and expected to use correct proofreading marks for the grammatical errors above. Has anyone ever heard of a newspaper editor? Well, today you will become editors of yours and your partners’ paper. You will look for all of the grammatical errors that we discussed and make the changes to them.

Assessment:
• Now that we are done I want you to get with your partner and practice what we just did as a class. Remember the rules and what I have said. I will be walking around conferencing and helping during this process.
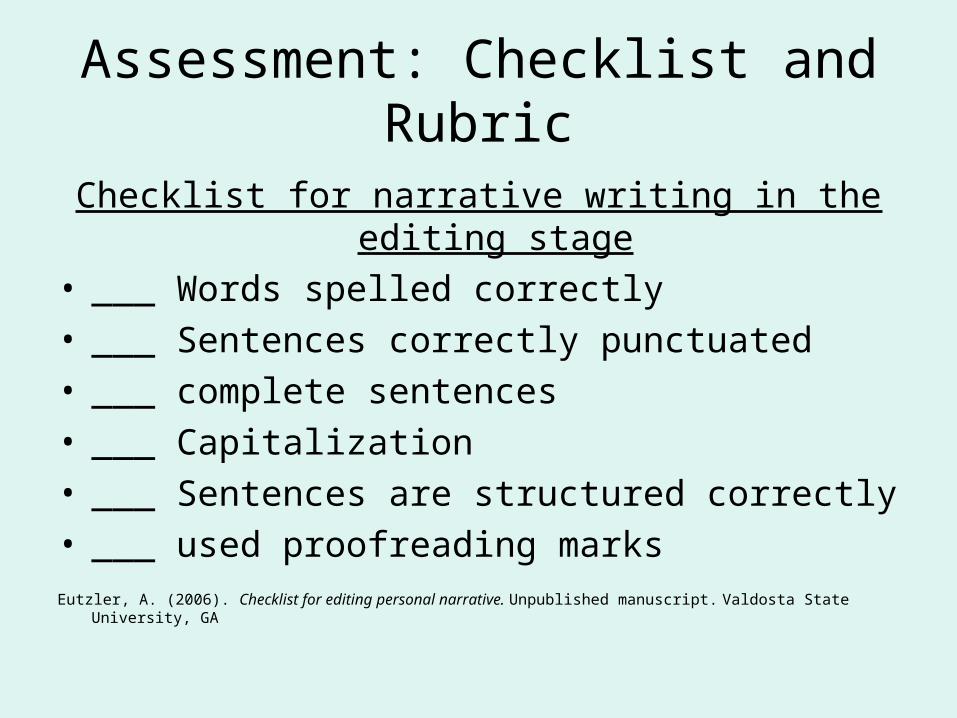
Assessment: Checklist and Rubric
Checklist for narrative writing in the editing stage• ___ Words spelled correctly• ___ Sentences correctly punctuated• ___ complete sentences• ___ Capitalization• ___ Sentences are structured correctly• ___ used proofreading marksEutzler, A. (2006). Checklist for editing personal narrative. Unpublished manuscript. Valdosta State University, GA

Exceeds Standards
4
Meet Standards
3
Partially Meets
Standards2
Needs Improvement
1
Words spelled correctly
All words are spelled
correctly
Students has 3 or less words spelled
incorrectly
Student has 4-6 words spelled
incorrectly
Student has more than 6 words spelled
incorrectly
Correct punctuatio
n
Student used correct
punctuation
Student had 5 or less
punctuation errors
Student has 6-8 punctuatio
n errors
Student has more than 8 errors
Capitalization Student has no capitalization errors
Student has 3 or less errors
Student has 4 errors
Student has more than 4 errors
Sentence structure
Student has no sentence structure
errors
Student has 3 or less errors
Student has 4-5 errors
Student has more than 5 errors
Proofreading marks
Student used correct
proofreading marks
Student used 1-2 correct
proofreading mark errors
Student used 3-4
proofreading mark errors
Student More than 4
proofreading mark errors

Publishing: Instructional Procedures
• The writing process is broken up into five stages. The five stages are prewriting, drafting, revising, editing, and publishing. To correctly write any kind of paper of story you must do each of these stages in this order. We learned about the prewriting stage and the drafting stage so far. Today we are going to take the next step in the writing process; we will be starting the revising stage.The publishing stage is where you will clean up your story. This is the final stage. During this stage you will make sure you have neat handwriting, correct grammar, punctuation, and spelling. On your final published draft you do not skip lines. You write on every line. This is the story your audience will read. You need to make sure that your paper is ready to be read. There should be no editing or revising errors in your final published piece. However, if you do find an error, I want you to put a single line through it and correct it.

Assessment:
• Alright, you have seen the publishing stage modeled, we have worked on one together, and the class had no more questions, therefore I am going to have you publish your story on your own. I want you to rewrite you story on regular paper, using correct handwriting, grammar, punctuation, spelling, and remember to write on every line. Make sure that there are no errors and if there are you only make one line through it and correct the error. Read over it again and be ready to read it to the class.

Assessment: Checklist and Rubric
Checklist for narrative writing in the publishing stage
• ___ Did I use correct spelling?
• ___ Is my punctuation correct?
• ___ Did I use correct capitalization?
• ___ Are my sentences well structured?
• ____ Did I write in my best handwriting?Eutzler, A. (2007). Checklist for publishing personal narrative. Unpublished manuscript. Valdosta
State University, GA

Exceeds Standar
ds4
Meet Standards
3
Partially Meets
Standards2
Needs Improveme
nt1
Words spelled correctly
All words are spelled
correctly
Students has 3 or less words spelled
incorrectly
Student has 4-6 words spelled
incorrectly
Student has more than 6 words spelled
incorrectly
Correct punctuatio
n
Student used correct
punctuation
Student had 5 or less
punctuation errors
Student has 6-8
punctuation errors
Student has more than
8 errors
Capitalization Student has no
capitalization errors
Student has 3 or less errors
Student has 4 errors
Student has more than
4 errors
Sentence structure
Student has no
sentence structure
errors
Student has 3 or less errors
Student has 4-5 errors
Student has more than
5 errors
Handwriting Great handwritin
g technique
Good handwritin
g
Average handwritin
g
Not legible


![Lisa Kidd Read 7140 Summer, 2007 Interdisciplinary Writing Unit Writing-2. (n.d.). [Online image].Retrieved May 28, 2007, from the Writer’s Workshop Web.](https://static.fdocuments.us/doc/165x107/56649e8e5503460f94b91bc6/lisa-kidd-read-7140-summer-2007-interdisciplinary-writing-unit-writing-2.jpg)