
Intelligence IBM Security Identity Governance...
44
IBM Security Identity Governance and Intelligence ServiceNow Adapter Installation and Configuration Guide IBM
Transcript of Intelligence IBM Security Identity Governance...
IBM Security Identity Governance andIntelligence
ServiceNow Adapter Installation andConfiguration Guide
IBM


Contents
Figures.................................................................................................................. v
Tables................................................................................................................. vii
Chapter 1. Overview.............................................................................................. 1Features of the adapter............................................................................................................................... 1Architecture of the adapter......................................................................................................................... 1Supported configurations............................................................................................................................ 2
Chapter 2. Planning............................................................................................... 3Roadmap...................................................................................................................................................... 3Prerequisites................................................................................................................................................ 4Software downloads.................................................................................................................................... 5Installation worksheet.................................................................................................................................6
Chapter 3. Installing in the virtual appliance.......................................................... 7
Chapter 4. Installing..............................................................................................9Installing the dispatcher..............................................................................................................................9Restarting the adapter service.................................................................................................................... 9Importing the adapter profile...................................................................................................................... 9Importing attribute mapping file............................................................................................................... 10Adding a connector....................................................................................................................................11Enabling connectors.................................................................................................................................. 12Reviewing and setting channel modes for each new connector.............................................................. 13Attribute Mapping...................................................................................................................................... 14Service/Target form details.......................................................................................................................15Verifying that the adapter is working correctly......................................................................................... 17
Chapter 5. Configuring.........................................................................................19Adding custom attributes.......................................................................................................................... 19Configuring the SSL connection between the Dispatcher and the ServiceNow server........................... 21Configuring the IBM Security Identity Manager password policy............................................................ 22Configuring the server to encrypt API password...................................................................................... 22
Chapter 6. Troubleshooting..................................................................................25Techniques for troubleshooting problems................................................................................................25Error messages and problem solving........................................................................................................26
Chapter 7. Uninstalling........................................................................................ 29Deleting the adapter profile.......................................................................................................................29
Chapter 8. Reference........................................................................................... 31Adapter attributes and object classes...................................................................................................... 31
Index.................................................................................................................. 33
iii

iv

Figures
1. The architecture of the ServiceNow Adapter............................................................................................... 1
2. Single server configuration............................................................................................................................2
v

vi

Tables
1. Prerequisites to install the adapter.............................................................................................................. 4
2. Required information to install the adapter................................................................................................. 6
3. Adapter package contents............................................................................................................................ 7
4. Prerequisites for enabling a connector.......................................................................................................12
5. Ports.............................................................................................................................................................16
6. Runtime problems.......................................................................................................................................27
7. Supported user attributes...........................................................................................................................31
8. Supported object classes............................................................................................................................32
vii

viii
Chapter 1. OverviewAn adapter is an interface between a managed resource and the IBM® Security Identity server. TheServiceNow Adapter uses the Tivoli® Directory Integrator functions to facilitate communication betweenthe IBM Security Identity server and ServiceNow.
Adapters can be installed on the managed resource. The IBM Security Identity server manages access tothe resource by using the security system. Adapters function as trusted virtual administrators on thetarget operating system. The adapter creates, suspends, restores user accounts, and other functions thatadministrators run manually. The adapter runs as a service, independently of whether you are logged onto the IBM Security Identity server.
Features of the adapterThis adapter automates several administrative tasks on the ServiceNow server.
You can use the adapter to automate the following tasks:
• Create, modify, suspend, restore, change password, and delete a user.• Reconcile user and user attributes.
Architecture of the adapterYou must install several components for the adapter to function correctly.
The adapter requires the following components:
• The Dispatcher• The IBM Tivoli Directory Integrator connector• IBM Security Identity Adapter profile
You must install the Dispatcher and the adapter profile; however, the Tivoli Directory Integrator connectormight already be installed with the base Tivoli Directory Integrator product.
The ServiceNow Adapter consists of IBM Tivoli Directory Integrator Assembly Lines. When an initialrequest is made by to the ServiceNow Adapter, the assembly lines are loaded into the Tivoli DirectoryIntegrator server. Subsequent service requests do not require those same assembly lines to be reloaded.
The assembly lines use the Tivoli Directory Integrator components to undertake user management-related tasks on the ServiceNow domain. They perform these tasks remotely by using the ID andpassword of a master account.
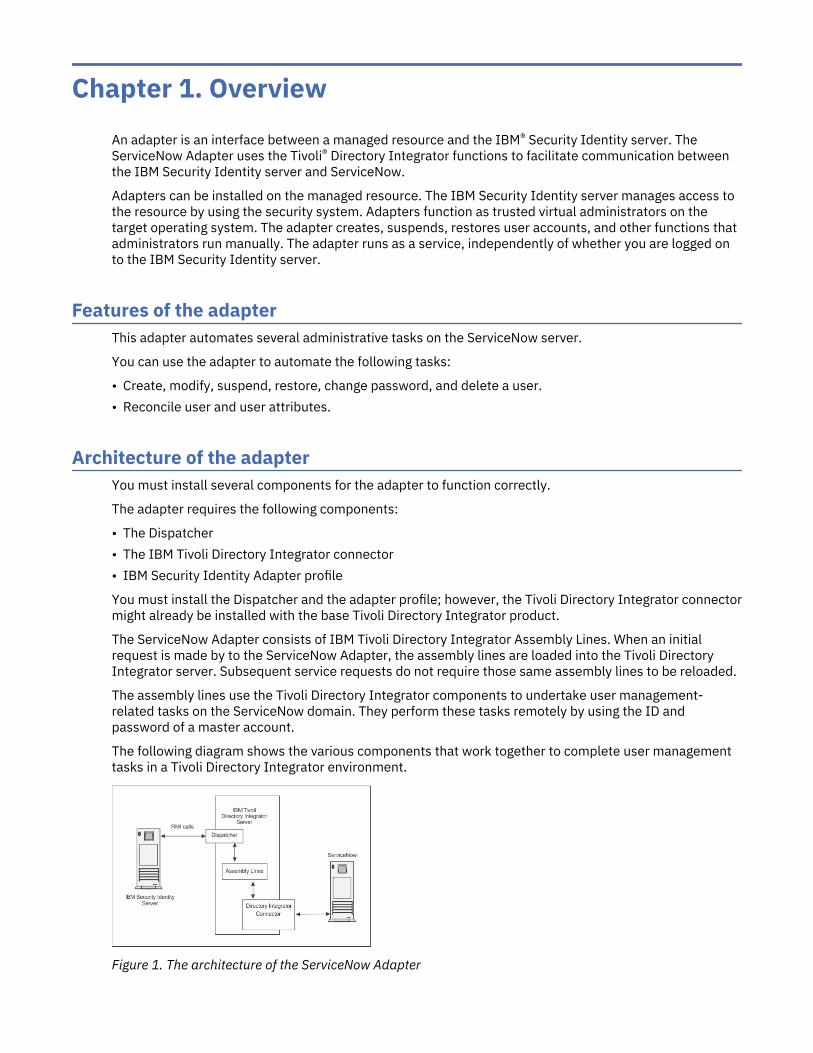
The following diagram shows the various components that work together to complete user managementtasks in a Tivoli Directory Integrator environment.
Figure 1. The architecture of the ServiceNow Adapter
Supported configurationsThe ServiceNow Adapter supports a number of different configurations and is designed to operate withIBM Security Identity Manager.
The following components are the fundamental components of a ServiceNow Adapter environment:
• An IBM Security Identity server• An IBM Tivoli Directory Integrator server• The ServiceNow Adapter
The ServiceNow Adapter only supports cloud-based ServiceNow end resource.
As part of each configuration, the ServiceNow Adapter must be installed on the computer that is runningthe IBM Tivoli Directory Integrator server.
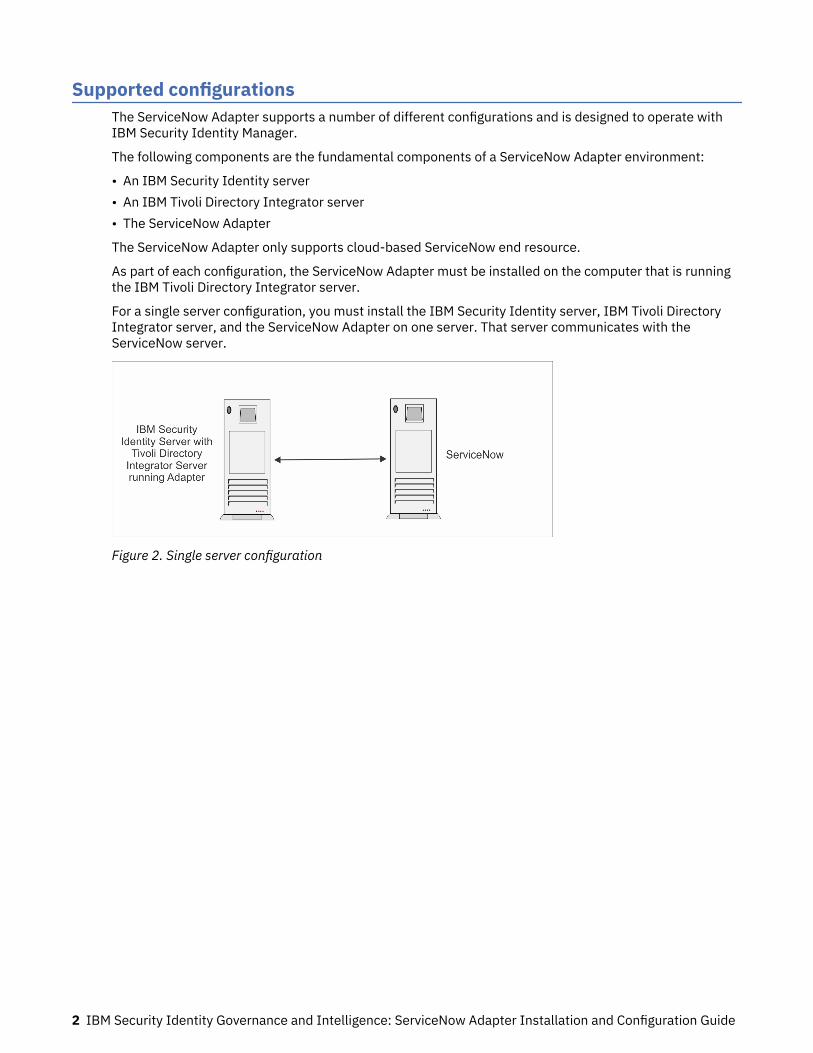
For a single server configuration, you must install the IBM Security Identity server, IBM Tivoli DirectoryIntegrator server, and the ServiceNow Adapter on one server. That server communicates with theServiceNow server.
Figure 2. Single server configuration
2 IBM Security Identity Governance and Intelligence: ServiceNow Adapter Installation and Configuration Guide
Chapter 2. PlanningInstalling and configuring the adapter involves several steps that you must complete in a specificsequence. Follow the roadmap for the main tasks.
Roadmap for IBM Tivoli Directory Integrator based adapters, for IBMSecurity Identity Governance and Intelligence
Follow this section when using the guide to install, configure, troubleshoot, or uninstall the adapter.
Note: There is a separate instruction for installing, upgrading or uninstalling adapters from the IBMSecurity Identity Governance and Intelligence virtual appliance.
Pre-installation
Complete these tasks.
1. Verify that your environment meets the software and hardware requirements for the adapter. SeePrerequisites.
2. Obtain the installation software. See Software downloads.3. Obtain the necessary information for the installation and configuration. See Installation worksheet.
Installation
Complete these tasks.
1. Install the dispatcher.2. Install the adapter binaries or connector.3. Install 3rd party client libraries.4. Set up the adapter environment.5. Restart the adapter service.6. Import the adapter profile.7. Load attribute mapping.8. Set account defaults.9. Create an adapter service/target.
10. Install the adapter language package.11. Verify that the adapter is working correctly.
Upgrade
To upgrade the adapter, do a full installation of the adapter. Follow the Installation roadmap.
Configuration
Complete these tasks.
1. Configure secure communication between the IBM Security Identity server and the adapter.
a. Configure 1-way authentication.b. Configure 2-way authentication.
2. Configure secure communication between the adapter and the managed target.
a. Configure 1-way authentication.
b. Configure 2-way authentication.3. Configure the adapter.4. Modify the adapter profiles.5. Customize the adapter.
Troubleshooting
See the following topics.
• Techniques for troubleshooting problems• Configure debugging• Logs• Error messages and problem solving
Uninstallation
Complete these tasks.
1. Stop the adapter service.2. Remove the adapter binaries or connector.3. Remove 3rd party client libraries.4. Delete the adapter service/target.5. Delete the adapter profile.
Reference
See the following topics.
• Adapter attributes and object classes• Adapter attributes by operations• Special attributes
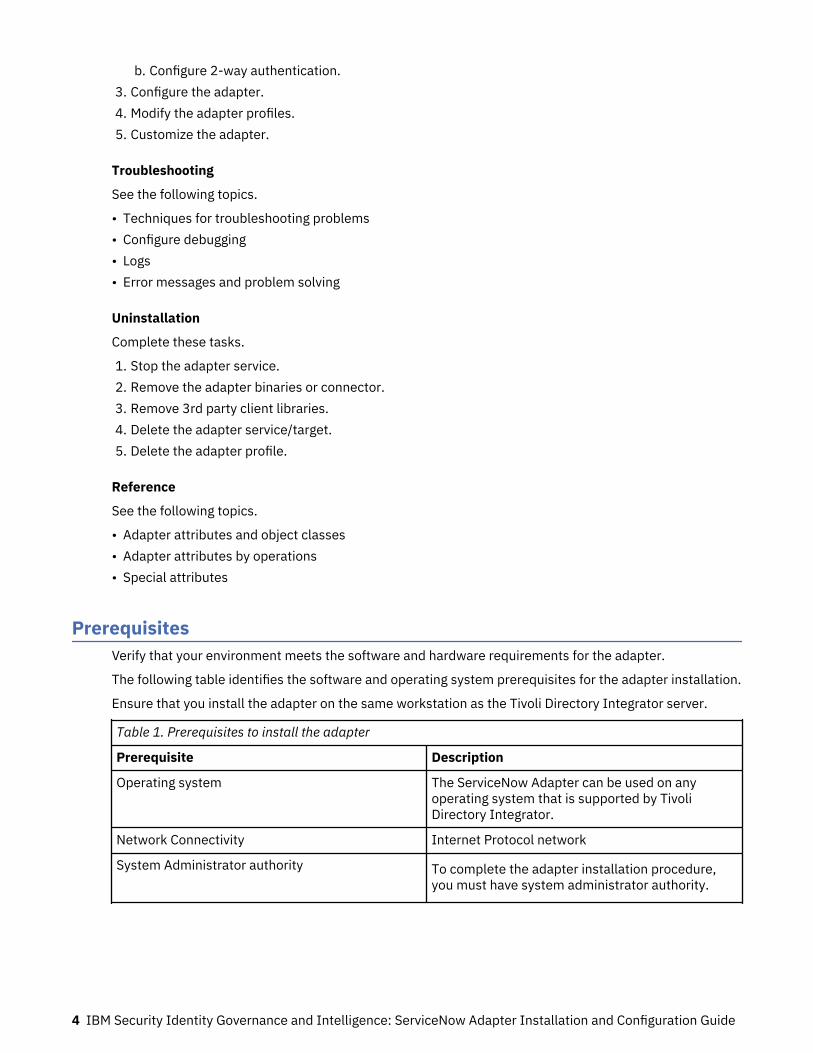
PrerequisitesVerify that your environment meets the software and hardware requirements for the adapter.
The following table identifies the software and operating system prerequisites for the adapter installation.
Ensure that you install the adapter on the same workstation as the Tivoli Directory Integrator server.
Table 1. Prerequisites to install the adapter
Prerequisite Description
Operating system The ServiceNow Adapter can be used on anyoperating system that is supported by TivoliDirectory Integrator.
Network Connectivity Internet Protocol network
System Administrator authority To complete the adapter installation procedure,you must have system administrator authority.
4 IBM Security Identity Governance and Intelligence: ServiceNow Adapter Installation and Configuration Guide
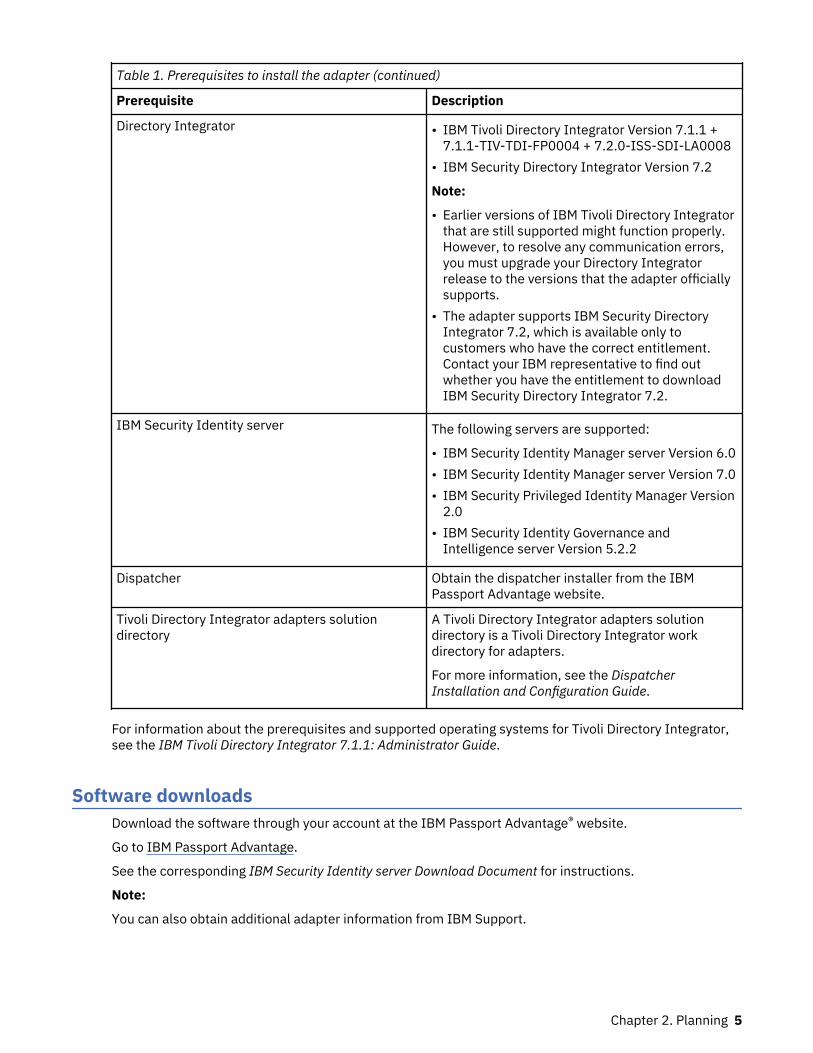
Table 1. Prerequisites to install the adapter (continued)
Prerequisite Description
Directory Integrator • IBM Tivoli Directory Integrator Version 7.1.1 +7.1.1-TIV-TDI-FP0004 + 7.2.0-ISS-SDI-LA0008
• IBM Security Directory Integrator Version 7.2
Note:
• Earlier versions of IBM Tivoli Directory Integratorthat are still supported might function properly.However, to resolve any communication errors,you must upgrade your Directory Integratorrelease to the versions that the adapter officiallysupports.
• The adapter supports IBM Security DirectoryIntegrator 7.2, which is available only tocustomers who have the correct entitlement.Contact your IBM representative to find outwhether you have the entitlement to downloadIBM Security Directory Integrator 7.2.
IBM Security Identity server The following servers are supported:
• IBM Security Identity Manager server Version 6.0• IBM Security Identity Manager server Version 7.0• IBM Security Privileged Identity Manager Version
2.0• IBM Security Identity Governance and
Intelligence server Version 5.2.2
Dispatcher Obtain the dispatcher installer from the IBMPassport Advantage website.
Tivoli Directory Integrator adapters solutiondirectory
A Tivoli Directory Integrator adapters solutiondirectory is a Tivoli Directory Integrator workdirectory for adapters.
For more information, see the DispatcherInstallation and Configuration Guide.
For information about the prerequisites and supported operating systems for Tivoli Directory Integrator,see the IBM Tivoli Directory Integrator 7.1.1: Administrator Guide.
Software downloadsDownload the software through your account at the IBM Passport Advantage® website.
Go to IBM Passport Advantage.
See the corresponding IBM Security Identity server Download Document for instructions.
Note:
You can also obtain additional adapter information from IBM Support.
Chapter 2. Planning 5
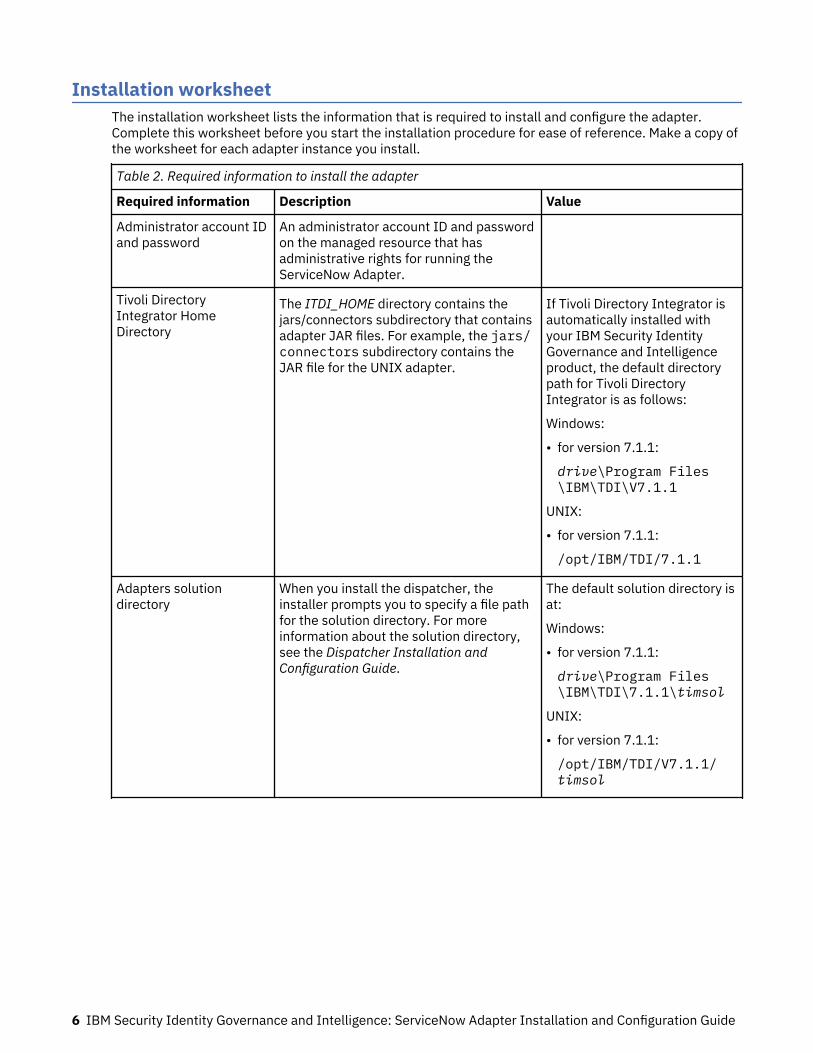
Installation worksheetThe installation worksheet lists the information that is required to install and configure the adapter.Complete this worksheet before you start the installation procedure for ease of reference. Make a copy ofthe worksheet for each adapter instance you install.
Table 2. Required information to install the adapter
Required information Description Value
Administrator account IDand password
An administrator account ID and passwordon the managed resource that hasadministrative rights for running theServiceNow Adapter.
Tivoli DirectoryIntegrator HomeDirectory
The ITDI_HOME directory contains thejars/connectors subdirectory that containsadapter JAR files. For example, the jars/connectors subdirectory contains theJAR file for the UNIX adapter.
If Tivoli Directory Integrator isautomatically installed withyour IBM Security IdentityGovernance and Intelligenceproduct, the default directorypath for Tivoli DirectoryIntegrator is as follows:
Windows:
• for version 7.1.1:
drive\Program Files\IBM\TDI\V7.1.1
UNIX:
• for version 7.1.1:
/opt/IBM/TDI/7.1.1
Adapters solutiondirectory
When you install the dispatcher, theinstaller prompts you to specify a file pathfor the solution directory. For moreinformation about the solution directory,see the Dispatcher Installation andConfiguration Guide.
The default solution directory isat:
Windows:
• for version 7.1.1:
drive\Program Files\IBM\TDI\7.1.1\timsol
UNIX:
• for version 7.1.1:
/opt/IBM/TDI/V7.1.1/timsol
6 IBM Security Identity Governance and Intelligence: ServiceNow Adapter Installation and Configuration Guide
Chapter 3. Installing in the Identity Governance andIntelligence virtual appliance
For Identity Governance and Intelligence target management, you can install an IBM Security IdentityAdapters or a custom adapter on the built-in Security Directory Integrator in the virtual appliance insteadof installing the adapter externally. As such, there is no need to manage a separate virtual machine orsystem.
About this task
This procedure is applicable for a selected list of Identity Adapters. See the Identity Adapters productdocumentation at http://www.ibm.com/support/knowledgecenter/SSIGMP_1.0.0/com.ibm.itim_pim.doc/c_adapters_intro.htm to determine which adapters are supported in Identity Governance andIntelligence, and which can be installed on the virtual appliance.
All Identity Governance and Intelligence supported adapters can be installed externally on the virtualappliance. Depending on the adapter, an external Security Directory Integrator may be required.
See the corresponding Adapter Installation and Configuration Guide for the specific prerequisites,installation and configuration tasks, and issues and limitations. See the Adapters Release Notes for anyupdates to these references.
Procedure
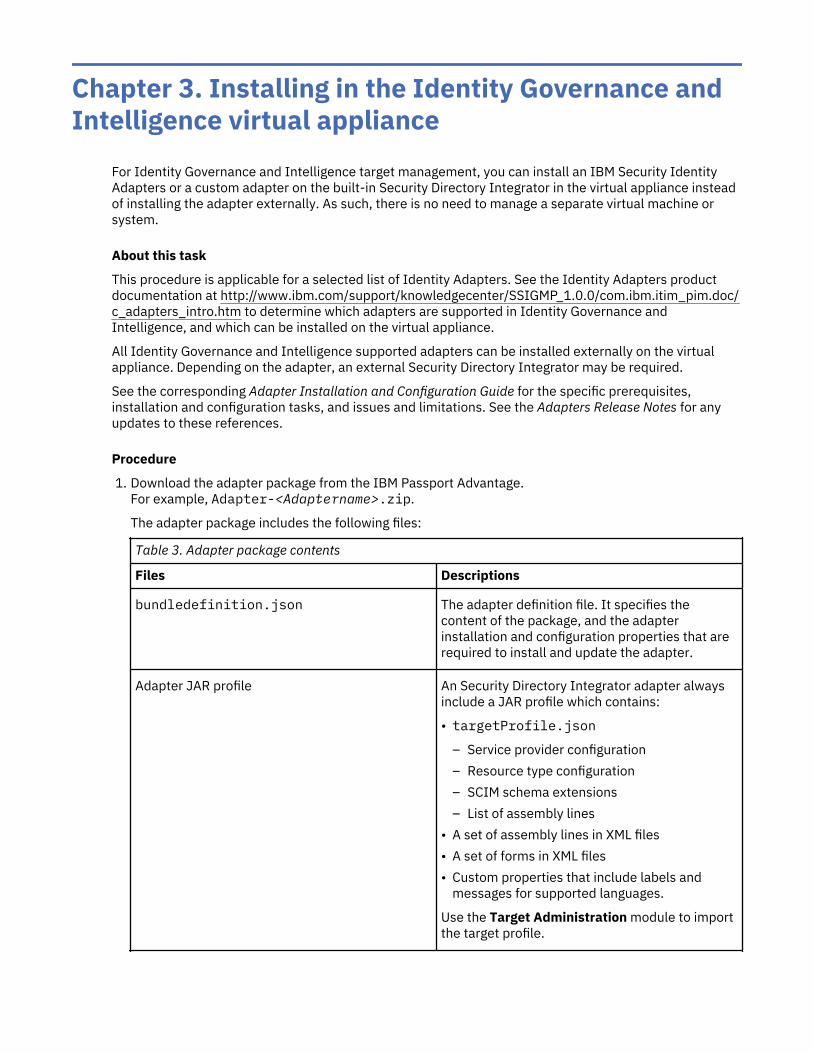
1. Download the adapter package from the IBM Passport Advantage.For example, Adapter-<Adaptername>.zip.
The adapter package includes the following files:
Table 3. Adapter package contents
Files Descriptions
bundledefinition.json The adapter definition file. It specifies thecontent of the package, and the adapterinstallation and configuration properties that arerequired to install and update the adapter.
Adapter JAR profile An Security Directory Integrator adapter alwaysinclude a JAR profile which contains:
• targetProfile.json
– Service provider configuration– Resource type configuration– SCIM schema extensions– List of assembly lines
• A set of assembly lines in XML files• A set of forms in XML files• Custom properties that include labels and
messages for supported languages.
Use the Target Administration module to importthe target profile.
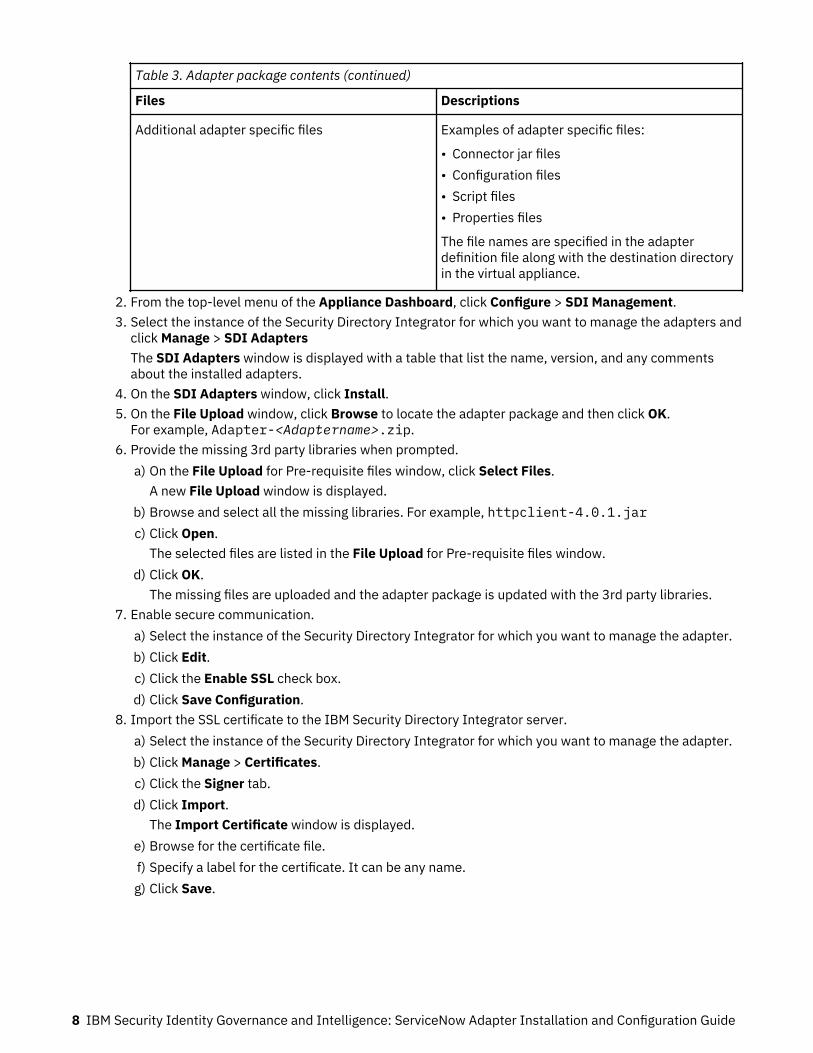
Table 3. Adapter package contents (continued)
Files Descriptions
Additional adapter specific files Examples of adapter specific files:
• Connector jar files• Configuration files• Script files• Properties files
The file names are specified in the adapterdefinition file along with the destination directoryin the virtual appliance.
2. From the top-level menu of the Appliance Dashboard, click Configure > SDI Management.3. Select the instance of the Security Directory Integrator for which you want to manage the adapters and
click Manage > SDI AdaptersThe SDI Adapters window is displayed with a table that list the name, version, and any commentsabout the installed adapters.
4. On the SDI Adapters window, click Install.5. On the File Upload window, click Browse to locate the adapter package and then click OK.
For example, Adapter-<Adaptername>.zip.6. Provide the missing 3rd party libraries when prompted.
a) On the File Upload for Pre-requisite files window, click Select Files.A new File Upload window is displayed.
b) Browse and select all the missing libraries. For example, httpclient-4.0.1.jarc) Click Open.
The selected files are listed in the File Upload for Pre-requisite files window.d) Click OK.
The missing files are uploaded and the adapter package is updated with the 3rd party libraries.7. Enable secure communication.
a) Select the instance of the Security Directory Integrator for which you want to manage the adapter.b) Click Edit.c) Click the Enable SSL check box.d) Click Save Configuration.
8. Import the SSL certificate to the IBM Security Directory Integrator server.a) Select the instance of the Security Directory Integrator for which you want to manage the adapter.b) Click Manage > Certificates.c) Click the Signer tab.d) Click Import.
The Import Certificate window is displayed.e) Browse for the certificate file.f) Specify a label for the certificate. It can be any name.g) Click Save.
8 IBM Security Identity Governance and Intelligence: ServiceNow Adapter Installation and Configuration Guide

Chapter 4. InstallingInstalling the adapter mainly involves importing the adapter profile and creating an adapter service.Depending on the adapter, several other tasks can be involved to completely install it.
All IBM Tivoli Directory Integrator based adapters require the Dispatcher for the adapters to functioncorrectly. If the Dispatcher is installed from a previous installation, do not reinstall it unless theDispatcher is upgraded. See Verifying the adapter installation.
Installing the dispatcherIf this is the first Tivoli Directory Integrator-based adapter installation, you must install the RMIDispatcher before you install the adapter. Install the RMI Dispatcher on the same Tivoli DirectoryIntegrator server where you want to install the adapter.
If you already installed the RMI Dispatcher for another adapter, you do not need to reinstall it.
If you have not yet installed the RMI Dispatcher in the Tivoli Directory Integrator environment, downloadthe Dispatcher installer from the IBM Passport Advantage website. For more information about theinstallation, see the Dispatcher Installation and Configuration Guide.
Restarting the adapter serviceVarious installation and configuration tasks might require the adapter to be restarted to apply thechanges. For example, you must restart the adapter if there are changes in the adapter profile, connector,or assembly lines. To restart the adapter, restart the Dispatcher.
The adapter does not exist as an independent service or a process. The adapter is added to theDispatcher instance, which runs all the adapters that are installed on the same Security DirectoryIntegrator instance.
See the topic about starting, stopping, and restarting the Dispatcher service in the Dispatcher Installationand Configuration Guide.
Importing the adapter profileYou can import a profile definition file, which creates a profile in IBM Security Identity Governance andIntelligence server. Use this option for importing adapter profiles.
Before you begin
• The IBM Security Identity Governance and Intelligence server is installed and running.• You have administrator authority on the IBM Security Identity Governance and Intelligence server.• The file to be imported must be a Java archive (JAR) file. The <Adapter>Profile.jar file includes all
the files that are required to define the adapter schema, account form, service/target form, and profileproperties. If necessary, you can extract the files from the JAR file, modify the files, and repackage theJAR file with the updated files.
About this task
Target definition files are also called adapter profile files. The profile definition files are provided with thevarious IBM Security Identity Adapter. The adapter profile must be imported because it defines the typesof resources that the Identity Governance and Intelligence server can manage.
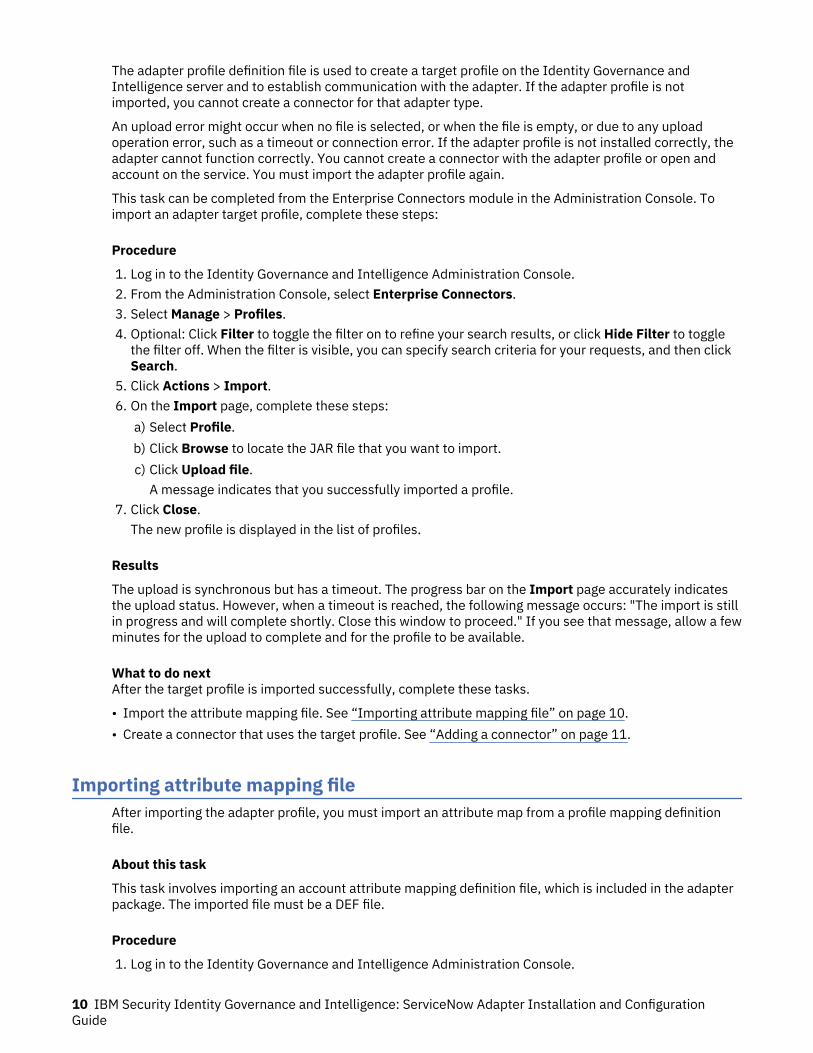
The adapter profile definition file is used to create a target profile on the Identity Governance andIntelligence server and to establish communication with the adapter. If the adapter profile is notimported, you cannot create a connector for that adapter type.
An upload error might occur when no file is selected, or when the file is empty, or due to any uploadoperation error, such as a timeout or connection error. If the adapter profile is not installed correctly, theadapter cannot function correctly. You cannot create a connector with the adapter profile or open andaccount on the service. You must import the adapter profile again.
This task can be completed from the Enterprise Connectors module in the Administration Console. Toimport an adapter target profile, complete these steps:
Procedure
1. Log in to the Identity Governance and Intelligence Administration Console.2. From the Administration Console, select Enterprise Connectors.3. Select Manage > Profiles.4. Optional: Click Filter to toggle the filter on to refine your search results, or click Hide Filter to toggle
the filter off. When the filter is visible, you can specify search criteria for your requests, and then clickSearch.
5. Click Actions > Import.6. On the Import page, complete these steps:
a) Select Profile.b) Click Browse to locate the JAR file that you want to import.c) Click Upload file.
A message indicates that you successfully imported a profile.7. Click Close.
The new profile is displayed in the list of profiles.
Results
The upload is synchronous but has a timeout. The progress bar on the Import page accurately indicatesthe upload status. However, when a timeout is reached, the following message occurs: "The import is stillin progress and will complete shortly. Close this window to proceed." If you see that message, allow a fewminutes for the upload to complete and for the profile to be available.
What to do nextAfter the target profile is imported successfully, complete these tasks.
• Import the attribute mapping file. See “Importing attribute mapping file” on page 10.• Create a connector that uses the target profile. See “Adding a connector” on page 11.
Importing attribute mapping fileAfter importing the adapter profile, you must import an attribute map from a profile mapping definitionfile.
About this task
This task involves importing an account attribute mapping definition file, which is included in the adapterpackage. The imported file must be a DEF file.
Procedure
1. Log in to the Identity Governance and Intelligence Administration Console.
10 IBM Security Identity Governance and Intelligence: ServiceNow Adapter Installation and ConfigurationGuide

2. From the Administration Console, select Enterprise Connectors.3. Select Manage > Profiles.4. Optional: Click Filter to toggle the filter on to refine your search results, or click Hide Filter to toggle
the filter off. When the filter is visible, you can specify search criteria for your requests, and then clickSearch.
5. Click Actions > Import.6. On the Import page, complete these steps:
a) Select Attribute Mapping.b) Click Browse to locate the attribute mapping file that you want to import.c) Click Upload file.
A message indicates that you successfully imported the file.7. Click Close.
Adding a connectorAfter you import the adapter profile on the Identity Governance and Intelligence server, add a connectorso that Identity Governance and Intelligence server can communicate with the managed resource.
Before you beginComplete Importing the adapter profile.
Note: If you migrated from Identity Governance and Intelligence V5.2.2 or V5.2.2.1 and want to add orconfigure a connector, see Adding and configuring a connector for each target in the IBM Security IdentityGovernance and Intelligence product documentation.
About this task
The connectors consolidate, extract, and reconcile user identities, organization units, permissions, anduser entitlements with the most common enterprise applications. Configure a connector to keep theAccess Governance Core repository synchronized with the target system.
This task can be completed from the Enterprise Connectors module in the Administration Console.
Procedure
To add a connector, complete these steps.1. Log in to the Identity Governance and Intelligence Administration Console.2. From the Administration Console, select Enterprise Connectors.3. Select Manage > Connectors.
A list of connectors is displayed on the Connectors tab.4. Click Filter to toggle the filter on to refine your search results, or click Hide Filter to toggle the filter
off. When the filter is visible, you can specify search criteria for your requests, and then click Search.5. To view all of the columns in the list of connectors, expand the Connectors pane.6. Click Actions > Add.
The Connector Details pane is enabled for your input.7. On the Connector Details tab, complete these steps:
a) Assign a name and description for the connector.b) Select the target profile type as Identity Brokerage and its corresponding target profile.c) Select the entity, such as Account or User.
Depending on the connector type, this field might be preselected.d) Optional: Select Trace ON and the corresponding Trace Level to enable trace logs.
Chapter 4. Installing 11

The available trace levels are DEBUG, INFO, and ERROR.e) Optional: Select History ON to save and track the connector usage.f) Click Save.
The fields for enabling the channels for sending and receiving data are now visible.g) Select and set the connector properties in the Global Config accordion pane.
For information about the global configuration properties, see Global Config accordion pane.h) Click Save. The fields for enabling the channels for sending and receiving data are now visible.
Results
The connector is saved and added to the list of connectors in the Connectors pane.
If you cannot create a connector with the target profile or open an account on an existing connector, thetarget profile was not installed correctly during the import. You must import the target profile again.
What to do next
Enable the channel modes to synchronize the data between the target systems and Identity Governanceand Intelligence. For more information, see “Enabling connectors” on page 12.
Enabling connectorsAfter you create a connector, by default it is in a disabled state. You must enable a connector to use it.
Before you begin
Table 4. Prerequisites for enabling a connector
Prerequisite Find more information
A connector must exist in Identity Governance andIntelligence.
“Adding a connector” on page 11.
Ensure that you enabled the appropriate channelmodes for the connector.
“Reviewing and setting channel modes for eachnew connector” on page 13.
Procedure
To enable a connector, complete these steps:1. Log in to the Identity Governance and Intelligence Administration Console.2. From the Administration Console, select Enterprise Connectors.3. Select Manage > Connectors.
A list of connectors is displayed on the Connectors tab.4. Optional: Click Filter to toggle the filter on to refine your search results, or click Hide Filter to toggle
the filter off. When the filter is visible, you can specify search criteria for your requests, and then clickSearch.
5. Optional: To view all of the columns in the list of connectors, expand the Connectors pane.6. Select the connector that you want to enable.7. On the Connector Details tab, complete these steps:
a) Select the channel modes that you want to enable, and then click Save. Depending on the channelsthat you enable, the corresponding Channel tabs are displayed.Enable write-to channel
Propagates every change in the Access Governance Core repository into the target system.
12 IBM Security Identity Governance and Intelligence: ServiceNow Adapter Installation and ConfigurationGuide
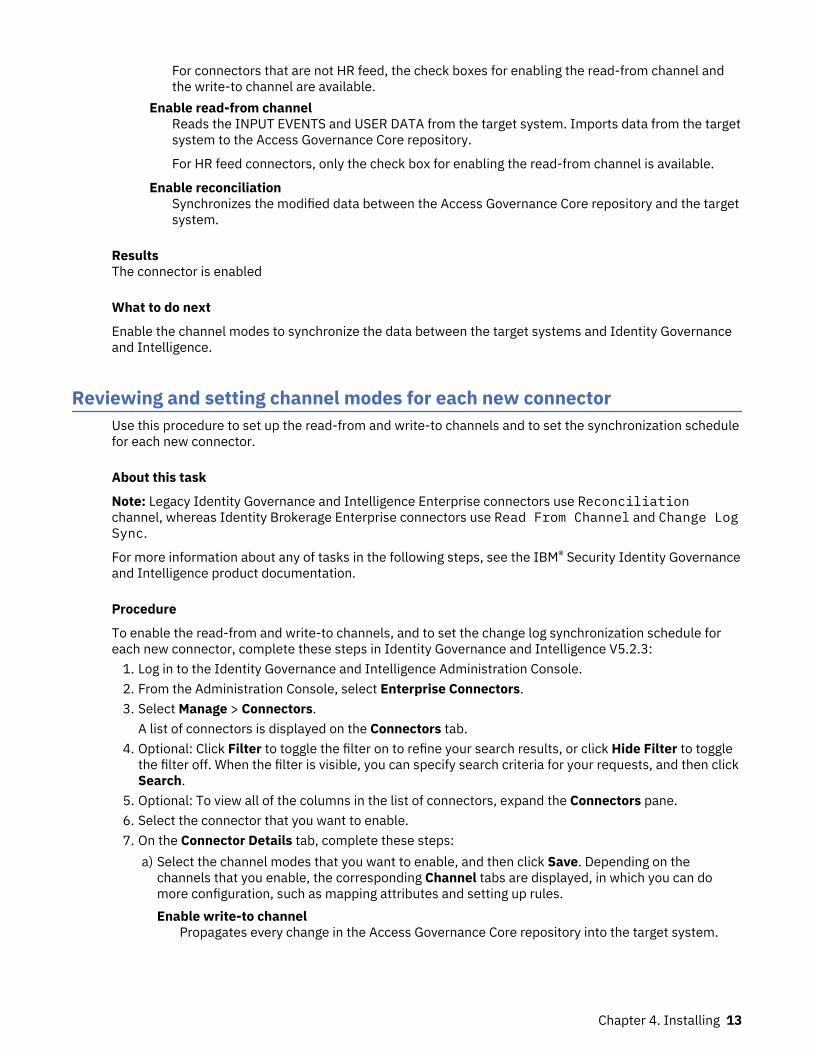
For connectors that are not HR feed, the check boxes for enabling the read-from channel andthe write-to channel are available.
Enable read-from channelReads the INPUT EVENTS and USER DATA from the target system. Imports data from the targetsystem to the Access Governance Core repository.
For HR feed connectors, only the check box for enabling the read-from channel is available.
Enable reconciliationSynchronizes the modified data between the Access Governance Core repository and the targetsystem.
ResultsThe connector is enabled
What to do next
Enable the channel modes to synchronize the data between the target systems and Identity Governanceand Intelligence.
Reviewing and setting channel modes for each new connectorUse this procedure to set up the read-from and write-to channels and to set the synchronization schedulefor each new connector.
About this task
Note: Legacy Identity Governance and Intelligence Enterprise connectors use Reconciliationchannel, whereas Identity Brokerage Enterprise connectors use Read From Channel and Change LogSync.
For more information about any of tasks in the following steps, see the IBM® Security Identity Governanceand Intelligence product documentation.
Procedure
To enable the read-from and write-to channels, and to set the change log synchronization schedule foreach new connector, complete these steps in Identity Governance and Intelligence V5.2.3:
1. Log in to the Identity Governance and Intelligence Administration Console.2. From the Administration Console, select Enterprise Connectors.3. Select Manage > Connectors.
A list of connectors is displayed on the Connectors tab.4. Optional: Click Filter to toggle the filter on to refine your search results, or click Hide Filter to toggle
the filter off. When the filter is visible, you can specify search criteria for your requests, and then clickSearch.
5. Optional: To view all of the columns in the list of connectors, expand the Connectors pane.6. Select the connector that you want to enable.7. On the Connector Details tab, complete these steps:
a) Select the channel modes that you want to enable, and then click Save. Depending on thechannels that you enable, the corresponding Channel tabs are displayed, in which you can domore configuration, such as mapping attributes and setting up rules.Enable write-to channel
Propagates every change in the Access Governance Core repository into the target system.
Chapter 4. Installing 13
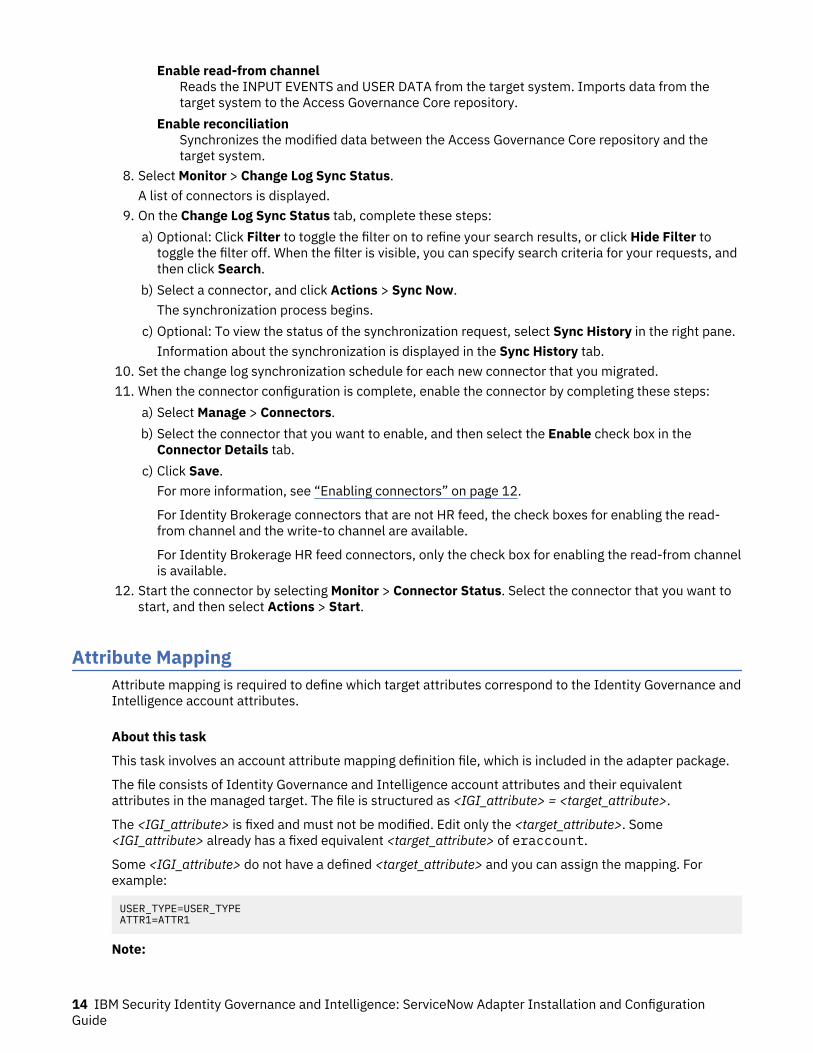
Enable read-from channelReads the INPUT EVENTS and USER DATA from the target system. Imports data from thetarget system to the Access Governance Core repository.
Enable reconciliationSynchronizes the modified data between the Access Governance Core repository and thetarget system.
8. Select Monitor > Change Log Sync Status.A list of connectors is displayed.
9. On the Change Log Sync Status tab, complete these steps:a) Optional: Click Filter to toggle the filter on to refine your search results, or click Hide Filter to
toggle the filter off. When the filter is visible, you can specify search criteria for your requests, andthen click Search.
b) Select a connector, and click Actions > Sync Now.The synchronization process begins.
c) Optional: To view the status of the synchronization request, select Sync History in the right pane.Information about the synchronization is displayed in the Sync History tab.
10. Set the change log synchronization schedule for each new connector that you migrated.11. When the connector configuration is complete, enable the connector by completing these steps:
a) Select Manage > Connectors.b) Select the connector that you want to enable, and then select the Enable check box in the
Connector Details tab.c) Click Save.
For more information, see “Enabling connectors” on page 12.
For Identity Brokerage connectors that are not HR feed, the check boxes for enabling the read-from channel and the write-to channel are available.
For Identity Brokerage HR feed connectors, only the check box for enabling the read-from channelis available.
12. Start the connector by selecting Monitor > Connector Status. Select the connector that you want tostart, and then select Actions > Start.
Attribute MappingAttribute mapping is required to define which target attributes correspond to the Identity Governance andIntelligence account attributes.
About this task
This task involves an account attribute mapping definition file, which is included in the adapter package.
The file consists of Identity Governance and Intelligence account attributes and their equivalentattributes in the managed target. The file is structured as <IGI_attribute> = <target_attribute>.
The <IGI_attribute> is fixed and must not be modified. Edit only the <target_attribute>. Some<IGI_attribute> already has a fixed equivalent <target_attribute> of eraccount.
Some <IGI_attribute> do not have a defined <target_attribute> and you can assign the mapping. Forexample:
USER_TYPE=USER_TYPEATTR1=ATTR1
Note:
14 IBM Security Identity Governance and Intelligence: ServiceNow Adapter Installation and ConfigurationGuide

• The default mapping is already included out-of-the box. If there are no changes to the attributemapping, there is no need to import the attribute mapping files.
• It might take up to 10 minutes for the attribute mapping changes to take effect once the file isimported.
Procedure
1. Open the mapping definition file by using any text editor.2. Edit the mapping.3. If the target attribute has a list of predefined values, use the following syntax to convert its values to
the corresponding Identity Governance and Intelligence attribute values.
[conversion].<target_attribute>.<IGI_attribute> = [<target_attribute_value1>=<IGI_attribute_value1>;...;<target_attribute_valuen>=<IGI_attribute_valuen>]
4. For attributes that contains date and time, use the following syntax to convert its values.For example:
[conversion.date].erbirthDate.BIRTHDAY=[yyyyMMdd=dd/MM/yyyy HH:mm:ss][conversion.date].ACCOUNT_EXPIRY_DATE.ACCOUNT_EXPIRY_DATE=[dd/MM/yyyy HH:mm:ss=dd/MM/yyyy HH:mm:ss]
5. Import the updated mapping definition file through the Enterprise Connectors module. For moreinformation, see Attribute-to-permission mapping service in the IBM Security Identity Governance andIntelligence product documentation.
6. Map the following attributes for Chanel-Write To and Chanel-Read From
Attribute Mapped Attribute
eruid CODE
erpassword PASSWORD
For more information, see Mapping attributes for a connector in the IBM Security Identity Governanceand Intelligence product documentation.
Service/Target form detailsComplete the service/target form fields.Adapter Details
Service NameSpecify a name that defines the adapter service on the IBM Security Identity server.
Note: Do not use forward (/) or backward slashes (\) in the service name.
Tivoli Directory Integrator location
Specify the URL for the IBM Tivoli Directory Integrator instance. The valid syntax for the URL isrmi://ip-address:port/ITDIDispatcher, where ip-address is the IBM Tivoli DirectoryIntegrator host and port is the port number for the RMI Dispatcher.
The default URL for the default SDI1 instance is rmi://localhost:1099/ITDIDispatcher.
The following table shows the ports that are open in the firewall for every instance that is created.However, usage of these port numbers do not support high availability.
Chapter 4. Installing 15
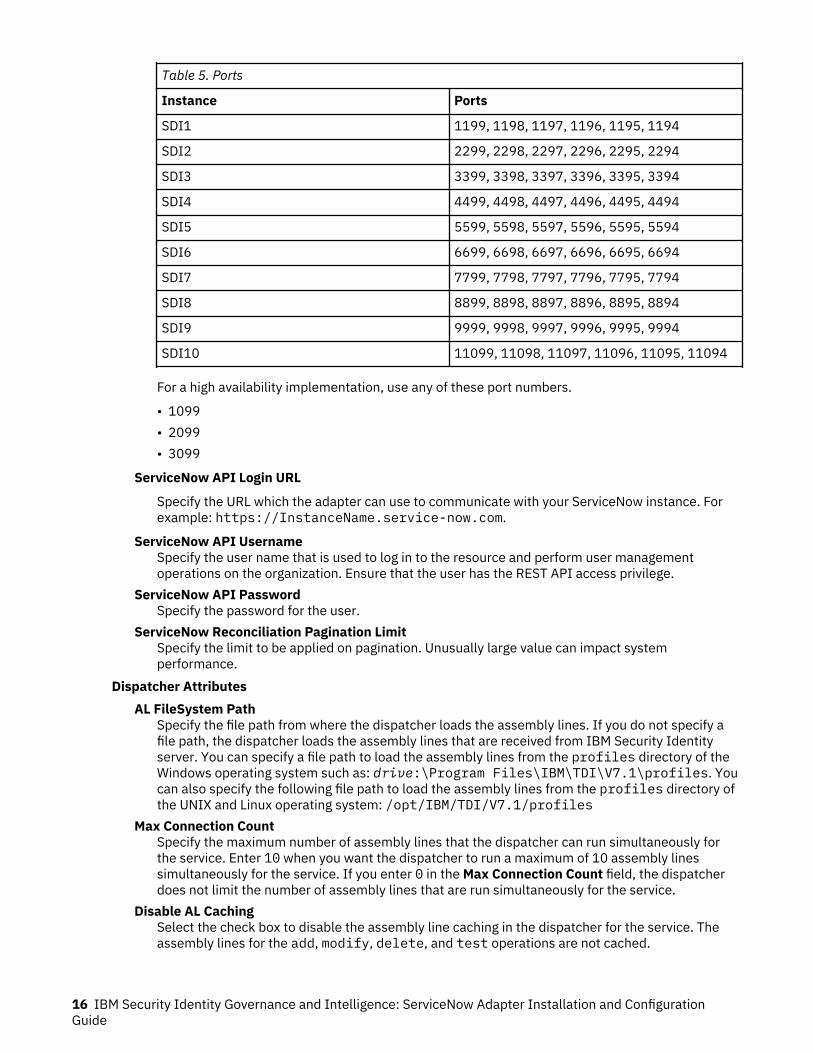
Table 5. Ports
Instance Ports
SDI1 1199, 1198, 1197, 1196, 1195, 1194
SDI2 2299, 2298, 2297, 2296, 2295, 2294
SDI3 3399, 3398, 3397, 3396, 3395, 3394
SDI4 4499, 4498, 4497, 4496, 4495, 4494
SDI5 5599, 5598, 5597, 5596, 5595, 5594
SDI6 6699, 6698, 6697, 6696, 6695, 6694
SDI7 7799, 7798, 7797, 7796, 7795, 7794
SDI8 8899, 8898, 8897, 8896, 8895, 8894
SDI9 9999, 9998, 9997, 9996, 9995, 9994
SDI10 11099, 11098, 11097, 11096, 11095, 11094
For a high availability implementation, use any of these port numbers.
• 1099• 2099• 3099
ServiceNow API Login URL
Specify the URL which the adapter can use to communicate with your ServiceNow instance. Forexample: https://InstanceName.service-now.com.
ServiceNow API UsernameSpecify the user name that is used to log in to the resource and perform user managementoperations on the organization. Ensure that the user has the REST API access privilege.
ServiceNow API PasswordSpecify the password for the user.
ServiceNow Reconciliation Pagination LimitSpecify the limit to be applied on pagination. Unusually large value can impact systemperformance.
Dispatcher AttributesAL FileSystem Path
Specify the file path from where the dispatcher loads the assembly lines. If you do not specify afile path, the dispatcher loads the assembly lines that are received from IBM Security Identityserver. You can specify a file path to load the assembly lines from the profiles directory of theWindows operating system such as: drive:\Program Files\IBM\TDI\V7.1\profiles. Youcan also specify the following file path to load the assembly lines from the profiles directory ofthe UNIX and Linux operating system: /opt/IBM/TDI/V7.1/profiles
Max Connection CountSpecify the maximum number of assembly lines that the dispatcher can run simultaneously forthe service. Enter 10 when you want the dispatcher to run a maximum of 10 assembly linessimultaneously for the service. If you enter 0 in the Max Connection Count field, the dispatcherdoes not limit the number of assembly lines that are run simultaneously for the service.
Disable AL CachingSelect the check box to disable the assembly line caching in the dispatcher for the service. Theassembly lines for the add, modify, delete, and test operations are not cached.
16 IBM Security Identity Governance and Intelligence: ServiceNow Adapter Installation and ConfigurationGuide
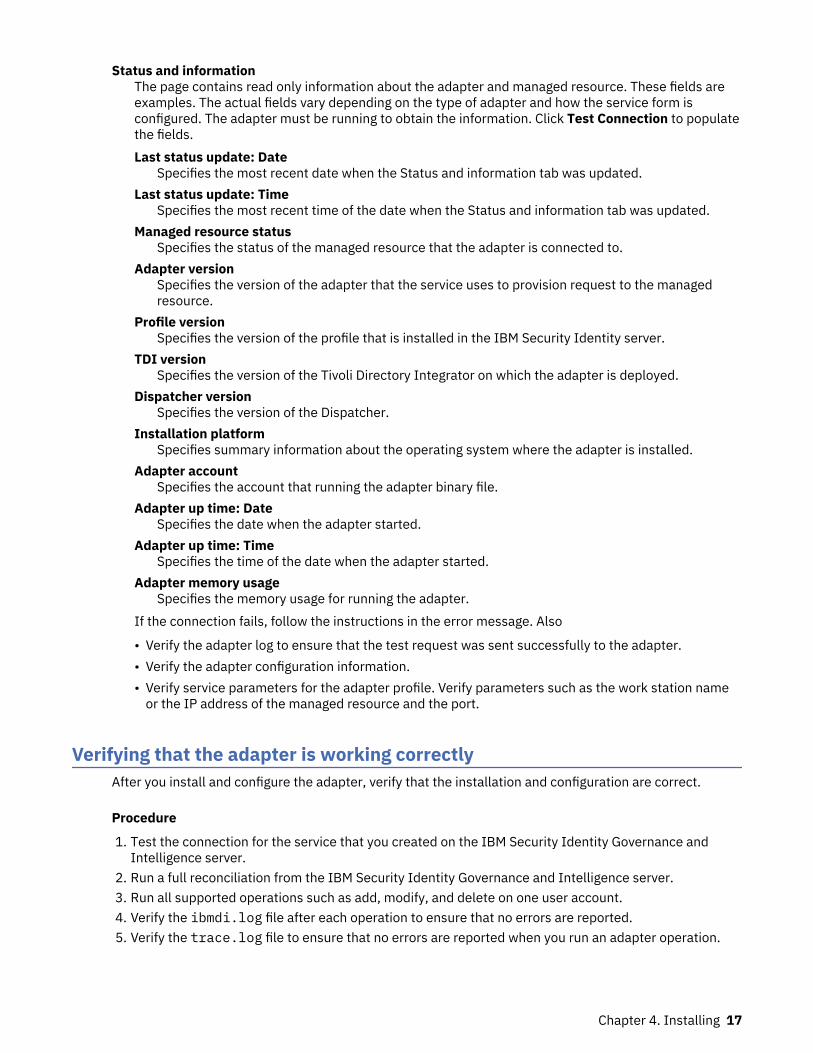
Status and informationThe page contains read only information about the adapter and managed resource. These fields areexamples. The actual fields vary depending on the type of adapter and how the service form isconfigured. The adapter must be running to obtain the information. Click Test Connection to populatethe fields.Last status update: Date
Specifies the most recent date when the Status and information tab was updated.Last status update: Time
Specifies the most recent time of the date when the Status and information tab was updated.Managed resource status
Specifies the status of the managed resource that the adapter is connected to.Adapter version
Specifies the version of the adapter that the service uses to provision request to the managedresource.
Profile versionSpecifies the version of the profile that is installed in the IBM Security Identity server.
TDI versionSpecifies the version of the Tivoli Directory Integrator on which the adapter is deployed.
Dispatcher versionSpecifies the version of the Dispatcher.
Installation platformSpecifies summary information about the operating system where the adapter is installed.
Adapter accountSpecifies the account that running the adapter binary file.
Adapter up time: DateSpecifies the date when the adapter started.
Adapter up time: TimeSpecifies the time of the date when the adapter started.
Adapter memory usageSpecifies the memory usage for running the adapter.
If the connection fails, follow the instructions in the error message. Also
• Verify the adapter log to ensure that the test request was sent successfully to the adapter.• Verify the adapter configuration information.• Verify service parameters for the adapter profile. Verify parameters such as the work station name
or the IP address of the managed resource and the port.
Verifying that the adapter is working correctlyAfter you install and configure the adapter, verify that the installation and configuration are correct.
Procedure
1. Test the connection for the service that you created on the IBM Security Identity Governance andIntelligence server.
2. Run a full reconciliation from the IBM Security Identity Governance and Intelligence server.3. Run all supported operations such as add, modify, and delete on one user account.4. Verify the ibmdi.log file after each operation to ensure that no errors are reported.5. Verify the trace.log file to ensure that no errors are reported when you run an adapter operation.
Chapter 4. Installing 17

18 IBM Security Identity Governance and Intelligence: ServiceNow Adapter Installation and ConfigurationGuide
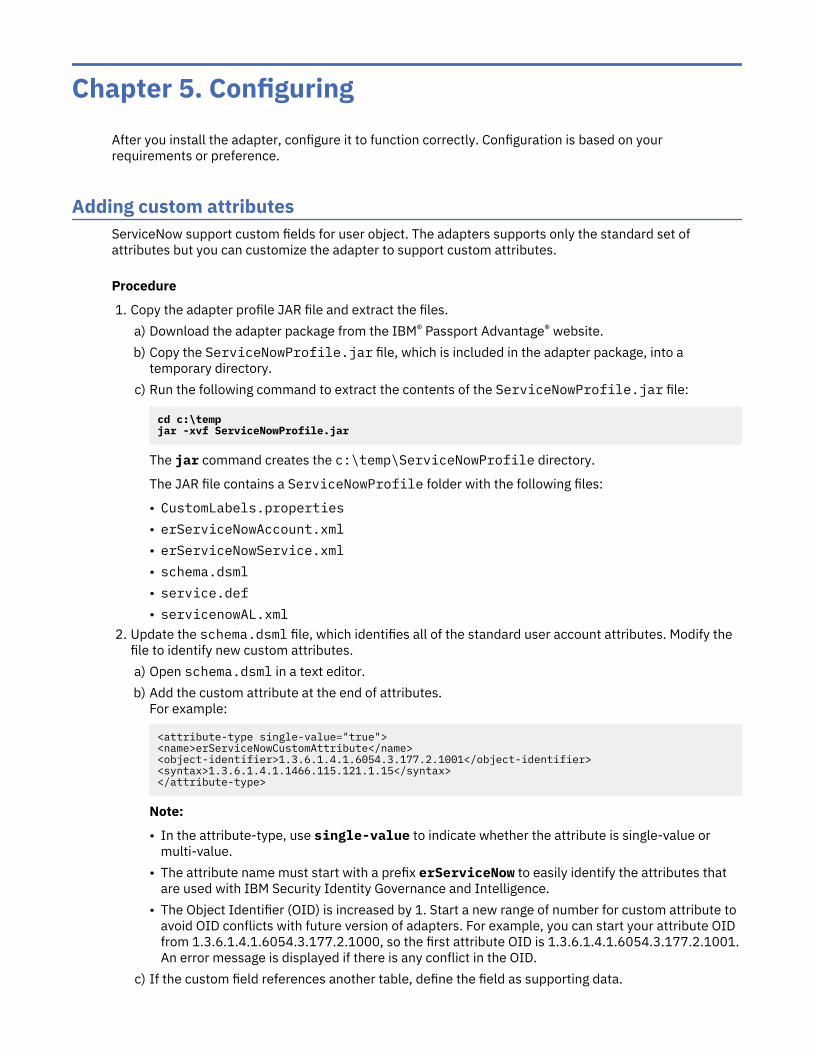
Chapter 5. ConfiguringAfter you install the adapter, configure it to function correctly. Configuration is based on yourrequirements or preference.
Adding custom attributesServiceNow support custom fields for user object. The adapters supports only the standard set ofattributes but you can customize the adapter to support custom attributes.
Procedure
1. Copy the adapter profile JAR file and extract the files.a) Download the adapter package from the IBM® Passport Advantage® website.b) Copy the ServiceNowProfile.jar file, which is included in the adapter package, into a
temporary directory.c) Run the following command to extract the contents of the ServiceNowProfile.jar file:
cd c:\tempjar -xvf ServiceNowProfile.jar
The jar command creates the c:\temp\ServiceNowProfile directory.
The JAR file contains a ServiceNowProfile folder with the following files:
• CustomLabels.properties• erServiceNowAccount.xml• erServiceNowService.xml• schema.dsml• service.def• servicenowAL.xml
2. Update the schema.dsml file, which identifies all of the standard user account attributes. Modify thefile to identify new custom attributes.a) Open schema.dsml in a text editor.b) Add the custom attribute at the end of attributes.
For example:
<attribute-type single-value="true"><name>erServiceNowCustomAttribute</name><object-identifier>1.3.6.1.4.1.6054.3.177.2.1001</object-identifier><syntax>1.3.6.1.4.1.1466.115.121.1.15</syntax></attribute-type>
Note:
• In the attribute-type, use single-value to indicate whether the attribute is single-value ormulti-value.
• The attribute name must start with a prefix erServiceNow to easily identify the attributes thatare used with IBM Security Identity Governance and Intelligence.
• The Object Identifier (OID) is increased by 1. Start a new range of number for custom attribute toavoid OID conflicts with future version of adapters. For example, you can start your attribute OIDfrom 1.3.6.1.4.1.6054.3.177.2.1000, so the first attribute OID is 1.3.6.1.4.1.6054.3.177.2.1001.An error message is displayed if there is any conflict in the OID.
c) If the custom field references another table, define the field as supporting data.
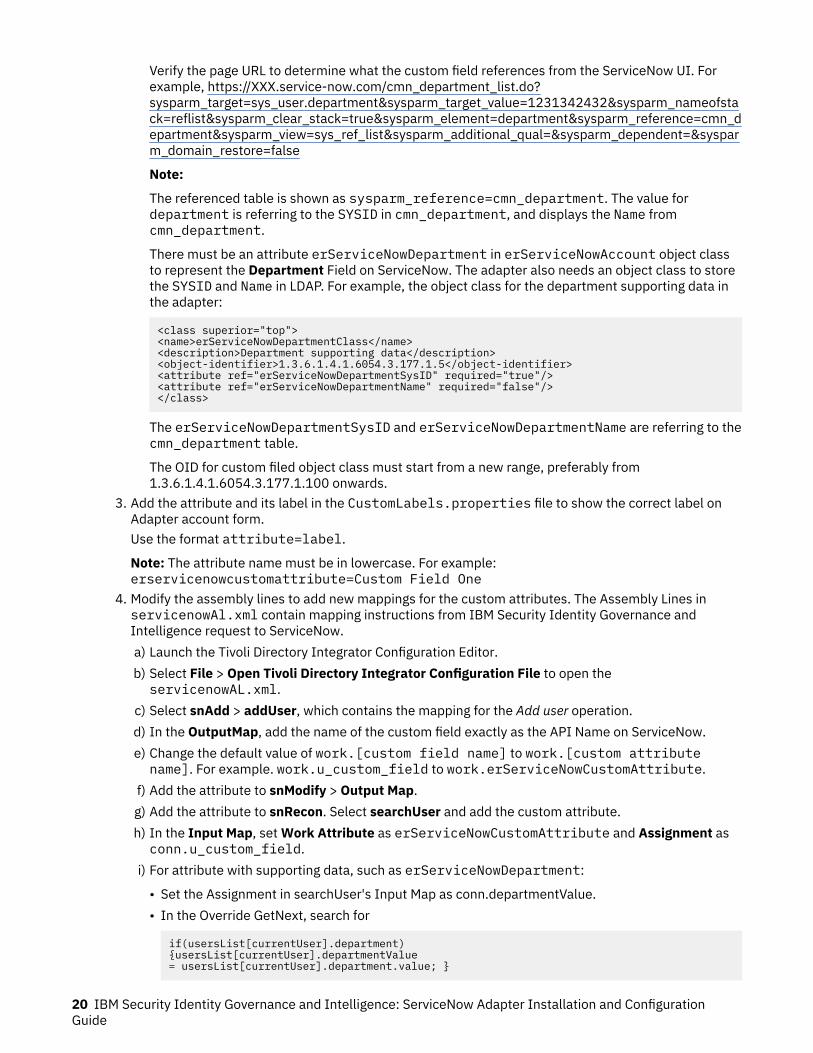
Verify the page URL to determine what the custom field references from the ServiceNow UI. Forexample, https://XXX.service-now.com/cmn_department_list.do?sysparm_target=sys_user.department&sysparm_target_value=1231342432&sysparm_nameofstack=reflist&sysparm_clear_stack=true&sysparm_element=department&sysparm_reference=cmn_department&sysparm_view=sys_ref_list&sysparm_additional_qual=&sysparm_dependent=&sysparm_domain_restore=false
Note:
The referenced table is shown as sysparm_reference=cmn_department. The value fordepartment is referring to the SYSID in cmn_department, and displays the Name fromcmn_department.
There must be an attribute erServiceNowDepartment in erServiceNowAccount object classto represent the Department Field on ServiceNow. The adapter also needs an object class to storethe SYSID and Name in LDAP. For example, the object class for the department supporting data inthe adapter:
<class superior="top"><name>erServiceNowDepartmentClass</name><description>Department supporting data</description><object-identifier>1.3.6.1.4.1.6054.3.177.1.5</object-identifier><attribute ref="erServiceNowDepartmentSysID" required="true"/><attribute ref="erServiceNowDepartmentName" required="false"/></class>
The erServiceNowDepartmentSysID and erServiceNowDepartmentName are referring to thecmn_department table.
The OID for custom filed object class must start from a new range, preferably from1.3.6.1.4.1.6054.3.177.1.100 onwards.
3. Add the attribute and its label in the CustomLabels.properties file to show the correct label onAdapter account form.Use the format attribute=label.
Note: The attribute name must be in lowercase. For example:erservicenowcustomattribute=Custom Field One
4. Modify the assembly lines to add new mappings for the custom attributes. The Assembly Lines inservicenowAl.xml contain mapping instructions from IBM Security Identity Governance andIntelligence request to ServiceNow.a) Launch the Tivoli Directory Integrator Configuration Editor.b) Select File > Open Tivoli Directory Integrator Configuration File to open theservicenowAL.xml.
c) Select snAdd > addUser, which contains the mapping for the Add user operation.d) In the OutputMap, add the name of the custom field exactly as the API Name on ServiceNow.e) Change the default value of work.[custom field name] to work.[custom attributename]. For example. work.u_custom_field to work.erServiceNowCustomAttribute.
f) Add the attribute to snModify > Output Map.g) Add the attribute to snRecon. Select searchUser and add the custom attribute.h) In the Input Map, set Work Attribute as erServiceNowCustomAttribute and Assignment asconn.u_custom_field.
i) For attribute with supporting data, such as erServiceNowDepartment:
• Set the Assignment in searchUser's Input Map as conn.departmentValue.• In the Override GetNext, search for
if(usersList[currentUser].department){usersList[currentUser].departmentValue = usersList[currentUser].department.value; }
20 IBM Security Identity Governance and Intelligence: ServiceNow Adapter Installation and ConfigurationGuide
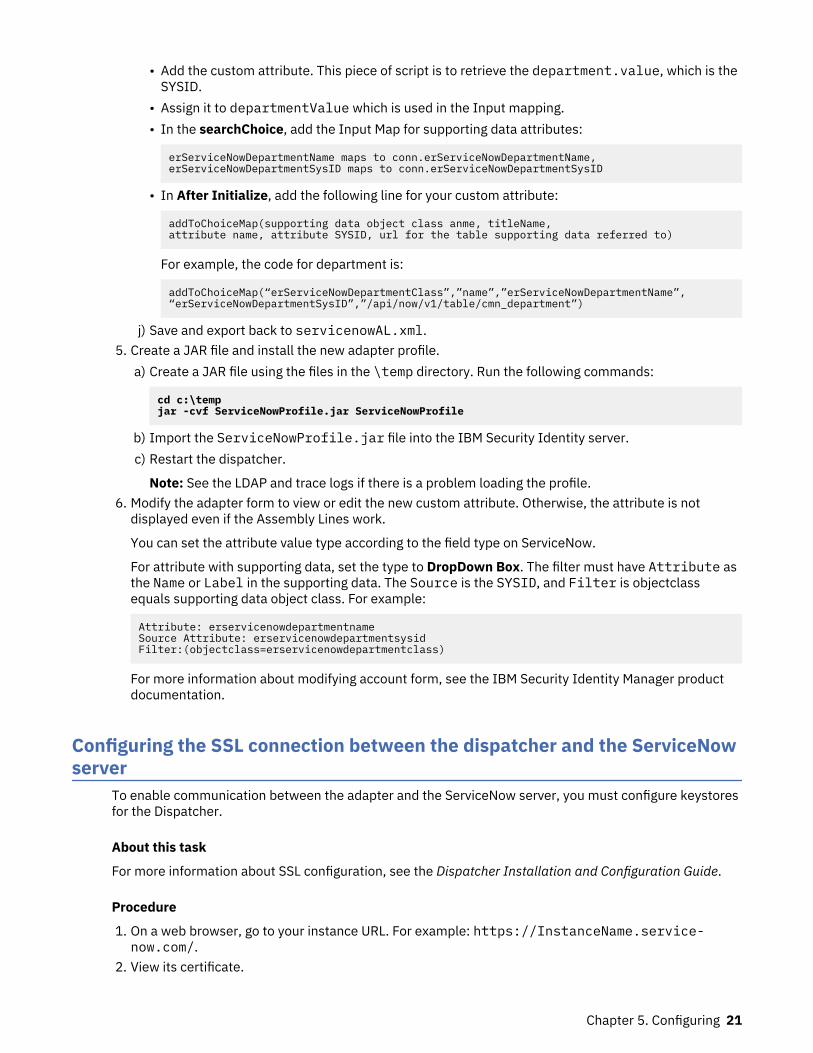
• Add the custom attribute. This piece of script is to retrieve the department.value, which is theSYSID.
• Assign it to departmentValue which is used in the Input mapping.• In the searchChoice, add the Input Map for supporting data attributes:
erServiceNowDepartmentName maps to conn.erServiceNowDepartmentName, erServiceNowDepartmentSysID maps to conn.erServiceNowDepartmentSysID
• In After Initialize, add the following line for your custom attribute:
addToChoiceMap(supporting data object class anme, titleName, attribute name, attribute SYSID, url for the table supporting data referred to)
For example, the code for department is:
addToChoiceMap(“erServiceNowDepartmentClass”,”name”,”erServiceNowDepartmentName”,“erServiceNowDepartmentSysID”,”/api/now/v1/table/cmn_department”)
j) Save and export back to servicenowAL.xml.5. Create a JAR file and install the new adapter profile.
a) Create a JAR file using the files in the \temp directory. Run the following commands:
cd c:\tempjar -cvf ServiceNowProfile.jar ServiceNowProfile
b) Import the ServiceNowProfile.jar file into the IBM Security Identity server.c) Restart the dispatcher.
Note: See the LDAP and trace logs if there is a problem loading the profile.6. Modify the adapter form to view or edit the new custom attribute. Otherwise, the attribute is not
displayed even if the Assembly Lines work.
You can set the attribute value type according to the field type on ServiceNow.
For attribute with supporting data, set the type to DropDown Box. The filter must have Attribute asthe Name or Label in the supporting data. The Source is the SYSID, and Filter is objectclassequals supporting data object class. For example:
Attribute: erservicenowdepartmentnameSource Attribute: erservicenowdepartmentsysidFilter:(objectclass=erservicenowdepartmentclass)
For more information about modifying account form, see the IBM Security Identity Manager productdocumentation.
Configuring the SSL connection between the dispatcher and the ServiceNowserver
To enable communication between the adapter and the ServiceNow server, you must configure keystoresfor the Dispatcher.
About this task
For more information about SSL configuration, see the Dispatcher Installation and Configuration Guide.
Procedure
1. On a web browser, go to your instance URL. For example: https://InstanceName.service-now.com/.
2. View its certificate.
Chapter 5. Configuring 21
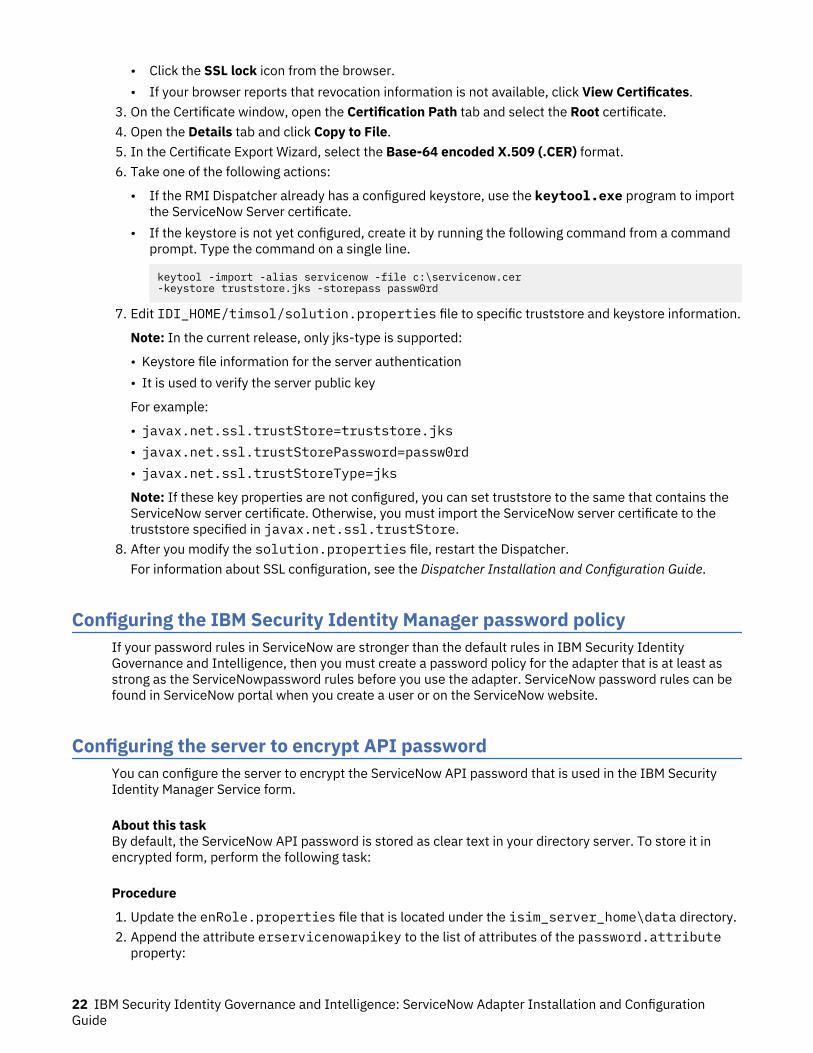
• Click the SSL lock icon from the browser.• If your browser reports that revocation information is not available, click View Certificates.
3. On the Certificate window, open the Certification Path tab and select the Root certificate.4. Open the Details tab and click Copy to File.5. In the Certificate Export Wizard, select the Base-64 encoded X.509 (.CER) format.6. Take one of the following actions:
• If the RMI Dispatcher already has a configured keystore, use the keytool.exe program to importthe ServiceNow Server certificate.
• If the keystore is not yet configured, create it by running the following command from a commandprompt. Type the command on a single line.
keytool -import -alias servicenow -file c:\servicenow.cer-keystore truststore.jks -storepass passw0rd
7. Edit IDI_HOME/timsol/solution.properties file to specific truststore and keystore information.
Note: In the current release, only jks-type is supported:
• Keystore file information for the server authentication• It is used to verify the server public key
For example:
• javax.net.ssl.trustStore=truststore.jks• javax.net.ssl.trustStorePassword=passw0rd• javax.net.ssl.trustStoreType=jks
Note: If these key properties are not configured, you can set truststore to the same that contains theServiceNow server certificate. Otherwise, you must import the ServiceNow server certificate to thetruststore specified in javax.net.ssl.trustStore.
8. After you modify the solution.properties file, restart the Dispatcher.For information about SSL configuration, see the Dispatcher Installation and Configuration Guide.
Configuring the IBM Security Identity Manager password policyIf your password rules in ServiceNow are stronger than the default rules in IBM Security IdentityGovernance and Intelligence, then you must create a password policy for the adapter that is at least asstrong as the ServiceNowpassword rules before you use the adapter. ServiceNow password rules can befound in ServiceNow portal when you create a user or on the ServiceNow website.
Configuring the server to encrypt API passwordYou can configure the server to encrypt the ServiceNow API password that is used in the IBM SecurityIdentity Manager Service form.
About this taskBy default, the ServiceNow API password is stored as clear text in your directory server. To store it inencrypted form, perform the following task:
Procedure
1. Update the enRole.properties file that is located under the isim_server_home\data directory.2. Append the attribute erservicenowapikey to the list of attributes of the password.attribute
property:
22 IBM Security Identity Governance and Intelligence: ServiceNow Adapter Installation and ConfigurationGuide

password.attributes=ersynchpassword erServicePassword erServicePwd1 erServicePwd2 erServicePwd3 erServicePwd4 erADDomainPassword erPersonPassword erNotesPasswdAddCert eritamcred erep6umds erposixpassphrase erservicenowapikey
Chapter 5. Configuring 23

24 IBM Security Identity Governance and Intelligence: ServiceNow Adapter Installation and ConfigurationGuide
Chapter 6. TroubleshootingTroubleshooting is a systematic approach to solving a problem. The goal of troubleshooting is todetermine why something does not work as expected and how to resolve the problem. This topic providesinformation and techniques for identifying and resolving problems that are related to the adapter,including troubleshooting errors that might occur during the adapter installation.
Techniques for troubleshooting problemsCertain common techniques can help with the task of troubleshooting. The first step in thetroubleshooting process is to describe the problem completely.
Problem descriptions help you and the IBM technical-support representative find the cause of theproblem. This step includes asking yourself basic questions:
• What are the symptoms of the problem?• Where does the problem occur?• When does the problem occur?• Under which conditions does the problem occur?• Can the problem be reproduced?
The answers to these questions typically lead to a good description of the problem, which can then leadyou to a problem resolution.
What are the symptoms of the problem?
When you start to describe a problem, the most obvious question is "What is the problem?" This questionmight seem straightforward; however, you can break it down into several more-focused questions thatcreate a more descriptive picture of the problem. These questions can include:
• Who, or what, is reporting the problem?• What are the error codes and messages?• How does the system fail? For example, is it a loop, hang, crash, performance degradation, or incorrect
result?
Where does the problem occur?
Determining where the problem originates is not always easy, but it is one of the most important steps inresolving a problem. Many layers of technology can exist between the reporting and failing components.Networks, disks, and drivers are only a few of the components to consider when you are investigatingproblems.
The following questions help you to focus on where the problem occurs to isolate the problem layer:
• Is the problem specific to one operating system, or is it common across multiple operating systems?• Is the current environment and configuration supported?• Do all users have the problem?• (For multi-site installations.) Do all sites have the problem?
If one layer reports the problem, the problem does not necessarily originate in that layer. Part ofidentifying where a problem originates is understanding the environment in which it exists. Take sometime to completely describe the problem environment, including the operating system and version, allcorresponding software and versions, and hardware information. Confirm that you are running within anenvironment that is a supported configuration. Many problems can be traced back to incompatible levelsof software that are not intended to run together or are not fully tested together.
When does the problem occur?
Develop a detailed timeline of events that lead up to a failure, especially for those cases that are one-timeoccurrences. You can most easily develop a timeline by working backward: Start at the time an error wasreported (as precisely as possible, even down to the millisecond), and work backward through theavailable logs and information. Typically, you use the first suspicious event that you find in a diagnosticlog.
To develop a detailed timeline of events, answer these questions:
• Does the problem happen only at a certain time of day or night?• How often does the problem happen?• What sequence of events leads up to the time that the problem is reported?• Does the problem happen after an environment change, such as upgrading or installing software or
hardware?
Responding to these types of questions can give you a frame of reference in which to investigate theproblem.
Under which conditions does the problem occur?
Knowing which systems and applications are running at the time that a problem occurs is an importantpart of troubleshooting. These questions about your environment can help you to identify the root causeof the problem:
• Does the problem always occur when the same task is being done?• Is a certain sequence of events required for the problem to occur?• Do any other applications fail at the same time?
Answering these types of questions can help you explain the environment in which the problem occursand correlate any dependencies. Remember that just because multiple problems might occur around thesame time, the problems are not necessarily related.
Can the problem be reproduced?
From a troubleshooting standpoint, the ideal problem is one that can be reproduced. Typically, when aproblem can be reproduced you have a larger set of tools or procedures at your disposal to help youinvestigate. Problems that you can reproduce are often easier to debug and solve.
However, problems that you can reproduce can have a disadvantage: If the problem is of significantbusiness impact, you do not want it to recur. If possible, re-create the problem in a test or developmentenvironment, which typically offers you more flexibility and control during your investigation.
• Can the problem be re-created on a test system?• Do multiple users or applications have the same type of problem?• Can the problem be re-created by running a single command, a set of commands, or a particular
application?
Related conceptsError messages and problem solvingYou might encounter some problems at run time. Use this information to resolve some of these commonruntime problems.
Error messages and problem solvingYou might encounter some problems at run time. Use this information to resolve some of these commonruntime problems.
Runtime problems and corrective actions are described in the following table.
26 IBM Security Identity Governance and Intelligence: ServiceNow Adapter Installation and ConfigurationGuide
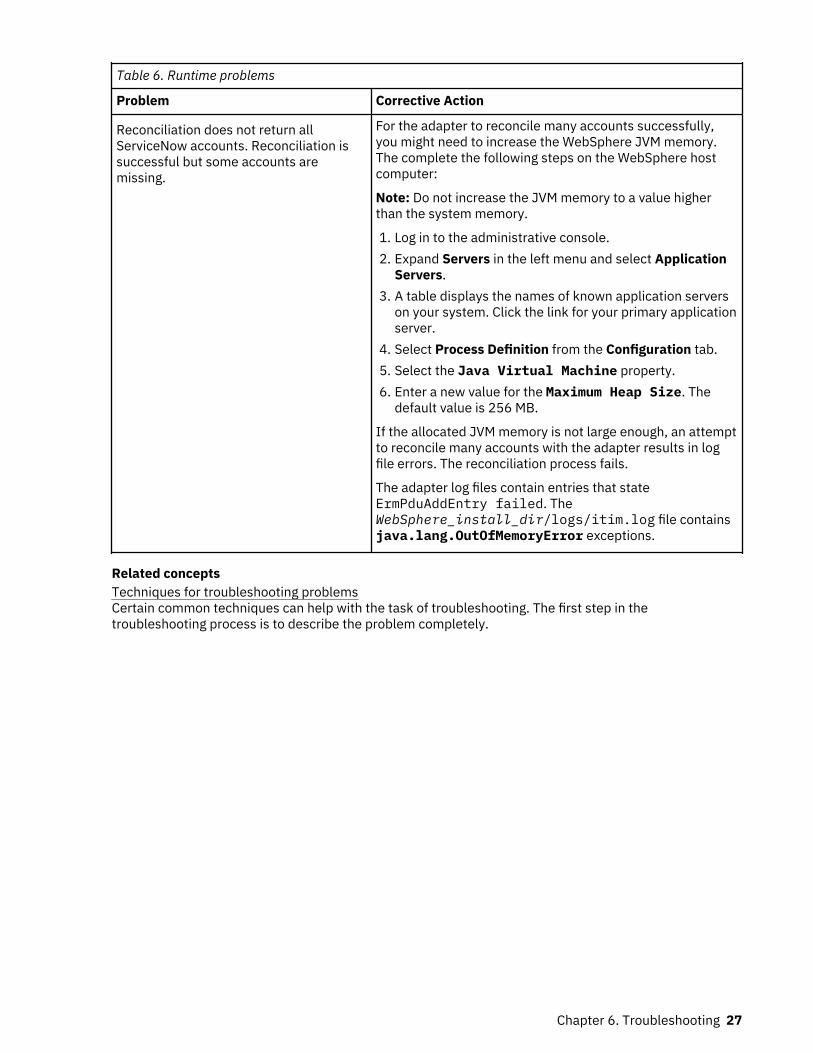
Table 6. Runtime problems
Problem Corrective Action
Reconciliation does not return allServiceNow accounts. Reconciliation issuccessful but some accounts aremissing.
For the adapter to reconcile many accounts successfully,you might need to increase the WebSphere JVM memory.The complete the following steps on the WebSphere hostcomputer:
Note: Do not increase the JVM memory to a value higherthan the system memory.
1. Log in to the administrative console.2. Expand Servers in the left menu and select Application
Servers.3. A table displays the names of known application servers
on your system. Click the link for your primary applicationserver.
4. Select Process Definition from the Configuration tab.5. Select the Java Virtual Machine property.6. Enter a new value for the Maximum Heap Size. The
default value is 256 MB.
If the allocated JVM memory is not large enough, an attemptto reconcile many accounts with the adapter results in logfile errors. The reconciliation process fails.
The adapter log files contain entries that stateErmPduAddEntry failed. TheWebSphere_install_dir/logs/itim.log file containsjava.lang.OutOfMemoryError exceptions.
Related conceptsTechniques for troubleshooting problemsCertain common techniques can help with the task of troubleshooting. The first step in thetroubleshooting process is to describe the problem completely.
Chapter 6. Troubleshooting 27

28 IBM Security Identity Governance and Intelligence: ServiceNow Adapter Installation and ConfigurationGuide
Chapter 7. UninstallingTo remove an adapter from the IBM Security Identity server for any reason, you must remove all thecomponents that were added during installation. Uninstalling an IBM Tivoli Directory Integrator basedadapter mainly involves removing the connector file, and the adapter profile from the IBM SecurityIdentity server. Depending on the adapter, some of these tasks might not be applicable, or there can beother tasks.
Deleting the adapter profileRemove the adapter service/target type from the IBM Security Identity server. Before you delete theadapter profile, ensure that no objects exist on the IBM Security Identity server that reference theadapter profile.
Objects on the IBM Security Identity server that can reference the adapter profile:
• Adapter service instances• Policies referencing an adapter instance or the profile• Accounts
Note: The Dispatcher component must be installed on your system for adapters to function correctly in aTivoli Directory Integrator environment. When you delete the adapter profile, do not uninstall theDispatcher.
For specific information about how to delete the adapter profile, see the IBM Security IdentityGovernance and Intelligence product documentation.

30 IBM Security Identity Governance and Intelligence: ServiceNow Adapter Installation and ConfigurationGuide
Chapter 8. ReferenceReference information is organized to help you locate particular facts quickly, such as adapter attributes,registry settings, and environment variables.
Adapter attributes and object classesAdapter attributes and object classes are required for customization, creating provisioning rules, andunderstanding what service/target attributes are supported by the adapter. The IBM Security Identityserver communicates with the adapter by using attributes, which are included in transmission packetsthat are sent over a network.
User attributes
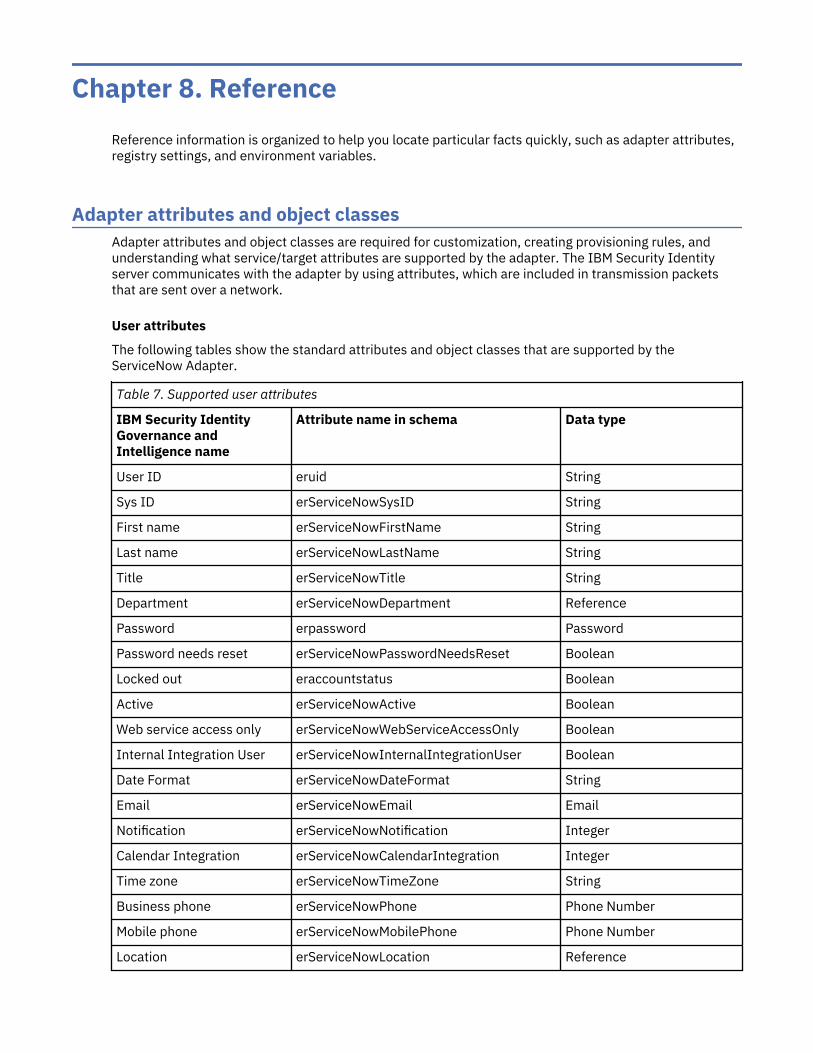
The following tables show the standard attributes and object classes that are supported by theServiceNow Adapter.
Table 7. Supported user attributes
IBM Security IdentityGovernance andIntelligence name
Attribute name in schema Data type
User ID eruid String
Sys ID erServiceNowSysID String
First name erServiceNowFirstName String
Last name erServiceNowLastName String
Title erServiceNowTitle String
Department erServiceNowDepartment Reference
Password erpassword Password
Password needs reset erServiceNowPasswordNeedsReset Boolean
Locked out eraccountstatus Boolean
Active erServiceNowActive Boolean
Web service access only erServiceNowWebServiceAccessOnly Boolean
Internal Integration User erServiceNowInternalIntegrationUser Boolean
Date Format erServiceNowDateFormat String
Email erServiceNowEmail Email
Notification erServiceNowNotification Integer
Calendar Integration erServiceNowCalendarIntegration Integer
Time zone erServiceNowTimeZone String
Business phone erServiceNowPhone Phone Number
Mobile phone erServiceNowMobilePhone Phone Number
Location erServiceNowLocation Reference

Object classes
Table 8. Supported object classes
Description Object class name in schema
Service class erServiceNowService
Account class erServiceNowAccount
Group class erServiceNowGroupAccount
Title class erServiceNowTitleClass
Department class erServiceNowDepartmentClass
Time Zone class erServiceNowTimeZoneClass
Location class erServiceNowLocationClass
Adapter Configuration PropertiesFor information about setting Tivoli Directory Integrator configuration properties for the operation of theServiceNow Adapter, see the Dispatcher Installation and Configuration Guide.
32 IBM Security Identity Governance and Intelligence: ServiceNow Adapter Installation and ConfigurationGuide

Index
Aadapter
features 1installation
troubleshooting errors 25warnings 25worksheet 6
overview 1uninstall 29
adapter installation 9adapters
removing profiles 29architecture 1attributes
group 31user 31
automation of administrative tasks 1
Ccomponents 2configuration
properties 31
Ddispatcher
architecture 1installation 9
download, software 5
Ggroup attributes 31
Iinstallation
adapter 9, 19planning roadmaps 3uninstall 29worksheet 6
Oobject classes 31operating system prerequisites 4overview, adapter 1
Rremoving
adapter profiles 29roadmaps
planning 3
Sservice
restart 9start 9stop 9
softwaredownload 5requirements 4website 5
supported configurations 2
Ttask automation 1tivoli directory integrator connector 1troubleshooting
identifying problems 25runtime problems 26techniques for 25
troubleshooting and supporttroubleshooting techniques 25
Uuser attributes 31
Vverification
dispatcher installation 9operating system
prerequisites 4requirements 4
softwareprerequisites 4requirements 4
Index 33

34 IBM Security Identity Governance and Intelligence: ServiceNow Adapter Installation and ConfigurationGuide


IBM®
![Identity: n v identity (-ies p) [identity]](https://static.fdocuments.us/doc/165x107/61c6ea26100dbe3ec3259821/identity-n-v-identity-ies-p-identity.jpg)