Intel ICH5R Serial ATA RAID - BioLegend the driver diskette Intel IAA RAID XP Driver For ICH5R...
24
Intel ICH5R Serial ATA RAID Quick User’s Guide
Transcript of Intel ICH5R Serial ATA RAID - BioLegend the driver diskette Intel IAA RAID XP Driver For ICH5R...

Intel ICH5R
Serial ATA RAID
Quick User’s Guide

1
Intel ICH5R Serial ATA RAID Introduction
Quick User’s Guide
Version 1.0G52-M6728X9-K01
Intel ICH5R Serial ATA RAID Introduction
2
EditionApril 2003
Copyright
© 2003 MICRO-STAR INT’L CO., LTD.The material in this document is the intellectual property of MICRO-STARINTERNATIONAL. We take every care in the preparation of this document,but no guarantee is given as to the correctness of its contents. Our productsare under continual improvement and we reserve the right to make changeswithout notice.
Trademarks
All trademarks used in this manual are the property of their respectiveowners.
Important Data Protection InformationYou should back up all data before installing any drive controller or storageperipheral. MSI is not responsible for any loss of data resulting from the use,disuse or misuse of this or any other MSI product.
Revision HistoryRevision Revision History Date1.0 First release April 2003
CONTENTS
Instructions .................................................................................................... 5BIOS Configuration ........................................................................................ 6Installing Software ....................................................................................... 14RAID Migration Instruction ........................................................................ 20
3
Intel ICH5R Serial ATA RAID Introduction
Appendix. Using 4- or 6-ChannelAudio FunctionI n t e l I C H 5 R S e r i a l ATA R A I DIntroduction
The southbridge ICH5R provides a hybrid solution that combines twoindependent SATA portsfor support of up to two Serial ATA (Serial ATARAID) drives.
Serial ATA (SATA) is the latest generation of the ATA interface. SATAhard drives deliver blistering transfer speeds of up to 150MB/sec. Serial ATAuses long, thin cables, making it easier to connect your drive and improvingthe airflow inside your PC.
1. Supports 150 MB/s transfers with CRC error checking2. Data handling optimizations including tagged command queuing,
elevator seek and packet chain command

Intel ICH5R Serial ATA RAID Introduction
4
IntroductionFollowing are the Parallel ATA (P-ATA) and Serial ATA (S-ATA) device
configurations supported by Intel ICH5R.
ATA Operate Mode
There are two modes to select: Legacy mode and Native mode.Legacy Mode:
--- In this mode, system BIOS just assign the traditional 14 and 15 IRQs to use for HDD.--- Older OSs that do not support switch to Native Mode (DOS, Win2K, Win98/ME...) should set SATA and PATA to Legacy Mode.--- Maximum 4 ATA devices to connect.--- Combine mode and Non-Combine mode.
! Non-Combined Mode: P-ATA devices only . Maximum of 4 devices.
! Non-Combined Mode: S-ATA devices only. Maximum of 2 devices.
! Combined Mode: S-ATA devices P-ATA devices Maximum of 2 devices each, thus total 4 devices at maximum.
Native Mode:--- In this mode, system BIOS will search all available IRQs to use for HDD.--- New OS that support switch to Native Mode (WinXP, Windows .NET Server) can set SATA and PATA to Native Mode.--- Comprehend both Legacy and/or Native Modes.--- Maximum 6 ATA deivces to connect (4 for P-ATA & 2 for S-ATA).
MSI Reminds You...Proper support: BIOS provides a BIOS setup option for NativeMode or Legacy Mode user selection.

5
Intel ICH5R Serial ATA RAID Introduction
BIOS ConfigurationThe Intel RAID Option ROM should be integrated with the system
BIOS on all motherboards with a supported Intel chipset. Please use <Ctrl> +<I> keys to enter the “Intel(R) RAID for Serial ATA” status screen, whichshould appear early in system boot-up, during the POST (Power-On Self Test).
Using the Intel RAID Option ROM
1. Creating, Deleting and Resetting RAID Volumes:The Serial ATA RAID volume may be configured using the RAID
Configuration utility stored within the Intel RAID Option ROM. During thePower-On Self Test (POST), the following message will appear for a few seconds:
MSI Reminds You...The “Driver Model”, “Serial #” and “Size” in the followingexample might be different from your system.
After the above message shows, press <Ctrl> and <I> keyssimultaneously to enter the RAID Configuration Utility.

Intel ICH5R Serial ATA RAID Introduction
6
2. Creating, Deleting and Resetting RAID Volumes:After pressing the <Ctrl> and <I> keys simultaneously, the follwing
window will appear:
(1) Create RAID VolumeSelect this option and press <Enter>. The followin screen appears:
MSI Reminds You...The following procedure is only available with a newly-builtsystem or if you are reinstalling your OS. It should not be used tomigrate an existing system to RAID 0.

7
Intel ICH5R Serial ATA RAID Introduction
Specify a RAID Volume name and then press the <TAB> or <Enter>key togo to the next field.
Select the strip value for the RAID 0 array by scrolling through the availablevalues by using the “upper arrow” or “down arrow” keys and pressing the<Enter> key to select and advance to the next field. The available values range from 4KB to 128 KB in power of 2 increments.The strip value should be chosen based on the planned drive usage. Here aresome suggested selections:
16 KB – Best for sequential transfers64 KB – Good general purpose strip size128 KB – Best performance for most desktops and workstations. The
default value.

Intel ICH5R Serial ATA RAID Introduction
8
Then Press <Enter> to create the specified volume and the following promptwill show:
Press <Y> to confirm the selection or press <N> to create the RAID volumeagain.
From the Strip size, press the <Tab> or <ENTER> key to advance to theCreate Volume prompt. The window will appear as follows:

9
Intel ICH5R Serial ATA RAID Introduction
Then you will return to the main menu with an updated status as follows:
Scroll to option 4 Exit and press <Enter> to exit the RAID Configurationutility. The following prompt appears:
Click <Y> to confirm the exit.

Intel ICH5R Serial ATA RAID Introduction
10
(2) Delete RAID VolumeHere you can delete the RAID volume, but please be noted that all data on
RAID drives will be lost.
Select option 2 Delete RAID Volume from the main menu window and press<Enter> key to select a RAID volume for deletion. The following window willappear:
MSI Reminds You...If your system currently boots to RAID and you delete the RAIDvolume in the Intel RAID Option ROM, your system will becomeunbootable.

11
Intel ICH5R Serial ATA RAID Introduction
Select the volume and press <Delete> key to delete the RAID volume. Thefollowing prompt appears:
Press <Y> key to accept the volume deletion.

Intel ICH5R Serial ATA RAID Introduction
12
(3) Reset Disks to Non-RAIDSelect option 3 Reset Disks to Non-RAID and press <Enter> to delete the
RAID volume and remove any RAID structures from the drives. The followingscreen appears:
Press <Y> key to accept the selection.
MSI Reminds You...1. You will lost all data on the RAID drives and any internal RAIDstructures when you perform this operation.2. This operation may cause some issues such as imcompatibleRAID configuration or a failed volume or failed disk.
13
Intel ICH5R Serial ATA RAID Introduction
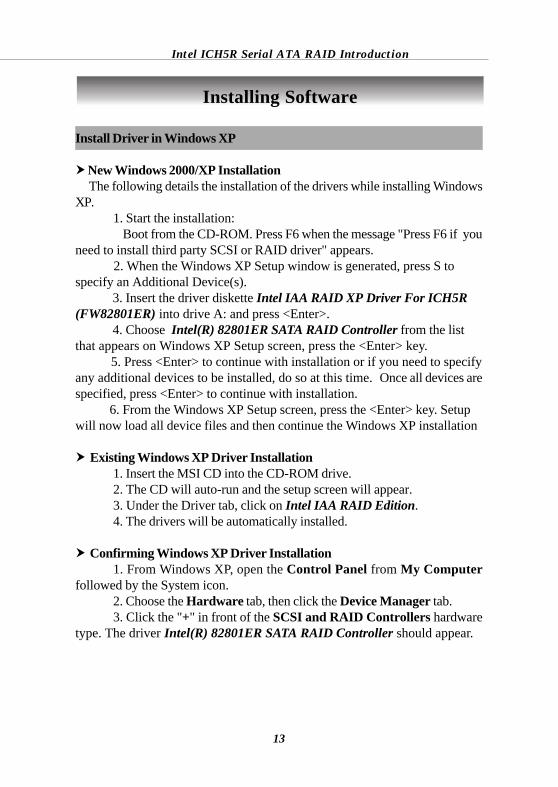
Install Driver in Windows XP
! New Windows 2000/XP Installation The following details the installation of the drivers while installing WindowsXP.
1. Start the installation: Boot from the CD-ROM. Press F6 when the message "Press F6 if youneed to install third party SCSI or RAID driver" appears. 2. When the Windows XP Setup window is generated, press S tospecify an Additional Device(s). 3. Insert the driver diskette Intel IAA RAID XP Driver For ICH5R(FW82801ER) into drive A: and press <Enter>. 4. Choose Intel(R) 82801ER SATA RAID Controller from the listthat appears on Windows XP Setup screen, press the <Enter> key. 5. Press <Enter> to continue with installation or if you need to specifyany additional devices to be installed, do so at this time. Once all devices arespecified, press <Enter> to continue with installation. 6. From the Windows XP Setup screen, press the <Enter> key. Setupwill now load all device files and then continue the Windows XP installation
! Existing Windows XP Driver Installation1. Insert the MSI CD into the CD-ROM drive.2. The CD will auto-run and the setup screen will appear.3. Under the Driver tab, click on Intel IAA RAID Edition.4. The drivers will be automatically installed.
! Confirming Windows XP Driver Installation1. From Windows XP, open the Control Panel from My Computer
followed by the System icon.2. Choose the Hardware tab, then click the Device Manager tab.3. Click the "+" in front of the SCSI and RAID Controllers hardware
type. The driver Intel(R) 82801ER SATA RAID Controller should appear.
Installing Software
Intel ICH5R Serial ATA RAID Introduction
14
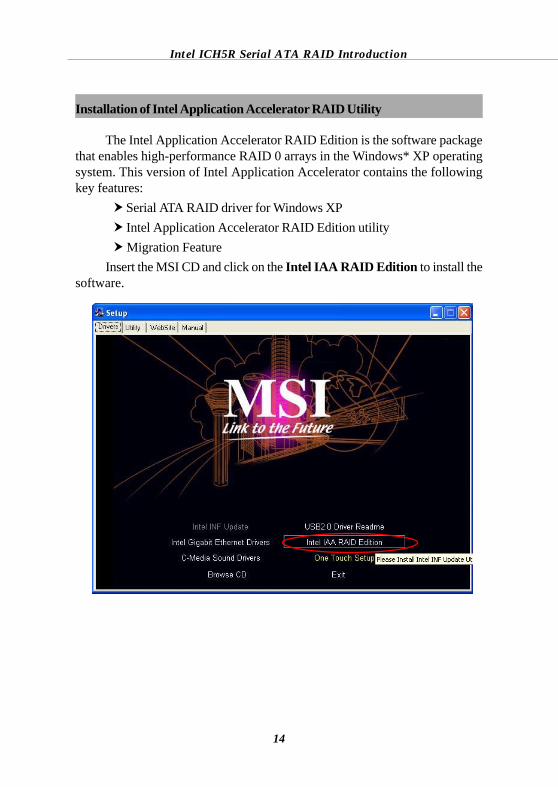
Installation of Intel Application Accelerator RAID Utility
The Intel Application Accelerator RAID Edition is the software packagethat enables high-performance RAID 0 arrays in the Windows* XP operatingsystem. This version of Intel Application Accelerator contains the followingkey features:
! Serial ATA RAID driver for Windows XP! Intel Application Accelerator RAID Edition utility! Migration Feature
Insert the MSI CD and click on the Intel IAA RAID Edition to install thesoftware.

15
Intel ICH5R Serial ATA RAID Introduction
The InstallShield Wizard will begin automatically for installation showedas following:
Click on the Next button to proceed the installation in the welcoming window.

Intel ICH5R Serial ATA RAID Introduction
16
After reading the license agreement in the following window, click Yes buttonto continue.
Select the folder in which you want the program to be installed in the followingwindow, and click Next button to start installation.

17
Intel ICH5R Serial ATA RAID Introduction
Select a program folder in the following window where you want Setup toadd the program icon.
The following window appears to show the Intel Application AcceleratorRAID Edition Setup installation status.

Intel ICH5R Serial ATA RAID Introduction
18
Once the installation is complete, the following window appears.

19
Intel ICH5R Serial ATA RAID Introduction
RAID Migration Instructions
The Intel Application Accelerator RAID Edition offers the flexibility toupgrade from a single Serial ATA (SATA) hard drive to a two drive RAID 0configuration when an additional SATA hard drive is added to the system.This process will create a new RAID volume from an existing disk. However,several important steps must be followed at the time the system is firstconfigured in order to take advantage of RAID when upgrading to a secondSATA hard drive:
1. BIOS must be configured for RAID before installing Windows* XP on the single SATA hard drive.2. Install the Intel Application Accelerator RAID driver during Windows Setup.3. Install the Intel Application Accelerator RAID Edition after the operating system is installed.
MSI Reminds You...A Create from Existing Disk operation will delete all existingdata from the added disk and the data cannot be recovered. It iscritical to backup all important data on the added disk beforeproceeding. However, during the migration process, the data onthe source disk is preserved.
After the Intel Application Accelerator RAID Edition has beensuccessfully installed and the system has rebooted, click on the Intel ApplicationAccelerator shortcut link and the following window will appear:

Intel ICH5R Serial ATA RAID Introduction
20
Create RAID Volume from Existing Disk
To create a RAID volume from an existing disk, right-click on RAIDVolume and select Create From Existing Disk to create a new RAID volumeas the screen below. You may also use the RAID drop-down menu and click onCreate Volume from Existing Disk.
(1) Step 1 of 3: Select the source diskFor Step 1, select the source disk that you wish to use and then click Next.
It is very important to note which disk is the source disk (the one containing allof the information to be migrated) and which one is the target disk. On a RAIDReady system, this can be determined by making a note during POST of whichport (e.g. Port 0 or Port 1) the single disk is attached to. You can also use the Intel Application Accelerator RAID Edition utilitybefore the second disk is installed to verify the Port and serial number of thedrive that contains all the data.

21
Intel ICH5R Serial ATA RAID Introduction
(2) Step 2 of 3: Select the RAID Volume Name and Strip SizeIn Step 2, select the RAID volume name and strip size, and click Next:
! RAID Volume Name:A desired RAID volume name needs to be typed in where the ‘RAID_Volume1’text currently appears above. The RAID volume name has a maximum limit of 16characters. The RAID volume name must also be in English alphanumericASCII characters.! Strip Sizes:Select the desired strip size setting. As indicated, the optimal setting is 128KB.Selecting any other option may result in performance degradation. Even though128KB is the recommended setting for most users, you should choose the stripsize value which is best suited to your specific RAID usage model. The mosttypical strip size settings are:
4KB: For specialized usage models requiring 4KB strips8KB: For specialized usage models requiring 8KB strips16KB: Best for sequential transfers32KB: Good for sequential transfers64KB: Good general purpose strip size128KB: Best performance for most desktops and workstations

Intel ICH5R Serial ATA RAID Introduction
22
Before you continue to Step 3 of 3 by clicking Next in Step 2 of 3, read thenext 2 dialog boxes carefully. Please note that once you have selected Migrateon Step 3 of 3, the Intel Application Accelerator RAID Edition will have claimedthe disks to be used in creating a new volume and this operation cannot beundone. It is critical that you backup all important data before selecting Yes tothese dialog boxes:
(2) Step 3 of 3: Confirm the creation of new RAID volumeIn Step 3, confirm the creation of the new RAID volume and then click
Migrate:

23
Intel ICH5R Serial ATA RAID Introduction
Migration Process
The migration process may take up to two hours to complete dependingon the size of the disks being used and the strip size selected. A dialog windowwill appear stating that the migration process may take considerable time tocomplete and you must click Yes in order to start the migration. While you canstill continue using your computer during the migration process, once themigration process starts, it cannot be stopped. If the migration process getsinterrupted and your system is rebooted for any reason, it will pick up themigration process where it left off. You will be provided with an estimatedcompletion time (the remaining time will depend on your system) once themigration process starts as illustrated in the following example:
The following screen appears if the migration process is completedsuccessfully. Then you have to reboot your system to use the full capacity ofthe new volume.