


Integration of Fibaro HC2 and DSC alarm - Incedosjoholmp/Fibaro_Homecenter/... · Per-Olov Sjöholm...
57
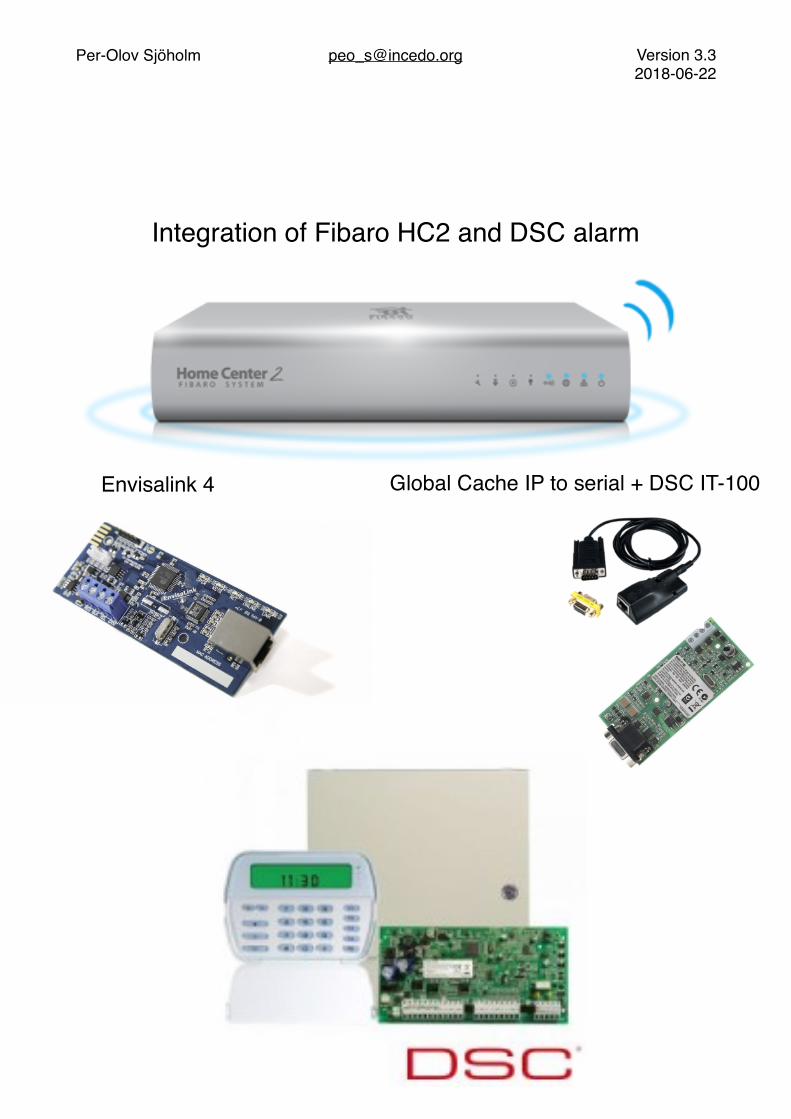
Per-Olov Sjöholm [email protected] Version 3.3 2018-06-22 Integration of Fibaro HC2 and DSC alarm Envisalink 4 Global Cache IP to serial + DSC IT-100
Transcript of Integration of Fibaro HC2 and DSC alarm - Incedosjoholmp/Fibaro_Homecenter/... · Per-Olov Sjöholm...
Per-Olov Sjöholm [email protected] Version 3.32018-06-22
Integration of Fibaro HC2 and DSC alarm
Envisalink 4 Global Cache IP to serial + DSC IT-100
Per-Olov Sjöholm [email protected] Version 3.32018-06-22
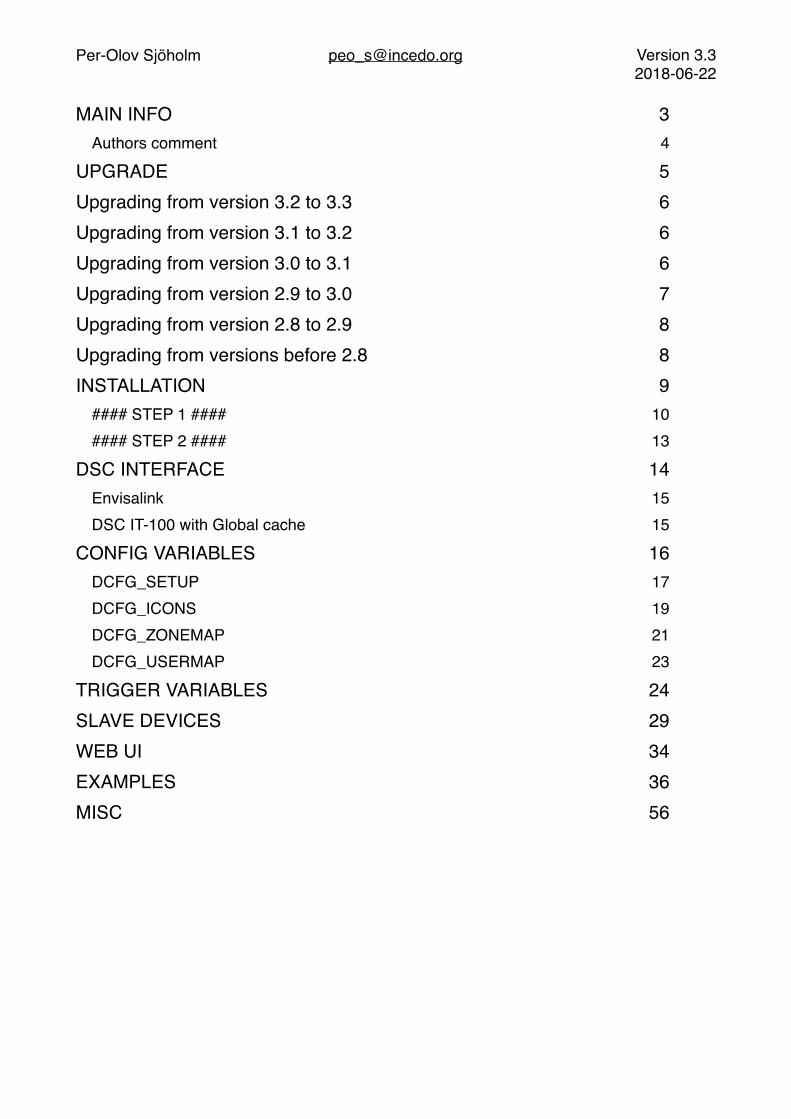
MAIN INFO 3Authors comment 4
UPGRADE 5Upgrading from version 3.2 to 3.3 6Upgrading from version 3.1 to 3.2 6Upgrading from version 3.0 to 3.1 6Upgrading from version 2.9 to 3.0 7Upgrading from version 2.8 to 2.9 8Upgrading from versions before 2.8 8INSTALLATION 9
#### STEP 1 #### 10#### STEP 2 #### 13
DSC INTERFACE 14Envisalink 15DSC IT-100 with Global cache 15
CONFIG VARIABLES 16DCFG_SETUP 17DCFG_ICONS 19DCFG_ZONEMAP 21DCFG_USERMAP 23
TRIGGER VARIABLES 24SLAVE DEVICES 29WEB UI 34EXAMPLES 36MISC 56

Per-Olov Sjöholm [email protected] Version 3.32018-06-22
MAIN INFOThis is a quick guide to integrate your DSC alarm with the Fibaro HC2. This code is written to work against either an EnvisaLink 4 card or by using a DSC IT-100 serial card over a Global cache in the DSC alarm. The code is meant to run in a virtual device main section of a Fibaro HC2.
* It will send received events from your DSC power series alarm on to global variables and VD labels to be used as triggers in scenes. Trigger that exist as of this version is:
- breach/restore of all zones- AC power status in your house- Alarm ARMING status- Partiton is in alarm
* You can also send codes to arm the DSC alarm to the status you wish. AWAY, STAY, ZERO-ENTRY-AWAY, ZERO-ENTRY-STAY* You can DISARM the alarm remotely* You will see what user that armed or disarmed the DSC alarm* It will handle the system even if you have more than one partition* A lot more is logged than what there are scene triggers for* It can send _very_ detailed logs to a syslog server if you set up one.* You can send arbitrary key pad events. See example section
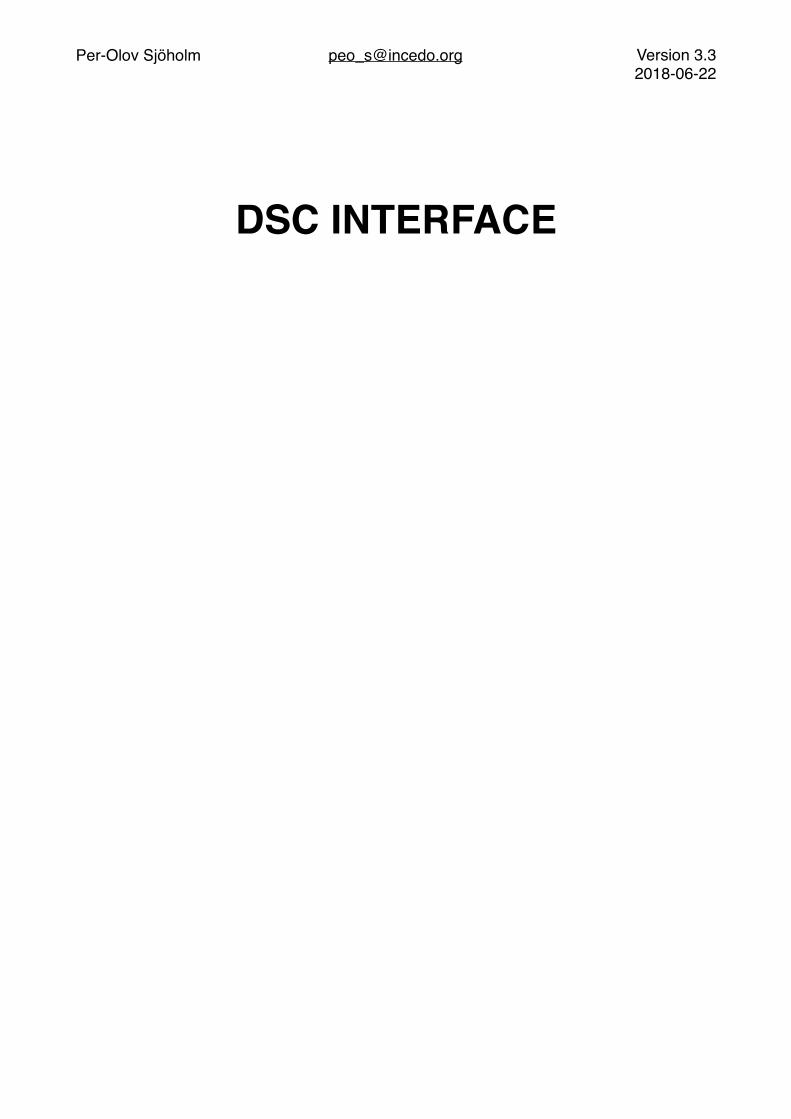
It has 4 auto created sub devices when starting the service:• A presentation device that shows arming status, live zone status as well
as AC power status and more• A Partition1 management device that shows partition status. It also give
the possibility to ARM, DISARM, ARM STAY plus have panic buttons.• A Partition 2 management device that is similar to the Partition 1 device
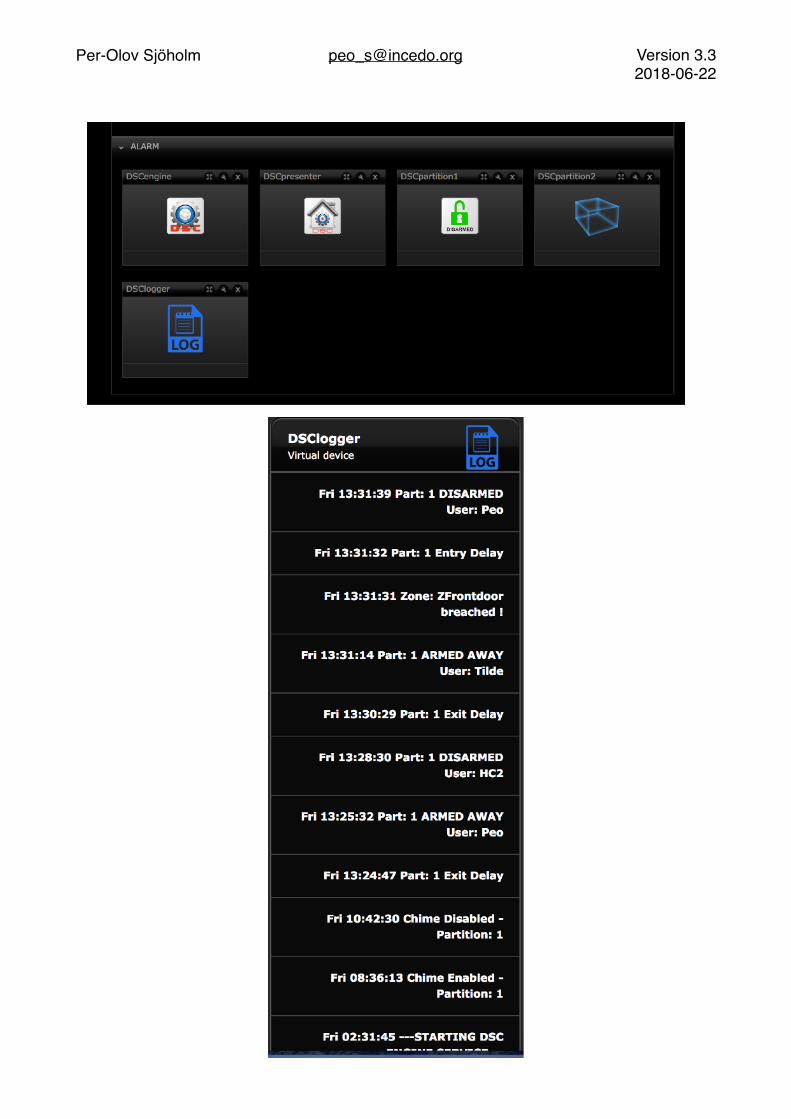
except no panic buttons (these only exists on DSC partition 1).• A log device. Auto created. This show a history log
And much more…
Hope you like it !
Relevant documentation is:http://www.incedo.eu/~sjoholmp/Fibaro_Homecenter/LUA/VDs/HC2_DSCengine/HC2_DSCengine-QuickGuide.pdf
Per-Olov Sjöholm [email protected] Version 3.32018-06-22
http://www.incedo.eu/~sjoholmp/Fibaro_Homecenter/LUA/VDs/HC2_DSCengine/HC2_DSCengine-release_notes.txt
The code home is here: http://www.incedo.eu/~sjoholmp/Fibaro_Homecenter/LUA/VDs/HC2_DSCengine/
The installation is just two easy steps.
Authors commentI started with HC2 dec 2016 and immediately tried the DSC plugin in HC2. It was really bad and had no features. Also I directly saw the one who wrote it did not have knowledge about the difference between zones and partitions. That is not optimal when we are talking about an alarm… I then asked Fibaro how to act to help Fibaro write a better plugin for free. The response was that “right now, it is unfortunately not possible to write plugins for HC2”. So then I used the tools I had to instead write a Virtual Device instead.
I have written this service for myself. But when I wrote some docs for myself I tough I maybe should share this VD…. Therefor it is now also published at Fibaro Marketplace https://marketplace.fibaro.com.
Feel free to drop me an email. I cannot give any guarantee of support. But if I have the time I will help.
Per-Olov Sjöholm [email protected] Version 3.32018-06-22
Upgrading from version 3.2 to 3.3
Exact same procedure as for 3.1 to 3.2 (with delete of DSCpartition1 and DSCpartition2) !
Upgrading from version 3.1 to 3.2
Read the release notes!
Upgrade as for 3.0 to 3.1, except that you between step 1 and 2 have to delete the DSCpartition1 and DSCpartition2 device so they are recreated.
Note:This means these two devices afterwards will have new device IDs in HC2 and need to be re-assigned to users in the access section. Otherwise these will disappear from the Fibaro App. The other devices (DSClogger and DSCpresenter) and all your variables will be fine though….
Upgrading from version 3.0 to 3.1
Read the release notes!
# 1Stop the DSCengine service by delete the code in the VD and click save. Delete the whole DSCengine VD would also be ok.
# 2either…
Per-Olov Sjöholm [email protected] Version 3.32018-06-22
Delete the old DSCengine device and import the new HC2_DSCengine-3.1.vfib
or..
paste the HC2_DSCengine-3.1.lua code in the existing DSCengine VD. If you go for this option, make sure you use an Unicode compliant editor (see note about it further down).
# 3Then go to the DSCengine VD and click “save” to restart it so it will pick up your config again and start up.
DONE!
Upgrading from version 2.9 to 3.0
Read the release notes!
# 1Stop the DSCengine service by delete the code in the VD and click save. Delete the whole DSCengine VD would also be ok.
# 2Write down your data from the DCFG_SETUP variable and then delete it (the other DCFG_* variables can be left).
# 3either… Delete the old DSCengine device and import the new HC2_DSCengine-3.0.vfib
or.. paste the HC2_DSCengine-3.0.lua code in the existing DSCengine VD. If you go for this option, make sure you use an Unicode compliant editor (see note about it further down).

Per-Olov Sjöholm [email protected] Version 3.32018-06-22
# 4Re-modify the DCFG_SETUP variable to your needs again. Then go to the DSCengine VD and click “save” to restart it so it will pick up your new config.
DONE!
Upgrading from version 2.8 to 2.9
EitherDelete the old DSCengine device and import the new HC2_DSCengine-2.9.vfib
Orpaste the HC2_DSCengine-2.9.lua code in the existing DSCengine VD. If you go for this option, make sure you use a an Unicode compliant editor (see note about it further down).
DONE!
Note: All existing settings and variables wont be touched and will continue to work as expected.
Upgrading from versions before 2.8
Delete all variables and the related virtual devices and do a clean installation from scratch
Per-Olov Sjöholm [email protected] Version 3.32018-06-22
#### STEP 1 ####
NOTE! As of DSCengine version 2.6, STEP1a, STEP1b, STEP 2a and STEP 2b can be replaced by instead importing the DSCengine.vfib VD file and going directly to STEP2c (to save a few install steps and to avoid possible editor issues with unicode characters).
Recommended editors if you chose not to import the “.vfib” VD that works cross platform for MAC, Linux and windows are for example: Sublime 3 text and Microsoft Visual Studio Code. Note that the popular Notepad++ does not handle unicode characters. Note that the editor is important even if you just copy-paste the code! I, as a non windows guy, actually recommend the Microsoft editor. It is really great! 😊
a) Create a new virtual device in HC2 and name it “DSCengine".
b)Add one label to/in the “DSCengine” device and set both the "label" and "id" of it to INPUTCODE.
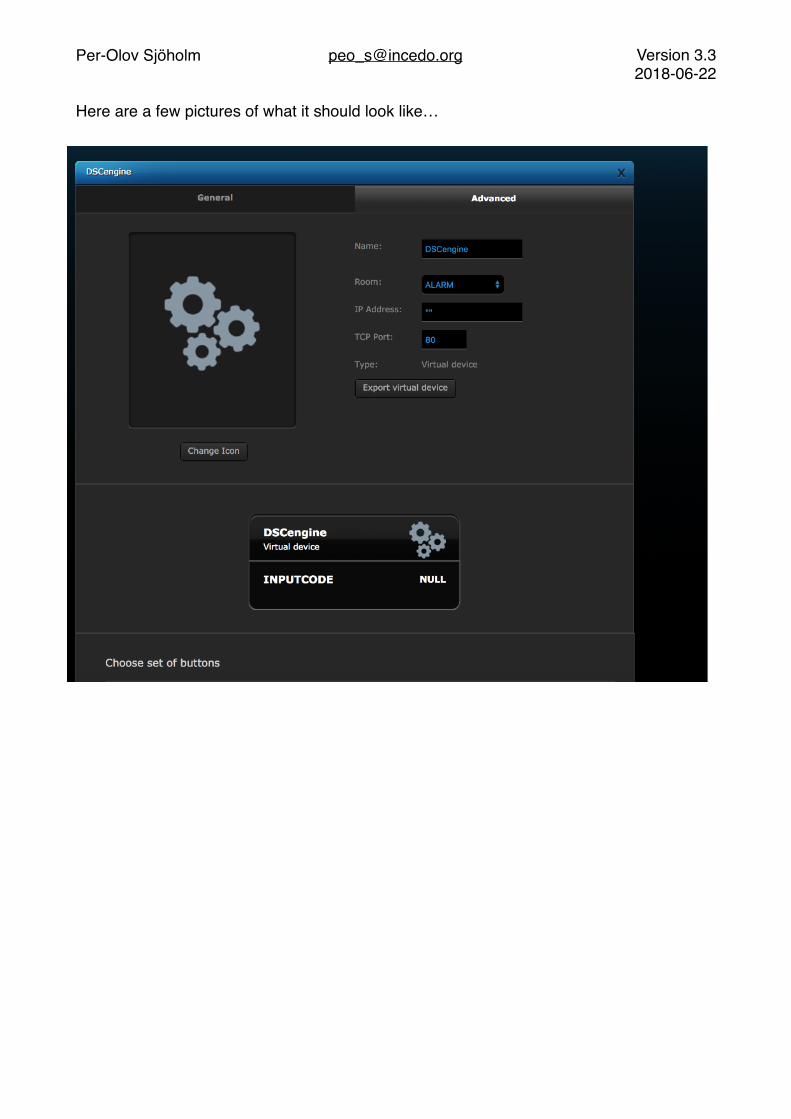
Per-Olov Sjöholm [email protected] Version 3.32018-06-22
Here are a few pictures of what it should look like…
Per-Olov Sjöholm [email protected] Version 3.32018-06-22
#### STEP 2 ####
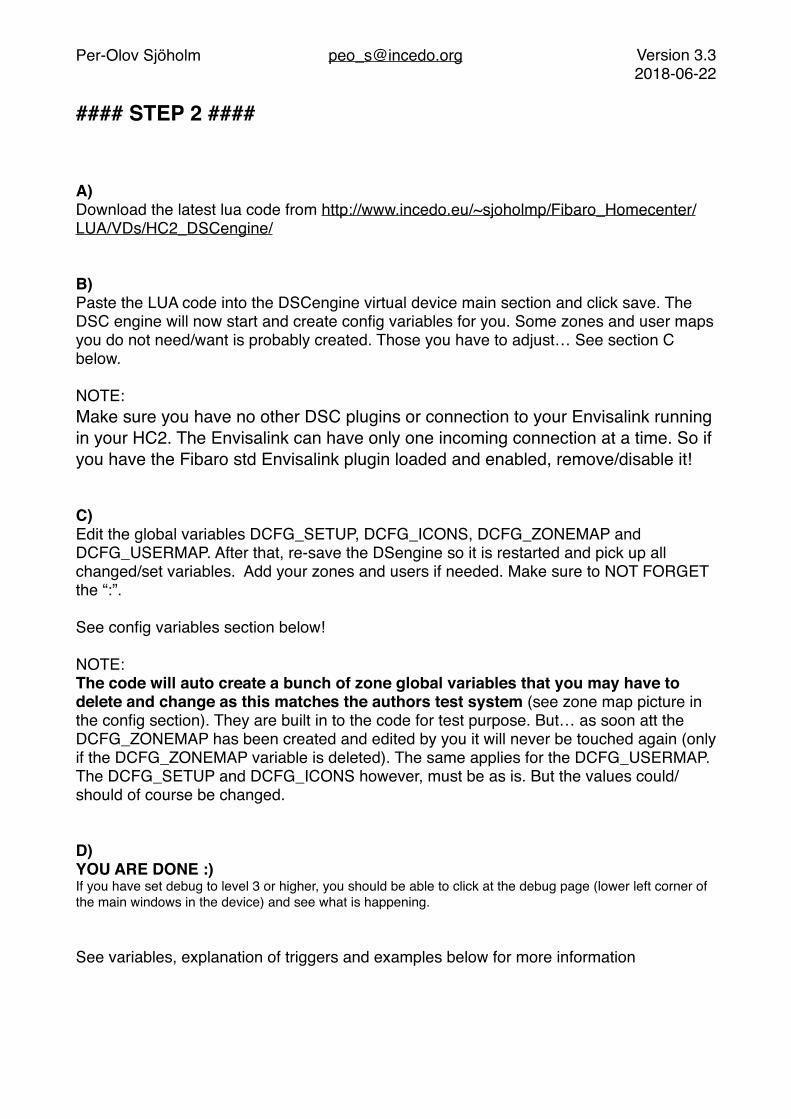
A)Download the latest lua code from http://www.incedo.eu/~sjoholmp/Fibaro_Homecenter/LUA/VDs/HC2_DSCengine/
B)Paste the LUA code into the DSCengine virtual device main section and click save. The DSC engine will now start and create config variables for you. Some zones and user maps you do not need/want is probably created. Those you have to adjust… See section C below.
NOTE:Make sure you have no other DSC plugins or connection to your Envisalink running in your HC2. The Envisalink can have only one incoming connection at a time. So if you have the Fibaro std Envisalink plugin loaded and enabled, remove/disable it!
C)Edit the global variables DCFG_SETUP, DCFG_ICONS, DCFG_ZONEMAP and DCFG_USERMAP. After that, re-save the DSengine so it is restarted and pick up all changed/set variables. Add your zones and users if needed. Make sure to NOT FORGET the “:”.
See config variables section below!
NOTE:The code will auto create a bunch of zone global variables that you may have to delete and change as this matches the authors test system (see zone map picture in the config section). They are built in to the code for test purpose. But… as soon att the DCFG_ZONEMAP has been created and edited by you it will never be touched again (only if the DCFG_ZONEMAP variable is deleted). The same applies for the DCFG_USERMAP. The DCFG_SETUP and DCFG_ICONS however, must be as is. But the values could/should of course be changed.
D)YOU ARE DONE :)If you have set debug to level 3 or higher, you should be able to click at the debug page (lower left corner of the main windows in the device) and see what is happening.
See variables, explanation of triggers and examples below for more information

Per-Olov Sjöholm [email protected] Version 3.32018-06-22
To communicate with the DSC Power Series alarm we have two possibilities…. Envisalink or DSC IT-100 serial card. The Envisalink is recommended if you do not yet have any of these due to lower price, easier to handle, more secure and better response times.
EnvisalinkInstall the Envisalink according to its instructions and set a new password on it
For this the following hardware is used:- Envisalink 4
Modify the DCFG_SETUP predefined variable and set:- DSC_INTERFACE to 0- IP to the IP address of the Envisalink card (port 4025 is hard coded in DSCengine)- PASSWORD to the password for the Envisalink
DSC IT-100 with Global cacheRight now this option is considered a beta as it is not yet very well tested and introduced in DSCengine 3.0. I have no indication though that it shouldn’t work ok.
For this the following hardware is used:- Global Cache' iTach Flex with Flex Link RS232 Serial cable- DSC IT-100 serial card
Install the Global cache per its instructions and make sure it can communicate on the network.Install Global Cache iHelp tool to find IP address of Global Cache.Log in to the Global Cache, change from IP to Serial, set baud= 9600, Flow Control= None, Duplex= Half, Parity= None, Databits= 8, stop bits= 1, Gender change = false
Modify the DCFG_SETUP predefined variable and set:- DSC_INTERFACE to 1- IP to the IP address of the global cache (port 4999 is hard coded in DSCengine)
Note that there is no bind with user and password using this solution. So make sure it is just used internally!
Many thanks to Chris Swan for making this IT-100 option possible by doing initial testing as the author has no such device.
Per-Olov Sjöholm [email protected] Version 3.32018-06-22
This section explains the variables to set. There are 4 multi variables to handle.
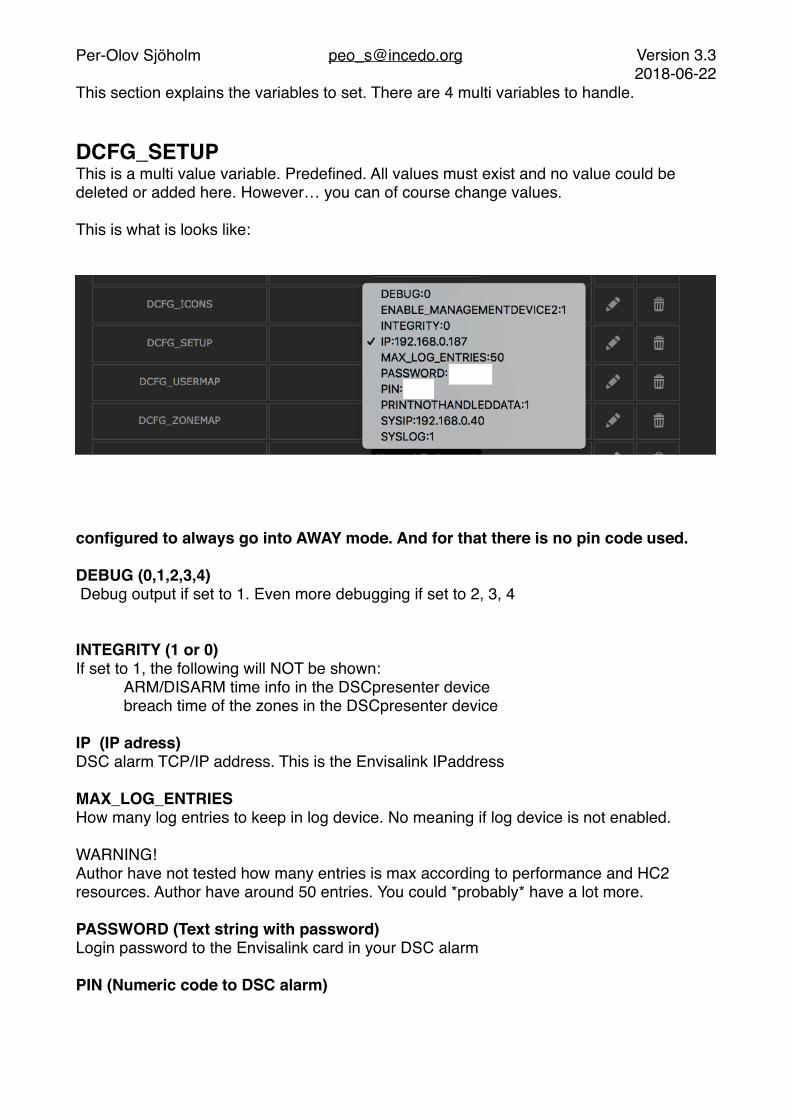
DCFG_SETUPThis is a multi value variable. Predefined. All values must exist and no value could be deleted or added here. However… you can of course change values.
This is what is looks like:
configured to always go into AWAY mode. And for that there is no pin code used.
DEBUG (0,1,2,3,4) Debug output if set to 1. Even more debugging if set to 2, 3, 4
INTEGRITY (1 or 0)If set to 1, the following will NOT be shown:
ARM/DISARM time info in the DSCpresenter devicebreach time of the zones in the DSCpresenter device
IP (IP adress)DSC alarm TCP/IP address. This is the Envisalink IPaddress
MAX_LOG_ENTRIESHow many log entries to keep in log device. No meaning if log device is not enabled.
WARNING!Author have not tested how many entries is max according to performance and HC2 resources. Author have around 50 entries. You could *probably* have a lot more.
PASSWORD (Text string with password)Login password to the Envisalink card in your DSC alarm
PIN (Numeric code to DSC alarm)

Per-Olov Sjöholm [email protected] Version 3.32018-06-22
The pin code you want to use for the DSCengine service to use when arming and/or disarming your DSC alarm. Buttons in the DSC presentation device uses this field. Also.. whatever PIN you put here, must of course first have been created in your DSC alarm :)
PRINTNOTHANDLEDDATA (1 or 0)Print all "not taken care of" data from alarm. Only enabled for syslog (requires SYSLOG = 1). If set to 1 it prints out API codes that we do not handle in our code if there come any.
SYSIP (IP adress) Syslog server TCP/IP address. If you don´t use a syslog server, leave IP "as is" and set SYSLOG to 0.
SYSLOG (1 or 0)Send the logs to syslog it set to 1. (All up to debug 1 goes to syslog even if debug is set to 0)
DSC_INTERFACE (1 or 0)If set to 0 an Envisalink card would ve expected.It set to 1, an Global Cache iTach Flex with Flex Link RS232 Serial cable to a DSC IT-100 card would be expected
Note:Option 1 With DSC-100 is not yet well tested. Therefor I consider this option a beta.
Per-Olov Sjöholm [email protected] Version 3.32018-06-22
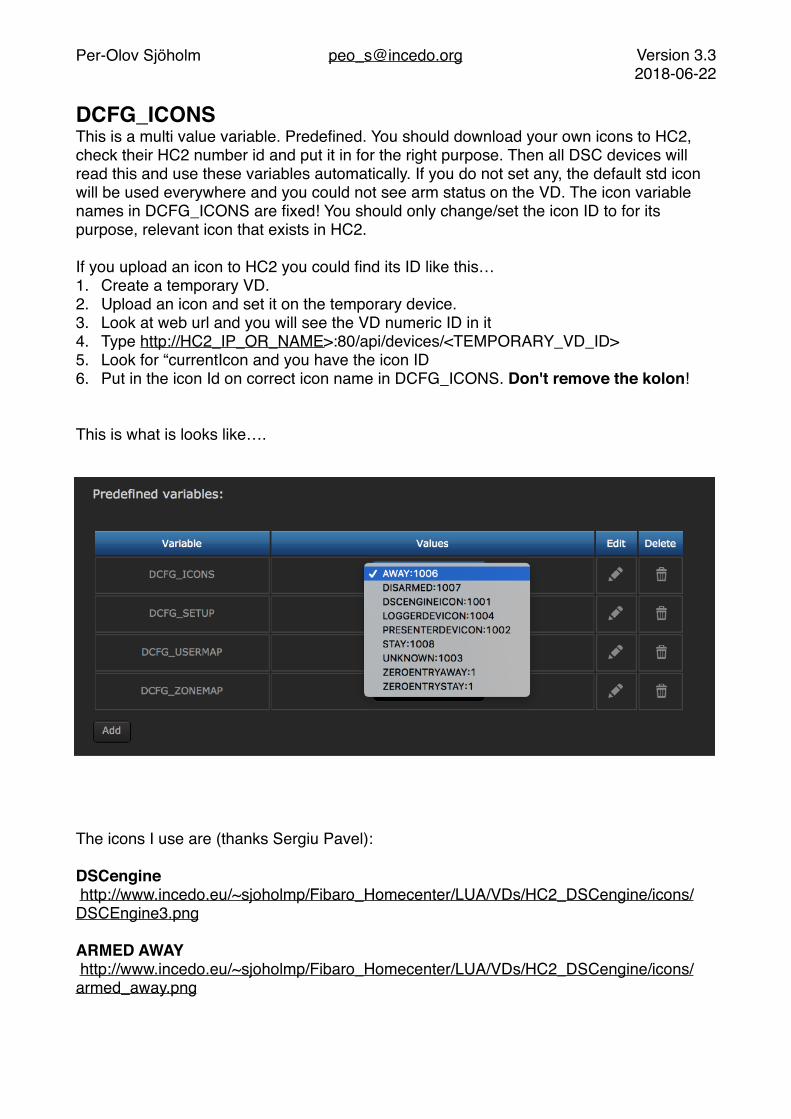
DCFG_ICONSThis is a multi value variable. Predefined. You should download your own icons to HC2, check their HC2 number id and put it in for the right purpose. Then all DSC devices will read this and use these variables automatically. If you do not set any, the default std icon will be used everywhere and you could not see arm status on the VD. The icon variable names in DCFG_ICONS are fixed! You should only change/set the icon ID to for its purpose, relevant icon that exists in HC2.
If you upload an icon to HC2 you could find its ID like this…1. Create a temporary VD. 2. Upload an icon and set it on the temporary device.3. Look at web url and you will see the VD numeric ID in it4. Type http://HC2_IP_OR_NAME>:80/api/devices/<TEMPORARY_VD_ID>5. Look for “currentIcon and you have the icon ID6. Put in the icon Id on correct icon name in DCFG_ICONS. Don't remove the kolon!
This is what is looks like….
The icons I use are (thanks Sergiu Pavel):
DSCengine http://www.incedo.eu/~sjoholmp/Fibaro_Homecenter/LUA/VDs/HC2_DSCengine/icons/DSCEngine3.png
ARMED AWAY http://www.incedo.eu/~sjoholmp/Fibaro_Homecenter/LUA/VDs/HC2_DSCengine/icons/armed_away.png

Per-Olov Sjöholm [email protected] Version 3.32018-06-22
UNKNOWN http://www.incedo.eu/~sjoholmp/Fibaro_Homecenter/LUA/VDs/HC2_DSCengine/icons/dsc_unknown.png
DISARMED http://www.incedo.eu/~sjoholmp/Fibaro_Homecenter/LUA/VDs/HC2_DSCengine/icons/dsc_disarmed.png
ARMED STAY http://www.incedo.eu/~sjoholmp/Fibaro_Homecenter/LUA/VDs/HC2_DSCengine/icons/dsc_armed_stay.png
LOG http://www.incedo.eu/~sjoholmp/Fibaro_Homecenter/LUA/VDs/HC2_DSCengine/icons/log.png
Per-Olov Sjöholm [email protected] Version 3.32018-06-22
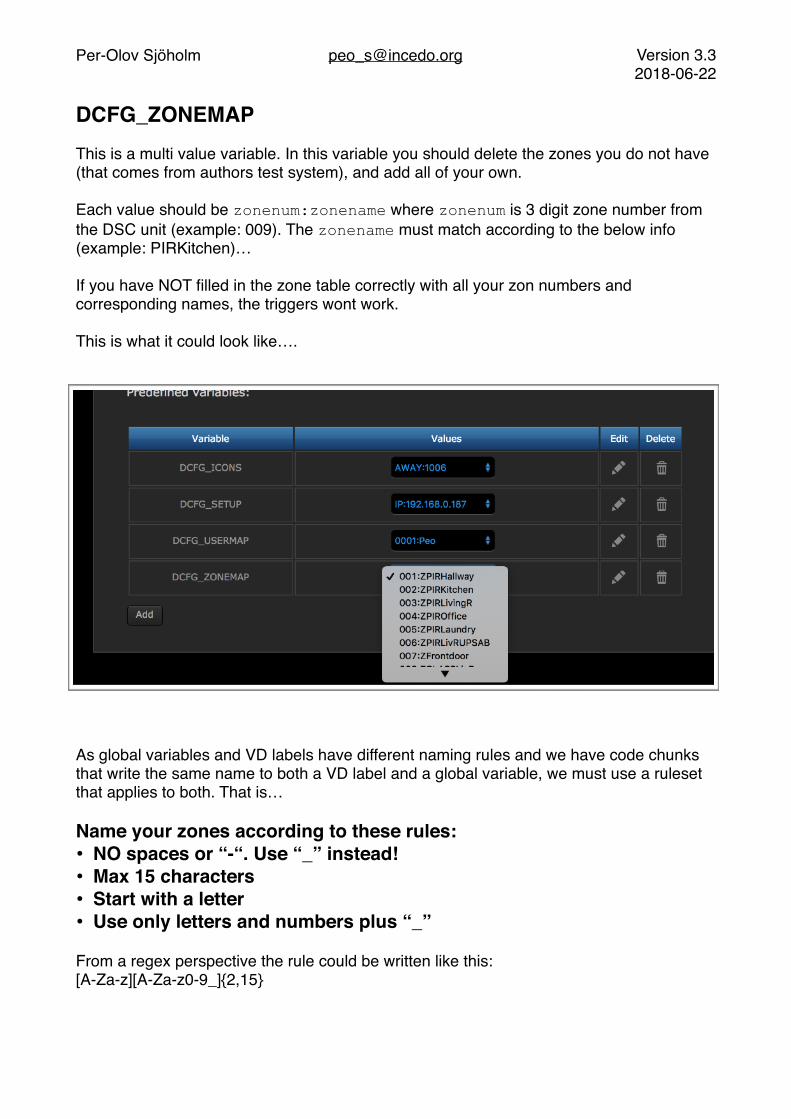
DCFG_ZONEMAPThis is a multi value variable. In this variable you should delete the zones you do not have (that comes from authors test system), and add all of your own.
Each value should be zonenum:zonename where zonenum is 3 digit zone number from the DSC unit (example: 009). The zonename must match according to the below info (example: PIRKitchen)…
If you have NOT filled in the zone table correctly with all your zon numbers and corresponding names, the triggers wont work.
This is what it could look like….
As global variables and VD labels have different naming rules and we have code chunks that write the same name to both a VD label and a global variable, we must use a ruleset that applies to both. That is…
Name your zones according to these rules:• NO spaces or “-“. Use “_” instead!• Max 15 characters• Start with a letter• Use only letters and numbers plus “_”
From a regex perspective the rule could be written like this:[A-Za-z][A-Za-z0-9_]{2,15}
Per-Olov Sjöholm [email protected] Version 3.32018-06-22
Also.. It could be a good thing to name the a zone to for example “ZKitchenPIR” instead of “KitchenPIR”. The reason is that all global trigger variables related to DSC then have names starting “Z*” to make it easier to relate them to this service if you have many global variables. If you have a character counting problem against the max of 15 chars in the global variable names, then you could for example name them like “ZPIRLivingR” where Z is a short for Zone. Just a suggestion…

Per-Olov Sjöholm [email protected] Version 3.32018-06-22
DCFG_USERMAPThis is a multi value variable. In this variable you map DSC user numbers to friendly usernames. If you don’t, the user number are shown instead. So no requirements to fill in this… If you do not want any usernames shown, delete all existing mappings and leave the DCFG_USERMAP empty.
The user map is is a 4 digit DSC user number (NOT the users pin code), a kolon, and then the username you want for that particular numeric DSC userID.
Example:0011:Bob
This is what it looks like:
Per-Olov Sjöholm [email protected] Version 3.32018-06-22
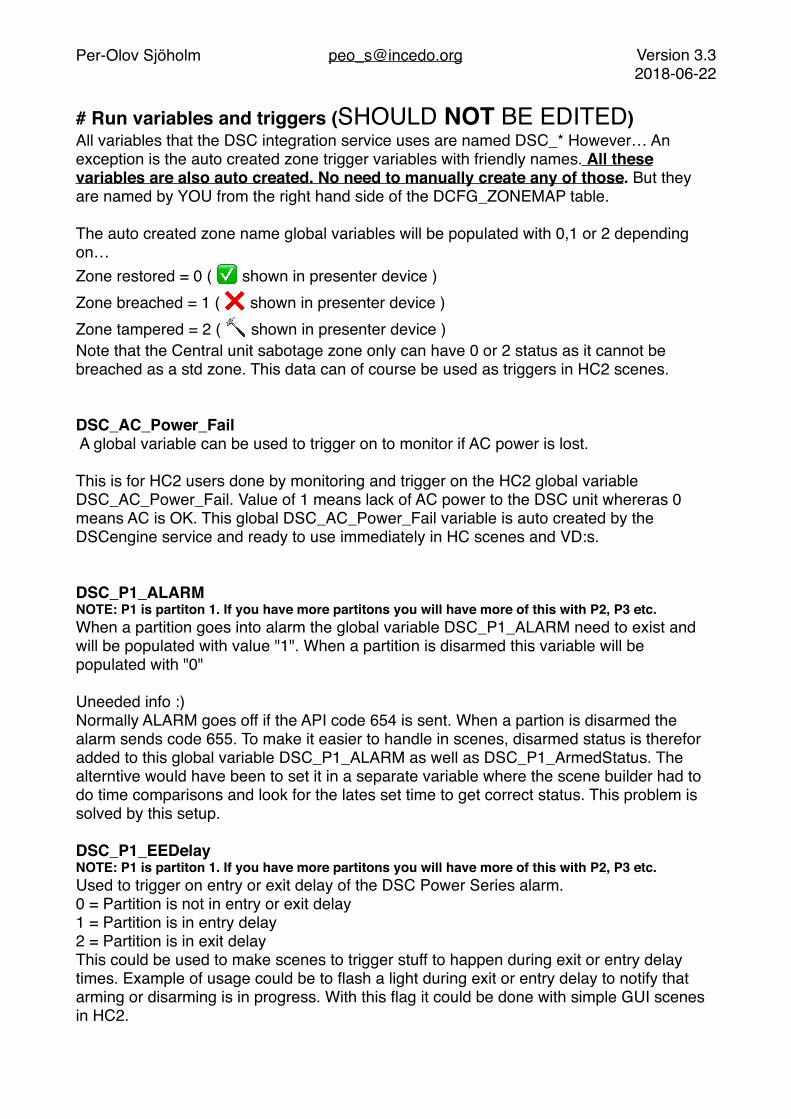
# Run variables and triggers (SHOULD NOT BE EDITED)All variables that the DSC integration service uses are named DSC_* However… An exception is the auto created zone trigger variables with friendly names. All these variables are also auto created. No need to manually create any of those. But they are named by YOU from the right hand side of the DCFG_ZONEMAP table.
The auto created zone name global variables will be populated with 0,1 or 2 depending on…Zone restored = 0 ( ✅ shown in presenter device )Zone breached = 1 ( ❌ shown in presenter device )Zone tampered = 2 ( 🔨 shown in presenter device ) Note that the Central unit sabotage zone only can have 0 or 2 status as it cannot be breached as a std zone. This data can of course be used as triggers in HC2 scenes.
DSC_AC_Power_Fail A global variable can be used to trigger on to monitor if AC power is lost.
This is for HC2 users done by monitoring and trigger on the HC2 global variable DSC_AC_Power_Fail. Value of 1 means lack of AC power to the DSC unit whereras 0 means AC is OK. This global DSC_AC_Power_Fail variable is auto created by the DSCengine service and ready to use immediately in HC scenes and VD:s.
DSC_P1_ALARMNOTE: P1 is partiton 1. If you have more partitons you will have more of this with P2, P3 etc.When a partition goes into alarm the global variable DSC_P1_ALARM need to exist and will be populated with value "1". When a partition is disarmed this variable will be populated with "0"
Uneeded info :)Normally ALARM goes off if the API code 654 is sent. When a partion is disarmed the alarm sends code 655. To make it easier to handle in scenes, disarmed status is therefor added to this global variable DSC_P1_ALARM as well as DSC_P1_ArmedStatus. The alterntive would have been to set it in a separate variable where the scene builder had to do time comparisons and look for the lates set time to get correct status. This problem is solved by this setup.
DSC_P1_EEDelayNOTE: P1 is partiton 1. If you have more partitons you will have more of this with P2, P3 etc.Used to trigger on entry or exit delay of the DSC Power Series alarm.0 = Partition is not in entry or exit delay1 = Partition is in entry delay2 = Partition is in exit delayThis could be used to make scenes to trigger stuff to happen during exit or entry delay times. Example of usage could be to flash a light during exit or entry delay to notify that arming or disarming is in progress. With this flag it could be done with simple GUI scenes in HC2.
Per-Olov Sjöholm [email protected] Version 3.32018-06-22
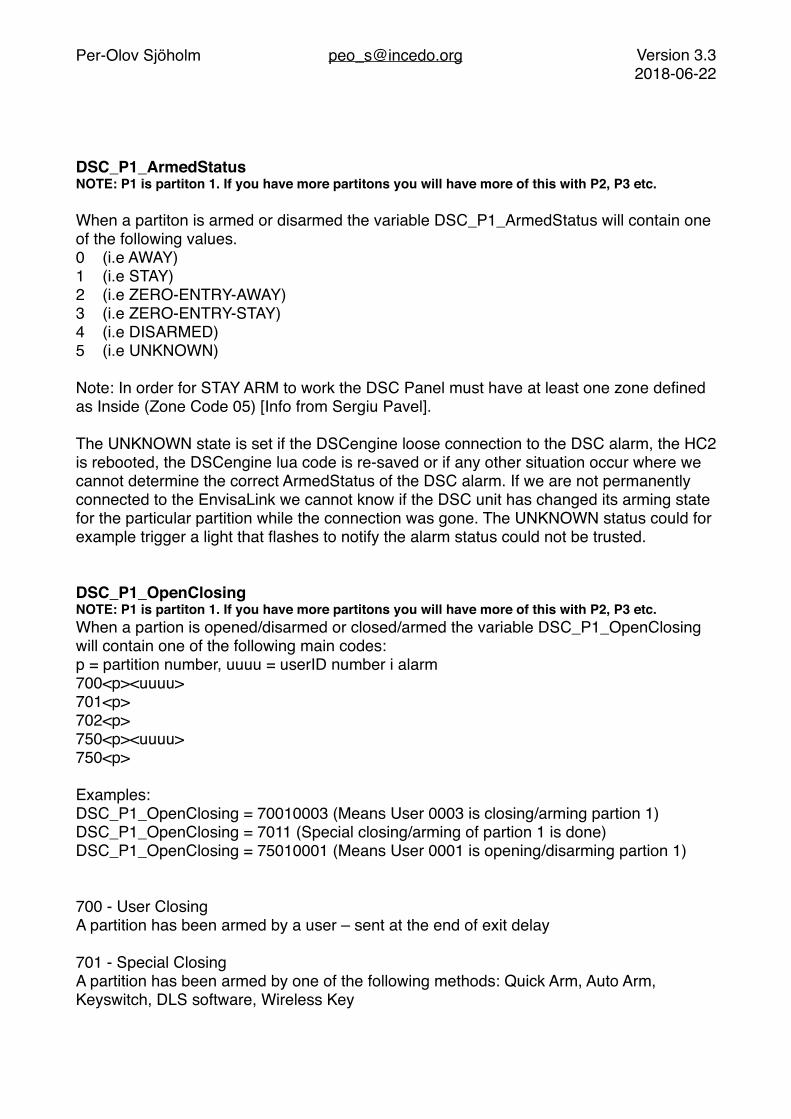
DSC_P1_ArmedStatusNOTE: P1 is partiton 1. If you have more partitons you will have more of this with P2, P3 etc.
When a partiton is armed or disarmed the variable DSC_P1_ArmedStatus will contain one of the following values.0 (i.e AWAY)1 (i.e STAY)2 (i.e ZERO-ENTRY-AWAY)3 (i.e ZERO-ENTRY-STAY)4 (i.e DISARMED)5 (i.e UNKNOWN)
Note: In order for STAY ARM to work the DSC Panel must have at least one zone defined as Inside (Zone Code 05) [Info from Sergiu Pavel].
The UNKNOWN state is set if the DSCengine loose connection to the DSC alarm, the HC2 is rebooted, the DSCengine lua code is re-saved or if any other situation occur where we cannot determine the correct ArmedStatus of the DSC alarm. If we are not permanently connected to the EnvisaLink we cannot know if the DSC unit has changed its arming state for the particular partition while the connection was gone. The UNKNOWN status could for example trigger a light that flashes to notify the alarm status could not be trusted.
DSC_P1_OpenClosingNOTE: P1 is partiton 1. If you have more partitons you will have more of this with P2, P3 etc.When a partion is opened/disarmed or closed/armed the variable DSC_P1_OpenClosing will contain one of the following main codes:p = partition number, uuuu = userID number i alarm700<p><uuuu>701<p>702<p>750<p><uuuu>750<p>
Examples:DSC_P1_OpenClosing = 70010003 (Means User 0003 is closing/arming partion 1)DSC_P1_OpenClosing = 7011 (Special closing/arming of partion 1 is done)DSC_P1_OpenClosing = 75010001 (Means User 0001 is opening/disarming partion 1)
700 - User ClosingA partition has been armed by a user – sent at the end of exit delay
701 - Special ClosingA partition has been armed by one of the following methods: Quick Arm, Auto Arm, Keyswitch, DLS software, Wireless Key

Per-Olov Sjöholm [email protected] Version 3.32018-06-22
702 - Partial ClosingA partition has been armed but one or more zones have been bypassed
750 - User OpeningA partition has been disarmed by a user
751 - Special OpeningA partition has been disarmed by one of the following methods: Keyswitch, DLS software, Wireless Key
DSC_Panel_Battery_FailThis variable will be populated with 1 of the DSC panel battery is bad and with 0 if all is good.
Per-Olov Sjöholm [email protected] Version 3.32018-06-22
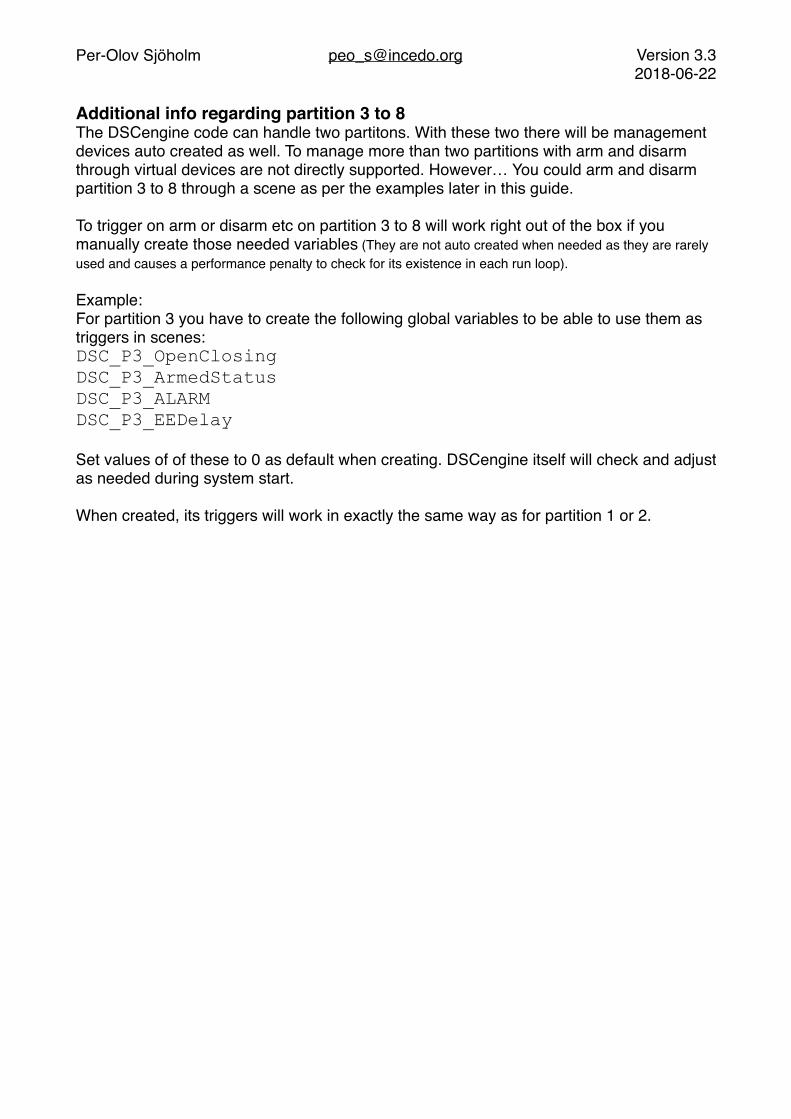
Additional info regarding partition 3 to 8The DSCengine code can handle two partitons. With these two there will be management devices auto created as well. To manage more than two partitions with arm and disarm through virtual devices are not directly supported. However… You could arm and disarm partition 3 to 8 through a scene as per the examples later in this guide.
To trigger on arm or disarm etc on partition 3 to 8 will work right out of the box if you manually create those needed variables (They are not auto created when needed as they are rarely used and causes a performance penalty to check for its existence in each run loop).
Example:For partition 3 you have to create the following global variables to be able to use them as triggers in scenes:DSC_P3_OpenClosing DSC_P3_ArmedStatus DSC_P3_ALARM DSC_P3_EEDelay
Set values of of these to 0 as default when creating. DSCengine itself will check and adjust as needed during system start.
When created, its triggers will work in exactly the same way as for partition 1 or 2.
Per-Olov Sjöholm [email protected] Version 3.32018-06-22
There is a presentation , Partition1, Partition2 and a log device. These devices are auto created without any user intervention.
If you want them into your smart phone, make sure it is allocated to the correct user after it is auto created. Otherwise it wont be seen. The devices automatically finds the master “DSCengine” device for the tasks it need to perform. Also the master device (DSCengine) also automatically find these devices. If you delete any of these slave devices and restart/re-save the DSCengine MAIN section code, the devices will be created again and work automatically.
Regarding the presenter device… A little clarification of the icons shown:In the presenter device, the icon ❓ can be shown. Actually a ❓ is shown for ALL zones until an event has occurred. When the DSCengine service is started or restarted, all zones will show an ❓ icon. It does not mean that breach, restore or tamper won't work (see zone variables above). It just tell you that you do not yet know the status of the sensor. If you walk into a room with a PIR, the presenter device will change from a ❓ to a ❌ . And when you leave the room it will be a ✅ . Tampering a device, for example change battery in a smoke sensor will show an 🔨 when removed from the roof (i.e tampered). When battery is re-inserted an ✅ is shown.
Per-Olov Sjöholm [email protected] Version 3.32018-06-22
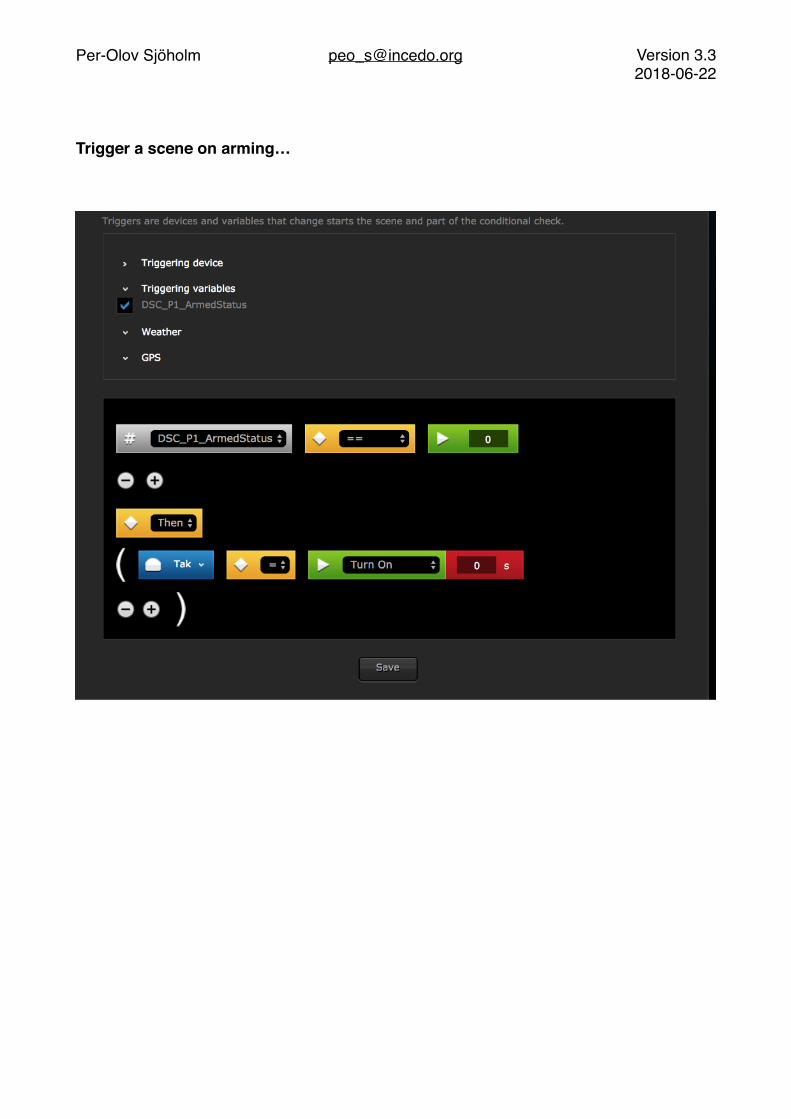
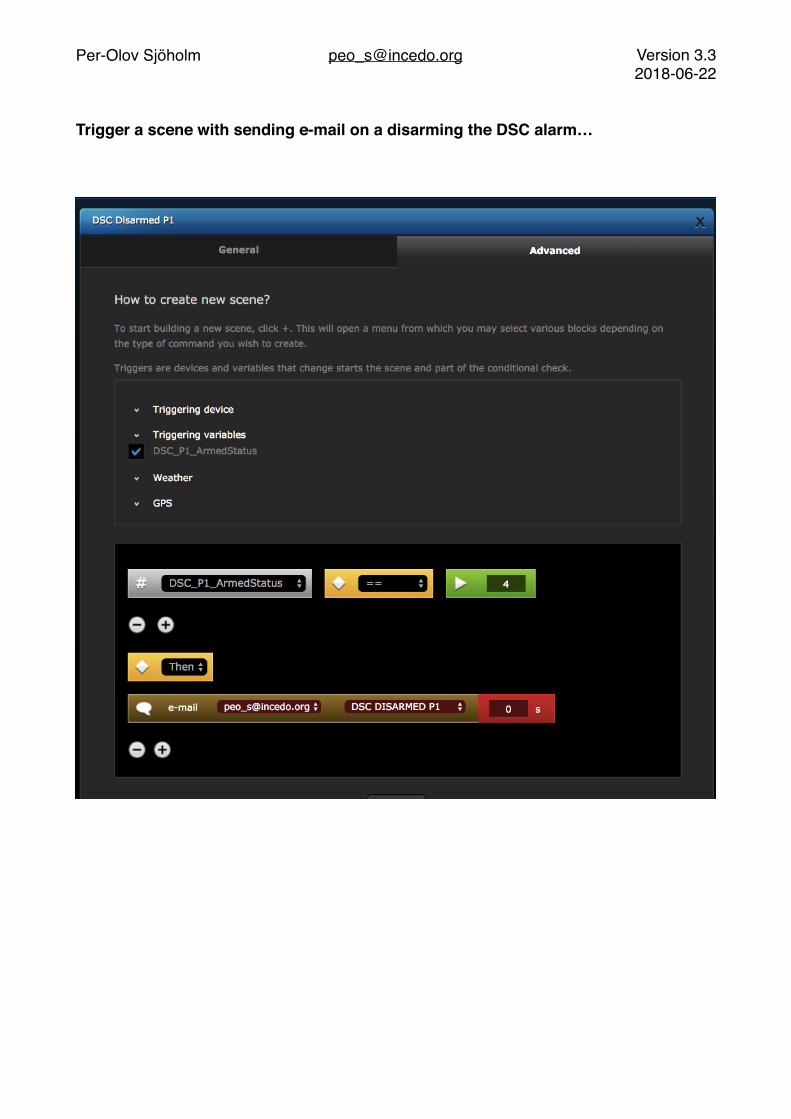
Trigger a scene with sending e-mail on a disarming the DSC alarm…
Per-Olov Sjöholm [email protected] Version 3.32018-06-22
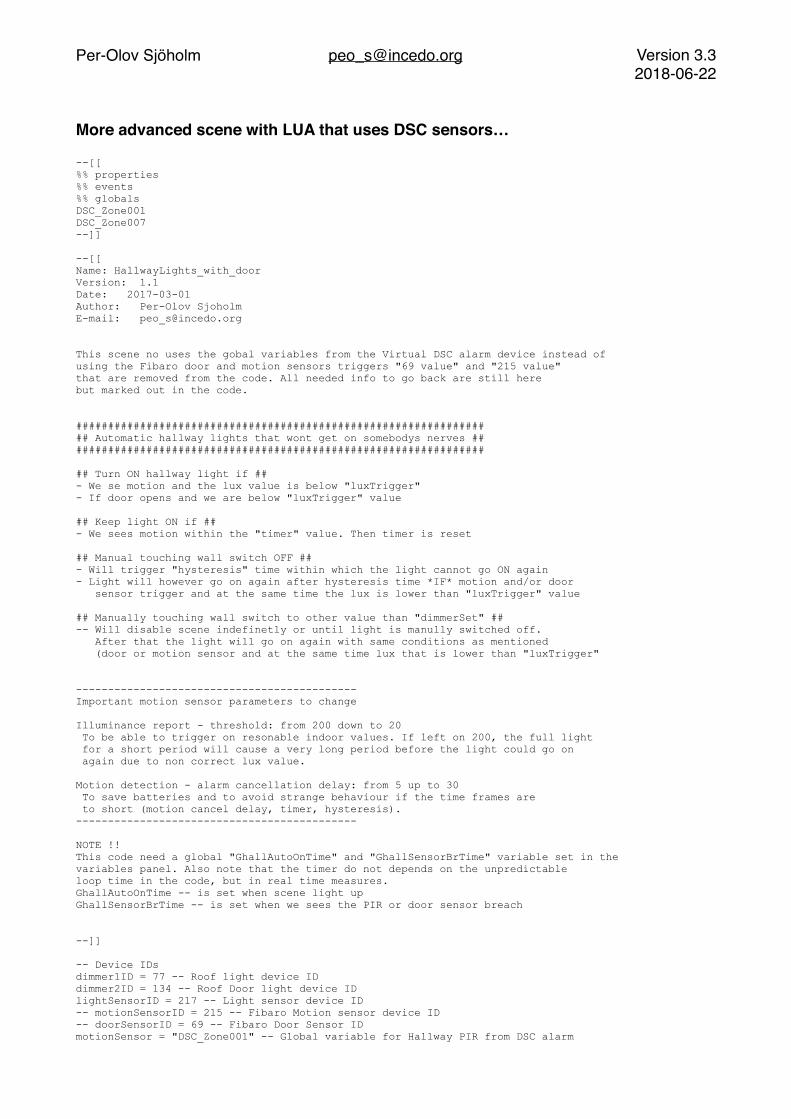
More advanced scene with LUA that uses DSC sensors…
--[[ %% properties %% events %% globals DSC_Zone001 DSC_Zone007 --]]
--[[ Name: HallwayLights_with_door Version: 1.1 Date: 2017-03-01 Author: Per-Olov Sjoholm E-mail: [email protected]
This scene no uses the gobal variables from the Virtual DSC alarm device instead of using the Fibaro door and motion sensors triggers "69 value" and "215 value" that are removed from the code. All needed info to go back are still here but marked out in the code.
################################################################ ## Automatic hallway lights that wont get on somebodys nerves ## ################################################################
## Turn ON hallway light if ## - We se motion and the lux value is below "luxTrigger" - If door opens and we are below "luxTrigger" value
## Keep light ON if ## - We sees motion within the "timer" value. Then timer is reset
## Manual touching wall switch OFF ## - Will trigger "hysteresis" time within which the light cannot go ON again - Light will however go on again after hysteresis time *IF* motion and/or door sensor trigger and at the same time the lux is lower than "luxTrigger" value
## Manually touching wall switch to other value than "dimmerSet" ## -- Will disable scene indefinetly or until light is manully switched off. After that the light will go on again with same conditions as mentioned (door or motion sensor and at the same time lux that is lower than "luxTrigger"
-------------------------------------------- Important motion sensor parameters to change
Illuminance report - threshold: from 200 down to 20 To be able to trigger on resonable indoor values. If left on 200, the full light for a short period will cause a very long period before the light could go on again due to non correct lux value.
Motion detection - alarm cancellation delay: from 5 up to 30 To save batteries and to avoid strange behaviour if the time frames are to short (motion cancel delay, timer, hysteresis). --------------------------------------------
NOTE !! This code need a global "GhallAutoOnTime" and "GhallSensorBrTime" variable set in the variables panel. Also note that the timer do not depends on the unpredictable loop time in the code, but in real time measures. GhallAutoOnTime -- is set when scene light up GhallSensorBrTime -- is set when we sees the PIR or door sensor breach
--]]
-- Device IDs dimmer1ID = 77 -- Roof light device ID dimmer2ID = 134 -- Roof Door light device ID lightSensorID = 217 -- Light sensor device ID -- motionSensorID = 215 -- Fibaro Motion sensor device ID -- doorSensorID = 69 -- Fibaro Door Sensor ID motionSensor = "DSC_Zone001" -- Global variable for Hallway PIR from DSC alarm
Per-Olov Sjöholm [email protected] Version 3.32018-06-22
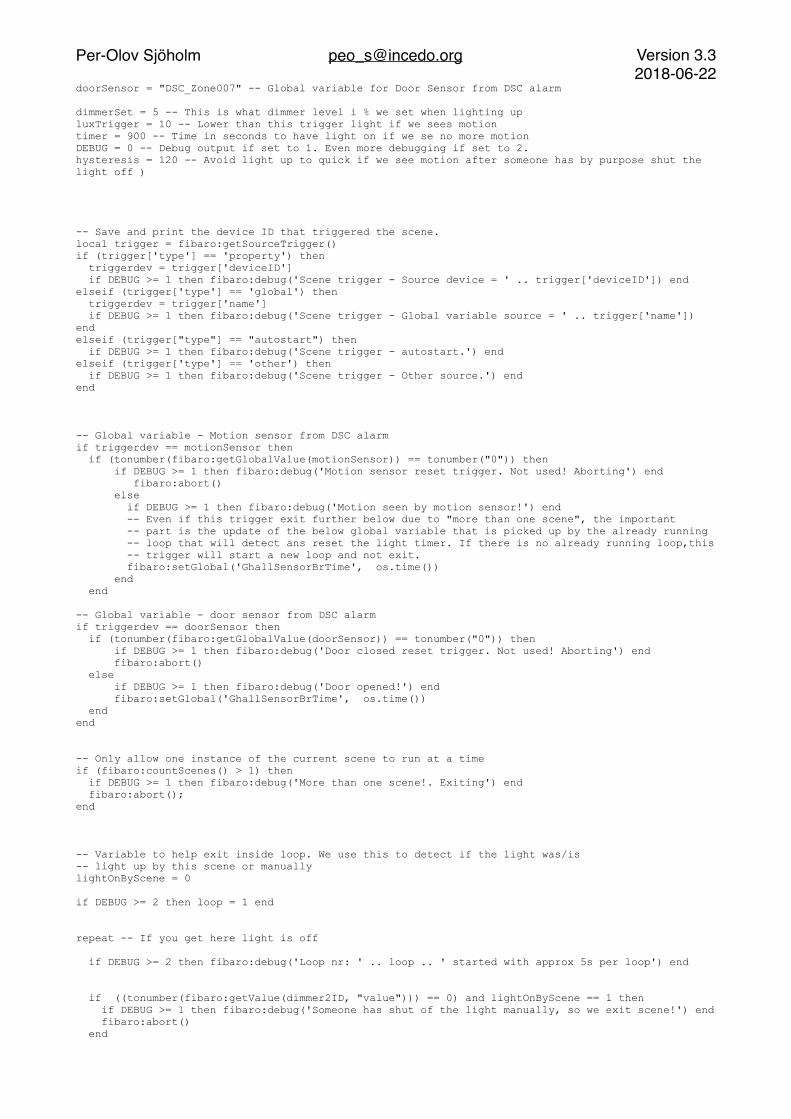
doorSensor = "DSC_Zone007" -- Global variable for Door Sensor from DSC alarm
dimmerSet = 5 -- This is what dimmer level i % we set when lighting up luxTrigger = 10 -- Lower than this trigger light if we sees motion timer = 900 -- Time in seconds to have light on if we se no more motion DEBUG = 0 -- Debug output if set to 1. Even more debugging if set to 2. hysteresis = 120 -- Avoid light up to quick if we see motion after someone has by purpose shut the light off )
-- Save and print the device ID that triggered the scene. local trigger = fibaro:getSourceTrigger() if (trigger['type'] == 'property') then triggerdev = trigger['deviceID'] if DEBUG >= 1 then fibaro:debug('Scene trigger - Source device = ' .. trigger['deviceID']) end elseif (trigger['type'] == 'global') then triggerdev = trigger['name'] if DEBUG >= 1 then fibaro:debug('Scene trigger - Global variable source = ' .. trigger['name']) end elseif (trigger["type"] == "autostart") then if DEBUG >= 1 then fibaro:debug('Scene trigger - autostart.') end elseif (trigger['type'] == 'other') then if DEBUG >= 1 then fibaro:debug('Scene trigger - Other source.') end end
-- Global variable - Motion sensor from DSC alarm if triggerdev == motionSensor then if (tonumber(fibaro:getGlobalValue(motionSensor)) == tonumber("0")) then if DEBUG >= 1 then fibaro:debug('Motion sensor reset trigger. Not used! Aborting') end fibaro:abort() else if DEBUG >= 1 then fibaro:debug('Motion seen by motion sensor!') end -- Even if this trigger exit further below due to "more than one scene", the important -- part is the update of the below global variable that is picked up by the already running -- loop that will detect ans reset the light timer. If there is no already running loop,this -- trigger will start a new loop and not exit. fibaro:setGlobal('GhallSensorBrTime', os.time()) end end
-- Global variable - door sensor from DSC alarm if triggerdev == doorSensor then if (tonumber(fibaro:getGlobalValue(doorSensor)) == tonumber("0")) then if DEBUG >= 1 then fibaro:debug('Door closed reset trigger. Not used! Aborting') end fibaro:abort() else if DEBUG >= 1 then fibaro:debug('Door opened!') end fibaro:setGlobal('GhallSensorBrTime', os.time()) end end
-- Only allow one instance of the current scene to run at a time if (fibaro:countScenes() > 1) then if DEBUG >= 1 then fibaro:debug('More than one scene!. Exiting') end fibaro:abort(); end
-- Variable to help exit inside loop. We use this to detect if the light was/is -- light up by this scene or manually lightOnByScene = 0
if DEBUG >= 2 then loop = 1 end
repeat -- If you get here light is off
if DEBUG >= 2 then fibaro:debug('Loop nr: ' .. loop .. ' started with approx 5s per loop') end
if ((tonumber(fibaro:getValue(dimmer2ID, "value"))) == 0) and lightOnByScene == 1 then if DEBUG >= 1 then fibaro:debug('Someone has shut of the light manually, so we exit scene!') end fibaro:abort() end

Per-Olov Sjöholm [email protected] Version 3.32018-06-22
if ((tonumber(fibaro:getValue(dimmer2ID, "value"))) == 0) then if tonumber(fibaro:getValue(lightSensorID, "value")) < luxTrigger then if DEBUG >= 1 then fibaro:debug('Lux value is ' .. (tonumber(fibaro:getValue(lightSensorID, "value"))) .. ' ,which is below the ' .. luxTrigger .. ' threshold. So we light up!') end if os.time() >= ((tonumber(fibaro:getModificationTime(dimmer2ID, 'value'))) + hysteresis) then fibaro:call(dimmer2ID, 'setValue', dimmerSet) lightOnByScene = 1 if DEBUG >= 1 then fibaro:debug('We turned on light to:' .. dimmerSet ..'%') end fibaro:setGlobal('GhallAutoOnTime', os.time()) fibaro:sleep(1000) -- The above sleep is needed for HC2 to pick up data -- Otherwise the "getValue" readings below (dimmer etc) wont -- be picked up directly (i.e old values returned). if DEBUG >= 1 then fibaro:debug('Global auto-on time set to: ' .. tonumber(fibaro:getGlobalValue('GhallAutoOnTime'))) end else local a, b a = (tonumber(fibaro:getModificationTime(dimmer2ID, 'value'))) + hysteresis b = a - os.time() if DEBUG >= 1 then fibaro:debug('Hysteresis delay of: ' .. hysteresis .. 's. Skipping lighting up...' .. b .. ' s left!') end fibaro:abort() end else if DEBUG >= 1 then fibaro:debug('We are above luxTrigger value') end fibaro:abort() end end
if ((tonumber(fibaro:getValue(dimmer2ID, "value"))) ~= dimmerSet) and ((tonumber(fibaro:getModificationTime(dimmer2ID, 'value'))) > (tonumber(fibaro:getGlobalValue('GhallAutoOnTime')))) then if DEBUG >= 1 then fibaro:debug('We exit scene as the light dimmer switch has been manually changed to another value than default set!') end fibaro:abort() end fibaro:sleep(4000) -- Reset timer if we see motion. --if ((tonumber(fibaro:getValue(motionSensorID, "lastBreached"))) > (tonumber(fibaro:getGlobalValue('GhallAutoOnTime')))) then -- GhallSensorBrTime is needed if we use global variable sensors that does not have a breach timecapabilites. if ((tonumber(fibaro:getGlobalValue('GhallSensorBrTime'))) > (tonumber(fibaro:getGlobalValue('GhallAutoOnTime')))) then fibaro:setGlobal('GhallAutoOnTime', os.time()) if DEBUG >= 1 then fibaro:debug('We have seen motion during our timer. Resetting timer! ' .. timer .. ' new seconds') end if DEBUG >= 2 then loop = 0 end end if DEBUG >= 2 then loop = loop + 1 end until(os.time() > tonumber((tonumber(fibaro:getGlobalValue('GhallAutoOnTime'))) + timer))
fibaro:call(dimmer2ID, 'turnOff') if DEBUG == 1 then fibaro:debug('Timer reached. EXIT scene.... Goodbye!') end fibaro:abort()

Per-Olov Sjöholm [email protected] Version 3.32018-06-22
DISARMING scene
Disarming through a scene. We do not use VDs with buttons as they cannot have pins to protect them. For more info see the text documentation.
Paste this code into the scene as LUA. You only have to set your alarm pin here. I could be a good thing to set the same as scene protect pin to avoid confusion.
It could be recommended to use the same pin on the scene as to the DSC alarm user pin to avoid confusion. The call ID below is the DSCengine device ID. The “partition” variable is the partition to arm or disarm. The “userpin” is the pincode you send to the alarm to arm or disarm. The call ID below (i.e 757) must be substituted to your DSCengine device ID. Note that code “040” below means DISARMING according to the API docs.
And…. Keep your pin code as secret as you can!

Per-Olov Sjöholm [email protected] Version 3.32018-06-22
--[[ %% properties %% events %% globals --]] local sendcommand = '040' local partition = '1' local userpin = '123456' local sendcode = sendcommand .. partition .. userpin fibaro:call(757, "setProperty", "ui.INPUTCODE.value", sendcode)
Per-Olov Sjöholm [email protected] Version 3.32018-06-22
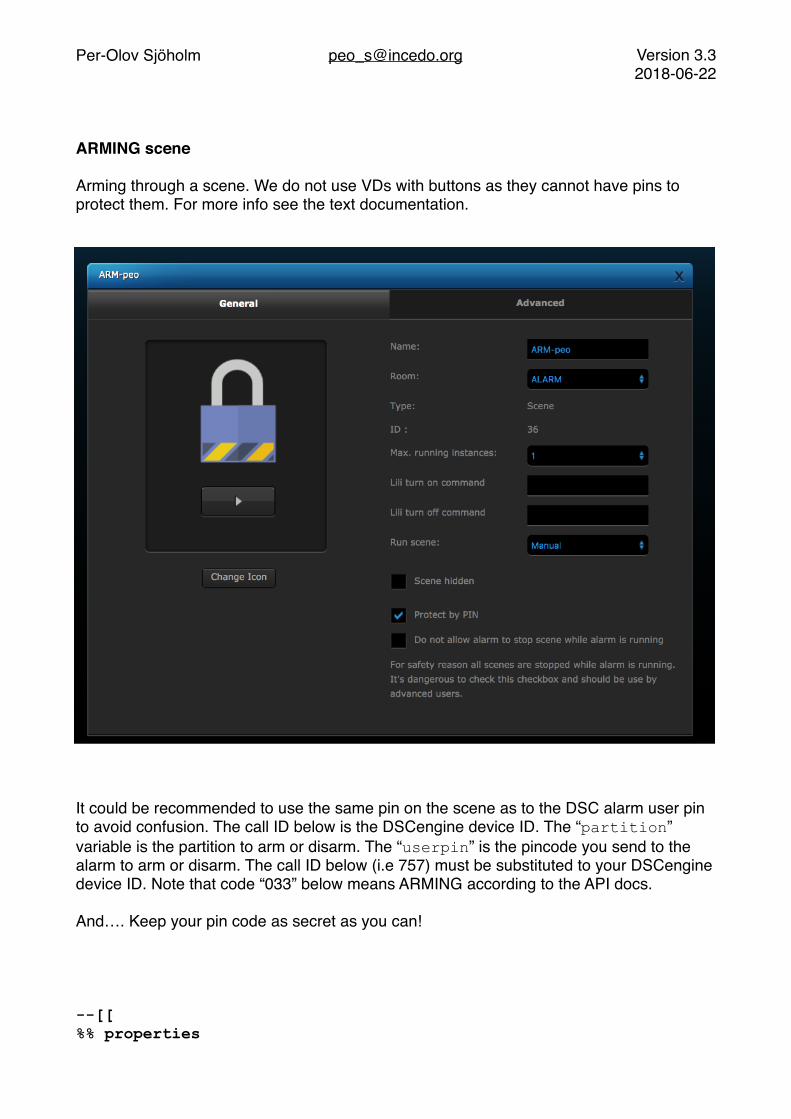
ARMING scene
Arming through a scene. We do not use VDs with buttons as they cannot have pins to protect them. For more info see the text documentation.
It could be recommended to use the same pin on the scene as to the DSC alarm user pin to avoid confusion. The call ID below is the DSCengine device ID. The “partition” variable is the partition to arm or disarm. The “userpin” is the pincode you send to the alarm to arm or disarm. The call ID below (i.e 757) must be substituted to your DSCengine device ID. Note that code “033” below means ARMING according to the API docs.
And…. Keep your pin code as secret as you can!
--[[ %% properties

Per-Olov Sjöholm [email protected] Version 3.32018-06-22
%% events %% globals --]] local sendcommand = "033" local partition = "1" local userpin = "123456" local sendcode = sendcommand .. partition .. userpin fibaro:call(757, "setProperty", "ui.INPUTCODE.value", sendcode)
Per-Olov Sjöholm [email protected] Version 3.32018-06-22
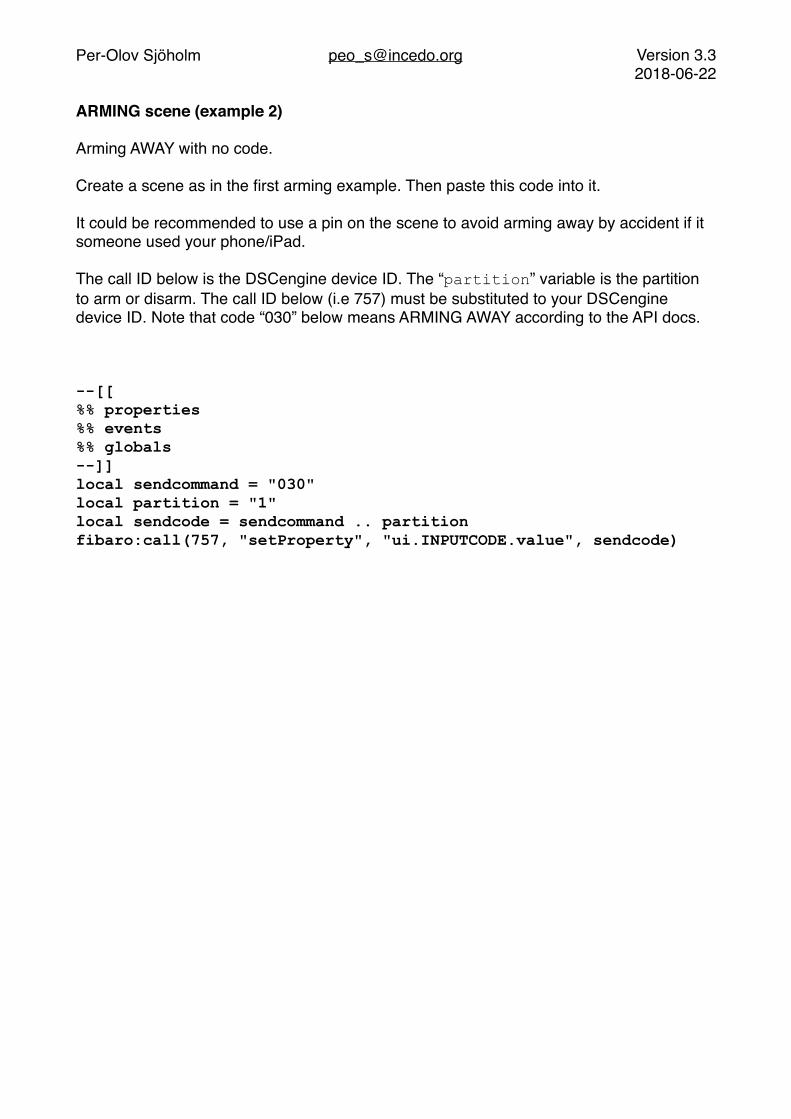
ARMING scene (example 2)
Arming AWAY with no code.
Create a scene as in the first arming example. Then paste this code into it.
It could be recommended to use a pin on the scene to avoid arming away by accident if it someone used your phone/iPad.
The call ID below is the DSCengine device ID. The “partition” variable is the partition to arm or disarm. The call ID below (i.e 757) must be substituted to your DSCengine device ID. Note that code “030” below means ARMING AWAY according to the API docs.
--[[ %% properties %% events %% globals --]] local sendcommand = "030" local partition = "1" local sendcode = sendcommand .. partition fibaro:call(757, "setProperty", "ui.INPUTCODE.value", sendcode)
Per-Olov Sjöholm [email protected] Version 3.32018-06-22
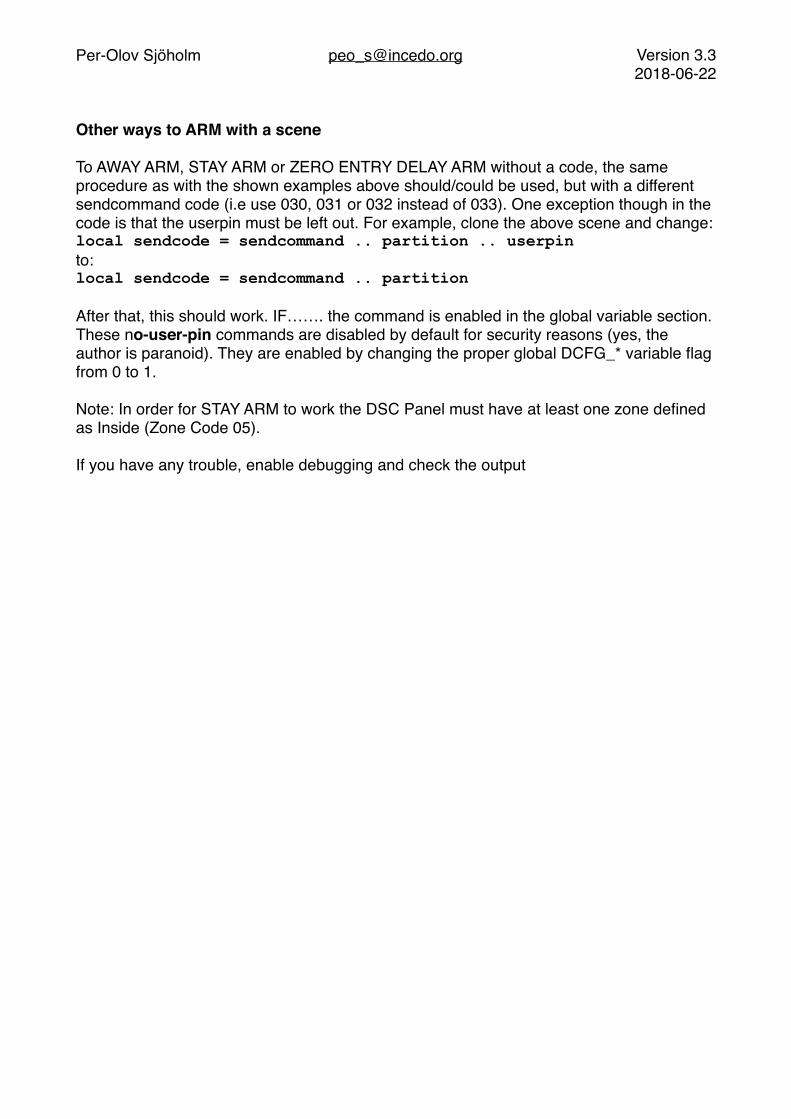
Other ways to ARM with a scene
To AWAY ARM, STAY ARM or ZERO ENTRY DELAY ARM without a code, the same procedure as with the shown examples above should/could be used, but with a different sendcommand code (i.e use 030, 031 or 032 instead of 033). One exception though in the code is that the userpin must be left out. For example, clone the above scene and change:local sendcode = sendcommand .. partition .. userpin to:local sendcode = sendcommand .. partition
After that, this should work. IF……. the command is enabled in the global variable section. These no-user-pin commands are disabled by default for security reasons (yes, the author is paranoid). They are enabled by changing the proper global DCFG_* variable flag from 0 to 1.
Note: In order for STAY ARM to work the DSC Panel must have at least one zone defined as Inside (Zone Code 05).
If you have any trouble, enable debugging and check the output
Per-Olov Sjöholm [email protected] Version 3.32018-06-22
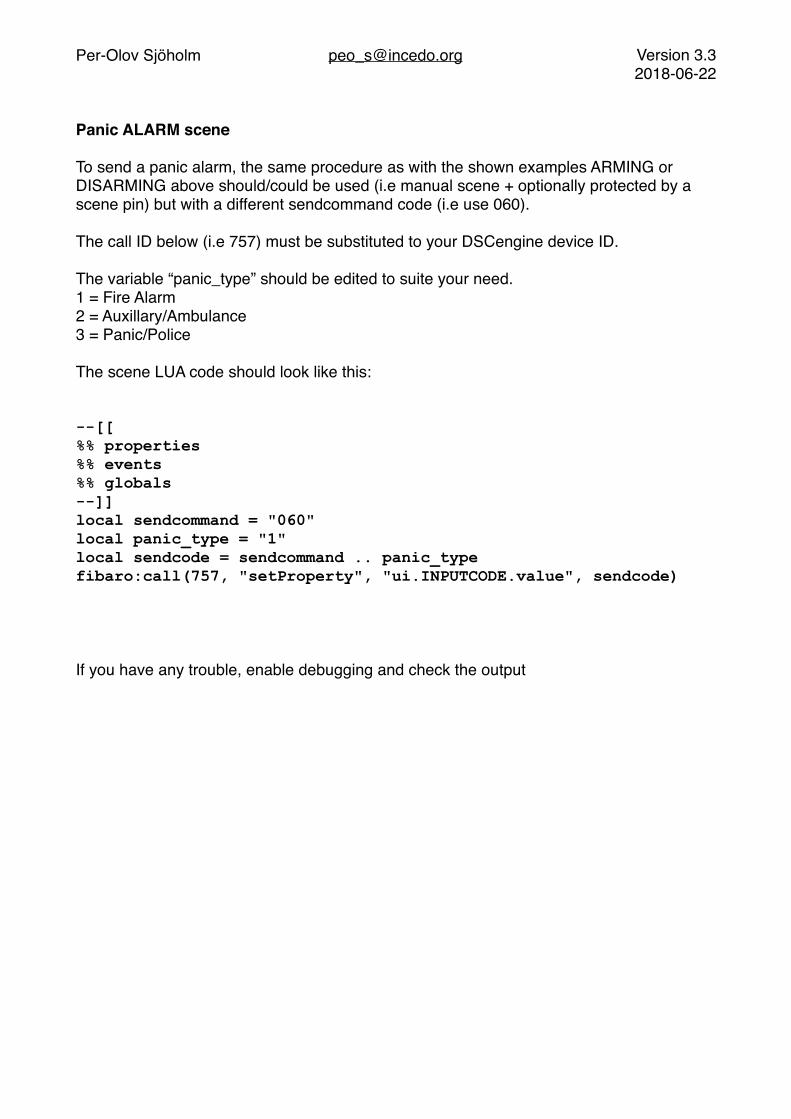
Panic ALARM scene
To send a panic alarm, the same procedure as with the shown examples ARMING or DISARMING above should/could be used (i.e manual scene + optionally protected by a scene pin) but with a different sendcommand code (i.e use 060).
The call ID below (i.e 757) must be substituted to your DSCengine device ID.
The variable “panic_type” should be edited to suite your need.1 = Fire Alarm2 = Auxillary/Ambulance3 = Panic/Police
The scene LUA code should look like this:
--[[ %% properties %% events %% globals --]] local sendcommand = "060" local panic_type = "1" local sendcode = sendcommand .. panic_type fibaro:call(757, "setProperty", "ui.INPUTCODE.value", sendcode)
If you have any trouble, enable debugging and check the output
Per-Olov Sjöholm [email protected] Version 3.32018-06-22
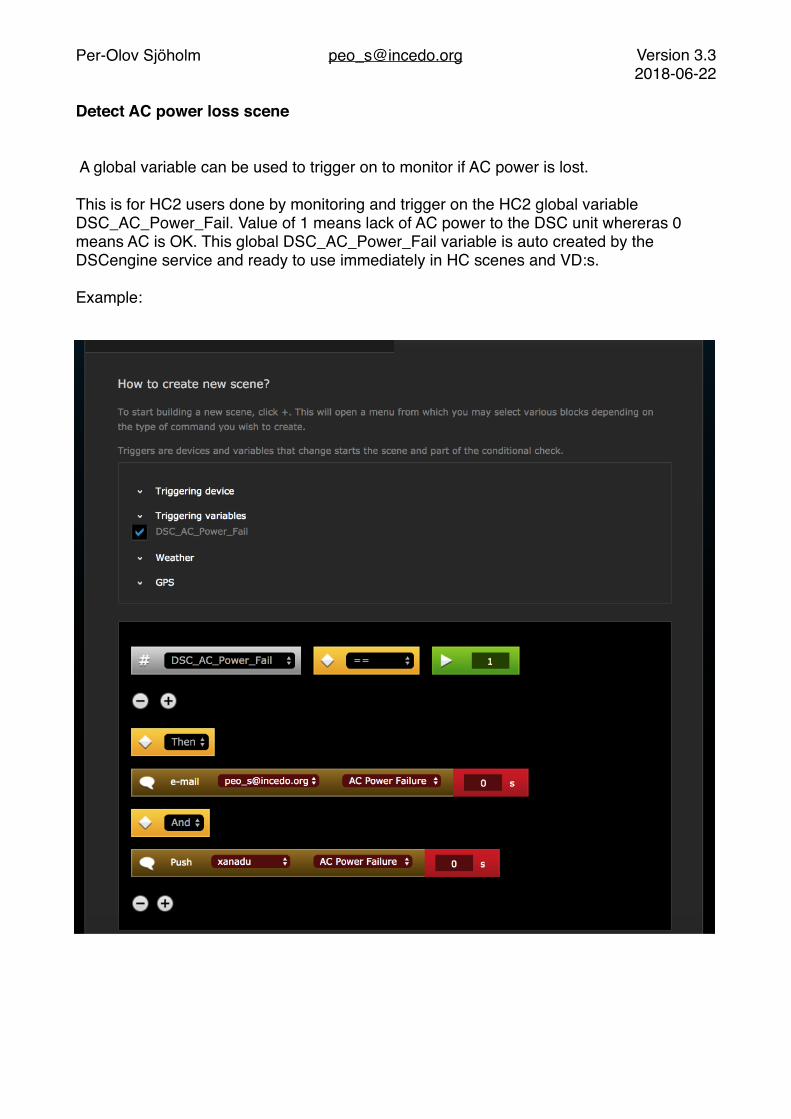
Detect AC power loss scene
A global variable can be used to trigger on to monitor if AC power is lost.
This is for HC2 users done by monitoring and trigger on the HC2 global variable DSC_AC_Power_Fail. Value of 1 means lack of AC power to the DSC unit whereras 0 means AC is OK. This global DSC_AC_Power_Fail variable is auto created by the DSCengine service and ready to use immediately in HC scenes and VD:s.
Example:
Per-Olov Sjöholm [email protected] Version 3.32018-06-22
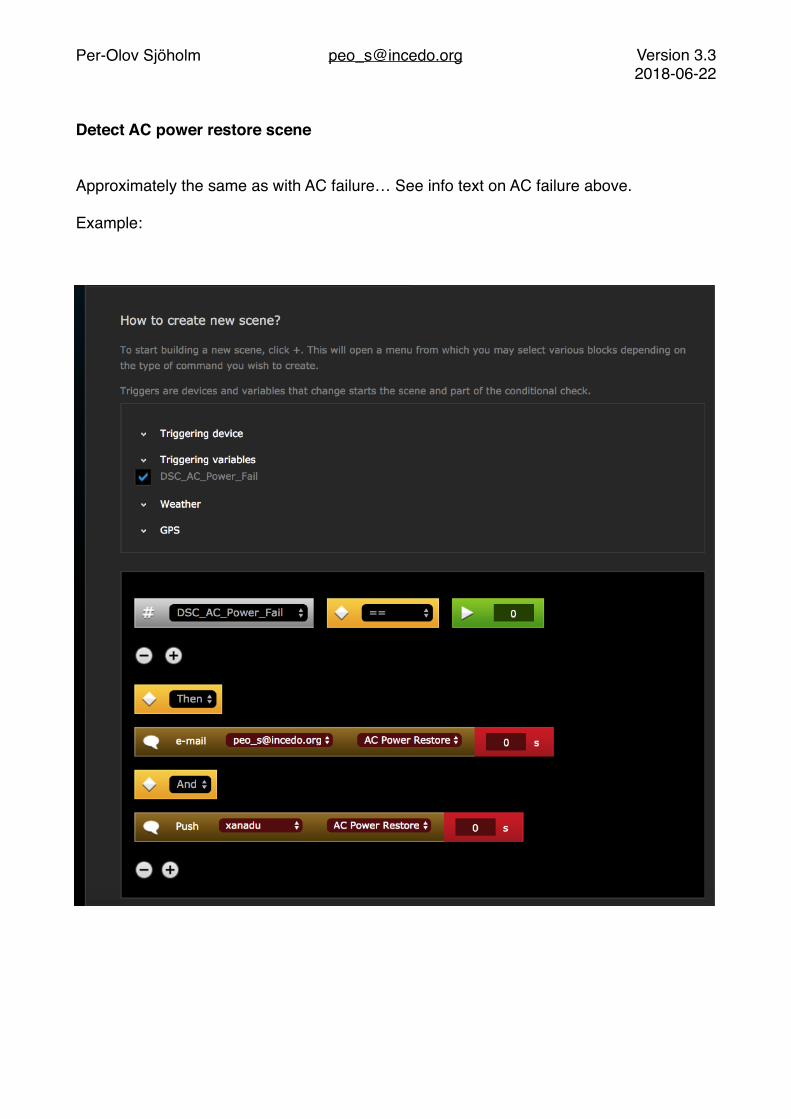
Detect AC power restore scene
Approximately the same as with AC failure… See info text on AC failure above.
Example:
Per-Olov Sjöholm [email protected] Version 3.32018-06-22
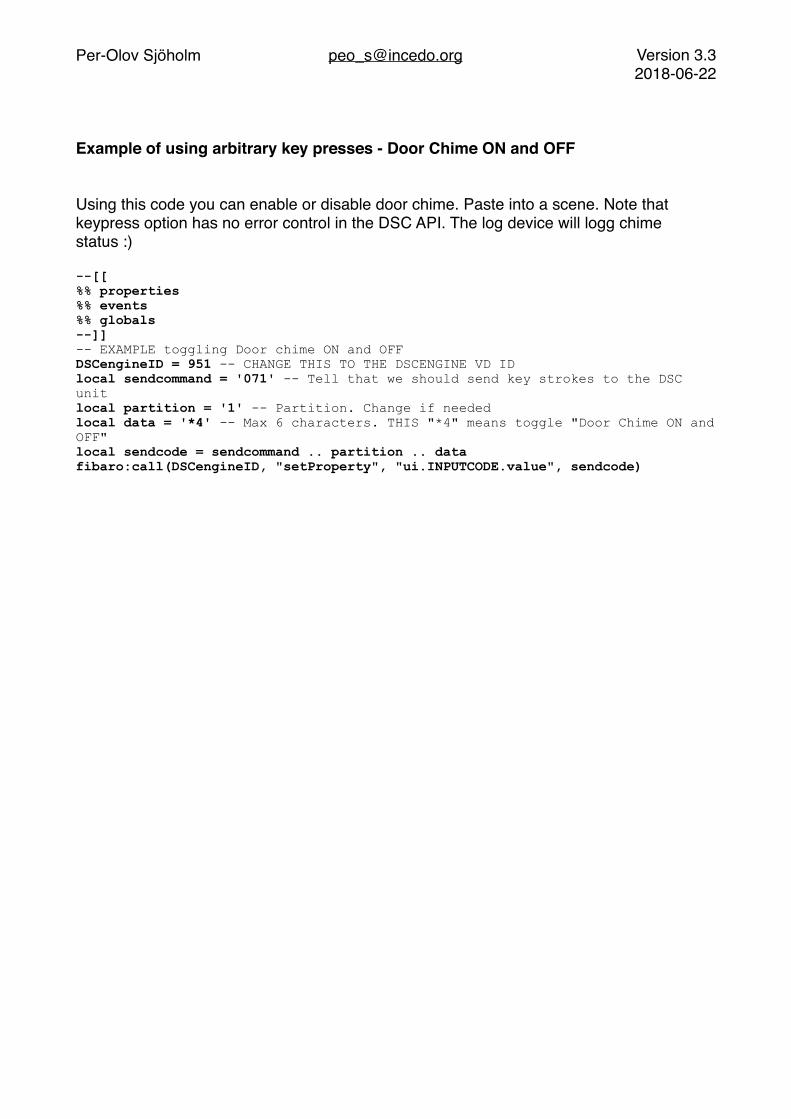
Example of using arbitrary key presses - Door Chime ON and OFF
Using this code you can enable or disable door chime. Paste into a scene. Note that keypress option has no error control in the DSC API. The log device will logg chime status :)
--[[ %% properties %% events %% globals --]] -- EXAMPLE toggling Door chime ON and OFF DSCengineID = 951 -- CHANGE THIS TO THE DSCENGINE VD ID local sendcommand = '071' -- Tell that we should send key strokes to the DSC unit local partition = '1' -- Partition. Change if needed local data = '*4' -- Max 6 characters. THIS "*4" means toggle "Door Chime ON and OFF" local sendcode = sendcommand .. partition .. data fibaro:call(DSCengineID, "setProperty", "ui.INPUTCODE.value", sendcode)
Per-Olov Sjöholm [email protected] Version 3.32018-06-22
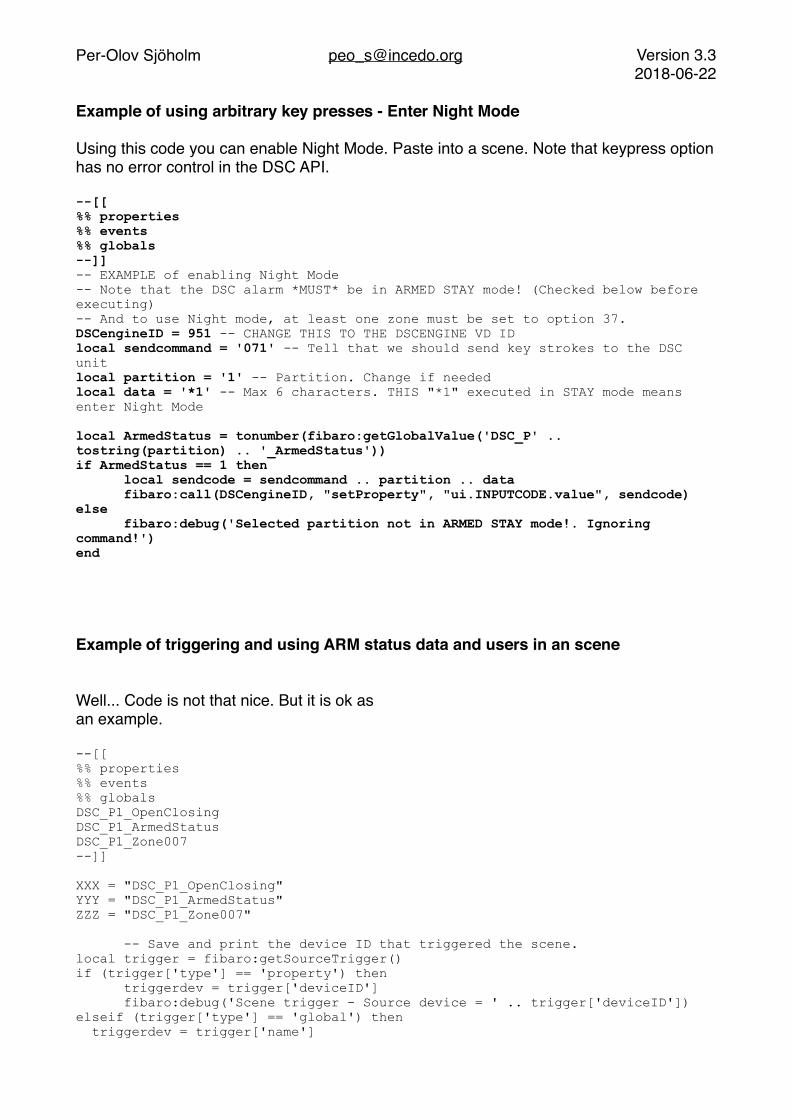
Example of using arbitrary key presses - Enter Night Mode
Using this code you can enable Night Mode. Paste into a scene. Note that keypress option has no error control in the DSC API.
--[[ %% properties %% events %% globals --]] -- EXAMPLE of enabling Night Mode -- Note that the DSC alarm *MUST* be in ARMED STAY mode! (Checked below before executing) -- And to use Night mode, at least one zone must be set to option 37. DSCengineID = 951 -- CHANGE THIS TO THE DSCENGINE VD ID local sendcommand = '071' -- Tell that we should send key strokes to the DSC unit local partition = '1' -- Partition. Change if needed local data = '*1' -- Max 6 characters. THIS "*1" executed in STAY mode means enter Night Mode
local ArmedStatus = tonumber(fibaro:getGlobalValue('DSC_P' .. tostring(partition) .. '_ArmedStatus')) if ArmedStatus == 1 then local sendcode = sendcommand .. partition .. data fibaro:call(DSCengineID, "setProperty", "ui.INPUTCODE.value", sendcode) else fibaro:debug('Selected partition not in ARMED STAY mode!. Ignoring command!') end
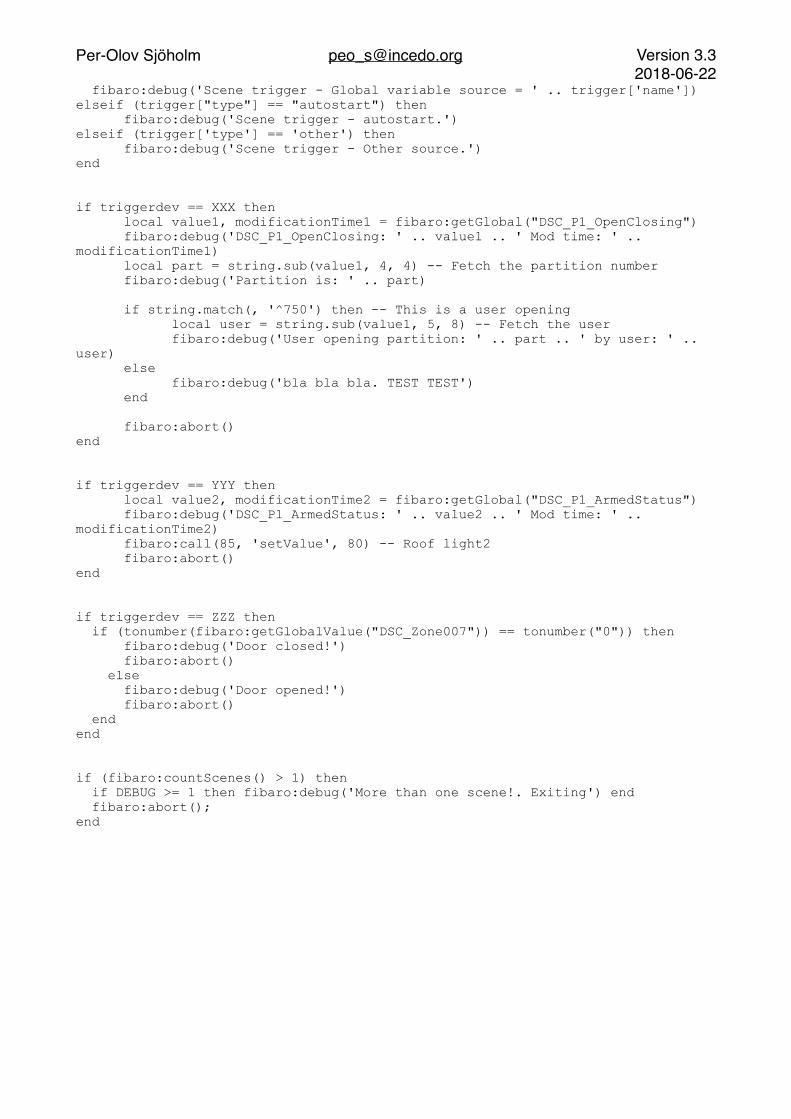
Example of triggering and using ARM status data and users in an scene
Well... Code is not that nice. But it is ok asan example.
--[[ %% properties %% events %% globals DSC_P1_OpenClosing DSC_P1_ArmedStatus DSC_P1_Zone007 --]]
XXX = "DSC_P1_OpenClosing" YYY = "DSC_P1_ArmedStatus" ZZZ = "DSC_P1_Zone007"
-- Save and print the device ID that triggered the scene. local trigger = fibaro:getSourceTrigger() if (trigger['type'] == 'property') then triggerdev = trigger['deviceID'] fibaro:debug('Scene trigger - Source device = ' .. trigger['deviceID']) elseif (trigger['type'] == 'global') then triggerdev = trigger['name']
Per-Olov Sjöholm [email protected] Version 3.32018-06-22
fibaro:debug('Scene trigger - Global variable source = ' .. trigger['name']) elseif (trigger["type"] == "autostart") then fibaro:debug('Scene trigger - autostart.') elseif (trigger['type'] == 'other') then fibaro:debug('Scene trigger - Other source.') end
if triggerdev == XXX then local value1, modificationTime1 = fibaro:getGlobal("DSC_P1_OpenClosing") fibaro:debug('DSC_P1_OpenClosing: ' .. value1 .. ' Mod time: ' .. modificationTime1) local part = string.sub(value1, 4, 4) -- Fetch the partition number fibaro:debug('Partition is: ' .. part) if string.match(, '^750') then -- This is a user opening local user = string.sub(value1, 5, 8) -- Fetch the user fibaro:debug('User opening partition: ' .. part .. ' by user: ' .. user) else fibaro:debug('bla bla bla. TEST TEST') end
fibaro:abort() end
if triggerdev == YYY then local value2, modificationTime2 = fibaro:getGlobal("DSC_P1_ArmedStatus") fibaro:debug('DSC_P1_ArmedStatus: ' .. value2 .. ' Mod time: ' .. modificationTime2) fibaro:call(85, 'setValue', 80) -- Roof light2 fibaro:abort() end
if triggerdev == ZZZ then if (tonumber(fibaro:getGlobalValue("DSC_Zone007")) == tonumber("0")) then fibaro:debug('Door closed!') fibaro:abort() else fibaro:debug('Door opened!') fibaro:abort() end end
if (fibaro:countScenes() > 1) then if DEBUG >= 1 then fibaro:debug('More than one scene!. Exiting') end fibaro:abort(); end
Per-Olov Sjöholm [email protected] Version 3.32018-06-22
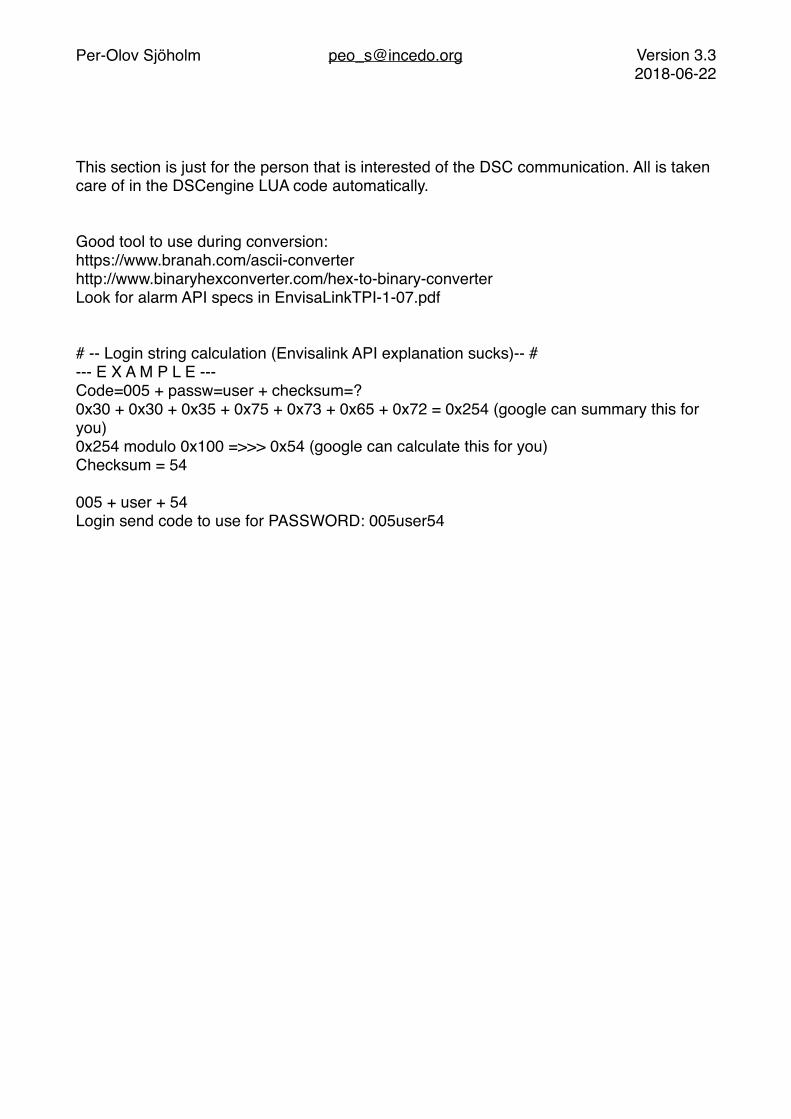
This section is just for the person that is interested of the DSC communication. All is taken care of in the DSCengine LUA code automatically.
Good tool to use during conversion:https://www.branah.com/ascii-converter http://www.binaryhexconverter.com/hex-to-binary-converterLook for alarm API specs in EnvisaLinkTPI-1-07.pdf
# -- Login string calculation (Envisalink API explanation sucks)-- #--- E X A M P L E ---Code=005 + passw=user + checksum=?0x30 + 0x30 + 0x35 + 0x75 + 0x73 + 0x65 + 0x72 = 0x254 (google can summary this for you)0x254 modulo 0x100 =>>> 0x54 (google can calculate this for you)Checksum = 54
005 + user + 54Login send code to use for PASSWORD: 005user54