Integra Miltex Dental Aspirating.pdfIntegra Miltex ® Aspirating Syringes are indicated to be used...
6
Integra ™ Miltex ® Dental Aspirating Syringes Directions for Use EC REP Manufacturer Integra York PA, Inc. i 589 Davies Drive, York, PA 17402 USA 866-854-8300 USA i 717-840-2763 outside USA i 717-840-9347 fax integralife.com/integra-miltex Description Integra™ Miltex® Aspirating Syringes are used in conjunction with a needle and a 1.8cc pre-filled anesthetic cartridge (not supplied by Integra™ Miltex®). Aspirating syringes are available in Type CW (Cook-Waite) and Type A (Astra). The syringes are reusable and are provided clean and supplied non-sterile. Indications Integra™ Miltex® Aspirating Syringes are indicated to be used in conjunction with anesthetic needles and anesthetic cartridges for injection of anesthetic solutions in the oral cavity. Contraindications None known. Warnings • To avoid needle sticks, re-cap needle after injection has been given. • To avoid leakage during an injection, ensure that needle is straight as it penetrates the cartridge diaphragm. Precautions • Syringes must be sterilized prior to use. See sterilization instructions. • Hubs cannot be removed. Do not attempt to remove hub from syringe for sterilization or for any reason as damage to the syringe will occur. • Do not mix metals when sterilizing syringes. Sterilizing syringes with other non chrome-plated brass instruments may cause damage to syringes. • Do not use cold sterilants, as they will react to the chrome plating of the syringe. • Keep needle capped while affixing or removing from syringe. Instructions Loading Instructions 1. Retract piston rod fully. 2. Insert 1.8cc cartridge, plunger end first, into syringe barrel. 3. Hold cartridge firmly in place. Push piston rod forward with a quick jab. 4. Affix needle to aspirating syringe. 5. Expel a few drops of solution to clear needle. 6. Aspirate before injecting solution after inserting needle into tissue. 7. After positioning the needle, pull back on thumb ring to aspirate. Unloading Instructions 1. Remove needle from syringe. 2. Withdraw piston rod to clear cartridge for removal. 3. Tilt syringe to expel cartridge. Cleaning Instructions • For best and long service life, syringes should be processed according to Integra™ Miltex® Care and Cleaning guidelines. • Remove all traces of blood, saliva, and anesthesia solution. • Remove paraffin that has accumulated on the harpoon. Sterilization Instructions • Syringes are supplied non-sterile and must be sterilized prior to each use. • Syringes should not be sterilized with other instruments to avoid syringe damage. • Before each use, sterilize and inspect instrument. Sterilize syringes according to an approved National/International Standard. Integra™ Miltex® syringes have been tested with no adverse effects under the following sterilization parameters in a standard, gravity steam, sterilizer: - Temperature: 250ºF (121ºC) - Exposure Time: 30 minutes - Dry Time: 20 minutes • Do not use cold sterilants, as they will react to the chrome plating of the syringe. Symbols Symbols may be used on some package labeling for easy identification. Integra and the Integra logo are trademarks of, and Miltex is a registered trademark of, Integra LifeSciences Corporation or its subsidiaries. ©2011 Integra LifeSciences Corporation. All rights reserved. DENTASPDFU Rev. B 06/13 EC REP Manufacturer Authorized Representative in the European Community Catalog number Lot number Caution: see warnings or precautions Product complies with requirements of directive 93/42/EEC for medical devices Federal (USA) law restricts this device to sale by or on the order of a physician or practitioner Consult instructions for use and website address ENGLISH Integra LifeSciences Services (France) SAS Immeuble Sequoia 2 97 allée Alexandre Borodine Parc Technologique de la Porte des Alpes 69800 Saint Priest–France Telephone: 33 (0) 4 37 47 59 10 Fax: 33 (0) 4 37 47 59 29
Transcript of Integra Miltex Dental Aspirating.pdfIntegra Miltex ® Aspirating Syringes are indicated to be used...

Integra™ Miltex®
Dental Aspirating Syringes Directions for Use
EC REP
ManufacturerIntegra York PA, Inc. i 589 Davies Drive, York, PA 17402 USA866-854-8300 USA i 717-840-2763 outside USA i 717-840-9347 faxintegralife.com/integra-miltex
DescriptionIntegra™ Miltex® Aspirating Syringes are used in conjunction with a needle and a 1.8cc pre-filled anesthetic cartridge (not supplied by Integra™ Miltex®). Aspirating syringes are available in Type CW (Cook-Waite) and Type A (Astra). The syringes are reusable and are provided clean and supplied non-sterile.
IndicationsIntegra™ Miltex® Aspirating Syringes are indicated to be used in conjunction with anesthetic needles and anesthetic cartridges for injection of anesthetic solutions in the oral cavity.
Contraindications None known.
Warnings • To avoid needle sticks, re-cap needle after injection has been given. • To avoid leakage during an injection, ensure that needle is straight as it penetrates the cartridge diaphragm.
Precautions • Syringes must be sterilized prior to use. See sterilization instructions. • Hubs cannot be removed. Do not attempt to remove hub from syringe for sterilization or for any reason as damage to the syringe will occur. • Do not mix metals when sterilizing syringes. Sterilizing syringes with other non chrome-plated brass instruments may cause damage to syringes. • Do not use cold sterilants, as they will react to the chrome plating of the syringe. • Keep needle capped while affixing or removing from syringe.
InstructionsLoading Instructions1. Retract piston rod fully.2. Insert 1.8cc cartridge, plunger end first, into syringe barrel.3. Hold cartridge firmly in place. Push piston rod forward with
a quick jab. 4. Affix needle to aspirating syringe.5. Expel a few drops of solution to clear needle. 6. Aspirate before injecting solution after inserting needle
into tissue.7. After positioning the needle, pull back on thumb ring to aspirate.
Unloading Instructions1. Remove needle from syringe.2. Withdraw piston rod to clear cartridge for removal.3. Tilt syringe to expel cartridge.
Cleaning Instructions • For best and long service life, syringes should be processed according to Integra™ Miltex® Care and Cleaning guidelines. • Remove all traces of blood, saliva, and anesthesia solution. • Remove paraffin that has accumulated on the harpoon.
Sterilization Instructions • Syringes are supplied non-sterile and must be sterilized prior to each use. • Syringes should not be sterilized with other instruments to avoid syringe damage. • Before each use, sterilize and inspect instrument. Sterilize syringes according to an approved National/International Standard. Integra™ Miltex® syringes have been tested with no adverse effects under the following sterilization parameters in a standard, gravity steam, sterilizer: - Temperature: 250ºF (121ºC) - Exposure Time: 30 minutes - Dry Time: 20 minutes • Do not use cold sterilants, as they will react to the chrome plating of the syringe.
Symbols
Symbols may be used on some package labeling for easy identification.
Integra and the Integra logo are trademarks of, and Miltex is a registered trademark of, Integra LifeSciences Corporation or its subsidiaries.©2011 Integra LifeSciences Corporation. All rights reserved.
DENTASPDFU Rev. B 06/13
EC REP
Manufacturer
Authorized Representative in the European Community
Catalog number
Lot number
Caution: see warnings or precautions
Product complies with requirements of directive 93/42/EEC for medical devices
Federal (USA) law restricts this device to sale by or on the order of a physician or practitioner
Consult instructions for use and website address ENG
LISH
Integra LifeSciences Services (France) SAS Immeuble Sequoia 297 allée Alexandre BorodineParc Technologique de la Porte des Alpes69800 Saint Priest–FranceTelephone: 33 (0) 4 37 47 59 10Fax: 33 (0) 4 37 47 59 29

EC REP
FabricanteIntegra York PA, Inc. i 589 Davies Drive, York, PA 17402 EE.UU.866-854-8300 EE.UU. i 717-840-2763 fuera de EE.UU. i 717-840-9347 faxintegralife.com/integra-miltex
DescripciónLas jeringas aspiradoras Integra™ Miltex® se utilizan junto con una aguja y un cartucho de anestesia de 1,8 cc (no suministrados por Integra™ Miltex®). Las jeringas aspiradoras están disponibles en tipo CW (Cook-Waite) y tipo A (Astra). Las jeringas son reutilizables y se suministran limpias y no estériles.
IndicacionesLas jeringas aspiradoras Integra™ Miltex® están concebidas para ser usadas junto con agujas y cartuchos de anestesia para la inyección de soluciones anestésicas en la cavidad oral.
ContraindicacionesNinguna conocida.
Advertencias• Para evitar pinchazos de la aguja, tápela una vez que se haya
administrado la inyección.• Para evitar la filtración durante una inyección, asegúrese de que la
aguja quede recta cuando penetre el diafragma del cartucho.
Precauciones• Las jeringas deben esterilizarse antes de ser utilizadas.
Consulte las instrucciones de esterilización• Los ejes no pueden retirarse. No intente retirar el eje de la jeringa
para su esterilización o por ninguna otra razón porque podría dañar la jeringa.
• No mezcle los metales cuando esterilice jeringas. Esterilizar jeringas con otros instrumentos de metal no cromados puede dañarlas.
• No use esterilizantes fríos, puesto que podrían reaccionar con el cromado de la jeringa.
• Mantenga la aguja tapada mientras que la fija o la retira de la jeringa.
InstruccionesInstrucciones de carga1. Retraiga la varilla del pistón por completo.2. Inserte el cartucho de 1,8 cc, primero el extremo del émbolo,
en el cilindro de la jeringa.3. Sujete bien el cartucho en su sitio. Empuje la varilla del
pistón hacia adelante con un movimiento rápido.4. Fije la aguja a la jeringa aspiradora.5. Deje salir unas gotas de la solución para limpiar la aguja. 6. Aspire antes de inyectar la solución después de insertar la
aguja en el tejido.7. Después de colocar la aguja, tire hacia atrás de la anilla
del pulgar para aspirar.
Instrucciones de descarga1. Quite la aguja de la jeringa.2. Retire la varilla del pistón para poder extraer el cartucho.3. Incline la jeringa para que salga el cartucho.
Instrucciones de limpieza• Para una vida útil mejor y más duradera, las jeringas deben
procesarse siguiendo las directrices de cuidado y limpieza de Integra™ Miltex®.
• Retire todos los restos de sangre, saliva y solución de anestesia. • Retire la parafina que se haya acumulado en el arpón.
Instrucciones de esterilización• Las jeringans se suministran no estériles y deben esterilizarse
antes de cada uso.• Las jeringas no deben esterilizarse con otros instrumentos para
evitar dañarlas.• Esterilice e inspeccione el instrumento antes de cada uso.
Esterilice las jeringas siguiendo un estándar nacional/internacional aprobado. Las jeringas Integra™ Miltex® han sido probadas y han demostrado no tener efectos adversos con los siguientes parámetros de esterilización en un esterilizador estándar, de vapor por gravedad:
- Temperatura: 121ºC (250ºF)- Tiempo de exposición: 30 minutos- Tiempo de secado: 20 minutos
• No use esterilizantes fríos, puesto que podrían reaccionar con el cromado de la jeringa.
SímbolosEs posible que se utilicen símbolos en algunas etiquetas del paquete para facilitar su identificación.
Integra y el logo de Integra son marcas comerciales de, y Miltex es una marca registrada de, Integra LifeSciences Corporation o de sus empresas afiliadas.©2011 Integra LifeSciences Corporation. Todos los derechos reservados.
DENTASPDFU Rev. B 06/13
EC REP
Fabricante
Representante autorizado en laComunidad Europea
Número de catálogo
Número de lote
Precaución
El producto cumple con los requisitos de la directiva 93/42/CEE para dispositivos médicos.
La ley federal de EE.UU. restringe la venta de este dispositivo, precisa prescripción facultativa de un dentista o un médico.
Consulte las instrucciones de uso y la dirección del sitio web
Integra™ Miltex®
Jeringas aspiradoras dentalesInstrucciones de uso
ESPA
ÑO
L
Integra LifeSciences Services (France) SAS Immeuble Sequoia 297 allée Alexandre BorodineParc Technologique de la Porte des Alpes69800 Saint Priest–FranceTelephone: 33 (0) 4 37 47 59 10Fax: 33 (0) 4 37 47 59 29

ESPA
ÑO
L
EC REP
FabricantIntegra York PA, Inc. i 589 Davies Drive, York, PA 17402 États-Unis866-854-8300 USA i 717-840-2763 en-dehors des États-Unis i 717-840-9347 faxintegralife.com/integra-miltex
DescriptionLes seringues d'aspiration Integra™ Miltex® sont utilisées conjointement avec une aiguille et une cartouche de 1,8 cc préremplie d'anesthésique (non fournie par Integra™ Miltex®). Les seringues d'aspiration existent en type CW (Cook-Waite) et type A (Astra). Les seringues sont réutilisables et fournies propres et non stériles.
IndicationsLes seringues d'aspiration Integra™ Miltex® sont indiquées pour être utilisées conjointement avec des aiguilles d'anesthésique et des cartouches d'anesthésique pour l'injection de solutions anesthésiques dans la cavité buccale.
Contre-indicationsAucune connue.
Avertissements• Pour éviter une piqûre accidentelle avec l'aiguille, replacer le
capuchon après l'injection.• Pour éviter une fuite durant une injection, s'assurer que l'aiguille
est droite quand elle pénètre dans le diaphragme de la cartouche.
Précautions• Les seringues doivent être stérilisées avant utilisation. Voir les
instructions de stérilisation.• Les raccords ne peuvent pas être retirés. Ne pas essayer de retirer
le raccord de la seringue pour une stérilisation, ni aucune autre raison, car cela endommagerait la seringue.
• Ne pas mélanger les métaux pendant la stérilisation des seringues. La stérilisation de seringues avec d'autres instruments qui ne sont pas en laiton chromé peut endommager les seringues.
• Ne pas utiliser de stérilisant à froid car il réagirait avec le chromage de la seringue.
• Garder le capuchon sur l'aiguille lorsqu'elle est fixée sur la seringue ou retirée de celle-ci.
InstructionsInstructions de chargement1. Rétracter complètement la tige du piston.2. Insérer la cartouche de 1,8 cc, extrémité du piston en premier,
dans le corps de seringue.3. Maintenir fermement la cartouche en position. Pousser la tige de
piston d'un rapide petit coup. 4. Fixer l'aiguille à la seringue d'aspiration.5. Expulser quelques gouttes de solution pour amorcer l'aiguille. 6. Après avoir inséré l'aiguille dans les tissus, aspirer avant d'injecter la
solution.7. Après avoir positionné l'aiguille, tirer sur l'anneau du pouce pour
aspirer.
Instructions de déchargement1. Retirer l'aiguille de la seringue.2. Tirer la tige de piston pour permettre le retrait de la cartouche.3. Pencher la seringue pour expulser la cartouche.
Instructions de nettoyage• Pour prolonger et garantir la longue durée de vie des instruments,
le traitement des seringues doit être effectué conformément aux directives de nettoyage et d'entretien d'Integra™ Miltex®.
• Retirer toute trace de sang, salive et solution anesthésique. • Retirer la paraffine qui s'est accumulée dans le harpon.
Instructions de stérilisation• Les seringues sont fournies non stériles et doivent être stérilisées
avant chaque utilisation.• Les seringues ne doivent pas être stérilisées avec d'autres
instruments pour éviter tout dommage sur les seringues.• Avant chaque utilisation, stériliser et inspecter l'instrument.
Stériliser les seringues conformément à une norme nationale/internationale approuvée. Les seringues Integra™ Miltex® ont été soumises aux paramètres de stérilisation suivants, dans un stérilisateur vapeur par gravité standard, sans subir aucun effet néfaste :
- Température : 121 ºC (250 ºF)- Durée d’exposition : 30 minutes- Temps de séchage : 20 minutes
• Ne pas utiliser de stérilisant à froid car il réagirait avec le chromage de la seringue.
SymbolesDes symboles peuvent être utilisés sur certains étiquetages de conditionnements pour faciliter l'identification.
Integra et le logo Integra sont des marques et Miltex est une marque déposée d'Integra LifeSciences Corporation ou de ses filiales.© 2011 Integra LifeSciences Corporation. Tous droits réservés.
DENTASPDFU Rev. B 06/13
EC REP
Fabricant
Représentant agréédans la Communauté européenne
Référence
Numéro de lot
Avertissement
Produit conforme aux exigences de la directive 93/42/CEE relative aux dispositifs médicaux
Aux États-Unis, la loi fédérale réserve la vente de ce dispositif aux médecins ou praticiens ou sur leur ordonnance médicale
Consulter le mode d'emploi et l'adresse du site Internet
Integra™ Miltex®
Seringues dentaires d'aspiration Mode d’emploi
FRA
NÇ
AIS
Integra LifeSciences Services (France) SAS Immeuble Sequoia 297 allée Alexandre BorodineParc Technologique de la Porte des Alpes69800 Saint Priest–FranceTelephone: 33 (0) 4 37 47 59 10Fax: 33 (0) 4 37 47 59 29
GER
MA
N
EC REP
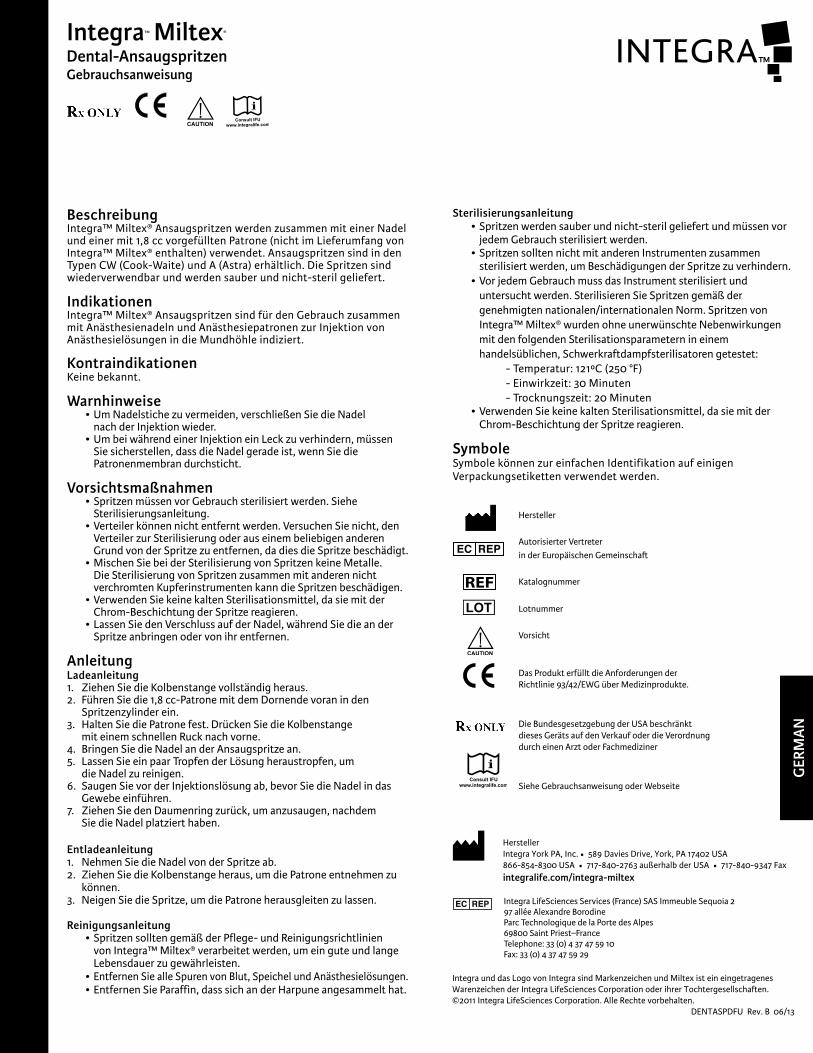
HerstellerIntegra York PA, Inc. i 589 Davies Drive, York, PA 17402 USA866-854-8300 USA i 717-840-2763 außerhalb der USA i 717-840-9347 Faxintegralife.com/integra-miltex
BeschreibungIntegra™ Miltex® Ansaugspritzen werden zusammen mit einer Nadel und einer mit 1,8 cc vorgefüllten Patrone (nicht im Lieferumfang von Integra™ Miltex® enthalten) verwendet. Ansaugspritzen sind in den Typen CW (Cook-Waite) und A (Astra) erhältlich. Die Spritzen sind wiederverwendbar und werden sauber und nicht-steril geliefert.
IndikationenIntegra™ Miltex® Ansaugspritzen sind für den Gebrauch zusammen mit Anästhesienadeln und Anästhesiepatronen zur Injektion von Anästhesielösungen in die Mundhöhle indiziert.
KontraindikationenKeine bekannt.
Warnhinweise• Um Nadelstiche zu vermeiden, verschließen Sie die Nadel
nach der Injektion wieder.• Um bei während einer Injektion ein Leck zu verhindern, müssen
Sie sicherstellen, dass die Nadel gerade ist, wenn Sie die Patronenmembran durchsticht.
Vorsichtsmaßnahmen• Spritzen müssen vor Gebrauch sterilisiert werden. Siehe
Sterilisierungsanleitung.• Verteiler können nicht entfernt werden. Versuchen Sie nicht, den
Verteiler zur Sterilisierung oder aus einem beliebigen anderen Grund von der Spritze zu entfernen, da dies die Spritze beschädigt.
• Mischen Sie bei der Sterilisierung von Spritzen keine Metalle. Die Sterilisierung von Spritzen zusammen mit anderen nicht verchromten Kupferinstrumenten kann die Spritzen beschädigen.
• Verwenden Sie keine kalten Sterilisationsmittel, da sie mit der Chrom-Beschichtung der Spritze reagieren.
• Lassen Sie den Verschluss auf der Nadel, während Sie die an der Spritze anbringen oder von ihr entfernen.
AnleitungLadeanleitung1. Ziehen Sie die Kolbenstange vollständig heraus.2. Führen Sie die 1,8 cc-Patrone mit dem Dornende voran in den
Spritzenzylinder ein.3. Halten Sie die Patrone fest. Drücken Sie die Kolbenstange
mit einem schnellen Ruck nach vorne. 4. Bringen Sie die Nadel an der Ansaugspritze an.5. Lassen Sie ein paar Tropfen der Lösung heraustropfen, um
die Nadel zu reinigen. 6. Saugen Sie vor der Injektionslösung ab, bevor Sie die Nadel in das
Gewebe einführen.7. Ziehen Sie den Daumenring zurück, um anzusaugen, nachdem
Sie die Nadel platziert haben.
Entladeanleitung1. Nehmen Sie die Nadel von der Spritze ab.2. Ziehen Sie die Kolbenstange heraus, um die Patrone entnehmen zu
können.3. Neigen Sie die Spritze, um die Patrone herausgleiten zu lassen.
Reinigungsanleitung• Spritzen sollten gemäß der Pflege- und Reinigungsrichtlinien
von Integra™ Miltex® verarbeitet werden, um ein gute und lange Lebensdauer zu gewährleisten.
• Entfernen Sie alle Spuren von Blut, Speichel und Anästhesielösungen. • Entfernen Sie Paraffin, dass sich an der Harpune angesammelt hat.
Sterilisierungsanleitung• Spritzen werden sauber und nicht-steril geliefert und müssen vor
jedem Gebrauch sterilisiert werden.• Spritzen sollten nicht mit anderen Instrumenten zusammen
sterilisiert werden, um Beschädigungen der Spritze zu verhindern.• Vor jedem Gebrauch muss das Instrument sterilisiert und
untersucht werden. Sterilisieren Sie Spritzen gemäß der genehmigten nationalen/internationalen Norm. Spritzen von Integra™ Miltex® wurden ohne unerwünschte Nebenwirkungen mit den folgenden Sterilisationsparametern in einem handelsüblichen, Schwerkraftdampfsterilisatoren getestet:
- Temperatur: 121ºC (250 °F)- Einwirkzeit: 30 Minuten- Trocknungszeit: 20 Minuten
• Verwenden Sie keine kalten Sterilisationsmittel, da sie mit der Chrom-Beschichtung der Spritze reagieren.
SymboleSymbole können zur einfachen Identifikation auf einigen Verpackungsetiketten verwendet werden.
Integra und das Logo von Integra sind Markenzeichen und Miltex ist ein eingetragenes Warenzeichen der Integra LifeSciences Corporation oder ihrer Tochtergesellschaften.©2011 Integra LifeSciences Corporation. Alle Rechte vorbehalten.
DENTASPDFU Rev. B 06/13
EC REP
Hersteller
Autorisierter Vertreter in der Europäischen Gemeinschaft
Katalognummer
Lotnummer
Vorsicht
Das Produkt erfüllt die Anforderungen der Richtlinie 93/42/EWG über Medizinprodukte.
Die Bundesgesetzgebung der USA beschränkt dieses Geräts auf den Verkauf oder die Verordnung durch einen Arzt oder Fachmediziner
Siehe Gebrauchsanweisung oder Webseite
Integra™ Miltex®
Dental-AnsaugspritzenGebrauchsanweisung
Integra LifeSciences Services (France) SAS Immeuble Sequoia 297 allée Alexandre BorodineParc Technologique de la Porte des Alpes69800 Saint Priest–FranceTelephone: 33 (0) 4 37 47 59 10Fax: 33 (0) 4 37 47 59 29
GER
MA
N
ITA
LIA
NO
EC REP
ProduttoreIntegra York PA, Inc. i 589 Davies Drive, York, PA 17402 USA866-854-8300 USA i 717-840-2763 negli altri paesi i 717-840-9347 faxintegralife.com/integra-miltex
DescrizioneLe siringhe aspiranti Integra™ Miltex® vengono utilizzate unitamente con un ago e una cartuccia da 1,8 cc precedentemente riempita di anestetico (non fornita da Integra™ Miltex®). Le siringhe aspiranti sono disponibili nei tipi CW (Cook-Waite) e A (Astra). Le siringhe sono riutilizzabili e fornite pulite e non sterili.
IndicazioniLe siringhe aspiranti Integra™ Miltex® sono indicate per l'uso unitamente ad aghi per anestetico e cartucce di anestetico per l'iniezione di soluzioni anestetiche nel cavo orale.
ControindicazioniNessuna conosciuta.
Avvertenze• Per evitare di pungersi con gli aghi, ritappare l’ago dopo l’iniezione.• Per evitare perdite durante un’iniezione, accertarsi che l’ago sia
diritto mentre penetra nel diaframma della cartuccia.
Precauzioni• Le siringhe devono essere sterilizzate prima dell'uso. Vedere le
istruzioni di sterilizzazione.• Non è possibile rimuovere il raccordo. Non tentare di rimuovere
il raccordo dalla siringa per la sterilizzazione o per qualsiasi altra ragione in quanto si verificherebbero danni alla siringa.
• Non mescolare i metalli quando si sterilizzano le siringhe. Sterilizzando le siringhe con altri strumenti che non siano in ottone cromato si possono danneggiare le siringhe.
• Evitare di usare sostanze sterilizzanti fredde che potrebbero reagire con la cromatura della siringa.
• Mantenere l'ago tappato durante l'installazione sulla siringa e la rimozione.
IstruzioniIstruzioni per il caricamento1. Retrarre interamente l'asta del pistone.2. Inserire una cartuccia da 1,8 cc, inserendo prima lo stantuffo, nel
cilindro della siringa.3. Tenere fermamente in posizione la cartuccia. Spingere
rapidamente in avanti l’asta del pistone. 4. Installare l'ago sulla siringa aspirante.5. Far fuoriuscire alcune gocce di soluzione per pulire l’ago. 6. Aspirare prima di iniettare la soluzione dopo aver introdotto
l'ago nel tessuto.7. Dopo aver posizionato l'ago, spingere retraendo
sull'appoggia-pollice per aspirare.
Istruzioni per lo scaricamento1. Rimuovere l'ago dalla siringa.2. Retrarre l'asta del pistone per liberare la cartuccia da rimuovere.3. Inclinare la siringa per espellere la cartuccia.
Istruzioni per la pulizia• Perché le siringhe funzionino in modo ottimale e a lungo,
rigenerarle conformemente alle linee guida per la cura e la pulizia di Integra™ Miltex®.
• Rimuovere ogni traccia di sangue, saliva e soluzione anestetica. • Rimuovere la paraffina accumulatasi sull'arpione.
Istruzioni per la sterilizzazione• Le siringhe sono fornite non sterili e devono essere sterilizzate
prima di ogni uso.• Non sterilizzare le siringhe assieme ad altri strumenti onde evitare
di danneggiarle.• Prima di ogni uso, sterilizzare e ispezionare lo strumento.
Sterilizzare le siringhe conformemente alla normativa nazionale/internazionale approvata. Le siringhe Integra™ Miltex® sono state collaudate senza rilevare effetti nocivi adottando i seguenti parametri di sterilizzazione in uno sterilizzatore a vapore con spostamento per gravità a norma:
- Temperatura: 121 ºC (250 °F)- Tempo di esposizione: 30 minuti- Tempo di essiccazione: 20 minuti
• Evitare di usare sostanze sterilizzanti fredde che potrebbero reagire con la cromatura della siringa.
SimboliSu alcune confezioni possono apparire stampati alcuni simboli che ne facilitano l'identificazione.
Integra e il logo Integra sono marchi di fabbrica di Integra LifeSciences Corporation o delle sue filiali e Miltex ne è il marchio di fabbrica depositato.©2011 Integra LifeSciences Corporation. Tutti i diritti riservati.
DENTASPDFU Rev. B 06/13
EC REP
Produttore
Rappresentante autorizzato per la Comunità Europea
Numero di catalogo
Numero di lotto
Attenzione
Il prodotto è conforme ai requisiti della direttiva 93/42/EEC per i dispositivi medici.
La legge degli Stati Uniti limita la vendita di questo dispositivo ai soli medici o dentisti o su loro prescrizione.
Consultare le Istruzioni per l'uso e l'indirizzo web
Integra™ Miltex®
Siringhe odontoiatriche aspirantiIstruzioni per l'uso
Integra LifeSciences Services (France) SAS Immeuble Sequoia 297 allée Alexandre BorodineParc Technologique de la Porte des Alpes69800 Saint Priest–FranceTelephone: 33 (0) 4 37 47 59 10Fax: 33 (0) 4 37 47 59 29

DEU
TSC
H
EC REP
FabrikantIntegra York PA, Inc. i 589 Davies Drive, York, PA 17402 VS866-854-8300 VS i 717-840-2763 buiten VS i 717-840-9347 faxintegralife.com/integra-miltex
BeschrijvingIntegra™ Miltex® niet-zelfvullende injectiespuiten worden gebruikt in combinatie met een naald en een voorgevulde anesthesiecartridge van 1,8cc (niet meegeleverd door Integra™ Miltex®). Niet-zelfvullende injectiespuiten zijn verkrijgbaar in Type CW (Cook-Waite) en Type A (Astra). De injectiespuiten zijn herbuikbaar en worden schoon en niet-steriel geleverd.
IndicatiesIntegra™ Miltex® niet-zelfvullende injectiespuiten zijn geïndiceerd voor gebruik in combinatie met anesthesienaalden en -cartridges voor injectie van anesthesievloeistoffen in de mondholte.
Contra-indicatiesGeen bekend.
Waarschuwingen• Om prikken van naalden te voorkomen dient de dop op de
naald te worden teruggeplaatst na toedienen van de injectie.• Om lekkage tijdens een injectie te voorkomen moet gewaarborgd
worden dat de naald recht is voordat het membraan van de cartridge wordt doorgeprikt.
Voorzorgsmaatregelen• Injectiespuiten moeten voorafgaand aan ieder gebruik worden
gesteriliseerd. Raadpleeg de instructies voor sterilisatie.• Hubs kunnen niet worden verwijderd. Probeer de hub niet van de
injectiespuit te verwijderen voor sterilisatie of enige andere reden; dit zal de injectiespuit beschadigen.
• Vermeng geen metalen bij het steriliseren van injectiespuiten. Het steriliseren van injectiespuiten samen met verchroomde koperen instrumenten kan schade toebrengen aan injectiespuiten.
• Gebruik geen middelen voor koude sterilisatie, aangezien deze reageren op de chroomlaag van de injectiespuit.
• Houd de dop op de naald bij het inbrengen of verwijderen uit de injectiespuit.
InstructiesInstructies voor vullen1. Trek de zuiger volledig uit.2. Plaats de 1,8cc cartridge (plunjer naar voren) in het
reservoir van de injectiespuit.3. Houd de cartridge stevig op zijn plek. Duw de zuiger
met een snelle beweging naar voren. 4. Bevestig de naald in de niet-zelfvullende injectiespuit.5. Duw een paar druppels vloeistof naar buiten om de
naald schoon te maken. 6. Vullen voor injecteren van de vloeistof en na inbrengen
van de naald in het weefsel.7. Als de naald in positie is, trek dan de duimring naar
achteren om te vullen.
Instructies voor leegmaken1. Verwijder de naald uit de injectiespuit.2. Trek de zuiger terug om de cartridge te kunnen verwijderen.3. Houd de injectiespuit schuin om de cartridge eruit te halen.
Instructies voor reiniging• Voor goed en lang functioneren dienen injectiespuiten te worden
behandeld volgens de richtlijnen voor onderhoud en reiniging van Integra™ Miltex®.
• Verwijder alle restanten bloed, speeksel en anesthesievloeistof. • Verwijder de paraffine die zich op de harpoen heeft verzameld.
Instructies voor sterilisatie• Injectiespuiten worden niet-steriel geleverd en moeten
voorafgaand aan ieder gebruik worden gesteriliseerd.• Injectiespuiten mogen niet samen met andere instrumenten worden
gesteriliseerd om schade aan de injectiespuit te voorkomen.• Steriliseer en inspecteer instrumenten voor gebruik. Steriliseer
injectiespuiten volgens een goedgekeurde nationale/internationale standaard. Integra™ Miltex®-injectiespuiten hebben bij testen geen ongewenste effecten vertoond bij de volgende sterilisatieparameters in een standaard-stoomsterilisator:
- Temperatuur: 121 ºC (250 ºF)- Blootstellingstijd: 30 minuten- Droogtijd: 20 minuten
• Gebruik geen middelen voor koude sterilisatie, aangezien deze reageren op de chroomlaag van de injectiespuit.
SymbolenOp sommige verpakkingsetiketten worden symbolen gebruikt voor eenvoudige identificatie.
Integra en het Integra-logo zijn handelsmerken van, en Miltex is een gedeponeerd handelsmerk van, Integra LifeSciences Corporation of haar dochtermaatschappijen.©2011 Integra LifeSciences Corporation. Alle rechten voorbehouden.
DENTASPDFU Rev. B 06/13
EC REP
Fabrikant
Geautoriseerd Vertegenwoordiger in de Europese Unie
Catalogusnummer
Partijnummer
Let op
Product is in overeenstemming met de vereisten van richtlijn 93/42/EEC voor medische hulpmiddelen
Federale wetgeving in de VS beperkt de verkoop van dit instrument tot door of op voorschrift van een arts
Raadpleeg de gebruiksaanwijzing en de website
Integra™ Miltex®
Dentale niet-zelfvullende injectiespuitenGebruiksaanwijzing
Integra LifeSciences Services (France) SAS Immeuble Sequoia 297 allée Alexandre BorodineParc Technologique de la Porte des Alpes69800 Saint Priest–FranceTelephone: 33 (0) 4 37 47 59 10Fax: 33 (0) 4 37 47 59 29