Instructions mandala
13
1 Materials: •A ready-to-begin mandala •ultra fine tip marker, •9H pencil (given) , •white eraser (given) , •Ruler (optional) •Tape for center circle ace over first o inner circles th an ultra fine tip marker. k for sticker to protect center… ggest mistake forgetting to leave center pty !!!!!
-
Upload
patrice-burkhardt -
Category
Art & Photos
-
view
85 -
download
4
Transcript of Instructions mandala
1
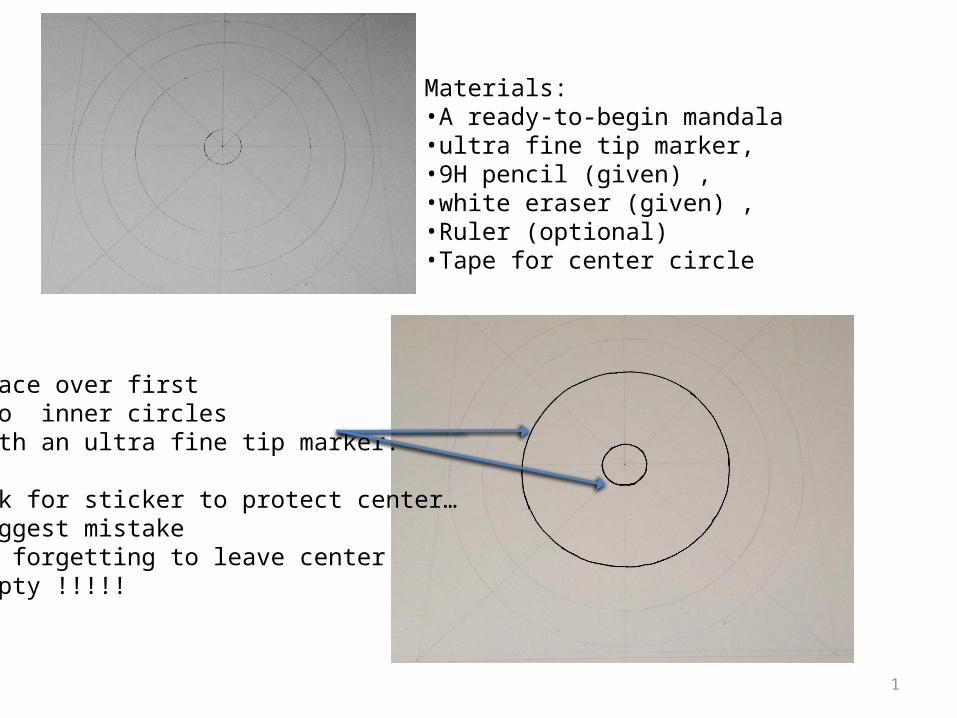
Materials:•A ready-to-begin mandala •ultra fine tip marker, •9H pencil (given) , •white eraser (given) , •Ruler (optional)•Tape for center circle
Trace over firsttwo inner circleswith an ultra fine tip marker.
Ask for sticker to protect center…Biggest mistake is forgetting to leave centerEmpty !!!!!
2
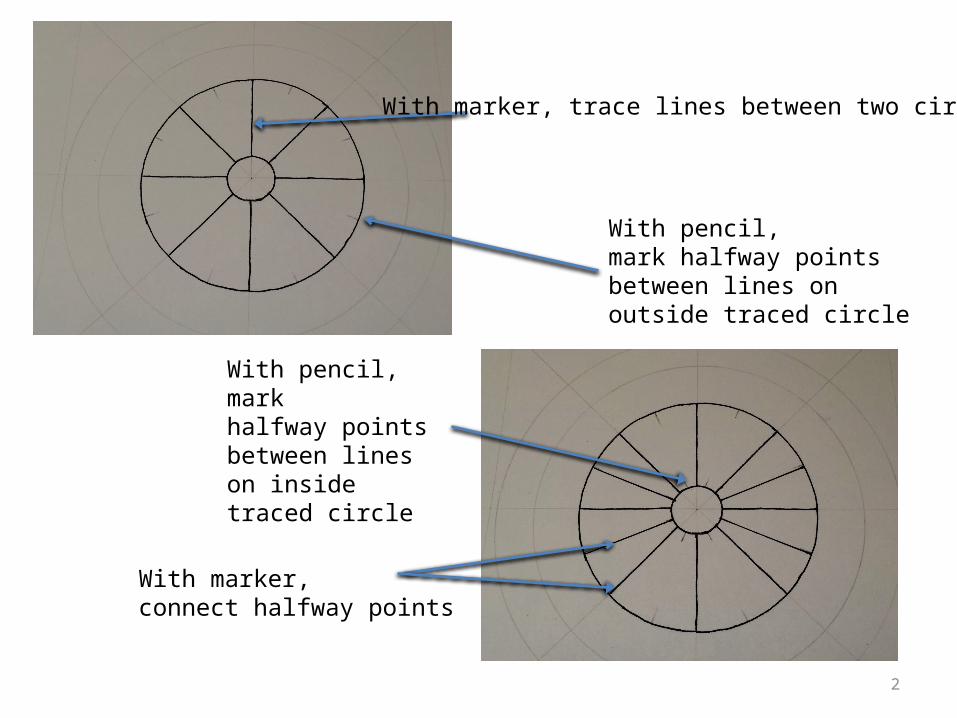
With marker, trace lines between two circles
With pencil, mark halfway pointsbetween lines on outside traced circle
With pencil, mark halfway pointsbetween lines on inside traced circle
With marker,connect halfway points
3
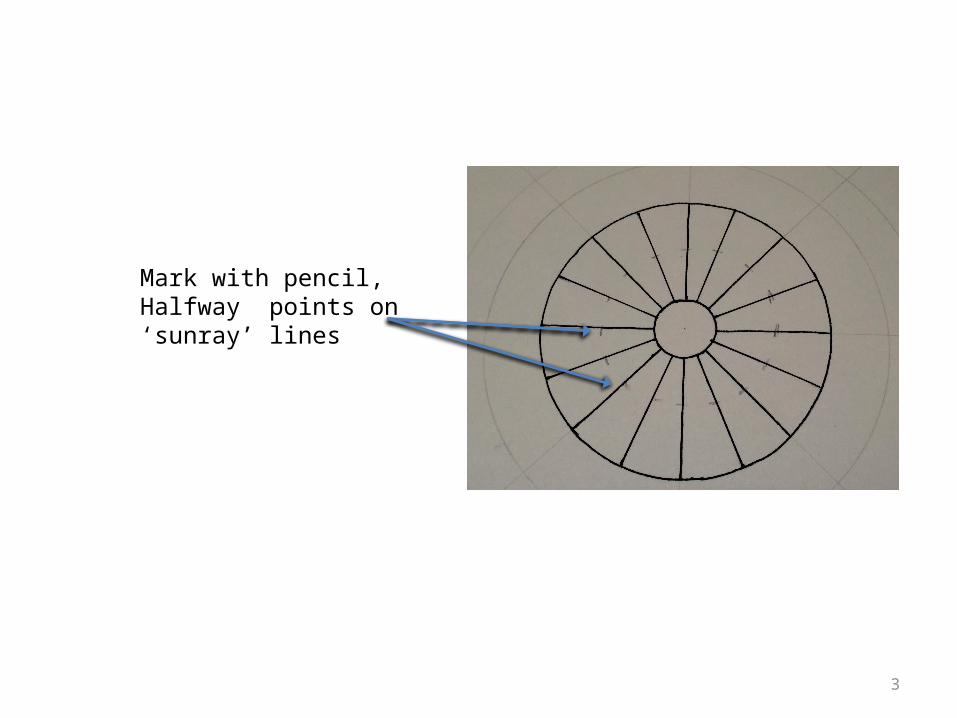
Mark with pencil,Halfway points on‘sunray’ lines
4
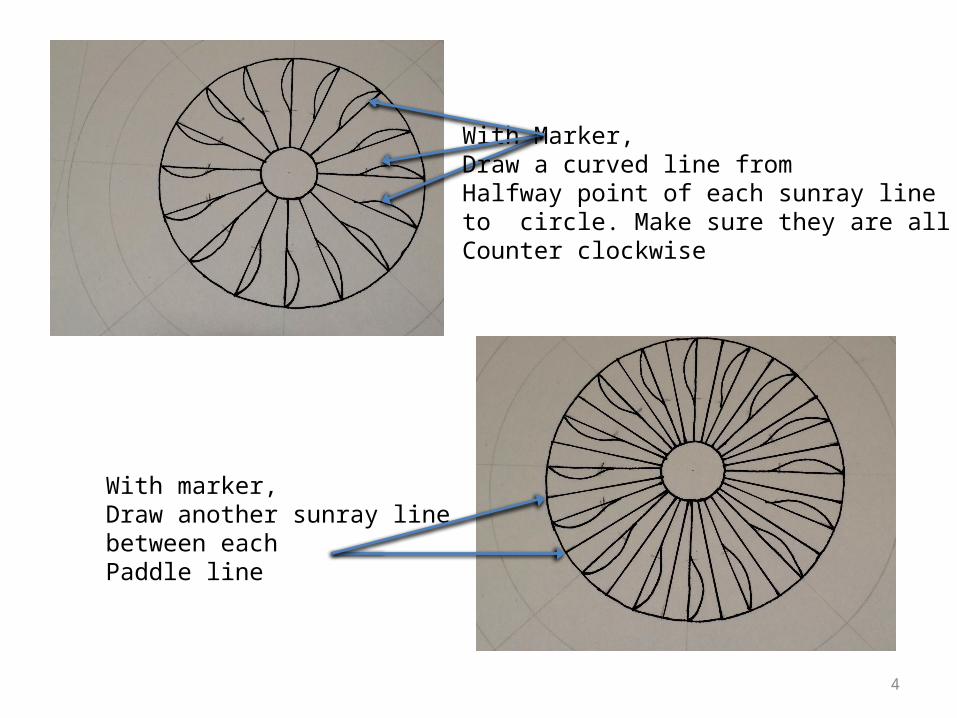
With Marker,Draw a curved line from Halfway point of each sunray line to circle. Make sure they are all goingCounter clockwise
With marker,Draw another sunray linebetween eachPaddle line
5
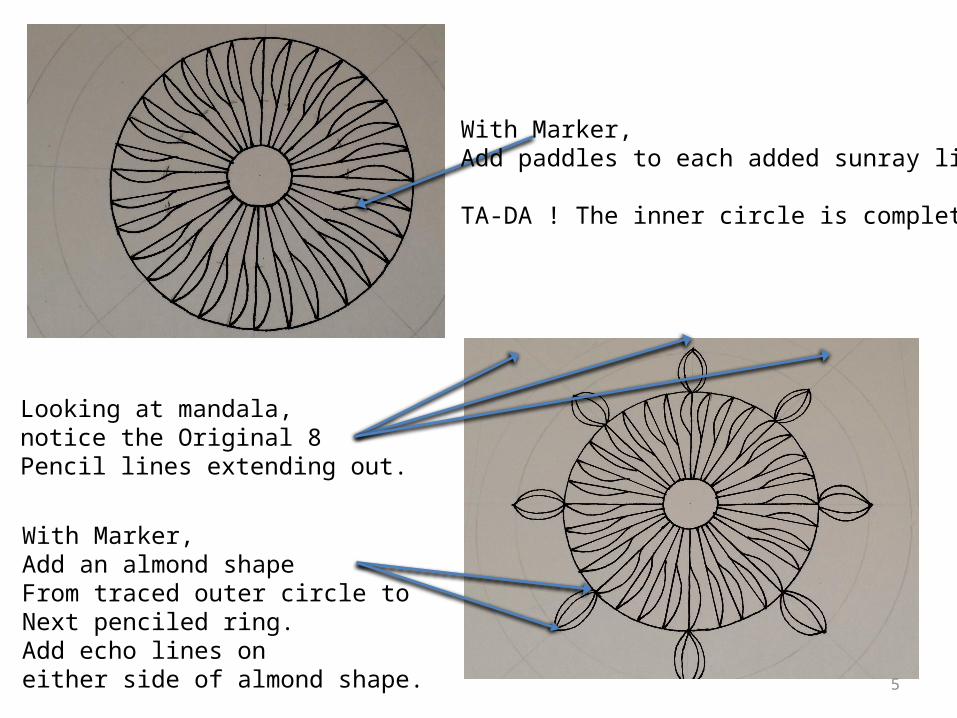
With Marker,Add paddles to each added sunray lines.
TA-DA ! The inner circle is complete.
With Marker, Add an almond shapeFrom traced outer circle toNext penciled ring.Add echo lines on either side of almond shape.
Looking at mandala, notice the Original 8 Pencil lines extending out.
6
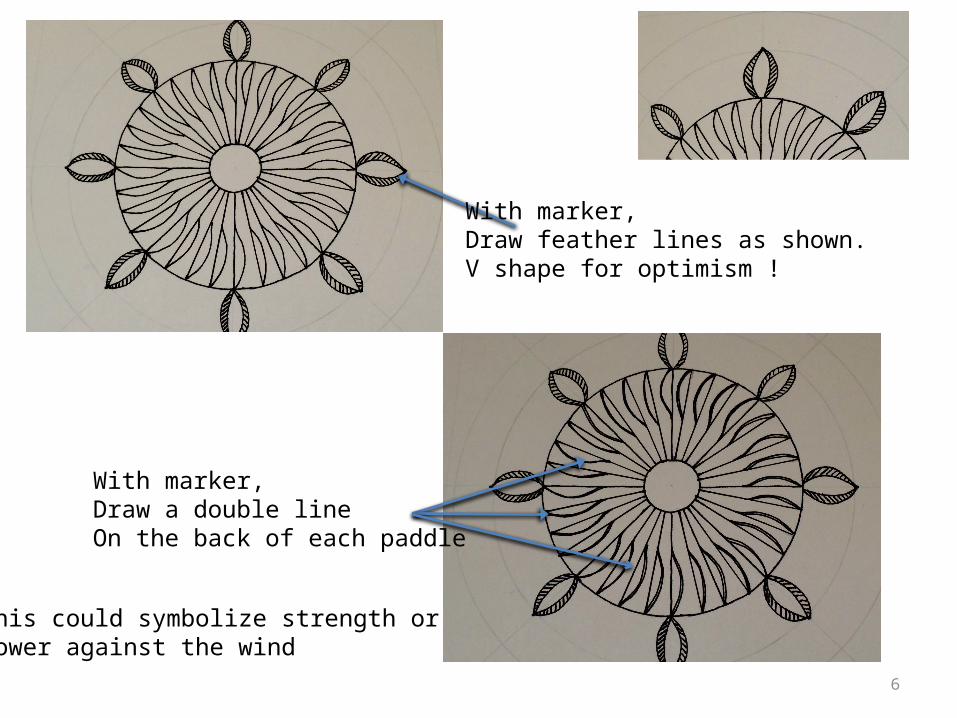
With marker,Draw feather lines as shown.V shape for optimism !
With marker,Draw a double lineOn the back of each paddle
This could symbolize strength or Power against the wind
7
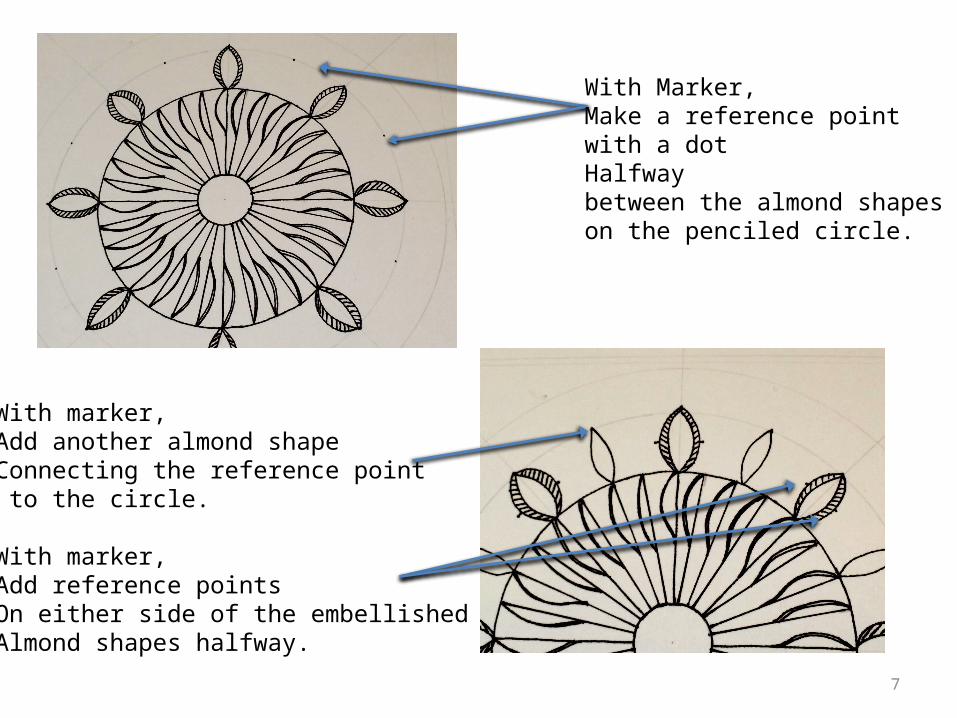
With Marker,Make a reference point with a dot Halfwaybetween the almond shapes on the penciled circle.
With marker,Add another almond shapeConnecting the reference point to the circle.
With marker,Add reference pointsOn either side of the embellished Almond shapes halfway.
8
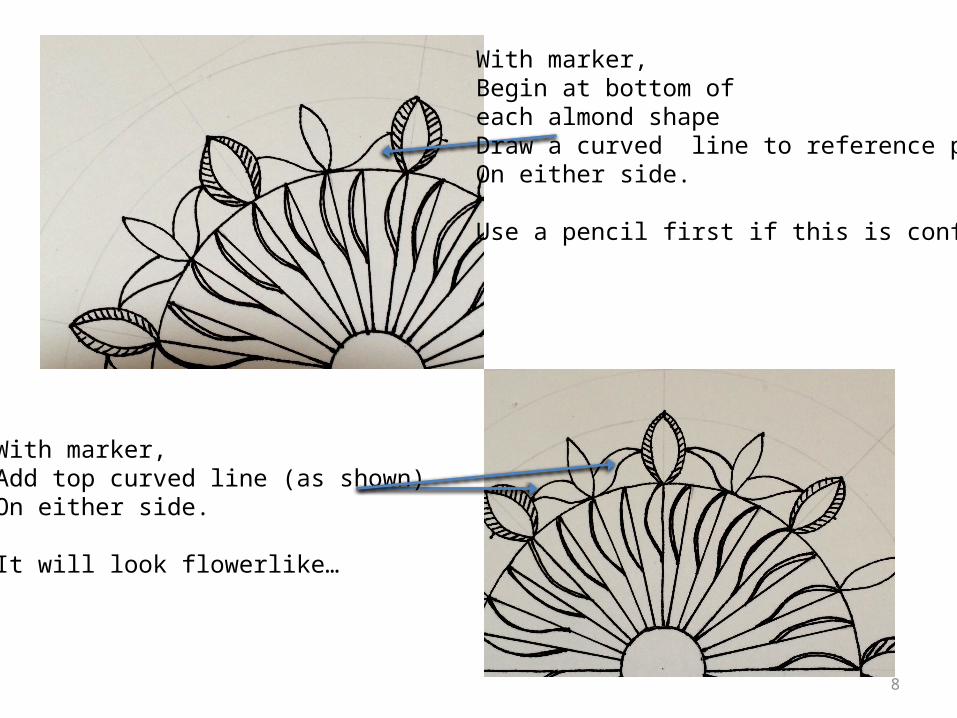
With marker,Begin at bottom ofeach almond shapeDraw a curved line to reference pointsOn either side.
Use a pencil first if this is confusing…
With marker,Add top curved line (as shown)On either side.
It will look flowerlike…
9
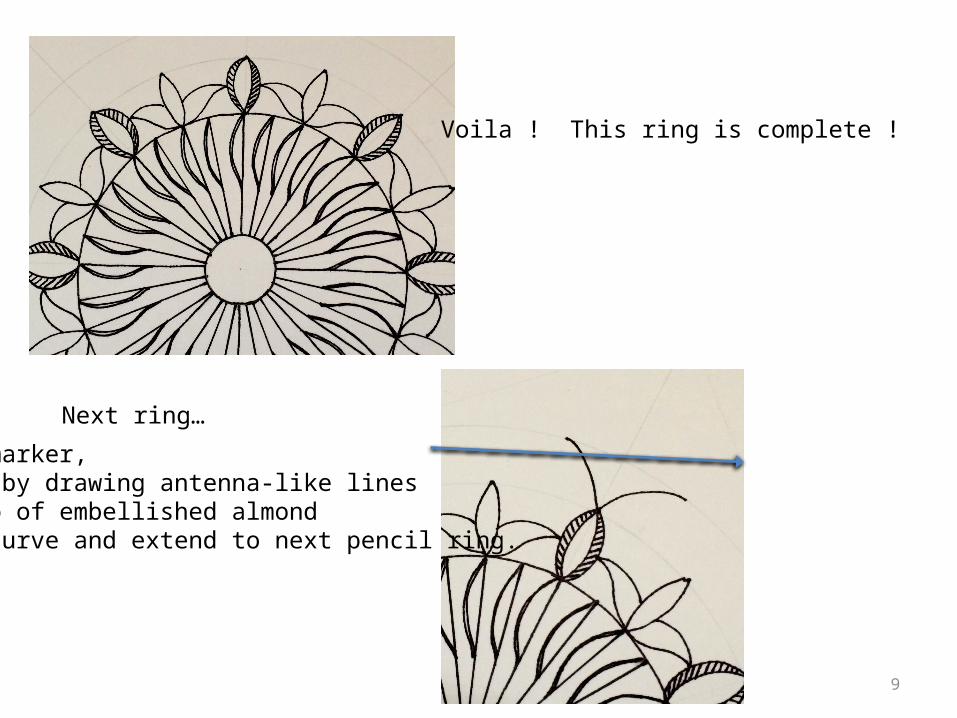
Voila ! This ring is complete !
Next ring…
With marker,Begin by drawing antenna-like linesOn top of embellished almond That curve and extend to next pencil ring.
10
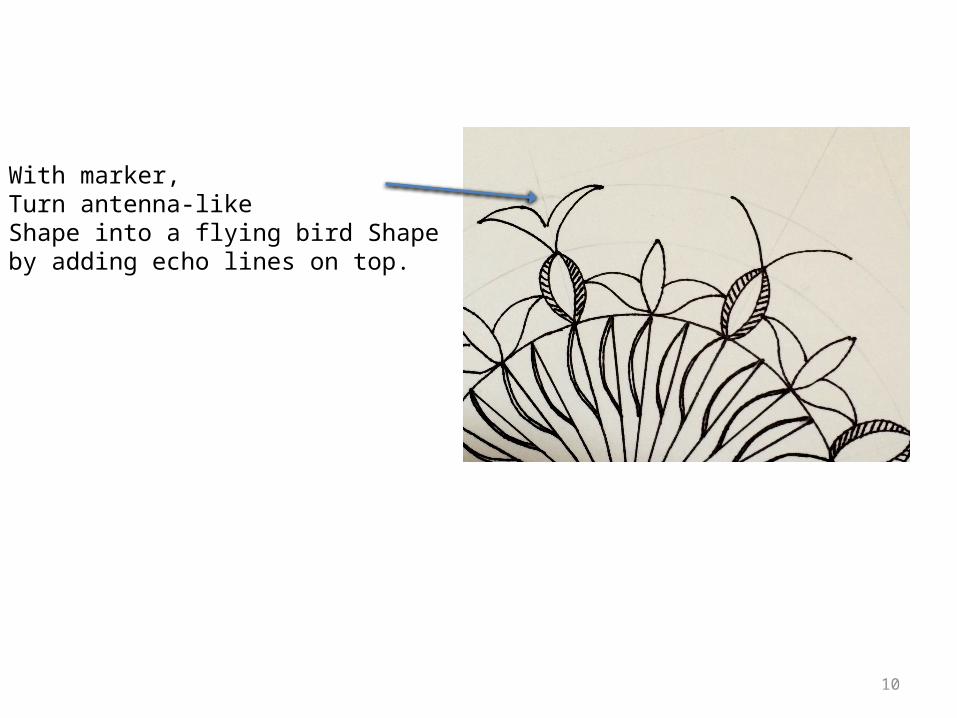
With marker,Turn antenna-likeShape into a flying bird Shape by adding echo lines on top.

11
With marker,Add an almond shape on topof Flower shapes.
With marker,Enclose the almond shapeWith a heart…
Love and optimism—yes?
And YES we have finished this ring now !
12
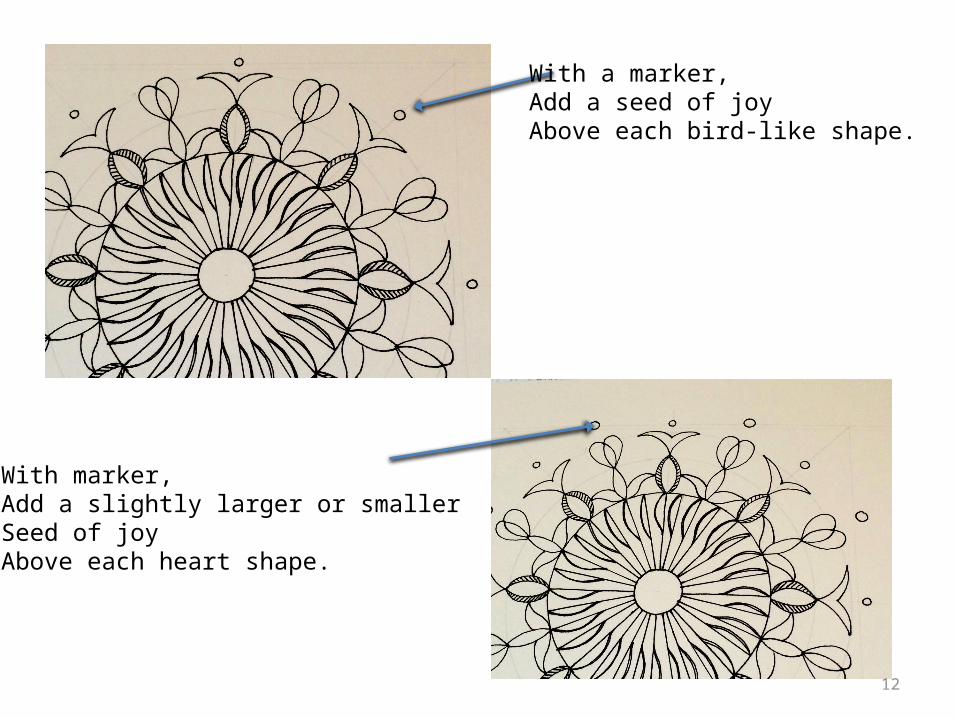
With a marker,Add a seed of joyAbove each bird-like shape.
With marker,Add a slightly larger or smallerSeed of joyAbove each heart shape.
13
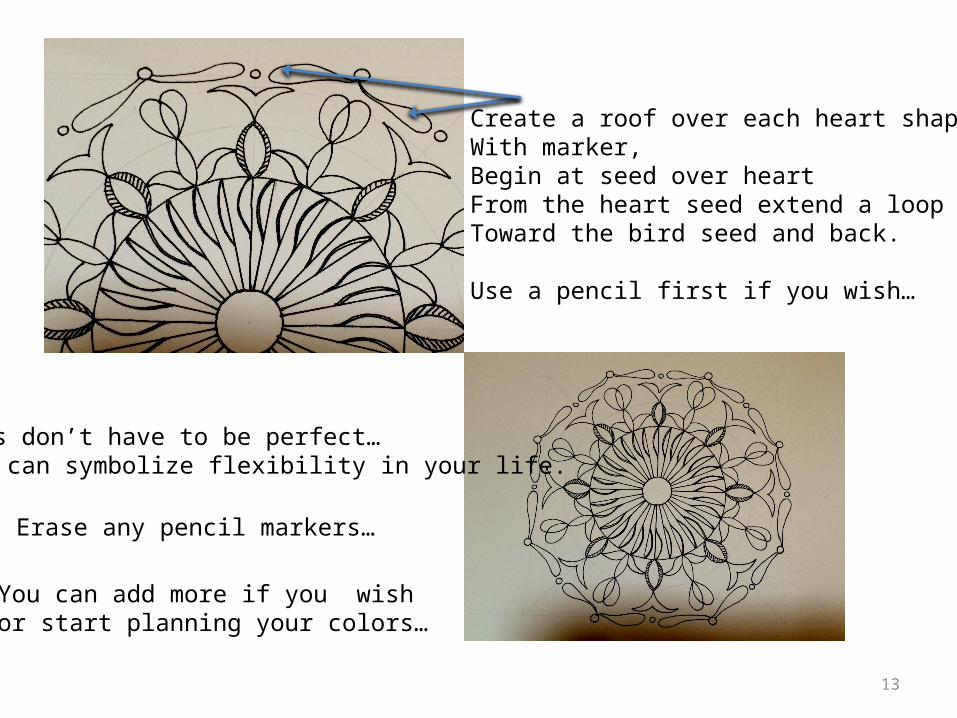
Create a roof over each heart shape.With marker,Begin at seed over heartFrom the heart seed extend a loop Toward the bird seed and back.
Use a pencil first if you wish…
Loops don’t have to be perfect…they can symbolize flexibility in your life.
You can add more if you wish or start planning your colors…
Erase any pencil markers…