INSTRUCTIONAL DESIGN PROJECT REPORT - Mercer...
73
Greg Rockwood INSTRUCTIONAL DESIGN PROJECT REPORT for EDTECH 503 (4173): Spring 2009 Submitted to: Dr. Ross Perkins May 10, 2009 Project Goal: Each student will use vector drawing tools and animation features in MS Power Point to create his/her own original animated stories.
Transcript of INSTRUCTIONAL DESIGN PROJECT REPORT - Mercer...

Greg Rockwood
INSTRUCTIONAL DESIGN PROJECT REPORT
for EDTECH 503 (4173): Spring 2009
Submitted to: Dr. Ross Perkins
May 10, 2009
Project Goal: Each student will use vector drawing tools and animation features in MS Power Point to create his/her own original animated stories.

2
TABLE OF CONTENTS
Synthesis Reflection Paper 3
1. Instructional Design Project Proposal 5
2. Front-end Analysis Plan 6
3. Front-end Analysis Report 8
4: Goal Analysis Document 9
5: Subskills Analysis & Entry Behaviors Flowchart 11
6: Learner and Context Analysis 17
7: Outline of Instructional Objectives 20
8: Learner Assessment Document 24
9. Instructional Strategies Packet 27
10. Instructional Materials for Learners 37
11. Formative Evaluation Plan 66
12. Formative Evaluation Results (SME Review) 68
Appendix 69

3
Synthesis Reflection .
At the most basic level instructional design is the process of determining what the target audience needs to learn, setting learning goals, designing means of assessment, developing a program of instruction to meet those goals, evaluating whether the program actually accomplishes the learning goals, and making revisions as needed.
Instructional design is a systematic process consisting of multiple related steps. It is important that each step in the process provides a foundation for the next step. There is a general order to the process, though the revision steps will loop back to previous steps. The designer has to determine first what material needs to be learned, and then the designer can determine how to teach the material and how to assess the learning of that material. Without the first step the others are pointless. After determining what to teach, how to teach it, and how to test it, the designer can evaluate the design of the instruction and revise those first steps. The systematic aspect of instructional design is the flow from one step to the next and the interconnection between those steps.
Defining the goals and objectives of instruction is one of the most important parts of the process because it is the first step in designing instruction. Determining what the learner needs to be able to do as a result of instruction is critical to deciding how to present and assess that instruction. The goals and objectives are the essence or soul of the instruction.
Creating instructional materials is also one of the most important parts of the process. As the goals and objectives are the soul of the instructional program the materials make up the body of the program. The materials are the tangible aspect of what the instruction is.
Before taking this class, I had not considered that there could be so many steps in the instructional design process. I suppose that I had considered many of the factors covered by those steps when designing lessons in the past. However, I did not formally follow steps such as analyzing the learning context or the background of the learners, conducting formative and summative evaluations of the instruction, or dividing instructional goals into smaller objectives. I have learned to be more conscious of the many related parts of the design process.
Though I’m not a big fan of formal procedures, the design process is and will be important to me in my work. The thing that I enjoy most about teaching is designing lessons and materials. I suspect that I would enjoy designing course materials full-time. I am particularly interested in creating self-guided instructional materials that allow the learner to work independently. I have a particular interest in web-based interactive foreign language instruction.
While acknowledging that the definition of educational technology encompasses much more than just electronic media, I still think of educational technology as relating primarily to computers and in particular the Internet. The Internet brings some key advantages to the field of education such as interactive programming, audio and video media, flexibility of access in time and place, collaboration tools, and a practically unlimited and ever growing supply of information. With these resources comes the need for well designed instructional programs that can utilize use them well. The Internet is a great tool for instruction. Good instructional design will make that tool more effective.

4
Part I: Analysis & Design 1. Instructional Design Project Proposal
2. Front-end Analysis Plan
3. Front-end Analysis Report
4. Goal Analysis Document
5. Subskills Analysis & Entry Behaviors Flowchart
6. Learner and Context Analysis
7. Outline of Instructional Objectives
8. Learner Assessment Document

5
Instructional Design Project Proposal .
My project will teach Jr. High students how to use the vector drawing tools in MS Power Point (in combination with the bit-map program Paint), as well as how to use the Power Point animation features to create their own original animated stories.
Power Point has a lot of potential for enhancing creative writing projects and promoting interest in developing higher-order computer skills. I have observed students who want to use the animation and art tools on Power Point in their spare time but don’t know what tools are available or how to use them.
As a Subject Matter Expert I would like to use another teacher that I know who teaches a Media/Technology class. His curriculum includes Power Point and a significant part of what he teaches is drawing and animation.

6
Front-end Analysis Plan .
PARTICIPANTS How many people will you survey or interview to collect needs assessment data? 10 (2 from each of 5 class sections)
Where will you find these potential participants? Students at my school/in my classes
What are some of the characteristics of the participants? 8th graders with at least some basic computer skills
LOGISTICS What kind of instrument(s)/tools /techniques will you use to collect data for the analysis? A survey of the participants’ prior skills in MS Power Point vector graphics drawing and animation effects. *the actual artifacts will be appear after this page
What arrangements do you need to make to collect the data/input? I will choose students in my own classess that have finished their assignments early and thus have time to respond to the survey.
When do you plan to be collecting data for the front-end analysis? FEB 17-18
Where will the actual collection of data for the analysis take place? (online? On the street? In a school?) Be specific. The survey will be completed in a computer lab classroom via computer network (or on paper if needed)

7

8
Front-end Analysis Report .
I had ten participants. These were 8th graders taking a Computer/Keyboarding Basics class. The majority of them indicated that they had enough basic knowledge of Power Point’s vector graphics to create, color, move, and change the size of shapes. About half indicated that they could create groups of shapes. Less than half indicated that they knew how to draw and change lines. A majority indicated that they could make shapes fly in and out of a slide, but did not know how to set timing or use more advanced motion effects. Most indicated that they did not know how to add sound clips.
The instruction and use of the skills will be taking place in a school computer lab (some of it could be practiced independently at home as well).
They know (or claim to know) more about basic drawing than I had assumed. Based on the findings, I feel that the greatest need for instruction is on line drawing tools (curves, freeform shapes, and freehand lines).
I added a short-answer question at the end of my survey asking them to write down what they wanted to learn. They overwhelmingly indicated that they wanted to know how to make animated stories. The students particularly expressed desires to learn to use animation effects.
Since the students surveyed expressed interest in learning to use animation effects and since they are not very familiar with the line-drawing tools, I have chosen to focus mainly on those two areas of instruction along with any closely related topics.

9
Goal Analysis Document .
1: Goal statement
My project will teach Jr. High students how to use the vector drawing tools in MS Power Point, as well as how to use some of the Power Point animation features to create their own original animated stories.
2: Classify the goal statement and describe why it fits that category
This goal fits into the Intellectual category. It involves teaching learners to perform complex tasks with both quantitative and qualitative aspects. In order to meet this goal the instructor will have to teach the learners to use the tools for drawing and altering curves, free forms shapes, and freehand lines. The learners will also have to be taught how to use some advanced animation movement settings, how to add sound clips, and how to change time settings. This goal involves technical knowledge as well as problem-solving and creative skills.
3: Goal analysis outline
A. Setting up the Slides a. Choose a Blank slide layout b. Setting slide transitions c. Adding text to slides
B. Creating Vector Objects a. Find and open the Auto Shapes menu
i. Find and open the Basic Shapes menu 1. Create a basic shape such as a circle, square, or triangle
ii. Find and open the Lines menu 1. Draw a single straight line 2. Draw a curved line 3. Draw a freeform shape 4. Draw a scribble (free-hand line) 5. Edit the points on a curve, freeform, or scribble
C. Manipulating Vector Objects a. Select an object b. Manually change the size of an object c. Change the color of an object d. Group/Ungroup two or more objects e. Move an object forward or backward
D. Importing Bitmap Objects a. Paste in an object copied from another program (such as Paint) b. Set a transparent background color on an object that’s pasted-in

10
E. Creating Animation Effects a. Find and open the Custom Animation menu
i. Make an object enter into or exit from slide ii. Set a motion path for a moving object
iii. Make an object appear/disappear
b. Change time settings for an animation effect c. Start effects with a click, with previous, or after previous effects
4: SME Review
My SME suggested that I add instructions for adding text to blank slides. He pointed out that not all students would know how to do that. I had overlooked it. He also corrected the names that I used for some of the shape-drawing tools. Finally, He suggested some sub skills that I should add under the main goals (underlined).
11
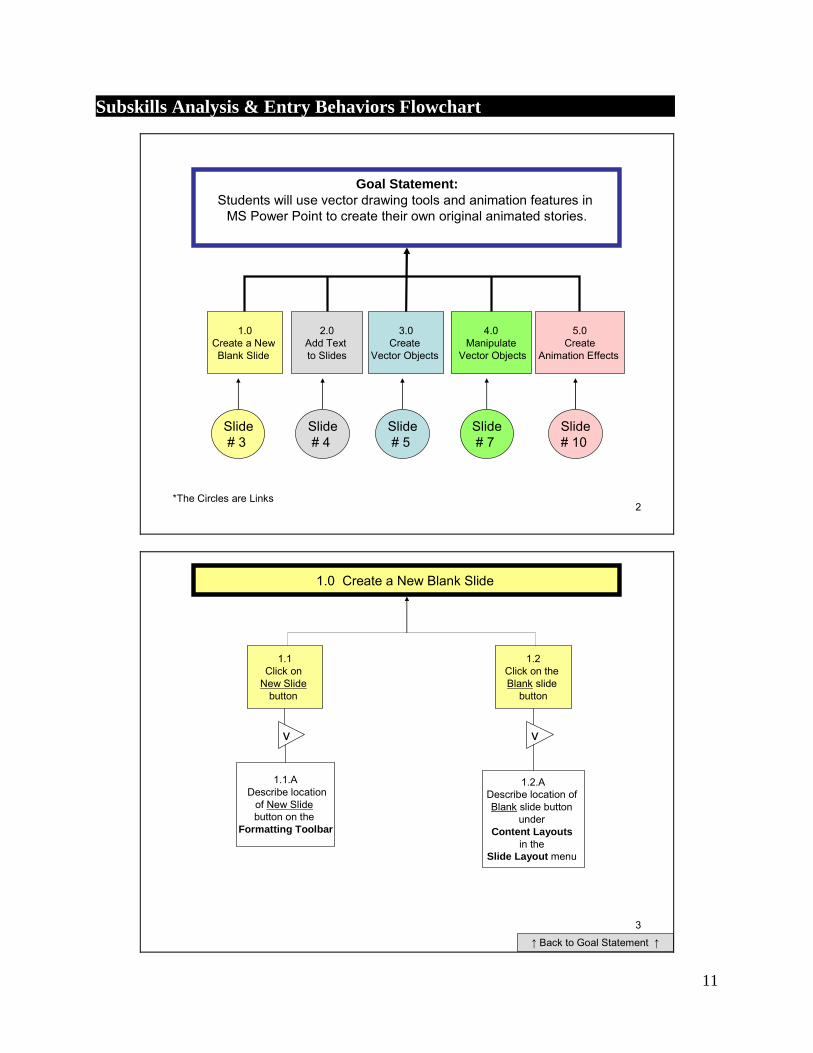
Subskills Analysis & Entry Behaviors Flowchart .
2
Goal Statement:Students will use vector drawing tools and animation features in
MS Power Point to create their own original animated stories.
1.0Create a New Blank Slide
2.0Add Text to Slides
3.0Create
Vector Objects
4.0Manipulate
Vector Objects
5.0Create
Animation Effects
Slide# 3
Slide# 4
Slide# 5
Slide# 7
Slide# 10
*The Circles are Links
3
1.0 Create a New Blank Slide
1.1Click on
New Slidebutton
1.2Click on the Blank slide
button
1.1.ADescribe location
of New Slidebutton on the
Formatting Toolbar
v
1.2.ADescribe location of Blank slide button
under Content Layouts
in the Slide Layout menu
v
↑ Back to Goal Statement ↑

12
4
2.0 Add Text to Slides
.
2.1Click on
the Text Box buttonto activate
the Text Box tool
2.2Click on the slide
and drag the Text Box tool
to create the text box
2.3Type text into the box
2.1.ADescribe the location of
the Text Box button on the Drawing Toolbar
v
↑ Back to Goal Statement ↑
5
3.0 Create Vector Objects
3.1Create Basic Shapes
3.2Draw lines
and original shapes
3.1.1Find and open the
Auto Shapes menu on the Drawing Toolbar
3.1.2Find and open the
Basic Shapes menu
3.1.1.ADescribe the location of
Auto Shapes menuon the Drawing Toolbar
3.1.4Click on the slide
and drag the selected shape toolto create the shape
3.1.3Choose and Click
on any shapeto activate
a shape tool
v
Slide# 6
↑ Back to Goal Statement ↑

13
6
3.2.1.1Find and open the Auto Shapes menu On the Drawing Toolbar
3.2.1Find and Open the Lines menu
3.2.1.1.ADescribe the locationof Auto Shapesmenu and the Drawing Toolbar
3.2.2.2Click on the slide and drag the Line tool to create a straight line
3.2.2.1Choose and Click on the Line buttonto activate the line tool
3.2Draw lines and original shapes
v
3.2.2Draw a straight Line
3.2.3Draw a Curve
3.2.4Draw a Freeform shape
3.2.5Draw a Scribble(free-hand) line
3.2.3.2Click on the slide and drag the Curve toolto create a curved line
3.2.3.1Choose and Click on the Curve buttonto activate the curve tool
3.2.4.2Click on the slideand drag the Freeform tool to createa freeform shape
3.2.4.1Choose and Click on the Freeform buttonto activate the freeform tool
3.2.5.2Click on the slideand drag the Scribble toolto create a free-hand shape
3.2.5.1Choose and Click on the Scribble buttonto activate the scribble tool
↑ Back to 3.0 Create Vector Objects ↑
7
4.0 Manipulate Vector Objects
4.3Change the color of an
object
4.4Group two or more objects
4.5Move an
object forward or backward
4.2Manually
change the size of an object
4.1
Select an object
4.1.1
Click on the desired object
4.2.2
Click on one of the white dots
that appear around the
edges of the shape and drag the dot in or out
4.2.1
Select the desired object
Slide# 9
4.6Edit the points
on a Line, a Curve,
a Freeform, or a Scribble
Slide# 8
↑ Back to Goal Statement ↑

14
8
4.3Change the color of an object
4.3.1
Select the desired object
4.3.2
Open the Fill Color Menu on the Drawing
Toolbar
4.3.3
Click on More Fill Colors then
choose the Standard tab
4.3.4
Choose a color, click on it, and then click OK
Describe the Fill Color
Menu button and its location
4.4Group two or more objects
4.4.1
Select the first object, then press the [Ctrl]
key, and hold it down while selecting the
other object(s)
4.4.2
Right Click while holding the mouse
pointer over one of the selected objects
4.4.3
Click on Grouping
then on the Group button
v
↑ Back to 4.0 Manipulate Vector Objects ↑
9
4.5Move an object forward or
backward
4.5.1
Select the desired object
4.5.2
Right Click while holding the mouse
pointer over the selected object
4.5.3
Click on Order then choose the
button for the desired option
4.6.1
Select the desired object
4.6.2
Right Click while holding the mouse
pointer over the selected object
4.6.3
Click on Edit Points
4.6.4
Click anywhere on the lines or on the black square points that appear around
the edges of the shape and drag in or out
4.6Edit the points on a Line, Curve,
Freeform, or Scribble
4.5Move an object forward or
backward
↑ Back to 4.0 Manipulate Vector Objects ↑

15
10
5.0 Create Animation Effects
5.1Find and open the Custom Animation
menu
5.2.1
Click on Entrance
5.2Make an object
enter into a slide
5.4Set a motion
path for a moving object
5.5 Modify an Animation
Effect after it has been set
5.1.3
Click on Add Effect
5.1.2
Right Click and choose Custom
Animation
5.1.1
Select the object to be animated
5.3Make an
object exit from a slide
5.2.2
Choose an entrance effect
from the list
5.3.1
Click on Exit
5.3.2
Choose an exit effect
from the list
Slide# 11
↑ Back to Goal Statement ↑
11
5.5 Modify an Animation Effect after it has been set
5.5.2
Choose which modifications to make from the menus that appear
above the effects display box
5.5.1
Click the effect to be modified in the effect display box inside the
Custom Animation panel
Describe the location of the
Custom Animation panelAnd the effects display box
5.4Set a motion path for a moving object
5.4.3Click on the object to be animated and drag the Motion Path tool to create a path
5.4.1
Click on Motion Paths
5.4.2
Choose a motion path effect from the list
v
↑ Back to 5.0 Create Animation Effects ↑

16
12
Assumed Entry Level Behaviors
•Able to use a Mouse
•Able to use a Keyboard
•Able to Open MS Power Point and Run a Slide Show

17
Learner and Context Analysis .
LEARNER ANALYSIS Entry Behaviors/Knowledge Characteristics: Students are assumed to already be able to use a computer, keyboard, and
mouse. Implications: They are already able to type text and follow instructions for clicking on
icons with a mouse. They are also able to start-up programs and save their work.
Data Source(s): Observation, Survey:Learner Prior knowledge of topic area Characteristics: Students are assumed to know how to start-up MS Power Point and to run a
presentation (one that is already made). Implications: Students will know how to start a presentation and how to advance slides Data Source(s): Observation, Survey:Learner, Interview:Instructor Attitudes toward content and potential delivery system Characteristics: The students generally want to learn how to draw and animate pictures on
MS Power Point. Those that already have some experience want to learn more and are open to instruction.
Implications: Students are willing and eager to learn the content. Data Source(s): Survey:Learners, Site visit Motivation to learn Characteristics: The students want to be able to create their own cartoon stories for personal
enjoyment and to share with their peers. It will provide a creative outlet for the imagination and artistic abilities.
Implications: Students are willing learners who will seek rather than resist instruction. They will actively participate in the learning process and most likely use the acquired skills on their own.
Data Source(s): Survey:Learners, Site visit Education ability and levels Characteristics: The target students are 8th graders with keyboarding and at least some basic
computer experience. Implications: The target group has the imagination, interest, and basic writing and
drawing skills to create interesting stories. Data Source(s): Observation, Site visit

18
General learning preferences Characteristics: The students prefer individual exploration with guided instruction in
response to their own questions. They prefer to work on their own projects while getting help when and as they request it.
Implications: Letting students decide what they will create and providing reference material and being available to give help and answer questions would be the approach best received by the students.
Data Source(s): Observation, Site visit, Survey:Learner Attitudes towards person(s) or organization providing the training or education Characteristics: Students want help on their own terms to create their own project. They
want to teacher to be a resource but not a boss. Implications: Students want open-ended instruction which allows them to set the goals,
and they want the teacher to take on an advisory role Data Source(s): Observation, Site visit, Survey:Learner Group characteristics Characteristics: They are Jr. High students who are sociable yet self conscious. They want
to impress their piers and have fun with their project. The want to learn for the sake of fun and entertainment, and to show off.
Implications: The process of instruction will be noisy and a bit chaotic as students want to “show and tell” as they go. They will want to imitate some of what others are doing and come up with their own innovations.
Data Source(s): Observation, Site visit INSTRUCTIONAL ANALYSIS ENVIRONMENT: K12 Support Characteristics: This instruction is supported by the standards for Computer Technology
instruction. Implications: This instruction builds and strengthens Computer Technology skills Data Source(s): State and District Instructional Standards Physical aspects Characteristics: This instruction takes place in computer lab. Each student has a computer
terminal with keyboard and mouse. Each student has access to necessary software and the internet.
Implications: Students can work independently on their own projects Data Source(s): Observation, Site visit Social aspects Characteristics: Students have contact with piers and an instructor in the room. Implications: Students can work independently, but they can also ask for guidance and
feed back. Data Source(s): Observation, Site visit

19
Relevance Characteristics: Student can use acquired skills to produce work of their own design and
interests, but the skills may also be helpful for creating presentations for assigned school work or a future job.
Implications: The skills have entertainment, academic, and career value. Data Source(s): Interview: Supervisor, Document Research CONTEXT ANALYSIS ENVIRONMENT: K12 Compatibility Characteristics: The computer lab environment is very compatible with the instruction
because all of the hardware, software, and instructional resources and tools are available.
Implications: The best place at school for this instruction is in a computer lab as part of a computer class.
Data Source(s): Observation, Site visit Adaptability for simulation Characteristics: There will be a TV or a Projector to showcase completed projects. Implications: Student work can be shown to all to enjoy, study, or critique Data Source(s): Observation, Site visit Delivery accommodations Characteristics: The Computer lab network allows for additional instruction, clarification,
and examples to given in written, or audio/visual form for the students to review as needed.
Implications: To an extent the students can set their own learning pace and access help resources via the network or the instructor.
Data Source(s): Observation, Site visit Learning-site constraints Characteristics: There will be one instructor for many students. Students will have to take
turns being helped. The noise level of other students may be an impediment to concentration.
Implications: Students will not always be able to get help as soon as they want it. They will have to cooperate with each other to maintain a good learning environment.
Data Source(s): Observation, Site visit

20
Outline of Instructional Objectives .
Goal Statement: Each student will use vector drawing tools and animation features in MS Power Point to create his/her own original animated stories.
1.0 The student will create at least ten new blank slides for the story
1.1 For each slide the student will locate and click on the New Slide button found on the Formatting Toolbar.
1.2 The student will locate and click on the Blank slide button under Content Layouts in the Slide Layout menu.
2.0 The student will add at least one sentence of text to each slide
2.1 The student will click on the Text Box button to activate the Text Box tool located on the Drawing Toolbar
2.2 The student will click the Text Box tool on the slide and drag to create the text box 2.3 The student will type some text into the box
3.0 The student will create the following vector objects and use them to illustrate their slides:
3.1 The student will create and use at least 10 of the shapes from the Basic Shapes menu to illustrate their slides.
3.1.1 The student will find and open the Auto Shapes menu on the Drawing
Toolbar 3.1.2 The student will find and open the Basic Shapes menu 3.1.3 The student will choose and click on a shape to activate a shape tool 3.1.4 The student will click on the slide and drag the selected shape tool to
create the shape
3.2 The student will draw and use at least 10 straight lines from the Lines menu to illustrate their slides.
3.2.1 The student will student will find and open the Auto Shapes menu On the
Drawing Toolbar 3.2.2 The student will find and open the Lines menu 3.2.3 The student will choose and click on the Line button to activate the line
tool 3.2.4 The student will click on the slide and drag the Line tool to create a
straight line

21
3.3 The student will draw and use at least 10 curved lines to illustrate their slides
3.3.1 The student will find and open the Auto Shapes menu On the Drawing Toolbar
3.3.2 The student will find and open the Lines menu 3.3.3 The student will choose and click on the Curve button to activate the curve
tool 3.3.4 The student will click on the slide and drag the Curve tool to create a
curved line
3.4 The student will draw and use at least 10 freeform shapes to illustrate their slides 3.4.1 The student will student will find and open the Auto Shapes menu On the
Drawing Toolbar 3.4.2 The student will find and open the Lines menu 3.4.3 The student will choose and click on the Freeform button to activate the
freeform tool 3.4.4 The student will click on the slide and drag the Freeform tool to create a
freeform shape 3.5 The student will draw and use at least 10 scribble (free-hand) shapes to illustrate their
slides 3.5.1 The student will find and open the Auto Shapes menu On the Drawing
Toolbar 3.5.2 The student will find and open the Lines menu 3.5.3 The student will choose and click on the Scribble button to activate the
scribble tool 3.5.4 The student will click on the slide and drag the Scribble tool to create a
free-hand shape
4.0 The student will manipulate the vector objects in the following ways:
4.1 The student will select each of the objects that will be altered 4.1.1 The student will click on the desired object
4.2 The student will manually change the size of at least one object on each slide (to a noticeable a degree)
4.2.1 The student will select the desired object 4.2.2 The student will click on one of the white dots that appear around the
edges of the shape and drag the dot in or out to shrink or increase the size of the object.
4.3 The student will color or change the color of at least 5 objects using at least 5
different colors 4.3.1 The student will select the desired object 4.3.2 The student will open the Fill Color menu on the Drawing Toolbar

22
4.3.3 The student will click on More Fill Colors and then choose the Standard tab
4.3.4 The student will choose a color, click on it, and then click OK
4.4 The student will create at least one group from two or more objects on each slide 4.4.1 The student will select the first object, press the [Ctrl] key, and hold it
down while selecting the other object(s) 4.4.2 The student will Right Click while holding the mouse pointer over one of
the selected objects 4.4.3 The student will click on Grouping and then on the Group button
4.5 The student will bring at least three objects to the front and send at least another three objects to the back (in a way that is noticeable)
4.5.1 The student will select the desired object 4.5.2 The student will Right Click while holding the mouse pointer over the
selected object 4.5.3 The student will click on Order and then choose the button for the
desired option
4.6 The student will edit the points to noticeably distort the lines on at least one Line, one Curve, one Freeform shape, and one Scribble shape
4.6.1 The student will select the desired object 4.6.2 The student will Right Click while holding the mouse pointer over the
selected object 4.6.3 The student will click on Edit Points 4.6.4 The student will click anywhere on the lines or on the black square points
that appear around the edges of the shape and drag in or out
5.0 The student will create the following animation effects:
5.1 The student will make a least two objects enter into a slide using at least two different entrance effects
5.1.1 The student will locate and click Slide Show on the Menu Bar and choose Custom Animation
5.1.2 The student will click on the object to be animated 5.1.3 The student will click on Add Effect under Custom Animation 5.1.4 The student will click on Entrance 5.1.5 The student will choose an entrance effect from the list
5.2 The student will make at least two objects exit from a slide using at least two different exit effects
5.2.1 The student will locate and click Slide Show on the Menu Bar and choose Custom Animation
5.2.2 The student will click on the object to be animated 5.2.3 The student will click on Add Effect under Custom Animation

23
5.2.4 The student will click on Exit 5.2.5 The student will choose an exit effect from the list
5.3 Set motion paths for at least two objects using at least two different paths. 5.3.1 The student will locate and click Slide Show on the Menu Bar and
choose Custom Animation 5.3.2 The student will click on the object to be animated 5.3.3 The student will click on Add Effect under Custom Animation 5.3.4 Click on Motion Paths 5.3.5 Choose a motion path effect from the list 5.3.6 Click on the object to be animated and drag the Motion Path tool to create
a path
5.4 Set at least two animation effects to start with or after a previous effect 5.4.1 The student will locate and click Slide Show on the Menu Bar and
choose Custom Animation 5.4.2 The student will click on the object to be animated 5.4.3 The student will locate the effect display box in the middle of the
Custom Animation panel 5.4.4 The student will click on the effect to be modified in the effect display
box 5.4.5 The student will choose an option from the Start menu that appears above
the effects display box.
5.5 Set at least one motion path to Very slow and another to Very fast 5.5.1 The student will locate and click Slide Show on the Menu Bar and
choose Custom Animation 5.5.2 The student will click on the object to be animated 5.5.3 The student will locate the effect display box in the middle of the
Custom Animation panel 5.5.4 The student will click on the motion path effect to be modified in the
effect display box 5.5.5 The student will choose an option from the Speed menu that appears
above the effects display box.

24
Learner Assessment Document .
Assessment Plan OBJECTIVE TAXONOMY ASSESSMENT DESCRIPTION
1 1.0 Create new blank slides
Application
Creation Of An Artifact Or Product
2 2.0 Add some text to slides
Application
Creation Of An Artifact Or Product
3 3.1 Create and use some shapes from the Basic Shapes menu
Application
Creation Of An Artifact Or Product
4 3.1.1 Find and open the Auto Shapes menu on the Drawing Toolbar
Application Knowledge
Creation Of An Artifact Or Product
5 3.2 Draw straight lines from the Lines menu
Application
Creation Of An Artifact Or Product
6 3.2.2 Find and open the Lines menu
Application Knowledge
Creation Of An Artifact Or Product
7
3.3 Draw curved lines
Application
Creation Of An Artifact Or Product
8 3.4 Draw freeform shapes
Application
Creation Of An Artifact Or Product
9 3.5 Draw scribble (free-hand) shapes
Application
Creation Of An Artifact Or Product
10 4.1 Select PPT graphic objects
Application
Creation Of An Artifact Or Product
11 4.2 Manually change the size of objects.
Application
Creation Of An Artifact Or Product
12 4.3 Change the color of objects
Application
Creation Of An Artifact Or Product
13 4.4 Create groups from two or more objects
Application
Creation Of An Artifact Or Product
14
4.5 Bring objects to the front and send objects to the back
Application
Creation Of An Artifact Or Product

25
15 4.6 Edit points to distort the shape of Lines, Curves, Freeform shapes, and Scribble shapes
Application
Creation Of An Artifact Or Product
16 5.1 Make objects enter into a slide using various entrance effects
Application
Creation Of An Artifact Or Product
17 5.2 Make objects exit from a slide using various exit effects
Application
Creation Of An Artifact Or Product
18 5.3 Set motion paths for objects using various path shapes.
Application
Creation Of An Artifact Or Product
19 5.4 Set animation effects to start with or after a previous effect
Application
Creation Of An Artifact Or Product
20 5.5 Set motion paths to run Very slow or Very fast
Application
Creation Of An Artifact Or Product
Example Assessment Description The final assessment for this instruction is a story written on Power Point slides. The story will consist of at least ten slides with at least one sentence of text on each slide. Each slide will be illustrated including original art work created by the student using the PPT drawing tools. Each slide will also include PPT animation effects. The required elements of the presentation will cover each of the stated instructional objectives mentioned at the beginning of the assessment plan.
The major goal of the instruction is to create an illustrated and animated story. The best assessment for this instruction is to create an artifact—the story. All of the objectives are application objectives. Therefore, the best way to assess them is through application. The method of assessment is basically written into the goal itself.
The instructor will administer the assessment and grade it according to the objectives. Students will be given several days, perhaps up to a week, to write the story, illustrate it, and add animation effects. The entire class will be working on their stories simultaneously. It will be done in a computer lab classroom.

26
PART II: DEVELOPMENT, IMPLEMENTATION,
& EVALUATION 9. Instructional Strategies Packet (9A, 9B, & 9C)
10. Instructional Materials Plan
11. Formative Evaluation Plan
12. Formative Evaluation Report (SME Review)

27
Instructional Strategies Packet (9A, 9B, & 9C) .
Part 9.A: Clustering & Sequencing Objectives
Project Goal Statement (Terminal Objective): Each student will use vector drawing tools and animation features in MS Power Point to create their own original animated stories.
CLUSTER TIME FRAME OBJECTIVES LISTED IN ORDER OF HOW THEY WILL BE TAUGHT
1 5 minutes 1.0 1.1 1.2
2 10 minutes 2.0 2.1 2.2 2.3
3 10 minutes 3.1 3.1.1 3.1.2 3.1.3 3.1.4
4 10 minutes 3.2 3.2.1 3.2.2 3.2.3 3.2.4
5 10 minutes 3.3 3.3.1 3.3.2 3.3.3 3.3.4
6 10 minutes 3.4 3.4.1 3.4.2 3.4.3 3.4.4
7 10 minutes 3.5 3.5.1 3.5.2 3.5.3 3.5.4

28
8
1 minute 4.1 4.1.1
9 5 minutes 4.2 4.2.1 4.2.2
10 10 minutes 4.3 4.3.1 4.3.2 4.3.3 4.3.4
11 10 minutes 4.4 4.4.1 4.4.2 4.4.3
12 10 minutes 4.5 4.5.1 4.5.2 4.5.3
13 10 minutes 4.6 4.6.1 4.6.2 4.6.3 4.6.4
14 10 minutes 5.1 5.1.1 5.1.2 5.1.3 5.1.4 5.1.5
15 10 minutes 5.2 5.2.1 5.2.2 5.2.3 5.2.4 5.2.5

29
16 10 minutes 5.3 5.3.1 5.3.2 5.3.3 5.3.4 5.3.5 5.3.6
17 10 minutes 5.4 5.4.1 5.4.2 5.4.3 5.4.4 5.4.5
18 10 minutes 5.5 5.5.1 5.5.2 5.5.3 5.5.4 5.5.5

30
Part 9.B: Motivational Strategies Project Goal Statement (Terminal Objective): Each student will use vector drawing tools and animation features in MS Power Point to create their own original animated stories.
Categories & Subcategories Strategies
ATTENTION
A.1. Perceptual arousal
A.2. Inquiry arousal
A.3. Variability
A.1. … Start by showing the student some examples of interactive animated stories done on Power Point.
A.2. … Tell student to think of some ideas of their own for interactive animated stories. Ask them to brainstorm and come up with some animation effects they might want to create. Ask them to think of some interactive effects they might want to create. Ask them to think of some uses or applications for their ideas.
A.3. … Prompt the studens to follow along with the instructions and examples by creating their own work during the process.
RELEVANCE
R.1. Goal orientation
R.2. Motive matching
R.3. Familiarity
R.1. … Ask the students what they are particularly interested in learning to do with Power Point and make a point of emphasizing or tying those things into the presentation of instruction. R.2. … Give the students the opportunity to choose how they will apply the functions learned based on their own interests. For example when teaching them how to draw a freehand shape let them choose what they will draw to practice. R.3. … Let the students develop the story line of their projects. They will put a part of themselves into them as they make them their own.

31
CONFIDENCE
C.1. Learning requirements
C.2. Success opportunities
C.3. Personal control
C.1. … Make the basic requirements clear upfront and then give encouragement and praise along the way. C.2. … The students will be doing at the same time as they are learning. They will be able to ask for guidance whenever needed. C.3. … They will be in charge of their own projects. They will do all of the work and generate the creative ideas that will ultimately produce the final product.
SATISFACTION
S.1. Natural consequences
S.2. Positive consequences
S.3. Equity
S.1. … After the instruction and practice phase let students add to what they have started. They will be able to freely explore the functions that they have learned and make the project a work of personal enjoyment. Reinforce the idea that the skills they have learned can be applied in many different ways to future work either to enhance their assigned school presentations, or to work on personal projects outside of school. S.2. … Set aside a day for the students to present the finished stories to their peers. Show the stories to parents on Parent Night. Post the stories on a class Website
S.3. … Recognize the unique creation of each student through a presentation of awards. This would be appropriate as long as there is an award for everyone.

32
Part 9.C: Instructional Strategies Plan
STATED OBJECTIVE: The student will create at least ten new blank slides for the story Objective # 1.0
PRE-INSTRUCTIONAL ACTIVITIES Motivational strategy: Start by showing the student some examples of interactive animated stories done on Power Point. Pre-Assessment: Ask the students to raise their hands if they have previously inserted new slides into a PPT presentation. CONTENT PRESENTATION Content:
• New Slide button found on the Formatting Toolbar • Blank slide button under Content Layouts in the Slide Layout menu. • Creating new blank slides
Examples: Create a new slide and apply a blank layout to it as students watch and do the same. Then repeat the process to create a total of ten new blank slides. Groups: no groups Media selection: MS Power Point on teacher’s and each student’s computers. The teacher needs to have a projector connected to his/her computer to show examples on a wall screen. STUDENT PARTICIPATION Practice Items: Students will follow the teacher’s example and do the same on their own computers. Feedback: Teacher will give verbal feed back after looking at each student’s screen Assessment: After presenting the material the teacher will quickly walk around to look at students’ screens to see if they have successfully created their new blank slides. FOLLOW-THROUGH ACTIVITIES Memory aids: An instruction sheet that lists the Toolbars, Menus, Buttons, and Functions necessary to perform the tasks being taught. Transfer: Ask students to share their ideas on how this skill could be useful beyond the present assignment. Ask how they might use what they are learning in another course or at home.

33
STATED OBJECTIVE: The student will add at least one sentence of text to each slide Objective # 2.0
PRE-INSTRUCTIONAL ACTIVITIES Motivational strategy: Ask students to start thinking of some ideas of their own stories. Pre-Assessment: Ask the students to raise their hands if they have previously added text to a PPT slide. CONTENT PRESENTATION Content:
• Text Box button located on the Drawing Toolbar • Adding a Text box and text to a slide
Examples: Create a text box on the first slide. Type in a sentence or two of text (Maybe ask students for suggestions) such as the following: Add text boxes and text to each of the slides. Groups: no groups Media selection: MS Power Point on teacher’s and each student’s computers. The teacher needs to have a projector connected to his/her computer to show examples on a wall screen. STUDENT PARTICIPATION Practice Items: Students will follow the teacher’s example and do the same on their own computers. Feedback: Teacher will give verbal feed back after looking at each student’s screen Assessment: After presenting the material the teacher will quickly walk around to look at students’ screens to see if they have successfully added Text boxes and text to their slides. FOLLOW-THROUGH ACTIVITIES Memory aids: An instruction sheet that lists the Toolbars, Menus, Buttons, and Functions necessary to perform the tasks being taught. Transfer: Ask students to share their ideas on how this skill could be useful beyond the present assignment. Ask how they might use what they are learning in another course or at home.
There was an alligator living in a swamp.

34
STATED OBJECTIVE: The student will draw and use at least 10 scribble (free‐hand) shapes to illustrate their slides
Objective # 3.5
PRE-INSTRUCTIONAL ACTIVITIES Motivational strategy: Ask students to start thinking of some ideas for illustrating their own stories. Pre-Assessment: Ask the students to raise their hands if they have previously drawn a scribble/free-hand shape on a PPT slide. CONTENT PRESENTATION Content:
• Auto Shapes menu On the Drawing Toolbar • Lines menu • Scribble button • Using the scribble tool to draw a free-hand shape
Examples: Using the Scribble tool draw a simple outline picture that matches the previously entered text (Maybe ask students for suggestions) such as the following: Draw a picture on each of the slides. Groups: no groups Media selection: MS Power Point on teacher’s and each student’s computers. The teacher needs to have a projector connected to his/her computer to show examples on a wall screen. STUDENT PARTICIPATION Practice Items: Students will follow the teacher’s example and do the same on their own computers. Feedback: Teacher will give verbal feed back after looking at each student’s screen Assessment: After presenting the material the teacher will quickly walk around to look at students’ screens to see if they have successfully drawn pictures on their slides. FOLLOW-THROUGH ACTIVITIES Memory aids: An instruction sheet that lists the Toolbars, Menus, Buttons, and Functions necessary to perform the tasks being taught. Transfer: Ask students to share their ideas on how this skill could be useful beyond the present assignment. Ask how they might use what they are learning in another course or at home.

35
STATED OBJECTIVE: The student will color or change the color of at least 5 objects using at least 5 different colors.
Objective # 4.3
PRE-INSTRUCTIONAL ACTIVITIES Motivational strategy: Ask students to think about the color schemes they may want to use for illustrating their stories. Pre-Assessment: Ask the students to raise their hands if they have previously colored objects on a PPT slide. CONTENT PRESENTATION Content:
• Fill Color menu on the Drawing Toolbar • More Fill Colors option and the Standard tab • Using the Fill Color menu to color shapes
Examples: Using the Fill Color menu color or re-color a previously drawn object (Maybe ask students for suggestions). such as the following: Repeat for at least 5 objects. Groups: no groups Media selection: MS Power Point on teacher’s and each student’s computers. The teacher needs to have a projector connected to his/her computer to show examples on a wall screen. STUDENT PARTICIPATION Practice Items: Students will follow the teacher’s example and do the same on their own computers. Feedback: Teacher will give verbal feed back after looking at each student’s screen Assessment: After presenting the material the teacher will quickly walk around to look at students’ screens to see if they have successfully colored the objects on their slides. FOLLOW-THROUGH ACTIVITIES Memory aids: An instruction sheet that lists the Toolbars, Menus, Buttons, and Functions necessary to perform the tasks being taught. Transfer: Ask students to share their ideas on how this skill could be useful beyond the present assignment. Ask how they might use what they are learning in another course or at home.

36
STATED OBJECTIVE: Set motion paths for at least two objects. Objective # 5.3
PRE-INSTRUCTIONAL ACTIVITIES Motivational strategy: Ask students to think about the motion effects they may want to use for animating their story illustrations. Pre-Assessment: Ask the students to raise their hands if they have previously set motion paths on a PPT slide. CONTENT PRESENTATION Content:
• Custom Animation panel • Add Effect button • Motion Paths menu • Setting a motion path for an object to follow
Examples: Using the Motion Paths menu set a path for a previously drawn object to follow such as the following: Repeat for at least 2 objects. Groups: no groups Media selection: MS Power Point on teacher’s and each student’s computers. The teacher needs to have a projector connected to his/her computer to show examples on a wall screen. STUDENT PARTICIPATION Practice Items: Students will follow the teacher’s example and do the same on their own computers. Feedback: Teacher will give verbal feed back after looking at each student’s screen Assessment: After presenting the material the teacher will quickly walk around to look at students’ screens to see if they have successfully set motion paths for the objects on their slides. FOLLOW-THROUGH ACTIVITIES Memory aids: An instruction sheet that lists the Toolbars, Menus, Buttons, and Functions necessary to perform the tasks being taught. Transfer: Ask students to share their ideas on how this skill could be useful beyond the present assignment. Ask how they might use what they are learning in another course or at home.

37
Instructional Materials Plan .
How to Draw and Animate in MS Power Point—Instructor Guide • Each student needs to have a computer with MS Power Point. • Instruct the students to open MS Power Point on each of their computers. • Tell them to name and save a new presentation.
(It is assumed that student already know how to perform these two steps but make sure that they do)
• Instruct the students to put their own names in the subtitle box of the title slide but to save the title for later.
SETTING UP SLIDES • Making A New Slide—Show the students how to make a new slide using the following
steps. → Click on the New Slide button found on the Formatting Toolbar
• Setting A Blank Layout On A New Slide—Show the students how to set a blank layout on the first slide using the following steps. → Click on the Blank layout under Content Layouts in the Slide Layout menu.
Instruct them to create a total of ten slides for their stories and to set a blank layout on each slide. Now, walk around to look at students’ screens to see if they have successfully created their new blank slides.

38
INSERTING TEXT • Placing A Textbox Onto A Slide—Show the students how to place a text box onto a slide
using the following steps. → Click on the Text Box button to activate the Text Box tool located on the Drawing
Toolbar → Then, click on the blank slide and drag the Text Box tool sideways to create the new text
box → The type some text into the box
At this point you could start to write a pre-scripted story or ask the students to suggest what you will type in the box (one sentence is a good start). For example:
Make it clear to them that they are not going to be copying your story onto their slides, rather they will be writing their own story—when prompted to do so.
After placing a text box and typing text on the first slide, continue by placing text boxes on the rest of the slides. Continue to write your prepared story or keep asking for suggestions as to what to write on each slide.
Tell the students to take a moment to think of a beginning sentence for their stories and to type it into the text box on their first slide.
There was an alligator living in a swamp.

39
DRAWING WITH VECTOR GRAPHIC TOOLS • Using Auto Shapes—Show the students how to draw auto shapes onto a slide using the
following steps. → Open the Auto Shapes menu, open the Basic Shapes menu, then click any shape to
activate a shape tool. → Then click on the slide and drag the selected shape tool upward and sideways to create
the chosen shape. After asking for suggestions then drawing an auto shape or two on your first slide. Tell the students to take a moment to draw an auto shape on their first slide. Let them know that they will be able to move it and re-size it later. Tell them not to go past their first slide until prompted to do so. Now, walk around to look at students’ screens to see if they have successfully followed instructions or if they need help. Example: Here is an example of an oval auto shape drawn on a slide to represent the swamp.
There was an alligator living in a swamp.

40
• Drawing Straight Lines → Open the Auto Shapes menu, open the Lines menu, then click on the Line button to
activate the tool. → Then click on the slide and drag the Line tool to create a straight line. After asking for suggestions then drawing some straight lines on your slide. Tell the students to take a moment to draw some straight lines on their first slide. Remind them that they will be able to move and re-size them later. Now, walk around to look at students’ screens to check on their progress. Example: Here are some straight lines drawn to represent cat-tail stems.
There was an alligator living in a swamp.

41
• Drawing Curved Lines → Open the Auto Shapes menu, open the Lines menu, then click on the Curve button to
activate the tool. → Then click on the slide and drag the Curve tool, click again then drag in a different
direction to create a curved line. Click then drag for each bend in the line. Double click to finish the line.
After asking for suggestions then drawing some curved lines on your slide. Tell the students to take a moment to draw some curved lines on their first slide. Remind them that they will be able to move, re-size and edit them later. Now, walk around to look at students’ screens to check on their progress. Example: Here are some curved lines drawn to represent cat-tails and water ripples.
There was an alligator living in a swamp.

42
• Drawing Freeform Shapes → Open the Auto Shapes menu, open the Lines menu, then click on the Freeform button
to activate the tool. → Then click on the slide and drag the Freeform tool, click again then drag in a different
direction to create an angular bent line. Click then drag for each bend in the line. Double click to finish the line.
After asking for suggestions then drawing some freeform shapes on your slide. Tell the students to take a moment to draw some freeform shapes on their first slide. Remind them that they will be able to move, re-size and edit them later. Now, walk around to look at students’ screens to check on their progress. Example: Here are some freeform shapes drawn to represent rocks.
There was an alligator living in a swamp.

43
• Drawing Scribble (Freehand) Shapes → Open the Auto Shapes menu, open the Lines menu, then click on the Scribble button to
activate the tool. → Then click on the slide, hold and drag the Scribble tool in different directions to create a
scribble/freehand line. Let go to finish the line. After asking for suggestions then drawing some scribble/freehand shapes on your slide. Tell the students to take a moment to draw some scribble/freehand shapes on their first slide. Remind them that they will be able to move, re-size and edit them later. Now, walk around to look at students’ screens to check on their progress. Example: Here is an alligator drawn with scribble/freehand shapes (body and each leg).
There was an alligator living in a swamp.

44
MANIPULATING VECTOR OBJECTS • Selecting An Object
→ Click on an object to select it.
• Selecting More Than One Object At The Same Time → Select the first object, then press the [Ctrl] key, and hold it down while selecting the other
object(s). • Changing The Size Of An Object
→ Select the object. → Then click on one of the white dots that appear around the edges of the shape. → Drag the dot in or out to shrink or increase the size of the object. Select some objects on your slide and make them smaller or larger. Tell the students to take a moment to do the same on their first slide. Now, walk around to look at students’ screens to check on their progress. Example: Here the rocks on the sides of the slide have been made smaller.
There was an alligator living in a swamp.

45
• Coloring An Object → Select the object. → Open the Fill Color menu on the Drawing Toolbar. → Click on More Fill Colors and choose the Standard tab. → Then, select a color, and click OK. Select some objects on your slide and color them. Tell the students to take a moment to do the same on their first slide. Now, walk around to look at students’ screens to check on the students’ progress. Example: Here several objects have been colored in.
There was an alligator living in a swamp.

46
• Grouping Objects Together → Select the first object, then press the [Ctrl] key, and hold it down while selecting the other
object(s). → Right Click while holding the mouse pointer over one of the selected objects. → Click on Grouping and then on the Group button. Select two or more related objects on your slide and group them together. Tell the students to take a moment to do the same on their first slide. Now, walk around to look at students’ screens to check on their progress. Example: Here the alligator’s body and both legs have been selected in order to be grouped as a single object.

47
• Moving Objects To The Front Or Back → Select the desired object. → Right Click while holding the mouse pointer over the selected object. → Click on Order and then choose the button for the desired option. Select some objects on your slide and move them to the front or to the back. Tell the students to take a moment to do the same on their first slide. Now, walk around to look at students’ screens to check on their progress. Example: Here the text box has been brought to the front and the two rocks on the edges of the slide have been sent to the back and moved behind the cat-tail plants.
There was an alligator living in a swamp.

48
• Changing The Shape Of Lines, Curves, Freeform Shapes, And Scribble Shapes → Select the desired object. → Right Click while holding the mouse pointer over the selected object. → Click on Edit Points. → Then click anywhere on the lines or on the black square points that appear around the
edges of the shape and drag in or out to change the shape. Click off of the object to stop editing the shape.
Select some lines or shapes to edit. Tell the students to take a moment to do the same on their first slide. Now, walk around to look at students’ screens to check on their progress. Example: Here the cat-tails have been reshaped and the middle rocks formed to fit below the text box.
There was an alligator living in a

49
ADDING ANIMATION EFFECTS • Setting Entrance Animation Effects
→ Click Slide Show on the Menu Bar and choose Custom Animation. → Select the object to be animated. → Click on Add Effect under Custom Animation → Click on Entrance then choose an entrance effect from the list.
• Setting Exit Animation Effects → Click Slide Show on the Menu Bar and choose Custom Animation. → Select the object to be animated. → Click on Add Effect under Custom Animation → Click on Exit then choose an exit effect from the list. Select some objects on your slide to bring in and to send out. Tell the students to take a moment to do the same on their first slide. Now, walk around to look at students’ screens to check on their progress. Example: Here the text box is set to appear then to later disappear. The alligator is set to slide in from the right and then to slide out to the left.
There was an alligator living in a swamp.
ENTER FROM RIGHT
EXIT TO LEFT
APPEAR DISAPPEAR

50
• Setting Motion Paths → Click Slide Show on the Menu Bar and choose Custom Animation. → Select the object to be animated. → Click on Add Effect under Custom Animation → Click on Motion Paths and then choose a motion path effect from the list. → Click on the object to be animated and drag the Motion Path tool to create a path. Set a motion path for one or more object on your slide. Tell the students to take a moment to do the same on their first slide. Now, walk around to look at students’ screens to check on their progress. Example: Here a fly has been added to the top right-hand corner of the slide. A freehand motion path has been set for the fly to move across the slide.

51
• Setting Animation Effects To Start With Or After A Previous Effect → click Slide Show on the Menu Bar and choose Custom Animation. → Select the object to be animated. → Click on the effect to be modified on the slide or in the effects display box located in the
middle of the Custom Animation panel.
→ Then, choose an option from the Start menu that appears above the effects display box.
• Setting The Speed Of Motion Paths → click Slide Show on the Menu Bar and choose Custom Animation. → Select the object to be animated. → Click on the motion path effect to be modified on the slide or in the effects display box
located in the middle of the Custom Animation panel. → Then, choose an option from the Speed menu that appears above the effects display box.
Set one or more animation effects to start with or after another effect. Also, change the speed for one or more effects. Tell the students to take a moment to do the same on their first slide. Now, walk around to look at students’ screens to check on their progress. Example: Here a motion path has been set to start with the previous effect, and it has been set to run at medium speed.
Now its time for the students to continue on their own. Give each student a copy of the Write, Illustrate, and Animate Your Own Story in MS Power Point—Student Assignment Sheet. Instruct them to read and follow the instructions on the assignment sheet. They may wish to make further changes to their first slides and then continue working on the rest of the slides according to the assignment instructions. Also, give each student a copy of How to Draw and Animate in MS Power Point—Student Reference Guide they may use this sheet to review the instructions for performing the tasks that have just been taught to them.

52

53
SETTING UP SLIDES • Making A New Slide
[Click on the New Slide button found on the Formatting Toolbar]
• Setting A Blank Layout On A New Slide
[Click on the Blank layout under Content Layouts in the Slide Layout menu.]
53

54
INSERTING TEXT • Placing A Textbox Onto A Slide
→ click on the Text Box button to activate the Text Box tool located on the Drawing Toolbar
→ Then, click on the blank slide and drag the Text Box tool sideways to create the new text box
→ The type some text into the box
54

55
DRAWING WITH VECTOR GRAPHIC TOOLS • Using Auto Shapes
→ Open the Auto Shapes menu, open the Basic Shapes menu, then click any shape to activate a shape tool.
→ Then click on the slide and drag the selected shape tool upward and sideways to create the chosen shape.
55

56
Drawing Straight Lines → Open the Auto Shapes menu, open the Lines menu, then click on the Line button to activate the tool.
→ Then click on the slide and drag the Line tool to create a straight line
• Drawing Curved Lines
→ Open the Auto Shapes menu, open the Lines menu, then click on the Curve button to activate the tool.
→ Then click on the slide and drag the Curve tool, click again then drag in a different direction to create a curved line. Click then drag for each bend in the line. Double click to finish the line.
56
•

57
Drawing Freeform Shapes → Open the Auto Shapes menu, open the Lines menu, then click on the Freeform button to activate the tool.
• Then click on the slide and drag the Freeform tool, click again then drag in a different direction to create an angular
bent line. Click then drag for each bend in the line. Double click to finish the line.
57
•

58
Drawing Scribble (Freehand) Shapes → Open the Auto Shapes menu, open the Lines menu, then click on the Scribble button to activate the tool.
→ Then click on the slide, hold and drag the Scribble tool in different directions to create a scribble/freehand line. Let go to finish the line.
58
•

59
MANIPULATING VECTOR OBJECTS • Selecting An Object
→ Click on an object to select it. • Selecting More Than One Object At The Same Time
→ Select the first object, then press the [Ctrl] key, and hold it down while selecting the other object(s).
• Changing The Size Of An Object
→ Select the object. → Then click on one of the white dots that appear around the edges of the shape. → Drag the dot in or out to shrink or increase the size of the object.
• Coloring An Object
→ Select the object. → Open the Fill Color menu on the Drawing Toolbar. → Click on More Fill Colors and choose the Standard tab. → Then, select a color, and click OK.
59

60
• Grouping Objects Together → Select the first object, then press the [Ctrl] key, and hold it down while selecting the other object(s). → Right Click while holding the mouse pointer over one of the selected objects. → Click on Grouping and then on the Group button.
• Moving Objects To The Front Or Back
→ Select the desired object. → Right Click while holding the mouse pointer over the selected object. → Click on Order and then choose the button for the desired option.
60

61
Changing The Shape Of Lines, Curves, Freeform Shapes, And Scribble Shapes → Select the desired object. → Right Click while holding the mouse pointer over the selected object. → Click on Edit Points.
→ Then click anywhere on the lines or on the black square points that appear around the edges of the shape and drag in or out to change the shape. Click off of the object to stop editing the shape.
61
•

62
ADDING ANIMATION EFFECTS • Setting Entrance Animation Effects
→ Click Slide Show on the Menu Bar and choose Custom Animation.
→ Select the object to be animated. → Click on Add Effect under Custom Animation → Click on Entrance then choose an entrance effect from the list.
• Setting Exit Animation Effects
→ Click Slide Show on the Menu Bar and choose Custom Animation. → Select the object to be animated. → Click on Add Effect under Custom Animation → Click on Exit then choose an exit effect from the list.
62

63
• Setting Motion Paths → Click Slide Show on the Menu Bar and choose Custom Animation. → Select the object to be animated. → Click on Add Effect under Custom Animation → Click on Motion Paths and then choose a motion path effect from the list. → Click on the object to be animated and drag the Motion Path tool to create a path.
• Setting Animation Effects To Start With Or After A Previous Effect
→ Click Slide Show on the Menu Bar and choose Custom Animation. → Select the object to be animated. → Click on the effect to be modified on the slide or in the effects display box located in the middle of the
Custom Animation panel. → Then, choose an option from the Start menu that appears above the effects display box.
63

64
Setting The Speed Of Motion Paths → Click Slide Show on the Menu Bar and choose Custom Animation. → Select the object to be animated. → Click on the motion path effect to be modified on the slide or in the effects display box located in the middle of
the Custom Animation panel. → Then, choose an option from the Speed menu that appears above the effects display box.
64
•
65
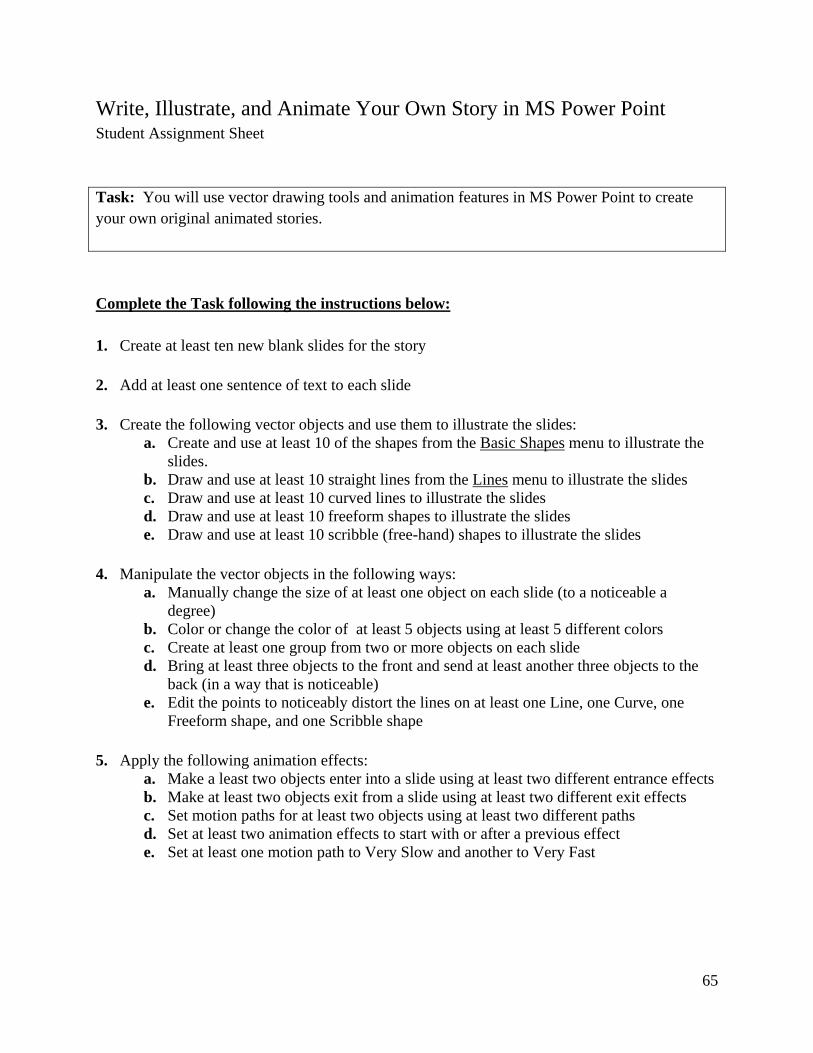
Write, Illustrate, and Animate Your Own Story in MS Power Point Student Assignment Sheet Task: You will use vector drawing tools and animation features in MS Power Point to create your own original animated stories. Complete the Task following the instructions below: 1. Create at least ten new blank slides for the story
2. Add at least one sentence of text to each slide 3. Create the following vector objects and use them to illustrate the slides:
a. Create and use at least 10 of the shapes from the Basic Shapes menu to illustrate the slides.
b. Draw and use at least 10 straight lines from the Lines menu to illustrate the slides c. Draw and use at least 10 curved lines to illustrate the slides d. Draw and use at least 10 freeform shapes to illustrate the slides e. Draw and use at least 10 scribble (free-hand) shapes to illustrate the slides
4. Manipulate the vector objects in the following ways:
a. Manually change the size of at least one object on each slide (to a noticeable a degree)
b. Color or change the color of at least 5 objects using at least 5 different colors c. Create at least one group from two or more objects on each slide d. Bring at least three objects to the front and send at least another three objects to the
back (in a way that is noticeable) e. Edit the points to noticeably distort the lines on at least one Line, one Curve, one
Freeform shape, and one Scribble shape
5. Apply the following animation effects: a. Make a least two objects enter into a slide using at least two different entrance effects b. Make at least two objects exit from a slide using at least two different exit effects c. Set motion paths for at least two objects using at least two different paths d. Set at least two animation effects to start with or after a previous effect e. Set at least one motion path to Very Slow and another to Very Fast

66
Formative Evaluation Plan . One-to-One Evaluation The instruction will be given by the designer. Select three students of varied experience with MS Power Point: one with substantial experience, one with some experience, and one with little or no experience. Give the instruction to each student separately at different times. Give the student all of the materials and present the instruction in a computer lab using a projector and screen or a smart board. The student will be at his/her own computer following the instruction. Tell the student beforehand that he/she may interrupt the presentation at ask a question or make a comment at any time. Make it clear that the instructional materials are being evaluated for effectiveness and accuracy, and that the student’s abilities are not being evaluated. Let the students know that he/she is helping to improve the instructional materials and that his/her input is important. Also, let the student know that he/she will be asked specific questions about the material during and after the presentation. Present the materials and observe the student as he/she follows the instruction after each segment of the presentation. Look to see if the student is doing what has been explained and demonstrated. Ask the student to explain what if anything was confusing or unclear about the preceding segment of instruction. Ask what was particularly helpful. If the student is not successfully doing what has been explained and demonstrated, ask the student to explain the instruction as he/she understands it. Also, ask the student to point out any errors or omissions that they may have noticed in the instructions. This will reemphasize that the instructional material not the student is under evaluation and will encourage the student to point out things that don’t make sense. After all of the instruction has been given and the student has looked over all of the materials, ask the student to give his/her opinion about what was useful and helpful about the instruction. Then, ask for an opinion on what was confusing, unclear, or unhelpful about the instruction. Small Group Evaluation The instruction will be given by the designer. Select a small mainstream class of 20 students or less. It is assumed that the class will include students of varied experience with MS Power Point; varied experience with computers in general; varied interest in creative writing, illustration, and animation; and varied attitudes about school in general. Present the instruction to all of the students at the same time. Give the students all of the materials and present the instruction in a computer lab using a projector and screen or a smart board. The students will each be at their own computers following the instruction. Make it clear beforehand that the instructional materials, not the students’ abilities, are being evaluated for effectiveness and accuracy, that they are helping to improve the instructional materials and that their input will be important. Also, let the students know that they will be asked questions about the material after the presentation. Present the materials and observe the students as they follow the instruction after each segment of the presentation. Look to see if the students are doing what has been explained and demonstrated. If any students are observed to be unsuccessful at doing what has been explained

67
and demonstrated take notes about what they are doing and after the instruction has been completed, ask those students individually to explain those particular bits of instruction as they understood them. Ask the students to explain what was confusing or unclear about those particular segments of instruction. After the instruction has been given and the students have looked at the materials, ask each student to give his/her opinion about what was useful or particularly helpful about the instruction. Ask what the students liked about the instruction. Then, ask for their opinions on what was confusing, unclear, or unhelpful about the instruction. Also, ask the students to point out any errors or omissions that they may have noticed in the instructions. The questions and answers should be given orally and recorded by the designer/instructor because students of the target age group (8th grade) are more likely to respond and expound their opinions orally than they are to do in writing. Field Test The instruction will be given by a classroom instructor, not the designer. The designer will be present to observe student performance and to ask questions after the presentation. Select an average class of 20 students or more. It is assumed that the class will include students of varied experience with MS Power Point; varied experience with computers in general; varied interest in creative writing, illustration, and animation; and varied attitudes about school in general. The instruction will be presented to all of the students at the same time in a computer lab using a projector and screen or a smart board. The students will each be at their own computers following the instruction. The instructor will give the students all of the materials and present the instruction. During instruction the designer will be present to observe the students as they follow the instruction after each segment of the presentation. Look to see if the students are doing what has been explained and demonstrated. If any students are observed to be unsuccessful at doing what has been explained and demonstrated take notes about what they are doing and after the instruction has been completed, ask those students individually to explain those particular bits of instruction as they understood them. Ask the students to explain what was confusing or unclear about those particular segments of instruction. After the instruction has been given and the students have looked at the materials, the designer will ask each student to give his/her opinion about what was useful or particularly helpful about the instruction. Ask what the students liked about the instruction. Then, ask for their opinions on what was confusing, unclear, or unhelpful about the instruction. Also, ask the students to point out any errors or omissions that they may have noticed in the instructions. The questions and answers should be given orally and recorded by the designer/instructor because students of the target age group (8th grade) are more likely to respond and expound their opinions orally than they are to do in writing.

68
Formative Evaluation Report (SME Review) . I sent my materials to the SME in advance to be looked over. A few days later, after he reviewed the materials, we met and he offered some brief answers to my questions. What do you think of the presentation strategies? The SME said that the presentation strategies were very appropriate to the subject matter. He felt that asking for student input as to what the instructor should write and draw for examples during the demonstration was a very good way to involve students and keep them interested in the presentation. He agreed that presenting the material visually, with short bits of explanation, and giving the students time to practice before proceeding was a good way to present it. What do you think of the informal assessment strategy? He also felt that walking around and watching the students practice after each segment of instruction was the best way to assess their comprehension. He suggested that the instructor watch a part of the class after each segment instead of trying to look at all of their work after every segment. He felt that over the course of the instruction the instructor could get a good idea whether each student was grasping the material by checking each student periodically. Do the graphics and arrows in the Student Reference Guide make the instructions clear? He said that the screen capture graphics, the colored arrows, and the highlighted step-by step instructions made the reference guide very clear and easy to follow. He said that it was a great addition to the instructional materials. Do the example graphics in the Teacher’s Guide provide a good feel for how the instruction should be given? Are the instructions clear and helpful? He liked the instructions in the teacher’s guide. He said that they were clear and would be easy to follow even by someone that didn’t have a lot of experience with MS Power Point. He felt that the example pictures and the accompanying explanatory notes were very helpful to the instructor either to be used themselves for the instruction or as a guide for how to give the instruction. What else might you suggest should be added to these materials or changed? He felt that adding anything more would be too much. He thought that the general design of the instruction was good as is. What other materials could be created? He suggested creating an assessment rubric for the students to follow and/or a checklist based on the assignment sheet. He felt that a checklist would help students keep track of each completed step so that they could be sure to meet all of the requirements of the final assignment.

69
PART III. APPENDIX • Professional Standards Addressed (AECT)

70
Professional Standards Addressed (AECT)
The following standards, developed by the Association for Educational Communications and Technology (AECT), and used in the accreditation process established by the National Council for Accreditation of Teacher Education (NCATE), are addressed to some degree in this course. The numbers of the standards correspond to the numbers next to the course tasks show on the list of assignments. Not all standards are addressed explicitly through student work.
Assignments meeting standard in whole or part Standard 1: DESIGN 1.1 Instructional Systems Design (ISD) X Reading notes/test on Brown & Green text 1.1.1 Analyzing X IDP – Part 2, 3, & 7; Reading from Dick, Carey & Carey 1.1.2 Designing X IDP – Part 4, 5; Reading from Dick, Carey & Carey 1.1.3 Developing X IDP – Part 10; Reading from Dick, Carey & Carey 1.1.4 Implementing X Final IDP Report; Reading from Dick, Carey & Carey
1.1.5 Evaluating X IDP – Part 11 & 12, Discussion #11; Reading from Dick, Carey & Carey
1.2 Message Design 1.3 Instructional Strategies X IDP – Part 9A, 9B, & 9C; Reading from Dick, Carey & Carey 1.4 Learner Characteristics X IDP – Part 5, 6; Reading from Dick, Carey & Carey Standard 2: DEVELOPMENT 2.0 (includes 2.0.1 to 2.0.8) X Overall ID project 2.1 Print Technologies X Overall ID project 2.2 Audiovisual Technologies 2.3 Computer-Based Technologies X Overall ID project 2.4 Integrated Technologies Standard 3: UTILIZATION 3.0 (includes 3.0.1 & 3.0.2) 3.1 Media Utilization X IDP – Part 9C, 10; Discussion #12 3.2 Diffusion of Innovations 3.3 Implementation and Institutionalization X
Overall ID project; Reading from Dick, Carey & Carey
3.4 Policies and Regulations Standard 4: MANAGEMENT 4.0 (includes 4.0.1 & 4.0.3) 4.1 Project Management 4.2 Resource Management 4.3 Delivery System Management 4.4 Information Management Standard 5: EVALUATION 5.1 Problem Analysis X IDP – Part 1, 4, 5 5.2 Criterion-Referenced Measurement X IDP – Part 8 5.3 Formative and Summative Evaluation X IDP Part 11, 12; Discussion #11 5.4 Long-Range Planning

71
1.0 Design 1.1 Instructional Systems Design
1.1.a Utilize and implement design principles which specify optimal conditions for learning.
1.1.b Identify a variety of instructional systems design models and apply at least one model.
1.1.1 Analyzing
1.1.1.a Write appropriate objectives for specific content and outcome levels.
1.1.1.b Analyze instructional tasks, content, and context.
1.1.2 Designing
1.1.2.a Create a plan for a topic of a content area (e.g., a thematic unit, a text chapter, an interdisciplinary unit) to demonstrate application of the principles of macro-level design.
1.1.2.b Create instructional plans (micro-level design) that address the needs of all learners, including appropriate accommodations for learners with special needs.
1.1.2.d Incorporate contemporary instructional technology processes in the development of interactive lessons that promote student learning.
1.1.3 Developing
1.1.3.a Produce instructional materials which require the use of multiple media (e.g., computers, video, projection).
1.1.3.b Demonstrate personal skill development with at least one: computer authoring application, video tool, or electronic communication application.
1.1.4 Implementing
1.1.4.a Use instructional plans and materials which they have produced in contextualized instructional settings (e.g., practica, field experiences, training) that address the needs of all learners, including appropriate accommodations for learners with special needs.
1.1.5 Evaluating
1.1.5.a Utilize a variety of assessment measures to determine the adequacy of learning and instruction.
1.1.5.b Demonstrate the use of formative and summative evaluation within practice and contextualized field experiences.
1.1.5.c Demonstrate congruency among goals/objectives, instructional strategies, and assessment measures.
1.3 Instructional Strategies
1.3.a Select instructional strategies appropriate for a variety of learner characteristics and learning situations.
1.3.b Identify at least one instructional model and demonstrate appropriate contextualized application within practice and field experiences.
1.3.c Analyze their selection of instructional strategies and/or models as influenced by the learning situation, nature of the specific content, and type of learner objective.
1.3.d Select motivational strategies appropriate for the target learners, task, and learning situation.
1.4 Learner Characteristics
1.4.a Identify a broad range of observed and hypothetical learner characteristics for their particular area(s) of preparation.

72
1.4.b Describe and/or document specific learner characteristics which influence the selection of instructional strategies.
1.4.c Describe and/or document specific learner characteristics which influence the implementation of instructional strategies.
2.0 Development 2.0.1 Select appropriate media to produce effective learning environments using technology resources.
2.0.2 Use appropriate analog and digital productivity tools to develop instructional and professional products.
2.0.3 Apply instructional design principles to select appropriate technological tools for the development of instructional and professional products.
2.0.4 Apply appropriate learning and psychological theories to the selection of appropriate technological tools and to the development of instructional and professional products.
2.0.5 Apply appropriate evaluation strategies and techniques for assessing effectiveness of instructional and professional products.
2.0.6 Use the results of evaluation methods and techniques to revise and update instructional and professional products.
2.0.7 Contribute to a professional portfolio by developing and selecting a variety of productions for inclusion in the portfolio.
2.1 Print Technologies
2.1.3 Use presentation application software to produce presentations and supplementary materials for instructional and professional purposes.
2.1.4 Produce instructional and professional products using various aspects of integrated application programs.
2.3 Computer-Based Technologies
2.3.2 Design, produce, and use digital information with computer-based technologies.
3.0 Utilization 3.1 Media Utilization
3.1.1 Identify key factors in selecting and using technologies appropriate for learning situations specified in the instructional design process.
3.1.2 Use educational communications and instructional technology (SMETS) resources in a variety of learning contexts.
3.3 Implementation and Institutionalization
3.3.1 Use appropriate instructional materials and strategies in various learning contexts.
3.3.2 Identify and apply techniques for integrating SMETS innovations in various learning contexts.
3.3.3 Identify strategies to maintain use after initial adoption.
4.0 Management (none specifically addressed in 503)

73
5.0 Evaluation 5.1 Problem Analysis
5.1.1 Identify and apply problem analysis skills in appropriate school media and educational technology (SMET) contexts (e.g., conduct needs assessments, identify and define problems, identify constraints, identify resources, define learner characteristics, define goals and objectives in instructional systems design, media development and utilization, program management, and evaluation).
5.2 Criterion-referenced Measurement
5.2.1 Develop and apply criterion-referenced measures in a variety of SMET contexts.
5.3 Formative and Summative Evaluation
5.3.1 Develop and apply formative and summative evaluation strategies in a variety of SMET contexts.
SMET = School Media & Educational Technologies