Instruction Manual: VelectriX Ascent+ 29 MTB29... · Instruction Manual: VelectriX Ascent+ 29 MTB ....
13
Instruction Manual: VelectriX Ascent+ 29 MTB
Transcript of Instruction Manual: VelectriX Ascent+ 29 MTB29... · Instruction Manual: VelectriX Ascent+ 29 MTB ....

Instruction Manual: VelectriX Ascent+ 29 MTB

Page 1
CONTENTS
Safe Riding Recommendations Page 2
Pre-Ride Checklist Page 3
Display and Controls Page 4
Maintenance Page 8
Warranty Page 9
Contact Details Page 10
Service Log Page 11
Model Specification Page 12

Page 2
Safe Riding Recommendations
1. Please ensure you are familiar with and follow all traffic laws
and regulations for your state. Please remember you may need
to review these when travelling interstate.
2. Always wear a helmet when riding your bike.
3. Don’t lend your bike to anyone who is unfamiliar with it.
4. As with all bikes it is important that you stay within safe limits
and speeds. If you feel you are travelling too quickly for the
road conditions, then slow down!! High speeds will increase
risk of injury in the event of an accident.
5. Please read and become familiar with the “Pre-Ride Checklist”
in this manual before riding your bike.
6. Switch the lights on your bike on when riding at all times of the
day or night. If your bike doesn’t have lights fitted as standard,
it is recommended that you purchase them and fit before
riding.
7. Your VelectriX bike must be returned to your servicing dealer
after 250kms or 6 weeks from date of purchase, whichever
comes first, to re-tension the spokes. Spokes should then be
re-tensioned every 1500kms.
Page 3
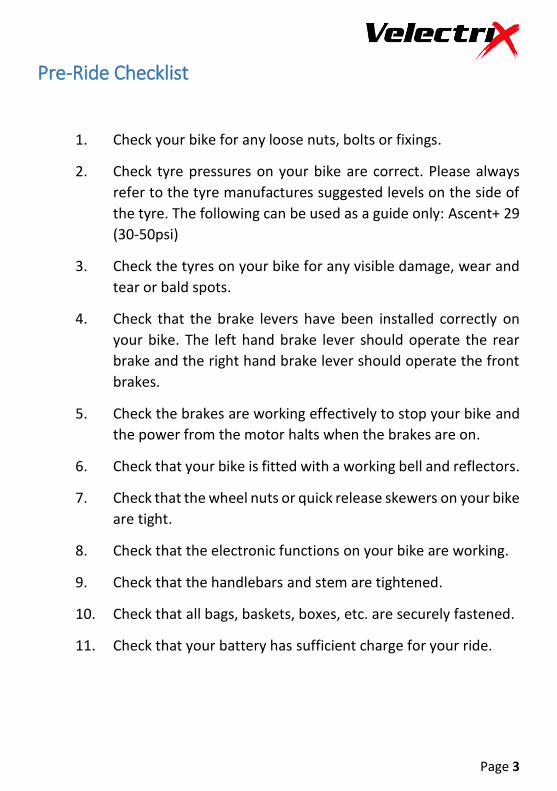
Pre-Ride Checklist
1. Check your bike for any loose nuts, bolts or fixings.
2. Check tyre pressures on your bike are correct. Please always
refer to the tyre manufactures suggested levels on the side of
the tyre. The following can be used as a guide only: Ascent+ 29
(30-50psi)
3. Check the tyres on your bike for any visible damage, wear and
tear or bald spots.
4. Check that the brake levers have been installed correctly on
your bike. The left hand brake lever should operate the rear
brake and the right hand brake lever should operate the front
brakes.
5. Check the brakes are working effectively to stop your bike and
the power from the motor halts when the brakes are on.
6. Check that your bike is fitted with a working bell and reflectors.
7. Check that the wheel nuts or quick release skewers on your bike
are tight.
8. Check that the electronic functions on your bike are working.
9. Check that the handlebars and stem are tightened.
10. Check that all bags, baskets, boxes, etc. are securely fastened.
11. Check that your battery has sufficient charge for your ride.

Page 4
LCD Display and Controls
Turn On The LCD Display
There are three buttons on the display unit: Power and plus and minus
buttons . To turn the display unit on, press and hold the power
button for 2 seconds. Press and hold the power button again to
turn the display off.
Turn The Lights On/Off (if lights are fitted as standard)
Press & hold the plus button button for 2 seconds. Do the same to
switch the lights off.
Your electric bike is equipped with
a LCD display, mounted on the left
side of the handlebar. The display
will show the battery level
capacity, speed, odometer, trip
meter, power assistance level, light
function and walk assist function.

Page 5
Walk Assist Mode
Press and hold the minus button and the bike will be powered to 6kph
walking speed. Simply release the button to stop, this is a handy function
for walking with the bike up steep inclines.
Riding With Pedal Assisted Power
There are 5 pedal assist settings on this bike, level 1 providing the lowest
level of assisted power and level 5 the highest. Simply push the plus or
minus buttons to change between the levels. Pedal assist does
not work in level 0 (zero).
Odometer & Trip Meter
You can choose to display either the odometer or the trip meter by pressing
the power button once. To “zero” the trip meter, hold the power &
minus buttons together .
Error Codes
Should the bike have an electrical fault, an “error code” will appear on the
display. If this occurs, please contact your local VelectriX dealer, who will
be able to deal with the issue for you. Please do not attempt to fix any
problems without first contacting your VelectriX dealer.

Page 6
Battery Instructions
To turn the battery ON/OFF, you should remove the battery from the bike
and press the ON/OFF button underneath the battery case (Pic 1). You do
not have to turn the battery OFF after every ride, only when the bike is not
being used for long periods of time.
This bike is supplied with a set of keys, which are needed to lock/unlock the
battery from the bike. The lock is located at the top of the battery on the
left hand side of the bike. Simply turn left or right to lock/unlock. To remove
the battery, unlock the battery and slide the battery to the left hand side.
The battery cradle will remain in place on the bike. When reattaching the
battery make sure to lock the battery to avoid unnecessary power failures
or damage.
You can charge the battery on or off the bike. Plug the battery charger
(supplied with this bike) into the charging port, which is positioned at the
bottom of the battery cradle on the left side ( Pic 2). Once connected to the
battery the charger can then be turned on at the power socket. A GREEN
light will indicate when the battery is fully charged. Max charge time is 4
hours.
Pic 1 Pic 2

Page 7
The Battery Charger
ONLY use the battery charger supplied with this bike.
Battery Care
The battery should be charged under dry conditions and at room
temperature.
Do not store your battery at temperatures below -10 °C & above 60 °C
If you plan to store your battery for long periods (more than 6 weeks)
then store in a dry location, ideally at a temperature between 0 and 20
°C. Being completely charged or completely discharged is not advisable
for lengthy periods of storage (no use). The ideal charge status for
lengthy periods of storage is 30-60% or 2 or 3 LEDs on the battery
indicator
For transport, the battery should be removed from the bike
Do not use a high pressure/jet hose to clean the battery, instead use a
damp cloth.

Page 8
Maintenance
1. Your VelectriX bike should be returned to your servicing dealer
for servicing and a thorough inspection once every 9 months or
1500kms, whichever comes first. Excluding the electronics,
motor, battery and wiring, your VelectriX bike is a normal bike,
with normal components. Your dealer will be able to explain to
you the general care and maintenance required for the
components of your bike.
2. Once a month lubricate all pivot points on your derailleur and
derailleur pulleys with suitable chain lube.
3. You can clean your bike with warm soapy water, however,
please do not submerge any electrical components or use a
high pressure hose. You can wipe dry the bike with a cloth.

Page 9
Warranty
All VelectriX bikes are covered by the following warranty and conditions
of use:
Battery 2 years
Motor 2 years
Frame 5 years
Other Components
1 year (excluding consumables: cables, tyres, tubes, hand grips).
The warranty is only valid for the first owner and is not
transferrable.
The warranty commences from the date of purchase and proof of
purchase must be provided to cover any warranty parts.
All commercial use is excluded.
All Accidental damage is excluded.
All damage caused from misuse is excluded.
All repairs must be completed by a VelectriX dealer.
The bike must be serviced every 1500kms or every 9 months,
whichever the sooner.
Please visit www.velectrix.com.au/warranty to view the full
VelectriX warranty document

Page 10
Contact Details
If you have any questions, concerns or technical issues with any VelectriX
product please contact your VelectriX dealer immediately.
Dealer Name:
Dealer
Contact Number
Address
Sales Person
Sales Date
VelectriX Australian Service Centre Contact Details:
VelectriX Pty Ltd
Phone: 1300 530 031 Visit: 10 Capital Place, Birtinya, Qld, 4575 Website: www.velectrix.com.au Email: [email protected]

Page 11
Service Log
Date Km Notes
Next Service Due Date: / / OR Km
Date Km Notes
Next Service Due Date: / / OR Km
Date Km Notes
Next Service Due Date: / / OR Km
Date Km Notes
Next Service Due Date: / / OR Km
Date Km Notes
Next Service Due Date: / / OR Km

Page 12
Model Specification
VelectriX Ascent+ 29 MTB
Frame: Aluminium VelectriX Ascent MTB
Size: 17” (medium), 19” (large)
Fork: Suntour SF13-XCT-HLO 100mm travel
Colour: Satin black with blue & grey decals
Tyres: Maxxis 29” x 2.10” MTB
Brakes: Tektro 285 hydraulic with 180mm rotors
Gears: Shimano Alivio Shadow 9
Motor: 36 volt 250 watt Bafang Max Drive
Battery: 36 volt Samsung 13.6ah lithium ion
Battery Charger: ST Electronics Li-Ion STC-8108L. 3a 240V
Maximum Speed: 25 km/h
Weight: 21kgs (inc. battery)
Range: Up to 110kms
Carrying Capacity: 110kgs (including battery, rider & accessories)