Installation Guide - Questsupport-public.cfm.quest.com/...InstallationGuide.pdf · Quest NetVault...
56
Quest ® NetVault ® Backup 11.3 Installation Guide
Transcript of Installation Guide - Questsupport-public.cfm.quest.com/...InstallationGuide.pdf · Quest NetVault...
Quest® NetVault® Backup 11.3
Installation Guide
© 2017 Quest Software Inc.
ALL RIGHTS RESERVED.
This guide contains proprietary information protected by copyright. The software described in this guide is furnished under a software license or nondisclosure agreement. This software may be used or copied only in accordance with the terms of the applicable agreement. No part of this guide may be reproduced or transmitted in any form or by any means, electronic or mechanical, including photocopying and recording for any purpose other than the purchaser’s personal use without the written permission of Quest Software Inc.
The information in this document is provided in connection with Quest Software products. No license, express or implied, by estoppel or otherwise, to any intellectual property right is granted by this document or in connection with the sale of Quest Software products. EXCEPT AS SET FORTH IN THE TERMS AND CONDITIONS AS SPECIFIED IN THE LICENSE AGREEMENT FOR THIS PRODUCT, QUEST SOFTWARE ASSUMES NO LIABILITY WHATSOEVER AND DISCLAIMS ANY EXPRESS, IMPLIED OR STATUTORY WARRANTY RELATING TO ITS PRODUCTS INCLUDING, BUT NOT LIMITED TO, THE IMPLIED WARRANTY OF MERCHANTABILITY, FITNESS FOR A PARTICULAR PURPOSE, OR NON-INFRINGEMENT. IN NO EVENT SHALL QUEST SOFTWARE BE LIABLE FOR ANY DIRECT, INDIRECT, CONSEQUENTIAL, PUNITIVE, SPECIAL OR INCIDENTAL DAMAGES (INCLUDING, WITHOUT LIMITATION, DAMAGES FOR LOSS OF PROFITS, BUSINESS INTERRUPTION OR LOSS OF INFORMATION) ARISING OUT OF THE USE OR INABILITY TO USE THIS DOCUMENT, EVEN IF QUEST SOFTWARE HAS BEEN ADVISED OF THE POSSIBILITY OF SUCH DAMAGES. Quest Software makes no representations or warranties with respect to the accuracy or completeness of the contents of this document and reserves the right to make changes to specifications and product descriptions at any time without notice. Quest Software does not make any commitment to update the information contained in this document.
If you have any questions regarding your potential use of this material, contact:
Quest Software Inc.Attn: LEGAL Dept.4 Polaris WayAliso Viejo, CA 92656
Refer to our website (https://www.quest.com) for regional and international office information.
Patents
Quest Software is proud of our advanced technology. Patents and pending patents may apply to this product. For the most current information about applicable patents for this product, please visit our website at https://www.quest.com/legal.
Trademarks
Quest, the Quest logo, Join the Innovation, and NetVault are trademarks and registered trademarks of Quest Software Inc. For a complete list of Quest marks, visit https://www.quest.com/legal/trademark-information.aspx. All other trademarks and registered trademarks are property of their respective owners.
NetVault Backup Installation GuideUpdated - February 2017Software Version - 11.3NVG-105-11.3-EN-01
Legend
WARNING: A WARNING icon indicates a potential for property damage, personal injury, or death.
CAUTION: A CAUTION icon indicates potential damage to hardware or loss of data if instructions are not followed.
IMPORTANT NOTE, NOTE, TIP, MOBILE, or VIDEO: An information icon indicates supporting information.
Contents
Introduction . . . . . . . . . . . . . . . . . . . . . . . . . . . . . . . . . . . . . . . . . . . . . . . . . . . . . . . . . . . . . . 5
About Quest® NetVault® Backup . . . . . . . . . . . . . . . . . . . . . . . . . . . . . . . . . . . . . . . . . . . . . . . 5
Key benefits . . . . . . . . . . . . . . . . . . . . . . . . . . . . . . . . . . . . . . . . . . . . . . . . . . . . . . . . . . . 5
Feature summary . . . . . . . . . . . . . . . . . . . . . . . . . . . . . . . . . . . . . . . . . . . . . . . . . . . . . . . 6
About this document . . . . . . . . . . . . . . . . . . . . . . . . . . . . . . . . . . . . . . . . . . . . . . . . . . . . . . . . 6
Target audience . . . . . . . . . . . . . . . . . . . . . . . . . . . . . . . . . . . . . . . . . . . . . . . . . . . . . . . . . . . . 7
Recommended additional reading . . . . . . . . . . . . . . . . . . . . . . . . . . . . . . . . . . . . . . . . . . . . . . 7
Deploying NetVault Backup . . . . . . . . . . . . . . . . . . . . . . . . . . . . . . . . . . . . . . . . . . . . . . . . . 8
About deploying NetVault Backup . . . . . . . . . . . . . . . . . . . . . . . . . . . . . . . . . . . . . . . . . . . . . . 8
NetVault Backup components . . . . . . . . . . . . . . . . . . . . . . . . . . . . . . . . . . . . . . . . . . . . . . . . . 9
NetVault Backup Server . . . . . . . . . . . . . . . . . . . . . . . . . . . . . . . . . . . . . . . . . . . . . . . . . . 9
NetVault Backup Clients . . . . . . . . . . . . . . . . . . . . . . . . . . . . . . . . . . . . . . . . . . . . . . . . . . 9
NetVault Backup plug-ins . . . . . . . . . . . . . . . . . . . . . . . . . . . . . . . . . . . . . . . . . . . . . . . . . 9
NetVault Backup WebUI . . . . . . . . . . . . . . . . . . . . . . . . . . . . . . . . . . . . . . . . . . . . . . . . . 11
NetVault Backup Command Line Interface . . . . . . . . . . . . . . . . . . . . . . . . . . . . . . . . . . . 11
Deployment planning . . . . . . . . . . . . . . . . . . . . . . . . . . . . . . . . . . . . . . . . . . . . . . . . . . . . . . . 11
Determine the server and client machines . . . . . . . . . . . . . . . . . . . . . . . . . . . . . . . . . . . 12
Determine the installation directory . . . . . . . . . . . . . . . . . . . . . . . . . . . . . . . . . . . . . . . . . 12
Determine the database location . . . . . . . . . . . . . . . . . . . . . . . . . . . . . . . . . . . . . . . . . . 12
Determine NetVault Backup name and password . . . . . . . . . . . . . . . . . . . . . . . . . . . . . . 13
Determine NetVault Backup PostgreSQL Linux user account . . . . . . . . . . . . . . . . . . . . 14
Reviewing pre-installation requirements . . . . . . . . . . . . . . . . . . . . . . . . . . . . . . . . . . . . . 15
General requirements . . . . . . . . . . . . . . . . . . . . . . . . . . . . . . . . . . . . . . . . . . . . . . . . . . . . . . 15
Platform-specific requirements . . . . . . . . . . . . . . . . . . . . . . . . . . . . . . . . . . . . . . . . . . . . . . . 17
CentOS 6.x . . . . . . . . . . . . . . . . . . . . . . . . . . . . . . . . . . . . . . . . . . . . . . . . . . . . . . . . . . . 18
CentOS 7 . . . . . . . . . . . . . . . . . . . . . . . . . . . . . . . . . . . . . . . . . . . . . . . . . . . . . . . . . . . . 18
Debian 7.x (64-bit) . . . . . . . . . . . . . . . . . . . . . . . . . . . . . . . . . . . . . . . . . . . . . . . . . . . . . . 19
Debian 8.x (64-bit) . . . . . . . . . . . . . . . . . . . . . . . . . . . . . . . . . . . . . . . . . . . . . . . . . . . . . . 19
FreeBSD 9.x and 10.x (32/64-bit) . . . . . . . . . . . . . . . . . . . . . . . . . . . . . . . . . . . . . . . . . . 19
Linux . . . . . . . . . . . . . . . . . . . . . . . . . . . . . . . . . . . . . . . . . . . . . . . . . . . . . . . . . . . . . . . . 19
RHEL 5.X . . . . . . . . . . . . . . . . . . . . . . . . . . . . . . . . . . . . . . . . . . . . . . . . . . . . . . . . . . . . 20
RHEL 6 . . . . . . . . . . . . . . . . . . . . . . . . . . . . . . . . . . . . . . . . . . . . . . . . . . . . . . . . . . . . . . 20
RHEL 7 . . . . . . . . . . . . . . . . . . . . . . . . . . . . . . . . . . . . . . . . . . . . . . . . . . . . . . . . . . . . . . 20
SLES 11 SP3 . . . . . . . . . . . . . . . . . . . . . . . . . . . . . . . . . . . . . . . . . . . . . . . . . . . . . . . . . 21
SLES 12 . . . . . . . . . . . . . . . . . . . . . . . . . . . . . . . . . . . . . . . . . . . . . . . . . . . . . . . . . . . . . 21
Ubuntu 10.x, 11.x, and 12.x . . . . . . . . . . . . . . . . . . . . . . . . . . . . . . . . . . . . . . . . . . . . . . 22
Ubuntu 14.x, 15.04, and 16.x . . . . . . . . . . . . . . . . . . . . . . . . . . . . . . . . . . . . . . . . . . . . . 22
Windows . . . . . . . . . . . . . . . . . . . . . . . . . . . . . . . . . . . . . . . . . . . . . . . . . . . . . . . . . . . . . 23
Installing NetVault Backup . . . . . . . . . . . . . . . . . . . . . . . . . . . . . . . . . . . . . . . . . . . . . . . . . 24
Installation overview . . . . . . . . . . . . . . . . . . . . . . . . . . . . . . . . . . . . . . . . . . . . . . . . . . . . . . . 24
NetVault Backup installer . . . . . . . . . . . . . . . . . . . . . . . . . . . . . . . . . . . . . . . . . . . . . . . . 24
Quest NetVault Backup 11.3 Installation GuideContents
3

Installation modes . . . . . . . . . . . . . . . . . . . . . . . . . . . . . . . . . . . . . . . . . . . . . . . . . . . . . . 24
Installation mode selection . . . . . . . . . . . . . . . . . . . . . . . . . . . . . . . . . . . . . . . . . . . . . . . 25
Installation logs . . . . . . . . . . . . . . . . . . . . . . . . . . . . . . . . . . . . . . . . . . . . . . . . . . . . . . . . 26
Push installation method . . . . . . . . . . . . . . . . . . . . . . . . . . . . . . . . . . . . . . . . . . . . . . . . . 26
Installing NetVault Backup in GUI mode . . . . . . . . . . . . . . . . . . . . . . . . . . . . . . . . . . . . . . . . 26
Installing NetVault Backup in text mode . . . . . . . . . . . . . . . . . . . . . . . . . . . . . . . . . . . . . . . . 31
Installing NetVault Backup in unattended mode . . . . . . . . . . . . . . . . . . . . . . . . . . . . . . . . . . 33
Examples . . . . . . . . . . . . . . . . . . . . . . . . . . . . . . . . . . . . . . . . . . . . . . . . . . . . . . . . . . . . 35
Sample option files . . . . . . . . . . . . . . . . . . . . . . . . . . . . . . . . . . . . . . . . . . . . . . . . . . . . . 36
Installing NetVault Backup Client on Windows using Group Policy . . . . . . . . . . . . . . . . . . . . 37
Reviewing post-installation requirements . . . . . . . . . . . . . . . . . . . . . . . . . . . . . . . . . . . . 40
Platform-specific post-installation requirements . . . . . . . . . . . . . . . . . . . . . . . . . . . . . . . . . . 40
Linux . . . . . . . . . . . . . . . . . . . . . . . . . . . . . . . . . . . . . . . . . . . . . . . . . . . . . . . . . . . . . . . . 40
RHEL 5.x . . . . . . . . . . . . . . . . . . . . . . . . . . . . . . . . . . . . . . . . . . . . . . . . . . . . . . . . . . . . . 41
Solaris 10 (SPARC and x86-64) . . . . . . . . . . . . . . . . . . . . . . . . . . . . . . . . . . . . . . . . . . . 41
Solaris 11 (SPARC and x86-64) . . . . . . . . . . . . . . . . . . . . . . . . . . . . . . . . . . . . . . . . . . . 42
Ubuntu . . . . . . . . . . . . . . . . . . . . . . . . . . . . . . . . . . . . . . . . . . . . . . . . . . . . . . . . . . . . . . . 43
Windows . . . . . . . . . . . . . . . . . . . . . . . . . . . . . . . . . . . . . . . . . . . . . . . . . . . . . . . . . . . . . 43
Windows 2008 R2 . . . . . . . . . . . . . . . . . . . . . . . . . . . . . . . . . . . . . . . . . . . . . . . . . . . . . . 43
Upgrading NetVault Backup . . . . . . . . . . . . . . . . . . . . . . . . . . . . . . . . . . . . . . . . . . . . . . . . 44
Upgrade considerations . . . . . . . . . . . . . . . . . . . . . . . . . . . . . . . . . . . . . . . . . . . . . . . . . . . . . 44
Preparing for an upgrade . . . . . . . . . . . . . . . . . . . . . . . . . . . . . . . . . . . . . . . . . . . . . . . . . . . . 45
Upgrading NetVault Backup in GUI mode . . . . . . . . . . . . . . . . . . . . . . . . . . . . . . . . . . . . . . . 45
Upgrading NetVault Backup in text mode . . . . . . . . . . . . . . . . . . . . . . . . . . . . . . . . . . . . . . . 46
Upgrading NetVault Backup in unattended mode . . . . . . . . . . . . . . . . . . . . . . . . . . . . . . . . . 47
Upgrading licensed plug-ins . . . . . . . . . . . . . . . . . . . . . . . . . . . . . . . . . . . . . . . . . . . . . . . . . 48
Licensing NetVault Backup . . . . . . . . . . . . . . . . . . . . . . . . . . . . . . . . . . . . . . . . . . . . . . . . 49
About licensing NetVault Backup . . . . . . . . . . . . . . . . . . . . . . . . . . . . . . . . . . . . . . . . . . . . . . 49
Obtaining the machine ID . . . . . . . . . . . . . . . . . . . . . . . . . . . . . . . . . . . . . . . . . . . . . . . . . . . 49
Obtaining permanent license keys . . . . . . . . . . . . . . . . . . . . . . . . . . . . . . . . . . . . . . . . . . . . 49
Installing product license keys . . . . . . . . . . . . . . . . . . . . . . . . . . . . . . . . . . . . . . . . . . . . . . . . 50
Removing NetVault Backup . . . . . . . . . . . . . . . . . . . . . . . . . . . . . . . . . . . . . . . . . . . . . . . . 51
Removing NetVault Backup Server or Client . . . . . . . . . . . . . . . . . . . . . . . . . . . . . . . . . . . . . 51
Troubleshooting . . . . . . . . . . . . . . . . . . . . . . . . . . . . . . . . . . . . . . . . . . . . . . . . . . . . . . . . . 53
Common errors . . . . . . . . . . . . . . . . . . . . . . . . . . . . . . . . . . . . . . . . . . . . . . . . . . . . . . . . . . . 53
About us . . . . . . . . . . . . . . . . . . . . . . . . . . . . . . . . . . . . . . . . . . . . . . . . . . . . . . . . . . . . . . . . 56
We are more than just a name . . . . . . . . . . . . . . . . . . . . . . . . . . . . . . . . . . . . . . . . . . . . . . . 56
Our brand, our vision. Together. . . . . . . . . . . . . . . . . . . . . . . . . . . . . . . . . . . . . . . . . . . . . . . 56
Contacting Quest . . . . . . . . . . . . . . . . . . . . . . . . . . . . . . . . . . . . . . . . . . . . . . . . . . . . . . . . . . 56
Technical support resources . . . . . . . . . . . . . . . . . . . . . . . . . . . . . . . . . . . . . . . . . . . . . . . . . 56
Quest NetVault Backup 11.3 Installation GuideContents
4
1
Introduction
• About Quest® NetVault® Backup
• About this document
• Target audience
• Recommended additional reading
About Quest® NetVault® BackupQuest NetVault Backup (NetVault Backup) offers the most advanced, cross-platform data protection capabilities on the market as well as unsurpassed ease of use, out-of-the-box deployment, and pain-free scalability.
NetVault Backup allows you to safeguard your data and applications in both physical and virtual environments from one intuitive user interface and to protect a massive number of servers that contain many petabytes of data. NetVault Backup also features heterogeneous support, so you can safeguard data on a wide range of operating systems, applications, databases, processor architectures, and networked storage devices. Such cross-platform versatility makes it easy for you to tailor NetVault Backup to match the ever-changing and growing landscape of your IT infrastructure.
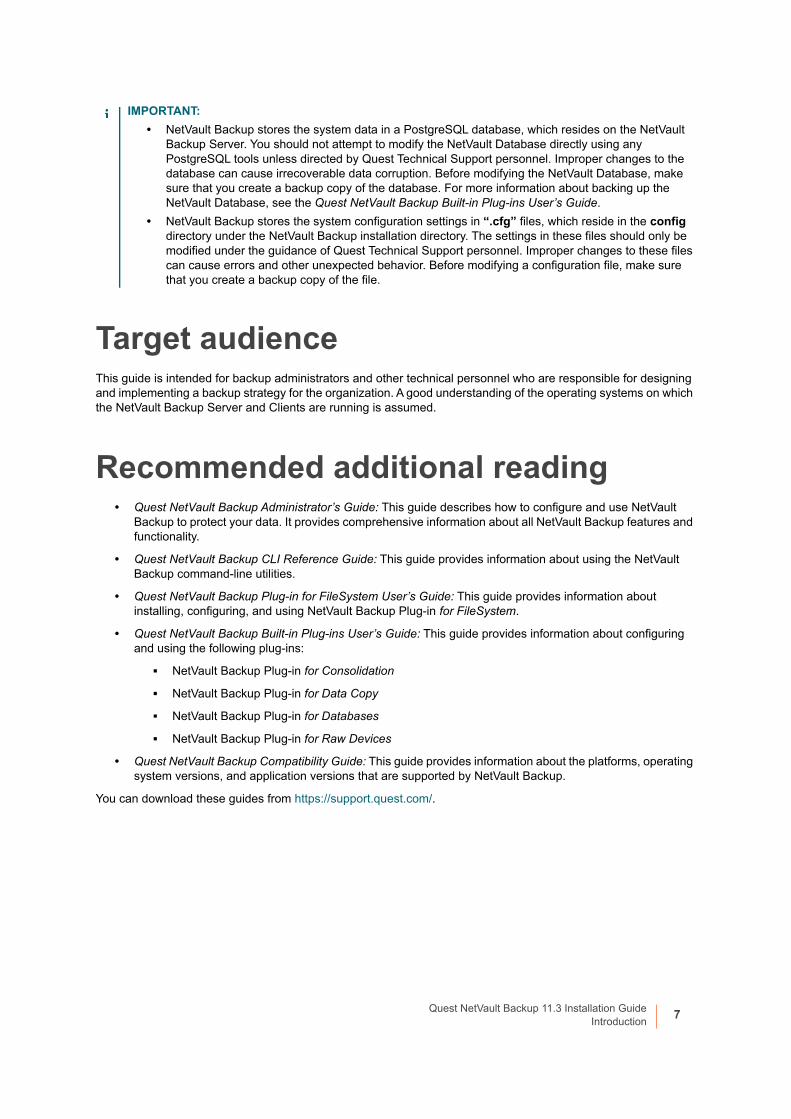
Key benefits• Simple, out-of-the-box deployment for fast time to value
• Fully automated installation manager that simplifies deployment of Windows clients
• Protection for both physical and virtual environments for cost savings
• Heterogeneous server support for unparalleled coverage in diverse IT environments
• Broad application support
• Disk-based backup and deduplication to significantly improve storage efficiency
• Seamless integration with the Dell DR Series system for source-side deduplication and WAN-optimized replication
• Comprehensive Network Attached Storage (NAS) protection to safeguard critical data
• Feature rich protection of virtual environments
• Bare metal recovery to drastically reduce the time it takes to recover a failed server
• Extensive storage attachment options to allow for distributed backup targets and workload
• Dynamic device sharing to optimize backup data transfers and reduce points of failure
• Fast file-system backups with high performance multi-streaming
Quest NetVault Backup 11.3 Installation GuideIntroduction
5
Feature summary• Application protection: Ensure the availability of business-critical applications such as Oracle,
SQL Server, Exchange, SharePoint, MySQL, PostgreSQL, Domino, DB2, Informix, SAP, and Sybase with application plug-ins. These plug-ins complement native solutions to save you time on integration. No scripting is required to run backup and recovery jobs.
• NAS protection: Get advanced data protection for information stored on NAS appliances, including the devices made by Quest, EMC, Hitachi, IBM, NetApp, and Sun. You can reduce traffic over the LAN and maximize performance by backing up data using Network Data Management Protocol (NDMP). NetVault Backup supports many different storage topologies and configurations, allowing you to perform backups directly to a locally attached SCSI device, a SAN-attached device, or a storage device elsewhere on the network.
• Enterprise-wide control: Use the web-based interface to configure, manage, and monitor your backup and recovery operations. Convenient wizards guide you through the common tasks, such as creating backup jobs, assigning policies, configuring storage devices, and generating reports.
• Back up to disk and tape: Leverage disk- and tape-based backups to a wide range of storage targets, including NAS devices and third-party deduplication appliances. NetVault Backup also allows you to move data from one storage target to another for off-site storage and disaster recovery purposes.
• Data deduplication: Reduce your data storage footprint with powerful deduplication technologies.
NetVault Backup integrates seamlessly with the Dell DR Series of deduplication systems and the Rapid Data Access (RDA) client-side deduplication technology, enabling you to take full advantage of the system’s powerful deduplication, compression, and replication capabilities. NetVault Backup also supports EMC Data Domain backup and recovery platform, as well as its DD Boost technology for deduplication.
• Virtualization support: Extend advanced data protection to VMware and Hyper-V environments. NetVault Backup gives you consistent, reliable, point-and-click backup and restore for virtual environments without requiring you to be an expert.
• High-performance multi-streaming: Save time and ease management by backing up multiple workloads simultaneously.
• Strong security: Meet regulatory requirements without sacrificing backup windows or deduplication performance with encryption plug-ins for CAST-128, CAST-256, and AES-256 algorithm support. Flexible job-level encryption lets you easily select which data to encrypt.
• Simple, straight-forward licensing: License NetVault Backup by capacity or by component. This option gives you incredible flexibility to choose the model that best meets the organization’s needs. With component-based licensing, you can choose which modules you need. You can also license NetVault Backup by capacity and deploy an unlimited number of clients or application plug-ins. Quest offers two capacity-based licensing editions for NetVault Backup. One offers great value for growing businesses; the other offers comprehensive protection for large enterprises.
About this documentThis guide provides information about installing the NetVault Backup Server and Client software. It does not provide information about the NetVault Backup features and functionality. For more information about using NetVault Backup to protect your data, see the Quest NetVault Backup Administrator’s Guide.
Quest NetVault Backup 11.3 Installation GuideIntroduction
6
Target audienceThis guide is intended for backup administrators and other technical personnel who are responsible for designing and implementing a backup strategy for the organization. A good understanding of the operating systems on which the NetVault Backup Server and Clients are running is assumed.
Recommended additional reading• Quest NetVault Backup Administrator’s Guide: This guide describes how to configure and use NetVault
Backup to protect your data. It provides comprehensive information about all NetVault Backup features and functionality.
• Quest NetVault Backup CLI Reference Guide: This guide provides information about using the NetVault Backup command-line utilities.
• Quest NetVault Backup Plug-in for FileSystem User’s Guide: This guide provides information about installing, configuring, and using NetVault Backup Plug-in for FileSystem.
• Quest NetVault Backup Built-in Plug-ins User’s Guide: This guide provides information about configuring and using the following plug-ins:
▪ NetVault Backup Plug-in for Consolidation
▪ NetVault Backup Plug-in for Data Copy
▪ NetVault Backup Plug-in for Databases
▪ NetVault Backup Plug-in for Raw Devices
• Quest NetVault Backup Compatibility Guide: This guide provides information about the platforms, operating system versions, and application versions that are supported by NetVault Backup.
You can download these guides from https://support.quest.com/.
IMPORTANT:
• NetVault Backup stores the system data in a PostgreSQL database, which resides on the NetVault Backup Server. You should not attempt to modify the NetVault Database directly using any PostgreSQL tools unless directed by Quest Technical Support personnel. Improper changes to the database can cause irrecoverable data corruption. Before modifying the NetVault Database, make sure that you create a backup copy of the database. For more information about backing up the NetVault Database, see the Quest NetVault Backup Built-in Plug-ins User’s Guide.
• NetVault Backup stores the system configuration settings in “.cfg” files, which reside in the config directory under the NetVault Backup installation directory. The settings in these files should only be modified under the guidance of Quest Technical Support personnel. Improper changes to these files can cause errors and other unexpected behavior. Before modifying a configuration file, make sure that you create a backup copy of the file.
Quest NetVault Backup 11.3 Installation GuideIntroduction
7
2
Deploying NetVault Backup
• About deploying NetVault Backup
• NetVault Backup components
• Deployment planning
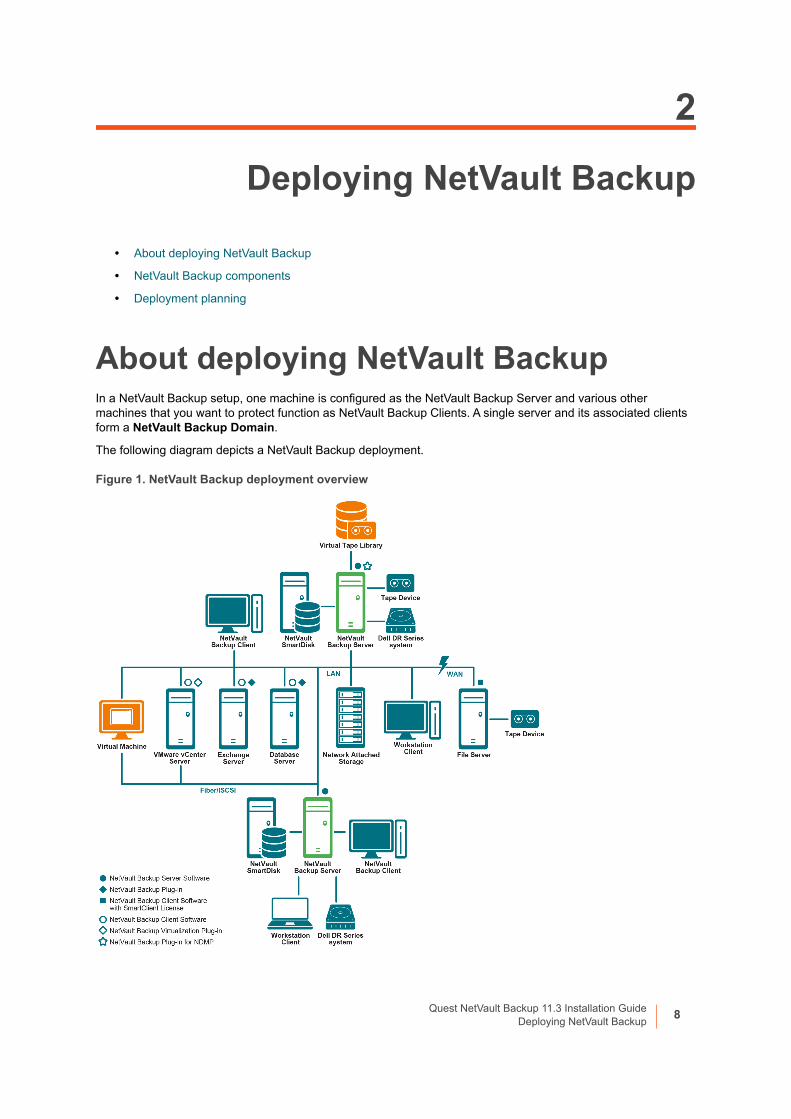
About deploying NetVault BackupIn a NetVault Backup setup, one machine is configured as the NetVault Backup Server and various other machines that you want to protect function as NetVault Backup Clients. A single server and its associated clients form a NetVault Backup Domain.
The following diagram depicts a NetVault Backup deployment.
Figure 1. NetVault Backup deployment overview
Quest NetVault Backup 11.3 Installation GuideDeploying NetVault Backup
8
NetVault Backup componentsA NetVault Backup deployment consists of the following components:
• NetVault Backup Server
• NetVault Backup Clients
• NetVault Backup plug-ins
• NetVault Backup WebUI
• NetVault Backup Command Line Interface
NetVault Backup ServerThe NetVault Backup Server provides the core services for protecting your data.
The server provides services such as schedule management, job management, device management, media management, user management, notification management, and log management. The server administers backup and restore jobs for all assigned clients. Various types of physical and virtual storage devices can be locally attached to the server.
The NetVault Backup Server can run on Windows and Linux operating systems.
NetVault Backup ClientsThe NetVault Backup Client is installed on machines that you want to protect using the NetVault Backup solution. These machines can be file servers, database servers, email servers, application servers, and workstations.
The NetVault Backup Clients are assigned to a NetVault Backup Server, which manages all data protection operations for the clients. A single server and its associated clients form a NetVault Backup Domain. A NetVault Backup SmartClient license is required to attach physical or virtual storage devices locally to a NetVault Backup Client.
The NetVault Backup Client can run on AIX, FreeBSD, HP-UX, Linux, Mac OS X, Solaris, and Windows operating systems.
NetVault Backup plug-insThe NetVault Backup Plug-ins are used to protect various applications and data stored on the server and client machines. There are two categories of NetVault Backup plug-ins: built-in plug-ins and licensed plug-ins.
NOTE: Quest NetVault Backup Workstation Client extends the NetVault Backup enterprise-class data protection to workstations by enabling protection for vital intellectual property stored in documents, spreadsheets, and data files on desktops and laptops. Its Shadowing process creates local redundant copies to protect data against corruption and accidental deletion. Seamless integration with the NetVault Backup Server protects the Shadow Area for long-term retention or disaster recovery to ensure business continuity. For more information about the NetVault Backup Workstation Clients, see the Quest NetVault Backup Workstation Client Administrator's Guide.
Quest NetVault Backup 11.3 Installation GuideDeploying NetVault Backup
9
Built-in plug-insThe built-in plug-ins are packaged with the NetVault Backup software, and automatically installed on the respective machines when you install the NetVault Backup Server and Client software.
NetVault Backup offers the following types of built-in plug-ins:
• NetVault Backup Plug-in for FileSystem (Plug-in for FileSystem): The Plug-in for FileSystem protects critical file system data, and minimizes downtime by allowing you to restore full volumes, individual partitions, or individual directories and files quickly and reliably with minimal interaction.
• NetVault Backup Plug-in for Consolidation (Plug-in for Consolidation): The Plug-in for Consolidation lets you create a composite saveset by combining a Full Backup and its associated Incremental Backups. You can use this consolidated saveset as the base for subsequent Incremental Backups. The Plug-in for Consolidation does not back up data from a client; it just creates a composite set from existing savesets.
• NetVault Backup Plug-in for Data Copy (Plug-in for Data Copy): The Plug-in for Data Copy lets you create one or more copies of backups for off-site storage and disaster recovery purposes. The Plug-in for Data Copy does not back up data from a client; it just creates a copy of an existing backup.
• NetVault Backup Plug-in for Databases (Plug-in for Databases): The Plug-in for Databases protects system data (such as configuration files, system settings, backup indexes, backup media information, job schedule, license keys, and other data) stored in the NetVault Database. You can use this backup to recover a functional NetVault Backup Server after a failure.
• NetVault Backup Plug-in for Raw Devices (Plug-in for Raw Devices): The Plug-in for Raw Devices protects data stored on physical disks. The plug-in lets you recover the Master Boot Record (MBR), system partitions, and individual user partitions from a point-and-click user interface without writing any complex scripts.
For more information about built-in plug-ins, see the Quest NetVault Backup Plug-in for FileSystem User’s Guide and Quest NetVault Backup Built-in Plug-ins User’s Guide.
Licensed plug-insThe licensed plug-ins are available as separate products, and installed on the NetVault Backup Server and Client machines to protect specific applications and appliances.
NetVault Backup offers the following types of licensed plug-ins:
• Plug-ins for applications: These plug-ins provide data protection to business-critical applications, such as Oracle, SQL Server, Exchange, SharePoint, MySQL, PostgreSQL, Domino, DB2, Informix, SAP, and Sybase.
• Plug-ins for NDMP-based NAS appliances: These plug-ins enable NDMP-based backups and restores for appliances that support this protocol. NetVault Backup also offers specialized plug-ins that integrate the NetApp SnapMirror, SnapVault, and Snapshot technologies to provide advanced data protection to NetApp appliances.
• Plug-ins for virtual environments: These plug-ins provide data protection to virtual machines in VMware and Hyper-V environments.
• Plug-ins for backup encryption: These plug-ins provide support for CAST-128, AES-256, and CAST-256 algorithms to meet regulatory backup security requirements.
• Plug-ins for device integration: These plug-ins enable configuration of specialized tape libraries for use in a NetVault Backup environment.
• Plug-ins for bare metal recovery: These plug-ins let you recover an entire system, including the operating system, applications, system settings, partition information, and data on supported Windows and Linux operating systems.
NetVault Backup also offers cluster-aware versions of various plug-ins that enable data protection for distributed data.
For more information about the licensed plug-ins, see the respective plug-in user’s guide.
Quest NetVault Backup 11.3 Installation GuideDeploying NetVault Backup
10
NetVault Backup WebUINetVault Backup offers a web-based user interface, called the NetVault Backup WebUI, to configure, manage, and monitor your NetVault Backup system.
You can use the NetVault Backup WebUI to perform various tasks such as the following:
• Configure performance, security, and other options
• Manage clients, storage devices, and storage media
• Perform backups and restores
• Monitor jobs, device activities, and logs
• Set up notifications
• Generate and view reports
You can access the NetVault Backup WebUI from any standard browser. You can use the WebUI to remotely administer a NetVault Backup Server from any system on which you can run a supported web browser and connect to the server over HTTP or HTTPS.
NetVault Backup Command Line InterfaceNetVault Backup also provides a Command Line Interface that allows you to configure and manage a NetVault Backup system from a command prompt window or terminal window.
You can use the NetVault Backup CLI utilities to perform various tasks such as the following:
• Start and stop the NetVault Backup Service
• Configure performance, security, and other options
• Manage clients, storage devices, and storage media
• Perform backups and restores
• Generate and view reports
The NetVault Backup command-line utilities can be accessed from the NetVault Backup Server and Client machines. For more information about the command-line interface, see the Quest NetVault Backup Command Line Interface Reference Guide.
Deployment planningBefore you deploy a NetVault Backup system, review the following topics:
• Determine the server and client machines
• Determine the installation directory
• Determine the database location
• Determine NetVault Backup name and password
• Determine NetVault Backup PostgreSQL Linux user account
Quest NetVault Backup 11.3 Installation GuideDeploying NetVault Backup
11
Determine the server and client machinesThe first step in deploying NetVault Backup is to identify the server and client machines:
• NetVault Backup Server: This machine hosts the server version of NetVault Backup.
The server manages all NetVault Backup operations and administers backup and recovery operations for the clients. A NetVault Backup Server can also act as a client to itself for backups and restores of its local data.
• NetVault Backup Clients: These machines host the client version of NetVault Backup and serve as the backup and restore targets.
Determine the installation directoryNetVault Backup must reside on a local disk. If you select a network share or mount point, and that is lost, it would cause NetVault Backup to stop or malfunction.
On Linux and UNIX platforms, you cannot install NetVault Backup on mount points. The installer tries to delete the existing contents on the mount point, which is not allowed on Linux and UNIX.
A NetVault Backup server installation requires about 200MB of disk space on Windows-based systems and 160MB of disk space on Linux-based systems.
Determine the database locationThe NetVault Database stores system information, configuration files, job details, and backup indexes. It is created on the NetVault Backup Server. The database continues to grow in size as various data protection operations are performed in the NetVault Backup system. NetVault Backup operations can stop if the database cannot be updated due to lack of disk space.
The NetVault Database cannot reside on a remote file system (for example, network share, network mapped drive, or NFS volume). For installing the NetVault Database, you must select a directory on a local drive or volume.
Database subdirectoriesThe database directory contains the following subdirectories:
• install: This directory contains the modules file, which includes a list of NetVault Backup modules installed on the server and client machines. The install directory is small in size.
• bkl: This directory contains the license key files for the NetVault Backup products. The bkl directory is small in size.
• MediaDatabase: This directory stores the media records and backup indexes. The MediaDatabase directory grows to be rather large as you use the NetVault Backup system. To estimate space requirements for the MediaDatabase directory, see Database size calculation.
• pgsql: This directory stores the backup and restore job records. The space requirement for this directory depends on the content of the jobs. When calculating space requirement for the NetVault Database, consider adding 10 percent of the MediaDatabase size for this directory.
NOTE: In large environments, we recommend that you select 500GB or 1TB disks with RAID 10 or RAID 5 configurations. The disks must support high Input/Output Operations Per Second (IOPS). Therefore, Solid State Drives (SSD) or 10k and 15k Serial Attached SCSI (SAS) drives are recommended.
Quest NetVault Backup 11.3 Installation GuideDeploying NetVault Backup
12
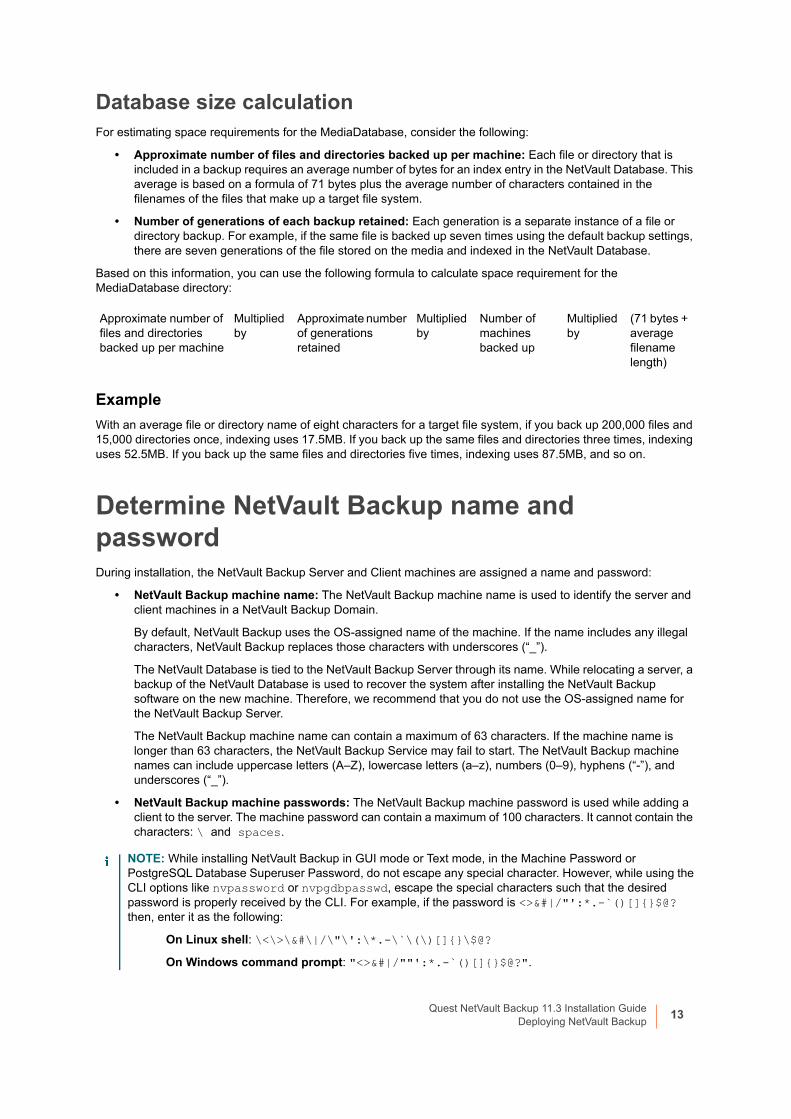
Database size calculationFor estimating space requirements for the MediaDatabase, consider the following:
• Approximate number of files and directories backed up per machine: Each file or directory that is included in a backup requires an average number of bytes for an index entry in the NetVault Database. This average is based on a formula of 71 bytes plus the average number of characters contained in the filenames of the files that make up a target file system.
• Number of generations of each backup retained: Each generation is a separate instance of a file or directory backup. For example, if the same file is backed up seven times using the default backup settings, there are seven generations of the file stored on the media and indexed in the NetVault Database.
Based on this information, you can use the following formula to calculate space requirement for the MediaDatabase directory:
Example
With an average file or directory name of eight characters for a target file system, if you back up 200,000 files and 15,000 directories once, indexing uses 17.5MB. If you back up the same files and directories three times, indexing uses 52.5MB. If you back up the same files and directories five times, indexing uses 87.5MB, and so on.
Determine NetVault Backup name and passwordDuring installation, the NetVault Backup Server and Client machines are assigned a name and password:
• NetVault Backup machine name: The NetVault Backup machine name is used to identify the server and client machines in a NetVault Backup Domain.
By default, NetVault Backup uses the OS-assigned name of the machine. If the name includes any illegal characters, NetVault Backup replaces those characters with underscores (“_”).
The NetVault Database is tied to the NetVault Backup Server through its name. While relocating a server, a backup of the NetVault Database is used to recover the system after installing the NetVault Backup software on the new machine. Therefore, we recommend that you do not use the OS-assigned name for the NetVault Backup Server.
The NetVault Backup machine name can contain a maximum of 63 characters. If the machine name is longer than 63 characters, the NetVault Backup Service may fail to start. The NetVault Backup machine names can include uppercase letters (A–Z), lowercase letters (a–z), numbers (0–9), hyphens (“-”), and underscores (“_”).
• NetVault Backup machine passwords: The NetVault Backup machine password is used while adding a client to the server. The machine password can contain a maximum of 100 characters. It cannot contain the characters: \ and spaces.
Approximate number of files and directories backed up per machine
Multiplied by
Approximate number of generations retained
Multiplied by
Number of machines backed up
Multiplied by
(71 bytes + average filename length)
NOTE: While installing NetVault Backup in GUI mode or Text mode, in the Machine Password or PostgreSQL Database Superuser Password, do not escape any special character. However, while using the CLI options like nvpassword or nvpgdbpasswd, escape the special characters such that the desired password is properly received by the CLI. For example, if the password is <>&#|/"':*.-`()[]{}$@? then, enter it as the following:
On Linux shell: \<\>\&#\|/\"\':\*.-\`\(\)[]{}\$@?
On Windows command prompt: "<>&#|/""':*.-`()[]{}$@?".
Quest NetVault Backup 11.3 Installation GuideDeploying NetVault Backup
13
Determine NetVault Backup PostgreSQL Linux user accountIn NetVault Backup, run PostgreSQL under a separate user account. This user account must only own the data that is managed by the server, and must not be shared with other daemons.
Sometimes, due to policy restrictions on your system, the NetVault Backup server installer on Linux operating system is unable to create new PostgreSQL Linux user account automatically.
While installing NetVault Backup server version 11.2 or later on Linux or upgrading from NetVault Backup Server 9.2 on Linux, you can select any of the following options for PostgreSQL Linux user account:
• Allow NetVault Backup to create PostgreSQL Linux user: The default option to allow NetVault Backup to create PostgreSQL Linux user account automatically (default value: netvault-pgsql on Linux).
• Linux user name: Create a new Linux user account by referring to the corresponding operating system guide. Ensure that the specified PostgreSQL Linux user belongs to the group <user name>. Create the group with the same name as of the Linux user name and add the user into the same group.
Quest NetVault Backup 11.3 Installation GuideDeploying NetVault Backup
14
3
Reviewing pre-installation requirements
• General requirements
• Platform-specific requirements
General requirementsBefore you start the installation procedure, verify that the following requirements are met:
• Review the release notes and compatibility guide: Before you start the installation procedure, review the Release Notes thoroughly. The Release Notes may contain important information regarding the installation and use of NetVault Backup.
You must also review the Quest NetVault Backup Compatibility Guide, which contains information about the supported platforms, operating system versions, devices, and application versions. You can download this guide from https://support.quest.com/.
• Review the OS requirements for NetVault Backup Server and Client: The NetVault Backup Server can be installed on Linux and Windows. The NetVault Backup Client can be installed on AIX, FreeBSD, HP-UX, Linux, Mac OS X, Solaris, and Windows.
For information about supported operating system versions, see the Quest NetVault Backup Compatibility Guide available at https://support.quest.com.
• Review the NetVault Backup Server Sizing Guide: This guide provides information about system requirements for the NetVault Backup Server. You can download this guide from http://www.quest.com/documents/#byproductnetvaultbackup (Technical Briefs section).
• Select the correct installation package on Linux and Windows: NetVault Backup offers separate client-only and server-only installation packages for Linux- and Windows-based systems. Both the server and the client packages are available in hybrid and pure 64-bit versions:
▪ Hybrid server and client packages: The hybrid packages are intended for users who do not have a pure 64-bit-only requirement.
These packages let you upgrade from pure 32-bit as well as hybrid installations of NetVault Backup. The hybrid packages retain binary compatibility with all previous versions of 32-bit and 64-bit plug-ins. These packages also work on 32-bit systems that do not have 64-bit capability.
▪ Pure 64-bit server and client packages: The pure 64-bit packages are intended for pure 64-bit operating systems. If you have a specific reason that you cannot use any 32-bit components (for example, you are using a Linux distribution that does not run 32-bit code), use these packages.
The pure 64-bit packages cannot be used to upgrade existing pure 32-bit or hybrid NetVault Backup installations. You must remove the existing pure 32-bit or hybrid version and install the pure 64-bit version separately. To reduce confusion, warning messages have been added to both the upgrade and installation packages to ensure that you understand that they are incompatible.
Quest NetVault Backup 11.3 Installation GuideReviewing pre-installation requirements
15
Depending on your OS type, make sure that you select the correct installation package to install the NetVault Backup Server software:
▪ netvault-<RYYYYMMMDD>-vx.x.x.x-Server-{LinuxX86Hybrid|WindowsX86Hybrid}: Use this package to install or upgrade NetVault Backup Server on 32-bit or 64-bit systems.
▪ netvault-<RYYYYMMMDD>-vx.x.x.x-Server-{LinuxX86Pure64|WindowsX86Pure64}: Use this package to install or upgrade NetVault Backup Server on pure 64-bit systems.
For client installations, make sure that you select the appropriate package based on your system.
• Set OS permissions: Set appropriate OS permissions on the target machines to allow users to install software components.
• Set the executable permission to the Linux and UNIX installers: On Linux and UNIX platforms, set the executable permission to the installers.
• Select multiuser runlevel on Linux and UNIX: On Linux and UNIX platforms, boot into multiuser mode.
• Set user permission (umask) on Linux and UNIX: On Linux and UNIX platforms, do not change the default umask value for the root user. The default value is 022. Setting umask to a value other than 022 (for example, 077) can cause job failures if the plug-in users are unable to access the NetVault Backup files.
• Verify the SELinux (Security-Enhanced Linux) policy: If SELinux is enabled using the default “targeted” policy, NetVault Backup processes do not cause any Access Vector Cache (AVC) denial problems. If a strict or custom policy is implemented, ensure that NetVault Backup processes can run in unconfined mode.
• Disable the anti-virus software: We recommend that you disable the anti-virus software before installing or upgrading NetVault Backup. If you do not disable the anti-virus software, the installation process may conflict with the anti-virus software and various NetVault Backup operations may fail to function properly after installation.
• Verify TCP/IP connectivity: NetVault Backup requires good TCP/IP connectivity between the server and client machines. To use name resolution, a host name must resolve to a unique IP address.
• Check storage device connections: Verify that the storage devices are properly connected and functional. You can check the device connections using any native OS tool for minimal backup operations on the device.
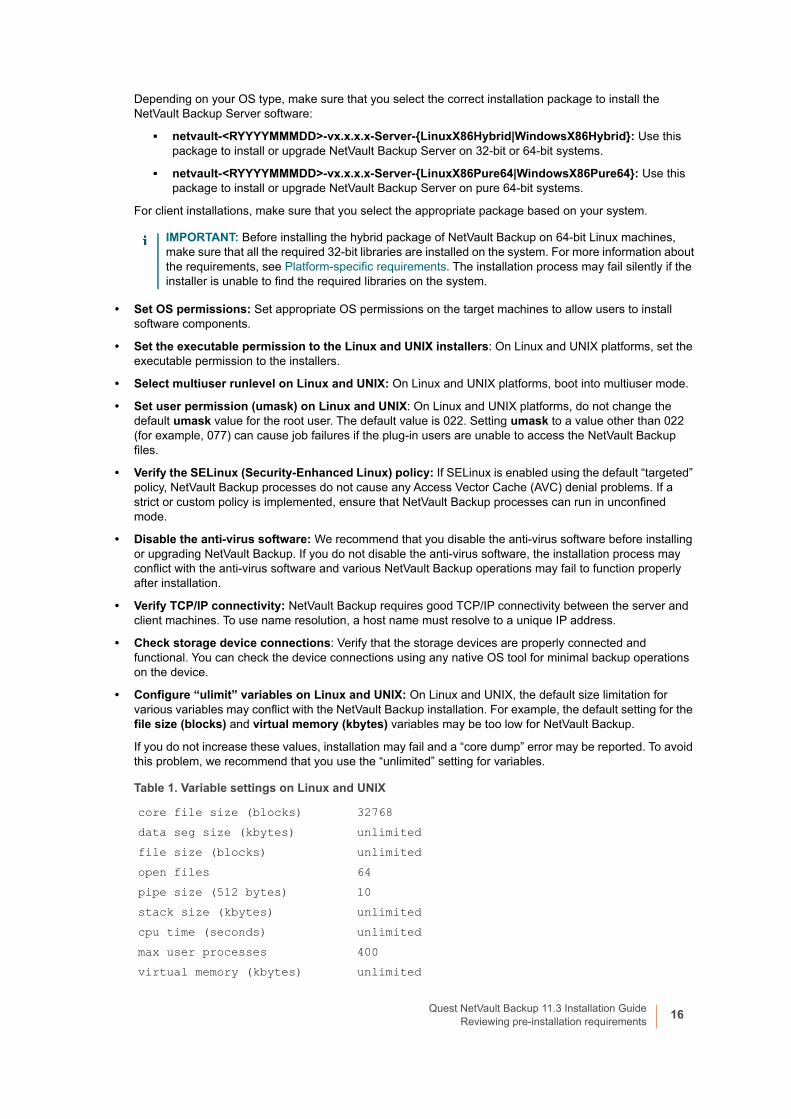
• Configure “ulimit” variables on Linux and UNIX: On Linux and UNIX, the default size limitation for various variables may conflict with the NetVault Backup installation. For example, the default setting for the file size (blocks) and virtual memory (kbytes) variables may be too low for NetVault Backup.
If you do not increase these values, installation may fail and a “core dump” error may be reported. To avoid this problem, we recommend that you use the “unlimited” setting for variables.
IMPORTANT: Before installing the hybrid package of NetVault Backup on 64-bit Linux machines, make sure that all the required 32-bit libraries are installed on the system. For more information about the requirements, see Platform-specific requirements. The installation process may fail silently if the installer is unable to find the required libraries on the system.
Table 1. Variable settings on Linux and UNIX
core file size (blocks) 32768
data seg size (kbytes) unlimited
file size (blocks) unlimited
open files 64
pipe size (512 bytes) 10
stack size (kbytes) unlimited
cpu time (seconds) unlimited
max user processes 400
virtual memory (kbytes) unlimited
Quest NetVault Backup 11.3 Installation GuideReviewing pre-installation requirements
16
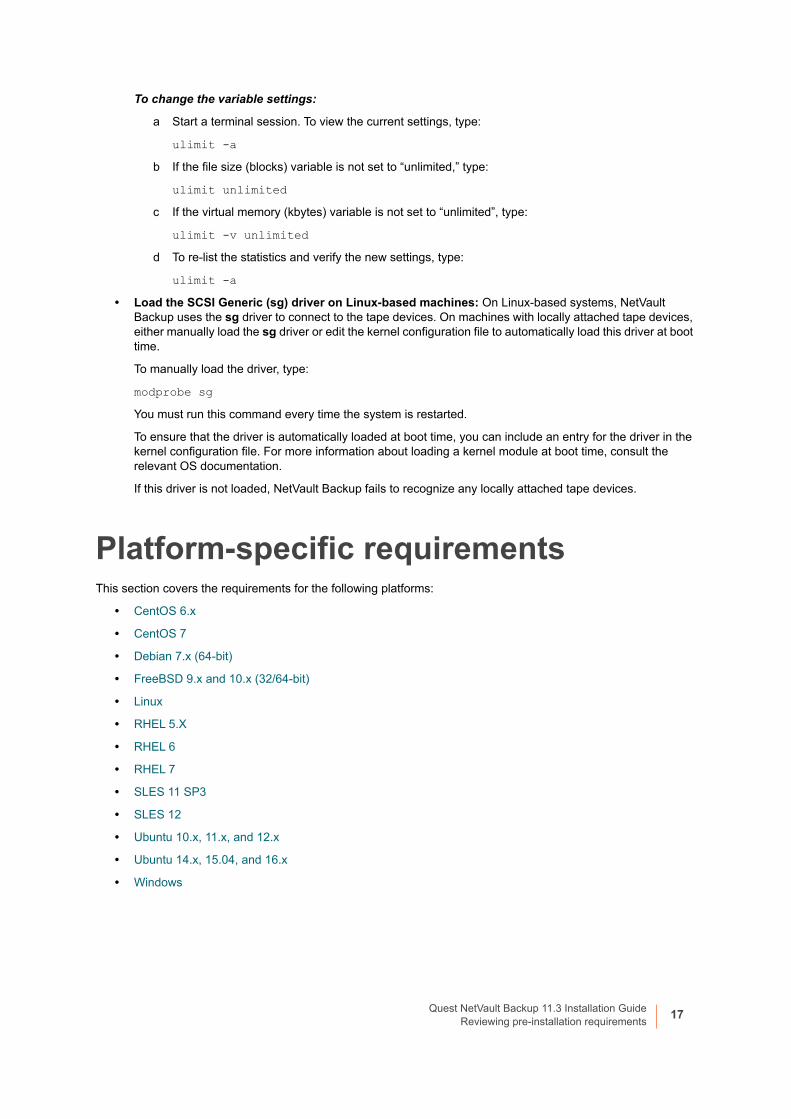
To change the variable settings:
a Start a terminal session. To view the current settings, type:
ulimit -a
b If the file size (blocks) variable is not set to “unlimited,” type:
ulimit unlimited
c If the virtual memory (kbytes) variable is not set to “unlimited”, type:
ulimit -v unlimited
d To re-list the statistics and verify the new settings, type:
ulimit -a
• Load the SCSI Generic (sg) driver on Linux-based machines: On Linux-based systems, NetVault Backup uses the sg driver to connect to the tape devices. On machines with locally attached tape devices, either manually load the sg driver or edit the kernel configuration file to automatically load this driver at boot time.
To manually load the driver, type:
modprobe sg
You must run this command every time the system is restarted.
To ensure that the driver is automatically loaded at boot time, you can include an entry for the driver in the kernel configuration file. For more information about loading a kernel module at boot time, consult the relevant OS documentation.
If this driver is not loaded, NetVault Backup fails to recognize any locally attached tape devices.
Platform-specific requirementsThis section covers the requirements for the following platforms:
• CentOS 6.x
• CentOS 7
• Debian 7.x (64-bit)
• FreeBSD 9.x and 10.x (32/64-bit)
• Linux
• RHEL 5.X
• RHEL 6
• RHEL 7
• SLES 11 SP3
• SLES 12
• Ubuntu 10.x, 11.x, and 12.x
• Ubuntu 14.x, 15.04, and 16.x
• Windows
Quest NetVault Backup 11.3 Installation GuideReviewing pre-installation requirements
17
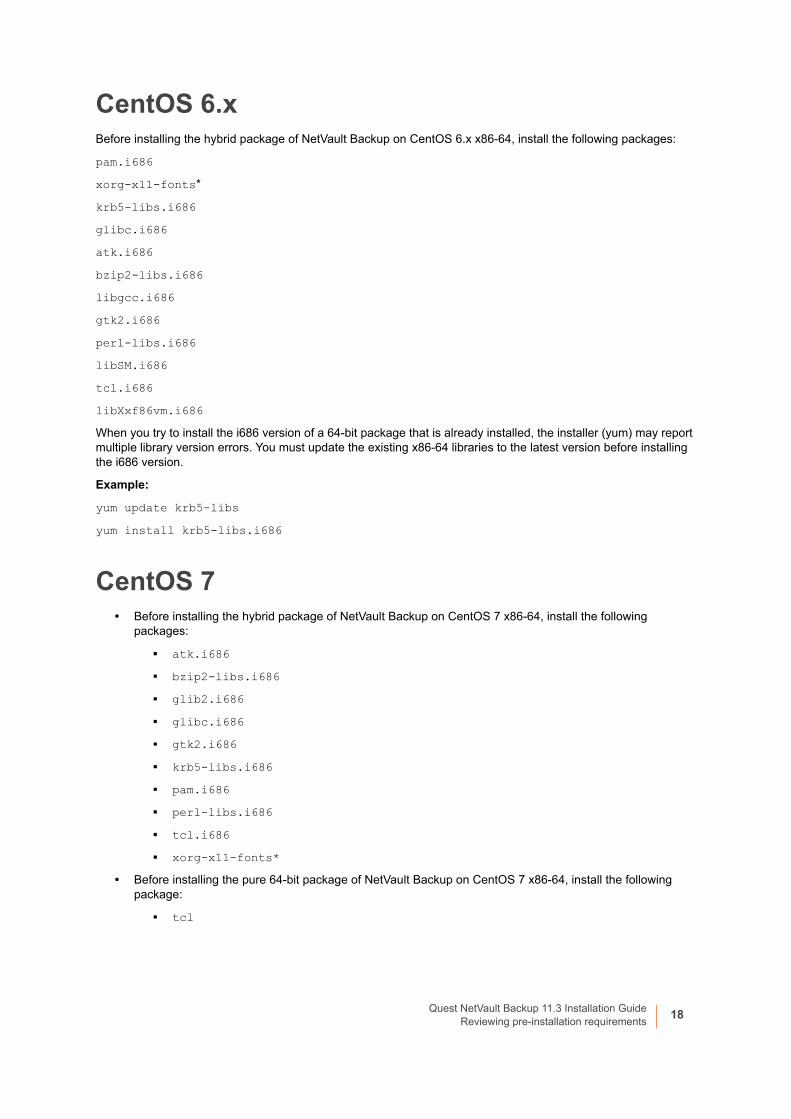
CentOS 6.xBefore installing the hybrid package of NetVault Backup on CentOS 6.x x86-64, install the following packages:
pam.i686
xorg-x11-fonts*
krb5-libs.i686
glibc.i686
atk.i686
bzip2-libs.i686
libgcc.i686
gtk2.i686
perl-libs.i686
libSM.i686
tcl.i686
libXxf86vm.i686
When you try to install the i686 version of a 64-bit package that is already installed, the installer (yum) may report multiple library version errors. You must update the existing x86-64 libraries to the latest version before installing the i686 version.
Example:
yum update krb5-libs
yum install krb5-libs.i686
CentOS 7• Before installing the hybrid package of NetVault Backup on CentOS 7 x86-64, install the following
packages:
▪ atk.i686
▪ bzip2-libs.i686
▪ glib2.i686
▪ glibc.i686
▪ gtk2.i686
▪ krb5-libs.i686
▪ pam.i686
▪ perl-libs.i686
▪ tcl.i686
▪ xorg-x11-fonts*
• Before installing the pure 64-bit package of NetVault Backup on CentOS 7 x86-64, install the following package:
▪ tcl
Quest NetVault Backup 11.3 Installation GuideReviewing pre-installation requirements
18
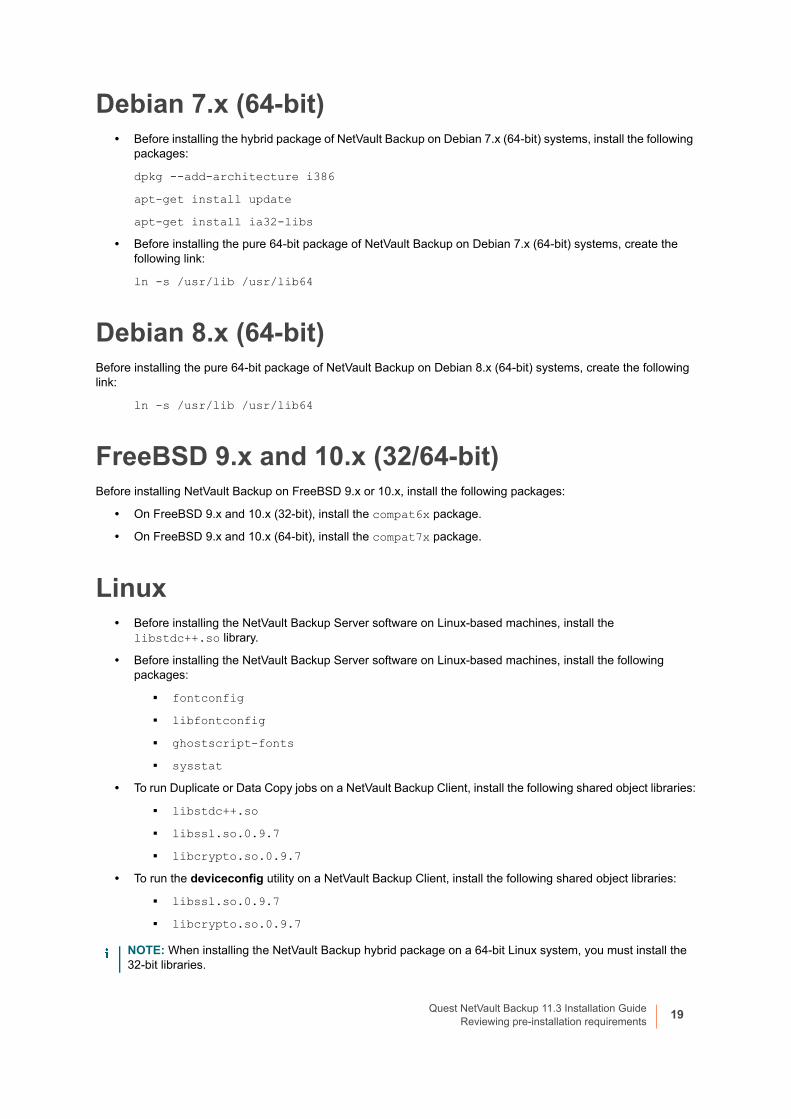
Debian 7.x (64-bit)• Before installing the hybrid package of NetVault Backup on Debian 7.x (64-bit) systems, install the following
packages:
dpkg --add-architecture i386
apt-get install update
apt-get install ia32-libs
• Before installing the pure 64-bit package of NetVault Backup on Debian 7.x (64-bit) systems, create the following link:
ln -s /usr/lib /usr/lib64
Debian 8.x (64-bit)Before installing the pure 64-bit package of NetVault Backup on Debian 8.x (64-bit) systems, create the following link:
ln -s /usr/lib /usr/lib64
FreeBSD 9.x and 10.x (32/64-bit)Before installing NetVault Backup on FreeBSD 9.x or 10.x, install the following packages:
• On FreeBSD 9.x and 10.x (32-bit), install the compat6x package.
• On FreeBSD 9.x and 10.x (64-bit), install the compat7x package.
Linux• Before installing the NetVault Backup Server software on Linux-based machines, install the
libstdc++.so library.
• Before installing the NetVault Backup Server software on Linux-based machines, install the following packages:
▪ fontconfig
▪ libfontconfig
▪ ghostscript-fonts
▪ sysstat
• To run Duplicate or Data Copy jobs on a NetVault Backup Client, install the following shared object libraries:
▪ libstdc++.so
▪ libssl.so.0.9.7
▪ libcrypto.so.0.9.7
• To run the deviceconfig utility on a NetVault Backup Client, install the following shared object libraries:
▪ libssl.so.0.9.7
▪ libcrypto.so.0.9.7
NOTE: When installing the NetVault Backup hybrid package on a 64-bit Linux system, you must install the 32-bit libraries.
Quest NetVault Backup 11.3 Installation GuideReviewing pre-installation requirements
19
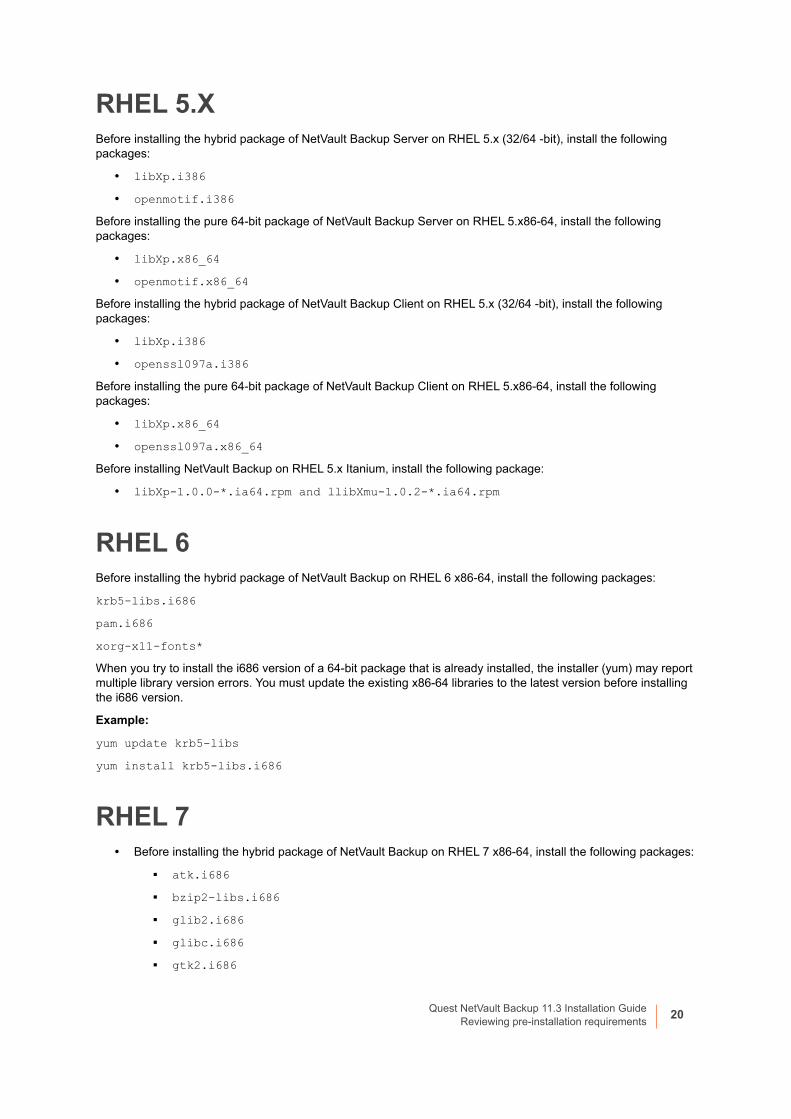
RHEL 5.XBefore installing the hybrid package of NetVault Backup Server on RHEL 5.x (32/64 -bit), install the following packages:
• libXp.i386
• openmotif.i386
Before installing the pure 64-bit package of NetVault Backup Server on RHEL 5.x86-64, install the following packages:
• libXp.x86_64
• openmotif.x86_64
Before installing the hybrid package of NetVault Backup Client on RHEL 5.x (32/64 -bit), install the following packages:
• libXp.i386
• openssl097a.i386
Before installing the pure 64-bit package of NetVault Backup Client on RHEL 5.x86-64, install the following packages:
• libXp.x86_64
• openssl097a.x86_64
Before installing NetVault Backup on RHEL 5.x Itanium, install the following package:
• libXp-1.0.0-*.ia64.rpm and llibXmu-1.0.2-*.ia64.rpm
RHEL 6Before installing the hybrid package of NetVault Backup on RHEL 6 x86-64, install the following packages:
krb5-libs.i686
pam.i686
xorg-x11-fonts*
When you try to install the i686 version of a 64-bit package that is already installed, the installer (yum) may report multiple library version errors. You must update the existing x86-64 libraries to the latest version before installing the i686 version.
Example:
yum update krb5-libs
yum install krb5-libs.i686
RHEL 7• Before installing the hybrid package of NetVault Backup on RHEL 7 x86-64, install the following packages:
▪ atk.i686
▪ bzip2-libs.i686
▪ glib2.i686
▪ glibc.i686
▪ gtk2.i686
Quest NetVault Backup 11.3 Installation GuideReviewing pre-installation requirements
20
▪ krb5-libs.i686
▪ pam.i686
▪ perl-libs.i686
▪ tcl.i686
▪ xorg-x11-fonts*
• Before installing the pure 64-bit package of NetVault Backup on RHEL 7 x86-64, install the following package:
▪ tcl
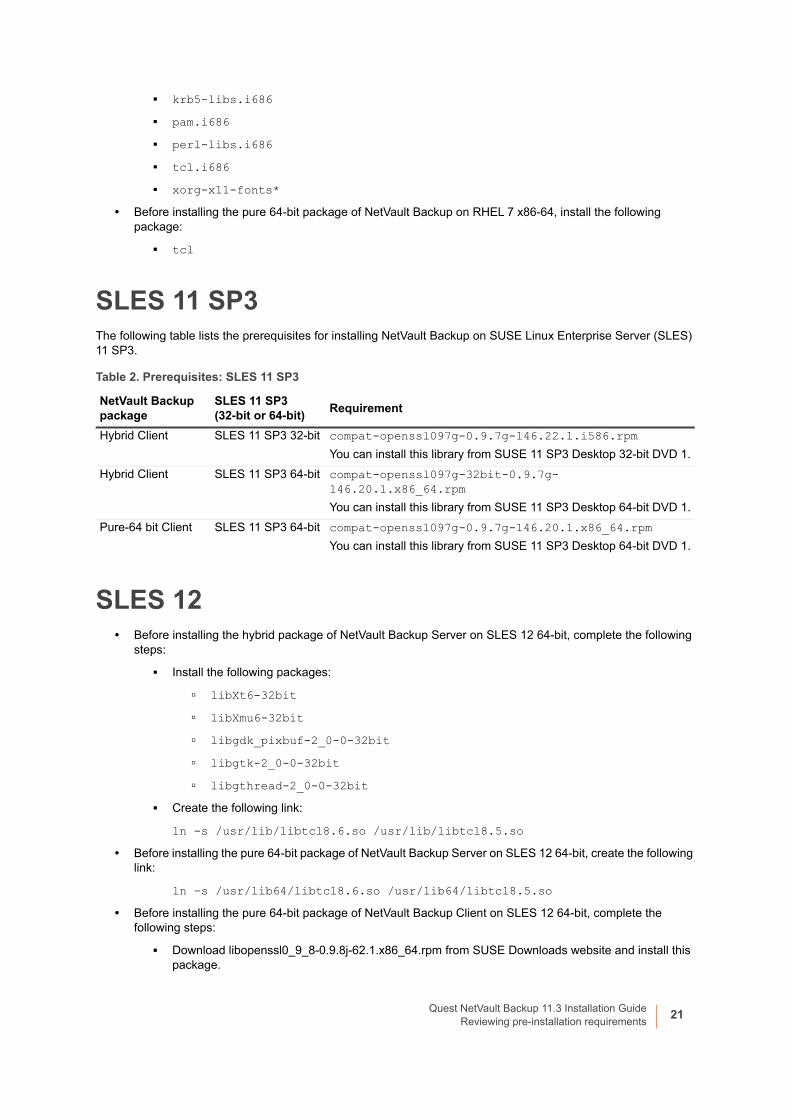
SLES 11 SP3The following table lists the prerequisites for installing NetVault Backup on SUSE Linux Enterprise Server (SLES) 11 SP3.
SLES 12• Before installing the hybrid package of NetVault Backup Server on SLES 12 64-bit, complete the following
steps:
▪ Install the following packages:
▫ libXt6-32bit
▫ libXmu6-32bit
▫ libgdk_pixbuf-2_0-0-32bit
▫ libgtk-2_0-0-32bit
▫ libgthread-2_0-0-32bit
▪ Create the following link:
ln -s /usr/lib/libtcl8.6.so /usr/lib/libtcl8.5.so
• Before installing the pure 64-bit package of NetVault Backup Server on SLES 12 64-bit, create the following link:
ln -s /usr/lib64/libtcl8.6.so /usr/lib64/libtcl8.5.so
• Before installing the pure 64-bit package of NetVault Backup Client on SLES 12 64-bit, complete the following steps:
▪ Download libopenssl0_9_8-0.9.8j-62.1.x86_64.rpm from SUSE Downloads website and install this package.
Table 2. Prerequisites: SLES 11 SP3
NetVault Backup package
SLES 11 SP3 (32-bit or 64-bit)
Requirement
Hybrid Client SLES 11 SP3 32-bit compat-openssl097g-0.9.7g-146.22.1.i586.rpm
You can install this library from SUSE 11 SP3 Desktop 32-bit DVD 1.
Hybrid Client SLES 11 SP3 64-bit compat-openssl097g-32bit-0.9.7g-146.20.1.x86_64.rpm
You can install this library from SUSE 11 SP3 Desktop 64-bit DVD 1.
Pure-64 bit Client SLES 11 SP3 64-bit compat-openssl097g-0.9.7g-146.20.1.x86_64.rpm
You can install this library from SUSE 11 SP3 Desktop 64-bit DVD 1.
Quest NetVault Backup 11.3 Installation GuideReviewing pre-installation requirements
21
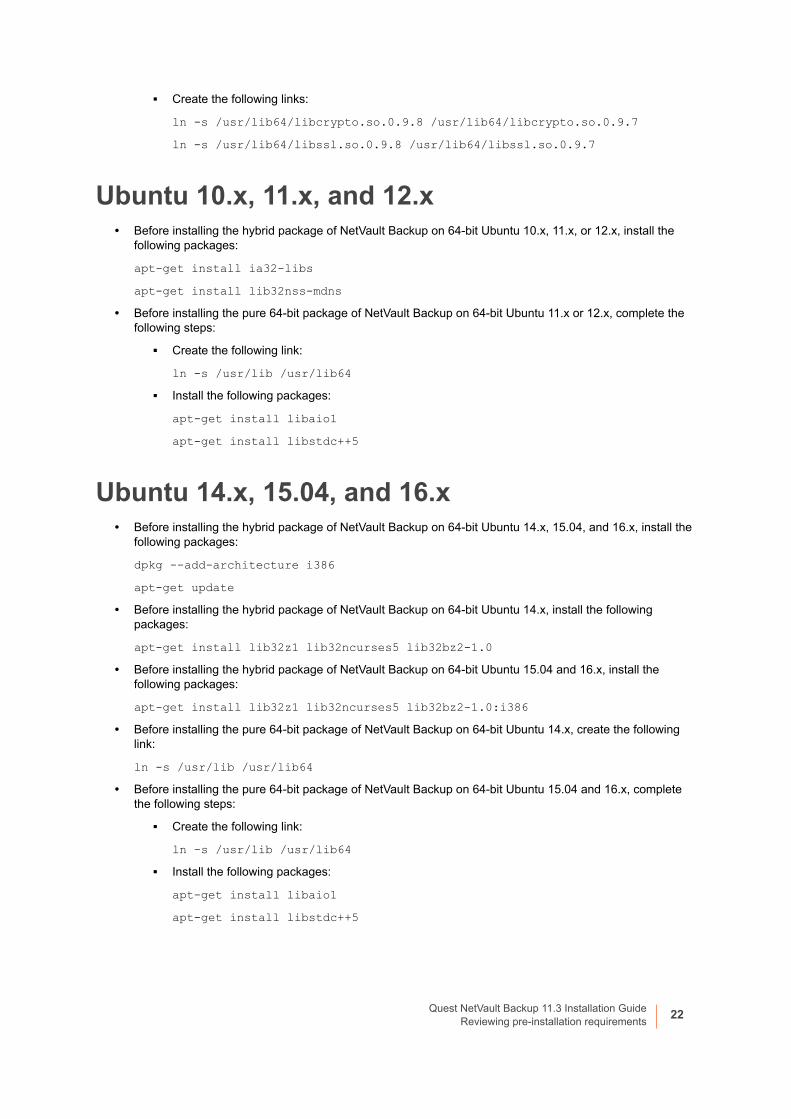
▪ Create the following links:
ln -s /usr/lib64/libcrypto.so.0.9.8 /usr/lib64/libcrypto.so.0.9.7
ln -s /usr/lib64/libssl.so.0.9.8 /usr/lib64/libssl.so.0.9.7
Ubuntu 10.x, 11.x, and 12.x• Before installing the hybrid package of NetVault Backup on 64-bit Ubuntu 10.x, 11.x, or 12.x, install the
following packages:
apt-get install ia32-libs
apt-get install lib32nss-mdns
• Before installing the pure 64-bit package of NetVault Backup on 64-bit Ubuntu 11.x or 12.x, complete the following steps:
▪ Create the following link:
ln -s /usr/lib /usr/lib64
▪ Install the following packages:
apt-get install libaio1
apt-get install libstdc++5
Ubuntu 14.x, 15.04, and 16.x• Before installing the hybrid package of NetVault Backup on 64-bit Ubuntu 14.x, 15.04, and 16.x, install the
following packages:
dpkg --add-architecture i386
apt-get update
• Before installing the hybrid package of NetVault Backup on 64-bit Ubuntu 14.x, install the following packages:
apt-get install lib32z1 lib32ncurses5 lib32bz2-1.0
• Before installing the hybrid package of NetVault Backup on 64-bit Ubuntu 15.04 and 16.x, install the following packages:
apt-get install lib32z1 lib32ncurses5 lib32bz2-1.0:i386
• Before installing the pure 64-bit package of NetVault Backup on 64-bit Ubuntu 14.x, create the following link:
ln -s /usr/lib /usr/lib64
• Before installing the pure 64-bit package of NetVault Backup on 64-bit Ubuntu 15.04 and 16.x, complete the following steps:
▪ Create the following link:
ln -s /usr/lib /usr/lib64
▪ Install the following packages:
apt-get install libaio1
apt-get install libstdc++5
Quest NetVault Backup 11.3 Installation GuideReviewing pre-installation requirements
22
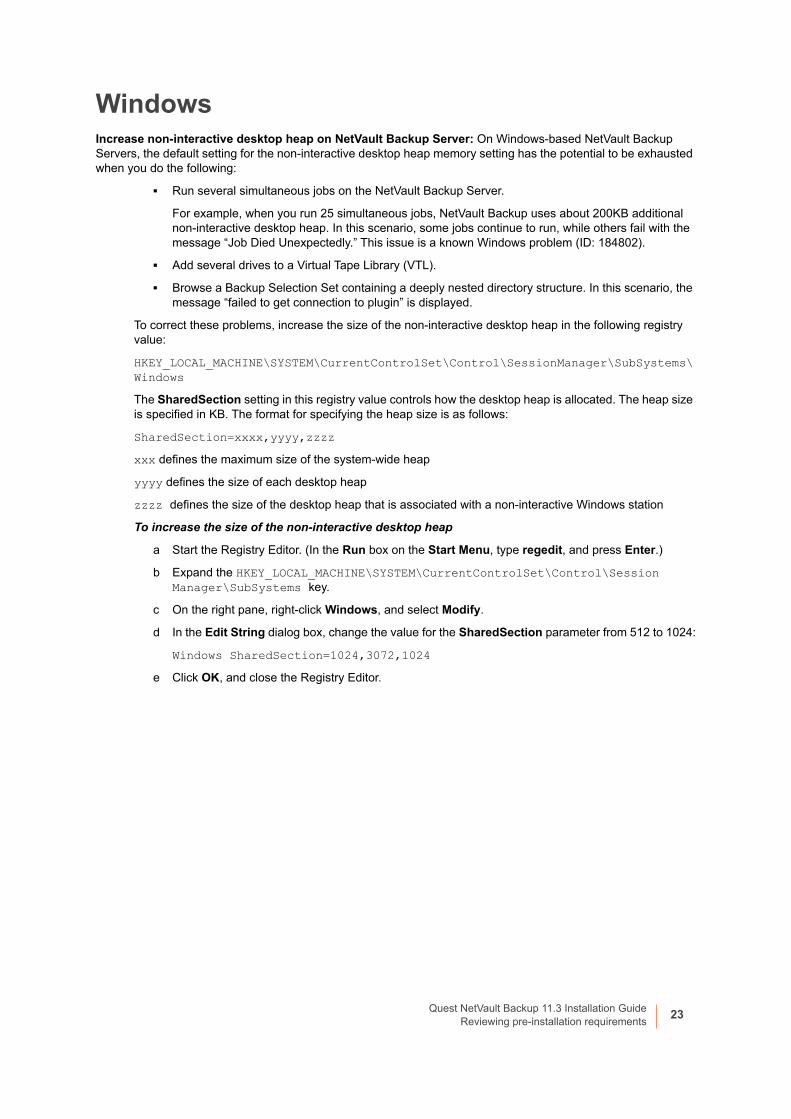
WindowsIncrease non-interactive desktop heap on NetVault Backup Server: On Windows-based NetVault Backup Servers, the default setting for the non-interactive desktop heap memory setting has the potential to be exhausted when you do the following:
▪ Run several simultaneous jobs on the NetVault Backup Server.
For example, when you run 25 simultaneous jobs, NetVault Backup uses about 200KB additional non-interactive desktop heap. In this scenario, some jobs continue to run, while others fail with the message “Job Died Unexpectedly.” This issue is a known Windows problem (ID: 184802).
▪ Add several drives to a Virtual Tape Library (VTL).
▪ Browse a Backup Selection Set containing a deeply nested directory structure. In this scenario, the message “failed to get connection to plugin” is displayed.
To correct these problems, increase the size of the non-interactive desktop heap in the following registry value:
HKEY_LOCAL_MACHINE\SYSTEM\CurrentControlSet\Control\SessionManager\SubSystems\Windows
The SharedSection setting in this registry value controls how the desktop heap is allocated. The heap size is specified in KB. The format for specifying the heap size is as follows:
SharedSection=xxxx,yyyy,zzzz
xxx defines the maximum size of the system-wide heap
yyyy defines the size of each desktop heap
zzzz defines the size of the desktop heap that is associated with a non-interactive Windows station
To increase the size of the non-interactive desktop heap
a Start the Registry Editor. (In the Run box on the Start Menu, type regedit, and press Enter.)
b Expand the HKEY_LOCAL_MACHINE\SYSTEM\CurrentControlSet\Control\Session Manager\SubSystems key.
c On the right pane, right-click Windows, and select Modify.
d In the Edit String dialog box, change the value for the SharedSection parameter from 512 to 1024:
Windows SharedSection=1024,3072,1024
e Click OK, and close the Registry Editor.
Quest NetVault Backup 11.3 Installation GuideReviewing pre-installation requirements
23
4
Installing NetVault Backup
• Installation overview
• Installing NetVault Backup in GUI mode
• Installing NetVault Backup in text mode
• Installing NetVault Backup in unattended mode
• Installing NetVault Backup Client on Windows using Group Policy
Installation overviewYou can install NetVault Backup by using the interactive or non-interactive installation method. You can also use the push installation method to simultaneously install the NetVault Backup Client software on multiple Windows-based machines. This section provides an overview of the NetVault Backup installer and available installation methods.
It includes the following topics:
• NetVault Backup installer
• Installation modes
• Installation mode selection
• Installation logs
• Push installation method
NetVault Backup installerStarting with version 11.1, the NetVault Backup installer is offered as a single file (typically an application). The installation file is named as follows:
netvault-<RYYYYMMMDD>-vx.x.x.x-{Server|Client}-<platform>
NetVault Backup offers separate client-only and server-only installation packages for Linux- and Windows-based systems. Both the server and the client packages are available in hybrid and pure 64-bit versions.
On Mac OS X, the installer is packaged as a disk image (.dmg) file. The installation file for Mac OS X is named as follows: netvault-<RYYYYMMMDD>-vx.x.x.x-client-MacOSX.dmg.
NetVault Backup supports installations in the following languages: English, Simplified Chinese, French, German, Japanese, and Korean. The installer automatically detects the system language and uses it as the default language. On systems that use an unsupported language, the installer defaults to English.
Installation modesYou can run the NetVault Backup installer in graphical, text, or unattended mode. These modes are available for both new and upgrade installations. This section provides an overview of the available installation modes.
Quest NetVault Backup 11.3 Installation GuideInstalling NetVault Backup
24
Graphical mode
Use the graphical mode to install the software interactively from a graphical user interface. This mode is available on all supported operating systems that provide a graphical environment. The graphical mode requires GTK packages or X Window System libraries on Linux- and UNIX-based systems. The installer automatically runs in graphical mode if no installation mode is specified.
Text mode
Use the text mode to install the software interactively from a text-based user interface. This mode is available on all supported operating systems, except Windows. On systems that do not provide a graphical environment, the installer automatically runs in text mode if no installation mode is specified.
Unattended mode
Use the unattended mode to perform automated installations with minimal or no user interaction. This mode is supported on all operating systems. When performing unattended installations, you can specify the installation options at the command line or in an option file.
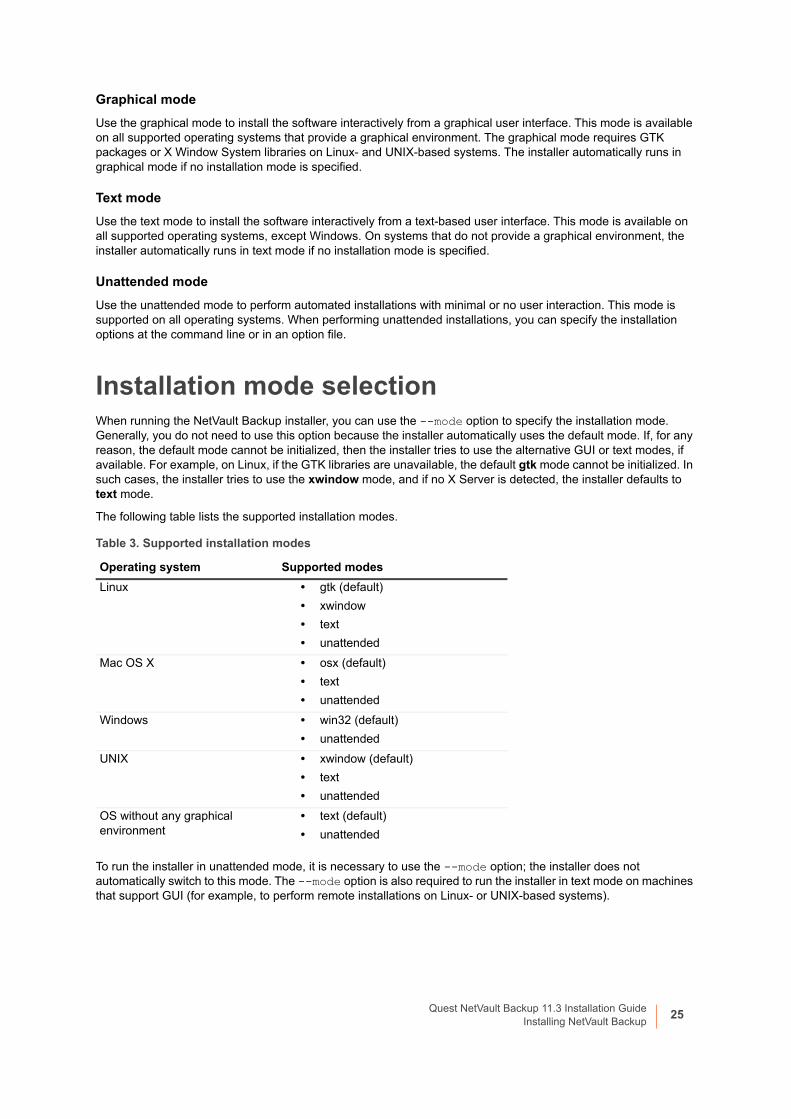
Installation mode selectionWhen running the NetVault Backup installer, you can use the --mode option to specify the installation mode. Generally, you do not need to use this option because the installer automatically uses the default mode. If, for any reason, the default mode cannot be initialized, then the installer tries to use the alternative GUI or text modes, if available. For example, on Linux, if the GTK libraries are unavailable, the default gtk mode cannot be initialized. In such cases, the installer tries to use the xwindow mode, and if no X Server is detected, the installer defaults to text mode.
The following table lists the supported installation modes.
To run the installer in unattended mode, it is necessary to use the --mode option; the installer does not automatically switch to this mode. The --mode option is also required to run the installer in text mode on machines that support GUI (for example, to perform remote installations on Linux- or UNIX-based systems).
Table 3. Supported installation modes
Operating system Supported modes
Linux • gtk (default)
• xwindow
• text
• unattended
Mac OS X • osx (default)
• text
• unattended
Windows • win32 (default)
• unattended
UNIX • xwindow (default)
• text
• unattended
OS without any graphical environment
• text (default)
• unattended
Quest NetVault Backup 11.3 Installation GuideInstalling NetVault Backup
25
Installation logsThe installer generates a log file in the system temporary directory. The file is named as follows: netvault_{GUID}_install.log, where {GUID} is unique for each installation occurrence (for example, netvault_274bffb2-a3c1-457e-7f5e-221bf60a7689_install.log).
If the installation fails for any reason, you can examine the log file for details about the problem.
If an installation or upgrade is unsuccessful, the installer may not generate the regular log file. Instead, the installer may leave an intermediate log file is named bitrock_installer.log or bitrock_installer_nnn.log in the system temporary directory.
Push installation methodThe push installation method lets you install one or more software packages on remote machines. You can use this method to install or upgrade the NetVault Backup client and plug-ins on multiple machines. You can perform push installations from the NetVault Backup WebUI. The push installation method is only available to Windows-based machines. For more information about this method, see the Quest NetVault Backup Administrator's Guide.
Installing NetVault Backup in GUI modeThe graphical mode is available on all supported operating systems that provide a graphical environment. This mode requires GTK packages or X Window System libraries on Linux- and UNIX-based systems.
To install NetVault Backup Server or Client in graphical mode:
1 Log on to the system with administrator or root-level access, and navigate to the directory in which the installation file resides.
2 Double-click the installation file.
3 In the Language Selection dialog box, select the language for your NetVault Backup installation.
The available options are:
▪ English
▪ Simplified Chinese
▪ French
▪ German
▪ Japanese
▪ Korean
The default selection is English.
Click OK.
4 In the Welcome dialog box, review the notes, and click Next to continue.
NOTE: On Mac OS X, the installer is packaged as a disk image (.dmg) file. Before you can run the installer, you must mount the disk image by double-clicking the installation file. After the image is mounted, you can start the installer by double-clicking the installer icon on the desktop.
After the installation completes, you can unmount the disk image from the Finder window by clicking the Eject icon next to the virtual drive icon. Alternatively, you can click the virtual drive icon on the desk top, and press CMD+E.
Quest NetVault Backup 11.3 Installation GuideInstalling NetVault Backup
26
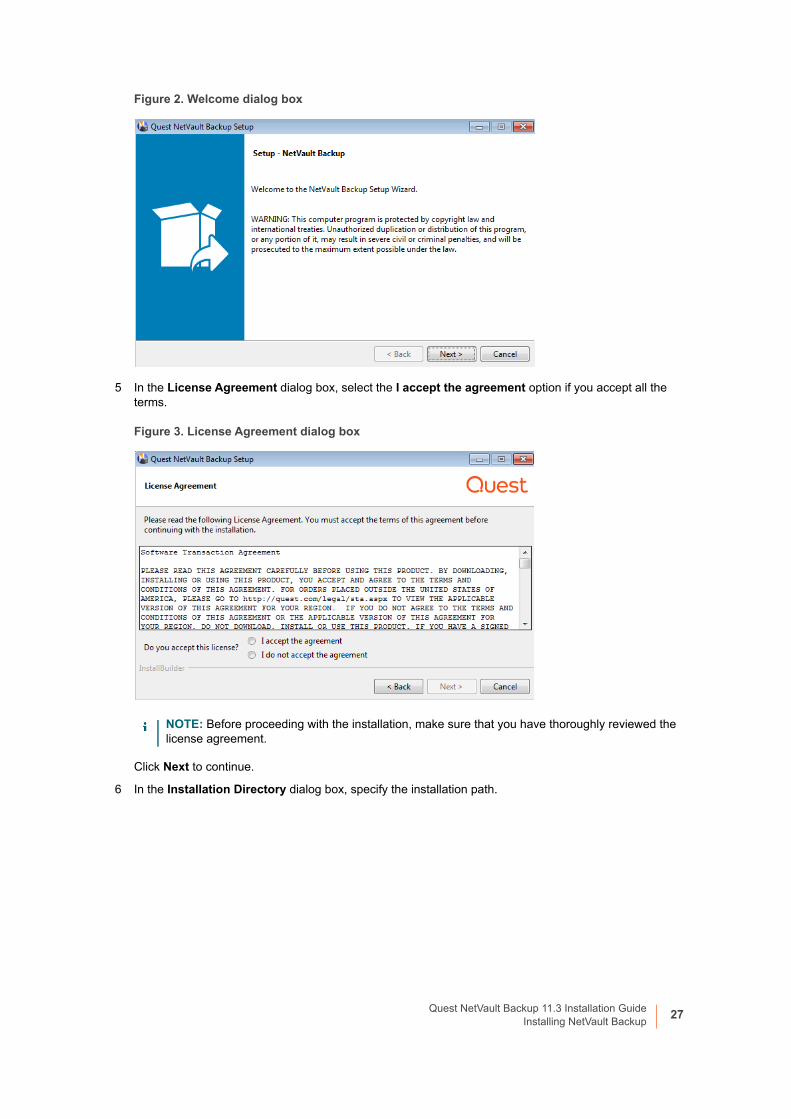
Figure 2. Welcome dialog box
5 In the License Agreement dialog box, select the I accept the agreement option if you accept all the terms.
Figure 3. License Agreement dialog box
Click Next to continue.
6 In the Installation Directory dialog box, specify the installation path.
NOTE: Before proceeding with the installation, make sure that you have thoroughly reviewed the license agreement.
Quest NetVault Backup 11.3 Installation GuideInstalling NetVault Backup
27
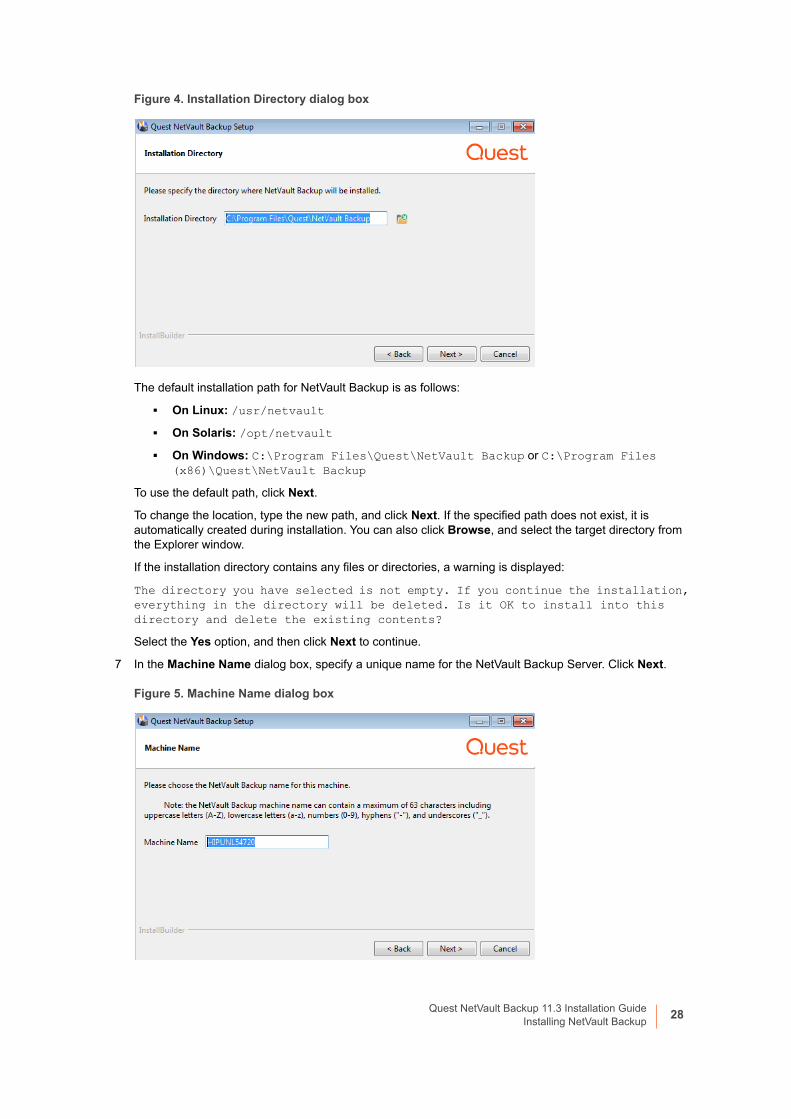
Figure 4. Installation Directory dialog box
The default installation path for NetVault Backup is as follows:
▪ On Linux: /usr/netvault
▪ On Solaris: /opt/netvault
▪ On Windows: C:\Program Files\Quest\NetVault Backup or C:\Program Files (x86)\Quest\NetVault Backup
To use the default path, click Next.
To change the location, type the new path, and click Next. If the specified path does not exist, it is automatically created during installation. You can also click Browse, and select the target directory from the Explorer window.
If the installation directory contains any files or directories, a warning is displayed:
The directory you have selected is not empty. If you continue the installation, everything in the directory will be deleted. Is it OK to install into this directory and delete the existing contents?
Select the Yes option, and then click Next to continue.
7 In the Machine Name dialog box, specify a unique name for the NetVault Backup Server. Click Next.
Figure 5. Machine Name dialog box
Quest NetVault Backup 11.3 Installation GuideInstalling NetVault Backup
28
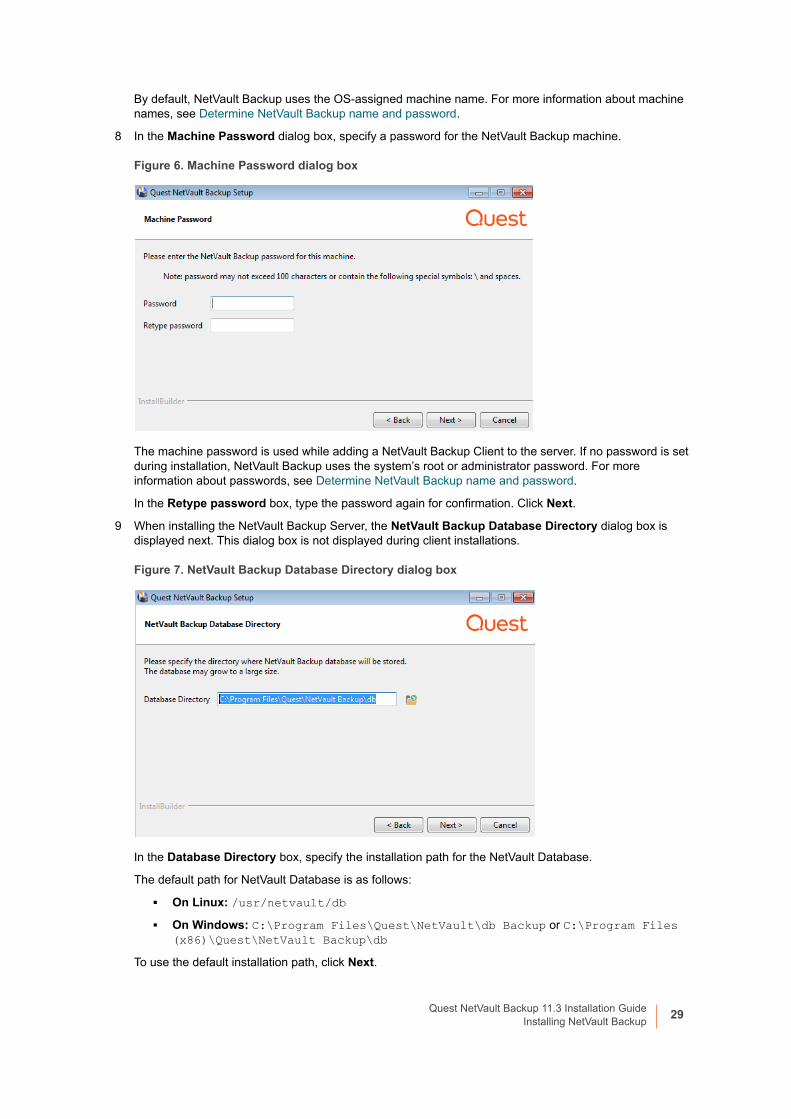
By default, NetVault Backup uses the OS-assigned machine name. For more information about machine names, see Determine NetVault Backup name and password.
8 In the Machine Password dialog box, specify a password for the NetVault Backup machine.
Figure 6. Machine Password dialog box
The machine password is used while adding a NetVault Backup Client to the server. If no password is set during installation, NetVault Backup uses the system’s root or administrator password. For more information about passwords, see Determine NetVault Backup name and password.
In the Retype password box, type the password again for confirmation. Click Next.
9 When installing the NetVault Backup Server, the NetVault Backup Database Directory dialog box is displayed next. This dialog box is not displayed during client installations.
Figure 7. NetVault Backup Database Directory dialog box
In the Database Directory box, specify the installation path for the NetVault Database.
The default path for NetVault Database is as follows:
▪ On Linux: /usr/netvault/db
▪ On Windows: C:\Program Files\Quest\NetVault\db Backup or C:\Program Files (x86)\Quest\NetVault Backup\db
To use the default installation path, click Next.
Quest NetVault Backup 11.3 Installation GuideInstalling NetVault Backup
29
To change the location, type the new path, and click Next. If the specified path does not exist, it is automatically created during installation. You can also click Browse, and select the target directory from the Explorer window.
If the database directory contains any files or directories, a warning is displayed:
The directory you have selected is not empty. If you continue the installation, everything in the directory will be deleted. Is it OK to install into this directory and delete the existing contents?
10 When installing the NetVault Backup Server on Linux, the dialog box for PostgreSQL Linux user account is displayed next.This dialog box is not displayed during client installations. For more information about NetVault Backup PostgreSQL Linux user account, see Determine NetVault Backup PostgreSQL Linux user account.
Select the option for PostgreSQL Linux user account:
▪ Allow NetVault Backup to create PostgreSQL Linux user: By default, this option is selected.
▪ Linux user name: Select this option if you want to use the already existing Linux user account.
— or —
To create new Linux user account, refer to the corresponding operating system guide.
Click Next to continue.
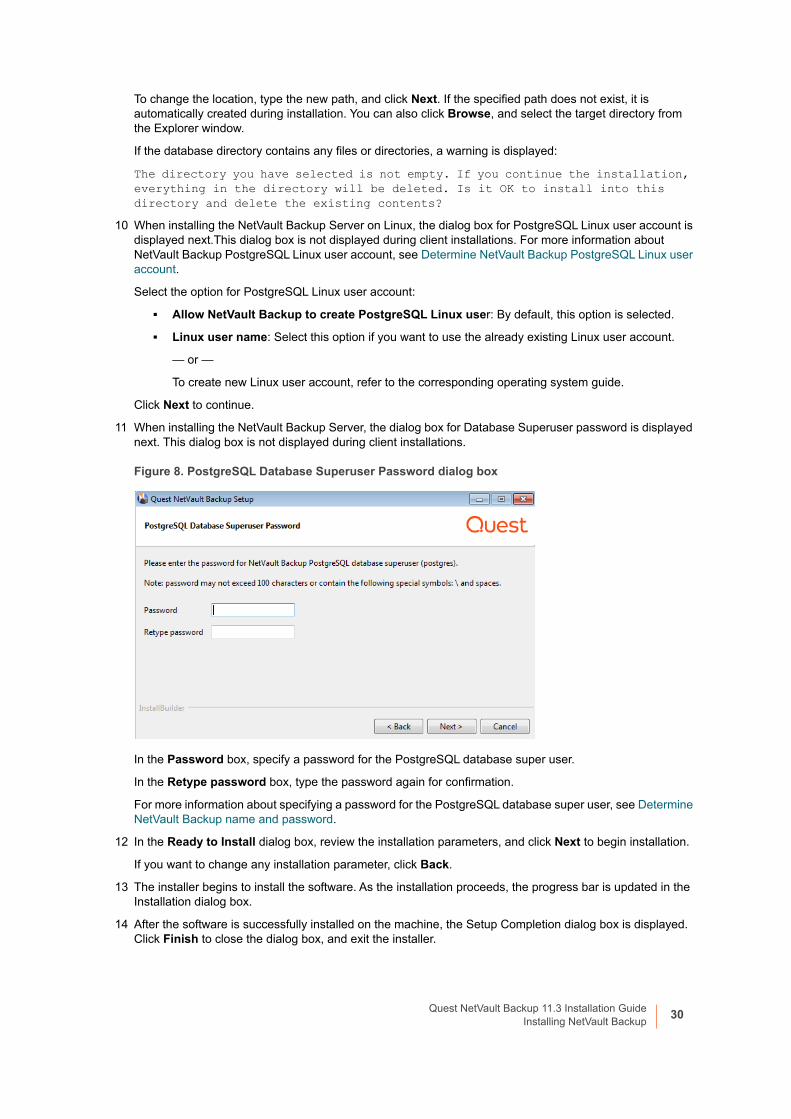
11 When installing the NetVault Backup Server, the dialog box for Database Superuser password is displayed next. This dialog box is not displayed during client installations.
Figure 8. PostgreSQL Database Superuser Password dialog box
In the Password box, specify a password for the PostgreSQL database super user.
In the Retype password box, type the password again for confirmation.
For more information about specifying a password for the PostgreSQL database super user, see Determine NetVault Backup name and password.
12 In the Ready to Install dialog box, review the installation parameters, and click Next to begin installation.
If you want to change any installation parameter, click Back.
13 The installer begins to install the software. As the installation proceeds, the progress bar is updated in the Installation dialog box.
14 After the software is successfully installed on the machine, the Setup Completion dialog box is displayed. Click Finish to close the dialog box, and exit the installer.
Quest NetVault Backup 11.3 Installation GuideInstalling NetVault Backup
30
Installing NetVault Backup in text modeThe text mode is available on all supported operating systems, except Windows.
To install NetVault Backup Server or Client in text mode:
1 Log on to the system with root-level access. Start a terminal session, and navigate to the directory in which the installation file resides.
2 To start the installer, type the following command:
./<installation file name> --mode text
Follow the instructions to complete the installation steps.
3 Language Selection
Please select the installation language
[1] English
[2] Simplified Chinese
[3] French
[4] German
[5] Japanese
[6] Korean
Please choose an option [1]:
Select the language for your NetVault Backup installation. To select English, press 1 or Enter. To select a different language, press the corresponding key.
4 The License Agreement screen is displayed next. Press Enter to read through the agreement.
Press y to accept the license agreement and continue.
5 Please specify the directory where NetVault Backup will be installed.
Installation Directory [/usr/netvault]:
The default installation path for NetVault Backup is as follows:
▪ On Linux: /usr/netvault
NOTE: You can exit the setup in text mode at any time before the installation starts by pressing Ctrl+C.
NOTE: On Mac OS X, the installer is packaged as a disk image (.dmg) file. Before you can run the installer, you must mount the disk image by running the following command:
hdiutil attach path/to/NVBU_Installer_Name.dmg
After the image is mounted, you can start the installer by running the following command:
“/Volumes/NetVault Backup/<Name of the installer>.app/Contents/MacOS/installbuilder.sh” --mode text
After the installation completes, you can unmount the disk image by running the following command:
hdiutil detach /dev/diskWithInstallerImage
When running the installer on Mac OS X from a remote terminal (SSH or telnet), it may be necessary to use the --mode text option. Otherwise, the installer may run in full graphic mode without showing any output in the console.
NOTE: Before proceeding with the installation, ensure that you have thoroughly reviewed the license agreement.
Quest NetVault Backup 11.3 Installation GuideInstalling NetVault Backup
31

▪ On Solaris: /opt/netvault
To use the default path, press Enter.
To change the location, type the new path, and press Enter. If the specified path does not exist, it is automatically created during installation.
If the installation directory contains any files or directories, a warning is displayed:
The directory ‘/usr/software/netvault’ already exists. All contents of this directory will be destroyed. Are you sure you want to continue? (y n) [n]
Press y to continue.
6 Please choose the NetVault Backup name for this machine.
Note: the NetVault Backup machine name can contain a maximum of 63 characters including uppercase letters (A-Z), lowercase letters (a-z), numbers (0-9), hyphens (“-”), and underscores (“_”).
Machine Name [<OS-assigned machine name>]:
By default, NetVault Backup uses the OS-assigned machine name. To select the default name, press Enter.
To assign a different name, type the name, and press Enter. For more information about machine names, see Determine NetVault Backup name and password.
7 Please enter the NetVault Backup password for this machine.
Note: password may not exceed 100 characters or contain the following special symbols: \ and spaces.
Password:
Specify a password for the NetVault Backup machine, and press Enter.
The machine password is used while adding a NetVault Backup Client to the server. If no password is set during installation, NetVault Backup uses the system’s root or administrator password. For more information about passwords, see Determine NetVault Backup name and password.
Retype password:
Type the password again for confirmation, and press Enter.
8 When installing the NetVault Backup Server, you are prompted for the database directory. This step does not apply to client installations.
NetVault Backup Database Directory
Please specify the directory where NetVault Backup database will be stored.
The database may grow to a large size.
Database Directory [/usr/netvault/db]:
The default installation path for the NetVault Database is /usr/netvault/db.
To use the default path, press Enter.
To change the location, type the new path, and press Enter. If the specified path does not exist, it is automatically created during installation.
If the database directory contains any files or directories, a warning is displayed:
The directory ‘/usr/software/netvaultdb’ already exists. All contents of this directory will be destroyed. Are you sure you want to continue? (y n) [n]
Press y to continue.
9 When installing the NetVault Backup Server on Linux, specify the option for PostgreSQL Linux user account. For more information about NetVault Backup PostgreSQL Linux user account, see Determine NetVault Backup PostgreSQL Linux user account.
Specify option for PostgreSQL Linux user account
Quest NetVault Backup 11.3 Installation GuideInstalling NetVault Backup
32
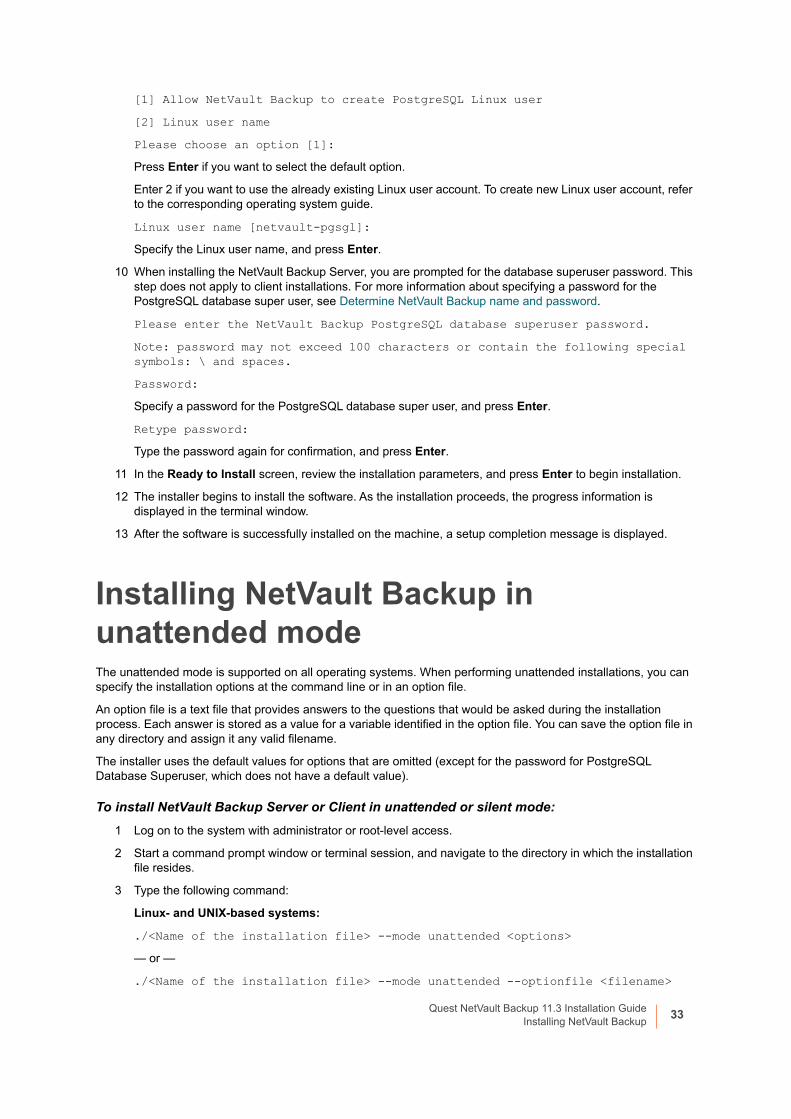
[1] Allow NetVault Backup to create PostgreSQL Linux user
[2] Linux user name
Please choose an option [1]:
Press Enter if you want to select the default option.
Enter 2 if you want to use the already existing Linux user account. To create new Linux user account, refer to the corresponding operating system guide.
Linux user name [netvault-pgsgl]:
Specify the Linux user name, and press Enter.
10 When installing the NetVault Backup Server, you are prompted for the database superuser password. This step does not apply to client installations. For more information about specifying a password for the PostgreSQL database super user, see Determine NetVault Backup name and password.
Please enter the NetVault Backup PostgreSQL database superuser password.
Note: password may not exceed 100 characters or contain the following special symbols: \ and spaces.
Password:
Specify a password for the PostgreSQL database super user, and press Enter.
Retype password:
Type the password again for confirmation, and press Enter.
11 In the Ready to Install screen, review the installation parameters, and press Enter to begin installation.
12 The installer begins to install the software. As the installation proceeds, the progress information is displayed in the terminal window.
13 After the software is successfully installed on the machine, a setup completion message is displayed.
Installing NetVault Backup in unattended modeThe unattended mode is supported on all operating systems. When performing unattended installations, you can specify the installation options at the command line or in an option file.
An option file is a text file that provides answers to the questions that would be asked during the installation process. Each answer is stored as a value for a variable identified in the option file. You can save the option file in any directory and assign it any valid filename.
The installer uses the default values for options that are omitted (except for the password for PostgreSQL Database Superuser, which does not have a default value).
To install NetVault Backup Server or Client in unattended or silent mode:
1 Log on to the system with administrator or root-level access.
2 Start a command prompt window or terminal session, and navigate to the directory in which the installation file resides.
3 Type the following command:
Linux- and UNIX-based systems:
./<Name of the installation file> --mode unattended <options>
— or —
./<Name of the installation file> --mode unattended --optionfile <filename>
Quest NetVault Backup 11.3 Installation GuideInstalling NetVault Backup
33
Windows-based systems:
<Name of the installation file> --mode unattended <parameter list>
— or —
<Name of the installation file> --mode unattended --optionfile <filename>
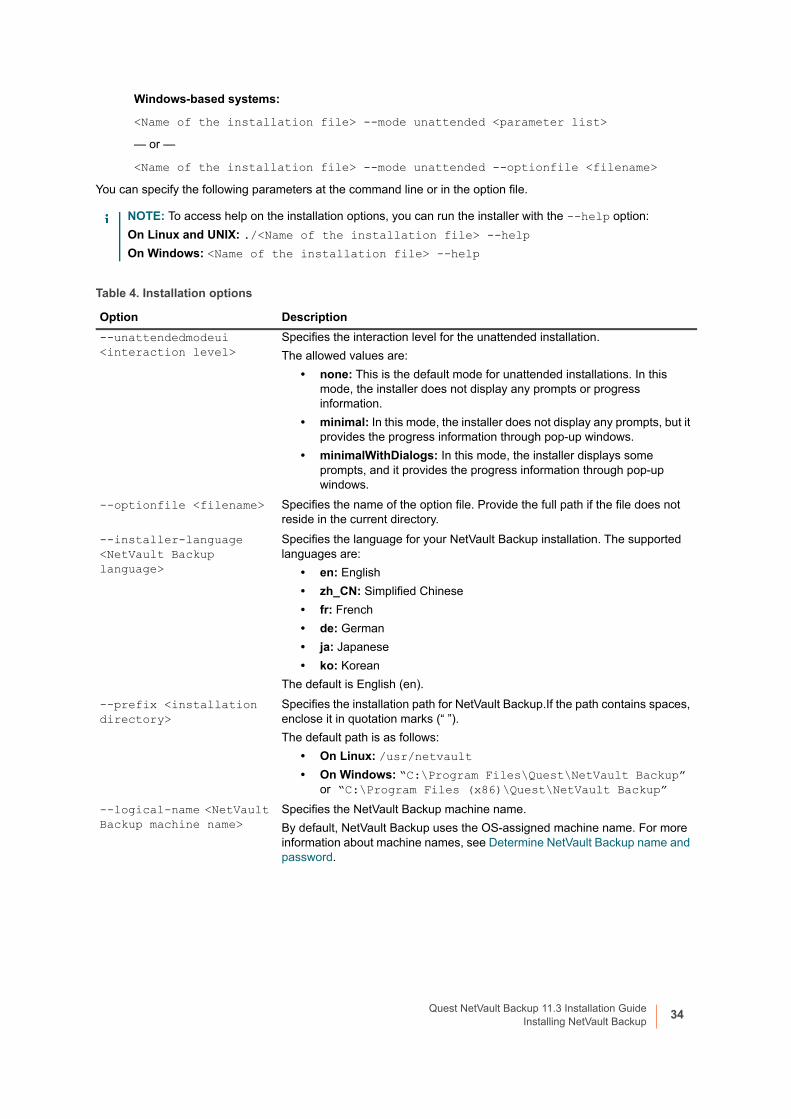
You can specify the following parameters at the command line or in the option file.
NOTE: To access help on the installation options, you can run the installer with the --help option:
On Linux and UNIX: ./<Name of the installation file> --help
On Windows: <Name of the installation file> --help
Table 4. Installation options
Option Description
--unattendedmodeui <interaction level>
Specifies the interaction level for the unattended installation.
The allowed values are:
• none: This is the default mode for unattended installations. In this mode, the installer does not display any prompts or progress information.
• minimal: In this mode, the installer does not display any prompts, but it provides the progress information through pop-up windows.
• minimalWithDialogs: In this mode, the installer displays some prompts, and it provides the progress information through pop-up windows.
--optionfile <filename> Specifies the name of the option file. Provide the full path if the file does not reside in the current directory.
--installer-language <NetVault Backup language>
Specifies the language for your NetVault Backup installation. The supported languages are:
• en: English
• zh_CN: Simplified Chinese
• fr: French
• de: German
• ja: Japanese
• ko: Korean
The default is English (en).
--prefix <installation directory>
Specifies the installation path for NetVault Backup.If the path contains spaces, enclose it in quotation marks (“ ”).
The default path is as follows:
• On Linux: /usr/netvault
• On Windows: “C:\Program Files\Quest\NetVault Backup” or “C:\Program Files (x86)\Quest\NetVault Backup”
--logical-name <NetVault Backup machine name>
Specifies the NetVault Backup machine name.
By default, NetVault Backup uses the OS-assigned machine name. For more information about machine names, see Determine NetVault Backup name and password.
Quest NetVault Backup 11.3 Installation GuideInstalling NetVault Backup
34
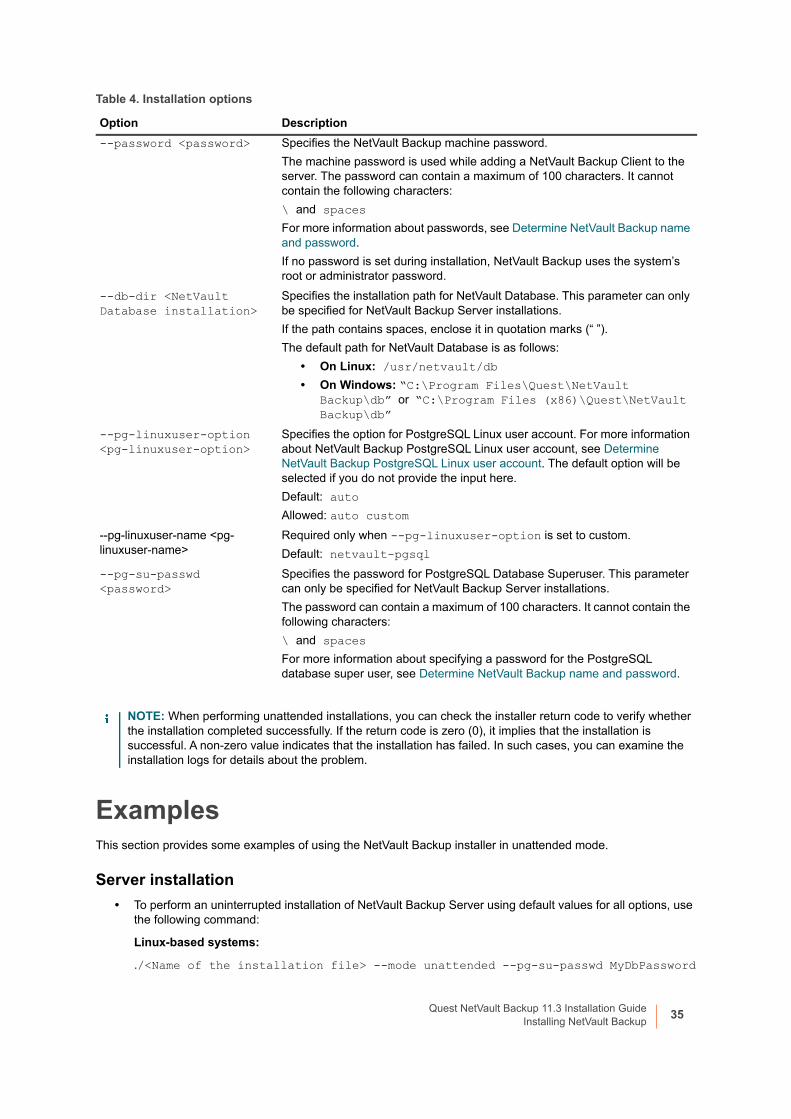
ExamplesThis section provides some examples of using the NetVault Backup installer in unattended mode.
Server installation
• To perform an uninterrupted installation of NetVault Backup Server using default values for all options, use the following command:
Linux-based systems:
./<Name of the installation file> --mode unattended --pg-su-passwd MyDbPassword
--password <password> Specifies the NetVault Backup machine password.
The machine password is used while adding a NetVault Backup Client to the server. The password can contain a maximum of 100 characters. It cannot contain the following characters:
\ and spaces
For more information about passwords, see Determine NetVault Backup name and password.
If no password is set during installation, NetVault Backup uses the system’s root or administrator password.
--db-dir <NetVault Database installation>
Specifies the installation path for NetVault Database. This parameter can only be specified for NetVault Backup Server installations.
If the path contains spaces, enclose it in quotation marks (“ ”).
The default path for NetVault Database is as follows:
• On Linux: /usr/netvault/db
• On Windows: “C:\Program Files\Quest\NetVault Backup\db” or “C:\Program Files (x86)\Quest\NetVault Backup\db”
--pg-linuxuser-option <pg-linuxuser-option>
Specifies the option for PostgreSQL Linux user account. For more information about NetVault Backup PostgreSQL Linux user account, see Determine NetVault Backup PostgreSQL Linux user account. The default option will be selected if you do not provide the input here.
Default: auto
Allowed: auto custom
--pg-linuxuser-name <pg-linuxuser-name>
Required only when --pg-linuxuser-option is set to custom.
Default: netvault-pgsql
--pg-su-passwd <password>
Specifies the password for PostgreSQL Database Superuser. This parameter can only be specified for NetVault Backup Server installations.
The password can contain a maximum of 100 characters. It cannot contain the following characters:
\ and spaces
For more information about specifying a password for the PostgreSQL database super user, see Determine NetVault Backup name and password.
NOTE: When performing unattended installations, you can check the installer return code to verify whether the installation completed successfully. If the return code is zero (0), it implies that the installation is successful. A non-zero value indicates that the installation has failed. In such cases, you can examine the installation logs for details about the problem.
Table 4. Installation options
Option Description
Quest NetVault Backup 11.3 Installation GuideInstalling NetVault Backup
35
Windows-based systems:
<Name of the installation file> --mode unattended --pg-su-passwd MyDbPassword
• To specify a custom name and installation directory for a Windows-based NetVault Backup Server, use the following command:
<Name of the installation file> --mode unattended --prefix “D:\NetVault Backup” --logical-name TestServer --pg-su-passwd MyDbPassword
• To install the Japanese version of NetVault Backup Server on a Linux-based system, use the following command:
./<Name of the installation file> --mode unattended --installer-language ja--pg-su-passwd MyDbPassword
Client installation
• To perform an uninterrupted installation of NetVault Backup Client using default values for all options, use the following command:
Linux-based systems:
./<Name of the installation file> --mode unattended
Windows-based systems:
<Name of the installation file> --mode unattended
• To specify a custom name and installation directory for a Windows-based NetVault Backup Client, use the following command:
<Name of the installation file> --mode unattended --prefix “D:\NetVault Backup” --logical-name Client-A
• To install the Japanese version of NetVault Backup Client on a Linux-based system, use the following command:
./<Name of the installation file> --mode unattended --installer-language ja
Sample option filesThis section provides some sample option files.
Server installation
• The following file specifies all options for installing the English version of NetVault Backup on a Linux-based system:
prefix=/usr/NetVault Backup
logical-name=TestServer
password=MyPassword
db-dir=/usr/TstDir/Db
pg-su-passwd=MyDbPassword
• The following file specifies a custom name and installation directory for a Windows-based NetVault Backup Server:
prefix=D:\NetVault Backup
logical-name=TestServer
db-dir=D:\TstDir\Db
pg-su-passwd=MyDbPassword
Quest NetVault Backup 11.3 Installation GuideInstalling NetVault Backup
36
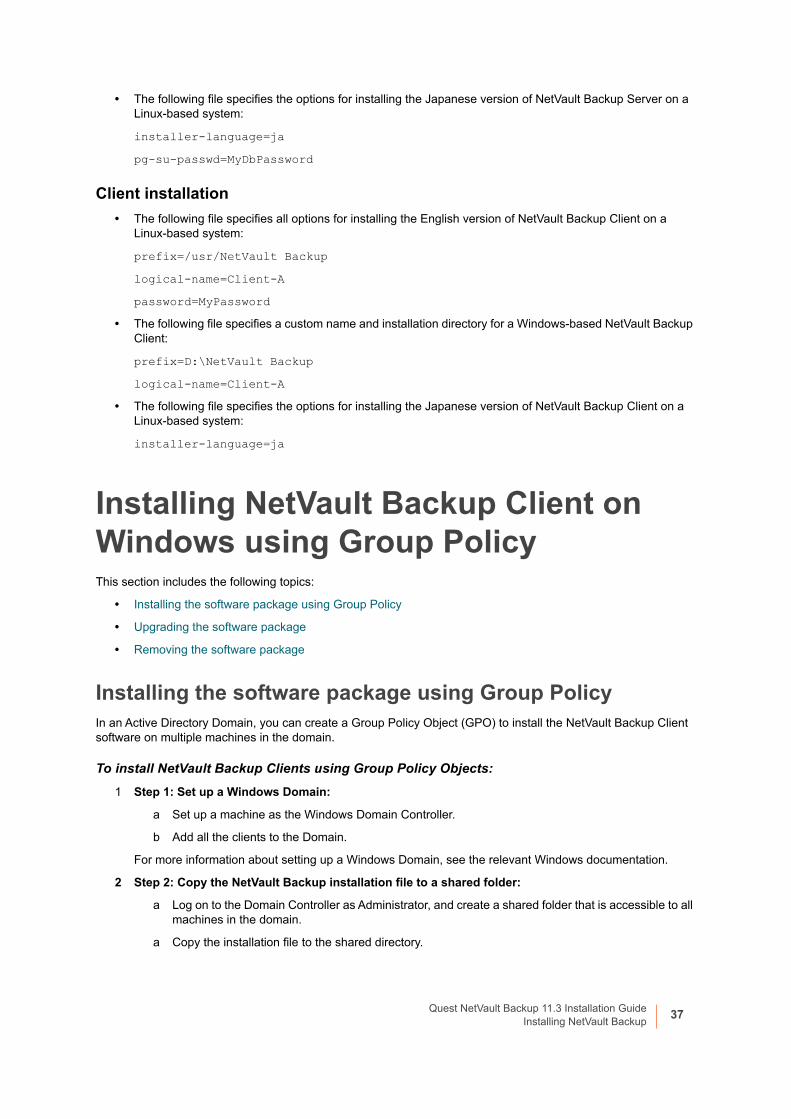
• The following file specifies the options for installing the Japanese version of NetVault Backup Server on a Linux-based system:
installer-language=ja
pg-su-passwd=MyDbPassword
Client installation
• The following file specifies all options for installing the English version of NetVault Backup Client on a Linux-based system:
prefix=/usr/NetVault Backup
logical-name=Client-A
password=MyPassword
• The following file specifies a custom name and installation directory for a Windows-based NetVault Backup Client:
prefix=D:\NetVault Backup
logical-name=Client-A
• The following file specifies the options for installing the Japanese version of NetVault Backup Client on a Linux-based system:
installer-language=ja
Installing NetVault Backup Client on Windows using Group PolicyThis section includes the following topics:
• Installing the software package using Group Policy
• Upgrading the software package
• Removing the software package
Installing the software package using Group PolicyIn an Active Directory Domain, you can create a Group Policy Object (GPO) to install the NetVault Backup Client software on multiple machines in the domain.
To install NetVault Backup Clients using Group Policy Objects:
1 Step 1: Set up a Windows Domain:
a Set up a machine as the Windows Domain Controller.
b Add all the clients to the Domain.
For more information about setting up a Windows Domain, see the relevant Windows documentation.
2 Step 2: Copy the NetVault Backup installation file to a shared folder:
a Log on to the Domain Controller as Administrator, and create a shared folder that is accessible to all machines in the domain.
a Copy the installation file to the shared directory.
Quest NetVault Backup 11.3 Installation GuideInstalling NetVault Backup
37
3 Step 3: Create a Group Policy Object:
a Click Start, point to Administrative Tools, and then click Group Policy Management.
b Right-click the domain, and click Create a GPO in this domain, and Link it here.
c Type a name for the new policy (for example, NetVault Backup), and click OK.
d In the left pane of the Group Policy Management Console, open the applicable nodes, and select the GPO. In the right-pane, go to the Security Filtering section.
e By default, the policy is not applied to any client machines. To add a machine, click Add. In the dialog box that appears, click Object Types, and select Computers (if not already selected).
f Select the machines on which you want to install NetVault Backup. Click OK.
4 Step 4: Assign the package:
a In the Group Policy Management Console, select the policy, and click Edit. Under Computer Configuration, expand Software Settings.
b Right-click Software installation, point to New, and then click Package. In the Open dialog box, type the full UNC path of the shared installer package (for example, \\<file server>\<share>\<installation file name>), and click Open.
c In the Deploy Software dialog box, leave the Assigned option selected, and click OK.
The NetVault Backup installation package is now listed in the right-pane of the Group Policy Management Editor.
d Close the Group Policy Management Editor and the Group Policy Management Console.
e When you restart the machine, NetVault Backup is automatically installed on the selected clients.
Upgrading the software package
To upgrade the NetVault Backup software package:
1 Click Start, point to Administrative Tools, and then click Group Policy Management.
2 Select the Group Policy Object that you used to deploy the package, and then click Edit.
3 In the Group Policy Management Editor, expand Software Settings.
4 Open the Software installation node.
5 In the right-pane of the Group Policy Management Editor, right-click the entry for NetVault Backup, point to All Tasks, and then click Redeploy application.
6 In the confirmation dialog box, click Yes.
7 Close the Group Policy Management Editor and the Group Policy Management Console.
Removing the software package
To remove the assigned software package:
1 Click Start, point to Administrative Tools, and then click Group Policy Management.
2 Select the Group Policy Object that you used to deploy the package, and then click Edit.
3 In the Group Policy Management Editor, expand Software Settings.
4 Open the Software installation node.
NOTE: Verify that you use the UNC path; do not use the Browse button to access the shared location.
Quest NetVault Backup 11.3 Installation GuideInstalling NetVault Backup
38
5 In the right-pane of the Group Policy Management Editor, right-click the entry for NetVault Backup, point to All Tasks, and then click Remove.
6 Do one of the following:
▪ Click Immediately uninstall the software from users and computers, and then click OK.
▪ Click Allow users to continue to use the software but prevent new installations, and then click OK.
7 Close the Group Policy Management Editor and the Group Policy Management Console.
Quest NetVault Backup 11.3 Installation GuideInstalling NetVault Backup
39
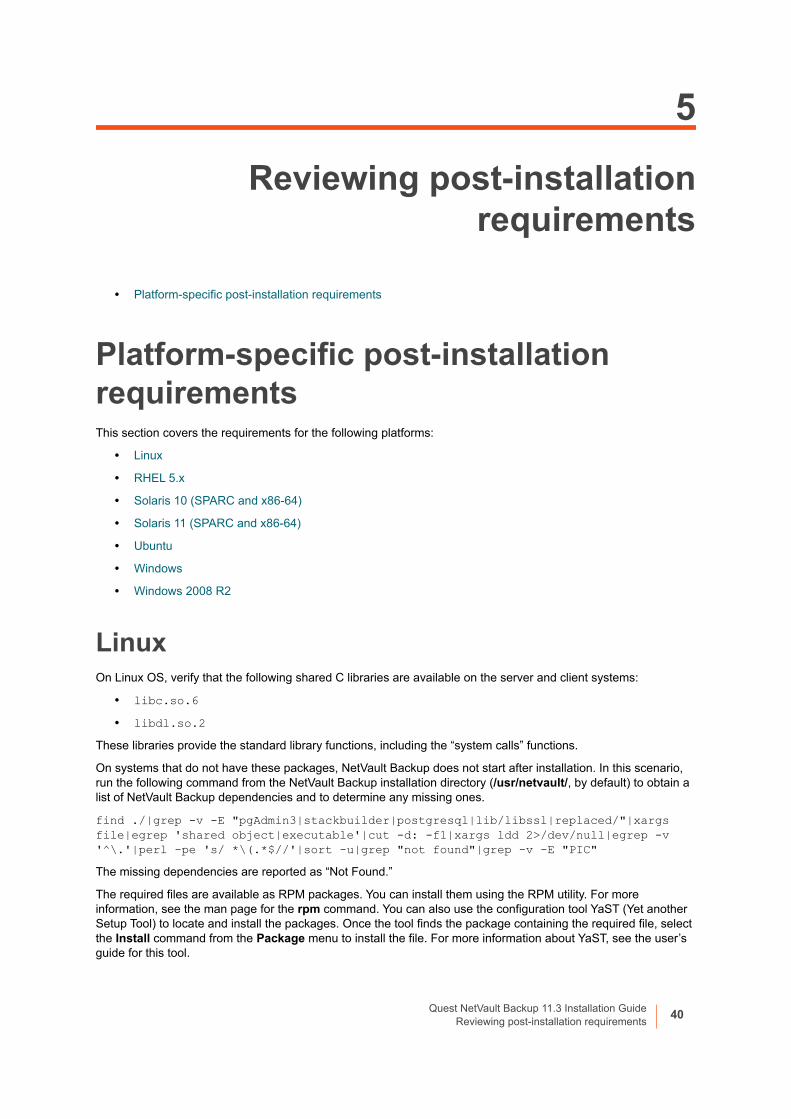
5
Reviewing post-installation requirements
• Platform-specific post-installation requirements
Platform-specific post-installation requirementsThis section covers the requirements for the following platforms:
• Linux
• RHEL 5.x
• Solaris 10 (SPARC and x86-64)
• Solaris 11 (SPARC and x86-64)
• Ubuntu
• Windows
• Windows 2008 R2
LinuxOn Linux OS, verify that the following shared C libraries are available on the server and client systems:
• libc.so.6
• libdl.so.2
These libraries provide the standard library functions, including the “system calls” functions.
On systems that do not have these packages, NetVault Backup does not start after installation. In this scenario, run the following command from the NetVault Backup installation directory (/usr/netvault/, by default) to obtain a list of NetVault Backup dependencies and to determine any missing ones.
find ./|grep -v -E "pgAdmin3|stackbuilder|postgresql|lib/libssl|replaced/"|xargs file|egrep 'shared object|executable'|cut -d: -f1|xargs ldd 2>/dev/null|egrep -v '^\.'|perl -pe 's/ *\(.*$//'|sort -u|grep "not found"|grep -v -E "PIC"
The missing dependencies are reported as “Not Found.”
The required files are available as RPM packages. You can install them using the RPM utility. For more information, see the man page for the rpm command. You can also use the configuration tool YaST (Yet another Setup Tool) to locate and install the packages. Once the tool finds the package containing the required file, select the Install command from the Package menu to install the file. For more information about YaST, see the user’s guide for this tool.
Quest NetVault Backup 11.3 Installation GuideReviewing post-installation requirements
40
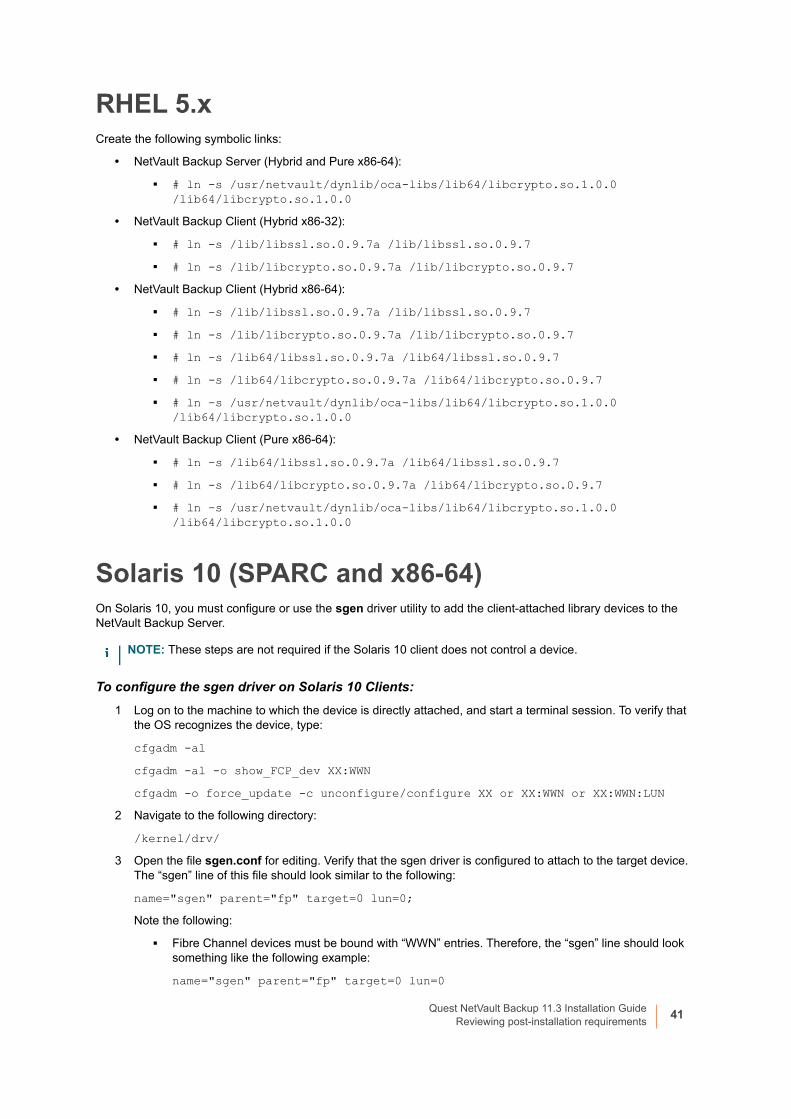
RHEL 5.xCreate the following symbolic links:
• NetVault Backup Server (Hybrid and Pure x86-64):
▪ # ln -s /usr/netvault/dynlib/oca-libs/lib64/libcrypto.so.1.0.0 /lib64/libcrypto.so.1.0.0
• NetVault Backup Client (Hybrid x86-32):
▪ # ln -s /lib/libssl.so.0.9.7a /lib/libssl.so.0.9.7
▪ # ln -s /lib/libcrypto.so.0.9.7a /lib/libcrypto.so.0.9.7
• NetVault Backup Client (Hybrid x86-64):
▪ # ln -s /lib/libssl.so.0.9.7a /lib/libssl.so.0.9.7
▪ # ln -s /lib/libcrypto.so.0.9.7a /lib/libcrypto.so.0.9.7
▪ # ln -s /lib64/libssl.so.0.9.7a /lib64/libssl.so.0.9.7
▪ # ln -s /lib64/libcrypto.so.0.9.7a /lib64/libcrypto.so.0.9.7
▪ # ln -s /usr/netvault/dynlib/oca-libs/lib64/libcrypto.so.1.0.0 /lib64/libcrypto.so.1.0.0
• NetVault Backup Client (Pure x86-64):
▪ # ln -s /lib64/libssl.so.0.9.7a /lib64/libssl.so.0.9.7
▪ # ln -s /lib64/libcrypto.so.0.9.7a /lib64/libcrypto.so.0.9.7
▪ # ln -s /usr/netvault/dynlib/oca-libs/lib64/libcrypto.so.1.0.0 /lib64/libcrypto.so.1.0.0
Solaris 10 (SPARC and x86-64)On Solaris 10, you must configure or use the sgen driver utility to add the client-attached library devices to the NetVault Backup Server.
To configure the sgen driver on Solaris 10 Clients:
1 Log on to the machine to which the device is directly attached, and start a terminal session. To verify that the OS recognizes the device, type:
cfgadm -al
cfgadm -al -o show_FCP_dev XX:WWN
cfgadm -o force_update -c unconfigure/configure XX or XX:WWN or XX:WWN:LUN
2 Navigate to the following directory:
/kernel/drv/
3 Open the file sgen.conf for editing. Verify that the sgen driver is configured to attach to the target device. The “sgen” line of this file should look similar to the following:
name="sgen" parent="fp" target=0 lun=0;
Note the following:
▪ Fibre Channel devices must be bound with “WWN” entries. Therefore, the “sgen” line should look something like the following example:
name="sgen" parent="fp" target=0 lun=0
NOTE: These steps are not required if the Solaris 10 client does not control a device.
Quest NetVault Backup 11.3 Installation GuideReviewing post-installation requirements
41
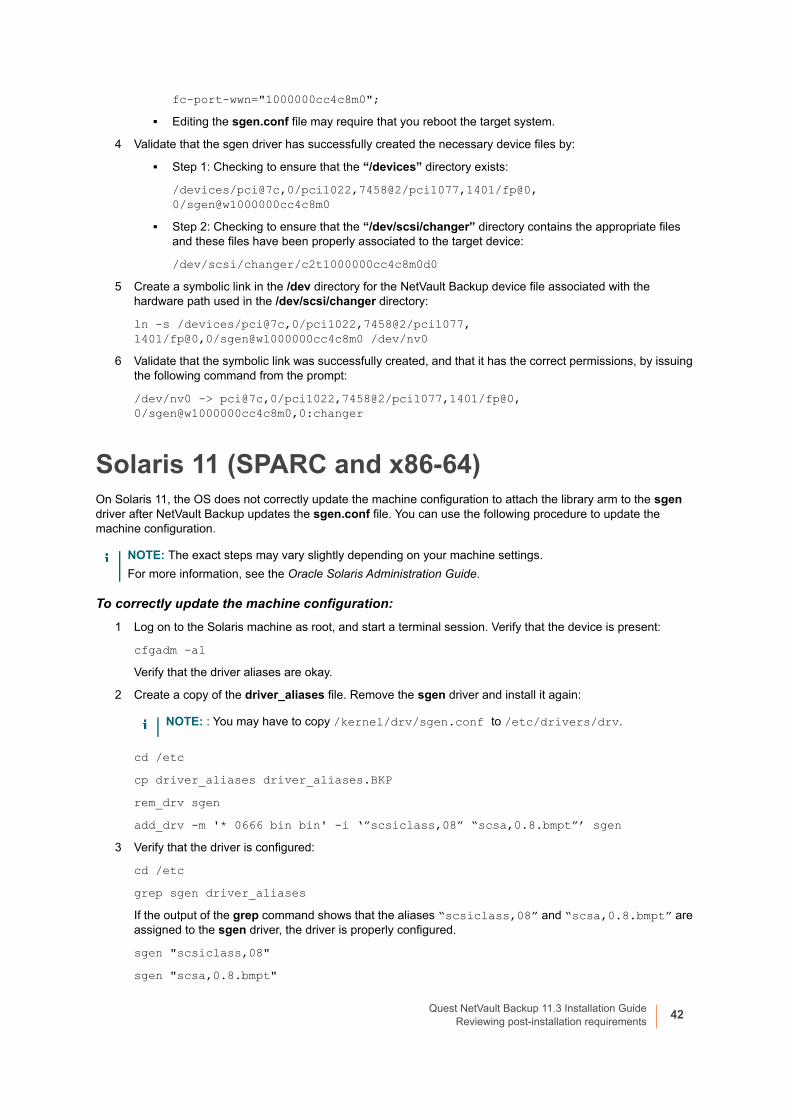
fc-port-wwn="1000000cc4c8m0";
▪ Editing the sgen.conf file may require that you reboot the target system.
4 Validate that the sgen driver has successfully created the necessary device files by:
▪ Step 1: Checking to ensure that the “/devices” directory exists:
/devices/pci@7c,0/pci1022,7458@2/pci1077,1401/fp@0, 0/sgen@w1000000cc4c8m0
▪ Step 2: Checking to ensure that the “/dev/scsi/changer” directory contains the appropriate files and these files have been properly associated to the target device:
/dev/scsi/changer/c2t1000000cc4c8m0d0
5 Create a symbolic link in the /dev directory for the NetVault Backup device file associated with the hardware path used in the /dev/scsi/changer directory:
ln -s /devices/pci@7c,0/pci1022,7458@2/pci1077, 1401/fp@0,0/sgen@w1000000cc4c8m0 /dev/nv0
6 Validate that the symbolic link was successfully created, and that it has the correct permissions, by issuing the following command from the prompt:
/dev/nv0 -> pci@7c,0/pci1022,7458@2/pci1077,1401/fp@0, 0/sgen@w1000000cc4c8m0,0:changer
Solaris 11 (SPARC and x86-64)On Solaris 11, the OS does not correctly update the machine configuration to attach the library arm to the sgen driver after NetVault Backup updates the sgen.conf file. You can use the following procedure to update the machine configuration.
To correctly update the machine configuration:
1 Log on to the Solaris machine as root, and start a terminal session. Verify that the device is present:
cfgadm -al
Verify that the driver aliases are okay.
2 Create a copy of the driver_aliases file. Remove the sgen driver and install it again:
cd /etc
cp driver_aliases driver_aliases.BKP
rem_drv sgen
add_drv -m '* 0666 bin bin' -i ‘”scsiclass,08” “scsa,0.8.bmpt”’ sgen
3 Verify that the driver is configured:
cd /etc
grep sgen driver_aliases
If the output of the grep command shows that the aliases “scsiclass,08” and “scsa,0.8.bmpt” are assigned to the sgen driver, the driver is properly configured.
sgen "scsiclass,08"
sgen "scsa,0.8.bmpt"
NOTE: The exact steps may vary slightly depending on your machine settings.
For more information, see the Oracle Solaris Administration Guide.
NOTE: : You may have to copy /kernel/drv/sgen.conf to /etc/drivers/drv.
Quest NetVault Backup 11.3 Installation GuideReviewing post-installation requirements
42
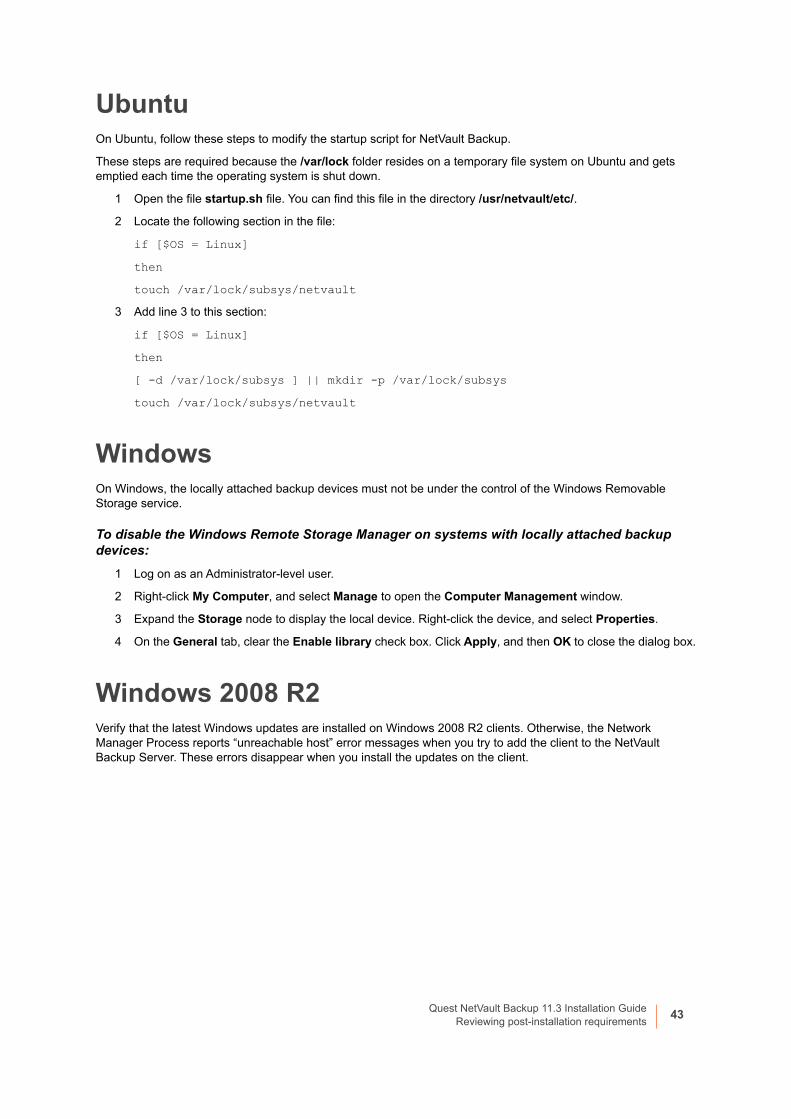
UbuntuOn Ubuntu, follow these steps to modify the startup script for NetVault Backup.
These steps are required because the /var/lock folder resides on a temporary file system on Ubuntu and gets emptied each time the operating system is shut down.
1 Open the file startup.sh file. You can find this file in the directory /usr/netvault/etc/.
2 Locate the following section in the file:
if [$OS = Linux]
then
touch /var/lock/subsys/netvault
3 Add line 3 to this section:
if [$OS = Linux]
then
[ -d /var/lock/subsys ] || mkdir -p /var/lock/subsys
touch /var/lock/subsys/netvault
WindowsOn Windows, the locally attached backup devices must not be under the control of the Windows Removable Storage service.
To disable the Windows Remote Storage Manager on systems with locally attached backup devices:
1 Log on as an Administrator-level user.
2 Right-click My Computer, and select Manage to open the Computer Management window.
3 Expand the Storage node to display the local device. Right-click the device, and select Properties.
4 On the General tab, clear the Enable library check box. Click Apply, and then OK to close the dialog box.
Windows 2008 R2Verify that the latest Windows updates are installed on Windows 2008 R2 clients. Otherwise, the Network Manager Process reports “unreachable host” error messages when you try to add the client to the NetVault Backup Server. These errors disappear when you install the updates on the client.
Quest NetVault Backup 11.3 Installation GuideReviewing post-installation requirements
43
6
Upgrading NetVault Backup
• Upgrade considerations
• Preparing for an upgrade
• Upgrading NetVault Backup in GUI mode
• Upgrading NetVault Backup in text mode
• Upgrading NetVault Backup in unattended mode
• Upgrading licensed plug-ins
Upgrade considerationsBefore you upgrade your NetVault Backup system, review the following notes.
• When you perform an upgrade, select the server or client version based on the current installation type.
• Upgrade the NetVault Backup Server before upgrading any client system.
• A NetVault Backup Server can only support clients of the same version as itself or older. The NetVault Backup Client software version cannot be higher than the NetVault Backup Server software version.
• Starting with 10.0, the NetVault Backup Server installation is only supported on Windows and Linux operating systems. You can no longer install the NetVault Backup server on UNIX and Mac OS X operating systems.
For information about supported operating system versions, see the Quest NetVault Backup Compatibility Guide available at https://support.quest.com.
• Upgrade to NetVault Backup Server 10.x and later is only supported from NetVault Backup Server 9.2 and later. To upgrade from a version earlier than 9.2, you must first upgrade your server to NetVault Backup 9.2.
• Upgrade to NetVault Backup Client 11.3 and later is only supported from NetVault Backup 9.0 and later. To upgrade from a version earlier than 9.0, you must first upgrade your client to a version prior to 11.3.
• When upgrading from NetVault Backup Server 9.2, the NetVault Database is migrated from proprietary format to the PostgreSQL database. The data migration can take a significant amount of time depending on the size of your NetVault Database and other factors such as system performance.
• When you upgrade NetVault Backup on Linux-based systems, it removes all start and stop links to the netvault init script before resetting them to the runlevels of the new version. If you want to retain any user-defined links to the init script after an upgrade, do not use the word “netvault” in the link name.
• To simultaneously upgrade the NetVault Backup Client software on multiple Windows-based machines, you can use the push installation method of NetVault Backup WebUI. You can use this method for both new and upgrade installations. For more information about this method, see the Quest NetVault Backup Administrator's Guide.
NOTE: Before upgrading from NetVault Backup 9.2, purging unnecessary logs can significantly reduce the database migration time. For more information about purging log files, see the Quest NetVault Backup Administrator's Guide.
Quest NetVault Backup 11.3 Installation GuideUpgrading NetVault Backup
44

• During upgrade, the language must be the same as the original language when NetVault Backup was first installed. If the language during upgrade differs from the original language, the default administrator account will not migrate successfully and the NetVault Backup instance may get locked.
Preparing for an upgrade• Back up the NetVault Database: The first step in preparing for an upgrade of NetVault Backup Server is to
perform a backup of the existing NetVault Database. If an upgrade is unsuccessful, you can reinstall the previous version of NetVault Backup and recover the NetVault Database to enable troubleshooting of the failed upgrade without interfering with an existing backup schedule.
For more information about backing up the NetVault Database with the Plug-in for Databases, see Quest NetVault Backup Built-in Plug-ins User’s Guide.
When you restore data from the NetVault Database, the logs are restored to the directory logs_restored_<YYYYMMDD>.
• Close all other NetVault Backup applications: Before starting the upgrade procedure, close all other NetVault Backup applications, such as NetVault Configurator, NetVault Backup Console, and Workstation Client. If you have opened any configuration file, make sure that the file is closed before you start the upgrade procedure. On Windows, it may also be necessary to close Event Viewer before performing an upgrade.
• Disable anti-virus software: We recommend that you disable the anti-virus software before installing or upgrading NetVault Backup. The installation process may conflict with the anti-virus software and various NetVault Backup operations may fail to function properly after the installation if you do not disable the anti-virus software.
Upgrading NetVault Backup in GUI modeThe graphical mode is available on all supported operating systems that provide a graphical environment. This mode requires GTK packages or X Window System libraries on Linux- and UNIX-based systems.
To upgrade NetVault Backup Server or Client in graphical mode:
1 Log on to the system with administrator or root-level access, and navigate to the directory in which the installation file resides.
2 Double-click the installation file.
3 In the Language Selection dialog box, select the language to be used in the upgraded installation. Click OK.
4 In the Welcome dialog box, review the notes, and click Next to continue.
IMPORTANT: Before upgrading from 9.2, you must create a backup of the NetVault Database. The new database format introduced in 10.0 increases the importance of performing NetVault Database backups before from 9.2.
NOTE: By default, in the Language Selection dialog box, the language of an existing NetVault Backup installation is displayed and the same language is displayed for upgraded installation as well.The language must be the same as the original language when NetVault Backup was first installed. If the language during upgrade differs from the original language, the default administrator account will not migrate successfully and the NetVault Backup instance may get locked.
Quest NetVault Backup 11.3 Installation GuideUpgrading NetVault Backup
45
5 In the License Agreement dialog box, select the I accept the agreement option if you accept all the terms.
Click Next to continue.
6 In the Upgrade Confirmation dialog box, click Yes.
Before upgrading the NetVault Backup Server, make sure that a backup of NetVault Database has been performed.
7 When upgrading from NetVault Backup Server 9.2 on Linux, the dialog box for PostgreSQL Linux user account is displayed next.This dialog box is not displayed during client installations. For more information about NetVault Backup PostgreSQL Linux user account, see Determine NetVault Backup PostgreSQL Linux user account.
Select the option for PostgreSQL Linux user account:
▪ Allow NetVault Backup to create PostgreSQL Linux user: By default, this option is selected.
▪ Linux user name: Select this option if you want to use the already existing Linux user account.
— or —
To create new Linux user account, refer to the corresponding operating system guide.
Click Next to continue.
8 When upgrading from NetVault Backup Server 9.2, the PostgreSQL Database Superuser Password dialog box is displayed. This dialog box is not displayed for other server or client upgrades.
In the Password box, specify a password for the PostgreSQL database super user.
In the Retype password box, type the password again for confirmation.
9 In the Ready to Upgrade dialog box, click Yes to begin installation.
10 The installer begins to install the software. As the installation proceeds, the progress bar is updated in the Installation dialog box.
11 After the software is successfully installed on the machine, the Setup Completion dialog box is displayed. Click Finish to close the dialog box, and exit the installer.
Upgrading NetVault Backup in text modeThe text mode is available on all supported operating systems, except Windows.
To upgrade NetVault Backup Server or Client in text mode:
1 Log on to the system with root-level access. Start a terminal session, and navigate to the directory in which the installation file resides.
2 To start the installer, type the following command:
./<installation file name> --mode text
Follow the instructions to complete the installation steps.
3 The License Agreement screen is displayed. Press Enter to read through the agreement.
Press y to accept the license agreement and continue.
NOTE: Before proceeding with the installation, make sure that you have thoroughly reviewed the license agreement.
NOTE: You can exit the setup in text mode at any time before the installation starts by pressing Ctrl+C.
Quest NetVault Backup 11.3 Installation GuideUpgrading NetVault Backup
46
4 In the Upgrade Confirmation screen, press y to continue.
5 When upgrading from NetVault Backup Server 9.2 on Linux, specify the option for PostgreSQL Linux user account. For more information about NetVault Backup PostgreSQL Linux user account, see Determine NetVault Backup PostgreSQL Linux user account.
Specify option for PostgreSQL Linux user account
[1] Allow NetVault Backup to create PostgreSQL Linux user
[2] Linux user name
Please choose an option [1]:
Press Enter if you want to select the default option.
Enter 2 if you want to use the already existing Linux user account. To create new Linux user account, refer to the corresponding operating system guide.
Linux user name [netvault-pgsgl]:
Specify the Linux user name, and press Enter.
6 When upgrading from NetVault Backup Server 9.2, you are prompted for the database superuser password. This step does not apply to other server or client upgrades.
Please enter the NetVault Backup PostgreSQL database superuser password.
Note: password may not exceed 100 characters or contain the following special symbols: \ and spaces.
Password:
Specify a password for the PostgreSQL database super user, and press Enter.
Retype password:
Type the password again for confirmation, and press Enter.
7 In the Ready to Upgrade screen, press Enter to begin installation.
8 The installer begins to install the software. As the installation proceeds, the progress information is displayed in the terminal window.
9 After the software is successfully installed on the machine, a setup completion message is displayed.
Upgrading NetVault Backup in unattended modeTo upgrade NetVault Backup Server or Client in unattended or silent mode:
1 Log on to the system with administrator or root-level access.
2 Start a command prompt window or terminal session, and navigate to the directory in which the installation file resides.
3 Type the following command:
Linux- and UNIX-based systems:
./<Name of the installation file> -mode unattended
NOTE: Before proceeding with the installation, make sure that you have thoroughly reviewed the license agreement.
Quest NetVault Backup 11.3 Installation GuideUpgrading NetVault Backup
47
Windows-based systems:
<Name of the installation file> -mode unattended
4 When upgrading from NetVault Backup Server 9.2 on Linux, you must also specify the following options for NetVault Backup PostgreSQL Linux user account:
<Name of the installation file> -mode unattended --pg-linuxuser-option <pg-linuxuser-option>
<Name of the installation file> -mode unattended --pg-linuxuser-name <pg-linuxuser-name>
For more information about NetVault Backup PostgreSQL Linux user account, see Determine NetVault Backup PostgreSQL Linux user account.
5 When upgrading from NetVault Backup Server 9.2, you must also specify the PostgreSQL Database Superuser password.
Example:
<Name of the installation file> -mode unattended --pg-su-passwd <password>
You can also use the option file to specify the PostgreSQL Database Superuser password. Specifying the password in an option file is more secure than passing the parameter in the command line.
Upgrading licensed plug-insThe procedures for installing and removing the licensed plug-ins are covered in the respective plug-in user's guides. The standard method for upgrading any optional plug-in is to install the latest version over the previous version of the plug-in. Any changes or additional steps required for an upgrade are described in the Release Notes for that version of the plug-in.
NOTE: When performing unattended installations, you can check the installer return code to verify whether the installation completed successfully. If the return code is zero (0), it implies that the installation is successful. A non-zero value indicates that the installation has failed. In such cases, you can examine the installation logs for details about the problem.
Quest NetVault Backup 11.3 Installation GuideUpgrading NetVault Backup
48
7
Licensing NetVault Backup
• About licensing NetVault Backup
• Obtaining the machine ID
• Obtaining permanent license keys
• Installing product license keys
About licensing NetVault BackupThe evaluation license for NetVault Backup is valid for 30 days. To continue using the software after the expiry of the evaluation period, you must install the permanent license keys for the server and installed plug-ins.
The server is licensed based on the NetVault Backup Server Edition and the additional options that you have purchased. The clients require a permanent license key only if any licensed plug-in has been installed on the machine.
The permanent license keys for NetVault Backup are tied to a particular machine where they are installed using the Machine ID. To obtain the permanent license key, locate the relevant Machine ID, and submit the request using the online licensing form.
Obtaining the machine IDTo obtain the machine ID for a NetVault Backup machine:
1 Start the NetVault Backup WebUI, and in the Navigation pane, click Manage Clients.
2 In the NetVault Backup Clients table, select the client, and click Manage.
3 On the View Clients page, note the machine ID exactly as it appears in the Client Summary table.
Obtaining permanent license keysTo obtain permanent license keys for NetVault Backup:
• Submit the request using the on-line product licensing form at: https://support.quest.com/
Quest NetVault Backup 11.3 Installation GuideLicensing NetVault Backup
49
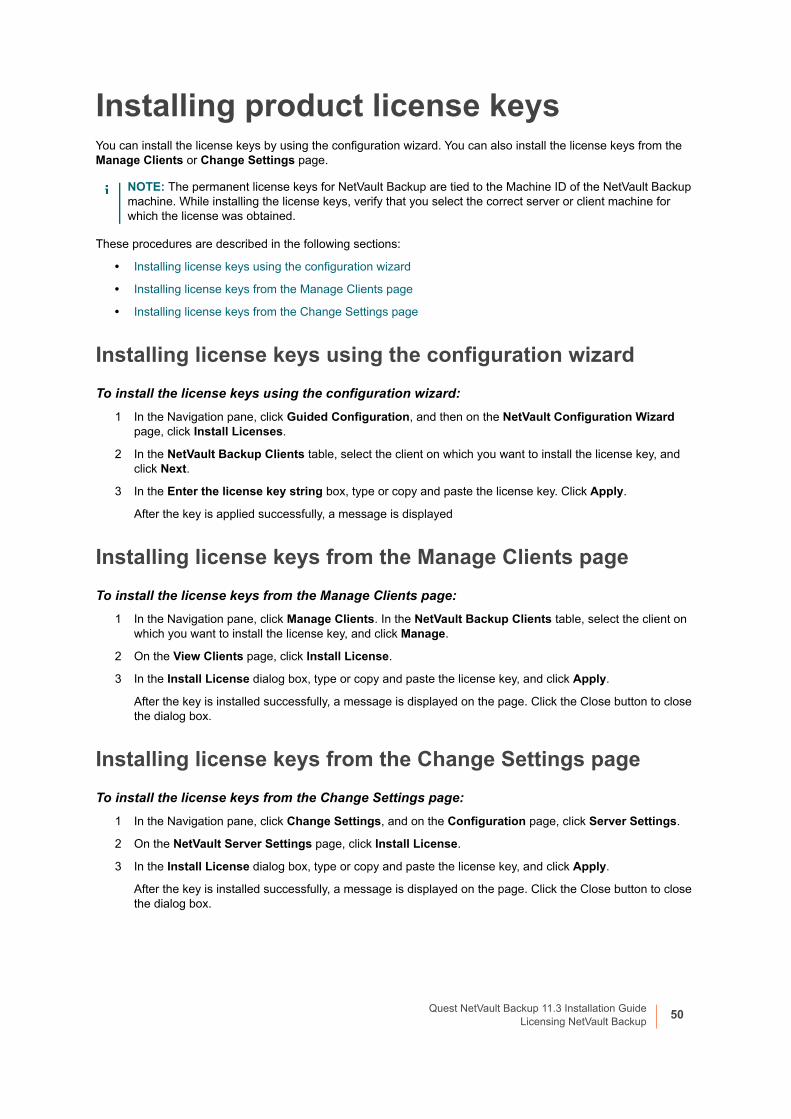
Installing product license keysYou can install the license keys by using the configuration wizard. You can also install the license keys from the Manage Clients or Change Settings page.
These procedures are described in the following sections:
• Installing license keys using the configuration wizard
• Installing license keys from the Manage Clients page
• Installing license keys from the Change Settings page
Installing license keys using the configuration wizard
To install the license keys using the configuration wizard:
1 In the Navigation pane, click Guided Configuration, and then on the NetVault Configuration Wizard page, click Install Licenses.
2 In the NetVault Backup Clients table, select the client on which you want to install the license key, and click Next.
3 In the Enter the license key string box, type or copy and paste the license key. Click Apply.
After the key is applied successfully, a message is displayed
Installing license keys from the Manage Clients page
To install the license keys from the Manage Clients page:
1 In the Navigation pane, click Manage Clients. In the NetVault Backup Clients table, select the client on which you want to install the license key, and click Manage.
2 On the View Clients page, click Install License.
3 In the Install License dialog box, type or copy and paste the license key, and click Apply.
After the key is installed successfully, a message is displayed on the page. Click the Close button to close the dialog box.
Installing license keys from the Change Settings page
To install the license keys from the Change Settings page:
1 In the Navigation pane, click Change Settings, and on the Configuration page, click Server Settings.
2 On the NetVault Server Settings page, click Install License.
3 In the Install License dialog box, type or copy and paste the license key, and click Apply.
After the key is installed successfully, a message is displayed on the page. Click the Close button to close the dialog box.
NOTE: The permanent license keys for NetVault Backup are tied to the Machine ID of the NetVault Backup machine. While installing the license keys, verify that you select the correct server or client machine for which the license was obtained.
Quest NetVault Backup 11.3 Installation GuideLicensing NetVault Backup
50
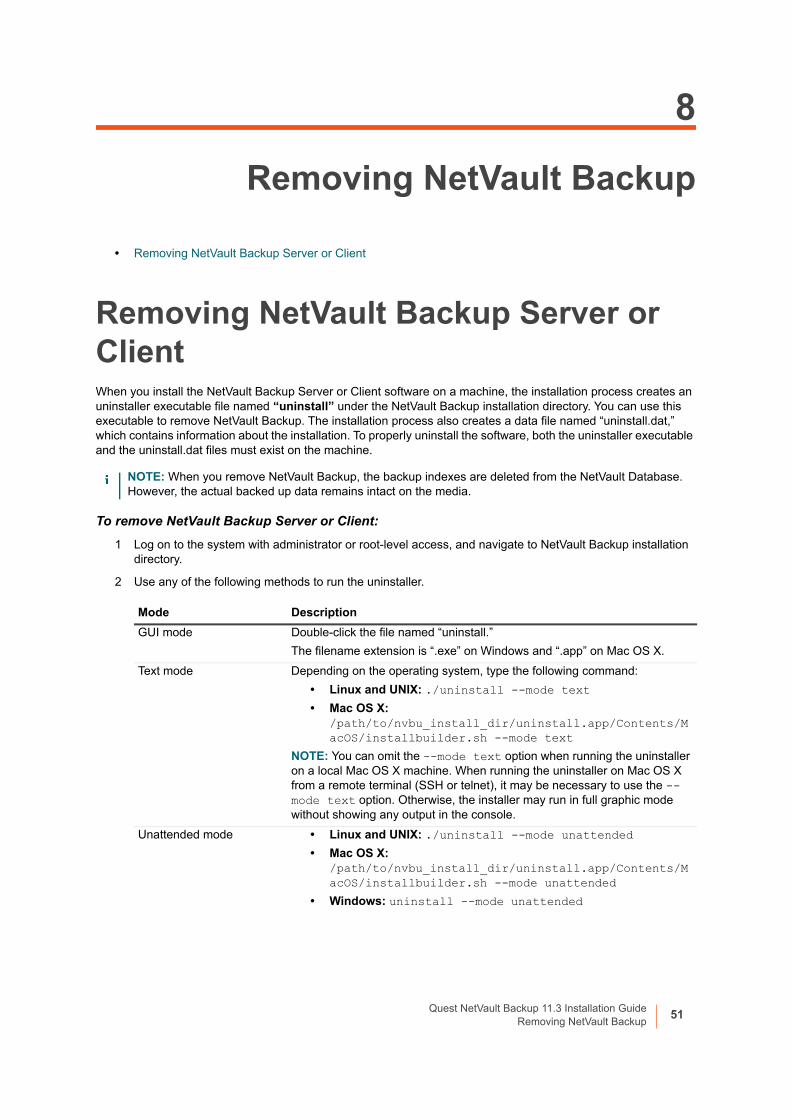
8
Removing NetVault Backup
• Removing NetVault Backup Server or Client
Removing NetVault Backup Server or ClientWhen you install the NetVault Backup Server or Client software on a machine, the installation process creates an uninstaller executable file named “uninstall” under the NetVault Backup installation directory. You can use this executable to remove NetVault Backup. The installation process also creates a data file named “uninstall.dat,” which contains information about the installation. To properly uninstall the software, both the uninstaller executable and the uninstall.dat files must exist on the machine.
To remove NetVault Backup Server or Client:
1 Log on to the system with administrator or root-level access, and navigate to NetVault Backup installation directory.
2 Use any of the following methods to run the uninstaller.
NOTE: When you remove NetVault Backup, the backup indexes are deleted from the NetVault Database. However, the actual backed up data remains intact on the media.
Mode Description
GUI mode Double-click the file named “uninstall.”
The filename extension is “.exe” on Windows and “.app” on Mac OS X.
Text mode Depending on the operating system, type the following command:
• Linux and UNIX: ./uninstall --mode text
• Mac OS X: /path/to/nvbu_install_dir/uninstall.app/Contents/MacOS/installbuilder.sh --mode text
NOTE: You can omit the --mode text option when running the uninstaller on a local Mac OS X machine. When running the uninstaller on Mac OS X from a remote terminal (SSH or telnet), it may be necessary to use the --mode text option. Otherwise, the installer may run in full graphic mode without showing any output in the console.
Unattended mode • Linux and UNIX: ./uninstall --mode unattended
• Mac OS X: /path/to/nvbu_install_dir/uninstall.app/Contents/MacOS/installbuilder.sh --mode unattended
• Windows: uninstall --mode unattended
Quest NetVault Backup 11.3 Installation GuideRemoving NetVault Backup
51
The uninstaller generates a log file named netvault_{GUID}_uninstall.log in the system temporary directory. If the uninstallation fails, the uninstaller may not generate the regular log file. Instead, it may leave an intermediate log file is named bitrock_installer.log or bitrock_installer_nnn.log in the system temporary directory.
NOTE: On Windows, you can also use Programs and Features to uninstall NetVault Backup:
1 Open Programs and Features (Start > Control Panel > Programs > Programs and Features).
2 In the list of installed programs, select NetVault Backup, and then click Uninstall. In the confirmation dialog, click Yes to remove the program.
Quest NetVault Backup 11.3 Installation GuideRemoving NetVault Backup
52
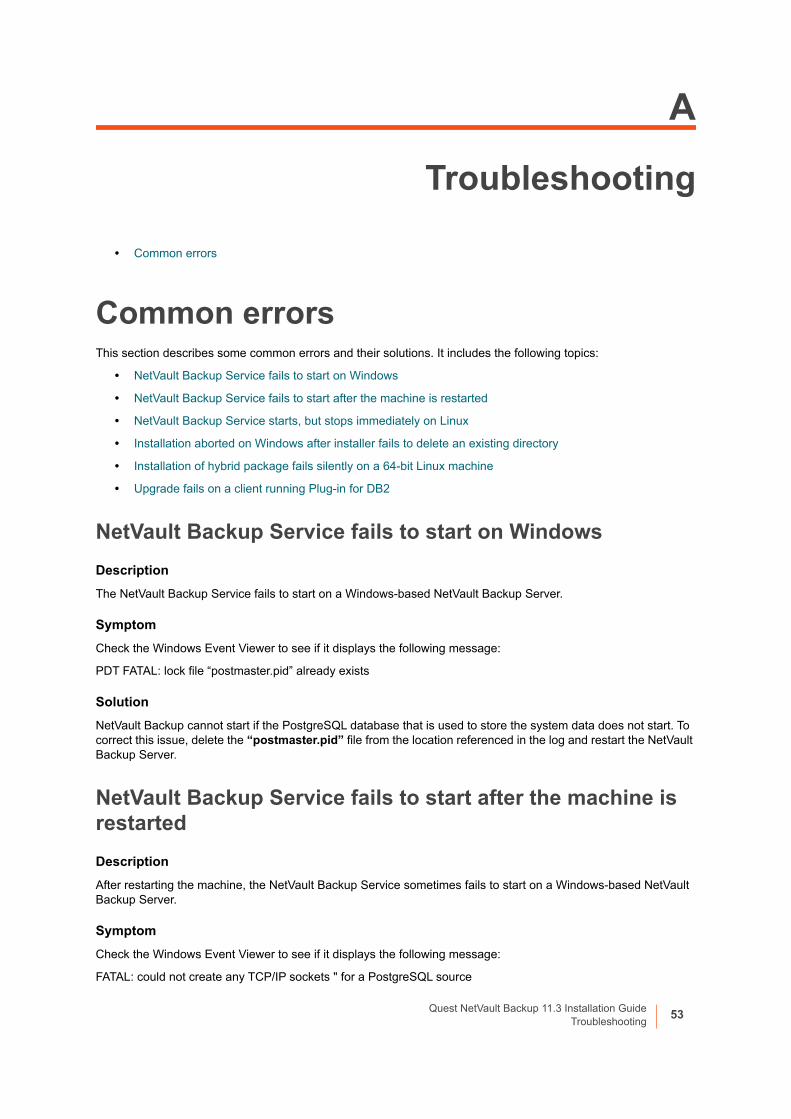
A
Troubleshooting
• Common errors
Common errorsThis section describes some common errors and their solutions. It includes the following topics:
• NetVault Backup Service fails to start on Windows
• NetVault Backup Service fails to start after the machine is restarted
• NetVault Backup Service starts, but stops immediately on Linux
• Installation aborted on Windows after installer fails to delete an existing directory
• Installation of hybrid package fails silently on a 64-bit Linux machine
• Upgrade fails on a client running Plug-in for DB2
NetVault Backup Service fails to start on Windows
Description
The NetVault Backup Service fails to start on a Windows-based NetVault Backup Server.
Symptom
Check the Windows Event Viewer to see if it displays the following message:
PDT FATAL: lock file “postmaster.pid” already exists
Solution
NetVault Backup cannot start if the PostgreSQL database that is used to store the system data does not start. To correct this issue, delete the “postmaster.pid” file from the location referenced in the log and restart the NetVault Backup Server.
NetVault Backup Service fails to start after the machine is restarted
Description
After restarting the machine, the NetVault Backup Service sometimes fails to start on a Windows-based NetVault Backup Server.
Symptom
Check the Windows Event Viewer to see if it displays the following message:
FATAL: could not create any TCP/IP sockets " for a PostgreSQL source
Quest NetVault Backup 11.3 Installation GuideTroubleshooting
53
Solution
NetVault Backup cannot start if the PostgreSQL database that is used to store the system data does not start. To correct this issue, start the Task Manager, and click Show processes from all users. You can see multiple instances of postgres32.exe running on the system. Select any one instance of this process, and click End Process to remove all instances of postgres32.exe. Then, start the NetVault Backup Service.
NetVault Backup Service starts, but stops immediately on Linux
Description
On a Linux-based machine, the NetVault Backup Service starts, and then stops immediately.
Symptom
No error messages are displayed.
Solution
This issue can occur if the Postgres service cannot resolve the host name localhost, and fails to start.
Check the /etc/hosts file, and if the file does not contain an entry for localhost, add the entry.
Installation aborted on Windows after installer fails to delete an existing directory
Description
On a Windows-based machine, installation fails if the installer is unable to remove the existing contents from the installation directory.
Symptom
The installer reports a preinstall script error and cancels the installation process.
Solution
This error can occur if there are any open files in the installation directory. If a file is locked by the Windows OS, the installer cannot delete it.
When this error occurs, do the following:
• Check if the installation folder contains any open files, and try to close the files or programs that use the files. Delete the files and run the installer.
• If you are unable to delete the files, restart the machine, and then run the installer.
Installation of hybrid package fails silently on a 64-bit Linux machine
Description
When installing the hybrid package of NetVault Backup on a 64-bit Linux machine, the installation process fails.
Symptom
No errors are reported; the installation process fails silently.
Quest NetVault Backup 11.3 Installation GuideTroubleshooting
54
Solution
This issue can occur if the required 32-bit libraries are not installed on the 64-bit Linux machines. If the installer cannot find the required libraries on the system, it may fail to run.
Try installing the software after installing the required libraries. For more information about the requirements, see Platform-specific requirements.
Upgrade fails on a client running Plug-in for DB2
Description
Upgrade fails on a Windows-based NetVault Backup Server or Client on which the Plug-in for DB2 is running.
Symptom
Upgrade fails because the installer is unable to delete the library files in the Windows\System32 folder due to sharing violations.
Solution
The Plug-in for DB2 causes this problem. When you run a DB2 backup or restore job, the DB2 Server process invokes the shared library used by the Plug-in for DB2. After the backup or restore job completes, the DB2 Server process does not unload the library and release the shared memory. During upgrade, the installer is unable to overwrite the library files because they are in use. So, the process fails.
To successfully upgrade the NetVault Backup Server or Client software, do the following:
1 Restart the DB2 Server. This step is necessary to unload the plug-in library and release the shared memory.
2 Restart the NetVault Backup Service.
3 Run the upgrade process.
Quest NetVault Backup 11.3 Installation GuideTroubleshooting
55
About us
We are more than just a nameWe are on a quest to make your information technology work harder for you. That is why we build community-driven software solutions that help you spend less time on IT administration and more time on business innovation. We help you modernize your data center, get you to the cloud quicker and provide the expertise, security and accessibility you need to grow your data-driven business. Combined with Quest’s invitation to the global community to be a part of its innovation, and our firm commitment to ensuring customer satisfaction, we continue to deliver solutions that have a real impact on our customers today and leave a legacy we are proud of. We are challenging the status quo by transforming into a new software company. And as your partner, we work tirelessly to make sure your information technology is designed for you and by you. This is our mission, and we are in this together. Welcome to a new Quest. You are invited to Join the Innovation™.
Our brand, our vision. Together.Our logo reflects our story: innovation, community and support. An important part of this story begins with the letter Q. It is a perfect circle, representing our commitment to technological precision and strength. The space in the Q itself symbolizes our need to add the missing piece — you — to the community, to the new Quest.
Contacting QuestFor sales or other inquiries, visit http://quest.com/company/contact-us.aspx or call +1-949-754-8000.
Technical support resourcesTechnical support is available to Quest customers with a valid maintenance contract and customers who have trial versions. You can access the Quest Support Portal at https://support.quest.com.
The Support Portal provides self-help tools you can use to solve problems quickly and independently, 24 hours a day, 365 days a year. The Support Portal enables you to:
• Submit and manage a Service Request.
• View Knowledge Base articles.
• Sign up for product notifications.
• Download software and technical documentation.
• View how-to-videos.
• Engage in community discussions.
• Chat with support engineers online.
• View services to assist you with your product.
Quest NetVault Backup 11.3 Installation GuideAbout us
56