inPhoto ID Webcam - ID photo software. Canon & web camera ... · inPhoto ID Webcam is designed for...
24
inPhoto ID Webcam Automatic ID photography With web cameras User Guide 2015
Transcript of inPhoto ID Webcam - ID photo software. Canon & web camera ... · inPhoto ID Webcam is designed for...

inPhoto ID Webcam
Automatic ID photography With web cameras
User Guide
2015

inPhoto ID Webcam: User Guide A.V. Povarkova, www.akond.net
2
Akond company Russia, St.-Petersburg, Serdobolskaya, 65a Phone/fax: +7(812)384-6430 Cell: +7(921)757-8319 e-mail: [email protected] http://www.akond.net inPhoto ID Webcam User Guide © 2015 A.V. Povarkova Information in this document is subject to change without notice. This document is a property of A.V. Povarkova. It may be copied or transmitted to a third party only in its complete form with no omissions; all trade marks and copyrights be preserved. Any changes or amendments shall be agreed upon in writing with A.V. Povarkova.

inPhoto ID Webcam: User Guide A.V. Povarkova, www.akond.net
3
Content Introduction 4 Software package and PC requirements 4 Camera and software installation 5 inPhoto ID Webcam operation 6 About company 24

inPhoto ID Webcam: User Guide A.V. Povarkova, www.akond.net
4
1. INTRODUCTION Thank you for purchasing inPhoto ID Webcam software! inPhoto ID Webcam is designed for full control of all standard Windows web cameras, automatic ID photography, image transfer to TWAIN compatible ID card management software and image databases, or save to disk. inPhoto ID Webcam can work both as the stand alone application and as TWAIN driver with any program supporting TWAIN protocol (e.g. Incardex, Asure ID, Card Five, ID Works, EPISuite, ID Flow, etc.). Connect your web camera to computer, install inPhoto ID Webcam software, and enjoy working with your camera from within any card management application supporting image acquisition via TWAIN. Basic features of inPhoto ID Webcam software:
• Ability to work as TWAIN driver. • Ability to work as stand alone software. • Camera settings control from computer. • Live image preview. • Image rotation: manual by 90 degrees. • Automatic face detection on the live image in preview window • Automatic image capture. • Automatic face crop on the captured image. • Image resizing and enhancement. • Image export to the TWAIN compatible software (e.g. to ID card
design and management software. • Save images to the specified folder.
2. SOFTWARE PACKAGE AND PC REQUIREMENTS Software package includes the following: 1. Setup file (inphotoidwebcam.exe file), 2. User Guide (inPhotoIDWebcam_Userguide.pdf file - downloadable from www.akond.net), 3. Serial number to activate the software.

inPhoto ID Webcam: User Guide A.V. Povarkova, www.akond.net
5
PC requirements: - Windows XP SP3, Windows Vista, Windows 7 (including 64bit), Windows 8 - Free 20MB on hard disk for the software files, - Microsoft .NET Framework 3.5 Service Pack 1, - One free USB 1.0 (or higher) port to connect your web camera to PC, Supported cameras: inPhoto ID Webcam software supports all standard Windows web cameras, for example, Logitech and Microsoft web cameras. Recommended Logitech cameras: - Logitech HD Webcam C920 / 930 Recommended Microsoft cameras: - Microsoft LifeCam Studio Both cameras can be mounted on a standard tripod.
3. CAMERA AND SOFTWARE INSTALLATION InPhoto ID Webcam software installation If the software is supplied with the Serial Number:
1. Run inPhoto ID Webcam Setup file and install the software. 2. Activate your license using on-line or off-line activation and
enjoy working with inPhoto ID Webcam. Web camera installation and preparation
1 Connect your web camera to PC with the standard USB cable. 2 Run inPhoto ID Webcam. You shall get the live preview
window on the PC monitor. Final check After you perform all above steps please check the following:

inPhoto ID Webcam: User Guide A.V. Povarkova, www.akond.net
6
1 Your web camera is connected to PC with USB cable and operates well.
2 inPhoto ID Webcam software is installed on PC. inPhoto ID Webcam start up Now you can run inPhoto ID Webcam software as TWAIN source from all TWAIN compatible applications.
• If you work with Incardex (ID card software) click on the photo with the right mouse button, select inPhoto ID Webcam driver in a list, then double click on the photo field, and inPhoto ID Webcam will be started.
• If you work in Adobe Photoshop go to File / Import / inPhoto ID Webcam.
• If you work in Jasc Paint Shop Pro go to File / Import / TWAIN / Select Source, and select inPhoto ID Webcam. After the source is selected use Acquire command (File / Import / TWAIN / Acquire).
• If you work in other third party applications supporting TWAIN please refer to the corresponding documentation supplied with your graphic software.
You can also run inPhoto ID Webcam as stand alone software (Start – All programs – inPhoto ID Webcam). After inPhoto ID Webcam is started up you will get the live image in the image preview window. Attention! The live image can be not sharp, dark, with not natural colors, etc. In order to get proper image in the preview window and start capturing photos please read the next Chapter. 4. INPHOTO ID WEBCAM OPERATION inPhoto ID Webcam window The program window view has two sections: the Image Preview area (on the left) and the Control Panel (on the right).

inPhoto ID Webcam: User Guide A.V. Povarkova, www.akond.net
7
The menu in the upper part of the software window provides access to inPhoto ID Webcam commands and settings.
Figure 1. inPhoto ID Webcam window.
In the Image preview area you can see live image of the object to be captured. Live image preview provides an ability to control image quality before capture and change camera settings if necessary. When you change camera settings you can see live preview changing in Image preview area. The Control Panel includes 8 controls: Capture to TWAIN, Capture to file, Rotate right, Rotate left, Update AE/AF, Camera settings, and Processing settings. Press Capture to TWAIN to capture image to TWAIN compatible application. Press Capture to file to shoot the photo and save image file to disk. Press Rotate right or Rotate left to rotate live image in the Image preview area. Press Update AE/AF to update automatic exposition / automatic focus settings if they have been changed. Press Update AE/AF button to update the automatic focus and automatic exposure.

inPhoto ID Webcam: User Guide A.V. Povarkova, www.akond.net
8
Capture to TWAIN button will be disabled if inPhoto ID Webcam is started as stand alone application. In order to be able to capture photos to TWAIN compatible software inPhoto ID Webcam shall be run from a TWAIN compatible software. If you press Camera settings button the Camera settings window will open. This window provides an ability to control the settings of your web camera from the personal computer with inPhoto ID Webcam software.
Camera settings control Web camera settings control is performed in Camera settings window. Press Camera settings button in the right part of the software window to revoke Camera settings window. This window has two tabs: Video and Camera settings. On the Video tab you can adjust brightness, contrast, hue, saturation, and other parameters. On the Camera settings tab you can set the shutter.
Figure 2. Camera settings Video tab. The tab view depends on the
camera model.

inPhoto ID Webcam: User Guide A.V. Povarkova, www.akond.net
9
Figure 3. Camera settings, Camera settings tab. The tab view depends
on the camera model.
When you select all Canon Powershot camera settings as you need for your application it is possible to close the Camera settings window by pressing Camera settings button again or by clicking Close button in the upper right corner of Camera settings window. Click Camera format to open the Camera format window. Camera format In order to be able to select the desired image format click the Image format button on the Control Panel in the right part of the software window.
inPhoto ID Webcam: User Guide A.V. Povarkova, www.akond.net
10
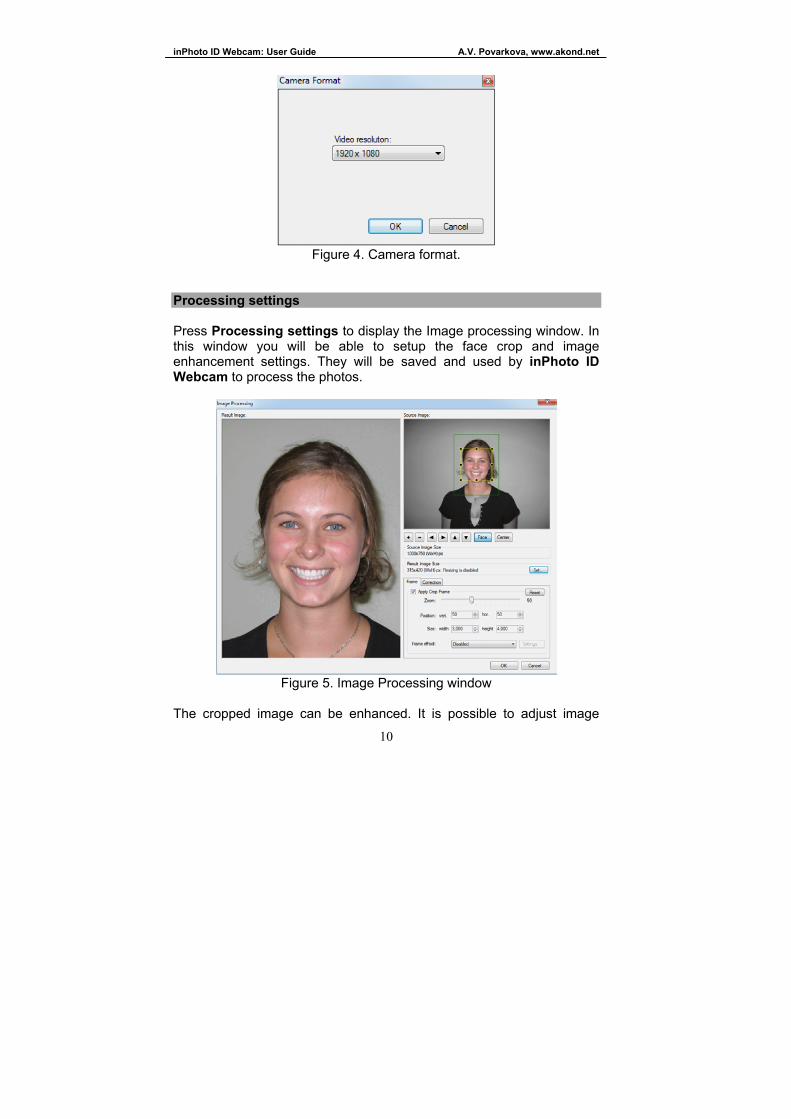
Figure 4. Camera format.
Processing settings Press Processing settings to display the Image processing window. In this window you will be able to setup the face crop and image enhancement settings. They will be saved and used by inPhoto ID Webcam to process the photos.
Figure 5. Image Processing window
The cropped image can be enhanced. It is possible to adjust image

inPhoto ID Webcam: User Guide A.V. Povarkova, www.akond.net
11
brightness, contrast, gamma, and sharpness using the corresponding controls in the right part of the Image Processing window. The Image Processing window has the following areas:
• Source image area. If Apply Crop Frame is checked the human face will be outlined by the yellow frame (shows the face found) and by the green (or red) frame (cropping frame).
• Processed (cropped) image area. • Information on the source image size. • Information on the image resizing options. • The crop frame parameters area. • The photo enhancement and resizing area.
Figure 6 Image Processing window: areas and controls.
Make the desired settings in the Image Processing window and they will be used for the automatic processing of the source images.

inPhoto ID Webcam: User Guide A.V. Povarkova, www.akond.net
12
Source image and crop frame The face area is automatically outlined by the yellow frame. The user can change the yellow frame size and position if necessary. The green (crop) frame outlines the result image area on the source image. The Crop frame is built automatically and can not be changed manually. This ensures a constant position of the person face on the resulting image. If the face on the image is not recognized automatically you have an option to outline the face area manually. If the face is located too close to the image frame and the area to be cropped is cut by the image border, the frame color will change from green to red. You can turn the crop frame on and off by checking Apply Crop Frame checkbox.
1. Zoom Using the Zoom slider set up the face percentage on the resulting ID photo. "70" value means that the human face will be occupy approximately 70% of the full cropped photo. If you use the same Zoom value for the photos to be processed you will get the consistent resulting images having the same size and the same surrounding area / face area ratio. The faces of a small child and a large adult person will have the same size in the resulting images. This is in full compliance with the requirements for ID images, and also allows better identification when these images are used in electronic or printed form.
2. Position Vertical and Horizontal Position Vertical and Horizontal controls allow you to change the face position on the resulting image. Using these controls you can change the position of the yellow frame center to the crop (green) frame center. In other words you can shift the green frame horizontally or/and vertically.
Adjust Position vertical and Position horizontal values to set up the face position on the resulting photo. The left bottom corner of the resulting photo corresponds to Position vertical "0" and Position horizontal "0". Set the Position vertical and Position horizontal to "50", and the face center will be located in the center of the resulting ID

inPhoto ID Webcam: User Guide A.V. Povarkova, www.akond.net
13
photo. Set the Position vertical to "25", and the distance above the face center will equal to 25% of the total photo vertical size.
3. Size Set the actual photo size. You can use either round values (e.g. 3 х 4) or fractional values (e.g. 3,5 x 4,5). 4. Rounded corners. The ID photo corners can now be rounded. The corners color and roundness radius are optional. To reset all the settings to default values, click Reset button. 5. Frame effect. For now the Rounded corners option is available. New options will be added in the future.
Resizing You can customize the resulting image size in pixels. This allows all produced files to be the same size, as well as reduce file size. File size is important in order to save disk space or database size. In the case of large database ID image size reduction can strongly reduce overall database size, which prevents the slow down and improves its reliability. Resizing in inPhoto ID Webcam reduces the size of resulting image. Image size increasing can not be performed. Resizing can also increase the image quality. You can shoot the image with maximum size, regardless of the size required, and then resize it to desired value. In this case resizing leads to improved output image quality.
Figure 7
inPhoto ID Webcam: User Guide A.V. Povarkova, www.akond.net
14
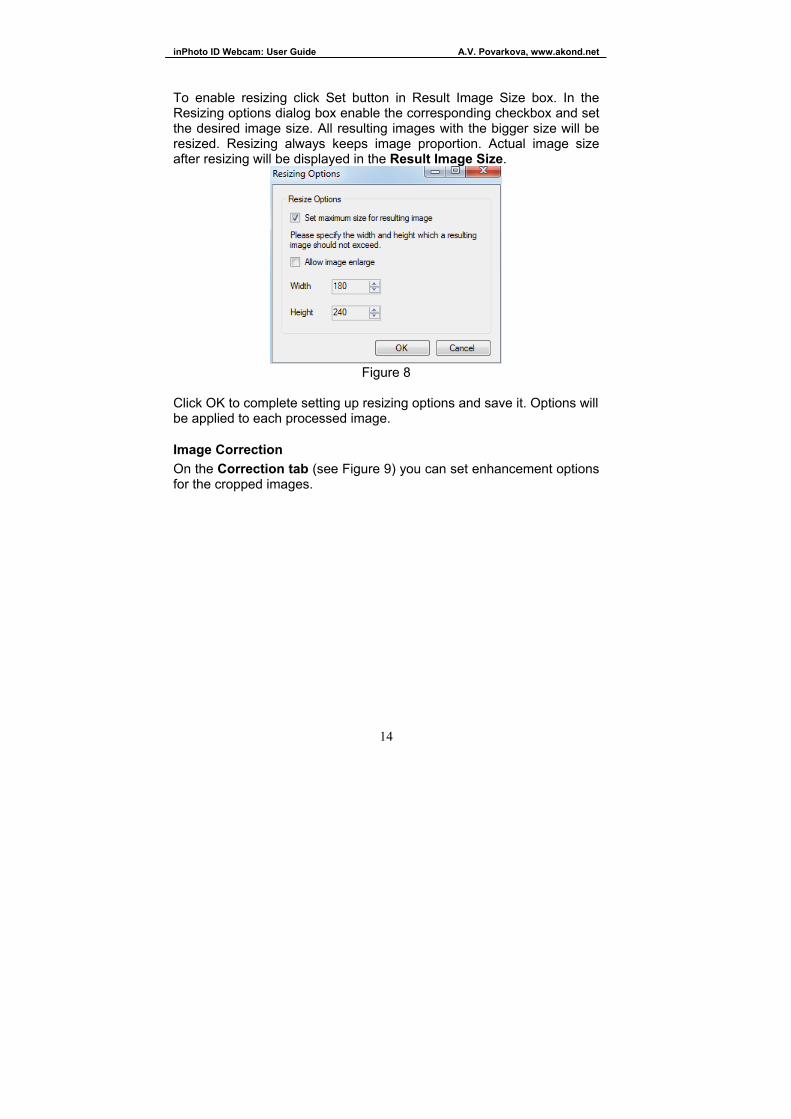
To enable resizing click Set button in Result Image Size box. In the Resizing options dialog box enable the corresponding checkbox and set the desired image size. All resulting images with the bigger size will be resized. Resizing always keeps image proportion. Actual image size after resizing will be displayed in the Result Image Size.
Figure 8
Click OK to complete setting up resizing options and save it. Options will be applied to each processed image.
Image Correction On the Correction tab (see Figure 9) you can set enhancement options for the cropped images.

inPhoto ID Webcam: User Guide A.V. Povarkova, www.akond.net
15
Figure 9. Image Processing window: general view, Correction tab
The cropped photo can be enhanced. It is possible to adjust image brightness, contrast, gamma, and sharpness using the corresponding controls. Brightness control allows you to make the image brighter or darker. Contrast is used if a face has little gradation. Gamma allows for both options - at the same time increasing or decreasing the brightness and contrast. Sharpness allows you to emphasize image details. It can improve the image when shooting was not enough in focus, or shooting conditions and camera quality do not allows to get a good focus image. For example, if the image was captured by the low-end webcam, the small value of sharpness can help to improve the image details and make result image of better quality.
WARNING! These improvements are only based on information obtained from the image. So they can not fix a broken shot, to restore the image, or to correct shooting

inPhoto ID Webcam: User Guide A.V. Povarkova, www.akond.net
16
errors. We recommend working with the images of good quality to minimize the necessity of any improvements.
To reset all the settings to default values, click Reset button. Live image preview Image preview (see Figure 1) is very important for image quality control and adjustment before capture. inPhoto ID Webcam software provides the dynamic image preview. The dynamic preview mode provides an ability to control the image quality before capture. All changes made to the web camera settings have effect on the previewed image immediately after they are performed. The rotated image will be displayed in the preview window if the corresponding controls are selected (Rotate right or Rotate left). The automatic face detections will be performed in the preview window if the corresponding settings are made on the Processing tab of the Options dialogue box (see Options). The yellow frame on live image in the preview window automatically outlines the face area. The green frame outlines the image area which will be cropped. The green/yellow frame ratio is adjusted by the sliders in the Image Processing window. If it is necessary to change the green/yellow frames position and aspect ratio, capture an image (the Image Processing option shall be selected on the Processing tab of the Options window) and make required adjustments in the Image Processing window. After that press Back button to return to the Image Preview window. If the face is located too close to the image frame and the area to be cropped is cut by the image border, the frame color will change from green to red. Press Capture to TWAIN button to capture the image and transfer it to the TWAIN compatible software. Press Capture to TWAIN button to capture the image and transfer it to the TWAIN compatible software. Capture to TWAIN control will be disabled if inPhoto ID Webcam is started as stand alone application.
inPhoto ID Webcam: User Guide A.V. Povarkova, www.akond.net
17
Press Capture to file button to capture the image and save it in a folder specified on the Save file tab of the Options window (see Options). Image rotation Working with inPhoto ID Webcam software the user can rotate the image in the Preview window. The rotated image will be captured either to the TWAIN compatible application (if the software is run as TWAIN driver) or to file (if the software is run as stand alone application). There is an option of manual image rotation by 90 degrees. The ability of manual image rotation is very useful for different applications including the object photography, and jewel photography in particular. The user can easily select the desired angle for the best presentation of the object. In order to rotate the image click Rotate right or Rotate left controls on the Control panel.
Face crop and image enhancement After the image is captured the face area can be cropped. Upon pressing the Capture to TWAIN button in the image preview window the Image Processing window will be invoked (see Figure 10). This window can be skipped off if the corresponding settings are made in the inPhoto ID Webcam options. This window provides an ability to crop the face area (automatically or manually), and enhance the resulting image if necessary.

inPhoto ID Webcam: User Guide A.V. Povarkova, www.akond.net
18
Figure 10. Image Processing window.
The face area is automatically outlined by the yellow frame. The user can change the frame size and position if necessary. If the face on the image is not recognized automatically the user has an option to outline the face area manually. The green frame outlines the image area to be cropped. The yellow frame / green frame ratio and position are adjusted by Zoom, Vertical offset, and Horizontal offset controls. User Size width and Size height boxes to set the resulting image size. If the face is located too close to the image frame and the area to be cropped is cut by the image border, the frame color will change from green to red. In this case the user has three options: ignore, modify the image frame, or press Back button and return back to the image preview window. The cropped image will be displayed in the right part of the Image Processing window.

inPhoto ID Webcam: User Guide A.V. Povarkova, www.akond.net
19
The cropped image can be enhanced if you are not quite satisfied with the resulting image quality. It is possible to adjust image brightness, contrast, gamma, and sharpness using the corresponding controls in the right part of the Image Processing window. It is also possible to resize the resulting photo. For this press Set… button in the right part of the Image Processing window and set the required image size in pixels in the corresponding window. Press OK in order to transfer the cropped, resized, and enhanced photo to the TWAIN compatible application from which inPhoto ID Webcam has been started up. Image transfer and save inPhoto ID Webcam software provides an ability to transfer the captured images to TWAIN compatible applications for further processing. It is also possible to automatically save captured images to file. Press Capture to TWAIN button, and the previewed image will be captured and transferred to the TWAIN compatible software for further processing and saving.

inPhoto ID Webcam: User Guide A.V. Povarkova, www.akond.net
20
Figure 11. ID Photo acquired to Incardex software
When the image is captured and transferred the inPhoto ID Webcam window will either stay open or get closed (if the Close on capture option is selected on the Genera tab of the Options dialogue box. To reduce the software activation time for the next image capture check Hide to tray instead of close to hide inPhoto ID Webcam to tray when it is closed. The captured image will be displayed in the TWAIN compatible software (e.g. Incardex). When Capture to file option is used the image will be captured and saved to file on the disk. The user can set up the folder, and the rules for file naming. These settings are made on the Save tab of the Option dialogue box. See Options section for more details. Options The Options dialogue box (File menu) is used to set the options of inPhoto ID Webcam operation.

inPhoto ID Webcam: User Guide A.V. Povarkova, www.akond.net
21
The Options dialogue box contains 6 tabs. On the General tab it is possible to select the options of inPhoto ID Webcam start up and close process.
Figure 12. Options dialogue box, General tab
If Close on capture is checked the inPhoto ID Webcam will be closed after the image is captured and transferred to the TWAIN compatible software (or saved to file). Check Hide to tray instead of close to hide inPhoto ID Webcam to tray when it is closed. It reduces tremendously the software activation time for the next image capture. The Save file tab is used to define the save to file settings. It is possible to select the folder to save images to upon pressing Capture to file button and create separate folders for the year / month / day.

inPhoto ID Webcam: User Guide A.V. Povarkova, www.akond.net
22
Figure 13. Options dialogue box, Save file tab
Check Ask before saving box on the Save file tab of the Options dialogue box, and after the image is captured the Save as window will be displayed, and you will be able to give a name to the image file before saving. The file will be saved on disk in the specified folder with the name assigned. On this tab it is also possible to set the JPEG image quality and set the size limit for the resulting photo. The Language tab provides an ability to select the software language. New language settings will take effect after the software is restarted. The following languages are supported: English, Russian, French, Dutch. The Processing tab contains controls to set up face detection and image processing options.

inPhoto ID Webcam: User Guide A.V. Povarkova, www.akond.net
23
Figure 14. Options dialogue box, Processing tab
Check Image Processing to enable image processing after capture. The Show Processing Window group includes the following options:
• Never: the Image Processing window will not be displayed (will be skipped off), and the image will be processed according to the last settings made. If the face has not been found automatically the full image will be captured,
• Always: the Image Processing window is always invoked, • Show if necessary: the Image Processing window is displayed
when necessary, e.g. when the face is not recognized on the image, when the face is too close to the image frame, etc.
Check Auto Face Detection to activate the automatic face recognition and detection. Check Face Tracking on Preview to enable dynamic face detection in the preview window. Voice control tab is used to select the commands to control the web camera by the voice. Informant tab is used to enable/disable the voice informer.

inPhoto ID Webcam: User Guide A.V. Povarkova, www.akond.net
24
Select camera dialogue box called up from the Camera menu is used to select the Canon camera to be controlled from the inPhoto ID Webcam software. inPhoto ID Webcam software provides an ability to control several cameras connected to the computer. Select camera in the drop down list and control all settings of the selected camera model from your computer. 5. ABOUT COMPANY We hope that you install inPhoto ID Webcam software and learn how to use it with no problems, and that your work will be more effective and comfortable than before. Other software products offered by our company: ID Photo Software
• inPhoto ID SLR • inPhoto ID PS • ID Photo Processor
Camera control software • inPhoto Capture SLR • inPhoto Capture PS
ID card software • Incardex
Information on all above products can be found on www.akond.net. Please feel free to contact us if you have any problems, questions or any comments on inPhoto ID Webcam operation. Akond company Russia, St.-Petersburg, Phone/fax: +7 (812) 384-6430 Cell: +7 (921) 757-8319 e-mail: [email protected] http://www.akond.net