Innovations Project Report - NCCA · Innovations Project Report An exploration of the union of 2D...
37
Huw J Evans 1 Innovations Project Report An exploration of the union of 2D animation with a 3D animated environment Huw Evans BA (Hons) Computer Visualisation and Animation Level H Spring 2006
Transcript of Innovations Project Report - NCCA · Innovations Project Report An exploration of the union of 2D...
Huw J Evans
1
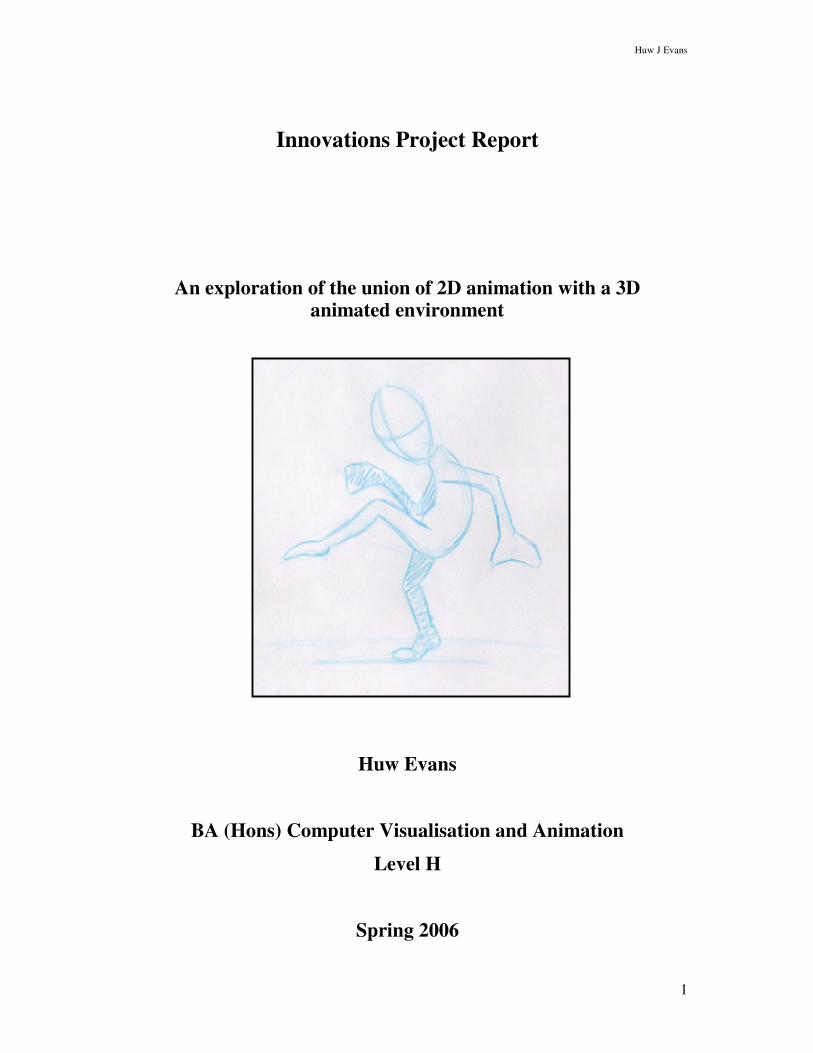
Innovations Project Report
An exploration of the union of 2D animation with a 3D animated environment
Huw Evans
BA (Hons) Computer Visualisation and Animation
Level H
Spring 2006

Huw J Evans
2
Index
1. Introduction
1.1 Aim Page 4
1.2 Product Page 4
1.3 Introduction Page 4
1.4 The Project as an Innovation Page 5
2. Production methods and Disciplines
2.1 Exploring 2D Animation Techniques Page 7
2.2 Exploring 3D Computer Animation Page 13
3. Combing the two methods
3.1 So why use our computers? Page 16
3.2 Creating my own mixed-discipline animated short Page 19
3.3 The Story Idea Page 19
3.4 Initial Testing Page 19
3.5 Design Stage Page 20
3.6 Animatic Page 21
3.7 Hand-drawn testing Page 22
3.8 Final Animation Page 24
4. Compiling the Animation for Viewing
4.1 Digitizing Images Page 28
4.2 Clean-Up Page 28
5. Conclusion
5.1 Critical Analysis of my work Page 30
5.2 Regrets Page 30
5.3 What I’ve learnt about both disciplines Page 31

Huw J Evans
3
6. References
6.1 Books Page 34
6.2 Films Page 34
6.3 Internet Page 35
7. Appendix
Huw J Evans
4
1. Introduction to the Project
1.1 Aim
To firstly formulate a comparative analysis of existing production disciplines
and to investigate the techniques and methods used in both 2D and 3D productions. I
will then back up this investigation by using these techniques for the creation of my
own animated.
1.2 Product
A 4 second animated short illustrating the merger of traditional 2D hand-
animated style with the more recent 3D computer animated style.
1.3 Introduction
‘Animation can explain whatever the mind of man can conceive.’
Walt Disney
This project is about an exploration of two apparent disciplines of animation;
traditional hand drawn animation, and modern three dimensional computer animation.
It will look at the techniques and methods used throughout a project’s development
and explore the reasons and the need for computer animation being born out of this
traditional approach. It will also review the creation of a merger between the two
styles (predominantly through the films of Walt Disney) and illustrate the effect this
has had on the industry. I will also be looking personally at how important it is to
understand the underlying principles of traditional animation in order to successfully
move into three dimensional computer animation.
Steve Roberts explains,
‘A computer can take a lot of the drudgery out of animating, but you can end
up doing a piece of animation without quite understanding how it happened

Huw J Evans
5
and whether it works or not.’
Steve Roberts, 2004
Through this project I have the aim of learning another aspect of animation I was
previously unfamiliar with - hand drawn animation - and seeing how I can apply what
I learn directly to my current knowledge of computer animation. The final animation I
produce as a result of my research will be a short piece of mixed disciplined work
combining 2D and 3D into a single effective production.
I will firstly explore the 2D animation process in detail, comparing it to that of the 3D
process. Then uncover the reasons for these styles decidedly merging and computers
being used for an increasing amount of work within predominantly 2D productions. I
will then outline my own animation pipeline and discuss problems and solutions I
encountered whilst creating my own work, before looking back on the finished
product and constructively criticising it, learning from my mistakes. The final chapter
will conclude the project.
1.4 The Project as an Innovation
There is nothing really innovative about the process of traditional animation
since it has been around for over 200 years.
‘Persistence of vision was first discovered in the 1800s. This led to such
devices as the zoetrope, or "wheel of life" to be created.’
(Rick Parent, http://www.siggraph.org/education/materials/HyperGraph/animation/rick_parent/Intr.html)
Similarly the process of computer animation has also become well engraved into
today’s industry. However, the subtle combining of these two disciplines is an
innovation that I feel has too quickly come and moved on. Mixing the hand-drawn
with the computer generated developed too quickly into fully 3D productions and
seems to be continuing that way.
There doesn’t seem to be anywhere near enough emphasis today on the importance of
life drawing, or acting. As Milt Kahl (Disney’s master animator) explained,

Huw J Evans
6
‘I don’t think it’s possible to be a top notch animator without being an
excellent draftsman…You need that figure drawing background in order to
sharpen. Every animator should have this background and unfortunately they
don’t!’
Milt Kahl (The Animator’s Survival Kit. Pg 24)
Having studied computer animation for 3 years now, I still find it unsettling that at no
point have I been taught, or decided to learn about traditional hand-drawn animation.
Nor even thought about the improvements this may bring to my computer animated
work. It seems that computer animation students can quite easily sit down at a
computer and work away through trial and error to create something that looks
reasonable. In comparison, traditional animation students study the subject in
incredible detail and not surprisingly, produce far better results.
Those who have mastered the art of animation may find it relatively easy to transfer
their skills to a computer program with relatively small problems. However, for a
computer animator to suddenly switch to traditional animation naturally proves a lot
more difficult, almost as if it’s a step backwards.
I hope to be innovative in my work as a computer animator by taking this step
‘backwards’ and exploring the production methods and skills involved with traditional
animation, in the hope of being able to apply what I have learnt to my current work.
While not aiming to create a completely traditional piece of animation for a final
product, I will still retain the element of computer animation through the use of a CG
background and animated camera move which my hand-drawn character will fit into.

Huw J Evans
7
2. Production Methods and disciplines
2.1 Exploring 2D Animation Techniques
In order to embark on this animated project, it seemed the only logical thing to
do was explore the various methods used to animate something - from both traditional
disciplines and computer aided, before trying to implement them into my production
pipeline.
Although methods are continually changing regarding the production of animated
films, the essence of the process still remains much unchanged. Tony White brings up
the point that both traditional 2D animation and more modern 3D animation, and even
live action filming in general all start with the ‘same crucial stages of production’.
(The Animator’s Workbook 1986).
These crucial stages, highlighted by Tony White, consist of,
----Scripting
This stage is probably the most important stage of any film production. Without a
good script, a project is destined to fall flat, no matter how flashy or clever it may be
in other aspects.
‘…the most important factor in the success of an animated feature has always been its
story…the medium is absolutely the least important.’
(http://www.mouseplanet.com/david/dk030814.htm)
Animated films in particular rely more heavily on the visual scripting at this stage
where as a live action film would be more concerned with dialogue.
----Storyboard
At this stage, the actions dictated in the script are visualised graphically. A lot of
changes take place during this early stage before getting too far into the production to
correct anything easily.

Huw J Evans
8
----Designs
Every character, background and prop from the script must be assigned a visual
interpretation. At this stage they are by no means final however. A few preliminary
character sketches later turn into character ‘model’ sheets portraying the character
from every angle and in a number of different ‘action’ poses, adding an element of
life to the initial sketches. These model sheets make it easier for the team of animators
to be consistent with regards to the character’s appearance.
----Animatic
An animatic is basically a filmed version of the storyboard which has been edited to
give an impression of the final cut film. It serves as an excellent test of not only the
script, but also the timing, action planning and soundtrack of the animation prior to
starting the costly process of final production. This is the stage where the director will
make most changes.
----Animation Layout
Producer / Director Raul da Silva summarizes this stage,
‘This step is used in setting up extremes for character to be used by the key
animator…It conveys different information to the storyboard as it gives you an
idea of the action required in the sequence of motion and shows the most
extreme character poses in the sequence.’
(The World of Animation 1979, p.37)
It is at this point during the production stages that the more traditional methods of
animation are no longer adhered to with the introduction of computer technology to
the field. The computer pipeline will be explored shortly. However, continuing with
the stages of a 2D production,
----Pencil Tests
After the animatic is approved and all animation layouts completed, work is passed on
to the animators to begin this two-stage process. The first stage involves a key
animator who must first decide which method of animation he or she will be using.
There are three key methods,

Huw J Evans
9
STRAIGHT AHEAD
The director for Sleeping Beauty, Woolie Reitherman describes his view on animating
‘straight ahead’,
‘When I didn’t know what I was doing in an action, I always went straight
ahead. I’d just start on ones. Half the time I didn’t know what I was doing. To
me, it’s fun. You find out something you wouldn’t have found out otherwise.’
(The Animator’s Survival Kit - page 61)
It is basically the idea
that you just start
drawing and see what
happens. It is a natural
progression from
frame to frame
without much forward
planning.
Richard Williams describes the advantages and disadvantages of this approach,
Advantages:
- Produces a natural flow of fluid, spontaneous action
- Has the vitality of improvisation
- It’s very creative to ‘go with the flow’ taking all the action as it comes along
- The unconscious mind kicks in
- It can produce surprise ‘magic’
- Its fun
Disadvantages:
- Things can start to wander
- Time stretches and the shot consequently lengthens
STRAIGHT FORWARD. The action of a man walking along, picking up a piece of chalk, then writing on a blackboard - illustrated using the ‘straight ahead’ method of animation.
© Richard Williams.

Huw J Evans
10
- Characters may unexpectedly grow and shrink
- Can miss the point of the shot and not arrive in right place at the right time
- The director can’t see what’s happening
- There is a lot of clean up afterwards and so the process is hard to assist
- It is an expensive way to work
- It’s also hard on the nerves
POSE TO POSE
In this approach, one first decides the most important drawings, or the story telling
drawings, then puts them in. Then one must put in the extremes or contact positions
and any other important poses. Then it is a case of working out the nicest transition
between two poses, known as the breakdown or passing poses.
It is also advisable to make clear charts to ease in and out of positions and add any
finishing touches or indications for the assistant before any inbetweens are created, as
Grim Natwick, creator of Betty Boop, reminds us,
‘Bad inbetweens will kill the finest animation.’
(The Animators Survival Kit. page 52)
Again Richard Williams does well to describe the advantages and disadvantages of
this approach,
Advantages:
- Clarity
POSE TO POSE: Starting off with the extremes so we know exactly what needs to happen in the scene. Then go back and add in all the contact positions. © Richard Williams.

Huw J Evans
11
- The point of the scene is nice and clear
- It is a structured, calculated and logical way of working
- Produces nice drawings and clearly readable positions
- It’s in order - the right things happen at the right time, in the right place
- The director likes it
- It is easy to assist
- It is a quick way to work
Disadvantages:
- Misses the ‘flow’ of animation
- The action can be choppy and unnatural
- It can be too literal, having no surprises or no ‘magic’
COMBINATION OF STRAIGHT AHEAD AND POSE TO POSE
This method involves first planning out what one is going to do in thumbnail
sketches. Then making big key drawings and big extremes, placing in all the
important poses along the way. This forms the structure of the animation but is only
there to act as a guide for things and places to aim at. It shouldn’t be adhered to
rigidly. It is then time to do several straight ahead runs on different parts. This may
mean having to revise some keys and extremes along the way. The point is to keep
adding to the detail; continually adding more runs (e.g. legs first, then body, then
arms, then head, then hair or drapery bits).
The advantages and disadvantages of this approach, according to Richard Williams,
Advantages:
- Combines the structured planning of the ‘pose-to-pose’ method with the
natural freedom of the ‘straight ahead’ method
- Creates a balance between planning and spontaneity
- Creates an important balance between cold-bloodedness and passion
Disadvantages:
- None

Huw J Evans
12
(Richard Williams - The Animator’s Survival Kit)
A quality animator has already given the character ‘life’ at this stage, even through
just a few keys and extremes. They want to make sure nothing is left for change when
passing the work on to the inbetweener.
The second key task during the pencil test stage is that of ‘inbetweening’. It is the
inbetweener’s job to draw the specified number of poses between the key and passing
positions created by the key animator. It is also vitally important that they are drawn
at the specified spacing. Given too much freedom, the inbetweener has the ability to
completely flatten any quality animation.
This animation can be tested along the way either by ‘flipping’ the sheets like a flick-
book or sending the frames off for printing and reviewing as a film clip. As Richard
Williams illustrates,
‘Pencil tests are our rehearsals’
(page 68)
----Clean-up
As no two animators draw exactly alike, the
clean-up artist is required to make overall
work from animator to animator consistent
from a design and drawing point of view. It
is there job removing some of the ‘testing’
scribbled lines that occur naturally when
conveying a sense of motion through
drawing. Through doing this, they
ultimately reduce every drawing to single
tidy linz\0.es. This process allows animators
to be freer with their work without having
to concentrate on the tiniest of details
concerning the design of the character, as
these can be corrected or picked up on
during the clean-up stage. After cleaning,
CLEAN-UP: Initially sketchy drawings are taken to a clean-up department who transform them into simplified line drawings. © Don Hahn

Huw J Evans
13
the drawings are then re-shot to ensure no errors have crept in which may throw off
the animation.
----Inking
After the director approves the cleaned-up animation, each drawing would
traditionally be transferred to thin sheets of acetate known as cells, and then painted
by hand according to the original designs. Using today’s methods however, drawings
are digitally scanned then coloured within a computer, cutting time and cost
dramatically.
----Checking
The checker must catch any mistakes before the project enters the final stages of
production. These might include broken lines, dirt on the acetate, painting mistakes or
accuracy of written instructions for the compositor / cameraman.
----Compositing
Once the checker is satisfied, all the artwork and camera instructions are passed on to
the cameraman or the digital compositor in more modern day productions, who’s job
it is to bring together all the digital elements including animation, backgrounds and
special effects.
----Final Edit
Unlike with live action filming, the animation final edit isn’t very creative, in that the
director has essentially made all the timing and filmmaking decisions during the
animatic stage. It serves more as a technical compilation process. Simply slotting all
the finished scenes into the initial animatic framework and replacing the pencil tests
with final prints ready for viewing on the big screen.
2.2 Exploring 3D Computer Animation Techniques
As described previously, there are a number of stages that must be included
regardless of the animation discipline, be it 2D or 3D. In exploring the production
processes undertaken in the creation of a computer animated feature, I looked towards
the most established company in that field, Pixar animation studios.

Huw J Evans
14
‘The Pixar process’ is described quite effectively on their website,
(http://www.pixar.com/howwedoit/index.html#)
Pixar films go through four key stages;
Development - creating the storyline
Pre-Production - addressing technical challenges
Production - making the film
Post-Production - ‘polishing’ the final product
1 - First a story idea is pitched, like a sales pitch. The challenge is to get the audience
to believe in the idea and see the possibilities in it.
2 - Nest the text treatment is written. This is a short document that summarizes the
main idea of the story. A few treatments may be made on the same idea to find the
best balance between solid ideas and open possibilities.
3 - Storyboards are drawn. Each storyboard artist receives script pages and / or a ‘beat
outline’, which is essentially a map of the characters’ emotional changes that need to
be seen through its actions. Using these actions, the artists design their storyboard
panels and pitch them to the director.
4 - The first temporary ‘scratch’ voices are recorded by Pixar artists for storyboard
reels. When the story and dialogue are closer to being finalised, professional actors
begin recording character voices, reading from a script and improvising. Actors must
record their lines several different ways. This is so the director has the ability to use
the best vocal take to eventually be animated to.
5 - Editorial begins making the reels. A reel allows the cleaned up storyboard
sequence to stand alone without having someone stood alongside pitching the story. It
is an excellent tool in reviewing the timing of the sequences.
6 - The art department creates the ‘look and feel’. Based on the text treatment and
provided storyboards (and of course their own imagination), characters, sets, props,
surface textures and colour scripts are designed.

Huw J Evans
15
7 - Taking the designs from the art department, characters, sets and props are first
either sculpted by hand, then scanned in three dimensionally, or modelled directly in
the computer in 3D. They are then rigged with a skeleton ready for animators to
animate with.
8 - After the virtual sets are built in 3D they must be dressed with prop models such as
furniture or just random objects in order to create a believable world.
9 - The layout crew then choreographs the characters within the set and uses a virtual
camera to create effective shots that capture the emotion and story point of each
scene. Often multiple versions of shots are provided to the editorial department giving
them choices for cutting the scene in order to gain maximum storytelling effect. Once
the scene has been cut, the final version is sent to the animators.
10 - The shot is then animated. Unlike 2D animation, computer animators are like
puppeteers. They are provided with the character models in various sets and have to
choreograph the movement and facial expressions for each scene. Like with
traditional animation, firstly key poses are defined allowing the computer to fill in the
in-betweens, which the animator then adjusts as necessary to get the look they require.
11 - The sets and the characters are then shaded. While the shape is determined by the
model, the surface colour and texture is determined by the shader.
12 - Lighting is then employed to complete the look. Using digital light, every scene
is lit in much the same manner as stage lighting. Key, fill, bounce and room ambience
lights are all defined and used to enhance the mood and emotion of each scene.
Lighting is inspired by the moody colour scripts created previously within the art
department.
13 - All the computer data is then rendered. The process of rendering translates all of
the information in the files that make up the shot - i.e. the sets, colours, character
movement, lighting etc - into a single frame of film incorporating motion blur as and
when it is needed. Each frame represents 1/24 of a second of screen time and at Pixar,
takes on average about six hours to render - though some frames have taken as many
as ninety hours!

Huw J Evans
16
14 - Final touches are then added. The editorial team oversees the completion and
addition of the musical score and any other sound effects. The effects animation team
will then add any special effects. The Photoscience department then records the digital
frames to film or to a form appropriate for digital projection.
3. Combining the two methods
3.1 So why use computers?
When was it decided that computers should be used and what was the first step made
in using 3D to extend or add to a predominantly 2D feature animation?
In 1982, Disney animators Glen Keane and John Lasseter experimented with
combining 2D and 3D animation with a 90-second test on author Maurice Sendak's
‘Where the Wild Things Are.’ Unfortunately due to costing issues, this project never
made it past the testing stage. However it did serve as an effective exercise in
inspiring the two to experiment further and later go on to revolutionize the medium at
Pixar Animation Studios and consequently direct several landmark computer-
animated films.
The big breakthrough was in 1985, where
3D imagery was starting to be
implemented into a predominantly 2D
film. Disney’s 25th
animated classic, ‘The
Black Cauldron’ was the first hand-
animated feature film to incorporate
elements of computer animation in it, and
was used for several inanimate objects,
including the cauldron itself.
‘The dimensions and volume of objects were fed into a computer and then
their shapes were perfectly maintained as their movement was generated by
BLACK CAULDRON: Built in 3D so that its shape was perfectly maintained regardless of the angle of view.
© Disney

Huw J Evans
17
programming.’
(http://disney.go.com/vault/archives/movies/blackcauldron/blackcauldron.html)
While this film was technically advancing into new grounds with regards to animation
production and practice,
‘The sheer lavishness of the production, did not guarantee huge grosses, and
the film was a box-office failure.’
(http://disney.go.com/vault/archives/movies/blackcauldron/blackcauldron.html)
This illustrates perfectly the point that adding flashy effects doesn’t make a story or a
production entertaining. Computer graphics should be there to enhance an animation,
not take precedence over it.
The next major step into three dimensions for Disney
was with their subsequent animated feature, ‘Basil the
Great Mouse Detective’ in 1986. Here 54 moving gears,
winches, ratchets, beams and pulleys inside the clock
tower of Big Ben were animated using the computer,
which although was only a small element of a big
picture, the idea had already served its purpose for adding otherwise overcomplicated
detail to enhance the original animation, which would otherwise have not been
attempted.
The first Disney feature animation to make
heavy use of computer animation, since these
previous films ‘The Black Cauldron’ and
‘The Great Mouse Detective’ had used it
only for special sequences, was 1988s
‘Oliver and Company’. Computer graphics
were used for making the skyscrapers, the
cars, the trains, Fagin's scooter-cart, the
climatic Subway chase, even the Brooklyn
Bridge, adding an extra dimension and an
extra excitement into the picture. It proved to
be a success and,
GEARED-UP: Computer technology allowed for creation of this complicated scene. © Disney
3D SCOOTER: Using computer graphics to build on a predominantly 2D production. © Disney

Huw J Evans
18
‘…was the first film to have its own department set up expressly for the
purpose of generating computer animation.’
(http://disney.go.com/vault/archives/movies/oliver/oliver.html)
Subsequent Disney film releases followed suit, each adding that little bit more using
computer technology. A prime example of arguably the best use of mixed animation
methods in any Disney feature animation is ‘Beauty and the Beast’. Most noticeably
is the ‘Ballroom sequence’ where Belle
and the Beast are dancing together.
Here, the characters are hand animated
within a computer generated room,
being filmed by a moving virtual
camera and reacting to the continually
changing perspective with incredible
accuracy. In a February 2002 interview
for ‘www.bigmoviezone.com’, director
Kirk Wise explained,
‘…we had an incredibly talented animator, James Baxter, who just had a
knack for moving characters in 3-d space. He had this chip in his head that
enabled him to perfectly match his drawings with a moving background.’
(http://www.bigmoviezone.com/articles/index.html?uniq=84)
It is scenes like this that capture the ‘magic’ of hand-drawn animation. Although this
scene could easily be recreated entirely using computer animation, would it still have
had the same captivating effect, and be remembered as,
‘…an important milestone in animated films’
(http://www.animationusa.com/wd02/wd155n.html)
BALLROOM SCENE: Quite possibly the best piece of animation done on any feature film. An incredible feeling for perspective. © Disney

Huw J Evans
19
3.2 Creating my own mixed-discipline animated short
Having explored both 2D and 3D production methods, one can deduce that
essentially, 3D animation is more an extension of traditional 2D animation, than it is a
separate entity, as they both rely on the same basic principles and methods, only
differing in practice and performance.
Using this research I went about formulating my own methods and working styles.
3.3 The Story Idea
My main inspiration was the ballroom scene from Disney’s ‘Beauty and the
Beast’. For me it had the perfect mixture of 2D animation within a 3D computer
generated environment. I wanted to create a similar shot with a moving virtual camera
inside a 3D scene then hand-animate a character following the same rules of
perspective as governed by the scene. Having no experience with traditional
animation, this was a very daunting prospect. Richard Williams’ ‘Animator’s Survival
Kit’ was excellent reference for getting to grips with animation and finding out where
to start and how to plan out what it was I wanted to achieve. I also found that Walt
Stanchfield’s Animation class notes (found on www.animationmeat.com) provided a
useful starting point for my work.
My initial thoughts were to keep things simple. With my lack of experience it would
be hard enough animating a character, let alone animating a character and a changing
perspective simultaneously. For this reason I firstly concentrated on getting a ‘feel’
for hand drawn animation with a few perspective tests.
3.4 Initial Testing
Using a 3D animation package (Maya), I created a basic room containing a
single cube. Then, adding a virtual camera, I plotted out a basic camera move -
moving from a ‘bird’s eye’ shot smoothly to a ‘side on’ shot. From the results of this

Huw J Evans
20
test, I had a satisfying camera move at an appropriate speed and so it was decided to
use the same length of shot for my final piece - 100 frames (or 4 seconds at 25fps).
Each of the 100 frames were rendered out
of Maya and brought into Photoshop as
layers. I then altered the opacity of the
rendered frames and traced out every 10th
frame using a graphics tablet. Then, hiding
the rendered frames, I tried to create the
inbetweens by hand and compared them to
the renders as I went. This served as quite
a good exercise as it got me into the ‘feel’
for changing perspective, especially
concerning the cube and how much it
changed with each consecutive drawing.
3.5 Design Stage
On completion of this test, it was then time to sketch out a rough ‘storyboard’
of my final scene and the camera move to be used. I wanted some kind of scenario
where I could incorporate a ‘sneak’ and the first thing that sprang to mind was a bank
robber creeping up to a valuable item he wishes to steal.
For designing the character I looked
primarily at Disney artwork and sketches,
as that is where my inspiration comes
from. I wanted a hint of ‘French-ness’
about his character for some reason and so
took inspiration from not only the Chef
from ‘Lady and the Tramp’, but also
Gaston from ‘Beauty and the Beast’ and
Clayton from ‘Tarzan’. With regards to
prominent features, I was interested in
CUBE TEST: My first perspective test. Offered an excellent insight into how shapes alter through changing perspective. © Huw Evans
CHARACTER DESIGN: Using Disney characters for reference, I designed the thief character with a hint of French about him.

Huw J Evans
21
giving my character a strong jaw and a large nose with a hint of mischief in the eyes.
Always peering through them half closed.
My initial character designs came up with quite a long
looking character with thin legs and arms but very large
hands and head. I thought the large hands would be useful
to express his character as he really wants this object and he
knows he’s not allowed to take it. His oversized head would
allow for expressive facial animation, and also leave me
with some room to be untidy with my drawings. I later
refined the character to be a lot shorter though as I thought
it provided a better contrast with the large head.
With regards to creating the environment, I decided to use a
very simple set, just a room with a cube in - similar to my
initial test - which will later act as a table or a plinth with an
expensive object displayed on it, as if in a museum.
3.6 Animatic
I firstly pencilled out a rough falling camera move which circles the character
and lowers perspective significantly. I wanted to keep it closely related to the camera
shot in my previous example as I thought it served its purpose well through testing.
I then created a basic ‘stand-in’ model of my sneaking character so I would have an
idea of where he should roughly be at each moment in time as he moves closer to the
‘jewel’. This helped me work out basic timing and to ensure I kept within the 100
frame limit I set myself.
Being a part of my animatic stage, it was here where I adjusted the timing of both the
character and the camera too see if the shot felt too rushed, or wasn’t focussed on
what I had intended.
It was at this stage when I realised I was ready to start planning my animation and
FINAL DESIGN: The final design for my thief character. Mischievous.

Huw J Evans
22
mapping out the key positions. However, I thought it wise that I try some more basic
animation tests, such as a character doing an action, while having no changing
perspective to confuse me. Not yet anyway!
3.7 Hand-drawn testing
The very first thing I tried whilst sat at the
lightbox was to draw my own hand clenching into a fist.
I just wanted to sample the benefits of having the ability
to see through to your previous drawings and my hand
was an easy to find subject. Having no idea about a
reasonable length of time for a convincing clench, I
decided to use only about 5 frames and just alter the
timing of the playback - just as a test to see change of
position and shape rather than timing. The results were
moderately successful, while not creating an animated
masterpiece, it did get me into the habits of flicking back
and forth between drawings and adjusting sections as
required until I thought it looked correct.
For the next step I decided to move onto a walk cycle, both as a means to practice the
art of animation, and to figure out a feeling for time scale. Having no idea how many
frames it takes for a two step cycle and what the effects are of adding or subtracting
frames, I decided to use some reference from Richard Williams’ book.
I explored the benefits of pose-to-pose animation through setting out the contact poses
and key-frames before adding the ‘in-betweens’. This felt like a good way to work
HAND: My first attempt at rough animation. Clenching my fist. © Huw Evans
WALK CYCLE: The first step of my 12 frame walk cycle. A pretty successful animation exercise.
© Huw Evans

Huw J Evans
23
and produced successful results. My first test was animated with 12 frames for two
steps and proved to be quite a success timing-wise. Although the resulting animation
is an on the spot cycle, it was animated travelling across the paper and later adjusted
in Photoshop to create an on the spot cycle for repeated viewing purposes. Very useful
in helping me spot mistakes as you can visually track points on the character and see
how smoothly they flow.
Through doing this, one quickly learns the importance of arcs of movement whilst
animating, and how without a smooth arc, movement looks incorrect or jumpy.
Steve Roberts explains,
‘When somebody looks to the side, their head will bob down through an arc.
When somebody jumps in the air, his or her trajectory will describe an arc.
Almost all movements made by any living thing will follow an arc.
If the character doesn’t follow arcs with its movement, your animation can
look stiff and robotic.’
(Steve Roberts - Character Animation in 3D. page 53)
In order to ensure I had smooth flowing arcs while I animated, I overlaid a sheet of
paper on top of my animation, and used it to track various points moving from frame
to frame - points such as the knees, or the wrists etc. On joining up these points, if the
resulting curve was smooth, then everything was ok. If a few points lay off the main
line, then I could easily tell which frames needed adjusting.
My next step was to advance from a walk cycle into a
sneak cycle in order to understand the timing required
for this slower movement. For this test I decided to
focus solely on the legs and the hips, keeping it a bit
simpler so as to not confuse myself with too much
information at once. I worked out a rough timing for a
sneak step by performing the action myself. I timed it
at around 21 frames for one leg, or 42 for a two leg
cycle. This timing was a little unconventional as
Williams describes that for a traditional sneak the,
SNEAKY: A frame taken from my unfinished sneak cycle. © Huw Evans

Huw J Evans
24
“Average version [is] 24 frames for each step. Fast version [is] 16 frames per step.
Slow version [is] 32 frames for each step.” (page 167)
I knew my sneak had to be between the average and the fast versions as I had a certain
distance to travel over 100 frames and wanted to stick to that.
From contact to contact with one leg it seemed to only take about 12 frames, then the
remainder of the 21 frames were used to adjust the centre of gravity and become
balanced again before stepping out with the other leg. This gave me a good insight
into otherwise unknown aspects of this action and in that sense was very useful.
However, I unfortunately ran out of paper for use with the lightbox at frame 13 (how
unlucky!) and so could only partially complete my sneak cycle. I could tell from what
I had though that the timing I employed would serve well in a completed cycle so was
not overly concerned.
3.8 Final Animation
It was at this point where I had no other option but to start animation on my
final scene. The idea of this was very daunting as still I didn’t know where to begin.
My first port of call was to take my rendered images from Maya, and print each of the
100 frames out onto A4 paper. I then decided on the arduous task of hand-tracing
very lightly, the outlines of the room walls, the cube, and even the rough character
stand-in model onto animation paper using the lightbox - all 100 frames! This was
very tedious work but provided me with an excellent reference framework for my
changing perspective without having to take my eyes off the page. It also meant I had
target positions for my animated character to reach in order to complete his actions
within the set time frame. This gave me a bit more confidence.
I decided quite early on that initially, I would need to be quite geometric about my
drawings as I find it a lot easier to visualise basic geometric shapes turning around in
3D space and altering in their perspective, than I do more complicated natural shapes.
This was evident from my cube in a room test which I found quite comfortable to
visualise.

Huw J Evans
25
My plan of action was to animate using these geometric based shapes in a number of
layers (although not actually using separate pieces of paper, just doing one run right
through, then going back over the top with another). My first layer would be the legs
and hips, as it worked well with my previous test. The next layer would be the main
torso section and a rough head positioning. The following layer would be rough arms
and improved head, leaving the final layer for finished arms/hands and facial
expressions. Splitting it up like this made it a lot easier to focus on the separate parts
before it all getting too crowded and complex.
I firstly decided to use the pose-to-pose method of animating and plot out each of the
contact positions taking into account the increasing size of my character as the
perspective shifts. Having the rough outline of both the cube and the character stand-
in became invaluable as a means of checking perspective and apparent height changes
in my animated legs. I found it quite difficult to visualise how the animation was
working through only ‘flicking’ the pages, especially when I had about 6 or 7 frames
or more. For this reason I decided it wise to scan my progress in so I could play it
back repeatedly. As original Disney animator Bill Tytla once said,
‘If you do a piece of animation and run over it enough times, you must see
what’s wrong with it.’
(Animators Survival Kit. page 69)
Upon reviewing my work, I noticed that there was something fundamentally wrong
with my character’s perspective. It became apparent that for each contact position, I
had been keeping the foot in the same position on the page rather than animating it
relative to the changing floor plane. This mistake took me quite some time to spot as
it seemed so unobvious that the characters second foot hitting the floor, would land in
exactly the same space on the paper as the previous foot was. I had assumed that the
second foot would progress a short distance ahead from the first which is where my
mistake arose. It was at this point I knew it wasn’t going to be as easy as I had
previously thought.
My aim was to animate every frame of the 100 I had decided upon (this is know as
animating on ‘ones’) as I was hoping to employ a lot of detail in the hands and the
face which animating every other frame (animating on ‘twos’) would possibly miss.

Huw J Evans
26
For my first animation pass (consisting of the legs and the hips), I used a mixture of
pose-to-pose and straight ahead. I plotted out my two extremes for one leg first
(frames 1 and 21) then my second contact position (frame 13), then went back and
broke up my first step into leg passing (frame 4), knee high-point (frame 7) and
extended leg (frame 10). Frames 13, 16 and 19 were used to shift the body weight
back from the back leg to the front leg to regain balance. This method naturally made
a three frame stagger for my drawings, so I inadvertently decided to animate on threes
for my first pass.
My main focus whilst animating was keeping a close eye on the arcs of animation as I
had recently learnt of their importance in achieving a realistic, aesthetically pleasing
piece of work. Picking points like the knees and the ankles and tracking them over a
few frames helped me achieve the smooth curves I required.
This stage of the animation involved a lot of re-scanning in order to give me the
easiest method of viewing what I had done and noticing any errors early on. One error
I found occurred quite often was the over-lengthening of limbs. The problem being
that once I had made the mistake in one frame without noticing, I would only add to
the mistake in every frame afterwards until I got to a point where the character was
almost double the size he should have been. Mistakes like this were very time
consuming and involved a lot of backtracking and re-drawing of frames.
Another problem I noticed was that my character was moving a little too slowly for
the distance he had to travel. Either that or his steps could have been a bit longer. This
was shown in my first pass of my pencil test as my animated legs quickly began to lag
behind my dummy character’s position. To remedy this, I decided to add another
method of sneaking to the second half of the piece, the tip-toe sneak. Richard
Williams describes this as a very ‘contained pose’ where the body stays quite rigid
and the legs kind of bounce from toe to toe. I liked the idea of this as it would give a
different side of character to my thief. His initial cautiousness while entering the
room, causing him to start looking around feeling a little nervous, until he gets so
close to his goal that desire and need consumes him and he is just focussed on his
prize, speeding up his movement and directing him more closely to this object. I think
it creates a nice variation in the animation.

Huw J Evans
27
After continually adjusting my first pass until I was satisfied that it looked correct, I
began to think about my second pass, the torso and basic head positioning. The torso
part was relatively easy as by animating the hips as a half sphere, I had already
worked out the angle the torso would be pointing in and basically had to add a larger
bendable cylinder growing out from the hips.
Blocking out the head position proved a bit more difficult, especially with my
character looking in different directions through an ever changing perspective. Again
I decided on a geometric approach and drew the head as a glorified cube shape with
an extended rectangle for a chin and a curved top for a hat. This made visualising the
object in three dimensions a lot easier as I now had corners I could track the arcs of.
My first few passes of the head position didn’t turn out too successful as I again had
trouble with increasing and decreasing scale as the animation progressed. These
problems were remedied however after reviewing the animation repeatedly and
checking scale against the rest of the body.
Moving on to the next animation pass, roughing in the arms and improving the head
shape and position, involved a little bit more personal performance. By sneaking
around the house myself, it helped me to figure out where my arms needed to be in
order to maintain balance while the rest of the body leaned back during each stride.
Again it became vitally important to check the arcs of motion throughout each frame,
ensuring a smooth curve. As far as improving the head shape, I basically used the
geometric framework from my previous pass to contain my cartoon drawing of the
head shape. This framework provided an excellent reference for where I would need
to draw the ears and the nose whilst the head was turning. Similarly the chin could
just be drawn inside its geometric equivalent making the whole process a little bit
easier. Even though things started to take shape at this point, there were still mistakes
made that I would have to backtrack. For example after adding the nose in its correct
position on the head, giving it half a face, it became apparent that in my earlier
frames, the head was trailing too far back and being a ‘bird’s eye’ view, this looked
incorrect having the character facing straight up. Problems like these were quite time
consuming to correct at this stage but I’m glad they were identified and not left until
any further down the line.

Huw J Evans
28
4. Compiling the Animation for Viewing
4.1 Digitizing Images
Combining the production pipelines of the
two disciplines, 2D cell and 3D computer
animation, I soon realised I had just a couple of
options for getting all the animation together for
viewing.
Hand animated cells were traditionally
photographed by a cameraman using an animation
stand and camera, Raul da Silva explains that,
“…one can use a normal camera on a tripod but
this is infinitely more stable and professional.”
(Butterworth & da Silva, 1979, p.55).
I had indeed tried using a digital camera during the early stages of animation testing
as working at home without a scanner warranted no other method. Lacking a tripod of
any kind, my methods were rather primitive and involved trying to frame up markers
on the paper with the corners of the viewing screen on the camera. Obviously this
method had limited success but did serve well for shorter tests.
The more modern day option was to use a scanner which would give me both higher
resolution images and also far more stable ones being that each frame would sit in
exactly the same position in the scanner. The only problem with this decision however
was the fact that the paper being used to animate on was larger than A4 and so
wouldn’t fit completely into the scanner. Luckily this problem had already been
overcome by the fact that I was working within an A4 space on the paper anyway due
to using the traced templates from the printed renders.
4.2 Clean-Up
Once the images had been scanned in they were imported into Adobe
CAMERA: A traditional animation stand and camera. © www.Photosonics.com

Huw J Evans
29
Photoshop where I could begin the clean-up process. I ensured that whilst scanning in,
I had adjusted the contrast levels accordingly so I had the best visibility of each frame
before even having to make any further adjustments.
The clean-up process primarily entailed removing the template lines that had been
traced in the beginning, and tidying up my hand-drawn lines a little, but no so much
as to remove from the free-flowing nature of the animation. It gave me the chance to
fix any broken lines, or lines I had drawn too lightly and so didn’t scan in very
successfully.
Once this was complete, I created alpha channels for each of the frames so that I was
just left with a cut out of the actual character, the remainder of the page being
transparent. This was to aid in the compositing stage as I could then import my
previously rendered background frames into the compositing software (Shake), and
overlay the character frames in their appropriate position, thus completing the merger.

Huw J Evans
30
5. Conclusion
5.1 Critical Analysis of my work:
My major criticism of my work is that I think I played it a bit too ‘safe’ with
regards to the animation of my character. Because I was concentrating so hard on
getting the movement and the perspective right at the same time, I think I was quite
constrictive with my animation. It lacks a good feeling of squash and stretch -
although I did implement it, I should have exaggerated the movements far more than I
did. I think I have used a far more realistic style of movement than I had originally
intended. It lacks the ‘magic’ that emerges when you are comfortable with your work
and feel more free than constrained like I did - although I guess that improves with
experience.
I also should have spent more time on the 3D production side of things, such as
creating a far superior environment where the action takes place. I ended up using my
very basic block model in the end which looks very amateurish and not at all what I
had in mind for a finished product. Spending a little time on a more detailed model, a
good use of textures and well positioned lighting would have added so much to the
finished piece. Coupled with a little more time spent cleaning up and adding colour
and detail to the 2D side of production I think the end product would have turned out
a lot more satisfactorily. Also it was a real shame not being able to include all the
inbetweens to the animation. I had hoped for the ability to add plenty of subtle
movements and gestures through consecutive frames, however, the result I still find
pleasing.
5.2 Regrets
Although not what I had originally intended to achieve, it would have been a
fantastic experience to complete all processes of the traditional animation pipeline,
including as previously mentioned the pen and ink stage after clean up, and possibly
even adding soft shadows onto the character. Just to create a really polished piece of

Huw J Evans
31
work while still having all the rough workings to show how I got there. Similarly with
the 3D side of my animation, I would have loved to get through each and every one of
the stages of production, including texturing the scene, lighting the scene dynamically
and rendering each frame out to a far higher quality. Possibly even add ambient music
and sound effects to really give the scene a sense of completion.
5.3 What I’ve learnt about both disciplines
Forward planning is critical for 2D animation - it is much more time
consuming and can also be far more frustrating finding mistakes than involve a lot of
work to fix. When working in 3D one can start an animation with a far more
haphazard approach. Although planning is still required in the early stages, when it
comes to actually animating the subject matter, testing and reviewing your progress is
quick and easy - errors can just be backtracked with a few clicks and undone,
speeding the correction process up significantly. Also since the inbetweens are
generated automatically, in an instant, keys can just be thrown in and moved around
until it looks right, allowing animation to be created simply through trial and error
which granted, does sometimes turn out acceptable but isn’t strongly advised.
I can see the incredible effects that the introduction of 3D computer software has had
on the field of animation already, and being familiar with computer animation after
studying it for 3 years, whereas traditional animation is still new to me, automatically
gives me some bias towards favouring animating with computers. However, (and it’s
a big however!) personally I still see a lot more ‘magic’ and captivation in traditional
animation, than I do with CG. Granted computer animation and effects have a
significant place in films today and so they should - the impact that the age of
computer animation and digital effects has had on the film industry is incredible,
giving the opportunity for so much more to be done on screen than was ever thought
possible without the help of a computer. Although technology is constantly
improving, it is still a long way off the spontaneity and liveliness of animating by
hand. The charisma and over exaggeration of movements, the way bodies change
shapes, the way characters are held by no boundaries other than imagination -
computer technology cannot yet come close to that. Maybe one day it will? Does this
bring the end of an era? The end of traditional animation?

Huw J Evans
32
I don’t think it will, and I certainly hope not. If it can last from Disney’s first
animated feature, ‘Snow White’ made in 1937, and still be watched and enjoyed by
both adults and children today, nearly 70 years later, then I think it will still be around
for a good while yet. This is proven by the fact that the Disney classics range on DVD
still sell amazingly well.
I think that now computer animation is around to be used, it is used a bit too freely.
Just because a film has computer animation in it, doesn’t make it a good film. Just
because it looks really nice, doesn’t make you want to watch it again, and again, and
even again. I’m all for combining the two disciplines as I think it creates fantastic
effects - otherwise unfeasible without. Take Disney’s ‘The Lion King’ for example.
The wilderbeast scene where Simba is being chased down the canyon was an
incredible scene, and the merger of 3D generated animals fit so effectively with the
hand animated main character. Michael Eisner once said that “2D animation was
dead” - I sincerely hope he is wrong, but the way things are going, I wouldn’t be
surprised if he were right.
Disney’s use of computer graphics in their 2D feature films slowly but surely
increased with every subsequent release, up to their relatively recent film ‘Home on
the Range’ which was announced to be Disney’s last fully 2D feature film. Steve
Goldberg (who worked on some of the first CG characters Disney ever produced in
the film Aladdin) stresses during a conference at Siggraph in 2005,
‘…that Disney’s changes are not about abandoning a medium, they are about
embracing the elements that are integral to animation. These elements
include story telling, art and direction and design. It is possible to celebrate
the elements of the past and continue to apply them within a new medium.’
(http://reports.siggraph.org/articles/the-legacy-of-disney-animation)
The Legacy of Disney Animation - Caitlin Winner
This has propelled Disney on into the world of fully 3D computer generated films
starting with its release of ‘Chicken Little’ in 2006. My personal opinion is that it
lacks the imagination of the traditional Disney’s. It becomes ‘just another cartoon
film’. One unnamed long-time animator expresses his opinion that,
Huw J Evans
33
‘Disney will never do hand-drawn animation again. Or at least not for a very,
very long time and to the qualities and standards they have already
established so far.’
(http://www.mouseplanet.com/david/dk030814.htm)
I think this statement has an element of truth about it, as Ron Miller (executive head
of production at Disney Studios) admits, ‘...there just aren’t that many people capable
of doing animation in the Disney style.’ (The Illusion of Life: Disney Animation, Johnston & Thomas.1981)
Frank Thomas and Ollie Johnston, two long-term Disney animators go a step further
to explain,
‘There is a special ingredient in our type of animation that produces drawings
that appear to think and make decisions and act of their own volition; it is
what creates the illusion of life. No other studio has been able to duplicate this
most important (but least understood) element in our films. It cannot be
produced with money alone.’
(The Illusion of Life: Disney Animation, Ollie Johnston and Frank Thomas.1981)
Even though it is still the Disney team producing these fully 3D productions, I think
maybe they have been bitten a little by the bug of computer technology. I think after
seeing the success of child company Pixar in the industry, Disney have decided they
want to get back in the game, and the only way to stay in it, is to ‘update’ their style.
However, as explained in Animation World Magazine,
‘There is still lots of room for collaboration between 3D and 2D animators. At
DreamWorks, 3D and 2D artists are working side by side in every department,
from layout through animation. As software developers and animators
continue to work towards a more classical approach to digital animation, the
future also looks bright for hybrid 2D/3D productions.’
(Animation World Magazine. Issue 2.5, August 1997)
My personal belief is that these hybrid 2D/3D productions need to make a come-back.
I think the market doesn’t need another fully computer animation based company, it
would do much better bringing in new innovative mixtures of current styles and styles
gone by. I believe this innovation will put them back on top.

Huw J Evans
34
6. References
6.1 Books
BUTTERWORTH, S & DA SILVA, R (1979): The World of Animation. New York:
Eastman Kodak Company.
CULHANE, Shamus (1988): Animation: From Script to Screen. USA: St Martins
Press
FINCH, C (1973): The Art of Walt Disney.
HAHN, Don (1996): Disney’s Animation Magic. USA: Disney Press
MALTIN, Leonard (1980): Of Mice and Magic. USA: The Penguin Group
ROBERTS, Steve (2004): Character Animation in 3D. Oxford: Focal Press.
THOMAS, Frank & JOHNSTON, Ollie (1981): The Illusion of Life: Disney
Animation. New York
WHITE, Tony (1986): The Animator’s Workbook. London: Phaidon Press Ltd.
WILLIAMS, Richard (2001): The Animators Survival Kit. London: Faber & Faber
Ltd.
6.2 Films
DISNEY, Walt (1937 - 2005): Disney’s Animated Classics. DVD: US
Disney’s ‘Snow White’ (1937)
Disney’s ‘Fantasia’ (1940)
Disney’s ‘The Black Cauldron’ (1985)
Disney’s ‘Basil the Great Mouse Detective’ (1986)

Huw J Evans
35
Disney’s ‘Oliver and Company’ (1988)
Disney’s ‘The Little Mermaid’ (1989)
Disney’s ‘Beauty and the Beast’ (1991)
Disney’s ‘Aladdin’ (1992)
Disney’s ‘The Lion King’ (1994)
Disney’s ‘Tarzan’ (1999)
Disney’s ‘Home on the Range’ (2005): Disney’s last hand animated feature
Disney’s ‘Chicken Little’ (2006)
Disney/Pixar’s ‘Toy Story’ (1995)
ANNECY AWARDS (1990, 1990): Video. France
Ropedance, Raimund Krumme Special Jury Award Annecy 1987
Crac!, Frederic Back Special Jury Award Annecy 1981
BLACKTON, J.Stuart (1906): Humorous Phases of Funny Faces.
MCCAY, Windsor (1914): Gertie.
MCCAY, Windsor (1918): Sinking of the Lusitania.
6.3 Internet
http://www.ultimatedisney.com
http://www.toonboom.com/company/animationlinks.php
http://www.tonywhite.net
http://haraldsiepermann.blogspot.com/2005_08_01_haraldsiepermann_archive.html
http://blackwingdiaries.blogspot.com/
http://www.hwcn.org/~ab323/als/animating/bazley2.htm

Huw J Evans
36
http://www.filmsite.org/visualeffects4.html
http://www.sacticket.com/static/movies/news/0525madagascar.html
http://www.sciencenews.org/articles/20020126/bob10.asp
http://www.siggraph.org/education/materials/HyperGraph/animation/rick_parent/Intr.html
(http://www.clickthecity.com/movies_article.asp?p=737 November 29th 2005)
(http://reports.siggraph.org/articles/the-legacy-of-disney-animation)
The Legacy of Disney Animation
by Caitlin Winner — last modified 2005-08-18 04:36 ACM SIGGRAPH Reports
(http://www.opinionjournal.com/la/?id=110007081)
Disney Erases Hand-Drawn Animation
BY JOHN CANEMAKER
Tuesday, August 9, 2005 12:01 a.m. EDT
(http://www.computerarts.co.uk/in_depth/Opinion/bad_omen_for_cg_features)
Bad omen for CG features
(Animation World Magazine, Issue 2.5, August 1997)
2D and 3D: Together For The Better
by Sean MacLennan Murch
(http://www.animationmeat.com)

Huw J Evans
37
7. Appendix