infant/toddler sleep sack - Loulou James · kimono infant/toddler sleep sack m and cozy ont opening...
11
kimono infant/toddler sleep sack Safer than a blanket, a sleep sack keeps little ones warm and cozy without any worries. The wrapped front opening is easy to put on and requires no zipper! Simple enough for a beginner, you can quickly sew up a few in different fabrics for cozy naps year round.
-
Upload
truongkhanh -
Category
Documents
-
view
216 -
download
0
Transcript of infant/toddler sleep sack - Loulou James · kimono infant/toddler sleep sack m and cozy ont opening...

kimonoinfant/toddler sleep sack
Safer than a blanket, a sleep sack keeps little ones warm and cozy without any worries. The wrapped front opening is easy to put on and requires no zipper! Simple enough for a beginner, you can quickly sew
up a few in different fabrics for cozy naps year round.

how-to: page 1
size
smallappx. 3-9 months
mediumappx. 9-18 months
largeappx. 18-36 months
sleep sackfinished length
31 inches
35 inches
40 inches
sleep sackchest width
34.5 inches
36.5 inches
38.5 inches
kimono - size chart
When selecting a size, remember to consider your baby should haveplenty of room to move their feet - you may want to allow 6” at the bottom.
what you will needBODY: appx.65” (45“ wide)/ 57” (60“ wide) woven craft-weight cotton or blend
(quilting prints, etc.), jersey, lightweight fleece or flannel. LINING: appx.65” (45“ wide)/ 57” (60“ wide) flannel, jersey or woven craft-weight cotton
FOR BEST RESULTS, BE SURE TO PRE-WASH FABRICS.
NOTIONS: 3/4” wide hook and loop tape for shoulder closure - 3.75” total cut into five pieces 3/4” each
BUTTONS ARE NOT RECOMMENDED.
how-to: page 2
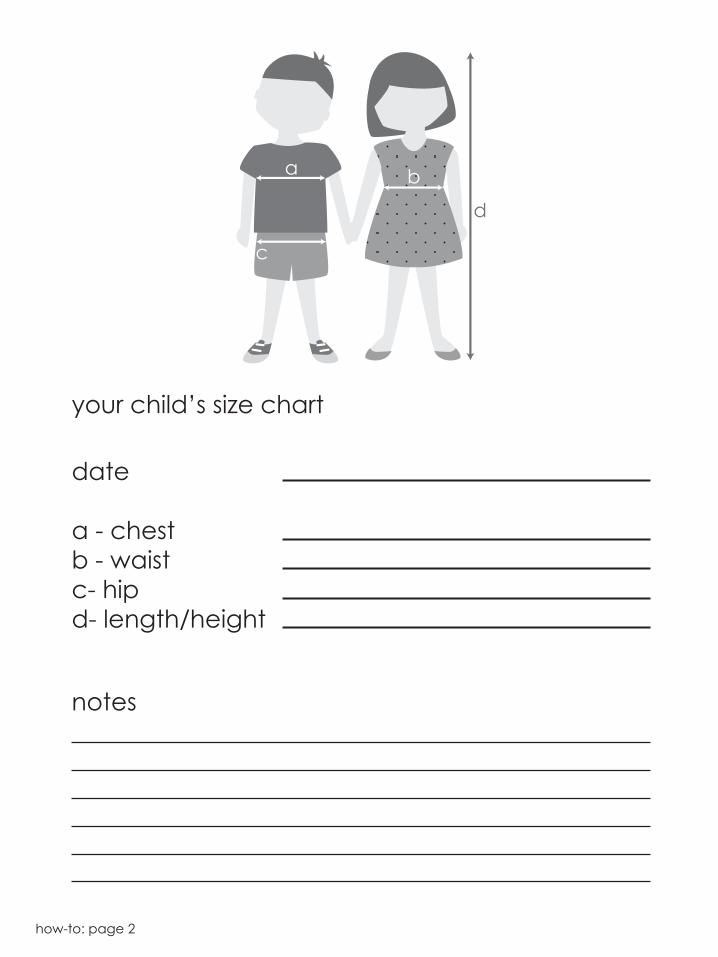
notes
date
a - chestb - waistc- hipd- length/height
your child’s size chart

how-to: page 3
seam attachment point
join these two numbered pieces
gather/pleat between these two points
ease between these two points
direction for pleat/dart to be pressed
beginning or end of vent/pleat
button or snap
buttonhole
zipper ending
slash/cut here
stitch line
grainline as indicated
ALL OTHERS AS MARKED
legend of symbols
fabric right side
fabric reverse side
lining right side
lining reverse side
for these diagrams

how-to: page 4
printing layout
1 2
5 6
9 10
13 14
19 20
3
7
11
15
21
4
8
12
16
22
18
24
17
23

how-to: page 5
cutting & yardage guide*this guide shows common 45” and 60” widths laid open with piece 3 mirrored.
Extra fabric may be needed to accomodate shrinkage.For directional patterns, be sure to lay
out as shown. See “Getting Started” for more.
Layout applies to lining as well, but no bias (piece 4) is needed.
45” widela
rge
65”
, me
d 6
0“, s
ma
ll 55
” lo
ng
1
2
3
4
1
2
3
4
60” wide
larg
e 5
7”, m
ed
52“
, sm
all
47”
lon
g

how-to: page 6
1. Begin by printing all the required pattern pieces. They are designed to fit on standard letter size (8.5” x 11”) paper. Refer to the 1” scale guide to be sure the size is correctly printed.
2. When all your pieces are printed you can begin to assemble the pattern – refer to the printing layout for reference if needed. Arrange the pieces in order, noting the numbers and letters for matching. Fold or cut precisely along the top and right hand sides; when ready, begin to tape to the lower left hand sides and work your way through the pages.
3. Determine the size you will need and cut following the lines as indicated. You can change a pattern to fit a size as necessary before you cut. If you need to make a pattern longer, cut along the indicated lines and spread the pieces apart to the desired length. If you need to make a pattern shorter, fold along the indi-cated lines and overlap to the length you need.
4. Using the cutting and yardage guide for reference, lay out your pattern pieces, noting the grainline and any pieces that may need to be placed on a fold. Pieces cut on a fold will be mirrored when open. 5. Pieces cut on a single layer of fabric are cut with the pattern on the right side of the fabric as shown. Pieces cut from two layers are cut with the pattern on the wrong side of the fabric. If your fabric is directional, meaning the print has a top and bottom be sure your pieces face the same way or you may have an upside down piece! 6. If you need to cut multiples of a piece you may want to make a photocopy/additional print and lay everything out at once. 7. When you have laid out your pieces, pin them in place. It’s a good idea to cut your pieces flat on your working surface – never pick them up and trim in your hand as they can shift or stretch.
8. Matching points like or can be marked with chalk or when at the edge of fabric, marked with a small cut no more than ¼”.
getting started

how-to: page 7
1. With the right sides together, pin the front and back pieces along the sides and sew a 1/2” seam from the armholes down to the notches. Press the seams open and flat. Repeat for the lining.
2. Place the lining and outer fabric together, right sides facing in. Sew a 1/2” seam around the back neck. Sew a 1/2” seam around the armholes, stopping about 2” down from the shoulders. Clip the curves with small cuts from the edge towards the seam, being careful not to cut the stitches.
how to make it
clip curves
sew around armholesleave open
stop at notches

how-to: page 8
3. Sew across left the front neck, pivot at the corner, and down the side to the notch. TIP: to sew a clean point where the neck and side meet, sew along the neck, stopping 1/2” from the edge. Lift your pressure foot, and pivot only 45 degrees. Sew one stitch. Pivot the other 45 degrees and down the seams, ending at the notch on the larger left front piece, and the hemline on the smaller right front piece. Cut the corner points off and clip along the curved neckline. Repeat for the right front, and clip the inside curve as well. Turn right side out.
4. Open the shoulders and line up the two ends, right sides together, matching the neckline seams (see next page). Sew a 1/2” seam and press open. Turn inside out again.
trim the end point
one stitch across the point
clip curve
how-to: page 9
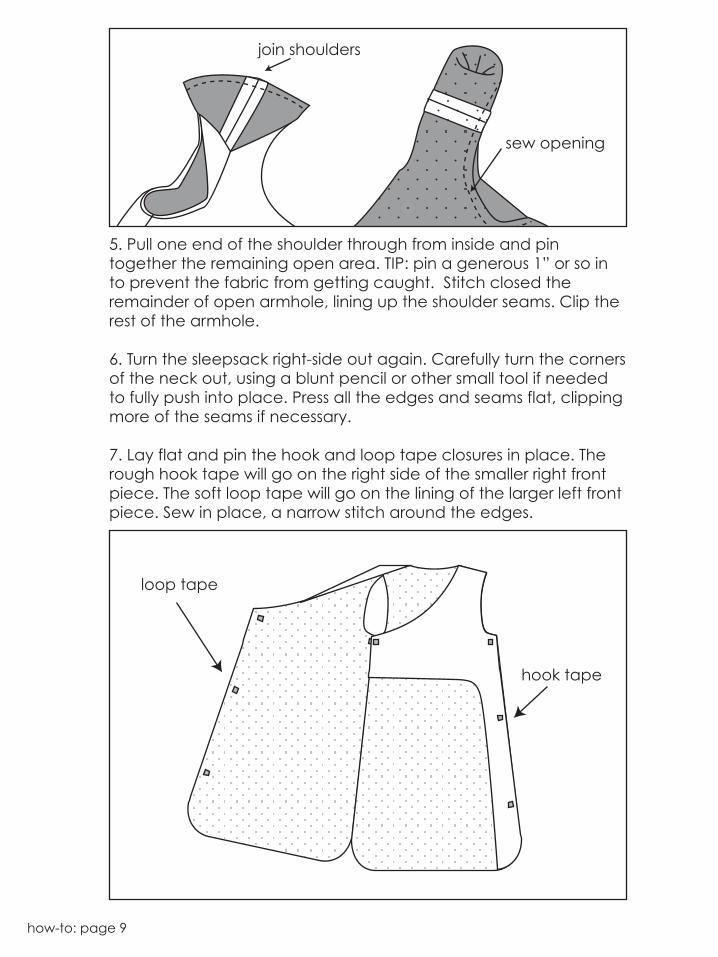
5. Pull one end of the shoulder through from inside and pin together the remaining open area. TIP: pin a generous 1” or so in to prevent the fabric from getting caught. Stitch closed the remainder of open armhole, lining up the shoulder seams. Clip the rest of the armhole.
6. Turn the sleepsack right-side out again. Carefully turn the corners of the neck out, using a blunt pencil or other small tool if needed to fully push into place. Press all the edges and seams flat, clipping more of the seams if necessary.
7. Lay flat and pin the hook and loop tape closures in place. The rough hook tape will go on the right side of the smaller right front piece. The soft loop tape will go on the lining of the larger left front piece. Sew in place, a narrow stitch around the edges.
sew opening
join shoulders
hook tape
loop tape

how-to: page 10
notes
questions? email us at [email protected]© 2013 loulou james |creative studio
8. Lay the front pieces in place, left over right, smoothing the layers flat. Pin or baste along the hem, matching the edges and notches up.
9. Fold the bias trim in half lengthwise and press flat. Matching the raw edges and centre notches, pin to the front of the sleepsack, working the bias around the curves and towards the side notches. The raw ends of the bias will extend beyond the notches. Pin or baste in place and sew a 1/2” seam allowance.
10. Fold the tape ends in at the notches/stitch end and wrap the bias around to the back. Pin in place. Sew the tape down by hand using a slipstitch or topstitch close to the edge.
match notches
raw edges together
fold down end wrap underand around to back