Improvements to nVision Reporting - finance.emory.edu Improvements Reference... · Improvements to...
19
Integrity, Competence, Teamwork 1 Improvements to nVision Reporting The Emory nVision reporting environment has been improved. Now when you use the reporting environment, you will have more dependable and flexible reporting: When you run an nVision report, other reports will not overwrite yours. You can create templates that allow you to run your own private reports, rather than public reports, and no one else can change those templates. You can run multiple reports with a single click. You can run reports automatically. A “closing reporting date” functionality has been activated, especially to use for reports that you run automatically. Reports you run will remain in Report Manager for 90 days, rather than being available only on the day they were run. Why the changes were made Previously, many Compass nVision reports were run as public reports. When you run a public report, you select report request values – parameters – that are available to everyone. The problem is that anyone with security access to run an nVision report can change and save public report parameters. If another user changes the parameters for a specific nVision report after you have saved your parameters but before your report actually runs, your report’s parameters will be overwritten, resulting in either the failure of your report to run or your report running with parameters the other user entered. This type of error was occurring frequently in the Compass reporting environment. What changes were made To prevent the problem the following changes were made: Public report request parameters cannot be changed. Now you can clone a report, save your clone as a private report, and change any report request parameters you want. No one will be able to change your private report request values when you run a private report. Creating and Running Private Reports You can use the standard nVision public reports as templates to create private report requests. Overview The process is a simple 5-step process, and you need to do it only once for each private report you want to run: 1. Select the public report you want to use as the template for your private report. 2. Clone it, giving it a name that will be easy for you to find in the future.
Transcript of Improvements to nVision Reporting - finance.emory.edu Improvements Reference... · Improvements to...

Integrity, Competence, Teamwork
1
Improvements to nVision Reporting
The Emory nVision reporting environment has been improved. Now when you use the reporting environment, you will have more dependable and flexible reporting:
When you run an nVision report, other reports will not overwrite yours. You can create templates that allow you to run your own private reports, rather than public
reports, and no one else can change those templates. You can run multiple reports with a single click. You can run reports automatically. A “closing reporting date” functionality has been activated, especially to use for reports that you
run automatically. Reports you run will remain in Report Manager for 90 days, rather than being available only on
the day they were run.
Why the changes were made
Previously, many Compass nVision reports were run as public reports. When you run a public report, you select report request values – parameters – that are available to everyone. The problem is that anyone with security access to run an nVision report can change and save public report parameters.
If another user changes the parameters for a specific nVision report after you have saved your parameters but before your report actually runs, your report’s parameters will be overwritten, resulting in either the failure of your report to run or your report running with parameters the other user entered. This type of error was occurring frequently in the Compass reporting environment.
What changes were made
To prevent the problem the following changes were made:
Public report request parameters cannot be changed. Now you can clone a report, save your clone as a private report, and change any report request
parameters you want. No one will be able to change your private report request values when you run a private report.
Creating and Running Private Reports
You can use the standard nVision public reports as templates to create private report requests.
Overview
The process is a simple 5-step process, and you need to do it only once for each private report you want to run:
1. Select the public report you want to use as the template for your private report. 2. Clone it, giving it a name that will be easy for you to find in the future.

Integrity, Competence, Teamwork
2
3. Open the clone. 4. Change the Access Mode from Public to Secured. 5. Save the report. You now have your private report clone that will not be overwritten when you
run it.
Creating a Private Report
You should do your reporting from the Compass Reporting environment (RPT). Remember, your report output will remain in Report Manager for 90, not just a single day.
Use the following instructions to create a private report request.
Step 1: Select the report
1. Log in to the RPT environment (https://compass-reports.emory.edu)
2. From the Compass home page, use the following path to navigate to the Report Request page:
Reporting Tools > PS/nVision > Define Report Request
3. Complete the Business Unit field.
4. Click the Search button.
A list of reports for the selected business unit displays.
5. Click the name of the report you want to run.
The nVision Report Request page displays.

Integrity, Competence, Teamwork
3
If you have not been given a Report Developer role by Security Administration, all the parameter fields are blocked. For instance, you can see the As Of Reporting Date, but you can’t change it.
Also, if you do not have a Report Developer role, you can see the Advanced Options page and the Scope and Delivery page by clicking the tab or the link, respectively, but you cannot change the information on those pages.
Step 2: Clone the report and name it
1. Click the Copy to Another Business Unit/Clone link.

Integrity, Competence, Teamwork
4
The following page displays:
1. Enter the same Business Unit in the Business Unit field. Do not change the name of the Business Unit from the public report you cloned. If you change the Business Unit name, the report may display incorrect data.
2. Change the Report ID to something that is meaningful and will be easy for you to locate in the future. Remember that PeopleSoft sorts Report IDs alphabetically.
Note: A good practice is to use your initials as the first two characters of the Report ID.
3. Click OK. If you receive a message that the Report ID already exists, cancel and enter a new Report ID.
WARNING: After you click OK, you are returned to the original Report ID, not the new Report ID. Therefore, the next step is critical.

Integrity, Competence, Teamwork
5
Step 3: Open the clone
1. Click the Return to Search button and enter the Business Unit and Report ID to open the new Report ID as in the following example:
2. Click the Share This Report Request link. The following page displays:
Integrity, Competence, Teamwork
6

Integrity, Competence, Teamwork
7
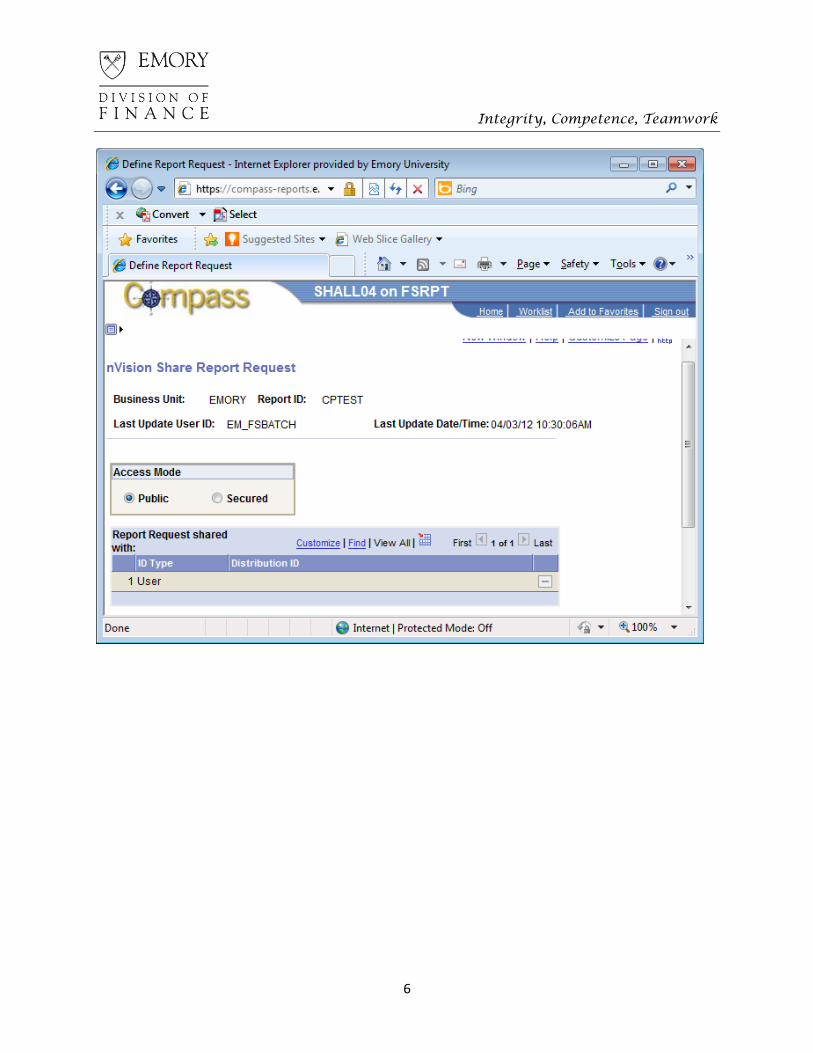
Step 4: Change the access mode
The Access Mode is set to Public for the report.
1. Click Secured to make the report private, as in the following screen:
Note that your User ID is displayed in the Report Request shared with field.
2. To share your private report with another user, click the + button. 3. Select User from the drop-down menu in the ID Type field. 4. Click the spy glass to select the user’s ID in the Distribution ID field.

Integrity, Competence, Teamwork
8
Note: Anyone you share your report with can change the report’s parameters, so you may want to share reports only on a temporary basis. You can delete any user in the shared field list by clicking the – button next to the + button.
5. Click OK. The following screen displays.

Integrity, Competence, Teamwork
9
Step 5: Save the report
Click Save. The private report request is saved. Only you have access to the report now, and you can run the private report any time you need it. You can also delete your private report at any time.
Note: Parameter fields that were inactive on the public report request are now available for you to change. However, some fields, such as Layout and Tree As Of Date, are secured and can only be changed by a developer.

Integrity, Competence, Teamwork
10
Creating and Running nVision Report Books
You can use nVision report books to run multiple reports with one click.
Previously, Compass users had limited access to report books. Now most Compass users can create and run report books in the Compass Reporting environment.
A report book is a run control. Therefore, you can use only the report books you create and no one else can use yours.
Creating nVision Report Books
Use the following instructions to create report books:
1. From the Compass home page, use the following path to navigate to the Report Books page:
Reporting Tools > PS/nVision > Define Report Books
The following screen displays:
Note: If you use the Search function on this screen, only the IDs in your report book are displayed.
2. To create a new report book, click the Add a New Value tab:
3. Enter a new Run Control (report book) ID, and click Add. The following screen displays:

Integrity, Competence, Teamwork
11
4. Add business units and report request IDs you want to run in a single batch to the report book.
5. After the first RID is entered, click the + button to the right of that row to add a new row.

Integrity, Competence, Teamwork
12
Notes:
The As Of Date you save overrides any other As Of Date specified in the report ID definition. Always use the default Use As Of Reporting Date in the Tree Effective Date field. Uncheck Ignore Runtime Errors if you want the report book to stop running if it encounters
errors on any of the report IDs in the book. When the Ignore Runtime Errors box is checked, the next report ID will start running if an error is encountered. Normally, you should check this option.
If you do not want a specific report to run, uncheck the Run option for that report ID. 6. Click Save.
Integrity, Competence, Teamwork
13
Running an nVision Report Book
Use the following instructions to run a report book:
1. From the Compass home page, use the following path to navigate to the Report Books page:
Reporting Tools > PS/nVision > Define Report Books
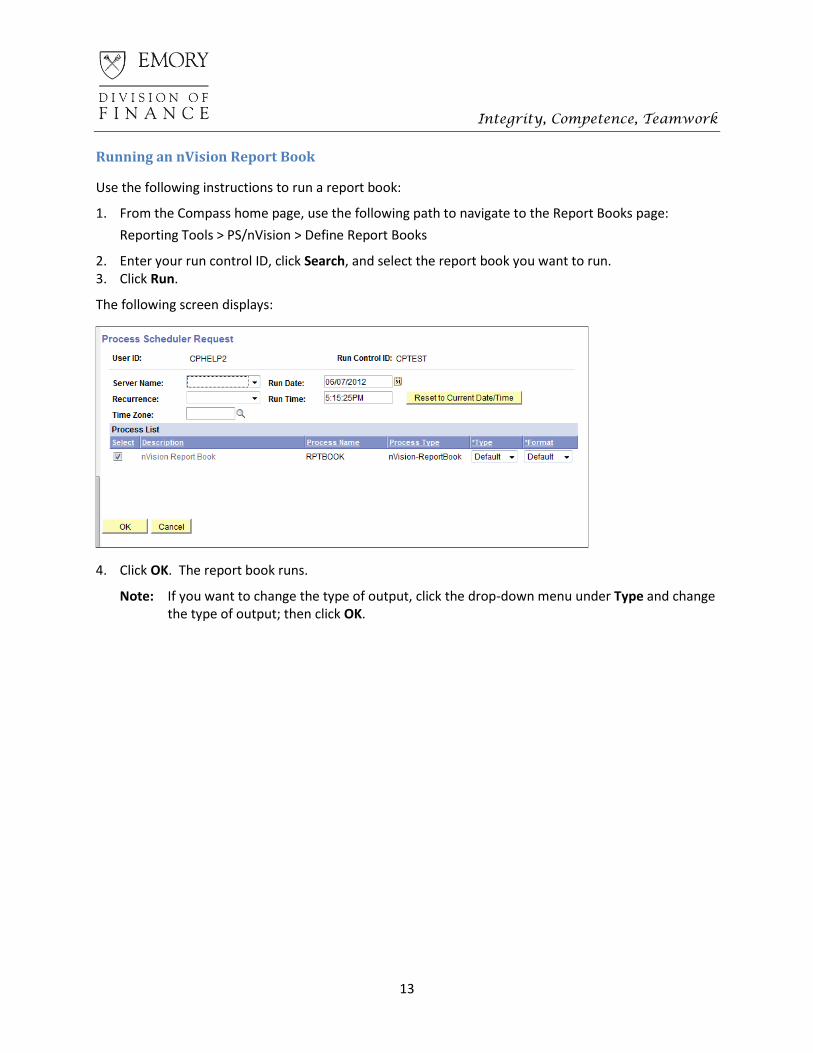
2. Enter your run control ID, click Search, and select the report book you want to run. 3. Click Run.
The following screen displays:
4. Click OK. The report book runs.
Note: If you want to change the type of output, click the drop-down menu under Type and change the type of output; then click OK.

Integrity, Competence, Teamwork
14
Recurring Report Requests
You can run both individual report requests and report books automatically on a recurring basis.
Setting Up Recurring Report Requests
The process for setting up individual report requests and report books to run automatically is similar.
1. From the Compass home page, use the following path to navigate to the PS/nVision page:
Reporting Tools > PS/nVision
The following screen displays:
2. Select either Define Report Book or Define Report Request. This is the only difference in setting up a report request or a report book to run automatically on a recurring basis.
Note: If you are running a report request, make sure you select one of your private report requests.
3. Click Run. The Process Scheduler Request page displays.

Integrity, Competence, Teamwork
15
4. Click the Recurrence drop-down and select an occurrence. This tells the process when to run and what frequency -- for instance the 10th of each month.
Note: To see a list of recurrence definitions, go to PeopleTools > Process Scheduler > Recurrences, and click Search.

Integrity, Competence, Teamwork
16
5. After the Recurrence has been selected on the Process Scheduler Request page, click OK. The following screen displays in the Process Monitor. The report or report book remains in Queued status until it is time to run.
Note: If you entered Today’s Date or Business Unit Reporting Date in the As Of Reporting Date field when you created the report request or report book, your report can run automatically without the need to maintain the As Of Reporting Date. However, if you specified a date, after the occurrence runs, you will need to return to the report request or report book and update the parameters for the request to use a different As Of Reporting Date.

Integrity, Competence, Teamwork
17
Appendix
As Of Reporting Date
For both individual report requests and report books, the As Of Reporting Date operates the same way.
You can enter Specify, Today’s Date, or Business Unit Reporting Date in the As Of Reporting Date field. The option you select is significant, as explained in the following sections.
Entering Specify in the As Of Reporting Date Field
The As Of Reporting Date value tells the report run process how to interpret TimeSpan variables coded in the layout such as Year-to-Date and Month-to-Date. For instance, if the As Of Reporting Date value is 5/31/2011, then the report run process will interpret the TimeSpan variable for Year-to-Date as the Accounting Period and Fiscal Year values within the range 9/1/2010 – 5/31/2011.
If you select Specify from the As Of Reporting Date field drop-down, you must select a date in the adjacent field.
If you select a specific date for this field, the output information from the report request or report book will be as of that date.
Entering Today’s Date in the As Of Reporting Date Field
If you select Today’s Date from the As Of Reporting Date field drop-down, the report request’s report output information will be as of today’s date. This is useful if you know that every time you’ll be running the report, the As Of Reporting Date should be the run date.
The As Of Reporting Date field drives which accounting periods are displayed in the report, with no distinction given to days within a month. That is, there is no difference, from a reporting standpoint, of entering 5/1/2012 or 5/31/2012. Both dates will produce a report for the same accounting period.
Entering Business Unit Reporting Date in the As Of Reporting Date Field
A new process has been activated in the Compass Reporting environment that enables the concept of “closing reporting date.”
Within the monthly closing cycle, it’s common to run a particular report daily, starting around the 20th of the month, with an As Of Reporting Date equal to the current month, and keep using that same As Of Reporting Date until after that month has closed, perhaps the 15th of the following month.
Integrity, Competence, Teamwork
18
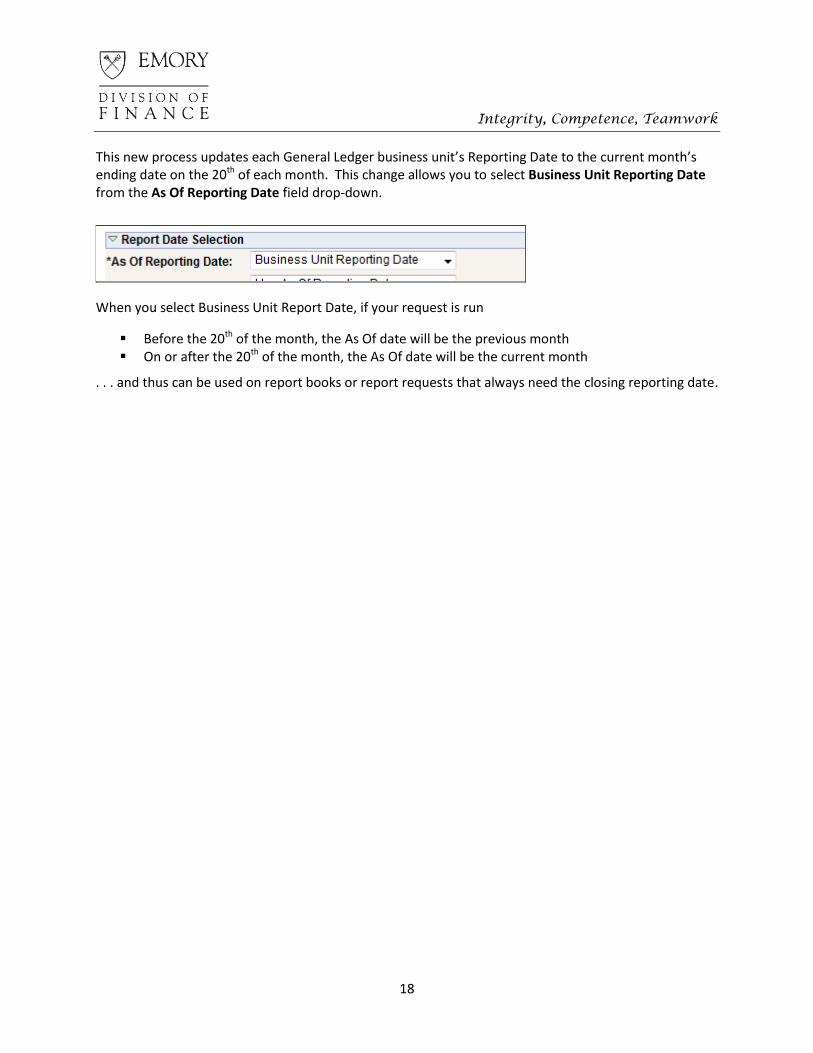
This new process updates each General Ledger business unit’s Reporting Date to the current month’s ending date on the 20th of each month. This change allows you to select Business Unit Reporting Date from the As Of Reporting Date field drop-down.
When you select Business Unit Report Date, if your request is run
Before the 20th of the month, the As Of date will be the previous month On or after the 20th of the month, the As Of date will be the current month
. . . and thus can be used on report books or report requests that always need the closing reporting date.

Integrity, Competence, Teamwork
19
Creating a Report Book Containing Reports with Different Scopes
Use the following example to create report books containing reports with different scopes.
1. Assume your Report ID is CPAF2244, as in the following example:
Also assume that the following is one of the scopes you want to run scope:
2. Save this private report request as CP44_064 using the Copy to Another Business Unit/Clone link. 3. If you want to run project 00000063, change the scope ID toP:00000063 and save the report request
as CP44_063. 4. If you also want to run project 00000062, change the scope ID to P:00000062 and save the report
request as CP44_062.