Call Network / Call detail records as new Big Data Source to predict Credit Scoring - Statswork
Upload
cathleen-hallCategory
view
29download
0description

Importing Do Not Call Importing Do Not Call RecordsRecords
And other text files, such as And other text files, such as customer records.customer records.

Importing Text FilesImporting Text Files
The text file import utility enables users to The text file import utility enables users to import downloaded Do Not Call Records import downloaded Do Not Call Records or their own text file of records (a customer or their own text file of records (a customer file, for example) into Criss+Cross Plus file, for example) into Criss+Cross Plus Real Estate. Real Estate.

Once imported, your records are matched Once imported, your records are matched against records contained on the CD. against records contained on the CD. Matching records are flagged (highlighted) Matching records are flagged (highlighted) on the file. on the file.
By importing and flagging records you can By importing and flagging records you can exclude those records from printing or exclude those records from printing or exporting.exporting.
Do Not Call RecordsDo Not Call Records
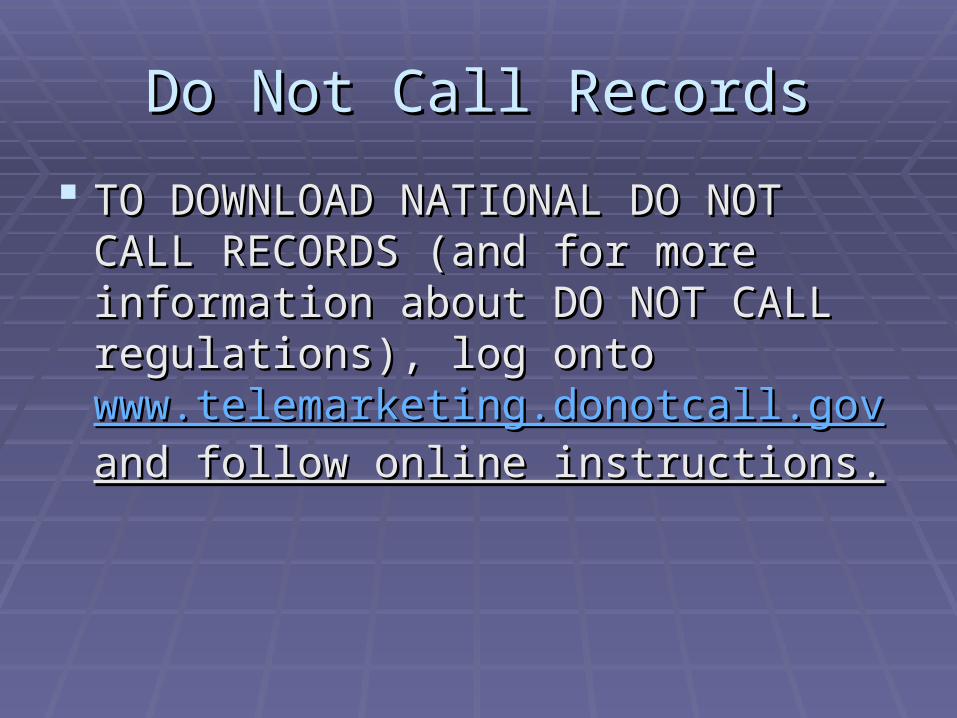
TO DOWNLOAD NATIONAL DO NOT TO DOWNLOAD NATIONAL DO NOT CALL RECORDS (and for more CALL RECORDS (and for more information about DO NOT CALL information about DO NOT CALL regulations), log onto regulations), log onto www.telemarketing.donotcall.govwww.telemarketing.donotcall.gov and and follow online instructions.follow online instructions.

Downloading RecordsDownloading Records
FOR STEP BY STEP INSTRUCTIONS FOR STEP BY STEP INSTRUCTIONS ON DOWNLOADING THE NATIONAL DO ON DOWNLOADING THE NATIONAL DO NOT CALL RECORDS, go to NOT CALL RECORDS, go to http://www.haines.com/ftp1.htmhttp://www.haines.com/ftp1.htm and enter and enter "ndnc.exe" in the area labeled "Enter file "ndnc.exe" in the area labeled "Enter file name to download."name to download."

Running the Import UtilityRunning the Import Utility
To run the file import utility, first open the To run the file import utility, first open the Criss+Cross program Real Estate V3, V3i or Criss+Cross program Real Estate V3, V3i or CC+ V6, and click “CC+ V6, and click “ImportImport.” .”

Then click “Then click “Run File Import UtilityRun File Import Utility” selection, ” selection, which will bring you to the File Import Utility which will bring you to the File Import Utility Welcome Screen, shown here. Click “Welcome Screen, shown here. Click “NextNext” to ” to continue on to Step 1. continue on to Step 1.

Deciding The Type of ImportDeciding The Type of Import Select “phone number” to import only phone numbers of Select “phone number” to import only phone numbers of
your records. This is useful when importing Do Not Call your records. This is useful when importing Do Not Call records, which often includes a phone number. records, which often includes a phone number. IMPORTANT: Your phone numbers must have an area IMPORTANT: Your phone numbers must have an area code to successfully import them.code to successfully import them.

Select "names and addresses" to import names, Select "names and addresses" to import names, addresses, and zip codes of your records. addresses, and zip codes of your records.
Click “Click “Open FileOpen File” and browse for the text file ” and browse for the text file saved previously (954dnc), as shown on the saved previously (954dnc), as shown on the next screen.next screen.
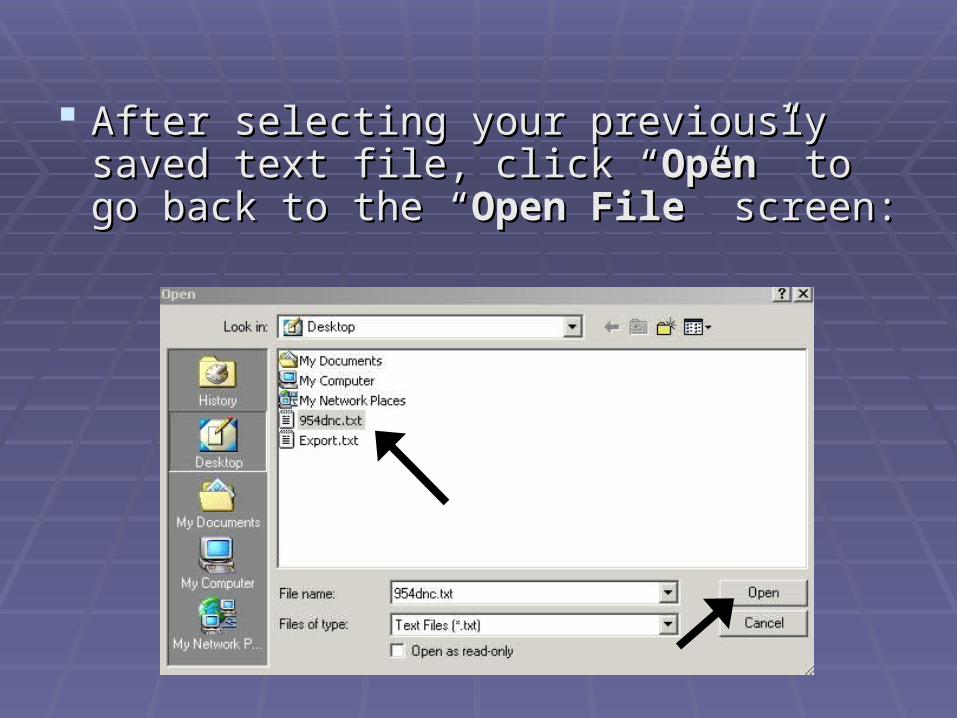
After selecting your previously saved text After selecting your previously saved text file, click “file, click “OpenOpen” to go back to the “” to go back to the “OpenOpen FileFile” screen: ” screen:

Choosing the File to ImportChoosing the File to Import
NOTE: “OPEN FILE” SCREEN WILL SHOW FILE SELECTED C:\NOTE: “OPEN FILE” SCREEN WILL SHOW FILE SELECTED C:\DOCUMENTS AND SETTINGS\ADMINISTRATOR\DESKTOP\YOUR DOCUMENTS AND SETTINGS\ADMINISTRATOR\DESKTOP\YOUR PREVIOUSLY SAVED TEXT FILE, IN THIS CASE (954dnc). AND THE NEXT PREVIOUSLY SAVED TEXT FILE, IN THIS CASE (954dnc). AND THE NEXT BUTTON WILL BE ENABLED TO CONTINUE ON.BUTTON WILL BE ENABLED TO CONTINUE ON.
Click “Click “NextNext” to continue on to Step 3 “” to continue on to Step 3 “Determine if the file is delimited or Determine if the file is delimited or fixedfixed."."

Click the radio button for “Click the radio button for “DelimitedDelimited,” and “,” and “Which Which row of the file would you like to start importing?row of the file would you like to start importing?” ” should remain “1.” Click “should remain “1.” Click “NextNext” to continue on to ” to continue on to Step 4 “Determine the fields (if the file is delimited).Step 4 “Determine the fields (if the file is delimited).

Checkmark the box for “Checkmark the box for “Comma,”Comma,” and click the and click the ““Text QualifierText Qualifier” drop down box to select ” drop down box to select {None}{None}. Click “. Click “NextNext” to continue on to Step 5 ” to continue on to Step 5 ““Determine which columns are toDetermine which columns are to be be imported."imported."

Click “Click “Phone Number is inPhone Number is in” drop down box and ” drop down box and select “select “Column 1.Column 1.” By doing so a brief message ” By doing so a brief message will appear as shown below: will appear as shown below:

Click “Click “YesYes” to continue Step 5. ” to continue Step 5.

After clicking After clicking ““Yes,Yes,” click ” click ““Phone No. also Phone No. also inin” drop down ” drop down box to select box to select ““Column 2.”Column 2.” By By doing so “doing so “NextNext” ” will enable you to will enable you to continue on to continue on to Step 6 “Step 6 “Indicate Indicate specifics about specifics about thethe recordsrecords." ."
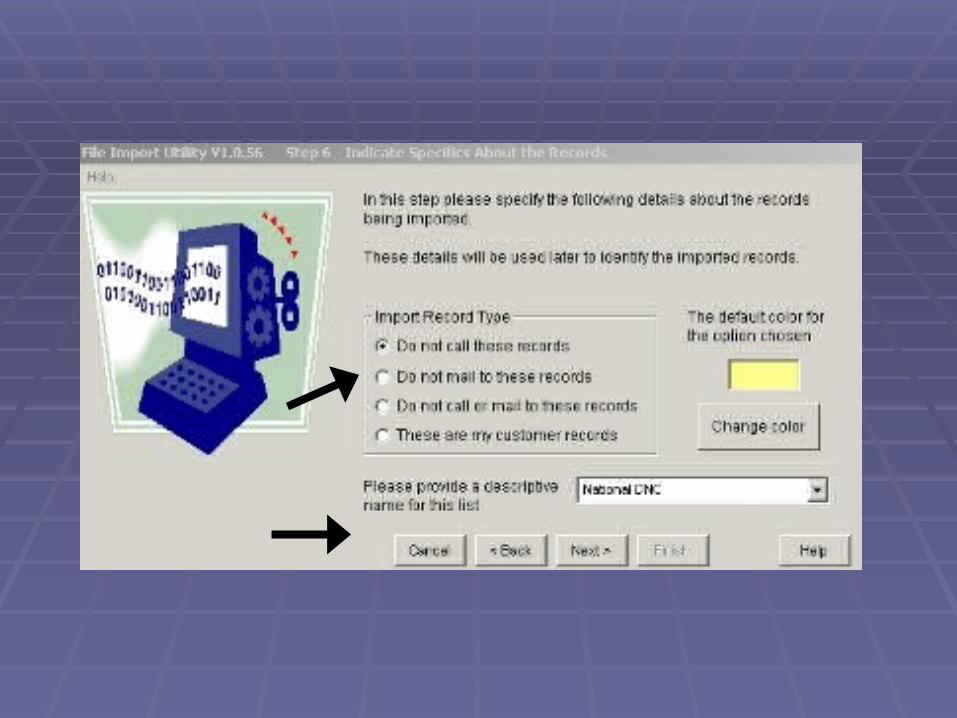

Click the radio button to select “Click the radio button to select “Do not call Do not call these records.these records.” Yellow is the default color that ” Yellow is the default color that Criss+Cross will use to show the National Do Criss+Cross will use to show the National Do Not Call Records in our database unless Not Call Records in our database unless changed otherwise by clicking “changed otherwise by clicking “Change color.”Change color.” Please provide a descriptive name for this Please provide a descriptive name for this listlist to show what records in yellow stand for to show what records in yellow stand for when doing searches in the Criss+Cross when doing searches in the Criss+Cross program. Click “program. Click “NextNext” to continue on to the final ” to continue on to the final step of the import process. step of the import process.

Click the radio button for “Click the radio button for “Add only new Add only new records to phone number databaserecords to phone number database” ” and click “and click “FinishFinish.” .”

Finishing the Import ProcessFinishing the Import Process
After the import is complete a box will pop-up to After the import is complete a box will pop-up to indicate thatindicate that “the import process has “the import process has finished.finished.” Click “” Click “OK,OK,” and then “” and then “ExitExit.” .”

Need HelpNeed Help
If you have any questions or are If you have any questions or are having difficulties with this having difficulties with this application, please contact our application, please contact our Technical Support Department at Technical Support Department at 1-800-697-4550.1-800-697-4550.