Illinois National Guard (ING) - isac.org 2016.pdf · User Guide: Illinois National Guard ... The...
13
User Guide: Illinois National Guard (ING)
Transcript of Illinois National Guard (ING) - isac.org 2016.pdf · User Guide: Illinois National Guard ... The...
User Guide:
Illinois National Guard (ING)

Introduction to ING Processing The Illinois National Guard (ING) Program is administered by schools using the ING system, which is available through ISAC’s Gift Assistance Programs (GAP) Access portal at https://isacportal.isac.org. Once the school user has successfully logged into GAP Access, the ING information is accessed by selecting the ING tab near the top of the screen. Benefit usage processing is accessed via the Benefits tab.
2
Please note that the system will time out after prolonged inactivity. The following message will appear to allow you to save your data:
February 2016
Quick links to ISAC contact information, the FAA section of ISAC’s website and ING program information can be found at the bottom of all ING system screens, as seen below:
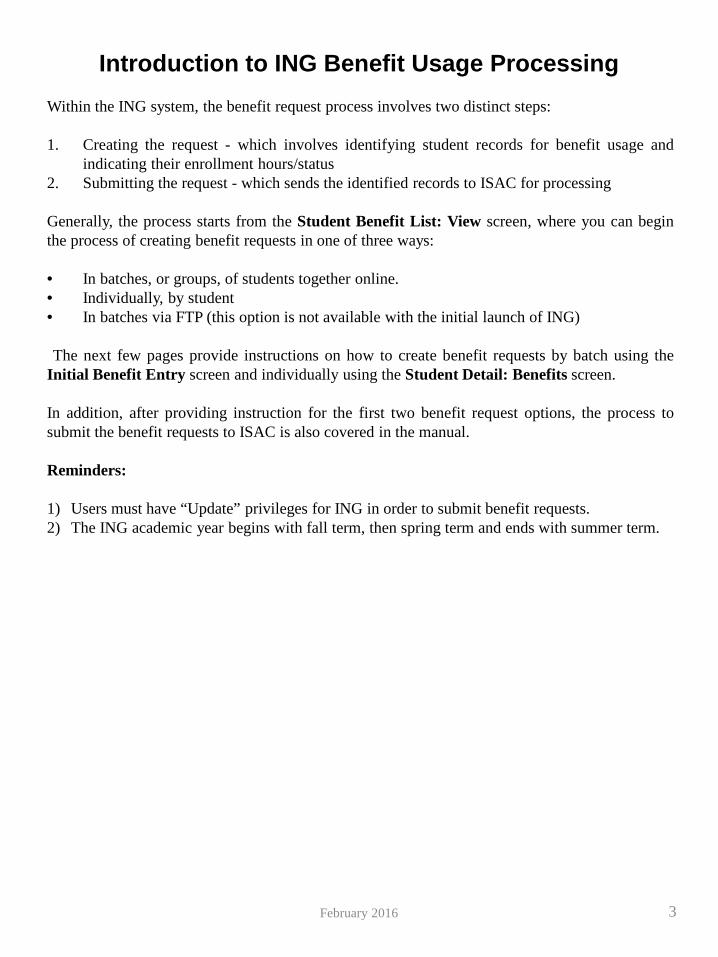
Introduction to ING Benefit Usage Processing Within the ING system, the benefit request process involves two distinct steps: 1. Creating the request - which involves identifying student records for benefit usage and
indicating their enrollment hours/status 2. Submitting the request - which sends the identified records to ISAC for processing
Generally, the process starts from the Student Benefit List: View screen, where you can begin the process of creating benefit requests in one of three ways: • In batches, or groups, of students together online. • Individually, by student • In batches via FTP (this option is not available with the initial launch of ING)
The next few pages provide instructions on how to create benefit requests by batch using the Initial Benefit Entry screen and individually using the Student Detail: Benefits screen. In addition, after providing instruction for the first two benefit request options, the process to submit the benefit requests to ISAC is also covered in the manual. Reminders: 1) Users must have “Update” privileges for ING in order to submit benefit requests. 2) The ING academic year begins with fall term, then spring term and ends with summer term.
February 2016 3
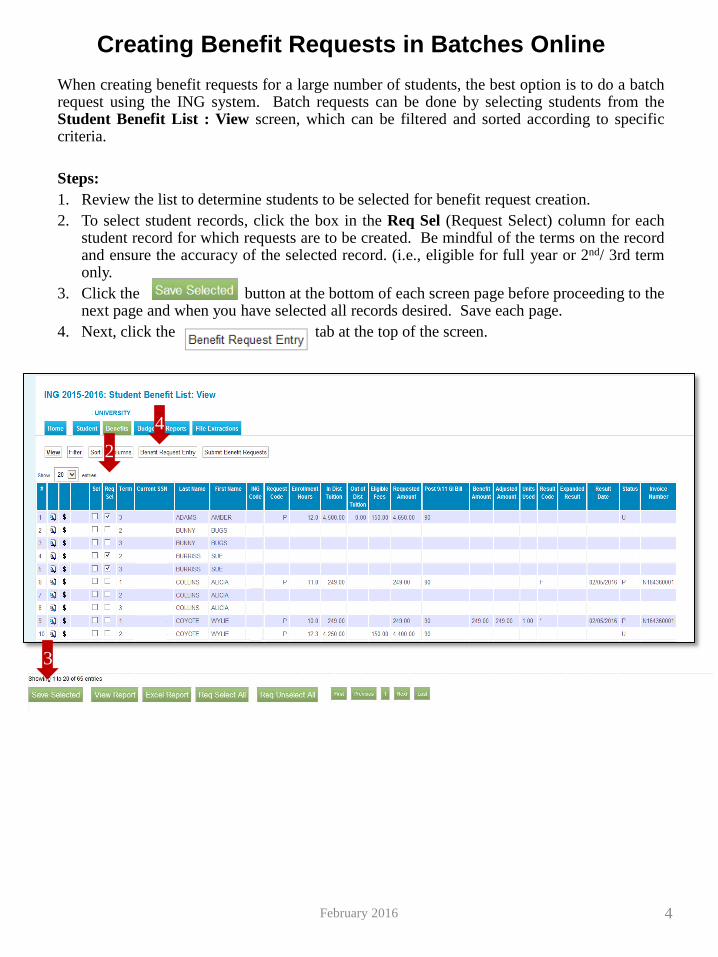
Creating Benefit Requests in Batches Online When creating benefit requests for a large number of students, the best option is to do a batch request using the ING system. Batch requests can be done by selecting students from the Student Benefit List : View screen, which can be filtered and sorted according to specific criteria. Steps: 1. Review the list to determine students to be selected for benefit request creation. 2. To select student records, click the box in the Req Sel (Request Select) column for each
student record for which requests are to be created. Be mindful of the terms on the record and ensure the accuracy of the selected record. (i.e., eligible for full year or 2nd/ 3rd term only.
3. Click the button at the bottom of each screen page before proceeding to the next page and when you have selected all records desired. Save each page.
4. Next, click the tab at the top of the screen.
February 2016 4
2
3
4
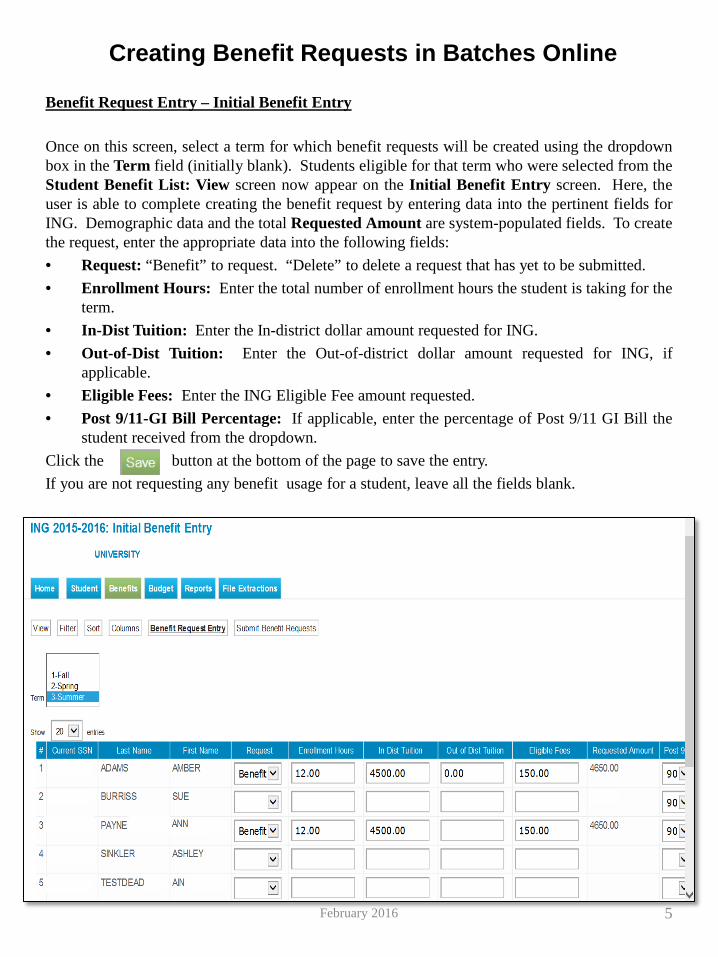
Creating Benefit Requests in Batches Online
Benefit Request Entry – Initial Benefit Entry Once on this screen, select a term for which benefit requests will be created using the dropdown box in the Term field (initially blank). Students eligible for that term who were selected from the Student Benefit List: View screen now appear on the Initial Benefit Entry screen. Here, the user is able to complete creating the benefit request by entering data into the pertinent fields for ING. Demographic data and the total Requested Amount are system-populated fields. To create the request, enter the appropriate data into the following fields: • Request: “Benefit” to request. “Delete” to delete a request that has yet to be submitted. • Enrollment Hours: Enter the total number of enrollment hours the student is taking for the
term. • In-Dist Tuition: Enter the In-district dollar amount requested for ING. • Out-of-Dist Tuition: Enter the Out-of-district dollar amount requested for ING, if
applicable. • Eligible Fees: Enter the ING Eligible Fee amount requested. • Post 9/11-GI Bill Percentage: If applicable, enter the percentage of Post 9/11 GI Bill the
student received from the dropdown. Click the button at the bottom of the page to save the entry. If you are not requesting any benefit usage for a student, leave all the fields blank.
February 2016 5

Creating Benefit Requests Individually Generating benefit requests for each student individually is the most straight-forward method and is done using the Student Detail: Benefit screen. Because this can be a time-consuming method, it is best used when you have a small number of records for which you need to generate a benefit. In addition, use this screen to make an adjustment to a previously processed benefit request. Access the Student Detail: Benefits screen by either clicking the dollar sign icon on the Student Benefit List: View screen or clicking the Benefits tab on the Student Detail: Eligibility screen. The screen will display and allow data entry only into terms for which the student is eligible. To create the request, enter the appropriate data into the following fields: • Request: “Benefit” to request an initial benefit or to adjust a previously processed benefit.
“Cancel” to completely cancel a previously processed benefit. “Delete” to delete a request that has yet to be submitted.
• Enrollment Hours: Enter the number of enrollment hours the student is taking for the term. • In-District Tuition: Enter the In-district dollar amount requested for ING. • Out-of-District Tuition: Enter the Out-of-district dollar amount requested for ING, if
applicable. • Eligible Fee Amount: Enter the ING Eligible Fee amount requested. • Post 9/11-GI Bill %: If applicable, enter the percentage of Post 9/11 GI Bill the student
received from the dropdown. Click the button in the middle of the page to save the entry. NOTE: If you have already created an initial request using the online batch method of creating a benefit request for a student, there is no need to create an individual request. Regardless of the way the benefit request is created, you must complete the process by submitting the benefit requests.
February 2016 6
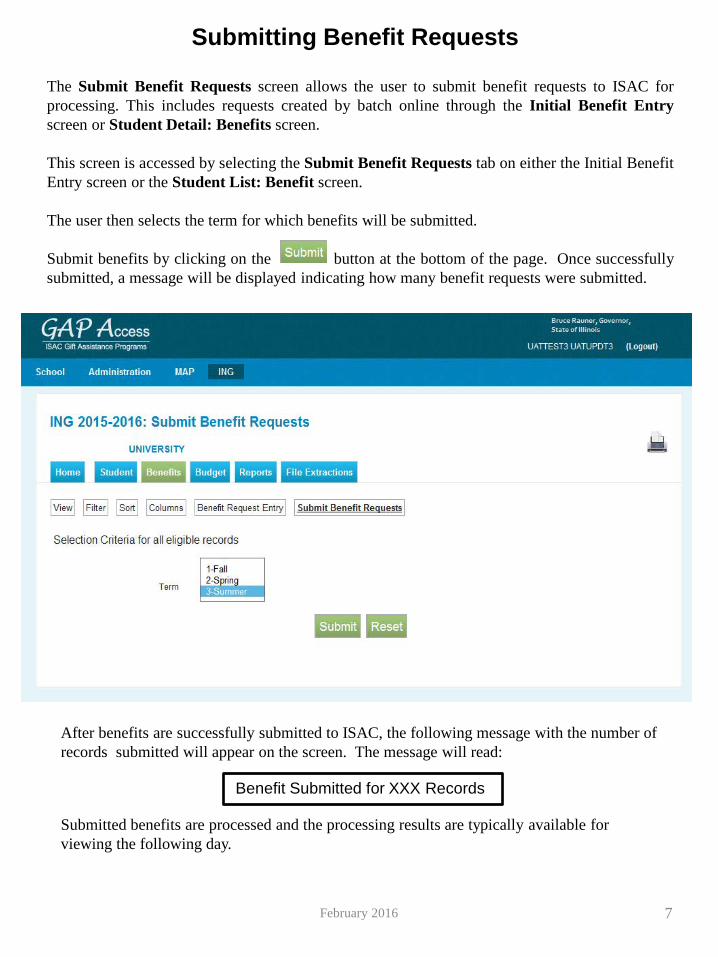
Submitting Benefit Requests
The Submit Benefit Requests screen allows the user to submit benefit requests to ISAC for processing. This includes requests created by batch online through the Initial Benefit Entry screen or Student Detail: Benefits screen. This screen is accessed by selecting the Submit Benefit Requests tab on either the Initial Benefit Entry screen or the Student List: Benefit screen. The user then selects the term for which benefits will be submitted. Submit benefits by clicking on the button at the bottom of the page. Once successfully submitted, a message will be displayed indicating how many benefit requests were submitted.
February 2016 7
To select Sort categories: highlight the item in the Unselected list and click on the arrow icon to move it to the Selected list. To select more than one item at a time, hold down the Ctrl key while highlighting the items, then click on the arrow icon.
After benefits are successfully submitted to ISAC, the following message with the number of records submitted will appear on the screen. The message will read:
Benefit Submitted for XXX Records
Submitted benefits are processed and the processing results are typically available for viewing the following day.

ING Benefit Processing Results ING benefit processing results are available for viewing in a few different ways. Results may be viewed:
• on the Student Benefit List: View screen, • on the Student Detail: Benefits screen, • on Benefit Results reports.
ING Student Benefit List screen ING benefit results are displayed on the Student Benefit List: View screen, in the columns that reflect the total benefit amount, the units used and the processing results codes*.
February 2016 8
*See page 13 of this guide for a listing of all the benefit result codes.

ING Benefit Processing Results Student Detail: Benefits screen To view the processing results for an individual student, you may also choose to access the Student Detail: Benefits. Simply click on the dollar sign icon on the Student Benefit List: View screen and navigate to the Student Detail: Benefits screen. The screen is divided into three sections: 1. The request section 2. The results section, and 3. The benefit processing invoicing section Review the Results section to see the most recent results of a benefit request. Review the Invoice section to see the latest invoicing data, including any adjustments to amounts made from a previous request.
February 2016 9

ING Benefit Processing Results
February 2016 10
ING Benefit Results Report Reports displaying the .pdf icon are ISAC-generated reports of the benefit processing results. These reports are identifiable by the user name INGInvoice in the last column of the report list. Typically, this report is made available on the next business day after your school’s benefit requests has been processed and will remain available as long as space allows. It is suggested that you save requested and ISAC-generated reports to your systems for future reference.

ING File Extractions
February 2016 11
ING File Extractions allow users to create a data file of benefit results that can be transferred to other systems. ING file extractions follow the ING 160-Byte File Layout Specifications that can be found on isac.org in the Electronic Tools section. The ING File Extraction lists students that may be eligible for the Illinois National Guard (ING) grant in an electronic format. The Reports screen is accessed from the File Extractions tab. To generate an extraction, first click the button in the upper right-hand corner of the screen. Then, select “ING Benefit Results File” from the Select Report drop down menu and click on the Request Report button.

ING File Extractions
February 2016 12
When the extraction is complete, the user is taken back to the File Extractions: Eligibility Status File screen. There, the user has the choice of viewing or downloading the in Excel or Text file format.

ING Benefit Results Codes
CODE DEFINITION
* Benefit processed as requested – no report exception.
B Benefit increased.
C Benefit decreased.
F Full ING units already used.
H Benefit already processed for your school for requested term, benefit amount or units
for term.
I Benefit reduced, amount requested is greater than term award.
J Ineligible for Benefit (Certified as not eligible)
K Ineligible for Benefit due to Stafford loan default status per ISAC.
P Student not eligible for term requested. Application received after the deadline date.
T With this Benefit, student attains 120 ING Paid Credit Hours. Student will no longer
be eligible for ING Benefit. (Not a 10-year(+) member of the Illinois National
Guard)
U Change in Benefit was requested; record indicates that no prior Benefit has been
made for this term.
V With this Benefit, student attains 180 ING paid credit hours. Student no longer
eligible for ING Benefit (10-year(+) member of the Illinois National Guard)
W ING units increased due to change in enrollment hours.
X ING units decreased due to change in enrollment hours.
13 February 2016