idrive Technical Document - Amazon S3 · This includes an image-based / bare-metal backup feature,...
29
www.idrive.net.au 1 Introduction The MS Windows System Backup module of idrive A-CLICK provides you with a set of tools to protect your personal computers on Windows operating system platforms. This includes an image-based / bare-metal backup feature, that leverages Microsoft’s native Wbadmin command-line tool (http://go.microsoft.com/fwlink/?LinkId=140216), and recovery feature, to ensure that your computers are protected even if they are lost or destroyed entirely. The image can be recovered onto a new device if necessary.
Transcript of idrive Technical Document - Amazon S3 · This includes an image-based / bare-metal backup feature,...
www.idrive.net.au 1
Introduction
The MS Windows System Backup module of idrive A-CLICK provides you with a set of tools to protect
your personal computers on Windows operating system platforms.
This includes an image-based / bare-metal backup feature, that leverages Microsoft’s native Wbadmin
command-line tool (http://go.microsoft.com/fwlink/?LinkId=140216), and recovery feature, to ensure
that your computers are protected even if they are lost or destroyed entirely. The image can be
recovered onto a new device if necessary.
www.idrive.net.au 2
Contents Introduction.............................................................................................................................................. 1
1 Requirements and Limitations ......................................................................................................... 3
1.1 Restore Consideration ............................................................................................................... 5
2 Starting idrive A-CLICK ................................................................................................................... 6
2.1 Login to idrive A-CLICK.............................................................................................................. 6
3 Configuring a MS Windows System Backup Set ............................................................................ 7
3.1 Create a MS Windows System Backup Set ............................................................................... 7
4 Overview on the Backup Process ................................................................................................. 14
5 Running a Backup ......................................................................................................................... 15
5.1 Start a Manual Backup ............................................................................................................. 15
5.2 Configure Backup Schedule for Automated Backup ................................................................ 16
6 Restore with a MS Windows System Backup Set ......................................................................... 17
6.1 Login to idrive A-CLICK............................................................................................................ 17
6.2 Restore the System Image ...................................................................................................... 17
6.3 Recovering Your Server ........................................................................................................... 22
6.3.1 Recover a Full System ...................................................................................................... 23
www.idrive.net.au 3
1 Requirements and Limitations
Ensure that the following requirements are met:
idrive A-CLICK Installation
Make sure that idrive A-CLICK is installed on the computer to be backed up.
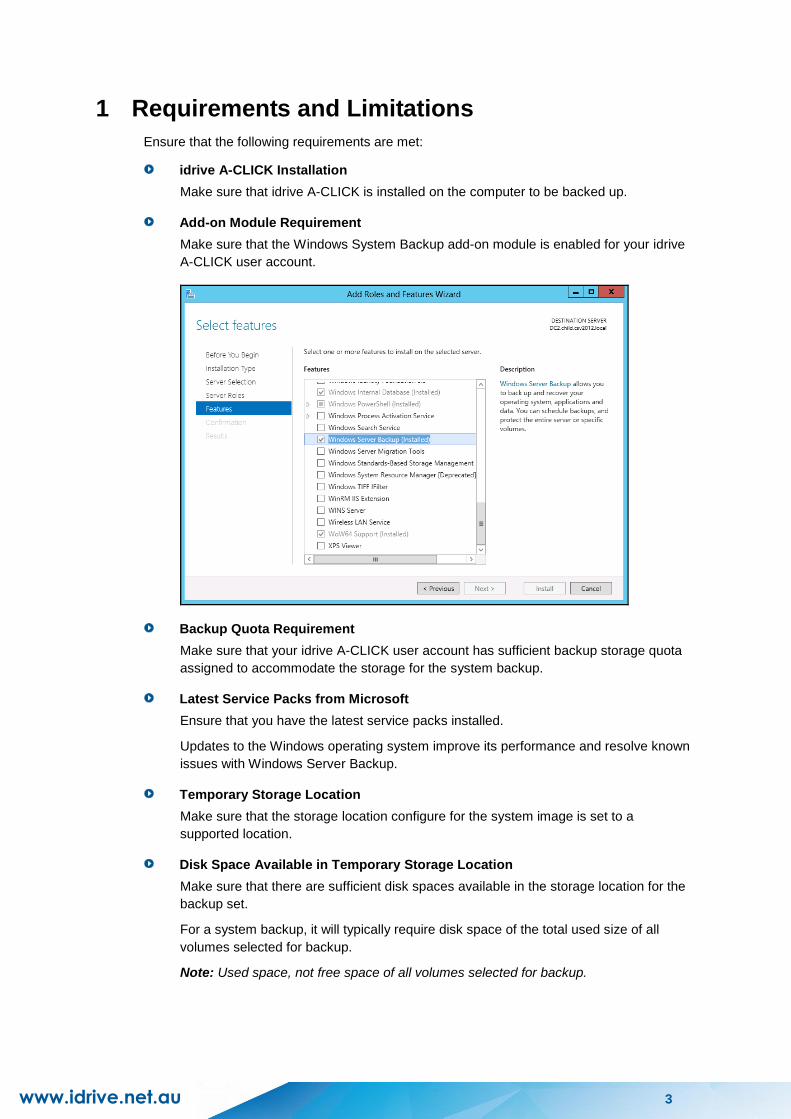
Add-on Module Requirement
Make sure that the Windows System Backup add-on module is enabled for your idrive
A-CLICK user account.
Backup Quota Requirement
Make sure that your idrive A-CLICK user account has sufficient backup storage quota
assigned to accommodate the storage for the system backup.
Latest Service Packs from Microsoft
Ensure that you have the latest service packs installed.
Updates to the Windows operating system improve its performance and resolve known
issues with Windows Server Backup.
Temporary Storage Location
Make sure that the storage location configure for the system image is set to a
supported location.
Disk Space Available in Temporary Storage Location
Make sure that there are sufficient disk spaces available in the storage location for the
backup set.
For a system backup, it will typically require disk space of the total used size of all
volumes selected for backup.
Note: Used space, not free space of all volumes selected for backup.
www.idrive.net.au 4
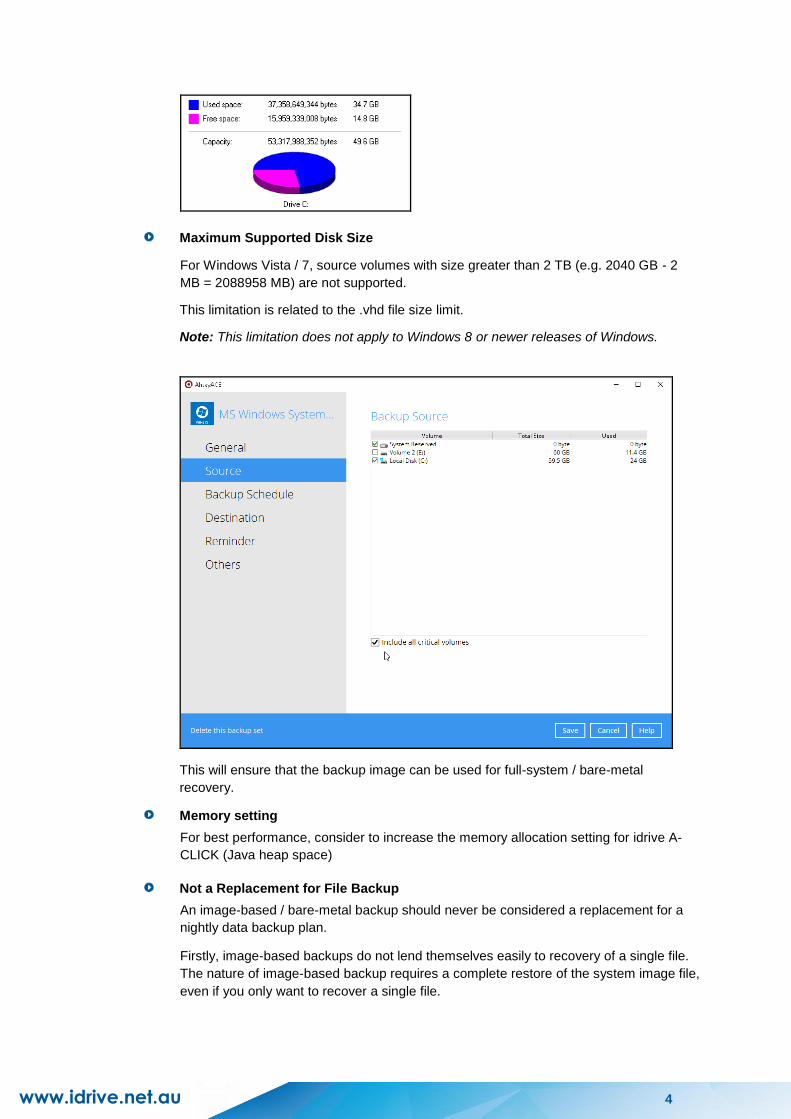
Maximum Supported Disk Size
For Windows Vista / 7, source volumes with size greater than 2 TB (e.g. 2040 GB - 2
MB = 2088958 MB) are not supported.
This limitation is related to the .vhd file size limit.
Note: This limitation does not apply to Windows 8 or newer releases of Windows.
This will ensure that the backup image can be used for full-system / bare-metal
recovery.
Memory setting
For best performance, consider to increase the memory allocation setting for idrive A-
CLICK (Java heap space)
Not a Replacement for File Backup
An image-based / bare-metal backup should never be considered a replacement for a
nightly data backup plan.
Firstly, image-based backups do not lend themselves easily to recovery of a single file.
The nature of image-based backup requires a complete restore of the system image file,
even if you only want to recover a single file.

www.idrive.net.au 5
1.1 Restore Consideration
Please consider the following before performing a restore:
Windows Account Permission
To perform a full-system recovery, the operating system account that you use, must be
a member of the Backup Operators or Administrators group.
Disk Size
For recovery of operating system to a new hard disk, ensure that the disk that you
restore to is at least the size of the disk that contained the volumes that were backed up,
regardless of the size of those volumes within.
For example, if there was only one volume of size 100 GB created on a 1 TB disk
during backup, then you should use a disk that is at least 1 TB when recovering.
Caution on Recovery to Dissimilar Hardware
This recovery method requires the restore target system to have similar hardware and
the exact same boot type as the source system from which the backup was taken. Disk
adapters are especially sensitive. If dissimilar hardware is used, the restored system
might not be boot.
For example, if the system backup image was taken from a BIOS-based system, the
recovery environment must be booted in BIOS mode.
BitLocker Drive
For computer with BitLocker Drive Encryption enabled, make sure to re-apply BitLocker
Drive Encryption to the volume after a restore.
This will not happen automatically, it must be enabled explicitly.
For instructions, refers to the following: http://go.microsoft.com/fwlink/?LinkID=143722
www.idrive.net.au 6
2 Starting idrive A-CLICK
2.1 Login to idrive A-CLICK
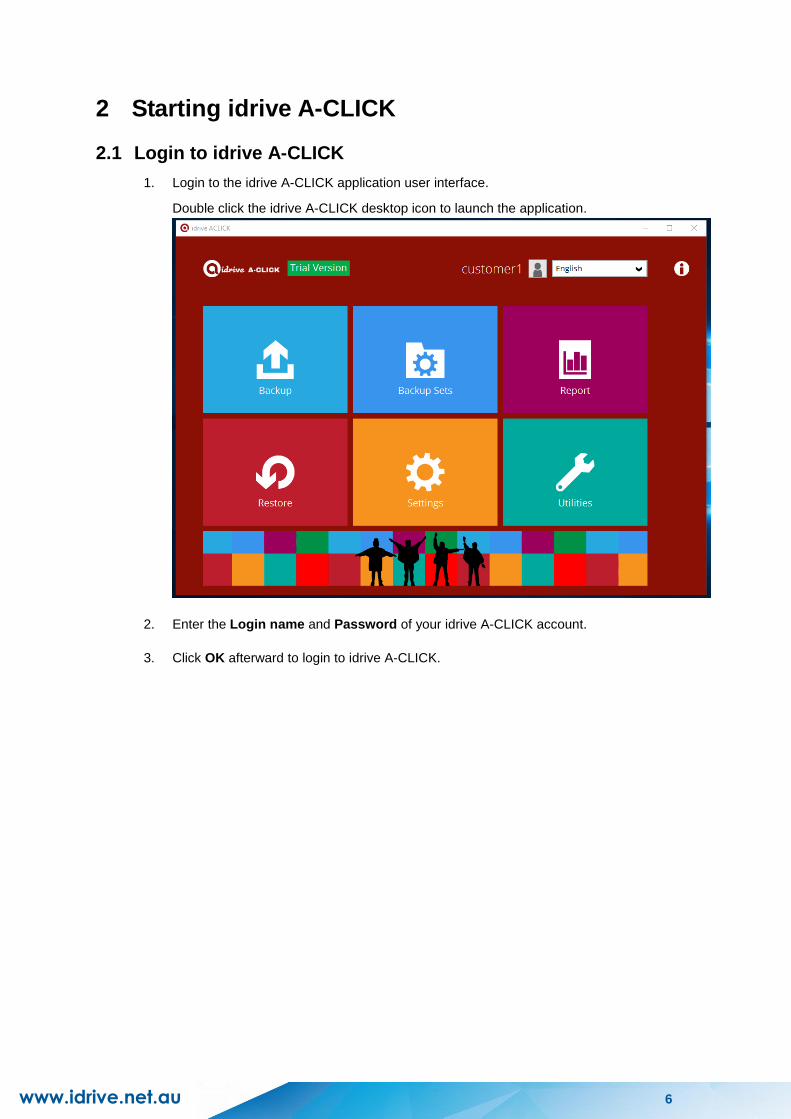
1. Login to the idrive A-CLICK application user interface.
Double click the idrive A-CLICK desktop icon to launch the application.
2. Enter the Login name and Password of your idrive A-CLICK account.
3. Click OK afterward to login to idrive A-CLICK.

www.idrive.net.au 7
3 Configuring a MS Windows System Backup Set
3.1 Create a MS Windows System Backup Set
1. In the idrive A-CLICK main interface, click Backup Sets.
2. Create a MS Windows System backup set by clicking the “+” icon next to Add new
backup set.
3. Select MS Windows System Backup as the Backup set type; then enter a Name for
your backup set.

www.idrive.net.au 8
4. Select the location where you would like to store the system image before generating the
backup data.
Select a local volume from the dropdown menu. Click Next to proceed.
-OR-
Enter the UNC path to a network volume that is accessible to the client computer. Click
Next to proceed.
Note: Make sure that the storage location configure for the system image is set to a
supported location.
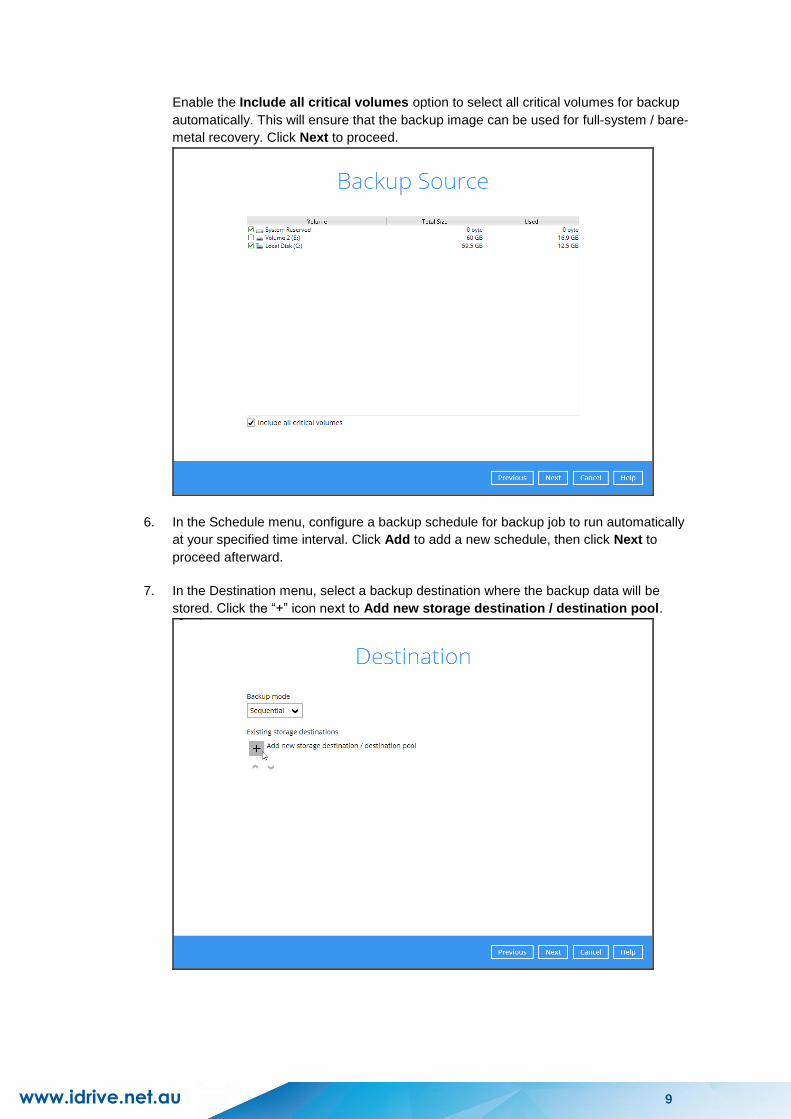
5. In the Backup Source menu, select the volume(s) which you would like to backup.
www.idrive.net.au 9
Enable the Include all critical volumes option to select all critical volumes for backup
automatically. This will ensure that the backup image can be used for full-system / bare-
metal recovery. Click Next to proceed.
6. In the Schedule menu, configure a backup schedule for backup job to run automatically
at your specified time interval. Click Add to add a new schedule, then click Next to
proceed afterward.
7. In the Destination menu, select a backup destination where the backup data will be
stored. Click the “+” icon next to Add new storage destination / destination pool.
www.idrive.net.au 10
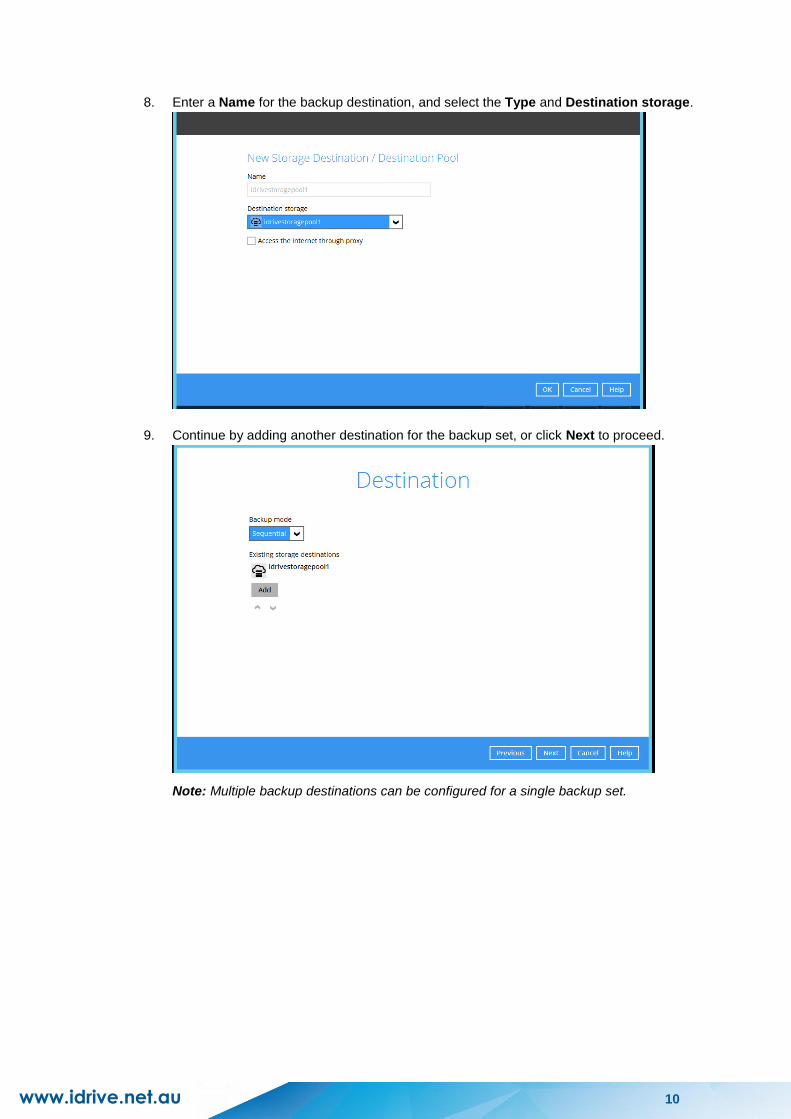
8. Enter a Name for the backup destination, and select the Type and Destination storage.
9. Continue by adding another destination for the backup set, or click Next to proceed.
Note: Multiple backup destinations can be configured for a single backup set.
www.idrive.net.au 11
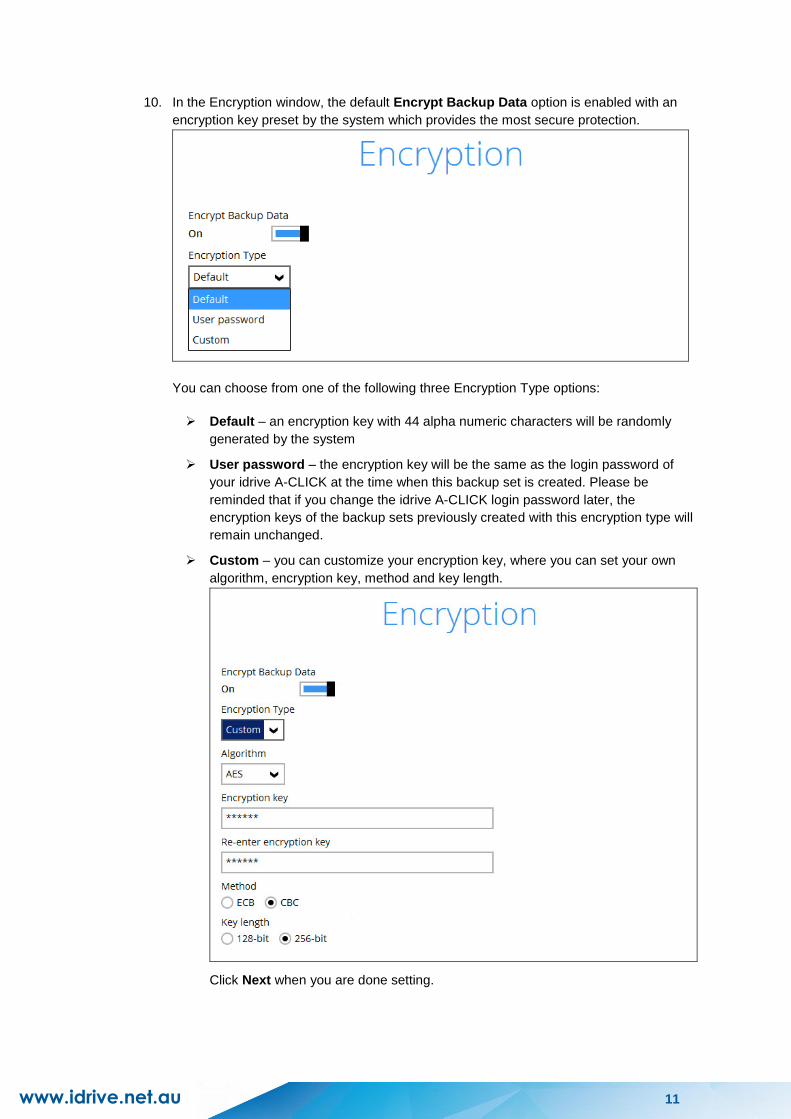
10. In the Encryption window, the default Encrypt Backup Data option is enabled with an
encryption key preset by the system which provides the most secure protection.
You can choose from one of the following three Encryption Type options:
Default – an encryption key with 44 alpha numeric characters will be randomly
generated by the system
User password – the encryption key will be the same as the login password of
your idrive A-CLICK at the time when this backup set is created. Please be
reminded that if you change the idrive A-CLICK login password later, the
encryption keys of the backup sets previously created with this encryption type will
remain unchanged.
Custom – you can customize your encryption key, where you can set your own
algorithm, encryption key, method and key length.
Click Next when you are done setting.
www.idrive.net.au 12
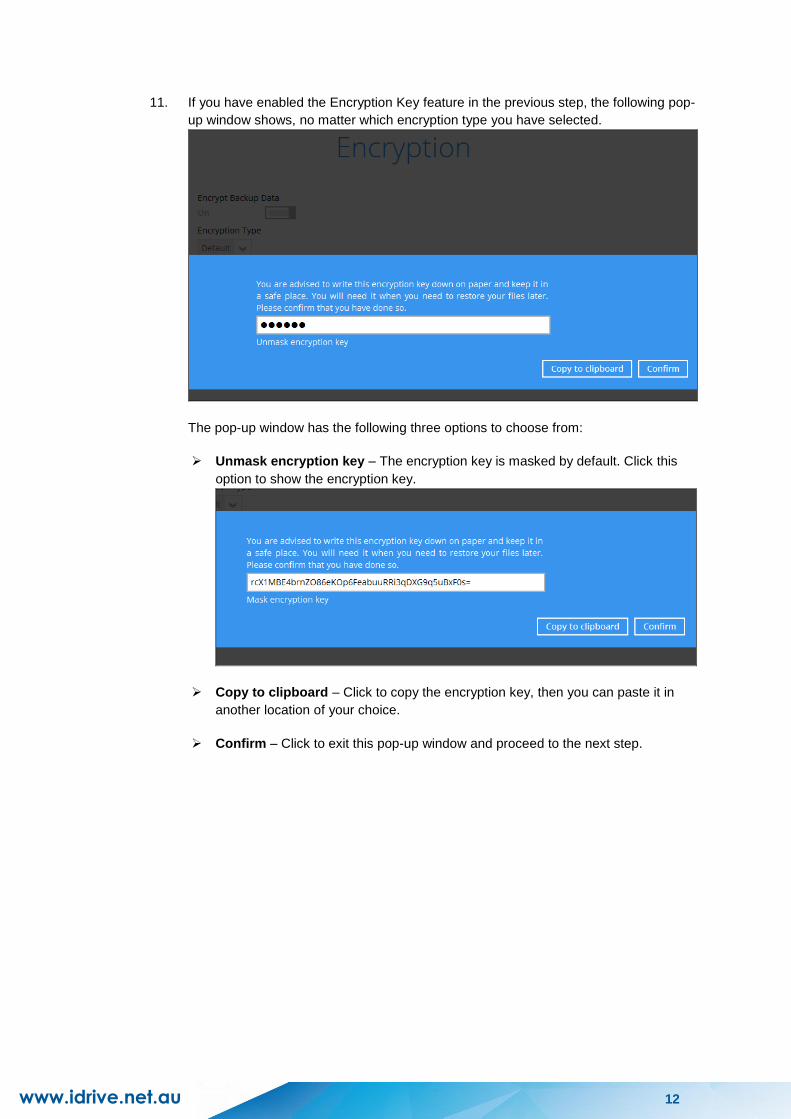
11. If you have enabled the Encryption Key feature in the previous step, the following pop-
up window shows, no matter which encryption type you have selected.
The pop-up window has the following three options to choose from:
Unmask encryption key – The encryption key is masked by default. Click this
option to show the encryption key.
Copy to clipboard – Click to copy the encryption key, then you can paste it in
another location of your choice.
Confirm – Click to exit this pop-up window and proceed to the next step.
www.idrive.net.au 13
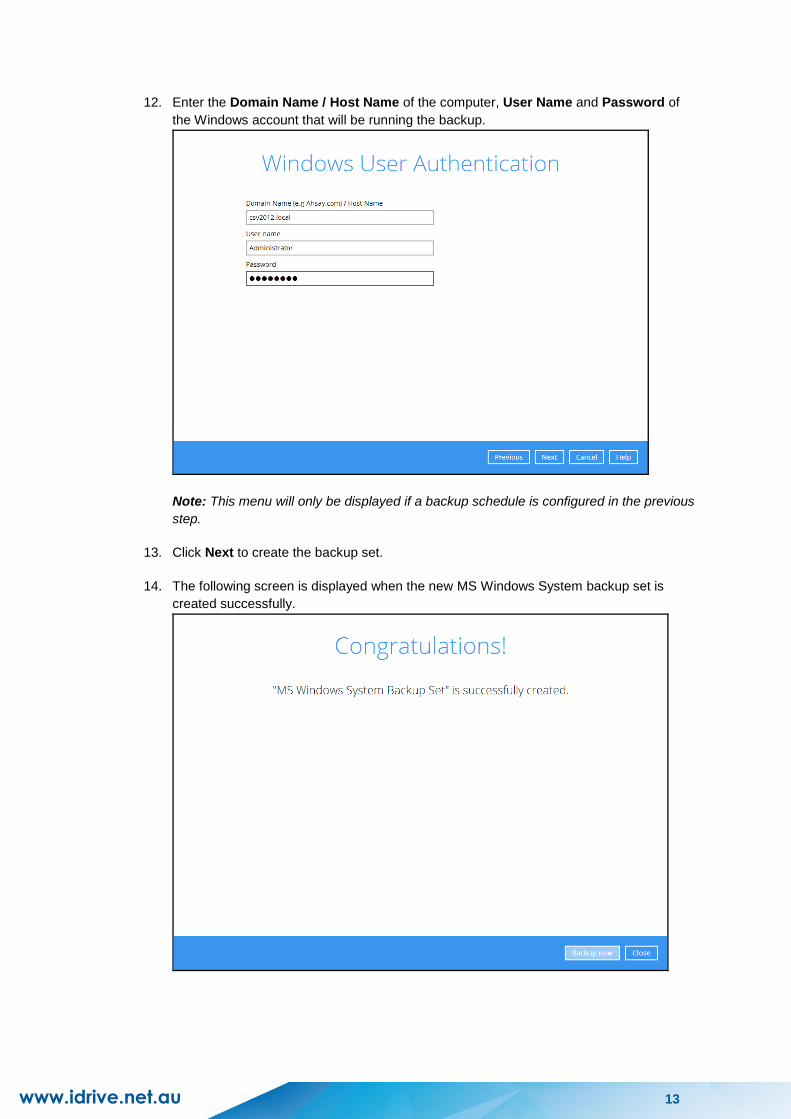
12. Enter the Domain Name / Host Name of the computer, User Name and Password of
the Windows account that will be running the backup.
Note: This menu will only be displayed if a backup schedule is configured in the previous
step.
13. Click Next to create the backup set.
14. The following screen is displayed when the new MS Windows System backup set is
created successfully.
www.idrive.net.au 14
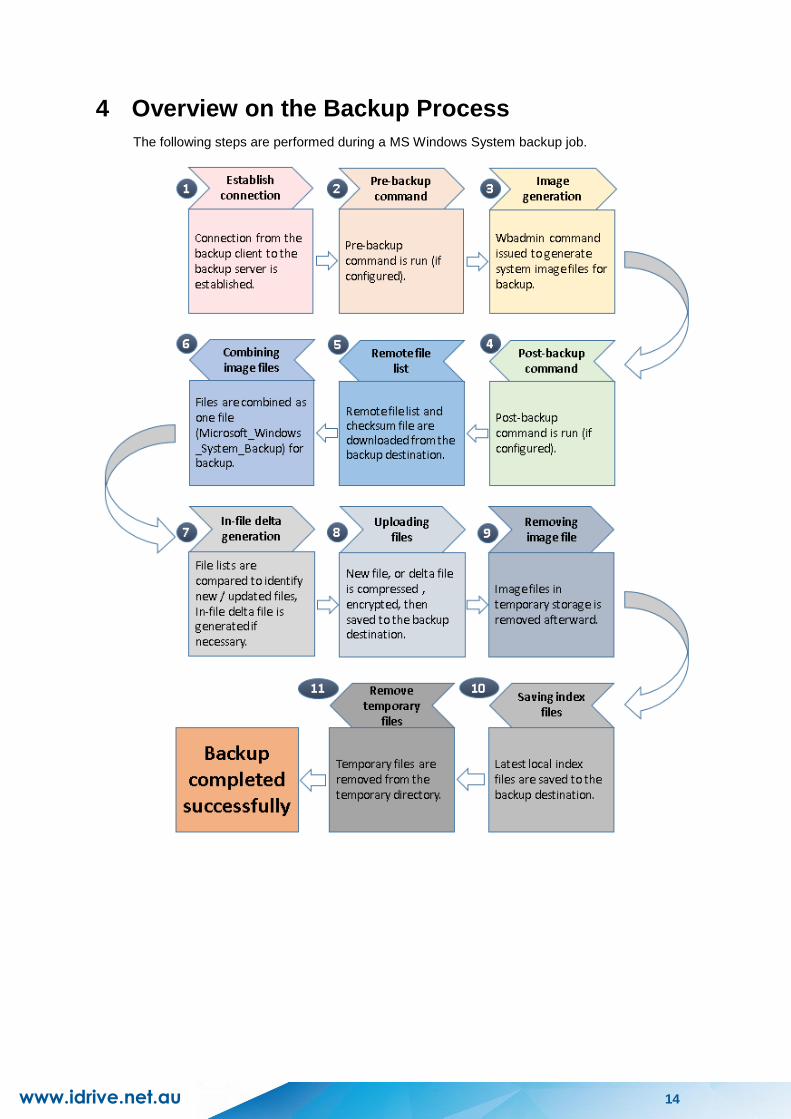
4 Overview on the Backup Process
The following steps are performed during a MS Windows System backup job.
www.idrive.net.au 15
5 Running a Backup
5.1 Start a Manual Backup
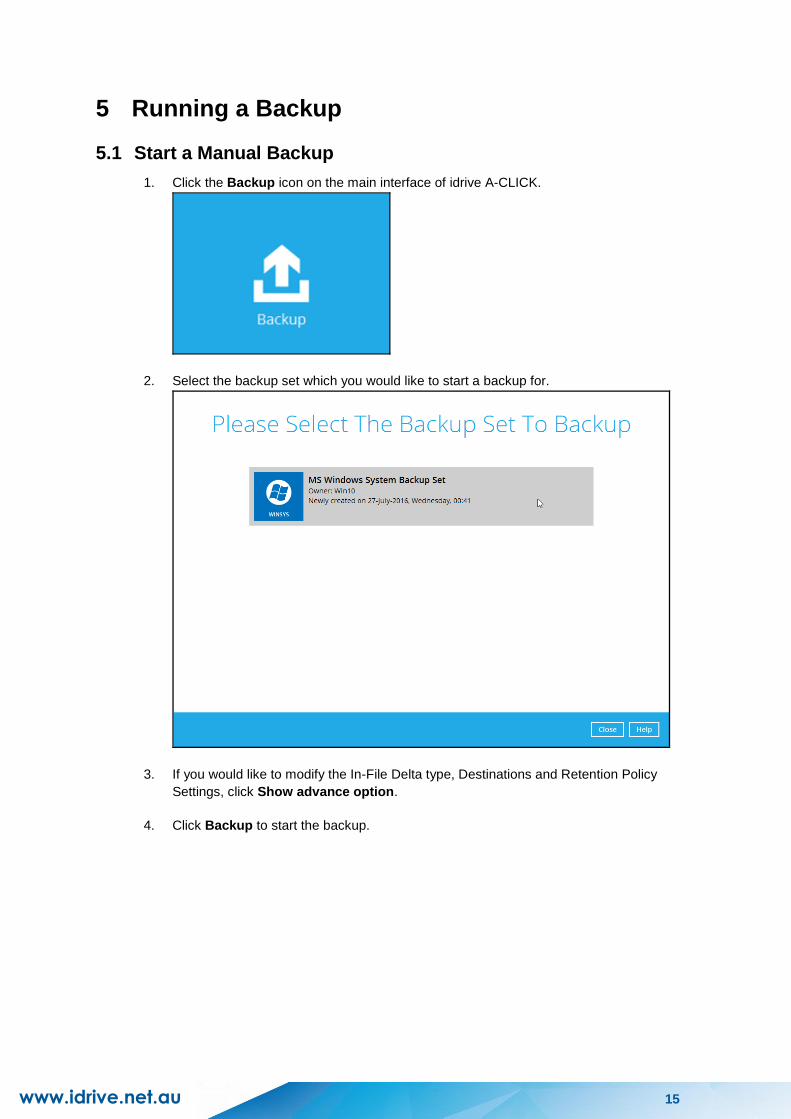
1. Click the Backup icon on the main interface of idrive A-CLICK.
2. Select the backup set which you would like to start a backup for.
3. If you would like to modify the In-File Delta type, Destinations and Retention Policy
Settings, click Show advance option.
4. Click Backup to start the backup.
www.idrive.net.au 16
5.2 Configure Backup Schedule for Automated Backup
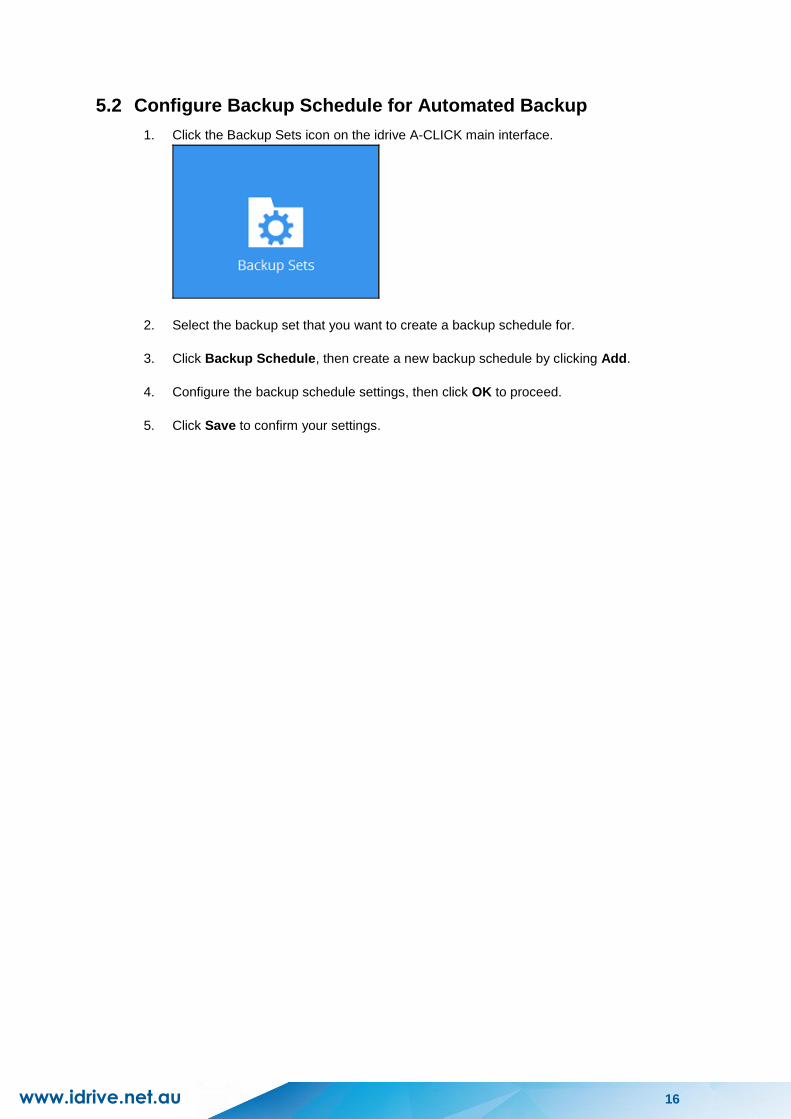
1. Click the Backup Sets icon on the idrive A-CLICK main interface.
2. Select the backup set that you want to create a backup schedule for.
3. Click Backup Schedule, then create a new backup schedule by clicking Add.
4. Configure the backup schedule settings, then click OK to proceed.
5. Click Save to confirm your settings.
www.idrive.net.au 17
6 Restore with a MS Windows System Backup Set
6.1 Login to idrive A-CLICK
6.2 Restore the System Image
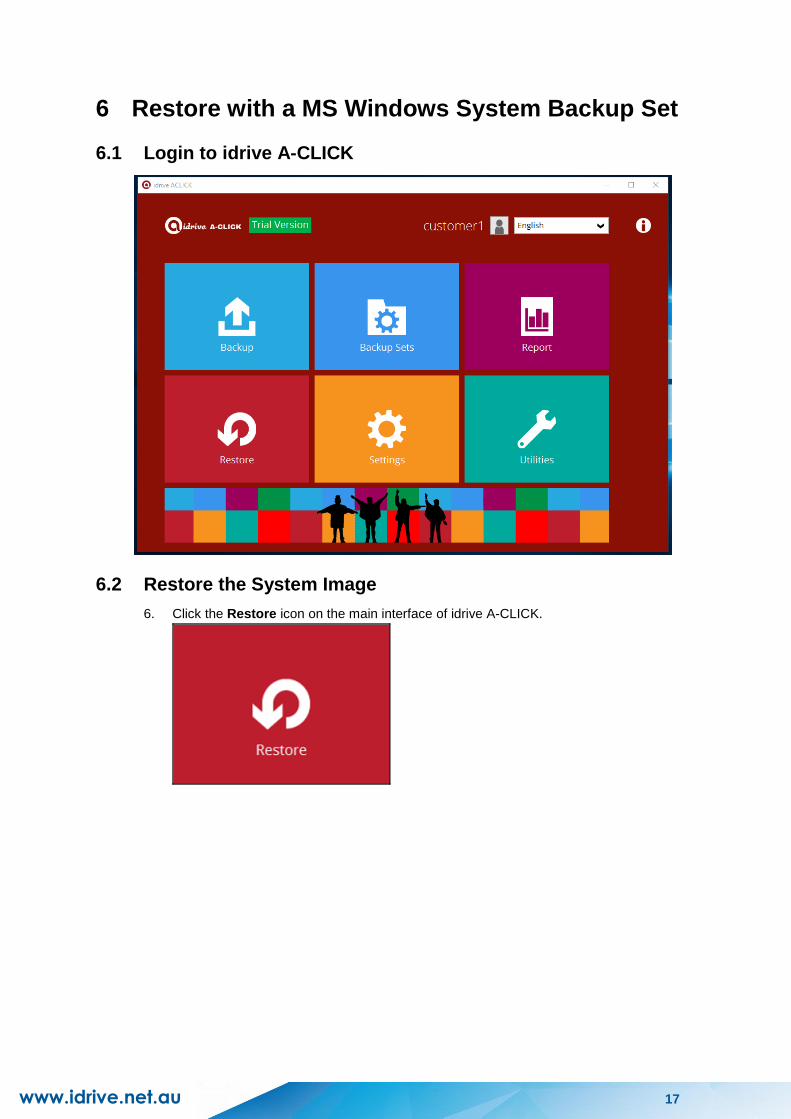
6. Click the Restore icon on the main interface of idrive A-CLICK.
www.idrive.net.au 18
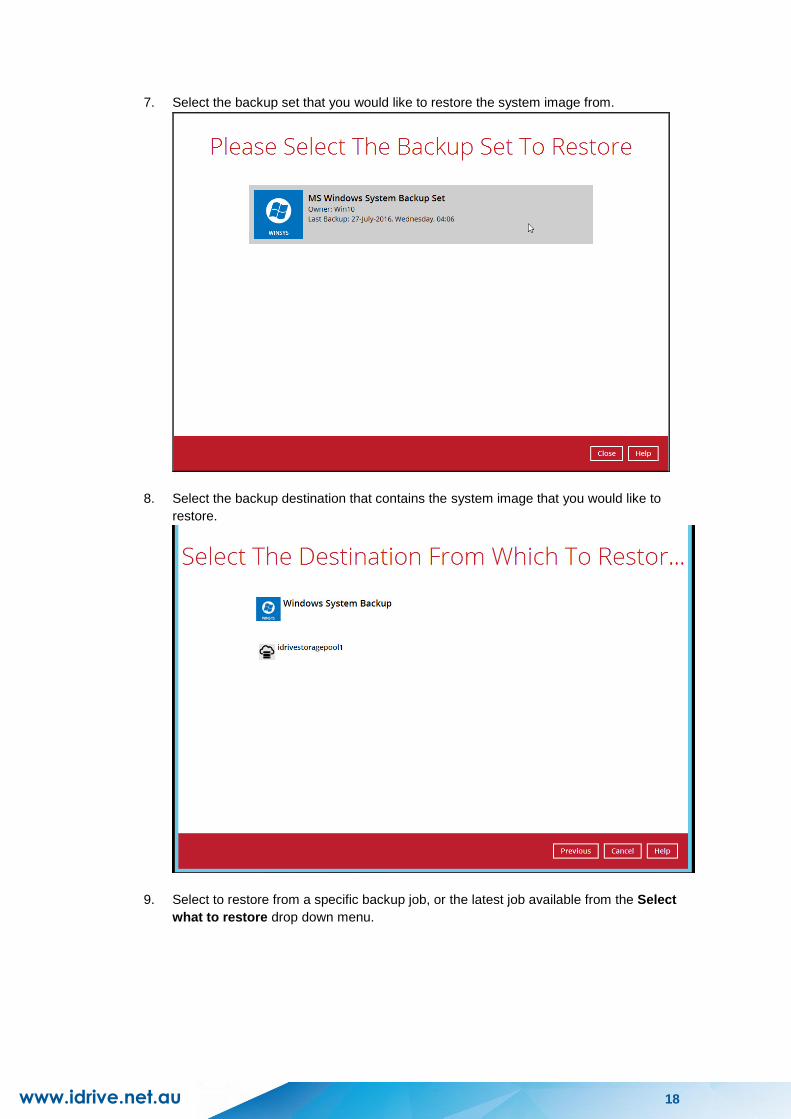
7. Select the backup set that you would like to restore the system image from.
8. Select the backup destination that contains the system image that you would like to
restore.
9. Select to restore from a specific backup job, or the latest job available from the Select
what to restore drop down menu.
www.idrive.net.au 19
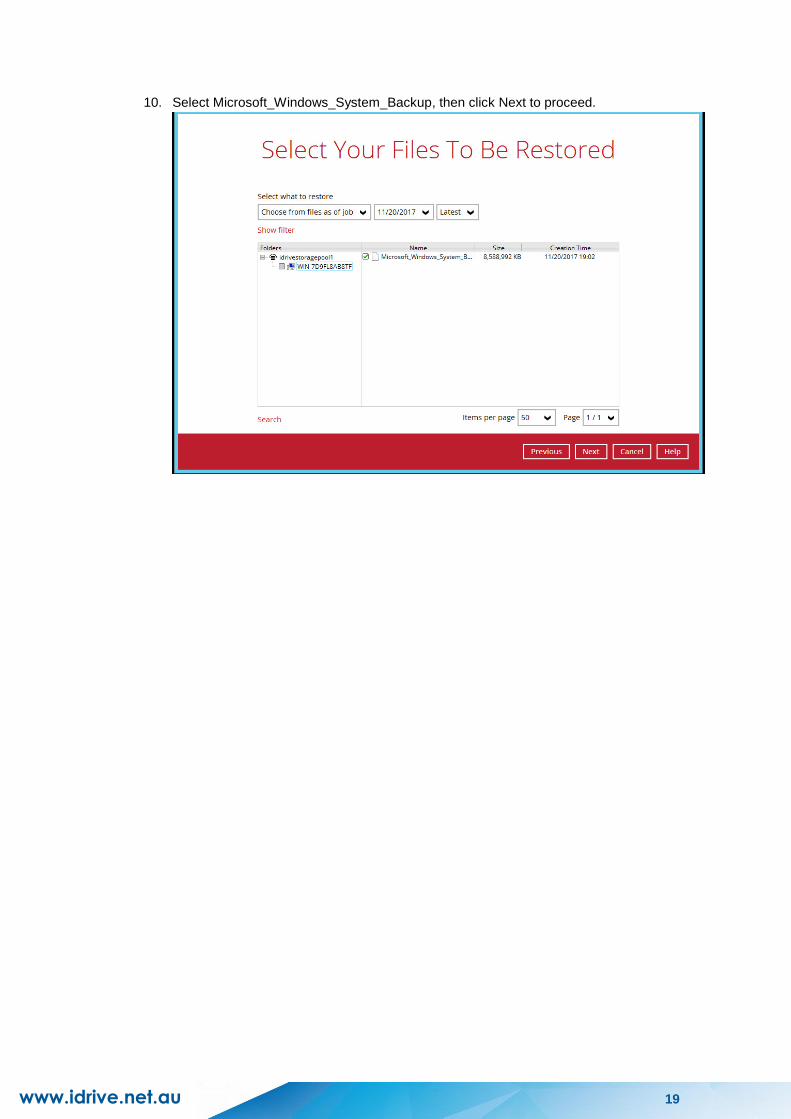
10. Select Microsoft_Windows_System_Backup, then click Next to proceed.
www.idrive.net.au 20
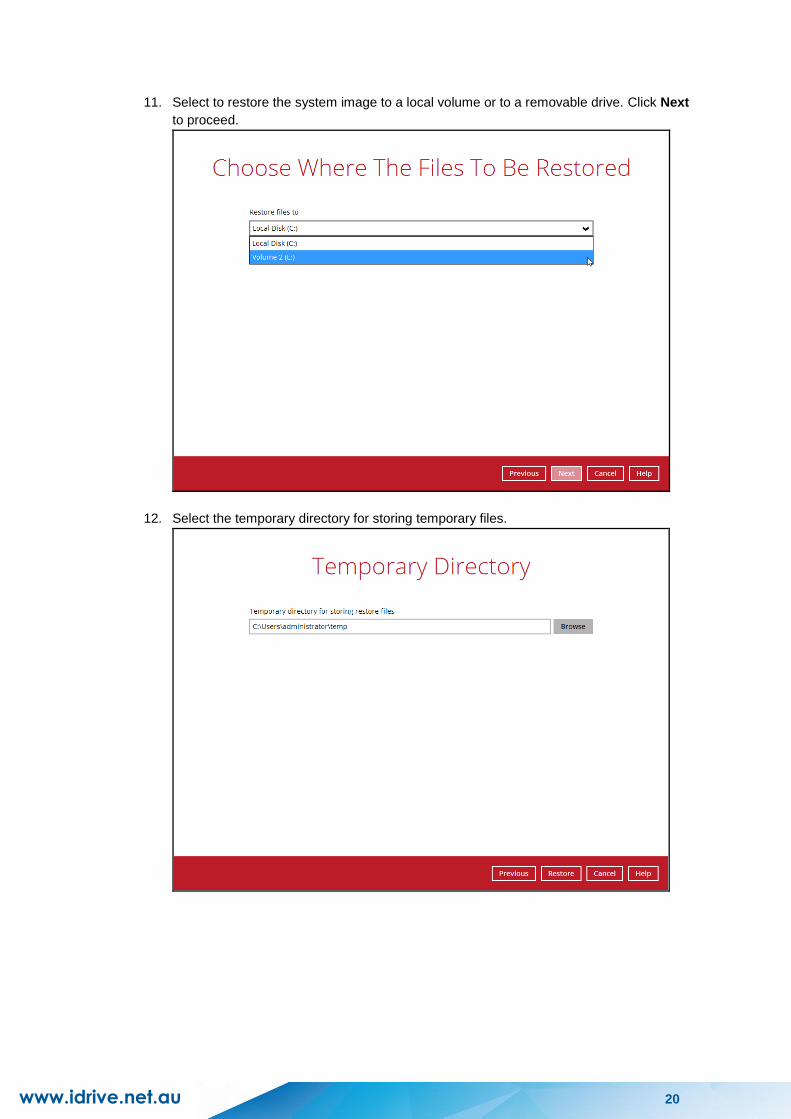
11. Select to restore the system image to a local volume or to a removable drive. Click Next
to proceed.
12. Select the temporary directory for storing temporary files.
www.idrive.net.au 21
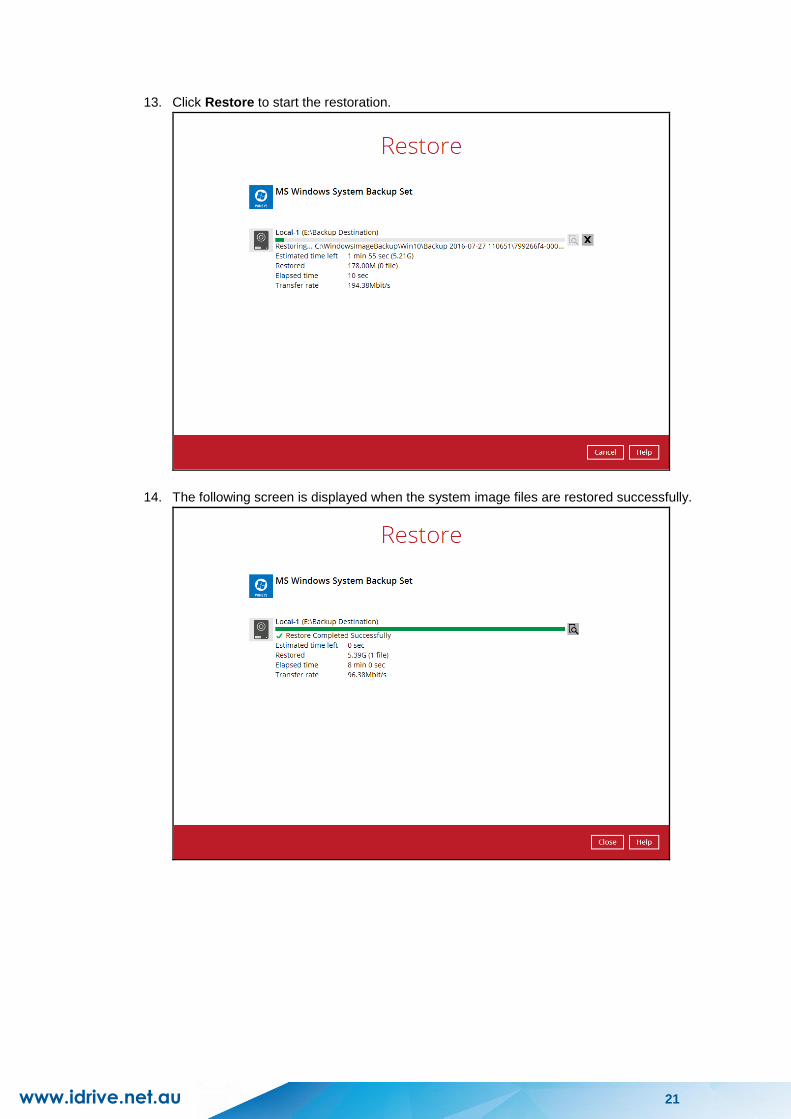
13. Click Restore to start the restoration.
14. The following screen is displayed when the system image files are restored successfully.
www.idrive.net.au 22
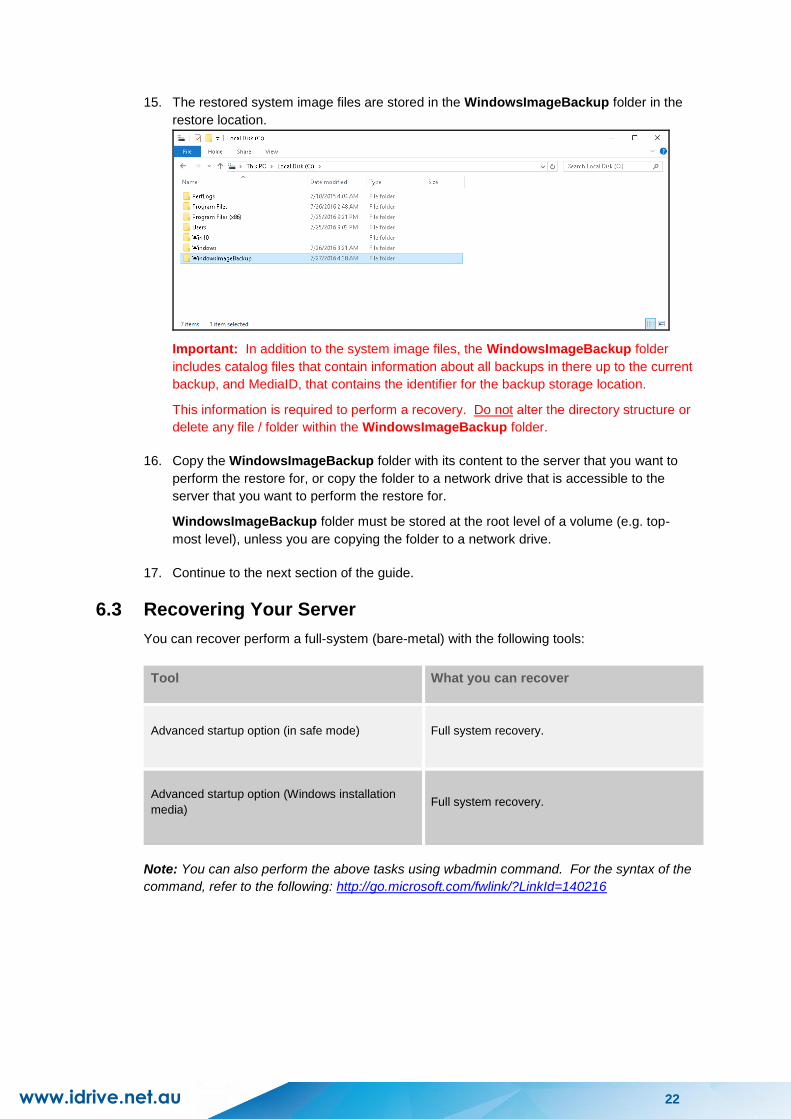
15. The restored system image files are stored in the WindowsImageBackup folder in the
restore location.
Important: In addition to the system image files, the WindowsImageBackup folder
includes catalog files that contain information about all backups in there up to the current
backup, and MediaID, that contains the identifier for the backup storage location.
This information is required to perform a recovery. Do not alter the directory structure or
delete any file / folder within the WindowsImageBackup folder.
16. Copy the WindowsImageBackup folder with its content to the server that you want to
perform the restore for, or copy the folder to a network drive that is accessible to the
server that you want to perform the restore for.
WindowsImageBackup folder must be stored at the root level of a volume (e.g. top-
most level), unless you are copying the folder to a network drive.
17. Continue to the next section of the guide.
6.3 Recovering Your Server
You can recover perform a full-system (bare-metal) with the following tools:
Note: You can also perform the above tasks using wbadmin command. For the syntax of the
command, refer to the following: http://go.microsoft.com/fwlink/?LinkId=140216
Tool What you can recover
Advanced startup option (in safe mode) Full system recovery.
Advanced startup option (Windows installation
media) Full system recovery.
www.idrive.net.au 23
6.3.1 Recover a Full System
You can recover a full system using the advanced startup option by:
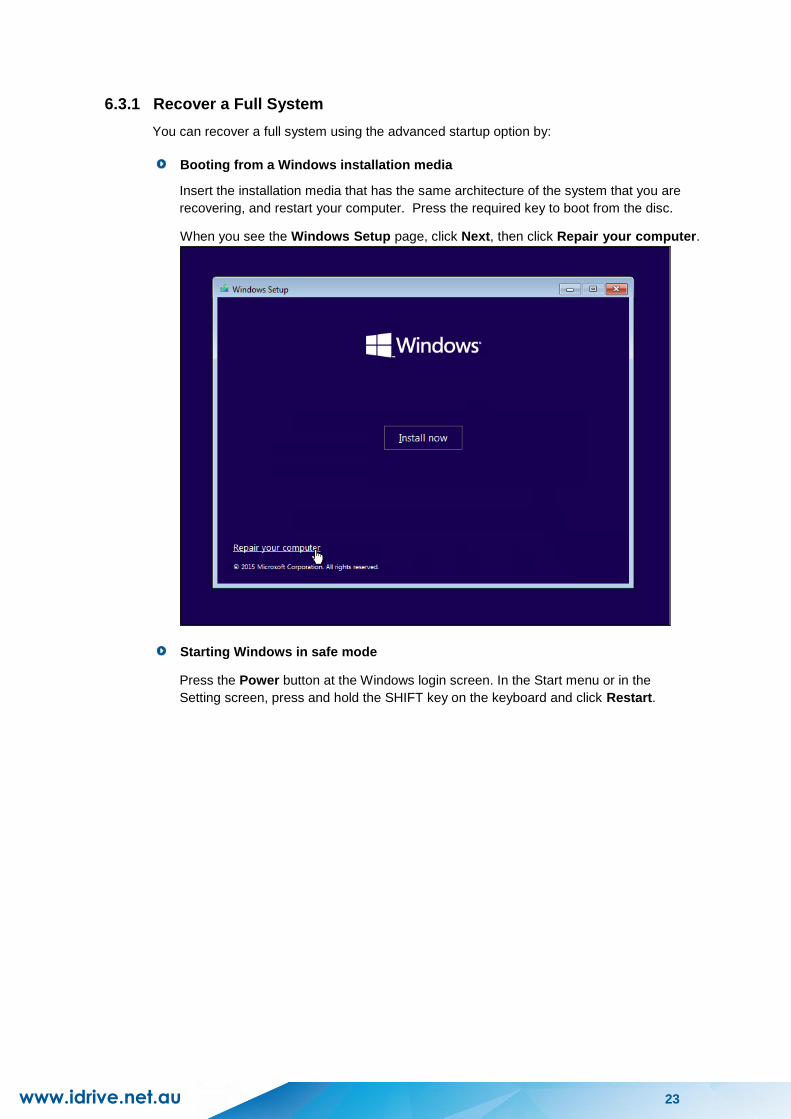
Booting from a Windows installation media
Insert the installation media that has the same architecture of the system that you are
recovering, and restart your computer. Press the required key to boot from the disc.
When you see the Windows Setup page, click Next, then click Repair your computer.
Starting Windows in safe mode
Press the Power button at the Windows login screen. In the Start menu or in the
Setting screen, press and hold the SHIFT key on the keyboard and click Restart.
www.idrive.net.au 24
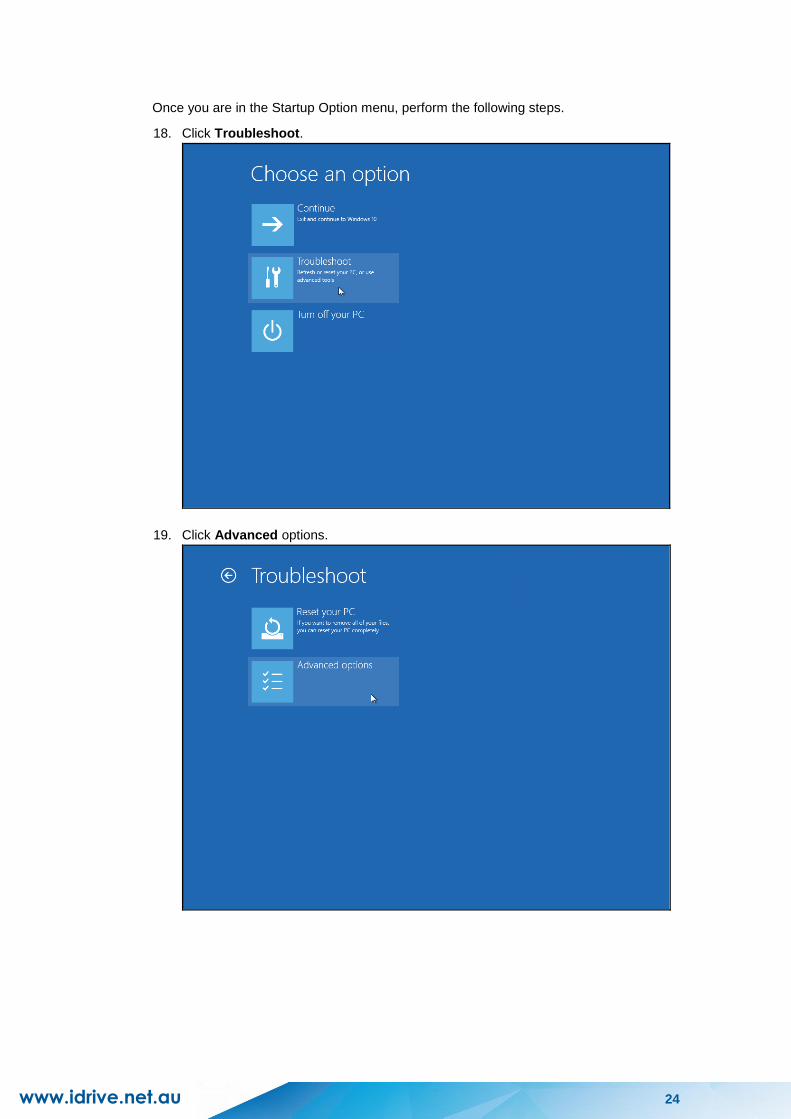
Once you are in the Startup Option menu, perform the following steps.
18. Click Troubleshoot.
19. Click Advanced options.
www.idrive.net.au 25
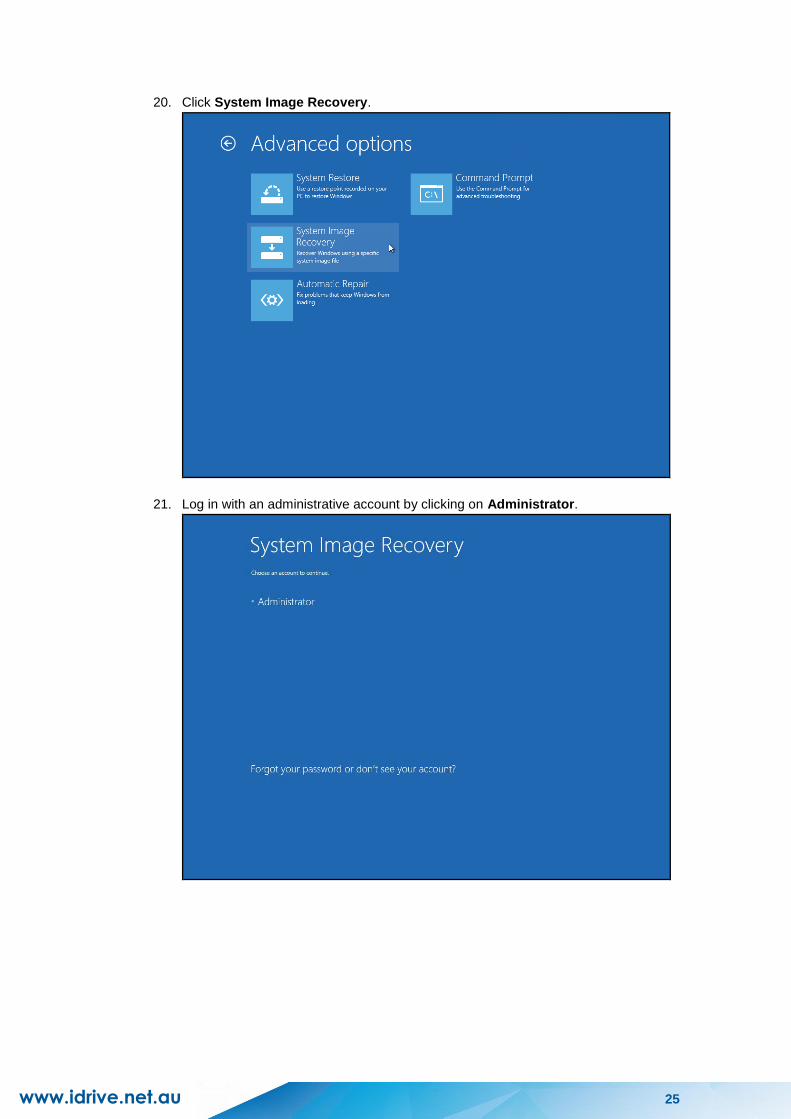
20. Click System Image Recovery.
21. Log in with an administrative account by clicking on Administrator.
www.idrive.net.au 26
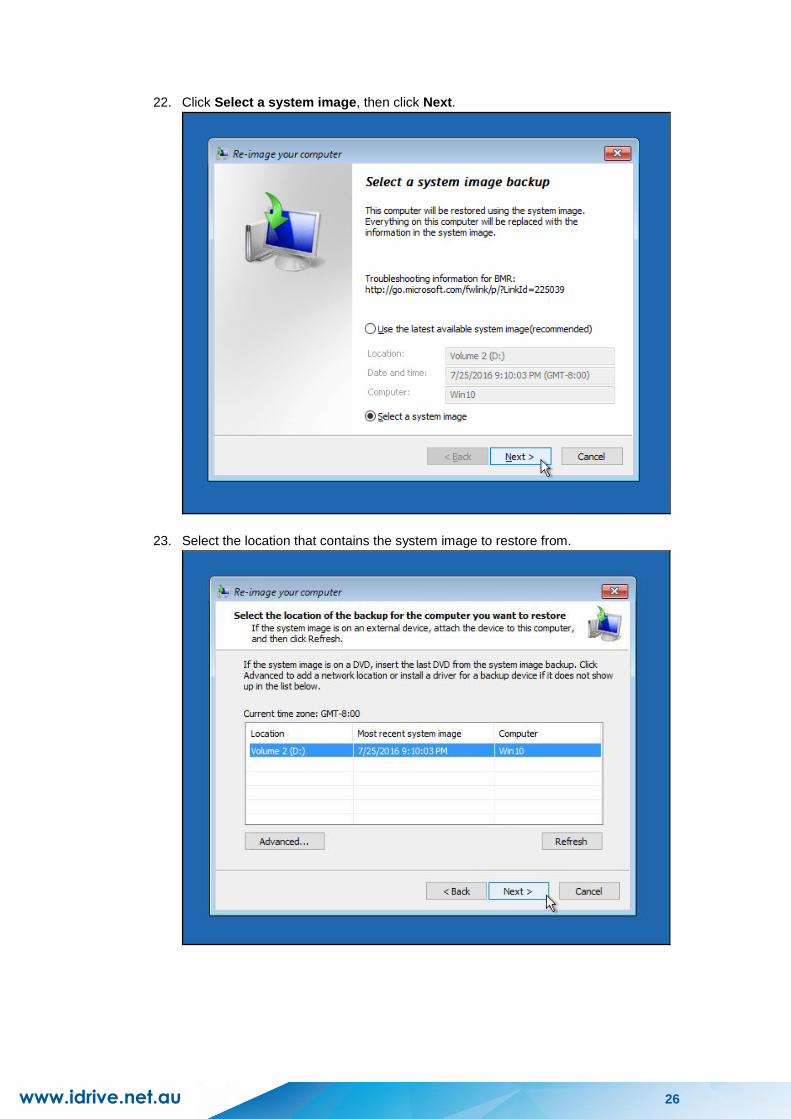
22. Click Select a system image, then click Next.
23. Select the location that contains the system image to restore from.
www.idrive.net.au 27
If you do not see the image available, then
Click Advanced, and install the required driver for the removable drive to be
accessed, if the system image was copied to a removable drive attached to the
server.
To install a driver, the driver must be located on the local system. You cannot
install a driver from the network.
Click Advanced, and browse to the remote shared folder which contains the
system image, if the system image was copied to a network path.
For domain environment, if the backup storage location is on a computer that is a
member of that domain, then the computer containing the storage location should
be on the IPsec boundary, to be accessible by non domain computer.
When a computer boots into Windows Recovery Environment, it becomes a non
domain computer, therefore, cannot access the usual network shares. Only
those computers that allow non domain computers to access the share can be
used as a backup storage location in this way.
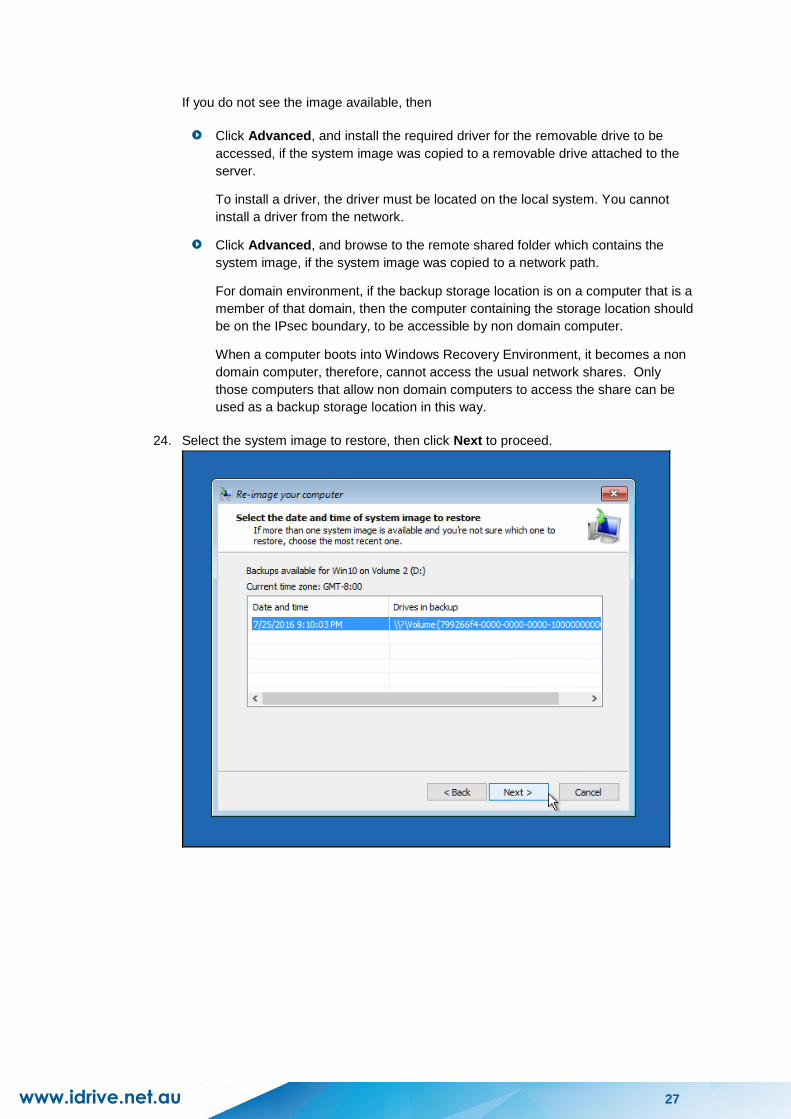
24. Select the system image to restore, then click Next to proceed.
www.idrive.net.au 28
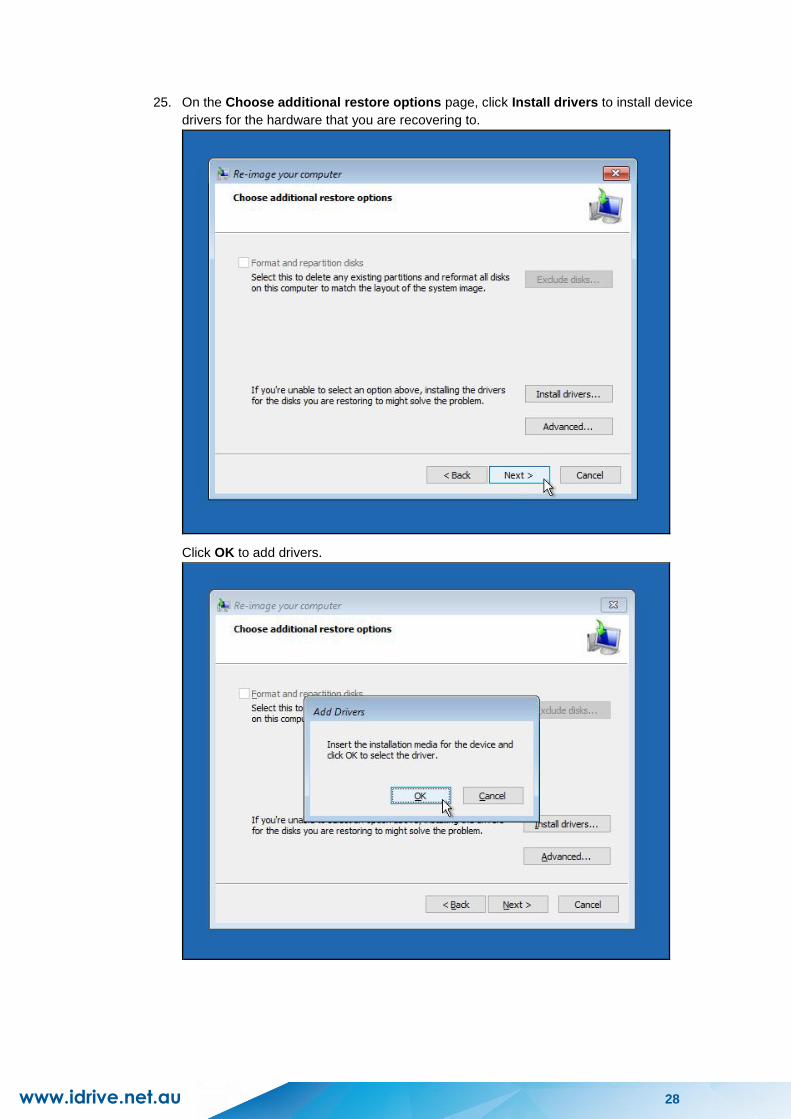
25. On the Choose additional restore options page, click Install drivers to install device
drivers for the hardware that you are recovering to.
Click OK to add drivers.

www.idrive.net.au 29
Click Advanced to specify whether the computer is automatically restarted and the
disks are checked for errors immediately after the recovery.
26. Confirm the details for the restoration, and then click Finish to start the recovery
process.
Important: Do not interrupt the restore process.
The recovery will succeed as long as all the critical volumes (e.g. volumes containing
operating system components) are recovered.