i285 Boost MobileTM Phone User’s Guide this equipment does cause harmful interference to radio or...
130
i285 Boost Mobile TM Phone User’s Guide
Transcript of i285 Boost MobileTM Phone User’s Guide this equipment does cause harmful interference to radio or...
er’s Guide
i285 Boost MobileTM Phone Us

i
CI
G
M
cy Phone Calls ........................23
........................................... 24rts.............................................24lerts ..........................................24ert Queue.................................24
........................................... 26alls to Contacts .......................26Calls.........................................27
........................................... 28e..............................................28e ..............................................28Keys........................................29ode..........................................30ode .........................................30
........................................... 31s ...............................................32.................................................33Faster .....................................34
.................................................35
.................................................35ity .............................................35
ontentsntroduction ................................................... 1
Welcome to Boost MobileTM — Wireless fora New Generation................................................ 1
etting Started .............................................. 2Opening the Battery Door .................................... 3Battery.................................................................. 5Powering On and Off ........................................... 8Enabling Over-the-Air Security ............................ 9Finding Your Phone Number ............................. 10Phone Basics ..................................................... 11SIM Security....................................................... 14Locking the Keypad ........................................... 16Faceplates ......................................................... 17Accessories........................................................ 17Boost MobileTM Customer Care......................... 17
aking Calls ................................................ 19Receiving Calls .................................................. 19Call Icons ........................................................... 20Entering the Number to Call............................... 20Using Mute......................................................... 22
Making Emergen
Call Alerts .........Sending Call AleReceiving Call AUsing the Call Al
Recent Calls .....Storing Recent CDeleting Recent
Entering Text....Using Alpha ModUsing Word ModSpecial FunctionUsing Numeric MUsing Symbols M
Contacts ...........Viewing ContactCreating EntriesStoring NumbersEditing Entries ...Deleting Entries.Checking Capac

ii
Me
Ad
Bo
mation .....................................44
.......................................... 45ne to Vibrate............................45ones to Contacts .....................46................................................46e Assignments .......................46
re Ring Tones..........................47ry .............................................47Ring Tones .............................47
.......................................... 48ssage Center .........................48Options ...................................48
ges................................... 49tions ........................................49.................................................50
ages .................................. 51sage.........................................51Mail fromter...........................................51ered Calls to Voice Mail ..........51
Creating Pauses and Waits ............................... 35International Numbers........................................ 36
mo............................................................ 37
vanced Calling Features ........................ 38Call Hold ............................................................ 38Creating Pauses and Waits While Dialing ......... 38Making International Calls.................................. 39Setting One Touch BoostTM Walkie-Talkie ........ 39Call Timers......................................................... 40Making TTY Calls............................................... 40Special Dialing Codes........................................ 42
ost MobileTM Phone Services................ 43Caller ID............................................................. 43Per-Call Blocking ............................................... 43Per-Line Blocking............................................... 43Boost MobileTM 411........................................... 43Yellow Page Listings.......................................... 43Nationwide Call Completion............................... 44Driving Directions............................................... 44Restaurant Reservations ................................... 44Movie Listings and Show Times ........................ 44
Local Event Infor
Ring Tones ........Setting Your PhoAssigning Ring TRing and VibrateViewing Ring TonDownloading MoManaging MemoDeleting Custom
Message CenterAccessing the MeMessage Center
Receiving MessaMessage NotificaMessage Center
Voice Mail MessReceiving a MesAccessing Voicethe Message CenSending Unansw
iii
Bo
SMNu
Bo
Ca
Jav
ations.......................................67ns............................................68lications..................................68
tions.........................................68ions..........................................68y .............................................69Main Menu ..............................69and GPS Enabled .................70
r Phone ........................... 72e.............................................72
ne to Not Ring .........................72................................................73................................................73...............................................76
.......................................... 77ings to Keep in Mind ...............77ency Call ................................78roximate Location ..................79erformance ............................80Almanac Data .......................81
ptions......................................82
ost MobileTM Voice Mail ......................... 52Setting Up Your Voice Mail Box......................... 52Changing Your Password .................................. 53Recording Your Name ....................................... 53Advanced Voice Mail Features .......................... 54
S and Boost MobileTM Text andmeric Messages...................................... 59SMS Messages.................................................. 59Boost MobileTM Text Messages and WebAlerts.................................................................. 60Boost MobileTM Numeric Messages .................. 62
ost MobileTM Wireless Web Services ...63Starting the Microbrowser.................................. 63
ll Forwarding ........................................... 65Forwarding All Calls ........................................... 65Turning Off Call Forwarding............................... 65Forwarding Missed Calls.................................... 66Viewing Call Forwarding Settings ...................... 66
a® Applications...................................... 67Running Applications ......................................... 67Suspending Applications.................................... 67
Resuming ApplicEnding ApplicatioDownloading AppInstalling ApplicaDeleting ApplicatManaging MemorShortcuts on theJava Applications
Customizing YouSetting the VolumSetting Your PhoUsing a Headset.Using Settings ....Optional Features
GPS Enabled .....IMPORTANT: ThMaking an EmergViewing Your AppEnhancing GPS PUpdating SatelliteSetting Privacy O

iv
Pro
Sh
Customer Care ................ 92
tatus Messages .............. 93
Terms and Conditionse ...................................... 95
ral Information .............. 105haracteristics ........................105roduct Operation and EME...............................................105Interference/Compatibility.....108
...............................................108ings ...................................... 109ions .......................................110Information .......................... 111
ITED WARRANTY ......... 113
mark Information ......... 117
........................................ 118
Using GPS with Map Software........................... 83
files .........................................................86Viewing Profiles ................................................. 86Switching Profiles............................................... 86How Changing Settings Affects Profiles ............ 86Temporary Profiles............................................. 87Creating Profiles ................................................ 88Editing Profiles................................................... 88Deleting Profiles................................................. 88Setting Call Filtering........................................... 89
ortcuts...................................................... 90Creating a Shortcut............................................ 90Using a Shortcut ................................................ 90Editing a Shortcut............................................... 90Deleting Shortcuts.............................................. 91
Boost MobileTM
Understanding S
Boost MobileTM
of Prepaid Servic
Safety and GeneRF Operational CPortable Radio PExposure ...........Electro MagneticMedical DevicesOperational WarnOperational CautAccessory Safety
MOTOROLA LIM
Patent and Trade
Index ..................

v
DECLARATION OF CONFORMITYPer FCC CFR 47 Part 2 Section 2.1077(a)
Responsible Party Name: Motorola, Inc.
Address: 8000 West Sunrise BoulevardPlantation, FL 33322 USAPhone Number: 1 (800) 453-0920
Hereby declares that the product:
Product Name: i285
Model Number: H75XAH6RR3AN
Conforms to the following regulations:
FCC Part 15, subpart B, section 15.107(a),15.107(d) and section 15.109(a)
Class B Digital Device
Note: This equipment has been tested andfound to comply with the limits for a ClassB digital device, pursuant to part 15 of theFCC Rules. These limits are designed toprovide reasonable protection againstharmful interference in a residentialinstallation. This equipment generates,uses and can radiate radio frequencyenergy and, if not installed and used inaccordance with the instructions, maycause harmful interference to radiocommunications. However, there is noguarantee that interference will not occurin a particular installation.If this equipment does cause harmfulinterference to radio or television reception,which can be determined by turning theequipment off and on, the user isencouraged to try to correct the interferenceby one or more of the following measures:
• Reorient or relocate the receivingantenna.
• Increase the separation between theequipment and receiver.
• Connect the equipment into an outlet ona circuit different from that to which thereceiver is connected.
• Consult the dealer or an experiencedradio/TV technician for help.


1
IntroductionWelcome to Boost MobileTM —Wireless for a New GenerationWith Boost MobileTM pre-paid, there’s no need toworry about credit checks or chalking up hugemonthly bills, because quite simply, there aren’tany. By paying for your phone calls up front, you’llkeep control of your monthly costs and get all themobile freedom you really want.
And Boost MobileTM has got the latest Motorolahandsets with the coolest features, like BoostTM
Walkie-Talkie, BoostTM Wireless Web, and TextMessaging. Plus, you get instant access toNextel’s world-class digital iDEN network.

G
i285 phone:
IM is in place.ry.vice.air security.
ton.
key — press the arrows togh menus and lists.
— accesses context-sensitive
— selects the optionabove it on the display.
— places phone calls.
ends phone calls; returns to; in browser mode, returns tomenu.
2
etting Started
To start using your
• Make sure your S• Charge the batte• Activate your ser• Enable over-the-
audio jack
accessory connector
volumecontrols
speaker(in back)
BoostTM
Walkie-TalkieButton
microphone
antenna
space key
back key
BoostTM
Walkie-Talkiespeaker on/off
p Power but
Navigationscroll throu
mMenu keymenus.
AOption keyappearing
s Send key
eEnd key —idle screenWeb main

3
Opening the Battery Door
O1
2
emoving Your SIMt touch the gold-colored areas ofIM.
d for optimal Contacts storager Boost MobileTM SIMation, visitom/cs_faqs_thesimcard.html.
SIM and use it with anotherer SIM with your phone, the
n is erased:
listettings
the MMS Setup menud in MemoS Enabled locationsthe Personalize menu
ses, Contacts may not beif you move your SIM toone. Contacts entries created285 phone are not readable byEN SIM-based phone.
pening the Battery DoorMake sure the phone is powered off. See“Powering On and Off” on page 8.Using the finger grip, slide the battery door untilit springs open.
Inserting and RImportant: Do no
your S
The SIM is designeand feature use. Focompatibility informwww.boostmobile.c
If you remove yourphone, or use anothfollowing informatio
• The recent calls• Call forwarding s• Web alerts• Options set using• Information store• 3 most recent GP• Options set using• Voice records*• Voice names*
Note: In some caaccessibleanother phwith your ian older iD

G
*
I
1
2
3
Mid loss or damage, do not removeIM from your phone unlesstely necessary.
powered off, open the batterythe battery.
ut of the SIM holder.
ur SIM as you would anyject. Store it carefully.
SIM holder
4
etting Started
See “Optional Features” on page 76.
nserting Your SIM
With your phone powered off, open the batterydoor and remove the battery.Hold your SIM as shown.
Carefully slide your SIM into your phone until itlines up with the marks above and below theSIM card holder.
Removing Your SIImportant: To avo
your Sabsolu
1 With your phonedoor and remove
2 Slide your SIM o
Note: Protect yodelicate ob
cut corner
SIM holder

5
Battery
BI1
2
door.
atterywith a battery charger.
into an electrical outlet.
atterynserting the Battery
With the phone powered off, open the batterydoor.Insert the top of the battery into the battery area.Make sure the gold contacts on the battery touchthe gold contacts in the battery area. Press thebottom of the battery to secure it.
3 Close the battery
Charging the BYour phone comes
1 Plug the charger
goldconnectors

G
2
3
he charger from the accessoryress the buttons on the sides
Pull the plug straight out.
ased optional batteries orharging Times”.hone is charging, the keypadill not illuminate.
sn battery and travel charger toopriate charging time.
rging times:
arge the batteries within theof 50°F to 104°F (10°C toharging is not recommended.
battery and battery dooressory sold separately.
rger
id Mid-Rate(included)
urs 3 hours
urs 4 hours
6
etting Started
Open the connector cover.
Plug the other end of the charger into theaccessory connector.
Device Attached appears on the display.
Tip: To remove tconnector: Pof the plug.
4 If you have purchchargers, see “CNote: While the p
backlight w
Charging TimeSee your Lithium Iodetermine the appr
Recommended cha
For best results, chtemperature range40°C). Prolonged c
*High Performanceavailable as an acc
flap
Battery Cha
Rap
Slim(included)
2 ho
HighPerformance*
2 ho

7
Battery
R1
2
B•
•
ries have a self discharge ratelose about 1% of their charge
city is degraded if the battery isriods while fully charged. Ifis required, store at half
Replacing the Battery
cessary to remove or replaceuse your phone, on somewish to do so.
tery Door
ery.
emoving the BatteryWith the phone powered off, open the batterydoor.Remove the battery by pushing the batterytoward the antenna, pulling on the ribbon andlifting it out.
attery Use and MaintenanceThe Motorola iDEN Approved Lithium Ionchargers provide optimum performance. Otherchargers may not fully charge the iDEN LithiumIon battery or may yield a reduced number oflifetime charge cycles.Extreme temperatures degrade batteryperformance. Do not store the battery wheretemperatures exceed 140°F (60°C) or fall below4°F (-20°C).
• Lithium Ion batteand without use,per day.
• The battery capastored for long pelong term storagecapacity.
Removing andDoorAlthough it is not nethe battery door tooccasions you may
Removing the Bat
1 Remove the batt

G
2
R
1
f the battery door into the slotplace.
n and Offe on:
8
etting Started
Grip the phone and battery door firmly and pullthe battery door, as shown.
eplacing the Battery Door
Position the battery door with its hinge resting infront of the slot in the phone.
2 Press the hinge ountil it snaps into
Powering OTo power your phon
Press p.
hinge
slot

9
nabling Over-the-Air Security
AsWt
T
EST(fd
1
s A under Later, the idleappear. The next time youfrom the main menu, you willd to enable security before youost MobileTM Wireless Web
d to enable security. Press Aies of screens and then thee displays.rn to the idle screen.
nabling security, you willcontaining your Personal(PTN), Boost MobileTM
ber, and BoostTM Walkie-Talkie
e a Web alert saying Newge - Receive Programmingder Goto.d to accept changes to yourder Ok.d again to accept changes toA under Ok.reen displays. Press A under
rn to the idle screen.
E
s your phone connects to the network, you willee the Boost icon and a connecting message.hen the idle screen appears, the phone is ready
o use.
o power the phone off:
Press and hold p.
nabling Over-the-Airecurity
o receive Over-the-Air Radio Service SoftwareOARSS) Security you must enable security theirst time you power on your phone or within 20ays of first activation of your phone.
Press A under Ok.
Note: If you presscreen willselect Webbe promptecan use Boservices.
2 You are prompteunder Yes. A serdefault homepag
3 Presse to retu
Within 24 hours of ereceive a Web alertTelephone NumberCustomer Care numnumber.
1 When you receivBrowser MessaInfo, press A un
2 You are promptelists. Press A un
3 You are prompteyour lists. Press
4 A confirmation scOk.
5 Presse to retu
MesgContcs
s d1
S
BOOST
iP

G
FMWi
1234
The IP address assigned tohe Internet with your phone.s — This information may beMobileTM Customer Care iflem with your phone’s services.
Voice Mailur voice mail box before youges. See “Setting Up Yourpage 52.
eaturesny features of your phone,e of incoming sound, rings, andustomizing Your Phone” on
10
etting Started
inding Your Phone Numbery Info lets you view your phone number, BoostTM
alkie-Talkie number, and other phonenformation:
Press m to access the main menu.Scroll to My Info.Press A under Select.Scroll to see your information:• Name — Enter your name. See “Entering
Text” on page 28.• Line 1 — your phone number is filled in when
you receive your first Web alert after enablingover-the-air security on your phone.
• Direct Connect (Boost Walkie-Talkie) —Your BoostTM Walkie-Talkie number is thenumber that others use to contact you usingBoostTM Walkie-Talkie service. It is filled inwhen you receive your first Web alert afterenabling over-the-air security on your phone.
• Ckt — Your circuit data number is the numberyou use if you want to use your phone totransfer circuit data. You receive this numberfrom Boost MobileTM Customer Care.
• Carrier IP — The IP address assigned toBoost MobileTM. It is filled in when you activateyour phone.
• IP1 Address —you for using t
• Service Statuused by Boostthere is a prob
Boost MobileTM
You must set up yocan retrieve messaVoice Mail Box” on
Customizing FYou can control maincluding the volumother tones. See “Cpage 72.

11
Phone Basics
PAp
Tie
TTp
DTst
tsres are arranged in menus,.
s in a menu or list, scroll usingt the top of your keypad. Thisp, down, left, or right. Pushingte part of the navigation key.
mbol > tells you to select aor example, Settings >
s on the main menu.elect to see the Settings
y and press A under Select toscreen.
ide context-sensitive menusrelated features and actions.rs any time a context-sensitiveress m to access the menu.
hone Basicsny time your phone is powered on, the displayrovides you with information and options.
he screen shown above is the idle screen. Thedle screen appears when your phone is on, but notngaged in any activity.
ext Areahis area displays menus, messages, names,hone numbers, and other information.
isplay Optionswo display options appear at the bottom of mostcreens. You select a display option by pressinghe option key below it.
Menus and LisYour phone’s featusubmenus, and lists
To access the itemthe navigation key akey lets you scroll udown the appropriaspeeds up scrolling
In this guide, this symenu or list item. FSecurity means:
1 Scroll to Setting2 Press A under S
screen.3 Scroll to Securit
see the Security
Menu KeyMany features provthat let you accessTheS icon appeamenu is available. P
MesgContcs
s d1
S
BOOST
iP
status icons
text area
menu icon
display options

G
MAtic
lkie)
Customize your phone.See page 72.
View personal phoneinformation, includingphone number andBoostTM Walkie-Talkienumber. See page 10.
mGroups of settings youapply together. Seepage 86.
Find your approximategeographical location.See page 77.
Create shortcuts toscreens. See page 90.
Record and play audiomessages.
12
etting Started
ain Menull your phone’s features can be accessed through
he main menu. When you are using a feature, thecon for that feature appears in the upper leftorner of the display.
n Re-Boost Recharge your accountfrom your handset.
a Web Browse the Web.
Text Messaging Access to Boost TextMessaging.
BoostLIVE Access and buy ringtones and wallpapers.
q Java Apps Java applications on yourphone. See page 67.
m Ring Toneslist of ring tonesRing Tones menu
Assign ring tones andturn ringer off. Seepage 45.
b SettingsDisplay/InfoPhone CallsDC (Walkie-TaPersonalizeOptionsVolumeSecurityAdvanced
j My Info
p Profilesnew profile forlist of profilesProfiles menu
l GPS
s Shortcuts
Voice Record

13
Phone Basics
r in the two rows at the top ofppear at all times. Othersour phone is engaged in certainou have activated certain
ery Strength — More bars onattery indicate a greater
ge.
al Strength — More bars nexte antenna indicate a strongeral.
ne In Use — Your phone ise on a phone call.
stTM Walkie-Talkie In Use —r phone is active on a BoostTM
kie-Talkie call.
ve Phone Line — 1 indicatese line 1 is ready to make calls.
Forward — Your phone is setrward calls. See “Callarding” on page 65.
Status IconsStatus icons appeathe display. Some aappear only when yactivities or when yfeatures.
k Call Alertlist of call alertsCall Alert menu
Lists call alerts. Seepage 24.
C Contactsnew contact formlist of contactsContacts menu
Create, view, store, editcontacts. See page 31.
e Messages[ComposeMessage]Voice MailInboxDraftsSent ItemsSMSNet Alert
Access messages. Seepage 69.
i Recent Callslist of callsrecent calls menuCall Setup menu
Lists recent calls. Seepage 26.
h Call Timers Phone usage information.See page 40.
f Call Forward Set call forwardingoptions. See page 65.
g Memo Store a number to accesslater. See page 37.
abcd
efgd
Battthe bchar
opqr
s
Signto thsign
A Phoactiv
B BooYouWal
1 Actiphon
GHIJKL
Callto foForw

G
yyour Contacts and protectsation. Since this information is
, not in your phone, you cantion by removing your SIM.
making emergency calls, yournot function without the SIM.
rized use of your phone, youra PIN that you enter each time
ed on. You can change the PINrement that it be entered.
Requirement On and
requirement is off, your phonet entering a PIN.
the SIM PIN requirement is off,rsonal data on your SIM is notted. Anyone can use your phonecess your personal data.
requirement is on, you areour PIN each time you power
14
etting Started
SIM SecuritYour SIM stores allyour personal informstored on your SIMremove the informa
Note: Except forphone will
To prevent unauthoSIM is protected bythe phone is poweror turn off the requi
Turning the PINOffWhen the SIM PINcan be used withou
Important: Whenthe peprotecand ac
When the SIM PINprompted to enter yon your phone.
vM Ringer Off — Your phone is set notto ring. See “Setting Your Phone toVibrate” on page 45.
u Speaker Off — Sets BoostTM
Walkie-Talkie sound to comethrough the earpiece rather thanthrough the speaker. Your phonedoes not ring for BoostTM
Walkie-Talkie calls if Alert Type isset to Silent or Vibrate.
wy Messages — You have one ormore messages. See “Messages”on page 69.
ljikmn
T9 Text Input — You are using T9Text Input to enter text. See“Entering Text” on page 28.
DEF Internet — You are ready tobrowse the internet or are browsingthe internet using a secureconnection.
NO TTY — You are ready to use yourphone to make calls using ateletypewriter device. See “MakingTTY Calls” on page 40.

15
SIM Security
1
234
5
E1
2
ININ requirement must be turnedto access this feature.
enu, select Settings >ge Password > SIM PIN.SIM PIN Code screen, enterIN.k.SIM PIN Code screen, enter
igit SIM PIN.k.ew SIM PIN Code screen,
SIM PIN to confirm.k.
IN displays.
PINN incorrectly three times, yourunblock your SIM, you mustleTM Customer Care to get a(PUK).unsuccessfully enter the PUK0 times, your SIM is permanentlyd and must be replaced. If thisns, all data is lost. You will get a
Note: If a SIM PIN is required, your phone willnot function until the SIM PIN is entered,except for making emergency calls.
From the main menu, select Settings >Security > SIM PIN.Scroll to On or Off.Press A under Select.Enter the current SIM PIN.Note: When you receive your phone, the SIM
PIN is 0000. Change your PIN to preventfraudulent use of the SIM card (see“Changing the PIN”).
Press A under Ok.
ntering the PINWhen the Enter SIM PIN Code screen appearsafter you power on your phone, enter your SIMPIN.Press A under Ok.
The message SIM Unlocked displays.
Important: If you enter your PIN incorrectly 3 times,your SIM is blocked. To unblock yourSIM, you must contact Boost MobileTM
Customer Care. See “Unblocking thePIN”.
Changing the PNote: The SIM P
on in order
1 From the main mSecurity > Chan
2 At the Enter Oldthe current SIM P
3 Press A under O4 At the Enter New
the new 4- to 8-d5 Press A under O6 At the Re-enter N
re-enter the new7 Press A under O
Changed: SIM P
Unblocking theIf you enter your PISIM is blocked. Tocontact Boost MobiPIN Unblock Code
Important: If youcode 1blockehappe

G
T
12
3456
Ia
LLfy
••
ing calls, messages, and
ency calls cannot be placed whileypad is locked.
:
een, press m.
hile the keypad is locked,cking the keypad display
ad:
een, press m.
locked, you can respond tosages, and alerts just as you
d is not locked. When finished,to the idle screen. The keypad
ption of setting your phone tohe keypad if there has been noed time.
enu, select Settings >ad Lock.
16
etting Started
message to contact Boost MobileTM
Customer Care. Except for makingemergency calls, your phone will notfunction with a blocked SIM.
o unblock the PIN:
Press*,#, m ,1.At your Boost MobileTM Customer Carerepresentative’s request, provide the informationneeded to give you a PUK code.Select Unblock PIN.Enter the PUK code.Enter a new 4- to 8-digit SIM PIN.Re-enter your SIM PIN.Note: These steps must be performed in quick
succession.
f you entered the codes properly, SIM Unlockedppears on the display.
ocking the Keypadocking the phone’s keypad prevents its buttonsrom being pressed. When the keypad is locked,ou can only:
Power the phone on and offUnlock the keypad
• Respond to incomalertsImportant: Emerg
the ke
To lock the keypad
1 From the idle scr2 Press*.
If you press a key winstructions for unlobriefly.
To unlock the keyp
1 From the idle scr2 Press*.
While the keypad isincoming calls, mesdo when the keypapresse to returnremains locked.
You also have the oautomatically lock tactivity for a specifi
1 From the main mSecurity > Keyp

17
Faceplates
2
3
Tms3
FR1
2
A1
2
logo button 1/4 turn clockwiselate into position.
with a Lithium Ion Battery and
s are available for use with yourg front covers, vehicle batteryHigh Performance batteryccessories and more.
accessories, go toom or call 1-888-BOOST-4Uou can also contact your BoostDealership. For information on
il store locations, go toom.
leTM Customer
tomer Care: 1-888-BOOST-4Ur dial 611 from your i285
To lock the keypad immediately, select LockNow. You will be given the option to press m and* to lock and unlock the keypad.To set a specific time for the keypad to lock ifthere has been no activity, select Auto Lock andpress A under Change.
he keypad can be set to lock in 5, 10, 15 or 20inutes if the keypad is not touched during the
pecified time. To turn the auto lock off, repeat stepand select Off.
aceplatesemoving the FaceplateTurn the Motorolo logo button, which is locatedat the top of the faceplate, a 1/4 turn (90degrees) counterclockwise.Pull on the faceplate on the sides of the phone’sdisplay and pull it away from the main body ofthe phone. The faceplate is held in place withtwo tabs on each side as well as two tabs at thebottom.
ttaching the FaceplateAlign the tabs on the bottom of the faceplate withthe slots in the bottom of the phone.Push the faceplate into place until it snaps intoposition.
3 Turn the Motorolato lock the facep
AccessoriesYour phone comestravel charger.
Various accessoriei285 phone, includinchargers, batteries,doors, hands-free a
To order additionalwww.boostmobile.c(1-888-266-7848). YMobileTM AuthorizedBoost MobileTM retawww.boostmobile.c
Boost MobiCareBoost MobileTM Cus(1-888-266-7848) ophone.

G
Recent Calls � Recent Calls (if any) � Store � View � Delete � Delete All � Call Alert Queue � Call Setup
Call Timers � Last Call � Phone Reset � Phone Lifetime � DC (Walkie-Talkie) Reset � DC (Walkie-Talkie) Lifetime � Circuit Reset � Circuit Lifetime � Kbytes Reset
Call Forward � All Calls - To
Retrieve Status � Detailed
- If Busy - If No Answer
- If Unreachable Retrieve Status
Memo � Store to Cntcs � Cancel � Delete
18
etting Started
Main Menu
� My Info � Name � Line 1 � Direct Connect (Boost Walkie-Talkie) � Carrier IP � IP1 Address � CKT � Service Status
� Profiles � [New Profile] � Profiles (if any) � View � Edit � New � Delete � Delete All � Setup
� GPS � Position � Privacy � Interface
� Shortcuts � [New Entry] � Shortcuts (if any) � Edit � New � Reorder � Delete � Delete All
� Voice Record
� Re-Boost
� Web
� Text Messaging
� BoostLIVE
� Java Apps � Java Applications (if any) � Deinstall � Permissions � License Info � Java System � Reset System � Delete All
� Ring Tones � VibeAll On/Off � Available Ring Tones � Vibrate � Silent � Assign w/vibe � Assign w/vibe � Overview � Memory Usage � Delete
� Settings � Display/Info � Phone Calls � DC (Walkie-Talkie) Options � Volume � Security � Advanced
� Contacts � [New Contact] � New � Search � Capacity � Filter � Call Setup � Delete All � Contacts (if any) � View � New � Search � Edit � Delete Contact � Delete Number � Capacity � Filter � Call Setup � Delete All
� Call Alert � Received Call Alerts (if any) � Store � View � Delete � Delete All � Sort By � Recent Calls
� Messages � [Create Mesg] � Voice Mail � Inbox � Drafts � Sent Items � SMS � Net Alert
�
�
�
�
�

19
MYccy
T
123
T
1
2
3
Walkie-Talkie Numbersie-Talkie number has 3 parts —rk ID, and a member ID — witheach of these parts. For
9999.
oostTM Walkie-Talkie call, youle BoostTM Walkie-Talkiee asterisks.
tore a BoostTM Walkie-Talkieontacts it is good practice to
whole BoostTM Walkie-Talkieuding the asterisks in case youour phone, or another BoostTM
e user, outside of your network.
allsphone call, your phone rings,
p its backlight.
call:
es. -or-
the keypad.
ll to voice mail instead of
aking Callsour i285 phone makes 2 types of calls: digitalellular phone calls and BoostTM Walkie-Talkiealls. With BoostTM Walkie-Talkie calls, you useour phone as a long-range, digital walkie-talkie.
o make a phone call:
Enter the number you want to call.Presss to place the call.Press e to end the call.
o make a BoostTM Walkie-Talkie call:
Enter the BoostTM Walkie-Talkie number youwant to call.Press and hold the BoostTM Walkie-Talkie buttonon the side of your phone. Begin talking afteryour phone emits a chirping sound.Release the BoostTM Walkie-Talkie button tolisten.Tip: To let someone know you want to talk to
him or her on a BoostTM Walkie-Talkie call,send a call alert. See “Call Alerts” on page24.
Dialing BoostEvery BoostTM Walkan area ID, a netwoan asterisk betweenexample: 999*999*
When you place a Bmust enter the whonumber including th
Tip: When you snumber in Cinclude thenumber incltravel with yWalkie-Talki
Receiving CWhen you receive avibrates, or lights u
To answer a phone
Presss. -or-
Press A under Y
Press any key on
To send a phone caanswering it:
Presse. -or-

M
T
Wy
T
12
3
CWa
all, this icon appears in the text
Number to Callr you want to call, you can:
on the keypadr from the recent calls listr from Contactsone number calledr Turbo Dial®
ne Touch BoostTM
ake a BoostTM Walkie-Talkie
e — see “Making TTY Calls” on
adr you want to call, press thepad.
ke:
ress A under Delete.
phone call.
20
aking Calls
Press A under No.
o end a phone call:
Presse.
hen you receive a BoostTM Walkie-Talkie call,our phone emits a chirping sound.
o answer a BoostTM Walkie-Talkie call:
Wait for the caller to finish speaking.Press and hold the BoostTM Walkie-Talkie buttonon the side of your phone. Begin talking afteryour phone emits a chirping sound.Release the BoostTM Walkie-Talkie button tolisten.
all Iconshen you make a call, call icons appear in the text
rea of the phone’s display.
When you miss a carea:
Entering theTo enter the numbe
• Use the numbers• Select the numbe• Select the numbe• Redial the last ph• Use Speed Dial o• Use One Touch O
Walkie-Talkie to mcall
• Use a TTY devicpage 40
From the KeypTo enter the numbenumbers on the key
If you make a mista
• To clear a digit, p
X Placing a phone call.
W Receiving a phone call.
Y Phone call is active.
Z Phone call is on hold.
U Phone call ended.
V You missed a

21
Entering the Number to Call
•
•
•
FTm
Tn
1
2
FIuoE
C
12
w. -or-
to display the Contacts type forant to call.
BoostTM Walkie-Talkie call,the call to the BoostTM
er stored in the Contacts entry,Walkie-Talkie icon is not
phone call:
es the call to the phone numberontacts type displayed.
pe displayed is not a phonene places the call to the phonethe Contacts entry.
pe displayed is not a phonehave more than one phonethe Contacts entry, your phone
elect the phone number youcall to.
tacts Entry
enu, select Contacts.e or number you want to call.iew. -or-
of your options: Press m.
To clear all digits, press and hold A underDelete.To insert or delete a digit anywhere in the stringof digits you have entered, scroll left or right.To cancel, presse.
rom the Recent Calls Listhe recent calls list stores the last 20 calls youade or received.
o select a number from the recent calls list as theumber you want to call:
From the idle screen, scroll down. -or-
From the main menu, select Recent Calls.
Scroll to the name or number you want to call.
rom Contactsf you have numbers stored in Contacts, you canse these numbers to make calls. For informationn entering numbers into Contacts, see “Creatingntries” on page 33.
alling from the Contacts List
From the main menu, select Contacts.Scroll to the name or number you want to call.Tip: To find Contacts entries faster, use the
keypad to enter the first letter of the name.
3 Place the call no
Scroll left or rightthe number you w
If you are making ayour phone placesWalkie-Talkie numbeven if the BoostTM
displayed.
If you are making a
• Your phone placassigned to the C
• If the Contacts tynumber, your phonumber stored in
• If the Contacts tynumber and younumber stored inprompts you to swant to place the
Calling from a Con
1 From the main m2 Scroll to the nam3 Press A under V
If View is not oneSelect View.

M
4
RPn
UEat
Tnt
S
1
2
T
ch BoostTM
Walkie-Talkie sets your phoneent BoostTM Walkie-Talkie onor to a BoostTM Walkie-Talkie, every time you press the
kie button. See “Setting Onekie-Talkie” on page 39.
u listen to incoming soundsound. Mute is availablen an active call.
ute.
nmute appears as a display
nmute.
22
aking Calls
Place the call now. -or-
Scroll to view more numbers. When you placethe call, it is made to the number displayed.
edialing the Last Numberress and holds to place a call to the last phoneumber you called.
sing Speed Dial and Turbo Dial®
ach phone number stored in Contacts is assignedSpeed Dial number which you can use to enter
hat number.
urbo Dial lets you place calls to the phoneumbers associated with Speed Dial numbers 1hrough 9 without entering the number.
peed Dial
From the idle screen, use the keypad to enterthe Speed Dial number assigned to the phonenumber you want to call.Press#.
urbo Dial
From the idle screen, press and hold the SpeedDial number (1 through 9) assigned to the phonenumber you want to call.
Using One TouWalkie-TalkieOne Touch BoostTM
to call the most recthe recent calls list,number you chooseBoostTM Walkie-TalTouch BoostTM Wal
Using MuteMuting calls lets yowithout transmittingwhenever you are o
To turn mute on:
Press A under M
While mute is on, Uoption.
To turn mute off:
Press A under U
23
king Emergency Phone Calls
MCYEy
Drm
WGpyvrl7iCllkrc
have not registered on therk, emergency calls cannot bewhile your SIM card is in your
.
Ma
aking Emergency Phonealls
our phone supports emergency calling.mergency phone calls can be made even whenour SIM is blocked or not in your phone.
ial 911 to be connected to an emergencyesponse center. If you are on an active call, youust end it before calling 911.
hen you make an emergency call, your phone’sPS Enabled feature can help emergency serviceersonnel find you, if you are in a location whereour phone's GPS antenna has established a cleariew of the open sky and your local emergencyesponse center has the equipment to processocation information. See “GPS Enabled” on page7, and particularly “IMPORTANT: Things to Keep
n Mind” on page 77 and “Making an Emergencyall” on page 78, for more information on the
imitations of this feature. Because of theimitations of this feature, always provide your bestnowledge of your location to the emergencyesponse center when you make an emergencyall.
Important: Emergency calls cannot be placed whilethe keypad is locked.
Important: If younetwoplacedphone

CSwW
WeB
T
•
•
•
S1
2
3
all Alertscall alert, you must answer,
ou cannot receive phone callsalkie calls until you do.
alert, press the BoostTM
tton to make a BoostTM
ll to the sender.
lert, press A under Queue.
ert, press A under Clear.
t calls list also stores call alertseceived. They appear asalkie-Talkie calls. Call alertsour recent calls list until you
or until they reach the end of
all Alert Queuecall alert, it remains in the callmake a BoostTM Walkie-Talkie
r delete it.
lertsenu, select Call Alert.
e list.
24
all Alertsending a call alert lets the recipient know youant to talk to him or her on a BoostTM
alkie-Talkie call.
hen you send a call alert, the recipient’s phonemits a series of beeps and displays your name oroostTM Walkie-Talkie number.
he recipient can:
Answer — begin a BoostTM Walkie-Talkie callwith the senderQueue — store the call alert to the call alertqueue, which is a list of call alertsClear — dismiss and delete the call alert
ending Call AlertsEnter the BoostTM Walkie-Talkie number youwant to send to, as you would when making aBoostTM Walkie-Talkie call.Press A under Alert. Ready to Alert appearson the display.Press the BoostTM Walkie-Talkie button untilAlert Successful appears on the display.Note: If the alert is not successful, this may
mean the person you are trying to reach ison a call or has the phone turned off.
Receiving CWhen you receive aqueue, or clear it. Yor BoostTM Walkie-T
To answer a callWalkie-Talkie buWalkie-Talkie ca
To queue a call a
To clear a call al
Note: The recenyou have rBoostTM Wremain in ydelete themthe list.
Using the CWhen you queue aalert queue until youcall to the sender o
Viewing Call A1 From the main m2 Scroll through th

25
Using the Call Alert Queue
VT
1234
RQAbs
MS
123
T
S
123
M Walkie-Talkie button untill appears on the display.
lertsrt from the queue:
rt queue, scroll to the call alertte.
es to confirm.
rts from the queue:
rt queue, press m.rt menu, select Delete All.es to confirm.
ertsve at least one call alert in thecess this feature.
y the order they were received:
enu, select Call Alert.
Top or Last on Top.elect.
iewing Date and Timeo view the date and time a call alert was received:
From the main menu, select Call Alert.Scroll to the call alert you want information on.Press m.Select View.
esponding to Call Alerts in theueue
fter you queue a call alert, you can respond to ity making a BoostTM Walkie-Talkie call to theender or sending a call alert to the sender.
aking a BoostTM Walkie-Talkie Call to theender
From the main menu, select Call Alert.Scroll to the call alert you want to respond to.Press the BoostTM Walkie-Talkie button to beginthe call.
his removes the call alert from the queue.
ending a Call Alert to the Sender
From the main menu, select Call Alert.Scroll to the call alert you want to respond to.Press A under Alert. Ready to Alert appearson the display.
4 Press the BoostTAlert Successfu
Deleting Call ATo delete a call ale
1 From the call aleyou want to dele
2 Press m.3 Select Delete.4 Press A under Y
To delete all call ale
1 From the call ale2 From the call ale3 Press A under Y
Sorting Call AlTip: You must ha
queue to ac
To sort call alerts b
1 From the main m2 Press m.3 Select Sort By.4 Scroll to First on5 Press A under S

RTm
T
1
2
Itt
Ait
Fnc
t calls list also stores call alertseceived. They appear asalkie-Talkie calls. Call alertsour recent calls list until you
or until they reach the end of
ation on a recent call:
calls list, scroll to the call youon.iew. -or-
of your options: Press m.
ation such as the namecall, the number, the date,f the call.
ent Calls to
calls list, scroll to the number.tore. -or-
e of your options: Press m.
t on this menu, the number ised in Contacts.
26
ecent Callshe recent calls list stores the numbers of the 20ost recent calls you have made and received.
o view the recent calls list:
From the idle screen, press the down arrow onthe navigation key. -or-
From the main menu, select Recent Calls.
Scroll through the list.
f the number of a recent call is stored in Contacts,he name associated with the number appears onhe recent calls list.
n icon appears beside the name or numberndicating the Contacts type of the number used inhe call. See “Contacts” on page 31.
or phone calls, an icon appears to the left of theame or number giving more information about theall:
Note: The recenyou have rBoostTM Wremain in ydelete themthe list.
To get more inform
1 From the recentwant information
2 Press A under V
If View is not oneSelect View.
This displays informassociated with thetime, and duration o
Storing RecContacts1 From the recent
you want to store2 Press A under S
If Store is not onSelect Store.
Tip: If Store is noalready stor
X A call you made.
W A call you received.
V A missed call. Missed calls appear on therecent calls list only if you have Caller ID.

27
Deleting Recent Calls
3
4
5
6
DT
1
234
T
123
To store the number as a new entry, select [NewContact]. -or-
To store the number to an existing entry, selectthe entry.
With the Contacts type field highlighted, scrollleft or right to display the Contacts type you wantto assign the number. For information onContacts types, see page 31.If you want to add more information to the entry,follow the applicable instructions in “CreatingEntries” on page 33.Press A under Done.
eleting Recent Callso delete a call:
From the recent calls list, scroll to the call youwant to delete.Press m.Select Delete.Press A under Yes to confirm.
o delete all calls:
From the recent calls list, press m.Select Delete All.Press A under Yes to confirm.

EYtfewe
Iti
We
T
1
ears next to the current textll to the text input mode you
elect.
Modethe keypad to enter the letters,
mbols on that key. For example,Y, press9 3 times.scroll up to make that lettere a letter then scroll down to
owercase.ction Keys” on page 29 foron adding spaces,
d punctuation.
Modeext Input analyzes the lettersn you press and arranges themyou type, T9 Text Inputrokes to words in its databasest commonly used matching
you own words to this
rdour text input mode.
28
ntering Textou can enter text into your phone using the
raditional method of pressing a key several timesor each character, or by pressing a key once forach letter while words likely to be the one youant are chosen from a database. You can alsonter symbols and numbers into a text field.
n screens that require you to enter text, you seehe following icons near the top right corner. Thesecons tell you which text input mode you are using:
hen you access a screen that requires you tonter text, you start in Alpha mode.
o choose a text input mode:
At a screen that requires you to enter text, pressm.
2 A checkmark appinput mode. Scrowant to use.
3 Press A under S
Using Alpha• Press any key on
numbers, and syto enter the letter
• Type a letter thenuppercase, or typmake that letter l
• See “Special Funmore informationcapitalization, an
Using WordIn Word mode, T9 Ton the keypad buttoto create words. Asmatches your keystand displays the moword. You can adddatabase.
Entering a Wo1 Select Word as y
l Alpha — Press a key several times for eachcharacter.
j Word — Press a key once for each letterwhile words likely to be the one you want arechosen from a database.
i Symbols — Enter punctuation and othersymbols.
k Numeric — Enter numbers.
29
Special Function Keys
2
3
It
A1234
Tn
nguageuage of the database:
equires you to enter text, press
s.uage you want for your
elect.
ction Keys’s keys assume differentlpha or Word mode.
ce.
to make the next letter typedmake all subsequent letters
aps lock), or to go back to
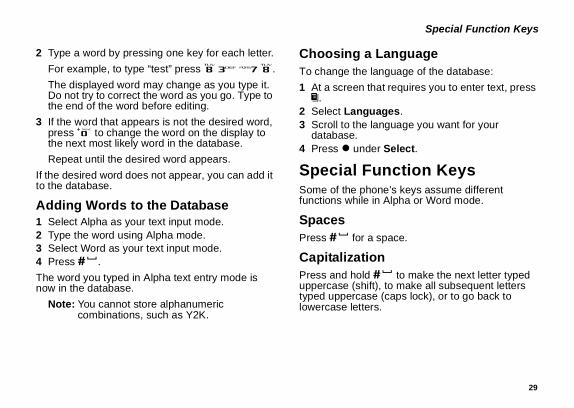
Type a word by pressing one key for each letter.
For example, to type “test” press8378.
The displayed word may change as you type it.Do not try to correct the word as you go. Type tothe end of the word before editing.
If the word that appears is not the desired word,press0 to change the word on the display tothe next most likely word in the database.
Repeat until the desired word appears.
f the desired word does not appear, you can add ito the database.
dding Words to the DatabaseSelect Alpha as your text input mode.Type the word using Alpha mode.Select Word as your text input mode.Press#.
he word you typed in Alpha text entry mode isow in the database.
Note: You cannot store alphanumericcombinations, such as Y2K.
Choosing a LaTo change the lang
1 At a screen that rm.
2 Select Language3 Scroll to the lang
database.4 Press A under S
Special FunSome of the phonefunctions while in A
SpacesPress# for a spa
CapitalizationPress and hold#uppercase (shift), totyped uppercase (clowercase letters.

E
T
Wa
PPptw
U12
U1
appears along the bottom ofplay. Scroll right to view the
to choose the symbol you want
elect.
30
ntering Text
hese icons appear in the top row of your display:
hen neither of these icons appear, letters typedre lowercase.
Note: Your phone automatically makes the firstletter of a sentence uppercase.
unctuationress1 or0 to insert punctuation. Continue toress the key to view the list of symbols availablehrough that key. Pause to select the symbol youant.
Note: Additional punctuation symbols areavailable in Symbols mode.
sing Numeric ModeSelect Numeric as your text input mode.Press the number buttons on your keypad toenter numbers.
sing Symbols ModeSelect Symbols as your text input mode.
A row of symbolsyour phone’s discomplete row.
2 Scroll left or rightto enter.
3 Press A under S
m Shift is on.
n Caps lock is on.

31
CCEa
IS
A
•
•
— Each number or addressssigned a Contacts type:
ress — Each Contacts entryumber or address. This may bee number, BoostTM
ber, email address, or IP
ore numbers up to 64 digitsvery 20 digits must beby a pause or wait. Seeauses and Waits” on page 35.
phone number
BoostTM Walkie-Talkienumber
phone number
phone number
phone number
email address
phone number
phone number
IP address
phone number
ontactsontacts stores up to 600 numbers or addresses.ach Contacts entry can store several numbers orddresses.
nformation stored in Contacts is saved on yourIM.
Contacts entry contains:
A name — A name is required if your are storingmore than one number or address to the entry;otherwise, it is optional. Typically, this is thename of the person whose contact information isstored in the entry.A ring tone — You can assign a ring tone toeach entry. This is the sound your phone makeswhen you receive phone calls or call alerts fromany of the numbers stored in the entry.
• A Contacts typestored must be a
• A number or addmust contain a nany type of phonWalkie-Talkie numaddress.Note: You can st
long, but eseparated“Creating P
A Mobile
B DC
C Work1
D Work2
E Home
F Email
G Fax
H Pager
J IP
K Other

C
•
•
VT
T
1
2
r the number or address youisplayed, press A under View.
of your options: Press m.
other numbers and addressestry.e entries, continue scrolling.
a Namee in Contacts:
ts list, press m.
ou want to see. See “Entering.k.
e name you entered or the
BoostTM Walkie-Talkie
show only entries that containkie number entries:
ts list, press m.
32
ontacts
A Speed Dial number — When you store aphone number, it is assigned a Speed Dialnumber. You can accept the default Speed Dialnumber or change it.A voice name — If you create a voice name for anumber, you can then dial that number by sayingthe voice name into your phone. This iconappearsP to the left of the Contacts type icon ifa voice name is assigned.Note: This is an optional feature. See “Optional
Features” on page 76.
iewing Contactso access Contacts:
Press A under Contcs. -or-
From the main menu, select Contacts. -or-
If you are on a call: Press m. Select Contacts.
o view entries:
From the Contacts list, scroll to the entry youwant to view.If an entry has more than one number oraddress stored, <> surrounds the Contacts typeicon. Scroll left or right to view the icon for eachnumber stored in the entry.
3 When the icon fowant to view is d-or-
If View is not oneSelect View.
4 Scroll to view thestored for the enTip: To view mor
Searching forTo search for a nam
1 From the Contac2 Select Search.3 Enter the name y
Text” on page 284 Press A under O
Your phone finds thnearest match.
Showing OnlyNumbersTo set Contacts toBoostTM Walkie-Tal
1 From the Contac2 Select Filter.

33
Creating Entries
3
T
1234
CArio
ACyC
Tt
T
1
> [New Contact]. -or-
ts list, press m. Scroll to New.elect.
sign a name to the entry:
eld highlighted, press A under
See “Entering Text” on pagee finished, press A under Ok.
sign a ring tone to the name:
field highlighted, press A under
tone you want to assign. Press
acts type to the number orored:
s type field highlighted, press A
tacts type you want to assign.elect.
r or address:
r ID for an email address, or IP) highlighted, press A under
With Show DC highlighted, press A underSelect.
o set Contacts to show all entries:
From the Contacts list, press m.Select Filter.Scroll to Show All.Press A under Select.
reating Entriesnumber or address and a Contacts type are
equired for all Contacts entries. Other informations optional. You may enter the information in anyrder by scrolling through the entry details.
fter you have entered the number or address,ontacts type, and any other information you want,ou can press A under Done to save the entry toontacts.
o cancel a Contacts entry at any time press,eo return to the idle screen.
Tip: In some fields that require you to enterinformation, you can begin entering theinformation from the keypad instead ofpressing A under Change.
o create a Contacts entry:
To access the entry details screen:
Select Contacts
From the ContacPress A under S
2 If you want to as
With the Name fiChange.
Enter the name.28. When you ar
3 If you want to as
With the RingerChange.
Scroll to the ringA under Select.
4 To assign a Contaddress being st
With the Contactunder Change.
Scroll to the ConPress A under S
5 To store a numbe
With the # field (ofor an IP addressChange.

C
6
7
8
A1
2
sign the phone number to aial location:
field highlighted, press A
elete to delete the currenter.
eed Dial number using the
ished, press A under Ok.
ished, press A under Back.
bers Fastero Contacts from the recent callcent Calls to Contacts” on page
o Contacts from Memo, see.
o Contacts from the idle screen:
o enter the number you want to
ber.ber as a new entry, select [New
34
ontacts
Enter the number or address. For phonenumbers, use the 10-digit format. For emailaddresses, see “Entering Text” on page 28.
Tip: Press A under Browse to select a numberor address from Contacts, the recent callslist, or Memo.
When you are finished, press A under Ok.
If you want to assign a Speed Dial number to thenumber, press A under Change with the[Options] field highlighted. See “AssigningOptions”.If you want to add more numbers or addressesto the entry:
Scroll past the information you already entered.
Enter the additional information for the entryusing step 2 through step 6. You must assign aname to the entry, if you have not already.
Press A under Done.
ssigning OptionsIf you have not already, press A under Changewith the [Options] field highlightedThe default Speed Dial number assigned to aphone number is displayed in the Speed # field.This is always the next available Speed Diallocation.
If you want to asdifferent Speed D
With the Speed #under Change.
Press A under DSpeed Dial numb
Enter the new Spkeypad.
When you are fin
3 When you are fin
Storing NumTo store numbers tlist, see “Storing Re26.
To store numbers t“Memo” on page 37
To store numbers t
1 Use the keypad tstore.
2 Press m.3 Select Store Num4 To store the num
Contact]. -or-

35
Editing Entries
5
6
7
E1
234
DD1
23
elect.es to confirm.
er or Addressts list, scroll to the entry thatber or address you want to
s type field highlighted, scrollplay the Contacts type for thet to delete.
umber.elect.es to confirm.
apacityumbers are stored in Contacts:
ts list, press m.
uses and Waitsber, you can program yourait between digits whilekes your phone pause for 3
ling further. A wait makes yourresponse before dialing further.
To store the number to an existing entry, selectthe entry.
With the Contacts type field highlighted, scrollleft or right to display the Contacts type you wantto assign the number.If you want to add more information to the entry,follow the applicable instructions in “CreatingEntries” on page 33.Press A under Done.
diting EntriesFrom the Contacts list, scroll to the entry youwant to edit.Press m.Select Edit. The entry details screen displays.Follow the applicable instructions in “CreatingEntries” on page 33 to edit the various fields.
eleting Entrieselete an EntryFrom the Contacts list, scroll to the entry youwant to delete.Press m.To delete the entire entry, scroll to DeleteContact.
4 Press A under S5 Press A under Y
Delete a Numb1 From the Contac
contains the numdelete.
2 With the Contactleft or right to disnumber you wan
3 Press m.4 Scroll to Delete N5 Press A under S6 Press A under Y
Checking CTo see how many n
1 From the Contac2 Select Capacity.
Creating PaWhen storing a numphone to pause or wdialing. A pause maseconds before diaphone wait for your

C
Todn
T
Itfl
Iaa
T
ItfaP
ate pauses and waits whilember from the keypad. Seeuses and Waits While Dialing”
l Numbersber that you plan to use forse Plus Dialing:
for two seconds. A “0”anges to a “+”.rk translates the “+” into thee international access codeplace the call.
code, city code or area code,er.
ut making international calls,tional Calls” on page 39.
36
ontacts
his feature is useful when using voice mail orther automated phone systems that require you toial a phone number and then enter an accessumber.
o program a pause:
Press and hold* until the letter P appears.The P represents a 3-second pause.
f you store 17035551235P1234, when you selecthis number and make a call, your phone dials theirst 11 digits, pauses for 3 seconds, then dials theast 4 digits.
f you want a pause longer than 3 seconds, pressnd hold* more than once. Each P represents3-second pause.
o program a wait:
Press and hold* until the letter W appears.The W means your phone waits before dialingfurther.
f you store 17035551235W1234, when you selecthis number and make a call, your phone dials theirst 11 digits and then waits. A message appearssking if you want to send the rest of the digits.ress A under Yes to dial the last 4 digits.
Tip: You can credialing a nu“Creating Paon page 38.
InternationaWhen storing a numinternational calls, u
1 Press and hold0appears, then chNote: The netwo
appropriatneeded to
2 Enter the countryand phone numb
For information abosee “Making Interna

37
MemoMemo lets you store a number, make a call to thatnumber, and save it to Contacts.
To create a memo:
1 From the main menu, select Memo.2 Enter the number using your keypad.3 Press A under Store.
To view the memo later:
1 From the main menu, select Memo.
To delete the memo:
1 From the main menu, select Memo.2 Press and hold A under Delete.3 Press A under Store.
To edit the memo:
1 From the main menu, select Memo.2 Enter the new number.3 Press A under Store.
To make a call to the memo number:
1 From the main menu, select Memo.2 Presss.
To store the memo number to Contacts:
1 From the main menu, select Memo.2 Press m.3 Press A under Select.4 To store the number as a new entry, select [New
Contact]. -or-
To store the number to an existing entry, selectthe entry.
5 With the Contacts type field highlighted, scrollleft or right to display the Contacts type you wantto assign the number.
6 If you want to add more information to the entry,follow the applicable instructions in “CreatingEntries” on page 33.
7 Press A under Done.

AFCCm
T
1234
T
1
2
Ta
Tc
witch.
uses and Waitsg
use or wait while dialing anformation on pauses and
Pauses and Waits” on page
hile dialing a phone number:
, enter the digits you want topause.
use.ou want to occur after the
ile dialing a phone number:
, enter the digits you want towait.
it.ou want to occur after the wait.
38
dvanced Callingeaturesall Hold
all Hold lets you put an active call on hold andake a second call.
o put a call on hold:
While on an active call, press m.Scroll to Hold.Press A under Select.If you want to make the call active again, pressA under Resum.
o make a second call while a call is on hold:
Enter the number you want to call.Tip: To enter the number from Contacts: Press
m. Select Contacts.
Presss to place the call.
o end the second call and make the call on holdctive again:
Presse.
o make the call on hold active and put the activeall on hold:
Press A under S
Creating PaWhile DialinYou can enter a panumber. For more iwaits, see “Creating35.
To create a pause w
1 From the keypadoccur before the
2 Press m.3 Select Insert Pa4 Enter the digits y
pause.
To create a wait wh
1 From the keypadoccur before the
2 Press m.3 Select Insert Wa4 Enter the digits y

39
Making International Calls
MYRC
CCc
Pmi
1
2
SWOtnWp
o call the most recent BoostTM
er on the recent calls list:
enu, select Settings > DC/GCouch DC.ll.elect.
o call a BoostTM Walkie-Talkie:
enu, select Settings > DC/GCouch DC > Assigned
stTM Walkie-Talkie number youto call every time you press thealkie button:
r using your keypad. -or-
earch. Select Contacts,Memo. Select the number you
k.
ch BoostTM Walkie-Talkie:
enu, select Settings > DC/GCouch DC.
elect.
aking International Callsour service default is “International Callsestricted.” Contact Boost MobileTM Customerare to obtain international dialing access.
alls placed between the United States andanada do not require an international accessode.
lus Dialing lets you place an international call toost countries without entering the local
nternational access code.
Press and hold0 for two seconds. A “0”appears, then changes to a “+”.Note: The network translates the “+” into the
appropriate international access codeneeded to place the call.
Enter the country code, city code or area code,and phone number.
etting One Touch BoostTM
alkie-Talkiene Touch BoostTM Walkie-Talkie sets your phone
o call the most recent BoostTM Walkie-Talkieumber on the recent calls list, or a BoostTM
alkie-Talkie number you choose, every time youress the BoostTM Walkie-Talkie button.
To set your phone tWalkie-Talkie numb
1 From the main mOptions> One T
2 Scroll to Last Ca3 Press A under S
To set your phone tnumber you choose
1 From the main mOptions > One TNumber.
2 To enter the Boowant your phoneBoostTM Walkie-T
Enter the numbe
Press A under SRecent Calls, orwant to enter.
3 Press A under O
To turn off One Tou
1 From the main mOptions > One T
2 Scroll to Off.3 Press A under S

A
CCcur
•
•
•
•
•
•
•
•
imer:
enu, select Call Timers.e you want to view or reset.
without resetting: Press An you are finished viewing.
e: Press A under Reset. Pressonfirm.
displayed by Call Timersbe used for billing. Call timerstes only.
Callsto make phone calls using a) device:
of a 2.5mm cable into ther phone. Connect the other
to your TTY device.our phone’s TTY feature is onY mode you want to use.
to enter phone numbers and
40
dvanced Calling Features
all Timersall timers measure the duration of your phonealls, BoostTM Walkie-Talkie calls, and circuit datase, as well as the number of Kilobytes sent andeceived by your phone:
Last Call — displays the duration of your mostrecent phone call.Phone Reset — keeps a running total of yourphone call minutes, until you reset it.Phone Lifetime — displays the total minutes ofall your phone calls.DC (Walkie-Talkie) Reset — keeps a runningtotal of all of your BoostTM Walkie-Talkie callminutes, until you reset it.DC (Walkie-Talkie) Lifetime — displays thetotal minutes of all your BoostTM Walkie-Talkiecalls.Circuit Reset — keeps a running total of all ofyour circuit data use, until you reset it.Circuit Lifetime — displays the total minutes ofall of your circuit data use.Kbytes Reset — keeps a running total of thenumber of Kilobytes sent and received by yourphone, until you reset it.
To view or reset a t
1 From the main m2 Select the featur3 To view a feature
under Done whe-or-
To reset a featurA under Yes to c
Note: The valuesshould notare estima
Making TTYTo use your phoneteletypewriter (TTY
1 Connect one endaudio jack on youend of the cable
2 Make sure that yand select the TT
3 Use your phonemake calls.

41
Making TTY Calls
Wt
THyd
TYtti
CY
•
•
arry-Over) — You type text onand listen to voice replies onker.
hile not in a call:
enu, select Settings > Phonepe.hange.mode you want.elect.
TY call, the call begins in theselected.
ring a call using your phone:
e.you want.
ring a call using your TTYf the following commands:
to select VCO modeto select HCO mode— to turn off HCO mode
hen you make a TTY call, these icons appear onhe phone’s display:
TY device features such as Turbo-Code,igh-Speed, and Interruption are not supported byour phone. These features must be turned off orisabled to use your TTY device with your phone.
urning On the TTY Featureour phone’s TTY feature must be on if you want
o make TTY calls, set the TTY mode, or changehe TTY baud rate. To make sure the TTY features on:
From the main menu, select Settings > PhoneCalls > TTY. This field must say On.
hoosing a Modeour phone supports these TTY modes:
TTY — You type and read text on your TTYdevice.VCO (Voice-Carry-Over) — You speak into yourphone and read text replies on your TTY device.
• HCO (Hearing-Cyour TTY deviceyour phone spea
To change mode w
1 From the main mCalls > TTY > Ty
2 Press A under C3 Scroll to the TTY4 Press A under S
When you make a TTTY mode you last
To change mode du
1 Press m.2 Select TTY > Typ3 Select the mode
To change mode dudevice, issue one o
• “VCO please” —• “HCO please” —• “HCO off please”
N Phone call is active.
O Phone call is on hold.

A
C4
SCYr(
Ci
TBcil
to your destination number.s through a Communicationss messages typed into aa speech or hearing impairede Communications Assistant
ken messages to the hearing ordividual. Telecommunicationsailable 24 hours a day, 7 days all is strictly confidential.
to reach Telecommunicationsice may not be available in all
42
dvanced Calling Features
Important: When you are using HCO, the soundcoming from your phone speaker maybe uncomfortably loud. Use cautionwhen putting the phone to your ear.(For information on setting the volumeof your phone speaker, see “Setting theVolume” on page 72.)
hanging the TTY Baud RateBy default, your phone’s TTY baud rate is set to45.45, the baud rate required for TTY callswithin the U.S. To make calls outside the U.S.,set your TTY baud rate to 50.0
pecial Dialing Codesall Restrictionsou can prevent your phone from making or
eceiving long distance, incoming, and outgoingexcept 911) calls.
ontact Boost MobileTM Customer Care for morenformation.
elecommunications Relay Serviceoost MobileTM supports services forommunicating with speech and/or hearingmpaired individuals. You can dial 711 to reach aocal Telecommunications Relay Center. You will
then be connectedRelay service workAssistant who readTDD/TTY device byindividual to you. Ththen types your spospeech impaired inRelay Service is avweek, and every ca
Note: Using 711Relay Servareas.

43
BSCt
CYns(dm
C
PYo
Yb8
ckingtly block delivery of your phonell you make.
-call basis:
before dialing the call.
leTM 411uts you straight through —d to make 2 calls, memorize aa pen to write a number down.is your mobile directory servicetraight through to the number
tingstelephone number for anyr government agency in thetates and Hawaii. Operatorsdress information if available.
Listingserator to perform a search byific business name is unknown.n request information for a surfe or school.
oost MobileTM Phoneervices
ontact Boost MobileTM Customer Care to obtainhese services or for additional information:
Note: Some services are not available outsideof the continental United States.
aller IDour phone automatically displays the phoneumber or name (if the 10-digit phone number istored in your Contacts) of the person callingunless blocked by the caller), enabling you toecide whether to take the call or forward it to voiceail.
aller ID information is not available on all calls.
er-Call Blockingou can block delivery of your phone number tother Caller ID units for a single phone call:
Press*67 before dialing the call.
our Boost MobileTM phone number cannot belocked from calls made to 911, 800, 855, 866,77, 888, or other toll- free phone numbers.
Per-Line BloYou can permanennumber on every ca
To disable on a per
Press*82
Boost MobiThe Directory that pNow there is no neenumber, or hunt forBoost MobileTM 411that connects you syou want.
White Page LisYou can request aperson, business, ocontinental United Scan also provide ad
Yellow PageYou can ask the opcategory if the specFor example, you cashop near your hom

B
NBaHl
DBdOsd
RBaBrFy
gs and Show
operators have access tost theaters in the continentalawaii. You only need to ask for
movie theater to get currentr show times. Additionalrunning time, synopsis, andilable. Show times and listingshours in advance.
Informationormation on local events suchconcerts, state and county fairsvents. Boost MobileTM 411de dates, times, and locations
44
oost MobileTM Phone Services
ationwide Call Completionoost MobileTM 411 operators can connect you tony listing in the continental United States andawaii. If requested, the operator will stay on the
ine while connecting to the number.
riving Directionsoost MobileTM 411 operators are able to provideirections to reach a specific destination.perators will work with you to determine yourtarting point and provide clear directions to theestination.
estaurant Reservationsoost MobileTM 411 operators can assist in findingrestaurant and then coordinate reservations. Aoost MobileTM 411 operator will confirm your
eservation information through a return phone call.or your convenience, the reservation will be inour name.
Note: Reservation service may not be availablefor all restaurants.
Movie ListinTimesBoost MobileTM 411movie listings at moUnited States and Ha specific movie ormovies, locations oinformation such asratings are also avaare available 24-48
Local EventYou can request infas sporting events,and other current eoperators can provifor these events.

45
RTra
123
45
6
7
8
r Phone to Vibrateone to vibrate instead of
en you receive all phone calls,kie calls, messagesll alerts.
enu, select Ring Tones >
to set VibeAll to On.volume controls to turn down
as far as possible sets VibeAll
o vibrate instead of making atures but not others:
enu, select Ring Tones.ll is set to Off.
e list of ring tones to Vibrate.ssign.re you want to set to make no
options for BoostTM
kie calls, see “Setting Yourot Ring” on page 72.
elect.to another feature, repeat
ep 6.
ing Toneso set the ring tone your phone makes when you
eceive phone calls, message notifications, or calllerts:
From the main menu, select Ring Tones.Make sure VibeAll is set to Off.Scroll through the list of ring tones and select theone you want to assign. Vibrate sets your phoneto vibrate instead of making a sound; Silent setsyour phone to neither vibrate nor make a sound.Tip: Highlighting a ring tone lets you hear it.
Press A under Assign.Scroll to the feature you want to assign the ringtone to.Press A under Select.Tip: A checkmark next to a feature means the
current ring tone has been assigned to it. Toremove the assignment: Scroll to thefeature. Press A under Select.
To assign the ring tone to other features, repeatstep 5 through step 6.When you are finished, press A under Done.
Setting YouYou can set your phmaking a sound whBoostTM Walkie-Talnotifications, and ca
1 From the main mVibeAll.
2 Scroll left or rightTip: Pressing the
the volumeto On.
To set your phone tsound for some fea
1 From the main m2 Make sure VibeA3 Scroll through th4 Press A under A5 Scroll to the featu
sound.Note: To set ring
Walkie-TalPhone to N
6 Press A under S7 To assign Vibrate
step 5 through st

R
8
T
T
ACYys
123
456
7
brateto ring and vibrate when you
or call alerts:
enu, select Ring Tones.ll is set to Off.list of ring tones and select the
assign.
/Vibe.e you want to set to ring and
ished, press A under Done.
rs on the display.
g Tonesenu, select Ring Tones.ll is set to Off.tone.
.g tones assigned to featuresies.
46
ing Tones
When you are finished, press A under Done.
hese icons indicate how the ringer is set.
hese icons may appear at the same time.
ssigning Ring Tones toontacts
ou can set the ring tone your phone makes whenou receive phone calls or call alerts fromomeone you have stored in Contacts.
From the main menu, select Ring Tones.Make sure VibeAll is set to Off.Scroll through the list of ring tones to the oneyou want to assign. Highlighting a ring tone letsyou hear it.Press A under Assign.Select A Contact.Scroll to the Contacts entry you want to assignthe ring tone to.Press A under Select.
Ring and ViTo set a your phonereceive phone calls
1 From the main m2 Make sure VibeA3 Scroll through the
one you want to4 Press m.5 Select Assign w6 Select the featur
vibrate.7 When you are fin
This iconS appea
Viewing RinAssignment1 From the main m2 Make sure VibeA3 Highlight any ring4 Press m.5 Select Overview6 Scroll to view rin
and Contact entr
u DC/GC speaker set to off.
v The phone always vibrates instead of ringing.
M The phone does not ring for phone calls.

47
ownloading More Ring Tones
DTIdwc
MTc
12345
D
stom Ring Tonesring tone:
enu, select Ring Tones.ll is set to Off.tone you want to delete.
es to confirm.
D
ownloading More Ringones
f you want to use other ring tones, you canownload them into your phone for a fee. Go toww.boostmobile.com update for a selection ofustom ring tones and downloading instructions.
Note: Ring tones purchased from this web sitemay be downloaded only once. If youdelete a ring tone from your phone, youmust purchase it again to download itagain.
anaging Memoryo view the amount of memory available forustom ring tones:
From the main menu, select Ring Tones.Make sure VibeAll is set to Off.Highlight any ring tone.Press m.Select Memory Usage.
eleting custom ring tones frees memory.
Deleting CuTo delete a custom
1 From the main m2 Make sure VibeA3 Scroll to the ring4 Press m.5 Select Delete.6 Press A under Y

48
Message CenterThe message center manages your messages.
When you receive the following types ofmessages, you can access them through themessage center:
• Voice mail messages• Short Message Service (SMS) messages• Two-Way messages (Net Alerts)
You can listen to or view these messages, deletethem, or continue to store them in the messagecenter.
Accessing the MessageCenter
Press A under Mesg. -or-
From the main menu, select Messages.
Message Center Options• Voice Mail — access voice mail messages you
have received.• SMS — access SMS messages you have
received.
• Net Alert — access Two-Way messages youhave received.

49
RWMy
•
•
MWyod
Idc
Imede
ation Optionsyour phone sounds messagehile you are on phone calls:
enu, select Settings > Phoneions.n you want:Tones sound during calls for
ssages.y — Tones sound during callsages; tones for all other typesre held until you end calls.ones for all types of messagesou end calls.
is the default setting.
elect.ation options during a call:lect In Call Setup >s.
eceiving Messageshen you receive a voice mail message, Shortessage Service (SMS) message, or Net alert,
ou have 2 ways to access the message:
Respond to the message notification thatappears when the message is received.Dismiss the message notification and accessthe message later through the message center.
essage Notificationshen you receive a message, your phone notifies
ou with text on the display and a notification toner vibration. You can access the message orismiss the notification.
f you dismiss the notification, the message is noteleted. It can be accessed through the messageenter.
f you are not on a phone call when you receive aessage, your phone sounds a notification tonevery 30 seconds until you access the message,ismiss the notification, or the alert time-outxpires.
Setting NotificTo control whethernotification tones w
1 From the main mCalls > Notificat
2 Choose the optio• Receive All —
all types of me• Msg Mail Onl
for SMS messof messages a
• Delay All — Tare held until y
Note: Delay All
3 Press A under STip: To set notific
Press m. SeNotification

R
MAcm
Tc
1
2
3
50
eceiving Messages
essage Centerll your messages are stored in the messageenter. The message center shows how manyessages you have of each type.
o access your messages through the messageenter:
Press A under Mesg. -or-
From the main menu, select Messages.
Scroll to the type of message you want toaccess.Press A under the display option on the left.Note: In order for you to access voice mail for
the first time, you must access it by dialinginto your voice mail box using your PTN. Ifthere is already a message in your voicemail box, then you can access your voicemail through the message center.

51
Voice Mail MessagesReceiving a MessageWhen you receive a voice mail message, NewVoice Mail Message appears on the display.
To call Boost MobileTM’s voice mail system andlisten to the message:
Press A under Call.
To dismiss the message notification:
Press A under Back. This icony appears onthe display, reminding you that you have a newmessage.
Accessing Voice Mail fromthe Message Center1 From the main menu, select Messages > Voice
Mail.2 Press A under Call to call Boost MobileTM’s
voice mail system.
Sending Unanswered Calls toVoice MailTo send a phone call to voice mail instead ofanswering it:
Presse. -or-
Press A under No.
If the caller leaves a message, this iconyappears on the display, reminding you that youhave a new message.

BM
SBUMeirsV
IiyyeBi
Yh
•
age, press 2.reeting, press 3.ersonal options press 4.
you are in a sub-menu, you willenu. If you press**, youoice mail menu. From the mainess# to exit voice mail. Atend the call by pressinge.
gesnew voice mail message, you
it immediately by pressing Aby pressing A under Exit.
vailable while you are listening
1.ing of message — press11.e the current message — press
ress3.nd of message — press
time stamp — press55.
vailable while a message iss played:
52
oost MobileTM Voiceail
Note: To receive voice mail messages, you mustfirst set up your voice mailbox.
etting Up Your Voice Mailox
sing your i285 phone, dial your 10-digit BoostobileTM Personal Telephone Number (PTN). Forxample: 7035557777. Follow the system
nstructions to create a new 4- to 7-digit password,ecord your name, and record a greeting. When theystem says, “Thank you for using Boost MobileTM
oice Mail,” your mailbox is set up.
f you are calling from a phone other than your285, dial your 10-digit Boost MobileTM PTN. Whenou hear the greeting, press the star key to accessour voice mail box. The system will prompt you tonter your password. Enter the last 7 digits of youroost MobileTM PTN. For example: 5557777. This
s your temporary password.
ou are at the main voice mail menu when youear the options listed below.
To play your messages, press 1. (This optionplays only if you have new or saved messages.)
• To record a mess• To change your g• To access your p
If you press * whilego to the previous mwill go to the main vvoice mail menu, prany time, you may
Playing MessaWhen you receive acan either listen tounder Call, or later
These are options ato your messages:
• Replay — press• Rewind to beginn• Pause or continu2.
• Fast forward — p• Fast forward to e33.
• Play the date and
These options are aplaying or after it ha

53
Changing Your Password
•
••••
Mya
TTsp
C1
234
ant that you choose a numbery for you to remember, but harde else to guess. Passwordse same digits, for examplea sequential series of digits,ll not be accepted.
return to the main menu.t your password, contact
Care.
our Namely to, or copy a message, your
cedes the message. To recordme at any time:
ice mail menu, press4 tooptions.ss personal preferences.ess the record your name
rd your name.return to the main menu.
r Active Greetingclude one or all of the followingting so that callers will know
Forward the message to another subscriber —press6.Delete the message — press7.Reply to a message — press8.Save the message — press9.Skip to the next message — press#.
essages that are not saved or deleted remain inour mailbox as new messages. All messages areutomatically deleted after 21 days.
o retrieve deleted messages, press*3.his option only applies to the current voice mailession. If you end the call, the messages will beermanently deleted.
Important: After exiting the voice mail session, youcannot recover deleted messages.
hanging Your PasswordFrom the main voice mail menu, press4 toaccess personal options.Press4 to access personal preferences.Press1 to modify password.Enter your new password. It must be 4 to 7 digitslong.
Note: It is importthat is easfor someonusing all th4,4,4,4 or1,2,3,4, wi
5 Press** toNote: If you forge
Customer
Recording YWhen you send, repname response preor re-record your na
1 From the main voaccess personal
2 Press4 to acce3 Press3 to acc
option.4 Press2 to reco5 Press** to
Recording YouYou may want to inoptions in your greethey are available.

B
••
•
T
1
2
3
4
AMYdgrg
l greetings:
ice mail menu, press 3 toings menu.
greetings.g number you wish to create or
a greeting.ting and press # when you
to the main menu.
e greeting:
ice mail menu, press 3 toings menu.another greeting to be active.r of the greeting that you wouldThe system will confirm yourumber.our active greeting.to the main menu.
54
oost MobileTM Voice Mail
Press 1 to send a numeric message.Press 2 to send an operator-assisted message.(This option is available only if you are asubscriber of Operator Assisted Messaging.Contact Boost MobileTM Customer Care for moreinformation.)Press # to skip the greeting and record amessage immediately.
o record or alter your greeting at any time:
From the main voice mail menu, press 3 tochange your greeting.Press 1 to play, press 2 to record or re-record, orpress 7 to delete your active greeting.Record your greeting and press # when youhave finished.Press ** to return to the main menu.
dvanced Voice Mail Featuresultiple Greetings
ou can create up to 5 different greetings andesignate which greeting will be your activereeting at any given time. The greeting that wasecorded during your initial voice mail box setup isreeting 1. This is your default active greeting.
To record additiona
1 From the main voaccess the greet
2 Press 4 to modify3 Enter the greetin
modify.4 Press 2 to record5 Record your gree
have finished.6 Press ** to return
To select your activ
1 From the main voaccess the greet
2 Press 3 to select3 Enter the numbe
like to be active.active greeting n
4 Press 1 to play y5 Press ** to return

55
dvanced Voice Mail Features
G
YatSp
T
1
23
backback mode of your voice mailmal. This feature automaticallyw messages when you log in.tic playback:
ice mail menu, press 4 tooptions.s personal preferences.s playback preferences.between automatic and normal
to the main menu.
back Order of Messages
order in which you wantto be played. You may listen tossage first, or you may listen tossage first. To select the order
ages should be played:
ice mail menu, press4 tooptions.s personal preferences.s playback preferences.between the playback orders.to the main menu.
G
G
G
A
reetings Schedule
ou can choose to have your greetingsutomatically activated based on a pre-determinedime schedule. By activating the Greetingchedule, Greetings 1, 2, and 3 will automaticallylay according to the time schedule listed below.
o activate the greeting schedule:
From the main voice mail menu, press 3 toaccess the greetings menu.Press 9 to activate your greeting schedule.Press ** to return to the main menu.Note: The greeting schedule, when on, will
override any other greeting that you mayset as active. If a greeting is not recorded,a system standard greeting will be played.
Automatic PlayBy default, the playservice is set to norplays and saves neTo activate automa
1 From the main voaccess personal
2 Press 4 to acces3 Press 2 to acces4 Press 2 to switch
playback.5 Press ** to return
Changing the Play
You can select theunheard messagesthe last received methe first received mein which new mess
1 From the main voaccess personal
2 Press 4 to acces3 Press 2 to acces4 Press 1 to switch5 Press ** to return
reeting 1 Evenings andWeekends
5:00 pm – 7:59 am,Monday – Friday24-hours, Saturdayand Sunday
reeting 2 WeekdayMornings
8:00 am – 11:59 amMonday – Friday
reeting 3 WeekdayAfternoons
Noon – 4:59 pmMonday – Friday

B
RM
Trdrst
T
1
2
3
4
56
nsted a message, you can assignategory before you send it.
options that can be applied to
ient will hear this messagesages.ient cannot copy the messagex or phone number.on-Delivery — You will be
ipient has not listened to yourrtain date and time.— You can specify a time and
nths in advance) for theelivered.ust have digits in the MM/DDigits for the month and 2 digits
e). For example, January 2nd102.
message has been sent fordelivery, it cannot be retrieved ord.
livery option:
our message, but before5 for delivery options.
56
oost MobileTM Voice Mail
ecording, Forwarding, and Replying toessages
hese functions allow you to record and send,eply to, or forward a message to an assignedestination address or group list number. If youecord a complete or partial message, but do notend it, Boost MobileTM Voice Mail service will refero this message as an “in preparation” message.
o record and send a message:
From the main voice mail menu, press 2 torecord a message.Record your message and press # to end themessage.Press 9 at the prompt to indicate that you wantto send the message or press 5 for deliveryoptions.Enter the mailbox number and/or group listnumber(s). (A mailbox number is the 10-digitBoost MobileTM PTN of a Boost MobileTM
customer. The Boost MobileTM customer mustbe in your local calling area. The name of therecipient plays if it is recorded.)Press # to send.Press ** to return to the main menu.Note: You can only send messages using this
method to Boost MobileTM customers inyour home market.
Delivery OptioAfter you have creathe message to a cBelow is a list of thea message:
• Urgent — Recipbefore other mes
• Private — Recipto another mailbo
• Notification of Nnotified if the recmessage by a ce
• Future Deliverydate (up to 3 momessage to be dNote: All dates m
format (2 dfor the datwould be 0
Important: Once afuturedelete
To set a special de
1 After recording ysending it, press
57
dvanced Voice Mail Features
2
3
4
56
WTincenl
st:
ice mail menu, press 4 tooptions.s your Group Lists.a Group List.digit group list number and
or the list and press #.mbers by mailbox number,e.ll entries added to the list.to the main menu.
ist:
ice mail menu, press 4 tooptions.s group lists.
a group list. Enter the numberou want to modify.new recipient.our changes.to the main menu.
t:
ice mail menu, press 4 tooptions.
A
Press the number that corresponds with thedesired delivery option:• Press 1 for urgent.• Press 2 for private.• Press 3 for notification of non-delivery. At
prompt, specify time and date.• Press 4 for future delivery of messages. At
prompt, specify time and date.• Press 9 to send the message immediately.The list of options will be presented again.Select an additional option or press 9 to sendthe message.Enter the destination mailbox or group listnumber of the recipient(s).Press # to send.Press ** to return to the main menu.
orking With Group Listshis feature enables you to create a list and assign
t a unique name. Then, you can add mailboxumbers, group lists, or individuals. Once youreate a list you can send a voice message toveryone on the list by entering the group listumber. You can have up to 40 group lists. Each
ist can hold up to 50 addresses.
To set up a group li
1 From the main voaccess personal
2 Press 2 to acces3 Press 2 to create4 Enter the 1- or 2-
press #.5 Record a name f6 Select group me
group list, or nam7 Press # to save a8 Press ** to return
To modify a group l
1 From the main voaccess personal
2 Press 2 to acces3 Press 4 to modify
of the group list y4 Press 1 to add a5 Press # to save y6 Press ** to return
Deleting a group lis
1 From the main voaccess personal

B
234
56
M
Taancfm
T
1
23
isable message forwarding,
forwarding type, press 2.to the main menu.
58
oost MobileTM Voice Mail
Press 2 to access group lists.Press 3 to delete a group list.Enter the number of the group list you want todelete. The system will play the name of thegroup list.Press # to delete the list.Press ** to return to the main menu.
essage ForwardingNote: You can only forward messages to Boost
MobileTM customers in your home market.
his feature allows you to program your phone toutomatically forward incoming messages tonother mailbox. There are 2 types of forwarding:otified and silent. Notified forwarding prompts thealler that the message will be forwarded. Silentorwarding does not prompt the caller that theessage will be forwarded.
o modify forwarding options,
From the main voice mail menu, press 4 toaccess personal options.Press 5 to modify forwarding options.Select the applicable option below:• To create a forwarding number, press 2.• If you have already created a forwarding
number, press 2 to modify the number.
• To enable or dpress 3.
• To change the4 Press ** to return

59
STMSStma
YS
YP
Imyay
Yu
ssagetext and numeric message,appears on the display.
e:
ead.lls more than one screen, scroll
sage, press A under Save. -or-
ssage, scroll to the end of thess A under Delete.
sage notification:
ack. This iconw appears onnding you that you have a new
the Message Centerenu, select Messages > SMS.sage you want to read.ead.lls more than one screen, scroll
sage, press A under Save. -or-
age, scroll to the end of theA under Delete.
MS and Boost MobileTM
ext and Numericessages
MS Messageshort Message Service (SMS) messages are short
ext messages, also called text and numericessages. You can send SMS messages throughny email account or on www.boostmobile.com.
our phone receives SMS messages sent to itsMS address, but does not send SMS messages.
our phone's SMS address is [email protected].
f your phone is powered off when you receive aessage, your phone notifies you the next time
ou power it on. If you are out of your coveragerea, your phone alerts you when you return toour coverage area.
our phone attempts to deliver these messages forp to 7 days.
Receiving a MeWhen you receive aNew Text Message
To view the messag
1 Press A under R2 If the message fi
to read it.3 To keep the mes
To delete the memessage and pre
To dismiss the mes
Press A under Bthe display, remimessage.
Reading from1 From the main m2 Scroll to the mes3 Press A under R4 If the message fi
to read it.5 To keep the mes
To delete the messmessage and press

S
CInw
Incnm
T
TP
TN
BaBrwrB
Ya
Boost MobileTM text message,you with a Web alert. Eachiew the Boost MobileTM textd with it.
in the message center. Boostges appear in the Boosteb Services browser.
ssageBoost MobileTM text message,
tion appears on the display.
e:
oto.
he message through Boosteb Services.
alert notification:
ack. This iconw appears onnding you that you have a new
60
MS and Boost MobileTM Text and Numeric Messages
alling and Storing Numbersf an SMS message you receive contains a phoneumber, you can call that number by pressingshile viewing the message.
f an SMS message you receive contains a phoneumber, BoostTM Walkie-Talkie number, you canall or send a call alert to that number, or store thatumber to Contacts. Press m while viewing theessage to access these options.
o call the number, select Call Back.
o send a call alert, select Alert, then press theTT button.
o store the number to Contacts, select Storeumber.
oost MobileTM Text Messagesnd Web Alertsoost MobileTM text messages can be sent and
eceived through any email account and onww.boostmobile.com. Your phone sends and
eceives Boost MobileTM text messages throughoost MobileTM Wireless Web Services.
our phone's Boost MobileTMText Messagingddress is [email protected].
When you receive ayour phone notifiesWeb alert lets you vmessage associate
Web alerts appearMobileTM text messaMobileTM Wireless W
Receiving a MeWhen you receive aa Web alert notifica
To view the messag
Press A under G
This lets you read tMobileTM Wireless W
To dismiss the Web
Press A under Bthe display, remiWeb alert.

61
ext Messages and Web Alerts
DWtasW
12
34
SMTp
1
2
3
nd a previously sent message.essage you want to send and
end.
to a new address:
number or email address of theending the message to.ptions and select OK.New to send a new message.
nd a previously sent message.essage you want to send and
ptions and select Send.
to a sent address:
number or email address you
New to send a new message.
nd a previously sent message.essage you want to send and
ptions and select Send.
Boost MobileTM T
eleting Web Alertshen you delete a Web alert, the Boost MobileTM
ext message is not deleted, but it is no longerccessible through the message center. You cantill access the message through Boost MobileTM
ireless Web Services.
From the main menu, select Messages.With Web Alert highlighted, press A underGoto.Press m.Select Delete.
ending Boost MobileTM Textessages
o send a Boost MobileTM text message from yourhone:
From the main menu, select Web > TextMessaging > Send Message.If you are sending the message to a newaddress, select New Address. -or-
If you are sending the message to an addressyou already sent a message to, select SentAddress. Select Ok.
Select Compose New to send a new message.-or-
Select Sent to seSelect the sent mselect Ok.
4 Press A under S
To send a message
1 Enter the phoneperson you are s
2 Press A under O3 Select Compose
-or-
Select Sent to seSelect the sent mselect Ok.
4 Press A under O
To send a message
1 Select the phonewant to send to.
2 Select Compose-or-
Select Sent to seSelect the sent mselect Ok.
3 Press A under O

S
BMBtmp
•
•
Tm
62
MS and Boost MobileTM Text and Numeric Messages
oost MobileTM Numericessages
oost MobileTM Numeric Messaging is availablehrough Boost MobileTM Voice Mail. Theseessages can be displayed directly on your i285hone. To leave a numeric message:
The caller must press “1” during your Voice Mailgreeting.Once the caller presses “1” only numericmessages can be sent.
hese messages appear one you phone as SMSessages.

63
BWBytPyS
•••
••••
YBabW
MobileTM Wireless Web is notBoost MobileTM Customer CareRepresentative to cancel theeless Web service.
Microbrowsertscape Navigator® or Microsoft®browse the Web from yourrowser allows you to explore
f Internet services. To beginbileTM Wireless Web:
s the Main Menu.
ELECT.displays.e you access Web, you will be
nable security to ensure yourremains private and secure.
under Yes. The phone willnerating…, Computing…,
)).be asked to (re)enableBoost MobileTM adds new
r upon your return to the U.S.ling.
oost MobileTM Wirelesseb Services
oost MobileTM Wireless Web is a service that letsou access Internet based information directly fromhe screen of your WAP (Wireless Applicationrotocol) enabled phone. In the palm of your hand,ou can access the Boost MobileTM Wireless Webervices to:
Send and receive emailCheck surf and snow reports, and sports scoresFind your nearest movie location and showtimesCheck your daily horoscopeMake CD purchasesAccess your accountand much more
our i285 phone will be automatically set up foroost MobileTM Wireless Web as soon as youctivate your account. Please refer tooostmobile.com for pricing on Boost MobileTM
ireless Web Services.
If you decide Boostfor you, simply calland ask your CareBoost MobileTM Wir
Starting theJust as you use NeInternet Explorer todesktop, the microband use a variety ousing the Boost Mo
1 Press m to acces2 Scroll to Web.3 Press A under S4 Your home page
Note: The first timasked to einformation
• Press Adisplay: GeSending)))• You maysecurity asservices oafter trave

B
5
6
BN•
•
l bar on the left of the phone’sthat additional text can being the navigation key.ting through Boost MobileTM
b screens, a number maye left of the application or topicaccess. Press theng number on the keypad forss to that application or topic.
ighly personal or sensitivedit card number, this iconting that the data is encrypted.
e asked to (re)enable securityobileTM adds new services orreturn to the U.S. after
os, Customer Quick Startnstruction for Boost MobileTM
ices, go toom.
64
oost MobileTM Wireless Web Services
• When transmitting highly personal orsensitive data, such as a credit cardnumber, you will see the Secure Data icon{. This icon indicates that the data isencrypted during transmission.
Scroll to highlight the service you wish to accessand press A under Ok. -or-
Press the number shown to the left toautomatically jump to that service.
Press* to return to the previous screen.
To return to the home page, presse.
To exit the browser, presse until the idlescreen displays. -or-
Press and hold m. The Browser Menu screendisplays with Exit Browser highlighted.
Press A under OK. When you re-enter Web,you will enter on the page from which you exited
oost MobileTM Wireless Webavigation KeysHome — Presse to return to your homepage.Back — Press* to return to a previousscreen.
• Scroll — A scroldisplay indicatesviewed. Scroll usTip: While naviga
Wireless Weappear to thyou want tocorrespondiquicker acce
When transmitting hdata, such as a creEappears, indicaduring transmission
Note: You may bas Boost Mupon yourtraveling.
For multimedia demGuides, and other iWireless Web Servwww.boostmobile.c

65
CCynnc
FWi
T
123456
mber, press and hold A under
ber you want to forward calls to:
r using your keypad. -or-
earch. Select Contacts,Memo. Select the number you
k.
w forwarded to the number you
s, you can select an option byor right instead of pressing Age.
Call Forwardingyour calls forwarded, turn the
enu, select Call Forward.hange.
hange.
elect.
all Forwardingall forwarding sends calls to the phone numbersou specify. You can forward all calls to oneumber or forward missed calls to differentumbers depending on the reason you missed theall.
orwarding All Callshen you set your phone to forward all calls, an
con appears in the top row of the display:
o forward all calls:
From the main menu, select Call Forward.Press A under Change.Select All Calls.Scroll to To.Press A under Change.If you specified a forwarding number for all callsbefore, this number displays. Press A underChange.
To forward calls to this number, press A underOk. -or-
To delete this nuDelete.
7 To enter the num
Enter the numbe
Press A under SRecent Calls, orwant to enter.
8 Press A under O
All your calls are nospecified.
Tip: In some fieldscrolling leftunder Chan
Turning OffIf you don’t want allfeature off:
1 From the main m2 Press A under C3 Select All Calls.4 Scroll to To.5 Press A under C6 Scroll to Off.7 Press A under S
G Phone line 1 is active; calls to phone line 1are being forwarded.

C
A
Coc
FYo
•
•
•
T
1234
5
forwarding number for this types number displays. Press A
to this number, press A underp 9. -or-
mber, press and hold A under
ber you want to forward this
r using your keypad. -or-
earch. Select Contacts,Memo. Select the number you
k.rough step 8 for No Answerble.
ed, press A under Back.
l Forwarding
enu, select Call Forward.ed, press m.Status.
66
all Forwarding
ll your calls are now sent to your phone.
alls you miss are forwarded according to theptions set for missed calls. By default, missedalls are forwarded to voice mail.
orwarding Missed Callsou can specify a forwarding number for each typef missed call:
If Busy — Your phone is on a call or transferringdata.If No Answer — You do not answer on the first4 rings.If Unreachable — Your phone is out ofcoverage or powered off.Note: If you want a type of missed call sent to
voice mail, the call forwarding number forthat type of missed call must be yourvoice mail access number.
o forward missed calls:
From the main menu, select Call Forward.Press A under Change.Select Detailed.Scroll to If Busy to specify a forwarding numberfor calls received when your phone is busy.Press A under Change.
6 If you specified aof call before, thiunder Change.
To forward callsOk and go to ste
To delete this nuDelete.
7 To enter the numtype of call to:
Enter the numbe
Press A under SRecent Calls, orwant to enter.
8 Press A under O9 Repeat step 4 th
and If Unreacha
When you are finish
Viewing CalSettings1 From the main m2 With To highlight3 Select Retrieve

67
JYam
Tt
RTm
1
2
To
12
3
hear the sounds associated withpplication, select Settings >d check the volumes of Javand Java Earpiece.
g Applicationsd an application, it does not stopthe background so that you canation in the foreground.
plication:
ose the flip.
ended applications:
enu, select Suspended Apps.
o 3 applications running at onein the foreground and 2 in the
Applicationssuspended application at any
t to the foreground.
enu, select Suspended Apps.cation you want to resume.
ava® Applicationsour phone arrives with Java applications installednd ready to run. You can download and installore Java applications.
o download and install more Java applications, goo www.boostmobile.com.
Note: Using Java applications may cause yourphone to use up more battery power thanother uses of your phone.
unning Applicationso run an application that has a shortcut on the mainenu:
From the main menu, select the application orsuite of applications you want to run.If you have selected a suite of applications, selectthe application you want to run.
o run an application that does not have a shortcutn the main menu:
From the main menu, select Java Apps.Select the application or suite of applications youwant to run.If you have selected a suite of applications, selectthe application you want to run.
Tip: If you don’tthe Java aVolume anSpeaker a
SuspendinWhen you suspenrunning. It goes torun another applic
To suspend an ap
Presse or cl
To view your susp
From the Java m
You can have up ttime — 1 runningbackground.
ResumingYou can resume atime. This brings i
1 From the Java m2 Select the appli

68
Jav
EnTo
1 F2 I
o3 S4 P5 S
To
1 F2 S3 P4 S5 I
tT
DoIf ydowwwJav
plicationsapplication you havest install them.
nu, select Java Apps.tion or suite of applications you
te a shortcut to the Javamain menu: Press A underer Yes.ne.
licationstion:
nu, select Java Apps.ation you want to delete.
s to confirm.has finished deleting theA under Done.
plications:
nu, select Java Apps.tem.
a® Applications
ding Applicationsend an application:
rom the main menu, select Java Apps.f the application you want to end is part of a suitef applications, select the suite.croll to the application you want to end.ress m.elect End.
end all applications:
rom the main menu, select Java Apps.croll to Suspended Apps.ress m.elect End All.
f you want to end all applications without lettinghem exit, press A under EndNow.ip: You can also end applications from the
Suspended Apps screen.
wnloading Applicationsou want to run more Java applications, you cannload them into your phone. Go to
w.boostmoblie.com update for a selection ofa applications and downloading instructions.
Installing ApBefore running mostdownloaded, you mu
1 From the main me2 Select the applica
want to install.3 If you want to crea
application on theNext. Press A und
4 Press A under Do
Deleting AppTo delete an applica
1 From the main me2 Scroll to the applic3 Press m.4 Select Deinstall.5 Press A under Ye6 When your phone
application, press
To delete all Java ap
1 From the main me2 Scroll to Java Sys3 Press m.

69
Managing Memory
45
MTa
1
23
D
SWs
ut to an application that is already
menu, select Settings >Menu Options > Add/Remove
enu: Press m. Select Main Menuemove Apps.
e list of Java applications. Anyhas a shortcut on the main menurk next to it.plication you want to create a
Done.
tcut:
menu, select Settings >Menu Options > Add/Remove
enu: Press m. Select Main Menuemove Apps.
e list of Java applications. Anyhas a shortcut on the main menurk next to it.cation you want to remove the
Done.
Select Delete All.Press A under Yes to confirm.
anaging Memoryo view the amount of memory available for Javapplications:
From the main menu, select Java Apps > JavaSystem.Press A under Next.To see more memory information, press A underNext again.
eleting Java applications frees memory.
Note: Java application data is stored in yourphone using the same memory space usedto store voice records, ring tones, andwallpaper images. Deleting some of theseother items frees memory space for Javaapplications.
hortcuts on the Main Menuhen you install an application, you can create a
hortcut to the application on the main menu.
To create a shortcinstalled:
1 From the mainPersonalize >Apps. -or-
From the main mSetup > Add/R
2 Scroll to view thapplication thathas a checkma
3 Scroll to the apshortcut for.
4 Press A under
To remove a shor
1 From the mainPersonalize >Apps. -or-
From the main mSetup > Add/R
2 Scroll to view thapplication thathas a checkma
3 Select the applishortcut for.
4 Press A under

70
Jav
JaEnSomphogeoEnaGPmatheprivJavyou
SeApTheapp
• Rapaa
• Ut
When a Java applications the location of your phone,to give permission. However,n may still be available to theet manager, or account
Options” on page 82 foring these options.
ying Permissionrmission, you must grant orication access to the location ofapplication requests accessmay be required to grant oruests from the sameg on the privacy setting youual Java application (seeach Java Application” on page
tion requests access thee, a screen appears informing
:
ny. The application does notn of your phone.option you want:
a® Applications
va Applications and GPSablede Java applications can make use of your
ne’s GPS feature to determine the approximategraphical location of your phone. (See “GPSbled” on page 77 for more information on the
S feature.) However, for privacy reasons, youy not always want Java applications to accesslocation of your phone. Your phone protects youracy by giving you the option to block all or somea applications from accessing the location ofr phone.
tting Privacy for All Javaplicationsse options control the privacy of all Javalications on your phone:
estricted — No Java or similar softwarepplications may access the location of yourhone. However, location information may still bevailable to the phone’s owner, fleet manager, orccount administrator.nrestricted — All Java applications may access
he location of your phone, without notifying you.
• By Permission —attempts to accesyou are promptedlocation informatiophone’s owner, fleadministrator.
See “Setting Privacyinformation on choos
Granting or DenIf you choose By Pedeny each Java applyour phone when thefor the first time. Youdeny subsequent reqapplication, dependinchoose for the individ“Setting Privacy for E71).
When a Java applicalocation of your phonyou.
To deny this request
1 Press A under Deaccess the locatio
2 Select the denying

71
Applications and GPS Enabled
T
1
2
y for Each Java
application requests access tor phone for the first time, you haveset GPS privacy option for that
menu, select Java Apps.cation or suite of applications youprivacy option for.
n has requested access to thephone, m appears when you
plication.
ions.cy option you want for this
he application always hasaccess the location of your
ut notifying you.the application requests access
n of your phone, you are promptedny permission (see “Granting orission” on page 70).
en the application requestslocation of your phone, the
nied without notifying you.
Java
• Always — If the application requests access tothe location of your phone again, the request isdenied without notifying you.
• For this session — If the application requestsaccess to the location of your phone againbefore you power off your phone, the request isdenied without notifying you.
• Only Once — If the application requestsaccess to the location of your phone again, youare prompted to grant or deny permission.
o grant this request:
Press A under Grant. The application accessesyour phone’s location.Select the granting option you want:• Always — If the application requests access to
the location of your phone again, the request isgranted without notifying you.
• For this session — If the application requestsaccess to the location of your phone againbefore you power off your phone, the request isgranted without notifying you.
• Only Once — If the application requestsaccess to the location of your phone again, youare prompted to grant or deny permission.
Setting PrivacApplicationAfter a given Javathe location of youthe opportunity toJava application.
1 From the main2 Select the appli
want to set the
If the applicatiolocation of yourhighlight the ap
3 Press m.4 Select Permiss5 Select the priva
application:• Always — T
permission tophone, witho
• Ask — Whento the locatioto grant or deDenying Perm
• Never — Whaccess to therequest is de

CSTp
12
34
5
T
Frp
12
res” on page 74.
r Phone to Not
o make no sound when you, BoostTM Walkie-Talkie calls,ns, and call alerts, see “Settingate” on page 45.
o vibrate instead of making aceive BoostTM Walkie-Talkieant your phone to ring for other
enu, select Settings > DC/GCType.does not appear: From the
select Ring Tones. Make sureet to Off. Repeat step 1.
hange..elect.
72
ustomizing Your Phoneetting the Volume
o set the volume of the sound coming from thehone’s earpiece or speaker:
From the main menu, select Settings > Volume.Scroll to Earpiece to set the earpiece volume.-or-
Scroll to Speaker to set the speaker volume.
Press A under Change.To select the volume:
Scroll left or right. -or-
Press the volume controls.
Press A under Ok.
o set the volume of the phone’s ring:
Press the volume controls.
or another way to set the volume of the phone’sing, or the volume of many other sounds yourhone makes:
From the main menu, select Settings > Volume.Scroll to the option you want and make thechange. Choose Line 1 to set the volume of thephone’s ring when you get a call on that line.
See “Volume Featu
Setting YouRingTo set your phone treceive phone callsmessage notificatioYour Phone to Vibr
To set your phone tsound when you recalls, even if you wfeatures:
1 From the main mOptions > AlertTip: If Alert Type
main menu,VibeAll is s
2 Press A under C3 Scroll to Vibrate4 Press A under S

73
Using a Headset
UIpst
1
23
4
USc
DTa
•
•
s whether the time and datele screen, sets the format of, and sets the year.the contrast on the display.
ts the language that your phone
aturesenu controls how your phone:
phone line 1 as the active line.If this feature is on, you canressing any key on the keypad.ets your phone to automaticallyake when the system is busy.
s your phone to automaticallying call after a specifiedWhen this feature is on, they connecting you to the caller;the call to voice mail, unlessverage or on the line.causes a beep to sound everyve call.causes the duration of a call toones display when the call
sing a Headsetf you use a headset or similar device with yourhone, you can set your phone to send incomingound to the headset only, or to the headset andhe speaker at the same time:
From the main menu, select Settings >Advanced > Headset/Spker.Press A under Change.Scroll to HdsetOnly to send incoming sound tothe headset only. -or-
Scroll to Hdset&Spkr to send incoming sound tothe headset and the speaker at the same time.
Press A under Select.
sing Settingsettings contains many submenus that let youustomize your phone.
isplay/Info Featureshe Display/Info menu controls how the keypadnd display appear:
Wallpaper — changes the wallpaper thatappears on the idle screen.Backlight — controls how long the backlightstays on after you make or receive a call.
• Clock — controlappears on the idthe time and date
• Contrast — sets• Language — se
displays.
Phone Calls FeThe Phone Calls mhandles phone calls
• Set Line — setsfor outgoing calls
• Any Key Ans —answer calls by p
• Auto Redial — sredial calls you m
• Auto Ans — setanswer an incomnumber of rings.phone answers bit does not sendyou are out of co
• Minute Beep —minute of an acti
• Call Duration —appear on the phends.

C
•
•
DTp
•
•
VTp
••
•
•
•
volume of sounds that notifiesreceiving a circuit data call.
aturesnu makes main menu items
Reorder Menu lets youof the items on the main menu
moving them; Add/Removeeate a shortcut to a Javae main menu.he main menu item you accessp from the idle screen.ts the main menu item youscroll down from the idle
the main menu item you accesseft from the idle screen.ts the main menu item you
scroll right from the idle
ts the main menu item youpress the left option key from
sets the main menu item youpress the right option key from
74
ustomizing Your Phone
TTY — lets you use your phone with a TTYdevice. See “Making TTY Calls” on page 40.Notifications — See “Setting NotificationOptions” on page 69.
C (Walkie-Talkie) Options Featureshe Walkie-Talkie Options menu controls how yourhone handles BoostTM Walkie-Talkie calls.
One Touch DC — See “Setting One TouchBoostTM Walkie-Talkie” on page 39.Alert Type — controls how your phone notifiesyou when you receive BoostTM Walkie-Talkiecalls. See page 72.
olume Featureshe Volume menu sets the volume of sounds yourhone makes:
Line 1 — sets ring volume for phone line 1.Messages — sets the volume of messagenotifications.Earpiece — sets the volume of sound comingout of the earpiece.Speaker — sets the volume of sound comingout of the speaker.Keypad — sets the volume of sound associatedwith pressing keys and buttons.
• Data — sets theyou that you are
Personalize FeThe Personalize meeasier to access.
• Menu Options —change the orderby grabbing andApps lets you crapplication on th
• Up Key — sets twhen you scroll u
• Down Key — seaccess when youscreen.
• Left Key — setswhen you scroll l
• Right Key — seaccess when youscreen.
• Left Sftkey — seaccess when youthe idle screen.
• Right Sftkey —access when youthe idle screen.

75
Using Settings
•
STo
•
•
•
•
rds — changes your phoneurity code, SIM PIN, and GPS
turesu contains advanced and rarelyres.
controls the amount of time asound when you receive a
tion or call alert.See “Using a Headset” on
Network ID sets the phone’stheir roaming options under thet MobileTM Customer Care;ts Boost MobileTM Customerervice in the event of a securityroblem.
Reset Settings returns allriginal defaults; Reset Alls to their original defaults andlists. Use only under thet MobileTM Customer Care.— controls how long the recentafter calls.revents your phone from
ing BoostTM Walkie-Talkie calls.
Power Up — sets the main menu item you seewhen you power on your phone. To set the idlescreen to be the first thing you see when youpower on your phone, select Default Ready.
ecurity Featureshe Security menu lets you turn security featuresn and off and change passwords:
Phone Lock — turns on a feature that locksyour phone, either immediately or automaticallyafter a set period of inactivity. An unlock code isrequired to enable this feature, to unlock thephone, and to set a new Unlock code. ContactBoost MobileTM Customer Care for your defaultunlock code.Keypad Lock — locks the phone’s keypad,either immediately or automatically after a setperiod of inactivity. See “Locking the Keypad” onpage 16 for more information on locking andunlocking the keypad.SIM PIN — enables and disables your phone’sSIM PIN security feature. See “Turning the PINRequirement On and Off” on page 14.GPS PIN — enables and disables your phone’sGPS PIN security feature. See “Setting the GPSPIN Security Feature” on page 83.
• Change Passwounlock code, secPIN.
Advanced FeaThe Advanced menused Settings featu
• Alert Timeout —tone continues tomessage notifica
• Headset/Spker —page 73.
• Connectivity —network IDs anddirection of BoosMaster Reset leCare reset your sor provisioning p
• Reset Defaults —settings to their oreturns all settingerases all storeddirection of Boos
• Return to Homecalls list displays
• Phone Only — pmaking or receiv

C
•
OSDw
76
ustomizing Your Phone
Baud Rate — sets the baud rate at which yourphone communicates with a laptop computer,PC, or similar device.
ptional Featurespeakerphone, VoiceRecord, and Voice-Activatedialing can be purchased for an additional fee onww.boostmobile.com.
77
GYisaeaicieobe“
Wfpaes
Yaa
nected to a laptop computer orare running on that device cann. To protect your privacy, you
r these requests are granted.
: Things to Keep
GPS feature of your phonee give full attention to driving
ignals from multiple satellitesusually because your GPSablish a view of a wide area offeature of your phone WILLsituations include but are
locationsgs, trains, or other covered
r metal or concrete roof or
ildings or under dense
radio or television tower
PS Enabledour phone’s GPS Enabled feature uses
nformation from Global Positioning System (GPS)atellites orbiting the Earth to determine thepproximate geographical location of your phone,xpressed as latitude and longitude. Thevailability and accuracy of this location
nformation (and the amount of time that it takes toalculate it) will vary depending on the environmentn which you are using the GPS feature. Forxample, GPS location fixes are often difficult tobtain indoors, in covered locations, between highuildings, or in other situations where you have notstablished a clear broad view of the sky. SEE:IMPORTANT: Things to Keep in Mind”.
hen you make a 911 emergency call, the GPSeature of your phone can help emergencyersonnel locate you if your phone has adequateccess to GPS satellite signals and yourmergency response center is equipped to processuch information.
ou can also use the GPS feature to view yourpproximate location. Location informationppears on the phone’s display.
If your phone is consimilar device, softwrequest your locatiocan control whethe
IMPORTANTin MindIf you are using thewhile driving, pleasand to the road.
Where adequate sare not available (antenna cannot estopen sky), the GPSNOT WORK. Suchnot limited to:
• In underground• Inside of buildin
vehicles• Under any othe
structure• Between tall bu
tree-cover• Near a powerful

G
•
•
Ws
Eclnarre
Esowmopp
WvnNR
time needed to obtain it willcircumstances, particularly thenals from adequate numbers of
, your phone uses assistancephone network to improve the
y of your phone’s locationassistance informationle, it may reduce the speed andtion calculation.
by the GPS feature of yourd by the U.S. government andes implemented in accordancet of Defense GPS user policydionavigation Plan. Theset the performance of the GPSne.
mergency Callected to an emergencyyou are on an active call, youalling 911.
emergency 911 call, the GPSe begins to seek information to
oximate location. It will takef your phone some time toproximate location. Evenas good access to sufficient
78
PS Enabled
When your GPS antenna is covered (forexample, by your hand or other object) orfacing the groundIn temperature extremes outside theoperating limits of your phone
alking or driving very slowly may alsoubstantially reduce GPS performance.
ven where location information can bealculated in such situations, it may take muchonger to do so, and your location estimate mayot be as accurate. Therefore, in any 911 call,lways report the location to the emergencyesponse center if you can and if you cannot,emain on your phone for as long as themergency response center instructs you.
ven where adequate signals from multipleatellites are available, your GPS feature willnly provide an approximate location, oftenithin 150 feet (45 meters) but sometimesuch further from your actual location. Advicen how to improve GPS performance isrovided in “Enhancing GPS Performance” onage 80.
hile the GPS feature of your phone can be aaluable navigational aid, it does not replace theeed for careful navigating and good judgment.ever rely solely on one device for navigation.emember that the accuracy of the location
information and thevary depending onability to receive sigsatellites.
On emergency callsinformation from thespeed and accuraccalculation: if suchbecomes unavailabaccuracy of the loca
The satellites usedphone are controlleare subject to changwith the Departmenand the Federal Rachanges may affecfeature of your pho
Making an EDial 911 to be connresponse center. Ifmust end it before c
When you make anfeature of your phoncalculate your apprthe GPS feature odetermine your apwhere your phone h

79
g Your Approximate Location
Gmatyac
IrrrraTrsjc
Ifdps
not have adequate access toals, the location of the nearestt with your phone isavailable to the emergency
the center has the capability toation.
S Performance” on page 80 forto help your phone determine
r Approximate
enu, select GPS > Position.entire screen.
llowing information about theon was calculated:
enwich Mean Time) and datewas last calculatedlocation, expressed as latitude
curacy of the calculatedimate of accuracy is only a verynd may vary substantially fromcy of the approximate locationted.
Viewin
PS satellite signals and network assist data, itay take 30 seconds or more to determine thepproximate location. This time will increase wherehere is reduced access to satellite signals. Whenour approximate location is determined, it is madevailable to the appropriate emergency responseenter.
n some cases, your local 911 emergencyesponse center may not be equipped toeceive GPS location information. For thiseason, and because the GPS location informationeported is only approximate or may not bevailable in your location (see “IMPORTANT:hings to Keep in Mind” on page 77), alwayseport your location to the 911 operator youpeak to when making an emergency call, if able,ust as you would when using a phone without GPSapabilities.
Note: If you are concerned about whether yourlocal 911 emergency response center isequipped to receive GPS locationinformation, contact your local authorities.
n general, if your phone has access to signalsrom more GPS satellites, your location will beetermined faster and more accurately than if yourhone has access to signals from fewer GPSatellites.
If your phone doesGPS satellites signcell tower in contacautomatically maderesponse center, ifreceive such inform
See “Enhancing GPinformation on howyour location.
Viewing YouLocation1 From the main m2 Scroll to view the
This displays the folast time your locati
• The time (as Grethat the location
• The approximateand longitude
• The estimated aclocation. This estrough estimate athe actual accurainformation repor

G
•
T
IcDyslP
Ti
Tc
Ecipt
one call or alert whileine your location, the Position
ar, but your phone will continueine its location. If it islocation information will be
ime you view the Position
GPS Performancefeature of your phone may be
a location calculationhappens when you are makingthe location of the nearest cellh your phone is made availablemergency response center ifapability to receive suchappens when you are trying ton the phone’s display, you will
icating that your phone cannot
y and increase your chances oftion, do the following while
mining your approximate
80
PS Enabled
The number of satellites used to calculate thelocation. In general, more satellites make forbetter accuracy.
o calculate your location again:
Press A under Rfrsh.
t may take your phone several minutes toomplete the process of determining your location.uring this time, a message usually appears onour phone’s display saying your phone iscanning for satellites. For tips on getting the bestocation calculation, see “Enhancing GPSerformance”.
he Position screen displays the updatednformation.
o cancel a location calculation before it isompleted:
Press A under Cancel to return to the Positionscreen. -or-
Presse to return to the idle screen.
ach time approximate location of your phone isalculated, the latest location information is storedn your phone and remains there even when yourhone is powered off. You will see this informationhe next time you view the Position screen.
If you received a phattempting to determscreen will disappeattempting to determsuccessful, the newdisplayed the next tscreen.
EnhancingSometimes the GPSunable to completesuccessfully. If thisan emergency call,tower in contact witto the appropriate ethe center has the cinformation. If this hview your location osee a message indaccess satellites.
To improve accuraca successful calculayour phone is deterlocation:

81
dating Satellite Almanac Data
•
•
ible, stand still until your phoneining your location. Movingalking pace while your phone
r approximate location mayrease GPS performance.ing the GPS Enabled feature inur phone so that the GPSd access to GPS signalswindows. Typically, the GPS
t access to GPS signals in a carr a window.oving your phone at a walkingases GPS performance,t the speed of a moving car
overage. Depending on whoider is, the network will provideinformation that helpscation more quickly and
tellite Almanac
p the GPS feature of youris to keep your satellitedate.
Up
Stay in the open. The GPS feature works bestwhere there is nothing between your phone anda large amount of open sky. If possible, gooutside, away from tall buildings and foliage.While performance in a building is improved bymoving closer to windows, glass with certain sunshielding films may block satellite signals.Hold your phone to enhance reception. Signalsfrom GPS satellites are transmitted to your GPSantenna, which is inside the back of your phone,opposite the earpiece, above the label with yourservice provider’s name on it. Hold your phoneaway from your body, giving the antenna clearaccess to satellite signals. Do not cover theantenna area with your fingers or anything else.
• Stand still. If possis finished determyour phone at a wis calculating yousubstantially dec
• In a car. When usa car, position yoantenna has goothrough the car’santenna has beswhen placed neaNote: Although m
pace decremoving it adoes not.
• Stay in network cyour service provyour phone withdetermine your loaccurately.
Updating SaDataAnother way to keephone working wellalmanac data up to
GPS antenna area

G
Tatydm
Tloufgo
IpiYc
SYspG
software applications mayof your phone. However,
ion may still be available to theleet manager, or account
All applications may view thehone, without notifying you.
When an applicationthe location of your phone, youto give permission. However,ion may still be available to theleet manager, or account
tions do not apply to theon of location informationrgency 911 calls.
ivacy options:
enu, select GPS > Privacy.security feature is enabled,IN. (See “Setting the GPS PIN
” for more information.)cy setting you want.elect.
82
PS Enabled
he United States government maintains anlmanac of data about where GPS satellites are ashey orbit the Earth. This information is available toour phone. Keeping your satellite almanac up toate helps your phone determine your locationore quickly.
he almanac contains information about theocation of satellites, their operational status, andther satellite information. Keeping this informationpdated enhances the performance of your GPSeature. In most cases, your phone will be able toet a fix in strong satellite signal conditions withutdated almanac data, but it may take longer.
Note: When you make an emergency call, yourphone does not rely upon the almanac todetermine your location.
f your satellite almanac data is out of date, yourhone may prompt you to update it. Follow the
nstructions that appear on the phone’s display.ou may be asked to go to a web site or call austomer care number.
etting Privacy Optionsour phone’s GPS privacy options control whetheroftware applications may view the location of yourhone.You may set your phone to one of thesePS privacy options:
• Restricted — Noview the locationlocation informatphone’s owner, fadministrator.
• Unrestricted —location of your p
• By Permission —attempts to viewwill be promptedlocation informatphone’s owner, fadministrator.Note: Privacy op
transmissiduring eme
To set your GPS pr
1 From the main m2 If your GPS PIN
enter your GPS PSecurity Feature
3 Scroll to the priva4 Press A under S

83
sing GPS with Map Software
STao
WfGyeo
T
1
234
5
T
1
2
k.to 8-digit GPS PIN.k.to 8-digit GPS PIN to confirm.k.
with Map SoftwareS feature of your phone to
e location data to a laptopdevice that is running
tware such as that made byoft. This way, if your phone hasS signals, your approximatean be made available as you
your phone to your laptop (ordata cable and set your phone
e “Getting Started” on page 84).ovides your approximatee running the map software,location on a map. Your phone
d location every second and theys your changing location on
S Performance” on page 80 foraining good location
U
etting the GPS PIN Security Featureo prevent your GPS privacy settings from beingltered without your knowledge, your GPS privacyption can be protected by a PIN.
hen you receive your phone, the GPS securityeature is turned off, so you do not have to enter aPS PIN to access your GPS privacy options. Ifou turn this feature on, you will be required tonter a GPS PIN to access your GPS privacyptions.
o turn the GPS Enabled security feature on or off:
From the main menu, select Settings >Security > GPS PIN.Scroll to On or Off.Press A under Select.Enter the current GPS PIN.Note: When you receive your phone, your GPS
PIN is 0000.
Press A under Ok.
o change your GPS PIN:
From the main menu, select Settings >Security > Change Password > GPS PIN.Enter the current GPS PIN.Note: When you receive your phone, your GPS
PIN is 0000.
3 Press A under O4 Enter the new 4-5 Press A under O6 Enter the new 4-7 Press A under O
Using GPSYou can use the GPprovide approximatcomputer or similarinteractive map sofDeLorme or Microsgood access to GPposition on a map ctravel in a vehicle.
To do this, connectother device) with ato transmit data (seYour phone then prlocation to the devicwhich displays yourprovides an updatemap software displaits map.
See “Enhancing GPmore details on obtinformation.

G
SYlMYNNR
Td
one to your laptop or other
tor cover.
display facing up, insert theector into the accessoryou hear a click.
flap
84
PS Enabled
Note: Because your phone is continuouslydetermining your location, using the GPSfeature of your phone with map softwareuses the phone’s battery power quickly.
oftware Compatibilityour phone sends location information to your
aptop or other device using the standard Nationalarine Electronics Association (NMEA) format.our phone supports output messages inMEA-0183 format and supports the followingMEA-0183 sentences: GGA, GLL, GSA, GSV,MC, and VTG.
he map software running on your laptop or otherevice must support NMEA 3.0.
Getting StartedTo connect your phdevice:
1 Open the connec
2 With the phone’sdata cable’s connconnector, until y

85
sing GPS with Map Software
3
Mp
Mo
•••••
o send location information todevice:
enu, select GPS > Interface.highlighted, press A under
elect. Your phone is nowdata to your laptop or other
from sending location data todevice:
to Off.
er your phone on, NMEA OUTto Off.
U
Insert the data plug into the COM port of yourlaptop or other device.
ake sure no other application is using the COMort selected.
ake sure the COM port settings of your laptop orther device are set to the following:
Bits per second: 4800Data bits: 8Parity: NoneStop bits: 1Flow control: Hardware
To set your phone tyour laptop or other
1 From the main m2 With NMEA OUT
Change.3 Scroll to On.4 Press A under S
sending locationdevice.
To stop your phoneyour laptop or other
Set NMEA OUT
Each time you powis automatically set

86
PAy
A
•
•
•
•
•
•
Ya
ofiless stored in your phone:
menu, select Profiles.e you want to view.that is currently in effect on youra checkmark next to it.
t settings to view their values.
rofilesto your phone:
menu, select Profiles.e you want to apply.
lected is now in effect.
ing Settings Affects
gs contained in profiles can be setor editing profiles — for example,gs or Ring Tones to set options,
olume of the phone’s ring usingls.
rofilesprofile is a group of settings saved together so that
ou can apply them to your phone easily.
profile contains these settings:
Ring Tones — sets all options described in “RingTones” on page 45, except assigning ring tones toContacts.Display/Info — sets Wallpaper, Color Palette,Text Size, and Backlight options. See“Display/Info Features” on page 73.Phone Calls — sets Set Line and Auto Ansoptions. See “Phone Calls Features” on page 73.Volume — sets all options described in “VolumeFeatures” on page 74.Call Filter — controls which calls, call alerts, andmessage notifications your phone responds to.See “Setting Call Filtering” on page 89.Advanced — sets headset option. See “Using aHeadset” on page 73.
our phone arrives with pre-set profiles. You canlso create your own profiles.
Viewing PrTo view the profile
1 From the main2 Select the profil
Tip: The profilephone has
3 Press m.4 Select View.5 Scroll and selec
Switching PTo apply a profile
1 From the main2 Select the profil
The profile you se
How ChangProfilesMany of the settinwithout switchingby selecting Settinor by setting the vthe volume contro

87
Temporary Profiles
W
•
•
Tc
1234
Tr
TItcp
Awcue
e stays in effect until you switchyour phone, or delete it (or then) from the list of profiles.
a temporary profile, it is deletedrofiles or power off your phone.
e is automatically given the samee it is based on, but with ant of it.
temporary profile’s settings, thefrom the profile it is based on havet of them.
porary Profileary profile as a new profile:
menu, select Profiles.porary profile.
New.you want to give the profile. Seeon page 28.
inished, press A under Done.
rofile that temporary profile is
menu, select Profiles.porary profile.
hen you do this, your phone either:
Updates the profile in effect to reflect thesechanges, without notifying you -or-Creates a temporary profile that contains thesechanges
o set your phone to create a temporary profile thatontains changes you make to settings:
From the main menu, select Profiles.Press m.Select Setup > Temp Profile.Set this option to On.
o set your phone to update the profile in effect toeflect any changes you make to settings:
Set Temp Profile to Off in step 4.
emporary Profilesf your phone is set to create temporary profiles, aemporary profile is created when you makehanges to settings without switching or editingrofiles.
temporary profile is based on the profile in effecthen you made the changes, but reflects thehanged settings. Making more changes furtherpdates the temporary profile, for as long as it is inffect.
A temporary profilprofiles, power offprofile it is based o
If you do not storewhen you switch p
A temporary profilname as the profilasterisk (*) in fron
When you view aoptions that differan asterisk in fron
Storing a TemTo store a tempor
1 From the main2 Scroll to the tem3 Press m.4 Select Store As5 Enter the name
“Entering Text”
When you are f
To overwrite the pbased on:
1 From the main2 Scroll to the tem

88
Pro
3 P4 S
Theproexigon
Cr1 F2 S
S
3 E“
W
4 Ipwaa
5 P6 S
v7 P
lesnu, select Profiles.you want to edit.
ble instructions in “Temporaryvarious fields.
files
nu, select Profiles.ou want to delete.profile is automatically deleted
ofile it is based on is deleted.
s to confirm.
:
nu, select Profiles.
s to confirm.
files
ress m.elect Store Changes.
temporary profile is stored with the name of thefile it is based on. The profile it is based on, as itsted before you made changes to settings, ise.
eating Profilesrom the main menu, select Profiles.elect [New Profile]. -or-
croll to any profile. Press m. Select New.
nter the name you want to give the profile. SeeEntering Text” on page 28.
hen you are finished, press A under Ok.
f you want to base this profile on an existingrofile: Select Copy from. Select the profile youant to base this profile on. If you do not chooseprofile to copy from, the new profile is based ondefault profile.ress A under Create.croll through the list of options and set theiralues.ress A under Done.
Editing Profi1 From the main me2 Scroll to the profile3 Press m.4 Select Edit.5 Follow the applica
Profiles” to edit the
Deleting ProTo delete a profile:
1 From the main me2 Select the profile y
Note: A temporarywhen the pr
3 Press m.4 Select Delete.5 Press A under Ye
To delete all profiles
1 From the main me2 Press m.3 Select Delete All.4 Press A under Ye

89
Setting Call Filtering
STcni
T
1
2
3
4
phone to notify you of all BoostTM
calls.phone to ignore all BoostTM
calls.ptions for call alerts, select Alerts.phone to notify you of all call
phone to ignore all call alerts.ptions for message notifications,ions.phone to notify you of all
ges sets your phone not to soundate when you receive voice
es sets your phone not to sound ae when you receive text
phone not to sound a tone oryou receive any message.
u receive a type of message younot to sound a tone or vibrate, thes notification screen appears as
Done.
etting Call Filteringhe call filtering setting in each profile lets youontrol which calls, call alerts, and messageotifications your phone notifies you of, and which it
gnores.
o set call filtering:
While setting options for a profile, select CallFilter.To set filtering options for phone calls, selectPhone.• Off sets your phone to notify you of all phone
calls.• All sets your phone to ignore all phone calls.• All Contacts sets your phone to notify you only
of phone calls from numbers stored inContacts.
• Some Cntcs sets your phone to notify you onlyof phone calls from numbers you select fromContacts.
If you set the Phone option to Some Cntcs,select up to 5 Contacts entries that contain phonenumbers you want to be notified of calls from.
When you are finished, press A under Done.
To set filtering options for BoostTM Walkie-Talkiecalls, select DC/GC.
• Off sets yourWalkie-Talkie
• On sets yourWalkie-Talkie
5 To set filtering o• Off sets your
alerts.• On sets your
6 To set filtering oselect Notificat• Off sets your
messages.• Voice Messa
a tone or vibrmessages.
• Text Messagtone or vibratmessages.
• All sets yourvibrate when
Note: When yohave setmessageusual.
7 Press A under

90
SSpva
C1
2
34
ortcutortcut number:
reen, press m., press the number assigned to
the shortcut number:
menu, select Shortcuts.rtcut you want to use.
hortcutber assigned to a shortcut:
menu, select Shortcuts.ut highlighted, press m..ortcut you want to move.Grab.ce where you want the shortcut to
Insert.hrough step 7 for all the items you
Done.
hortcutshortcuts lets you access most menu options byressing a number on your keypad or saying theoice name of the shortcut. You create the shortcutnd then use it to take you to that screen any time.
reating a ShortcutGo to the menu item you want to create a shortcutfor.
For example, if you want to create a shortcut tothe screen for creating a new Contacts entry:From the main menu, select Contacts > [NewContact].
Press and hold m until a confirmation screenappears.A key number for the shortcut is displayed.To assign this key number to the shortcut, pressA under Ok. -or-
To choose another key number:
Press A under Delete.
Press the key number you want to assign to theshortcut.
Press A under Ok.
Using a ShIf you know the sh
1 From the idle sc2 On your keypad
the shortcut.
If you do not know
1 From the main2 Scroll to the sho
Editing a STo change the num
1 From the main2 With any shortc3 Select Reorder4 Highlight the sh5 Press A under6 Scroll to the pla
appear.7 Press A under8 Repeat step 4 t
want to move.9 Press A under

91
Deleting Shortcuts
Ts
1234
DT
12345
T
1234
o change the name or number assigned to ahortcut:
From the main menu, select Shortcuts.Scroll to any shortcut.Press m.Select Edit.
eleting Shortcutso delete a shortcut:
From the main menu, select Shortcuts.Scroll to the shortcut you want to delete.Press m.Select Delete.Press A under Yes to confirm.
o delete all shortcuts:
From the main menu, select Shortcuts.With any shortcut highlighted, press m.Select Delete All.Press A under Yes to confirm.

92
Boost MobileTM
Customer CareYou can contact Boost MobileTM Customer Care 7days a week simply by dialing 611 from your i285phone, or by calling 1-888-BOOST-4U(1-888-266-7848). Our Boost MobileTM CustomerCare team will assist you in answering all yourquestions. Or, visit boostmobile.com for a variety ofBoost MobileTM Customer Care services online.
Before you contact Boost MobileTM Customer Carefor service or to resolve an issue, be sure to haveyour Boost MobileTM Personal Telephone Number,your model number (located on your phoneunderneath the battery), and the ID number printedon your SIM card. You’ll want to record thesenumbers, and keep them handy, so that you canreplace the battery prior to contacting BoostMobileTM Customer Care.
Please have the following information available togive to the representative who answers yourinquiry.
• Your Personal Telephone Number (PTN).• Your phone's model number (located
underneath the battery).• The ID numbers printed on your SIM.
You'll want to keep this information handy so thatyou can replace the battery and power up yourphone should the representative need you toaccess other information on it during your call.

93
UMYcCafm
This service was restricted byBoost Mobile, or this service wasnot purchased.
You are either out of coverage orhaving problems with provisioning.
The system is experiencing heavytraffic. Please try again later.
This service cannot be enabledbecause an incompatible servicehas already been turned on.
An error occurred. Please tryagain.
A fault was detected with yourphone. If this error recurs, note theerror code and contact CustomerCare.
An operational fault was detectedwith your phone. Note the numericcode, turn your phone off, andcontact Customer Care.
The incorrect PIN was entered 3consecutive times. You will beunable to place or receive calls onyour phone. Contact Boost MobileCustomer Care to have themobtain the PIN Unblocking Key(PUK) code.
Message Description
nderstanding Statusessagesou may receive status messages under certainonditions. Before contacting Boost MobileTM
ustomer Care, note the message, numeric code,nd the conditions under which it appeared. Theollowing table lists and describes the statusessages.
Status Messages Message Description
Number Not inService
The number that you entered isnot valid.
User Not Available The phone that you called is eitherbusy, out of coverage, or turnedoff. Please try again later.
User Not Authorized The person that you called has notpurchased this service.
Please Try Later This service is temporarily notavailable. Please try again later.
User Busy in BoostWalkie-Talkie call
The phone that you called is busyin a BoostTM Walkie-Talkie call.
User Busy in Data The phone that you called is busyusing Boost Mobile Wireless Webservices or Boost Mobile WirelessWeb services.
Service Restricted
Service NotAvailable
System Busy
Service Conflict
Please Try Again
Self Check Error +Number Code
Self Check Fail +Number Code
PIN BlockedCall Your Provider
Status Messages

U
Directs you to update GPS satellitealmanac data.
A problem occurred in yourphone’s GPS circuitry. If this erroroccurs, contact Boost MobileCustomer Care.
Message Description
94
nderstanding Status Messages
Insert SIM Your SIM card is not beingdetected. Please check to ensurethat you have inserted the SIMcard correctly into your phone.
Check SIM Please check your SIM to makesure it has been inserted properly.
Wrong PIN You have entered an incorrect PINnumber.
Please EnterSpecial Code
You have inserted a SIM card thatwill not work with a Nextel phone.Contact Customer Care if youbelieve this is a valid SIM card.
Enter SIM PIN Please enter your 4- to 8- digit SIMPIN code.
Enter Unlock Code Auto Phone Lock is activated.Enter you unlock code.
New BrowserMessage MemoryFull!
Warns of low memory for WebAlerts.
Scanning forSatellites
Searching for GPS satellites.
Unable to LocateSats
Could not find GPS satellites.
Status Messages Message Description
For Update Visit:
Technical Error
Status Messages

95
BaPTSCAB
YAM(w“atEbhapwwcaSa
ctivation Guide, the terms anden-current applicableAgreement will control. Theto you through the Company asthe Digital Mobile Network (the
l Communications, Inc. and itsiaries (collectively, “Nextel”).tions afforded to the Companyre also afforded to Nextel
incipal-agent relationship with
ATION - To activate thel credits in your BOOSTGuide, you must call our freeumber before the date shown.
calling this number to activatee agreeing to these Terms andid Service. By activating thethorize Company to exchangeness entities, contractors orinvolved in providing theer information you may have
ny that is necessary for thesecontractors, and entities toin providing the Service.end or cancel the Service attice if: (i) there are reasonablethe information provided byMobile or its agent for useryou activated your Service,
oost MobileTM Termsnd Conditions ofrepaid Service
ERMS AND CONDITIONS OF PREPAIDERVICE: PLEASE READ THESE TERMS ANDONDITIONS CAREFULLY. THEY CONSTITUTEBINDING AGREEMENT (the “Agreement”)
ETWEEN YOU AND BOOST MOBILE.
ou (“Customer”) accept the terms of thisgreement (a) by calling to activate BOOSTOBILESM wireless communications services
“Service”), (b) by purchasing BOOST MOBILEireless communications equipment (the
Equipment”) or Service or replenishing yourirtime through boostmobile.com, or (c) by signinghis Agreement, whichever applies. By using thequipment, you subscribe to the Service providedy Boost Mobile (sometimes “Company”). If youave not signed a printed copy of this Agreementnd do not accept these terms, do not activate yourhone; you may return your phone for a full refund,ithin 10 days of purchase, to the retail storehere you purchased it. Should there be anyonflict between the terms and conditions below,nd the terms and conditions of any applicableervice/Subscriber Agreement between Customernd Company covering the Equipment
accompanying the Aconditions of the thService/SubscriberService is providedagent for, and using“System”) of, Nexteaffiliates and subsidAll rights and protecby this Agreement athrough Nextel’s prthe Company.
1. SERVICE ACTIVService and the calMOBILE Activationautomated service nRemember that byyour service, you arConditions of PrepaService you also auwith its related busiagents who may beService, any customprovided to Comparelated businesses,assist the CompanyCompany may suspany time without nogrounds to suspectCustomer to Boostregistration or when

B
wfyACSc
2ttRptdnRoVm6caor
3SaS
under no obligation to replacee you. If Boost Mobile doesour SIM card, you may beent fee.
CE – Customer agrees toutes, rules and regulationsmer, including all applicablel Communications Commissionmer will not use the Service forse. Customer will not use ther in motor vehicles in violationr ordinance. Customeragrees that all future purchaseses and Equipment by customery the terms and conditionsless Customer and Companyuent Service/Subscriberny may change this Agreementanges are effective whenCustomer with written noticedate of the change(s). If
use the Services or make anyny on or after the effective datestomer is deemed to havee(s). If Customer does not, Customer may terminateffective date of the changes.
96
oost MobileTM Terms and Conditions of Prepaid Service
as incomplete or incorrect or if there has beenraud or misuse by you in relation to the Service; (ii)ou breach any of the terms or conditions in thisgreement; or (iii) you do anything which in theompany’s opinion, may cause damage to theystem. In addition, Service may be suspended,hanged or terminated without notice.
. CALL CREDITS – Your call credits are valid forhe Call Credit Validity Period, i.e., from the date ofheir activation, until the call credit expiration date.efer to your rate plan table for details. You mayurchase additional RE-BOOSTTM Cards at anyime but you must activate them by calling theesignated BOOST MOBILE Customer Careumber before the expiration date of theE-BOOST Card. If you don’t use your call creditsr replenish your service within the Call Creditalidity Period, your call credits will expire and yourobile number will be withdrawn at the end of a0-day Grace Period. There is a limit of $300 inall credits that may be aggregated on your servicet any time. RE-BOOST Cards can be used oncenly. Call credits are not transferable oredeemable for cash.
. SIM CARDS – The BOOST MOBILE pre-paidIM card remains the property of Boost Mobile atll times. Should your BOOST MOBILE pre-paidIM card or RE-BOOST Card(s) be lost or stolen,
Boost Mobile will bethem or compensatchoose to replace ycharged a replacem
4. USE OF SERVIcomply with all statapplicable to Custorules of the Federa(the “FCC”). Custoany unlawful purpoService in aircraft oof law, regulation oacknowledges andof Company Servicshall be governed bcontained herein unenter into a subseqAgreement. Compaat any time. Any chCompany providesstating the effectiveCustomer elects topayment to Compaof the changes, Cuaccepted the changaccept the changesServices as of the e

97
5ChSiqEmorrnnCsslgCec
6baMMwoCb
dges that chargeable time forBOOST Walkie-Talkie callated by a handset begins whenblished with CompanyOST Walkie-Talkie call isrticipant if that participantsix (6) seconds after the otherOST MOBILE CONNECTSM
omer accepts responsibility form incoming telephone calls toe time that Customer respondscharges may apply to somen Customer calls the BOOSTService number1-888-266-7848). If Customere charges, Customer mustlanation within forty five (45)
Company debits Customer’suted Service. If Companyerror was made with respect toe charges, Company shallccount in the amount of thedoes not pay the amount inmpany, Company may exercise
have under this Agreement forrvice charges. Companymodify any and all elements ofat any time by giving notice of
stomer. If Customer continuesfter the Company has provided
. CUSTOMER MOBILE DIGITAL EQUIPMENT –ustomer must have a Company approvedandset or device and must be a BOOST MOBILEervice customer to access the Service. Company
s not responsible for the installation, operation,uality of transmission, or maintenance of thequipment. Any change in Service or Equipmentay require additional programming or Equipmentr changes to assigned codes or numbers that mayequire programming fees. Company reserves theight to change or remove assigned codes and/orumbers when such change is reasonablyecessary in the conduct of its business.ustomer does not have any proprietary interest inuch codes or numbers. Although Federal andtate laws may make it illegal for third parties toisten in on service, complete privacy cannot beuaranteed. Company shall not be liable toustomer or to any third party for anyavesdropping on or interception ofommunications from Company’s System.
. RATES, CHARGES, AND PAYMENT – You wille charged for your use of the Service inccordance with the terms of the BOOSTOBILETM Rate Plan, as found in your BOOSTOBILE handset kit or online atww.boostmobile.com. You may request a copyf this document from Boost Mobile at any time.ustomer agrees to pay Company, on a prepayasis, for charges by Company for the Service.
Customer acknowletelephone calls andtransmissions origina connection is estafacilities. A new BOinitiated by a call paresponds more thanparty finishes its BOtransmission. CustAirtime charges frothe handset from thto the call. Serviceservice options wheMOBILE Customer1-888-BOOST-4U (disputes any Servicsubmit a written expdays from the dateaccount for the dispdetermines that anany disputed Serviccredit Customer’s aerror. If Customerdispute owed to Coany remedies it maynon-payment of Sereserves the right tothe Service chargessuch changes to Cuto use the Service a

B
saeSCecu
7–ce(cAaECtAcEspocfiAM
mpatible phone, and is subjectory or other Equipment
tain Internet sites may beain BOOST MOBILE Wirelessnot be available in all Company
USTOMER CARE ANDmer acknowledges and agreesthe developer of an Applicationroviding customer care andto all Customers using theevent Customer contactscare with a problemof an Application, Customerthe Application developer’sCompany shall have no
rt such Application.
ELLECTUAL PROPERTYy is not a publisher of the thirdustomer may access from time
OST MOBILE Wireless Web, Company is not responsibleided by such third parties,ited to statements, opinions,usic, services and othernt”), and accessed byoost Wireless Web Services.
guarantee or assurance as toacy, completeness or utility of
98
oost MobileTM Terms and Conditions of Prepaid Service
uch notice, Customer will be deemed to haveccepted the changes, and such changes will beffective immediately upon Customer’s use of theervice following notice of the changes, unless theompany’s communication indicates a laterffective date. If Customer does not accept thehanges, Customer must immediately cease allse of the Service.
. BOOST MOBILE WIRELESS WEB SERVICESBOOST MOBILE Wireless Web Services,
onsisting of certain applications such as Internet,mail, data and other wireless information servicesthe “Applications”) are part of the Services thatan be obtained through Company. Certainpplications offered through Company oruthorized third parties may be compatible with thequipment and/or the Service offered byompany. Customer acknowledges and agrees
hat there is no guarantee or assurance that thepplications are compatible, or will continue to beompatible, with Company’s System or any of itsquipment or Service offerings. Such compatibilityhall not be construed as an endorsement of aarticular Application or a commitment on the partf Company that Application(s) will continue to beompatible with the System, Equipment or Serviceor any period of time. Company reserves the right,n its sole discretion, to disable or discontinue anypplication for any reason. Use of BOOSTOBILE Wireless Web Services requires a
wireless Internet coto any storage, memlimitation. Only ceraccessed, and certWeb Services mayService areas.
8. APPLICATION CSUPPORT – Custothat in most cases,is responsible for pApplication supportApplication. In theCompany customerconcerning the usemay be referred tocustomer care, andobligation to suppo
9. CONTENT; INTRIGHTS – Companparty content that Cto time through BOServices; thereforefor the content provincluding but not limgraphics, photos, minformation (“ConteCustomer through BCompany gives nothe currency, accur
99
CWpcbeapps
1CEdCdiip
1AfatomtSe
es and assessments; universalts, telephone relay service; recoveries or similar charges.esponsible for such Chargeser the Charge is imposed uponnt or services, upon Customer,If any such Charge isplicable and has not been paidCustomer accepts delivery of
er shall pay Company the fullCharge no later than ten (10)
f the invoice therefor.
REA – Local Dispatch (BOOSTular calling, BOOST MOBILEices, and respective coveragevices are subject to change atdiscretion of Company.
RMINATION - If you breachto Company or fail to performyou made in this Agreement,
lt and Company may, withoutnd Service and/or terminateddition to all other remedies
u agree to pay all costsle attorneys fees, collectionts Company may incur inment through any appeals.
ontent obtained through BOOST MOBILEireless Web Services. Company, Content
roviders and others have proprietary interests inertain Content. Customer shall not reproduce,roadcast, distribute, sell, publish, commerciallyxploit or otherwise disseminate such Content inny manner, or permit others to do so, without therior written consent of Company, Contentroviders, or others with proprietary interests inuch Content, as applicable.
0. RISK OF LOSS: INSURANCE – Uponustomer’s acceptance of delivery of thequipment, all risk of loss, damage, theft, orestruction to the Equipment shall be borne by theustomer. No such loss, damage, theft, orestruction of the Equipment, in whole or part, shall
mpair the obligations of Customer hereunder,ncluding, without limitation, responsibility for theayment of Service Charges due hereunder.
1. TAXES, FEES, SURCHARGES &SSESSMENTS – Customer is responsible for all
ederal, state, and local taxes, fees, surcharges,nd other assessments (collectively, “Charges”)hat are imposed on telecommunications services,ther services, and equipment or that areeasured by gross receipts from the sale of
elecommunications services and/or equipment.uch Charges shall include, but are not limited to:xcise taxes; sales and transaction taxes; utility
taxes; regulatory feservice assessmen(TRS) assessmentsCustomer shall be rregardless of wheththe sale of equipmeor upon Company.determined to be apby Customer beforeequipment, Customamount of any suchdays after receipt o
12. COVERAGE AWalkie-Talkie), cellWireless Web Servareas for these Serany time at the sole
13. DEFAULT / TEany representationany of the promisesyou will be in defaunotice to you, suspethis Agreement, in aavailable to us. Yoincluding reasonabfees, and court cosenforcing this Agree

B
1IsEuoiCaaeeseeswscWtfWCbCwoec
T AS OTHERWISE SETECEDING SENTENCE, IN NOCOMPANY BE LIABLE FORUENTIAL, INCIDENTAL,
ER INDIRECT DAMAGESTHE SERVICES, WHETHEREGLIGENCE ORFOR ECONOMIC LOSS,
IES OR PROPERTYINED BY THE CUSTOMERRTIES ARISING OUT OF THER NO CIRCUMSTANCESONJUNCTION WITH WHICHOVIDES THE SERVICES, BEMER FOR ANY DAMAGES,TSOVER, REGARDLESS OF
TION OR CAUSE OF ACTION,THE SERVICES. CUSTOMER
IVES ANY CLAIM YOUE HAVE AGAINST NEXTEL
THE SERVICES ANDTO MAKE OR BRING ANYD AGAINST NEXTEL
THE SERVICES. Customer, defend, and hold Companys from any Customer violationsgulations or Customer violation
100
oost MobileTM Terms and Conditions of Prepaid Service
4. LIMITATION AND CONDITION OF LIABILITY;NDEMNITY - Company does not assume andhall have no liability for (i) failure to deliver thequipment within a specified time period; (ii)navailability or delays in delivery of the Equipmentr the Services; (iii) damage due directly or
ndirectly to causes beyond the control ofompany, including, but not limited to acts of God,cts of the public enemy, acts of the government,cts or failure to act of the Customer, its agents,mployees or subcontractors, fires, floods,pidemics, quarantine restrictions, corrosiveubstances in the air or other hazardousnvironmental conditions, strikes, freightmbargoes, inability to obtain materials orervices, commotion, war, unusually severeeather conditions or default of Company’subcontractors whether or not due to any suchauses; or (iv) the use of BOOST MOBILEireless Web Services, including but not limited to
he accuracy or utility of any information acquiredrom the Internet through BOOST MOBILE
ireless Web Services; or Internet Services,ontent or Applications whether or not supportedy Company. Without limiting the foregoing, theompany’s sole liability for Service disruption,hether caused by the negligence of the Companyr otherwise, is limited to a credit allowance notxceeding an amount equal to the proportionateharge to the Customer for the period of Service
disruption. EXCEPFORTH IN THE PREVENT WILL THEACTUAL, CONSEQSPECIAL OR OTHARISING OUT OFCAUSED BY ITS NOTHERWISE, NORPERSONAL INJURDAMAGES SUSTAOR ANY THIRD PASERVICES. UNDEWILL NEXTEL, IN CTHE COMPANY PRLIABLE TO CUSTOOF ANY KIND WHATHE FORM OF ACARISING OUT OFIRREVOCABLY WAMIGHT OTHERWISARISING OUT OFCOVENANTS NOTCLAIM OF ANY KINARISING OUT OFagrees to indemnifyand Nextel harmlesof FCC rules and re

101
osSe
1RAORAAALATA
tion Association (“AAA”), asgreement. You and we agree
ent evidences a transaction inrce and the arbitration will benforced in accordance with thee laws of the Commonwealthrbitration will be conducted at an, Virginia, to be designated by
BITRATION. All administrativees of an Arbitration will beetween you and Company. Inach party will bear the expensel, experts, witnesses and
presentation of evidence at the
PUNITIVE DAMAGE CLAIMSTION. By this Agreement, bothompany are waiving certainisputes in court. If for any
ation clause is deemedvalid, Customer and Companye fullest extent allowed by law,ht otherwise have to recoverplary damages and any right tos on a class or consolidatedesentative capacity.
f any statutes, ordinances or laws of any local,tate, or federal public authority. The terms of thisection 14 will survive any termination orxpiration of this Agreement
5. RESOLUTION OF DISPUTES -. PLEASEEAD THIS SECTION CAREFULLY. ITFFECTS RIGHTS THAT YOU MAYTHERWISE HAVE. IT PROVIDES FORESOLUTION OF MOST DISPUTES THROUGHRBITRATION INSTEAD OF COURT TRIALSND CLASS ACTIONS. ARBITRATION IS FINALND BINDING AND SUBJECT TO ONLY VERYIMITED REVIEW BY A COURT. THISRBITRATION CLAUSE SHALL SURVIVEERMINATION OR EXPIRATION OF THISGREEMENT.
A. ARBITRATION PROCEDURES. YOUMUST FIRST PRESENT ANY CLAIM ORDISPUTE TO US BY CONTACTING BOOSTMOBILE CUSTOMER CARE, IN WRITING, TOALLOW US THE OPPURTUNITY TORESOLVE THE DISPUTE. You may invokearbitration if your claim or dispute is not resolvedwithin 60 days after we receive your detailedwritten description of the dispute or claim andthe circumstances giving rise to it. Thearbitration of any dispute or claim shall beconducted in accordance with the WirelessIndustry Arbitration rules (“WIA Rules”) of the
American Arbitramodified by this Athat this Agreeminterstate commeinterpreted and eWIA Rules and thof Virginia. The alocation in Restothe Company.
B. COST OF ARfees and expensdivided equally ball arbitrations, eof its own counsepreparation andarbitration.
C. WAIVER OFAND CLASS ACCustomer and Crights to litigate dreason the arbitrinapplicable or inboth waive, to thany right we migpunitive or exempursue any claimbasis or in a repr

B
1AAbposatbaoccAfpArspca
1TCehCC
ll the services that are subjectithout prior written consent ofto the restrictions containedent shall bind and inure to thessors and permitted assigns ofThe laws of the Commonwealthapplication of its conflicts ofll govern this Agreement.
RDING USE OF SERVICER EMERGENCY CALLS – Thereunder does not interact with
rgency services in the sametelephone service. Depending
es of a particular call, thereunder may not be able to
n to emergency services andbe connected to the
ncy services provider.vision of 911 or other
s may be conditioned ons to the governmentallement or coordinate access toCustomer agrees thatortion and pass through sucher, which shall be paid by
e, in connection withto such 911 or other
s, where available.ES TO HOLD COMPANY ANDS AGAINST ANY AND ALL
102
oost MobileTM Terms and Conditions of Prepaid Service
6. COMPLETEGREEMENT/SEVERABILITY/WAIVER – Thisgreement sets forth all of the agreementsetween the parties concerning the Services andurchase of the Equipment, and there are no oralr written agreements between them other than aset forth in this Agreement. No amendment orddition to this Agreement shall be binding uponhis Company unless it is in writing and signed byoth parties (and, in the case of the Company, byn officer of the Company). Should any provisionf this Agreement be found illegal or inontravention of the law, such provision shall beonsidered null and void but the remainder of thisgreement shall not be affected thereby. The
ailure of Company, at any time to require theerformance by Customer of the provisions of thisgreement shall not affect in any way the right to
equire such performances at any later time, norhall the waiver by Company of a breach of anyrovision hereof be taken or held to be a waiver ofompliance with or breach of any other provision orcontinuing waiver of such provision.
7. ASSIGNMENT/RESALE/GOVERNING LAW –his Agreement may be freely assigned byompany to any successor of it or any other firm orntity capable of performing its obligationsereunder, and upon any such assignment,ompany shall be released from all obligations toustomer. Customer may not assign this
Agreement, or reseto this Agreement wCompany. Subjectherein, this Agreembenefit of the succethe parties hereto.of Virginia, withoutlaws principles, sha
18. NOTICE REGAFOR 911 OR OTHEService provided he911 and other ememanner as landlineon the circumstancService provided heidentify your locatioyou may not alwaysappropriate emergeAdditionally, the proemergency servicepayment of amountauthorities who impsuch services, andCompany may appamounts to CustomCustomer when duCustomer’s accessemergency serviceCUSTOMER AGRENEXTEL HARMLES

103
CAPASE
1CWIIOTOCIITCITNI
2CWKCO
HER COMPANY NORNY EXPRESS OR IMPLIEDMERCHANTABILITY ORARTICULAR PURPOSE.BY WAIVES, AS AGAINST
EXTEL ALL OTHERARANTEES, CONDITIONS,XPRESS OR IMPLIED,OR OTHERWISE. IN NOMPANY, OR NEXTEL BEEQUENTIAL, SPECIAL, OR
AGES, WHETHER OR NOTTHEIR NEGLIGENCE ANDOUT LIMITATION, LIABILITYR DAMAGE RESULTINGRUPTION OR FAILURE INOF ANY EQUIPMENT SOLDROVIDED HEREUNDER.ARRANTIES THAT EXTENDCRIPTION CONTAINEDER ASSUMES THE ENTIREUALITY ANDF THE EQUIPMENT.ISE AGREED BY COMPANY,T PROVES DEFECTIVE, THECESSARY SERVICING ANDORNE BY CUSTOMER.
LAIMS, DEMANDS, ACTIONS, OR CAUSES OFCTION (INCLUDING ALL ACTIONS BY THIRDARTIES) ARISING OUT OF THE USE ORTTEMPTED USE OF THE COMPANY’SERVICE TO ACCESS 911 OR OTHERMERGENCY SERVICES.
9. NO WARRANTY (SERVICE) – NEITHEROMPANY NOR NEXTEL MAKES ANYARRANTIES, EXPRESS OR IMPLIED,
NCLUDING WITHOUT LIMITATION, ANYMPLIED WARRANTY OF MERCHANTABILITYR FITNESS FOR A PARTICULAR PURPOSEO CUSTOMER IN CONNECTION WITH ITS USEF THE SERVICE. IN NO EVENT SHALLOMPANY OR NEXTEL BE LIABLE FOR
NCIDENTAL, CONSEQUENTIAL OR OTHERNDIRECT DAMAGES TO THE FULL EXTENTHE SAME MAY BE DISCLAIMED BY LAW.USTOMER ACKNOWLEDGES THAT SERVICE
NTERRUPTIONS WILL OCCUR FROM TIME TOIME, AND AGREES TO HOLD COMPANY ANDEXTEL HARMLESS FOR ALL SUCH
NTERRUPTIONS.
0. NO WARRANTY (EQUIPMENT) – NEITHEROMPANY NOR NEXTEL MAKES ANYARRANTIES OR REPRESENTATIONS OF ANY
IND, STATUTORY, EXPRESS OR IMPLIED, TOUSTOMER OR TO ANY OTHER PURCHASERF THIS EQUIPMENT. WITHOUT LIMITING THE
FOREGOING, NEITNEXTEL MAKES AWARRANTIES OFFITNESS FOR A PCUSTOMER HERECOMPANY AND NWARRANTIES, GUOR LIABILITIES, EARISING BY LAWEVENT SHALL COLIABLE FOR CONSINCIDENTAL DAMOCCASIONED BYINCLUDING, WITHFOR ANY LOSS OFROM THE INTERTHE OPERATIONOR OTHERWISE PTHERE ARE NO WBEYOND THE DESHEREIN. CUSTOMRISK AS TO THE QPERFORMANCE OUNLESS OTHERWIF THE EQUIPMENCOSTS OF ALL NEREPAIR WILL BE B

B
2Ataomafaabmoa
104
oost MobileTM Terms and Conditions of Prepaid Service
1. DEFINITIONS – For purposes of thisgreement: 1) “Call Credit Validity Period” means
he number of days, from the date of call creditctivation until the date of call credit expiration, setut in the relevant rate plan; 2) “RE-BOOST Card”eans the Boost MobileTM card containingdditional call credits which may be purchasedrom participating outlets or the voucher numbernd expiration date provided to customers whendditional call credits are purchased without a cardeing provided, as applicable; 3) “Grace Period”eans the 60 day period commencing on the datef Call Credit expiration, and ending on the date ofccount cancellation.

105
SIIE
RYP
RCYtstact
POYwshe
deral Communicationsde of Federal Regulations; 47art J.al Standards Institute (ANSI) /ical and Electronics Engineers992.ical and Electronics Engineers999 Edition.
mission on Non-Ionizingtion (ICNIRP) 1998.
(Canada). Safety Code 6.Exposure to RadiofrequencyFields in the Frequency Range0 GHz, 1999.unications Authoritytions (Electromagneticn Exposure) Standard 2003.egulatory Authority, Resolution1) “additional requirements for
d PCS product certification.”
radio product performanceman exposure to radio
agnetic energy is within theh in the above standards,he following procedures:
afety and GeneralnformationMPORTANT INFORMATION ON SAFE ANDFFICIENT OPERATION.
EAD THIS INFORMATION BEFORE USINGOUR INTEGRATED MULTI-SERVICEORTABLE RADIO.
F Operationalharacteristics
our radio product contains a radio frequencyransmitter to convey the information you wish toend as well as occasional automatic signals usedo sustain connection to the wireless network, andreceiver which enables you to receive
ommunication and connection information fromhe network.
ortable Radio Productperation and EME Exposure
our Motorola radio product is designed to complyith the following national and internationaltandards and guidelines regarding exposure ofuman beings to radio frequency electromagneticnergy (EME):
• United States FeCommission, CoCFR part 2 sub-p
• American NationInstitute of Electr(IEEE). C95. 1-1
• Institute of Electr(IEEE). C95. 1-1
• International ComRadiation Protec
• Ministry of HealthLimits of HumanElectromagneticfrom 3 kHz to 30
• Australian CommRadiocommunicaRadiation - Huma
• ANATEL, Brasil R256 (April 11, 200SMR, cellular an
To assure optimaland make sure hufrequency electromguidelines set fortalways adhere to t

S
PWrS
TWtrwi
BTgbphUenaihiafw
ay radio mode: one inch (2.5
sing any data feature with orssory cable: one inch (2.5
lied or an approvedna. Unauthorized antennas,
tachments could damage theay violate FCC regulations.
ntenna when the radio”. Holding the antenna affectscause the radio product to
power level than needed.
essoriesd Motorola accessories callvisit our website at
/iden.
106
afety and General Information
hone Operationhen placing or receiving a phone call, hold your
adio product as you would a wireline telephone.peak directly into the microphone.
wo-way radio operationhen using your radio product as a
raditional two-way radio, hold theadio product in a vertical positionith the microphone one to two
nches (2.5 to 5 cm) away from the lips.
ody-worn operationo maintain compliance with FCC RF exposureuidelines, if you wear a radio product on yourody when transmitting, always place the radioroduct in a Motorola approved clip, holder,olster, case or body harness for this product.se of non-Motorola-approved accessories mayxceed FCC RF exposure guidelines. If you doot use a Motorola approved body-wornccessory and are not using the radio productn the intended use positions along side theead in the phone mode or in front of the face
n the two-way radio mode, then ensure thentenna and the radio product are kept theollowing minimum distances from the bodyhen transmitting
• Phone or Two-wcm)
• Data operation uwithout an accecm)
Antenna CareUse only the suppreplacement antenmodifications, or atradio product and m
DO NOT hold the aproduct is “IN USEcall quality and mayoperate at a higher
Approved AccFor a list of approve1-800-453-0920, orwww.motorola.com

107
Operation and EME Exposure
AGTYiltGgtsossrTeA1otfhpvmtw
Bmerp
e FCC for each model. The highestel phone when tested for use at thehen tested on the body, as
guide, is 1.38 W/kg during packetdy-worn measurements differ
, depending upon availablerequirements.)2
ferences between the SAR levels ofvarious positions, they all meet thent for safe exposure.
an Equipment Authorization for thiseported SAR levels evaluated as inCC RF exposure guidelines. SARdel phone is on file with the FCCer the Display Grant section of/fccid after searching on FCC ID
on Specific Absorption Rates (SAR)ellular Telecommunications Industryb-site at http://www.wow-com.com.
and Canada, the SAR limit forby the public is 1.6 watts/kg (W/kg)ram of tissue. The standard
tantial margin of safety to givefor the public and to account for anyements.reported to the FCC includes the
rola testing protocol, assessmentsurement uncertainty range for this
Portable Radio Product
LL MODELS WITH FCC ID AZ489FT5827 MEET THEOVERNMENT’S REQUIREMENTS FOR EXPOSUREO RADIO WAVES.our wireless phone is a radio transmitter and receiver. It
s designed and manufactured not to exceed the emissionimits for exposure to radiofrequency (RF) energy set byhe Federal Communications Commission of the U.S.overnment. These limits are part of comprehensiveuidelines and establish permitted levels of RF energy for
he general population. The guidelines are based ontandards that were developed by independent scientificrganizations through periodic and thorough evaluation ofcientific studies. The standards include a substantialafety margin designed to assure the safety of all persons,egardless of age and health.he exposure standard for wireless mobile phonesmploys a unit of measurement known as the Specificbsorption Rate, or SAR. The SAR limit set by the FCC is.6W/kg.1 Tests for SAR are conducted using standardperating positions reviewed by the FCC with the phone
ransmitting at its highest certified power level in all testedrequency bands. Although the SAR is determined at theighest certified power level, the actual SAR level of thehone while operating can be well below the maximumalue. This is because the phone is designed to operate atultiple power levels so as to use only the power required
o reach the network. In general, the closer you are to aireless base station antenna, the lower the power output.
efore a phone model is available for sale to the public, itust be tested and certified to the FCC that is does not
xceed the limit established by the government-adoptedequirement for safe exposure. The tests are performed inositions and locations (e.g., at the ear and worn on the
body) as required by thSAR value for this modear is 1.42 W/kg and wdescribed in this userdata transmission. (Boamong phone modelsaccessories and FCC
While there may be difvarious phones and atgovernment requireme
The FCC has grantedmodel phone with all rcompliance with the Finformation on this moand can be found undhttp://www.fcc.gov/oetAZ489FT5827.Additional informationcan be found on the CAssociation (CTIA) we
1 In the United Statesmobile phones usedaveraged over one gincorporates a subsadditional protectionvariations in measur
2 The SAR informationFCC-accepted Motoprocedure, and meaproduct.

S
EI
FTcase
AWpra
ices
ical Technology Associationends that a minimumes (15 cm) be maintainedd wireless radio product and arecommendations aree of the U.S. Food and Drug
akers should:
e radio product more than 6om their pacemaker when theurned ON.io product in a breast pocket.site the pacemaker to minimizenterference.oduct OFF immediately if youto suspect that interference is
ss radio products may interfereaids. In the event of suchay want to consult your hearingdiscuss alternatives.
108
afety and General Information
lectro Magneticnterference/Compatibility
Note: Nearly every electronic device issusceptible to electromagneticinterference (EMI) if inadequatelyshielded, designed or otherwiseconfigured for electromagneticcompatibility.
acilitieso avoid electromagnetic interference and/orompatibility conflicts, turn off your radio product inny facility where posted notices instruct you to doo. Hospitals or health care facilities may be usingquipment that is sensitive to external RF energy.
ircrafthen instructed to do so, turn off your radio
roduct when on board an aircraft. Any use of aadio product must be in accordance withpplicable regulations per airline crew instructions.
Medical DevPacemakersThe Advanced Med(AdvaMed) recommseparation of 6 inchbetween a handhelpacemaker. Theseconsistent with thosAdministration.
Persons with pacem
• ALWAYS keep thinches (15 cm) frradio product is t
• Not carry the rad• Use the ear oppo
the potential for i• Turn the radio pr
have any reasontaking place.
Hearing AidsSome digital wirelewith some hearinginterference, you maid manufacturer to

109
Operational Warnings
OIcdei
UCpt
W
•••
Warningsith an Air
able radio product in the areain the air bag deployment area.great force. If a portable radioag deployment area and the airio product may be propelledcause serious injury to
hicle.
losive Atmospheresproduct prior to entering anylly explosive atmosphere,roduct type especially qualifieds as “Intrinsically Safe” (forutual, CSA, or UL approved).
tall, or charge batteries in suchotentially explosive
use an explosion or firejury or even death.
with potentially explosiveres referred to above includeeas such as below decks onl or chemical transfer orcilities, areas where the airhemicals or particles, such
!!
ther Medical Devicesf you use any other personal medical device,onsult the manufacturer of your device toetermine if it is adequately shielded from RFnergy. Your physician may be able to assist you
n obtaining this information.
se While Drivingheck the laws and regulations on the use of radioroducts in the area where you drive. Always obeyhem.
hen using the radio product while driving, please:
Give full attention to driving and to the road.Use hands-free operation, if available.Pull off the road and park before making oranswering a call if driving conditions so require.
OperationalFor Vehicles wBagDo not place a portover the air bag orAir bags inflate withis placed in the air bbag inflates, the radwith great force andoccupants of the ve
Potentially ExpTurn off your radioarea with a potentiaunless it is a radio pfor use in such areaexample, Factory MDo not remove, insareas. Sparks in a patmosphere can caresulting in bodily in
Note: The areasatmosphefueling arboats, fuestorage facontains c

S
BToaoa
OBAbsecbcaosc
rying Considerationsry case may help protect therevent liquids (e.g., rain) fromerior of the radio product. Thisproof, and exposing the unit topermanent damage to the unit.
t interior gets wet, then do noting with the use of an oven or amage the radio product andnstead, do the following:
er off the radio product.and SIM card (if so equipped)ct.uid from radio product.roduct and battery in an areamperature and has good air
duct, battery, and SIM card dryre reconnecting the batteryon the radio product.
does not work after followingve, contact your dealer forn.
110
afety and General Information
as grain, dust or metal powders, andany other area where you wouldnormally be advised to turn off yourvehicle engine. Areas with potentiallyexplosive atmospheres are often butnot always posted.
lasting Caps and Areaso avoid possible interference with blastingperations, turn off your radio product when youre near electrical blasting caps, in a blasting area,r in areas posted: “Turn off two-way radio”. Obeyll signs and instructions.
perational Cautionsatteriesll batteries can cause property damage and/orodily injury, such as burns if a conductive materialuch as jewelry, keys, or beaded chains touchesxposed terminals. The conductive material mayomplete an electrical circuit (short circuit) andecome quite hot. Exercise care in handling anyharged battery, particularly when placing it insidepocket, purse, or other container with metalbjects. To reduce the risk of injury, batterieshould not be exposed to fire, disassembled, orrushed.
Cleaning and DUsing a leather carsurfaces and help pentering into the intproduct is not waterliquids may result in
If your radio productry to accelerate drydryer as this will davoid the warranty. I
1 Immediately pow2 Remove Battery
from radio produ3 Shake excess liq4 Place the radio p
that is at room teflow.
5 Let the radio profor 72 hours befoand/or powering
If the radio productthe steps listed aboservicing informatio
!

111
Accessory Safety Information
CwdhctAp
A
•
•
k of damage to the cord or plug,ather than the cord when youattery charger from the power
ny battery charger with aplug — replace them
may become warm duringt hot. If it becomes hot to therom the power outletdiscontinue its use.ommended attachment to aay result in a risk of fire,injury to persons.ttery charger power cord iswill not be stepped on, trippedd to damage or stress.d should not be used with anynless absolutely necessary.er extension cord could resultd electric shock. If an extensiond, make sure that:e plug of the extension cord areber, size, and shape as thosethe charger.cord is properly wired and in
l condition.
lean the external surfaces of the radio productith a damp cloth, using a mild solution ofishwashing detergent and water. Someousehold cleaners may contain chemicals thatould seriously damage the radio product. Avoidhe use of any petroleum-based solvent cleaners.lso, avoid applying liquids directly on the radioroduct.
ccessory Safety InformationImportant: Save these accessory safety
instructions.
Before using any battery or battery charger, readall the instructions for and cautionary markingson (1) the battery, (2) the battery charger, whichmay include a separate wall-mounted powersupply or transformer, and (3) the radio productusing the battery.Do not expose any battery charger to water,rain, or snow as they are designed for indoor orin-vehicle use only.
• To reduce the rispull by the plug rdisconnect the bsource outlet.
• Do not operate adamaged cord orimmediately.
• Battery chargersoperation, but notouch, unplug it fimmediately and
• Use of a non-recbattery charger melectric shock, or
• Make sure the balocated so that itover, or subjecte
• An extension corbattery charger uUse of an impropin a risk of fire ancord must be use• The pins on th
the same numon the plug of
• The extensiongood electrica
Warning: To reduce the risk of injury,charge only the rechargeablebatteries described in “Battery” onpage 5. Other types of batteries mayburst, causing personal injury anddamage.
!!

S
•
•
•
•
•
•
Frc
112
afety and General Information
• The cord size is 18AWG for lengths up to 100feet and 16AWG for lengths up to 150 feet.
Do not operate any battery charger if it hasreceived a sharp blow, has been dropped, orhas been damaged in any way; take it to aqualified service technician.Do not disassemble a battery charger; take it toa qualified service technician when service orrepair is required. Incorrect reassembly mayresult in a risk of electric shock or fire.Maximum ambient temperature around thepower supply or transformer of any batterycharger should not exceed 40°C (104°F).The output power from the power supply ortransformer must not exceed the rating given onthe Desktop Dual-Pocket Charger.The disconnection from the line voltage is madeby unplugging the power supply from the ACreceptacle.To reduce risk of electric shock, unplug anybattery charger from the outlet before attemptingany maintenance or cleaning.
or optimum charging performance, turn off theadio product while charging it in any batteryharger.

113
MW
W
SMMMuMtPmcTrPpow
LENGTH OFCOVERAGE
ed One (1) year from thedate of purchase by thefirst consumerpurchaser of theproduct.
One (1) year from thedate of purchase by thefirst consumerpurchaser of theproduct.
areaced.
The balance of theoriginal warranty orfor ninety (90) daysfrom the date returnedto the consumer,whichever is longer.
edly tothe
iestware
Ninety (90) days fromthe date of purchase.
OTOROLA LIMITEDARRANTY
Note: FOR IDEN SUBSCRIBER PRODUCTS,ACCESSORIES AND SOFTWAREPURCHASED IN THE UNITED STATESOR CANADA
hat Does this Warranty Cover?
ubject to the exclusions contained below,otorola, Inc. warrants its Motorola iDEN Digitalobile and Portable Handsets ("Products"),otorola-branded or certified accessories sold for
se with these Products ("Accessories") andotorola software contained on CD-Roms or other
angible media and sold for use with theseroducts ("Software") to be free from defects inaterials and workmanship under normal
onsumer usage for the period(s) outlined below.his limited warranty is a consumer's exclusiveemedy, and applies as follows to newroducts, Accessories and Softwareurchased by consumers in the United Statesr Canada, which are accompanied by thisritten warranty:
PRODUCTSCOVERED
Products as definabove.
Accessories asdefined above.
Products orAccessories thatRepaired or Repl
Software as definabove. Applies onphysical defects inmedia that embodthe copy of the sof(e.g. CD-ROM, orfloppy disk).

M
W
Nra
Bcbw
AfadtlpfcAoe
UAtPp
ice or Modification. Defectsg from service, testing,tion, maintenance, alteration,itation, software changes, or
way by someone other thanorized service centers, arerage.
Products or Accessories withr date tags that have beenobliterated; (b) broken seals orof tampering; (c) mismatched
rs; or (d) nonconforming orngs, antennas, or parts, arerage.
ervices. Defects, damages, orcts, Accessories or Softwareication service or signal you
r use with the Products,ware is excluded from
d in Physical Media. Noat the software will meet yourl work in combination with anyre applications provided by thirdration of the software productsor error free, or that all defects
ucts will be corrected.
114
OTOROLA LIMITED WARRANTY
hat is not covered? (Exclusions)
ormal Wear and Tear. Periodic maintenance,epair and replacement of parts due to normal wearnd tear are excluded from coverage.
atteries. Only batteries whose fully chargedapacity falls below 80% of their rated capacity andatteries that leak are covered by this limitedarranty.
buse & Misuse. Defects or damage that resultrom: (a) improper operation, storage, misuse orbuse, accident or neglect, such as physicalamage (cracks, scratches, etc.) to the surface ofhe product resulting from misuse; (b) contact withiquid, water, rain, extreme humidity or heavyerspiration, sand, dirt or the like, extreme heat, orood; (c) use of the Products or Accessories forommercial purposes or subjecting the Product orccessory to abnormal usage or conditions; or (d)ther acts which are not the fault of Motorola, arexcluded from coverage.
se of Non-Motorola Products andccessories. Defects or damage that result from
he use of Non-Motorola branded or certifiedroducts, Accessories, Software or othereripheral equipment are excluded from coverage.
Unauthorized Servor damages resultinadjustment, installaincluding without limmodification in anyMotorola, or its authexcluded from cove
Altered Products.(a) serial numbers oremoved, altered orthat show evidenceboard serial numbenon-Motorola housiexcluded from cove
Communication Sthe failure of Produdue to any communmay subscribe to oAccessories or Softcoverage.
Software Embodiewarranty is made threquirements or wilhardware or softwaparties, that the opewill be uninterruptedin the software prod

115
SS(i
Wtt
WwpSWrPoocrar
HIp
M1
T
atla.com/iden/support
tructions on how to ship theies or Software, at yourrola Authorized Repair Center.ou must include: (a) a copy of
sale or other comparable proofritten description of the
me of your service provider, ifame and location of the
if applicable) and, mostr address and telephone
tions Are There? ANYTIES, INCLUDING WITHOUTMPLIED WARRANTIES OFY AND FITNESS FOR APOSE, SHALL BE LIMITEDN OF THIS LIMITEDERWISE THE REPAIR,R REFUND AS PROVIDEDESS LIMITED WARRANTY ISEMEDY OF THEIS PROVIDED IN LIEU OFANTIES, EXPRESS OFENT SHALL MOTOROLA BEIN CONTRACT OR TORT
IGENCE) FOR DAMAGES INURCHASE PRICE OF THE
oftware NOT Embodied in Physical Media.oftware that is not embodied in physical media
e.g. software that is downloaded from thenternet), is provided "as is" and without warranty.
ho is covered? This warranty extends only tohe first consumer purchaser, and is notransferable.
hat will Motorola Do? Motorola, at its option,ill at no charge repair, replace or refund theurchase price of any Products, Accessories oroftware that does not conform to this warranty.e may use functionally equivalent
econditioned/refurbished/pre-owned or newroducts, Accessories or parts. No data, softwarer applications added to your Product, Accessoryr Software, including but not limited to personalontacts, games and ringer tones, will beeinstalled. To avoid losing such data, softwarend applications please create a back up prior toequesting service.
ow to Obtain Warranty Service or Othernformation? To obtain service or information,lease call:
otorola iDEN Customer Services-800-453-0920 or 954-723-4910
TY-877-483-2840
Or visit us onlinehttp://www.motoro
You will receive insProducts, Accessorexpense, to a MotoTo obtain service, yyour receipt, bill ofof purchase; (b) a wproblem; (c) the naapplicable; (d) the ninstallation facility (importantly; (e) younumber.
What Other LimitaIMPLIED WARRANLIMITATION THE IMERCHANTABILITPARTICULAR PURTO THE DURATIOWARRANTY, OTHREPLACEMENT, OUNDER THIS EXPRTHE EXCLUSIVE RCONSUMER, ANDALL OTHER WARRIMPLIED. IN NO EVLIABLE, WHETHER(INCLUDING NEGLEXCESS OF THE P

M
PFCLBSFCTSD
SlcllTafa
Lpceoot
use, including without limitationh Motorola software or exercisets reserved for Motorola, is
116
OTOROLA LIMITED WARRANTY
RODUCT, ACCESSORY OR SOFTWARE, OROR ANY INDIRECT, INCIDENTAL, SPECIAL ORONSEQUENTIAL DAMAGES OF ANY KIND, OROSS OF REVENUE OR PROFITS, LOSS OFUSINESS, LOSS OF INFORMATION OR DATA,OFTWARE OR APPLICATIONS OR OTHERINANCIAL LOSS ARISING OUT OF OR INONNECTION WITH THE ABILITY OR INABILITYO USE THE PRODUCTS, ACCESSORIES OROFTWARE TO THE FULL EXTENT THESEAMAGES MAY BE DISCLAIMED BY LAW.
ome states and jurisdictions do not allow theimitation or exclusion of incidental oronsequential damages, or limitation on theength of an implied warranty, so the aboveimitations or exclusions may not apply to you.his warranty gives you specific legal rights,nd you may also have other rights that varyrom state to state or from one jurisdiction tonother.
aws in the United States and other countriesreserve for Motorola certain exclusive rights foropyrighted Motorola software such as thexclusive rights to reproduce and distribute copiesf the Motorola software. Motorola software maynly be copied into, used in, and redistributed with,he Products associated with such Motorola
software. No otherdisassembly of sucof the exclusive righpermitted.

117
Patent and TrademarkInformation© 2004 Boost Worldwide, Inc. All rights reserved.BOOST, BOOST and Logo, BOOST MOBILE,BOOST MOBILE and Logo, and the Logo aretrademarks and/or service marks of BoostWorldwide, Inc.
©2004 Nextel Communications, Inc. NEXTEL®, theNEXTEL logo®, NEXTEL ONLINE®, NEXTEL.Done.TM, PUSH TO TALKTM, PTTTM, DIRECTCONNECTTM, GROUP CONNECTTM and NEXTELWORLDWIDE® are service marks, trademarks,and/or registered trademarks owned by NextelCommunications, Inc.
MOTOROLA, the Stylized M Logo and all othertrademarks indicated as such herein aretrademarks of Motorola, Inc. ® Reg. U.S. Pat. &Tm. Off. © 2004 Motorola, Inc. All rights reserved.
Microsoft and Microsoft Internet Explorer areregistered trademarks of Microsoft Corporation.
T9 is a trademark owned by TegicCommunications.
T9® Text Input Patent and Trademark Information
This product is covered by U.S. Pat. 5,818,437,U.S. Pat. 5,953,541, U.S. Pat. 6,011,554 and otherpatents pending.
All other product names or services mentioned inthis manual are the property of their respectivetrademark owners.
Software Copyright Notice
The Motorola products described in this manualmay include copyrighted Motorola and third partysoftware stored in semiconductor memories orother media. Laws in the United States and othercountries preserve for Motorola and third partysoftware providers certain exclusive rights forcopyrighted software, such as the exclusive rightsto distribute or reproduce the copyrighted software.Accordingly, any copyrighted software contained inthe Motorola products may not be modified,reverse-engineered, distributed, or reproduced inany manner to the extent allowed by law.Furthermore, the purchase of the Motorolaproducts shall not be deemed to grant eitherdirectly or by implication, estoppel, or otherwise,any license under the copyrights, patents, or patentapplications of Motorola or any third party softwareprovider, except for the normal, non-exclusive,royalty-free license to use that arises by operationof law in the sale of a product.

118
InAAcc
Alp
BBacBat
BatBauBooBooBooCoBoo
Boo
from Recent calls 21from SMS messages 60icons 20international 39on hold 38receiving 19redialing 22, 73TTY, see TTY calls
Clock 73Contacts 21, 31
capacity 35creating entries 33deleting 35editing entries 34icons 31International numbers 36searching 32showing all entries 33showing only Boost
Walkie-Talkie 32SIM card 31storing fast 34storing from idle screen 34storing from Memo 34, 37
dex
essories 17safety 111ha mode 28
klight 73terycharging 5, 6door 3inserting 5safety 110tery Use and Maintenance 7d rate 76st 52st Mobile Customer Care 92st Mobile Terms and
nditions of Prepaid Service 95st Mobile text messages 60
receiving 60st Mobile Voice Mail 10, 52
CCall alerts 24
deleting 25queue 24receiving 24responding 24, 25sending 24sorting 25viewing 24
Call forwarding 65all calls 65missed calls 66off 65
Call Hold 38Call restrictions 42Call Timers 40Calls
answering automatically 73answering with any key 73emergency 23ending 20entering number 20from Contacts 21from memo 37

119
DDia
DirDis
EEmEmEnaEnd
FFacFin
GGP
calling 39storing 36
Internetsecurity 64
JJava Applications 67Java applications
deleting 68memory 69
KKeypad 2
locking 75
LLanguage 73Lists, see menusLocking the Keypad 16
MMemo 37
calling from 37creating 37editing 37storing to Contacts 34, 37viewing 37
storing from recent calls 26, 34type 26, 31viewing 32
ling codesnon-emergency numbers 42telecommunications relay
service 42ectory Assistance 43playbacklight 73options 11screen 11
ail 31, 34ergency calls 23bling Over-the-Air Security 9key 2
eplates 17ding Your Phone Number 10
S Enabled 77
almanac data 81best results 80emergency calls 23, 78map software 83privacy options 82security 83viewing location 79
GPS PIN 75GPS, see GPS Enabled
HHandset, see phoneHeadset 73
IIcons
calls 20Contacts 31main menu 12Recent calls 26status 13text entry 28
Idle screen 11storing to Contacts 34
International numbers 39

120
Ind
Me
MeMe
Me
Me
Me
Mic
NNaNoNu
Programming, over-the-air 9PUK code 15
RRadio frequency 105Recent calls 21, 26
deleting 27display time 75icons 26storing to Contacts 26, 34viewing 26
Redialing 22, 73Ring tones 31, 45
deleting 47downloading 47memory 47off 45setting 45setting in Contacts 33, 46vibrate 45viewing assigned 46
Ringer 72see also Ring tonesoff 72
ex
moryJava applications 69ring tones 47nu key 2, 11nus 11context-sensitive 2, 11main menu 12ssage center 49, 51see also messagesSMS messages 59voice mail 51ssage notifications 49setting options 49ssages 48see also voice mail, SMS
messages, Two-Waymessages, and Net alerts
receiving 49robrowser 63
vigation key 2n-emergency numbers 42meric mode 30
OOARSS, see over-the-airprograming 9Over-the-air programming 9
PPassword
voice mail 53Passwords 75Patent information 117Pauses
dialing 38storing 35
Personalize 74Phone 2, 11
active line 73locking 75off 9on 8only 75setting up 2
Phone callscall restrictions 42
Powering On and Off 8Profiles 86

121
SSaf
SecSenSet
ShoSIM
SIM
SIM
SM
making 40mode 41on 41
TTY devices 42Two-Way messages
sending 61
UUsing Speed Dial and Turbo Dial22
VVoice Mail
changing password 53greetings 53group lists 57message forwarding 58playing messages 52
Voice mail 51receiving 51sending calls to 19setting up 10, 52
Voice name 32Volume, setting 72, 74
ety 105accessory 111battery 110electromagnetic interference
108medical devices 108radio frequency 105urity 64, 75d key 2tings 73resetting 75rtcuts 90
inserting 4removing 4
card 3, 14Contacts 31
PIN 14, 75changing 15requirement 14unblocking 15, 16S messages 59calling from 60
message center 59receiving 59
Speed Dial 32, 34Status messages 93Symbols mode 30
TT9 Text Input, see text entryTDD/TTY devices 42Telecommunications relayservice42Text and numeric messages
see SMS messagesText display area 11, 20Text entry 28
Alpha mode 28database 28, 29icons 28mode 28Numeric mode 30Symbols mode 30Word mode 28
Trademark information 117TTY calls 40
baud rate 42

122
Ind
WWa
WaWaWe
WhWo
YYel
ex
itsdialing 38storing 35lkie-Talkie Options 74rranty 116b alerts 60deleting 61receiving 60ite Page listings 43rd mode 28
low Page listings 43