I - NC Science Essential Standards - homescnces.ncdpi.wikispaces.net/file/view/6unit6.doc/... ·...
68
I. Grade Level/Unit Number: Grade 6 Unit Six II: Unit Title: Energetic Waves of Energy III. Unit Length: 5 weeks IV. Major Goals and Learning Outcomes: How is energy transferred through waves? How does sound behave as a wave? How is energy transferred between objects? How can you examine/measure energy transfer? In a closed system, how does energy react according to the Law of Conservation of Energy? How is energy transformed not created or destroyed? How is energy conserved? How is energy transferred through convection? How is energy transferred through radiation? How is thermal energy transferred between objects at different temperatures? How does light absorb or scatter matter? Why do you see color? How does the human eye work? Why do different materials conduct heat at a different rate? How does change in temperature cause expansion or contraction? V. Objectives Included: Number Competency or Objective RBT Tag 1.01 Identify and create questions and hypotheses that can be answered through scientific investigations. A1 1.02 Develop appropriate experimental procedures for: Given questions. Student generated questions. B3 1.03 Apply safety procedures in the laboratory and in field studies: A3 1
Transcript of I - NC Science Essential Standards - homescnces.ncdpi.wikispaces.net/file/view/6unit6.doc/... ·...

I. Grade Level/Unit Number: Grade 6 Unit Six
II: Unit Title: Energetic Waves of Energy
III. Unit Length: 5 weeks
IV. Major Goals and Learning Outcomes: How is energy transferred through waves? How does sound behave as a wave? How is energy transferred between objects? How can you examine/measure energy transfer? In a closed system, how does energy react according to the Law of
Conservation of Energy? How is energy transformed not created or destroyed? How is energy conserved? How is energy transferred through convection? How is energy transferred through radiation? How is thermal energy transferred between objects at different
temperatures? How does light absorb or scatter matter? Why do you see color? How does the human eye work? Why do different materials conduct heat at a different rate? How does change in temperature cause expansion or contraction?
V. Objectives Included:Number Competency or Objective RBT
Tag1.01 Identify and create questions and hypotheses that can be
answered through scientific investigations.A1
1.02 Develop appropriate experimental procedures for: Given questions. Student generated questions.
B3
1.03 Apply safety procedures in the laboratory and in field studies:
Recognize potential hazards. Manipulate materials and equipment. Conduct appropriate procedures.
A3
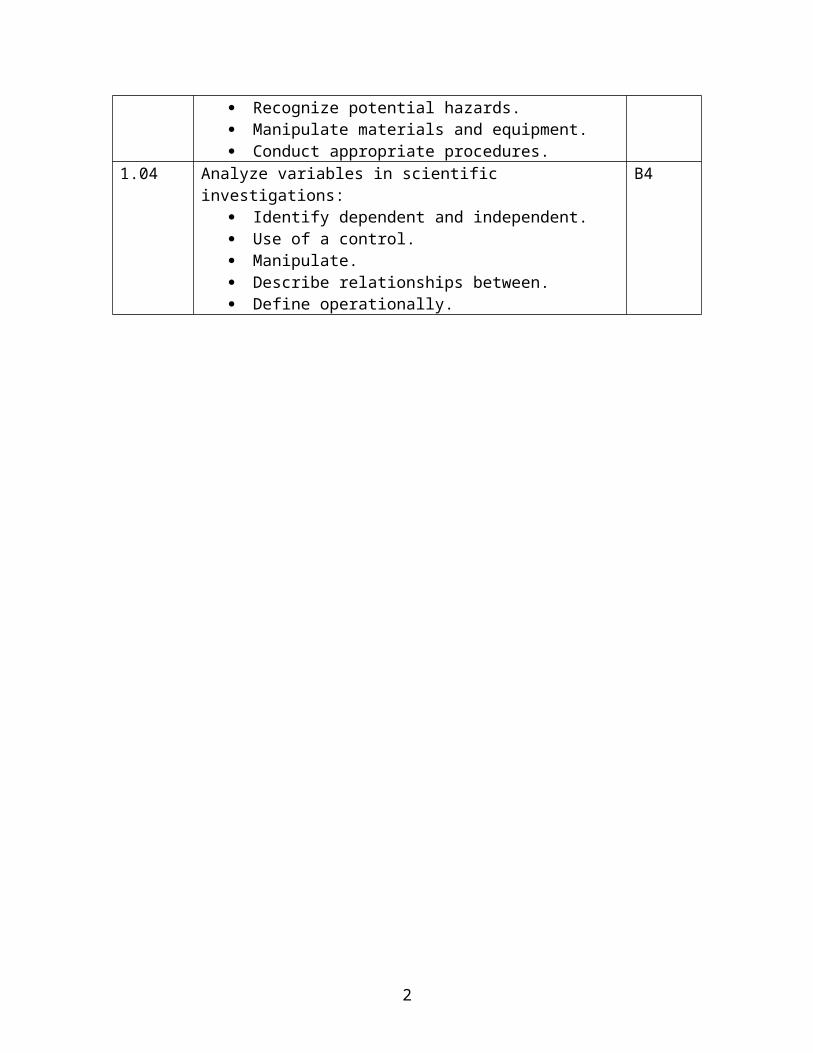
1.04 Analyze variables in scientific investigations: Identify dependent and independent. Use of a control. Manipulate. Describe relationships between. Define operationally.
B4
1
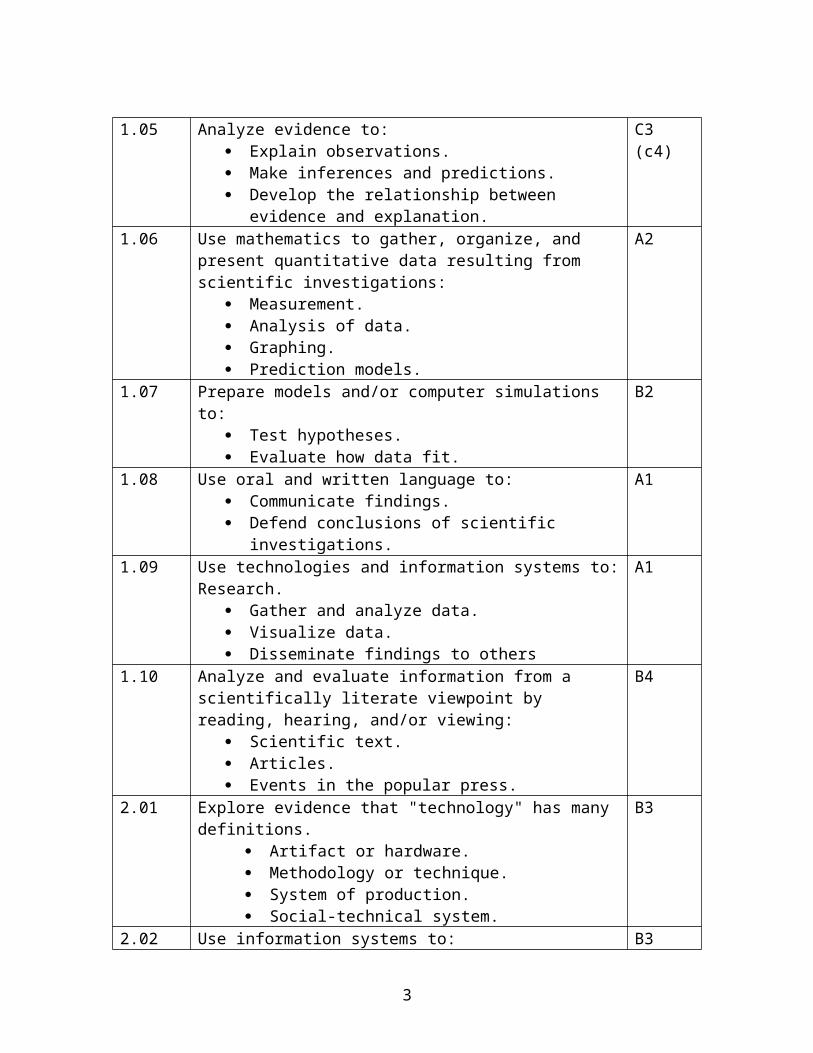
1.05 Analyze evidence to: Explain observations. Make inferences and predictions. Develop the relationship between evidence and
explanation.
C3 (c4)
1.06 Use mathematics to gather, organize, and present quantitative data resulting from scientific investigations:
Measurement. Analysis of data. Graphing. Prediction models.
A2
1.07 Prepare models and/or computer simulations to: Test hypotheses. Evaluate how data fit.
B2
1.08 Use oral and written language to: Communicate findings. Defend conclusions of scientific investigations.
A1
1.09 Use technologies and information systems to:Research.
Gather and analyze data. Visualize data. Disseminate findings to others
A1
1.10 Analyze and evaluate information from a scientifically literate viewpoint by reading, hearing, and/or viewing:
Scientific text. Articles. Events in the popular press.
B4
2.01 Explore evidence that "technology" has many definitions. Artifact or hardware. Methodology or technique. System of production. Social-technical system.
B3
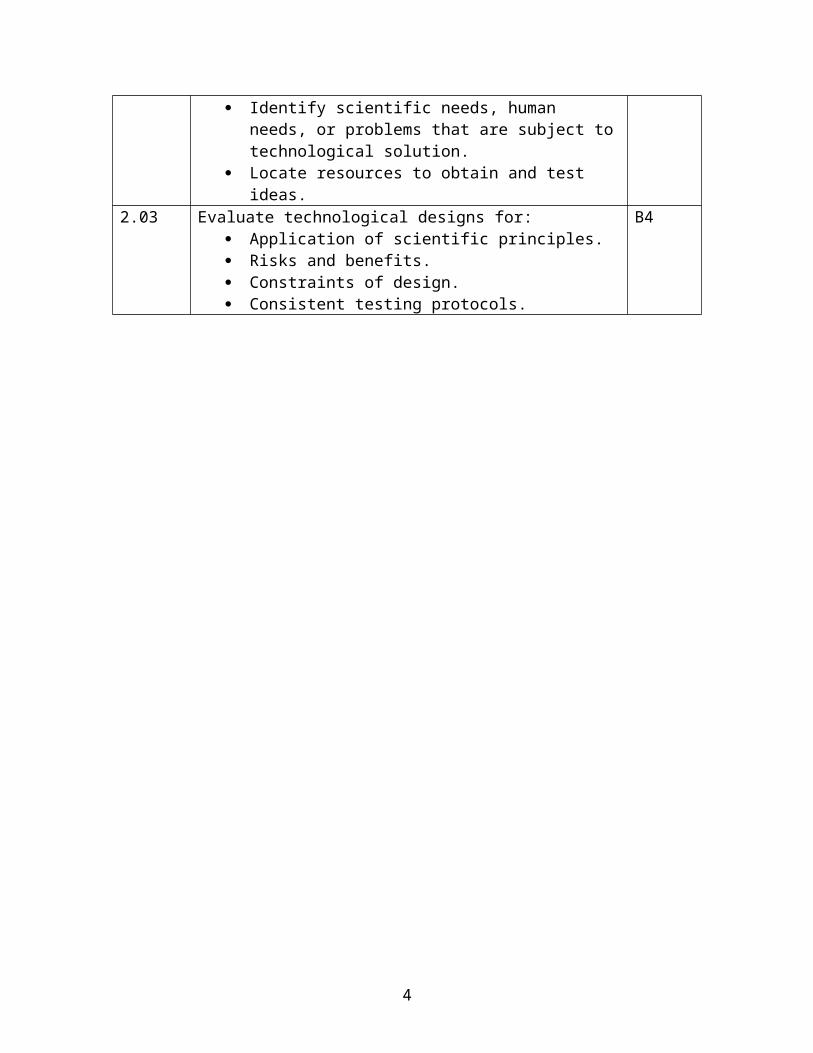
2.02 Use information systems to: Identify scientific needs, human needs, or problems
that are subject to technological solution. Locate resources to obtain and test ideas.
B3
2.03 Evaluate technological designs for: Application of scientific principles. Risks and benefits. Constraints of design. Consistent testing protocols.
B4
2
2.04 Apply tenets of technological design to make informed consumer decisions about:
Products. Processes. Systems.
B3
6.01 Determine how convection and radiation transfer energy B4 (C3)
6.02 Analyze heat flow through materials or across space from warm objects to cooler objects until both objects are at equilibrium.
B4
6.03 Analyze sound as an example that vibrating materials generate waves that transfer energy.
Frequency. Amplitude. Loudness. How sound travels through different material. Form and function of the human ear.
B4
6.04 Evaluate data for qualitative and quantitative relationships associated with energy transfer and/or transformation.
B6 (B5)
6.05 Analyze the physical interactions of light and matter: Absorption. Scattering. Color perception. Form and function of the human eye.
B4
6.06 Analyze response to heat to determine the suitability of materials for use in technological design:
Conduction. Expansion. Contraction.
B4
6.07 Analyze the Law of Conservation of Energy: Conclude that energy cannot be created or
destroyed, but only changed from one form into another.
Conclude that the amount of energy stays the same, although within the process some energy is always converted to heat.
Some systems transform energy with less loss of heat than others.
B4 (B5)
VI. LEP
3
VII. Materials: Prism set Mirror Sturdy rope Slinky Overhead Medicine dropper Clear plastic container with
flat bottom Markers Construction paper Water Cotton cord/ yarn Metal coat hangers Set of tuning forks Rubber mallets Water Paper cups (various sizes) Kite string Tin cans Wire Yarn Plastic cord Aluminum electrical tubing Glass bottles with narrow
mouth (Identical- at least 3) ruler Recycled items
Clear plastic cups (3 per group)
Foam cups Thermometers and/or
computer temperature probes if available
Hot water or hot plate to heat water
Ice Graduated Cylinders Computer and computer
graphing program 500 ml beaker Piece of wood Food coloring Small bottles with small
openings Printer- at computer station Computer lab with internet
access Cardboard Black markers Magnifying glasses Window or light source Paper towel or tissue “empty”
roll (can also use a paper cup)
Wax paper
VIII. Big IdeaHeat flows through materials or across space from warm objects to cooler
objects, until both objects are at equilibrium. Heat travels through solids, primarily by conduction. Heat is circulated in fluids, both liquids and gases, through the process of convection. Most fluids expand when heated, causing the volume of the fluid to increase but without changing the mass of the material in the fluid. Similarly, the cooling of fluids increases the density of a portion of a fluid due to these changes in density. These cells rotate and help change the temperature of the entire fluid.
Light is a form of energy emitted by the Sun as well as light-producing objects on Earth. Light can be absorbed or reflected by objects depending upon the properties of the object and the type and angle of light when it hits the object. Some materials scatter light and others allow light rays to pass through, but refract the light by changing its speed. The structure of the human eye can detect many colors in visible light that are reflected by objects.
4

Sound is a form of energy that is caused when vibrating materials produce waves that move through matter. These waves have different characteristics such as frequency and amplitude, which will determine the properties of sound such as pitch and loudness. The form of the human ear can receive sound waves as vibrations and convert them to signals that are processed by the brain.
There are many forms of energy such as thermal, mechanical, light, sound, electrical, solar, chemical, and electromagnetic. Energy can not be created or destroyed, but only changed from one form into another. This means that the total amount of energy in a system stays the same. Energy conversion is never perfect and usually heat is released in the process.
Humans have learned to use these forms of energy in many ways to meet our basic needs and enrich our lives. Humans have developed many tools and instruments that detect the many forms of energy. These instruments help us understand the properties of materials, which determine their suitability for technological design.
IX. Notes to Teacher: This unit can be one of the most interesting and exciting of any in sixth
grade. There are so many opportunities to really get student’s hands on and mind’s wrapped around important science concepts related to energy and energy transfer. With very simple and inexpensive materials, students can do some engaging lab activities with heat, light, and sound.
There are two reasons to teach this unit as the last one in the year. First, it can be used to review, summarize and connect concepts in astronomy, geology, and ecology studied in sixth grade. Energy and waves serve as the common denominator for all these topics.
The second reason to plan on teaching this unit at the end of the school year is that the content tends to be more abstract than some of the others in this grade level. This does not mean that it is too difficult or challenging for sixth graders. The way the content is approached makes all the difference. Teaching from the textbook will be difficult and probably boring for the teacher and student. The activities in this unit connect abstract concepts to the lives of students and the things students care about. For example, sound is taught through music and the study and construction of musical instruments. Heat insulation and conduction is taught with a “Save the Ice Cube” contest.
There is a heavy reliance on line material as there are so many great websites with animations that make abstract ideas more accessible to concrete learners. These websites explored either in whole class or individual settings will greatly enhance understanding of key concepts in this unit. With this reliance on technology and hands on learning, the textbook becomes what it was designed to be – a resource to support learning. The textbook is a great source of
5

pictures, diagrams, and definitions but is not effective in exciting learners about energy!
The lessons in this unit are: Heat Energy on the Move
o This lesson explores convection and reviews radiation and the conservation of energy from an earlier unit. Heat insulators and conductors and the movement of heat from warmer to cooler materials are all explored in high interest activities.
How Your Brain Understand What Your Ear Hearso This lesson is an NIH module with some great on line activities to
explore the workings of the human ear and sound as a powerful means of communication.
The Symphony of Soundo This lesson explores the physics of sound through music and the
study and construction of homemade musical instruments. Lighting Up Science
o This lesson combines the study of the eye with general concepts on the nature of light. An on line dissection of a cow eye is a lesson sixth graders will not forget.
Energetic Waves of Energyo A summary lesson on heat, sound, and light waves that ends with a
rousing wave rap that enables students to review major concepts.
X. Global Content NC SCSGrade 6
Activity title 21st century goal
1.01, 1.02, 1.03, 1.04, 1.05, 1.06, 1.07, 1.08, 1.09, 1.10, 2.01, 2.02, 2.03, 2.04, 6.01, 6.02, 6.04, 6.06, 6.07
Heat Energy on the Move
Organizing and relating ideas when writing- Language Skill/writing
Conveying thought or opinions effectively- Communication skills
Explaining a concept to other-communication skills
Identifying cause and effect relationships- Language skills /reading
Working independently- Employability Skills
Working on a teams- teamwork Taking initiative- teamwork Synthesizing information form
several sources- Language skills/ writing
Develop visual aids for presentations- Computer knowledge
6

1.01, 1.02, 1.04, 1.05, 1.07, 1.08, 1.09, 2.02, 2.03, 2.04, 6.03
How Your Brain Understands What Your Ear Hears
Organizing and relating ideas when writing- Language Skill/writing
Conveying thought or opinions effectively- Communication skills
Explaining a concept to other-communication skills
Identifying cause and effect relationships- Language skills /reading
Working independently- Employability Skills
Working on a teams- teamwork1.01, 1.02, 1.04, 1.05, 1.07, 1.08, 1.09, 1.10, 2.02, 2.04, 6.03, 6.04
The Symphony of Sound
Organizing and relating ideas when writing- Language Skill/writing
Conveying thought or opinions effectively- Communication skills
Explaining a concept to other-communication skills
Identifying cause and effect relationships- Language skills /reading
Working independently- Employability Skills
Working on a teams- teamwork1.01, 1.02, 1.04, 1.05, 1.07, 1.08, 1.10, 2.02, 2.03, 2.04, 6.05
Lighting Up Science Organizing and relating ideas when
writing- Language Skill/writing Conveying thought or opinions
effectively- Communication skills Explaining a concept to other-
communication skills Identifying cause and effect
relationships- Language skills /reading
Working independently- Employability Skills
Working on a teams- teamwork Taking initiative- teamwork Synthesizing information form
several sources- Language skills/ writing
Develop visual aids for presentations- Computer knowledge
Learning new software programs- Computer knowledge
7

1.01, 1.02, 1.04, 1.05, 1.06, 1.07, 1.09, 1.10, 2.02, 2.04, 6.01, 6.03, 6.04, 6.05
Energetic Waves of Energy
Organizing and relating ideas when writing- Language Skill/writing
Conveying thought or opinions effectively- Communication skills
Explaining a concept to other-communication skills
Identifying cause and effect relationships- Language skills /reading
Working independently- Employability Skills
Working on a teams- teamwork
Taking initiative- teamwork Synthesizing information form
several sources- Language skills/ writing
Develop visual aids for presentations- Computer knowledge
8

Heat Energy on the MoveObjectives:1.01, 1.02, 1.03, 1.04, 1.05, 1.06, 1.07, 1.08, 1.09, 1.10, 2.01, 2.02, 2.03, 2.04, 6.01, 6.02, 6.04, 6.06, 6.07
Materials Clear plastic cups (3 per group) Foam cups Thermometers and/or computer temperature probes if available Water Hot water or hot plate to heat water Ice Graduated Cylinders Computer and computer graphing program 500 ml beaker Piece of wood Food coloring Small bottles with small openings (See Engage)
Engage1. Convection in a Beaker Teacher Demo only! Be very aware of safety with this demo. Students should not be in a position to encounter boiling hot water or touch the hot beaker.
Place a 500ml beaker on a hot plate. Slide half of the beaker off the burner and rest on a pencil or small block of wood whichever is appropriate for the hot plate you have. Whatever is used should support the side of the beaker not on the burner of the hot plate to the same height as the side that rests on the hot plate. Be sure that the beaker is very stable before you start this demo!
The beaker will be filled with water to the 400ml measuring point of the beaker. Drop some paper punches in the water. Turn on the hot plate and boil the water. Observe the path of the paper punches. Have the students draw, label, and try to explain what you see happening in the beaker. Make sure that the students add color in their drawings.
9
Hot plate
Beaker
Wood

2. Convection in a jarPut food coloring in a small amount of hot water in a small jar with a small opening- the smaller the better. (A small jar example would be a similar size to a hotel shampoo bottle. Dropper bottles will work also.) Use tongs to place small jar on bottom of a large clear container of cold water. (Container example would be a beaker or a canning jar) Have the students observe, draw, and try to explain what you see.
How is this like convection in the beaker? What part of the convection current is missing in this activity?
ExplorePart 1Each group will need three plastic cups of water.
1. One should be at room temperature, one should be very warm, and the other ice cold.
2. Record the temperature of each cup of water every five minutes over a period of time.
3. After the first temperature reading, have students put one drop of food coloring in each cup.
4. Students should observe and make a series of drawings showing the movement of the food coloring through the water over time.
5. Make a line graph of temperature readings using a different color for each cup of water.
6. Graph time on the horizontal axis and temperature on the vertical axis. 7. Label each axis and make a key for the colors used on the graph.
Have the students respond to these questions in their science notebooks: How long did it take for the food coloring to spread evenly throughout
each of the cups of water? Through which cup of water did the food coloring spread most quickly?
Why do you think this happened? Through which cup of water did the food coloring spread most slowly?
Why do you this happened? Which cup of water seemed to have the most “energy”? Explain you
reason. At what point did the temperature in each cup reach “equilibrium” (stop
changing)? Why did this happen? Where did the heat energy come from that warmed the ice water? Where did the heat energy from the hot water go as the temperature
dropped? What happens to the temperature of the water that is warmer than
room temperature? Where does the heat from the water go? What happens to the temperature of the water that is below room
temperature?
10

Where does the heat energy come from that causes this change in temperature?
How does the motion of the molecules in the warm and cold water compare?
How does this activity illustrate the Law of Conservation of Energy?
Part 21. Each group needs three foam cups. 2. A volume (the amount does not matter) of hot water is measured and
poured into the first cup. 3. An equal volume of ice-cold water is measured and poured into the
second cup. 4. Have students predict and record the temperature of the mixture of hot
water and ice water on a table.5. Mix the water in one cup, measure, and record the temperature. 6. Repeat steps with unequal volumes of hot and cold water.
Volume of Cold water
Temp ofCold Water
Volume ofHot Water
Temp of Hot Water
Estimated Temp ofMixture
MeasuredTemp of Mixture
ExplainPart 1Each group should share their findings from the above activity. (Examples of possible student work are posters, charts, or graphs)
Discussion Questions: Why did lines for hot, cold, and room temperature water eventually
converge at the same point? What happened to the heat energy in the hot water? What happened to the heat energy in the cold water? Which container of water reached room temperature first? Why do you
think this was true? How does this activity illustrate radiation and convection? Which method of heat transfer (radiation, convection) was most important
in the temperature change? Why do you think this? Why were foam cups used in this activity?
ElaborateHeat moves by waves of radiation from warmer to cooler objects and by convection through liquids and gases. Heat conductors and insulators are used to control the flow of heat into and out of systems. Think about these questions
11

as they relate to the movement of heat energy. This can be completed in several ways:
1. Individual reflection in a student note book and then share in a whole group setting.
2. Small groups could have peer discussion about each topic and them compare ideas in a whole group setting.
3. Cut the ideas apart and distribute to individuals/ partners and have them present their thoughts on their individual concept.
If you were to participate in a “Melt the Ice Cube” Contest what are some ideas you might try to melt the ice cube in record time?
If your hot chocolate is too hot, what are some ideas for speeding up its cool down?
If you want to keep your hot chocolate hot, what would you do?
How does a thermos bottle work to keep hot liquids hot and cold liquids cold? Draw and label diagrams to explain your answer.
How does increasing the insulation in a house decrease both heating bills in the winter and air conditioning costs in the summer?
How can you bake a Baked Alaska dessert consisting mostly of ice cream in a very hot oven and the ice cream not melt? Find a recipe for baked Alaska. What insulates the ice cream when its in the oven?
Why is it so cold in space?
Why is it so hot on one side of the moon and so cold on the other?
How do space suits keep astronauts cool in the sun and warm in the shade?
Why is it colder on a mountain than at sea level?
How can there be more heat energy in an iceberg than in a piping hot cup of cocoa? Give reasons for your answer.
Where is the warmest air in a room? Why do you think this? How can you find out?
Where is the warmest air in house – the attic or the basement? Why do you think so? How can you find out?
12

EvaluateHave the students participate in a “Save the Ice Cube” contest. Allow the students to devise a plan that will keep an ice cube from melting. Refer to the DPI Middle school support documents for an explanation of experimental design. It can be found on pages 57-67 in the Middle School Science Strategies document accessed at this site.http://www.ncpublicschools.org/curriculum/science/middlegrades/
Students will test their ideas and record their findings. Students will share their findings with the class. Students will reflect on the data presented in the science journal.
Things to think about for reflection: When looking at YOUR design- how did it compare to others presented in
the class? What designs were successful? Explain your reasoning. What designs were not successful? Explain your reasoning. If you were to change the objective of this activity to “How quickly can you
melt a block of ice?”, how would you proceed with this challenge? How did this activity relate to “Energy on the Move?” Explain your
reasoning.
Websites that student could use for reference for the competition are as follows: http://www.fi.edu/pieces/hiley/thermal_insulator.htmOn line interactive experiment on thermal insulators used in space suits.
http://www.emints.org/ethemes/resources/S00000872.shtmlGreat lessons comparing different temperature scales (Celsius, Fahrenheit, ad Kelvin)
13

How Your Brain Understands What Your Ear HearsObjectives:1.01, 1.02, 1.04, 1.05, 1.07, 1.08, 1.09, 2.02, 2.03, 2.04, 6.03
Materials: Computer Internet access Student notebook
Notes to the TeacherThe core of this lesson is on line at http://www.science.education.nih.gov/supplements/hearing .
At this site you can order hard copies of the module, download the module, access the web-based activities and print out student handouts. The lesson was originally targeted for 7-8 grades but has been successfully used in many sixth grade classrooms. Make any adjustments as you would any lesson to tailor this lesson to the needs of your students.
The lesson outline suggests 8 days for this NIH Module, How Your Brain Understands What Your Ear Hears. Most of the student activities involve use of the computer and require very little in the way of materials. Module includes blackline masters and possible supplies that will be used to carry out the activities.
Engage:Getting the MessageIntroduce students to language and communication by listening to a few lines of the Gettysburg address in different languages and investigate why they do not understand all that they hear. Discuss student readings that concern critical periods for language development in children. There are discussion questions embedded within the lesson.
Explore:Sound CommunicationStudents watch and listen to human speech using visual and auditory clues that build understanding. Students engage in a listening walk in which they list and classify sounds as environmental, voiced, or musical. Students will record observations in a science notebook.
Explain:Do You Hear What I HearIntroduce the decibel as the unit for measuring the loudness of a sound. Using web-based material, students generate a hearing-response curve and investigate the relationship of loudness, pitch, and hearing.
14

Elaborate: A Black Box Problem: How Do I Hear?Students assemble a diagram of the hearing pathway using information about its parts and their functions.
Evaluate: Too Loud, Too Close. Too LongFocus on loudness of common environmental sounds and have students evaluate the risk of hearing loss. This may result from factors such as noise. Students evaluate their own sound exposure and determine how to minimize their own risk of noise-induced hearing loss.
Webquests:Located at this site is an interactive virtual tour of the human ear. Requires shockware, which can be downloaded for free at this site.http://www.earfoundation.org/ear_anatomy.asp
Music Studio WebQuest presents a problem-based scenario for students to solve research by conducting online research on sound and hearing. http://www.gmpdc.org/webquests/thomas/soundwq.htm
Extensions:Try your hand at this old classic problem:
A tree falls in the forest. If there were no one, no human or animal, in the forest would the falling tree make any sound? Defend your answer with facts to back it up.
List as many ways as you can in which technology utilizes sound waves to benefit people such as sonar and ultrasound.
What happens when you hear a sonic boom? Why can pets hear whistles that humans cannot?
Research: Do a four part foldable (who, where, what, when) explaining how each of these contributed to our understanding of energy moving in sound waves: Christian Johann Doppler, Marin Mersenn, Ernst Mach, Ernst Chladni, Charles Yeager
15

A Symphony of SoundObjectives:1.01, 1.02, 1.04, 1.05, 1.07, 1.08, 1.09, 1.10, 2.02, 2.04, 6.03, 6.04
Materials: Student science notebooks Cotton cord/ yarn Metal coat hangers Set of tuning forks Rubber mallets Water Paper cups (various sizes) Kite string Tin cans Wire Yarn Plastic cord Aluminum electrical tubing Glass bottles with narrow mouth (Identical- at least 3) ruler Recycled items Computer Internet access
EngageUse one or all of these ideas to get students thinking about sound and sound waves. One way of doing this would be to set up rotation lab stations. At each activity the students verbalize the procedures of the station and draw illustrations of what they learned about sound.
Another suggestion for completing these activities would be to assign different activities to different groups. Share findings with the class.
Whichever format is used, students could do a RERUN of each activity in their science notebooks.
Recall Describe what you did
Explain Explain why you did itWhat were you hoping to find out?
Results What did you observe?Draw and label what you observed?
Uncertainty What are you unsure about?What was unexpected?
16

What are possible errors?
New What did you learn? What new questions arose?
Activity list: 1. Are those cathedral bells I hear?Tie cotton cord/ yarn onto curved ends of a metal coat hanger. Bump the metal hook on against something metal. Describe the sound you hear. Wrap the other end of the string around a finger on each hand and hold ends of string in your ears. Bend over and again bump the metal hook of the coat hanger against something metal (file cabinet, metal leg of chair or table, etc). Describe the sound you hear. How was the sound different this time. Bump the metal against wood or plastic. Compare and contrast the sounds you hear when the metal hits different materials.
Find directions and explanation of what is happening here at this site:http://www.exploratorium.edu/science_explorer/secret_bells.html
2. What’s the splash?Hit the end of a tuning fork with a rubber mallet or on the bottom of your shoe. Place ends of tuning fork in water. Observe what happens. Draw and label what you see. Add any questions that you have.
o Hang a ping pong ball on a thread. Strike the end of the tuning fork. Touch the ball with one of the tines. Observe what happens. Draw and label what you see.
o Touch end of a vibrating tuning fork to a block of wood or a table top. Listen carefully. How is the sound changed? What do you think may cause this change?
Discussion Questions: 1. How are all these activities alike? 2. What can we learn about sound from these activities? 3. What questions do you have about sound after doing these
activities?
3. Slinky wavesSlightly stretch a slinky out on a table. Hold both ends still as another student squeezes a few coils together and then releases them. Observe the disturbance as it moves down the slinky. Record your observations in your notebook. Draw and label what you see. How can a slinky serve as a model of a sound wave? Can you create an “echo” wave? Can you increase the speed of the wave? Decrease the speed of the wave? In this model of a sound wave what do the coils of wire represent? How could the slinky be
17

used to model a light or infrared heat wave? What would you do differently in such a model?
4. Can you hear me now?Make string telephones using paper cups and about 4 meters of kite string. Create other phones using tin cans, plastic cups and wire, yarn, or plastic cord instead of string. Experiment changing only one variable at a time in order to make the best possible phone.
Find out how to use same materials to make an Ear Guitar at this site:http://www.exploratorium.edu/science_explorer/ear_guitar.html
Discussion questions:o What does a string telephone tell you about the ability of solids
(like the string) and gases (like air) to transmit sounds through different materials?
o What role does the can or cup in the telephone play? Try the instrument without the can or cup. Does it work? Is the sound loud enough for you to hear? How do you think the can and the cup amplify the sound and make it loud enough for you to hear?
o Compare and contrast the string telephone and ear guitar
Use a line of dominoes balanced on narrow end (or a line of students) to model sound waves moving through solids, liquids, and gases.
Discussion questions:o Which model will have dominoes stacked or students standing
closest together? (solids)o Why do you think sound travels fastest through solids? o Through which form of matter would sound travel slowest? (gas)
Make a cuica (pronounced KWEE-kah) sometimes referred to as a
Squawker or Laughing Cup from a yogurt or drinking cup, a string, and a paper clip. Punch a small hole in bottom of cup. Push string through the hole. Tie a paper clip to the end of the string. Hold cup in one-hand and pull/rub fingers of other hand along string. Try doing the same thing with a string and paper clip that is not tied to a cup. Try using different kinds and sizes of cups, strings, and paper clips. Change one variable at a time and see how this affects the sound produced.
o How are the sounds created different with and without the cup?o Why is the cup important to making the squawker “squawk” nice
and loud?o What part of a musical instrument or sound system does the
same thing?o How does changing the cup, string, or paper clip affect the
sound produced?
18

o This instrument has been called a “friction drum”. In what ways is that an accurate description?
o Compare and contrast the cuica and the ear guitar.
Note to teacher: The cuica is a small “friction drum” made of metal with a thin bamboo rod suspended in a hollow center. This instrument is best known today as one of a group of instruments used to play samba music during Brazil’s famous carnival parade. Students may want to read more about this and other instruments from other cultures as a social studies connection to this lesson.
Whole group discussions after the above activities are completed. What do we know about sound from these activities? What questions do these activities raise about sound and how it travels?
ExploreOption 1Observe the strings on a stringed instrument such as guitar or a piano or the pipes on a xylophone. How are they different? How are they alike? Pluck some strings, hit some keys on the piano, or pipes on the xylophone. What is the relationship between pitch and the length, size, or mass of the strings or pipes?
NOTE:A homemade xylophone can be constructed using 3 meters of 13mm electrical tubing cut to lengths of 29.9cm, 27.7 cm, 26 cm, 23.3 cm, 23.9 cm, 22.6 cm, 21.8 cm, 20.5 cm, 19.5 cm, 18.1 cm, 17.6 cm, 16.5 cm, 15.5 cm. Smooth edges of each section with a file. Prepare a board with two strips of foam to rest pipes and foam spacers to separate pipes. Use a wood dowel and drawer knob as a mallet. Find more detailed instructions in CESI Sourcebook on Physical Science Activities for Elementary and Middle School. http://www.motherearthnews.com/DIY/1981-11-01/The-Pipe-Xylophone.aspxThis website has very detailed instructions for making an inexpensive xylophone.
Option 2Fill a set of at least three identical size bottles with different volumes of water (1/4, ½. and ¾ full works nicely). Predict how sounds made by the bottles will be different when you blow across the top and when you hit the side of the bottle. Test your prediction by blowing across the top of one of the bottles and then by hitting the side of the same bottle with a pencil or ruler. How are the sounds different?
Blow across the top of each of the three bottles.other sounds. Describe the pitch of each sound produced as high, medium, or low in relationship to the other two sounds.
19
Hit the side of each of three bottles.Describe the pitch of each sound produced as high, medium, or low in relationship to the other two sounds.
Make and record data in a chart like the one below. Explain the difference observed in pitch produced by the same bottle
when these two different methods are used to set up vibrations in the bottles.
How does the height of the water column affect pitch when you hit the bottle?
How does the height of the column of air affect pitch when you blow across the top of the bottle?
Can you explain why this happens?
Bottle Height of water (cm)
Height of air column (cm)
Pitch Produced by Blowing Across Top
Pitch Produced by Hitting Side
prediction actual prediction actualABC
ExplainDraw a diagram of the instruments observed and explain how the pitch is changed.
From a list of diagrams and pictures of instruments, select one to explain how pitch and loudness can be changed. Possible pictures to use: (images found at the accompanying website)
www.empire.k12.ca.us/.../instruments/trumpet.gif
www.germes-online.com/.../50215545/Flute.jpg
www.buy-scores.com/boutique-uk-acc.php?CATEGO...
20

www.auramusicale.com/
Have band members bring instruments to class and share how pitch is changed on brass, string, percussion, and/or reed instruments. What part of the instruments amplifies the sound and makes it louder?
Have students make and complete a chart on each instrument shared with the class.Type of instrument
Examples of thistype of instrument
What vibrates?
How pitch is changed?
How sound is amplified?
BrassPercussionReedString
Revisit the activities in the engage section. Have students try to expand on explanation and understanding of properties of sound and sound waves illustrated by these simple activities.
Elaborate Use common materials to create a musical instrument. For example a recycled plastic bottle can be turned into maracas by adding beans… and shake….shake…shake. A straw can become a flute. A rubber band, pencil, and a ruler can be a mini ukulele. Street performers often create instruments from pots and pans, buckets and oil barrels. In fact most anything can be a part of a homemade musical instrument –even the kitchen sink. A popular off Broadway show has musicians strap on kitchen sinks and play them along with some other very unconventional instruments. Likewise there is no limit to the ingenuity that can go into creating a symphony of the sounds of music in your classroom!
Step 1 Make a PlanMake a homemade musical instrument. Brainstorm a list of materials that could be used to make a homemade musical instrument. Think about the design of your instrument. What will vibrate to set up sound waves? How will that material be set in motion? How will the instrument produce musical sounds? How will you vary the sound produced to get higher and lower pitches? What can you add to the instrument to amplify the sound?
21

Step 2 Build your instrumentExperiment with different materials to find the sound you like best.How do different kinds of materials affect the sounds?Explore and experiment with your design. How does adding or removing certain parts or materials affect the loudness of your sound?How can you vary the pitch of your sound?
Step 3 Play your instrument for the classIs the sound pleasing to the ear? Can you play a wide range of notes? Can you vary the loudness? Have classmates suggest improvements that you might make to your instrument.
From what you have learned about pitch and loudness what adjustments can you make to produce different tones.
Try to play a simple song or make up your own. Videotape your performance.
Suggested resources for ideas on homemade instruments:http://www.expertvillage.com/videos/kids-music-xylophone.htmVideo on making a xylophone from glasses and water. Scroll down to find videos for making 14 simple musical instruments.
AIMS Publication “Primarily Physics” has an activity “Musical Instruments” with lots of ideas for making simple instruments from everyday materials.
Evaluate:To summarize what the students learned about the qualities of sound in their relationship to musical instruments. Have the students explore the following site on the computer:http://www.exploratorium.edu/music/exhibits/index.html. This is an interactive site where the students will use sound qualities that will relate back to the world around them. Please stress for the students to explore the section entitled “headland experiments” these are great examples of sound in the real world.
Extension: History of SoundTrace history of sound/music technology from Edison’s first record player to LP’s to tapes, to music CD’s to the electronic music systems of today.
Students can explore music from movies in different eras at the following site: http://www.mtsu.edu/~smpte/timeline.html and be asked to prepare an illustrated time line to share with the class. Activities with Soundhttp://scifiles.larc.nasa.gov/text/kids/D_Lab/acts_sound.html
22

http://school.discoveryeducation.com/lessonplans/programs/humanbody/Lesson on the five senses
http://library.thinkquest.org/19537/The Soundry contains basic concepts of sound through how humans understand the waves of sound.
WebQuest. http://www.runet.edu/~sbisset/soundwq.htm- This is a WebQuest dealing with general sound concepts.
http://www.springs.k12.wi.us/sound.htmlthis is a WebQuest dealing with the nature of sound waves and how it relates to our human lives.
http://mclean.usd259.org/webquests/sound/index.htmThis is labeled as a 5th grade WebQuest- but the content is very appropriate for sixth grade competency goals. Students will be introduced to some great websites as they work through these activities.
23

Lighting Up Science
Objectives: 1.01, 1.02, 1.04, 1.05, 1.07, 1.08, 1.10, 2.02, 2.03, 2.04, 6.05
Materials Computer station with printer and internet access Computer lab with internet access Materials for explore depend on activities selected. All materials are
readily available: white and colored paper, clear plastic cups, pennies, colored markers, bottle caps, food coloring, eye dropper.
Cardboard Black markers Magnifying glasses Window or light source Paper towel or tissue “empty” roll (can also use a paper cup) Wax paper
Notes to the TeacherThis lesson attempts to take the study of the eye beyond simply labeling the parts of the eye to an appreciation for the human eye as a truly remarkable organ. Understanding that we can see objects only as a result of light reflecting off them is an important concept for this unit. Many middle school students think that an apple in a totally dark closet would be visible to the human eye after the eye has time to adjust to the darkness. This is a misconception that can be addressed with activities in this lesson and others in this unit. Just as we see the moon and the planets in the night sky only as a result of reflected sunlight, we see non-luminous objects in our environment only as a result of light produced by luminous objects being reflected off them to our eyes. While this lesson deals just with the visible light portion of the electromagnetic spectrum, students may enjoy learning about how infrared detectors are used by firemen to “see” victims in burning houses where smoke makes location and detection of people and pets impossible with sight. Infrared radiation, not visible light, is used.
Engage
Select one or all of these activities to accomplish the objectives of the engage portion of a five e lesson: access prior knowledge, provide motivation, and raise questions for student investigation and research.
24

Activity 1: Can I see in total darkness?
Brainstorm a list of things that are luminous (radiate or emit light). Brainstorm another list of things that reflect light rays. Draw pictures of a few items in each list and use arrows to show light rays radiating out from luminous objects in the first list and reflecting off objects in the second list.
Note to teacher: The first list is fairly straight forward if students remember that the moon is seen only by reflected light from the sun. The second list is a bit trickier. Most students will probably think of light being reflected (bounced off) shiny, smooth surfaces like mirrors. Some may have more prior knowledge and suggest that anything that the eye can “see” must be reflecting light waves.
Questions to have students consider as a way of assessing background knowledge on light and sight:
How does the eye work? How do insect and human eyes compare?
What makes it possible for us to see objects?
Can you see in the dark? Why or why not?
How many sources and kinds of light can you name?
What is the role of luminous objects in making it possible for us to see non- luminous objects?
Why can you hear around a corner but can’t see around one?
Why do you see lightning before you hear thunder?
Can you draw a diagram to show what happens to light rays when they hit different surfaces and objects such as a black asphalt pavement, aluminum foil, window glass, magnifying glass, glass of water, or sandpaper?
What is a laser? Why is laser light always a “colored” light?
Challenge students to draw a diagram in science notebooks that traces the path that a light rays would travel from a luminous object like the sun or a light bulb to the human eye enabling us to see non luminous objects. Come back to this diagram at the end of the unit to see if student ideas about this have changed.
Activity 2 Colors from black and white?
25

In 1894, toymaker C. E. Benham discovered that a spinning disk with a particular pattern of black and white marks could cause people to see colors. Mr. Benham called his disk an "Artificial Spectrum Top". His toy has puzzled scientists for over 100 years. Students can use directions at this site to make this toy themselves. There are three sets of directions varying in complexity. The simplest uses only cardboard, a toothpick and black and white patterned disks downloaded from the web. The most sophisticated uses an old CD and a penny. There are suggestions for inquiry activities and experiments with this unique toy. This site includes possible explanations for the mystery colors produced. http://faculty.washington.edu/chudler/benham.html
Another site with instructions, explanation, and pattern for a Benham Diskhttp://www.exploratorium.edu/snacks/benhams_disk.html
Activity 3: Reflecting colors round and round inside a kaleidoscopeMake a Kaleidoscope and enjoy interesting and changing patterns of colorA very simple and inexpensive kaleidoscope can be made from plexiglass and duct tape! Each kaleidoscope requires: 3 (15 cm x 2.54) pieces of plexiglass, duct tape, 3 circles (radius of 5 cm) cut from clear transparency plastic, 1 (12 cm) nail)
1.Provide students with materials listed above. 2.Have them tape the plexiglass together so that it forms a triangular prism. Enough duct tape should be used to totally cover the outside of the plexiglass.3. Use permanent markers to draw original designs on the transparency circles.4. Find the center of the circles and poke the circles with the nail. Tape the nail to the side of the triangular prism.5. Turn the circles as you look through the other end.6. Describe what you observe. What is the role of the plexiglass in the kaleidoscope?
Notes to the teacher:1. Plexiglass can be purchased rather inexpensively at home improvement stores. Sheets are usually cut for you for free if you tell them it is for your class.2. Add math connections by reviewing parts of a circle (center, radius, diameter), finding the area and circumference of the circles, and by finding the volume and surface area of the triangular prism.
See this website for another method of constructing a kaleidoscope and information on what is happening and the science behind the “magic” of the kaleidoscope. http://www.csiro.au/resources/ps1up.html
Activity 4: Make a periscope
26

Find out how to make a simple periscope. What is a periscope? Who might use a periscope? What is the essential part of a periscope?
Find uses, history, and simple directions for making binoculars, kaleidoscopes, and periscopes at this site. http://micro.magnet.fsu.edu/optics/activities/students/scopes.html
ExploreThe website below has a number of simple and high interest activities with optical illusions and tricks with vision. Select a number of them to set up stations around the room for a rotation lesson on vision. Some of the activities will require a computer as they are done online. Others use simple, inexpensive materials and have simple directions that can be printed out for stations. Students can work in pairs. Duplicate stations can be set up for activities that take longer to complete or ones that the teacher wishes to require all students to complete. Students should record name of each station completed in their science notebook along with observations, labeled drawings, and questions that arise as a result of the activity at that station. Challenge students to conduct research in the media center or on line related to questions that arise.
All these activities are high interest and will motivate students to want to learn more about how the eye and brain work together to receive and interpret information from light waves reflected off objects around us.http://faculty.washington.edu/chudler/chvision.html
Select some or all of these activities from the site above:1. The Blind Spot (Includes interesting activities and a link to directions
for calculating the diameter of your blind spot)2. Depth Perception (2 activities and a game)3. Shifting Backgrounds, Shifting Images4. Dark Adaptation5. Visual Illusions (15 interesting optical illusions), many of these online
as interactive shockware games at http://faculty.washington.edu/chudler/flash/nill.html
6. Contrast Effect (interactive picture)7. Don’t Jump to Conclusions (interactive picture)8. See It To Believe It 9. X-Ray Vision10.Starlight, Star Bright11.Seeing in the Dark12.Accommodating Accommodation
Explain
27

Have groups of students share observations, drawings, comments, and questions that arose from selected activities. With each activity ask students to consider “What is the big idea here? What did we learn about the human eye and human sight by doing this activity? Be sure to encourage students to continue to “wonder” and formulate questions
After reviewing the activities above, the students will complete a content frame that will demonstrate their understanding of at least 3 of the above activities. A content frame is a literacy strategy that allows the students to look at a concept and compare the information within a concept. An example of a concept map is as follows: Criteria being compared:
See It to Believe It X-Ray Vision Seeing in the Dark
Elaboratehttp://www.exploratorium.edu/learning_studio/cow_eye/experimenting.html -this is an informational site for background information for the following activities.
Activity oneExperiment with a magnifying glass to focus an image on a piece of paper. Stand in a dimly lighted room with your back to the sun or light coming from a window. Focus the image of a distance object on a white sheet of paper. You can also use the light from a bare incandescent bulb to focus the image of the bulb on a white sheet of paper. What do you notice about the image on the paper? What part of the eye is most like the magnifying glass? What happens to the light rays as they hit the magnifying glass? Are they reflected, refracted, absorbed, or dispersed?
Activity Two: Magic Flipping arrow:Have the student prepare a flashlight for this activity in the following way:
1. Cut wax paper into a 6” square. 2. Cut out the following “arrow template.”
3. Cut out the arrow on the above template.
28

4. Assemble the flashlight in the following order:
Flashlight wax arrow lens lens paper cover
5. Reassemble the flashlight. 6. Tape a measuring tape along the edge of a lab table.7. Place a ball of clay on the table ½ way down the measuring tape. 8. Push the handle of a hand lens in the clay so that the lens is
resting on the measuring tape. 9. Make the hand lens stand up perpendicular to the table top as
illustrated below:
clay
Eye flashlight
10. One student will position themselves at the end of the table and place their eye level with the table as seen in the above diagram.
11. Another student will move the flashlight one cm at a time towards the hand lens. Make sure that the arrow inside the flashlights lens is pointing straight up.
12. Record anything that is observed from the student at that is at the end of the table. (Students should see that the arrow “flips.”)
13. Take turns to make observations from all the teammatesa. The teacher should facilitate questions as the student
experience this activity.
Activity three: Making a pinhole viewer: Have the student construct a pinhole camera using a “empty” paper tube from paper towels or tissue and a square of wax paper.
1. Secure the wax paper on one end of the “empty” tube. (Use rubber band, glue, and tape…)
2. Have the student make a PINhole in the middle of the wax paper using a pushpin.
3. Allow students to explore the classroom by looking through the “pinhole” and record what they see.
4. Have them make a chart to record their observations.
29

5. Try making a pinhole viewer with a paper cup by punching hole in the bottom of the cup.
6. Have the students share their findings.
Object: Observation Thoughts: 1234
Activity Four:Find six simple activities appropriate for setting up as learning centers for individual or small group exploration at this site. One activity uses an old CD as a diffraction grating to observe spectrum of colors in different lights.Description of activities and material lists are found at this site:http://micro.magnet.fsu.edu/optics/activities/teachers/properties.htmlStudent directions for activity centers can be printed out from this site:http://micro.magnet.fsu.edu/optics/activities/students/properties.html
Activity Five: Cow Eye Virtual Dissectionhttp://www.exploratorium.edu/learning_studio/cow_eye/index.html
Evaluate: Find Science, Optics, and You, a series of interactive java tutorials, at this site. Some suggested ones include: Newton’s Prism Experiments, Optical Light Bench, Eclipses of the Moon, Solar Eclipse, Light and Color, and Human Vision.http://micro.magnet.fsu.edu/optics/tutorials/index.html
Prepare a rubric to grade student notebook entries from the activities assigned from this site.
Extension:Make an illustrated timeline of optical instruments including telescopes, microscopes, cameras, eyeglasses and contact lenses.
WebsitesOn line activities on basic concepts associated with lighthttp://www.learner.org/teacherslab/science/light/index.html
Find uses, history, and simple directions for making binoculars, kaleidoscopes, and periscopes at this site. http://micro.magnet.fsu.edu/optics/activities/students/scopes.html
30

Good background information on the eye and how vision workshttp://faculty.washington.edu/chudler/bigeye.html
List of hints on eye safety and links to two on line quizzes “Eye Fitness” and “Safe Eyes Quiz for Kids” can be found at this website.http://faculty.washington.edu/chudler/eyesafe.html
Students make a model of the eye and compare how the human eye and a camera workhttp://school.discoveryeducation.com/lessonplans/programs/seeingthelight/
Download a 16 page pamphlet, VISION – A School Program for Grades 4-8. It includes three lessons and student task sheets:
The Eyes and the Great Brain ConnectionThe Imperfect EyeEye Safety
http://www.nei.nih.gov/education/visionschool/index.asp
Website with basic information on light, speed it travels, and how it can be blocked or absorbed, reflected or refracted (bent) by different materials.http://www.opticalres.com/optics_for_kids/kidoptx_p1.html
http://www.opticalres.com/optics_for_kids/kidoptx_p3.htmlFind a discussion of laser light at this site.
31

Energetic Waves of EnergyObjectives:1.01, 1.02, 1.04, 1.05, 1.06, 1.07, 1.09, 1.10, 2.02, 2.04, 6.01, 6.03, 6.04, 6.05
Materials Prism set Mirror Sturdy rope Slinky Overhead Medicine dropper Clear plastic container with flat bottom Water
Notes to the teacher:This lesson attempts to connect concepts from several units and lessons in the sixth grade curriculum. Spectra of the sun or distant stars, destructive earthquakes, beautiful rainbows, pulsating musical rhythms, warm rays from the sun which provide energy to power our planet and global warming with the possibility of destroying fragile earth systems are all connected by wave phenomena. Each of these can only be understood when one understands waves as “energy on the move”.
Sometimes we can see or feel waves like water waves or earthquake waves. Some very important waves that affect our lives are often not as noticeable as waves of water or as destructive as earthquake waves. These waves are ever present in our world serving as seemingly “invisible movers and shakers” filling the universe with light, sound, and heat energy on the move! Whether visible or invisible, waves share many basic properties that students explore in this lesson.
Both hands on experiences with ropes and slinkys and computer animations are needed to help the sixth grader begin to understand the somewhat abstract concept of waves. This understanding is more fully developed in later years.
Animations of transverse and longitudinal waves at this site will help students visualize the difference between light and sound waves.http://www.school-for-champions.com/science/waves.htm
Dr Dan Russell at Kettering University in Michigan has some excellent animations and explanations of wave motion on this website. It is copyrighted but permission is given to teachers to use this material with students. This site is excellent for building teacher background knowledge. Information and animations will be helpful in facilitating student activities in this lesson.http://www.kettering.edu/~drussell/demos.html
32

This lesson is best taught as a culminating one as it has the potential to tie together so many of the topics in the sixth grade standard course of study.EngagePart One: White light is really what colors?Shine a beam of light on white surface. Put a prism in the path of the beam of light.
What do you see? Can you list colors in order? Where do you think these colors come from? How does the acronym ROY G BIV help you describe what you see? Which color seems to bend (refract) the most as light passes through the
prism? Which color bends (refracts) the least? What might this tell us about the wavelength of different colors of light?
Place a pan of water in direct sunlight. Place a mirror in the pan. Most of the mirror should be underwater. Tilt the mirror so that reflected sunlight falls on a white surface. What do you see on the white surface?
Find four flash videos showing refraction of white light through prisms and rainsdrops to create spectrums and rainbows at this site.http://aspire.cosmic-ray.org/labs/AspireRefractionDemos/index.htm
Think of a time you saw a rainbow in the sky. Think about and discuss the following questions:
What were the conditions at the time? What time of day was it? What direction of the sky was the rainbow seen in? Why does the sky appear blue? Why do we often see lots of red and orange in sunsets and sunrises?
Answer these questions with the simple activity found at this site:http://www.exploratorium.edu/snacks/blue_sky.html
Part Two: Waves as “disturbances moving through a medium”Place a clear container of water on an overhead. Place a drop of water in the center of the overhead projector. Observe the waves projected on the screen as the surface is “disturbed” by the falling drop.
Brainstorm a list of places you have “seen” different kinds of waves. How are all these waves alike? What makes them “waves”?
Brainstorm some invisible waves that you cannot see but yet are around us all the time bombarding us with energy. Hint: radio waves, microwaves, sound waves, etc.
33

Part Three: What’s the “wave connection?Use a word splash to categorize the following terms: Word Splash- this is a literacy strategy that can be used to assess student prior knowledge about a concept or a reading selection. The goal of this activity is to have the students look at words, both familiar and unfamiliar, and write a prediction of how ALL the words interrelate. Make it a challenge to see if the student can relate ALL the words. Use the handout that follows this lesson to help you. NOTE: Have the students look for causal relationships, opposites, similarities etc…
transverse, longitudinal, sound, light, heat, amplitude, frequency, wavelength, velocity, crest, trough, compression, rarefaction, bright, dim, low, high, pitch, speed, reflection, echo, earthquake, color, laser, P wave, S wave, refraction, radiation, matter, decibel, hertz
Add or substract words from this list as you deem appropriate to meet the needs of your students. Defining or memorizing definitions for these terms is not the purpose of this activity. It is an exercise to stimulate students thinking.
Explorehttp://sunshine.chpc.utah.edu/labs/waves/wave_basics/waves.htmWork through this short interactive site to explore wave basics and terms like wavelength, amplitude, frequency
Activity one: Making Waves1. Have students simulate the motion of particles in a transverse (light or
heat wave) using a stiff rope. This can be modeled by tying a rope to a door knob or having one student hold one end of the rope still while another student moves the other end up and down creating a wave pattern. If the rope is too limp to hold crests and troughs, try stretching it out on a smooth floor. One student holds one end secure as another student moves the end of the rope back and forth to create a wave motion. Have the student draw what they “see” in their notebook. The teacher will model a picture on the board. Examples of this will be as follows:
2. Have the students try to do each of the following with the rope: Make a wave with one crest. Make a wave with more than one crest. Make a wave that shows a high frequency (lots of crests and trough
moving along rope.
34

Make a wave that shows a low frequency (only one crest and trough moving along rope.)
Make a wave that has the shortest wavelength (distance from the crest on wave to the crest on the next wave). Estimate how many centimeters.
Make a wave that has the longest possible wavelength. Estimate the distance from the crest of one wave to the crest of the next wave.
Students should draw, label, and record observations of each attempt in their science notebook. Have the student write down their thoughts to the following questions: (They can also be discussed in a whole group setting. )
Which waves were easiest to model? Which wave was most difficult? How are all these waves alike? How are these waves different?
This website is an intro to waves. It has great animations of waves as disturbances that occur as energy moves through a medium such as air or water.http://www.kettering.edu/~drussell/Demos/waves-intro/waves-intro.html
http://www.kettering.edu/~drussell/Demos/waves/wavemotion.html- animated examples are located at this site.
Activity two: Two Kinds of Waves: Similarities and DifferencesAfter students explore the general properties of waves using a rope, a long slinky can be used to model and compare transverse (light and heat) and longitudinal (sound) waves.
Wave Type 11. Start with the slinky stretched out on a table or the floor. A student should
hold each end of the slinky2. Pull a few coils at one end of the slinky to one side. Release and observe as
the wave moves down the slinky to the other student. Draw and describe what you see in your science notebook.
3. Move one end of the slinky to the left and then back to the right. Draw and label a diagram of the wave you observe.
4. Repeat increasing the distance you move the slinky to the left and to the right. How does this change the wave?
5. Repeat increasing the rate at which you move the slinky to the left and to the right. How does this change the wave?
6. What kind of wave have made? What are some words to describe this wave?
35

Wave Type 21. Start with the slinky stretched out on a table or the floor. A student should
hold each end of the slinky.2. Squeeze together the first 20 coils making a compression. Release and
observe as the disturbance moves down the slinky. Repeat with fewer and then again with more coils compressed.
3. Draw and label a diagram of this kind of wave in your science notebook. What are some terms that could be used to describe this wave?
Comparing the two kinds of slinky waves1. List some ways the waves are alike?2. List some ways the waves are different?3. What are some terms that can used to describe both waves?4. What are some terms that relate to only one type of wave?5. What kind of energy might move in each of these waves?
Reading about wavesRead in your textbook, in media center books, or on line about the characteristics and types of waves. Make a two part foldable comparing and contrasting the two types of waves. Include information from the slinky activity as well as information from your research. Some questions to try to answer from your research:
Which wave is like a sound wave? Which waves are like heat and light waves? Which wave can travel through a vacuum? Which wave needs matter to move through? How does amplitude of a sound wave affect the nature of the sound? How does the amplitude of a light wave affect light? How does frequency of a sound wave affect the sound produced? Why is the frequency of electromagnetic wave important? Which wave is like a primary earthquake wave? Which wave is like a secondary earthquake wave? Which kind of earthquake wave doesn’t move through liquids? How is this
important to our understanding of earth layers? What is the difference between a light and heat wave? What is the difference between a light and sound wave? What is the difference between a heat and sound wave? How are all waves alike? How are they different?
Some possible website to research the above questions are as follows: 1. http://www.glenbrook.k12.il.us/gbssci/phys/Class/waves/u10l1c.html 2. http://www.bbc.co.uk/schools/gcsebitesize/physics/waves/
the_electromagnetic_spectrumrev1.shtml3. http://www.darylscience.com/Demos/PSWaves.html 4. http://www.howstuffworks.com/light2.htm
36

5. http://imagine.gsfc.nasa.gov/docs/science/know_l1/emspectrum.html 6. http://science.hq.nasa.gov/kids/imagers/ems/visible.html
Activity Three: Human WavesLine students up and ask them how they could represent particle movement in a light and sound wave. Students may remember making waves around a stadium at an athletic contest by raising and lowering arms in turn as the wave moves through the crowd. Have students suggest ways they can represent the difference between a transverse (light or heat) and a longitudinal (sound) wave moving through the line of students. Videotape what each class comes up with. Share with other classes and have students vote on the best representation of the movement of particles in each type of wave.
The following site describes one way that this might be done. The website discuses modeling primary and secondary earthquake waves. Primary earthquake waves are longitudinal waves and secondary earthquake waves are transverse. Students will love this kinesthic representation of the two types of waves!http://serc.carleton.edu/introgeo/roleplaying/examples/seismic.html
ExplainHave students in small groups and whole class discussion share their experiences and notebook drawings and explanations of the explore activities.
Have a peer review of student-made foldable that comparing transverse and longitudinal waves.
Discuss the questions posed for research. Which ones were easily answered by all? Which ones were most difficult to answer? Are there any that no one could find an answer to? What other questions do you have about waves and energy in moving in waves?
ElaborateLearn and perform the Wave Rap at the end of this lesson. Have the student identify the terms that were in both the word splash and word rap. Have student use the terms that were not included in the original rap to add additional verses. Have students write their own raps that include all the words and address heat, light and sound waves. Videotape wave raps written in each class to share with other classes, with parents, or students in the school.
EvaluateCreate a three part foldable to compare sound waves, visible light waves, and infrared heat waves. Make sure that the students include diagrams to support
37

their understanding. Encourage the student to use as many of the words from the word splash activity as possible to demonstrate the connections.
Extensions
Connecting the study of waves to energy from the sunThe lesson at this website is an excellent one for connecting the idea of waves to the energy the earth receives from the sun. It both compares the two types of waves and directs students to explore where sunlight falls on the electromagnetic spectrum and how individual lives are affected by other wavelengths and types of transverse waves along the electromagnetic spectrum. Handles an abstract concept in a way that is manageable for middle school students.http://school.discoveryeducation.com/lessonplans/activities/electromagneticspectrum/
Video of electromagnetic spectrumhttp://www.teachersdomain.org/resources/phy03/sci/phys/energy/emspectrum/index.html
WebQuest on the electromagnetic spectrum has students explore waves on the electromagnetic spectrum, their benefits and risks to humans.http://www.tripforteachers.org/Webquests/Quests/Waves/WavesR.htm
Have students view this video and then brainstorm a list of electromagnetic waves that they have been exposed in the last 24 hours, the last month, and the last year.
How do waves along the electromagnetic spectrum differ? How are waves on the electromagnetic spectrum the same?
Webquest on Wave Technology designed for high school but some parts would be good as extension activity for some sixth graders.http://www.iowa-city.k12.ia.us/schools/west/library/WQWaves/Index.htm
This upbeat song relates some of the terms addressed in this lessonhttp://www.songsforteaching.com/hood/energywaves.htm
Connecting the study of waves to astronomyThis is a site has an on line activity with stellar spectrum. Using this activity connects this unit to the one on space.http://www.learner.org/teacherslab/science/light/color/spectra/index.html
Connecting the study of waves to global warmingUnderstanding the difference between visible light and infrared heat waves helps one understand what is happening with global warming. Visible light waves have shorter waves lengths and move through the atmosphere to heat the earth’s surface. When the heated earth radiates infrared heat waves back to space
38

these longer wavelengths of energy are “trapped” by carbon dioxide, water vapor, and other gases in the air.
Have students read the material at this website: “What is Global Warming? – The Simple Fourth Grade Science That Everyone Needs to Know” and identify other websites on global warming such as this one to make this connection.http://abcnews.go.com/Technology/GlobalWarming/Story?id=1755389&page=1
Connecting the study of waves to earthquakesThese sites are great for connecting what students have learned about light, heat, and sound waves to earthquake waves. Great site for students to explore earthquake wave properties and to compare them to connect them to what was learned about waves in this lessonhttp://www.thetech.org/exhibits/online/quakes/waves/p&s_waves.html
Observe animations of earthquakes at this site:http://www.classzone.com/books/earth_science/terc/content/visualizations/es1002/es1002page01.cfm?chapter_no=visualization
Modeling p waves and s waveshttp://serc.carleton.edu/introgeo/roleplaying/examples/seismic.html
Animation and text of the p and s waves moving through the earth’s interior.http://www.classzone.com/books/earth_science/terc/content/visualizations/es1009/es1009page01.cfm
More info on seismic waves for the more advanced student.http://www.geo.mtu.edu/UPSeis/waves.html
http://www.seismo.unr.edu/ftp/pub/louie/class/100/seismic-waves.html
39

40
refraction
Waves
heat
S Wavepitch
longitudinal
soundamplitude
frequency
high
transverse
speed
light
P Wavelow
crest reflection
compression
troughwavelength

Wave Rap
I’m gonna tell ya’ bout a wave,Just like the dance,
And you might just like it-if you give it a chance.
Throw a stone in the water and watch it go,Energy does travel – now don’t you know?
Up and down is called transverse,But back and forth is another verse.Look at a spring get long and short,Longitudinal is the wave of this sort.
No matter what you call it – a wave is a waveThree things in common- that’s all the same.
There is wavelength, speed, and frequency, too,It’s all explained in how they move.
Wavelength is the length from crest to crest,But our wave rap is just the best.
Speed comes next, don’t you knowIt’s the distance traveled in a short time frame.
Count how many crests pass by in time,And you’ll know the frequency-just fine.
You all know hertz-like a rental car,Well it measures frequency-OK so far?
Waves can move-we know that’s true,But now we’ll tell you what else they do.They bend and change-the way they go,
When they hit some wall that slows their flow.Refraction is the name of this bending fate.But after they pass-they’re path is straight.Reflection is a game that waves do play,
Cause the energy of motion just won’t stay.It bounces right back into your face,
And puts itself in its first place.
Sound is energy we can’t see,But we hear it - easily.
Waves move back and forth through the air.They move real fast yet don’t muss your hair.
The warmer the air ,the faster they go.So in the cold they go real slow.
Sound moves faster in solids, its trueIt’s slower in air and water, too.
41

You can hear around corners, that’s a fact.It’s all because waves diffract.
They bend around corners so all can hear,Down the hall- loud and clear.
Each wave has its own frequency,And something else that we will see.With frequency high, vibrations fast,
Pitch is high and heard by bats.Pitch is the way that sound is heardThat’s how we tell two kinds of birds.
Music is a sound of a special kind,It soothes your soul and clears your mind.The sounds of music are pleasing to hear,
These waves have frequencies somewhat near.Noise comes from waves of all kinds,
It messes with your ears and blurs your mind.Musical sounds are sorta neat,Especially if you know the beat.
Too much music and you might yell,It’s too loud – turn it down a decibel.
Every ten decibels you see,Make it twice as loud for you and me.
So now you know what waves can do,Sound and light at work for you.
AUTHOR UNKNOWN
42

Assessments: 6.01 Determine how convection and radiation transfer energy B4 (C3)
1. How can you classify energy according to its waves?a. According to the waves’ frequency, amplitude, and loudness. b. According to the waves’ wavelength. c. According to the waves’ crest and trough. d. According to its sound.
2. A car is warm on a summer day because_________. a. Nuclear energy converts to light energy. b. Chemical energy converts to heat energy. c. Light energy is converted to heat energy.d. Heat energy is converted to light energy.
6.02 Analyze heat flow through materials or across space from warm objects to cooler objects until both objects are at equilibrium.
B4
1. When tap water (water from the sink) is heated on the stove, the water molecules movements begin to__________?
a. Decrease in speed.b. Remain the same. c. Increase in speed. d. Stop.
2. If you placed a hot stone in a beaker of cold water, what would happen to both objects after 10 minutes of time elapsed?
a. The stone would get warmer and the water would get cooler. b. The stone will get as cold as the water had been.c. The water would get as hot as the stone had been. d. The stone would get cooler and the water would get warmer.
43

6.03 Analyze sound as an example that vibrating materials generate waves that transfer energy.
Frequency. Amplitude. Loudness. How sound travels through different material. Form and function of the human ear.
B4
1. Which of the following diagrams have the highest frequency?
a.
b.
c.
d.
2. Which of the following types of energy is an example of a longitudinal wave? a. light wavesb. water wavesc. x-rayd. sound wave
44

6.04 Evaluate data for qualitative and quantitative relationships associated with energy transfer and/or transformation.
B6 (B5)
Hunter observed a band concert and noted the following data about three instruments: Instrument one A string vibrated 15 times per
second.String length- 10 cm
Instrument two A string vibrates 20 times per second.
String length- 50 cm
Instrument three A string vibrates 9 times per second.
String length- 100 cm
1. Which one of the following statements is true when looking at the data above?
a. Instrument one has the highest pitch. b. Instrument two has the lowest pitch. c. There is no difference in the pitch of the instruments. d. There is not enough information to determine the relative pitch of
the instruments.
2. Selena stretches a rubber band across a box and lets it go. What is produced?
a. Electrical energyb. Magnetic energyc. Sound wavesd. Light waves
6.05 Analyze the physical interactions of light and matter: Absorption. Scattering. Color perception. Form and function of the human eye.
B4
Use the following diagram to answer the question below:
1. Walker uses a prism and makes this drawing of his observations. Which best explains the observation.
a. Each color of light bends at a different angle.
45
White light
RedOrangeYellowGreenBlueViolet

b. Each color of light bends at the same angle. c. White light is made of one wavelength of light. d. White light is reflected by the prism.
2. Why is the moon visible from the Earth? a. The moon has its own light.b. The moon absorbs light during the day and emits it during the night. c. Light from the Earth makes the moon visible. d. Sunlight is reflected off the moon to the Earth.
6.06 Analyze response to heat to determine the suitability of materials for use in technological design:
Conduction. Expansion. Contraction.
B4
Not heated Not heated
Cold metal ball fits . Heated metal ball does not fit through the ring. through the ring. Images found at : www.goalfinder.com/product.asp?productid=60
1. Kristi observes the two situations that are shown in the above diagram. If Kristi watches the teacher heat the second situation as stated, she will be able to explain that, _____.
a. The ball was already smaller than the ring. b. The ball expanded when heated and now does not fit in the
ring. c. The ball contracted once placed through the ring and now will not
exit. d. The ball gained an extra mass as it was heated and it became
heavier.
2. Sandra notes that the concrete pad in the driveway had large irregular cracks. When recording her observations of the problem, she notices that the area was extremely large without separation joints. These cracks probably occurred because_______.
a. Expansion and contraction due to heating and cooling. b. External pressure. c. Weathering. d. Expansion and contraction due to moisture absorption.
46
6.07 Analyze the Law of Conservation of Energy: Conclude that energy cannot be created or
destroyed, but only changed from one form into another.
Conclude that the amount of energy stays the same, although within the process some energy is always converted to heat.
Some systems transform energy with less loss of heat than others.
B4 (B5)
1. Nelda was preparing bathwater for Alli Grace. The hot water flowed from the faucet at 80 degrees Celsius, too hot for the baby. Which of the following methods would make the bath water appropriate for Alli Grace the fastest?
a. Let the water cool down over time. b. Add cold water to the tub. c. Add ice to the water.d. Fan the surface of the water with your hand.
2. An Ice cube is placed into a glass of soda. What happens to the glass of soda within the first minute?
a. Ice cube gains heat and the soda loses heat. b. Both the ice cube and the soda looses heatc. Both the ice cube and the soda gains heatd. The ice cube gains heat and the soda loses heat.
47