Hyperion Strategic Finance Installation Guide - Oracle Documentation
62
HYPERION® STRATEGIC FINANCE RELEASE 9.3.1 INSTALLATION GUIDE P/N: DS90293100
Transcript of Hyperion Strategic Finance Installation Guide - Oracle Documentation

H Y P E R I O N ® S T R A T E G I C F I N A N C E
R E L E A S E 9 . 3 . 1
I N S T A L L A T I O N G U I D E
P / N : D S 9 0 2 9 3 1 0 0

Strategic Finance Installation Guide, 9.3.1
Copyright © 1996, 2007, Oracle and/or its affiliates. All rights reserved.
Authors: Will MacLean
The Programs (which include both the software and documentation) contain proprietary information; they are providedunder a license agreement containing restrictions on use and disclosure and are also protected by copyright, patent, andother intellectual and industrial property laws. Reverse engineering, disassembly, or decompilation of the Programs, exceptto the extent required to obtain interoperability with other independently created software or as specified by law, isprohibited.
The information contained in this document is subject to change without notice. If you find any problems in thedocumentation, please report them to us in writing. This document is not warranted to be error-free. Except as may beexpressly permitted in your license agreement for these Programs, no part of these Programs may be reproduced ortransmitted in any form or by any means, electronic or mechanical, for any purpose.
If the Programs are delivered to the United States Government or anyone licensing or using the Programs on behalf of theUnited States Government, the following notice is applicable:
U.S. GOVERNMENT RIGHTS Programs, software, databases, and related documentation and technical data delivered toU.S. Government customers are "commercial computer software" or "commercial technical data" pursuant to theapplicable Federal Acquisition Regulation and agency-specific supplemental regulations. As such, use, duplication,disclosure, modification, and adaptation of the Programs, including documentation and technical data, shall be subjectto the licensing restrictions set forth in the applicable Oracle license agreement, and, to the extent applicable, the additionalrights set forth in FAR 52.227-19, Commercial Computer Software--Restricted Rights (June 1987). Oracle USA, Inc., 500Oracle Parkway, Redwood City, CA 94065.
The Programs are not intended for use in any nuclear, aviation, mass transit, medical, or other inherently dangerousapplications. It shall be the licensee's responsibility to take all appropriate fail-safe, backup, redundancy and other measuresto ensure the safe use of such applications if the Programs are used for such purposes, and we disclaim liability for anydamages caused by such use of the Programs.
Oracle is a registered trademark of Oracle Corporation and/or its affiliates. Other names may be trademarks of theirrespective owners.
The Programs may provide links to Web sites and access to content, products, and services from third parties. Oracle isnot responsible for the availability of, or any content provided on, third-party Web sites. You bear all risks associated withthe use of such content. If you choose to purchase any products or services from a third party, the relationship is directlybetween you and the third party. Oracle is not responsible for: (a) the quality of third-party products or services; or (b)fulfilling any of the terms of the agreement with the third party, including delivery of products or services and warrantyobligations related to purchased products or services. Oracle is not responsible for any loss or damage of any sort that youmay incur from dealing with any third party.

Contents
Chapter 1. Starting Your Strategic Finance Installation . . . . . . . . . . . . . . . . . . . . . . . . . . . . . . . . . . . . . . . . . 7
Introduction . . . . . . . . . . . . . . . . . . . . . . . . . . . . . . . . . . . . . . . . . . . . . . . . . . . . . . . . . . 7
Strategic Finance Overview . . . . . . . . . . . . . . . . . . . . . . . . . . . . . . . . . . . . . . . . . . . . . . . 7
Architecture and Components . . . . . . . . . . . . . . . . . . . . . . . . . . . . . . . . . . . . . . . . . . . . . 7
Client Tier . . . . . . . . . . . . . . . . . . . . . . . . . . . . . . . . . . . . . . . . . . . . . . . . . . . . . . . . 8
Server Tier . . . . . . . . . . . . . . . . . . . . . . . . . . . . . . . . . . . . . . . . . . . . . . . . . . . . . . . . 8
Database Tier . . . . . . . . . . . . . . . . . . . . . . . . . . . . . . . . . . . . . . . . . . . . . . . . . . . . . . 8
Staging Database . . . . . . . . . . . . . . . . . . . . . . . . . . . . . . . . . . . . . . . . . . . . . . . . . . . . 9
Extended Analytics Star Schema Database . . . . . . . . . . . . . . . . . . . . . . . . . . . . . . . . . 9
HSF Administrator Utility . . . . . . . . . . . . . . . . . . . . . . . . . . . . . . . . . . . . . . . . . . . . . 9
The Initial Administrator . . . . . . . . . . . . . . . . . . . . . . . . . . . . . . . . . . . . . . . . . . . . . 9
Templates and Entities . . . . . . . . . . . . . . . . . . . . . . . . . . . . . . . . . . . . . . . . . . . . . . . 9
Hyperion Shared Services . . . . . . . . . . . . . . . . . . . . . . . . . . . . . . . . . . . . . . . . . . . . . . . 10
Configuring the Initial Administrator and HSF Access User Names . . . . . . . . . . . . . . 10
Hyperion Hyperion Configuration Utility . . . . . . . . . . . . . . . . . . . . . . . . . . . . . . . . 11
Hyperion System 9 Installation Start Here . . . . . . . . . . . . . . . . . . . . . . . . . . . . . . . . 11
Integration Requirements . . . . . . . . . . . . . . . . . . . . . . . . . . . . . . . . . . . . . . . . . . . . . . . 11
Interoperability . . . . . . . . . . . . . . . . . . . . . . . . . . . . . . . . . . . . . . . . . . . . . . . . . . . . 11
Financial Management . . . . . . . . . . . . . . . . . . . . . . . . . . . . . . . . . . . . . . . . . . . . . . 12
Essbase and Planning . . . . . . . . . . . . . . . . . . . . . . . . . . . . . . . . . . . . . . . . . . . . . . . 13
Hyperion Hyperion Enterprise . . . . . . . . . . . . . . . . . . . . . . . . . . . . . . . . . . . . . . . . . 13
Extended Analytics . . . . . . . . . . . . . . . . . . . . . . . . . . . . . . . . . . . . . . . . . . . . . . . . . 14
Installation Options . . . . . . . . . . . . . . . . . . . . . . . . . . . . . . . . . . . . . . . . . . . . . . . . . . . 15
Using Terminal Services . . . . . . . . . . . . . . . . . . . . . . . . . . . . . . . . . . . . . . . . . . . . . 15
Using Citrix . . . . . . . . . . . . . . . . . . . . . . . . . . . . . . . . . . . . . . . . . . . . . . . . . . . . . . 15
Silent Installation . . . . . . . . . . . . . . . . . . . . . . . . . . . . . . . . . . . . . . . . . . . . . . . . . . 16
Hyperion License Compliance . . . . . . . . . . . . . . . . . . . . . . . . . . . . . . . . . . . . . . . . . . . . 17
About Hyperion Home . . . . . . . . . . . . . . . . . . . . . . . . . . . . . . . . . . . . . . . . . . . . . . . . . 18
Location . . . . . . . . . . . . . . . . . . . . . . . . . . . . . . . . . . . . . . . . . . . . . . . . . . . . . . . . . 18
Common Files . . . . . . . . . . . . . . . . . . . . . . . . . . . . . . . . . . . . . . . . . . . . . . . . . . . . 18
Changing the Hyperion Home Location . . . . . . . . . . . . . . . . . . . . . . . . . . . . . . . . . . 19
Contents iii

Chapter 2. Upgrading to Strategic Finance 9.3 . . . . . . . . . . . . . . . . . . . . . . . . . . . . . . . . . . . . . . . . . . . . . 21
Considerations . . . . . . . . . . . . . . . . . . . . . . . . . . . . . . . . . . . . . . . . . . . . . . . . . . . . . . . 21
General . . . . . . . . . . . . . . . . . . . . . . . . . . . . . . . . . . . . . . . . . . . . . . . . . . . . . . . . . 21
Migrating to Shared Services . . . . . . . . . . . . . . . . . . . . . . . . . . . . . . . . . . . . . . . 21
Upgrading Customized Systems . . . . . . . . . . . . . . . . . . . . . . . . . . . . . . . . . . . . . 21
Upgrading From 9.2 . . . . . . . . . . . . . . . . . . . . . . . . . . . . . . . . . . . . . . . . . . . . . . . . 22
Upgrading From 4.1 . . . . . . . . . . . . . . . . . . . . . . . . . . . . . . . . . . . . . . . . . . . . . . . . 22
Changing the Strategic Finance Project Name in Shared Services . . . . . . . . . . . . . 22
Changing the AdminDoc Filename . . . . . . . . . . . . . . . . . . . . . . . . . . . . . . . . . . 22
Upgrading the Templates and Entities for Debt Scheduler . . . . . . . . . . . . . . . . . . 22
Converting Obsolete Templates . . . . . . . . . . . . . . . . . . . . . . . . . . . . . . . . . . . . . 23
ODBC and OLE DB Connections for Relational Database Export . . . . . . . . . . . . . 24
Historical Periods Using ‘#’ or ‘##’ Overrides . . . . . . . . . . . . . . . . . . . . . . . . . . . 24
Illegal Characters in Report Graphs . . . . . . . . . . . . . . . . . . . . . . . . . . . . . . . . . . 24
Upgrading Consolidator . . . . . . . . . . . . . . . . . . . . . . . . . . . . . . . . . . . . . . . . . . 24
Managing Archive Repair . . . . . . . . . . . . . . . . . . . . . . . . . . . . . . . . . . . . . . . . . 24
Shared Services . . . . . . . . . . . . . . . . . . . . . . . . . . . . . . . . . . . . . . . . . . . . . . . . . 25
Upgrading From Pre 2.9 Releases . . . . . . . . . . . . . . . . . . . . . . . . . . . . . . . . . . . . . . . 26
Upgrading to 9.3 . . . . . . . . . . . . . . . . . . . . . . . . . . . . . . . . . . . . . . . . . . . . . . . . . . . . . . 26
Upgrading a Stand-Alone Client . . . . . . . . . . . . . . . . . . . . . . . . . . . . . . . . . . . . . . . 26
Upgrading the Client-Server Implementation . . . . . . . . . . . . . . . . . . . . . . . . . . . . . . 27
Upgrading the Server . . . . . . . . . . . . . . . . . . . . . . . . . . . . . . . . . . . . . . . . . . . . 27
Upgrading the Client . . . . . . . . . . . . . . . . . . . . . . . . . . . . . . . . . . . . . . . . . . . . . 28
Chapter 3. Installing and Configuring Strategic Finance . . . . . . . . . . . . . . . . . . . . . . . . . . . . . . . . . . . . . . . 29
Installing the Server . . . . . . . . . . . . . . . . . . . . . . . . . . . . . . . . . . . . . . . . . . . . . . . . . . . 29
Verifying the HSFService Installation . . . . . . . . . . . . . . . . . . . . . . . . . . . . . . . . . . . . . . . 30
Installing the Strategic Finance Client . . . . . . . . . . . . . . . . . . . . . . . . . . . . . . . . . . . . . . . 31
Chapter 4. Configuring and Setting Up Strategic Finance . . . . . . . . . . . . . . . . . . . . . . . . . . . . . . . . . . . . . . 33
Hyperion Configuration Utility . . . . . . . . . . . . . . . . . . . . . . . . . . . . . . . . . . . . . . . . . . . 33
Preparing to Use Hyperion Configuration Utility . . . . . . . . . . . . . . . . . . . . . . . . . . . . . . 33
Task Sequence . . . . . . . . . . . . . . . . . . . . . . . . . . . . . . . . . . . . . . . . . . . . . . . . . . . . . . . 34
About Configuring Product Upgrades . . . . . . . . . . . . . . . . . . . . . . . . . . . . . . . . . . . . . . 34
Launching Hyperion Configuration Utility . . . . . . . . . . . . . . . . . . . . . . . . . . . . . . . . . . . 35
Registering Products with Shared Services . . . . . . . . . . . . . . . . . . . . . . . . . . . . . . . . . . . 36
Configuring a Database . . . . . . . . . . . . . . . . . . . . . . . . . . . . . . . . . . . . . . . . . . . . . . . . . 36
Changing Database Passwords . . . . . . . . . . . . . . . . . . . . . . . . . . . . . . . . . . . . . . . . . 38
Microsoft SQL Server Windows Authentication . . . . . . . . . . . . . . . . . . . . . . . . . . . . 39
Deregistering Products with Shared Services . . . . . . . . . . . . . . . . . . . . . . . . . . . . . . . . . . 39
iv Contents

Product-Specific Configuration . . . . . . . . . . . . . . . . . . . . . . . . . . . . . . . . . . . . . . . . . . . 40
Customizing Strategic Finance with Shared Services . . . . . . . . . . . . . . . . . . . . . . . . . 40
Configuring Strategic Finance for Shared Services . . . . . . . . . . . . . . . . . . . . . . . . . . . 40
Migrating Existing Strategic Finance Users to Shared Services . . . . . . . . . . . . . . . . . . 41
Reconfiguring Hyperion Products . . . . . . . . . . . . . . . . . . . . . . . . . . . . . . . . . . . . . . . . . 42
Completing Hyperion Configuration Utility . . . . . . . . . . . . . . . . . . . . . . . . . . . . . . . . . . 43
Configuration Troubleshooting . . . . . . . . . . . . . . . . . . . . . . . . . . . . . . . . . . . . . . . . . . . 43
Chapter 5. Post-Installation Tasks . . . . . . . . . . . . . . . . . . . . . . . . . . . . . . . . . . . . . . . . . . . . . . . . . . . . . . 45
Verifying Startup Dependencies . . . . . . . . . . . . . . . . . . . . . . . . . . . . . . . . . . . . . . . . . . . 45
Starting and Stopping Hyperion License Server . . . . . . . . . . . . . . . . . . . . . . . . . . . . . . . . 45
Starting Hyperion License Server Manually . . . . . . . . . . . . . . . . . . . . . . . . . . . . . . . . 45
Restarting Hyperion License Server . . . . . . . . . . . . . . . . . . . . . . . . . . . . . . . . . . . . . 46
Stopping Hyperion License Server . . . . . . . . . . . . . . . . . . . . . . . . . . . . . . . . . . . . . . 46
Starting and Stopping Shared Services . . . . . . . . . . . . . . . . . . . . . . . . . . . . . . . . . . . . . . 47
Starting Shared Services . . . . . . . . . . . . . . . . . . . . . . . . . . . . . . . . . . . . . . . . . . . . . . 47
Verifying Successful Startup of Shared Services . . . . . . . . . . . . . . . . . . . . . . . . . . . . . 48
Stopping Shared Services . . . . . . . . . . . . . . . . . . . . . . . . . . . . . . . . . . . . . . . . . . . . . 48
Setting up Servers and Databases . . . . . . . . . . . . . . . . . . . . . . . . . . . . . . . . . . . . . . . . . . 49
Starting Administrator . . . . . . . . . . . . . . . . . . . . . . . . . . . . . . . . . . . . . . . . . . . . . . 50
Creating Servers . . . . . . . . . . . . . . . . . . . . . . . . . . . . . . . . . . . . . . . . . . . . . . . . . . . 50
Connecting to a Server . . . . . . . . . . . . . . . . . . . . . . . . . . . . . . . . . . . . . . . . . . . . . . 50
Creating a Database . . . . . . . . . . . . . . . . . . . . . . . . . . . . . . . . . . . . . . . . . . . . . . . . 51
Selecting Databases . . . . . . . . . . . . . . . . . . . . . . . . . . . . . . . . . . . . . . . . . . . . . . . . . 51
Adding Users (Standard NLTM only) . . . . . . . . . . . . . . . . . . . . . . . . . . . . . . . . . . . . 51
Connecting a Client to a Strategic Finance Server and Database . . . . . . . . . . . . . . . . . . . . 53
Changing a Database on the Server . . . . . . . . . . . . . . . . . . . . . . . . . . . . . . . . . . . . . 53
Using the Server Menu . . . . . . . . . . . . . . . . . . . . . . . . . . . . . . . . . . . . . . . . . . . . . . 54
Installing PKZip® (Optional) for Database Backup and Restore . . . . . . . . . . . . . . . . . . . . 55
Chapter 6. Uninstalling Strategic Finance . . . . . . . . . . . . . . . . . . . . . . . . . . . . . . . . . . . . . . . . . . . . . . . . . 57
Uninstalling the Server . . . . . . . . . . . . . . . . . . . . . . . . . . . . . . . . . . . . . . . . . . . . . . . . . 57
Uninstalling from the Control Panel . . . . . . . . . . . . . . . . . . . . . . . . . . . . . . . . . . . . 57
Uninstalling from the Command Prompt . . . . . . . . . . . . . . . . . . . . . . . . . . . . . . . . . 58
Uninstalling the Client . . . . . . . . . . . . . . . . . . . . . . . . . . . . . . . . . . . . . . . . . . . . . . . . . 58
Uninstalling from the Control Panel . . . . . . . . . . . . . . . . . . . . . . . . . . . . . . . . . . . . 58
Uninstalling Using the Command Prompt . . . . . . . . . . . . . . . . . . . . . . . . . . . . . . . . 59
Index . . . . . . . . . . . . . . . . . . . . . . . . . . . . . . . . . . . . . . . . . . . . . . . . . . . . . . . . . . . . . . 61
Contents v

vi Contents

1Starting Your Strategic Finance
Installation
In This Chapter
Introduction... . . . . . . . . . . . . . . . . . . . . . . . . . . . . . . . . . . . . . . . . . . . . . . . . . . . . . . . . . . . . . . . . . . . . . . . . . . . . . . . . . . . . . . . . . . . . . . . . . . . . . . . . . . . . . . . . . . . . . . . 7
Strategic Finance Overview... . . . . . . . . . . . . . . . . . . . . . . . . . . . . . . . . . . . . . . . . . . . . . . . . . . . . . . . . . . . . . . . . . . . . . . . . . . . . . . . . . . . . . . . . . . . . . . . . . . . . . . 7
Architecture and Components .. . . . . . . . . . . . . . . . . . . . . . . . . . . . . . . . . . . . . . . . . . . . . . . . . . . . . . . . . . . . . . . . . . . . . . . . . . . . . . . . . . . . . . . . . . . . . . . . . . . . 7
Hyperion Shared Services ... . . . . . . . . . . . . . . . . . . . . . . . . . . . . . . . . . . . . . . . . . . . . . . . . . . . . . . . . . . . . . . . . . . . . . . . . . . . . . . . . . . . . . . . . . . . . . . . . . . . . . .10
Integration Requirements ... . . . . . . . . . . . . . . . . . . . . . . . . . . . . . . . . . . . . . . . . . . . . . . . . . . . . . . . . . . . . . . . . . . . . . . . . . . . . . . . . . . . . . . . . . . . . . . . . . . . . . .11
Installation Options ... . . . . . . . . . . . . . . . . . . . . . . . . . . . . . . . . . . . . . . . . . . . . . . . . . . . . . . . . . . . . . . . . . . . . . . . . . . . . . . . . . . . . . . . . . . . . . . . . . . . . . . . . . . . . .15
Hyperion License Compliance ... . . . . . . . . . . . . . . . . . . . . . . . . . . . . . . . . . . . . . . . . . . . . . . . . . . . . . . . . . . . . . . . . . . . . . . . . . . . . . . . . . . . . . . . . . . . . . . . . .17
About Hyperion Home ... . . . . . . . . . . . . . . . . . . . . . . . . . . . . . . . . . . . . . . . . . . . . . . . . . . . . . . . . . . . . . . . . . . . . . . . . . . . . . . . . . . . . . . . . . . . . . . . . . . . . . . . . . .18
IntroductionThis guide describes installing and configuring Oracle's Hyperion® Strategic Finance. Forsoftware and hardware prerequisites, see The Hyperion System 9 Installation Start Here.
For known issues and product updates, see the Hyperion System 9 Strategic Finance Readme filelocated on the Hyperion Download Center and on the Hyperion Solutions Web Site athttp:// www.hyperion.com.
Strategic Finance OverviewStrategic Finance integrates and consolidates financial forecast models among a company'splanning, business development, treasury, and investor relation groups. This includesinteraction between corporate groups, business units, and the corporate office. The result isenhanced, consistent communication within the company. Strategic Finance reduces the timeand planning costs while assuring accurate analytics. It is ideal for merger and acquisitionanalysis, strategic planning, equity analysis, deal underwriting, and portfolio analysis.
Architecture and ComponentsIn client-server implementations, multiple Strategic Finance clients may exist on a network,accessing shared data stored in databases on the Strategic Finance server.
Introduction 7

Figure 1 Strategic Finance client-server architecture
The Administration utility controls Client access to data on the Strategic Finance server.
Client TierThe Strategic Finance client creates financial models, which can be stored on the client, or on aStrategic Finance server.
Server TierThe Strategic Finance server is a centrally-managed, networked version control system,containing databases for storing entities. Clients check out entities, which the server locks fromaccess by other clients, ensuring data integrity. After users modify entities, they check them backinto the database.
You use Administrator to control database access and perform database-related tasks. Serversconvert entities during upgrades, archive entities, and enable Entity Change Management andAssumptions Change Management.
Database TierServer can contain multiple databases. Database are repositories for storing and sharing entities.
8 Starting Your Strategic Finance Installation

Figure 2 Database Tier
Staging DatabaseYou use staging databases for exporting to external databases and messaging between theStrategic Finance server and external databases.
Extended Analytics Star Schema DatabaseExtended Analytics exports Strategic Finance data to an external database as a star schemaoptimized for reporting and for export into multidimensional Oracle's Hyperion® Essbase® –System 9 databases.
HSF Administrator UtilityStrategic Finance Administrator manages centralized security and access permissions elementsof the system, including: user rights, entity access, group membership, and transaction and useraccess logs.
The Initial AdministratorWhen you install the Strategic Finance server, the first user name used to access Administratorby default becomes the initial administrator, with. full access permissions. See “StartingAdministrator” on page 50.
Templates and EntitiesStrategic Finance entities contain financial models. They are stored in the server, but can bestored locally as *.alc files. Entities are the primary mechanism for storing and manipulatingdata.
Templates are frameworks for creating entities. They can be stored in the server, or locally as*.alt files.
Architecture and Components 9

Figure 3 Templates and Entities
Hyperion Shared ServicesOracle's Hyperion® Shared Services (formerly Shared Services) functionality is included in manyHyperion products such as Oracle's Hyperion® Planning – System 9 and Oracle's Hyperion®Performance Scorecard – System 9 and provides this functionality:
● User provisioning
● External authentication
● Metadata synchronization
● Data synchronization
● Task flow management
User provisioning is described in the Hyperion System 9 Shared Services User ManagementGuide available on the Hyperion Download Center. Configuration for external authenticationis described in the Hyperion System 9 Shared Services Installation Guide available on the HyperionDownload Center. All Shared Services tools are described in the Administrator and User guides.
Products using Shared Services require:
● Access to the Shared Services Server that runs the Shared Services client
● A database dedicated to Shared Services
Configuring the Initial Administrator and HSF Access UserNamesYou must install Shared Services before configuring Strategic Finance for use with SharedServices by adding these user names:
10 Starting Your Strategic Finance Installation
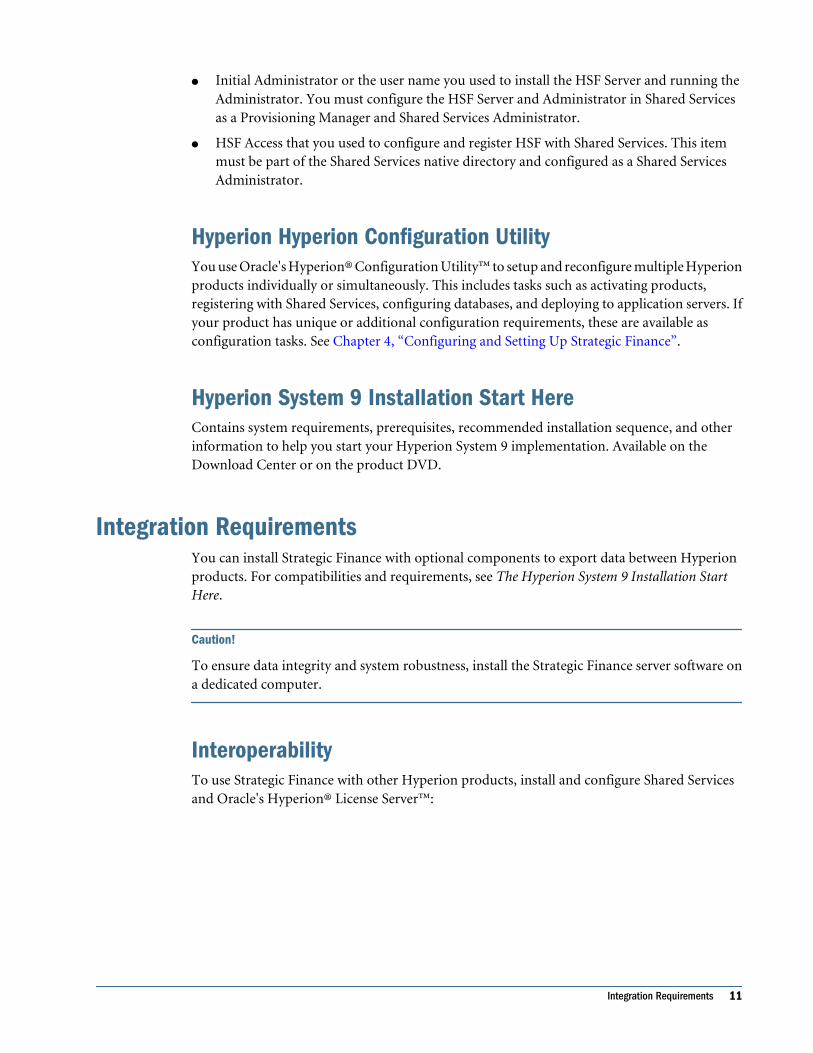
● Initial Administrator or the user name you used to install the HSF Server and running theAdministrator. You must configure the HSF Server and Administrator in Shared Servicesas a Provisioning Manager and Shared Services Administrator.
● HSF Access that you used to configure and register HSF with Shared Services. This itemmust be part of the Shared Services native directory and configured as a Shared ServicesAdministrator.
Hyperion Hyperion Configuration UtilityYou use Oracle's Hyperion® Configuration Utility™ to setup and reconfigure multiple Hyperionproducts individually or simultaneously. This includes tasks such as activating products,registering with Shared Services, configuring databases, and deploying to application servers. Ifyour product has unique or additional configuration requirements, these are available asconfiguration tasks. See Chapter 4, “Configuring and Setting Up Strategic Finance”.
Hyperion System 9 Installation Start HereContains system requirements, prerequisites, recommended installation sequence, and otherinformation to help you start your Hyperion System 9 implementation. Available on theDownload Center or on the product DVD.
Integration RequirementsYou can install Strategic Finance with optional components to export data between Hyperionproducts. For compatibilities and requirements, see The Hyperion System 9 Installation StartHere.
Caution!
To ensure data integrity and system robustness, install the Strategic Finance server software ona dedicated computer.
InteroperabilityTo use Strategic Finance with other Hyperion products, install and configure Shared Servicesand Oracle's Hyperion® License Server™:
Integration Requirements 11

For Shared Services and Hyperion License Server, see the Hyperion System 9 Shared ServicesInstallation Guide.
For user provisioning, see the Hyperion System 9 Shared Services User Management Guide.
Financial ManagementTo share data between Strategic Finance and Oracle's Hyperion® Financial Management –System 9:
Product Prerequisites
Strategic Finance Server ● Install Financial Management 9.2 or 9.3 of the Client on the same computer as theStrategic Finance server
12 Starting Your Strategic Finance Installation

Product Prerequisites
● Configure for single Sign-on.
Strategic Finance Client ● Install release 9.2 or 9.3 of the Financial Management Client and Strategic Financeon the on the same computer.
Essbase and PlanningTo share data between Strategic Finance, Essbase and Planning:
Product Prerequisites
Strategic Finance Server ● Install Essbase 7.1.x.x Client Windows or Essbase 9.2/9.3 Client Windows on the samecomputer as the Strategic Finance server
● Configure for single sign-on.
Strategic Finance Client ● Install Essbase 7.1.x.x Client Windows or Essbase 9.2/9.3 Client Windows on thesame computer as the Strategic Finance Client
Hyperion Hyperion EnterpriseTo share data between Strategic Finance and Oracle's Hyperion® Enterprise®, install theHyperion Enterprise 6.3 or 6.4 Client or Hyperion Enterprise 6.3 or 6.4 Client Windows on thesame computer as the Strategic Finance client:
Integration Requirements 13

Extended AnalyticsTo use Strategic Finance with Extended Analytics, install these products. To configure forExtended Analytics, see the Hyperion System 9 Strategic Finance Administrator's Guide.
Hyperion System 9 BI+
Module Star Schema Database
Essbase 9.2/9.3 with
Oracle's Hyperion® Application Link9.2/9.3
Oracle's Hyperion® Interactive ReportingWeb Client 9.2/9.3
Yes Yes
Oracle's Hyperion® Smart View for Office9.2/9.3
No Yes
Oracle's Hyperion® Financial Reporting –System 9 9.2/9.3
No Yes
14 Starting Your Strategic Finance Installation

Hyperion System 9 BI+
Module Star Schema Database
Essbase 9.2/9.3 with
Oracle's Hyperion® Application Link9.2/9.3
Oracle's Hyperion® Web Analysis Studio9.2/9.3
Yes Yes
Note: Extended Analytics exports to arelational database only. From the relationaldatabase, use Oracle's Hyperion®Application Link to export to Essbase.
Installation OptionsFor compatibility, see The Hyperion System 9 Installation Start Here.
Using Terminal ServicesYou can deploy the Strategic Finance client with Microsoft Terminal Services for centralizedmanagement. A user runs Terminal Services Client to access a Terminal Services server installedwith the Strategic Finance client, allowing a number of clients to share the same installation.
Figure 4 The Strategic Finance Client on a Terminal Services Server
You can deploy the Strategic Finance client with Citrix for centralized management. A user runsCitrix client to access a Citrix server installed with the Strategic Finance client, allowing a numberof clients to share the same installation.
Using CitrixYou can deploy the Strategic Finance client with Citrix, enabling centralized management of theClient application. Running under Citrix, you can install the Strategic Finance client applicationon a server, and configure other networked computers to remotely run the Client from thatserver.
Installation Options 15

Silent InstallationYou use silent installation from the command prompt.
➤ To perform silent installations:
1 In a command prompt, access the Strategic Finance install directory.
2 To create the answerrec.txt file, run:
setup.exe –option-record answerfile.txt
3 In a text editor, open answerrec.txt and add this to the beginning of the file:
-W HSF<xxx>ClientLicenseBean.typedPasswordHash="b1164835"
4 You use the other lines to configure the installation:
-P installLocation="C:\Hyperion\StrategicFinance\"
# The install location.
-W setupTypes.selectedSetupTypeId=custom
# The setup type option:
# typical - Recommended for most users.
# custom - Enables you to select or deselect the features following.
-P hSFInstRef_Hyperion Strategic Finance.active=true
# Selects or deselects the client for installation:
# true - selected
# false - deselected
-P hSFInstRef_hSFClient<xxx>_1EntIntBean.active=false
# Selects or deselects the Hyperion Enterprise Integration feature. Options:
# true - selects
# false - deselects
-P hSFInstRef_hSF<xxx>HFMFeatureBean.active=false
# Selects or deselects the Hyperion Financial Management Integration feature.
16 Starting Your Strategic Finance Installation

# Options:
# true - selects
# false - deselects
-P hSFInstRef_hSF<xxx>PlanningIntegrationBean.active=false
# Selects or deselects the Hyperion Planning Integration feature. Options:
# true - Indicates that the feature is selected for installation
# false - Indicates that the feature is not selected for installation
-P hSFInstRef_hSFClient<xxx>EssBaseIntBean.active=false
# Selects or deselects the Hyperion Essbase Integration feature. Options:
# true - selects
# false - deselects
-P hSFInstRef_hSF<xxx>DeskIconBean.active=true
# Selects or deselects the Desktop Icon feature. Options:
# true - selects
# false - deselects
-P hSFInstRef_hSF<xxx>AdminFeature.active=false
# Selects or deselects the Server Administration Tool feature. Options:
# true - selects
# false - deselects
-P hSFInstRef_hSF<xxx>DeskIconBean2.active=true
# Selects or deselects the Admin Desktop Icon feature. Options:
# true - selects
# false - deselects
-P hSFInstRef_hSF<xxx>GUISupportFeatBean.active=true
# Selects or deselects the Support Files feature. Options:
# true - selects
# false - deselects
5 Run:
setup.exe –options answerfile.txt -silent
Hyperion License ComplianceHyperion no longer ships or requires Hyperion License Server (or standalone license files) foruse with Hyperion products.
Hyperion License Compliance 17

To ensure compliance with your license agreement, Hyperion recommends that you implementan auditing process. In addition, during product configuration with Hyperion ConfigurationUtility, you activate only the features you purchased. For more information, see “HyperionLicense Compliance” in Hyperion Installation Start Here.
About Hyperion HomeWhen multiple Hyperion products are installed on one computer, common internal and third-party components are installed in Hyperion Home. The Hyperion Home location is defined inthe system environment variable called HYPERION_HOME.
LocationThe default location for Hyperion Home is C:\Hyperion. When you install, the installersearches for the HYPERION_HOME environment variable on the computer to which you areinstalling.
If the Hyperion Home location was previously defined for another Hyperion product, theinstallation uses the previously defined location. The location cannot be changed through theinstaller.
If the current installation is the first Hyperion installation on the computer, you can specify thelocation during installation.
Common FilesVarious files are installed in \HYPERION_HOME\common for a default installation of SharedServices. Some common components, and thus some files and folders, are optional and may notbe installed.
Table 1 Common-Component Folders Created in the HYPERION_HOME\common Directory
Folder Contents
appServers Application server files
config Hyperion Configuration Utility files
CSS Files to support Hyperion external authentication
DBMS Relational database management system (DBMS) files
Docs Product documentation files
HyperionLookAndFeel Installer user interface files
JCE JCE files for encryption, key generation and agreement, and MAC
JDBC JDBC files
18 Starting Your Strategic Finance Installation

Folder Contents
JDK JDK files
loggers Files for external authentication logging
SAP SAP files
utilities Utilities to change the location of Hyperion Home and export, import, or validateprovisioning data
XML Common XML components
Changing the Hyperion Home LocationAfter Hyperion Home is defined through the product installation, you can run a migration utilityto change the Hyperion Home location.
The migration utility moves the files installed in Hyperion Home to the new location and updatesthe value of the HYPERION_HOME environment variable.
Hyperion Home Migration Utility is provided with the Shared Services installation.
Note:
For an Apache Tomcat 5.0.28 Windows installation, you can install the Shared Services serveras a Windows service. If you select this option, the Shared Services server is launchedautomatically by the service and runs in the background. However, if you change theHYPERION_HOME location, the Windows service does not automatically start. This problemoccurs because the registry entries for the Windows service retain the old path information. Tosolve this problem, you must manually update the location of the Windows service.
➤ To change the Hyperion Home location:
1 Launch the migration utility:
● Choose a method:
❍ Double-click the run.exe file from %HYPERION_HOME%\common\utilities\HyperionHomeTool\9.3.0\bin.
❍ From a Windows console, change to %HYPERION_HOME%\common\utilities\HyperionHomeTool\9.3.0\bin. Then type run.exe -console.
2 Step through the screens, and when prompted, enter the Hyperion Home location or click Browse to navigateto the preferred location.
Do not choose a HYPERION_HOME location containing a space character. For example, C:\Program Files is not acceptable.
About Hyperion Home 19

20 Starting Your Strategic Finance Installation

2Upgrading to Strategic Finance
9.3
In This Chapter
Considerations ... . . . . . . . . . . . . . . . . . . . . . . . . . . . . . . . . . . . . . . . . . . . . . . . . . . . . . . . . . . . . . . . . . . . . . . . . . . . . . . . . . . . . . . . . . . . . . . . . . . . . . . . . . . . . . . . . . .21
Upgrading to 9.3 ... . . . . . . . . . . . . . . . . . . . . . . . . . . . . . . . . . . . . . . . . . . . . . . . . . . . . . . . . . . . . . . . . . . . . . . . . . . . . . . . . . . . . . . . . . . . . . . . . . . . . . . . . . . . . . . . .26
Considerations
GeneralSee also “About Configuring Product Upgrades” on page 34.
Migrating to Shared ServicesIf this is the first implementation with Shared Services, use the Hyperion Configuration Utilityto migrate Strategic Finance users to Shared Services. See “Migrating Existing Strategic FinanceUsers to Shared Services” on page 41.
Upgrading Customized SystemsCopy custom files and client-defined fields to another directory before removing the previousrelease. After installing this release and restarting the client or server, copy custom files to theprogram directories of the client and server:
Caution!
If the client or server starts without these files, your customizations are not implemented.
● custom.coa files. E.g.<your company>.coa
● currdata.dat
● consdata.dat
● convert.idx
Considerations 21

Upgrading From 9.2If you are upgrading from 9.2, you need not uninstall the server or the client software. Installthis release over your existing version. Back up your production environment and/or create atest environment for testing the upgrade.
Upgrading From 4.1You perform these tasks to upgrade from 4.1:
● Change the project name in Shared Services. See “Changing the Strategic Finance ProjectName in Shared Services” on page 22.
● Change the AdminDoc filename. See “Changing the AdminDoc Filename” on page 22.
● Upgrade debt scheduler templates and entities. See “Upgrading the Templates and Entitiesfor Debt Scheduler” on page 22.
● Convert obsolete templates. See “Converting Obsolete Templates” on page 23
● Upgrade the consolidator. See “Upgrading Consolidator” on page 24.
● Repair archives. See “Managing Archive Repair” on page 24.
Changing the Strategic Finance Project Name in Shared Services
➤ To change the project name:
1 In the Shared Services User Management Console, select theStrategic Finance project and click Next.
2 Change Name to Strategic Finance.
3 Click Save.
Changing the AdminDoc FilenameIf the name of the existing Admin Doc file is user.adm, you must change it to users.adm beforeinstalling and running the new server.
After you uninstall the previous version of the server and install the latest version, user.admand users.adm may co-exist. Delete the old users.adm and rename user.adm tousers.adm.
Caution!
Do not install the HSF Service until you rename these files.
Upgrading the Templates and Entities for Debt SchedulerWhen you upgrade, Debt Scheduler support is added to files and entities based on the standardand utility templates. Perform the tasks described here to these files:
22 Upgrading to Strategic Finance 9.3

● HSF Standard.alt
● HSF Utility.alt
● Sample.alc
● Sample Utility.alc
Any entities created from the upgraded versions of these files contain these changes.
Modify the Freeform Formula in the Amortization Expense (v1115) Account
For entities based on the Utility template, modify the Amortization Expense (v1115)account with this Freeform Formula:
v2400.03 + v2402.03 + v2406.03 + 2410.03 + v2085.03
Modify the Freeform Formula in the Other Interest Expense (v1360) Account
For entities based on the Standard and Utility templates, modify the Other InterestExpense (v1360) account to capture new accounts added to support Debt Scheduler:
● Issue Expense on New Senior Notes (v2652.75)
● Issue Expense on New Senior Subordinated Notes (v2654.75)
● Issue Expense (v2660.75)
If you do not use forecasting a value in Other Interest Expense (v1360), create a FreeformFormula with this value:
v2652.75 + v2654.75 + v2660.75
To forecast a value in Other Interest Expense (v1360), create a Freeform Formula containingthose accounts.
Converting Obsolete TemplatesThese templates are no longer supported:
● Financial Institutions
● International
● Standard Latin
● Latin Utility Spanish
● Latin Utility Portuguese
Convert files based on these templates to another template. Consult your Hyperionrepresentative.
Considerations 23

ODBC and OLE DB Connections for Relational Database ExportThe standard relational database export feature uses only OLE DB. If you use ODBC for databaseexport, reconfigure database connections for OLE DB. See the Hyperion System 9 StrategicFinance Administrator’s Guide.
Historical Periods Using ‘#’ or ‘##’ OverridesIn earlier versions, you could enter ‘#’ and ‘##’ overrides in historical periods, if you applied aFreeform Formula to the period. You can still use ‘#’ and ‘##’ overrides in historical periods tooverride Freeform Formulas, but in no other situations.
Illegal Characters in Report GraphsThe characters “(”, “)”, and “!” are no longer valid in the tab names of formulas. If used, thesecharacters convert to underscores, (_).
Upgrading Consolidator
Converting Consolidations
If you are converting from 4.1.x and use Consolidator, run all consolidation files after upgradingand before changing the files. If you do not run the consolidation before trying to make changes,an infinite loop may result.
Scenario Handling in the Consolidator
Consider these consolidation structures factors before converting previous versions of StrategicFinance previous to 4.1.x.x:
● If entities in a consolidation structure contribute different scenarios, the scenario for theentity during the last consolidation run becomes the scenario in the upgrade.
● If an entity uses the <Current> scenario, Strategic Finance uses the scenario currentlyselected in the entity.
● If a consolidation structure uses the ‘Use scenario in all children’ option to create scenariovariations, only the last used variation is upgraded.
To recreate the other variations, select ‘Use scenario in all children’ in the new system andchange the target scenarios in the consolidated files.
Managing Archive RepairConsider these issues before converting Strategic Finance releases before 4.1.x.x. ConsultHyperion support.
24 Upgrading to Strategic Finance 9.3

● The Administration utility uses Archive Repair to fix archive numbers. When you open anarchive of an entity, this release checks that the version number is correct for the archive.By default, archive check is enabled.
● When the archive version and number are out of sync, you cannot open the archive untilthe Archive Repair runs.
● When you run Archive Repair on an archived entity, the proper version numbers are restoredand the archive is stored under a new filename.
● Because repaired data is under a new filename, you may not want to repair the archive. Forexample, if FreeStyle Reports reference archived entities through Alias Manager, ArchiveRepair may break those aliases, because the archive has a new filename.
In this case you can:
❍ Repair the archives by opening the FreeStyle Report and changing the Alias Manager toreference the new filename of the repaired archives.
❍ Not repair the archives and use them to keep your existing FreeStyle Reports. You mustperform these tasks:
1. Use the ArchiveWarningLevel registry entry to override the archive check.
2. Specify a setting:
❍ Silent to override the archive check and enable out-of-sync archives.
❍ Warn to enable out-of-sync archives and log out—of— sync archive activity.
❍ Block to restrict the archive.
Because the Archive Repair changes the filename of the archive data, the audit point may bedeleted if you purge archives before running the Archive Repair.
➤ To restore audit points from a backup system:
1 Delete the archives.
2 Restore the previous archives from the backup. If you maintain backups incrementally, restore the previousarchives.
3 Open Administrator and run the Archive Repair on the restored archives.
4 Open the archives, ensure that the audit points are correct, and purge.
Shared ServicesIf you cannot register with Shared Services because the system reads two Strategic Financeservers, delete the \4.1.0.0 subdirectory in:
InstallDrive:\Hyperion\common\config\product\hsf\
After deleting the subdirectory, rerun the Hyperion Configuration Utility.
Considerations 25

Upgrading From Pre 2.9 Releases● If you upgrade from 2.9 or earlier, convert to 3.5.1 before 4.1.
● Cell-based calculation allows Strategic Finance to support leads and lags in calculations thatpreviously produced a value of “N/A.” Consequently, some calculations that previouslyproduced N/A values are correctly detected as producing circular references. A warningmessage specifies such formulas. You cannot calculate the entity until resolving all circularreferences.
● An extra zero displays in the Related Accounts section of the Account Number. For example,2010.1.000 displays as 2010.01.000. Old formulas and report references show the olderAccount Number format, but Strategic Finance uses these in the new format without makingchanges.
Upgrading to 9.3Perform these tasks before upgrading to this release:
Table 2 Before Upgrading
Task Description
Check in all server entities Ensure all entities in the server are checked in. When you upgrade, data isconverted to the new format as follows:
● Stand-alone
Converts when you open files. You must save these files.
● Client-server
Converts during server start.
Backup the production environment Perform a complete backup of your Strategic Finance or Alcar productionenvironment. Backup \HSFData, \AlcarData, or all Strategic Finance files(stand-alone client).
Create a test environment Create a test environment to install the latest release, and convert test data toensure data integrity. Once testing indicates a stable environment, move theenvironment into production, or convert the production environment.
Upgrading a Stand-Alone ClientIf you are using the Strategic Finance client as a stand-alone program, data conversion is simple.After the software is installed, open your existing.alc files in the new release, and StrategicFinance converts your data to the upgraded format. Save the converted file.
➤ To upgrade the Strategic Finance client, install the new Strategic Finance client software.
See “Installing the Strategic Finance Client” on page 31.
26 Upgrading to Strategic Finance 9.3
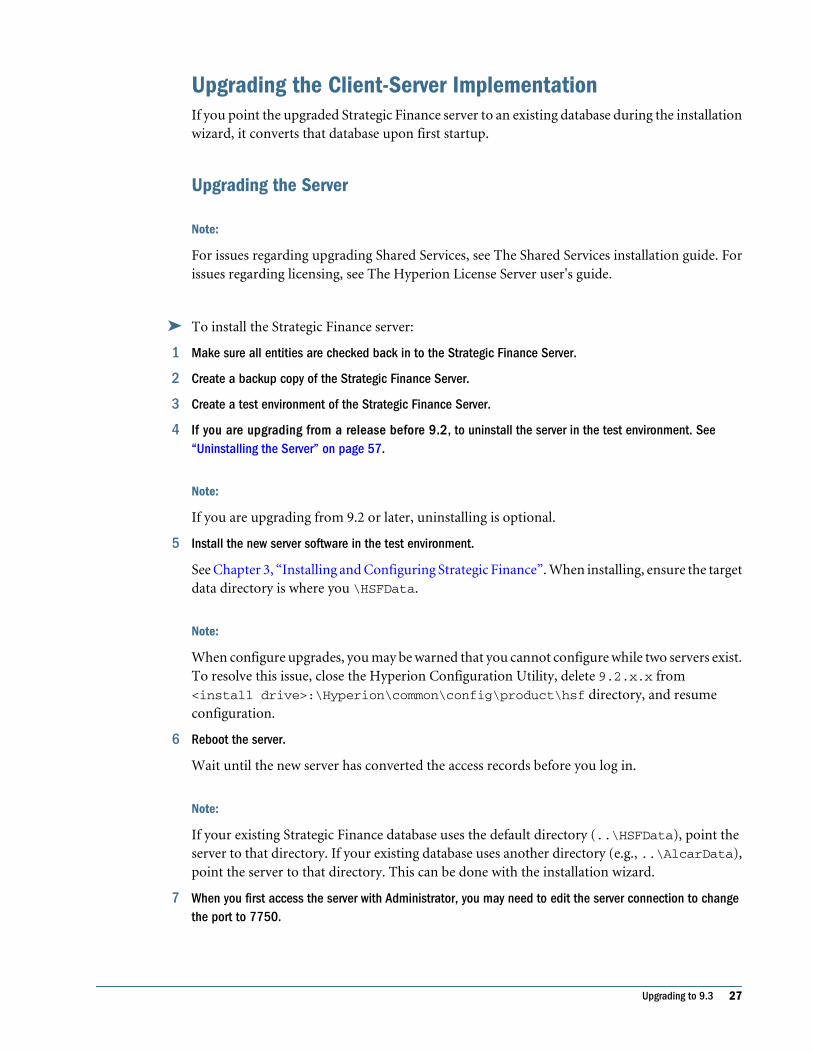
Upgrading the Client-Server ImplementationIf you point the upgraded Strategic Finance server to an existing database during the installationwizard, it converts that database upon first startup.
Upgrading the Server
Note:
For issues regarding upgrading Shared Services, see The Shared Services installation guide. Forissues regarding licensing, see The Hyperion License Server user's guide.
➤ To install the Strategic Finance server:
1 Make sure all entities are checked back in to the Strategic Finance Server.
2 Create a backup copy of the Strategic Finance Server.
3 Create a test environment of the Strategic Finance Server.
4 If you are upgrading from a release before 9.2, to uninstall the server in the test environment. See“Uninstalling the Server” on page 57.
Note:
If you are upgrading from 9.2 or later, uninstalling is optional.
5 Install the new server software in the test environment.
See Chapter 3, “Installing and Configuring Strategic Finance”. When installing, ensure the targetdata directory is where you \HSFData.
Note:
When configure upgrades, you may be warned that you cannot configure while two servers exist.To resolve this issue, close the Hyperion Configuration Utility, delete 9.2.x.x from<install drive>:\Hyperion\common\config\product\hsf directory, and resumeconfiguration.
6 Reboot the server.
Wait until the new server has converted the access records before you log in.
Note:
If your existing Strategic Finance database uses the default directory (..\HSFData), point theserver to that directory. If your existing database uses another directory (e.g., ..\AlcarData),point the server to that directory. This can be done with the installation wizard.
7 When you first access the server with Administrator, you may need to edit the server connection to changethe port to 7750.
Upgrading to 9.3 27

Upgrading the Client
➤ To upgrade the client, install the new Strategic Finance client software.
1 If you are upgrading from a release before 9.2, uninstall the client.
See Chapter 6, “Uninstalling Strategic Finance”.
2 Install the new client software.
3 When you first access the server with an upgraded client, you may need to edit the server connection andchange the port number to 7750.
28 Upgrading to Strategic Finance 9.3

3Installing and Configuring
Strategic Finance
In This Chapter
Installing the Server.. . . . . . . . . . . . . . . . . . . . . . . . . . . . . . . . . . . . . . . . . . . . . . . . . . . . . . . . . . . . . . . . . . . . . . . . . . . . . . . . . . . . . . . . . . . . . . . . . . . . . . . . . . . . . . .29
Verifying the HSFService Installation ... . . . . . . . . . . . . . . . . . . . . . . . . . . . . . . . . . . . . . . . . . . . . . . . . . . . . . . . . . . . . . . . . . . . . . . . . . . . . . . . . . . . . . . . . . .30
Installing the Strategic Finance Client .. . . . . . . . . . . . . . . . . . . . . . . . . . . . . . . . . . . . . . . . . . . . . . . . . . . . . . . . . . . . . . . . . . . . . . . . . . . . . . . . . . . . . . . . . .31
Installing the Server
➤ To install the Strategic Finance Server:
1 From the download directory or install CD, run Setup.exe.
2 On Welcome, click Next.
3 Select a country and click Next.
4 Accept the license agreement and click Next.
5 In Directory Name, accept the default or specify another directory and click Next.
6 In Hyperion Home Directory, accept the default or enter the Hyperion Home directory and click Next.
7 In Directory for Server Data Files, accept the default or select a directory to contain server files and clickNext.
Caution!
Do not install the Strategic Finance ..\HSFData directory in a file share directory on a remoteserver or in an NAS (Network Attached Storage) area. Install .\HSFData to a local hard driveor SAN (Storage Area Network array).
8 Optional: If you use Shared Services, select Yes when prompted to register and click Next.
9 Select a setup type:
● To install standard server components, select Typical.
● To install additional server components, select Custom and the components:
❍ Shared Services Configuration Utility
❍ Hyperion Configuration Utility
Hyperion System 9 Strategic Finance Server
Installing the Server 29

Includes:
❏ Administrator Desktop Icon
Installs a startup icon on the desktop.
❏ Database Export
Supports SQLServer and Oracle export databases.
● Microsoft SQL Server 2000
Build and update scripts for database export.
● Oracle 9i
Build and update scripts for database export.
❏ Hyperion System 9 Planning/Essbase Integration
For importing and exporting with Essbase and Planning
❏ Hyperion System 9 Financial Management Integration
For importing and exporting with Financial Management
❏ Web Services
The WebServices API
10 Verify the installation data and click Next.
The server installs.
11 Click Next.
12 Optional: When prompted, click Yes to Launch Configuration Tool automatically, and click OK.
● To use the Hyperion Configuration Utility, see Chapter 4, “Configuring and Setting UpStrategic Finance”.
● To not use Hyperion Configuration Utility, continue to the next step.
13 Indicate when to restart your computer and click Finish.
Once you restart, the Strategic Finance service should run. Check the service to verify theinstallation. See “Verifying the HSFService Installation” on page 30.
14 Configure Strategic Finance. See Chapter 4, “Configuring and Setting Up Strategic Finance”.
Verifying the HSFService Installation
➤ To verify the Strategic Finance Service:
1 From the Windows desktop, select Start > Control Panel > Administrative Tools > Services.
2 In the Services utility, ensure that HS9 Strategic Finance Service was added and is running.
3 Optional: If it has not been installed, run service-install.bat from:
<drive>:\Hyperion\StrategicFinance\Server\service-install.bat
30 Installing and Configuring Strategic Finance

4 Optional: In the Services utility, right-click HSFService and select Start.
Installing the Strategic Finance ClientBefore you install the client, you must configure the Strategic Finance server. See Chapter 4,“Configuring and Setting Up Strategic Finance”.
➤ To install the client:
1 From the download directory or install CD, runsetup.exe.
2 On Welcome, click Next.
3 Select a country and click Next.
4 Select I AGREE and click Next.
5 In Directory Name, accept the default or specify another directory, and click Next.
6 Under Hyperion Home Directory, accept the default or enter a filepath for Hyperion Home and click Next.
7 Select a setup type:
● To install the standard client components, select Typical and click Next.
● To install additional components, select Custom and click Next.
8 Optional: If select Custom, choose components:
● Hyperion System 9 Strategic Finance Client
Includes:
❍ Desktop Icon
❍ Hyperion System 9 Financial Management Integration
For importing and exporting with Oracle's Hyperion® Financial Management – System9.
❍ Hyperion System 9 Planning/Analytic Services Integration
For importing and exporting with Oracle's Hyperion® Planning – System 9 and Oracle'sHyperion® Essbase® – System 9 .
❍ Hyperion Enterprise Integration
For importing and exporting with Oracle's Hyperion® Enterprise®.
● Server Administration Tool
Includes these Administrator utility.
9 When prompted, confirm that you entered the correct installation data and click Next.
The client installs.
10 When the installation finishes, click Next.
11 Select Yes, restart my computer and click Finish.
Installing the Strategic Finance Client 31

Note:
If you use Shared Services, seeChapter 4, “Configuring and Setting Up Strategic Finance”.
32 Installing and Configuring Strategic Finance

4Configuring and Setting Up
Strategic Finance
In This Chapter
Hyperion Configuration Utility . . . . . . . . . . . . . . . . . . . . . . . . . . . . . . . . . . . . . . . . . . . . . . . . . . . . . . . . . . . . . . . . . . . . . . . . . . . . . . . . . . . . . . . . . . . . . . . . . . . . .33
Preparing to Use Hyperion Configuration Utility . . . . . . . . . . . . . . . . . . . . . . . . . . . . . . . . . . . . . . . . . . . . . . . . . . . . . . . . . . . . . . . . . . . . . . . . . . . . . . . . .33
Task Sequence ... . . . . . . . . . . . . . . . . . . . . . . . . . . . . . . . . . . . . . . . . . . . . . . . . . . . . . . . . . . . . . . . . . . . . . . . . . . . . . . . . . . . . . . . . . . . . . . . . . . . . . . . . . . . . . . . . . .34
About Configuring Product Upgrades ... . . . . . . . . . . . . . . . . . . . . . . . . . . . . . . . . . . . . . . . . . . . . . . . . . . . . . . . . . . . . . . . . . . . . . . . . . . . . . . . . . . . . . . . . .34
Launching Hyperion Configuration Utility . . . . . . . . . . . . . . . . . . . . . . . . . . . . . . . . . . . . . . . . . . . . . . . . . . . . . . . . . . . . . . . . . . . . . . . . . . . . . . . . . . . . . . . .35
Registering Products with Shared Services ... . . . . . . . . . . . . . . . . . . . . . . . . . . . . . . . . . . . . . . . . . . . . . . . . . . . . . . . . . . . . . . . . . . . . . . . . . . . . . . . . . . .36
Configuring a Database ... . . . . . . . . . . . . . . . . . . . . . . . . . . . . . . . . . . . . . . . . . . . . . . . . . . . . . . . . . . . . . . . . . . . . . . . . . . . . . . . . . . . . . . . . . . . . . . . . . . . . . . . .36
Deregistering Products with Shared Services... . . . . . . . . . . . . . . . . . . . . . . . . . . . . . . . . . . . . . . . . . . . . . . . . . . . . . . . . . . . . . . . . . . . . . . . . . . . . . . . . .39
Product-Specific Configuration ... . . . . . . . . . . . . . . . . . . . . . . . . . . . . . . . . . . . . . . . . . . . . . . . . . . . . . . . . . . . . . . . . . . . . . . . . . . . . . . . . . . . . . . . . . . . . . . . .40
Reconfiguring Hyperion Products .. . . . . . . . . . . . . . . . . . . . . . . . . . . . . . . . . . . . . . . . . . . . . . . . . . . . . . . . . . . . . . . . . . . . . . . . . . . . . . . . . . . . . . . . . . . . . . . .42
Completing Hyperion Configuration Utility . . . . . . . . . . . . . . . . . . . . . . . . . . . . . . . . . . . . . . . . . . . . . . . . . . . . . . . . . . . . . . . . . . . . . . . . . . . . . . . . . . . . . . .43
Configuration Troubleshooting ... . . . . . . . . . . . . . . . . . . . . . . . . . . . . . . . . . . . . . . . . . . . . . . . . . . . . . . . . . . . . . . . . . . . . . . . . . . . . . . . . . . . . . . . . . . . . . . . . .43
Hyperion Configuration UtilityHyperion Configuration Utility provides these tasks for configuration and reconfiguration ofHyperion products:
● Product activation—Hyperion Configuration Utility detects installed components and listsdeactivated products. See ???.
● Shared Services registration—Required for all products. See “Registering Products withShared Services” on page 36.
● Database configuration—Required for products with databases. See “Configuring aDatabase” on page 36.
● Application server deployment—Required for products with application servers. See ???.
● Shared Services deregistration—For deregistering products from Shared Services beforeuninstalling. See “Deregistering Products with Shared Services” on page 39.
Preparing to Use Hyperion Configuration UtilityTasks to complete before using Hyperion Configuration Utility the first time:
1. Obtain a license for each product.
Hyperion Configuration Utility 33

2. Install and start Hyperion License Server, and copy the license file to <HYPERION_HOME>\common\LicenseServer\Licenses.
3. Install, configure, and start the Shared Services server.
4. Install an application server.
5. Prepare a database to use for relational storage.
6. Install Hyperion products.
Note:
Do not start the product that you are configuring.
7. Start Hyperion License Server and Shared Services server, if not started.
Task SequenceHyperion Configuration Utility performs multiple configuration tasks in this order:
● Product activation
● Shared Services registration
● Database configuration
● Application server deployment
The product activation task is performed first and, if activation fails, you cannot perform theremaining configuration tasks. All input for Shared Services registration, database configuration,and application server deployment is gathered by Hyperion Configuration Utility to performthese tasks.
You can use Hyperion Configuration Utility to perform configuration tasks in many ways:
● Tasks can be sequential for multiple products in one session
● Individual tasks can be performed across multiple products
● Tasks can be performed sequentially or individually for a product
As a troubleshooting measure, configure products separately.
About Configuring Product UpgradesUse Hyperion Configuration Utility to configure products when they are upgraded from aprevious Hyperion release (for example, 9.x or 4.x). Hyperion Configuration Utility determines(and the product selection page indicates) whether the products installed on the computer arenew or upgraded.
All configuration tasks are available for upgraded products; however, for upgraded productsconfigured for relational databases, the database configuration page is read-only except for thepassword. You can configure one upgraded product at a time, because each product may be
34 Configuring and Setting Up Strategic Finance
configured per database. Similarly, you cannot configure new products and upgraded productssimultaneously.
If you are upgrading Shared Services and other Hyperion products, upgrade Shared Servicesfirst. You must activate upgraded products and reregister them with Shared Services.
Note:
Hyperion Configuration Utility is backward compatible with previous Hyperion releases andcan be used to configure products for previous releases.
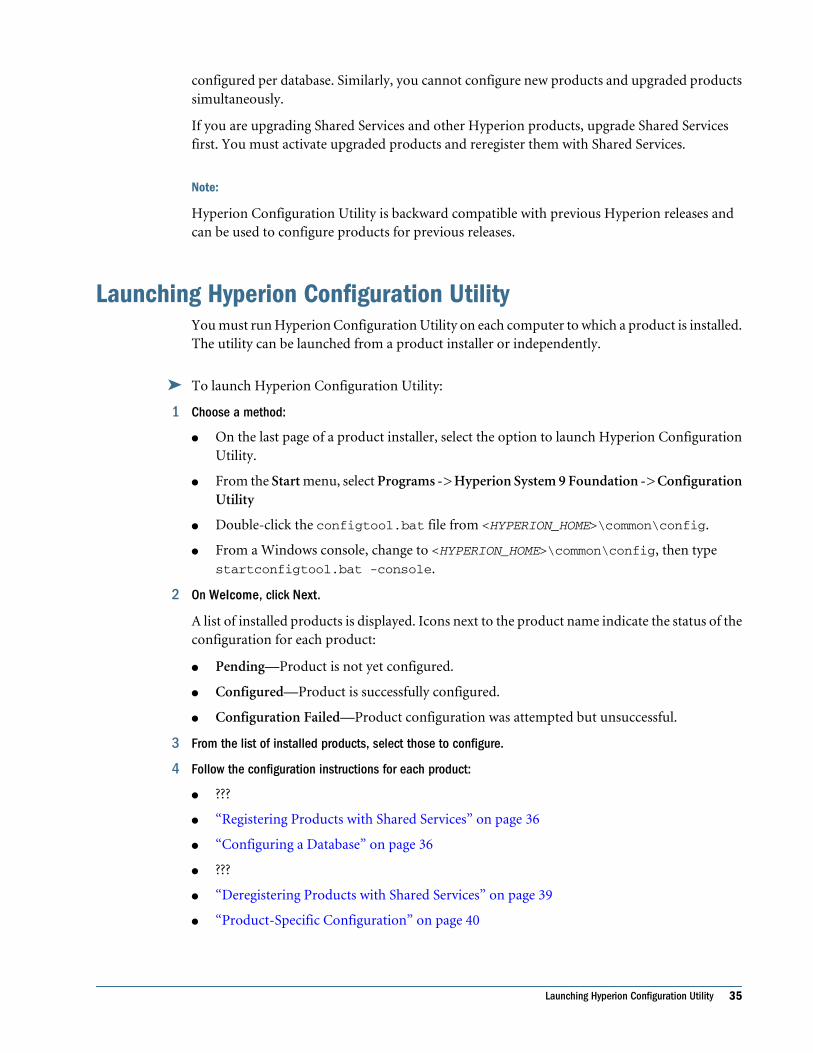
Launching Hyperion Configuration UtilityYou must run Hyperion Configuration Utility on each computer to which a product is installed.The utility can be launched from a product installer or independently.
➤ To launch Hyperion Configuration Utility:
1 Choose a method:
● On the last page of a product installer, select the option to launch Hyperion ConfigurationUtility.
● From the Start menu, select Programs -> Hyperion System 9 Foundation -> ConfigurationUtility
● Double-click the configtool.bat file from <HYPERION_HOME>\common\config.
● From a Windows console, change to <HYPERION_HOME>\common\config, then typestartconfigtool.bat -console.
2 On Welcome, click Next.
A list of installed products is displayed. Icons next to the product name indicate the status of theconfiguration for each product:
● Pending—Product is not yet configured.
● Configured—Product is successfully configured.
● Configuration Failed—Product configuration was attempted but unsuccessful.
3 From the list of installed products, select those to configure.
4 Follow the configuration instructions for each product:
● ???
● “Registering Products with Shared Services” on page 36
● “Configuring a Database” on page 36
● ???
● “Deregistering Products with Shared Services” on page 39
● “Product-Specific Configuration” on page 40
Launching Hyperion Configuration Utility 35

Registering Products with Shared ServicesShared Services functionality is programmed into Hyperion products to enable userprovisioning, single-sign on, and metadata management.
Products that implement Shared Services functionality require access to the Shared Servicesserver and to a database dedicated to Shared Services. When a product is registered with SharedServices, a registration file is created under its corresponding product directory in SharedServices.
➤ To register products with Shared Services:
1 Launch Hyperion Configuration Utility.
See “Launching Hyperion Configuration Utility” on page 35.
2 From the list of installed products, select those to configure.
3 If you have not activated the products, activate them.
See ???.
4 From the list of configuration tasks for each selected product, select Shared Services Registration andclick Next.
5 Specify Shared Services server information:
Table 3 Shared Services Server Fields
Field Instruction
Server Name Enter the host name where Shared Services server resides. Do not specify an IP address, especiallyin DHCP environments. Only alphanumeric characters and these special characters are valid: dash( - ), underscore ( _ ), dot (.).
Port Enter the Shared Services server port number, or accept the default (58080).
User Enter the username of the Shared Services Administrator.
Password Enter the password of the Shared Services Administrator.
SSL Select if you are using Secure Sockets Layer (SSL).
6 Click Next.
Configuring a DatabaseWhen you configure Hyperion products to use a database, Hyperion Configuration Utilityensures that the database is connected and is a supported database type. If a database is detected,you may be prompted to choose whether to use the detected repository or create a repository.For some products, this affects relational and OpenLDAP databases.
If errors occur during a multiple-product configuration terminating one product, configurationcontinues for the other products. Hyperion Configuration Utility displays error messages on asummary page when the process completes.
36 Configuring and Setting Up Strategic Finance

If you are configuring a Microsoft SQL Server database, Hyperion Configuration Utility supportsWindows Authentication for a SQL Server connection. For instructions, see “Microsoft SQLServer Windows Authentication” on page 39.
➤ To configure a relational database:
1 Launch Hyperion Configuration Utility.
See “Launching Hyperion Configuration Utility” on page 35.
2 From the list of installed products, select those to configure.
3 If you have not activated the products, activate them.
See ???.
4 From the list of configuration tasks for each selected product, select Configure Database, and click Next.
5 From the list of supported databases, select the database and click Next.
The database configuration details page is displayed.
Note:
If you are configuring a product upgrade, the fields on this page are read-only except for thepassword.
6 Specify database information:
Table 4 Database Configuration Fields
Field Instruction
Server Enter the computer name of the server hosting the database.
Port Specify the server port number on which the database listens, or accept the defaultport:
● DB2—50000
● Oracle—1521
● SQL Server—1433
● MySQL—3306
Product Review the name of each product being configured and its install location. You cannotchange the field.
Database or SID (Oracle only) Enter the database name or the Oracle system identification (database instance).You can enter only English alphanumeric characters and the dash character (-).
Username Enter the name of the database owner.
Password Enter the password of the database owner.
Confirm Password
MySQL only
Re-enter the password of the database owner.
Data Tablespace Enter the tablespace name to contain tables. Optional.
Configuring a Database 37

Field Instruction
Oracle only
Index Tablespace
Oracle only
Enter the tablspace name to contain indexes. Optional.
7 Click Next to view status.
8 Click Next.
Changing Database Passwords
➤ To change database-owner passwords:
1 Change the user’s password externally in the database.
Note:
For MySQL, you must use Hyperion Configuration Utility to change the password.
2 Shut down Strategic Finance.
Note:
To change the password for multiple products, shut down each product. You need not shutdown Shared Services.
3 Launch Hyperion Configuration Utility.
See “Launching Hyperion Configuration Utility” on page 35.
4 From the installed product list, select products.
5 From the configuration task list for each product, select Configure Database, and click Next.
6 From the supported database list, select the database and click Next.
The database configuration details page is displayed.
7 For Password, enter a password.
Note:
If you change the user name of the database owner, data is not migrated with the user.
8 Click Next.
9 At the prompt to create a repository or reuse a repository, select to reuse the existing repository.
10 Click Next, and click Finish.
Hyperion Configuration Utility updates configuration files with the new password.
11 Start Strategic Finance.
38 Configuring and Setting Up Strategic Finance

Microsoft SQL Server Windows AuthenticationIf you are configuring a Microsoft SQL Server database, Hyperion Configuration Utility supportsWindows Authentication for a SQL Server connection.
➤ To set up Windows authentication for a SQL Server connection:
1 Set up SQL Server with your NT login user:
a. Ensure that your NT domain user is assigned to your SQL Server database (for example,hub).
b. Grant the NT domain user full access permissions to the database.
2 Launch Hyperion Configuration Utility.
See “Launching Hyperion Configuration Utility” on page 35.
3 From the list of installed products, select those to configure.
4 From the list of configuration tasks for each selected product, select Configure Database, and click Next.
5 From the list of supported databases, select SQL Server, and click Next.
6 Specify all database information except for Username and Password. Leave these fields blank.
7 Click Next and finish the configuration.
Hyperion Configuration Utility connects to databases using your NT domain username andpassword.
Deregistering Products with Shared ServicesFor Hyperion products registered with Shared Services, deregister them before uninstalling.
➤ To deregister products with Shared Services:
1 Launch Hyperion Configuration Utility.
See “Launching Hyperion Configuration Utility” on page 35.
2 Select the products to configure and click Next.
3 Select Shared Services Deregistration, and click Next.
On the Shared Services location page, the Server, Port, and User fields display the informationthat was specified when the product was registered with Shared Services.
4 In Password, enter the password for the Shared Services user.
5 Click Next.
Deregistering Products with Shared Services 39

Product-Specific Configuration
Customizing Strategic Finance with Shared ServicesIf you are upgrading from Strategic Finance 4.1, ensure the HSF Server Instance ID here is thesame used in the 4.1 installation.
➤ To Strategic Finance with Shared Services:
1 In HSF Server Application name, enter the Strategic Finance server name.
2 In HSF Server Instance ID, enter the instance ID name.
3 Click Next.
Configuring Strategic Finance for Shared ServicesThis setting effects all databases within the currently selected server.
Note:
Before performing this task, the user name for installing must be set up as a Provisioning Managerand Administrator in Shared Services. See the Hyperion System 9 Shared Service UserManagement Guide for information.
➤ To change server settings:
1 From the desktop, select Start > Programs > Hyperion System 9 Applications+ > Strategic Finance >Server > Server Administrator.
2 Select Server > Settings.
3 Select General.
4 In Security Mechanism, selectExternal Authentication.
For use with Shared Services.
Note:
Restart HSFService for these changes to take effect.
5 Click OK when finished.
6 Close Administrator and restart HSFService.
40 Configuring and Setting Up Strategic Finance

Migrating Existing Strategic Finance Users to SharedServicesIf this is the first time you have configured Strategic Finance for use with Shared Services, youmust migrate the users and user groups from Strategic Finance. After migrating users and groupsto Shared Services, the Users tab in Administrator no longer displays, as all related functionalityis in Shared Services.
Note:
Before you can perform this task, you must go to Shared Services and set up the user name youare using for the installation as a Provisioning Manager and Administrator. See the HyperionSystem 9 Shared Services User Management Guide.
Caution!
After migrating from Standard NTLM to Shared Services, you cannot revert to Standard NTLM.
➤ To migrate existing Strategic Finance users to Shared Services:
1 From the desktop select Start > Programs > Hyperion Solutions > Strategic Finance > Server > ServerAdministrator.
2 When prompted to migrate Strategic Finance users and user groups toShared Services, click OK.
3 OnUsers, under Migration Action, select a migration option for each Strategic Finance user and click OK.
For each user, the table lists:
● Name
The user name in Strategic Finance.
● User ID
The user name in the Standard NTLM Provider.
● New Shared Services ID
The user name in Shared Services. Empty if the user is not in Shared Services.
● Role
The user role in Strategic Finance transferred into Shared Services.
● Status
Indicates if the user name is located.
● Migration Action
How each user is migrated.
If a user does not exist in an external directory (NTLM, MSAD, or LDAP), select one:
❍ Create Native User
Product-Specific Configuration 41

Create a new user name to migrate in an external directory.
If a user exists in Shared Services, select one:
❍ Map to Existing User
Migrate the Strategic Finance user to the corresponding user name.
❍ Don’t Migrate
Do not copy the user to Shared Services.
4 In User Groups, under Migration Action and Role, and for each user group in the Name select an optiondefining how each is migrated, and click Finish.
For each user group, the table lists:
● Name
The user group name in Strategic Finance.
● Shared Services Name
The user group name in Shared Services. Empty if the group does not exist in Shared Services.
● Role
How each user is migrated:
❍ The ? option.
● Migration Action
How each user is migrated.
❍ If a user group is not in Shared Services, select one:
❏ Create Native Group
Create a new user group in Shared Services and migrates the users.
❍ If a user group is in Shared Services, select one:
❏ Merge
Merges the Strategic Finance user groups with corresponding groups in SharedServices.
❏ Don’t Migrate
Do not migrate the user group to Shared Services.
Reconfiguring Hyperion ProductsYou can rerun Hyperion Configuration Utility to reconfigure Hyperion products.
Note:
If you reconfigure the database, you must restart the application server.
42 Configuring and Setting Up Strategic Finance

Reconfiguration does not require product activation.
Completing Hyperion Configuration UtilityDepending on the components selected, Hyperion Configuration Utility may take some time tocomplete. Progress is logged to <HYPERION_HOME>\common\config\logs\configtool.log.
When the deployment finishes, a summary displays the tasks and status.
Note:
For troubleshooting, perform configuration tasks individually by module.
Configuration TroubleshootingBecause Hyperion Configuration Utility separates configuration from product installation,tracking and correcting configuration errors is simplified. Oracle's Hyperion® ConfigurationUtility™ logs configuration errors and warning messages to a log file, configtool.log, in acentral location:
<HYPERION_HOME>\common\config\logs
Note:
If you experience problems with configuration, as a troubleshooting measure, performconfiguration tasks individually for one product at a time.
Completing Hyperion Configuration Utility 43

44 Configuring and Setting Up Strategic Finance

5Post-Installation Tasks
In This Chapter
Verifying Startup Dependencies ... . . . . . . . . . . . . . . . . . . . . . . . . . . . . . . . . . . . . . . . . . . . . . . . . . . . . . . . . . . . . . . . . . . . . . . . . . . . . . . . . . . . . . . . . . . . . . . .45
Starting and Stopping Hyperion License Server.. . . . . . . . . . . . . . . . . . . . . . . . . . . . . . . . . . . . . . . . . . . . . . . . . . . . . . . . . . . . . . . . . . . . . . . . . . . . . . . .45
Starting and Stopping Shared Services... . . . . . . . . . . . . . . . . . . . . . . . . . . . . . . . . . . . . . . . . . . . . . . . . . . . . . . . . . . . . . . . . . . . . . . . . . . . . . . . . . . . . . . .47
Setting up Servers and Databases ... . . . . . . . . . . . . . . . . . . . . . . . . . . . . . . . . . . . . . . . . . . . . . . . . . . . . . . . . . . . . . . . . . . . . . . . . . . . . . . . . . . . . . . . . . . . .49
Connecting a Client to a Strategic Finance Server and Database... . . . . . . . . . . . . . . . . . . . . . . . . . . . . . . . . . . . . . . . . . . . . . . . . . . . . . . . . . .53
Installing PKZip® (Optional) for Database Backup and Restore... . . . . . . . . . . . . . . . . . . . . . . . . . . . . . . . . . . . . . . . . . . . . . . . . . . . . . . . . . . . .55
Verifying Startup DependenciesBefore starting Strategic Finance, verify that these components are running:
Component How to Verify Successful Startup How to Start
Hyperion License Server On the Hyperion License Server computer, run the lmstat utilityfrom a command line, or use the lmtools interface to runlmstat. See the Shared Services Installation Guide.
See the Shared Services Installation Guide.
Shared Services server On the Shared Services server computer, look for confirmationmessages in the server console window or launch Oracle'sHyperion® Shared Services User Management Console. See theHyperion System 9 Security Guide.
See the Hyperion System 9 Security Guide.
Starting and Stopping Hyperion License ServerOn Windows by default, Hyperion License Server is installed as an automatic Windows serviceso it starts when the computer on which it is installed starts. However, you can start HyperionLicense Server manually.
Starting Hyperion License Server ManuallyYou can start Hyperion License Server manually using these methods:
● Start > Programs > Hyperion System 9 Foundation > Hyperion License Server > StartLicense Server
● As a service
Verifying Startup Dependencies 45

● From the command line using the lmgrd —c command
Table 5 Manual Hyperion License Server Start Options
Goal Instructions
Start the server using specific license files Type C:\HYPERION\common\LicenseServer>lmgrd -c Licenses\license_file_name
Specify the directory containing license files Type C:\HYPERION\common\LicenseServer>lmgrd -c Licenses
Run the server in the foreground using specific license files Type C:\HYPERION\common\LicenseServer>lmgrd -c.\licenses -zlicense_file_name
Run the server in the foreground while specifying thedirectory containing license files (recommended)
Type C:\HYPERION\common\LicenseServer>lmgrd -c.\licenses -z
Licenses
Note:
Although you can add license files later without stopping and restarting Hyperion License Server,Hyperion recommends you not specify a license file when starting Hyperion License Server. Uselmreread to start using a license file while Hyperion License Server is running. For informationabout lmreread, see Chapter 7 of the FLEXnet Licensing End User Guide, “License Server Tools.”
For detailed information on starting Hyperion License Server manually, see Chapter 6 of theFLEXnet Licensing End User Guide: “Starting the License Server Manager on Windows.”
Restarting Hyperion License ServerIf Hyperion License Server abnormally shuts down, restart Hyperion License Server.
Note:
After restarting Hyperion License Server, it may take several minutes to resynchronize withapplication product servers.
Stopping Hyperion License ServerYou can gracefully shut down Oracle's Hyperion® License Server™ by using the command lineutility, lmdown.
➤ To stop Hyperion License Server:
1 Navigate to the Tools folder ($HYPERION_HOME\common\LicenseServer\Tools) and use acommand:
46 Post-Installation Tasks

lmdown -c $HYPERION_HOME\common\LicenseServer\Licenses
2 When prompted, entery.
For detailed information on using lmdown to stop License Server, see Chapter 7 of the FLEXnetLicensing End User Guide.
Starting and Stopping Shared Services
Starting Shared ServicesIf you deployed the Shared Services application server as a Windows service, to start SharedServices manually, from the Windows control panel, select Administrative Tools > Services.
➤ If you did not deploy Shared Services application server as a Windows service, to start the SharedServices server:
1 Select Start > Programs > Hyperion System 9 Foundation > Start Shared Services.
2 If the menu item does not indicate the application server to which the Shared Services server is deployed,you must start Shared Services server manually.
If you did not deploy the Shared Services application server as a Windows service, you can startit manually.
➤ To start Shared Services server manually, execute the startup script:
Application Server Path to Script
IBM WebSphere <HSS_HOME>\AppServer\InstalledApps\<AppServName>\<version>\SharedServices9\
bin\startSharedServices9.bat
BEA WebLogic <HSS_HOME>\AppServer\InstalledApps\<AppServName>\<version>\SharedServices9\
startSharedServices.bat
Oracle <OracleInstallDir>\bin\emctl start iasconsole
<OracleInstallDir>\opmn\bin\opmnctl startall
Apache Tomcat <HSS_HOME>\AppServer\InstalledApps\<AppServName>\<version>\SharedServices9\
bin\startSharedServices9.bat
Note:
<HSS_HOME> is the directory where Shared Services is installed; e.g., c:\hyperion\SharedServices\9.3.
Starting and Stopping Shared Services 47

Verifying Successful Startup of Shared Services
➤ To verify successful startup and configuration of Shared Services:
1 During startup, find these messages in the Shared Services console window:
● Database Configuration Test Passed
● Security System Initialized Successfully
● Shared Services Initialized Successfully
When Shared Services is deployed to WebSphere, the confirmation message is logged to<WebSphereInstallDir>\AppServer\logs\SharedServices9\SystemOut.log.
When Shared Services is deployed to WebLogic, if the log level is not set to WARN, theconfirmation message is logged to<HSS_HOME>\<AppServer>\InstalledApps\WebLogic\8.1\SharedServices9\ logs\SharedServices_Metadata.log
2 On the Shared Services server computer, launch the User Management Console login page by opening abrowser and entering:
http://SharedServicesServerName:port#/interop
where:
● SharedServicesServerName—the computer where Shared Services server resides
● port#—the Shared Services server port number
Default: 58080
If Shared Services server has a non-default port, specify that value. For example:
http://jdoe:58080/interop/
Note:
The URL should use an IP address or a fully qualified machine name including the domain name.If the IP address is dynamic, use the fully qualified machine name.
Note:
Select Start > Programs > Hyperion System 9 Foundation > User Management Console.
Display of the Oracle's Hyperion® Shared Services User Management Console login pageindicates that the Shared Services server started successfully.
Stopping Shared ServicesIf you installed the Shared Services application server as a Windows service, to stop SharedServices server, use the Windows control panel.
48 Post-Installation Tasks

➤ To stop Shared Services server manually:
1 Choose a method:
● For Windows, select Start > Programs > Hyperion System 9 Foundation > Stop SharedServices.
● For all systems, execute the stop script:
Application Server Path to Script
IBM WebSphere <HSS_HOME>\<AppServer>\InstalledApps\<AppServName>\<version>\SharedServices9\bin\stopSharedServices9.bat
BEA WebLogic <HSS_HOME>\<AppServer>\InstalledApps\<AppServName>\<version>\SharedServices9\stopSharedServices.bat
Oracle <OracleInstallDir>\bin\emctl stop iasconsole
<OracleInstallDir>\opmn\bin\opmnctl stopall
Apache Tomcat <HSS_HOME>\<AppServer>\InstalledApps\<AppServName>\<version>\SharedServices9\bin\stopSharedServices9.bat
Note: <HSS_HOME> is the directory where Shared Services is installed; e.g., c:\hyperion\SharedServices\9.3.
2 On WebLogic, use the FORCESHUTDOWN command to stop Shared Services server if required:
a. In a text editor, open the stop script.
See the table under Step 1 for the stop script location.
b. In the file, find SHUTDOWN, and replace it with FORCESHUTDOWN.
c. Save and execute the file.
Setting up Servers and DatabasesWhen you first install the Strategic Finance server, no servers, databases, or users exist. UseAdministrator to create Strategic Finance servers and databases, and add users to the system.
After installing Strategic Finance server, see:
● “Starting Administrator” on page 50
● “Creating Servers” on page 50
● “Connecting to a Server” on page 50
● “Creating a Database” on page 51
● “Selecting Databases” on page 51
● “Adding Users (Standard NLTM only)” on page 51
Setting up Servers and Databases 49

Starting AdministratorThe first time you access Administrator, the user name used for log in becomes the initialadministrator.
➤ To start Administrator and create the initial administrator, from the desktop, double-click theAdministrator icon:
The log in user name has now been designated as the initial administrator. Change the nameusing Administrator.
Creating Servers
➤ To create servers:
1 From Administrator, select Server > Open.
2 Next to Server on the Strategic Finance Login dialog, click ... .
3 On Select Server, click New.
4 In Address of Server on Network (IP or DNS), enter the address of the server on the network (IP Addressor Domain Name).
If you are running Administrator from the server console, you can enter “localhost” as the IPaddress.
Note:
The default DNS setting is HSFServer.
5 In Protocol for Server Connection, enter a protocol.
Note:
The default protocol is ncacn_ip_tcp.
6 In Name for this Server Connection, enter a name.
7 Click OK.
8 Optional: To automatically connect to a Strategic Finance server for future logon, select the server and selectMake Default.
9 Click OK.
Connecting to a ServerYou can connect to an existing server from the Strategic Finance Administrator.
50 Post-Installation Tasks
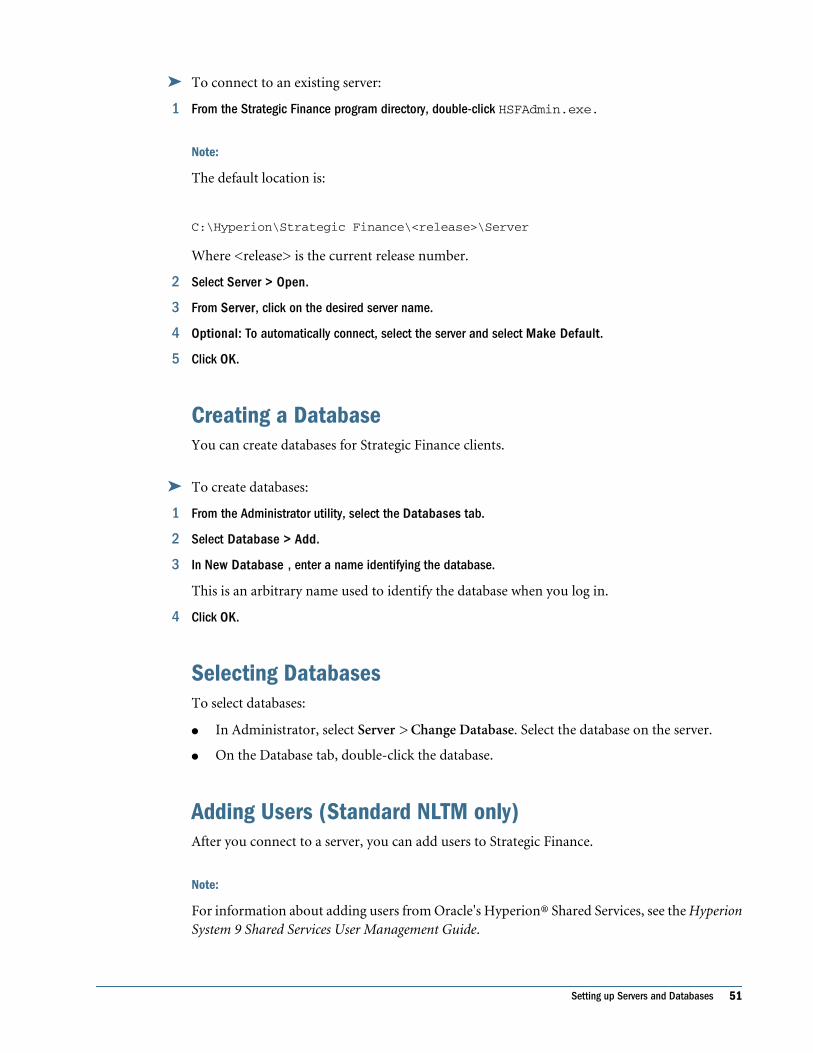
➤ To connect to an existing server:
1 From the Strategic Finance program directory, double-click HSFAdmin.exe.
Note:
The default location is:
C:\Hyperion\Strategic Finance\<release>\Server
Where <release> is the current release number.
2 Select Server > Open.
3 From Server, click on the desired server name.
4 Optional: To automatically connect, select the server and select Make Default.
5 Click OK.
Creating a DatabaseYou can create databases for Strategic Finance clients.
➤ To create databases:
1 From the Administrator utility, select the Databases tab.
2 Select Database > Add.
3 In New Database , enter a name identifying the database.
This is an arbitrary name used to identify the database when you log in.
4 Click OK.
Selecting DatabasesTo select databases:
● In Administrator, select Server > Change Database. Select the database on the server.
● On the Database tab, double-click the database.
Adding Users (Standard NLTM only)After you connect to a server, you can add users to Strategic Finance.
Note:
For information about adding users from Oracle's Hyperion® Shared Services, see the HyperionSystem 9 Shared Services User Management Guide.
Setting up Servers and Databases 51

➤ To add users:
1 From the Administrator utility, select the Users tab.
2 Select User > Add.
3 In Domain Name, enter to the domain wherein the user is a member. Click ... to browse.
4 In User Name, enter the user name in the domain. Click ... to browse.
5 In Full Name, enter the user's real name.
6 In Access Type, select an access type:
● Administrator
This enables users to:
❍ Create users and user groups
❍ Create Scenario Types
❍ Create Rule Sets for data export to an external database
● Power User
This access type enables users to:
❍ Create, check-in, and check-out entities
❍ Create and modify reports
❍ Create and modify subaccounts
❍ Create and modify forecast methods
❍ Create and modify Freeform formulas
● Data Input- Enables users to check-in and check-out entities for data input.
● Read Only — Enables users to check-out entities for viewing.
7 Optional: In Compression Level, select a compression level (default recommended).
8 Optional: Select administrator options:
● Select Edit Server Information in Summary Information to enable users to change summaryinformation in the Administrator utility.
● Select Open ALS Files to enable users to open server entities as local files.
● In E-mail address , enter an E-mail address to send server action notifications. Click SendE-mail to send a test message.
● In Phone number, enter an emergency phone number for the administrator.
9 Optional: In Notes, enter additional information.
10 Click OK.
52 Post-Installation Tasks
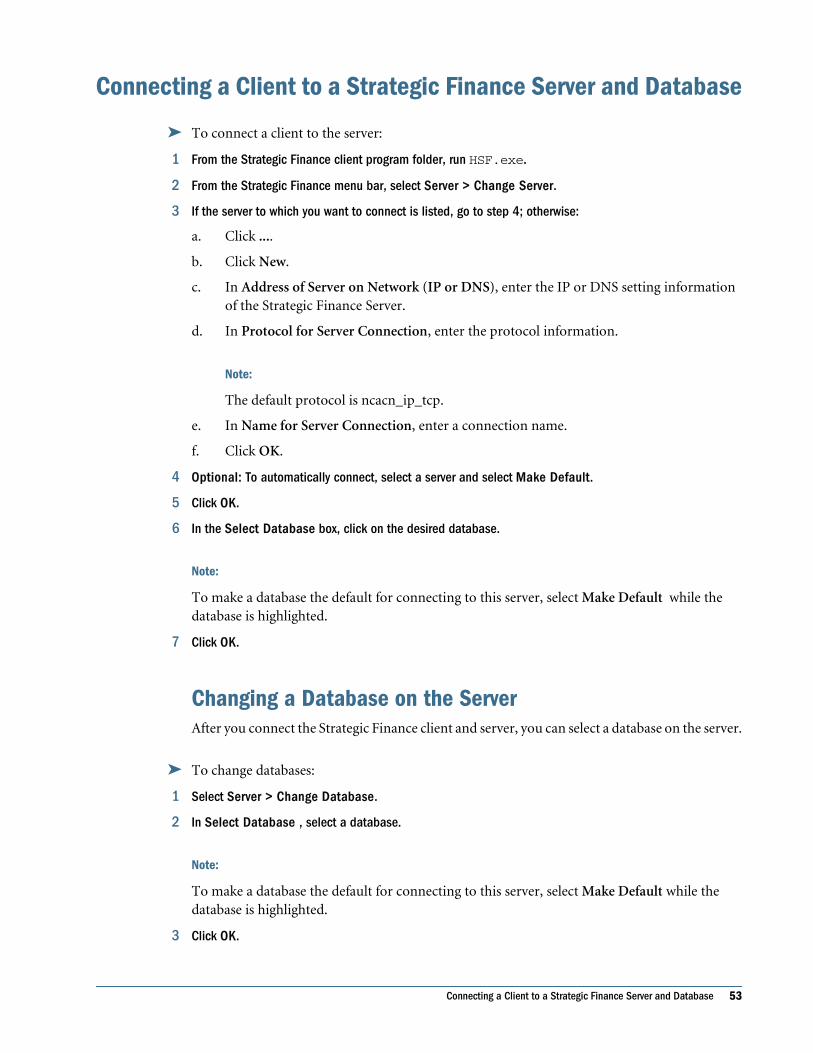
Connecting a Client to a Strategic Finance Server and Database
➤ To connect a client to the server:
1 From the Strategic Finance client program folder, run HSF.exe.
2 From the Strategic Finance menu bar, select Server > Change Server.
3 If the server to which you want to connect is listed, go to step 4; otherwise:
a. Click ....
b. Click New.
c. In Address of Server on Network (IP or DNS), enter the IP or DNS setting informationof the Strategic Finance Server.
d. In Protocol for Server Connection, enter the protocol information.
Note:
The default protocol is ncacn_ip_tcp.
e. In Name for Server Connection, enter a connection name.
f. Click OK.
4 Optional: To automatically connect, select a server and select Make Default.
5 Click OK.
6 In the Select Database box, click on the desired database.
Note:
To make a database the default for connecting to this server, select Make Default while thedatabase is highlighted.
7 Click OK.
Changing a Database on the ServerAfter you connect the Strategic Finance client and server, you can select a database on the server.
➤ To change databases:
1 Select Server > Change Database.
2 In Select Database , select a database.
Note:
To make a database the default for connecting to this server, select Make Default while thedatabase is highlighted.
3 Click OK.
Connecting a Client to a Strategic Finance Server and Database 53

After these connections are established, the other items on the Server menu become available.
Using the Server MenuThe Server menu is available from the Strategic Finance Desktop, and is used to manageinteraction with files on the Strategic Finance server, or the server itself. This table describes theServer menu options.
Table 6 Server Menu Options
Option Description
Create New Entity Creates a new file on the Strategic Finance Server, modeled on a file stored on theserver.
Copy Local File to Server Creates a new file on the Strategic Finance Server, modeled on a locally stored file.
Open Entity Retrieves an Entity, or file, from the connected Strategic Finance server. You can openEntities with read/write access (check-out with lock), or read-only access (open ascopy). If a file is checked out with read/write access, it is locked by the user.
Open Draft Retrieves draft copies of Entities.
Check-In Checks in a locked and checked out file. Disabled unless a file was checked out.
Available only when an entity is open.
Save as Draft Saves the entity as a draft copy.
Available only when an entity is open.
Release Lock Opens an interface that enables users to break locks they own.
Available only when an entity is open.
Entity Change Management Enables you to perform one or multiple operations to several Entities with onecommand.
Entity Structures Provides a convenient way to view and manage Entities.
Consolidation Structures Enables you to create and modify Consolidation structures.
Batches Enables you to create and manage batches for import-export between Hyperionproducts.
Maps Enables you to create and manage maps for import-export between Hyperion products.
List Log Files Displays a list of Strategic Finance Server transaction logs.
Change Database Changes the selected database.
Change Server Changes the selected Strategic Finance server.
Disconnect Disconnects from the Strategic Finance server.
54 Post-Installation Tasks

Installing PKZip® (Optional) for Database Backup and RestoreYou can back up databases for archiving and sharing. An archived database can be restoredlocally or transmitted to a related system. You use the PKZip®Command Line for backing upand restoring Strategic Finance databases files through Administrator. PKZip is purchasedthrough www.pkware.com.
Installing PKZip® (Optional) for Database Backup and Restore 55

56 Post-Installation Tasks

6Uninstalling Strategic Finance
In This Chapter
Uninstalling the Server .. . . . . . . . . . . . . . . . . . . . . . . . . . . . . . . . . . . . . . . . . . . . . . . . . . . . . . . . . . . . . . . . . . . . . . . . . . . . . . . . . . . . . . . . . . . . . . . . . . . . . . . . . . .57
Uninstalling the Client .. . . . . . . . . . . . . . . . . . . . . . . . . . . . . . . . . . . . . . . . . . . . . . . . . . . . . . . . . . . . . . . . . . . . . . . . . . . . . . . . . . . . . . . . . . . . . . . . . . . . . . . . . . . .58
Uninstalling the ServerYou can uninstall the server from the Control Panel or using the product uninstaller.
Uninstalling from the Control PanelFollow this procedure to remove the server. If the procedure fails, use the uninstall utility.
Caution!
Before uninstalling, ensure all entities are checked into the server.
➤ To uninstall the server:
1 Select Start > Settings > Control Panel > Administrative > Services.
2 On the Services box, select the Strategic Finance server:
● In 9.3: Hyperion S9 Strategic Finance Service
● Between 2.9 and 9.2: HSFService
● Before 2.9: AlcarService
3 Click Stop.
4 From the desktop, select Start > Settings > Control Panel > Add/Remove Programs.
5 On the Add/Remove Programs box, select the Strategic Finance Server as follows:
● Release 9.3: Hyperion S9 Strategic Finance Service
● Between 2.9 and 9.2: HSFService
● Before 2.9: AlcarService
Uninstalling the Server 57

Note:
Do not remove the existing database directory (depending on your release, it may be called ..\HSFData or ..\AlcarData). When the new server software is installed, it automaticallydetects the database(s) in these directories.
6 Click Remove.
7 Reboot the computer.
Uninstalling from the Command Prompt
➤ To uninstall from the command prompt:
1 Open a command prompt.
2 Navigate to the uninstall directory.
Default:
<drive>:\Hyperion\StrategicFinance\Server\StrategicFinanceUninstaller
3 Execute the uninstall utility using the -console switch.
Example:
uninstallhsfserver -console
4 Follow the prompts.
5 Reboot the computer.
Uninstalling the Client
Uninstalling from the Control Panel
➤ To uninstall the Strategic Finance client:
1 Select Start > Settings > Control Panel > Add/Remove Programs.
2 On the Add/Remove Programs box, select the Strategic Finance client.
Note:
This may be Oracle's Hyperion® Strategic Finance or Alcar.
3 Click Remove.
4 Reboot the computer.
58 Uninstalling Strategic Finance

Uninstalling Using the Command PromptIf a standard uninstall has failed, use the uninstall utility.
➤ To uninstall from a command prompt:
1 Open a command prompt.
2 Navigate to the uninstall directory.
Default:
<drive>:\Hyperion\StrategicFinance\Client\StrategicFinanceUninstaller
Where <release> is the number of the current release.
3 Uninstall using the -console switch.
Example:
uninstallhsfclient -console
4 Follow the prompts.
5 Reboot the computer.
Uninstalling the Client 59

60 Uninstalling Strategic Finance

Index
Cconfiguration status, 35Configuration Utility
configuration status, 35described, 33order of tasks, 34prerequisites, 33task list, 33
DDatabase
concept, 8
Ffolders installed
HYPERION_HOME directory, 18
HHyperion Home, 18HYPERION_HOME environment variable, 18
LLicense Server
starting, 45starting manually on Windows, 45
SShared Services
starting, 47stopping, 48
shutdowncommands
for Shared Services server, 49shutting down Shared Services, 48starting Shared Services, 47
startupcommands
for Shared Services server, 47stopping Shared Services, 48
UUser Management Console
launchingURL, 48
WWindows services
starting, 47
C D F H L S U W
Index 61

C D F H L S U W
62 Index