Human Micronutrient Chemiluminescent (7-Plex) · Principle of the Assay 2 ... Appendix A: Plate...
20
For Research Use Only Version 2.9 Not For Use In Diagnostic Procedures Human Micronutrient Chemiluminescent (7-Plex)
Transcript of Human Micronutrient Chemiluminescent (7-Plex) · Principle of the Assay 2 ... Appendix A: Plate...

For Research Use Only Version 2.9Not For Use In Diagnostic Procedures
Human MicronutrientChemiluminescent (7-Plex)

1For Research Use Only
Manufactured and Distributed by:Quansys Biosciences
365 North 600 West Logan, Utah 84341, USATEL: (888) 782-6797
E-MAIL: [email protected]
For International Distributors see: http://www.quansysbio.com/distributors
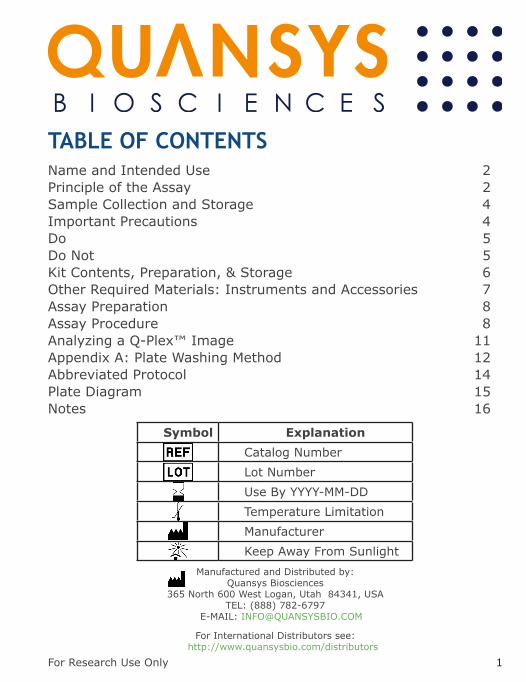
TABLE OF CONTENTSName and Intended Use 2Principle of the Assay 2Sample Collection and Storage 4Important Precautions 4Do 5Do Not 5Kit Contents, Preparation, & Storage 6Other Required Materials: Instruments and Accessories 7Assay Preparation 8Assay Procedure 8Analyzing a Q-Plex™ Image 11Appendix A: Plate Washing Method 12Abbreviated Protocol 14Plate Diagram 15Notes 16
Symbol ExplanationCatalog NumberLot NumberUse By YYYY-MM-DDTemperature LimitationManufacturerKeep Away From Sunlight
2 For Research Use Only
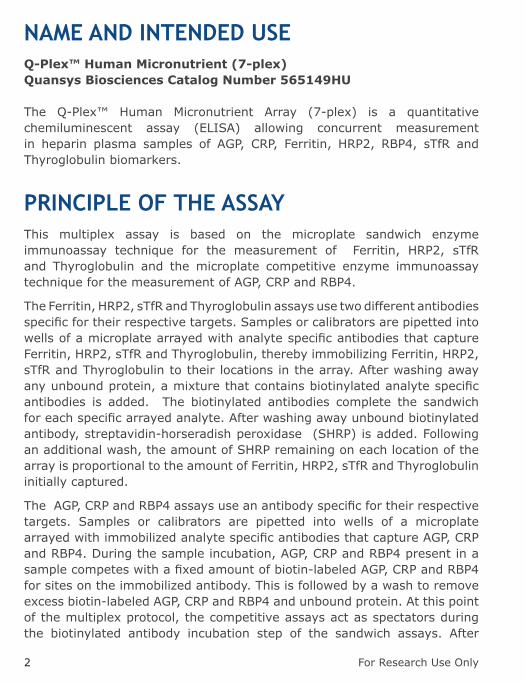
NAME AND INTENDED USEQ-Plex™ Human Micronutrient (7-plex)Quansys Biosciences Catalog Number 565149HU
The Q-Plex™ Human Micronutrient Array (7-plex) is a quantitative chemiluminescent assay (ELISA) allowing concurrent measurement in heparin plasma samples of AGP, CRP, Ferritin, HRP2, RBP4, sTfR and Thyroglobulin biomarkers.
PRINCIPLE OF THE ASSAY This multiplex assay is based on the microplate sandwich enzyme immunoassay technique for the measurement of Ferritin, HRP2, sTfR and Thyroglobulin and the microplate competitive enzyme immunoassay technique for the measurement of AGP, CRP and RBP4.
The Ferritin, HRP2, sTfR and Thyroglobulin assays use two different antibodies specific for their respective targets. Samples or calibrators are pipetted into wells of a microplate arrayed with analyte specific antibodies that capture Ferritin, HRP2, sTfR and Thyroglobulin, thereby immobilizing Ferritin, HRP2, sTfR and Thyroglobulin to their locations in the array. After washing away any unbound protein, a mixture that contains biotinylated analyte specific antibodies is added. The biotinylated antibodies complete the sandwich for each specific arrayed analyte. After washing away unbound biotinylated antibody, streptavidin-horseradish peroxidase (SHRP) is added. Following an additional wash, the amount of SHRP remaining on each location of the array is proportional to the amount of Ferritin, HRP2, sTfR and Thyroglobulin initially captured.
The AGP, CRP and RBP4 assays use an antibody specific for their respective targets. Samples or calibrators are pipetted into wells of a microplate arrayed with immobilized analyte specific antibodies that capture AGP, CRP and RBP4. During the sample incubation, AGP, CRP and RBP4 present in a sample competes with a fixed amount of biotin-labeled AGP, CRP and RBP4 for sites on the immobilized antibody. This is followed by a wash to remove excess biotin-labeled AGP, CRP and RBP4 and unbound protein. At this point of the multiplex protocol, the competitive assays act as spectators during the biotinylated antibody incubation step of the sandwich assays. After
3For Research Use Only
washing away unbound biotinylated antibody, SHRP is added. Following an additional wash, the amount of SHRP remaining on each location of the array is inversely proportional to the amount of AGP, CRP and RBP4 initially present in a sample.
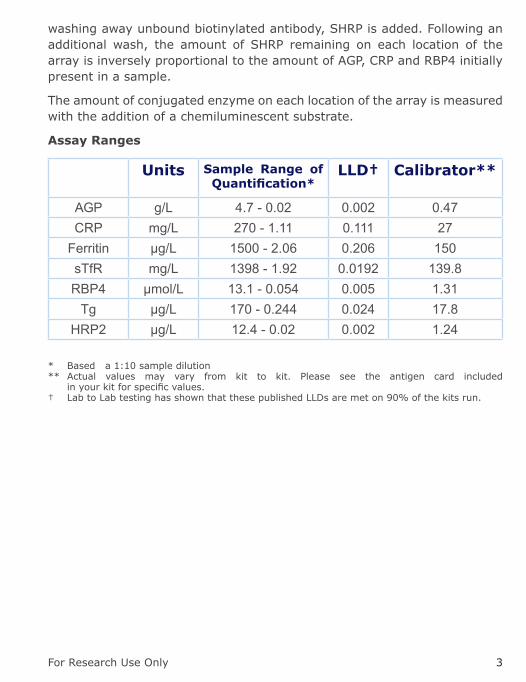
The amount of conjugated enzyme on each location of the array is measured with the addition of a chemiluminescent substrate.
Assay Ranges
Units Sample Range of Quantification*
LLD† Calibrator**
AGP g/L 4.7 - 0.02 0.002 0.47CRP mg/L 270 - 1.11 0.111 27
Ferritin μg/L 1500 - 2.06 0.206 150sTfR mg/L 1398 - 1.92 0.0192 139.8RBP4 μmol/L 13.1 - 0.054 0.005 1.31
Tg μg/L 170 - 0.244 0.024 17.8HRP2 μg/L 12.4 - 0.02 0.002 1.24
* Based a 1:10 sample dilution** Actual values may vary from kit to kit. Please see the antigen card included in your kit for specific values.† Lab to Lab testing has shown that these published LLDs are met on 90% of the kits run.

4 For Research Use Only
SAMPLE COLLECTION AND STORAGEThe sample collection and storage conditions are intended as general guidelines. Sample stability has not been evaluated.
Plasma - Collect plasma using heparin as an anticoagulant. Centrifuge for 15 minutes at 1000 x g within 30 minutes of collection. Assay immediately or aliquot and store samples at ≤ -20 °C. Avoid repeated freeze-thaw cycles.
IMPORTANT PRECAUTIONS 1. Read all instructions before beginning test.
2. For research use only. Not for use in diagnostic procedures.
3. The kit should not be used beyond the expiration date on the kit label.
4. If running multiple kits, a calibration curve must be included for each 96-well plate. The curve from one plate cannot be used to calculate sample values from other plates.
5. Do not mix or substitute reagents with those from other kits or lots.
6. All products are carefully validated, however due to the variability encountered in biological buffers and sample matrices, the possibility of interference or sample matrix effects cannot be excluded.
7. Warning: The calibrator contains components of human origin. These components have been tested at the donor level and found negative for HBsAg, HIV-1 and HIV-2 antibodies, and HCV. However, consider all materials as potentially infectious and use only approved guidelines for the proper handling and disposal of infectious material.
5For Research Use Only
DO• Do set up and practice using the Q-View™ Imager Pro or Q-View™
Imager LS before starting the assay.
• Do be exact when setting shaker speed to 500 RPM.
• Do dilute all samples at least 1:10 (one part sample to nine parts diluent) with the provided sample diluent to prevent false positives, and mix thoroughly.
• Pre-wet pipette tips three times by drawing up the liquid into the pipette and then dispensing back into the original vessel prior to the addition of samples or calibrators to the microplate.
• Do load all calibrators and samples into the microplate within 10 minutes of each other.
• Do be exact with incubation times, particularly the streptavidin-horseradish peroxidase (SHRP) incubation.
• Do be exact when mixing Substrate A and B and mix thoroughly.
DO NOT• Do not allow the plate to dry out between steps.
• Do not allow the substrate or SHRP to be exposed to UV light, as this may degrade it.
6 For Research Use Only
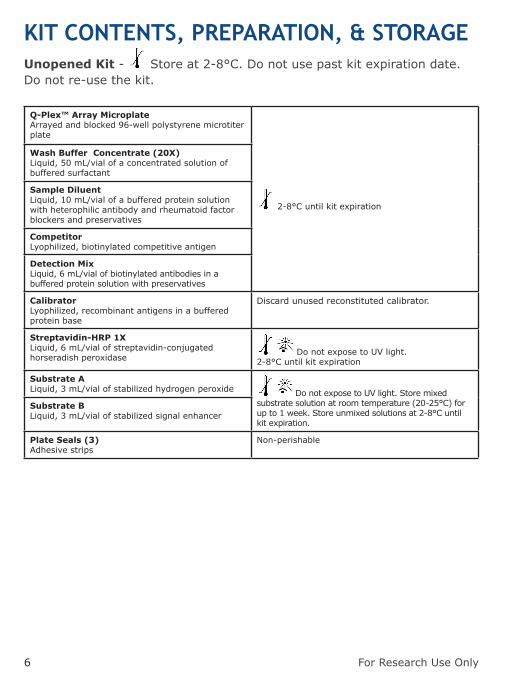
KIT CONTENTS, PREPARATION, & STORAGEUnopened Kit - Store at 2-8°C. Do not use past kit expiration date.Do not re-use the kit.
Q-Plex™ Array MicroplateArrayed and blocked 96-well polystyrene microtiter plate
2-8°C until kit expiration
Wash Buffer Concentrate (20X)Liquid, 50 mL/vial of a concentrated solution of buffered surfactant
Sample DiluentLiquid, 10 mL/vial of a buffered protein solution with heterophilic antibody and rheumatoid factor blockers and preservatives
CompetitorLyophilized, biotinylated competitive antigen
Detection MixLiquid, 6 mL/vial of biotinylated antibodies in a buffered protein solution with preservatives
CalibratorLyophilized, recombinant antigens in a buffered protein base
Discard unused reconstituted calibrator.
Streptavidin-HRP 1XLiquid, 6 mL/vial of streptavidin-conjugated horseradish peroxidase
Do not expose to UV light.2-8°C until kit expiration
Substrate ALiquid, 3 mL/vial of stabilized hydrogen peroxide Do not expose to UV light. Store mixed
substrate solution at room temperature (20-25°C) for up to 1 week. Store unmixed solutions at 2-8°C until kit expiration.
Substrate BLiquid, 3 mL/vial of stabilized signal enhancer
Plate Seals (3)Adhesive strips
Non-perishable
7For Research Use Only
OTHER REQUIRED MATERIALS: INSTRUMENTS AND ACCESSORIESIn addition to the kit contents listed, the following materials are required to run this assay.
1. Multichannel pipette (20-200 μL) and/or a single channel pipette (20- 200 μL) and tips
2. Polypropylene tubes or polypropylene 96-well plate(s) for sample and calibrator preparation
a. Recommended: Nunc® MicroWell™ 96-Well Plates, Polypropylene, 249944; Eppendorf® LoBind Protein or Genomic Microcentrifuge Tubes, 022431102
3. Q-View™ Imager and Software
4. Microplate shaker
a. For example: Barnstead/labline 4625 titer plate shaker, IKA MTS 2/4 for 2 or 4 microtiter plates, or equivalent, capable of 500 RPM.
5. Deionized water
6. Microplate washer
7. Graduated cylinder for the preparation of wash buffer
8 For Research Use Only
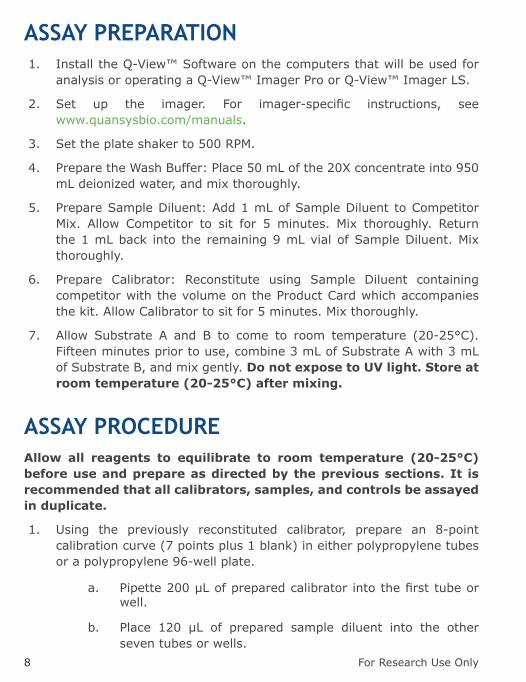
ASSAY PREPARATION 1. Install the Q-View™ Software on the computers that will be used for
analysis or operating a Q-View™ Imager Pro or Q-View™ Imager LS.
2. Set up the imager. For imager-specific instructions, see www.quansysbio.com/manuals.
3. Set the plate shaker to 500 RPM.
4. Prepare the Wash Buffer: Place 50 mL of the 20X concentrate into 950 mL deionized water, and mix thoroughly.
5. Prepare Sample Diluent: Add 1 mL of Sample Diluent to Competitor Mix. Allow Competitor to sit for 5 minutes. Mix thoroughly. Return the 1 mL back into the remaining 9 mL vial of Sample Diluent. Mix thoroughly.
6. Prepare Calibrator: Reconstitute using Sample Diluent containing competitor with the volume on the Product Card which accompanies the kit. Allow Calibrator to sit for 5 minutes. Mix thoroughly.
7. Allow Substrate A and B to come to room temperature (20-25°C). Fifteen minutes prior to use, combine 3 mL of Substrate A with 3 mL of Substrate B, and mix gently. Do not expose to UV light. Store at room temperature (20-25°C) after mixing.
ASSAY PROCEDUREAllow all reagents to equilibrate to room temperature (20-25°C) before use and prepare as directed by the previous sections. It is recommended that all calibrators, samples, and controls be assayed in duplicate.
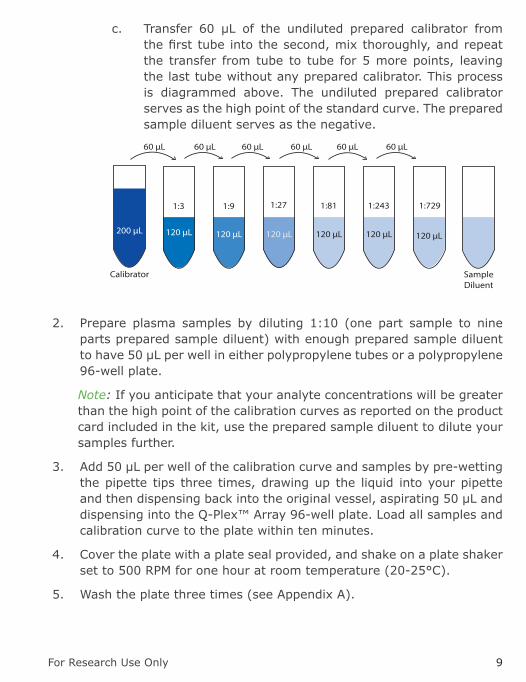
1. Using the previously reconstituted calibrator, prepare an 8-point calibration curve (7 points plus 1 blank) in either polypropylene tubes or a polypropylene 96-well plate.
a. Pipette 200 μL of prepared calibrator into the first tube or well.
b. Place 120 μL of prepared sample diluent into the other seven tubes or wells.
9For Research Use Only
c. Transfer 60 μL of the undiluted prepared calibrator from the first tube into the second, mix thoroughly, and repeat the transfer from tube to tube for 5 more points, leaving the last tube without any prepared calibrator. This process is diagrammed above. The undiluted prepared calibrator serves as the high point of the standard curve. The prepared sample diluent serves as the negative.
Calibrator SampleDiluent
1:3 1:9 1:27 1:81 1:243 1:729
200 μL
60 μL 60 μL 60 μL 60 μL 60 μL 60 μL
120 μL 120 μL 120 μL 120 μL 120 μL 120 μL
2. Prepare plasma samples by diluting 1:10 (one part sample to nine parts prepared sample diluent) with enough prepared sample diluent to have 50 μL per well in either polypropylene tubes or a polypropylene 96-well plate.
Note: If you anticipate that your analyte concentrations will be greater than the high point of the calibration curves as reported on the product card included in the kit, use the prepared sample diluent to dilute your samples further.
3. Add 50 μL per well of the calibration curve and samples by pre-wetting the pipette tips three times, drawing up the liquid into your pipette and then dispensing back into the original vessel, aspirating 50 μL and dispensing into the Q-Plex™ Array 96-well plate. Load all samples and calibration curve to the plate within ten minutes.
4. Cover the plate with a plate seal provided, and shake on a plate shaker set to 500 RPM for one hour at room temperature (20-25°C).
5. Wash the plate three times (see Appendix A).

10 For Research Use Only
6. Add 50 μL per well of Detection Mix, cover with a new plate seal, and return to the plate shaker set to 500 RPM for one hour at room temperature (20-25°C).
7. Wash the plate three times (see Appendix A).
8. Add 50 μL per well of Streptavidin-HRP 1X, cover with a new plate seal, and return to the plate shaker set to 500 RPM for 20 minutes at room temperature (20-25°C).
9. Wash the plate six times (see Appendix A).
10. Add 50μL per well of previously prepared substrate. Wait no longer than 15 minutes to commence imaging.
Note: If imaging cannot commence immediately, protect the plate from drying for up to 15 minutes by dispensing 100 μL of wash buffer into each well of the plate prior to adding the mixed substrate. When ready to image, remove the wash buffer from the plate and add the substrate.
11. Place the plate in the Q-View™ Imager Pro or Q-View™ Imager LS.
12. Open Q-View™ Software, create or open a project, and click Acquire Image.
13. When using a Q-View™ Imager Pro, set the exposure time to 300 seconds.
14. When using a Q-View™ Imager LS, set the exposure time to 270 seconds and standard image processing.
15. Click the Capture Image(s) button. Users may continue on to Well Assignment while images are being captured.
Note: Details about these imaging steps are available in the Q-View™ Software Manual viewable at www.quansysbio.com/manuals or within Q-View™ Software under Support > Manual.
16. Dispose of all used and unused materials. Disposal of waste may differ from country to country. Please refer to local disposal rules.

11For Research Use Only
ANALYZING A Q-PLEX™ IMAGEThe following summarizes a general workflow for analyzing a Q-Plex™ image in Q-View™ Software. Each of these steps is described in greater detail in the Q-View™ Software and Imager Manual, viewable at www.quansysbio.com/manuals, or within Q-View™ Software under Support > Manual.
1. Acquire or import an image into Q-View™ Software as previously described.
2. Enter the Product Code (found on the Product Card) into the Product Code field of the software.
3. Image Processing: Align the plate overlay as follows:
a. Set the overlay: If using the Auto-Set Plate Overlay feature, this will occur automatically. Otherwise, go to Overlay Options > Set Plate Overlay.
b. To visualize bright or dim spots, optimize the display using Image Options > Adjust Gamma (does not affect the data).
c. Optimize overlay alignment: Go to Overlay Options > Adjust plate to pivot the overlay, Adjust Well and Adjust Spot to move individual wells and spots, then Auto-Adjust Spots to automatically snap each circle of the overlay to the nearest spot of the image beneath.
4. Well Assignment: Label wells as samples, controls, calibrators, or negatives, and specify their dilution factors. Use Templates to quickly assign layouts that are repeated often, or export the layout as a .csv file.
5. Data Analysis: Once you have completed Image Processing and Well Assignment, select Data Analysis. Click Perform Analysis to generate charts, concentrations, and statistics based on optimal regression settings provided by the product definition.
Note: Tips for data analysis are available at www.quansysbio.com/tech-tips. We take great care to ensure that customers have success using our products and services. If you have further questions about running the assay, data analysis, troubleshooting, or our products or services, please contact us at 888-QUANSYS (782-6797) or at [email protected].

12 For Research Use Only
APPENDIX A: PLATE WASHING METHOD 1. Use a program that will aspirate and dispense 300-400 μL wash buffer
Aspirate Dispense300 - 400 μLWash Bu�er
Aspirate
3 to 6 Times.
2. Ensure that the plate washer has a program that will not scratch the bottom of the microplate and will prevent plate drying. This is critical to prevent damage to the capture antibody arrays. The simplest method to avoid plate drying is to leave a small, uniform amount (1-3 μL) of wash in the well after the final aspiration, and add the next reagent to the plate as quickly as possible.
3. Leaving a uniform amount of wash in the wells can be accomplished with an automated washer by slightly increasing the aspiration height of the washer head.
4. Leaving a uniform amount of wash in the wells can be accomplished with an automated washer by slightly increasing the aspiration height of the washer head.
For example:
Process Distance Steps on a Biotek ELX-405
Aspiration Height 3.810 mm 30Aspiration Position 1.28 mm from
center-28
Dispense Height 15.24 mm 120no soak or shake cycles are needed

13For Research Use Only
5. Connect the prepared wash buffer to your automatic plate washer.
6. Run 1-2 priming cycles to make sure that the wash buffer is running through the plate washer. When the buffer has run through the machine, the waste will be foamy.
7. To ensure that all pins are functioning, in a spare microtiter plate, dispense 100μL wash buffer and ensure that all pins dispense uniformly, then aspirate and ensure that all pins aspirate uniformly.
8. Prime the plate washer one time before the first wash step. When running the assay, perform the wash 3 or 6 times according to the protocol.

14 For Research Use Only
ABBREVIATED PROTOCOLPreparation
1. Install Q-View™ Software (page 8).
2. Set up the imager (page 8).
3. Set up microplate washer (page 12) and shaker (page 8).
4. Reconstitute and prepare reagents (page 8).
Running the Assay
5. Prepare the calibration curve using the Calibrator and Sample Diluent according to the Product Card (page 8).
6. Prepare the samples with Sample Diluent (page 9).
7. Load the calibration curve and samples onto the plate. Shake for one hour at room temperature (500 RPM) (page 9).
8. Wash the plate three times, add the Detection Mix, and shake for one hour at room temperature (500 RPM) (page 9).
9. Wash the plate three times, add the Streptavidin HRP 1X, shake for 20 minutes at room temperature, (500 RPM) (page 10).
10. Allow Substrate A and Substrate B to come to room temperature, then mix equal volumes and allow the solution to sit at room temperature (page 8).
11. Wash the plate six times, and add the mixed Substrate (page 10).
12. Capture and analyze image of the plate (page 10).
15For Research Use Only
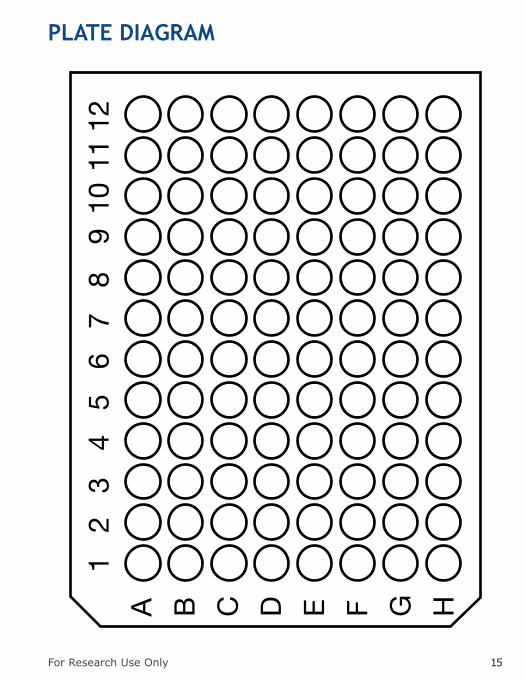
PLATE DIAGRAM

16 For Research Use Only
NOTES


A SPENDLOVE RESEARCH COMPANY
365 North 600 West, Logan, Utah 84321
T: 1-888-782-6797 • F: (435)750-6869
www.quansysbio.com • Technical Support: [email protected]