HP41 Rechargeable Battery Pack Refurbishment.hp41.claughan.com/file/HP41Battery.pdf · HP41...
10
HP41 Rechargeable Battery Pack Refurbishment. By Helmut Wabnig, November 2005. Email: [email protected] No responsibilities taken by the author, use at your own risk. The replacement batteries must be small enough to fit into the original Battery case. A suitable type of batteries is made by VARTA. Battery Type: Ni-MH 2/V150H 2 cells wielded together in one plastic case, Voltage 2,4 Volt You may try to purchase from a VARTA outlet, but I get them from RS-Components: http://www.rs-components.at Part Number: 422-371 Price 4,50 € per piece, 2 pieces required. Replacement Procedure: With a fine saw cut a groove at the middle of the case on 3 sides. Stop sawing after 0,5 mm, just make a fine groove. Then cut the Rest with a knife. The groove will lead the blade and there is less Danger for your fingers.
Transcript of HP41 Rechargeable Battery Pack Refurbishment.hp41.claughan.com/file/HP41Battery.pdf · HP41...
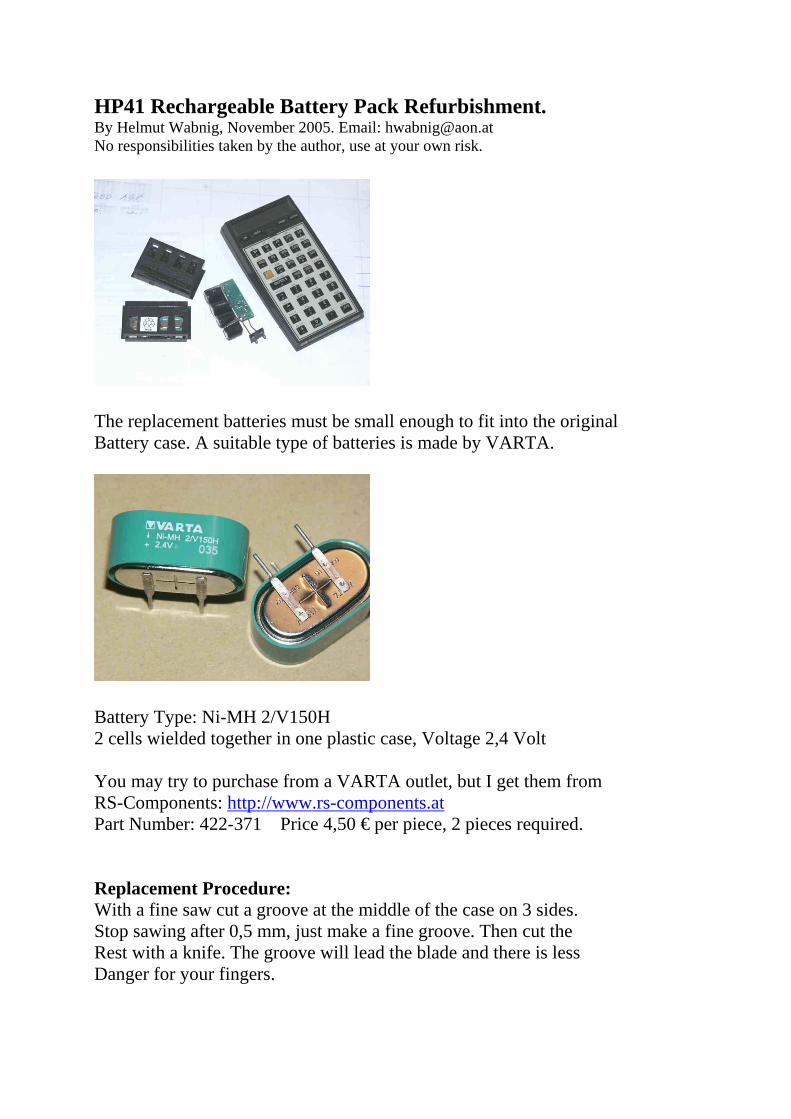
HP41 Rechargeable Battery Pack Refurbishment. By Helmut Wabnig, November 2005. Email: [email protected] No responsibilities taken by the author, use at your own risk.
The replacement batteries must be small enough to fit into the original Battery case. A suitable type of batteries is made by VARTA.
Battery Type: Ni-MH 2/V150H 2 cells wielded together in one plastic case, Voltage 2,4 Volt You may try to purchase from a VARTA outlet, but I get them from RS-Components: http://www.rs-components.at Part Number: 422-371 Price 4,50 € per piece, 2 pieces required. Replacement Procedure: With a fine saw cut a groove at the middle of the case on 3 sides. Stop sawing after 0,5 mm, just make a fine groove. Then cut the Rest with a knife. The groove will lead the blade and there is less Danger for your fingers.
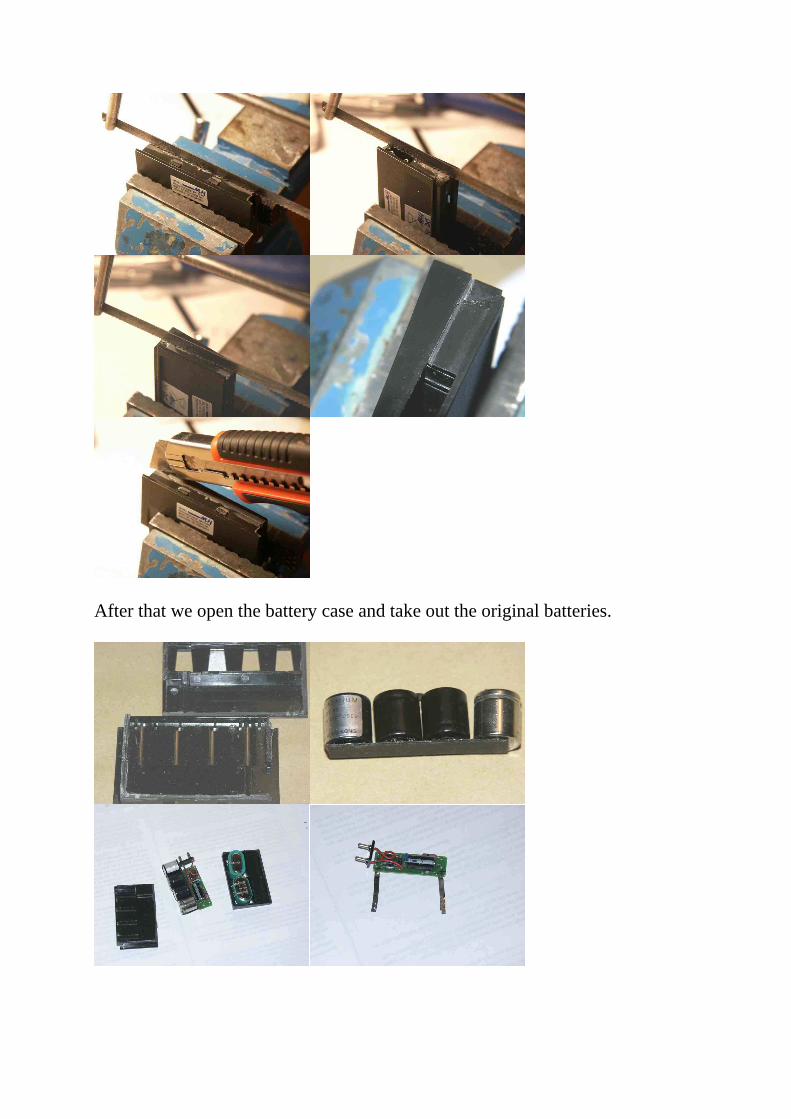
After that we open the battery case and take out the original batteries.

When we compare the old and the new batteries we find that space Is very limited in the battery case. The old batteries have a diameter Of 12,8 mm and the new batteries have a height of 12,1 mm. Theoretically that space would be sufficient in the case, but I run Into difficulties and could not get the 2 shells of the case closed.
Preparing the new batteries: I decided to tear off the wielded contact lugs from the batteries.
That gives some additional height reserve and the cases will fit better. Paranoia: Take a close look at the new batteries, press them to remove the plastic cover:
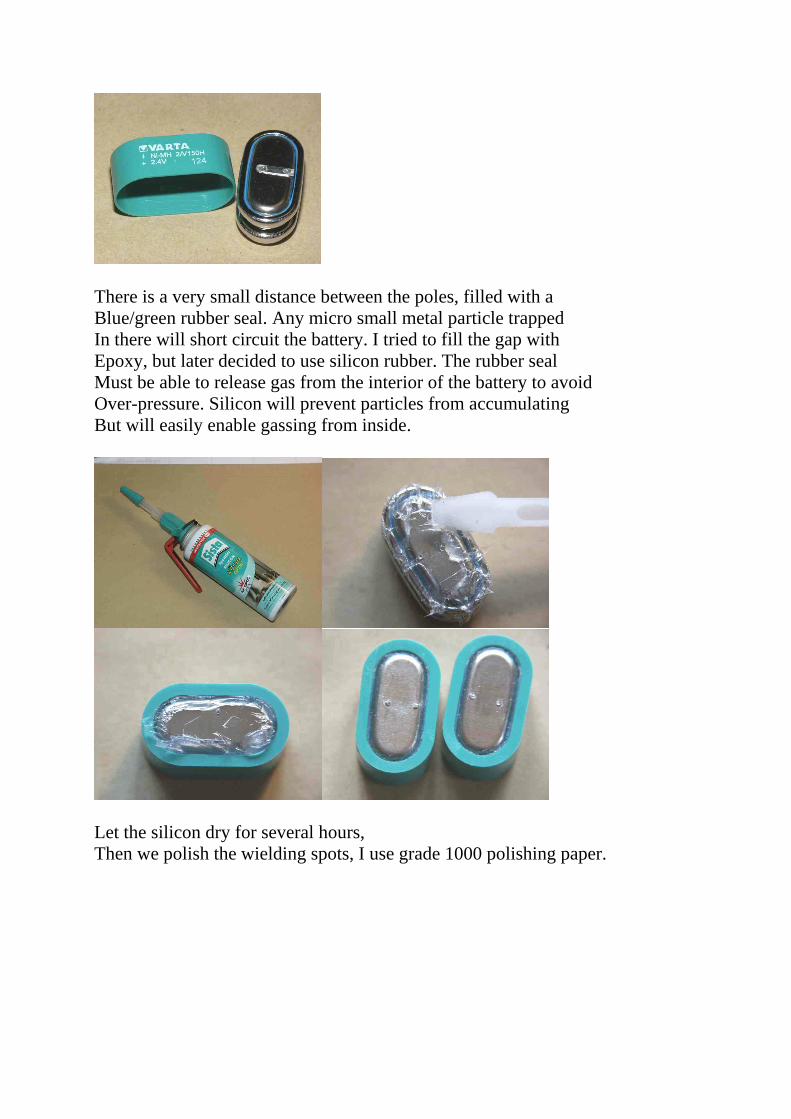
There is a very small distance between the poles, filled with a Blue/green rubber seal. Any micro small metal particle trapped In there will short circuit the battery. I tried to fill the gap with Epoxy, but later decided to use silicon rubber. The rubber seal Must be able to release gas from the interior of the battery to avoid Over-pressure. Silicon will prevent particles from accumulating But will easily enable gassing from inside.
Let the silicon dry for several hours, Then we polish the wielding spots, I use grade 1000 polishing paper.

Now we are ready to begin assembling. Assembling the new batteries. Prepare some copper or brass sheet metal and cut small stripes:
The batteries must be opposite orientation, the plus Up at the left and the minus up at the right. The copper lead must Protrude to the front where it will be bent downwards. This is how it will look later:
I found that it is better to have the right stripe out of the way of the Contact spring on the right side, put it more to the middle of the right battery:

Before we do the soldering we prepare the bottom case with two drops Of epoxy. There we put the batteries, the glue will hold them fixed. We mark the batteries where we will apply a small piece of solder.
Soldering. Before we proceed let us discuss soldering. The batteries can withstand Operational environmental temperatures of 65 grad Celsius. Heating a small point on the metal surface for a very short time will not affect battery quality. The contact wielding process proved that already. So we must try to stay Near or within the contact wielding stress. This can only be accomplished With a suitable large and rather hot soldering tip while keeping the contact Time below one half second or less if possible. The soldering iron should have about 60 Watts and a size of at least 5mm.
We apply two small dots of tin on the batteries and on the stripes and then we solder:

The Contacts. They will have to fit between upper and lower case lid. We could press them directly against the copper stripes, But I prefer soldering.
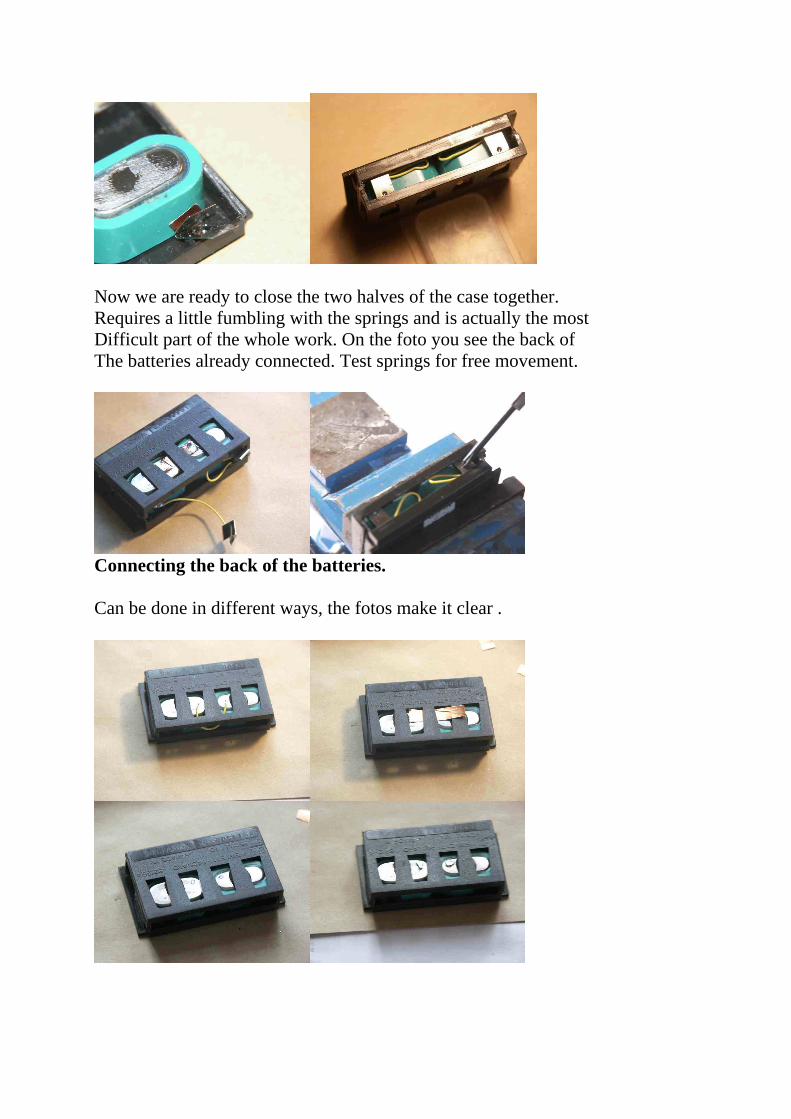
Now we are ready to close the two halves of the case together. Requires a little fumbling with the springs and is actually the most Difficult part of the whole work. On the foto you see the back of The batteries already connected. Test springs for free movement.
Connecting the back of the batteries. Can be done in different ways, the fotos make it clear .
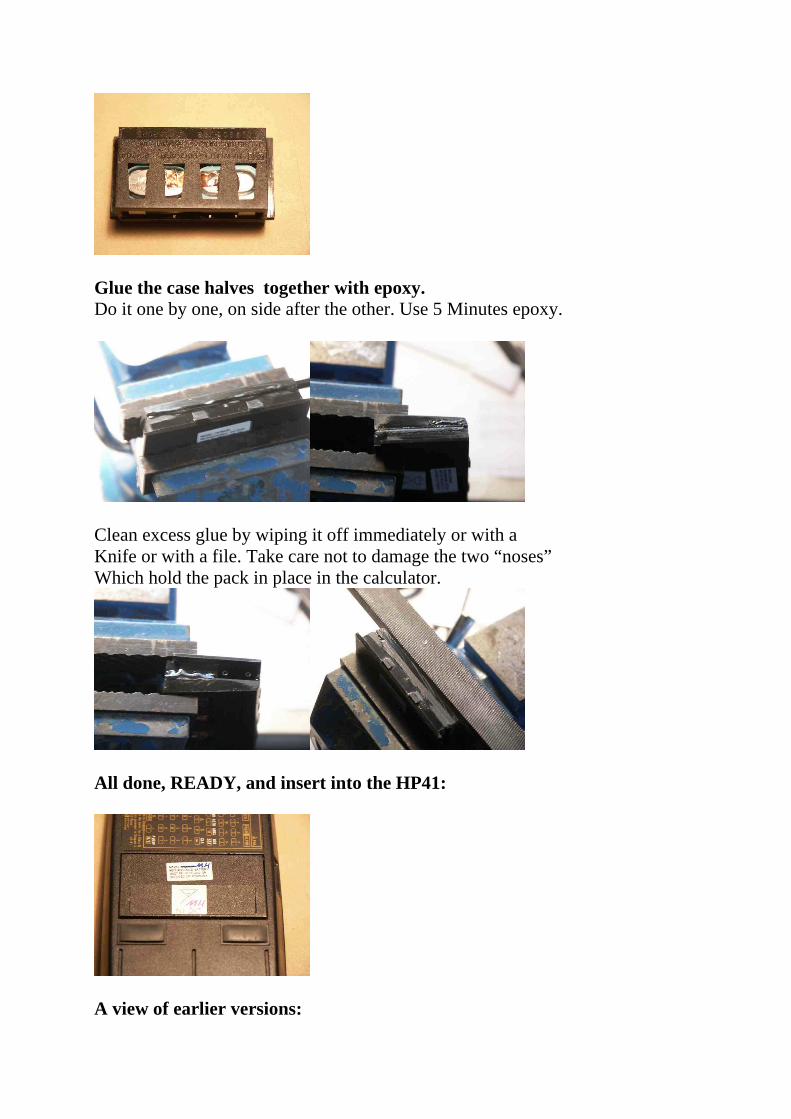
Glue the case halves together with epoxy. Do it one by one, on side after the other. Use 5 Minutes epoxy.
Clean excess glue by wiping it off immediately or with a Knife or with a file. Take care not to damage the two “noses” Which hold the pack in place in the calculator.
All done, READY, and insert into the HP41:
A view of earlier versions:
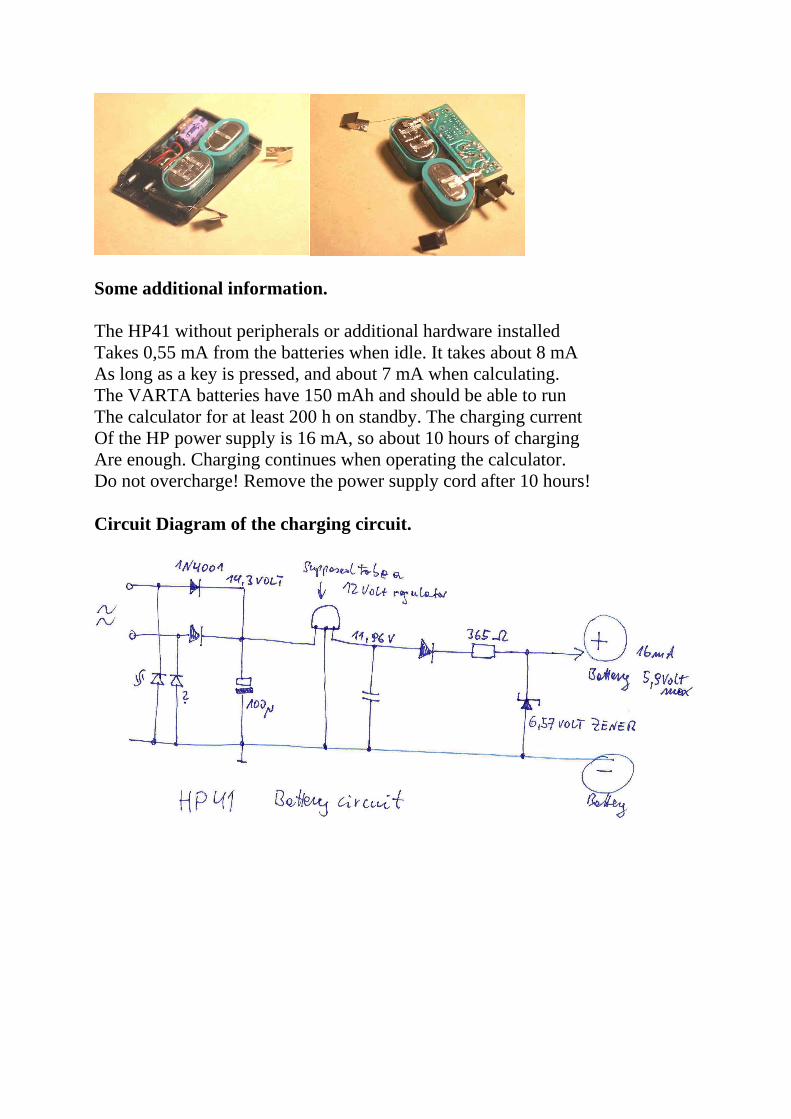
Some additional information. The HP41 without peripherals or additional hardware installed Takes 0,55 mA from the batteries when idle. It takes about 8 mA As long as a key is pressed, and about 7 mA when calculating. The VARTA batteries have 150 mAh and should be able to run The calculator for at least 200 h on standby. The charging current Of the HP power supply is 16 mA, so about 10 hours of charging Are enough. Charging continues when operating the calculator. Do not overcharge! Remove the power supply cord after 10 hours! Circuit Diagram of the charging circuit.