
HP OpenView Console User’s Guide - TeamNA Consulting · 2014-01-10 · Chapter 1 15 Introucton to...
113
HP OpenView Console User’s Guide HP 3000 MPE/iX Computer Systems Edition 2 Manufacturing Part Number: B3118-90011 E0895 U.S.A. August 1995
Transcript of HP OpenView Console User’s Guide - TeamNA Consulting · 2014-01-10 · Chapter 1 15 Introucton to...
HP OpenView ConsoleUser’s Guide
HP 3000 MPE/iX Computer Systems
Edition 2
Manufacturing Part Number: B3118-90011E0895
U.S.A. August 1995
NoticeThe information contained in this document is subject to changewithout notice.
Hewlett-Packard makes no warranty of any kind with regard to thismaterial, including, but not limited to, the implied warranties ofmerchantability or fitness for a particular purpose. Hewlett-Packardshall not be liable for errors contained herein or for direct, indirect,special, incidental or consequential damages in connection with thefurnishing or use of this material.
Hewlett-Packard assumes no responsibility for the use or reliability ofits software on equipment that is not furnished by Hewlett-Packard.
This document contains proprietary information which is protected bycopyright. All rights reserved. Reproduction, adaptation, or translationwithout prior written permission is prohibited, except as allowed underthe copyright laws.
Restricted Rights LegendUse, duplication, or disclosure by the U.S. Government is subject torestrictions as set forth in subparagraph (c) (1) (ii) of the Rights inTechnical Data and Computer Software clause at DFARS 252.227-7013.Rights for non-DOD U.S. Government Departments and Agencies areas set forth in FAR 52.227-19 (c) (1,2).
AcknowledgmentsUNIX is a registered trademark of The Open Group.
Hewlett-Packard Company3000 Hanover StreetPalo Alto, CA 94304 U.S.A.
© Copyright 1992 and 1995, by Hewlett-Packard Company
2
Contents
1. Introucton to Using HP OpenView ConsoleOverview . . . . . . . . . . . . . . . . . . . . . . . . . . . . . . . . . . . . . . . . . . . . . . . . . . . . . . . . . . . . . . . . . . . 14OVC Features . . . . . . . . . . . . . . . . . . . . . . . . . . . . . . . . . . . . . . . . . . . . . . . . . . . . . . . . . . . . . . . 16The OVC PC User Interface. . . . . . . . . . . . . . . . . . . . . . . . . . . . . . . . . . . . . . . . . . . . . . . . . . . . 18Starting HP OpenView . . . . . . . . . . . . . . . . . . . . . . . . . . . . . . . . . . . . . . . . . . . . . . . . . . . . . . . 19Logging On . . . . . . . . . . . . . . . . . . . . . . . . . . . . . . . . . . . . . . . . . . . . . . . . . . . . . . . . . . . . . . . . . 21Where to Go from Here . . . . . . . . . . . . . . . . . . . . . . . . . . . . . . . . . . . . . . . . . . . . . . . . . . . . . . . 23
2. OVC FeaturesOverview . . . . . . . . . . . . . . . . . . . . . . . . . . . . . . . . . . . . . . . . . . . . . . . . . . . . . . . . . . . . . . . . . . . 26
Menu Items of OVC. . . . . . . . . . . . . . . . . . . . . . . . . . . . . . . . . . . . . . . . . . . . . . . . . . . . . . . . . 26SysMgr Copy Map . . . . . . . . . . . . . . . . . . . . . . . . . . . . . . . . . . . . . . . . . . . . . . . . . . . . . . . . . . . 28SysMgr Paste Map . . . . . . . . . . . . . . . . . . . . . . . . . . . . . . . . . . . . . . . . . . . . . . . . . . . . . . . . . . . 29SysMgr Event Browser . . . . . . . . . . . . . . . . . . . . . . . . . . . . . . . . . . . . . . . . . . . . . . . . . . . . . . . 30SysMgr Logoff. . . . . . . . . . . . . . . . . . . . . . . . . . . . . . . . . . . . . . . . . . . . . . . . . . . . . . . . . . . . . . . 32SysMgr MSI . . . . . . . . . . . . . . . . . . . . . . . . . . . . . . . . . . . . . . . . . . . . . . . . . . . . . . . . . . . . . . . . 33SysMgr Report . . . . . . . . . . . . . . . . . . . . . . . . . . . . . . . . . . . . . . . . . . . . . . . . . . . . . . . . . . . . . . 34Customize HP SysMgr . . . . . . . . . . . . . . . . . . . . . . . . . . . . . . . . . . . . . . . . . . . . . . . . . . . . . . . . 35
Configure Management Node. . . . . . . . . . . . . . . . . . . . . . . . . . . . . . . . . . . . . . . . . . . . . . . . . 35Configure EML Database . . . . . . . . . . . . . . . . . . . . . . . . . . . . . . . . . . . . . . . . . . . . . . . . . . . . 36Configure Users. . . . . . . . . . . . . . . . . . . . . . . . . . . . . . . . . . . . . . . . . . . . . . . . . . . . . . . . . . . . 36
Using On-Line Help . . . . . . . . . . . . . . . . . . . . . . . . . . . . . . . . . . . . . . . . . . . . . . . . . . . . . . . . . . 37LAN Console . . . . . . . . . . . . . . . . . . . . . . . . . . . . . . . . . . . . . . . . . . . . . . . . . . . . . . . . . . . . . . . . 39Exiting OVC . . . . . . . . . . . . . . . . . . . . . . . . . . . . . . . . . . . . . . . . . . . . . . . . . . . . . . . . . . . . . . . . 41
3. Using OVC: A Typical ScenarioOverview . . . . . . . . . . . . . . . . . . . . . . . . . . . . . . . . . . . . . . . . . . . . . . . . . . . . . . . . . . . . . . . . . . . 44A Typical Scenario . . . . . . . . . . . . . . . . . . . . . . . . . . . . . . . . . . . . . . . . . . . . . . . . . . . . . . . . . . . 45
How Bill Organizes His Work. . . . . . . . . . . . . . . . . . . . . . . . . . . . . . . . . . . . . . . . . . . . . . . . . 45How Bill Responds to Events . . . . . . . . . . . . . . . . . . . . . . . . . . . . . . . . . . . . . . . . . . . . . . . . . 46How Bill Uses the Event Folder . . . . . . . . . . . . . . . . . . . . . . . . . . . . . . . . . . . . . . . . . . . . . . . 48
4. Generating ReportsOverview . . . . . . . . . . . . . . . . . . . . . . . . . . . . . . . . . . . . . . . . . . . . . . . . . . . . . . . . . . . . . . . . . . . 50
Creation Period Criteria . . . . . . . . . . . . . . . . . . . . . . . . . . . . . . . . . . . . . . . . . . . . . . . . . . . . . 51Event Type. . . . . . . . . . . . . . . . . . . . . . . . . . . . . . . . . . . . . . . . . . . . . . . . . . . . . . . . . . . . . . . . 51Application Code Range . . . . . . . . . . . . . . . . . . . . . . . . . . . . . . . . . . . . . . . . . . . . . . . . . . . . . 52Annotation . . . . . . . . . . . . . . . . . . . . . . . . . . . . . . . . . . . . . . . . . . . . . . . . . . . . . . . . . . . . . . . . 52Object Name List Box . . . . . . . . . . . . . . . . . . . . . . . . . . . . . . . . . . . . . . . . . . . . . . . . . . . . . . . 52Report Generation. . . . . . . . . . . . . . . . . . . . . . . . . . . . . . . . . . . . . . . . . . . . . . . . . . . . . . . . . . 52
Creating Template Files. . . . . . . . . . . . . . . . . . . . . . . . . . . . . . . . . . . . . . . . . . . . . . . . . . . . . . . 55Report Entries . . . . . . . . . . . . . . . . . . . . . . . . . . . . . . . . . . . . . . . . . . . . . . . . . . . . . . . . . . . . . 58
3
Contents
Template Files. . . . . . . . . . . . . . . . . . . . . . . . . . . . . . . . . . . . . . . . . . . . . . . . . . . . . . . . . . . .59
5. Using Automated Response Service (ARS)Overview . . . . . . . . . . . . . . . . . . . . . . . . . . . . . . . . . . . . . . . . . . . . . . . . . . . . . . . . . . . . . . . . . . .64
How ARS Works . . . . . . . . . . . . . . . . . . . . . . . . . . . . . . . . . . . . . . . . . . . . . . . . . . . . . . . . . . . .64Customizing ARS. . . . . . . . . . . . . . . . . . . . . . . . . . . . . . . . . . . . . . . . . . . . . . . . . . . . . . . . . . . . .65ARS Rule File Syntax . . . . . . . . . . . . . . . . . . . . . . . . . . . . . . . . . . . . . . . . . . . . . . . . . . . . . . . . .70ARS Rule File Command Syntax . . . . . . . . . . . . . . . . . . . . . . . . . . . . . . . . . . . . . . . . . . . . . . . .71
IF . . . . . . . . . . . . . . . . . . . . . . . . . . . . . . . . . . . . . . . . . . . . . . . . . . . . . . . . . . . . . . . . . . . . . . . .71DO or #DO . . . . . . . . . . . . . . . . . . . . . . . . . . . . . . . . . . . . . . . . . . . . . . . . . . . . . . . . . . . . . . . .73ARS Rule File Syntax Error Messages . . . . . . . . . . . . . . . . . . . . . . . . . . . . . . . . . . . . . . . . . .74
ARS Rule File Processing . . . . . . . . . . . . . . . . . . . . . . . . . . . . . . . . . . . . . . . . . . . . . . . . . . . . . .75SYSMGR CI Command File Variables and Processing . . . . . . . . . . . . . . . . . . . . . . . . . . . . . . .76Using the MPE TELLOP Command with ARS . . . . . . . . . . . . . . . . . . . . . . . . . . . . . . . . . . . . .78ARS Log File . . . . . . . . . . . . . . . . . . . . . . . . . . . . . . . . . . . . . . . . . . . . . . . . . . . . . . . . . . . . . . . .79ARS Tutorial . . . . . . . . . . . . . . . . . . . . . . . . . . . . . . . . . . . . . . . . . . . . . . . . . . . . . . . . . . . . . . . .81
Exercise 1 . . . . . . . . . . . . . . . . . . . . . . . . . . . . . . . . . . . . . . . . . . . . . . . . . . . . . . . . . . . . . . . . .82Exercise 2 . . . . . . . . . . . . . . . . . . . . . . . . . . . . . . . . . . . . . . . . . . . . . . . . . . . . . . . . . . . . . . . . .84EMG0AUTO.SECURE Rule File Example . . . . . . . . . . . . . . . . . . . . . . . . . . . . . . . . . . . . . . .86EXECUTE.SECURE CI Command File . . . . . . . . . . . . . . . . . . . . . . . . . . . . . . . . . . . . . . . . .87NOTICE.SECURE CI Command File . . . . . . . . . . . . . . . . . . . . . . . . . . . . . . . . . . . . . . . . . . .88
A. Console Automation ScriptsOverview . . . . . . . . . . . . . . . . . . . . . . . . . . . . . . . . . . . . . . . . . . . . . . . . . . . . . . . . . . . . . . . . . . .90
For HP 3000 Systems Close to an OVC/SysMgr PC. . . . . . . . . . . . . . . . . . . . . . . . . . . . . . . .90For HP 3000 Systems Far from an OVC/SysMgr PC . . . . . . . . . . . . . . . . . . . . . . . . . . . . . . .90
SysMgr LAN Console . . . . . . . . . . . . . . . . . . . . . . . . . . . . . . . . . . . . . . . . . . . . . . . . . . . . . . . . .91Script Files . . . . . . . . . . . . . . . . . . . . . . . . . . . . . . . . . . . . . . . . . . . . . . . . . . . . . . . . . . . . . . . .92
build.rcl . . . . . . . . . . . . . . . . . . . . . . . . . . . . . . . . . . . . . . . . . . . . . . . . . . . . . . . . . . . . . . . . .92builddtc.rcl. . . . . . . . . . . . . . . . . . . . . . . . . . . . . . . . . . . . . . . . . . . . . . . . . . . . . . . . . . . . . . .92hiconsol.rcl. . . . . . . . . . . . . . . . . . . . . . . . . . . . . . . . . . . . . . . . . . . . . . . . . . . . . . . . . . . . . . .92hicondtc.rcl . . . . . . . . . . . . . . . . . . . . . . . . . . . . . . . . . . . . . . . . . . . . . . . . . . . . . . . . . . . . . .92byeconsol.rcl . . . . . . . . . . . . . . . . . . . . . . . . . . . . . . . . . . . . . . . . . . . . . . . . . . . . . . . . . . . . .92dialhost.rcl. . . . . . . . . . . . . . . . . . . . . . . . . . . . . . . . . . . . . . . . . . . . . . . . . . . . . . . . . . . . . . .93console.rcl . . . . . . . . . . . . . . . . . . . . . . . . . . . . . . . . . . . . . . . . . . . . . . . . . . . . . . . . . . . . . . .93<nodename>.rcl. . . . . . . . . . . . . . . . . . . . . . . . . . . . . . . . . . . . . . . . . . . . . . . . . . . . . . . . . . .93
Configuration Files. . . . . . . . . . . . . . . . . . . . . . . . . . . . . . . . . . . . . . . . . . . . . . . . . . . . . . . . . .93build.r1w . . . . . . . . . . . . . . . . . . . . . . . . . . . . . . . . . . . . . . . . . . . . . . . . . . . . . . . . . . . . . . . .93<nodename>.r1w. . . . . . . . . . . . . . . . . . . . . . . . . . . . . . . . . . . . . . . . . . . . . . . . . . . . . . . . . .93console.r1w . . . . . . . . . . . . . . . . . . . . . . . . . . . . . . . . . . . . . . . . . . . . . . . . . . . . . . . . . . . . . .93
B. Error Messages
4

Contents
OVC PC Error Messages . . . . . . . . . . . . . . . . . . . . . . . . . . . . . . . . . . . . . . . . . . . . . . . . . . . . . . 98Error Message Log Files . . . . . . . . . . . . . . . . . . . . . . . . . . . . . . . . . . . . . . . . . . . . . . . . . . . . . 109Event Message Errors . . . . . . . . . . . . . . . . . . . . . . . . . . . . . . . . . . . . . . . . . . . . . . . . . . . . . . . 110
5

Contents
6
Figures
Figure 1-1. HP OpenView Window with OVC Program Icons . . . . . . . . . . . . . . . . . . . . . . 19Figure 1-2. SysMgr Logon Dialog Box . . . . . . . . . . . . . . . . . . . . . . . . . . . . . . . . . . . . . . . . . 21Figure 2-1. HP OpenView Menu Bar . . . . . . . . . . . . . . . . . . . . . . . . . . . . . . . . . . . . . . . . . . 26Figure 2-2. OVC Menu Items . . . . . . . . . . . . . . . . . . . . . . . . . . . . . . . . . . . . . . . . . . . . . . . . 27Figure 2-3. HP OpenView Edit Menu . . . . . . . . . . . . . . . . . . . . . . . . . . . . . . . . . . . . . . . . . 28Figure 2-4. Paste Objects Dialog Box . . . . . . . . . . . . . . . . . . . . . . . . . . . . . . . . . . . . . . . . . . 29Figure 2-5. Pattern Replace Dialog Box . . . . . . . . . . . . . . . . . . . . . . . . . . . . . . . . . . . . . . . . 29Figure 2-6. SysMgr Event Browser Dialog Box with Detailed Message and Annotation . 30Figure 2-7. SysMgr MSI Terminal Window . . . . . . . . . . . . . . . . . . . . . . . . . . . . . . . . . . . . . 33Figure 2-8. EML Report Dialog Box . . . . . . . . . . . . . . . . . . . . . . . . . . . . . . . . . . . . . . . . . . . 34Figure 2-9. Customize HP SysMgr Submenu Items . . . . . . . . . . . . . . . . . . . . . . . . . . . . . . 35Figure 2-10. SysMgr - MN Configuration Dialog Box . . . . . . . . . . . . . . . . . . . . . . . . . . . . . 35Figure 2-11. SysMgr - EML Configuration Dialog Box . . . . . . . . . . . . . . . . . . . . . . . . . . . . 36Figure 2-12. SysMgr - Configure Users Dialog Box. . . . . . . . . . . . . . . . . . . . . . . . . . . . . . . 36Figure 2-13. HP OpenView Help Menu Item. . . . . . . . . . . . . . . . . . . . . . . . . . . . . . . . . . . . 37Figure 2-14. SysMgr Report Help Dialog Box . . . . . . . . . . . . . . . . . . . . . . . . . . . . . . . . . . . 38Figure 2-15. LAN Console Configured to Use COM1 Port . . . . . . . . . . . . . . . . . . . . . . . . . 39Figure 2-16. LAN Console Port Configuration Frame. . . . . . . . . . . . . . . . . . . . . . . . . . . . . 40Figure 3-1. Bill’s Top-Level Map. . . . . . . . . . . . . . . . . . . . . . . . . . . . . . . . . . . . . . . . . . . . . . 45Figure 3-2. Bill’s Submap of Tasks for the HP 3000 . . . . . . . . . . . . . . . . . . . . . . . . . . . . . . 45Figure 3-3. Pop-Up Menu with Show SysMgr Events... Menu Item. . . . . . . . . . . . . . . . . . 46Figure 3-4. SysMgr Event Browser . . . . . . . . . . . . . . . . . . . . . . . . . . . . . . . . . . . . . . . . . . . 46Figure 3-5. MSI Icon . . . . . . . . . . . . . . . . . . . . . . . . . . . . . . . . . . . . . . . . . . . . . . . . . . . . . . . 47Figure 3-6. Bill’s MSI Session. . . . . . . . . . . . . . . . . . . . . . . . . . . . . . . . . . . . . . . . . . . . . . . . 47Figure 3-7. Detailed SysMgr Event Browser Icon . . . . . . . . . . . . . . . . . . . . . . . . . . . . . . . . 47Figure 3-8. Bill Adds Annotation Text . . . . . . . . . . . . . . . . . . . . . . . . . . . . . . . . . . . . . . . . . 48Figure 4-1. HP OpenView Report Menu Option . . . . . . . . . . . . . . . . . . . . . . . . . . . . . . . . . 50Figure 4-2. EML Report Dialog Box . . . . . . . . . . . . . . . . . . . . . . . . . . . . . . . . . . . . . . . . . . . 50Figure 4-3. Creation Period Text Boxes . . . . . . . . . . . . . . . . . . . . . . . . . . . . . . . . . . . . . . . . 51Figure 4-4. Application Code Range with Object Name List Box. . . . . . . . . . . . . . . . . . . . 52Figure 4-5. Report Generation Dialog Box. . . . . . . . . . . . . . . . . . . . . . . . . . . . . . . . . . . . . . 53Figure 4-6. File Equation Dialog Box. . . . . . . . . . . . . . . . . . . . . . . . . . . . . . . . . . . . . . . . . . 53Figure 4-7. Report Destination Showing Back-Referenced File Descriptor. . . . . . . . . . . . 54Figure 4-8. EML Report Template . . . . . . . . . . . . . . . . . . . . . . . . . . . . . . . . . . . . . . . . . . . . 55Figure 5-1. ARS Syntax Error EML Entry . . . . . . . . . . . . . . . . . . . . . . . . . . . . . . . . . . . . . 68Figure 5-2. Example EMG0AUTO Rule File . . . . . . . . . . . . . . . . . . . . . . . . . . . . . . . . . . . . 70Figure 5-3. ARS Log File Listing . . . . . . . . . . . . . . . . . . . . . . . . . . . . . . . . . . . . . . . . . . . . . 80Figure A-1. Execution Logic to Connect via a SWITCHABLE Port . . . . . . . . . . . . . . . . . . 94Figure A-2. Execution Logic to Connect via a NAILED Port . . . . . . . . . . . . . . . . . . . . . . . 95
7

Figures
8

Tables
Table 4-1. Variables for Cover Page, Page Header, and Page Footer . . . . . . . . . . . . . . . . . 56Table 4-2. Variables for Defining the Record . . . . . . . . . . . . . . . . . . . . . . . . . . . . . . . . . . . . 57Table 5-1. ARS Rule File Syntax Error Messages . . . . . . . . . . . . . . . . . . . . . . . . . . . . . . . . 74Table 5-2. CI Variables within CI Command . . . . . . . . . . . . . . . . . . . . . . . . . . . . . . . . . . . . 76
9

Tables
10
PrefaceRead this manual if you are responsible for the day-to-day operation ofan HP 3000 system managed by an OpenView Console. You should haveknowledge of HP 3000 systems and utilities of the MPE/iX operatingsystem, including the commands required for operation.
Since HP OpenView Console (OVC delivers its functionality throughWindows, you should be familiar with the Windows user interface. Theoperating system for your PC is MS-DOS so you should also be familiarwith DOS concepts and utilities. For more information, refer to themanuals provided by Microsoft.
It is also important that you are familiar with PC-related hardwareissues. For more information about PC concepts and troubleshooting,refer to the user’s guide for your PC.
11

12

1 Introucton to Using HPOpenView Console
This chapter introduces the basic concepts and features of HPOpenView Console (OVC).
13
Introucton to Using HP OpenView ConsoleOverview
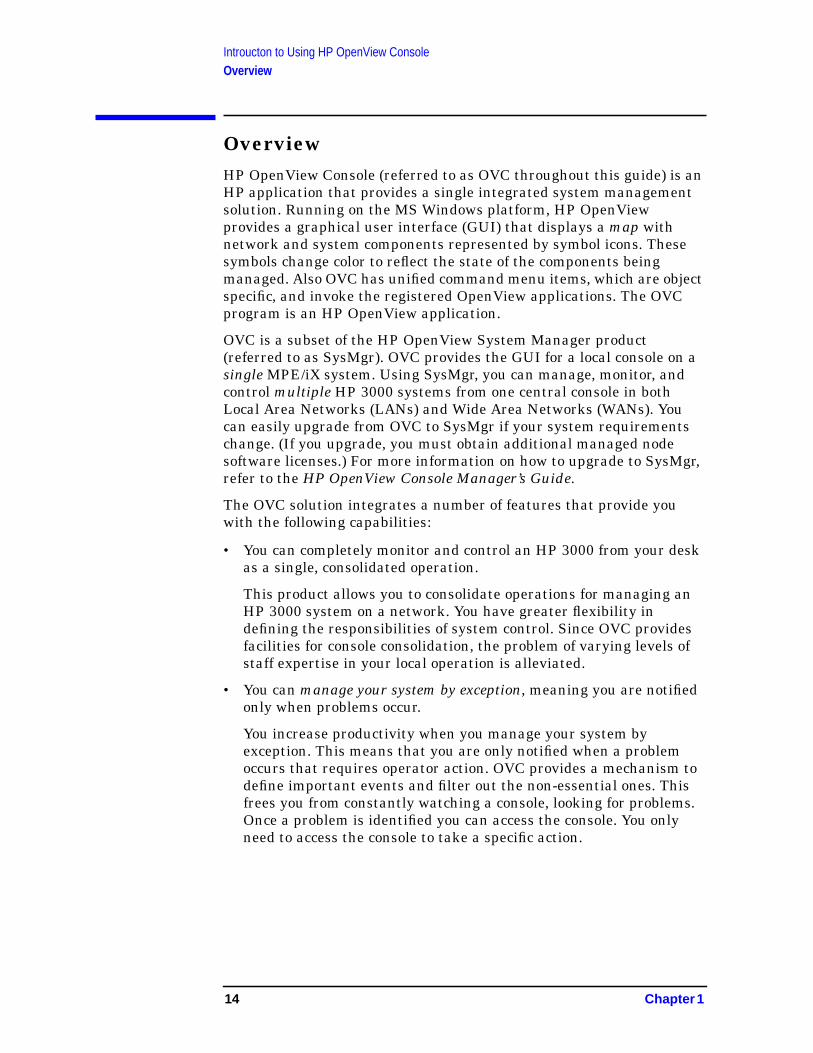
OverviewHP OpenView Console (referred to as OVC throughout this guide) is anHP application that provides a single integrated system managementsolution. Running on the MS Windows platform, HP OpenViewprovides a graphical user interface (GUI) that displays a map withnetwork and system components represented by symbol icons. Thesesymbols change color to reflect the state of the components beingmanaged. Also OVC has unified command menu items, which are objectspecific, and invoke the registered OpenView applications. The OVCprogram is an HP OpenView application.
OVC is a subset of the HP OpenView System Manager product(referred to as SysMgr). OVC provides the GUI for a local console on asingle MPE/iX system. Using SysMgr, you can manage, monitor, andcontrol multiple HP 3000 systems from one central console in bothLocal Area Networks (LANs) and Wide Area Networks (WANs). Youcan easily upgrade from OVC to SysMgr if your system requirementschange. (If you upgrade, you must obtain additional managed nodesoftware licenses.) For more information on how to upgrade to SysMgr,refer to the HP OpenView Console Manager’s Guide.
The OVC solution integrates a number of features that provide youwith the following capabilities:
• You can completely monitor and control an HP 3000 from your deskas a single, consolidated operation.
This product allows you to consolidate operations for managing anHP 3000 system on a network. You have greater flexibility indefining the responsibilities of system control. Since OVC providesfacilities for console consolidation, the problem of varying levels ofstaff expertise in your local operation is alleviated.
• You can manage your system by exception, meaning you are notifiedonly when problems occur.
You increase productivity when you manage your system byexception. This means that you are only notified when a problemoccurs that requires operator action. OVC provides a mechanism todefine important events and filter out the non-essential ones. Thisfrees you from constantly watching a console, looking for problems.Once a problem is identified you can access the console. You onlyneed to access the console to take a specific action.
14 Chapter 1
Introucton to Using HP OpenView ConsoleOverview
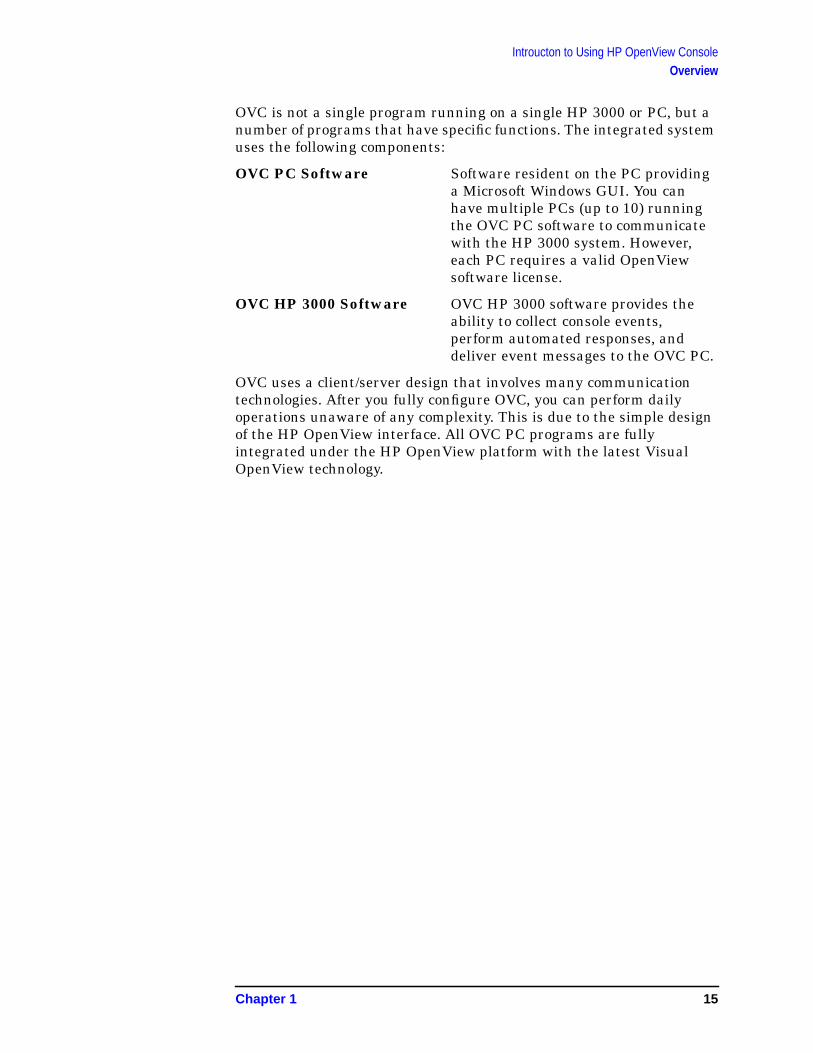
OVC is not a single program running on a single HP 3000 or PC, but anumber of programs that have specific functions. The integrated systemuses the following components:
OVC PC Software Software resident on the PC providinga Microsoft Windows GUI. You canhave multiple PCs (up to 10) runningthe OVC PC software to communicatewith the HP 3000 system. However,each PC requires a valid OpenViewsoftware license.
OVC HP 3000 Software OVC HP 3000 software provides theability to collect console events,perform automated responses, anddeliver event messages to the OVC PC.
OVC uses a client/server design that involves many communicationtechnologies. After you fully configure OVC, you can perform dailyoperations unaware of any complexity. This is due to the simple designof the HP OpenView interface. All OVC PC programs are fullyintegrated under the HP OpenView platform with the latest VisualOpenView technology.
Chapter 1 15
Introucton to Using HP OpenView ConsoleOVC Features
OVC FeaturesWhen you configure OVC correctly, you can monitor, control, anddiagnose any problem your HP 3000 may encounter. The OVC HP 3000software monitors console events automatically. If a problem occurs,you are notified so that you can locate, analyze, and solve problems. TheOVC features include:
System Event Notification
Agent software on the HP 3000 scans console messagesfor events. The OVC HP 3000 software collects andsends the event messages to the OVC PC. You arenotified of the arrival of these events when the color ofthe objects on the OpenView map changes.
Event Message Review
When an event message is saved in the event messagedatabase on the HP 3000, you can review it from theOVC PC. By invoking the Multiple Document Interface(MDI) event browser, you can review the outstandingunacknowledged events. Using this message reviewprocess, you can annotate, respond to, acknowledge(remove), and export an event message.
Central Event Repository
All system events are stored in the Event Message Log(EML) database on the HP 3000. You can use the EMLreport generation feature to produce a report of theevent messages, even if these messages areacknowledged (removed) from the event browser.
Monitor Console
With this feature you can monitor the output of theOVC console from a terminal session at the HP 3000.You can use the OVC NTC utility at a terminal sessionto display the console messages.
Control Console
This feature provides console access to the HP 3000from the OVC PC via a physical connection to theHP 3000’s console port. You can use a dial-up modemconnection or a Data Communications and TerminalController (DTC) in a Local Area Network (LAN)environment.
Management Session Interface (MSI)
This feature provides control of normal HP 3000
16 Chapter 1
Introucton to Using HP OpenView ConsoleOVC Features
operations while the system is running. From the OVCPC, the Management Session Interface (MSI) providesa special Virtual Terminal (VT) session for theHP 3000. During an MSI session you can executecommands that were previously restricted only to thesystem console. The MSI technology uses the existingnetwork so no additional hardware is required. BlockMode programs can be executed via MSI.
Automated Response Service (ARS)
OVC’s automated response service allows your datacenter to automate procedures by monitoring consolemessages and executing MPE Command Interpreter(CI) scripts without user intervention. As acustomizable tool, you can configure ARS to executeany response.
Integrated OpenView Interface
All OVC PC programs are integrated with theHP OpenView/DOS platform. You can also integrateyour network management tools with the sameOpenView map. If you have the Workgroup NodeManager version of OpenView, you can link beepernotification with the OVC event posting function.
Task-Based Operations
OVC allows you to customize your network map toshow only the system events that apply to an operator’sjob or task. This feature is especially useful in a datacenter environment where different operators areassigned to perform different tasks managing thesystem.
Chapter 1 17
Introucton to Using HP OpenView ConsoleThe OVC PC User Interface
The OVC PC User InterfaceBefore starting an OVC session on your HP OpenView Console PC, youneed to take certain steps. To start the OVC HP 3000 software or toinstall software on the HP 3000, refer to the first chapters of the HPOpenView Console Manager’s Guide.
To start an OVC session, you should check that:
• The OVC HP 3000 software is installed and activated.
• All the required network and application software is installed andactivated on your OVC PC.
• Your OpenView map is created and specifically tailored for yourjob assignment. (To learn how to assign a default map to your logon,or to modify your current map, refer to the HP OpenView forWindows User’s Guide for more information.)
NOTE OVC is preconfigured with a user logon (MGR) and a password(HPSYSMGR). However, you can change the logon and password andadd more users and passwords later.
18 Chapter 1
Introucton to Using HP OpenView ConsoleStarting HP OpenView
Starting HP OpenViewAfter completing the required installation and configuration, startHP OpenView:
• Double-click on the HP OpenView program icon.
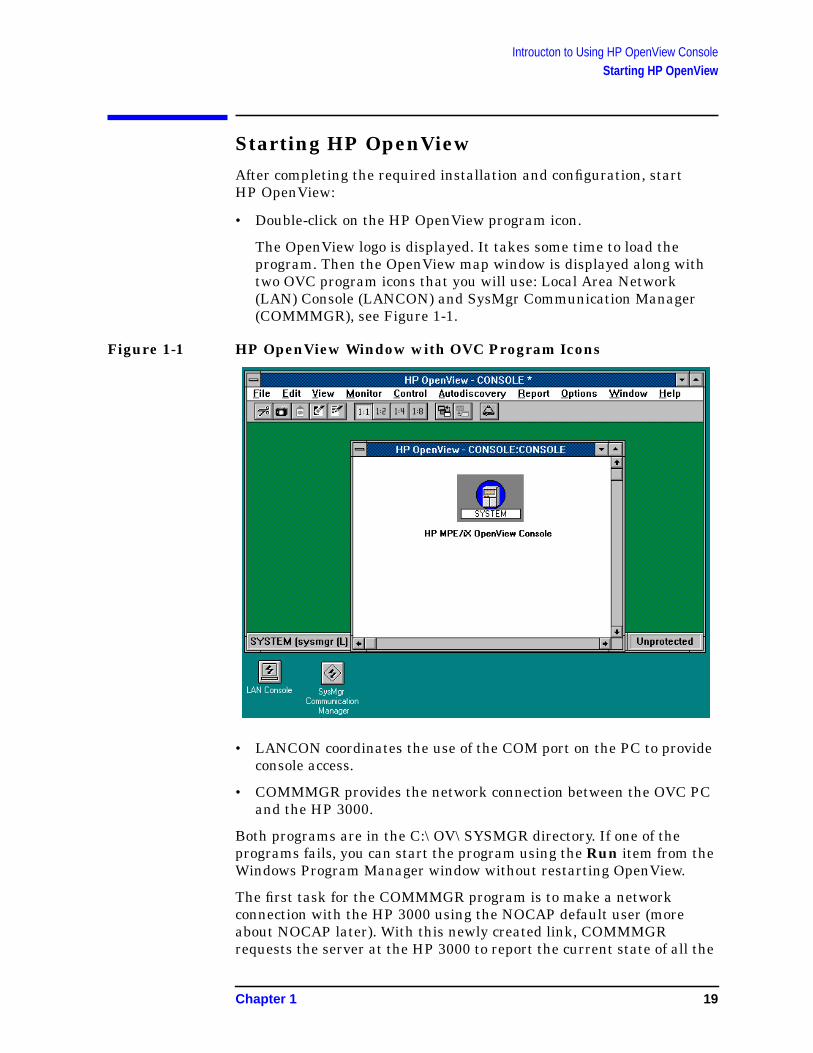
The OpenView logo is displayed. It takes some time to load theprogram. Then the OpenView map window is displayed along withtwo OVC program icons that you will use: Local Area Network(LAN) Console (LANCON) and SysMgr Communication Manager(COMMMGR), see Figure 1-1.
Figure 1-1 HP OpenView Window with OVC Program Icons
• LANCON coordinates the use of the COM port on the PC to provideconsole access.
• COMMMGR provides the network connection between the OVC PCand the HP 3000.
Both programs are in the C:\OV\SYSMGR directory. If one of theprograms fails, you can start the program using the Run item from theWindows Program Manager window without restarting OpenView.
The first task for the COMMMGR program is to make a networkconnection with the HP 3000 using the NOCAP default user (moreabout NOCAP later). With this newly created link, COMMMGRrequests the server at the HP 3000 to report the current state of all the
Chapter 1 19
Introucton to Using HP OpenView ConsoleStarting HP OpenView
known map symbols. A status window is displayed. The Windowscursor changes to an hourglass (the wait cursor). All mouse andkeyboard activity is suspended until the arrow cursor is displayed.Then each map symbol is displayed with one of these event colorsindicating a specific condition.
• Red — a critical condition
• Yellow — a warning condition
• Magenta — an informational message
• Green — a normal condition
• Blue — an unknown condition (COMMMGR never received a colorupdate for the symbol)
20 Chapter 1

Introucton to Using HP OpenView ConsoleLogging On
Logging OnThe first time you select an OVC command (for example, the ConfigureMgmt Node... submenu from the Customize HP SysMgr menu underthe HP OpenView Options menu), the SysMgr Logon dialog box isdisplayed (see Figure 1-2).
Figure 1-2 SysMgr Logon Dialog Box
Follow these steps to log on:
1. Enter the name of the HP 3000 in the Management Node: text box.
If your map symbols are receiving color update information, yourcurrent HP 3000 name is already displayed in the ManagementNode: text box. But if all your map symbols are blue, most likely youwill see an empty text box. Without knowing what system is thedesignated HP 3000, the COMMMGR program cannot create theNOCAP user link to get the symbol color. Therefore, you must enterthe HP 3000 name manually. Once a network link is created, thisnode name is remembered automatically.
The NOCAP user is a special entry defined in the OVC userconfiguration database. The PC uses the NOCAP user to create anetwork link so that map symbols are updated although no real userlogon exists. Once a real user logs on, the OVC HP 3000 drops theNOCAP link, and creates a new link for the PC that has the newlylogged on user.
2. Use the Tab key to move the cursor to the User Name: text box (orclick in the box with the mouse), and enter your assigned OVC username.
3. Use the Tab key to move the cursor to the Password: text box (orclick in the box with the mouse), and enter your password.
4. Either click on the OK button at the bottom of the dialog box, orpress the Enter key to log on to the HP 3000.
If you logged on successfully, the command that you selected isactivated, and the associated window is displayed. At this point, you
Chapter 1 21
Introucton to Using HP OpenView ConsoleLogging On
have access to any functions that are configured for your OVC username. Your OVC administrator has authority to change your OVCcapabilities. For more information on these capabilities, refer to theHP OpenView Console Manager’s Guide.
Follow this step to log off from your session with OVC:
1. From the Control menu, click on the SysMgr Logoff option.
When you select this menu item, the COMMMGR program closesout all the links the HP 3000 associated with your logon, and createsa NOCAP link. Initially you see all the symbols on your map changeto blue, but in a second all the symbols’ colors are updated to theiroriginal color.
Your HP OpenView map remains displayed on the OVC PC.
22 Chapter 1
Introucton to Using HP OpenView ConsoleWhere to Go from Here
Where to Go from HereIf you successfully logged on for your first OVC session, your network isworking properly. You are now ready to use OVC. First read Chapter 2 ,“OVC Features,” which describes all the menu items you can use duringan OVC session.
After reading Chapter 2 , “OVC Features,” you should have enoughinformation to begin exploring OVC. Chapter 3 , “Using OVC: A TypicalScenario,” outlines how a data center typically uses OVC formonitoring, controlling, and maintaining its HP 3000 system. Thisshould give you an idea of how to use OVC.
Chapter 4 , “Generating Reports.” describes how you create reports ofevent messages.
Chapter 5 , “Using Automated Response Service (ARS),” describes howyou use the Automated Response Service to respond to system events.
The Appendices at the back of the guide explain the error messages forthe OVC PC and the log file.
Chapter 1 23

Introucton to Using HP OpenView ConsoleWhere to Go from Here
24 Chapter 1

2 OVC Features
This chapter describes the OVC features that you can use to control theHP 3000 system from your PC.
25
OVC FeaturesOverview
OverviewOVC has a Windows graphical user interface so you can manipulateobjects either directly (while designing your network map, for example),or by clicking on items, such as menus or buttons. When you click onone of the menus, you can select options that get system information orperform system operations during an OVC session. The OVC menus arethe standard Windows type with alternate key combinations so thatyou do not have to use the mouse.
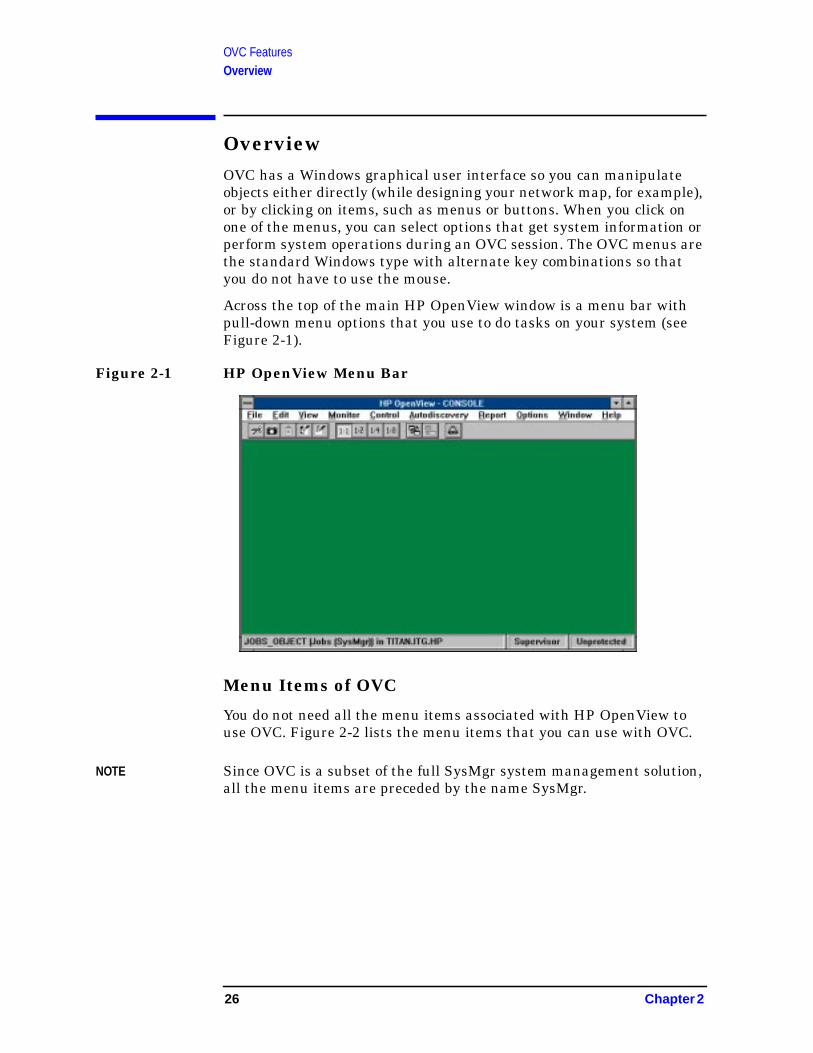
Across the top of the main HP OpenView window is a menu bar withpull-down menu options that you use to do tasks on your system (seeFigure 2-1).
Figure 2-1 HP OpenView Menu Bar
Menu Items of OVC
You do not need all the menu items associated with HP OpenView touse OVC. Figure 2-2 lists the menu items that you can use with OVC.
NOTE Since OVC is a subset of the full SysMgr system management solution,all the menu items are preceded by the name SysMgr.
26 Chapter 2
OVC FeaturesOverview
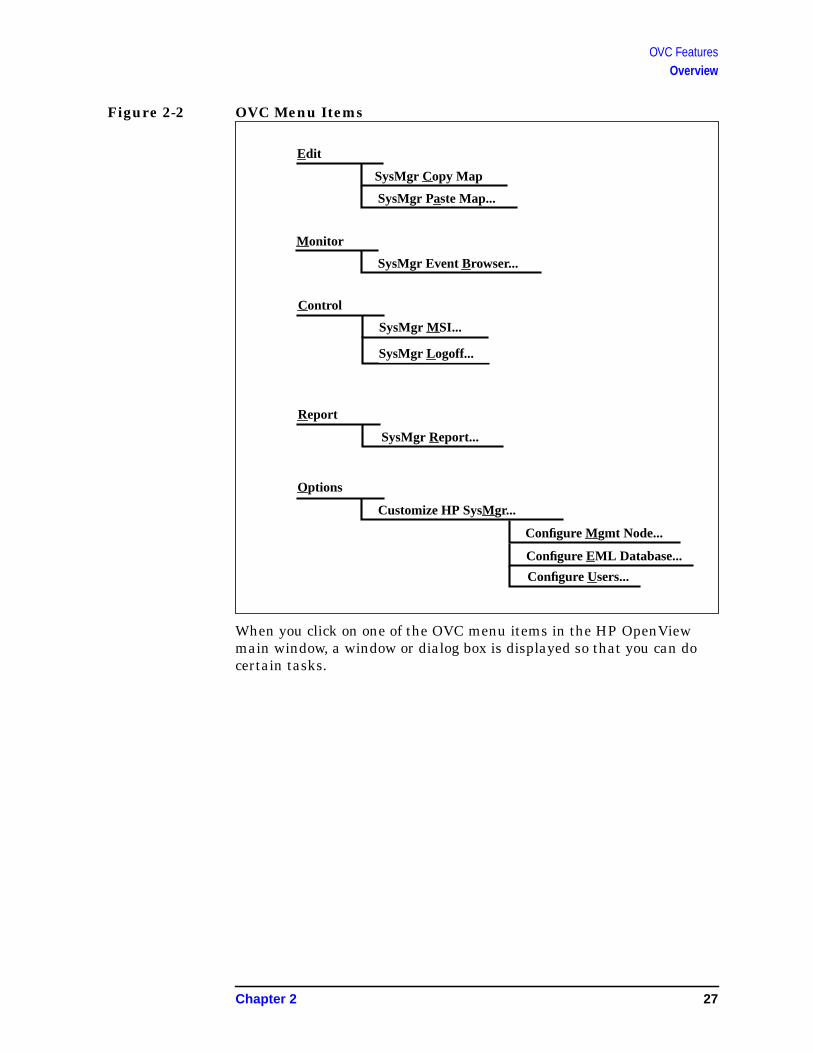
Figure 2-2 OVC Menu Items
When you click on one of the OVC menu items in the HP OpenViewmain window, a window or dialog box is displayed so that you can docertain tasks.
Monitor
SysMgr EventBrowser...
Control
SysMgr MSI...
Report
SysMgr Report...
Options
Customize HP SysMgr...
Configure Mgmt Node...
Configure EML Database...
Edit
SysMgr Copy Map
SysMgr Paste Map...
SysMgr Logoff...
Configure Users...
Chapter 2 27
OVC FeaturesSysMgr Copy Map
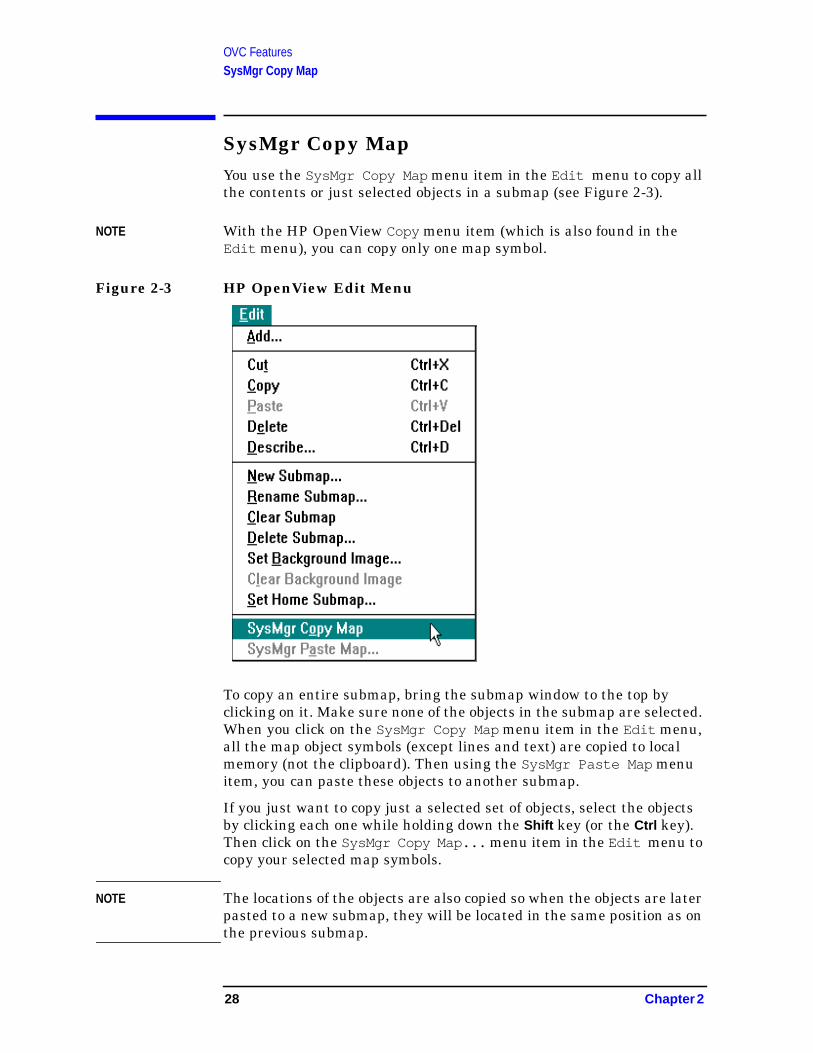
SysMgr Copy MapYou use the SysMgr Copy Map menu item in the Edit menu to copy allthe contents or just selected objects in a submap (see Figure 2-3).
NOTE With the HP OpenView Copy menu item (which is also found in theEdit menu), you can copy only one map symbol.
Figure 2-3 HP OpenView Edit Menu
To copy an entire submap, bring the submap window to the top byclicking on it. Make sure none of the objects in the submap are selected.When you click on the SysMgr Copy Map menu item in the Edit menu,all the map object symbols (except lines and text) are copied to localmemory (not the clipboard). Then using the SysMgr Paste Map menuitem, you can paste these objects to another submap.
If you just want to copy just a selected set of objects, select the objectsby clicking each one while holding down the Shift key (or the Ctrl key).Then click on the SysMgr Copy Map... menu item in the Edit menu tocopy your selected map symbols.
NOTE The locations of the objects are also copied so when the objects are laterpasted to a new submap, they will be located in the same position as onthe previous submap.
28 Chapter 2
OVC FeaturesSysMgr Paste Map
SysMgr Paste MapYou use the SysMgr Paste Map... menu item in the Edit menu topaste copied objects onto a submap. Before using this menu item, youmust first use SysMgr Copy Map... to copy objects.
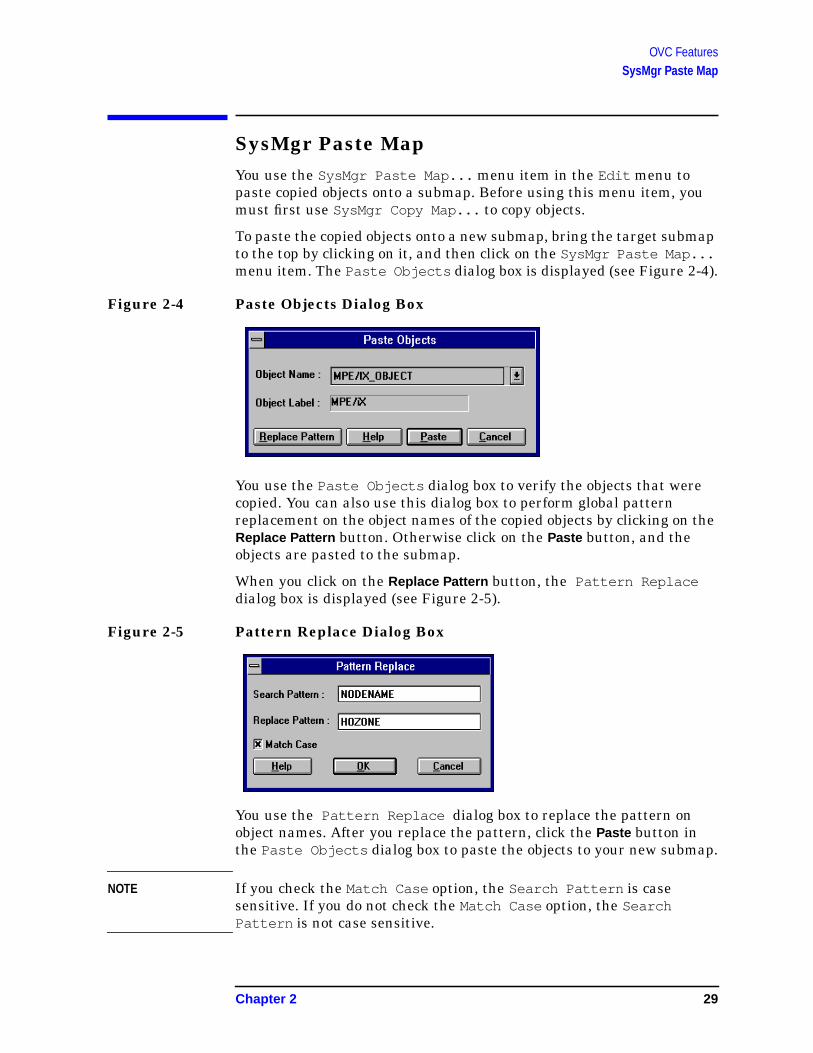
To paste the copied objects onto a new submap, bring the target submapto the top by clicking on it, and then click on the SysMgr Paste Map...menu item. The Paste Objects dialog box is displayed (see Figure 2-4).
Figure 2-4 Paste Objects Dialog Box
You use the Paste Objects dialog box to verify the objects that werecopied. You can also use this dialog box to perform global patternreplacement on the object names of the copied objects by clicking on theReplace Pattern button. Otherwise click on the Paste button, and theobjects are pasted to the submap.
When you click on the Replace Pattern button, the Pattern Replacedialog box is displayed (see Figure 2-5).
Figure 2-5 Pattern Replace Dialog Box
You use the Pattern Replace dialog box to replace the pattern onobject names. After you replace the pattern, click the Paste button inthe Paste Objects dialog box to paste the objects to your new submap.
NOTE If you check the Match Case option, the Search Pattern is casesensitive. If you do not check the Match Case option, the SearchPattern is not case sensitive.
Chapter 2 29
OVC FeaturesSysMgr Event Browser
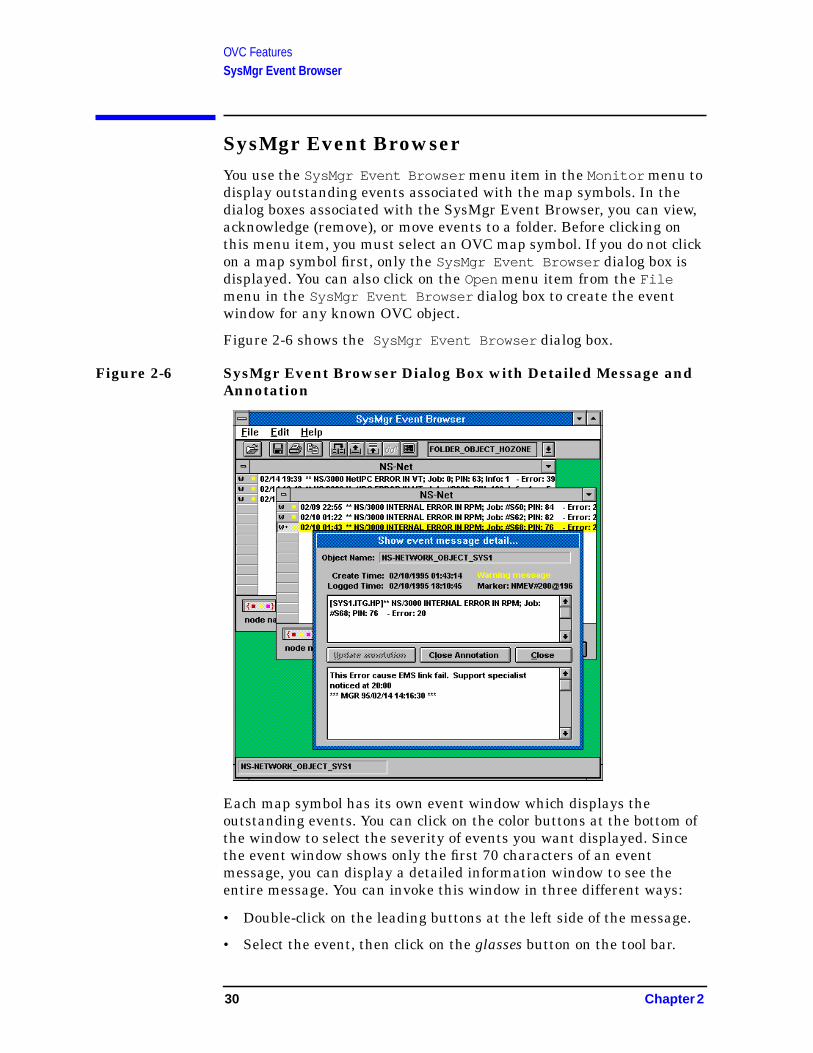
SysMgr Event BrowserYou use the SysMgr Event Browser menu item in the Monitor menu todisplay outstanding events associated with the map symbols. In thedialog boxes associated with the SysMgr Event Browser, you can view,acknowledge (remove), or move events to a folder. Before clicking onthis menu item, you must select an OVC map symbol. If you do not clickon a map symbol first, only the SysMgr Event Browser dialog box isdisplayed. You can also click on the Open menu item from the Filemenu in the SysMgr Event Browser dialog box to create the eventwindow for any known OVC object.
Figure 2-6 shows the SysMgr Event Browser dialog box.
Figure 2-6 SysMgr Event Browser Dialog Box with Detailed Message andAnnotation
Each map symbol has its own event window which displays theoutstanding events. You can click on the color buttons at the bottom ofthe window to select the severity of events you want displayed. Sincethe event window shows only the first 70 characters of an eventmessage, you can display a detailed information window to see theentire message. You can invoke this window in three different ways:
• Double-click on the leading buttons at the left side of the message.
• Select the event, then click on the glasses button on the tool bar.
30 Chapter 2
OVC FeaturesSysMgr Event Browser
• Select the event, then pull down the Edit menu to choose the ShowEvent Detail menu item.
The detailed information window is shared by all the event windows,and its content is updated automatically when you select a newmessage. Each event window uses approximately 3% of the PC’sresources, so do not open too many event windows at the same time.
The only way you can clear the symbol color is to acknowledge (remove)the event from the display. So if you want to keep the event for furtherinvestigation, move it into an event folder (a temporary holding place).You can add as many folder symbols as you want to your map.
CAUTION Folders do not provide long-term event storage. The folder symbolbehaves as an ordinary object symbol. When the Event Message Log(EML) database containing the event expires, the event is removedautomatically from the folder. To keep an event longer than the life ofits related database, save it to a disk file or export it to atrouble-tracking system by using the Windows clipboard.
Click on the Help menu at the top of the SysMgr Event Browser dialogbox to learn more about the SysMgr Event Browser features and uses.
Chapter 2 31
OVC FeaturesSysMgr Logoff
SysMgr LogoffYou use the SysMgr Logoff menu item in the Control menu to log offfrom OVC without exiting HP OpenView. The SysMgr COMMMGRprogram enables this menu item when you log on to SysMgrsuccessfully. When you click on this menu item, COMMMGR closes allthe currently operating OVC applications and returns the status colorsof the map symbols to blue. Then COMMMGR creates the NOCAP userlink with the HP 3000 to update the color status of all map symbols.This operation may take a few seconds. A status window may bedisplayed to indicate what is happening. User input is temporarilysuspended.
32 Chapter 2
OVC FeaturesSysMgr MSI
SysMgr MSIYou use the SysMgr MSI... menu item in the Control menu to startthe Management Session Interface (MSI). With MSI you can issueoperator commands that control the HP 3000. Before clicking on thismenu item, you must first select a computer symbol from your HPOpenView map. When you click on this menu item, a terminal emulatorwindow is displayed, and a terminal script is executed automatically.
The first time you start SysMgr MSI you are prompted to specify theHP 3000 logon information needed to establish the VT session with theHP 3000. This logon information will be stored and used whenever youstart MSI again. At the end of the script execution you see the colon (: )prompt (see Figure 2-7).
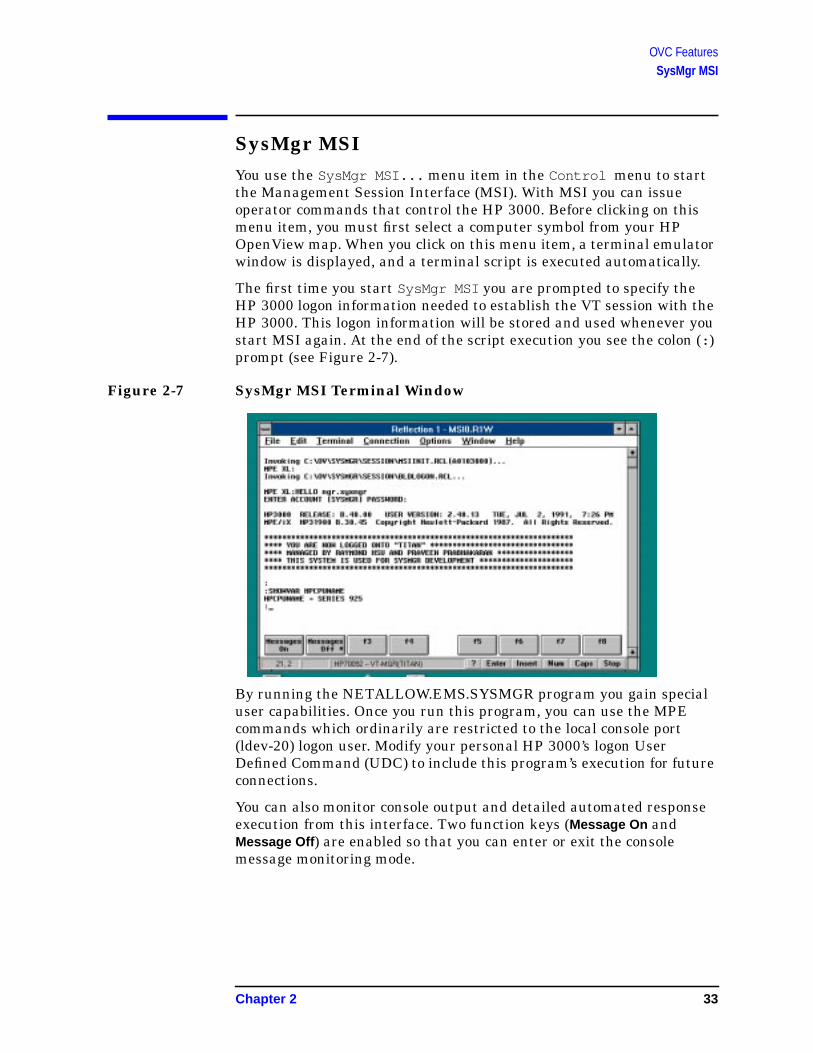
Figure 2-7 SysMgr MSI Terminal Window
By running the NETALLOW.EMS.SYSMGR program you gain specialuser capabilities. Once you run this program, you can use the MPEcommands which ordinarily are restricted to the local console port(ldev-20) logon user. Modify your personal HP 3000’s logon UserDefined Command (UDC) to include this program’s execution for futureconnections.
You can also monitor console output and detailed automated responseexecution from this interface. Two function keys (Message On andMessage Off ) are enabled so that you can enter or exit the consolemessage monitoring mode.
Chapter 2 33
OVC FeaturesSysMgr Report
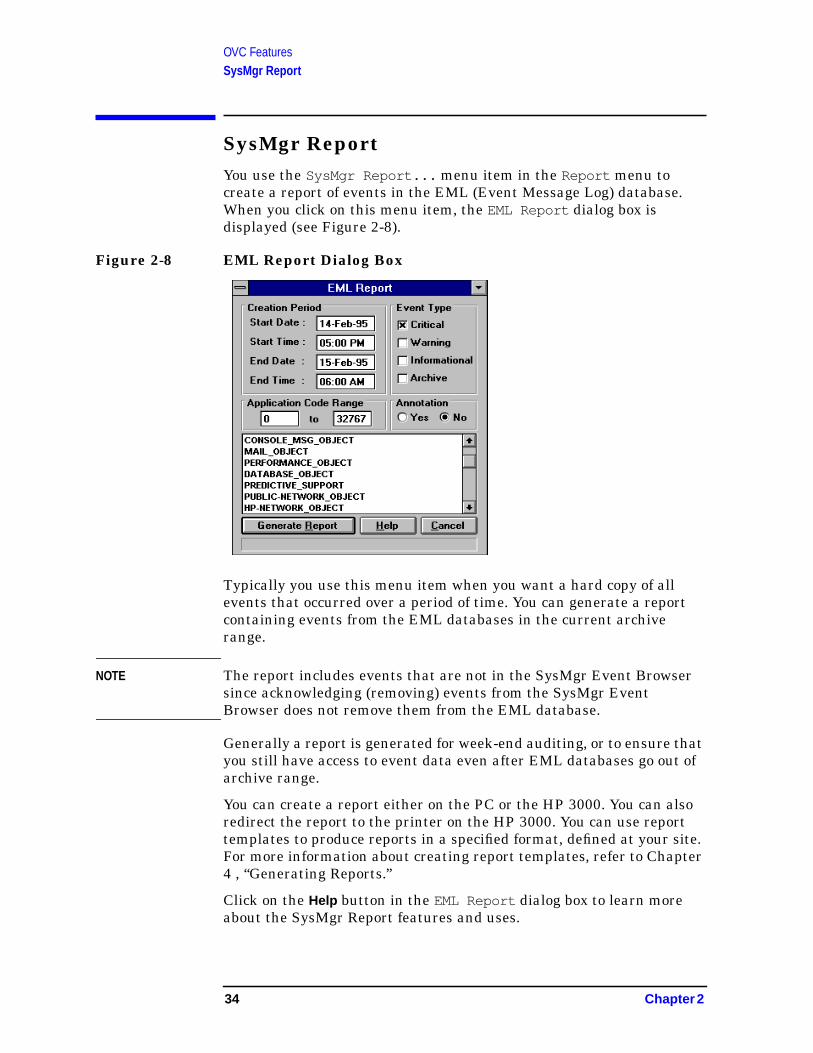
SysMgr ReportYou use the SysMgr Report... menu item in the Report menu tocreate a report of events in the EML (Event Message Log) database.When you click on this menu item, the EML Report dialog box isdisplayed (see Figure 2-8).
Figure 2-8 EML Report Dialog Box
Typically you use this menu item when you want a hard copy of allevents that occurred over a period of time. You can generate a reportcontaining events from the EML databases in the current archiverange.
NOTE The report includes events that are not in the SysMgr Event Browsersince acknowledging (removing) events from the SysMgr EventBrowser does not remove them from the EML database.
Generally a report is generated for week-end auditing, or to ensure thatyou still have access to event data even after EML databases go out ofarchive range.
You can create a report either on the PC or the HP 3000. You can alsoredirect the report to the printer on the HP 3000. You can use reporttemplates to produce reports in a specified format, defined at your site.For more information about creating report templates, refer to Chapter4 , “Generating Reports.”
Click on the Help button in the EML Report dialog box to learn moreabout the SysMgr Report features and uses.
34 Chapter 2
OVC FeaturesCustomize HP SysMgr
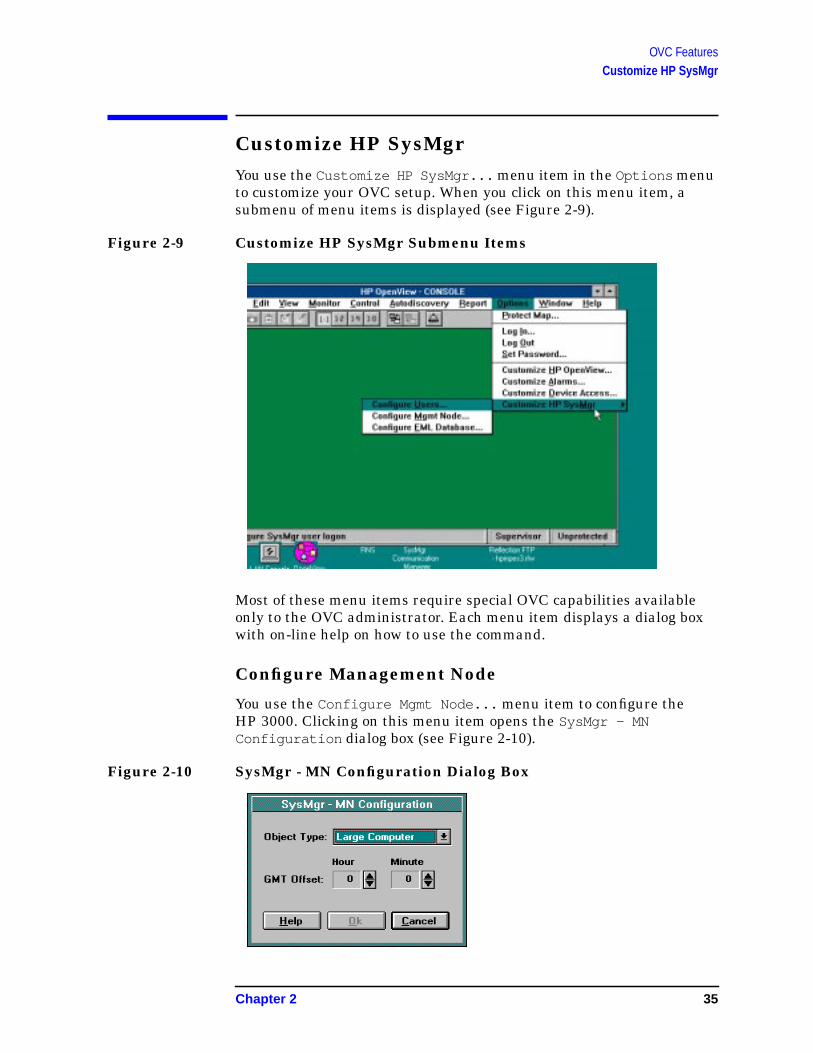
Customize HP SysMgrYou use the Customize HP SysMgr... menu item in the Options menuto customize your OVC setup. When you click on this menu item, asubmenu of menu items is displayed (see Figure 2-9).
Figure 2-9 Customize HP SysMgr Submenu Items
Most of these menu items require special OVC capabilities availableonly to the OVC administrator. Each menu item displays a dialog boxwith on-line help on how to use the command.
Configure Management Node
You use the Configure Mgmt Node... menu item to configure theHP 3000. Clicking on this menu item opens the SysMgr - MNConfiguration dialog box (see Figure 2-10).
Figure 2-10 SysMgr - MN Configuration Dialog Box
Chapter 2 35
OVC FeaturesCustomize HP SysMgr
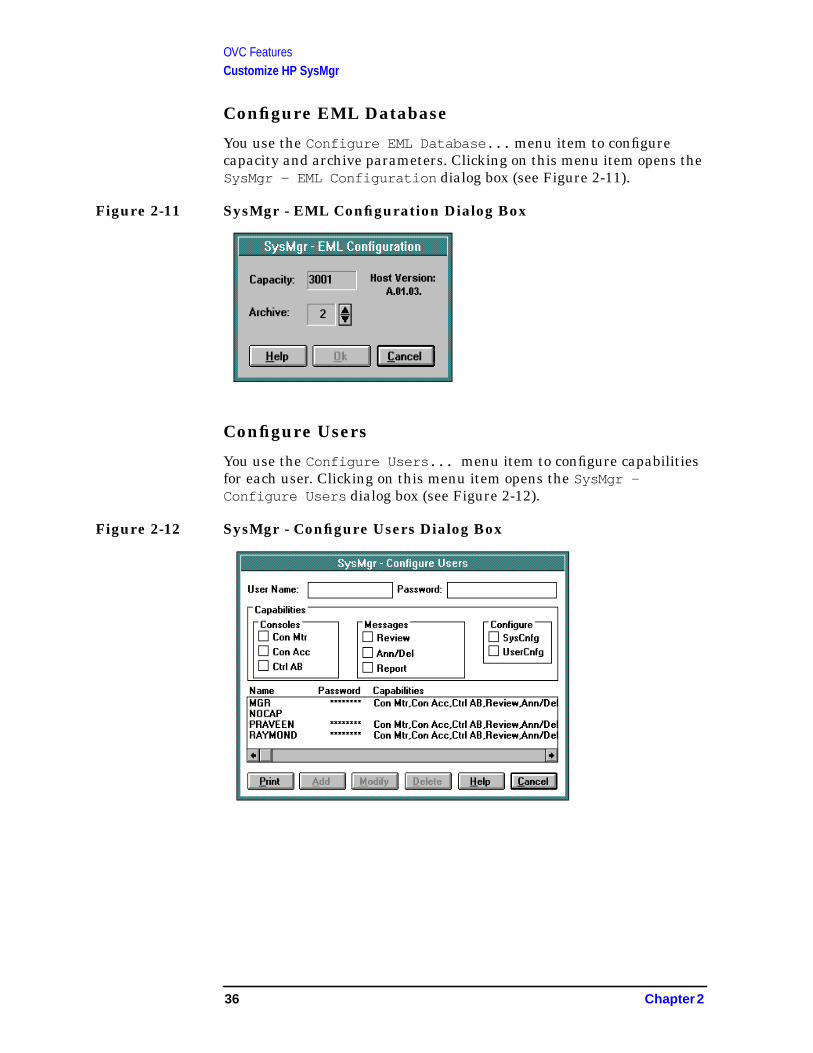
Configure EML Database
You use the Configure EML Database... menu item to configurecapacity and archive parameters. Clicking on this menu item opens theSysMgr - EML Configuration dialog box (see Figure 2-11).
Figure 2-11 SysMgr - EML Configuration Dialog Box
Configure Users
You use the Configure Users... menu item to configure capabilitiesfor each user. Clicking on this menu item opens the SysMgr -Configure Users dialog box (see Figure 2-12).
Figure 2-12 SysMgr - Configure Users Dialog Box
36 Chapter 2
OVC FeaturesUsing On-Line Help
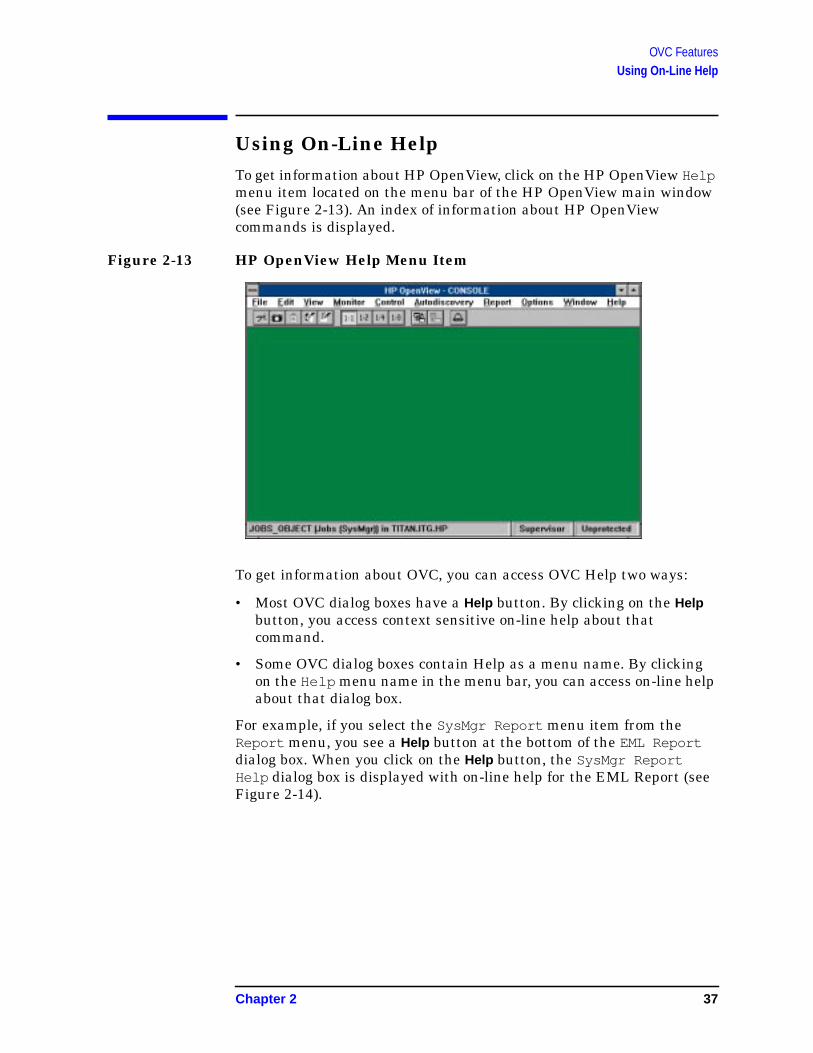
Using On-Line HelpTo get information about HP OpenView, click on the HP OpenView Helpmenu item located on the menu bar of the HP OpenView main window(see Figure 2-13). An index of information about HP OpenViewcommands is displayed.
Figure 2-13 HP OpenView Help Menu Item
To get information about OVC, you can access OVC Help two ways:
• Most OVC dialog boxes have a Help button. By clicking on the Helpbutton, you access context sensitive on-line help about thatcommand.
• Some OVC dialog boxes contain Help as a menu name. By clickingon the Help menu name in the menu bar, you can access on-line helpabout that dialog box.
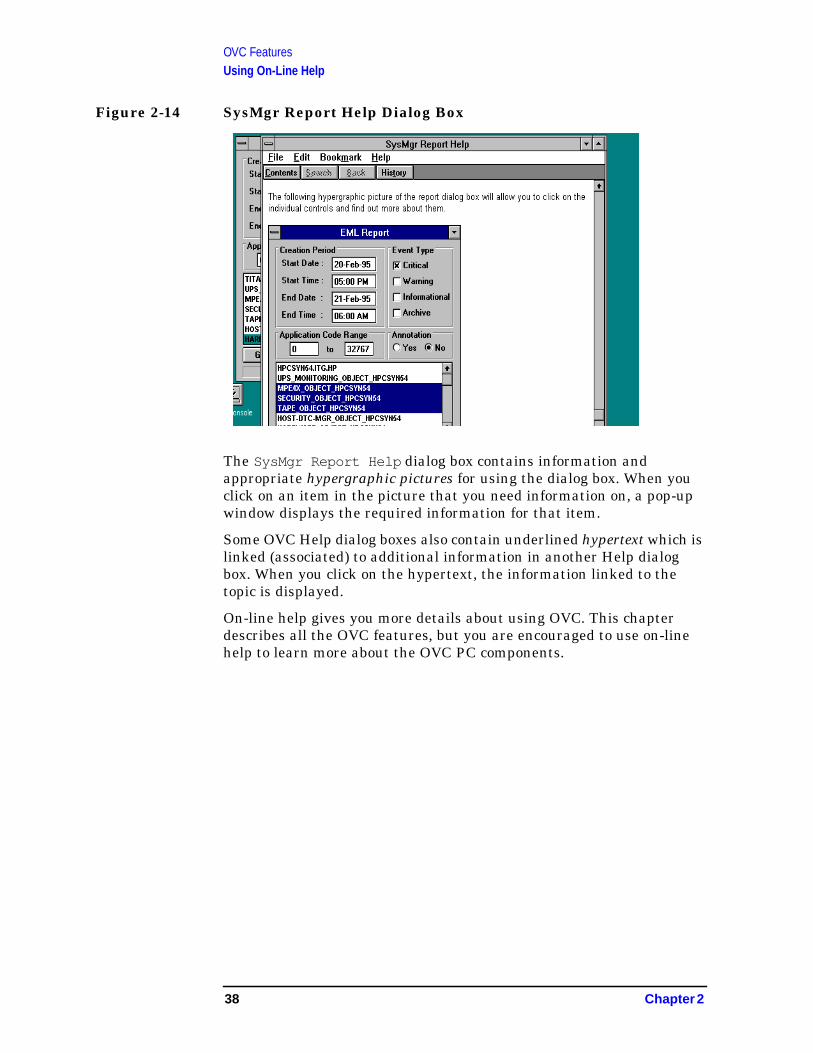
For example, if you select the SysMgr Report menu item from theReport menu, you see a Help button at the bottom of the EML Reportdialog box. When you click on the Help button, the SysMgr ReportHelp dialog box is displayed with on-line help for the EML Report (seeFigure 2-14).
Chapter 2 37
OVC FeaturesUsing On-Line Help
Figure 2-14 SysMgr Report Help Dialog Box
The SysMgr Report Help dialog box contains information andappropriate hypergraphic pictures for using the dialog box. When youclick on an item in the picture that you need information on, a pop-upwindow displays the required information for that item.
Some OVC Help dialog boxes also contain underlined hypertext which islinked (associated) to additional information in another Help dialogbox. When you click on the hypertext, the information linked to thetopic is displayed.
On-line help gives you more details about using OVC. This chapterdescribes all the OVC features, but you are encouraged to use on-linehelp to learn more about the OVC PC components.
38 Chapter 2
OVC FeaturesLAN Console
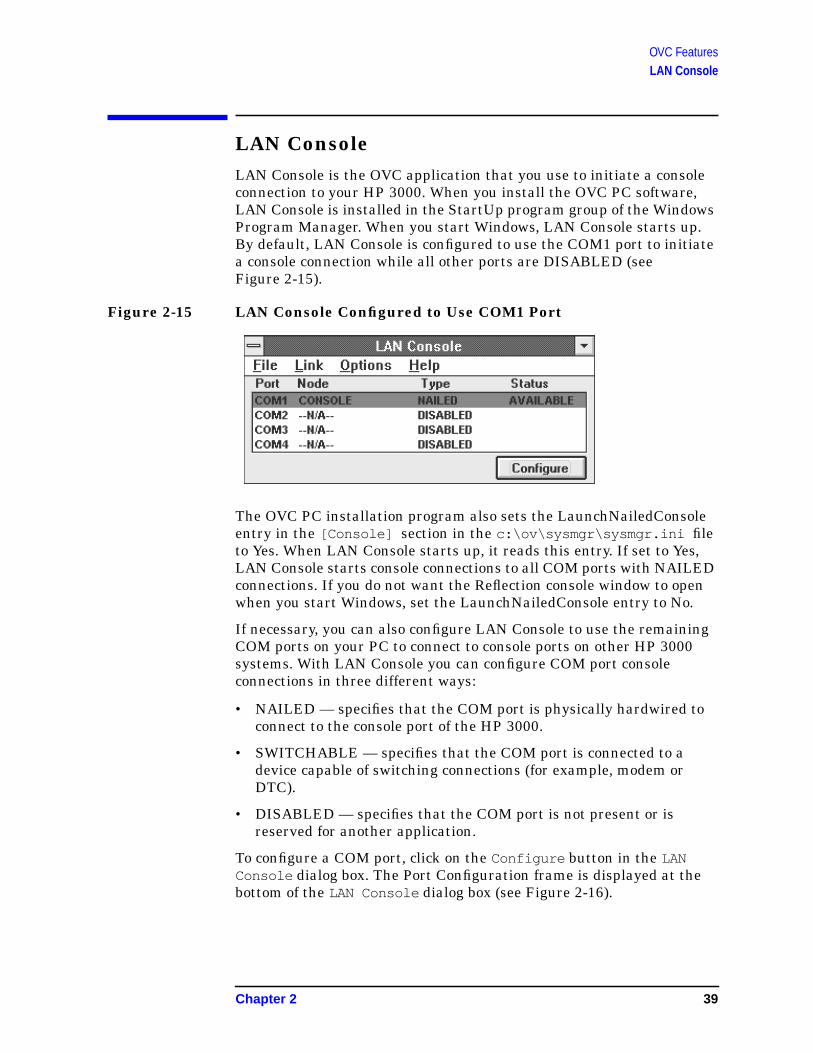
LAN ConsoleLAN Console is the OVC application that you use to initiate a consoleconnection to your HP 3000. When you install the OVC PC software,LAN Console is installed in the StartUp program group of the WindowsProgram Manager. When you start Windows, LAN Console starts up.By default, LAN Console is configured to use the COM1 port to initiatea console connection while all other ports are DISABLED (seeFigure 2-15).
Figure 2-15 LAN Console Configured to Use COM1 Port
The OVC PC installation program also sets the LaunchNailedConsoleentry in the [Console] section in the c:\ov\sysmgr\sysmgr.ini fileto Yes. When LAN Console starts up, it reads this entry. If set to Yes,LAN Console starts console connections to all COM ports with NAILEDconnections. If you do not want the Reflection console window to openwhen you start Windows, set the LaunchNailedConsole entry to No.
If necessary, you can also configure LAN Console to use the remainingCOM ports on your PC to connect to console ports on other HP 3000systems. With LAN Console you can configure COM port consoleconnections in three different ways:
• NAILED — specifies that the COM port is physically hardwired toconnect to the console port of the HP 3000.
• SWITCHABLE — specifies that the COM port is connected to adevice capable of switching connections (for example, modem orDTC).
• DISABLED — specifies that the COM port is not present or isreserved for another application.
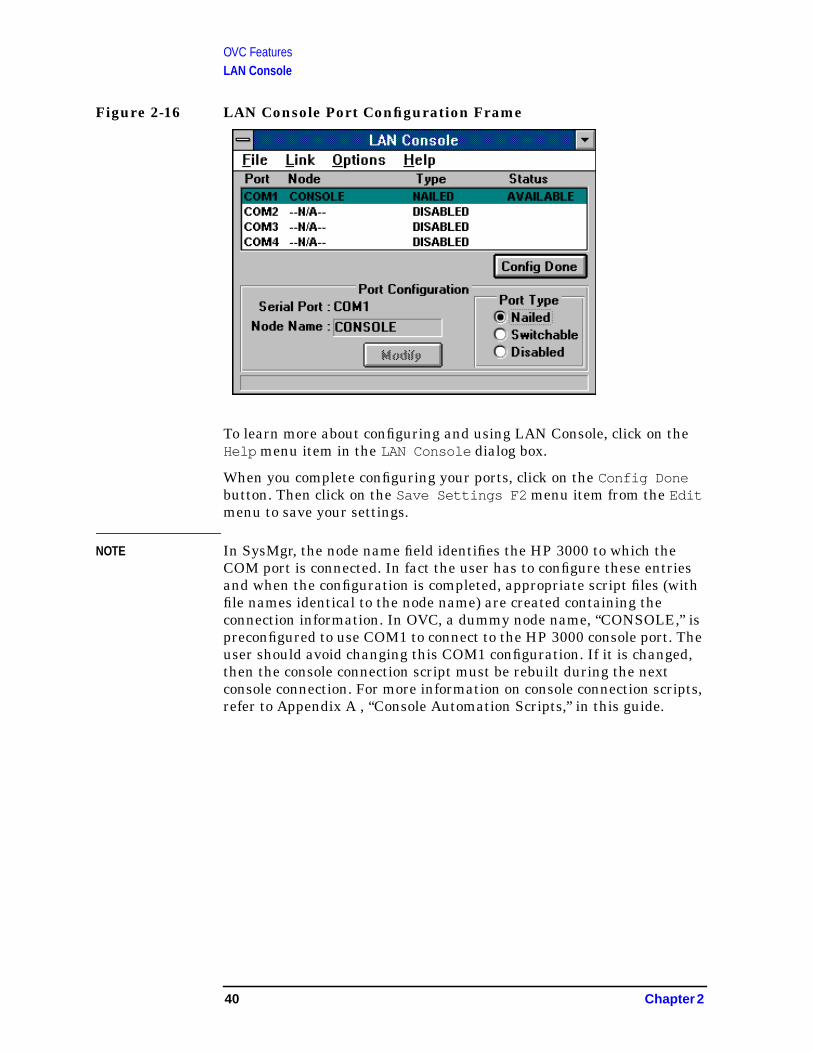
To configure a COM port, click on the Configure button in the LANConsole dialog box. The Port Configuration frame is displayed at thebottom of the LAN Console dialog box (see Figure 2-16).
Chapter 2 39
OVC FeaturesLAN Console
Figure 2-16 LAN Console Port Configuration Frame
To learn more about configuring and using LAN Console, click on theHelp menu item in the LAN Console dialog box.
When you complete configuring your ports, click on the Config Donebutton. Then click on the Save Settings F2 menu item from the Editmenu to save your settings.
NOTE In SysMgr, the node name field identifies the HP 3000 to which theCOM port is connected. In fact the user has to configure these entriesand when the configuration is completed, appropriate script files (withfile names identical to the node name) are created containing theconnection information. In OVC, a dummy node name, “CONSOLE,” ispreconfigured to use COM1 to connect to the HP 3000 console port. Theuser should avoid changing this COM1 configuration. If it is changed,then the console connection script must be rebuilt during the nextconsole connection. For more information on console connection scripts,refer to Appendix A , “Console Automation Scripts,” in this guide.
40 Chapter 2
OVC FeaturesExiting OVC
Exiting OVCYou use the Exit menu item in the File menu to end your OVC sessionon the OVC PC. When you click on this menu item, a dialog box isdisplayed indicating that your OpenView session will end. Click on theOK button.
However, although you ended the OVC session, OVC is still running onthe HP 3000. To terminate OVC on the HP 3000 system, refer to theHP OpenView Console Manager’s Guide.
Chapter 2 41

OVC FeaturesExiting OVC
42 Chapter 2

3 Using OVC: A Typical Scenario
This chapter shows an example of how you might use OVC forday-to-day operations.
43
Using OVC: A Typical ScenarioOverview
OverviewThis chapter briefly describes a scenario showing how an operator usesOVC. Hopefully, you will find the information useful in planning,organizing, and using the OVC tools. Also the information will help youunderstand how you can control and solve any problem you mayencounter with the HP 3000 you manage from your desk. The scenariodoes not include details about configuring or setting up OVC. For moredetailed information on those topics, refer to the HP OpenView ConsoleManager’s Guide.
The scenario suggests a very likely series of tasks you might undertake,step by step, after finding a serious event on your HP 3000. Alsoincluded are suggestions for the steps you might use to locate and solvea problem on your HP 3000 system.
44 Chapter 3
Using OVC: A Typical ScenarioA Typical Scenario
A Typical ScenarioBill manages the HP 3000 system located in the ProductionDepartment. He uses OVC to manage the HP 3000 from his office. Bill’sHP 3000 system is named TITAN and is on a LAN using Ethernet. Billhas ensured control console access to the HP 3000 from his OVC PC byconnecting the OVC PC’s COM1 port to the ldev-20 console port of theHP 3000.
How Bill Organizes His Work
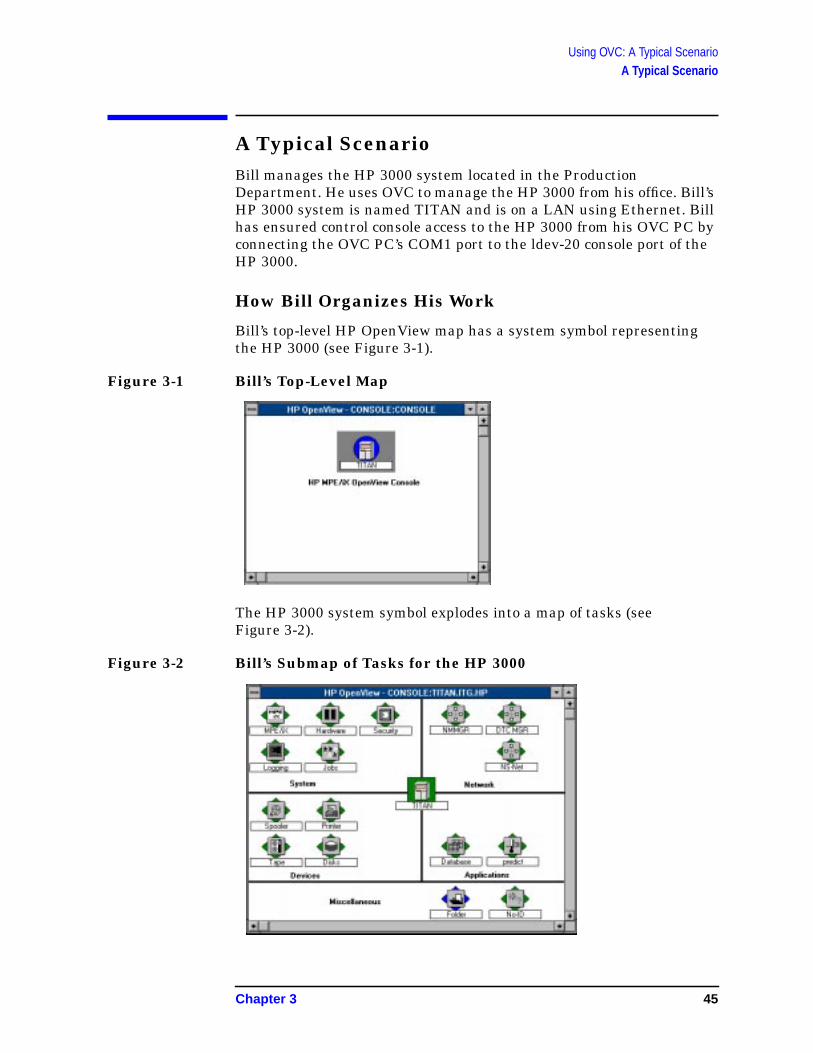
Bill’s top-level HP OpenView map has a system symbol representingthe HP 3000 (see Figure 3-1).
Figure 3-1 Bill’s Top-Level Map
The HP 3000 system symbol explodes into a map of tasks (seeFigure 3-2).
Figure 3-2 Bill’s Submap of Tasks for the HP 3000
Chapter 3 45
Using OVC: A Typical ScenarioA Typical Scenario
How Bill Responds to Events
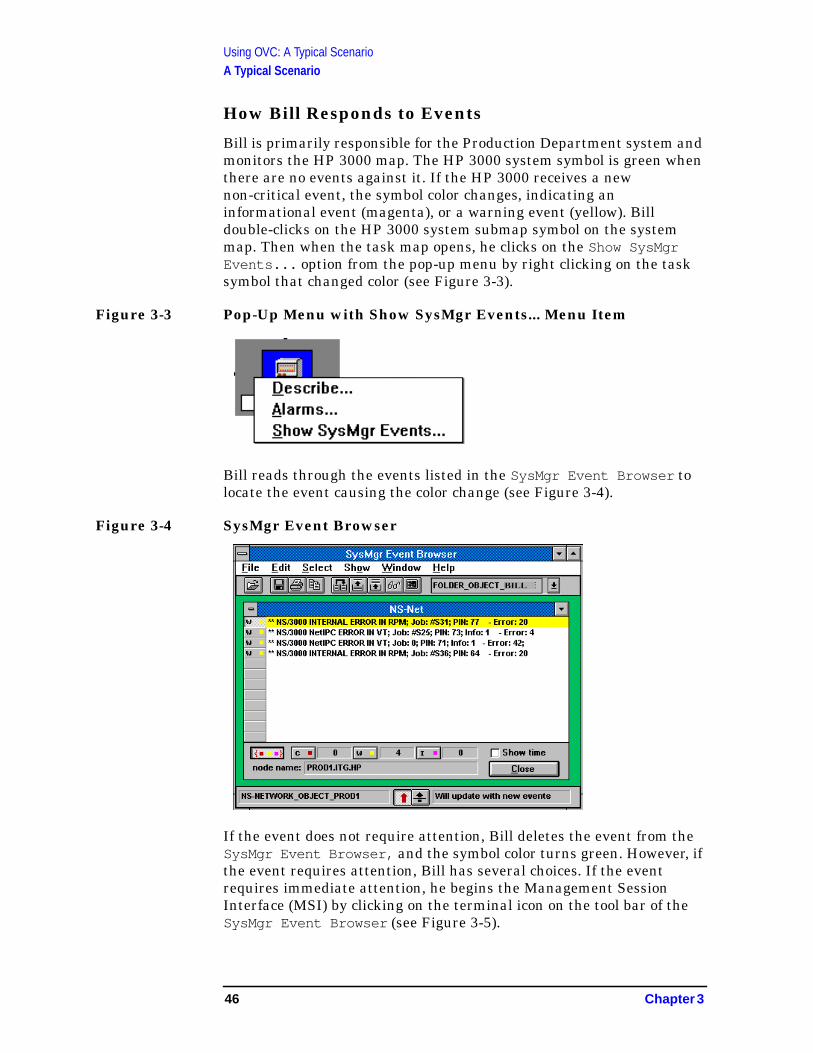
Bill is primarily responsible for the Production Department system andmonitors the HP 3000 map. The HP 3000 system symbol is green whenthere are no events against it. If the HP 3000 receives a newnon-critical event, the symbol color changes, indicating aninformational event (magenta), or a warning event (yellow). Billdouble-clicks on the HP 3000 system submap symbol on the systemmap. Then when the task map opens, he clicks on the Show SysMgrEvents... option from the pop-up menu by right clicking on the tasksymbol that changed color (see Figure 3-3).
Figure 3-3 Pop-Up Menu with Show SysMgr Events... Menu Item
Bill reads through the events listed in the SysMgr Event Browser tolocate the event causing the color change (see Figure 3-4).
Figure 3-4 SysMgr Event Browser
If the event does not require attention, Bill deletes the event from theSysMgr Event Browser, and the symbol color turns green. However, ifthe event requires attention, Bill has several choices. If the eventrequires immediate attention, he begins the Management SessionInterface (MSI) by clicking on the terminal icon on the tool bar of theSysMgr Event Browser (see Figure 3-5).
BILL
46 Chapter 3
Using OVC: A Typical ScenarioA Typical Scenario
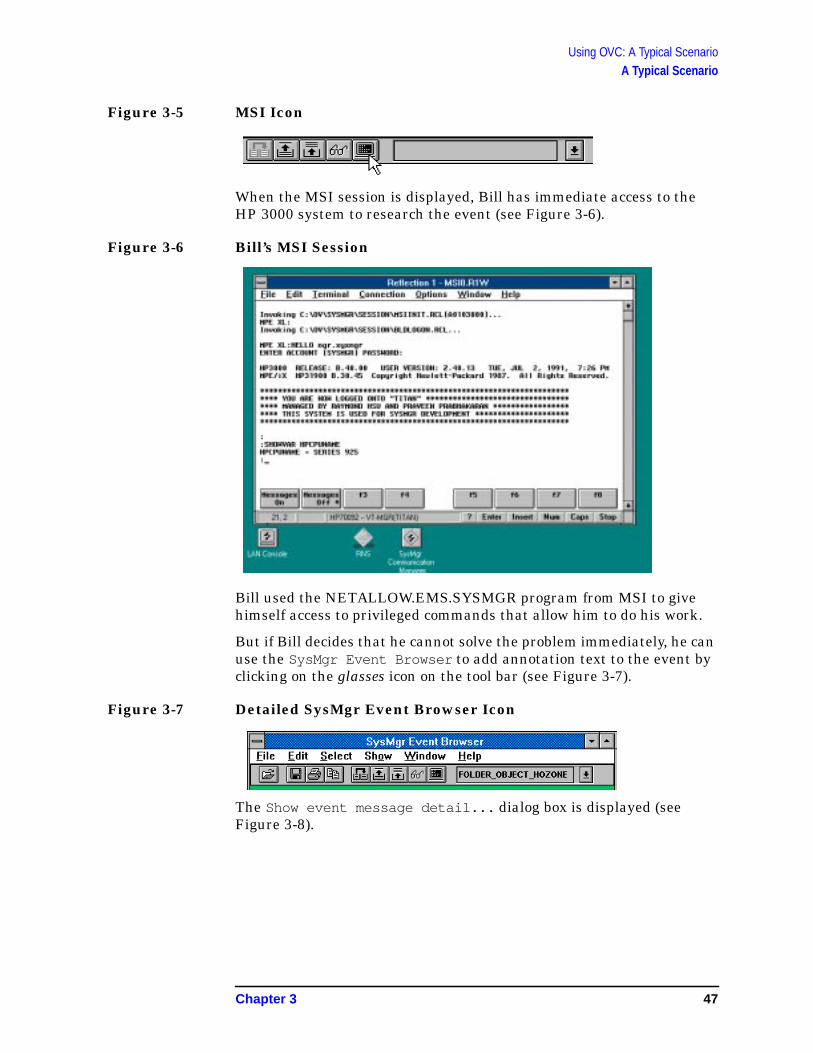
Figure 3-5 MSI Icon
When the MSI session is displayed, Bill has immediate access to theHP 3000 system to research the event (see Figure 3-6).
Figure 3-6 Bill’s MSI Session
Bill used the NETALLOW.EMS.SYSMGR program from MSI to givehimself access to privileged commands that allow him to do his work.
But if Bill decides that he cannot solve the problem immediately, he canuse the SysMgr Event Browser to add annotation text to the event byclicking on the glasses icon on the tool bar (see Figure 3-7).
Figure 3-7 Detailed SysMgr Event Browser Icon
The Show event message detail... dialog box is displayed (seeFigure 3-8).
Chapter 3 47
Using OVC: A Typical ScenarioA Typical Scenario
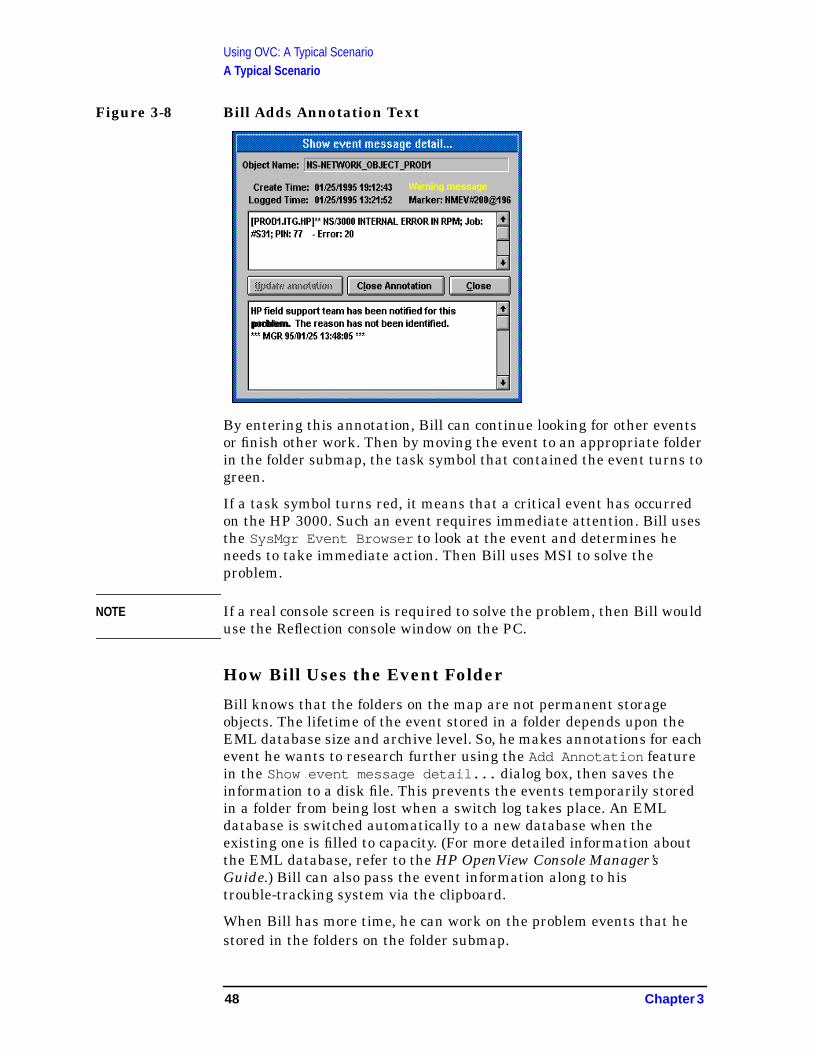
Figure 3-8 Bill Adds Annotation Text
By entering this annotation, Bill can continue looking for other eventsor finish other work. Then by moving the event to an appropriate folderin the folder submap, the task symbol that contained the event turns togreen.
If a task symbol turns red, it means that a critical event has occurredon the HP 3000. Such an event requires immediate attention. Bill usesthe SysMgr Event Browser to look at the event and determines heneeds to take immediate action. Then Bill uses MSI to solve theproblem.
NOTE If a real console screen is required to solve the problem, then Bill woulduse the Reflection console window on the PC.
How Bill Uses the Event Folder
Bill knows that the folders on the map are not permanent storageobjects. The lifetime of the event stored in a folder depends upon theEML database size and archive level. So, he makes annotations for eachevent he wants to research further using the Add Annotation featurein the Show event message detail... dialog box, then saves theinformation to a disk file. This prevents the events temporarily storedin a folder from being lost when a switch log takes place. An EMLdatabase is switched automatically to a new database when theexisting one is filled to capacity. (For more detailed information aboutthe EML database, refer to the HP OpenView Console Manager’sGuide.) Bill can also pass the event information along to histrouble-tracking system via the clipboard.
When Bill has more time, he can work on the problem events that hestored in the folders on the folder submap.
problem.
48 Chapter 3

4 Generating Reports
This chapter explains how you use SysMgr Report to generate reportsof event messages.
49
Generating ReportsOverview
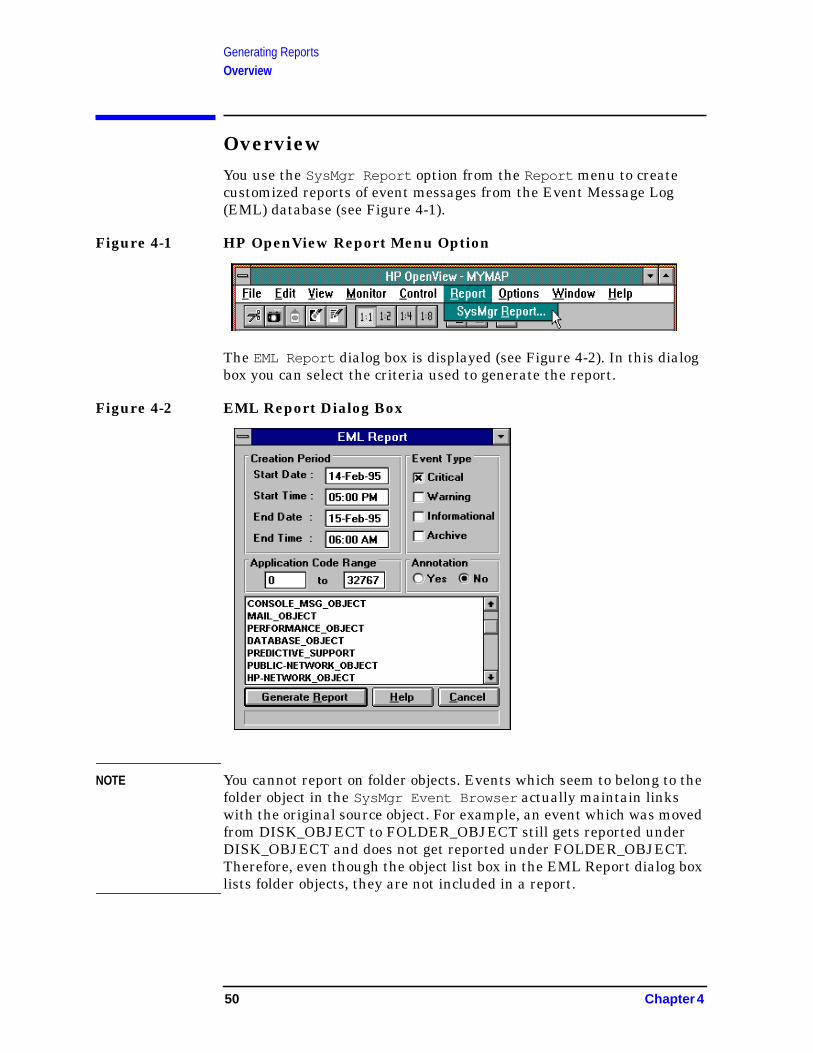
OverviewYou use the SysMgr Report option from the Report menu to createcustomized reports of event messages from the Event Message Log(EML) database (see Figure 4-1).
Figure 4-1 HP OpenView Report Menu Option
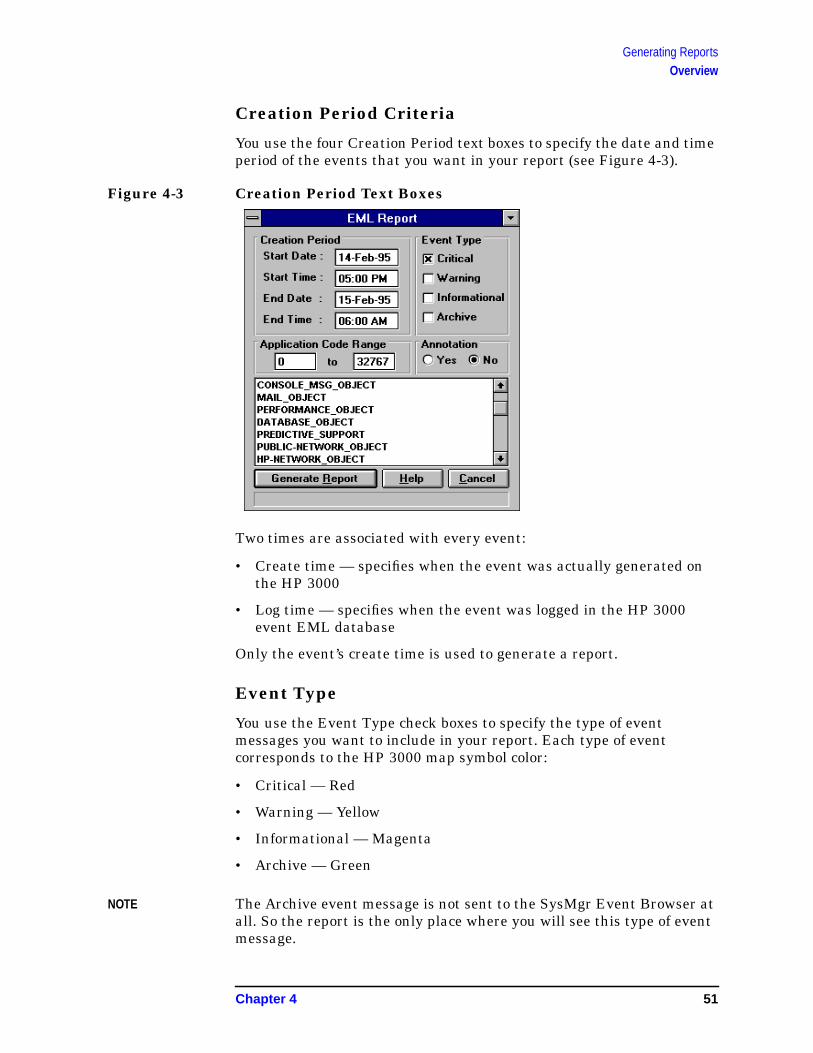
The EML Report dialog box is displayed (see Figure 4-2). In this dialogbox you can select the criteria used to generate the report.
Figure 4-2 EML Report Dialog Box
NOTE You cannot report on folder objects. Events which seem to belong to thefolder object in the SysMgr Event Browser actually maintain linkswith the original source object. For example, an event which was movedfrom DISK_OBJECT to FOLDER_OBJECT still gets reported underDISK_OBJECT and does not get reported under FOLDER_OBJECT.Therefore, even though the object list box in the EML Report dialog boxlists folder objects, they are not included in a report.
50 Chapter 4
Generating ReportsOverview
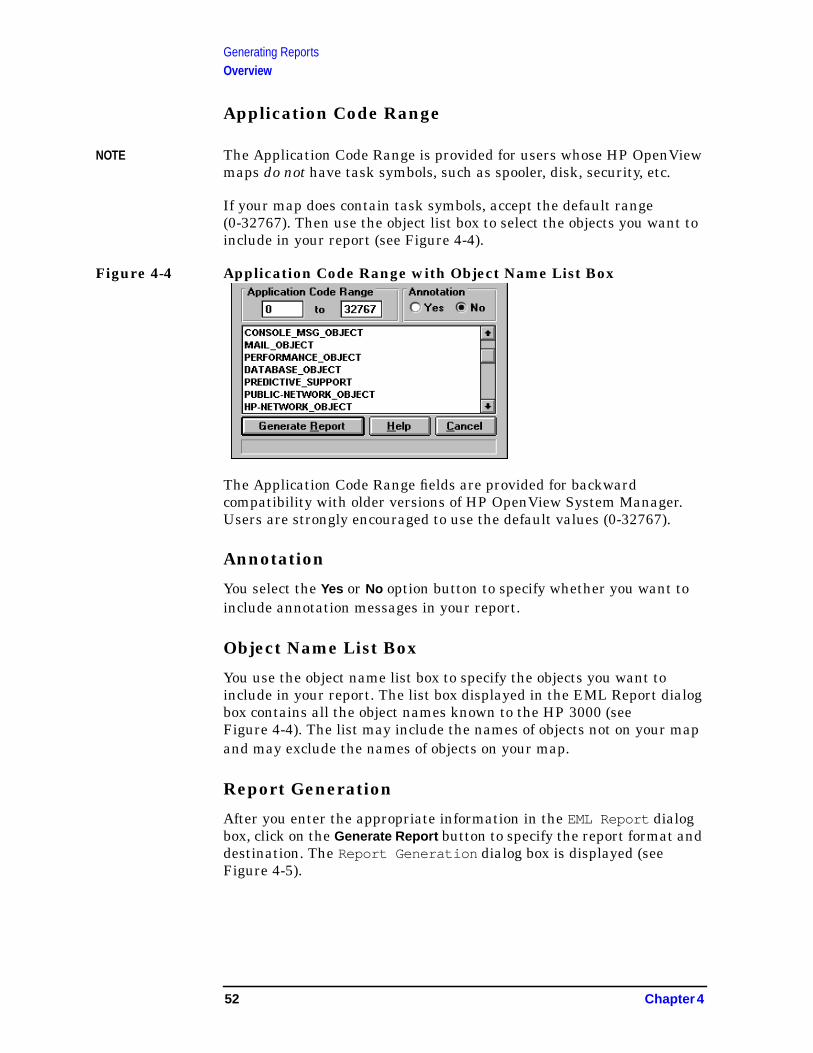
Creation Period Criteria
You use the four Creation Period text boxes to specify the date and timeperiod of the events that you want in your report (see Figure 4-3).
Figure 4-3 Creation Period Text Boxes
Two times are associated with every event:
• Create time — specifies when the event was actually generated onthe HP 3000
• Log time — specifies when the event was logged in the HP 3000event EML database
Only the event’s create time is used to generate a report.
Event Type
You use the Event Type check boxes to specify the type of eventmessages you want to include in your report. Each type of eventcorresponds to the HP 3000 map symbol color:
• Critical — Red
• Warning — Yellow
• Informational — Magenta
• Archive — Green
NOTE The Archive event message is not sent to the SysMgr Event Browser atall. So the report is the only place where you will see this type of eventmessage.
Chapter 4 51
Generating ReportsOverview
Application Code Range
NOTE The Application Code Range is provided for users whose HP OpenViewmaps do not have task symbols, such as spooler, disk, security, etc.
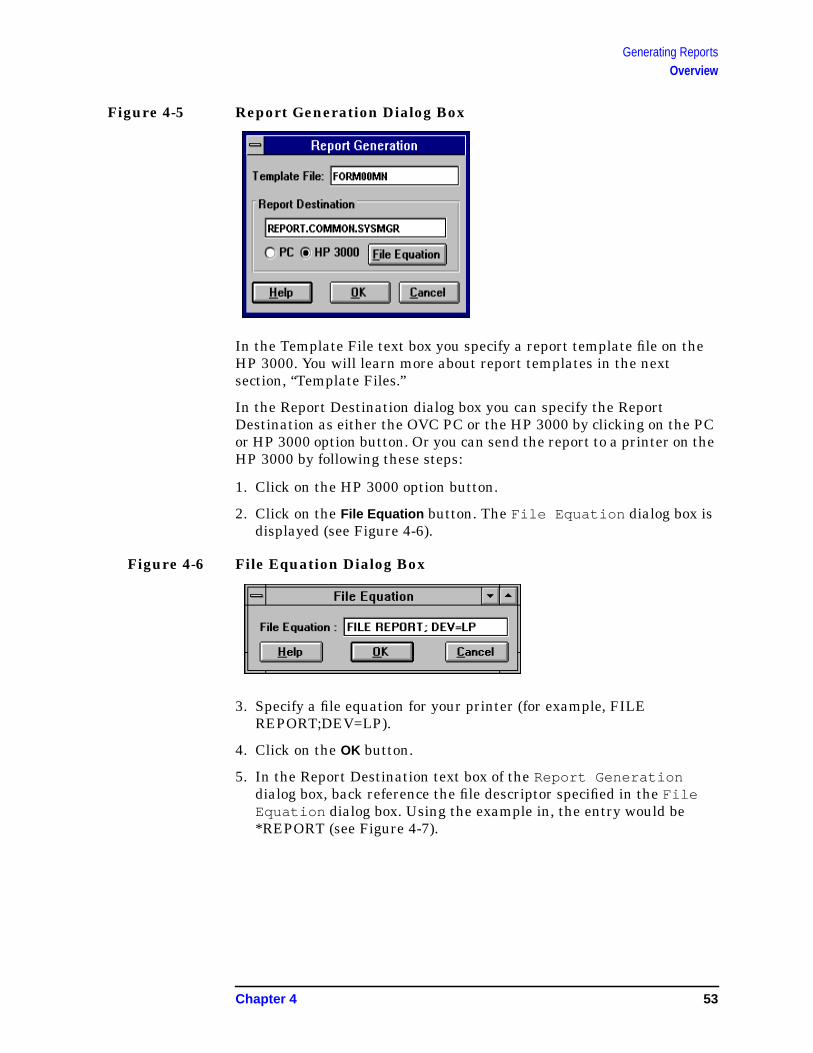
If your map does contain task symbols, accept the default range(0-32767). Then use the object list box to select the objects you want toinclude in your report (see Figure 4-4).
Figure 4-4 Application Code Range with Object Name List Box
The Application Code Range fields are provided for backwardcompatibility with older versions of HP OpenView System Manager.Users are strongly encouraged to use the default values (0-32767).
Annotation
You select the Yes or No option button to specify whether you want toinclude annotation messages in your report.
Object Name List Box
You use the object name list box to specify the objects you want toinclude in your report. The list box displayed in the EML Report dialogbox contains all the object names known to the HP 3000 (seeFigure 4-4). The list may include the names of objects not on your mapand may exclude the names of objects on your map.
Report Generation
After you enter the appropriate information in the EML Report dialogbox, click on the Generate Report button to specify the report format anddestination. The Report Generation dialog box is displayed (seeFigure 4-5).
52 Chapter 4
Generating ReportsOverview
Figure 4-5 Report Generation Dialog Box
In the Template File text box you specify a report template file on theHP 3000. You will learn more about report templates in the nextsection, “Template Files.”
In the Report Destination dialog box you can specify the ReportDestination as either the OVC PC or the HP 3000 by clicking on the PCor HP 3000 option button. Or you can send the report to a printer on theHP 3000 by following these steps:
1. Click on the HP 3000 option button.
2. Click on the File Equation button. The File Equation dialog box isdisplayed (see Figure 4-6).
Figure 4-6 File Equation Dialog Box
3. Specify a file equation for your printer (for example, FILEREPORT;DEV=LP).
4. Click on the OK button.
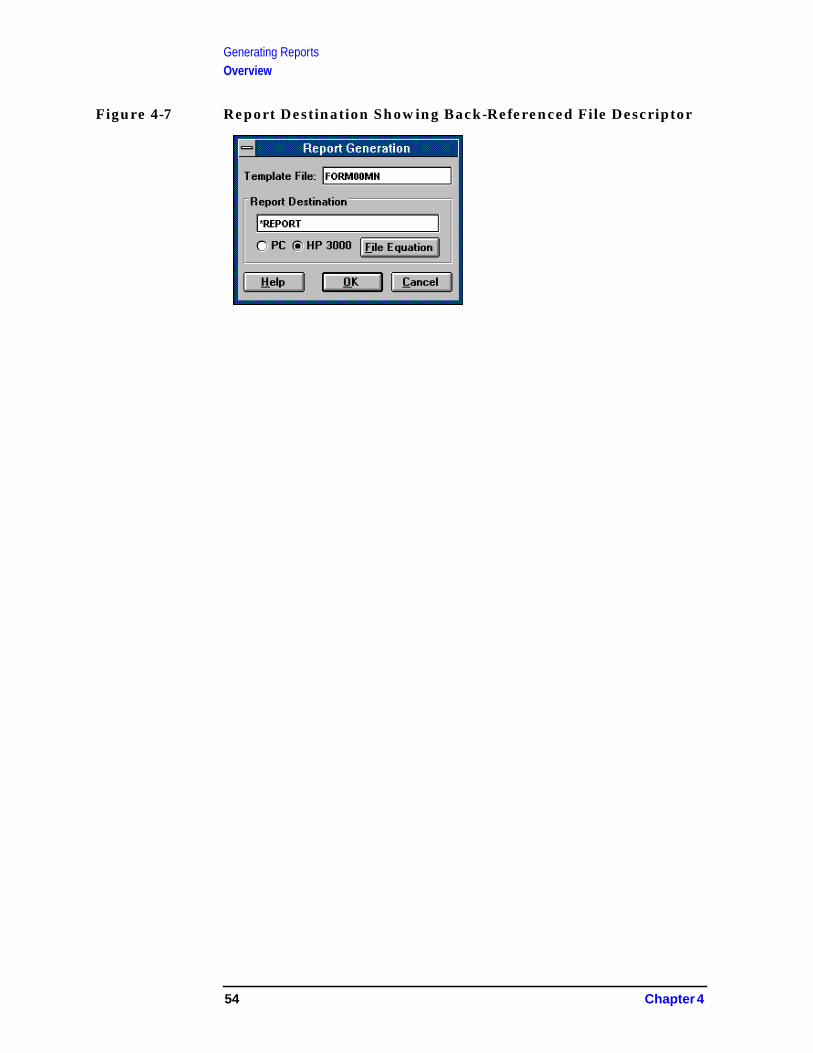
5. In the Report Destination text box of the Report Generationdialog box, back reference the file descriptor specified in the FileEquation dialog box. Using the example in, the entry would be*REPORT (see Figure 4-7).
Chapter 4 53
Generating ReportsOverview
Figure 4-7 Report Destination Showing Back-Referenced File Descriptor
54 Chapter 4
Generating ReportsCreating Template Files
Creating Template FilesYou use report template s to customize reports. This section details howto create report templates to suit your needs. By using your own reporttemplates, you can create reports that contain only the information youneed in a format meaningful to you. Two default template files resideon the HP 3000 in the COMMON group of the SYSMGR account:
• FORM00PC — template file designed for report generation on theOVC PC
• FORM00MN — template file designed for report generation on theHP 3000
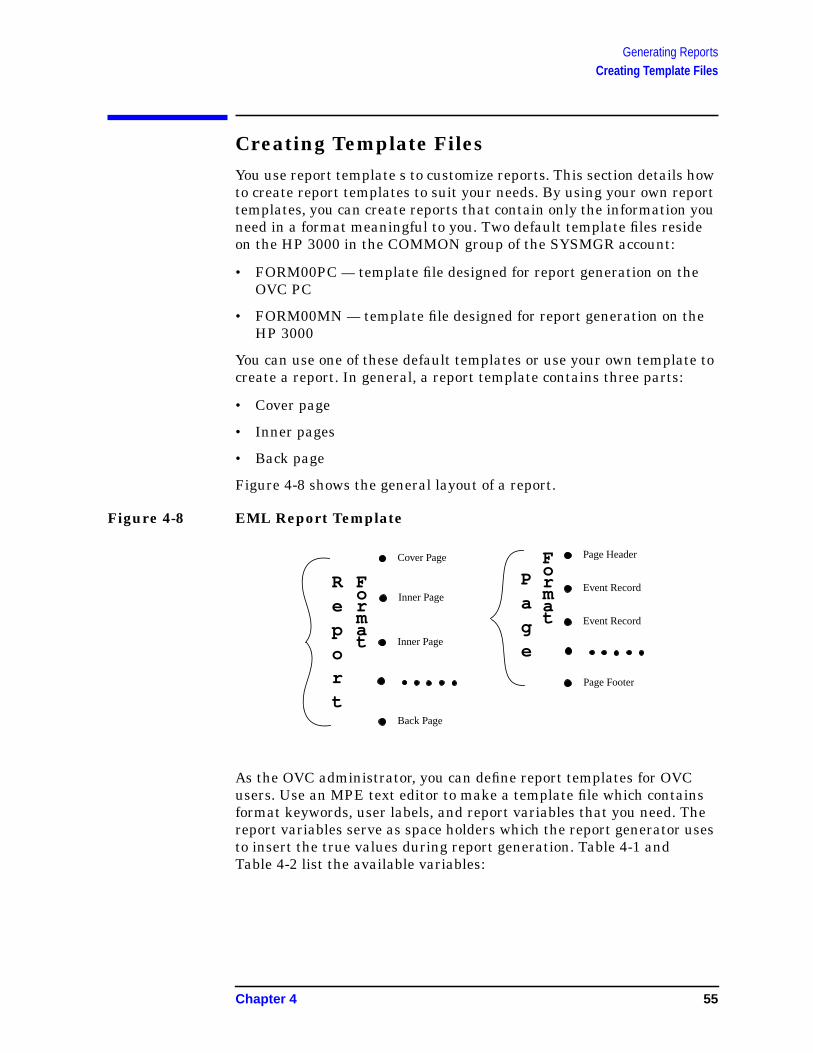
You can use one of these default templates or use your own template tocreate a report. In general, a report template contains three parts:
• Cover page
• Inner pages
• Back page
Figure 4-8 shows the general layout of a report.
Figure 4-8 EML Report Template
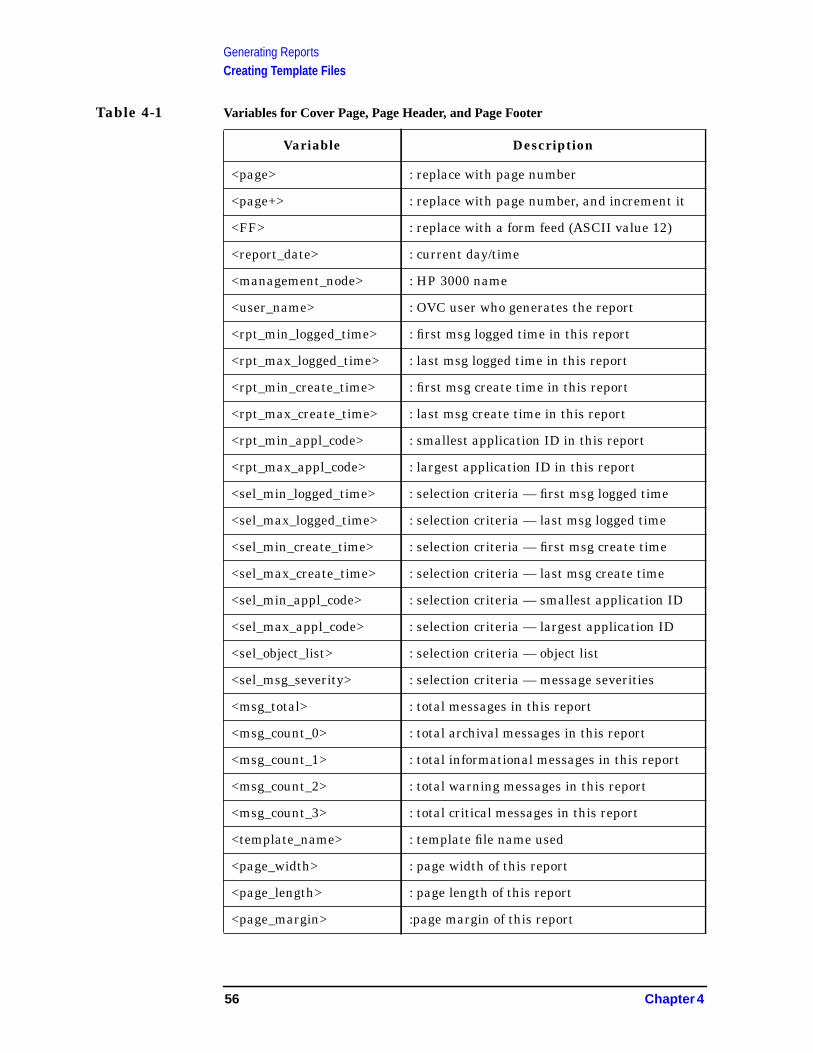
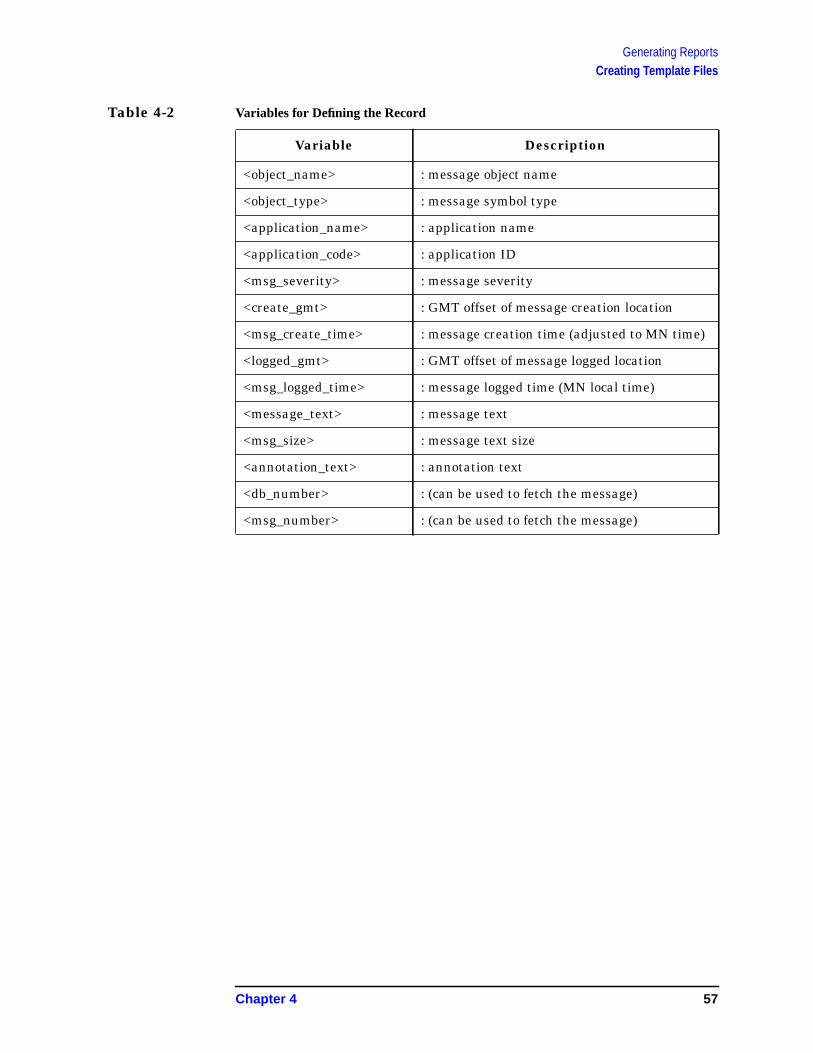
As the OVC administrator, you can define report templates for OVCusers. Use an MPE text editor to make a template file which containsformat keywords, user labels, and report variables that you need. Thereport variables serve as space holders which the report generator usesto insert the true values during report generation. Table 4-1 andTable 4-2 list the available variables:
Report
Cover Page
Back Page
Inner Page
Page Header
Event Record
Event Record
Inner Page
Page Footer
Format
Page
Format
Chapter 4 55
Generating ReportsCreating Template Files
Table 4-1 Variables for Cover Page, Page Header, and Page Footer
Variable Description
<page> : replace with page number
<page+> : replace with page number, and increment it
<FF> : replace with a form feed (ASCII value 12)
<report_date> : current day/time
<management_node> : HP 3000 name
<user_name> : OVC user who generates the report
<rpt_min_logged_time> : first msg logged time in this report
<rpt_max_logged_time> : last msg logged time in this report
<rpt_min_create_time> : first msg create time in this report
<rpt_max_create_time> : last msg create time in this report
<rpt_min_appl_code> : smallest application ID in this report
<rpt_max_appl_code> : largest application ID in this report
<sel_min_logged_time> : selection criteria — first msg logged time
<sel_max_logged_time> : selection criteria — last msg logged time
<sel_min_create_time> : selection criteria — first msg create time
<sel_max_create_time> : selection criteria — last msg create time
<sel_min_appl_code> : selection criteria — smallest application ID
<sel_max_appl_code> : selection criteria — largest application ID
<sel_object_list> : selection criteria — object list
<sel_msg_severity> : selection criteria — message severities
<msg_total> : total messages in this report
<msg_count_0> : total archival messages in this report
<msg_count_1> : total informational messages in this report
<msg_count_2> : total warning messages in this report
<msg_count_3> : total critical messages in this report
<template_name> : template file name used
<page_width> : page width of this report
<page_length> : page length of this report
<page_margin> :page margin of this report
56 Chapter 4
Generating ReportsCreating Template Files
Table 4-2 Variables for Defining the Record
Variable Description
<object_name> : message object name
<object_type> : message symbol type
<application_name> : application name
<application_code> : application ID
<msg_severity> : message severity
<create_gmt> : GMT offset of message creation location
<msg_create_time> : message creation time (adjusted to MN time)
<logged_gmt> : GMT offset of message logged location
<msg_logged_time> : message logged time (MN local time)
<message_text> : message text
<msg_size> : message text size
<annotation_text> : annotation text
<db_number> : (can be used to fetch the message)
<msg_number> : (can be used to fetch the message)
Chapter 4 57
Generating ReportsCreating Template Files
Report Entries
The report template is an ordinary text file. Entries that start with aleading “!” character are comments. Entries that start with a “$”character are keyword lines. These keyword lines divide your reporttemplate into different sections, so you can define the layout of eachreport component. In the following example the keywords are defined:
$COVER_BEGIN< specify your cover page layout here>
$COVER_END
$PAGE_BEGIN< specify your inner page header here>
$RECORDS [(CROSS)]< specify your inner page footer here>
$PAGE_END
$RECORD_BEGIN< specify your event record layout here>
$RECORD_END
$FINAL_BEGIN< specify your back page layout>
$FINAL_END
There are limits to the number of lines you can specify for each reportcomponent:
Front/Back cover : should not exceed the “page_length”Page header/footer : 6 linesRecord layout : 12 lines
Even if a page layout declaration exceeds its size limit, the RPTEXEprocess does not fail. Instead, RPTEXE discards extra lines.
Report attributes such as “page_length” are defined by a set of keywordattributes. These keywords are:
$PAGE_WIDTH Defines the page width in a rangebetween 40 and 132 characters. Thedefault value is 80 characters for areport on the PC and 132 characters fora report on the HP 3000, if thisspecification is omitted.
$PAGE_LENGTH Defines the page length as a value thatmust be greater than 24 lines. Thedefault value is 60, if this specificationis omitted.
$PAGE_MARGIN Defines the page margin. Thedifference between “page_width” and“page_margin” must be greater than 40characters. The default value is 0, ifthis specification is omitted.
58 Chapter 4
Generating ReportsCreating Template Files
$PAGE_NUMBER Defines the starting page number usedfor first <page>/<page+> variablesubstitution. Its value must be greaterthan or equal to 0. The default value is1, if this specification is omitted.
$PAGE_FULL ON Specifies that empty space on the pageis filled with blank lines. If thiskeyword is missing, no blank “space”filling lines are added to a page. Usethis keyword where the printer doesnot honor the FF (ASCII value 12)character.
Template Files
With the information given in the previous sections, you should now beable to read the FORM00PC and FORM00MN template files in theCOMMON group. The FORM00PC report template is listed here foryour review:
!! FORM: FORM00PC.COMMON.SYSMGR!! This is an EML REPORT template file, which directs! the RPTEXE process to generate EML REPORTS on PC.!$PAGE_WIDTH 80$PAGE_LENGTH 58$PAGE_MARGIN 5$PAGE_NUMBER 1!! Define the front cover page!$COVER_BEGIN<FF>Event Message Log Report <report_date> Page <page+> Management Node:<management_node>
*** EML Report Selection Information ****
First msg logged date : <sel_min_logged_time>Last msg logged date : <sel_max_logged_time>First msg create date : <sel_min_create_time>Last msg create date : <sel_max_create_time>
Included remote nodes : <sel_object_list>
Message severities : <sel_msg_severity>Lowest application code : <sel_min_appl_code>Highest application code : <sel_max_appl_code>
<FF>$COVER_END!
Chapter 4 59

Generating ReportsCreating Template Files
!! Define the page layout!$PAGE_BEGINEvent Message Log Report <report_date> Page <page>
$RECORDS
Event Message Log Report <report_date> Page <page+><FF>$PAGE_END!! Define the record layout!$RECORD_BEGINObject : <object_name> Sev.: <msg_severity>App. code : <application_code> Created: <msg_create_time>App. name : <application_name> Logged : <msg_logged_time>Msg text : <message_text>Cmt text : <annotation_text>
$RECORD_END
!! Define the last page layout!$FINAL_BEGINEvent Message Log Report <report_date> Page <page+> Management Node:<management_node>
**** EML Report Generation statistics ****
First msg logged date : <rpt_min_logged_time>Last msg logged date : <rpt_max_logged_time>First msg create date : <rpt_min_create_time>Last msg create date : <rpt_max_create_time>
Lowest application code : <rpt_min_appl_code>Highest application code : <rpt_max_appl_code>
Archived msg count : <msg_count_0>Informative msg count : <msg_count_1>Warning msg count : <msg_count_2>Critical msg count : <msg_count_3>Total message count : <msg_total>
Report Generated by : <user_name>Report Template used : <template_name>
END OF EML REPORT
$FINAL_END
60 Chapter 4
Generating ReportsCreating Template Files
The $RECORD_BEGIN and $RECORD_END keyword lines arerequired for each report. All other keyword lines are optional. Forexample, the most simple report template you can create has only threeentries:
$RECORD_BEGIN<message_text>$RECORD_END
The event message report you generate from this example template hasno cover page, no page header, and no page footer. It lists only messagetext for every event.
The default setting does not allow an event record to cross pageboundaries. However, if you replace the “$RECORDS” keyword with the“$RECORDS (CROSS)” keyword, a record is allowed to cross a pageboundary.
The rule of substitution used for report variables is overwrite. To makeyour report format correctly, you should be aware of how long asubstitution is and what the page width is. If a formatted line is longerthan the page width, characters that exceed the page width are notprinted. It is also possible that a variable substitution may overwritethe succeeding variables on the same line. If this happens, the programdoes not fail, but the report is not formatted. Therefore, make sure thatthere is enough room for a variable substitution. For example, 28characters for a time string and 50 characters for a NS/3000 nodename. The “<message_text>,” “<annotation_text>,” and“<sel_object_list>” variables can do multiple line substitution. Thesevariables remember the offset value when additional lines are requiredto represent the information.
Chapter 4 61

Generating ReportsCreating Template Files
62 Chapter 4

5 Using Automated ResponseService (ARS)
This chapter describes the Automated Response Service (ARS) and howyou use ARS to respond to system events.
63
Using Automated Response Service (ARS)Overview
OverviewARS is a fully integrated OVC feature to process events and monitorconsole messages. You can turn on ARS to respond to events on theHP 3000. No system overhead occurs if you do not use ARS.
When enabled on the HP 3000, ARS scans for OVC console events. Thatmeans that ARS checks only for console messages which have theNMEV# marker. The default setting for the message filter is ON. Youcan also set ARS to check for any text string. ARS does not use anyadditional processing time for the OVC event collector (the EventMessage Gatherer or EMG) to provide this message filtering. ARS is apowerful tool with minimum CPU consumption: the major designguideline of ARS. However, without proper planning you can increasesignificantly the CPU’s time consumption. By using the guidelines inthis chapter, you will be able to use ARS wisely.
How ARS Works
When the OVC event collector (EMG) starts at the HP 3000, it looks foran ARS rule file. Once it finds this file, it launches ARS, which loads therule data into memory. Since all the rules are memory resident,response trigger processing is very efficient. This rule file is used todefine the triggering criteria for OVC events and response actions. It isa standard ASCII text file that can be prepared with an MPE texteditor.
If an OVC event satisfies the ARS rule, ARS queues a response for it.All the events that require a response are handled by ARS, one by one.A response can be an MPE CI command, an MPE job file execution, oran MPE/iX CI script file execution. Using ARS does not require thatyou learn any new script language to implement response logic.
In this chapter you will learn how to write CI scripts and monitor theirexecution. Monitoring ARS execution is important, since to automatemeans that no human decision is involved once the response logic isreliable. You can monitor ARS response execution by using themonitoring console window from the OVC PC or by using theNTC00EXE program at the HP 3000. With the Option List commandenabled for the CI script file, you can monitor line by line execution of aresponding CI script.
For tracking purposes, ARS log files on the HP 3000 maintain detailedARS response execution steps. For console messages identified as OVCevent messages, the execution status is placed in the annotation part ofthe event message.
64 Chapter 5
Using Automated Response Service (ARS)Customizing ARS
Customizing ARSYou can create your own ARS solutions by following some general stepsand considering certain guidelines. This will help you implement smartand effective ARS solutions for your data center.
1. Identify the problem.
First, use the right tool to do the right job. You must first define theproblem. You may want to remove annoying messages, automatesome task, or catch unexpected events. But you MUST keep in mindthe importance of conserving CPU time. ARS is very powerful butuse it as the last option for solving problems.
The most effective way to remove unwanted OVC events is to dropthem using logical object redirection. You can modify or add entriesto the USER0DEF.EMS.SYSMGR file to void event messages. Forinformation on customizing the task logical object, refer toChapter 4, “Customizing Your Map and System Events” in theHP OpenView Console Manager’s Guide.
If you use ARS, the most effective rule to perform trigger checking isto identify an event from its application ID and message priority.With the help of the SysMgr Event Browser , find the NMEV# eventmarker from the detailed information window.
2. Add rules to trigger an action.
The rule file contains the rules (matching patterns) that arecompared to console messages during processing. The basicconstruction unit for this file is called the “decision block.” A rule filemay contain just one or as many decision blocks as you need. Eachdecision block is formed by one or more IF commands and one DOcommand. The IF command is used to specify the triggering rulesand the DO command is used to specify the response action. Byallowing multiple IF commands in one decision block, it produces theeffect of the AND operation. By allowing rule testing for everydecision block in the rule file, it creates the effect of an OR operation.For example, two different decision blocks may have the same DOcommand, but each decision block has different IF commands.
This design allows multiple responses for a single event, if an eventsatisfies multiple decision blocks. If multiple responses are desired,the response order is important. Use either CI variables or JCWs tocoordinate the execution results among responses. This coordinationis possible since all responses are done under the EMG process jobcontext. Use the EMGINIT.EMS initialization file, which sets up therequired job environment for ARS. If you want special capability, addthe :RUN NETALLOW command to the file. If you want to define fileequations, add JCWs or CI variables, this is the place to define them.
Chapter 5 65
Using Automated Response Service (ARS)Customizing ARS
This also is the place to put the DSLINE and REMOTE command, ifyou want open VT links for this response execution environment.
The rule file is a standard MPE ASCII text file with the nameEMG0AUTO. Creating and maintaining this file is yourresponsibility. The file equation that is specified to locate this file isnot defined when OVC software is installed at the HP 3000. Afterthe software installation, you will find a sample file in the SECUREgroup, but the ARS feature is disabled by default. When using theMPE EDITOR or TDP program to modify this file, remember to savethis file as an unnumbered file. ARS rule file syntax for creating therule file is described in the next section.
Try to use the IF$CODE command as often as possible. It is the mosteffective way to identify events. If you can respond with a singleMPE command or UDC, do not write a CI script file. It may bedifficult to set up and change the UDC, but it conserves CPU time. Ifthe response is not time critical or if it requires a special jobenvironment, you can stream a job file as the response. If none ofthese suggestions meet your needs, write an ARS response CIcommand file as a last resort.
3. Develop the ARS Response CI Command File.
The ARS DO command can be used to execute an MPE/iX CIcommand file, also referred to as a command script. Writing thecommand script is the user’s responsibility and should be considereda programming activity that requires an understanding of theMPE/iX CI Command File facility and script programming. Foradditional information on command files, refer to Chapter 3, “UserCommands,” in the MPE/iX Commands Reference Manual. Usingcommand files provides a way for ARS to issue a sequence of MPEcommands in response to a console message. OVC does not imposeany restrictions on the use of MPE/iX command files for performingautomated responses.
Futhermore, OVC has added several CI variables. CI variables areused to assist in controlling the execution of, and in retrieving theresults from, CI command file execution. These variables areaccessible from within a command file. Refer to “SYSMGR CICommand File Variables and Processing” in this chapter for moreinformation on CI command file variables and command fileprocessing.
4. Safeguard the rule file, the CI scripts, and the response log file.
ARS allows commands to be executed in a highly privilegedcommand execution environment. For example, the “ARS Tutorial”section of this chapter shows you how to program ARS to execute aresponse when you issue an MPE TELLOP command. As a securitymeasure, the logon ID of the user who triggers the responseexecution is included in the detailed ARS execution steps that are
66 Chapter 5
Using Automated Response Service (ARS)Customizing ARS
written to the ARSLOG## log file.
Privileged information is likely to reside within the EMG0AUTOrule file, the ARSLOG## log files, and the CI command files used byARS. As a security precaution, it is important that access to thesefiles be restricted to guard against unauthorized access andmodification. These files should NOT be placed within the EMSgroup of the SYSMGR account where many of the OVC files reside.EMS group access restrictions are set so that any user can read andexecute files within that group.
OVC creates a new group, called SECURE, within the SYSMGRaccount. The EMG0AUTO rule file, the ARSLOG## log files, and theCI command files should be placed within this group. The SECUREgroup should have the following access capabilities:
ACCESS=(R,W,L,A,X,S:GU)
After doing this, modify the EMGINIT file(EMGINIT.EMS.SYSMGR) to include the following file equation:
FILE EMG0AUTO=EMG0AUTO.SECURE
in the EMG0AUTO rule file with the proper MPE group name.
5. Enable ARS
Automated response is enabled if the rule file, EMG0AUTO, can befound and opened at the time the EMG processes are initialized onthe HP 3000. At this time, OVC reads the rule file, performs a syntaxcheck, and stores the valid decision blocks into system memory.
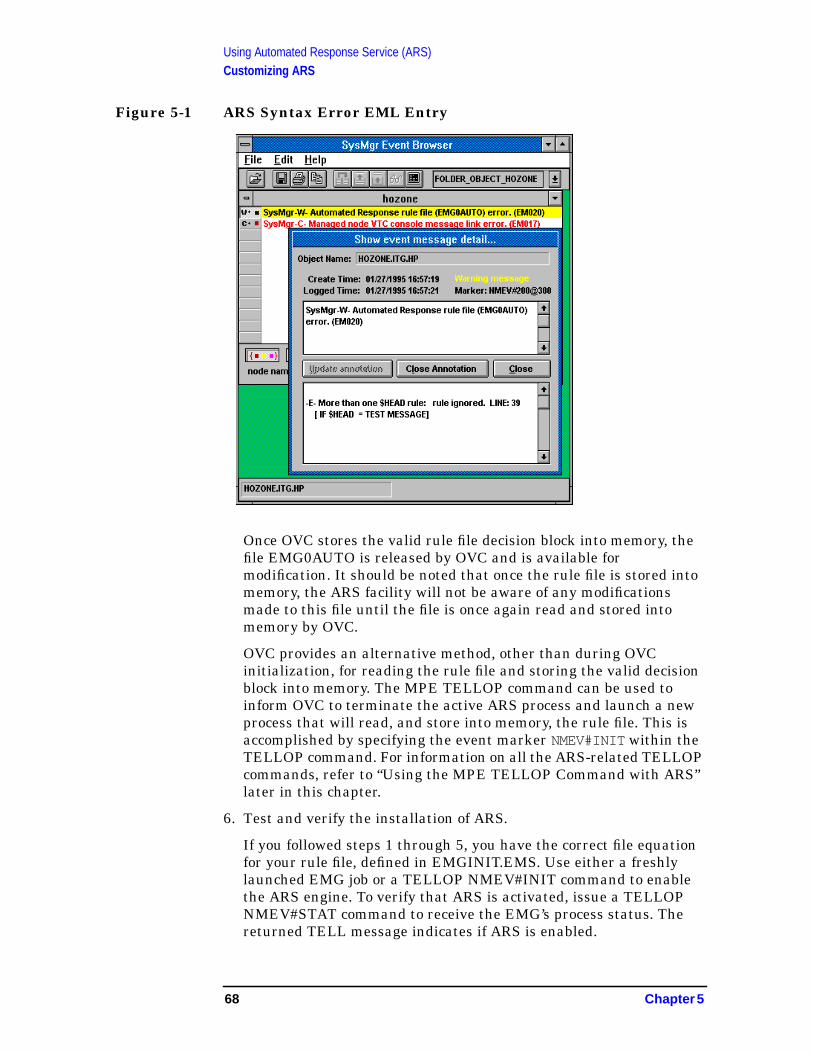
If any syntax errors were detected, a single WARNING OVC eventmessage is forwarded to the Event Message Log (EML) on theHP 3000. The error text, the line number at which the erroroccurred, and the error entry for each detected error are passed asannotation text within this event message. Refer to later in thischapter for a list of syntax error messages. Figure 5-1 shows anexample of a rule file syntax error EML entry. Since OVC reportsonly exception conditions, no event message is generated if all thedecision blocks have correct syntax.
Chapter 5 67
Using Automated Response Service (ARS)Customizing ARS
Figure 5-1 ARS Syntax Error EML Entry
Once OVC stores the valid rule file decision block into memory, thefile EMG0AUTO is released by OVC and is available formodification. It should be noted that once the rule file is stored intomemory, the ARS facility will not be aware of any modificationsmade to this file until the file is once again read and stored intomemory by OVC.
OVC provides an alternative method, other than during OVCinitialization, for reading the rule file and storing the valid decisionblock into memory. The MPE TELLOP command can be used toinform OVC to terminate the active ARS process and launch a newprocess that will read, and store into memory, the rule file. This isaccomplished by specifying the event marker NMEV#INIT within theTELLOP command. For information on all the ARS-related TELLOPcommands, refer to “Using the MPE TELLOP Command with ARS”later in this chapter.
6. Test and verify the installation of ARS.
If you followed steps 1 through 5, you have the correct file equationfor your rule file, defined in EMGINIT.EMS. Use either a freshlylaunched EMG job or a TELLOP NMEV#INIT command to enablethe ARS engine. To verify that ARS is activated, issue a TELLOPNMEV#STAT command to receive the EMG’s process status. Thereturned TELL message indicates if ARS is enabled.
68 Chapter 5
Using Automated Response Service (ARS)Customizing ARS
There are many ways to monitor response execution. You canmonitor it using MSI. Turn Message On with the function key at thebottom of your terminal emulation window, so you can watchresponse execution in single node mode. Using the Message Onfunction key activates a NTC00EXE.EMS program at your HP 3000logon session. Run this program directly from a terminal connectedto your HP 3000. For information about the NTC00EXE program,refer to Chapter 5, “OVC Utilities,” in the HP OpenView ConsoleManager’s Guide.
You can find response detail information in the ARS log files. Theselog files reside on the HP 3000. Use the PRINT command to read thecontents if ARS response is not set to the silent mode. OVC allowsARS to have silent response (which means that execution detail isnot logged). You have no way to monitor a silent execution.Therefore, you must fully debug your response before setting ARSfor silent response. However, it does not matter if ARS was set forsilent execution or not. As long as an EML message is generated, youshould be able to find the response result in the annotation text ofthe message.
Chapter 5 69
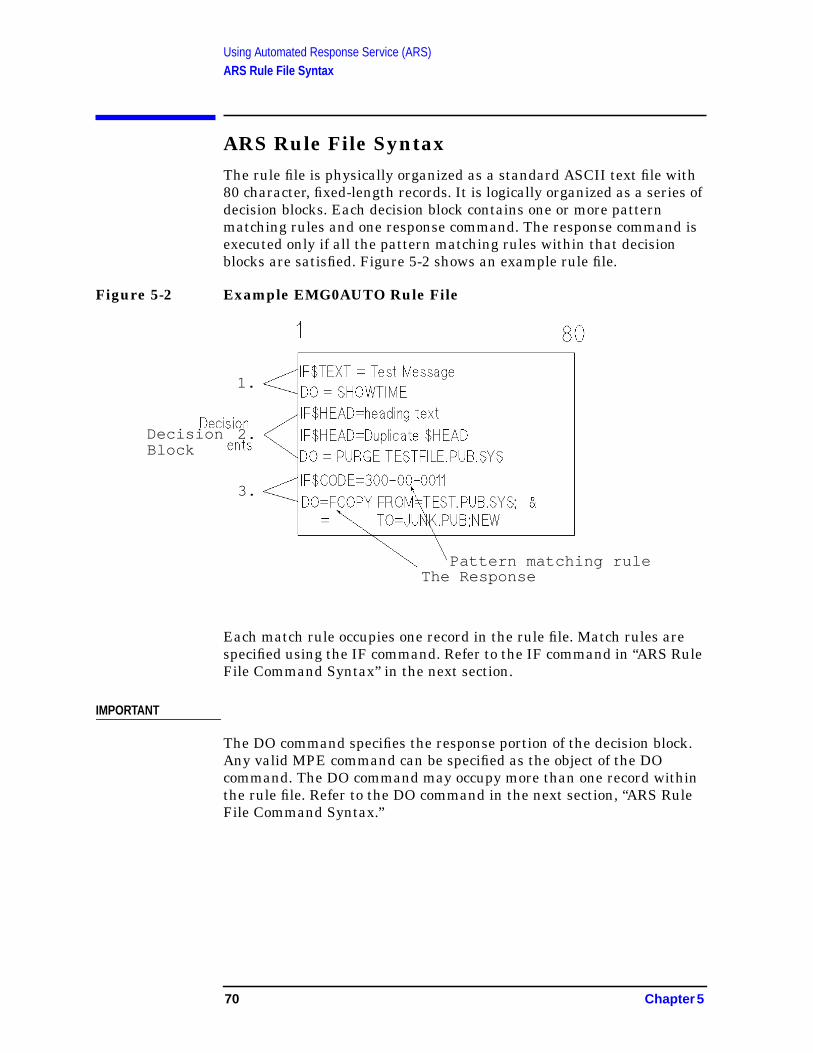
Using Automated Response Service (ARS)ARS Rule File Syntax
ARS Rule File SyntaxThe rule file is physically organized as a standard ASCII text file with80 character, fixed-length records. It is logically organized as a series ofdecision blocks. Each decision block contains one or more patternmatching rules and one response command. The response command isexecuted only if all the pattern matching rules within that decisionblocks are satisfied. Figure 5-2 shows an example rule file.
Figure 5-2 Example EMG0AUTO Rule File
Each match rule occupies one record in the rule file. Match rules arespecified using the IF command. Refer to the IF command in “ARS RuleFile Command Syntax” in the next section.
IMPORTANT
The DO command specifies the response portion of the decision block.Any valid MPE command can be specified as the object of the DOcommand. The DO command may occupy more than one record withinthe rule file. Refer to the DO command in the next section, “ARS RuleFile Command Syntax.”
The Response
1.
2.
3.
DecisionBlock
Pattern matching rule
70 Chapter 5
Using Automated Response Service (ARS)ARS Rule File Command Syntax
ARS Rule File Command SyntaxThis section describes the ARS rule file syntax and correct usage for theIF and DO commands. Also at the end of the section Table 5-1 listspossible ARS syntax error messages.
IF
IF Creates a rule statement within the ARS rule file EMG0AUTO. Allowsthe user to specify the search pattern to be matched within a consolemessage.
SYNTAX IF keyword = pattern
PARAMETERS
keyword Must be one of the following:
$HEAD Look for the matching pattern at the front of theconsole message.
$TAIL Look for the matching pattern at the end of theconsole message.
$TEXT Look for the matching pattern anywhere withinthe console message.
$CODE Match on the application code contained withinthe console message.
pattern The data being searched for within the console message. This is specifiedas a string of up to a maximum of 72 characters, or when used with the$CODE keyword, a valid SYSMGR application code, such as 300-00-0011,using the following syntax:
applicationID-classID-prioritymask
PARAMETERS
applicationID A 3 digit decimal number assigned to a registeredapplication. Refer to Chapter 4, “CustomizingYour Map and System Events” in the HPOpenView Console Manager’s Guide for moreinformation.
classID A 2 digit decimal value used to provide messagegrouping within a specific application.
Chapter 5 71
Using Automated Response Service (ARS)ARS Rule File Command Syntax
prioritymask A 4 digit binary value representing, from left toright within the mask, the 4 event messagepriorities of ARCHIVE, INFORMATIONAL,WARNING and CRITICAL, used within OVC. Avalue of 1 signifies that messages with thatpriority are an acceptable match; a value of 0signifies an unacceptable match.
USE This command can only be used within the ARS rule file EMG0AUTO.
OPERATION Embedded spaces are allowed on either side of the keyword parameterand the “=” character. However, this will reduce the amount of charactersremaining for specifying the pattern match data. Any record within thisfile preceeded by the “!” character is treated as a comment line andignored by the rule file syntax checker. Spaces preceeding the “!”character are allowed.
Multiple IF$TEXT= match rule records are allowed per decision block.Only one IF$HEAD=, IF$TAIL=, and IF$CODE= match rule record isallowed per decision block. If multiple IF$HEAD= and IF$TAIL= matchrule records are specified, only the first occurrence will be honored. Formultiple IF$CODE= match rule records, only the last occurrence will behonored.
The pattern matching rule is case sensitive, so it is important thatuppercase and lowercase be specified where necessary within the patternmatching data. Non-printing characters, such as Carriage Return, LineFeed, Space, etc., may be specified within pattern matching data usingthe <ddd> construct, where ddd is a decimal number with a valid rangefrom 0 to 255. For example, a space is specified by placing <032> withinthe pattern matching data.
The placement of the dash character “-” within the pattern parameter isimportant when using the $CODE parameter. It is used as a parameterdelimiter and helps define the wildcard conditions. If a parameter is notspecified, then any value will constitute a valid match. The followingexamples will clarify its use.
IF$CODE= 300-00-0011 means match all console messages that have anapplication ID equal to 300 with either WARNING or CRITICAL priority.IF$CODE= --0011 means match all WARNING and CRITICAL consolemessages. And the match rule IF$CODE= -- means match all consolemessages. Finally, the match rule IF$CODE= 300--0000, with all 0s in theprioritymask field, would be an error since it means that no messages willsatisfy the rule, and the decision is void.
It is important to remember that a response will be expected when all therules for that decision have been successfully met. For those familiar withBoolean logic, this meets the criteria of the Boolean AND operator. Shouldyou desire to execute a response based on Boolean OR logic, you canspecify a decision based on a different set of rules and executing the sameresponse.
72 Chapter 5
Using Automated Response Service (ARS)ARS Rule File Command Syntax
DO or #DO
DO or #DO Performs the MPE command or executes the MPE/iX command file.The execution result is inserted into the annotation text of the consolemessage that is forwarded to the HP 3000. The DO command with the“#” preceeding is a silent DO command. This command is used where itis necessary to remove any trace of its execution.
SYNTAX DO[/A]={}{response}
[/D]
PARAMETERS
/A If the command is executed successfully, the priority of the consolemessage is lowered to ARCHIVE.
/D If the command is executed successfully, the priority of the message isset to UNKNOWN. This will cause the message to not be logged to theEvent Message Log (EML) database on the HP 3000.
response Can be any valid MPE/iX command, UDC, or MPE/iX CI command file.
USE This command can only be used within the ARS rule file EMG0AUTO.
OPERATION Since the maximum length of a CI command is 278 characters, and therecord size of the rule file is 80 characters, the MPE standardcontinuation character “&” may be used to construct a DO commandthat requires multiple records to specify. When this is necessary, theline following the continuation character must begin with the “=”character. As with the IF command, embedded spaces are allowed oneither side of the parameter and the “=” character to facilitatereadability.
Chapter 5 73
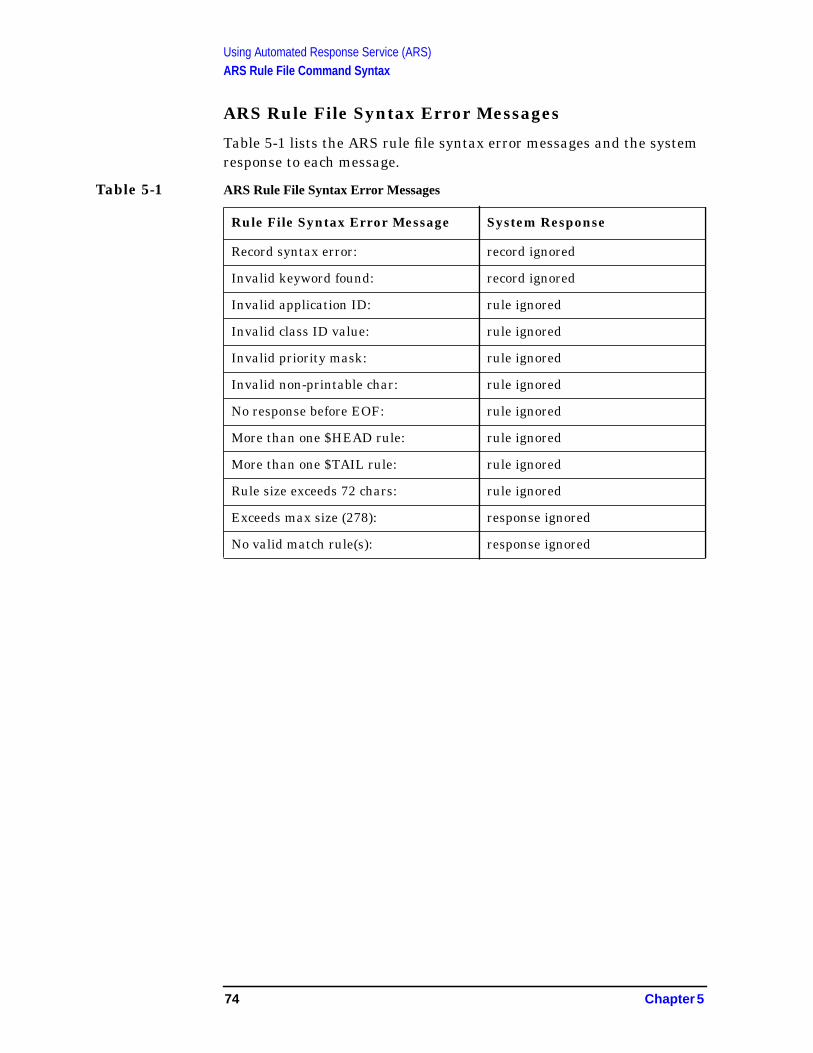
Using Automated Response Service (ARS)ARS Rule File Command Syntax
ARS Rule File Syntax Error Messages
Table 5-1 lists the ARS rule file syntax error messages and the systemresponse to each message.
Table 5-1 ARS Rule File Syntax Error Messages
Rule File Syntax Error Message System Response
Record syntax error: record ignored
Invalid keyword found: record ignored
Invalid application ID: rule ignored
Invalid class ID value: rule ignored
Invalid priority mask: rule ignored
Invalid non-printable char: rule ignored
No response before EOF: rule ignored
More than one $HEAD rule: rule ignored
More than one $TAIL rule: rule ignored
Rule size exceeds 72 chars: rule ignored
Exceeds max size (278): response ignored
No valid match rule(s): response ignored
74 Chapter 5
Using Automated Response Service (ARS)ARS Rule File Processing
ARS Rule File ProcessingConsole messages are checked sequentially against each decision blockwithin the rule file. Checking is performed in the order in which thedecision blocks are placed in the rule file. For each satisfied decision, aDO command (response) entry is placed within the execution queue file.Responses are executed in the order in which they are placed in theexecution queue file.
A single console message can generate multiple entries within thequeue by satisfying multiple decision blocks. It is important tounderstand that all queue entries relating to a single console messagemay not get executed.
This is the case when the DO/D= response execution changes theconsole priority to UNKNOWN. This causes OVC to discard the consolemessage and ignore all remaining queue entries relating to this consolemessage. With this in mind, the ordering of decision blocks within therule file becomes important when using the DO/D= response command.
Chapter 5 75
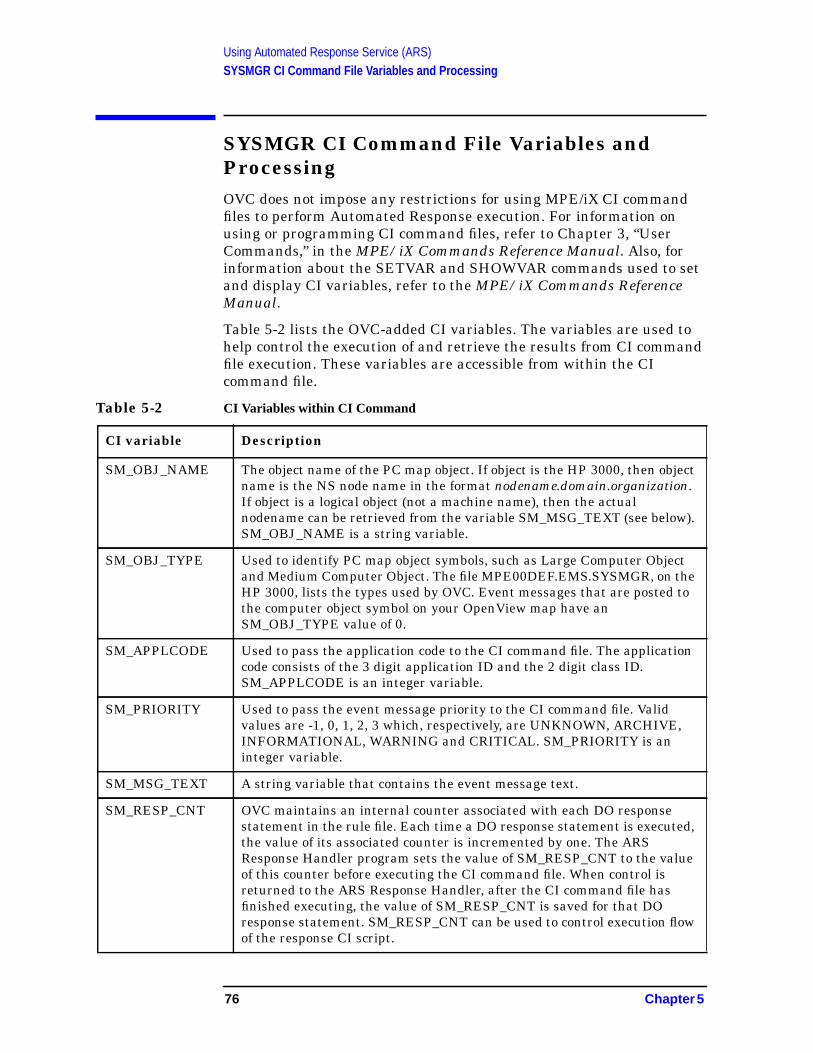
Using Automated Response Service (ARS)SYSMGR CI Command File Variables and Processing
SYSMGR CI Command File Variables andProcessingOVC does not impose any restrictions for using MPE/iX CI commandfiles to perform Automated Response execution. For information onusing or programming CI command files, refer to Chapter 3, “UserCommands,” in the MPE/iX Commands Reference Manual. Also, forinformation about the SETVAR and SHOWVAR commands used to setand display CI variables, refer to the MPE/iX Commands ReferenceManual.
Table 5-2 lists the OVC-added CI variables. The variables are used tohelp control the execution of and retrieve the results from CI commandfile execution. These variables are accessible from within the CIcommand file.
Table 5-2 CI Variables within CI Command
CI variable Description
SM_OBJ_NAME The object name of the PC map object. If object is the HP 3000, then objectname is the NS node name in the format nodename.domain.organization.If object is a logical object (not a machine name), then the actualnodename can be retrieved from the variable SM_MSG_TEXT (see below).SM_OBJ_NAME is a string variable.
SM_OBJ_TYPE Used to identify PC map object symbols, such as Large Computer Objectand Medium Computer Object. The file MPE00DEF.EMS.SYSMGR, on theHP 3000, lists the types used by OVC. Event messages that are posted tothe computer object symbol on your OpenView map have anSM_OBJ_TYPE value of 0.
SM_APPLCODE Used to pass the application code to the CI command file. The applicationcode consists of the 3 digit application ID and the 2 digit class ID.SM_APPLCODE is an integer variable.
SM_PRIORITY Used to pass the event message priority to the CI command file. Validvalues are -1, 0, 1, 2, 3 which, respectively, are UNKNOWN, ARCHIVE,INFORMATIONAL, WARNING and CRITICAL. SM_PRIORITY is aninteger variable.
SM_MSG_TEXT A string variable that contains the event message text.
SM_RESP_CNT OVC maintains an internal counter associated with each DO responsestatement in the rule file. Each time a DO response statement is executed,the value of its associated counter is incremented by one. The ARSResponse Handler program sets the value of SM_RESP_CNT to the valueof this counter before executing the CI command file. When control isreturned to the ARS Response Handler, after the CI command file hasfinished executing, the value of SM_RESP_CNT is saved for that DOresponse statement. SM_RESP_CNT can be used to control execution flowof the response CI script.
76 Chapter 5
Using Automated Response Service (ARS)SYSMGR CI Command File Variables and Processing
With the exception of the SM_MSG_TEXT variable, the value of eachvariable may be reset by the command file during execution.
Upon completing execution of the DO command, command file variablesassociated with the console message, except for SM_MSG_TEXT, areupdated to reflect any changes to the variables that may have occurredduring DO command execution. This enables the command file tochange the values of these variables based on the outcome of itsexecution; this includes overriding the console message priorityassigned as a result of specifying the /A= and /D= parameters.
Two additional CI variables, SM_STATUS and SM_RESULT, areprovided. These can also be set by the CI command file duringexecution. SM_STATUS can be set to reflect the success of thecommand file execution. If this variable exists, its value will be insertedinto the Automated Response result area within the console messageannotation text. SM_RESULT is a string variable whose value, if itexists, will be passed as the Automated Response result.
Chapter 5 77
Using Automated Response Service (ARS)Using the MPE TELLOP Command with ARS
Using the MPE TELLOP Command with ARSThis section describes the MPE TELLOP commands used with ARS.The part of the command following the “#” character can be eitheruppercase or lowercase.
NMEV#KILL Stops the ARS command executionprogram, ARS00EXE, and disables theARS facility.
NMEV#INIT Starts a new ARS initialization andstops existing ARS execution, if theARS process exists.
NMEV#FOFF Disables the NMEV# filter. This allowsARS to perform Automated Responsefor all console messages, not just thosecontaining the event filter NMEV#. Ifthe JCW variable EMGOPEN isdefined within the EMGINIT file, thenARS is started with the filter disabled.
NOTE When the NMEV# filter is disabled, EMG passes all console messagesto ARS. Operating in this mode is very expensive in CPU time, but itcan trigger a response for messages without the NMEV# marker.Events without markers are dropped if no response raises the messageseverity.
NMEV#F_ON Enables the NMEV# filter. This is thedefault setting.
NMEV#STAT As it relates to ARS, reports the statusof Automated Response and theNMEV# filter. The status is reported asON or OFF.
78 Chapter 5
Using Automated Response Service (ARS)ARS Log File
ARS Log FileBoth the detailed execution procedure and result, or status, of theAutomated Response execution are accessible after processing iscompleted. The execution status is logged in the event messageannotation area, and the detailed execution steps are logged to the logfile ARSLOG##, where ## represents the log file index number whosevalid range is from 1 to 99. You can read the log file, which is an ASCIItext file, by using the FCOPY command, the PRINT command, or anASCII text editor program.
When an ARS log file becomes full, OVC automatically performs aprocess known as the ARS Switch Log. This process deactivates thecurrent ARS log file and creates a new log file in which the value of thenumeric portion of the filename is incremented by 1. That is, a switchlog creates log file ARSLOG05 once log file ARSLOG04 is full. If the logfile already exists, the old copy is removed before creating the new copy.Once log file ARSLOG99 is reached, the next switch log creates ARS logfile ARSLOG01.
The ARSLOGKEEP JCW variable is defined in the EMG job templatefile, EMG00TPL.EMS. This template file is used to build the EMG jobfile EMG00JOB.EMS. ARSLOGKEEP is used to specify the number oflog files currently maintained on disk and, therefore, accessible forviewing. If ARSLOGKEEP is not defined, or is set to a value less than 2,OVC assigns a default value of 2. If the value specified is greater than99, the value is set by OVC to 99. Using the above example with adefault ARSLOGKEEP value of 2, ARSLOG03 would be deleted duringthe switch log to ARSLOG05, since an ARSLOGKEEP value of 2specifies that only 2 log files are to exist at the same time. If the switchlog process encounters a problem deleting an old copy of the log file,because the file is being read or is missing, the switch log process doesnot report an error message.
The ARSLOGSIZE JCW variable is also defined in the EMG00TPL jobtemplate file, as discussed above. ARSLOGSIZE is used to specify thenumber of records within the log file. The default value is 1024 records.
The switch log process generates an event message to signify that it hascompleted. The newly created log file name is inserted in the eventmessage annotation text to inform the user of the name of the currentARS log file. Figure 5-3 shows an example of log file listing generatedby ARS.
Chapter 5 79
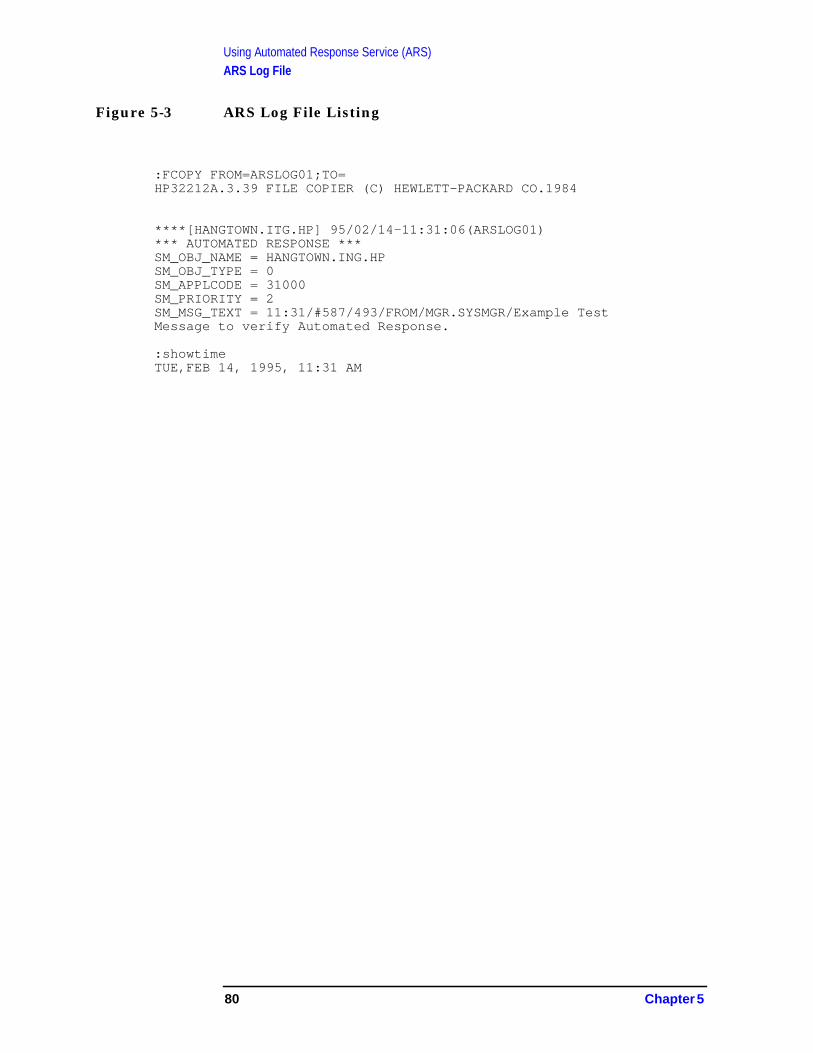
Using Automated Response Service (ARS)ARS Log File
Figure 5-3 ARS Log File Listing
:FCOPY FROM=ARSLOG01;TO=HP32212A.3.39 FILE COPIER (C) HEWLETT-PACKARD CO.1984
****[HANGTOWN.ITG.HP] 95/02/14-11:31:06(ARSLOG01)*** AUTOMATED RESPONSE ***SM_OBJ_NAME = HANGTOWN.ING.HPSM_OBJ_TYPE = 0SM_APPLCODE = 31000SM_PRIORITY = 2SM_MSG_TEXT = 11:31/#587/493/FROM/MGR.SYSMGR/Example TestMessage to verify Automated Response.
:showtimeTUE,FEB 14, 1995, 11:31 AM
80 Chapter 5
Using Automated Response Service (ARS)ARS Tutorial
ARS TutorialIn this tutorial you will learn the basics for using OVC ARS so that youcan further explore ARS on your own. The tutorial contains twoexercises:
• Exercise 1 — shows you how to program ARS so that specific userscan execute MPE commands from within the EMS.SYSMGR jobcontext.
• Exercise 2 — shows you how to program ARS so that nonprivilegedusers at the HP 3000 can interactively receive MPE LOGONmessages.
NOTE Before trying these exercises, it is strongly recommended that you firstread this chapter.
In the exercises you will use three sample files:
• EMG0AUTO.SECURE — sample rule file (used in both exercises)
• EXECUTE.SECURE — sample CI command file
• NOTICE.SECURE — sample CI command file
With minor changes to reflect your operations environment, you can usethese sample files to expand your ARS functionality. (Refer to thelistings for these sample files at the end of this chapter.)
During execution of the OVC software installation script, the SECUREgroup is created within the SYSMGR account on the HP 3000.
Before doing the exercises, you need to follow some steps to enable ARSand verify that ARS is running on the HP 3000.
Follow these steps to enable and verify that ARS is running on theHP 3000:
1. Stop the JCOMMON job by issuing the UDC command:
OVSTOP
2. Stop the EMG job (EMG00JOB) by issuing the following MPEcommand while logged on to the HP 3000:
TELLOP NMEV#EXIT
3. Modify the MPE file EMGINIT to add the following file equation:
: FILE EMG0AUTO=EMG0AUTO.SECURE
4. Restart OVC on the HP 3000 by typing the following UDC commandat the MPE prompt:
OVSTART
Chapter 5 81
Using Automated Response Service (ARS)ARS Tutorial
5. Verify the status of OVC by issuing the following command.
TELLOP NMEV#STAT
This command should be issued after the EMG job shows up in an MPESHOWJOB listing.
The status is displayed in an MPE TELL message such as:
FROM/J12 MGR.SYSMGR/Logical obj:OFF Auto-response:ONFilter:ON Tracing:OFF
The two ARS-related status indicators are Auto-response and Filter.“Autoresponse:ON” indicates that ARS is enabled. “Filter:ON” indicatesthat the OVC event message filter is enabled. When this filter isenabled, ARS processes only those console messages that have theevent marker string “NMEV#?” inserted within their text. The “?” inthe event marker represents a value from 0 to 3 which indicates one ofthe OVC event message priority values.
Exercise 1
In this exercise you will learn how to program ARS so that specificusers can execute MPE commands from within the EMS.SYSMGR(EMG00JOB) job context. Ordinarily, the MPE logon ID for these userswould not be granted privileged capability, and these users would beunable to execute privileged MPE commands. However, by running theOVC utility program NETALLOW, the logon ID for the EMG00JOB canbe granted privileged capability and can execute the privileged MPEcommands for the users.
To begin this exercise, on the HP 3000 you must first create an accountnamed TEST and the users MGR and USER, if they do not alreadyexist. ARS (from within the ARS job context) authorizes the usersMGR.TEST and USER.TEST to execute MPE commands.
Now that ARS is enabled, you will generate a few console messages totest the operation of ARS. Follow these steps:
1. At the MPE prompt, while logged on as MGR.SYSMGR, issue thefollowing command:
TELLOP NMEV#0 perform SHOWME
After issuing this command, you receive a TELL message from theEMG job (EMG00JOB) such as:
FROM/J12 MGR.SYSMGR/MGR.SYSMGR is not an authorized user
If you have a map displayed on the OVC PC, you see the map symbolfor the HP 3000 turn RED, indicating a critical message has beenlogged to the Event Message Log (EML).
2. Review the message using the SysMgr Event Browser . Review theannotation that is attached to the message.
82 Chapter 5
Using Automated Response Service (ARS)ARS Tutorial
To understand what happened when you issued the TELLOPcommand, look at both the rule file and the CI command fileEXECUTE.SECURE. The TELLOP command satisfied the IFcommand matching pattern for the following decision block within therule file:
IF $TEXT=perform
DO = EXECUTE.SECURE
Since a pattern match is found on the word perform, ARS executes theCI command file EXECUTE.SECURE. Looking at this CI command filelisting, you see this sequence of events:
• The user that sent the TELLOP command is isolated within the CIvariable SM_MSG_TEXT.
• A check is made to determine if the user is either USER.TEST orMGR.TEST.
• If the user is not USER.TEST or MGR.TEST, as is the case here, theCI variable SM_RESULT is assigned the unauthorized user errormessage and the CI variable SM_PRIORITY is assigned a value of 3.As a result, the HP 3000 map symbol turns RED, and a CRITICALmessage is sent to the Event Message Log on the HP 3000.
• Send the execution result TELL message to the user.
In the remaining steps, you will test the case where the TELLOPcommand is issued by an authorized ARS user (MGR.TEST):
1. Log off as MGR.SYSMGR and log on as MGR.TEST.
2. Issue the following MPE TELLOP command:
TELLOP NMEV#0 perform SHOWME
This time you will receive a TELL message from the EMG job(EMG00JOB) such as:
FROM/J12 MGR.SYSMGR/Execution completed successfully
After receiving this message, you can verify the successful executionof ARS by printing out the contents of the ARS log file within theSECURE group of the SYSMGR account. This file should have aname such as ARSLOG01.
Again, since a pattern match is found on the word perform, ARSexecutes the CI command file EXECUTE.SECURE. Looking at this CIcommand file listing, you see this sequence of events. The initialsequence of events within the CI command file is the same as for thefirst TELLOP command that you issued. However, this time the senderof the TELLOP command matches one of the authorized users.
• The command portion of the TELLOP message (SHOWME) isisolated within the CI variable SM_MSG_TEXT.
Chapter 5 83
Using Automated Response Service (ARS)ARS Tutorial
• The command string SHOWME is echoed to the listing device.
• The command SHOWME is executed.
• The CI variable SM_RESULT is assigned the Execution completedsuccessfully message and the CI variable SM_PRIORITY is assigneda value of 1. As a result, the HP 3000 map symbol turns MAGENTA,and an INFORMATIONAL message is sent to the Event MessageLog on the HP 3000.
• Send the execution result TELL message to the user.
Exercise 2
NOTE This example is taken from the HP OpenView System Manager User’sGuide. It shows how ARS can trigger an event at one HP 3000 and beresponded to at another HP 3000. You cannot try this exercise if youhave not upgraded your OVC to SysMgr.
In this exercise you will learn how to program ARS so thatnonprivileged MPE users at the management HP 3000 caninteractively receive MPE LOGON messages from a remote HP 3000.Immediately after a user logs on to the remote HP 3000, the userMGR.SYSMGR at the management HP 3000 receives two TELLmessages indicating the logon has occurred. The first TELL messagecontains the HP 3000 name and MPE job number. The second TELLmessage contains the user name and account name.
Follow these steps to complete the exercise:
1. Log on to the remote HP 3000 as MGR.SYSMGR.
2. Remove the comment indicator (!) from the following decision blockin the remote HP 3000 rule file EMG0AUTO.SECURE.
IF $TEXT=LOGON FOR:
DO = >>>
This decision block redirects ARS execution from the remoteHP 3000 to the management HP 3000.
3. Reinitialize ARS on the remote HP 3000 by issuing the command:
TELLOP NMEV#init
4. Issue the following command to disable the NMEV#? filter. You mustdo this since the MPE LOGON message does not contain the OVCEvent Marker “NMEV#?” where the “?” represents a value from 0to 3.
TELLOP NMEV#foff
5. Log on to the management HP 3000 as MGR.SYSMGR.
84 Chapter 5
Using Automated Response Service (ARS)ARS Tutorial
6. Remove the comment indicator (!) from the following decision blockin the management HP 3000 rule file EMG0AUTO.SECURE.
IF $TEXT=LOGON FOR:
DO = NOTICE.SECURE
7. Reinitialize ARS on the management HP 3000 by issuing thecommand:
TELLOP NMEV#init
8. Open a Reflections console session.
9. Log on as MGR.SYSMGR on the management HP 3000.
This is the user who will receive the remote HP 3000 user LOGONmessages. As users log on to the remote HP 3000, you should see theTELL messages indicating the logons on your display.
NOTE The map symbol for the remote HP 3000 where the logon occurred doesnot change color. Also no event message is added to the event messagereview. However, these logon messages are logged to the Event MessageLog (EML) on the management HP 3000.
You need to look at both the rule file and the CI command fileNOTICE.SECURE to understand how the user MGR.SYSMGR on themanagement HP 3000 received logon TELL messages from the remoteHP 3000.
Removing the comment indicators from the second decision block in theremote HP 3000 rule file EMG0AUTO.SECURE resulted in redirectingARS execution from the remote HP 3000 to ARS on the managementHP 3000. This is necessary since you want the user MGR.SYSMGR onthe management HP 3000 to receive the TELL messages.
Removing the comment indicators from the third decision block withinthe management HP 3000 rule file EMG0AUTO.SECURE enabled ARSto check on the management HP 3000 for the “LOGON FOR” stringwithin console messages.
Each time a logon occurs on the remote HP 3000, since a match is foundon the pattern LOGON FOR:, ARS executes the CI command fileNOTICE.SECURE on the management HP 3000. Looking at this CIcommand file listing, you see this sequence of events:
• The TELL message containing the HP 3000 and job number isconstructed and sent to MGR.SYSMGR.
• The second TELL message containing the user name and accountname is constructed and sent to MGR.SYSMGR.
• The CI variable SM_PRIORITY is reassigned a value of 0, whichmeans ARCHIVE. This is important since the default messagepriority of a console message without the NMEV#? event marker is 1
Chapter 5 85

Using Automated Response Service (ARS)ARS Tutorial
(INFORMATIONAL). As stated earlier, LOGON console messagesdo NOT have the event marker inserted in them.
If the value is not changed to zero, the map symbol for the remoteHP 3000 receives an INFORMATIONAL (MAGENTA) message.
EMG0AUTO.SECURE Rule File Example
! File: EMG0AUTO.SECURE (A0100000)!! This is an example rule file for OVC Automated Response.!!! example 1: (MPE-XL only)!! If user issues “:tellop NMEV#0 perform command”, the MPE! command will be executed by the ARS under the EMS.SYSMGR job! context.! For example:!! :TELLOP NMEV#0 perform SHOWJOB!! result will be logged in the ARSLOG??.SECURE.SYSMGR at! the remote HP 3000.!! If user uses NMEV#1 instead of NMEV#0 in the :TELLOP command,! the message is sent to the management HP 3000 and it can be! reviewed from the OVC PC interface.!IF $TEXT = perform<032>DO = EXECUTE.SECURE!!! example 2: (applies to both MPE-V and MPE-iX remote node)!! This example shows that a user MGR.SYSMGR on the management! HP 3000 can receive all the LOGON console messages from the! remote HP3000.!! **** If this is remote HP 3000, remove the comment mark “!” for! **** the following decision block.!!IF $TEXT =LOGON FOR:!DO = >>>!! **** If this is management HP 3000, remove the comment mark “!”! **** for the next decision block.!!IF $TEXT =LOGON FOR:!DO = NOTICE.SECURE!! **** END OF EMG0AUTO.SECUR
86 Chapter 5
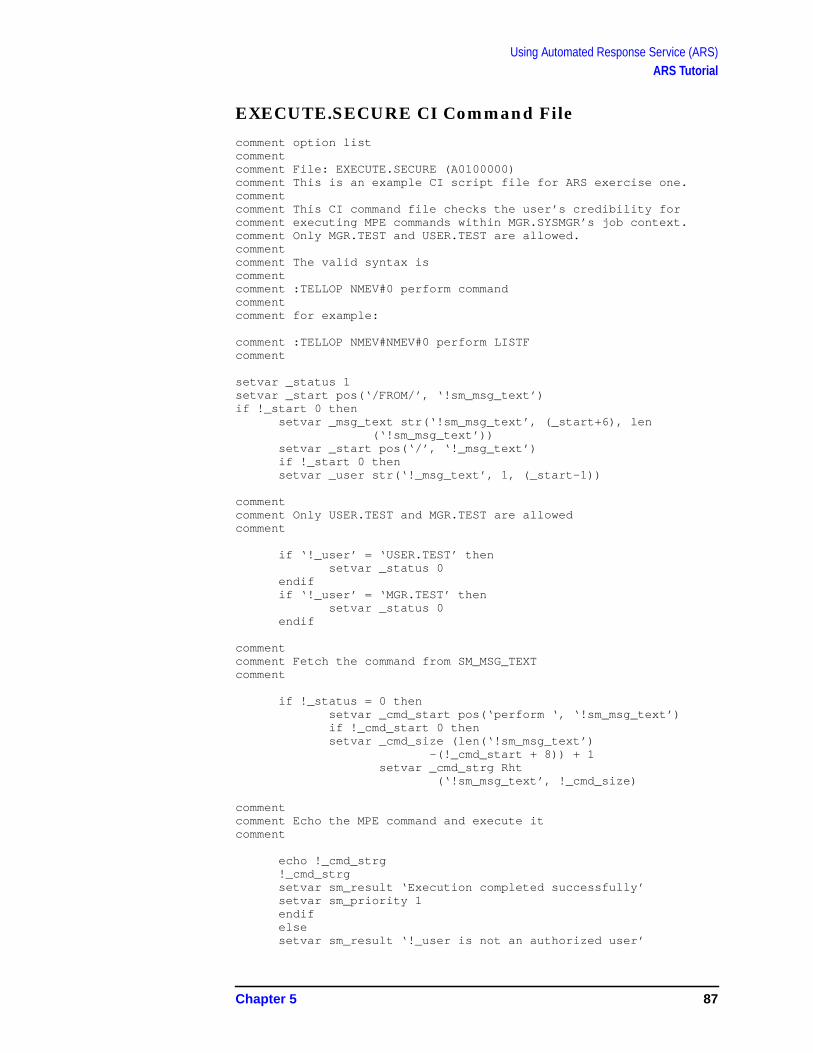
Using Automated Response Service (ARS)ARS Tutorial
EXECUTE.SECURE CI Command File
comment option listcommentcomment File: EXECUTE.SECURE (A0100000)comment This is an example CI script file for ARS exercise one.commentcomment This CI command file checks the user’s credibility forcomment executing MPE commands within MGR.SYSMGR’s job context.comment Only MGR.TEST and USER.TEST are allowed.commentcomment The valid syntax iscommentcomment :TELLOP NMEV#0 perform commandcommentcomment for example:
comment :TELLOP NMEV#NMEV#0 perform LISTFcomment
setvar _status 1setvar _start pos(‘/FROM/’, ‘!sm_msg_text’)if !_start 0 then
setvar _msg_text str(‘!sm_msg_text’, (_start+6), len(‘!sm_msg_text’))
setvar _start pos(‘/’, ‘!_msg_text’)if !_start 0 thensetvar _user str(‘!_msg_text’, 1, (_start-1))
commentcomment Only USER.TEST and MGR.TEST are allowedcomment
if ‘!_user’ = ‘USER.TEST’ thensetvar _status 0
endifif ‘!_user’ = ‘MGR.TEST’ then
setvar _status 0endif
commentcomment Fetch the command from SM_MSG_TEXTcomment
if !_status = 0 thensetvar _cmd_start pos(‘perform ‘, ‘!sm_msg_text’)if !_cmd_start 0 thensetvar _cmd_size (len(‘!sm_msg_text’)
-(!_cmd_start + 8)) + 1setvar _cmd_strg Rht
(‘!sm_msg_text’, !_cmd_size)
commentcomment Echo the MPE command and execute itcomment
echo !_cmd_strg!_cmd_strgsetvar sm_result ‘Execution completed successfully’setvar sm_priority 1endifelsesetvar sm_result ‘!_user is not an authorized user’
Chapter 5 87
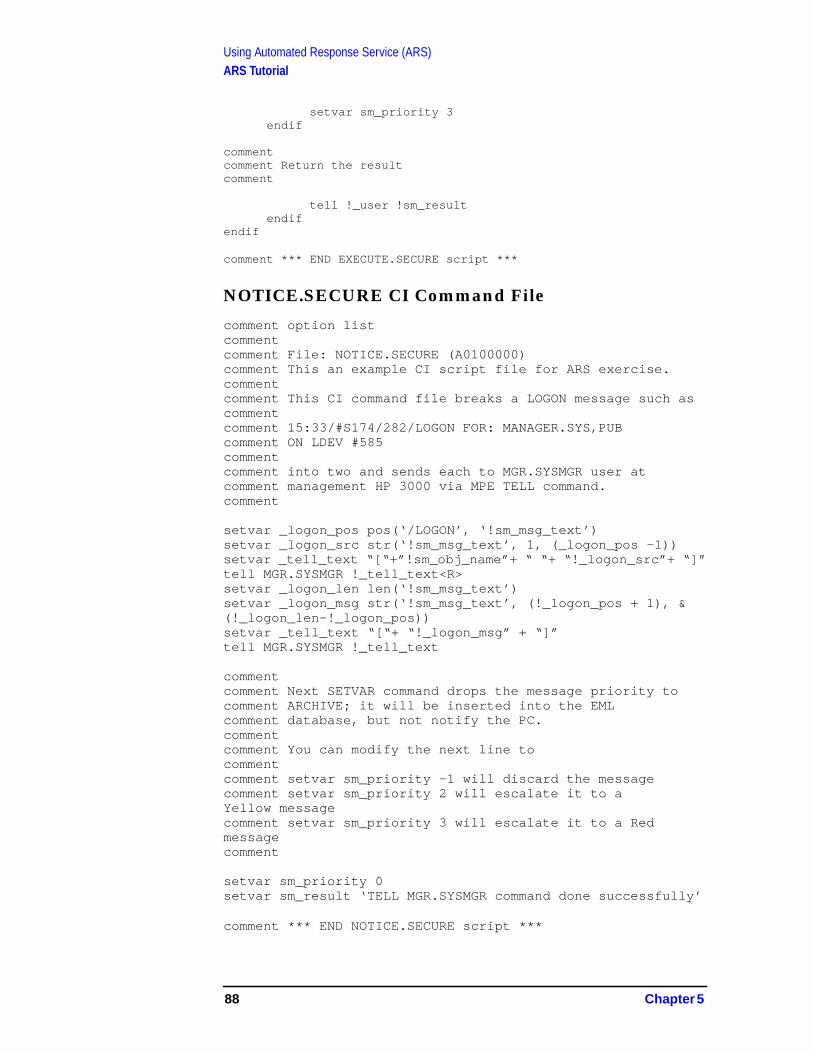
Using Automated Response Service (ARS)ARS Tutorial
setvar sm_priority 3endif
commentcomment Return the resultcomment
tell !_user !sm_resultendif
endif
comment *** END EXECUTE.SECURE script ***
NOTICE.SECURE CI Command File
comment option listcommentcomment File: NOTICE.SECURE (A0100000)comment This an example CI script file for ARS exercise.commentcomment This CI command file breaks a LOGON message such ascommentcomment 15:33/#S174/282/LOGON FOR: MANAGER.SYS,PUBcomment ON LDEV #585commentcomment into two and sends each to MGR.SYSMGR user atcomment management HP 3000 via MPE TELL command.comment
setvar _logon_pos pos(‘/LOGON’, ‘!sm_msg_text’)setvar _logon_src str(‘!sm_msg_text’, 1, (_logon_pos -1))setvar _tell_text “[“+”!sm_obj_name”+ “ “+ “!_logon_src”+ “]”tell MGR.SYSMGR !_tell_text<R>setvar _logon_len len(‘!sm_msg_text’)setvar _logon_msg str(‘!sm_msg_text’, (!_logon_pos + 1), &(!_logon_len-!_logon_pos))setvar _tell_text “[“+ “!_logon_msg” + “]”tell MGR.SYSMGR !_tell_text
commentcomment Next SETVAR command drops the message priority tocomment ARCHIVE; it will be inserted into the EMLcomment database, but not notify the PC.commentcomment You can modify the next line tocommentcomment setvar sm_priority -1 will discard the messagecomment setvar sm_priority 2 will escalate it to aYellow messagecomment setvar sm_priority 3 will escalate it to a Redmessagecomment
setvar sm_priority 0setvar sm_result ‘TELL MGR.SYSMGR command done successfully’
comment *** END NOTICE.SECURE script ***
88 Chapter 5

A Console Automation Scripts
This appendix describes the Reflection scripts used to automate consoleconnections to HP 3000 systems.
89
Console Automation ScriptsOverview
OverviewIn the OVC/SysMgr solution, you can access the console of HP 3000systems in various ways. To obtain full console access capabilities(Ctrl-A and Ctrl-B ) to an HP 3000, you must have access to its consoleport (ldev-20 or ldev-21). You can obtain this access several waysdepending on the proximity of the HP 3000 system to the OVC SysMgrPC.
For HP 3000 Systems Close to an OVC/SysMgr PC
If the HP 3000 system is located close to the OVC/SysMgr PC:
1. Use a special HP cable specifically made for OVC (HP 8120-6415) toconnect any PC COM port to the HP 3000’s console port (ldev-20).
2. Use a local DTC as the switchbox.
The PC’s COM port is connected to a terminal port on the DTC, anda host port on the DTC is connected to ldev-21 of the HP 3000. Theadvantage of this solution is that you can use the same COM port toconnect to different HP 3000s.
For HP 3000 Systems Far from an OVC/SysMgr PC
If the HP 3000 system is located far from the OVC/SysMgr PC:
1. Use modems to connect the OVC/SysMgr PC’s COM port to themodem port (ldev-21) of the HP 3000.
You need to use two modems, one at the PC end and one at theHP 3000 end.
2. Use a back-to-back DTC solution.
This solution uses two DTCs: one next to the PC and the other nextto the HP 3000. For more information on setting up DTCs, refer tothe HP OpenView DTC Manager manuals.
90 Appendix A
Console Automation ScriptsSysMgr LAN Console
SysMgr LAN ConsoleThe SysMgr LAN Console program is used to automate the consoleconnection once you have set up the hardware for either of thepreviously described solutions. Depending on the type of solution use,you must configure a PC COM port as either NAILED orSWITCHABLE. COM ports that are not used, or are not available,should be configured DISABLED. You configure the COM port asNAILED (to an HP 3000) in LAN Console if you think that the port isgoing to be used only to connect to the specified HP 3000 (as in the caseof a direct serial connection). You configure the COM port to beSWITCHABLE if it is going to be used to connect to more than oneHP 3000 (as in the case of using a DTC to switch between systemconsoles).
Choosing a specific configuration decides the contents of theconfiguration files that are created to automate the console connection.For every HP 3000 that you get console access to, a correspondingReflection script file and a Reflection configuration file are created.These files reside in the c:\ov\sysmgr\console directory and havenames identical to the node names of the HP 3000s that they represent.For HP 3000s that are NAILED to a COM port (that is, for HP 3000sthat are connected using NAILED ports), the Reflection script files havethe COM port number hardcoded.
For HP 3000 systems that can be connected using SWITCHABLE ports,the COM port number is not hardcoded, and at console connection timea free COM port is chosen from the list of available SWITCHABLEports, and a connection is initiated. A disadvantage of this is if you havetwo SWITCHABLE COM ports, one using a modem to connect and theother using a DTC. Although both connections are capable of switching,both COM ports cannot be configured SWITCHABLE. The problem isobvious.
For example, assume that you configured COM1 and COM2 asSWITCHABLE with COM1 using a modem and COM2 using a DTC.You intended to connect to System A using the modem and System Busing the DTC. But in the case when you try to create a consoleconnection to System B while COM1 is free (you are not accessingSystem A’s console), LAN Console chooses COM1 to connect to SystemB because it is the first SWITCHABLE port that is available. However,this won’t work because System B is not accessible using a modem butby using a DTC. You can overcome this problem by configuring COM1port as NAILED to System A. This way, COM1 is never used to initiatea connection to any other system except System A.
A separate Reflection script file is created for every HP 3000 that youwant console access to. These Reflection scripts contain informationrelated to your console connection (for example, baud rate, DTC
Appendix A 91
Console Automation ScriptsSysMgr LAN Console
password, phone number, etc.). This information is collected the firsttime you create a console connection to the node. For subsequentconnections, a console connection initiation script uses this connectioninformation to establish the connection.
The next sections contain the names of the script files and configurationfiles that are used to create console connections with an explanation ofwhat they do.
Script Files
build.rcl
This script executes whenever the user invokes LAN Console for aNAILED system that was not accessed previously and, therefore, hasno configuration or script file. This script asks the user for the specificsof connecting to the system and builds a configuration file and a scriptfile to carry out the access automatically for all subsequent operations.
builddtc.rcl
This script executes whenever the user uses LAN Console to establish acontrol console through a SWITCHABLE COM port to a system thathas not been accessed previously and, therefore, has no configurationfile or script file. This script asks the user for the specifics of connectingto the system and builds a configuration file and a script file to carry outthe access automatically for all subsequent operations.
hiconsol.rcl
This script is used to connect to a remote system’s console. Theconnection is either a MODEM, DTC, or SERIAL port. For modemconnections, the “DIALHOST.RCL” script shipped with the Reflectionproduct is used. This script is used only for NAILED connections.
hicondtc.rcl
This control console script is executed connect to a remote system’sconsole using a SWITCHABLE COM port. The connection is either aMODEM, DTC, or SERIAL port. For modem connections, the“DIALHOST.RCL” script shipped with the Reflection product is used.This script is usually launched with the configuration file,<nodename>.r1w. If this is the first time connection to a node with aSWITCHABLE port then this script is called by BUILDDTC.RCL. Thisscript is used only for SWITCHABLE connections.
byeconsol.rcl
This script terminates a remote console session. The connection iseither a MODEM, DTC, or SERIAL port.
92 Appendix A
Console Automation ScriptsSysMgr LAN Console
dialhost.rcl
This script file is included with Reflection 1 for Windows and is used todial out using modems. This script is executed when the modemsolution is used to get console access.
console.rcl
This is a dummy script file used with the CONSOLE.R1W configurationfile for OV Console installations. This file is required by LAN Console tolaunch a connection on COM1.
<nodename>.rcl
This is a script file maintained for the HP 3000 system whose name is<nodename>. This file contains console connection information(connection type, connection speed, relevant passwords, etc.) specific toconnecting to the system <nodename>.
Configuration Files
build.r1w
This Reflection configuration file sets up the initial configuration of theReflection Terminal Emulator window which is invoked when a consolescript has to be built for the first time. In the initial configuration, theReflection window does not have any active connection.
<nodename>.r1w
This Reflection configuration file sets up the initial configuration of theReflection Terminal Emulator window which is invoked when youinitiate a console connection to the system <nodename>. Thisconfiguration file sets up the initial connection to “NONE” and sets thewindow title to “<nodename>.r1w”.
console.r1w
This Reflection configuration file sets up the initial configuration of theReflection Terminal Emulator window which is invoked when thedefault console connection is initiated on COM1 to the local HP 3000system. This is identical to the <nodename>.r1w configuration filewhere <nodename> is replaced with “console.” Figure A-1 andFigure A-2 show the logic of two important script files,BUILDDTC.RCL and BUILD.RCL.
Appendix A 93
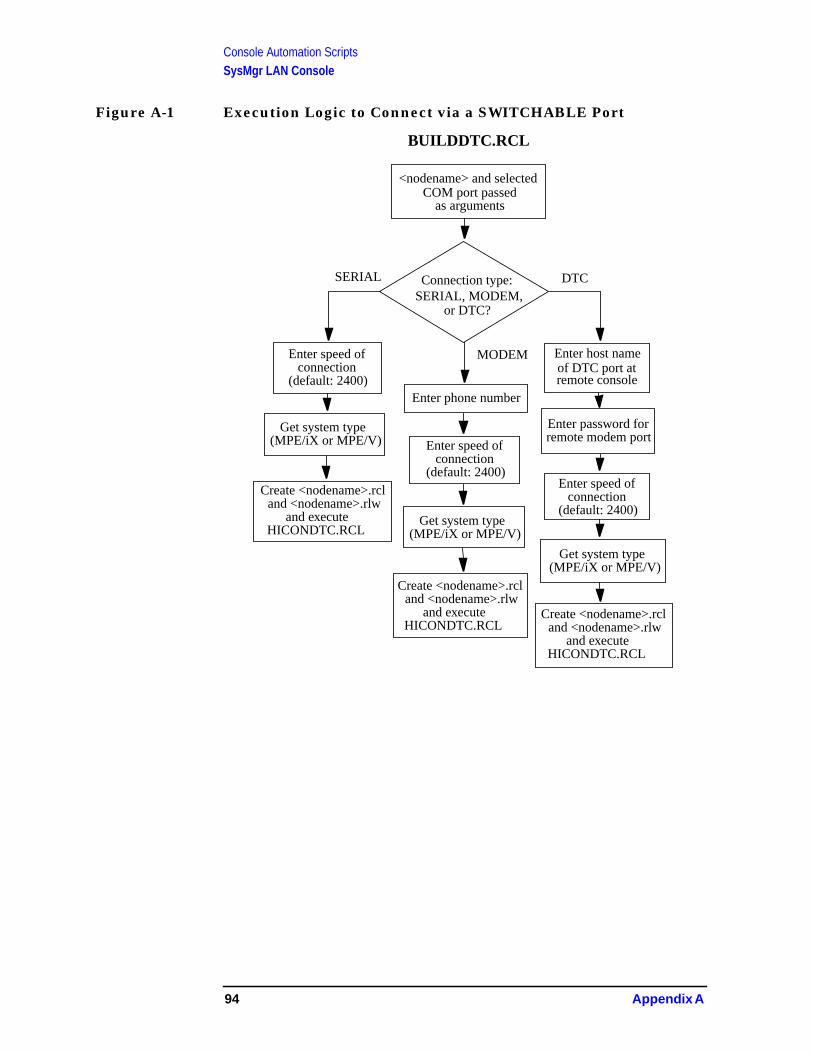
Console Automation ScriptsSysMgr LAN Console
Figure A-1 Execution Logic to Connect via a SWITCHABLE Port
BUILDDTC.RCL
<nodename> and selected
as arguments
Connection type:SERIAL, MODEM,
or DTC?
SERIAL DTC
Enter speed ofconnection
(default: 2400)
Enter speed ofconnection
(default: 2400)Enter speed of
connection(default: 2400)
Get system type(MPE/iX or MPE/V)
Get system type(MPE/iX or MPE/V)
Get system type(MPE/iX or MPE/V)
Enter phone number
Enter password forremote modem port
Create <nodename>.rcland <nodename>.rlw
and executeHICONDTC.RCL
Create <nodename>.rcland <nodename>.rlw
and executeHICONDTC.RCL
Create <nodename>.rcland <nodename>.rlw
and executeHICONDTC.RCL
Enter host nameof DTC port atremote console
MODEM
COM port passed
94 Appendix A
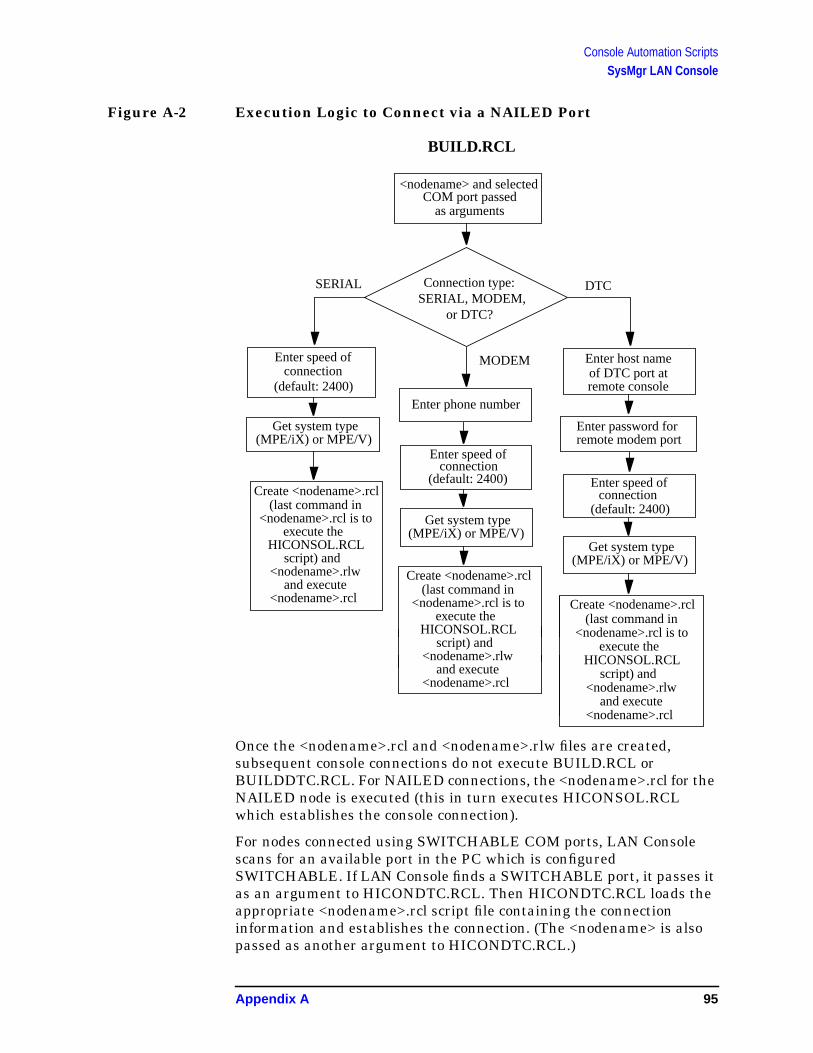
Console Automation ScriptsSysMgr LAN Console
Figure A-2 Execution Logic to Connect via a NAILED Port
Once the <nodename>.rcl and <nodename>.rlw files are created,subsequent console connections do not execute BUILD.RCL orBUILDDTC.RCL. For NAILED connections, the <nodename>.rcl for theNAILED node is executed (this in turn executes HICONSOL.RCLwhich establishes the console connection).
For nodes connected using SWITCHABLE COM ports, LAN Consolescans for an available port in the PC which is configuredSWITCHABLE. If LAN Console finds a SWITCHABLE port, it passes itas an argument to HICONDTC.RCL. Then HICONDTC.RCL loads theappropriate <nodename>.rcl script file containing the connectioninformation and establishes the connection. (The <nodename> is alsopassed as another argument to HICONDTC.RCL.)
MODE
Enter passwordfor
BUILD.RCL
MODEM
<nodename> and selectedCOM port passed
as arguments
Connection type:SERIAL, MODEM,
or DTC?
Enter speed ofconnection
(default: 2400)
Enter speed of
(default: 2400)
Get system type(MPE/iX) or MPE/V)
Create <nodename>.rcl(last command in
<nodename>.rcl is toexecute the
HICONSOL.RCLscript) and
<nodename>.rlwand execute
<nodename>.rcl
Enter phone number
Get system type(MPE/iX) or MPE/V)
Create <nodename>.rcl(last command in
<nodename>.rcl is toexecute the
HICONSOL.RCLscript) and
<nodename>.rlwand execute
<nodename>.rcl
Create <nodename>.rcl(last command in
<nodename>.rcl is toexecute the
HICONSOL.RCLscript) and
<nodename>.rlwand execute
<nodename>.rcl
Enter host nameof DTC port atremote console
Enter password forremote modem port
Enter speed ofconnection
(default: 2400)
Get system type(MPE/iX) or MPE/V)
MODEM
connection
SERIAL DTC
Appendix A 95

Console Automation ScriptsSysMgr LAN Console
96 Appendix A

B Error Messages
This appendix explains the error messages that you may see whenusing OVC. These messages may be displayed on the OVC PC screen, inan HP 3000 log file, or in the SysMgr Event Browser dialog box.
97

Error MessagesOVC PC Error Messages
OVC PC Error MessagesThe following error messages may be displayed in a dialog box on theOVC PC screen while you are running OVC.
IMFVAL ERR 3 MESSAGE: Unexpected SysMgr CommMgr Error: Error <error code>Program will terminate.
CAUSE: The SNA IMF path is missing from the configuration file.
ACTION: Restore the configuration file from a backup tape and retry thevalidation. Also, submit an SR.
P0-00 MESSAGE: Corrupt configuration file. Missing IMF path.(IMFVALERR 3)
CAUSE: Program defect
ACTION: Contact your HP representative
P0-02 MESSAGE: SysMgr CommMgr program missing! Program willterminate.
CAUSE:Someone closed the COMMMGR window or COMMMGR failed.
ACTION: Restart the c:\ov\sysmgr\commmgr.exe program using the“Run” menu item from the Windows Program Manager.
P0-11 MESSAGE: Network error happened. Program will terminate.
CAUSE: Some fatal network error happened.
ACTION: Some other message box should appear to report networkerror. Contact your local network administrator for assistance.
P0-20 MESSAGE: Error saving file <file name> <file error text>.
CAUSE: A disk (file) error occurred on your PC.
ACTION: Fix the problem.
P0-21 MESSAGE: SysMgr <application program name> is already loaded!
CAUSE: This is an unexpected error.
ACTION: Close the COMMMGR window and restart it using the “Run”menu item from the Windows Program Manager.
P0-22 MESSAGE: Logon user [<user name>] does not have requiredcapability! See your SysMgr administrator for assistance.
CAUSE: User missing “SysCnfg” capability.
ACTION: Have your OVC administrator add the “SysCnfg” capability toyour OVC logon.
P0-23 MESSAGE: CommMgr returned Error code : <errno>.
98 Appendix B

Error MessagesOVC PC Error Messages
CAUSE: Program could not open a connection to the HP 3000.
ACTION: Make sure CommMgr is running.
P0-24 MESSAGE: Unable to create window.
CAUSE: The creation of the window or dialog box corresponding to thecommand or button you selected failed. Most likely, you are running outof memory.
ACTION: Close as many other Windows programs as possible.
P0-25 MESSAGE: Action could not be completed due to a memory error.
CAUSE: A failure occurred in accessing memory.
ACTION: Restart MS-Windows.
P0-26 MESSAGE: Insufficient user capabilities.
CAUSE: You don’t have the capabilities necessary to access thiscommand.
ACTION: Log off and log on as a user with the required capabilities, orselect another command for which you have the required capabilities.
P0-27 MESSAGE: Connection with the Management node has been lost.
CAUSE:HP 3000 is down; network is down; or one or both the OVC jobson the HP 3000 are down.
ACTION: Check to see if the OVC jobs are running on the HP 3000 andwhether the network is up.
P0-28 MESSAGE: Incompatibility detected between workstation andmanagement node software.
CAUSE: The OVC PC software and the OVC HP 3000 software are notversion compatible.
ACTION: Reinstall the appropriate version of the PC/HP 3000 software.
P0-29 MESSAGE: Configuration is already being accessed.
CAUSE: Another user is accessing the same configuration command.
ACTION: Wait until the user is done.
P0-30 MESSAGE: There are no window timers available to run thisapplication.
CAUSE: This is due either to a low memory condition or a softwaredefect.
ACTION: Close as many other Windows programs as possible.
P1-01 MESSAGE: The required management node job [<job name>] doesnot exist!
CAUSE: The required job on the HP 3000 has either not been activated
Appendix B 99
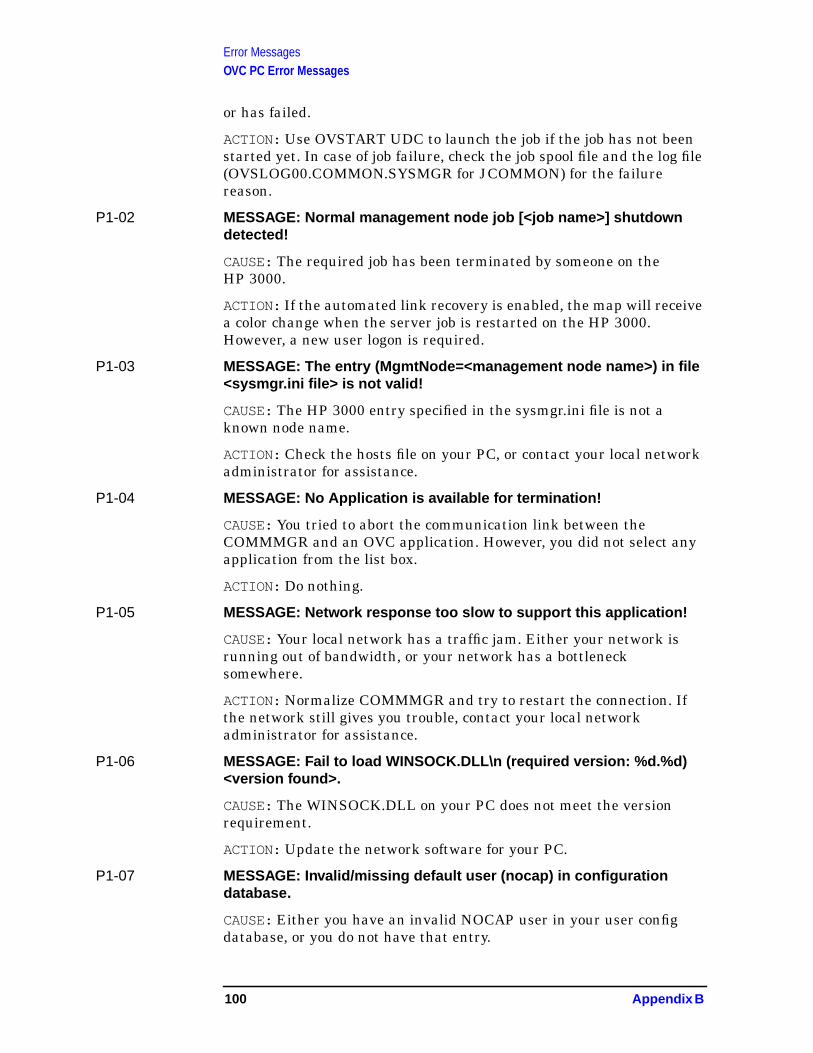
Error MessagesOVC PC Error Messages
or has failed.
ACTION: Use OVSTART UDC to launch the job if the job has not beenstarted yet. In case of job failure, check the job spool file and the log file(OVSLOG00.COMMON.SYSMGR for JCOMMON) for the failurereason.
P1-02 MESSAGE: Normal management node job [<job name>] shutdowndetected!
CAUSE: The required job has been terminated by someone on theHP 3000.
ACTION: If the automated link recovery is enabled, the map will receivea color change when the server job is restarted on the HP 3000.However, a new user logon is required.
P1-03 MESSAGE: The entry (MgmtNode=<management node name>) in file<sysmgr.ini file> is not valid!
CAUSE: The HP 3000 entry specified in the sysmgr.ini file is not aknown node name.
ACTION: Check the hosts file on your PC, or contact your local networkadministrator for assistance.
P1-04 MESSAGE: No Application is available for termination!
CAUSE: You tried to abort the communication link between theCOMMMGR and an OVC application. However, you did not select anyapplication from the list box.
ACTION: Do nothing.
P1-05 MESSAGE: Network response too slow to support this application!
CAUSE: Your local network has a traffic jam. Either your network isrunning out of bandwidth, or your network has a bottlenecksomewhere.
ACTION: Normalize COMMMGR and try to restart the connection. Ifthe network still gives you trouble, contact your local networkadministrator for assistance.
P1-06 MESSAGE: Fail to load WINSOCK.DLL\n (required version: %d.%d)<version found>.
CAUSE: The WINSOCK.DLL on your PC does not meet the versionrequirement.
ACTION: Update the network software for your PC.
P1-07 MESSAGE: Invalid/missing default user (nocap) in configurationdatabase.
CAUSE: Either you have an invalid NOCAP user in your user configdatabase, or you do not have that entry.
100 Appendix B

Error MessagesOVC PC Error Messages
ACTION: You need to add a NOCAP user entry in your user configdatabase. This user should not be given any capability.
P1-09 MESSAGE: Version mismatch between the PC and managementnode!
CAUSE: Your HP 3000 software does not support this version of PCsoftware.
ACTION: You need to upgrade your HP 3000 software.
P1-10 MESSAGE: Unexpected fatal management node job [<job name>]abort!
CAUSE: The <job name> failed on the HP 3000.
ACTION: This is caused by either a network failure or a job failure. Ifthis is a job failure, check the job spool file and the log file(OVSLOG00.COMMON.SYSMGR for JCOMMON) for the failurereason.
P1-11 MESSAGE: SysMgr Communication Manager already activated!
CAUSE: Only one copy of COMMMGR is allowed.
ACTION: Do nothing.
P1-12 MESSAGE: Network WINSOCK Error: <WINSOCK error text or errornumber>\n See your local network administrator for assistance.
CAUSE: COMMMGR encountered a network problem.
ACTION: Contact your local network administrator for assistance.
P1-13 MESSAGE: Failed to create file [<file name>]\nFileError: <errortext>\nProgram will terminate!
CAUSE: COMMMGR encountered a disk (file) problem.
ACTION: Fix the problem.
P1-14 MESSAGE: Failed to allocate the required memory!
CAUSE: You have run out of your PC resources. The COMMMGRprogram fails to allocate the buffer space to receive the incomingmessages.
ACTION: Close some PC applications and restart OpenView.
P1-15 MESSAGE: Requires an active Microsoft DBWIN.EXE window for thisfeature!
CAUSE: The OVC PC software displays the tracing information via theDBWIN.EXE window, so you must have that program installed andactivated.
ACTION: Install and run the DBWIN.EXE program.
P1-15 MESSAGE: Requires an active Microsoft DBWIN.EXE window for this
Appendix B 101
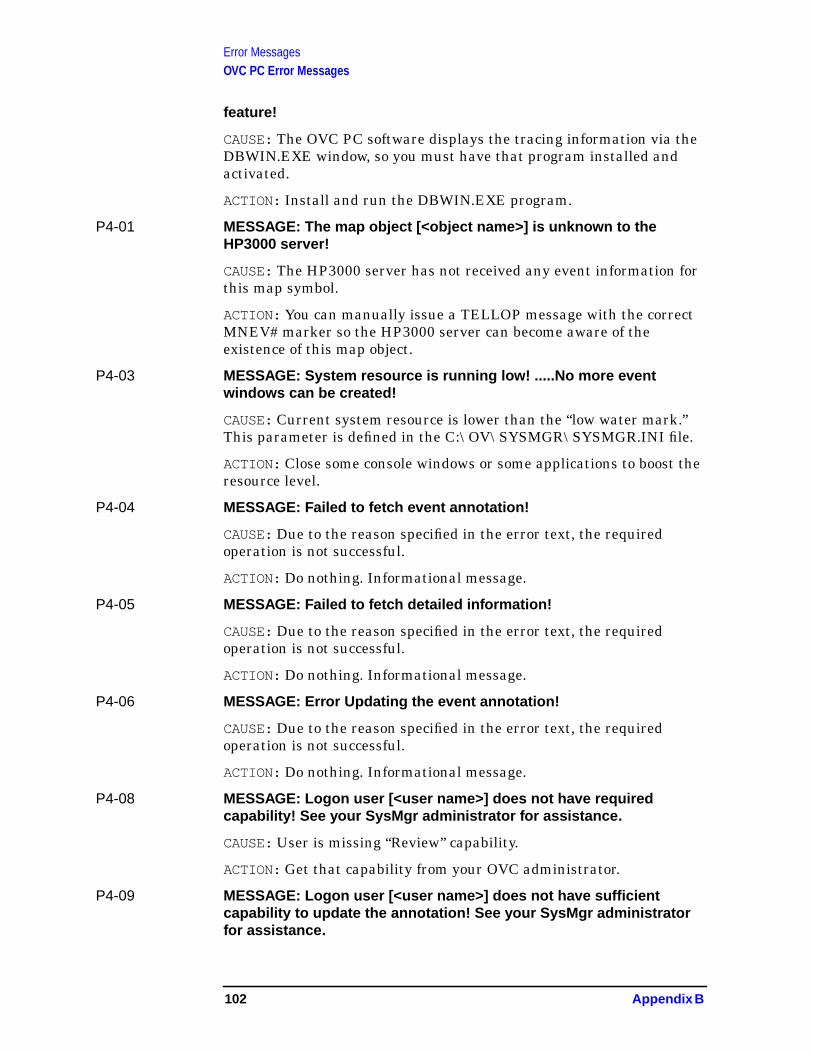
Error MessagesOVC PC Error Messages
feature!
CAUSE: The OVC PC software displays the tracing information via theDBWIN.EXE window, so you must have that program installed andactivated.
ACTION: Install and run the DBWIN.EXE program.
P4-01 MESSAGE: The map object [<object name>] is unknown to theHP3000 server!
CAUSE: The HP3000 server has not received any event information forthis map symbol.
ACTION: You can manually issue a TELLOP message with the correctMNEV# marker so the HP3000 server can become aware of theexistence of this map object.
P4-03 MESSAGE: System resource is running low! .....No more eventwindows can be created!
CAUSE: Current system resource is lower than the “low water mark.”This parameter is defined in the C:\OV\SYSMGR\SYSMGR.INI file.
ACTION: Close some console windows or some applications to boost theresource level.
P4-04 MESSAGE: Failed to fetch event annotation!
CAUSE: Due to the reason specified in the error text, the requiredoperation is not successful.
ACTION: Do nothing. Informational message.
P4-05 MESSAGE: Failed to fetch detailed information!
CAUSE: Due to the reason specified in the error text, the requiredoperation is not successful.
ACTION: Do nothing. Informational message.
P4-06 MESSAGE: Error Updating the event annotation!
CAUSE: Due to the reason specified in the error text, the requiredoperation is not successful.
ACTION: Do nothing. Informational message.
P4-08 MESSAGE: Logon user [<user name>] does not have requiredcapability! See your SysMgr administrator for assistance.
CAUSE: User is missing “Review” capability.
ACTION: Get that capability from your OVC administrator.
P4-09 MESSAGE: Logon user [<user name>] does not have sufficientcapability to update the annotation! See your SysMgr administratorfor assistance.
102 Appendix B
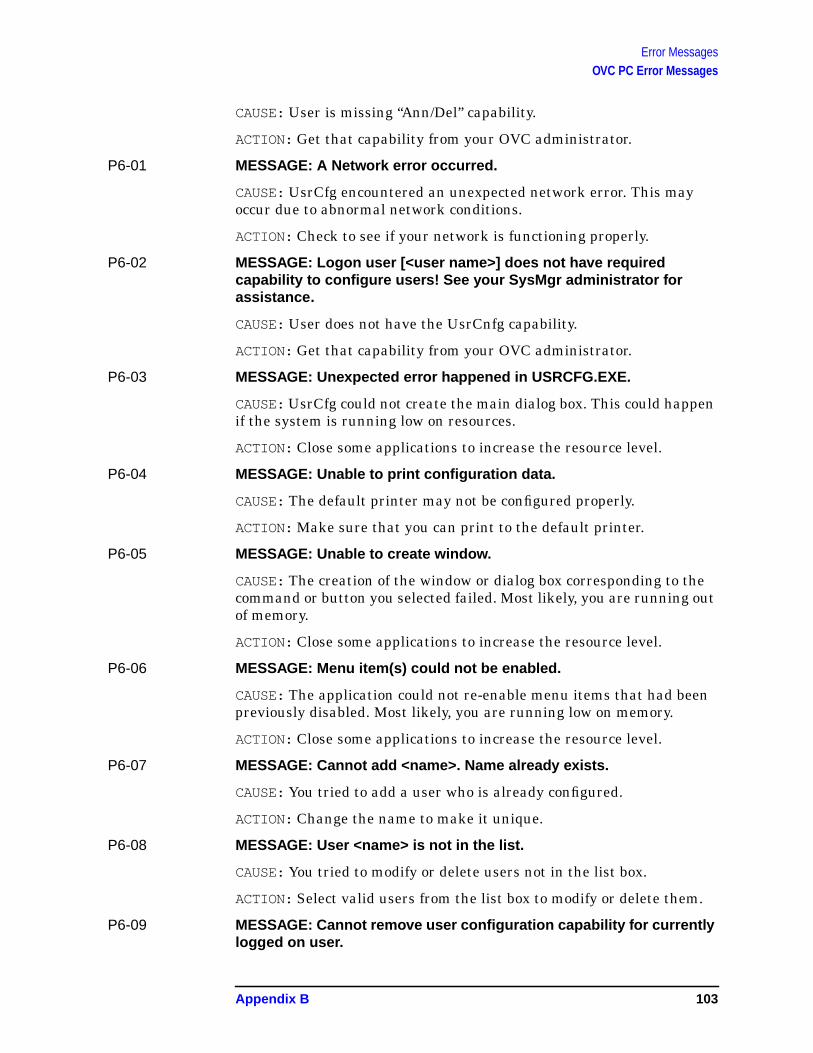
Error MessagesOVC PC Error Messages
CAUSE: User is missing “Ann/Del” capability.
ACTION: Get that capability from your OVC administrator.
P6-01 MESSAGE: A Network error occurred.
CAUSE: UsrCfg encountered an unexpected network error. This mayoccur due to abnormal network conditions.
ACTION: Check to see if your network is functioning properly.
P6-02 MESSAGE: Logon user [<user name>] does not have requiredcapability to configure users! See your SysMgr administrator forassistance.
CAUSE: User does not have the UsrCnfg capability.
ACTION: Get that capability from your OVC administrator.
P6-03 MESSAGE: Unexpected error happened in USRCFG.EXE.
CAUSE:UsrCfg could not create the main dialog box. This could happenif the system is running low on resources.
ACTION: Close some applications to increase the resource level.
P6-04 MESSAGE: Unable to print configuration data.
CAUSE: The default printer may not be configured properly.
ACTION: Make sure that you can print to the default printer.
P6-05 MESSAGE: Unable to create window.
CAUSE: The creation of the window or dialog box corresponding to thecommand or button you selected failed. Most likely, you are running outof memory.
ACTION: Close some applications to increase the resource level.
P6-06 MESSAGE: Menu item(s) could not be enabled.
CAUSE: The application could not re-enable menu items that had beenpreviously disabled. Most likely, you are running low on memory.
ACTION: Close some applications to increase the resource level.
P6-07 MESSAGE: Cannot add <name>. Name already exists.
CAUSE: You tried to add a user who is already configured.
ACTION: Change the name to make it unique.
P6-08 MESSAGE: User <name> is not in the list.
CAUSE: You tried to modify or delete users not in the list box.
ACTION: Select valid users from the list box to modify or delete them.
P6-09 MESSAGE: Cannot remove user configuration capability for currentlylogged on user.
Appendix B 103
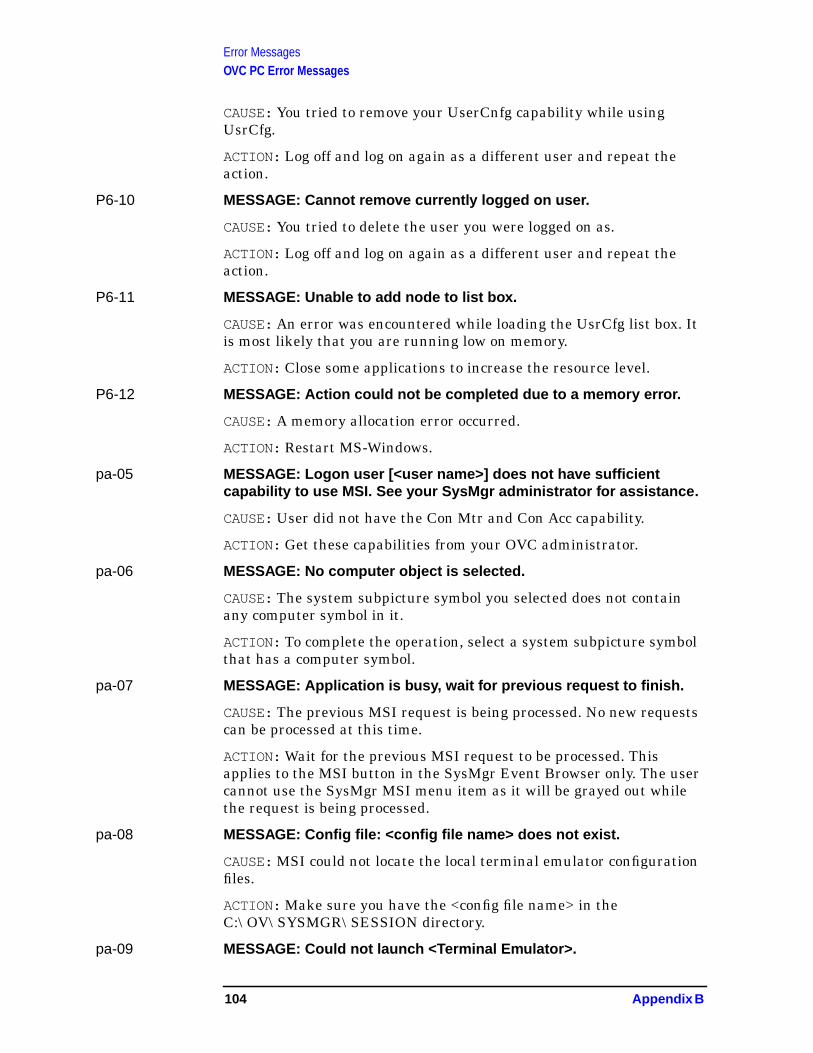
Error MessagesOVC PC Error Messages
CAUSE: You tried to remove your UserCnfg capability while usingUsrCfg.
ACTION: Log off and log on again as a different user and repeat theaction.
P6-10 MESSAGE: Cannot remove currently logged on user.
CAUSE: You tried to delete the user you were logged on as.
ACTION: Log off and log on again as a different user and repeat theaction.
P6-11 MESSAGE: Unable to add node to list box.
CAUSE: An error was encountered while loading the UsrCfg list box. Itis most likely that you are running low on memory.
ACTION: Close some applications to increase the resource level.
P6-12 MESSAGE: Action could not be completed due to a memory error.
CAUSE: A memory allocation error occurred.
ACTION: Restart MS-Windows.
pa-05 MESSAGE: Logon user [<user name>] does not have sufficientcapability to use MSI. See your SysMgr administrator for assistance.
CAUSE: User did not have the Con Mtr and Con Acc capability.
ACTION: Get these capabilities from your OVC administrator.
pa-06 MESSAGE: No computer object is selected.
CAUSE: The system subpicture symbol you selected does not containany computer symbol in it.
ACTION: To complete the operation, select a system subpicture symbolthat has a computer symbol.
pa-07 MESSAGE: Application is busy, wait for previous request to finish.
CAUSE: The previous MSI request is being processed. No new requestscan be processed at this time.
ACTION: Wait for the previous MSI request to be processed. Thisapplies to the MSI button in the SysMgr Event Browser only. The usercannot use the SysMgr MSI menu item as it will be grayed out whilethe request is being processed.
pa-08 MESSAGE: Config file: <config file name> does not exist.
CAUSE: MSI could not locate the local terminal emulator configurationfiles.
ACTION: Make sure you have the <config file name> in theC:\OV\SYSMGR\SESSION directory.
pa-09 MESSAGE: Could not launch <Terminal Emulator>.
104 Appendix B
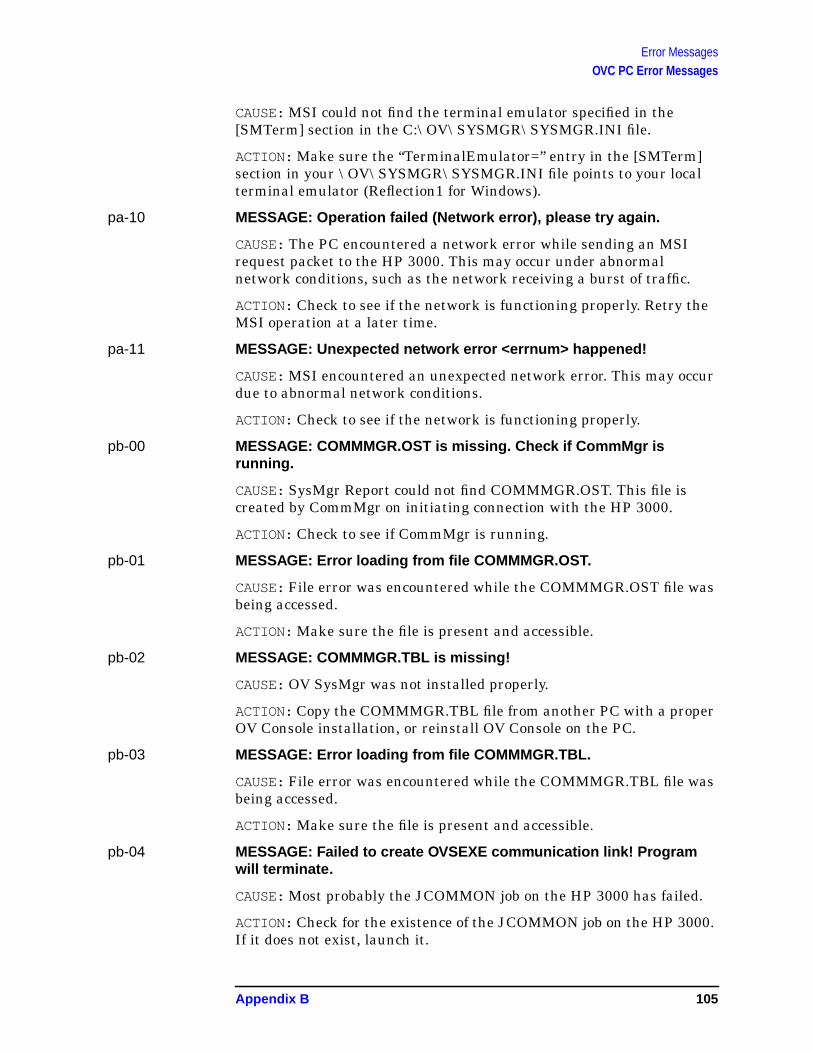
Error MessagesOVC PC Error Messages
CAUSE: MSI could not find the terminal emulator specified in the[SMTerm] section in the C:\OV\SYSMGR\SYSMGR.INI file.
ACTION: Make sure the “TerminalEmulator=” entry in the [SMTerm]section in your \OV\SYSMGR\SYSMGR.INI file points to your localterminal emulator (Reflection1 for Windows).
pa-10 MESSAGE: Operation failed (Network error), please try again.
CAUSE: The PC encountered a network error while sending an MSIrequest packet to the HP 3000. This may occur under abnormalnetwork conditions, such as the network receiving a burst of traffic.
ACTION: Check to see if the network is functioning properly. Retry theMSI operation at a later time.
pa-11 MESSAGE: Unexpected network error <errnum> happened!
CAUSE:MSI encountered an unexpected network error. This may occurdue to abnormal network conditions.
ACTION: Check to see if the network is functioning properly.
pb-00 MESSAGE: COMMMGR.OST is missing. Check if CommMgr isrunning.
CAUSE: SysMgr Report could not find COMMMGR.OST. This file iscreated by CommMgr on initiating connection with the HP 3000.
ACTION: Check to see if CommMgr is running.
pb-01 MESSAGE: Error loading from file COMMMGR.OST.
CAUSE:File error was encountered while the COMMMGR.OST file wasbeing accessed.
ACTION: Make sure the file is present and accessible.
pb-02 MESSAGE: COMMMGR.TBL is missing!
CAUSE: OV SysMgr was not installed properly.
ACTION: Copy the COMMMGR.TBL file from another PC with a properOV Console installation, or reinstall OV Console on the PC.
pb-03 MESSAGE: Error loading from file COMMMGR.TBL.
CAUSE:File error was encountered while the COMMMGR.TBL file wasbeing accessed.
ACTION: Make sure the file is present and accessible.
pb-04 MESSAGE: Failed to create OVSEXE communication link! Programwill terminate.
CAUSE: Most probably the JCOMMON job on the HP 3000 has failed.
ACTION: Check for the existence of the JCOMMON job on the HP 3000.If it does not exist, launch it.
Appendix B 105
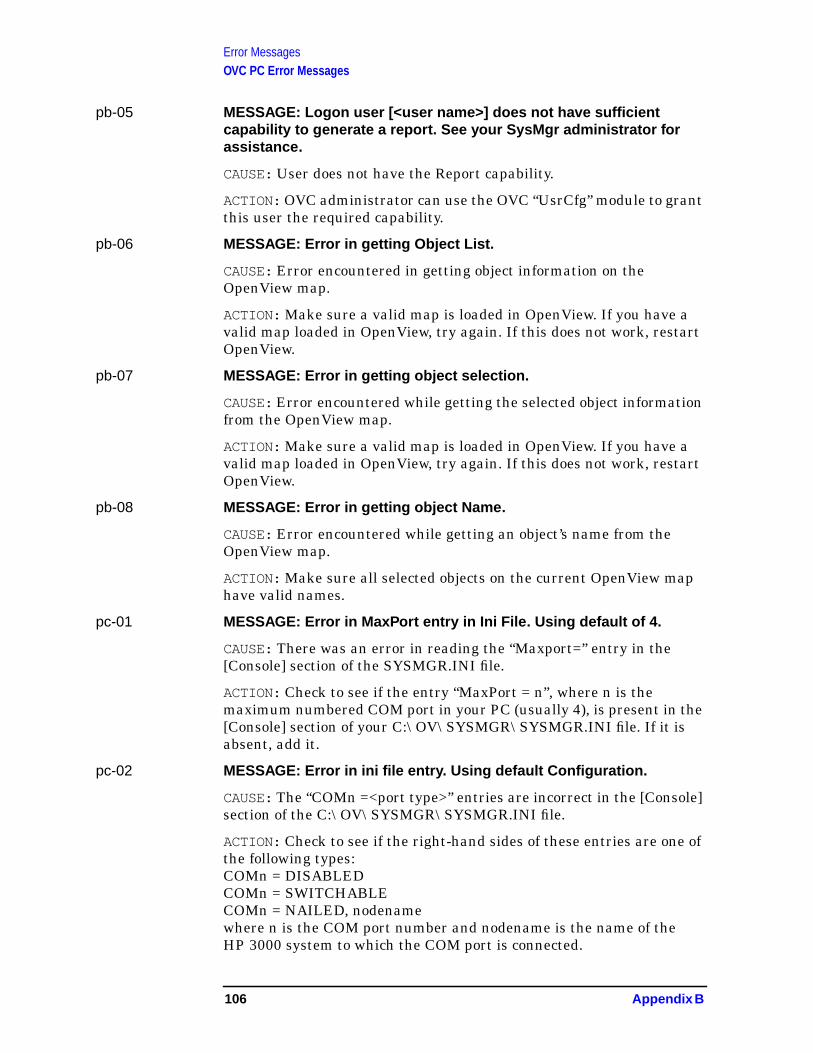
Error MessagesOVC PC Error Messages
pb-05 MESSAGE: Logon user [<user name>] does not have sufficientcapability to generate a report. See your SysMgr administrator forassistance.
CAUSE: User does not have the Report capability.
ACTION: OVC administrator can use the OVC “UsrCfg” module to grantthis user the required capability.
pb-06 MESSAGE: Error in getting Object List.
CAUSE: Error encountered in getting object information on theOpenView map.
ACTION: Make sure a valid map is loaded in OpenView. If you have avalid map loaded in OpenView, try again. If this does not work, restartOpenView.
pb-07 MESSAGE: Error in getting object selection.
CAUSE:Error encountered while getting the selected object informationfrom the OpenView map.
ACTION: Make sure a valid map is loaded in OpenView. If you have avalid map loaded in OpenView, try again. If this does not work, restartOpenView.
pb-08 MESSAGE: Error in getting object Name.
CAUSE: Error encountered while getting an object’s name from theOpenView map.
ACTION: Make sure all selected objects on the current OpenView maphave valid names.
pc-01 MESSAGE: Error in MaxPort entry in Ini File. Using default of 4.
CAUSE: There was an error in reading the “Maxport=” entry in the[Console] section of the SYSMGR.INI file.
ACTION: Check to see if the entry “MaxPort = n”, where n is themaximum numbered COM port in your PC (usually 4), is present in the[Console] section of your C:\OV\SYSMGR\SYSMGR.INI file. If it isabsent, add it.
pc-02 MESSAGE: Error in ini file entry. Using default Configuration.
CAUSE:The “COMn =<port type>” entries are incorrect in the [Console]section of the C:\OV\SYSMGR\SYSMGR.INI file.
ACTION: Check to see if the right-hand sides of these entries are one ofthe following types:COMn = DISABLEDCOMn = SWITCHABLECOMn = NAILED, nodenamewhere n is the COM port number and nodename is the name of theHP 3000 system to which the COM port is connected.
106 Appendix B
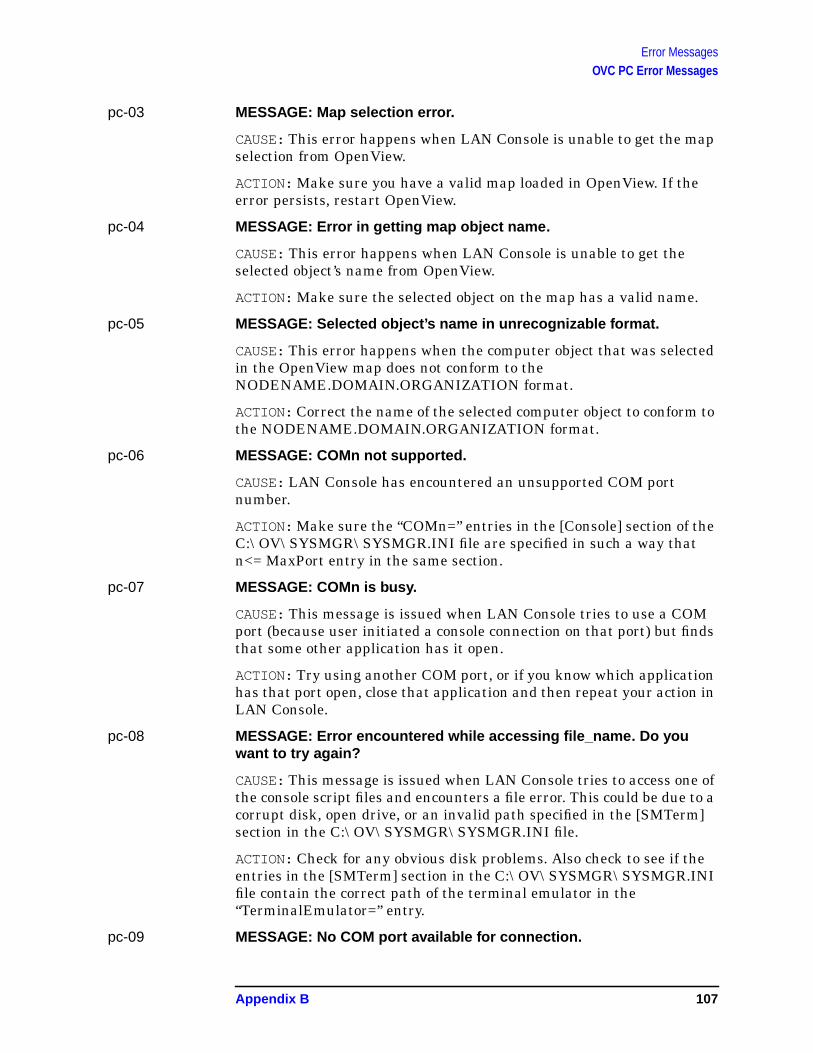
Error MessagesOVC PC Error Messages
pc-03 MESSAGE: Map selection error.
CAUSE:This error happens when LAN Console is unable to get the mapselection from OpenView.
ACTION: Make sure you have a valid map loaded in OpenView. If theerror persists, restart OpenView.
pc-04 MESSAGE: Error in getting map object name.
CAUSE: This error happens when LAN Console is unable to get theselected object’s name from OpenView.
ACTION: Make sure the selected object on the map has a valid name.
pc-05 MESSAGE: Selected object’s name in unrecognizable format.
CAUSE:This error happens when the computer object that was selectedin the OpenView map does not conform to theNODENAME.DOMAIN.ORGANIZATION format.
ACTION: Correct the name of the selected computer object to conform tothe NODENAME.DOMAIN.ORGANIZATION format.
pc-06 MESSAGE: COMn not supported.
CAUSE: LAN Console has encountered an unsupported COM portnumber.
ACTION: Make sure the “COMn=” entries in the [Console] section of theC:\OV\SYSMGR\SYSMGR.INI file are specified in such a way thatn<= MaxPort entry in the same section.
pc-07 MESSAGE: COMn is busy.
CAUSE: This message is issued when LAN Console tries to use a COMport (because user initiated a console connection on that port) but findsthat some other application has it open.
ACTION: Try using another COM port, or if you know which applicationhas that port open, close that application and then repeat your action inLAN Console.
pc-08 MESSAGE: Error encountered while accessing file_name. Do youwant to try again?
CAUSE:This message is issued when LAN Console tries to access one ofthe console script files and encounters a file error. This could be due to acorrupt disk, open drive, or an invalid path specified in the [SMTerm]section in the C:\OV\SYSMGR\SYSMGR.INI file.
ACTION: Check for any obvious disk problems. Also check to see if theentries in the [SMTerm] section in the C:\OV\SYSMGR\SYSMGR.INIfile contain the correct path of the terminal emulator in the“TerminalEmulator=” entry.
pc-09 MESSAGE: No COM port available for connection.
Appendix B 107

Error MessagesOVC PC Error Messages
CAUSE: This message is issued by LAN Console when it is not able tosatisfy a user’s request for a console connection due to unavailability ofan appropriate COM port.
ACTION: Free COM ports by closing existing console connections.
108 Appendix B
Error MessagesError Message Log Files
Error Message Log FilesThe following log files contain error messages for the HP 3000:
OVSLOG00.COMMON.SYSMGR
VRCLOG00.EMS.SYSMGR
Appendix B 109
Error MessagesEvent Message Errors
Event Message ErrorsThe following Event Message error messages may be displayed in theSysMgr Event Browser while you are running OVC.
EM005 MESSAGE: SysMgr-I- Workstation user interface link error. (EM005)
CAUSE:An unexpected NetIPC 64 or 67 error was detected. Most likelythe workstation was rebooted.
ACTION: Do nothing.
EM006 MESSAGE: SysMgr-W- Workstation user interface link failed. (EM006)
CAUSE: An unexpected NetIPC error was detected.
ACTION: View the annotation text and take the appropriate action.
EM010 MESSAGE: SysMgr-W- STREAM EMG00JOB error <MPE errormessage>. (EM010)
CAUSE: The EMS failed to stream EMG.
ACTION: Log on into the SYSMGR account on the HP 3000 and issue aSTREAM EMG00JOB.EMS.SYSMGR directly at the MPE prompt. Thiswill manually start up EMG. By doing this you will see the MPE failurethat caused the error message.
EM011 MESSAGE: SysMgr-W- EML report generation failed. (EM011)
CAUSE: EML Report failed because of a problem on the HP 3000.
ACTION: Check the annotation text for a more detailed error message.
EM016 MESSAGE: SysMgr-C- Unexpected internal process terminated.(EM016)
CAUSE: Possible file system or system resource problem.
ACTION: Shut down SysMgr using OVSTOP. Read the log fileVRCLOG00.SYSMGR.SYSMGR on the HP 3000 to tell you the jobnumber that failed. Read that spool file on the HP 3000 to find out thereason for the error. Contact your system manager or your HPrepresentative.
110 Appendix B
Index
Symbols$RECORD_BEGIN, 61$RECORD_END, 61$RECORDS, 61$RECORDS (CROSS), 61
AARS
automated response service, 17DO command, 66enable, 67log file, 79log files, 64overview, 64response CI command file, 66rule file processing, 75rule file syntax, 70, 71rule file syntax error messages, 74silent response, 69solutions, 65syntax error messages, 71test, 68tutorial, 81verify, 68
ARSLOG##, 79ARSLOG## log file, 67ARSLOGKEEP, 79ARSLOGSIZE, 79automated response service
ARS, 17
CCI command, 76COM port console connections, 39
DISABLED, 39NAILED, 39SWITCHABLE, 39
commandDO, 70IF, 70TELLOP, 68TELLOP NMEV#STAT, 68
commandsSETVAR, 76SHOWVAR, 76TELLOP NMEV#INIT, 68
COMMMGR, 32SysMgr communication manager, 19
configureEML database, 36management node, 35
users, 36customize reports, 55
Ddata communications and terminal controller
DTC, 16default range, 52default templates, 55default values, 52DO command, 70DO/D= response command, 75DTC
data communications and terminal controller,16
EEMG
event message gatherer, 64EMG0AUTO, 66, 67EMG0AUTO.SECURE, 85EMGINIT.EMS, 66EMGINIT.EMS.SYSMGR, 67EML
dialog box, 50event message log, 16, 34
EML database, 48EML Report, 34
create time, 51log time, 51
enable ARS, 67event colors, 20event message gatherer
EMG, 64event message log, 16event type, 51events, 16
Ffile equation, 53FORM00MN, 55FORM00PC, 55
Ggenerate report, 52graphical user interface
GUI, 14GUI
graphical user interface, 14
Index 111
Index
Hhelp, 37
IIF command, 70
Kkeywords
$PAGE_FULL ON, 59$PAGE_LENGTH, 58$PAGE_MARGIN, 58$PAGE_NUMBER, 59$PAGE_WIDTH, 58
LLAN
console, 39local area network, 19
LANCONlocal area network (LAN) console, 19
LaunchNailed Console, 39llocal area network
LAN, 19
Mmanagemen by exception defined, 14management session interface
MSI, 17, 46MDI
multiple document interface, 16MSI
management session interface, 17, 46session, 47
multiple document interface, 16
NNETALLOW.EMS.SYSMGR, 33, 47NOCAP, 21NOTICE.SECURE, 85NTC00EXE.EMS program, 69
OOpenView
starting, 19OVC
defined, 14exiting, 41help, 37
OVC HP 3000 software, 15OVC NTC, 16
OVC PC software, 15
Rreport destination, 53report template, 58
SSETVAR command, 76SHOWVAR command, 76SM_MSG_TEXT, 77SM_RESULT, 77SM_STATUS, 77software
OVC HP 3000, 15OVC PC, 15
startingOpenView, 19
starting OVC, 18SysMgr
copy map, 28customize, 35defined, 14diaglog box, 30event browser, 30logoff, 32MSI, 33paste map, 29report, 34
SysMgr communication managerCOMMMGR, 19
SysMgr copy map, 28SysMgr paste map, 29
Ttask managing, 17TELLOP command, 68TELLOP commands
NMEV#F_ON, 78NMEV#FOFF, 78NMEV#INIT, 78NMEV#KILL, 78NMEV#STAT, 78
TELLOP NMEV#INIT command, 68TELLOP NMEV#STAT command, 68template files
FORM00MN, 59FORM00PC, 59
UUSER0DEF.EMS.SYSMGR, 65
112 Index

Index
VVisual OpenView technology, 15
Wworkgroup node manager, 17
Index 113