How to Make your own Physically Correct Shading -
57
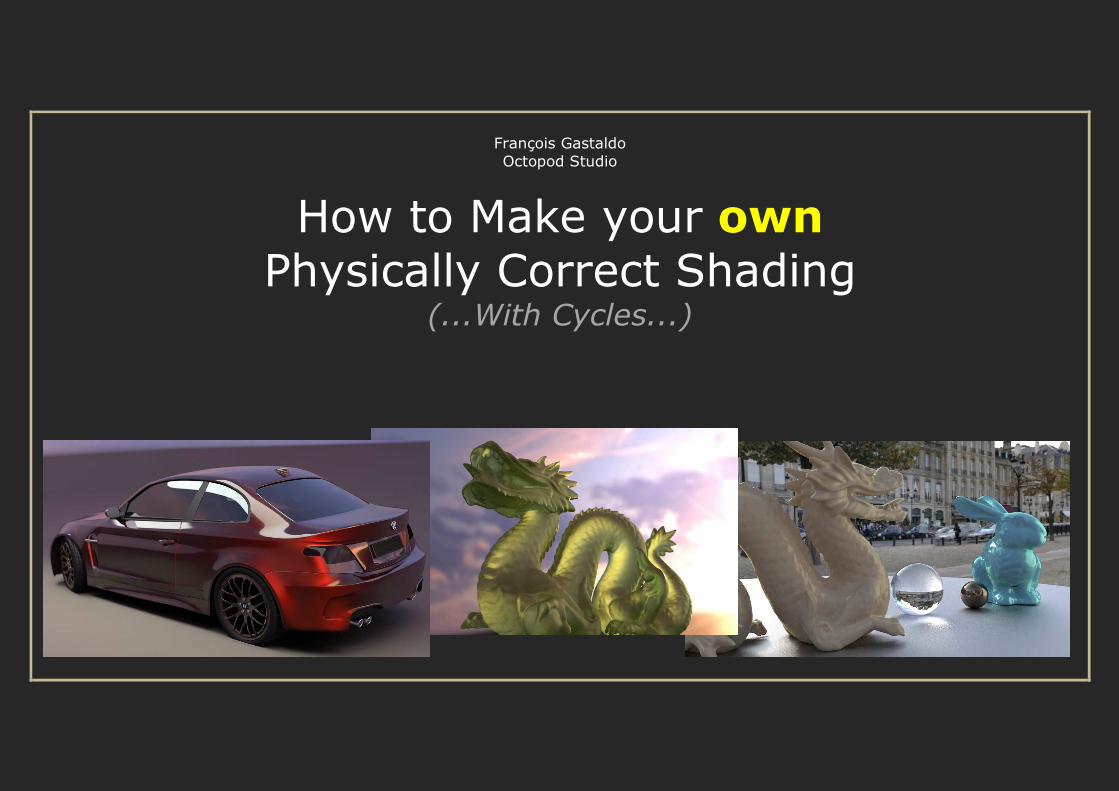
François Gastaldo Octopod Studio How to Make your own Physically Correct Shading (...With Cycles...)
Transcript of How to Make your own Physically Correct Shading -
François Gastaldo
Octopod Studio
How to Make your own
Physically Correct Shading (...With Cycles...)
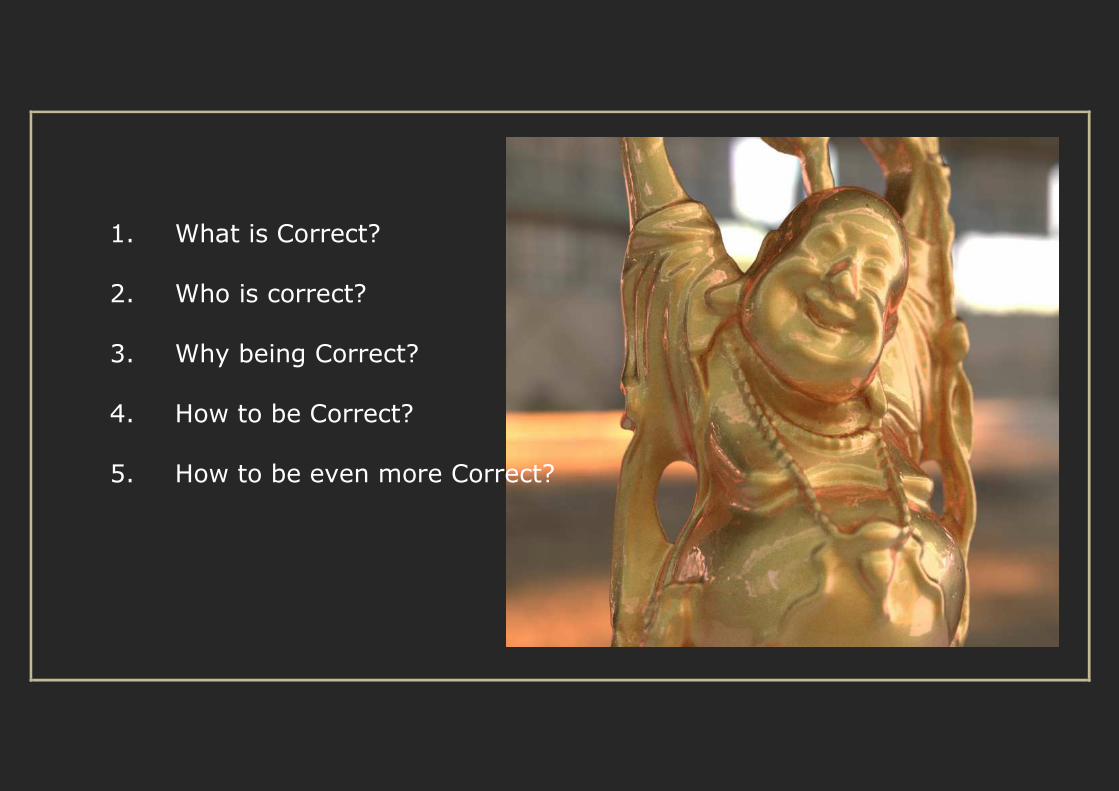
1. What is Correct?
2. Who is correct?
3. Why being Correct?
4. How to be Correct?
5. How to be even more Correct?

What is Correct?
Any photography is physically Correct!
Being Physically Correct is:
Using the same laws in reality and in your rendering.
Or
Respecting the Law of Mother Nature!
The goal is to have materials that react to light as real materials do.
What is the difference between ‘physically correct’ and ‘Physically Based’?
• Both are physically correct.
• Physically Based is FROM real materials (used as input)
• Physically Correct is LIKE real materials
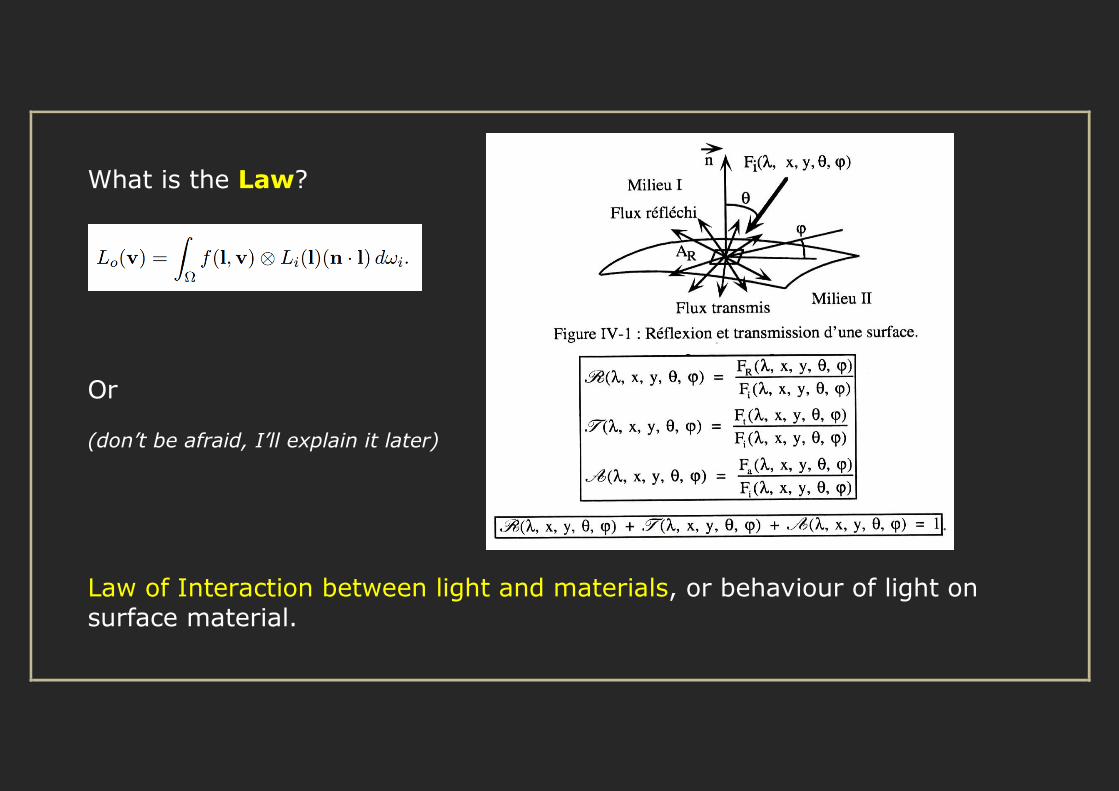
What is the Law?
Or
(don’t be afraid, I’ll explain it later)
Law of Interaction between light and materials, or behaviour of light on surface material.
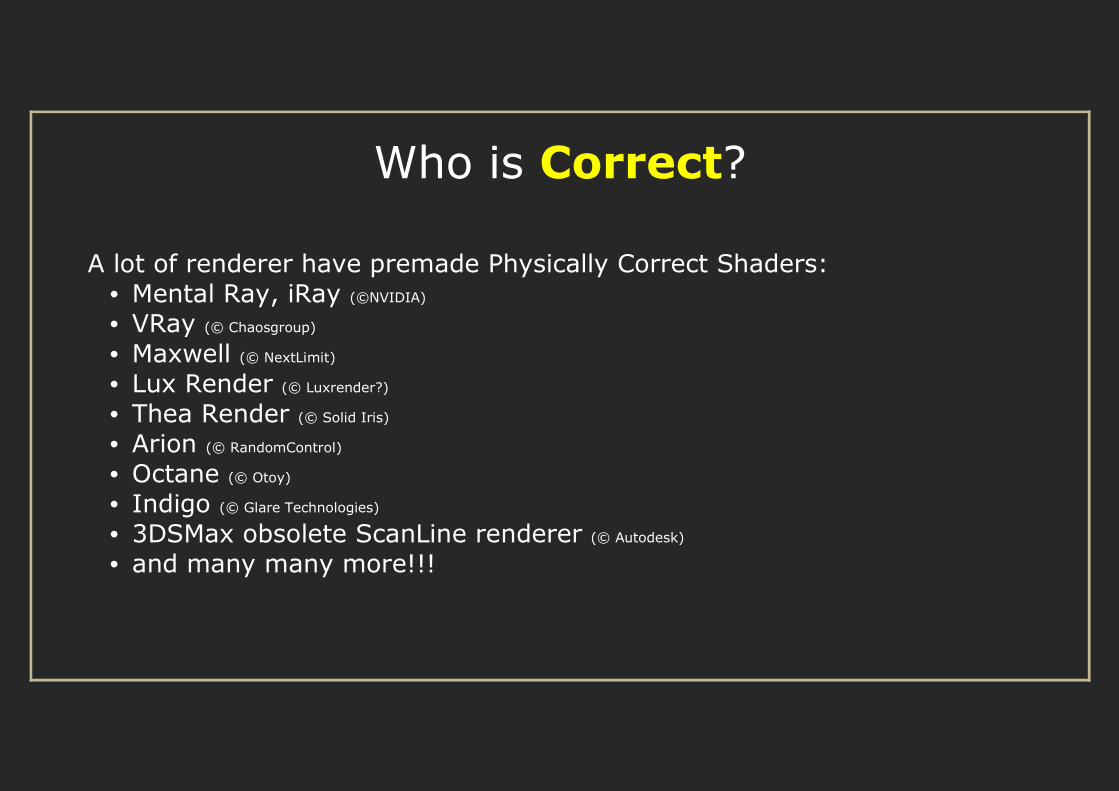
Who is Correct?
A lot of renderer have premade Physically Correct Shaders:
• Mental Ray, iRay (©NVIDIA) • VRay (© Chaosgroup)
• Maxwell (© NextLimit)
• Lux Render (© Luxrender?)
• Thea Render (© Solid Iris)
• Arion (© RandomControl)
• Octane (© Otoy)
• Indigo (© Glare Technologies)
• 3DSMax obsolete ScanLine renderer (© Autodesk)
• and many many more!!!
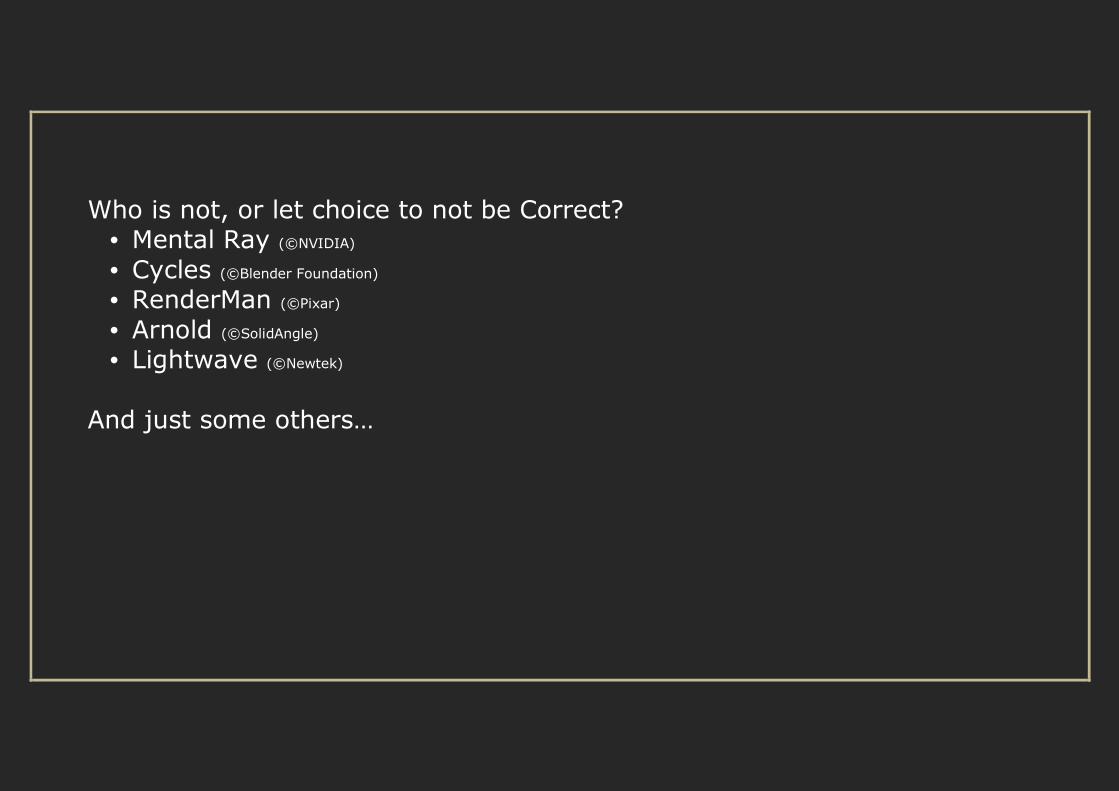
Who is not, or let choice to not be Correct? • Mental Ray (©NVIDIA)
• Cycles (©Blender Foundation) • RenderMan (©Pixar)
• Arnold (©SolidAngle) • Lightwave (©Newtek)
And just some others…
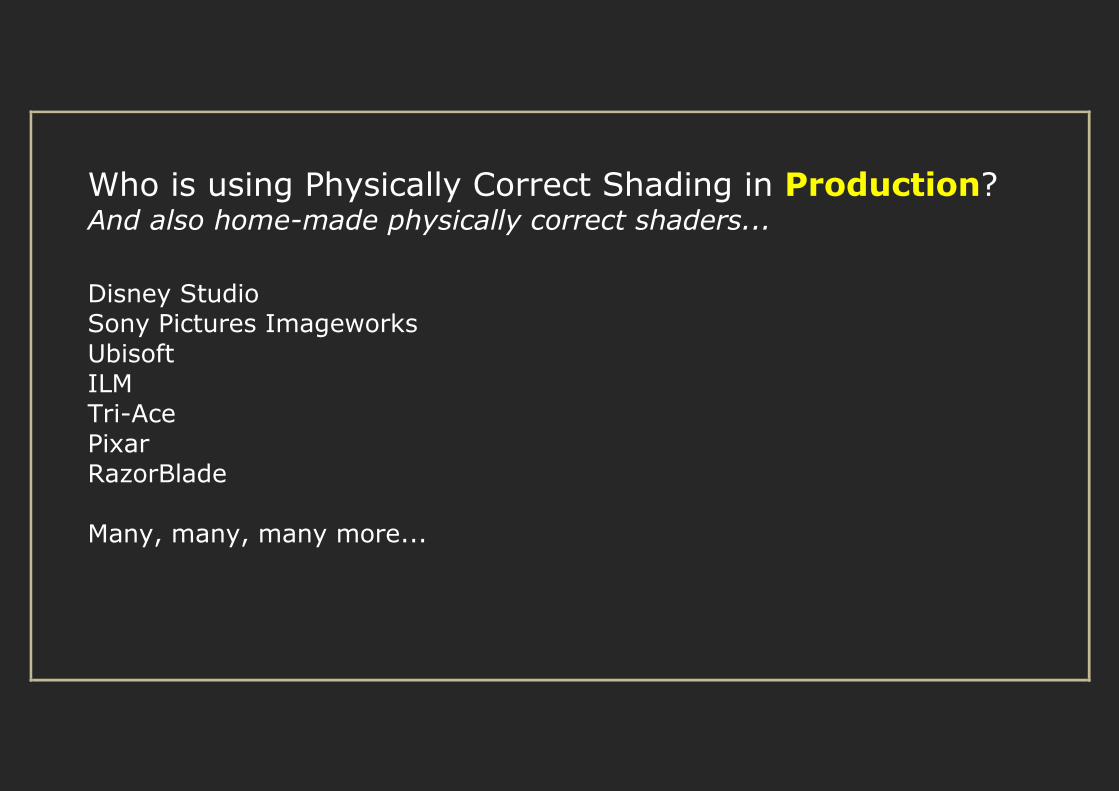
Who is using Physically Correct Shading in Production? And also home-made physically correct shaders...
Disney Studio Sony Pictures Imageworks
Ubisoft
ILM
Tri-Ace
Pixar
RazorBlade
Many, many, many more...
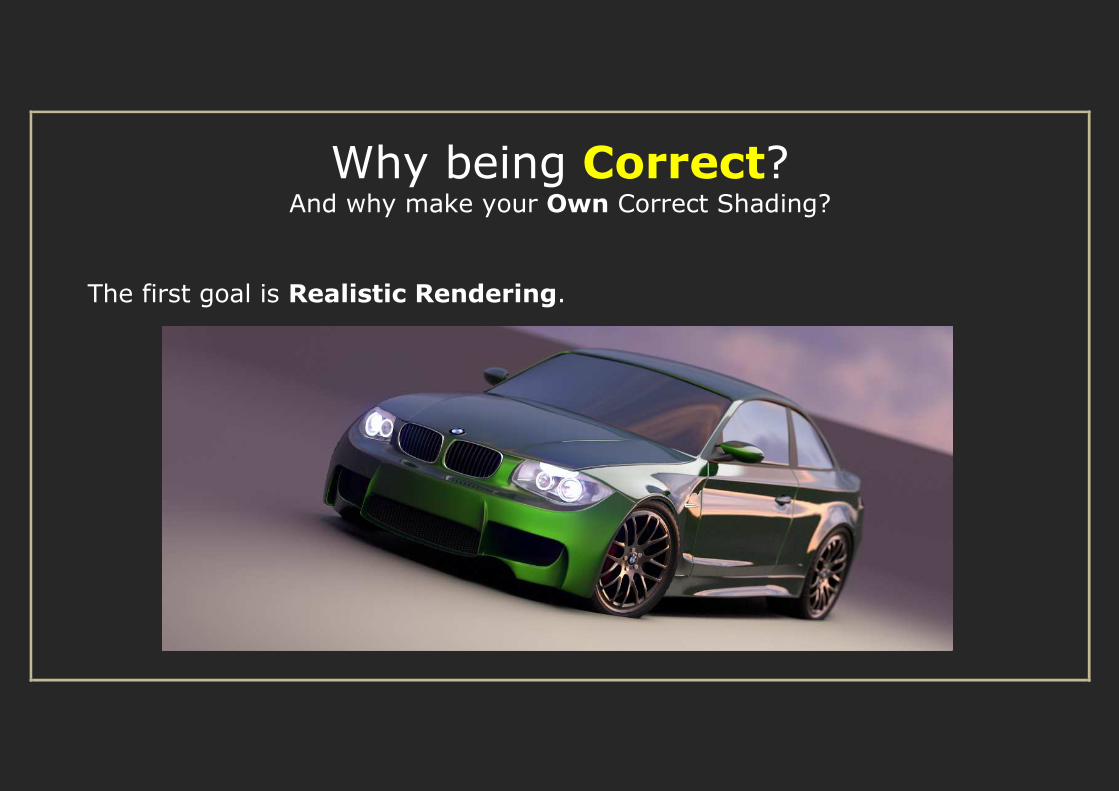
Why being Correct? And why make your Own Correct Shading?
The first goal is Realistic Rendering.
Second is to have an unified shader pipeline:
• All objects react in the same way to lighting • All materials are build on the same base
• Materials are specific to your needs and perfectly fitted to what you want to do with them.
In other words.
• No need to individually relight objects • No need to develop new shader tree for each objects.
• No need to understand tons of parameters from an all-purpose material.
(kind of dream, no?)
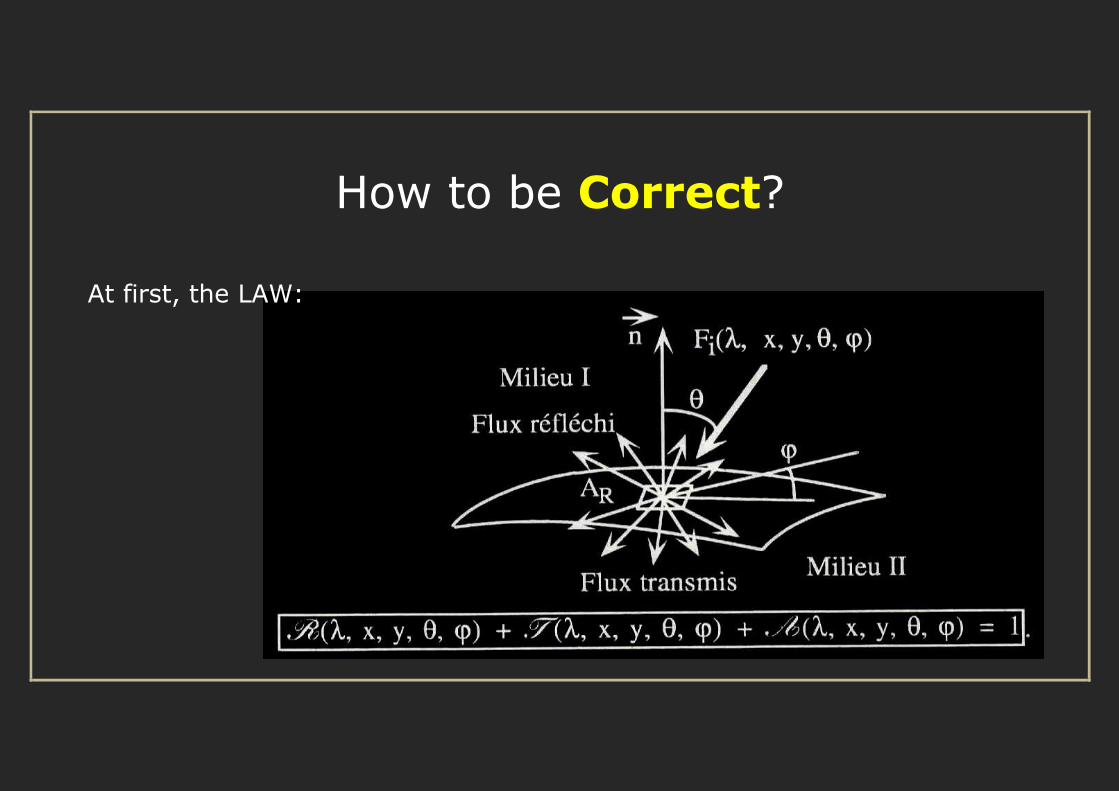
How to be Correct?
At first, the LAW:
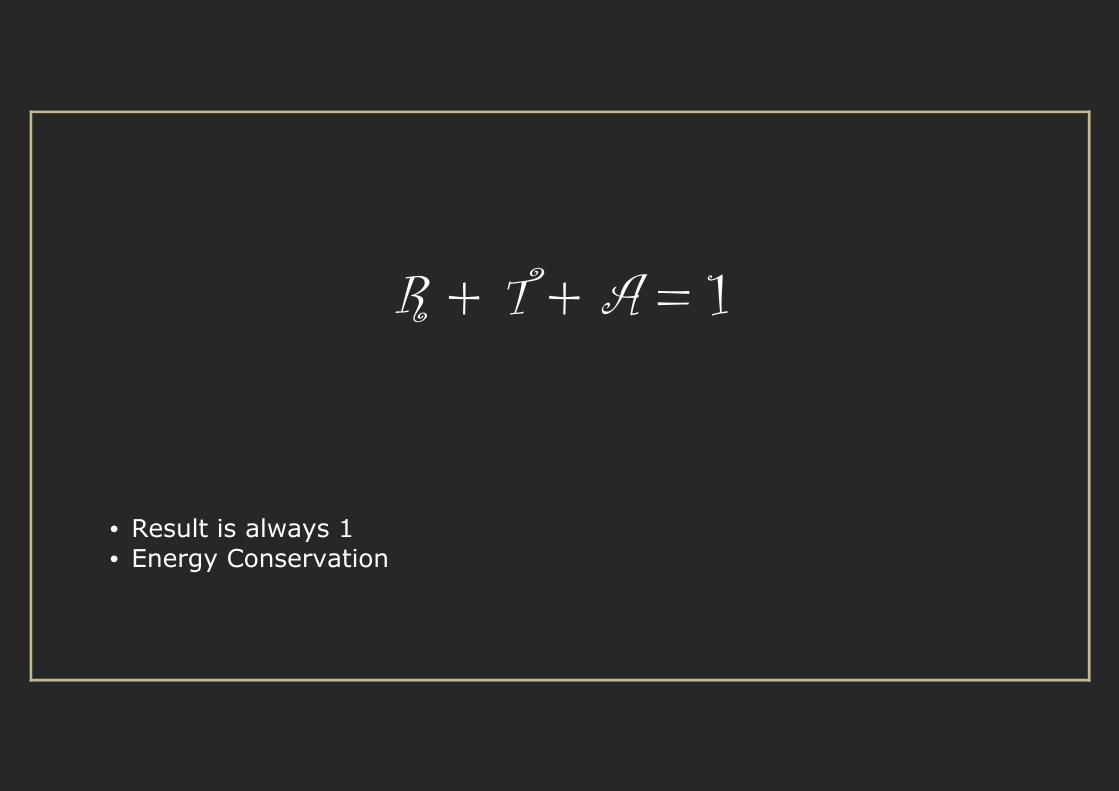
R + T + A = 1
• Result is always 1
• Energy Conservation
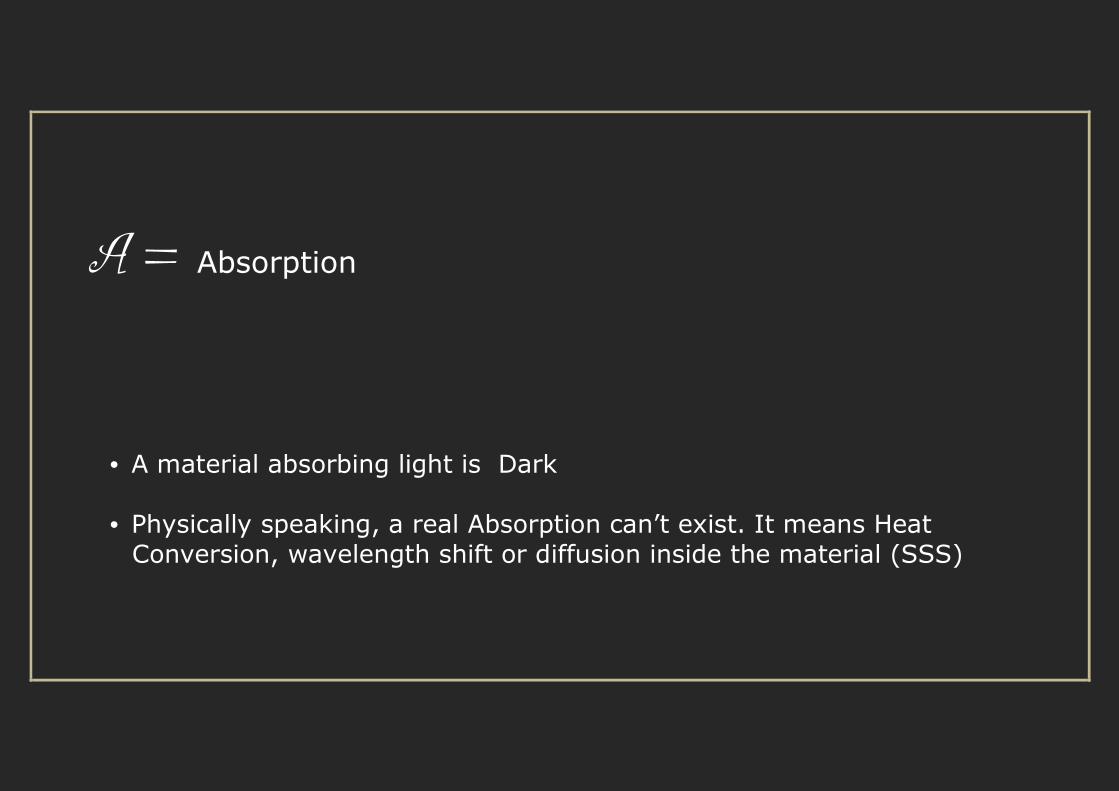
A = Absorption
• A material absorbing light is Dark
• Physically speaking, a real Absorption can’t exist. It means Heat
Conversion, wavelength shift or diffusion inside the material (SSS)
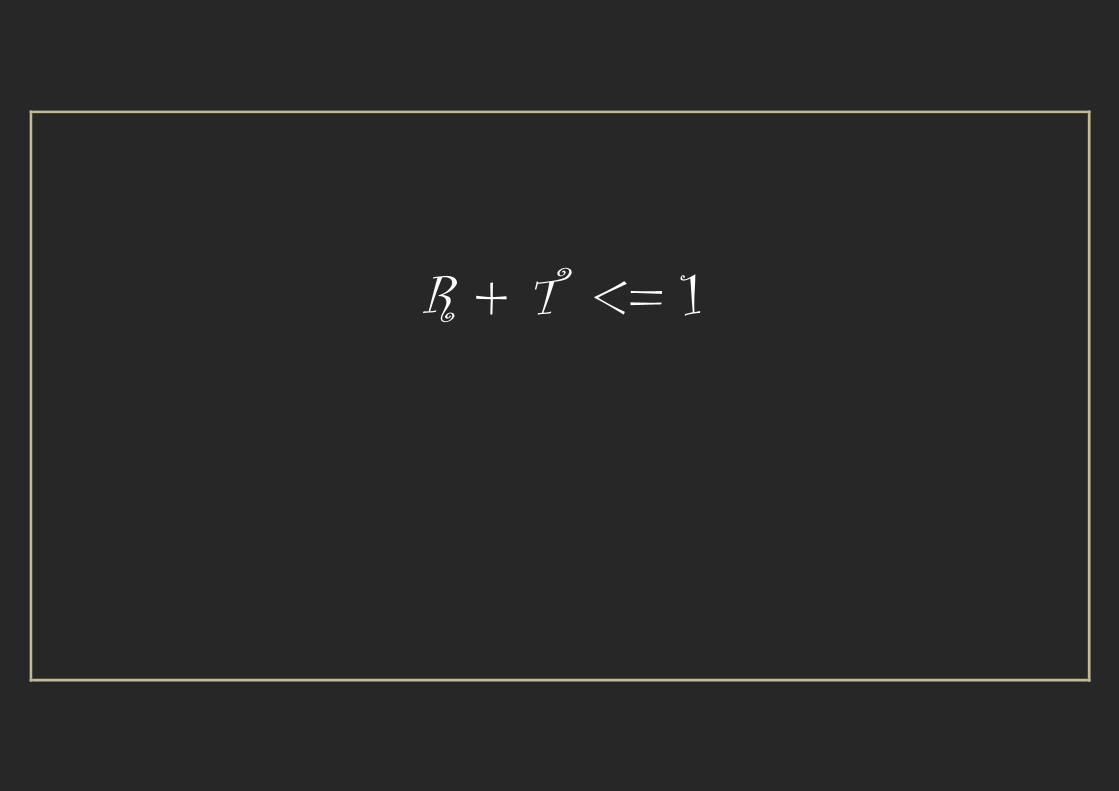
R + T <= 1

R = Reflectivity
• Also (mis)called Reflection
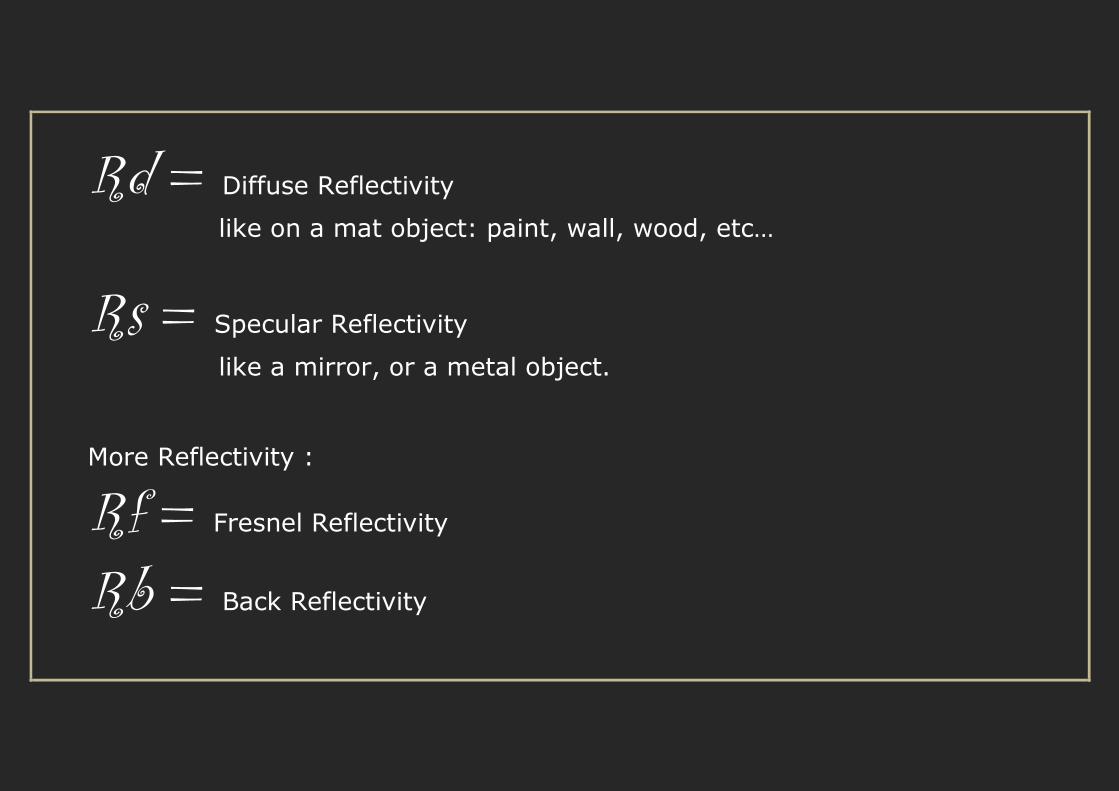
Rd = Diffuse Reflectivity
like on a mat object: paint, wall, wood, etc…
Rs = Specular Reflectivity
like a mirror, or a metal object.
More Reflectivity :
Rf = Fresnel Reflectivity
Rb = Back Reflectivity
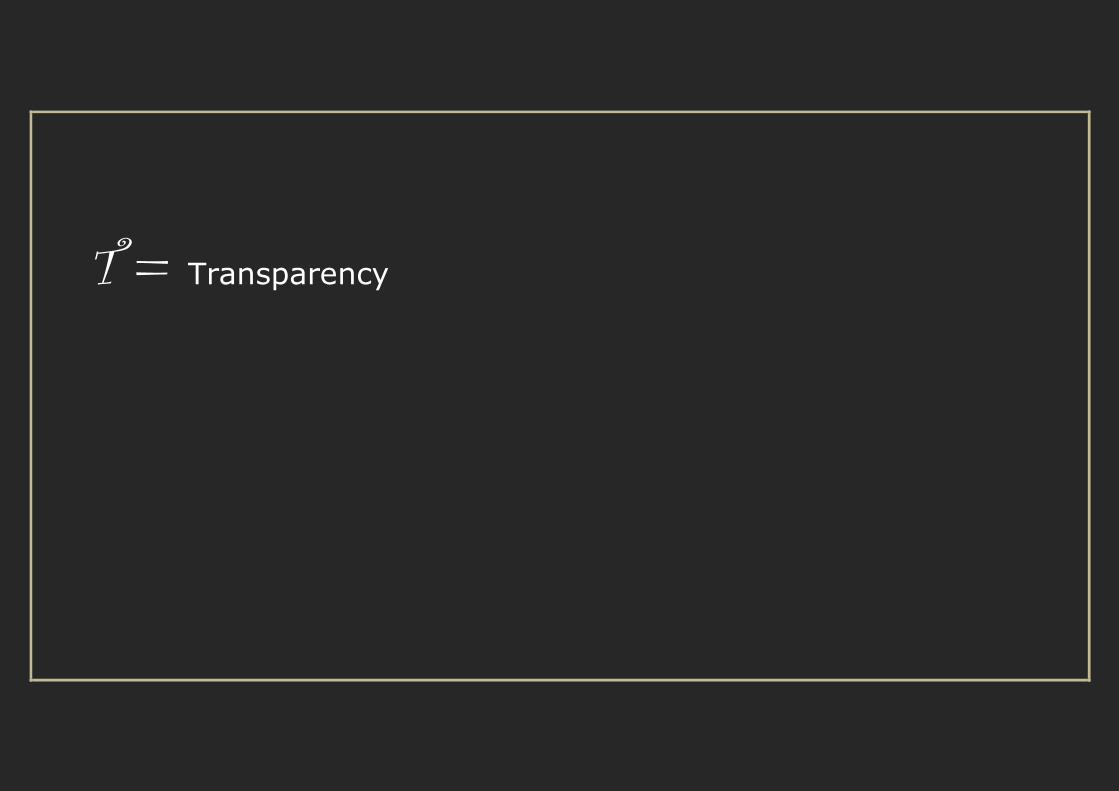
T = Transparency
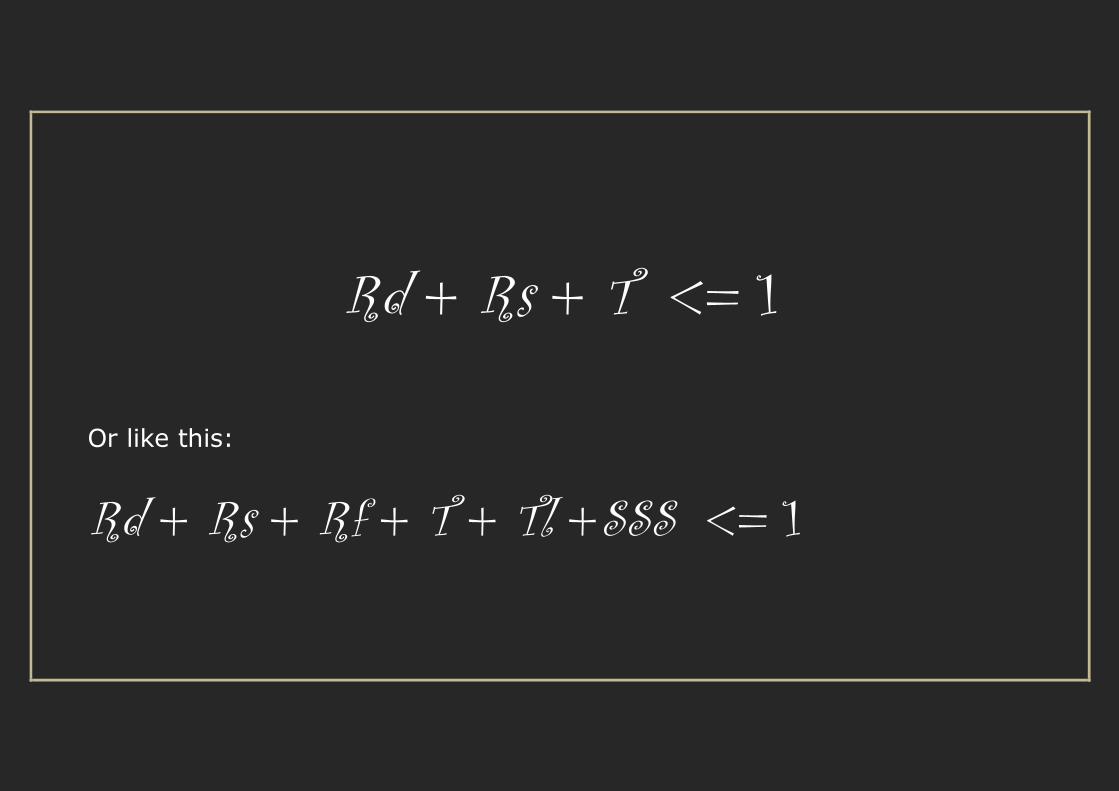
Rd + Rs + T <= 1
Or like this:
Rd + Rs + Rf + T + Tl +SSS <= 1
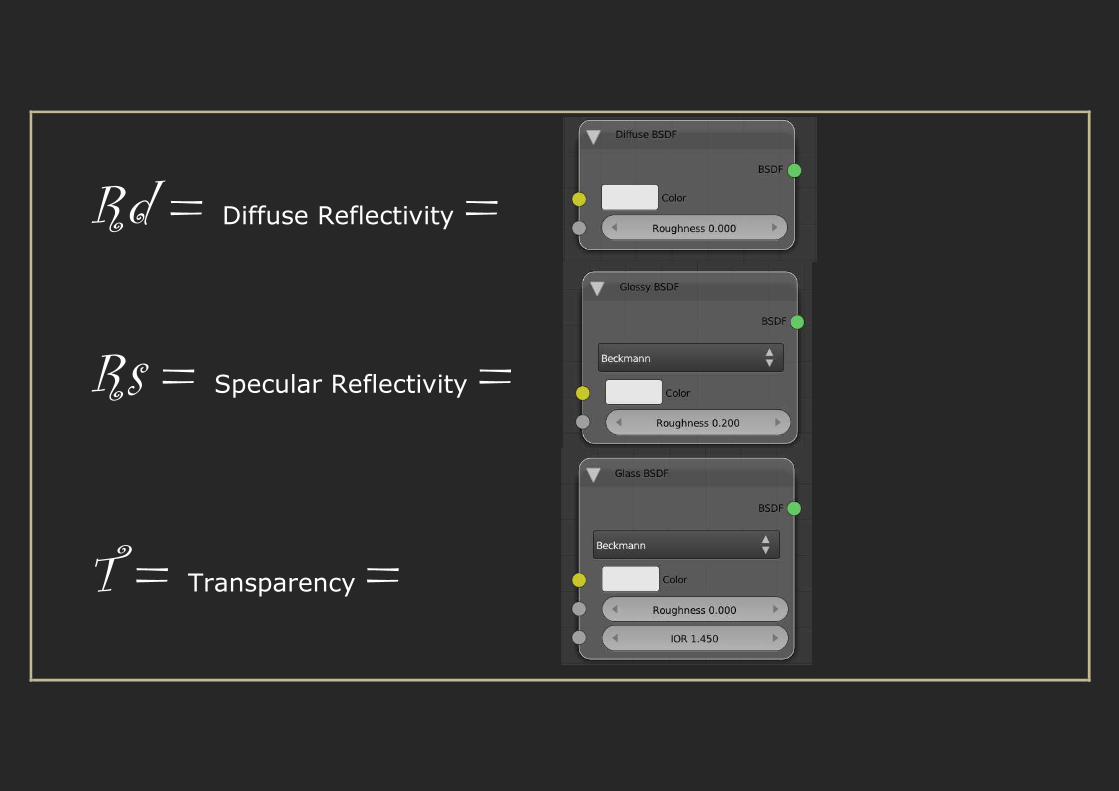
Rd = Diffuse Reflectivity =
Rs = Specular Reflectivity =
T = Transparency =
…One Minute Break…
What is this law in real life?
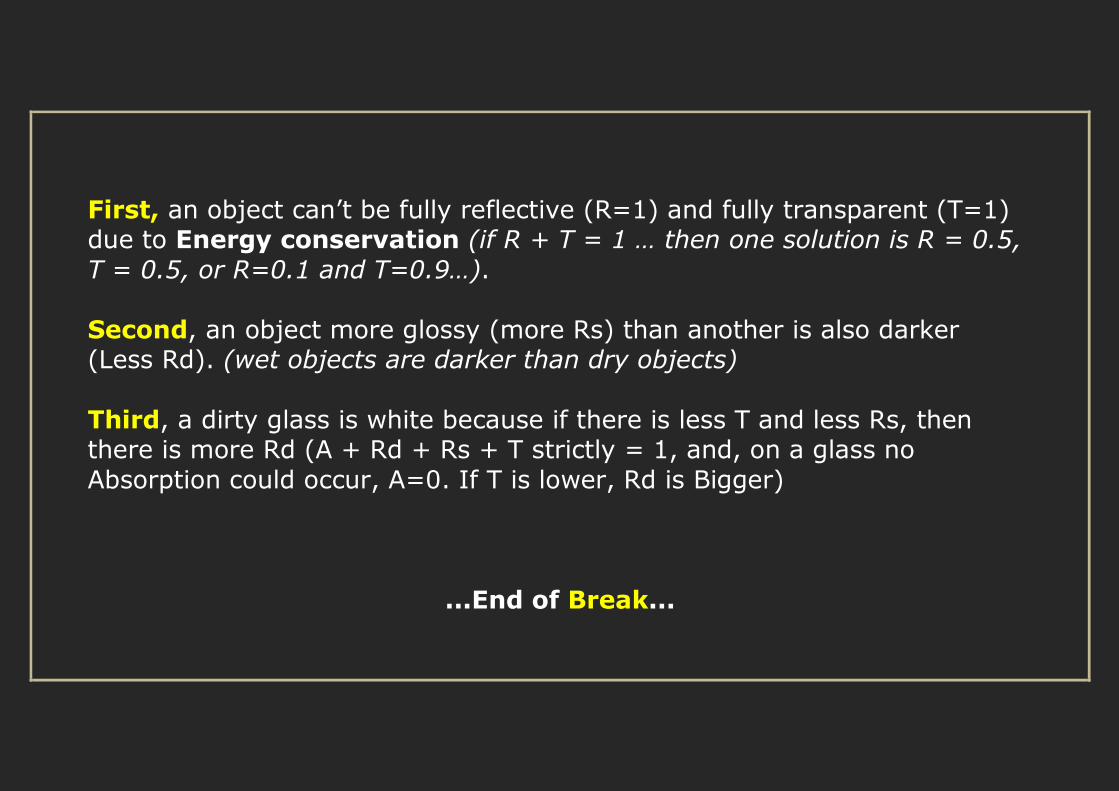
First, an object can’t be fully reflective (R=1) and fully transparent (T=1) due to Energy conservation (if R + T = 1 … then one solution is R = 0.5,
T = 0.5, or R=0.1 and T=0.9…).
Second, an object more glossy (more Rs) than another is also darker (Less Rd). (wet objects are darker than dry objects)
Third, a dirty glass is white because if there is less T and less Rs, then there is more Rd (A + Rd + Rs + T strictly = 1, and, on a glass no
Absorption could occur, A=0. If T is lower, Rd is Bigger)
...End of Break...
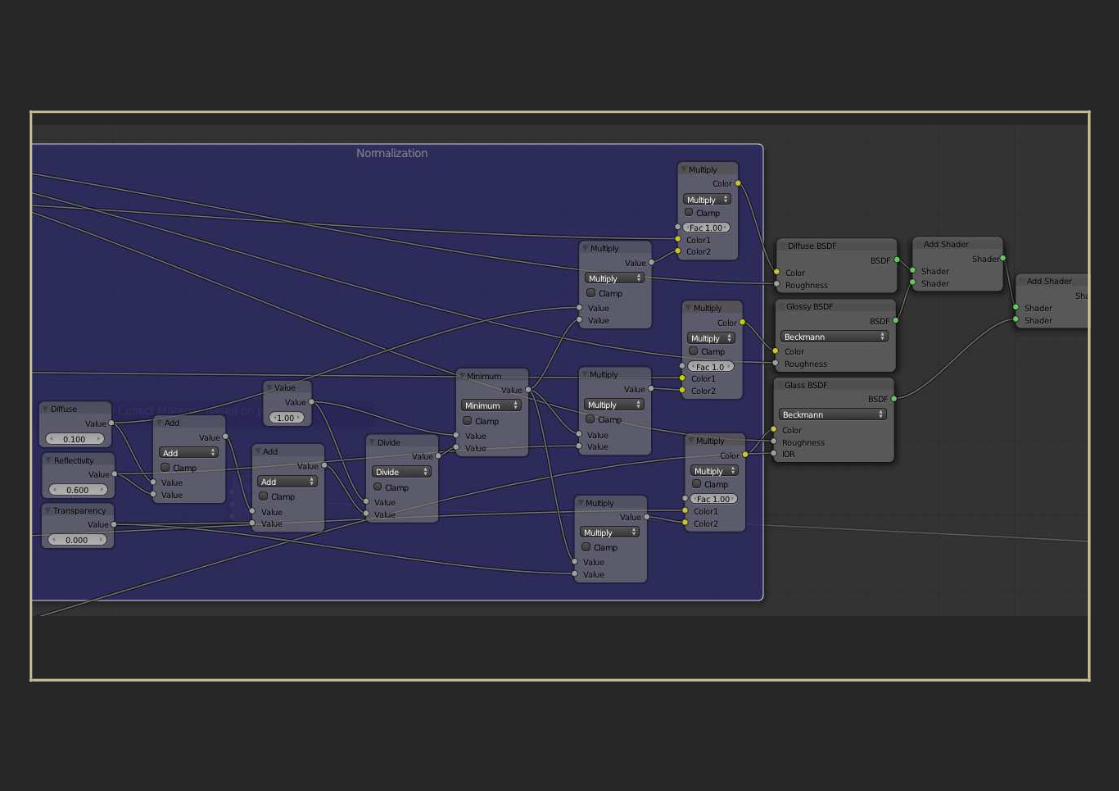
Normalization
Keep it below One !

Simplest Physically Correct Shader:
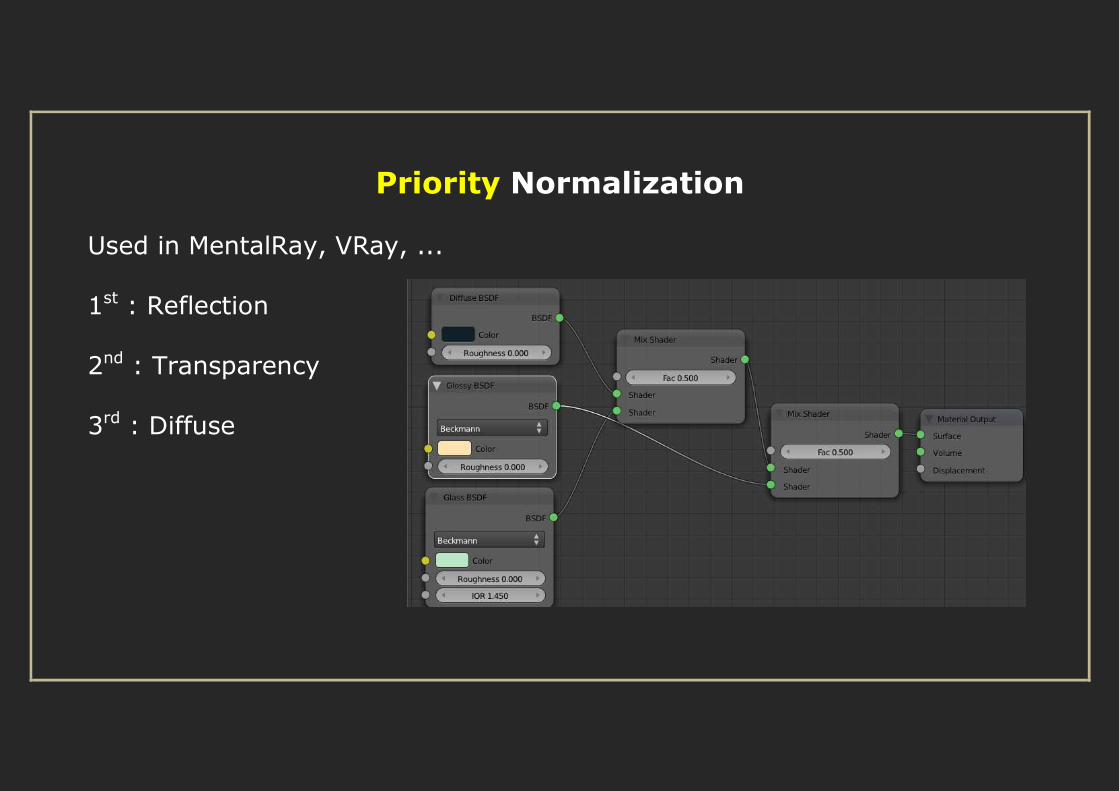
Priority Normalization
Used in MentalRay, VRay, ...
1st : Reflection
2nd : Transparency
3rd : Diffuse
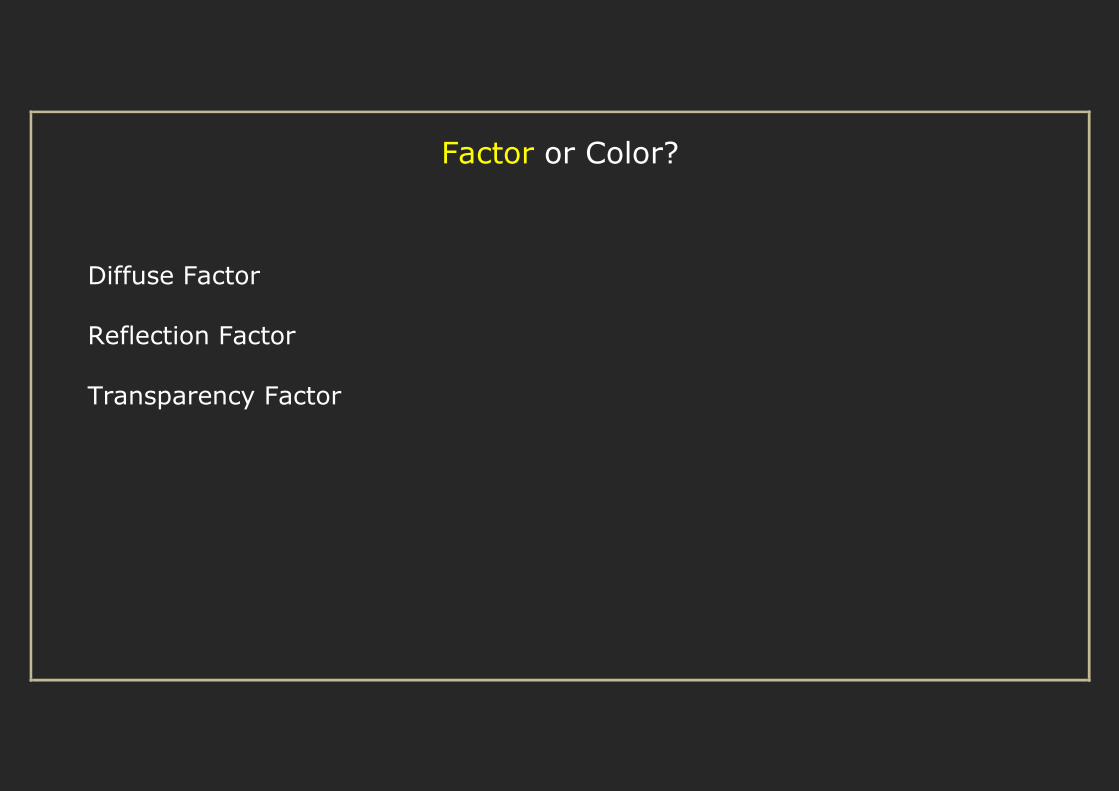
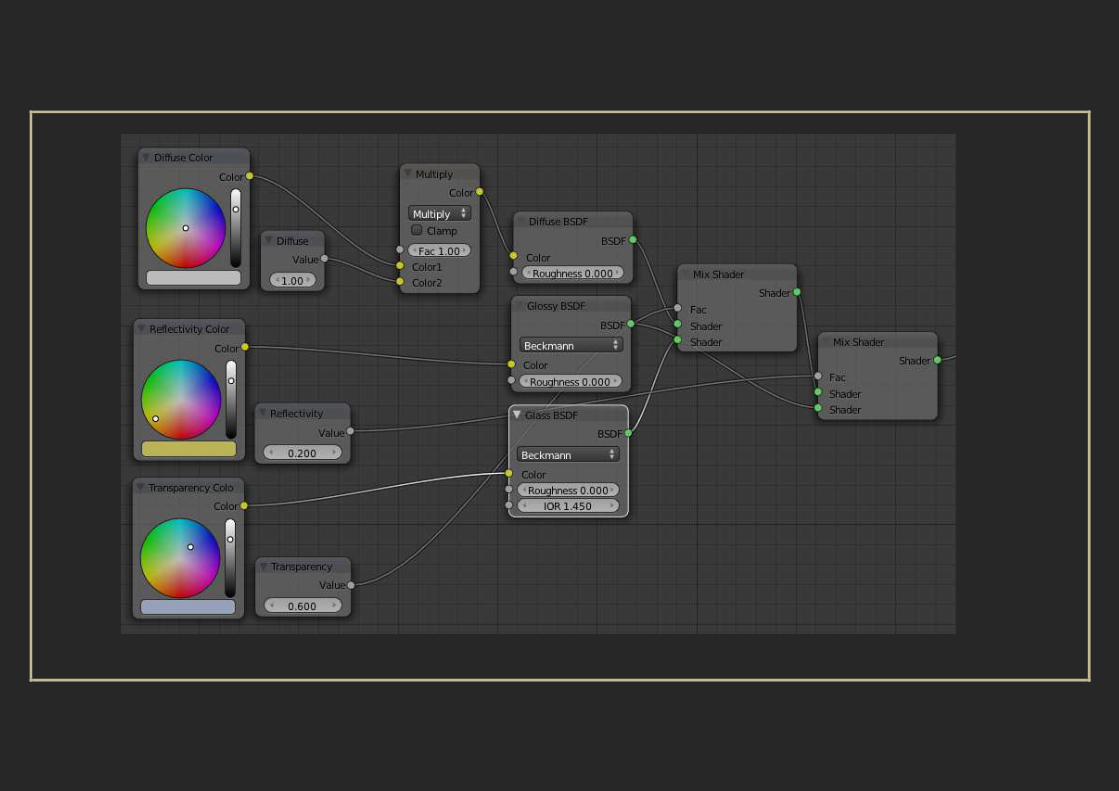
Factor or Color?
Diffuse Factor
Reflection Factor
Transparency Factor
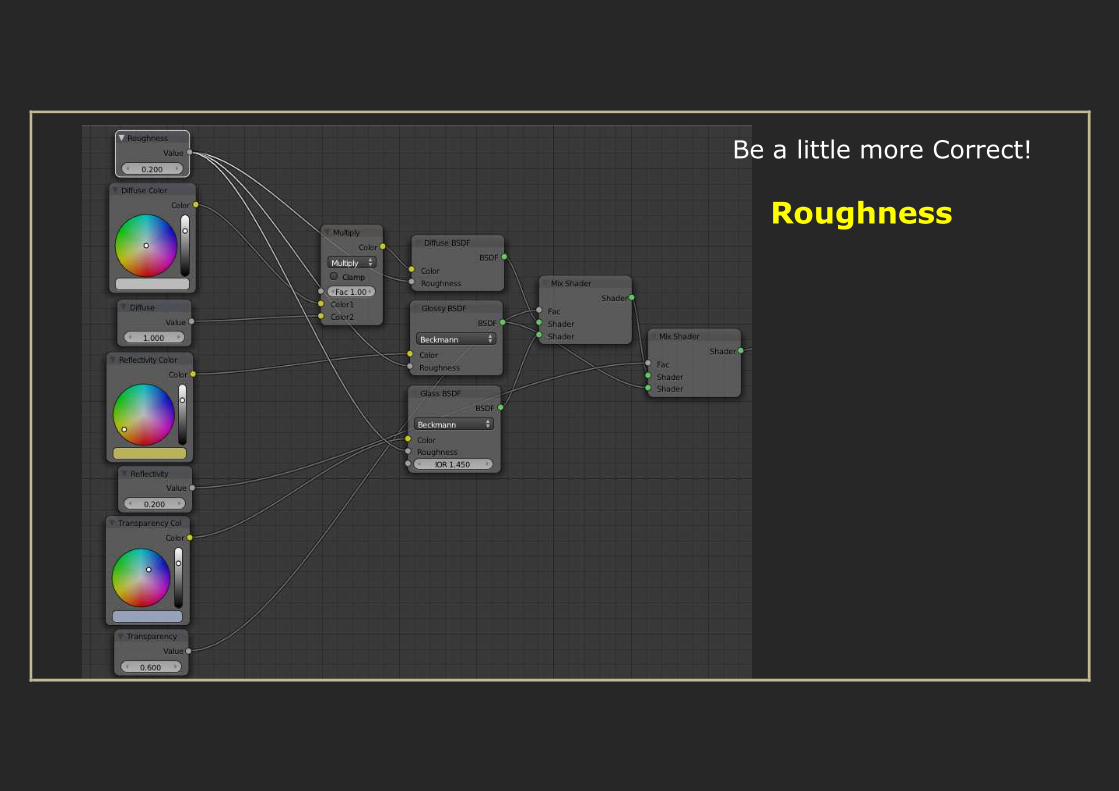
Be a little more Correct!
Roughness
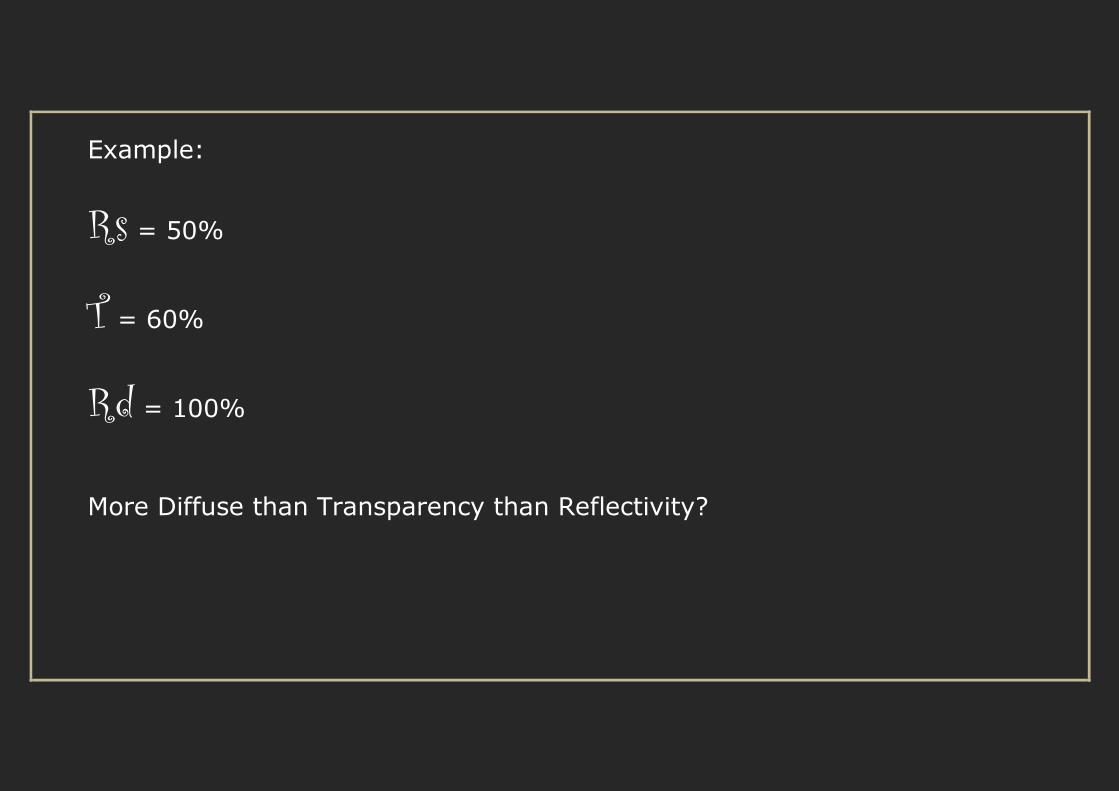
Example:
Rs = 50%
T = 60%
Rd = 100%
More Diffuse than Transparency than Reflectivity?
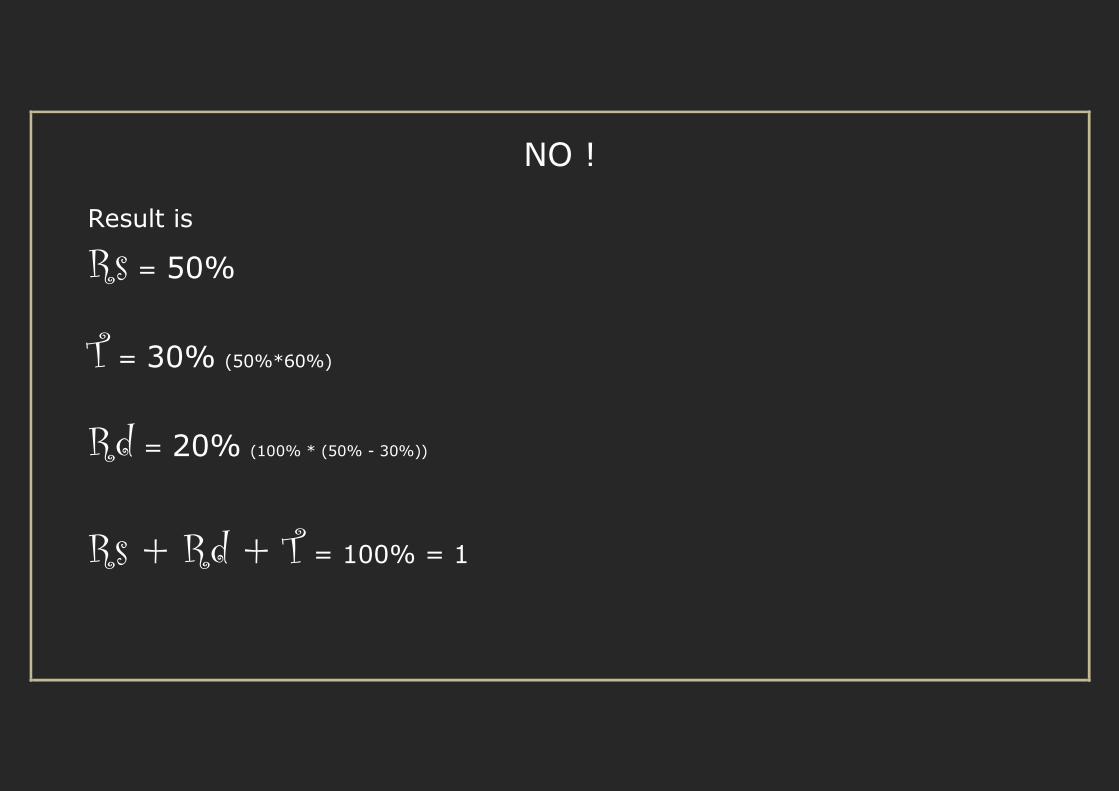
NO ! Result is
Rs = 50%
T = 30% (50%*60%)
Rd = 20% (100% * (50% - 30%))
Rs + Rd + T = 100% = 1
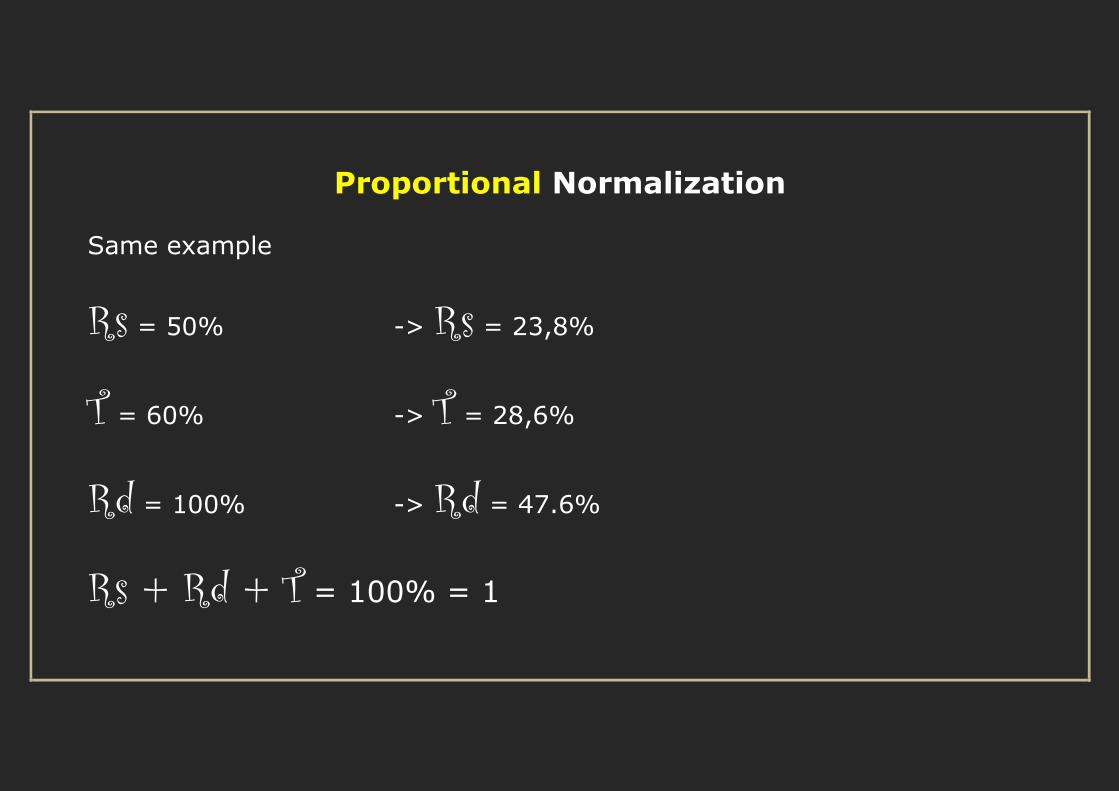
Proportional Normalization
Same example
Rs = 50% -> Rs = 23,8%
T = 60% -> T = 28,6%
Rd = 100% -> Rd = 47.6%
Rs + Rd + T = 100% = 1
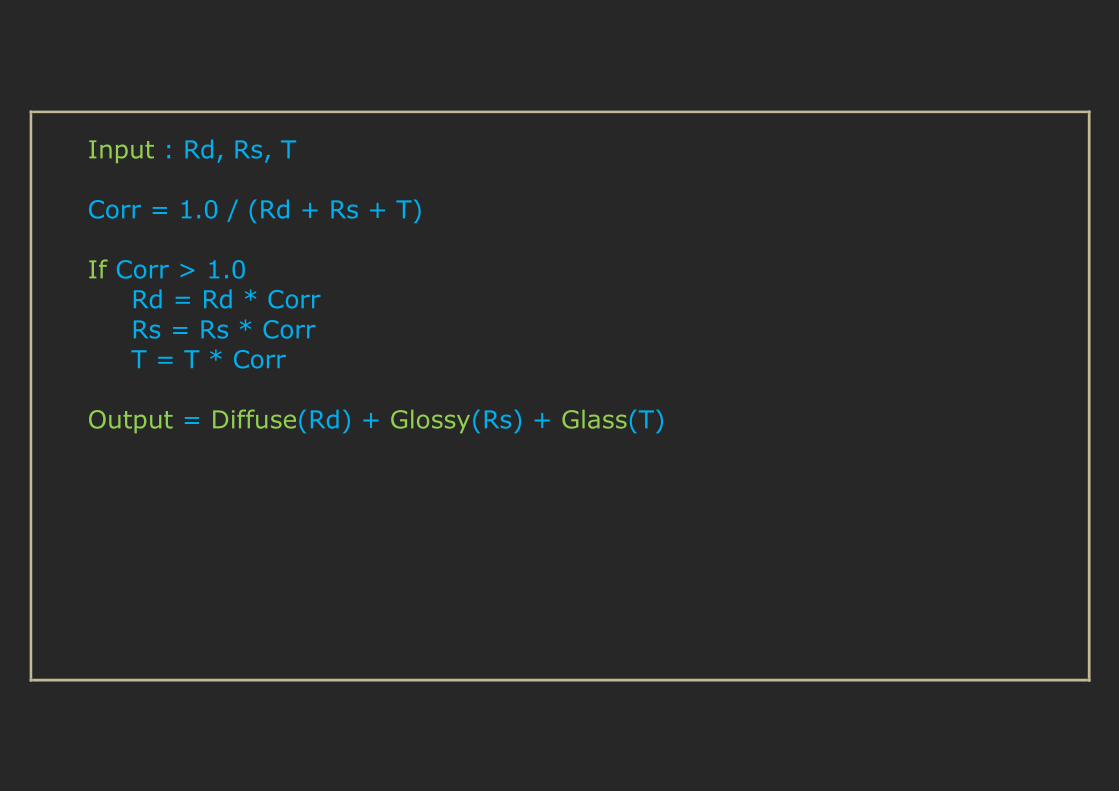
Input : Rd, Rs, T
Corr = 1.0 / (Rd + Rs + T)
If Corr > 1.0 Rd = Rd * Corr
Rs = Rs * Corr T = T * Corr
Output = Diffuse(Rd) + Glossy(Rs) + Glass(T)
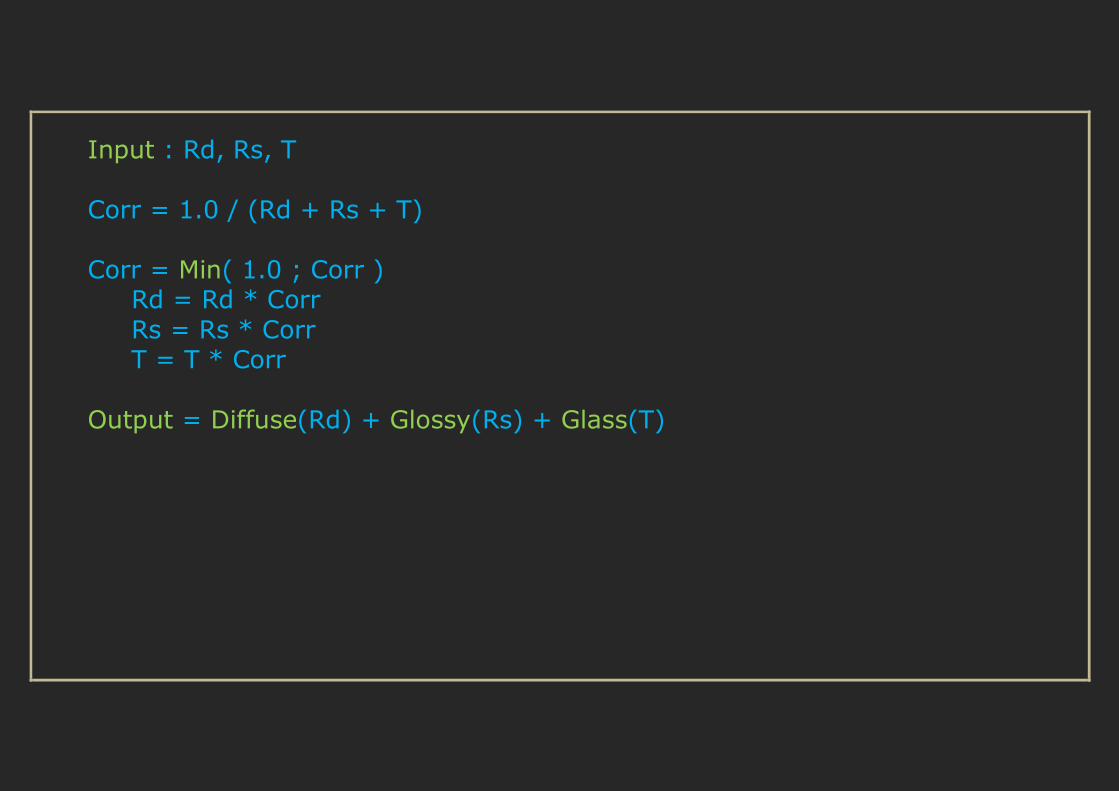
Input : Rd, Rs, T
Corr = 1.0 / (Rd + Rs + T)
Corr = Min( 1.0 ; Corr ) Rd = Rd * Corr
Rs = Rs * Corr T = T * Corr
Output = Diffuse(Rd) + Glossy(Rs) + Glass(T)
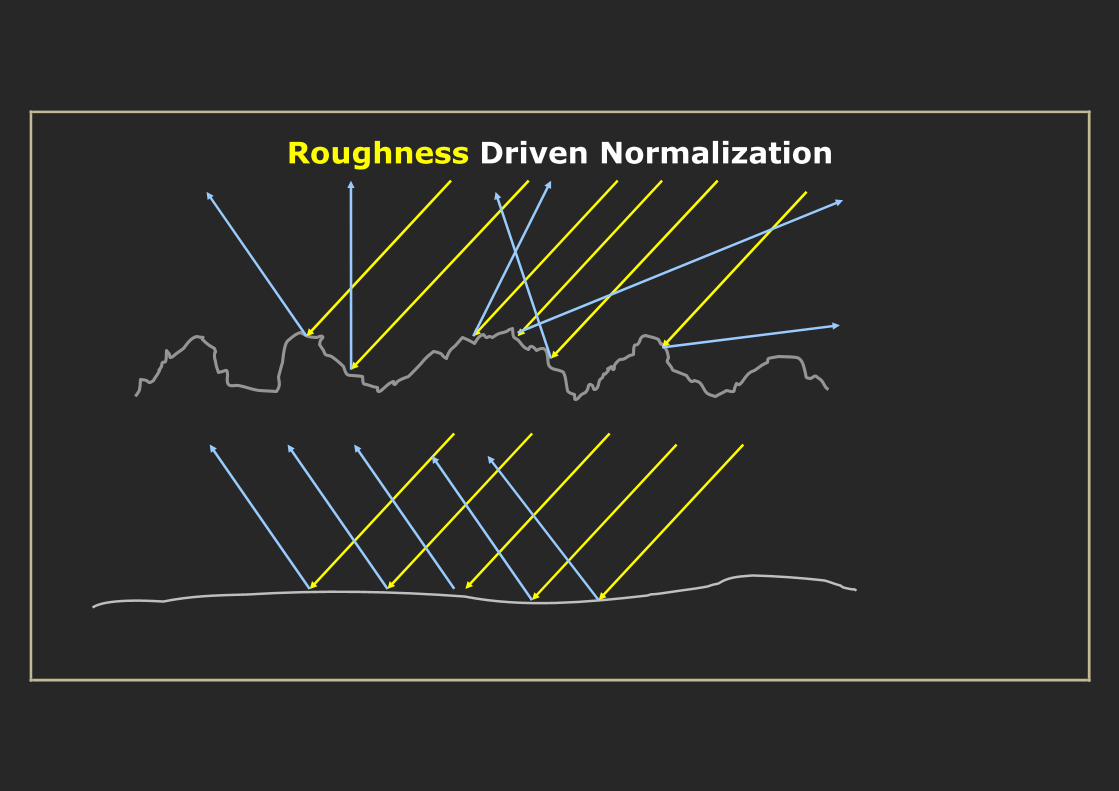
Roughness Driven Normalization
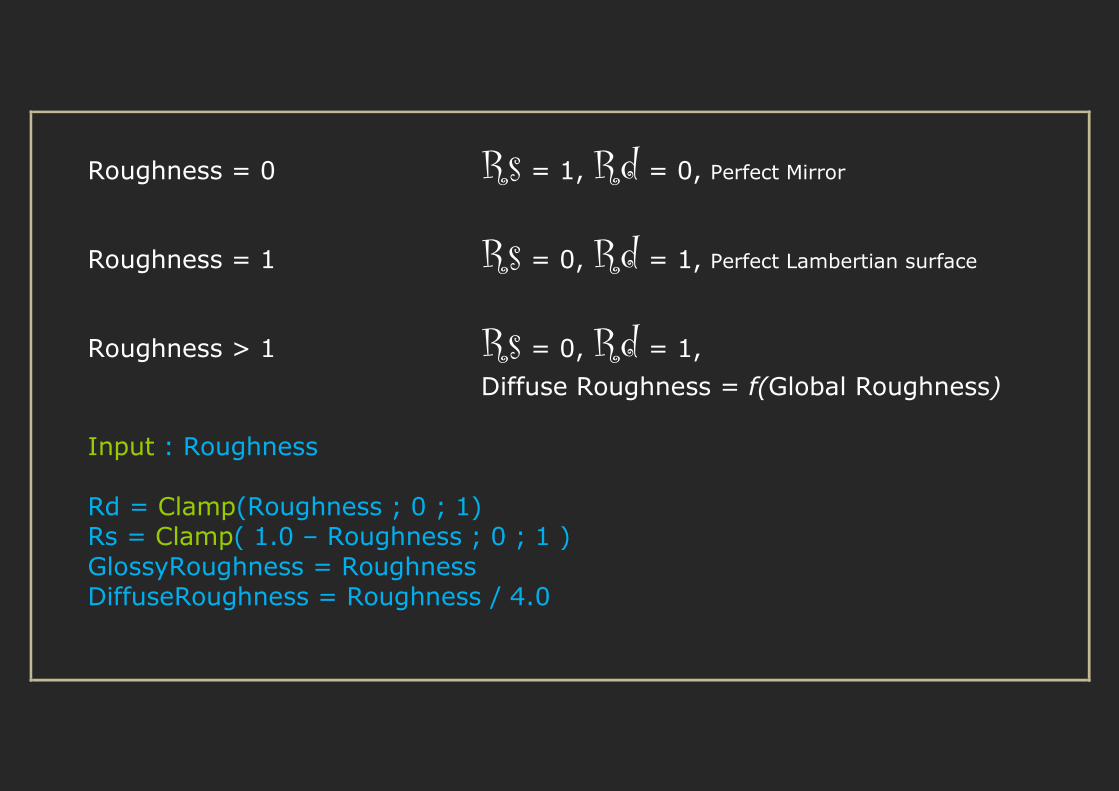
Roughness = 0 Rs = 1, Rd = 0, Perfect Mirror
Roughness = 1 Rs = 0, Rd = 1, Perfect Lambertian surface
Roughness > 1 Rs = 0, Rd = 1,
Diffuse Roughness = f(Global Roughness)
Input : Roughness
Rd = Clamp(Roughness ; 0 ; 1) Rs = Clamp( 1.0 – Roughness ; 0 ; 1 )
GlossyRoughness = Roughness
DiffuseRoughness = Roughness / 4.0
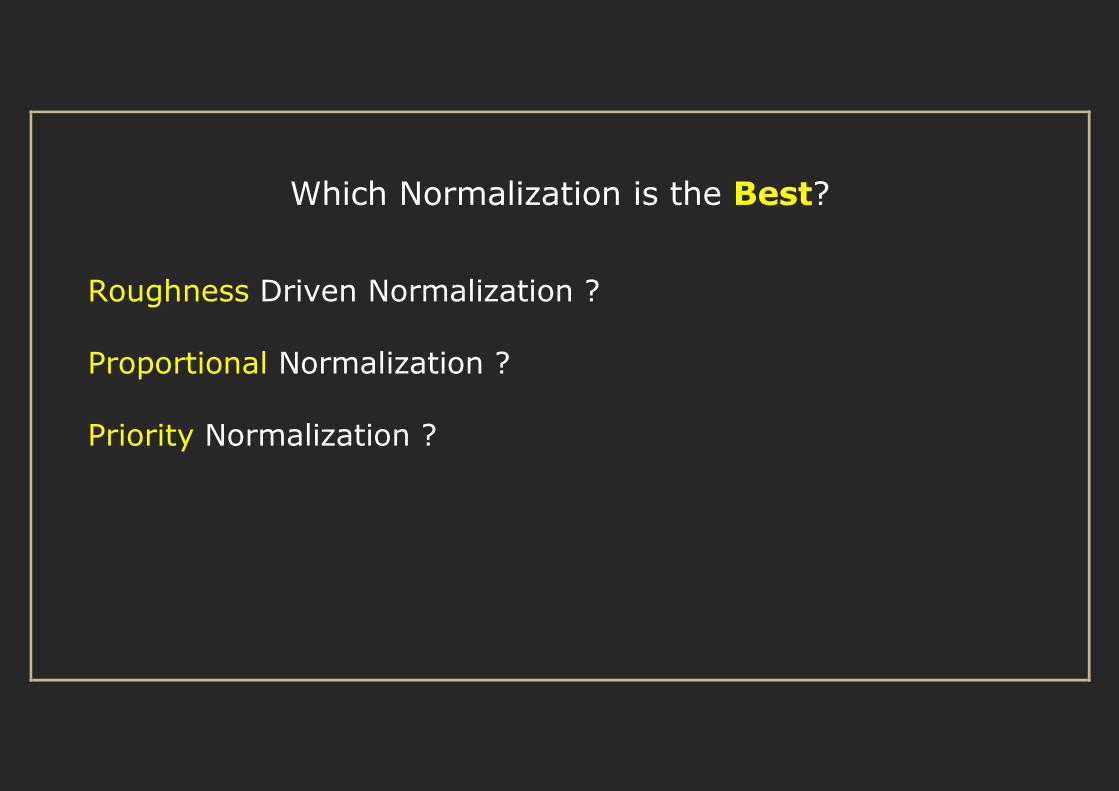
Which Normalization is the Best?
Roughness Driven Normalization ?
Proportional Normalization ?
Priority Normalization ?
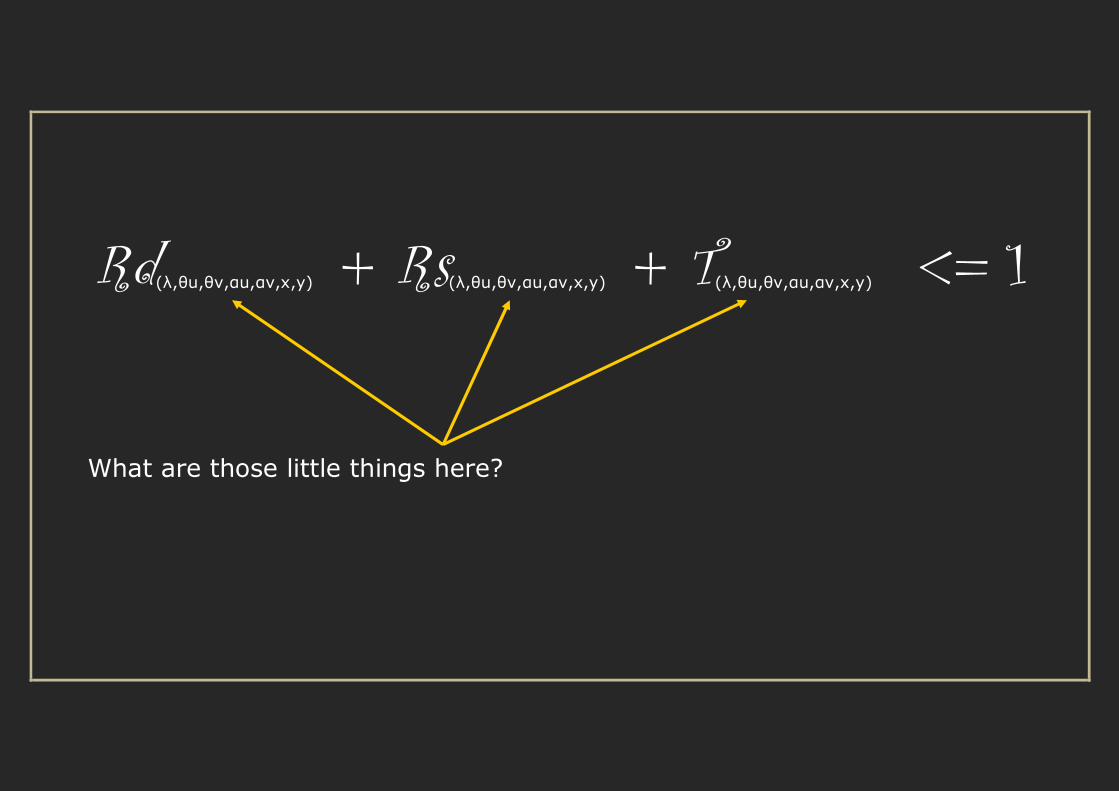
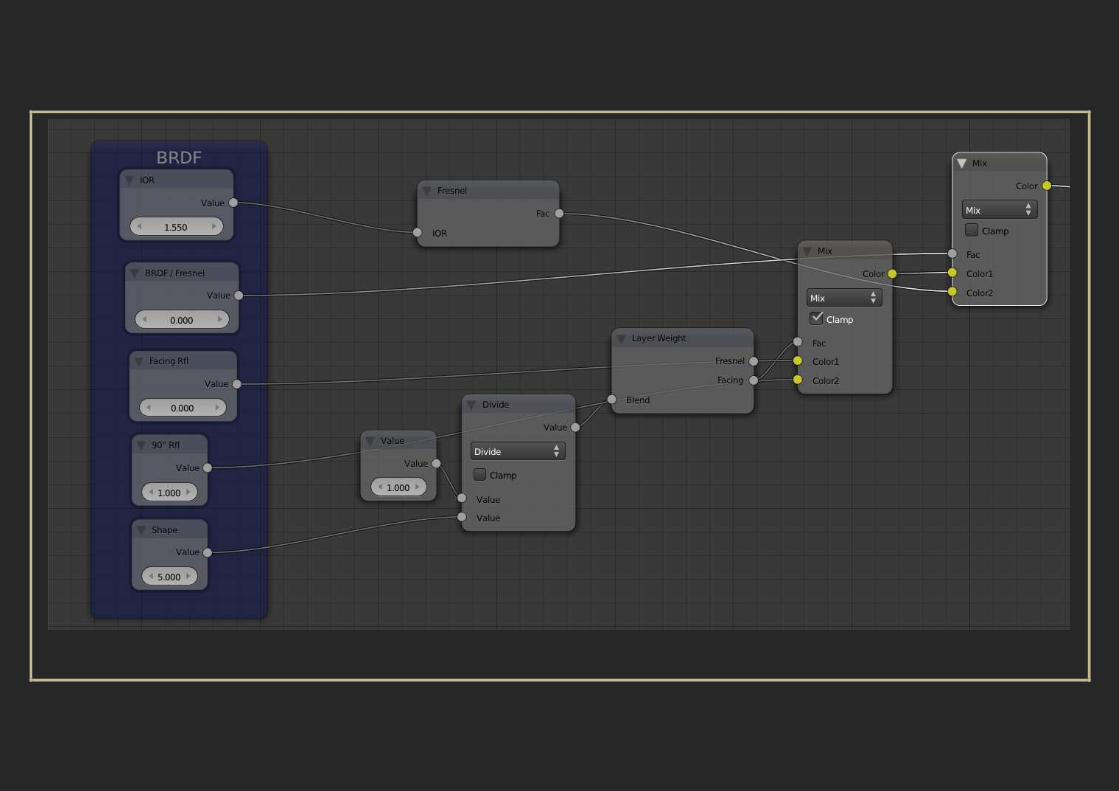
Rd(λ,θu,θv,αu,αv,x,y) + Rs(λ,θu,θv,αu,αv,x,y) + T(λ,θu,θv,αu,αv,x,y) <= 1
What are those little things here?
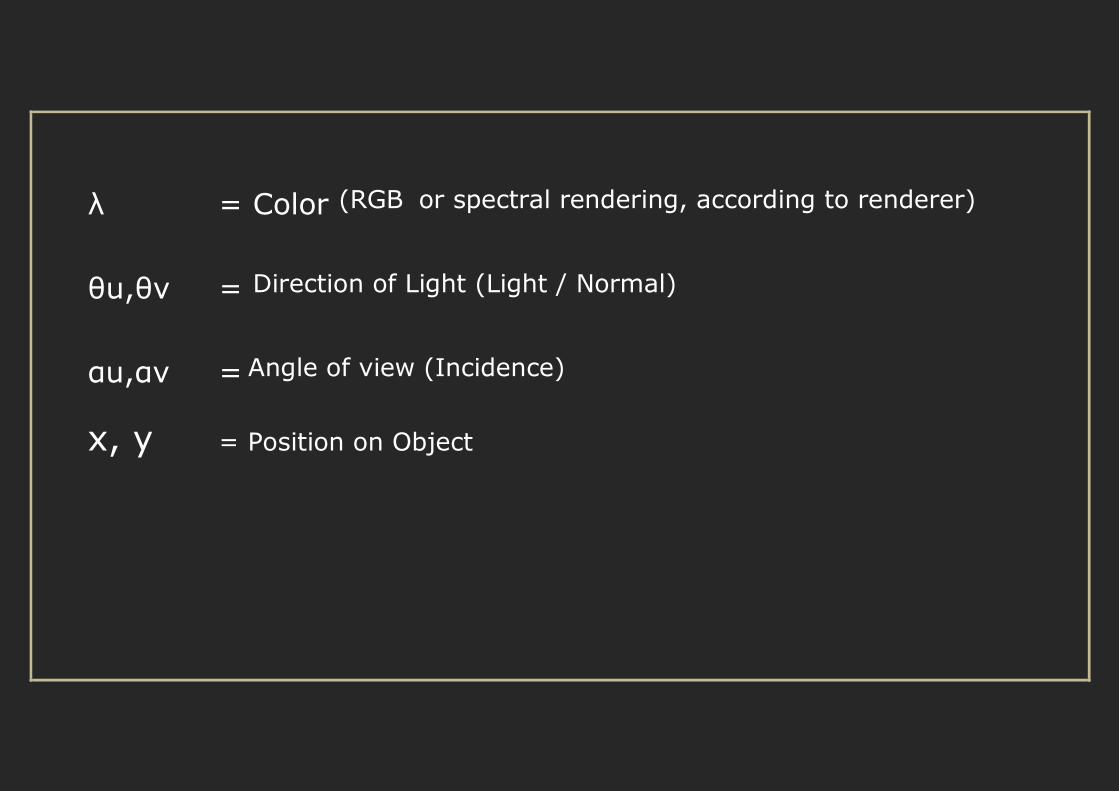
λ = Color (RGB or spectral rendering, according to renderer)
θu,θv = Direction of Light (Light / Normal)
αu,αv = Angle of view (Incidence)
x, y = Position on Object
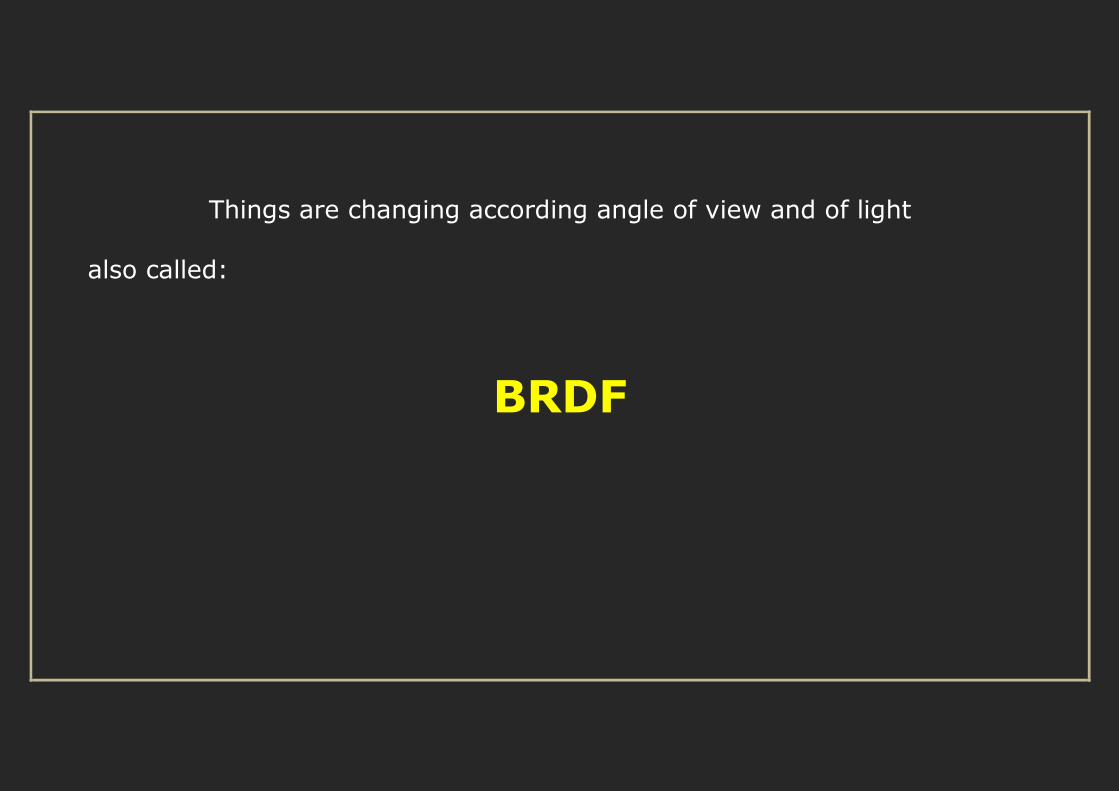
Things are changing according angle of view and of light
also called:
BRDF
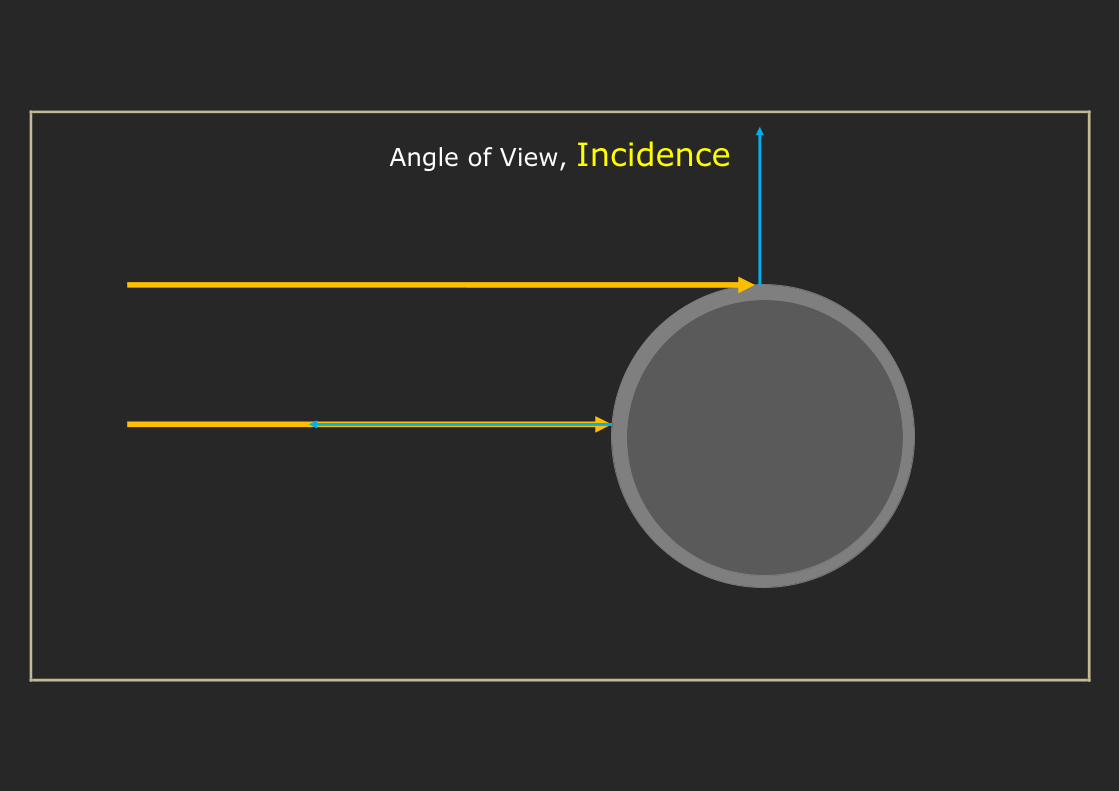
Angle of View, Incidence
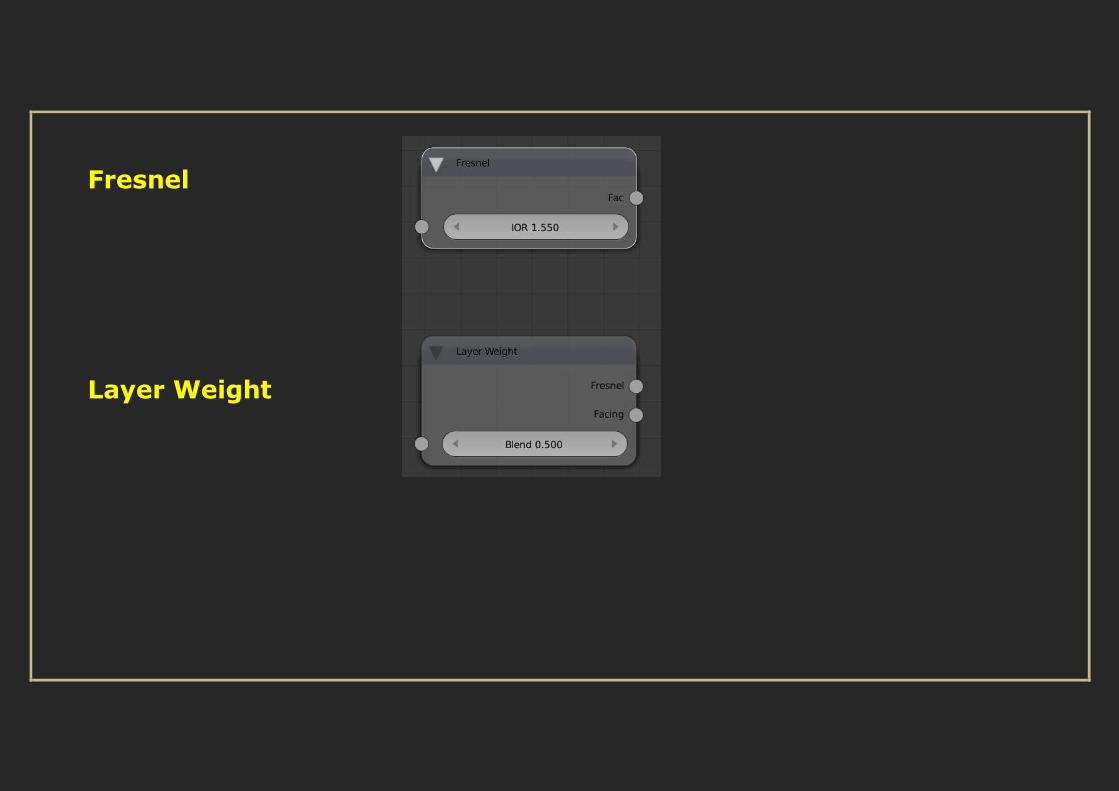
Fresnel
Layer Weight
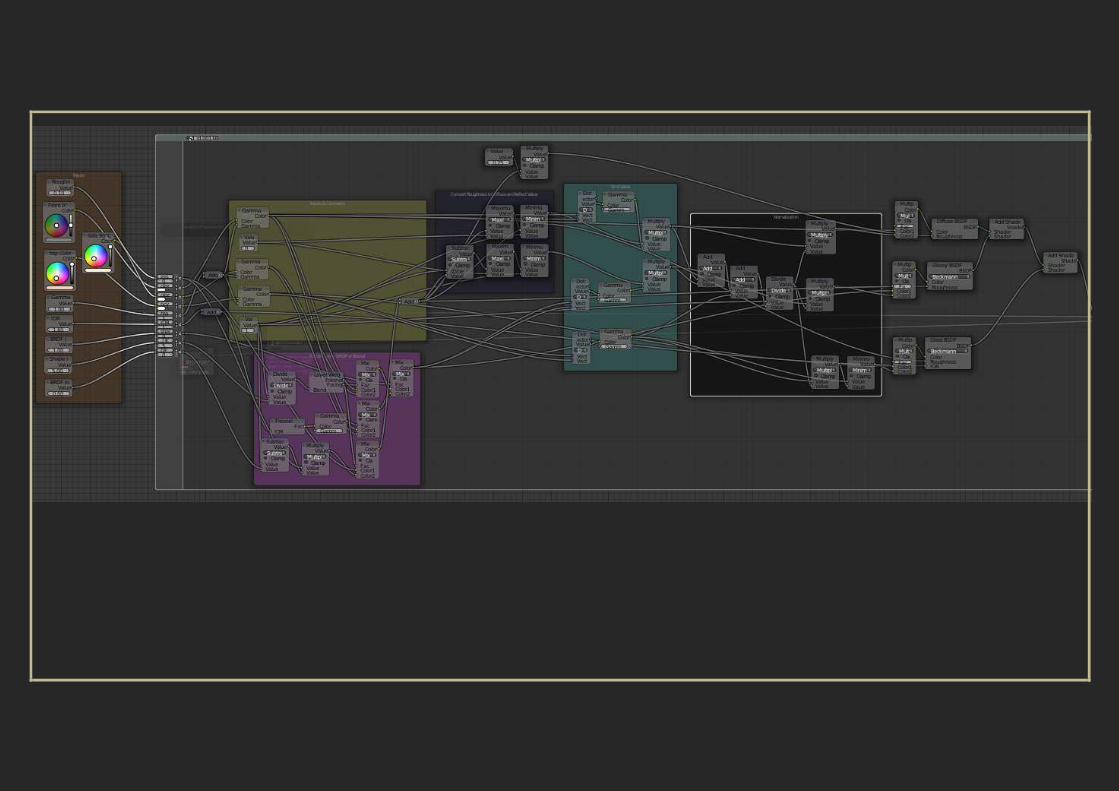
Is it Enough Correct?

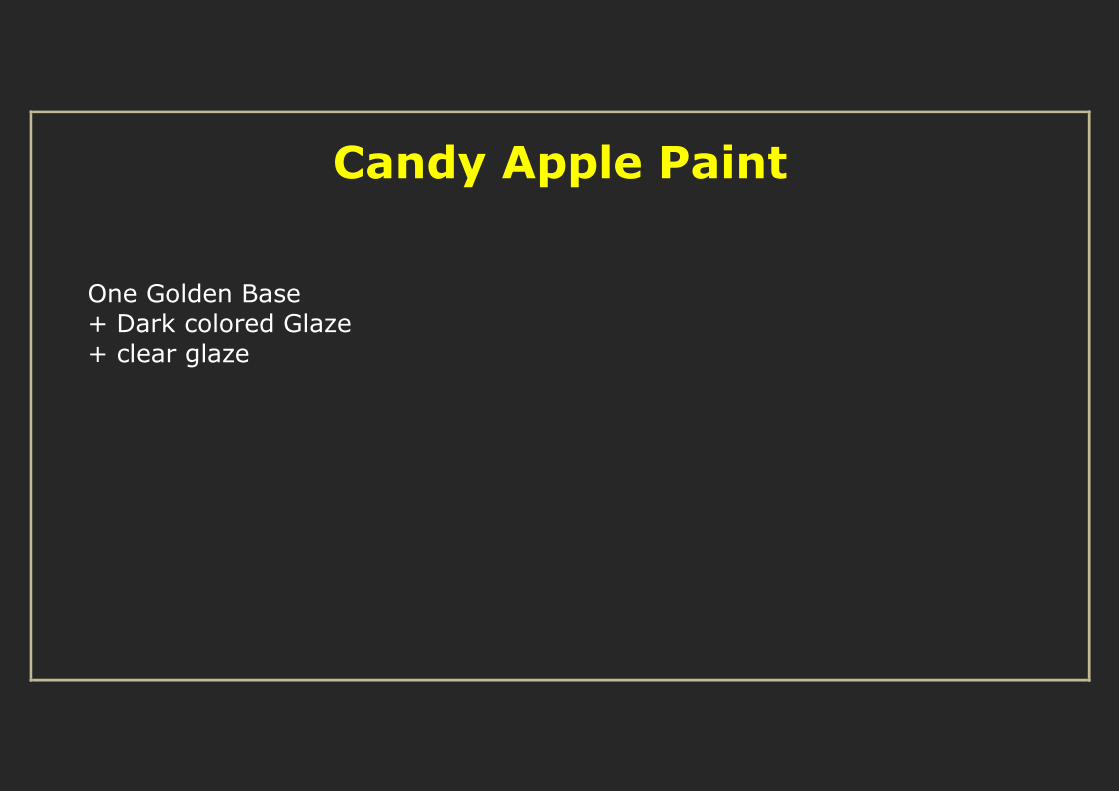
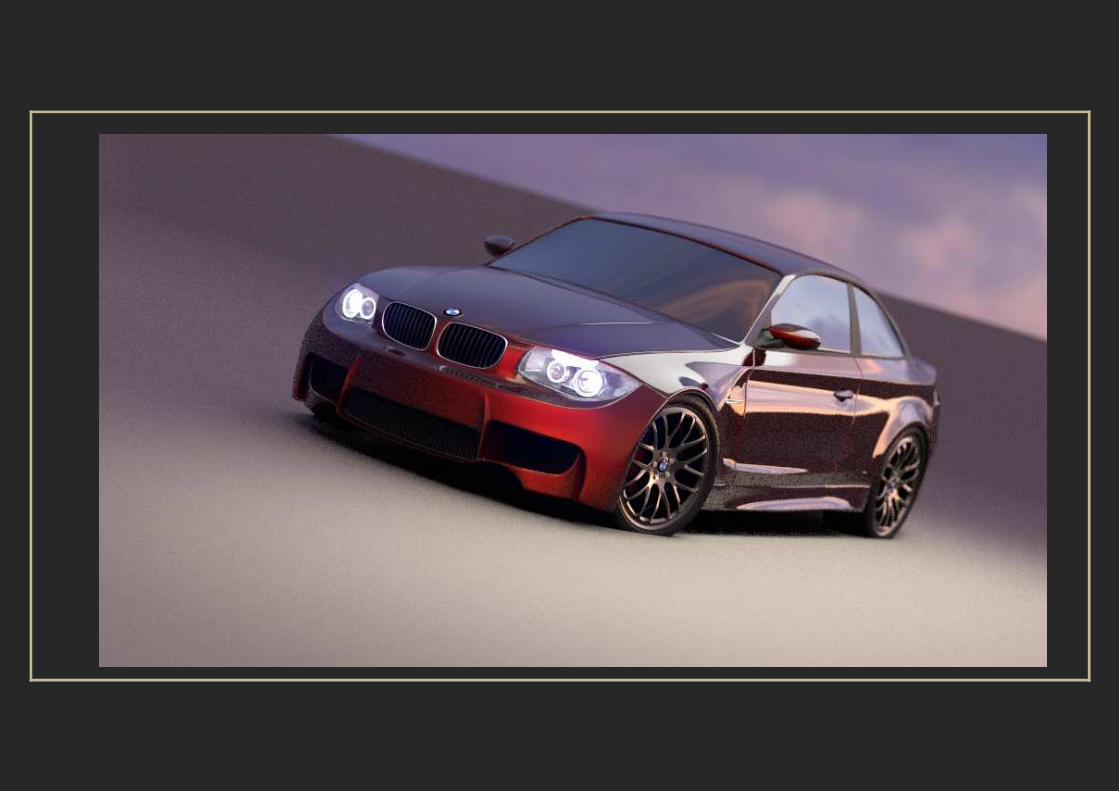
Candy Apple Paint
One Golden Base + Dark colored Glaze
+ clear glaze
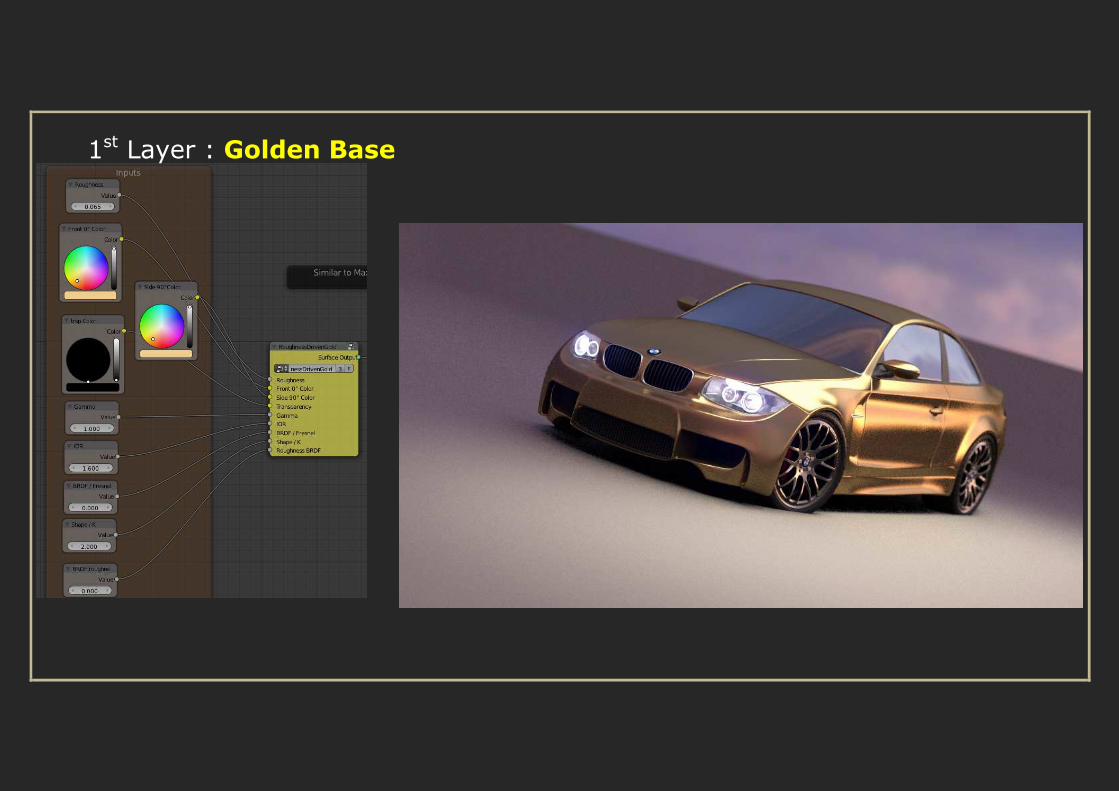
1st Layer : Golden Base
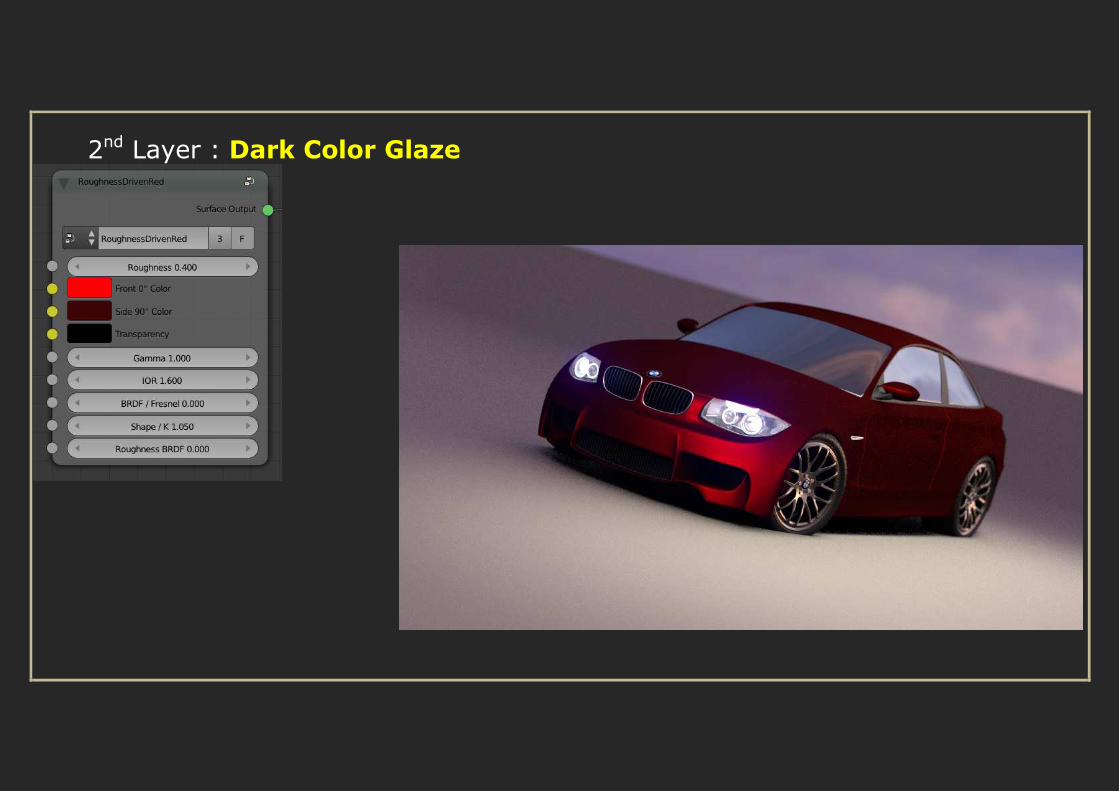
2nd Layer : Dark Color Glaze
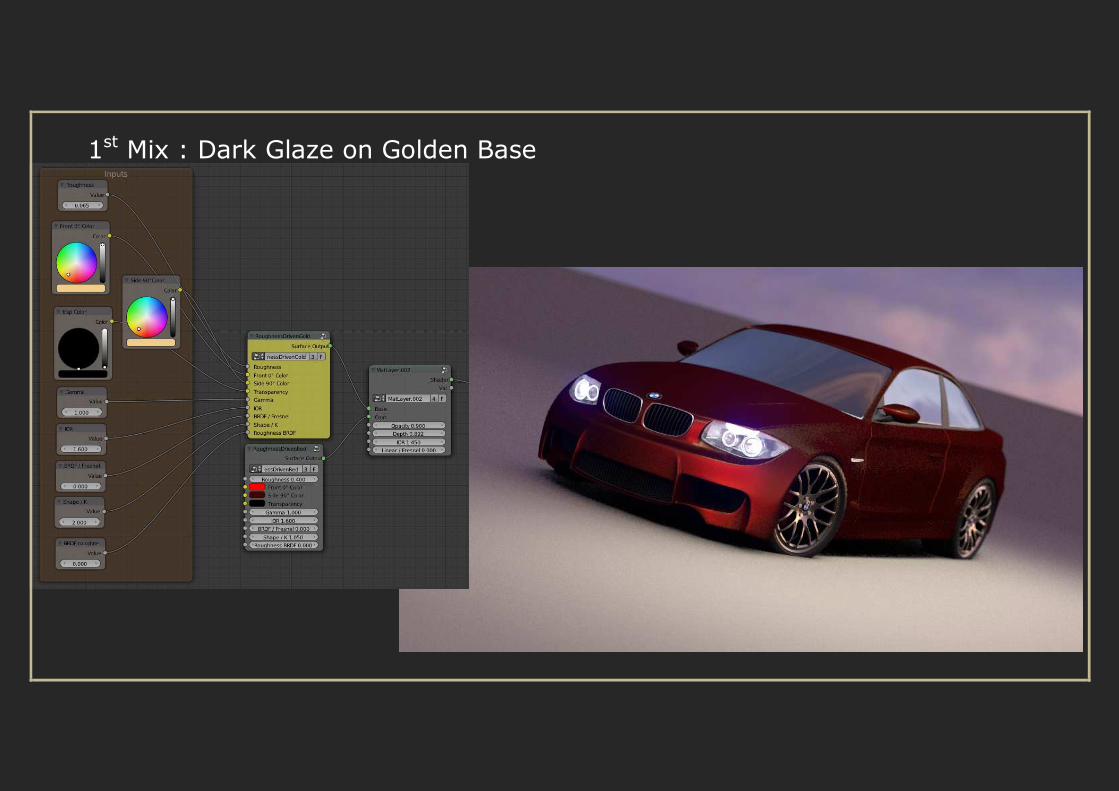
1st Mix : Dark Glaze on Golden Base
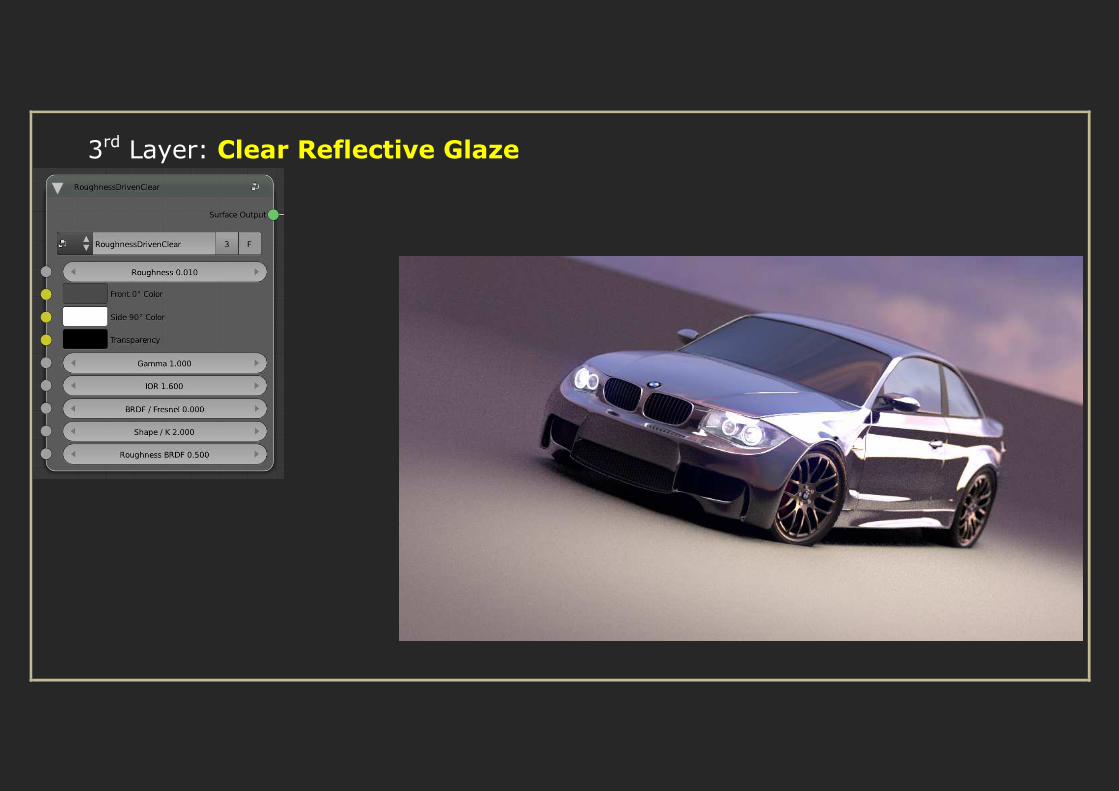
3rd Layer: Clear Reflective Glaze
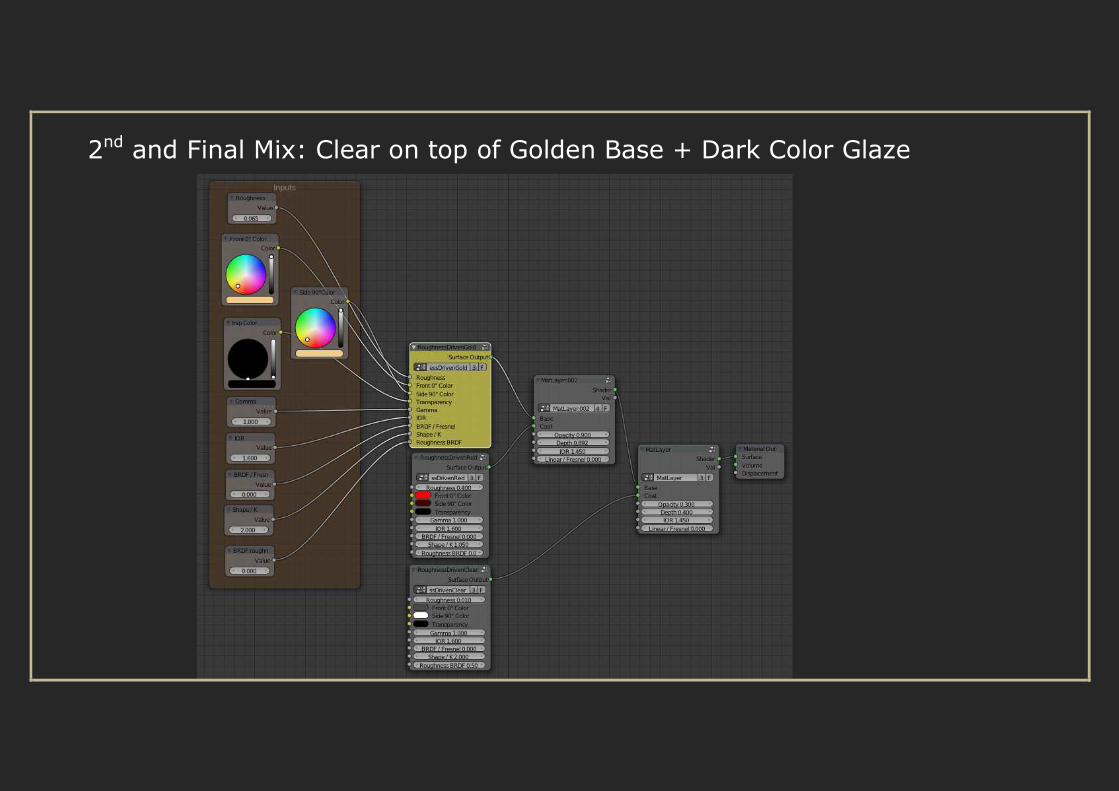
2nd and Final Mix: Clear on top of Golden Base + Dark Color Glaze
Some (good) Advices
• Work with Linear Workspace
• Always keep your input datas outside of Shader Group
• Beware of CPU node limitation
• KISS : Keep It Stupidly Simple
The END
Thanks for your attention
It’s Time for Questions!
See you next year for same talk done with OSL!
Contact me: