How to make a Shopping List Strictly Dancing Tri Fold Box · PDF fileStrictly Dancing Tri Fold...
19
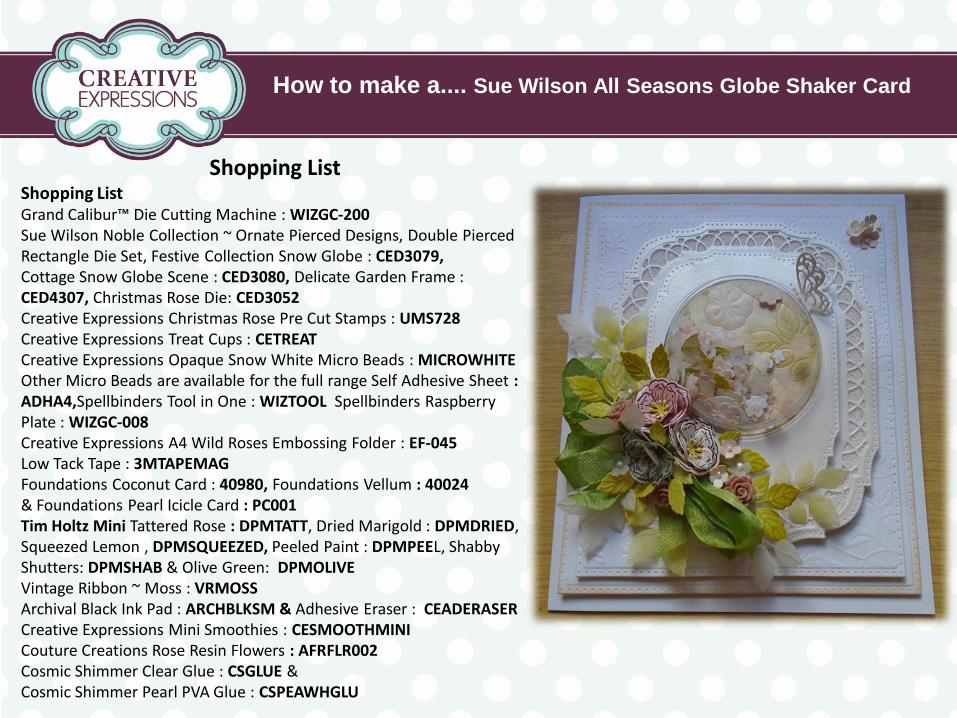
How to make a.... Strictly Dancing Tri Fold Box Shopping List:- Grand Calibur™ Die Cutting Machine : WIZCAL Sue Wilson Austrian Collection Background Die ( Collection 2 ) : CED2201 Creative Expressions Singles Stamps ~ Salsa : UMS186 , American Smooth : UMS183 & Paso Doble : UMS184 Spellbinders All in One Tool : WIZTOOL Wrinkled Edged Champagne Ribbon :NK02 Foundations A4 Teal Card : 40985 A3 Card or Coconut A4 Card : 40980 Cosmic Shimmer Clear Glue : CSGLUE & Silicone Glue Grime Boss : GB30 & Cut `n` Dry Foam : FOAMCUT Creative Expressions Cameo Embellishment : CAMEO9 Non-Stick craft sheet: CRAFTSHEET Clear and Resist Ink Pad : CRPAD Cosmic Shimmer Viola Black Embossing Powder : CSEPVIOBLK Shopping List Shopping List Grand Calibur™ Die Cutting Machine : WIZGC-200 Sue Wilson Noble Collection ~ Ornate Pierced Designs, Double Pierced Rectangle Die Set, Festive Collection Snow Globe : CED3079, Cottage Snow Globe Scene : CED3080, Delicate Garden Frame : CED4307, Christmas Rose Die: CED3052 Creative Expressions Christmas Rose Pre Cut Stamps : UMS728 Creative Expressions Treat Cups : CETREAT Creative Expressions Opaque Snow White Micro Beads : MICROWHITE Other Micro Beads are available for the full range Self Adhesive Sheet : ADHA4,Spellbinders Tool in One : WIZTOOL Spellbinders Raspberry Plate : WIZGC-008 Creative Expressions A4 Wild Roses Embossing Folder : EF-045 Low Tack Tape : 3MTAPEMAG Foundations Coconut Card : 40980, Foundations Vellum : 40024 & Foundations Pearl Icicle Card : PC001 Tim Holtz Mini Tattered Rose : DPMTATT, Dried Marigold : DPMDRIED, Squeezed Lemon , DPMSQUEEZED, Peeled Paint : DPMPEEL, Shabby Shutters: DPMSHAB & Olive Green: DPMOLIVE Vintage Ribbon ~ Moss : VRMOSS Archival Black Ink Pad : ARCHBLKSM & Adhesive Eraser : CEADERASER Creative Expressions Mini Smoothies : CESMOOTHMINI Couture Creations Rose Resin Flowers : AFRFLR002 Cosmic Shimmer Clear Glue : CSGLUE & Cosmic Shimmer Pearl PVA Glue : CSPEAWHGLU How to make a.... Sue Wilson All Seasons Globe Shaker Card
Transcript of How to make a Shopping List Strictly Dancing Tri Fold Box · PDF fileStrictly Dancing Tri Fold...
How to make a....
Strictly Dancing Tri Fold Box
Shopping List:- Grand Calibur™ Die Cutting Machine : WIZCAL Sue Wilson Austrian Collection Background Die ( Collection 2 ) : CED2201 Creative Expressions Singles Stamps ~ Salsa : UMS186 , American Smooth : UMS183 & Paso Doble : UMS184 Spellbinders All in One Tool : WIZTOOL Wrinkled Edged Champagne Ribbon :NK02 Foundations A4 Teal Card : 40985 A3 Card or Coconut A4 Card : 40980 Cosmic Shimmer Clear Glue : CSGLUE & Silicone Glue Grime Boss : GB30 & Cut `n` Dry Foam : FOAMCUT Creative Expressions Cameo Embellishment : CAMEO9 Non-Stick craft sheet: CRAFTSHEET Clear and Resist Ink Pad : CRPAD Cosmic Shimmer Viola Black Embossing Powder : CSEPVIOBLK
Shopping List Shopping List Grand Calibur™ Die Cutting Machine : WIZGC-200 Sue Wilson Noble Collection ~ Ornate Pierced Designs, Double Pierced Rectangle Die Set, Festive Collection Snow Globe : CED3079, Cottage Snow Globe Scene : CED3080, Delicate Garden Frame : CED4307, Christmas Rose Die: CED3052 Creative Expressions Christmas Rose Pre Cut Stamps : UMS728 Creative Expressions Treat Cups : CETREAT Creative Expressions Opaque Snow White Micro Beads : MICROWHITE Other Micro Beads are available for the full range Self Adhesive Sheet : ADHA4,Spellbinders Tool in One : WIZTOOL Spellbinders Raspberry Plate : WIZGC-008 Creative Expressions A4 Wild Roses Embossing Folder : EF-045 Low Tack Tape : 3MTAPEMAG Foundations Coconut Card : 40980, Foundations Vellum : 40024 & Foundations Pearl Icicle Card : PC001 Tim Holtz Mini Tattered Rose : DPMTATT, Dried Marigold : DPMDRIED, Squeezed Lemon , DPMSQUEEZED, Peeled Paint : DPMPEEL, Shabby Shutters: DPMSHAB & Olive Green: DPMOLIVE Vintage Ribbon ~ Moss : VRMOSS Archival Black Ink Pad : ARCHBLKSM & Adhesive Eraser : CEADERASER Creative Expressions Mini Smoothies : CESMOOTHMINI Couture Creations Rose Resin Flowers : AFRFLR002 Cosmic Shimmer Clear Glue : CSGLUE & Cosmic Shimmer Pearl PVA Glue : CSPEAWHGLU
How to make a.... Sue Wilson All Seasons Globe Shaker Card

Step 1. This workshop will show you how to make this dimensional card using the following main products...... The Sue Wilson Noble collection ~ ornate pierced designs die, the noble double pierced rectangle die, the festive collection snow globe and cottage snow globe scene die. The shaker blossom is made out of the small flower die in the delicate garden frame die set, along with the filigree butterfly as the embellishment. The main flowers are using the Creative Expressions Christmas rose pre cut stamps cut out using the Sue Wilson Christmas rose die. The shaker section is made using the blossom in the Creative Expressions treat cups and this project just shows the snow globe dies can be used for an everyday card.
Step 2. Take a piece of Foundations raspberry card and attach the snow globe die so just the main circle shape is placed on the card. Then PLEASE use a coconut card/white card to cut the whole circle out, not the pink as shown. Secure the dies in place with some low tack tape and pass the dies through the Grand Calibur die cutting machine.
Step 3. Once the snow globe section is cut remove the card and turn the circle die area around the slot the card back into the edge of the die. Secure the die onto the card using the low tack tape and then cut the card the die cutting machine.

Step 4. Once cut this will allow a neat quick backing to the snow globe shaker as the circle will cover the opening of the Creative Expressions treat cup. This could be done freehand but I like the quickness and neatness with this method.
Step 5. Add the small flower die from the Sue Wilson delicate garden frame, along with the filigree butterfly and then add the small leaf die and the small flower centres from the Sue Wilson Christmas rose die set. Place smallest and 2nd size Christmas rose onto a piece of Foundations pink card and once they are all secured in place with some low tack tape run them through the Grand Calibur die cutting machine and then back through with the embossing sandwich.
Step 6. Here are all the die pieces from that one pass.
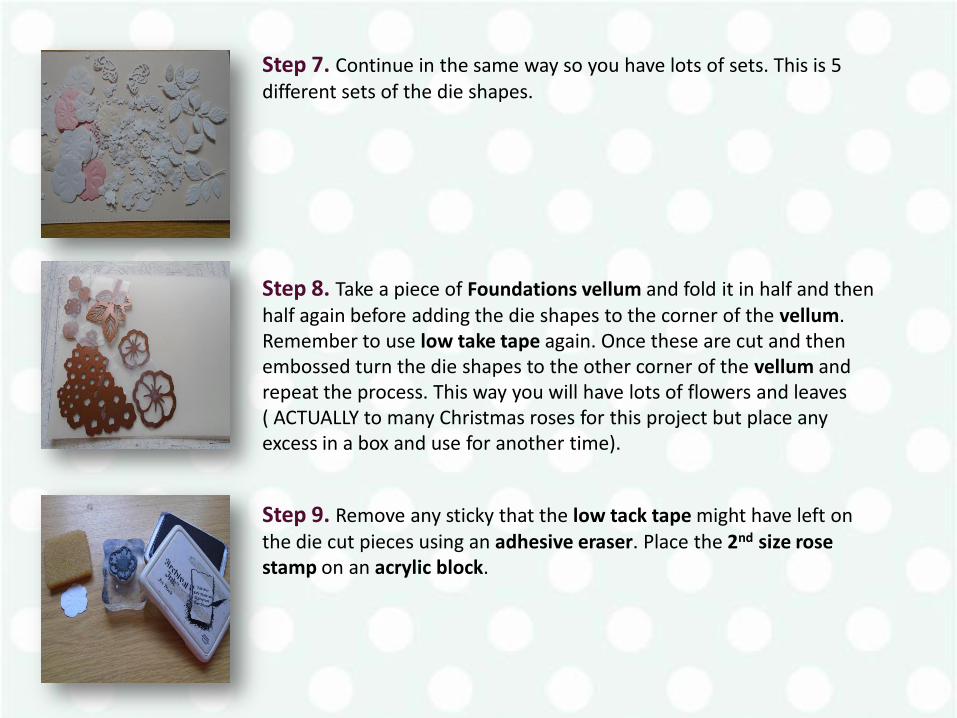
Step 7. Continue in the same way so you have lots of sets. This is 5 different sets of the die shapes.
Step 8. Take a piece of Foundations vellum and fold it in half and then half again before adding the die shapes to the corner of the vellum. Remember to use low take tape again. Once these are cut and then embossed turn the die shapes to the other corner of the vellum and repeat the process. This way you will have lots of flowers and leaves ( ACTUALLY to many Christmas roses for this project but place any excess in a box and use for another time).
Step 9. Remove any sticky that the low tack tape might have left on the die cut pieces using an adhesive eraser. Place the 2nd size rose stamp on an acrylic block.

Step 10. Ink the rose stamp using the black archival ink pad.
Step 11. Find where the pointy edge of the rose is and marry it up with the same point on the stamp. Press firmly down on the card. Alternatively stamp the rose and then die cut the flowers afterwards. But for this amount of roses it was easier to cut the flowers first.
Step 12. Here was the stamped result. Maybe a little to much edge on one side but you can adjust the positioning on the next stamped rose. These roses will be inked up later so no need to worry.

Step 13. Take the vellum roses and repeat the process. Here the ink is easily seen from under the vellum which makes it great for stamping in this manner. Continue until you have all the flowers stamped up.
Step 14. Take the reverse of the smaller snow scene outer die cut piece which was cut in Foundations pearl icicle card and place the 2 rose dies and the leaf cluster so they fall off the circle edge. Secure with the low take tape and run through the Grand Calibur using just the embossing sandwich as you don`t want to cut the shapes out. Repeat the process with just one rose die where the gap is left.
Step 15. Once the last step is complete I ran the circle back through the Grand Calibur with just the embossing tan mat etc and no dies to level out the embossing as one die shape was raised more that the other 3.
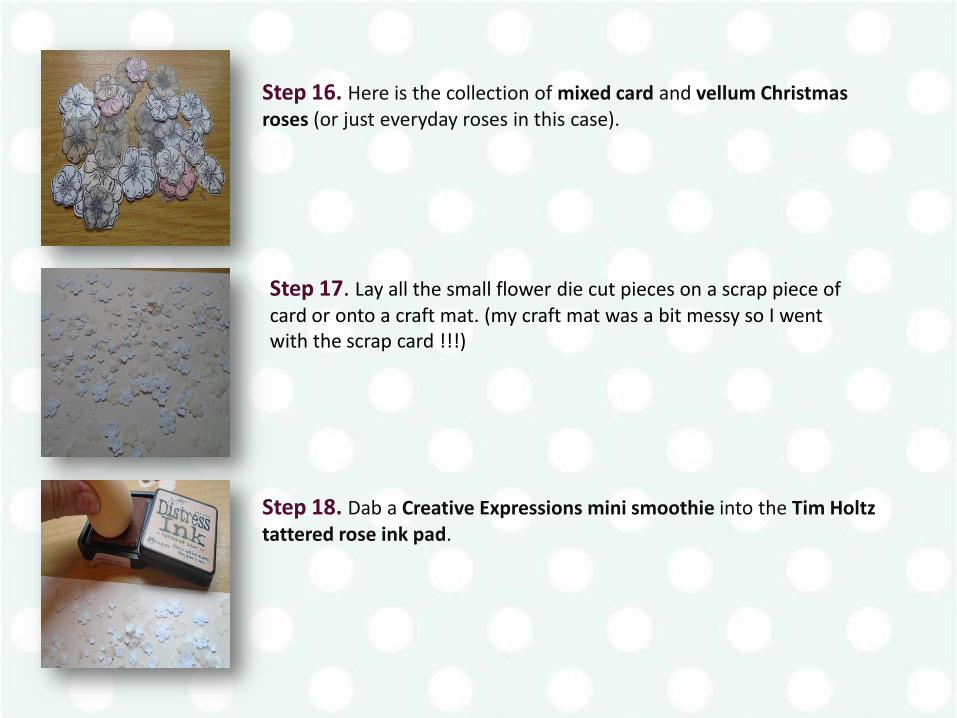
Step 16. Here is the collection of mixed card and vellum Christmas roses (or just everyday roses in this case).
Step 17. Lay all the small flower die cut pieces on a scrap piece of card or onto a craft mat. (my craft mat was a bit messy so I went with the scrap card !!!)
Step 18. Dab a Creative Expressions mini smoothie into the Tim Holtz tattered rose ink pad.

Step 19. Then dab over the small flowers at random.
Step 20. Once the flowers at mostly covered turn the flowers over. Just roughly will do and repeat the inking process.
Step 21. Once inked gather the flowers up in a pile to see if you have enough for the treat cup. The amount suggested to cut was enough for the blossom but to many for the Christmas roses (but they can be used for another project so just set aside). Just note there are some white backs to the flowers but this is ok as it shows the flowers up more.

Step 22. Take the white card leaves and here some have the small base leaves removed to make the sprigs smaller and to allow the individual leaves to be used in the shaker section. Add some of the Tim Holtz crushed olive ink onto a Creative Expressions mini smoothie and then dab this onto the ends of the leaf sprigs.
Step 23. Now add some of the Tim Holtz peeled paint ink onto a the smoothie (the same one is used as they are both green tones) and then finish colouring the leaves as this will add depth to the end result.
Step 24. Repeat the inking technique and add the Tim Holt squeezed lemon ink onto a smoothie and dab it onto the flower centre die shapes.

Step 25. Go back in the tip of the smoothie and the peeled paint ink to highlight the centre of the flower area only.
Step 26. Take the rose die shapes and press them directly into the tattered rose ink pad or use the smoothie for a softer feel.
Step 27. I liked the distress rough inked feel the 1st option gave.

Step 28. So after a nice play in cutting, inking and leaving the vellum pieces plain here are all the different elements ready for the project. Please note the small blossom flowers are placed on a piece of card so they can be moved around quickly. Just make sure they are dry before adding them into the shaker next step.
Step 29. Ink the embossed inner circle and attach it to the pink larger die circle. Place all the blossom flowers and leaves into the Creative Expressions shaker treat cup. Retain 8 – 10 of the larger blossoms to embellish the card corner later on.
Step 30. Add a line of the Cosmic Shimmer dries clear glue round the pink rim ONLY of the circle. Smooth the glue out with your finger to make sure the glue doesn`t spread under the treat cut.

Step 31. As the treat cup is facing downwards place the glued up circle over the shaker section and press firmly down.
Step 32. Turn the shaker treat cup over making sure the circle has a same size rim left all around the outside of the circle.
Step 33. Take the smaller solid Sue Wilson ornate pierced designs die (not the rectangle inner one) and attach the small solid circle from the snow scene die set inside. Secure the dies with some low tack tape and make sure there is more of a gap at the bottom of the design as this is where the flowers and bow will be added.

Step 34. Add a small amount of the Cosmic Shimmer dries clear glue as you don`t want to make the card wrinkle or BETTER STILL use some strong double sided tape to add a ring around the reverse of the circle cut out.
Step 35. Place the Creative Expressions treat cup through the aperture and press it firmly onto the glue or tape once you have it correctly in place.
Step 36. Cut just the large solid Sue Wilson ornate pierced designs die in white card and either cut a panel with the inner section cut out in the self adhesive sheet and stick it onto the frame (this can be done as another panel will be added over the top and it will save on the amount of micro beads used) or cut an aperture in the ornate shape using the smaller ornate die used to create the shaker panel. Also cut the largest ornate frame and the next size intricate die in some pearl icicle card and retain for later.

Step 37. Place the Creative Expressions snow white micro beads over the sticky sheet making sure you have the panel in a plastic box. Press the micro beads firmly onto the sticky.
Step 38. Cut a panel using the 3rd from largest Sue Wilson noble double pierced rectangle die in the Foundations coconut card. Then emboss the panel by placing it in the Creative Expressions wild rose embossing folder without any metal dies in it !!! and then pass it through the Grand Calibur machine. Now cut another coconut panel using the 2nd from largest pierced rectangle die and this time just distress the edge using some dried marigold distress ink on a mini smoothie. Layer the panels onto a base card by joining 2 pieces of A4 card together and trimming the card to size. Use foam tape for added dimension to each panel.
Step 39. Add the delicate frame over the micro bead panel using some Cosmic Shimmer dries clear glue and mount that onto the pierced layers again using foam tape. Add the worked shaker card onto the card using foam tape again.

Step 40. Make a shabby chic bow using the vintage moss green ribbon. Set it at an angle at the bottom left hand side of the shaker panel.
Step 41. Now for the rose embellishments. Snip into the petals on the Christmas rose and curve the edges of the flower.
Step 42. Place the rose on a stamping mat or an overturned piece of foam mat. Use the Spellbinders tool `n` one and press in the centre of the rose.......
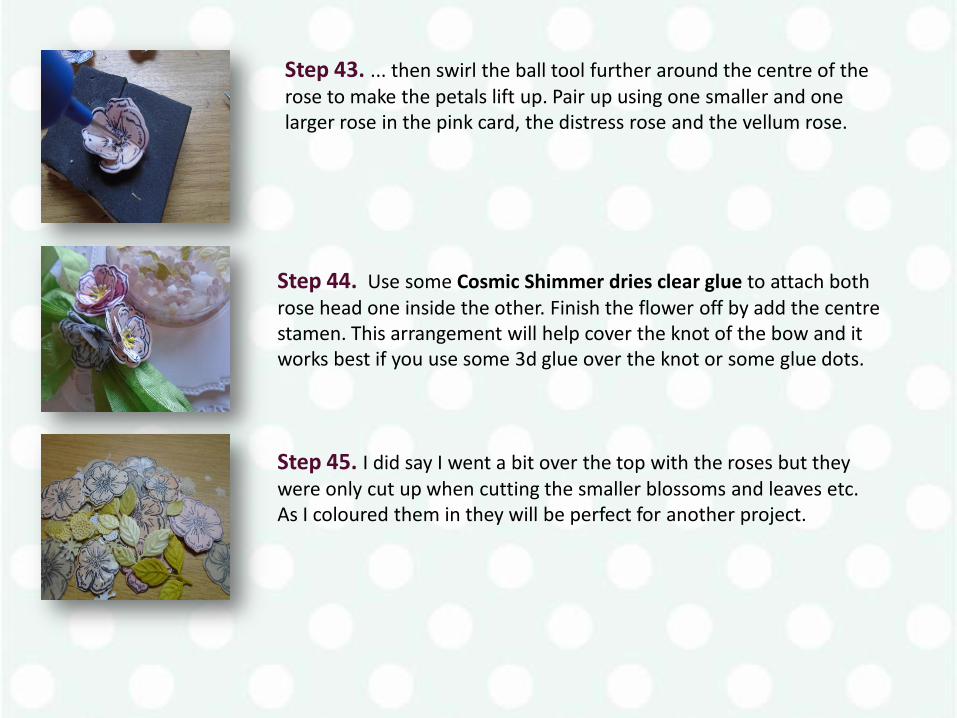
Step 43. ... then swirl the ball tool further around the centre of the rose to make the petals lift up. Pair up using one smaller and one larger rose in the pink card, the distress rose and the vellum rose.
Step 44. Use some Cosmic Shimmer dries clear glue to attach both rose head one inside the other. Finish the flower off by add the centre stamen. This arrangement will help cover the knot of the bow and it works best if you use some 3d glue over the knot or some glue dots.
Step 45. I did say I went a bit over the top with the roses but they were only cut up when cutting the smaller blossoms and leaves etc. As I coloured them in they will be perfect for another project.

Step 46. Now fill in the design by adding the various leaves creating a nice tapered effect towards the edges of the arrangement.
Step 47. Apply the small left over blossoms (keep 3 aside) to the card as well as adding 3 resin flowers from the Always and forever Craft Consortium range.
Step 48. Add the remaining 3 flowers to the corner of the card before adding some Cosmic Shimmer pearl PVA glue to the centre of the flower to make a faux pearl effect.

Step 49. Attach the 2 butterflies to the card so one is the base and the other one on top so it looks like the butterfly is in flight. Add 3 very small faux pearl dots at the top of the butterfly so they look like an antenna using the pearl PVA glue.
Step 50. Here is the completed card. Something very fresh and then you can make more Christmassy designs nearer the time. Us crafters love a double use of a product !!!
Step 51. Here is a close up of the blossom shaker section.

Step 52. and another slightly different angle of the card.
Step 53. This photo shows the depths of the treat cut which is a quick and easy why to make a
shaker card.
Happy Crafting x