How to Draw Graffitti Names
13
How to Draw Graffitti Names A power point presentation taken from the how to manual that you can edit http://ncvps.blackboard.com/webapp s/portal/frameset.jsp?tab_id=_2_1& url=%2fwebapps%2fblackboard%2fexec ute%2flauncher%3ftype%3dCourse%26i d%3d_13761_1%26url%3d
-
Upload
brenda-keith -
Category
Documents
-
view
41 -
download
1
description
How to Draw Graffitti Names. A power point presentation taken from the how to manual that you can edit http://ncvps.blackboard.com/webapps/portal/frameset.jsp?tab_id=_2_1&url=%2fwebapps%2fblackboard%2fexecute%2flauncher%3ftype%3dCourse%26id%3d_13761_1%26url%3d. - PowerPoint PPT Presentation
Transcript of How to Draw Graffitti Names

How to Draw Graffitti Names
A power point presentation taken from
the how to manual that you can edithttp://ncvps.blackboard.com/webapps/portal/frameset.jsp?tab_id=_2_1&url=%2fwebapps%2fblackboard%2fexecute%2flauncher%3ftype%3dCourse%26id%3d_13761_1%26url%3d
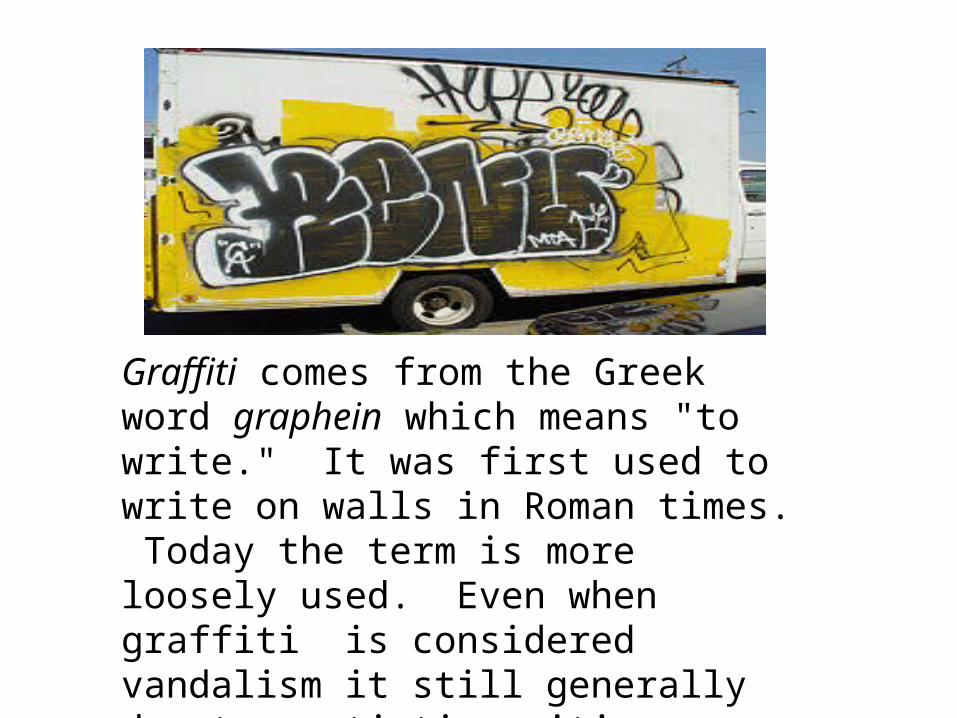
Graffiti comes from the Greek word graphein which means "to write." It was first used to write on walls in Roman times. Today the term is more loosely used. Even when graffiti is considered vandalism it still generally denotes artistic writing or drawing. Howver, It can be done in a way that does not vandalize or violate the law.
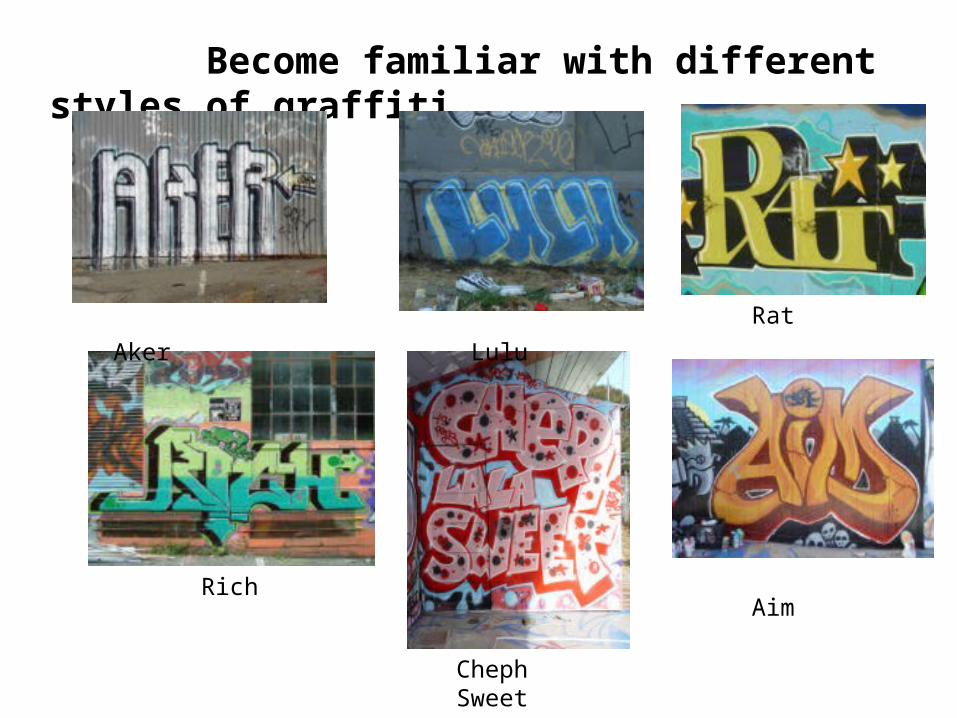
Become familiar with different styles of graffiti.
Aker Lulu Rat
Cheph Sweet
AimRich
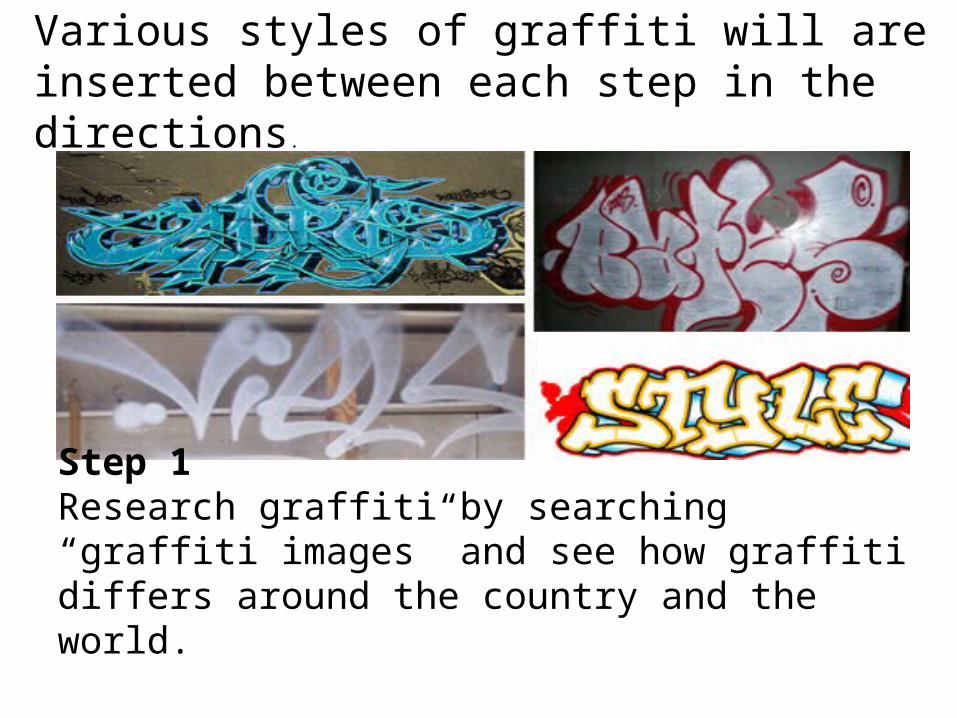
Various styles of graffiti will are inserted between each step in the directions.
Step 1Research graffiti by searching “graffiti images” and see how graffiti differs around the country and the world.
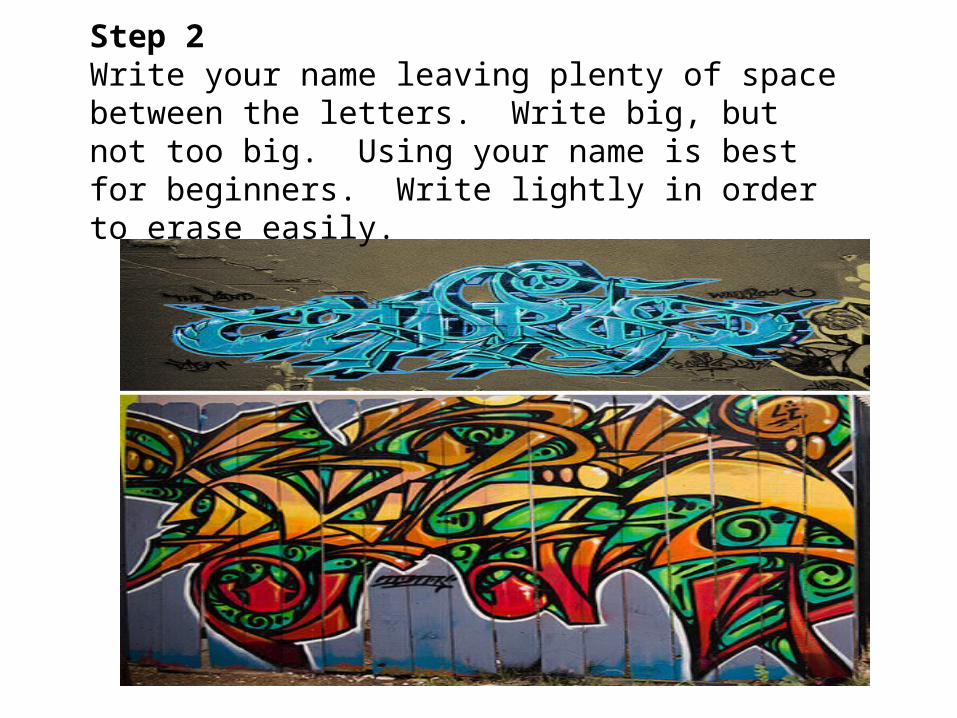
Step 2Write your name leaving plenty of space between the letters. Write big, but not too big. Using your name is best for beginners. Write lightly in order to erase easily.
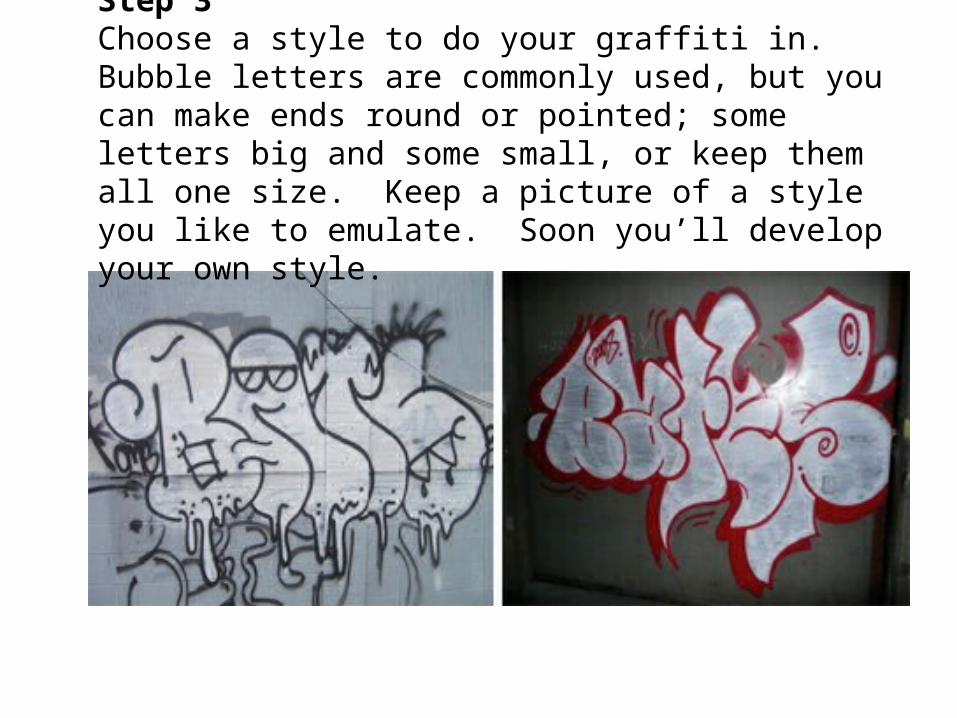
Step 3Choose a style to do your graffiti in. Bubble letters are commonly used, but you can make ends round or pointed; some letters big and some small, or keep them all one size. Keep a picture of a style you like to emulate. Soon you’ll develop your own style.
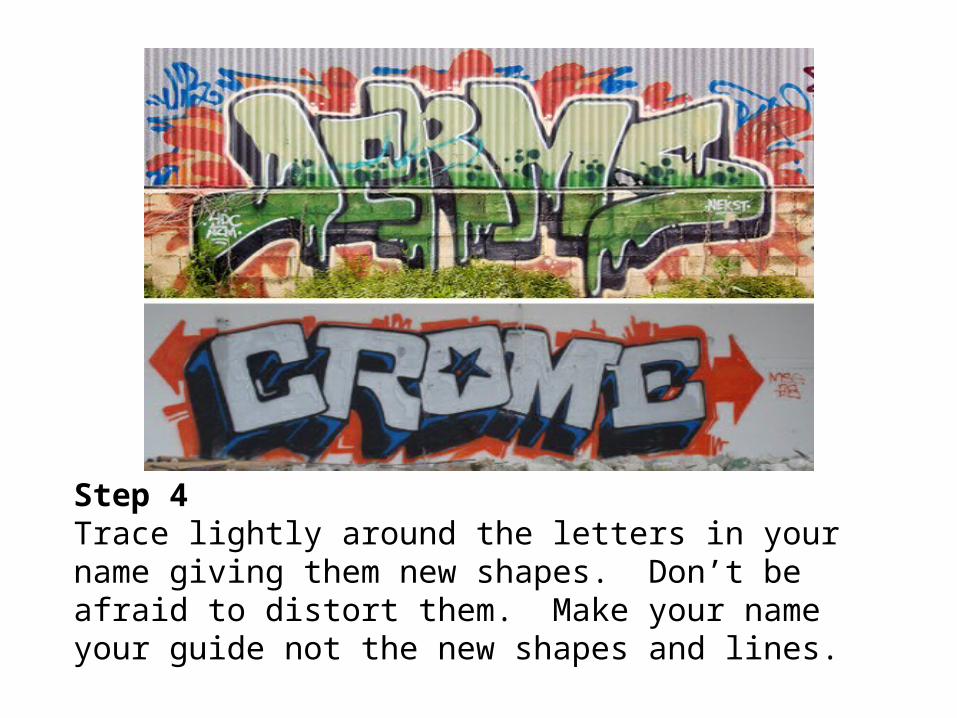
Step 4Trace lightly around the letters in your name giving them new shapes. Don’t be afraid to distort them. Make your name your guide not the new shapes and lines.

Step 5Vary the thickness of your lines. For example, the top of a letter may have a thick line and the bottom a thin line; or you may want the letters to look 3-D. Darken the areas you want darker just a little now with your pencil. You will use a marker later to blacken the lines.
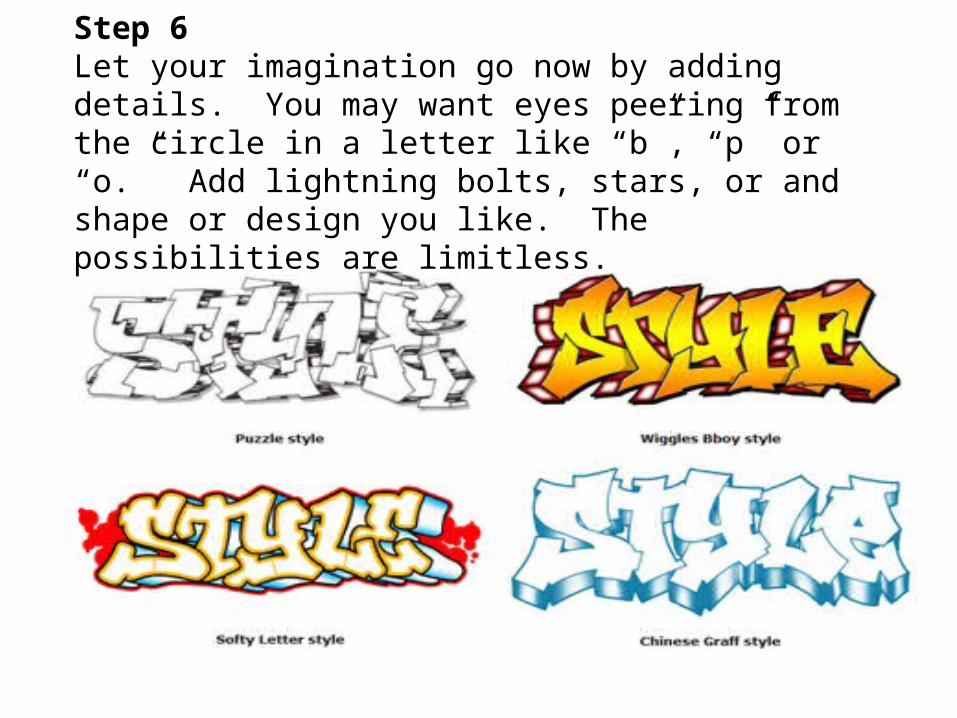
Step 6Let your imagination go now by adding details. You may want eyes peering from the circle in a letter like “b”, “p” or “o.” Add lightning bolts, stars, or and shape or design you like. The possibilities are limitless.
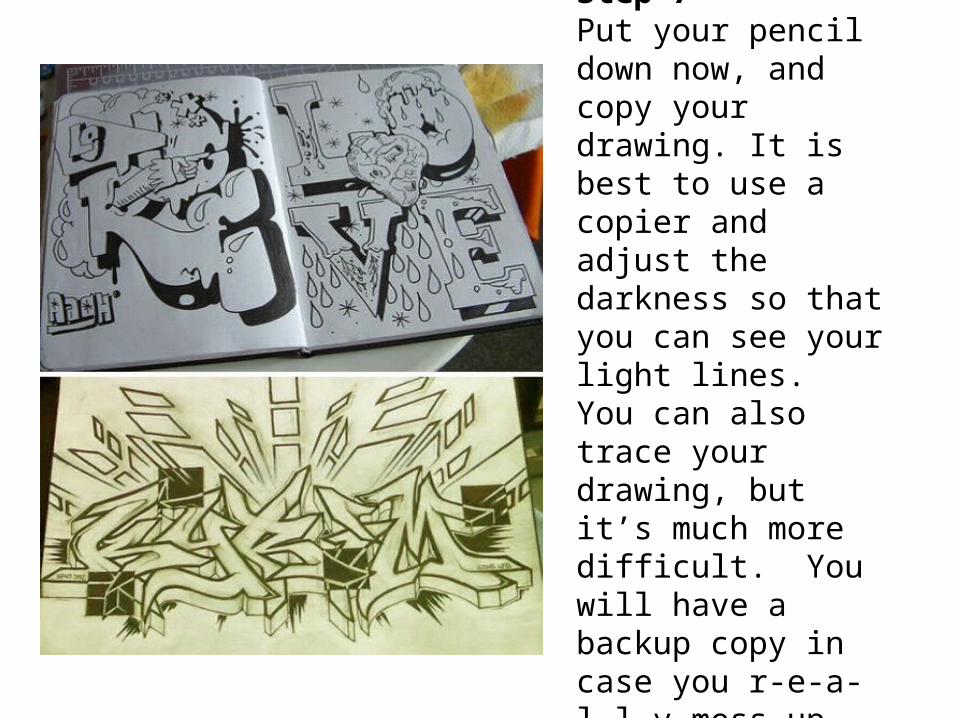
Step 7Put your pencil down now, and copy your drawing. It is best to use a copier and adjust the darkness so that you can see your light lines. You can also trace your drawing, but it’s much more difficult. You will have a backup copy in case you r-e-a-l-l-y mess up.
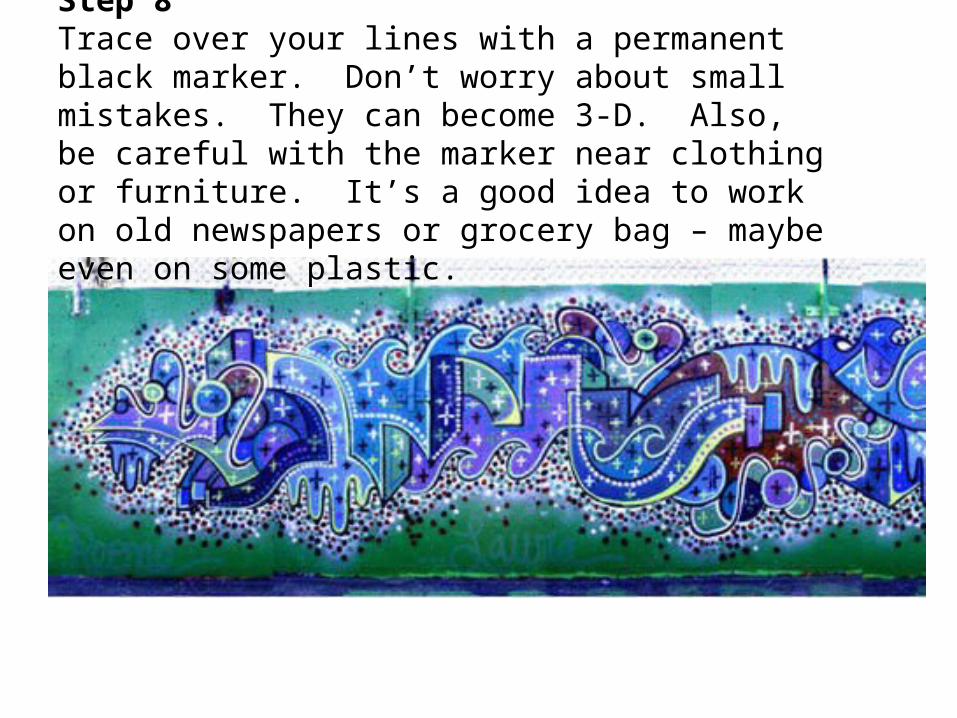
Step 8Trace over your lines with a permanent black marker. Don’t worry about small mistakes. They can become 3-D. Also, be careful with the marker near clothing or furniture. It’s a good idea to work on old newspapers or grocery bag – maybe even on some plastic.
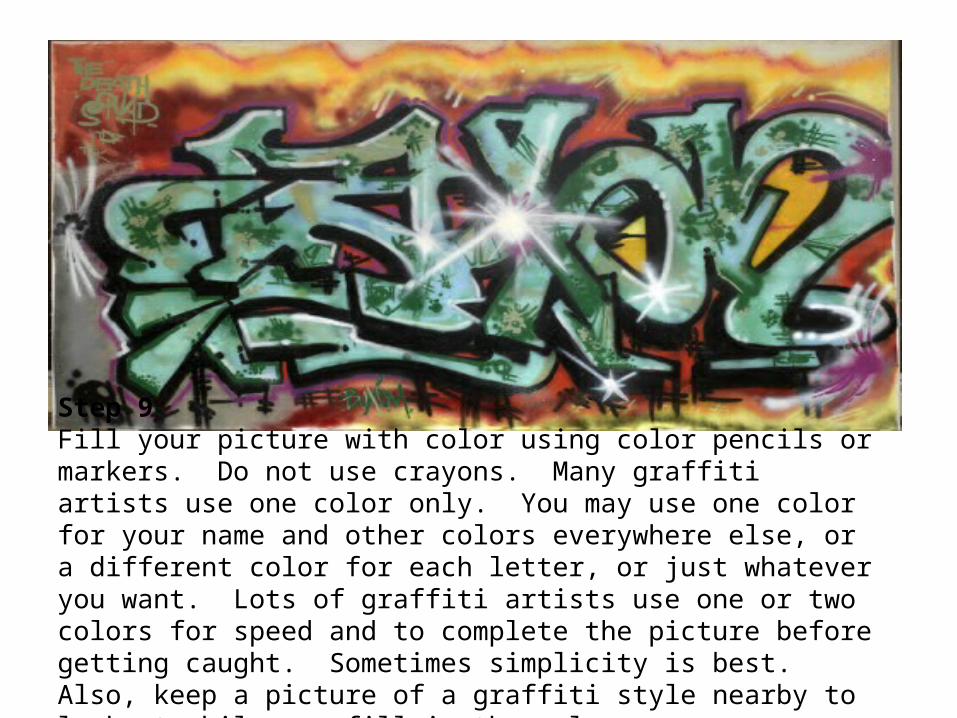
Step 9Fill your picture with color using color pencils or markers. Do not use crayons. Many graffiti artists use one color only. You may use one color for your name and other colors everywhere else, or a different color for each letter, or just whatever you want. Lots of graffiti artists use one or two colors for speed and to complete the picture before getting caught. Sometimes simplicity is best. Also, keep a picture of a graffiti style nearby to look at while you fill in the color.

Step 10Congratulations! You have completed your graffiti art work. Be careful not to copy others’ work. Develop your own style. The more you do the more original you’ll become


![CHEMISTRY PAPER-I€¦ · How many geometrical isomers are possible for [Ru(H20)3C13] ? Draw their structures and indicate their names. 10 Q7. (a) Draw the structures of the following](https://static.fdocuments.us/doc/165x107/5ea596ef70710b49c1668730/chemistry-paper-i-how-many-geometrical-isomers-are-possible-for-ruh203c13-.jpg)