How to Crochet a Granny Square By Spincushions 2014 · PDF file1 How to Crochet a Granny...
20
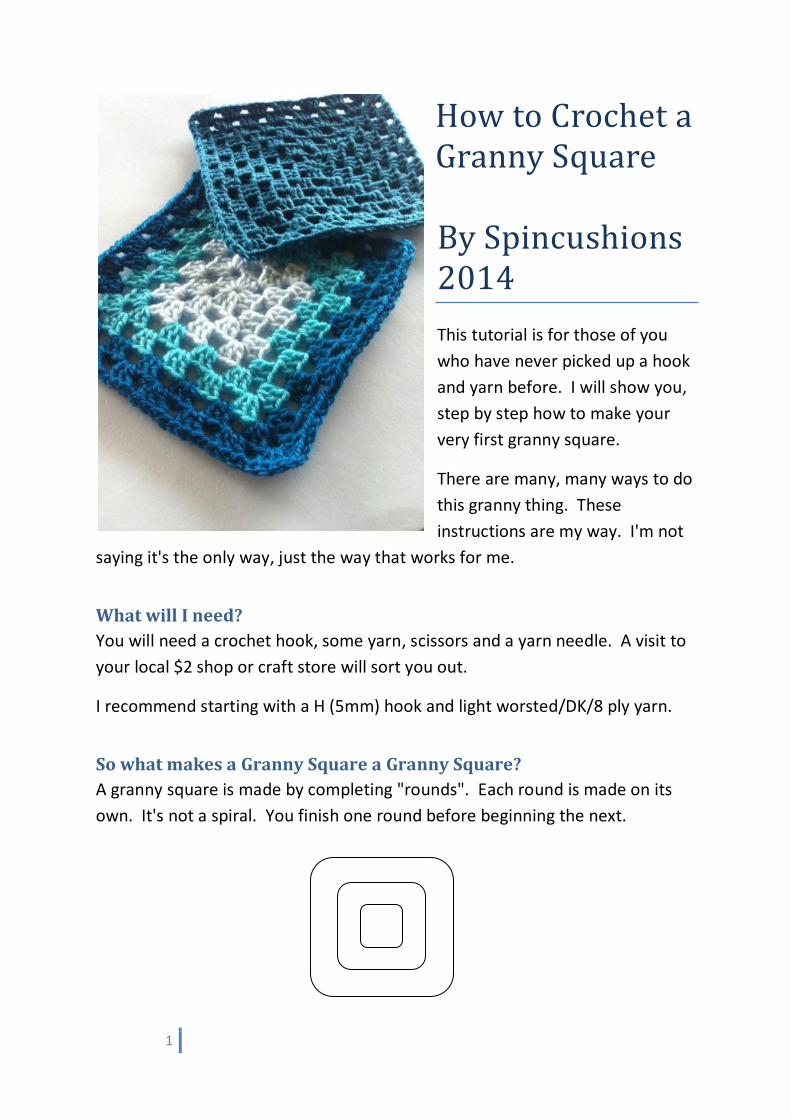
1 How to Crochet a Granny Square By Spincushions 2014 This tutorial is for those of you who have never picked up a hook and yarn before. I will show you, step by step how to make your very first granny square. There are many, many ways to do this granny thing. These instructions are my way. I'm not saying it's the only way, just the way that works for me. What will I need? You will need a crochet hook, some yarn, scissors and a yarn needle. A visit to your local $2 shop or craft store will sort you out. I recommend starting with a H (5mm) hook and light worsted/DK/8 ply yarn. So what makes a Granny Square a Granny Square? A granny square is made by completing "rounds". Each round is made on its own. It's not a spiral. You finish one round before beginning the next.
Transcript of How to Crochet a Granny Square By Spincushions 2014 · PDF file1 How to Crochet a Granny...
1
How to Crochet a Granny Square By Spincushions 2014
This tutorial is for those of you
who have never picked up a hook
and yarn before. I will show you,
step by step how to make your
very first granny square.
There are many, many ways to do
this granny thing. These
instructions are my way. I'm not
saying it's the only way, just the way that works for me.
What will I need?
You will need a crochet hook, some yarn, scissors and a yarn needle. A visit to
your local $2 shop or craft store will sort you out.
I recommend starting with a H (5mm) hook and light worsted/DK/8 ply yarn.
So what makes a Granny Square a Granny Square?
A granny square is made by completing "rounds". Each round is made on its
own. It's not a spiral. You finish one round before beginning the next.
2
A traditional granny square is made up with 3 crochet stitches. Chain (ch),
Treble crochet (tr) and Slip Stitch (ss) . I'll be using those abbreviations from
now on. Learning these abbreviations is the first step to knowing how to read
crochet patterns. Might as well start to learn now I reckon.
Along the way, you will see some optional alternative ways to do things. I
recommend you ignore these until you are truly comfortable and really
understand the process and pattern of a granny square. I'll mark these bits
with a lightning bolt. These options are dangerous to your confidence if you're
not ready. I don't want you to get discouraged. Save them to re-visit once you
can whip up a Granny Square without referring to notes. Check out the Crochet
Alternatives PDF when you're ready.
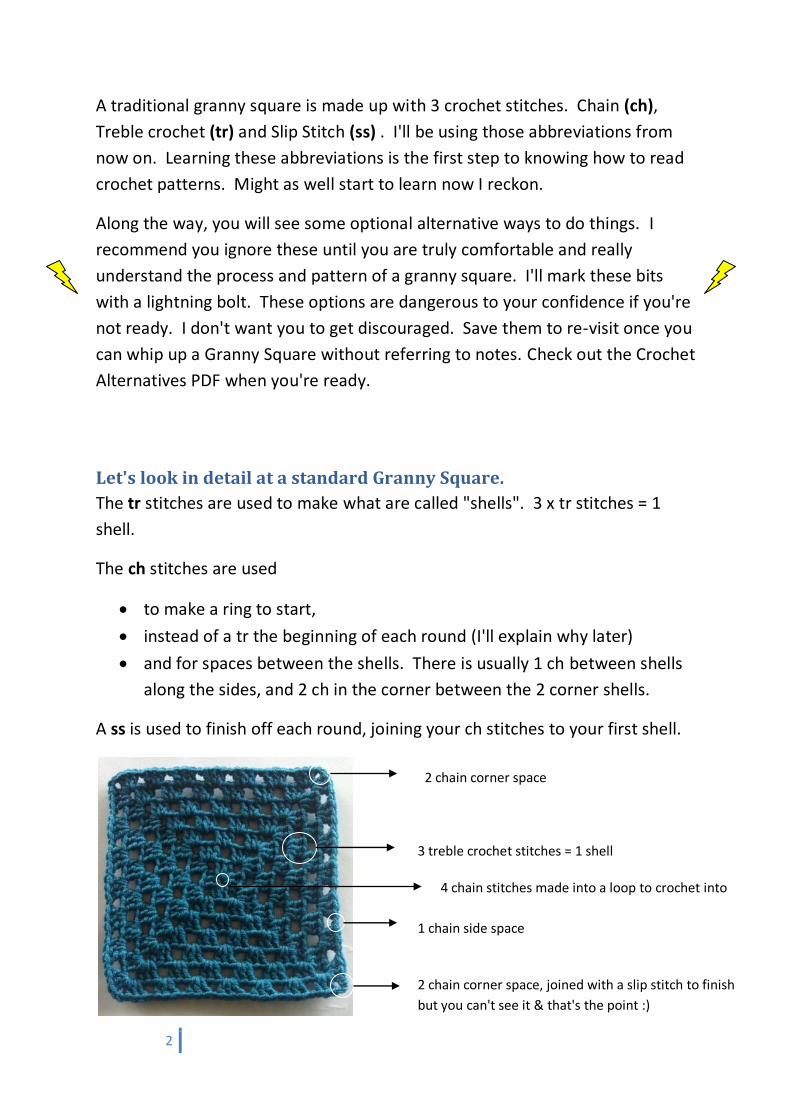
Let's look in detail at a standard Granny Square.
The tr stitches are used to make what are called "shells". 3 x tr stitches = 1
shell.
The ch stitches are used
to make a ring to start,
instead of a tr the beginning of each round (I'll explain why later)
and for spaces between the shells. There is usually 1 ch between shells
along the sides, and 2 ch in the corner between the 2 corner shells.
A ss is used to finish off each round, joining your ch stitches to your first shell.
2 chain corner space
3 treble crochet stitches = 1 shell
4 chain stitches made into a loop to crochet into
1 chain side space
2 chain corner space, joined with a slip stitch to finish
but you can't see it & that's the point :)
3
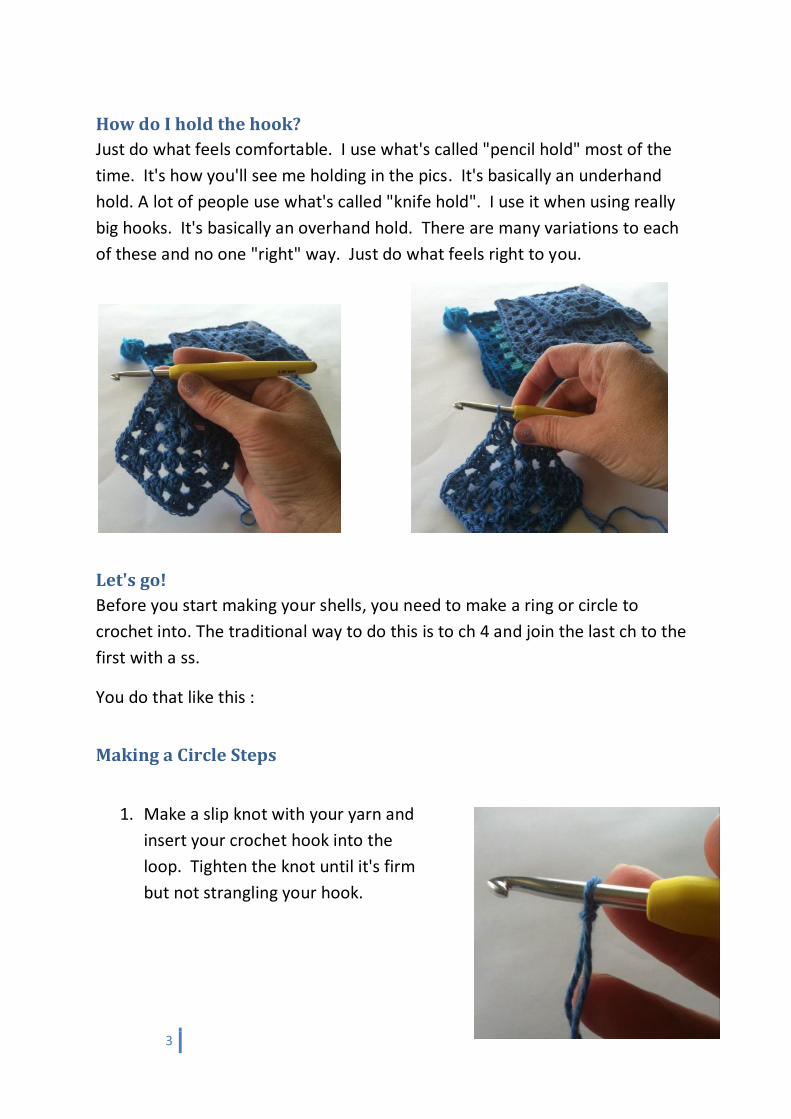
How do I hold the hook?
Just do what feels comfortable. I use what's called "pencil hold" most of the
time. It's how you'll see me holding in the pics. It's basically an underhand
hold. A lot of people use what's called "knife hold". I use it when using really
big hooks. It's basically an overhand hold. There are many variations to each
of these and no one "right" way. Just do what feels right to you.
Let's go!
Before you start making your shells, you need to make a ring or circle to
crochet into. The traditional way to do this is to ch 4 and join the last ch to the
first with a ss.
You do that like this :
Making a Circle Steps
1. Make a slip knot with your yarn and
insert your crochet hook into the
loop. Tighten the knot until it's firm
but not strangling your hook.

4
2. "Yarn over" - you'll see this term a
lot. Sometimes, it is abbreviated to
"yo" it means wrap your yarn over
your hook from back to front.
3. Pull that bit of yarn through
the slip knot and pull the
tail that goes to your ball of
yarn to tighten it a bit but
not too much
That's 1 ch made.
4. Now repeat steps 2 & 3 three
times. This will mean you have 4
ch.
5
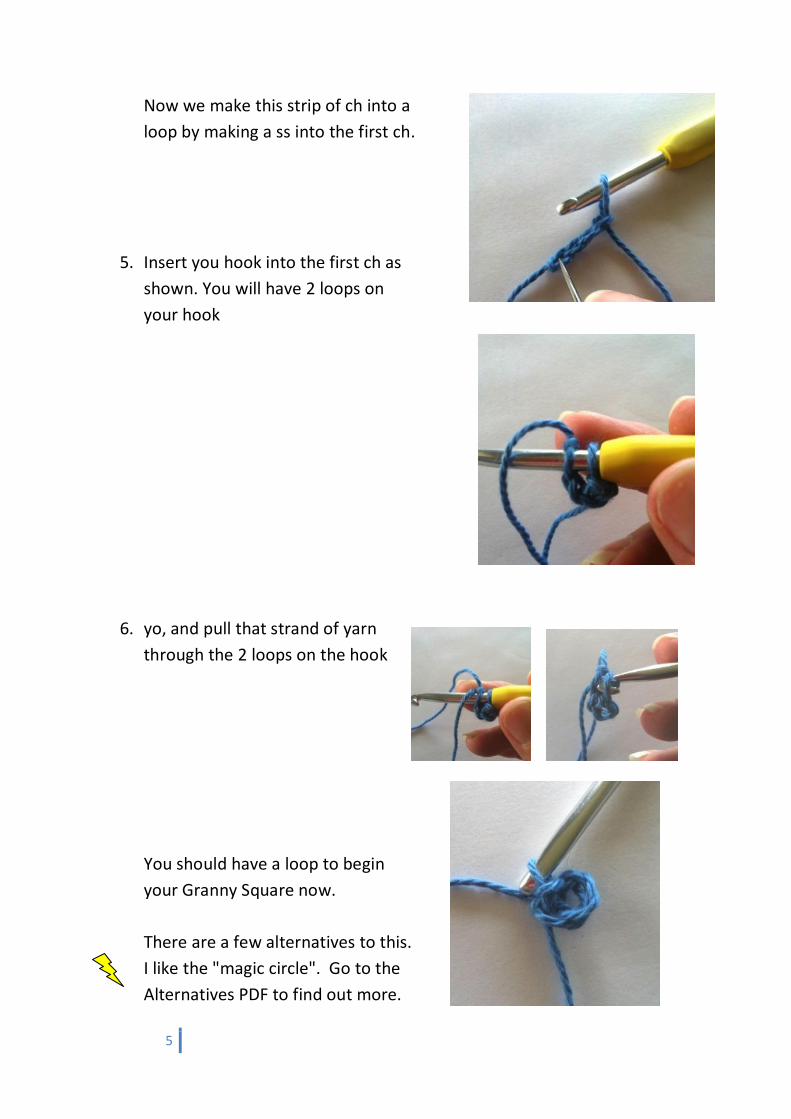
Now we make this strip of ch into a
loop by making a ss into the first ch.
5. Insert you hook into the first ch as
shown. You will have 2 loops on
your hook
6. yo, and pull that strand of yarn
through the 2 loops on the hook
You should have a loop to begin
your Granny Square now.
There are a few alternatives to this.
I like the "magic circle". Go to the
Alternatives PDF to find out more.
6
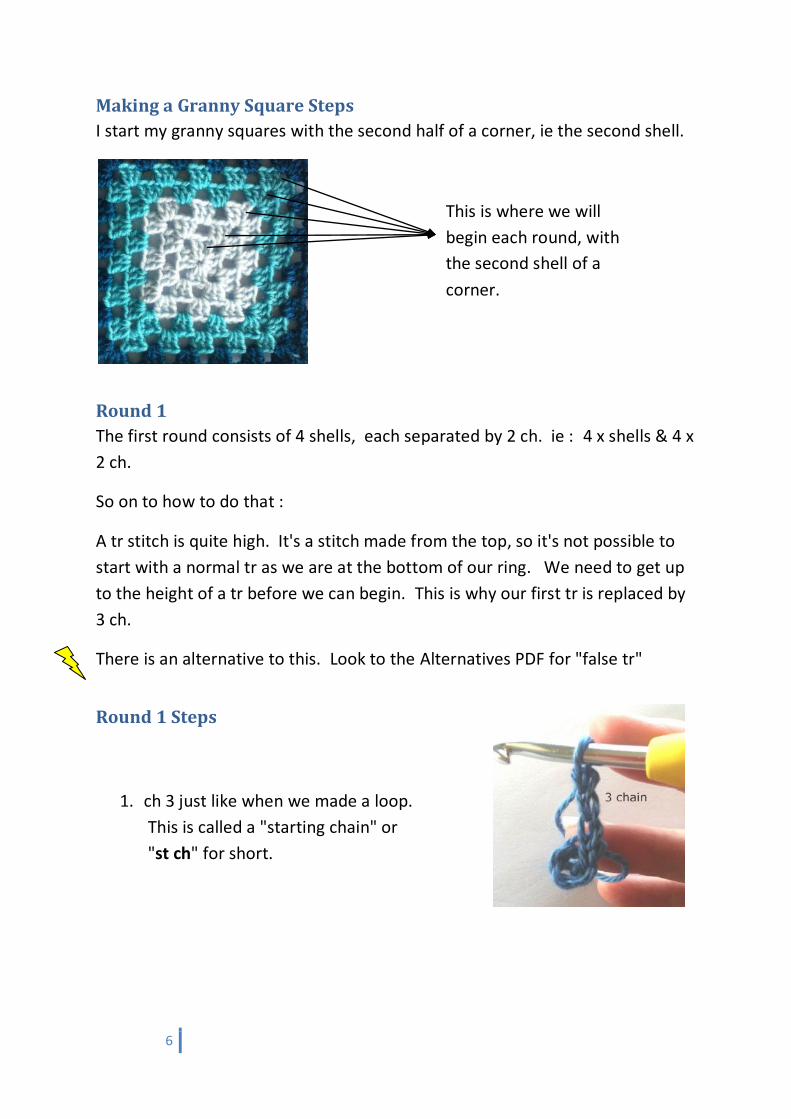
Making a Granny Square Steps
I start my granny squares with the second half of a corner, ie the second shell.
Round 1
The first round consists of 4 shells, each separated by 2 ch. ie : 4 x shells & 4 x
2 ch.
So on to how to do that :
A tr stitch is quite high. It's a stitch made from the top, so it's not possible to
start with a normal tr as we are at the bottom of our ring. We need to get up
to the height of a tr before we can begin. This is why our first tr is replaced by
3 ch.
There is an alternative to this. Look to the Alternatives PDF for "false tr"
Round 1 Steps
1. ch 3 just like when we made a loop.
This is called a "starting chain" or
"st ch" for short.
This is where we will
begin each round, with
the second shell of a
corner.

7
As we do the next bits, we'll want
to hold the loose tail behind the
ring and work over it. This will help
hide and secure the tail.
2. yo, insert hook into the ring (make
sure you go under the loose tail
too)
3. yo again, and pull that last strand
through to the front. You should
have 3 loops on your hook.
4. yo and pull that strand through 2
of the 3 loops on your hook. I like
to give the yarn a tug to tighten
the stitch at this point. You
should have 2 loops on your hook.
8
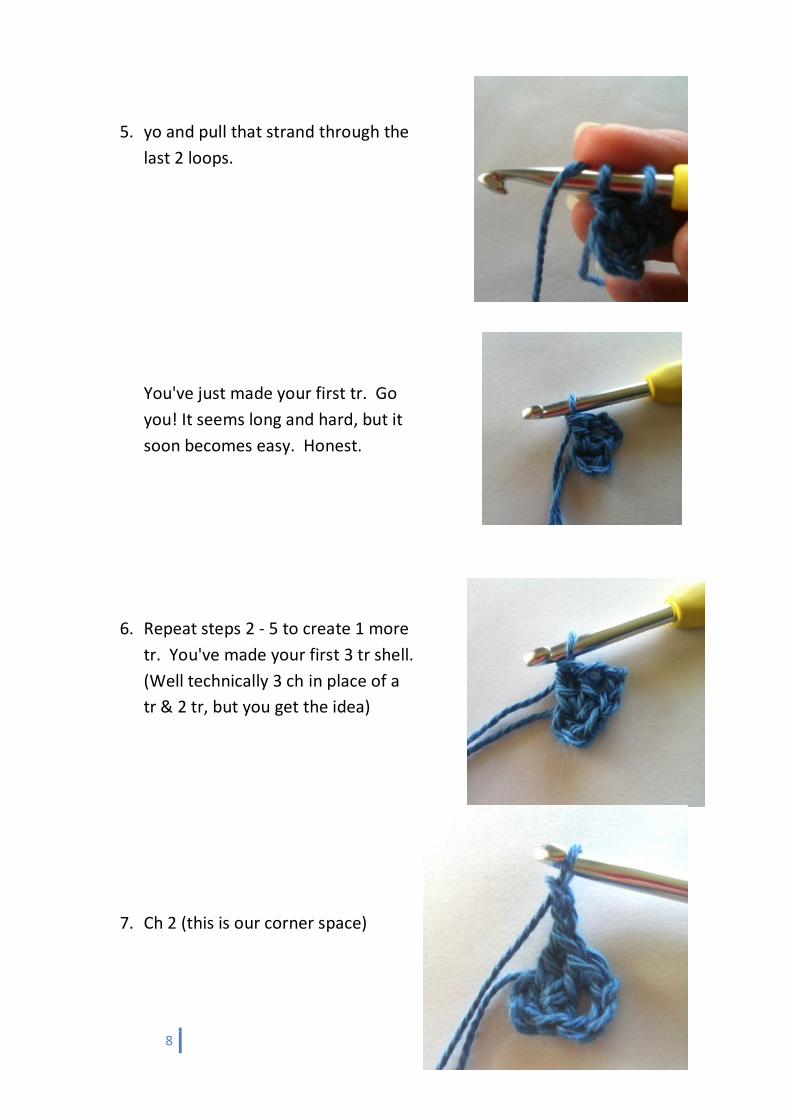
5. yo and pull that strand through the
last 2 loops.
You've just made your first tr. Go
you! It seems long and hard, but it
soon becomes easy. Honest.
6. Repeat steps 2 - 5 to create 1 more
tr. You've made your first 3 tr shell.
(Well technically 3 ch in place of a
tr & 2 tr, but you get the idea)
7. Ch 2 (this is our corner space)
9
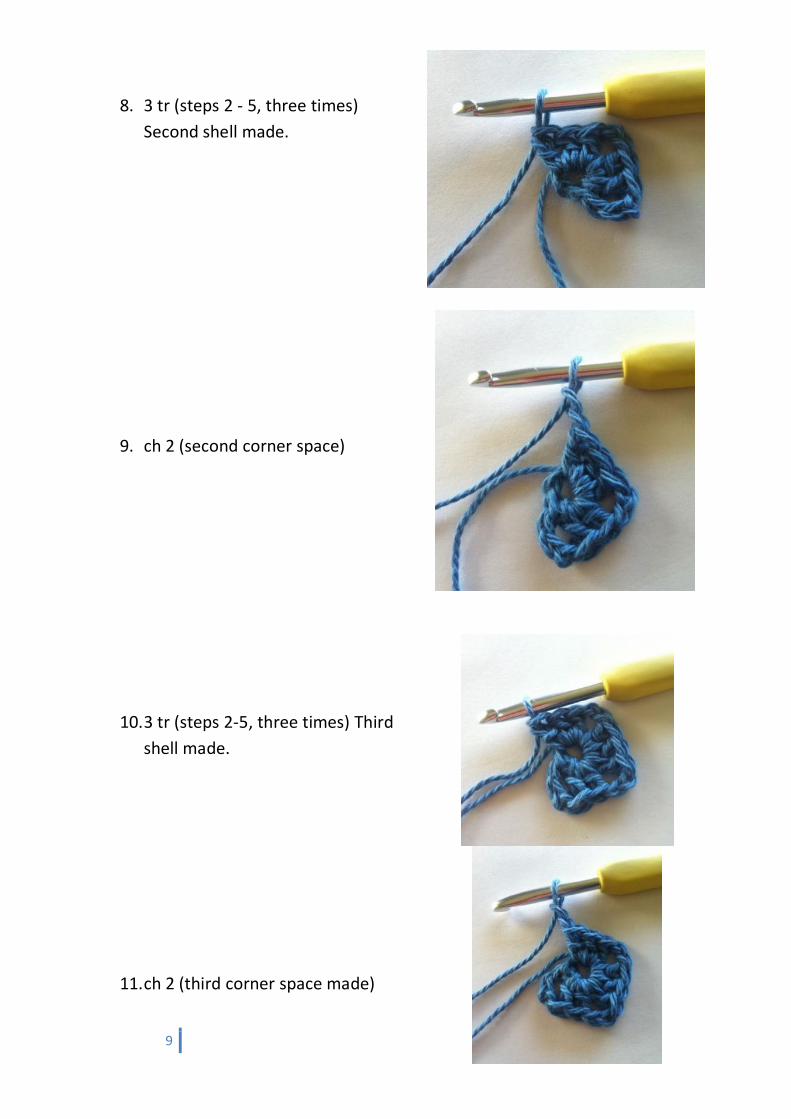
8. 3 tr (steps 2 - 5, three times)
Second shell made.
9. ch 2 (second corner space)
10. 3 tr (steps 2-5, three times) Third
shell made.
11. ch 2 (third corner space made)
10
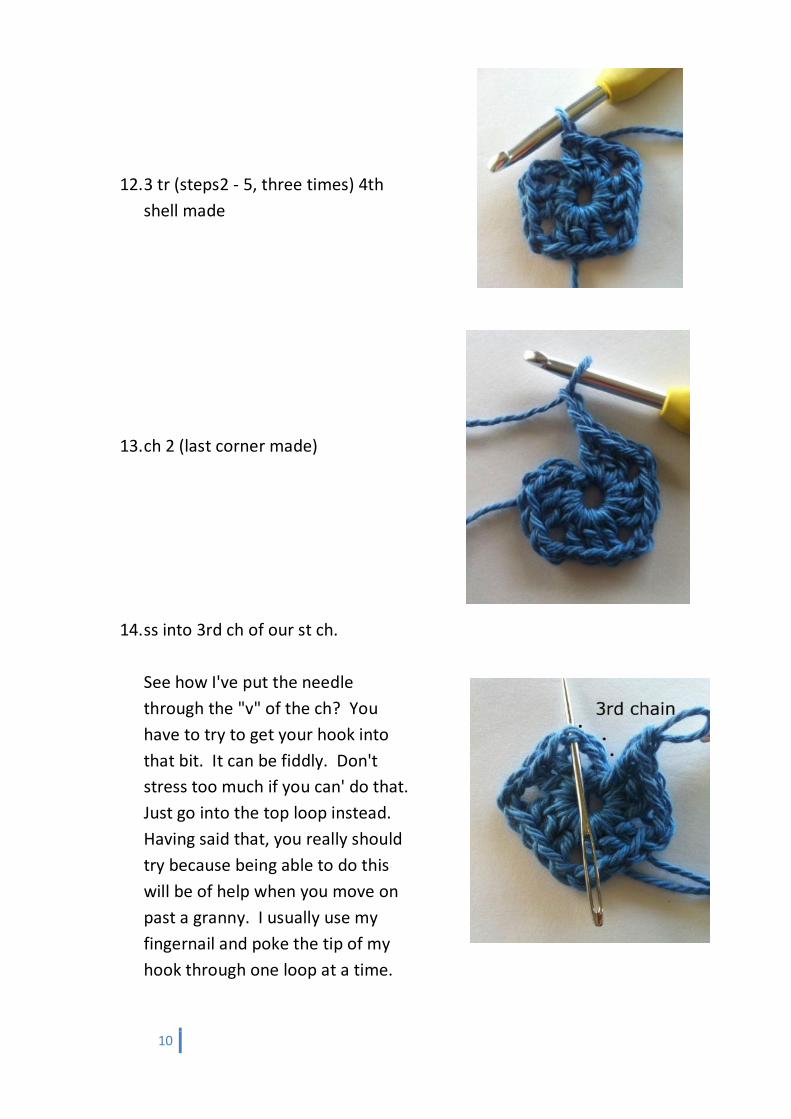
12. 3 tr (steps2 - 5, three times) 4th
shell made
13. ch 2 (last corner made)
14. ss into 3rd ch of our st ch.
See how I've put the needle
through the "v" of the ch? You
have to try to get your hook into
that bit. It can be fiddly. Don't
stress too much if you can' do that.
Just go into the top loop instead.
Having said that, you really should
try because being able to do this
will be of help when you move on
past a granny. I usually use my
fingernail and poke the tip of my
hook through one loop at a time.
11
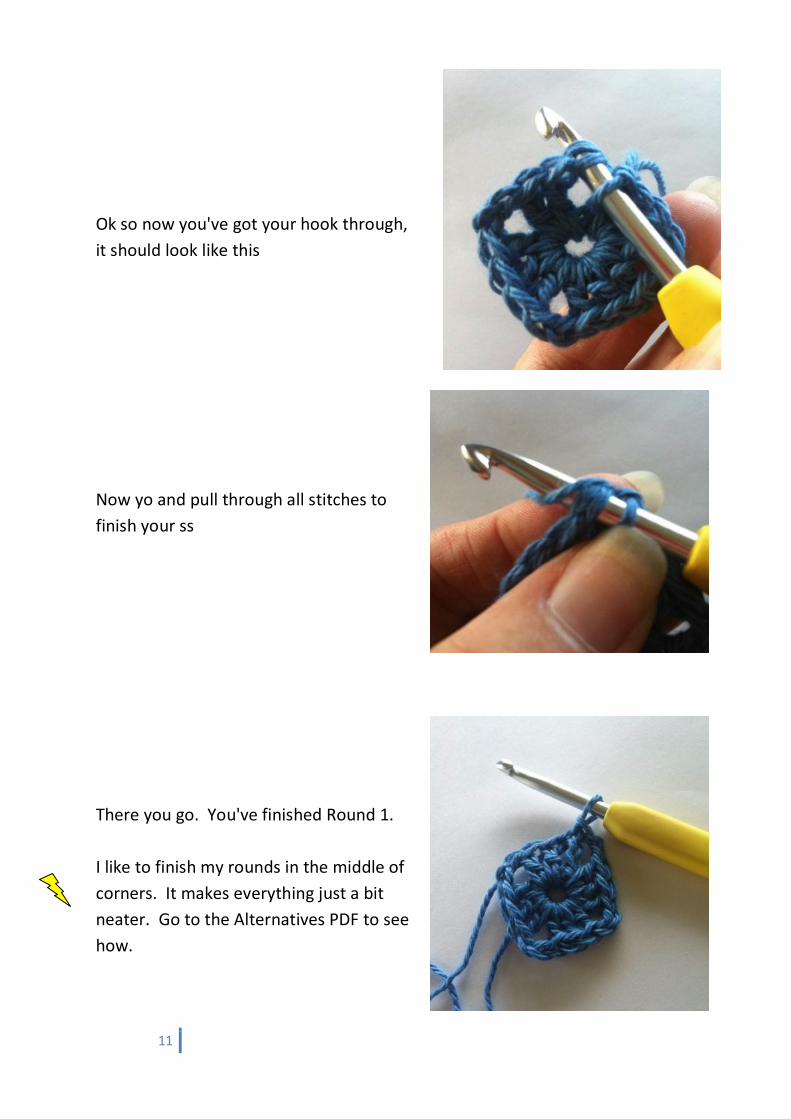
Ok so now you've got your hook through,
it should look like this
Now yo and pull through all stitches to
finish your ss
There you go. You've finished Round 1.
I like to finish my rounds in the middle of
corners. It makes everything just a bit
neater. Go to the Alternatives PDF to see
how.
12
Round 2
The second round is where you start the corners, which are 2 shells separated
by 2 ch. This 2 ch is called a 2 chain space. ie (3 tr, 2 ch, 3 tr) = a corner. To
get to the next corner, you make 1 ch. This is called a 1 ch space.
Here's how you do that :
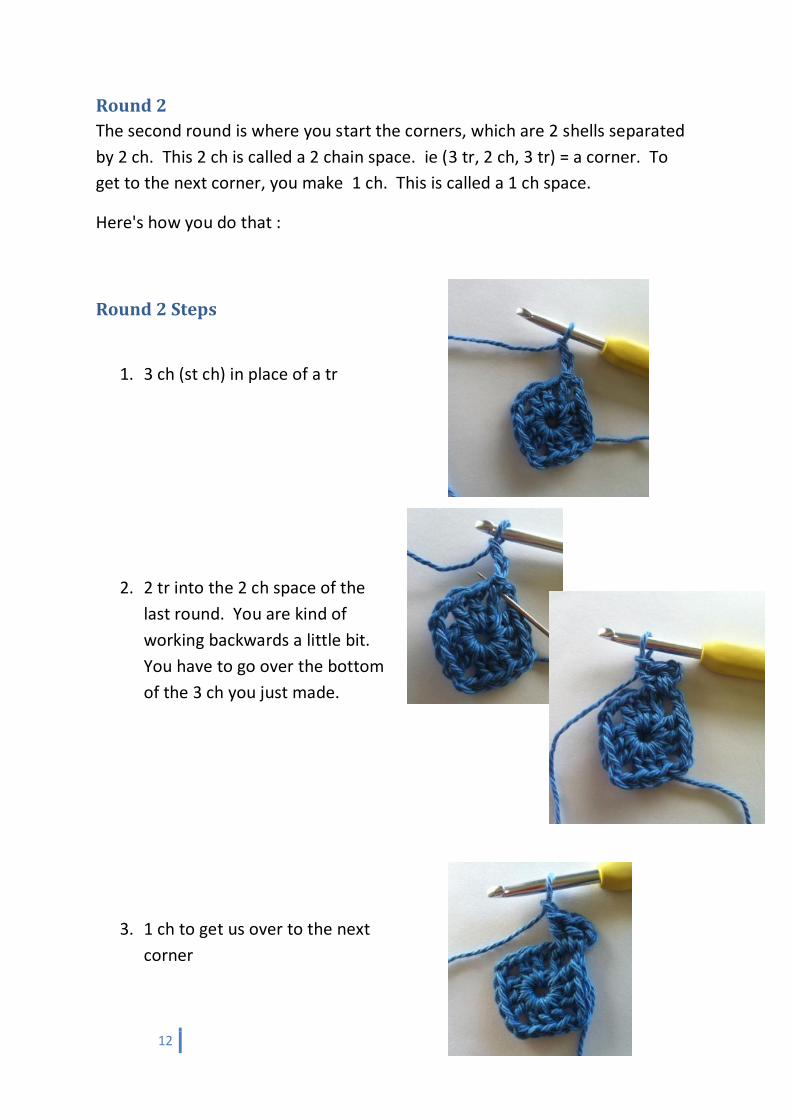
Round 2 Steps
1. 3 ch (st ch) in place of a tr
2. 2 tr into the 2 ch space of the
last round. You are kind of
working backwards a little bit.
You have to go over the bottom
of the 3 ch you just made.
3. 1 ch to get us over to the next
corner
13
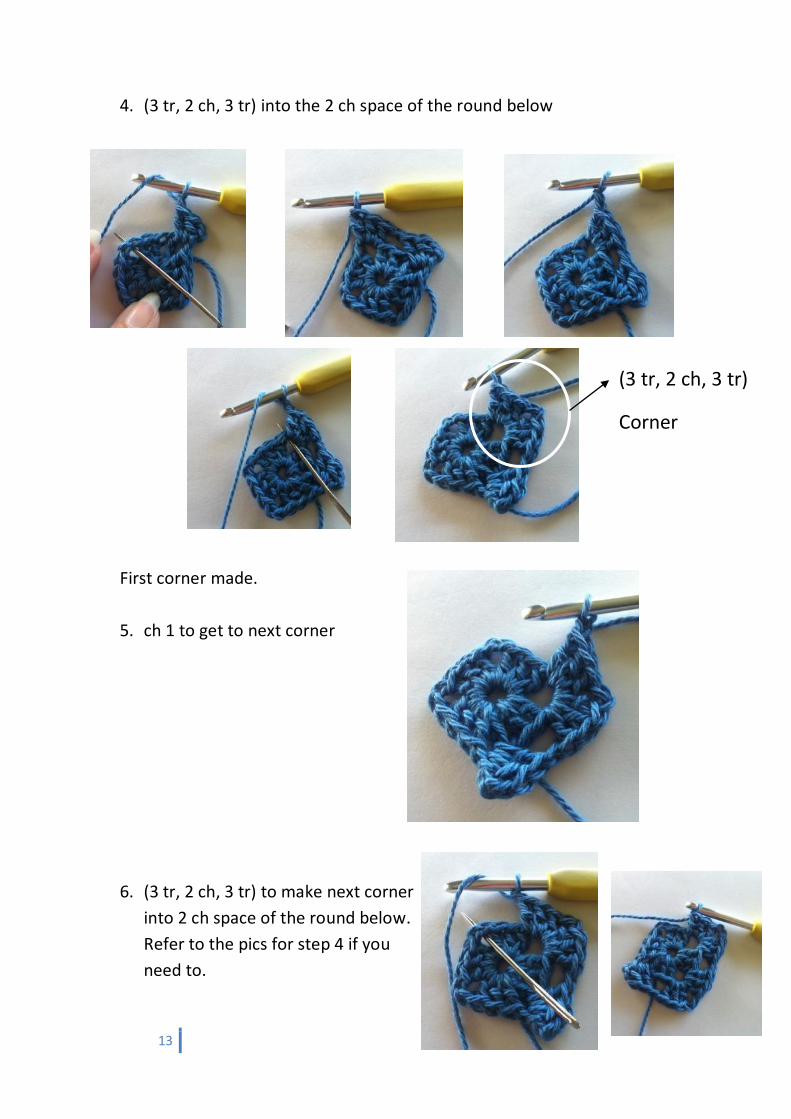
4. (3 tr, 2 ch, 3 tr) into the 2 ch space of the round below
First corner made.
5. ch 1 to get to next corner
6. (3 tr, 2 ch, 3 tr) to make next corner
into 2 ch space of the round below.
Refer to the pics for step 4 if you
need to.
(3 tr, 2 ch, 3 tr)
Corner

14
7. ch 1 to get to the next corner
8. (3 tr, 2 ch, 3 tr) in 2 ch space of
round below (refer to step 4 pics if
you need to)
9. ch 1 to get to the last corner
10. 3 tr in the same 2 ch space that we
did our first 3 tr into on this round
in steps 1 & 2.
15
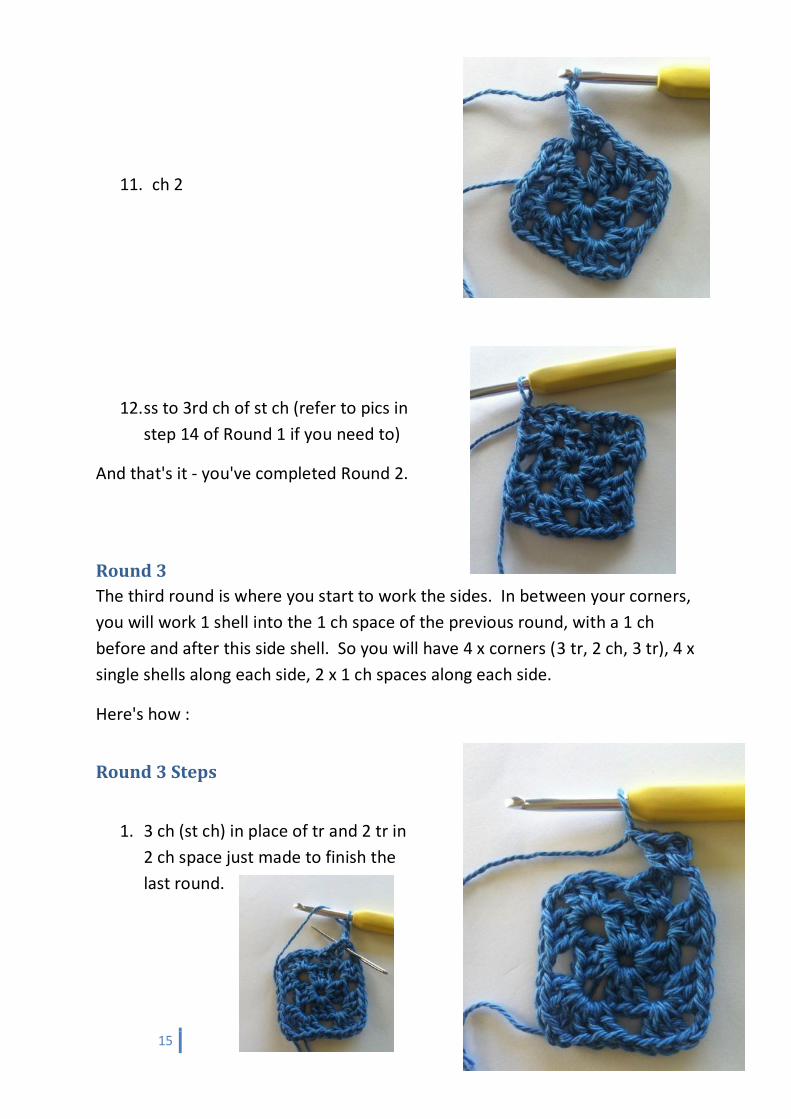
11. ch 2
12. ss to 3rd ch of st ch (refer to pics in
step 14 of Round 1 if you need to)
And that's it - you've completed Round 2.
Round 3
The third round is where you start to work the sides. In between your corners,
you will work 1 shell into the 1 ch space of the previous round, with a 1 ch
before and after this side shell. So you will have 4 x corners (3 tr, 2 ch, 3 tr), 4 x
single shells along each side, 2 x 1 ch spaces along each side.
Here's how :
Round 3 Steps
1. 3 ch (st ch) in place of tr and 2 tr in
2 ch space just made to finish the
last round.
16
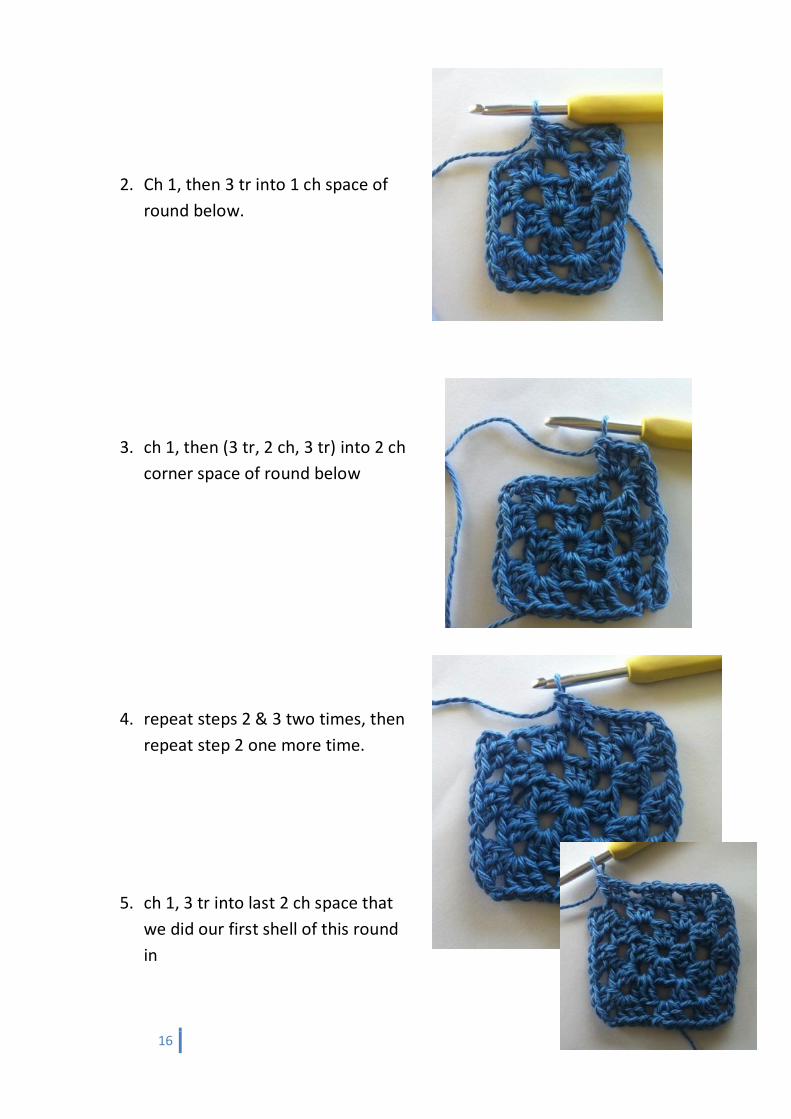
2. Ch 1, then 3 tr into 1 ch space of
round below.
3. ch 1, then (3 tr, 2 ch, 3 tr) into 2 ch
corner space of round below
4. repeat steps 2 & 3 two times, then
repeat step 2 one more time.
5. ch 1, 3 tr into last 2 ch space that
we did our first shell of this round
in
17
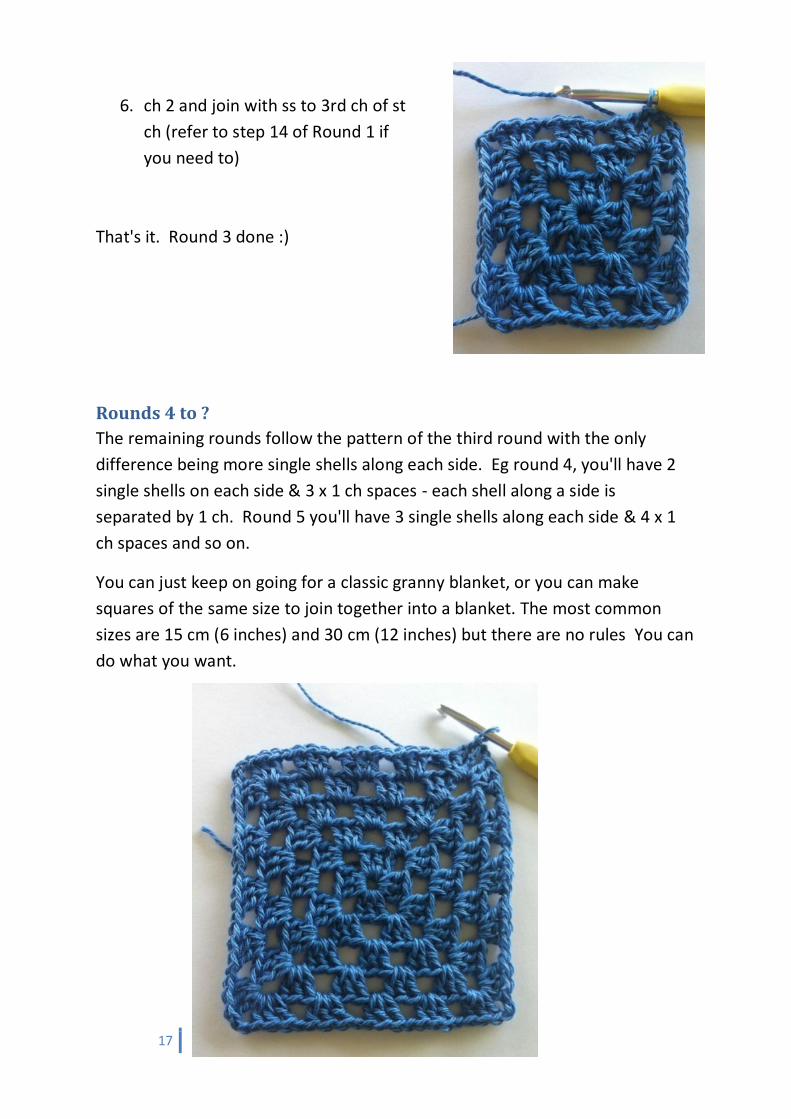
6. ch 2 and join with ss to 3rd ch of st
ch (refer to step 14 of Round 1 if
you need to)
That's it. Round 3 done :)
Rounds 4 to ?
The remaining rounds follow the pattern of the third round with the only
difference being more single shells along each side. Eg round 4, you'll have 2
single shells on each side & 3 x 1 ch spaces - each shell along a side is
separated by 1 ch. Round 5 you'll have 3 single shells along each side & 4 x 1
ch spaces and so on.
You can just keep on going for a classic granny blanket, or you can make
squares of the same size to join together into a blanket. The most common
sizes are 15 cm (6 inches) and 30 cm (12 inches) but there are no rules You can
do what you want.

18
Finishing off ad Weaving in the Ends
Now that you've made a granny square, you will need to tie off the yarn and
deal with the loose ends. One from the start and one from the end. This is my
method. I REALLY recommend you do this as you go. Don't leave all your ends
hanging until the end of a project. You will hate having to deal with them all at
once.
1. Pull up a loop and cut your yarn
about 10-15 cm from the square
2. Turn the square over so the back is
facing up and pull the tail through
the loop loosely - not all the way
tight.
3. Put your thumb nail right up under
the base of the loop and pull the
tail tight towards to centre of the
square
19
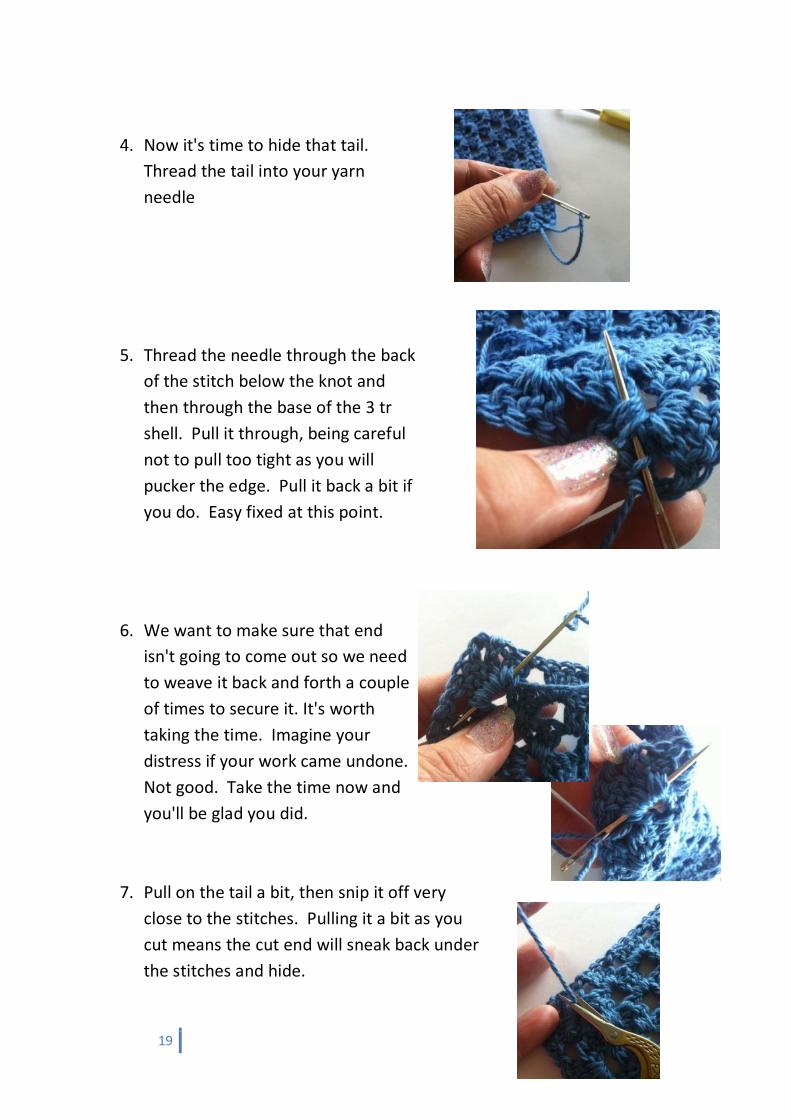
4. Now it's time to hide that tail.
Thread the tail into your yarn
needle
5. Thread the needle through the back
of the stitch below the knot and
then through the base of the 3 tr
shell. Pull it through, being careful
not to pull too tight as you will
pucker the edge. Pull it back a bit if
you do. Easy fixed at this point.
6. We want to make sure that end
isn't going to come out so we need
to weave it back and forth a couple
of times to secure it. It's worth
taking the time. Imagine your
distress if your work came undone.
Not good. Take the time now and
you'll be glad you did.
7. Pull on the tail a bit, then snip it off very
close to the stitches. Pulling it a bit as you
cut means the cut end will sneak back under
the stitches and hide.
20
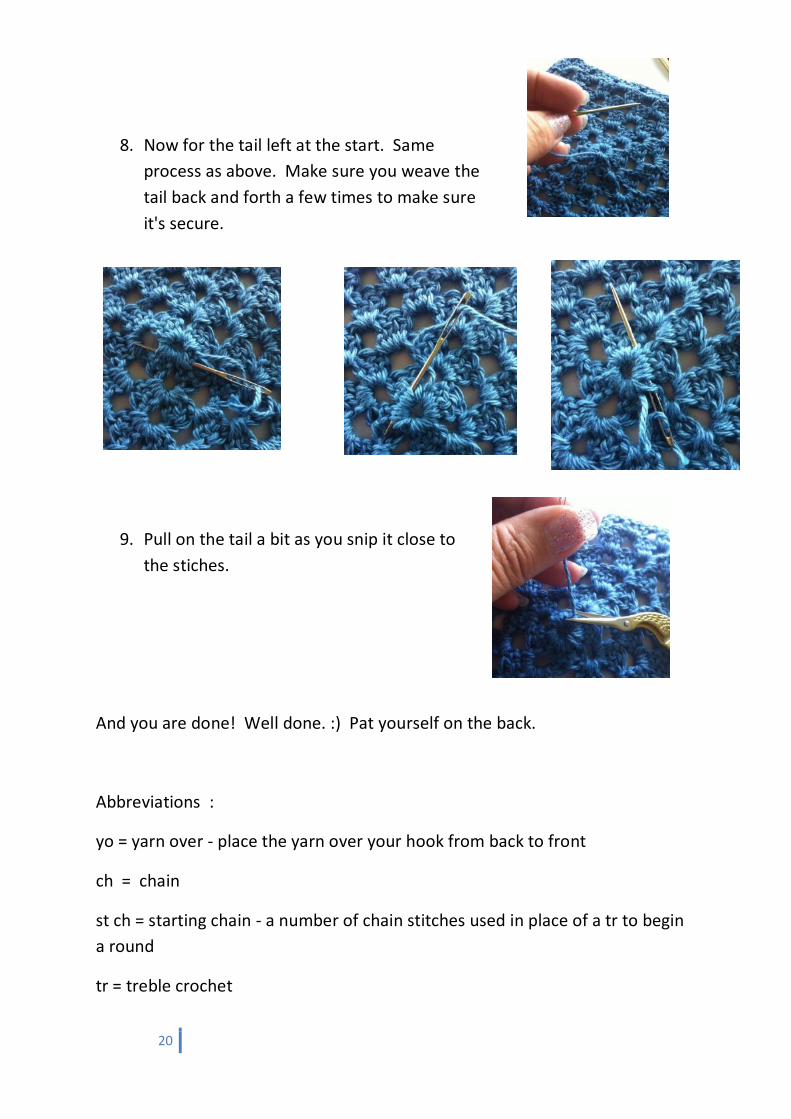
8. Now for the tail left at the start. Same
process as above. Make sure you weave the
tail back and forth a few times to make sure
it's secure.
9. Pull on the tail a bit as you snip it close to
the stiches.
And you are done! Well done. :) Pat yourself on the back.
Abbreviations :
yo = yarn over - place the yarn over your hook from back to front
ch = chain
st ch = starting chain - a number of chain stitches used in place of a tr to begin
a round
tr = treble crochet


![How to Crochet a Granny Square - Snohomish Knitters GuildHow to Crochet a Granny Square By Tandy Imhoff/SmartCat Studios Step 1: 1a]Starting with a slip knot on your hook, 1b] chain](https://static.fdocuments.us/doc/165x107/610c2de4e173ee59ff3e52c6/how-to-crochet-a-granny-square-snohomish-knitters-guild-how-to-crochet-a-granny.jpg)