Holiday eBook from Red Heart.pdf
48
description
crochet
Transcript of Holiday eBook from Red Heart.pdf

Holiday eBook from Red Heart Yarn
Find more crochet and knitting patterns, yarn inspiration and creative ideas at www.coatsandclark.com. 2
Holiday eBook from Red Heart Yarn
Find more crochet and knitting patterns, yarn inspiration and creative ideas at www.coatsandclark.com. 3
Make it a Red Heart Holiday from Red Heart Yarn
Easy-to-follow Craft, Crochet, and Knitting Patterns for the Season
Copyright 2010 by Prime Publishing LLC
All rights reserved. No part of this book may be reproduced or transmitted in any form or by any means,
electronic or mechanical, including photocopying, recording, or by any information storage or retrieval
system, without written permission from the publisher, except in the case of brief quotations embodied
in critical articles and reviews.
Trademarks are property of their respective holders. When used, trademarks are for the benefit of the
trademark owner only.
Published by Prime Publishing LLC, 3400 Dundee Road, Northbrook, IL 60062 – www.primecp.com
Holiday eBook from Red Heart Yarn
Find more crochet and knitting patterns, yarn inspiration and creative ideas at www.coatsandclark.com. 4
Letter from the Editors
Dear Reader,
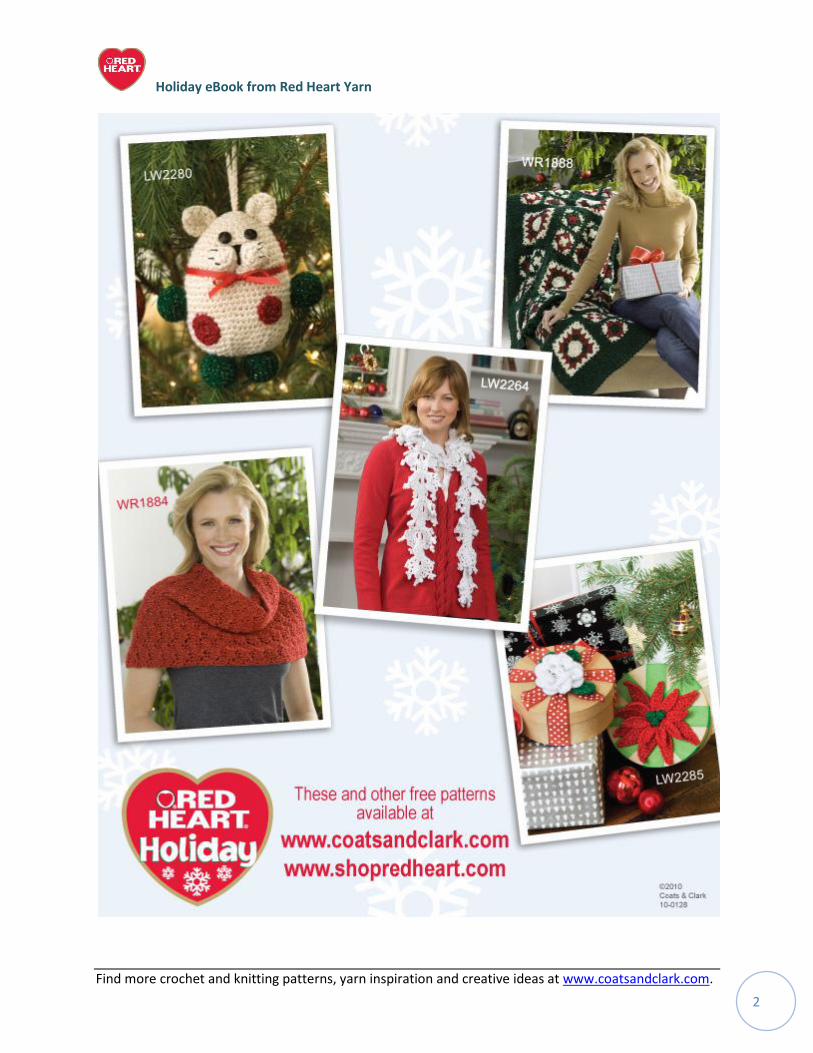
Are you looking for gifts and decorations to make for the holidays? These 26 projects are perfect for
those who love to craft, crochet, and knit with yarn. Whether you want to make decorations for the
home, ornaments for the tree, décor items such as placemats and throws, or hats, scarves, and more to
keep everyone cozy this year, the assortment of projects guarantees that you'll find a project (or 10)
that you can't wait to make! Red Heart Yarn presents this FREE collection of 26 holiday patterns for your
enjoyment.
With 6 knitting patterns, 19 crochet patterns, and a craft project, you're sure to find the pattern you're
looking for. For the crafters, try the Pom-Pom Yarn Christmas Trees on pg. 14. For the knitters, we have
Striped Christmas Stockings on pg. 23, Knit Mitten Ornaments on pg. 37, Jingle Bell Hats for the Family
on pg. 47, and more. If you crochet, there's the Christmas Pinwheel Placemats and Coasters on pg. 9, the
Christmas Striped Throw on pg. 12, Mr. & Mrs. Snowman on pg. 21, and scarves, hats, and ornaments
galore.
For more free crochet and knitting patterns and to purchase the materials listed in these patterns, visit
coatsandclark.com.
We would like to thank www.FaveCrafts.com for helping to create this eBook.
Sincerely,
Red Heart Yarn
www.shopredheart.com
Holiday eBook from Red Heart Yarn
Find more crochet and knitting patterns, yarn inspiration and creative ideas at www.coatsandclark.com. 5
Make it a Red Heart Holiday Table of Contents
Abbreviations .................................. 6
For the Home ................................... 7
Crocheted Snowflake Table Runner ............... 7
Christmas Pinwheel Placemats & Coasters .... 9
Zigzag Christmas Throw & Pillows ............... 10
Christmas Striped Throw .............................. 12
Decorations .................................... 14
Pom-Pom Yarn Christmas Trees ................... 14
Crocheted Nativity ....................................... 15
Mr. and Mrs. Snowman ............................... 21
Striped Christmas Stockings ......................... 23
Holly Stocking ............................................... 25
Trim the Tree ................................ 27
Pinwheel Garland ......................................... 27
Snowy Garland ............................................. 28
Crocheted Gift Card Holder ......................... 29
Crochet Heart Ornaments ............................ 30
Little Stocking Ornaments ............................ 31
Snowflake Mitten Holiday Ornament .......... 33
Elf-Size Stocking Ornament .......................... 34
Festive Bird Ornament ................................. 35
Knit Mitten Ornaments ................................ 37
Hats, Scarves, and More ...............38
Santa Hat Knitting Pattern ........................... 38
Holiday Hats ................................................. 39
Holiday Scarves Trio ..................................... 40
Jingle Jester Hat ........................................... 41
Candy Cane Scarf ......................................... 43
Crochet Santa Hat ........................................ 44
Pom-Pom Trimmed Fingerless Gloves ......... 46
Jingle Bell Hats for the Family ...................... 47
Holiday eBook from Red Heart Yarn
Find more crochet and knitting patterns, yarn inspiration and creative ideas at www.coatsandclark.com. 6
Abbreviations
A, B, C – Color A, Color B, color, C, etc. ch – chain dc – double crochet dec – decrease dpn – double pointed needle hdc – half double crochet inc – increase K – knit k2tog – knit next two stitches together kwise – knitwise m1 – make 1 mm – millimeters P – purl p2tog – purl next two stitches together pm – place marker pwise – purlwise RS – right side rem – remaining rnd – round sc – single crochet sc2tog – single crochet two stitches together sk – skip ssk – slip the next two stitches knit wise onto right hand needle, insert left hand needle into front loops of these stitches, knit together. st(s) – stitch(es) St st – stockinette stitch (knit right side rows, purl wrong side rows) tbl – through back loop tog – together tr – treble (or triple) crochet WS – wrong side yo – yarn over * or ** – repeat whatever follows the * or ** as indicated [ ] – work directions in brackets the number of times specified
Holiday eBook from Red Heart Yarn
Find more crochet and knitting patterns, yarn inspiration and creative ideas at www.coatsandclark.com. 7
For the Home
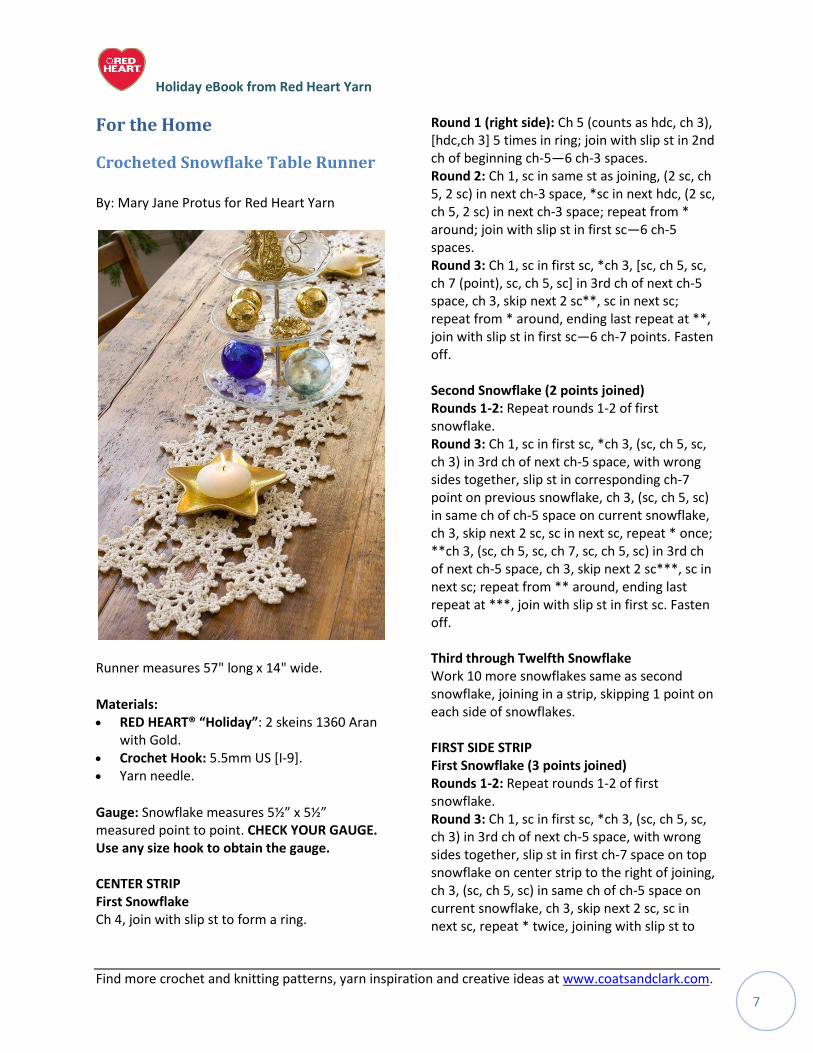
Crocheted Snowflake Table Runner
By: Mary Jane Protus for Red Heart Yarn
Runner measures 57" long x 14" wide.
Materials: RED HEART® “Holiday”: 2 skeins 1360 Aran
with Gold. Crochet Hook: 5.5mm US [I-9]. Yarn needle.
Gauge: Snowflake measures 5½” x 5½” measured point to point. CHECK YOUR GAUGE. Use any size hook to obtain the gauge. CENTER STRIP First Snowflake Ch 4, join with slip st to form a ring.
Round 1 (right side): Ch 5 (counts as hdc, ch 3), [hdc,ch 3] 5 times in ring; join with slip st in 2nd ch of beginning ch-5—6 ch-3 spaces. Round 2: Ch 1, sc in same st as joining, (2 sc, ch 5, 2 sc) in next ch-3 space, *sc in next hdc, (2 sc, ch 5, 2 sc) in next ch-3 space; repeat from * around; join with slip st in first sc—6 ch-5 spaces. Round 3: Ch 1, sc in first sc, *ch 3, [sc, ch 5, sc, ch 7 (point), sc, ch 5, sc] in 3rd ch of next ch-5 space, ch 3, skip next 2 sc**, sc in next sc; repeat from * around, ending last repeat at **, join with slip st in first sc—6 ch-7 points. Fasten off. Second Snowflake (2 points joined) Rounds 1-2: Repeat rounds 1-2 of first snowflake. Round 3: Ch 1, sc in first sc, *ch 3, (sc, ch 5, sc, ch 3) in 3rd ch of next ch-5 space, with wrong sides together, slip st in corresponding ch-7 point on previous snowflake, ch 3, (sc, ch 5, sc) in same ch of ch-5 space on current snowflake, ch 3, skip next 2 sc, sc in next sc, repeat * once; **ch 3, (sc, ch 5, sc, ch 7, sc, ch 5, sc) in 3rd ch of next ch-5 space, ch 3, skip next 2 sc***, sc in next sc; repeat from ** around, ending last repeat at ***, join with slip st in first sc. Fasten off. Third through Twelfth Snowflake Work 10 more snowflakes same as second snowflake, joining in a strip, skipping 1 point on each side of snowflakes. FIRST SIDE STRIP First Snowflake (3 points joined) Rounds 1-2: Repeat rounds 1-2 of first snowflake. Round 3: Ch 1, sc in first sc, *ch 3, (sc, ch 5, sc, ch 3) in 3rd ch of next ch-5 space, with wrong sides together, slip st in first ch-7 space on top snowflake on center strip to the right of joining, ch 3, (sc, ch 5, sc) in same ch of ch-5 space on current snowflake, ch 3, skip next 2 sc, sc in next sc, repeat * twice, joining with slip st to
Holiday eBook from Red Heart Yarn
Find more crochet and knitting patterns, yarn inspiration and creative ideas at www.coatsandclark.com. 8
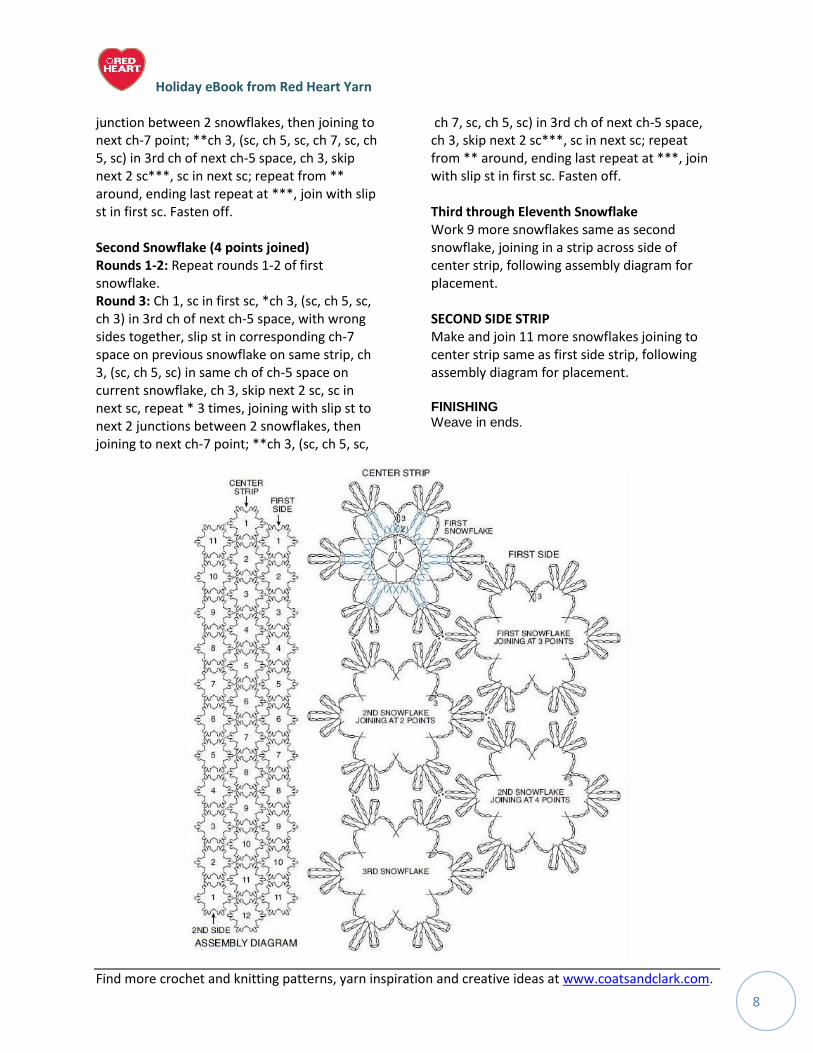
junction between 2 snowflakes, then joining to next ch-7 point; **ch 3, (sc, ch 5, sc, ch 7, sc, ch 5, sc) in 3rd ch of next ch-5 space, ch 3, skip next 2 sc***, sc in next sc; repeat from ** around, ending last repeat at ***, join with slip st in first sc. Fasten off. Second Snowflake (4 points joined) Rounds 1-2: Repeat rounds 1-2 of first snowflake. Round 3: Ch 1, sc in first sc, *ch 3, (sc, ch 5, sc, ch 3) in 3rd ch of next ch-5 space, with wrong sides together, slip st in corresponding ch-7 space on previous snowflake on same strip, ch 3, (sc, ch 5, sc) in same ch of ch-5 space on current snowflake, ch 3, skip next 2 sc, sc in next sc, repeat * 3 times, joining with slip st to next 2 junctions between 2 snowflakes, then joining to next ch-7 point; **ch 3, (sc, ch 5, sc,
ch 7, sc, ch 5, sc) in 3rd ch of next ch-5 space, ch 3, skip next 2 sc***, sc in next sc; repeat from ** around, ending last repeat at ***, join with slip st in first sc. Fasten off. Third through Eleventh Snowflake Work 9 more snowflakes same as second snowflake, joining in a strip across side of center strip, following assembly diagram for placement. SECOND SIDE STRIP Make and join 11 more snowflakes joining to center strip same as first side strip, following assembly diagram for placement. FINISHING Weave in ends.

Holiday eBook from Red Heart Yarn
Find more crochet and knitting patterns, yarn inspiration and creative ideas at www.coatsandclark.com. 9
Christmas Pinwheel Placemats &
Coasters
By: Mary Jane Protus for Red Heart Yarn
Placemat measures 16" in diameter. Coaster measures 4½" in diameter.
Materials:
RED HEART “Holiday”: 1 Ball each 9040 Red/Silver A and 6040 Green/Silver C, 2 balls 1040 White/Silver B. (Yarn amounts will make a complete set of 4 placemats and 4 coasters, two in each color combination.)
Crochet Hook: 5mm [US H-8].
Stitch marker, yarn needle.
GAUGE: 14 sts = 4"; 7 rnds = 4" in dc. CHECK YOUR GAUGE. Use any size hook to obtain the gauge. Note: Instructions are written using A + B for spiral with C border. Change colors for other color combinations. PLACEMAT Center: With A, ch 4; join with a slip st in first ch to forma ring; ch 1, (sc, hdc, 3 dc) all into ring, drop A, DO NOT FASTEN OFF; following the A
sts, join B with an sc in the ring, work (hdc, 3 dc) all into same ring, drop B, DO NOT FASTEN OFF. Rnd 1: Pick up A, work 2 dc into each B st – 10 dc A; drop A, pick up B, work 2 dc in each A st around – 30 dc B, drop B. Rnd 2: Pick up A, * dc in next dc, 2 dc in next dc; repeat from * around – 45 dc A; drop A, pick up B and repeat from * to last st; dc in last st – 67 dc B, drop B. Rnd 3: Pick up A, [dc in next 3 dc, 2 dc in next dc] 16 times, dc in last 3 dc – 83 dc A; drop A, pick up B, [dc in next 6 dc, 2 dc in next dc] 11 times, dc in last 6 dc – 94 dc B, drop B. Rnd 4: Pick up A, [dc in next 10 dc, 2 dc in next dc] 8 times, dc in next 6 dc – 102 dc A; drop A, pick up B, [dc in next 6 dc, 2 dc in next dc] 14 times, dc in last 4 dc – 116 dc B, drop B. Rnd 5: Pick up A, [dc in next 10 dc, 2 dc in next dc] 10 times, dc in next 6 dc – 126 dc A; drop A, pick up B, [dc in next 10 dc, 2 dc in next dc] 11 times, dc in last 5 dc – 137 dc, drop B. Rnd 6: Pick up A, [dc in next 14 dc, 2 dc in next dc] 9 times, dc in next 2 dc – 146 dc A; drop A, pick up B, [dc in next 18 dc, 2 dc in next dc] 7 times, dc in last 13 dc – 153 dc B. Mark 77th dc from hook. Rnd 7: Pick up A, * dc in next 18 dc, 2 dc in next dc; repeat from * to marker; ** hdc in next 2 dc, sc in next dc, slip st in next dc **; fasten off A; pick up B; repeat from ** to ** across next 4 dc. Fasten off B. COASTER Work same as Placemat through Rnd 1. Rnd 2: Pick up A, 2 dc in next 10 dc, dc in next dc, * hdc in next dc, sc in next dc, slip st in next dc *; fasten off A, pick up B, dc in next dc; repeat from * to * across next 3 dc. Fasten off B. BORDER (Worked on Placemats and Coasters) With right side facing, join C, join in any st; ch 1, * (sc, ch 2, sc) all in same st, skip next st; repeat from * around; join with a slip st in first sc. Fasten off. Weave in ends.
Holiday eBook from Red Heart Yarn
Find more crochet and knitting patterns, yarn inspiration and creative ideas at www.coatsandclark.com. 10
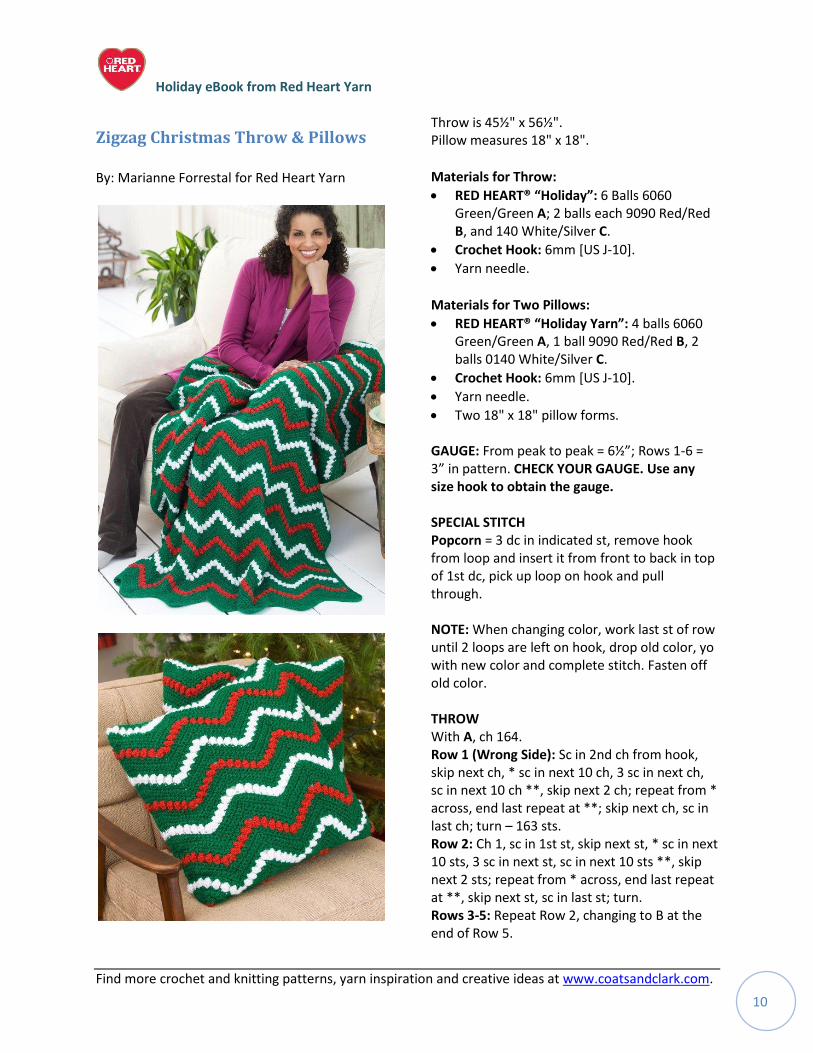
Zigzag Christmas Throw & Pillows
By: Marianne Forrestal for Red Heart Yarn
Throw is 45½" x 56½". Pillow measures 18" x 18".
Materials for Throw:
RED HEART® “Holiday”: 6 Balls 6060 Green/Green A; 2 balls each 9090 Red/Red B, and 140 White/Silver C.
Crochet Hook: 6mm [US J-10].
Yarn needle.
Materials for Two Pillows:
RED HEART® “Holiday Yarn”: 4 balls 6060 Green/Green A, 1 ball 9090 Red/Red B, 2 balls 0140 White/Silver C.
Crochet Hook: 6mm [US J-10].
Yarn needle.
Two 18" x 18" pillow forms. GAUGE: From peak to peak = 6½”; Rows 1-6 = 3” in pattern. CHECK YOUR GAUGE. Use any size hook to obtain the gauge. SPECIAL STITCH Popcorn = 3 dc in indicated st, remove hook from loop and insert it from front to back in top of 1st dc, pick up loop on hook and pull through. NOTE: When changing color, work last st of row until 2 loops are left on hook, drop old color, yo with new color and complete stitch. Fasten off old color. THROW With A, ch 164. Row 1 (Wrong Side): Sc in 2nd ch from hook, skip next ch, * sc in next 10 ch, 3 sc in next ch, sc in next 10 ch **, skip next 2 ch; repeat from * across, end last repeat at **; skip next ch, sc in last ch; turn – 163 sts. Row 2: Ch 1, sc in 1st st, skip next st, * sc in next 10 sts, 3 sc in next st, sc in next 10 sts **, skip next 2 sts; repeat from * across, end last repeat at **, skip next st, sc in last st; turn. Rows 3-5: Repeat Row 2, changing to B at the end of Row 5.
Holiday eBook from Red Heart Yarn
Find more crochet and knitting patterns, yarn inspiration and creative ideas at www.coatsandclark.com. 11
Row 6 (Right Side): With B, ch 3, skip 1st two sts, *Popcorn in next st, ch 1, [skip next st, Popcorn in next st, ch 1] 4 times, skip next st, [Popcorn, ch 1] twice all in next st, [skip next st, Popcorn in next st, ch 1] 4 times; skip next st, Popcorn in next st **, skip next 2 sts; repeat from * across, end last repeat at **, skip next st, dc in last st; change to A, turn – 84 Popcorns. Row 7: With A, ch 1, sc in 1st st, skip 1st Popcorn, [sc in next ch-1 space, sc in next Popcorn] 5 times; 3 sc in next ch-1 space, [sc in next Popcorn, sc in next ch-1 space] 5 times **; skip next 2 Popcorns; repeat from * across, end last repeat at **, skip next Popcorn, sc in top of ch-3; turn – 163 sts. Rows 8-11: Repeat Row 2, changing to C at end of Row 11. Row 12: With C, repeat Row 6. Row 13: With A, repeat Row 7. Rows 14-113: Repeat Rows 2-12 eight more times, then Rows 2-5 once more. At end of Row 113, do not change color of fasten A off; turn. BORDER Top Edge With A, ch 3, skip next st, * dc in next 10 sts, 3 dc in next st, dc in next 10 sts **, skip next 2 sts; repeat from * across, end last repeat at **, skip next st, 3 dc in next st; turn to work along Side Edge. Side Edge 1: Dc in side of each sc row, 2 dc in side of each Popcorn row; turn to work along Bottom Edge. Bottom Edge: Working in unused loops of beginning ch, 3 dc in 1st ch, * dc in next 10 ch, skip next ch, dc in next 10 ch **, 3 dc in next ch-2 space; repeat from * across, end last repeat at **, 3 dc last ch; turn to work along Side Edge. Side Edge 2: Repeat Side Edge 1; turn to work 2 dc in same st as beginning ch-3; join with a slip st to top of ch-3. Fasten off. Weave in ends.
PILLOW COVER (make 2) Row 1 (Wrong Side): With A ch 72; sc in 2nd ch from hook, skip next ch, [sc in next 10 ch, 3 sc in next ch, sc in next 10 ch, skip next 2 ch] 2 times, sc in next 10 ch, 3 sc in next ch, sc in next 10 ch, skip next ch, sc in last ch; turn—3 ripples. Rows 2–5: Ch 1, sc in first sc, skip next sc, [sc in next 10 sc, 3 sc in next sc, sc in next 10 sc, skip next 2 sc] 2 times, sc in next 10 sc, 3 sc in next sc, sc in next 10 sc, skip next sc, sc in last sc, changing to B at end of Row 5; turn. Fasten off A. Row 6: Ch 3, skip first 2 sc, *popcorn in next sc, ch 1, [skip next sc, popcorn in next sc, ch 1] 4 times, skip next sc, (popcorn, ch 1, popcorn) in next sc, ch 1, [skip next sc, popcorn in next sc, ch 1] 4 times, skip next sc, popcorn in next sc**, skip next 2 sc; repeat from * 2 more times, end at **, skip next sc, dc in last sc, changing to A; turn. Fasten off B. Row 7: Ch 1, sc in first dc, *[sc in next ch-1 space, sc in next popcorn] 5 times, 3 sc in next ch-1 space, [sc in next popcorn, sc in next ch-1 space] 5 times**, skip next 2 popcorn; repeat from * 2 times, end at **, skip next popcorn, sc in top of beginning ch-3; turn. Rows 8–11: Repeat Rows 2-5, changing to C at end of Row 11. Fasten off A. Row 12: Repeat Row 6, changing to A at the end of row; turn. Fasten off C. Row 13: Repeat Row 7. Rows 14–84: Repeat Rows 2–13 five times, then repeat Rows 2–12. Fasten off C. ASSEMBLY Fold pillow cover in half, with right sides together, bringing first row up to meet last row. With A, whipstitch first row to last row. Flatten pillow so seam is centered on back. Whipstitch one side seam. Turn pillow cover right side out, insert pillow form, and whipstitch remaining side seam. Weave in ends.
Holiday eBook from Red Heart Yarn
Find more crochet and knitting patterns, yarn inspiration and creative ideas at www.coatsandclark.com. 12
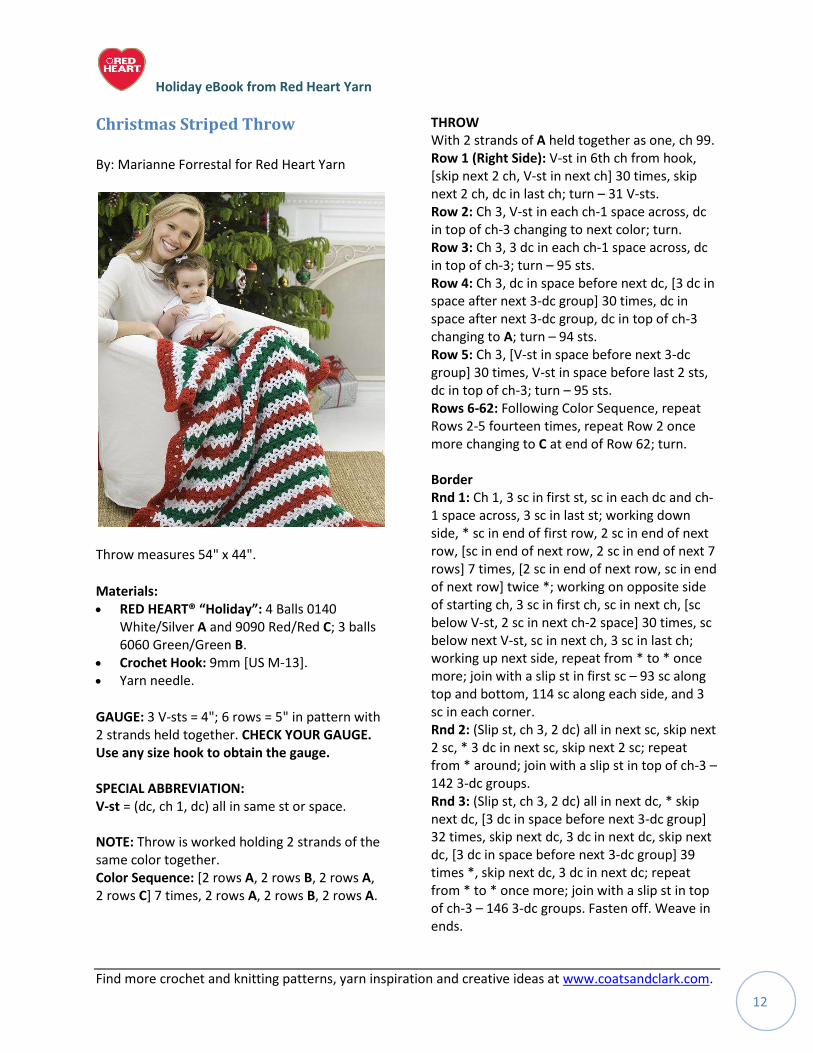
Christmas Striped Throw
By: Marianne Forrestal for Red Heart Yarn
Throw measures 54" x 44".
Materials: RED HEART® “Holiday”: 4 Balls 0140
White/Silver A and 9090 Red/Red C; 3 balls 6060 Green/Green B.
Crochet Hook: 9mm [US M-13]. Yarn needle.
GAUGE: 3 V-sts = 4"; 6 rows = 5" in pattern with 2 strands held together. CHECK YOUR GAUGE. Use any size hook to obtain the gauge. SPECIAL ABBREVIATION: V-st = (dc, ch 1, dc) all in same st or space. NOTE: Throw is worked holding 2 strands of the same color together. Color Sequence: [2 rows A, 2 rows B, 2 rows A, 2 rows C] 7 times, 2 rows A, 2 rows B, 2 rows A.
THROW With 2 strands of A held together as one, ch 99. Row 1 (Right Side): V-st in 6th ch from hook, [skip next 2 ch, V-st in next ch] 30 times, skip next 2 ch, dc in last ch; turn – 31 V-sts. Row 2: Ch 3, V-st in each ch-1 space across, dc in top of ch-3 changing to next color; turn. Row 3: Ch 3, 3 dc in each ch-1 space across, dc in top of ch-3; turn – 95 sts. Row 4: Ch 3, dc in space before next dc, [3 dc in space after next 3-dc group] 30 times, dc in space after next 3-dc group, dc in top of ch-3 changing to A; turn – 94 sts. Row 5: Ch 3, [V-st in space before next 3-dc group] 30 times, V-st in space before last 2 sts, dc in top of ch-3; turn – 95 sts. Rows 6-62: Following Color Sequence, repeat Rows 2-5 fourteen times, repeat Row 2 once more changing to C at end of Row 62; turn. Border Rnd 1: Ch 1, 3 sc in first st, sc in each dc and ch-1 space across, 3 sc in last st; working down side, * sc in end of first row, 2 sc in end of next row, [sc in end of next row, 2 sc in end of next 7 rows] 7 times, [2 sc in end of next row, sc in end of next row] twice *; working on opposite side of starting ch, 3 sc in first ch, sc in next ch, [sc below V-st, 2 sc in next ch-2 space] 30 times, sc below next V-st, sc in next ch, 3 sc in last ch; working up next side, repeat from * to * once more; join with a slip st in first sc – 93 sc along top and bottom, 114 sc along each side, and 3 sc in each corner. Rnd 2: (Slip st, ch 3, 2 dc) all in next sc, skip next 2 sc, * 3 dc in next sc, skip next 2 sc; repeat from * around; join with a slip st in top of ch-3 – 142 3-dc groups. Rnd 3: (Slip st, ch 3, 2 dc) all in next dc, * skip next dc, [3 dc in space before next 3-dc group] 32 times, skip next dc, 3 dc in next dc, skip next dc, [3 dc in space before next 3-dc group] 39 times *, skip next dc, 3 dc in next dc; repeat from * to * once more; join with a slip st in top of ch-3 – 146 3-dc groups. Fasten off. Weave in ends.
Holiday eBook from Red Heart Yarn
Find more crochet and knitting patterns, yarn inspiration and creative ideas at www.coatsandclark.com. 13
Holiday eBook from Red Heart Yarn
Find more crochet and knitting patterns, yarn inspiration and creative ideas at www.coatsandclark.com. 14
Decorations
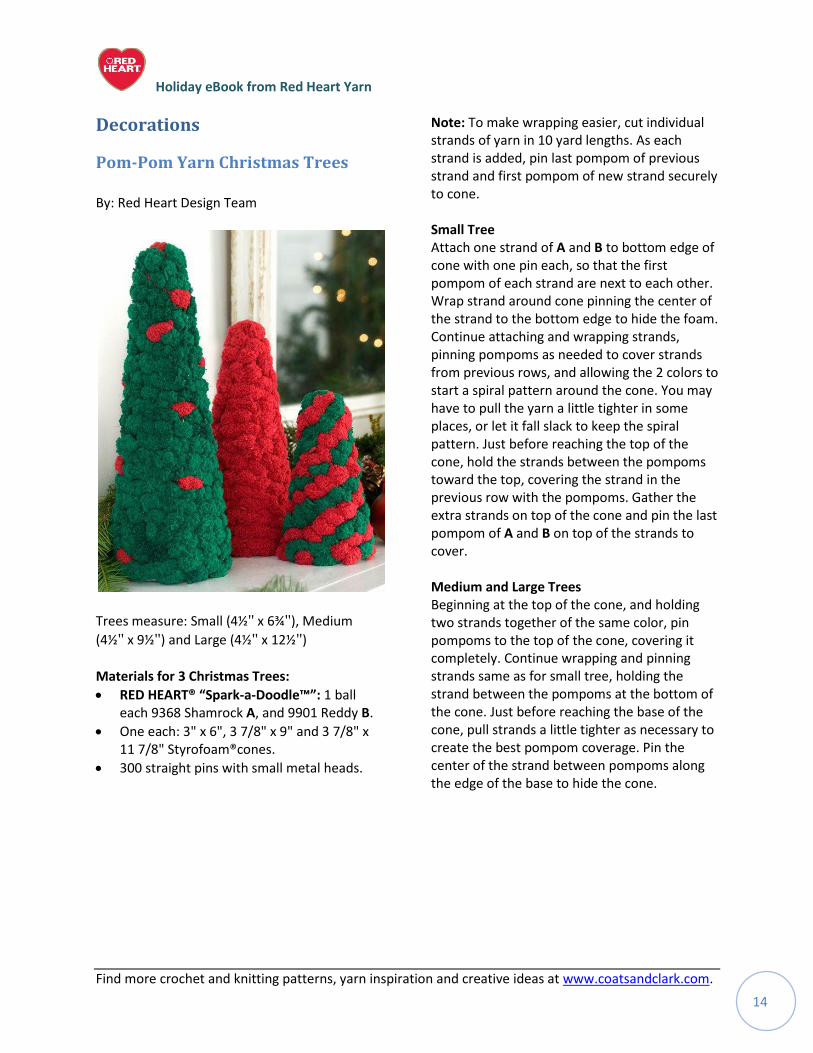
Pom-Pom Yarn Christmas Trees
By: Red Heart Design Team
Trees measure: Small (4½" x 6¾"), Medium
(4½" x 9½") and Large (4½" x 12½")
Materials for 3 Christmas Trees:
RED HEART® “Spark-a-Doodle™”: 1 ball each 9368 Shamrock A, and 9901 Reddy B.
One each: 3" x 6", 3 7/8" x 9" and 3 7/8" x 11 7/8" Styrofoam®cones.
300 straight pins with small metal heads.
Note: To make wrapping easier, cut individual strands of yarn in 10 yard lengths. As each strand is added, pin last pompom of previous strand and first pompom of new strand securely to cone. Small Tree Attach one strand of A and B to bottom edge of cone with one pin each, so that the first pompom of each strand are next to each other. Wrap strand around cone pinning the center of the strand to the bottom edge to hide the foam. Continue attaching and wrapping strands, pinning pompoms as needed to cover strands from previous rows, and allowing the 2 colors to start a spiral pattern around the cone. You may have to pull the yarn a little tighter in some places, or let it fall slack to keep the spiral pattern. Just before reaching the top of the cone, hold the strands between the pompoms toward the top, covering the strand in the previous row with the pompoms. Gather the extra strands on top of the cone and pin the last pompom of A and B on top of the strands to cover. Medium and Large Trees Beginning at the top of the cone, and holding two strands together of the same color, pin pompoms to the top of the cone, covering it completely. Continue wrapping and pinning strands same as for small tree, holding the strand between the pompoms at the bottom of the cone. Just before reaching the base of the cone, pull strands a little tighter as necessary to create the best pompom coverage. Pin the center of the strand between pompoms along the edge of the base to hide the cone.
Holiday eBook from Red Heart Yarn
Find more crochet and knitting patterns, yarn inspiration and creative ideas at www.coatsandclark.com. 15
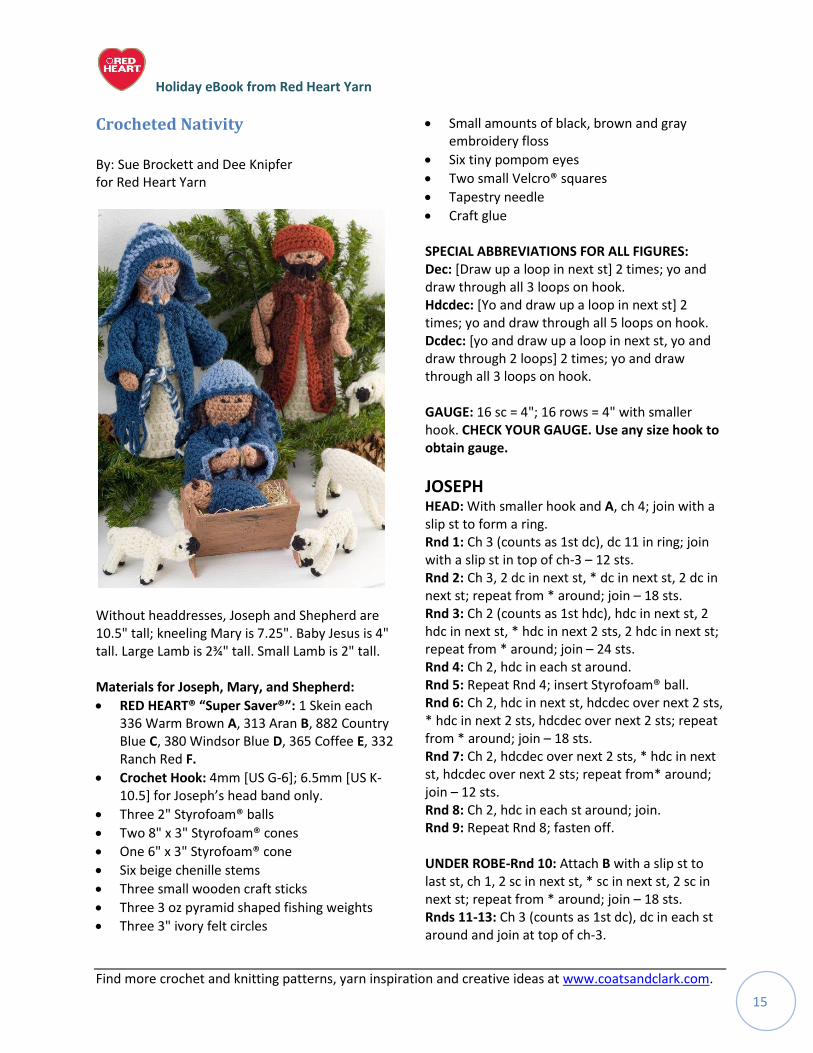
Crocheted Nativity
By: Sue Brockett and Dee Knipfer for Red Heart Yarn
Without headdresses, Joseph and Shepherd are 10.5" tall; kneeling Mary is 7.25". Baby Jesus is 4" tall. Large Lamb is 2¾" tall. Small Lamb is 2" tall. Materials for Joseph, Mary, and Shepherd:
RED HEART® “Super Saver®”: 1 Skein each 336 Warm Brown A, 313 Aran B, 882 Country Blue C, 380 Windsor Blue D, 365 Coffee E, 332 Ranch Red F.
Crochet Hook: 4mm [US G-6]; 6.5mm [US K-10.5+ for Joseph’s head band only.
Three 2" Styrofoam® balls
Two 8" x 3" Styrofoam® cones
One 6" x 3" Styrofoam® cone
Six beige chenille stems
Three small wooden craft sticks
Three 3 oz pyramid shaped fishing weights
Three 3" ivory felt circles
Small amounts of black, brown and gray embroidery floss
Six tiny pompom eyes
Two small Velcro® squares
Tapestry needle
Craft glue
SPECIAL ABBREVIATIONS FOR ALL FIGURES: Dec: [Draw up a loop in next st] 2 times; yo and draw through all 3 loops on hook. Hdcdec: [Yo and draw up a loop in next st] 2 times; yo and draw through all 5 loops on hook. Dcdec: [yo and draw up a loop in next st, yo and draw through 2 loops] 2 times; yo and draw through all 3 loops on hook. GAUGE: 16 sc = 4"; 16 rows = 4" with smaller hook. CHECK YOUR GAUGE. Use any size hook to obtain gauge.
JOSEPH HEAD: With smaller hook and A, ch 4; join with a slip st to form a ring. Rnd 1: Ch 3 (counts as 1st dc), dc 11 in ring; join with a slip st in top of ch-3 – 12 sts. Rnd 2: Ch 3, 2 dc in next st, * dc in next st, 2 dc in next st; repeat from * around; join – 18 sts. Rnd 3: Ch 2 (counts as 1st hdc), hdc in next st, 2 hdc in next st, * hdc in next 2 sts, 2 hdc in next st; repeat from * around; join – 24 sts. Rnd 4: Ch 2, hdc in each st around. Rnd 5: Repeat Rnd 4; insert Styrofoam® ball. Rnd 6: Ch 2, hdc in next st, hdcdec over next 2 sts, * hdc in next 2 sts, hdcdec over next 2 sts; repeat from * around; join – 18 sts. Rnd 7: Ch 2, hdcdec over next 2 sts, * hdc in next st, hdcdec over next 2 sts; repeat from* around; join – 12 sts. Rnd 8: Ch 2, hdc in each st around; join. Rnd 9: Repeat Rnd 8; fasten off. UNDER ROBE-Rnd 10: Attach B with a slip st to last st, ch 1, 2 sc in next st, * sc in next st, 2 sc in next st; repeat from * around; join – 18 sts. Rnds 11-13: Ch 3 (counts as 1st dc), dc in each st around and join at top of ch-3.
Holiday eBook from Red Heart Yarn
Find more crochet and knitting patterns, yarn inspiration and creative ideas at www.coatsandclark.com. 16
Rnd 14: Ch 3, dc in next st, 2 dc in next st, * dc in next 2 sts, 2 dc in next st; repeat from * around; join – 24 sts. Rnds 15-17: Ch 3, dc in each st around; join. Rnd 18: Ch 3, dc in next 2 sts, 2 dc in next st, * dc in next 3 sts, 2 dc in next st; repeat from * around; join – 30 sts. Rnds 19-24: Ch 3, * dc in next st; repeat from * around; join. Rnd 25: Ch 3, dc in next 2 sts, dcdec in next 2 sts, * dc in next 3 sts, dcdec in next 2 sts; repeat from * around; join – 24 sts. Rnd 26: Ch 1, sc around; join and fasten off. BODY: Glue a 4" piece of craft stick into top of Styrofoam® cone (leave 1" protruding to glue into head). Allow to dry. Apply glue to remaining portion of craft stick and fit crocheted Under Robe over cone, carefully fitting stick into Styrofoam® ball. Cut pyramid shaped hole into bottom of cone and glue weight and felt circle into place. Wrap 2 chenille stems together and insert through body at bottom of second Under Robe row for arms (use a skewer or an awl to help guide the stem through). Position stem equally on body and fold over at each end (approximately ½") for hands. Dab a small amount of glue where arms and body meet and allow to dry. ARMS (Make 2): With smaller hook and A, ch 38; turn. Row 1: Dc in 4th ch from hook, dc in next 13 ch, hdc in next 8 ch, dc in last 14 ch, ch 3; turn. Row 2: Dc in next 13 sts, hdc in next 8 sts, dc in last 14 sts; fasten off, leave a 20" tail for sewing. Using tapestry needle, fold arm together (end to end) and stitch to fold. Turn and stitch first 4 hdc together. Fit onto wire arm, wrap tail around three times to form wrist, continue sewing up the arm then stitch to under robe at shoulders. FACE: Using gray embroidery floss, cut a 30" and a 10" piece. Loop the 30" piece around a 5"piece of cardboard and sew at top of each ear. Loop the 10" section around a 2" piece of cardboard and attach above beard for mustache. The mustache
may be tacked into place at the ends, if desired. Use black floss to form small lines for eyes and glue pompoms into place above each eye. ROBE: With smaller hook and C, ch 36. Row 1: Dc in 4th ch from hook, dc in each ch across; turn –33 sts. Row 2: Ch 3 (counts as first dc), dc in next 5 sts, ch 3, skip next 3 sts, dc in next 16 sts, ch 3, skip next 3 sts, dc in last 5 sts and in top of ch-3; turn. Row 3: Ch 3, dc in each dc and in each ch across; turn. Rows 4-10: Ch 3, dc in each st across; turn. Row 11: Ch 1, sc in each st across. Fasten off. Fringe: Cut thirty six 4" strands of C and attach two in every other st on bottom edge of robe. Tie: With C, ch 55. Fasten off. Weave through first dc row at top of robe for neck gathering. SLEEVES (Make 2): With smaller hook and C and leaving 10" beginning tail for sewing, ch 12; join. Rnd 1: Ch 3 (counts as 1st dc), dc in each ch around; join – 12 sts. Rnds 2-4: Ch 3, dc around; join. Rnd 5: Ch 3, dc in next st, 2 dc in next st, * dc in next 2 sts, 2 dc in next st; repeat from * around; join – 16 sts. Rnd 6: Ch 3, dc in each st around; join. Rnd 7: Ch 3, dc in next 2 sts, 2 dc in next st, * dc in next 3 sts, 2 dc in next st; repeat from * around; join – 20 sts. Rnd 8: Ch 1, (sc in each st) around; join. Fasten off. Stitch each sleeve into place on robe. HEADPIECE: With smaller hook and C, ch 38. Row 1: Dc in 4th ch from hook and in each chain across; drop yarn, DO NOT TURN – 35 sts. Row 2: Attach D at top of 1st dc, ch 3 (counts as beginning dc), dc in each st across; drop yarn; turn. Row 3: Pick up C and slip stitch to top of last dc, ch 3, dc in each st across; drop yarn. Row 4: With D, repeat Row 3; turn at end. Row 5: With C, repeat Row 3. Fasten C off. Row 6: With D, repeat Row 3. Fasten D off.
Holiday eBook from Red Heart Yarn
Find more crochet and knitting patterns, yarn inspiration and creative ideas at www.coatsandclark.com. 17
Fold tog end to end and with C, stitch last row together. With right side facing, attach D at one side of bottom and sc once in each st and twice around each post across. Fasten off. HEAD BAND: With larger hook, hold one strand each B, C, and D together as one; ch 45. Fasten off. Tie around Joseph’s head to hold headpiece in place.
MARY HEAD & UNDER ROBE: Work as for Joseph. BODY: Using the 6" Styrofoam® cone, measure 4" down back and 5" down front and cut at an angle. Glue a 4" piece of craft stick into top of cone (leave 1" protruding to glue into head). Allow to dry. Apply glue to remaining portion of craft stick and fit crocheted Under Robe over cone, carefully fitting stick into Styrofoam® ball. Cut pyramid shaped hole into bottom of cone and glue weight and felt circle into place. Fold excess Under Robe material under and stitch together to form kneeling legs. Wrap 2 chenille stems together and insert through body at bottom of second Under Robe row for arms (use a skewer or an awl to help guide the stem through). Position stem equally on body and fold over at each end (approximately ½") for hands. Dab a small amount of glue where arms and body meet and allow to dry. ARMS: Work as for Joseph. Glue Velcro® onto hands for a praying posture. FACE: To form Mary’s curls, wrap black and brown strands of yarn together around wooden skewer after dipping into a diluted glue solution. Allow to dry overnight. Unwrap, and sew small portions over ears, as desired; finish eyes as described for Joseph. ROBE: With smaller hook and C, ch 31. Row 1: Dc in 4th ch from hook, dc in each ch across; turn – 28 sts. Row 2: Ch 3 (counts as 1st dc), dc in next 4 sts, ch 3, skip next 3 sts, dc in next 13 sts, ch 3, skip next
3 sts, dc in last 4 sts and at the top of 1st ch-3; turn. Row 3: Ch 3, dc in each dc and in each ch across; turn. Rows 4-7: Ch 3, dc in each st across; turn. Row 8: Ch 1, sc in each st across. Fasten off. Trim: With right side facing, attach D at the upper left front of robe. Ch 1, sc around post, * ch 1, sc around next post; repeat from * to bottom; ** ch 3, sc in next st, skip next st; repeat from ** across bottom; ch 3, sc around next post; repeat from * to top of right side. Fasten off. Tie: With C, ch 55. Fasten off. Weave through first dc row of robe for neck gathering. SLEEVES (Make 2): With smaller hook and C, and leaving 1st 10" tail for sewing, ch 12; join. Rnd 1: Ch 3 (counts as 1st dc), dc in each ch; join. Rnds 2-3: Ch 3, dc in each st; join. Rnd 4: Ch 3, dc in next st, 2 dc in next st, * dc in next 2 sts, 2 dc in next st; repeat from * around; join – 16 sts. Rnds 5-6: Repeat Rnds 2-3. Fasten off. Rnd 7: Attach D, * ch 3, skip next st, sc; repeat from * around; join. Fasten off. Stitch each sleeve into place on robe. HEADPIECE: With smaller hook and D, ch 6; join. Rnd 1: Ch 2 (counts as 1st hdc), hdc 11 times in ring; join to the top of 1st hdc – 12 sts. Rnd 2: Ch 2, 2 hdc in next st, * hdc in next st, 2 hdc in next st; repeat from * around; join – 18 sts. Rnd 3: Ch 2, hdc in next st, 2 hdc in next st, * hdc in next 2 sts, 2 hdc in next st; repeat from * around; join – 24 sts. Rnd 4: Ch 2, hdc in next 2 sts, 2 hdc in next st, * hdc in next 3 sts, 2 hdc in next st; repeat from * around; join – 30 sts. Rnd 5: Ch 2, hdc in each st; join. Rnd 6: Ch 1, sc in first 4 sts, dec in next 2 sts, * sc in next 4 sts, dec; repeat from * around; join – 35 sts. Row 7: Ch 3 (counts as 1st dc); TURN; dc in next 2 sts, dcdec in next 2 sts; [dc in next 3 sts, dcdec in next 2 sts] 2 times; dc in next 3 sts; turn – 18 sts. Rows 8-9: Ch 3, dc in each st across; turn.

Holiday eBook from Red Heart Yarn
Find more crochet and knitting patterns, yarn inspiration and creative ideas at www.coatsandclark.com. 18
Row 10: Ch 3, dc in next st, 2 dc in next st, * dc in next 2 sts, 2 dc in next st; repeat from * across; turn – 24 sts. Row 11: Ch 3, dc in each st; join. Fasten off. Trim: Join C to last st, ch 3, sc in every other st and around each post around headpiece; join. Fasten off.
SHEPHERD HEAD, UNDER ROBE, BODY, ARMS, & FACE: Work as for Joseph. Using black yarn, finish face as for Joseph. ROBE: With smaller hook and E, ch 31. Row 1: Dc in 4th ch from hook, dc in each ch across; turn. Row 2: Ch 3 (counts as 1st dc), dc in next 4 sts, ch 3, skip next 3 sts, dc in next 13 sts, ch 3, skip next 3 sts, dc in next 3 sts, dc in 3rd ch of beginning ch-3; turn – 28 sts. Row 3: Ch 3, dc in each dc and in each ch across; turn. Rows 4-11: Ch 3, dc in each st across; turn. Row 12: Ch 3, skip next st, sc in next st, * ch 3, skip next st, sc in next st; repeat from * across. Fasten off. Trim: Join F at the top post on left side of robe. Slip st in same post and in next st, [2 sc around next post] 3 times; [2 hdc around next post] 2 times; [2 dc around next post] 2 times; [2 tr in next post] 3 times; ch 4 and sc in first ch-3 space at bottom of robe, ch 4, sc in each ch space across bottom, ch 4, [2 tr around next post] 3 times; [2 dc in next post] 2 times; [2 hdc in next post] 2 times; [2 sc in next post] 3 times; slip st in next post, 2 slip st in last post. Fasten off. Tie: With E, ch 55. Fasten off. Weave through first dc row at the top of robe for neck gathering. Finishing: Join E at a ch in armhole, ch 1, sc in same ch, ch 3, skip next st, sc in next st, ch 3, sc around next post, ch 3, sc in next st, ch 3, skip next st, sc in next st, ch 3, sc around next post, ch 3; join to 1st sc. Fasten off. Repeat for other armhole.
HEADPIECE: With smaller hook and F, ch 30. Row 1: Hdc in 3rd ch from hook (counts as first hdc), hdc in each ch across; turn – 28 sts. Rows 2-3: Ch 2, hdc in each st across; turn. Row 4: Ch 1, sc in next 5 sts, dec in next 2 sts, * sc in next 5 sts, dec in next 2 sts; repeat from * across. DO NOT FASTEN OFF. Finishing: Fold over and sc ends together evenly to form circle. Fasten off.
BABY JESUS Materials for Baby Jesus:
RED HEART® “Super Saver®”: 1 skein 336 Warm Brown A, 313 Aran B, and 882 Country Blue C.
Crochet Hook: 3.25mm [US D-3].
1" piece of curly Mary hair (see instructions for Mary)
Small amount of black embroidery floss
Small amount of fiberfill material GAUGE: 20 sc = 4"; 20 rows = 4". CHECK YOUR GAUGE. Use any size hook to obtain the gauge. BODY: With B, ch 4; join to form ring. Rnd 1: Ch 2 (counts as 1st hdc), 9 hdc in circle, join at top of beginning ch-2 – 10 sts. Rnd 2: Ch 2, 2 hdc in next st; * hdc in next st, 2 hdc in next st; repeat from * around; join – 15 sts. Rnd 3: Ch 2, hdc in the next st, 2 hdc in next st, * hdc in next 2 sts, 2 hdc in next st; repeat from * around; join – 20 sts. Rnd 4: Ch 2, hdc in next st and in each st around; join. Rnd 5: Repeat Rnd 4. Rnd 6: Ch 1, sc in first 3 sts, dec in next 2 sts, * sc in next 3 sts, dec in next 2 sts; repeat from * around; join – 16 sts. Rnd 7: Ch 1, sc in first 2 sts, dec in next 2 sts, * sc in next 2 sts, dec in next 2 st; repeat from * around; join – 12 sts. Fill lightly with fiberfill material. Rnd 8: Ch 1, sc in 1st st, dec in next 2 sts, * sc in next st, dec in next 2 sts; repeat from * around; join. Fasten off.
Holiday eBook from Red Heart Yarn
Find more crochet and knitting patterns, yarn inspiration and creative ideas at www.coatsandclark.com. 19
HEAD: With A, work as for Body through Rnd 2. Rnd 3: Ch 2, hdc in each st around; join – 15 sts. Rnd 4: Ch 2, hdc in next 2 sts, hdcdec in next 2 sts, * hdc in next 3 sts, hdcdec in next 2 sts; repeat from * around; join – 12 sts. Rnd 5: Ch 1, sc in 1st 2 sts, dec in next 2 sts, * sc in next 2 sts, dec in next 2 sts; repeat from * around; join – 9 sts. Fill lightly. Rnd 6: Ch 1, sc in 1st st, dec in next 2 sts, * sc in next st, dec in next 2 sts; repeat from * around; join. Fasten off. Finishing: Sew head and body together. Use three strands of black embroidery floss to form closed eyes and to stitch on curl. SWADDLING CLOTHES: With C, ch 6; join. Rnd 1: Ch 2 (counts as 1st hdc), 11 hdc in circle; join –12 sts. Rnd 2: Ch 2, 2 hdc in next st, * hdc in next st, 2 hdc in next st; repeat from * around; join –18 sts. Rnds 3-6: Ch 3 (counts as 1st dc), dc in each st around; join. Rnd 7: Ch 2, hdc in each st around; join. Rnd 8: * Ch 3, skip next st, sc in next st; repeat from * around; join. Fasten off.
LAMBS Materials for the Lambs:
RED HEART® “Super Saver®”: 1 skein each 313 Aran A and 312 Black B.
Crochet Hook: 3.25mm [US D-3].
Small amount of fiberfill material
Four 12" 6mm white chenille stems
Tapestry needle
Craft glue. GAUGE: 20 sc = 4"; 20 rows = 4". CHECK YOUR GAUGE. Use any size hook to obtain the gauge. LARGE LAMB With A, ch 6; join. Rnd 1: Ch 2 (counts as 1st hdc), 9 hdc in ring; join – 10 sts. Rnd 2: Ch 2, 2 hdc in next st, * hdc in next st, 2 hdc in next st; repeat from * around; join – 15 sts.
Rnd 3: Ch 2, hdc in next st, 2 hdc in next st, * hdc in next 2 sts, 2 hdc in next st; repeat from * around; join – 20 sts. Rnds 4-8: Ch 2, hdc in each st around; join. Rnd 9: Ch 2, hdc in next 2 sts, hdcdec in next 2 sts, * hdc in next 3 sts, hdcdec in next 2 sts; repeat from * around; join – 16 sts. Rnd 10: Ch 2, hdc in next st, hdcdec in next 2 sts, * hdc in next 2 sts, hdcdec in next 2 sts; repeat from * around; join – 12 sts. Fill lightly with fiberfill. Rnds 11-13: Ch 2, hdc in each st around; join. Rnd 14: Ch 2, 2 hdc in next st, * hdc in next st, 2 hdc in next st; repeat from * around; join – 18 sts. Rnds 15-16: Ch 2, hdc in each st around; join. Rnds 17: Ch 1, sc in 1st 3 sts, dec in next 2 sts, * sc in next st, dec in next 2 sts; repeat from * around; join – 12 sts. Fill head lightly. Rnd 18: Ch 1, sc in 1st 2 sts, dec in next 2 sts, * sc in next 2 sts, dec in next 2 sts; repeat from * around; join – 9 sts. Fasten off. Rnd 19: Join B in any st, ch 1, sc in 1st st, dec in next 2 sts, * sc in next st, dec in next 2 sts; repeat from * around; join – 6 sts. Rnd 20: Slip st in each st. Rnd 21: Repeat Rnd 20. Fasten off, leaving 8" tail for forming eyes. Using tapestry needle, form a black eye on each side of head and fasten off. EARS (Make 2): With A, ch 6. Row 1: Sc in 2nd ch from hook, hdc in next ch, dc in next 2 ch, tr in last ch. Fasten off. TAIL: With A, ch 8. Row 1: Hdc in 3rd ch from hook and in each ch across. Fasten off. LEGS (Make 4): With A, leave beginning 10" tail, ch 11. Row 1: Hdc in 3rd ch from hook and in each ch across; turn–9 sts. Row 2: Ch 2, hdc in each st across; turn. Row 3: Repeat Row 2. Fasten off, leaving another 10" tail for sewing. Hooves: Join B to end which has no tails, leaving a small tail for tying.
Holiday eBook from Red Heart Yarn
Find more crochet and knitting patterns, yarn inspiration and creative ideas at www.coatsandclark.com. 20
Row 1: Ch 1, 3 sc evenly across. Fasten off and tie onto beginning black tail (this begins to form a cylinder for leg). FINISHING: Fold two chenille stems in half. Insert one through body at top of Rnd 3 and one through body at top of Rnd 10, centering equally. Dab a small amount of glue where legs meet body. Note: Use wooden skewer or awl to help guide stems through lamb’s body. With tapestry needle, sew tail and ears onto bodies. Stitch legs together, fit onto wires and sew onto bodies. SMALL LAMB With A, ch 4; join. Rnd 1: Ch 2 (counts as 1st hdc), 7 hdc in ring; join – 8 sts. Rnd 2: Ch 2, 2 hdc in next st, * hdc in next st, 2 hdc in next st; repeat from * around; join – 12 sts. Rnd 3: Ch 2, hdc in next st, 2 hdc in next st, * hdc in next 2 sts, 2 hdc in next st; repeat from * around; join – 16 sts. Rnds 4-5: Ch 2, hdc in each st around; join. Rnd 6: Ch 2, hdc in next st, hdcdec in next 2 sts (hdc in next 2 sts, hdcdec in next 2 sts) around; join – 12 sts. Rnd 7: Ch 2, hdcdec in next 2 sts; * hdc in next st, hdcdec in next 2 sts; repeat from * around; join – 8 sts. Fill body lightly. Rnds 8-9: Ch 2, hdc in each st around; join. Fill neck lightly. Rnds 10-11: Ch 2, 2 hdc in next st, * hdc in next st, 2 hdc in next st; repeat from * around; join – 12 sts. Rnd 12: Ch 1, sc in 1st st, dec in next 2 sts; * sc in next st, dec in next 2 sts; repeat from * around; join – 8 sts. Rnd 13: Ch 1, sc in 1st 3 sts, dec in next 2 sts, sc in next st, dec in next 2 sts; join – 6 sts. Faste off. Fill head lightly. Rnd 14: With B, join in any st, ch 1, sc in 1st st, dec in next 2 sts, sc in next st, dec in next 2 sts; join – 4 sts. Rnd 15: Slip st in each st.
Rnd 16: Repeat Rnd 15. Fasten off, leaving 8" tail of yarn for forming eyes. Finish as described for Large Lamb. EARS (make 2): With A, ch 5. Row 1: Sc in 2nd ch from hook, hdc in next ch, dc in next ch, tr in last ch. Fasten off, leaving 6" tail for sewing. TAIL: With A, ch 6. Row 1: Hdc in 3rd ch from hook and in each ch across. Fasten off, leaving 6" tail for sewing. LEGS (Make 4): With A, leave beginning 8" tail, ch 8. Row 1: Hdc in 3rd ch from hook, hdc in each ch across; turn – 6 sts. Row 2: Ch 2, hdc in each st across; turn. Row 3: Repeat Row 2. Fasten off, leaving another 8" tail for sewing. Hooves: Work as for Large Lamb. FINISHING: Cut two chenille stems to 8", fold in half. Insert one through body at top of Rnd 2 and one through body at top of Rnd 7. Finish as for Large Lamb.
Holiday eBook from Red Heart Yarn
Find more crochet and knitting patterns, yarn inspiration and creative ideas at www.coatsandclark.com. 21
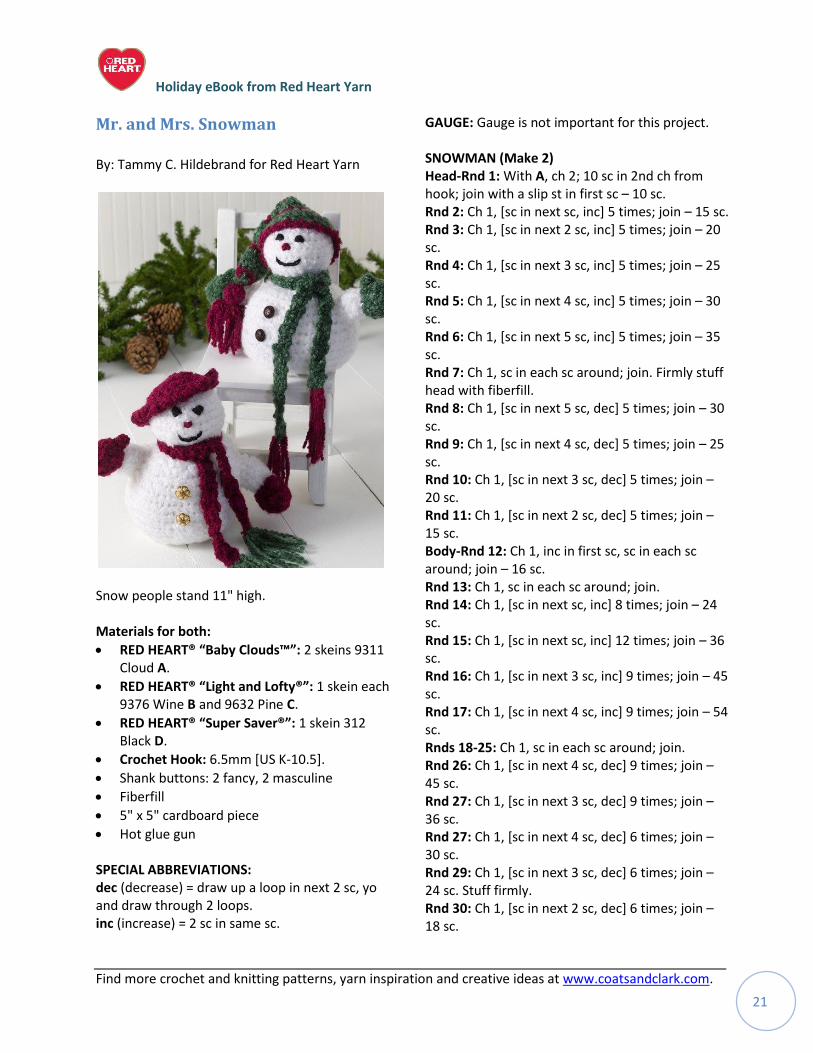
Mr. and Mrs. Snowman
By: Tammy C. Hildebrand for Red Heart Yarn
Snow people stand 11" high. Materials for both:
RED HEART® “Baby Clouds™”: 2 skeins 9311 Cloud A.
RED HEART® “Light and Lofty®”: 1 skein each 9376 Wine B and 9632 Pine C.
RED HEART® “Super Saver®”: 1 skein 312 Black D.
Crochet Hook: 6.5mm [US K-10.5].
Shank buttons: 2 fancy, 2 masculine
Fiberfill
5" x 5" cardboard piece
Hot glue gun SPECIAL ABBREVIATIONS: dec (decrease) = draw up a loop in next 2 sc, yo and draw through 2 loops. inc (increase) = 2 sc in same sc.
GAUGE: Gauge is not important for this project. SNOWMAN (Make 2) Head-Rnd 1: With A, ch 2; 10 sc in 2nd ch from hook; join with a slip st in first sc – 10 sc. Rnd 2: Ch 1, [sc in next sc, inc] 5 times; join – 15 sc. Rnd 3: Ch 1, [sc in next 2 sc, inc] 5 times; join – 20 sc. Rnd 4: Ch 1, [sc in next 3 sc, inc] 5 times; join – 25 sc. Rnd 5: Ch 1, [sc in next 4 sc, inc] 5 times; join – 30 sc. Rnd 6: Ch 1, [sc in next 5 sc, inc] 5 times; join – 35 sc. Rnd 7: Ch 1, sc in each sc around; join. Firmly stuff head with fiberfill. Rnd 8: Ch 1, [sc in next 5 sc, dec] 5 times; join – 30 sc. Rnd 9: Ch 1, [sc in next 4 sc, dec] 5 times; join – 25 sc. Rnd 10: Ch 1, [sc in next 3 sc, dec] 5 times; join – 20 sc. Rnd 11: Ch 1, [sc in next 2 sc, dec] 5 times; join – 15 sc. Body-Rnd 12: Ch 1, inc in first sc, sc in each sc around; join – 16 sc. Rnd 13: Ch 1, sc in each sc around; join. Rnd 14: Ch 1, [sc in next sc, inc] 8 times; join – 24 sc. Rnd 15: Ch 1, [sc in next sc, inc] 12 times; join – 36 sc. Rnd 16: Ch 1, [sc in next 3 sc, inc] 9 times; join – 45 sc. Rnd 17: Ch 1, [sc in next 4 sc, inc] 9 times; join – 54 sc. Rnds 18-25: Ch 1, sc in each sc around; join. Rnd 26: Ch 1, [sc in next 4 sc, dec] 9 times; join – 45 sc. Rnd 27: Ch 1, [sc in next 3 sc, dec] 9 times; join – 36 sc. Rnd 27: Ch 1, [sc in next 4 sc, dec] 6 times; join – 30 sc. Rnd 29: Ch 1, [sc in next 3 sc, dec] 6 times; join – 24 sc. Stuff firmly. Rnd 30: Ch 1, [sc in next 2 sc, dec] 6 times; join – 18 sc.
Holiday eBook from Red Heart Yarn
Find more crochet and knitting patterns, yarn inspiration and creative ideas at www.coatsandclark.com. 22
Rnd 31: Ch 1, [sc in next sc, dec] 6 times; join – 12 sc. Rnd 32: Ch 1, [dec] 6 times; join – 6 sc. Fasten off. Finish stuffing. Sew opening closed. Arms (Make 4) Rnd 1: With A, ch 2; 10 sc in 2nd ch from hook; join. Rnd 2: Ch 1, sc in back loop of each sc around; join. Rnds 3 and 4: Ch 1, sc in each sc around; join. Fasten off at end of Rnd 4 leaving 8" for sewing. Stuff arm firmly with fiberfill. Mitten (Make 2 A and 2 B) Rnd 1: Working in unused front loops of Rnd 2, join yarn in any loop; ch 1, sc in same loop, 2 sc in next loop, [sc in next loop, 2 sc in next loop] 4 times; join – 15 sc. Rnds 2 and 3: Ch 1, sc in each sc around; join. Rnd 4: Ch 1, [sc in next sc, dec] 5 times; join – 10 sc. Rnd 5: Ch 1, [dec] 5 times; join – 5 sc. Fasten off. Stuff lightly with fiberfill. Sew opening closed. Thumbs: Working around post of any sc of Rnd 1, join yarn in any sc; ch 1, (sc, 2 dc, sc) all in same st as joining, drop loop from hook, insert hook from front to back into first sc and into dropped loop and draw loop through the sc. Fasten off. Sew one arm to each side of snowman in desired position. Scarf (Make 1 A and 1 B) Ch 3; sc in 2nd ch from hook, sc in next ch; turn – 2 sc. Work even in rows of sc for desired length. Fasten off. Fringe: Using 2 strands of contrasting color, knot 3 groups of fringe along each short end. Trim ends. Mrs. Frosty’s Hat: With B, ch 3; join with a slip st to form a ring. Rnd 1: Ch 3, 11 dc in ring; join with a slip st in top of ch-3 – 12 sts. Rnd 2: Ch 3, 2 dc in next dc, [dc in next st, 2 dc in next dc] 5 times; join in top of ch-3 – 18 sts.
Rnd 3: Ch 3, dc in next dc, 2 dc in next dc, [dc in next 2 dc, 2 dc in next dc] 5 times; join – 24 sts. Rnd 4: Ch 1, sc in each st around; join. Rnd 5: Ch 1, * [sc, ch 2] twice in next sc; repeat from * around; join in first sc. Fasten off. Mr. Frosty’s Hat With C, ch 30; being careful not to twist ch, join with a slip st to form a ring. Rnd 1: Ch 1, sc in each ch around; join – 30 sc. Rnd 2: Ch 1, sc in each sc around; join. Rnd 3: Ch 1, [sc in next 4 sc, dec] 5 times; join – 25 sc. Fasten off. Rnd 4: Join B in any sc; ch 1, sc in each sc around; join. Fasten off. Rnd 5: Join C in any sc; ch 1, sc in each sc around; join. Rnd 6: Ch 1, sc in each sc around; join. Rnd 7: Ch 1, [sc in next 3 sc, dec] 5 times; join – 20 sc. Fasten off. Rnds 8-10: Repeat Rnds 4-6. Rnd 11: Ch 1, [sc in next 2 sc, dec] 5 times; join – 15 sc. Fasten off. Rnds 12-14: Repeat Rnds 4-6. Rnd 15: Ch 1, [sc in next sc, dec] 5 times; join – 10 sc. Rnd 16-18: Repeat Rnds 4-6. Rnd 19: Ch 1, [dec] 5 times; join – 5 sc. Fasten off. Rnd 20: Join C in any sc; ch 1, sc in each sc around; join. Fasten off. Sew opening closed. Edging: Working in remaining loops of beginning ch, join B in any loop; ch 1, [working from left to right, sc in next loop, ch 1] 30 times; join. Fasten off. Tassel: Wrap B around cardboard 10 times. Slip a 10" yarn length under yarn at one end and knot securely. Cut wraps at opposite side of cardboard. Wrap a 16" yarn length around tassel 1" from top. Sew to end of Mr. Frosty’s hat. Trim ends. Using hot glue gun and following photo for placement, glue 2 fancy buttons to center of body of Mrs. Frosty. Glue 2 masculine buttons to center of body of Mr. Frosty. With D, embroider mouth with Straight stitches and eyes with French Knots. With B, embroider nose.
Holiday eBook from Red Heart Yarn
Find more crochet and knitting patterns, yarn inspiration and creative ideas at www.coatsandclark.com. 23
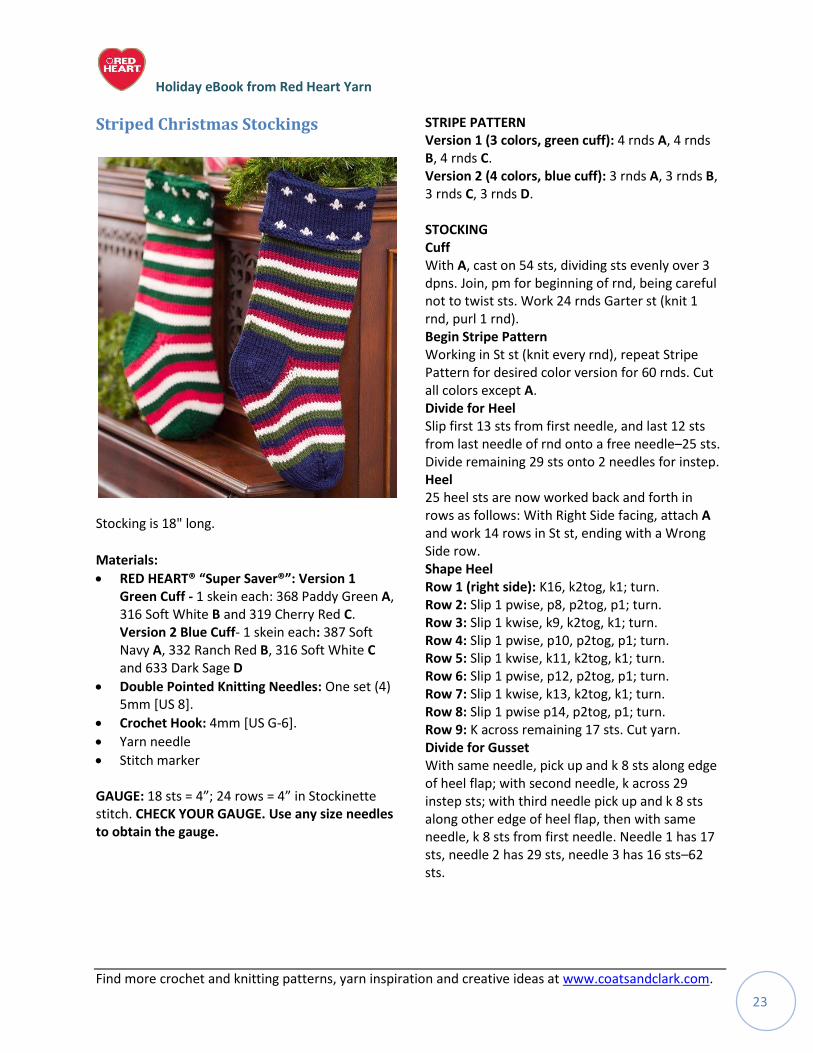
Striped Christmas Stockings
Stocking is 18" long.
Materials:
RED HEART® “Super Saver®”: Version 1 Green Cuff - 1 skein each: 368 Paddy Green A, 316 Soft White B and 319 Cherry Red C. Version 2 Blue Cuff- 1 skein each: 387 Soft Navy A, 332 Ranch Red B, 316 Soft White C and 633 Dark Sage D
Double Pointed Knitting Needles: One set (4) 5mm [US 8].
Crochet Hook: 4mm [US G-6].
Yarn needle
Stitch marker GAUGE: 18 sts = 4”; 24 rows = 4” in Stockinette stitch. CHECK YOUR GAUGE. Use any size needles to obtain the gauge.
STRIPE PATTERN Version 1 (3 colors, green cuff): 4 rnds A, 4 rnds B, 4 rnds C. Version 2 (4 colors, blue cuff): 3 rnds A, 3 rnds B, 3 rnds C, 3 rnds D. STOCKING Cuff With A, cast on 54 sts, dividing sts evenly over 3 dpns. Join, pm for beginning of rnd, being careful not to twist sts. Work 24 rnds Garter st (knit 1 rnd, purl 1 rnd). Begin Stripe Pattern Working in St st (knit every rnd), repeat Stripe Pattern for desired color version for 60 rnds. Cut all colors except A. Divide for Heel Slip first 13 sts from first needle, and last 12 sts from last needle of rnd onto a free needle–25 sts. Divide remaining 29 sts onto 2 needles for instep. Heel 25 heel sts are now worked back and forth in rows as follows: With Right Side facing, attach A and work 14 rows in St st, ending with a Wrong Side row. Shape Heel Row 1 (right side): K16, k2tog, k1; turn. Row 2: Slip 1 pwise, p8, p2tog, p1; turn. Row 3: Slip 1 kwise, k9, k2tog, k1; turn. Row 4: Slip 1 pwise, p10, p2tog, p1; turn. Row 5: Slip 1 kwise, k11, k2tog, k1; turn. Row 6: Slip 1 pwise, p12, p2tog, p1; turn. Row 7: Slip 1 kwise, k13, k2tog, k1; turn. Row 8: Slip 1 pwise p14, p2tog, p1; turn. Row 9: K across remaining 17 sts. Cut yarn. Divide for Gusset With same needle, pick up and k 8 sts along edge of heel flap; with second needle, k across 29 instep sts; with third needle pick up and k 8 sts along other edge of heel flap, then with same needle, k 8 sts from first needle. Needle 1 has 17 sts, needle 2 has 29 sts, needle 3 has 16 sts–62 sts.
Holiday eBook from Red Heart Yarn
Find more crochet and knitting patterns, yarn inspiration and creative ideas at www.coatsandclark.com. 24
Shape Foot Join, pm for beginning of rnd being careful not to twist sts, and keeping continuity of stripe pattern, shape foot as follow: Rnd 1 (dec): Needle 1: k15, k2tog; Needle 2: k2tog, k25, k2tog; Needle 3: k2tog, k14. Rnd 2: K even around. Rnd 3 (dec): Needle 1: k to last 2 sts, k2tog; Needle 2: k27; Needle 3: k2tog, k to end. Rep rnds 2 and 3 once more. Needle 1 has 14 sts, needle 2 has 27 sts, needle 3 has 13 sts–54 sts. Work even for 27 rnds. Cut all colors except A. Toe Rnd 1: With A, k 1 rnd even in St st. Rnd 2 (dec): Needle 1: k across to last 2 sts, k2tog, Needle 2: k2tog, k across to last 2 sts, k2tog; Needle 3: k2 tog, k to end. Repeat Rnds 1 and 2, 7 times more. Needle 1 has 7 sts, needle 2 has 13 sts, needle 3 has 6 sts–26 sts. With needle 3, k across needle 1. 13 sts now on 2 needles. Cut A leaving 24” tail. FINISHING Graft toe sts together. Fold cuff over stocking. With right side facing and crochet hook, attach B at back; sl st in each st around; ch 12 for hanging loop, sl st to first sl st. Fasten off. Weave in yarn ends.
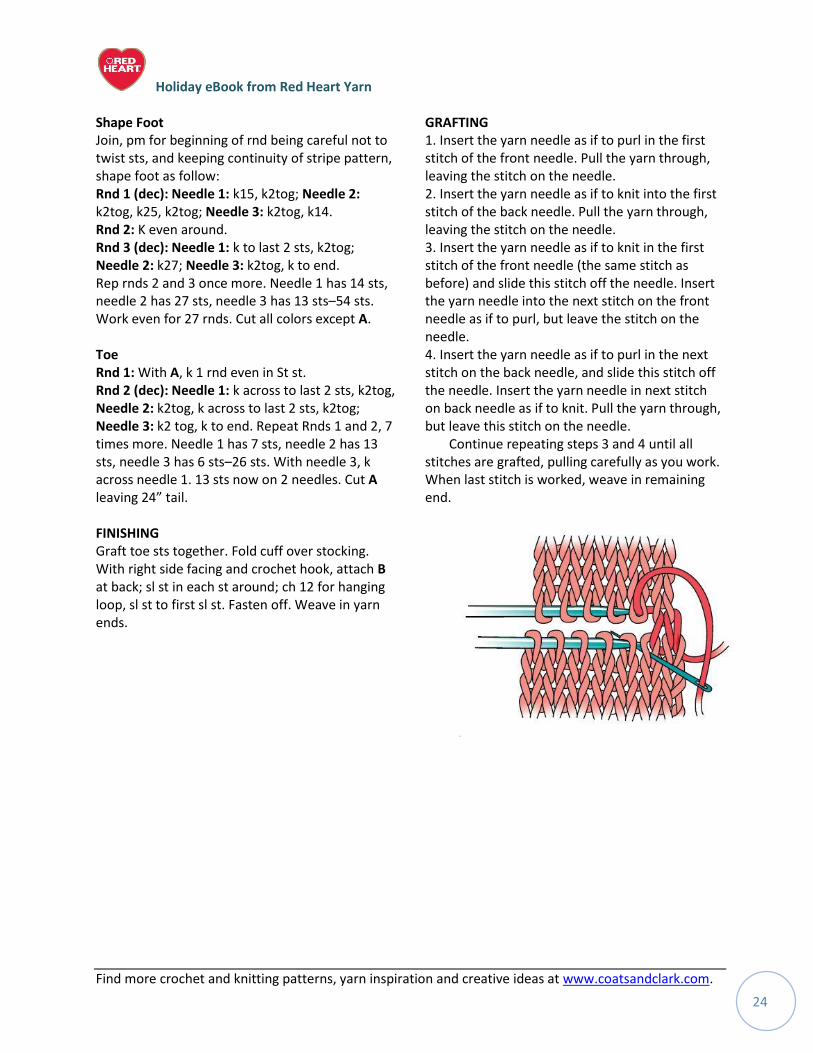
GRAFTING 1. Insert the yarn needle as if to purl in the first stitch of the front needle. Pull the yarn through, leaving the stitch on the needle. 2. Insert the yarn needle as if to knit into the first stitch of the back needle. Pull the yarn through, leaving the stitch on the needle. 3. Insert the yarn needle as if to knit in the first stitch of the front needle (the same stitch as before) and slide this stitch off the needle. Insert the yarn needle into the next stitch on the front needle as if to purl, but leave the stitch on the needle. 4. Insert the yarn needle as if to purl in the next stitch on the back needle, and slide this stitch off the needle. Insert the yarn needle in next stitch on back needle as if to knit. Pull the yarn through, but leave this stitch on the needle.
Continue repeating steps 3 and 4 until all stitches are grafted, pulling carefully as you work. When last stitch is worked, weave in remaining end.
Holiday eBook from Red Heart Yarn
Find more crochet and knitting patterns, yarn inspiration and creative ideas at www.coatsandclark.com. 25
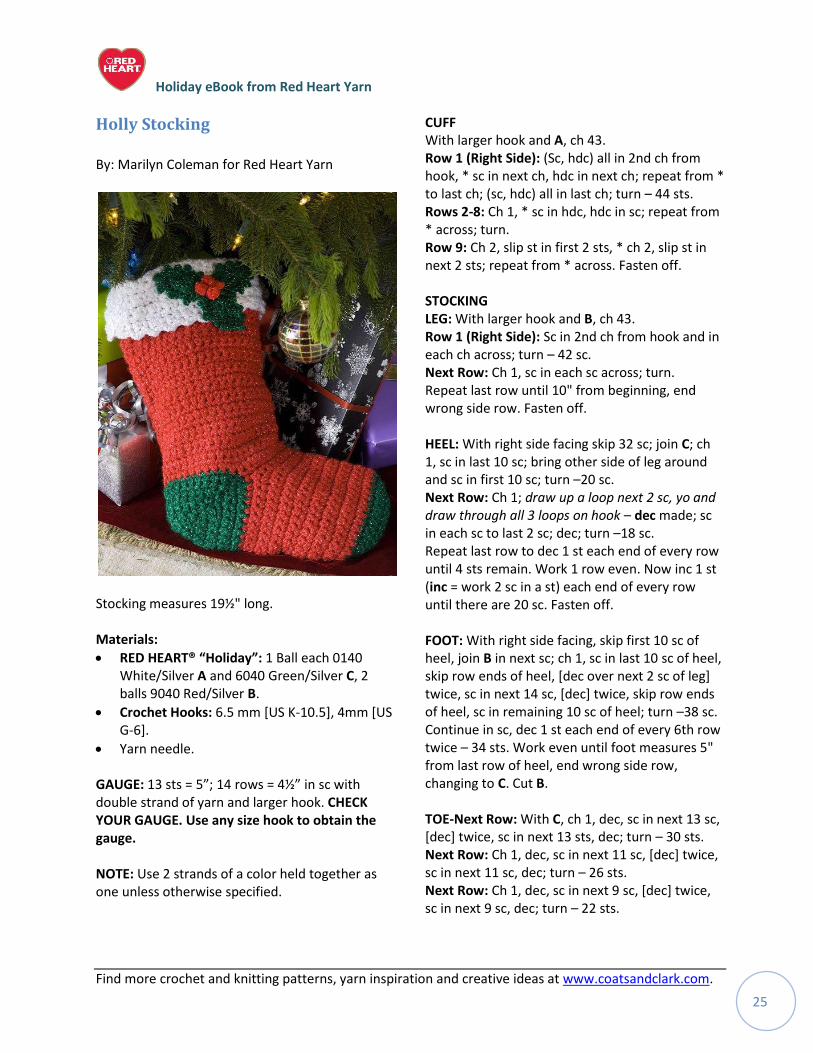
Holly Stocking
By: Marilyn Coleman for Red Heart Yarn
Stocking measures 19½" long. Materials:
RED HEART® “Holiday”: 1 Ball each 0140 White/Silver A and 6040 Green/Silver C, 2 balls 9040 Red/Silver B.
Crochet Hooks: 6.5 mm [US K-10.5], 4mm [US G-6].
Yarn needle. GAUGE: 13 sts = 5”; 14 rows = 4½” in sc with double strand of yarn and larger hook. CHECK YOUR GAUGE. Use any size hook to obtain the gauge. NOTE: Use 2 strands of a color held together as one unless otherwise specified.
CUFF With larger hook and A, ch 43. Row 1 (Right Side): (Sc, hdc) all in 2nd ch from hook, * sc in next ch, hdc in next ch; repeat from * to last ch; (sc, hdc) all in last ch; turn – 44 sts. Rows 2-8: Ch 1, * sc in hdc, hdc in sc; repeat from * across; turn. Row 9: Ch 2, slip st in first 2 sts, * ch 2, slip st in next 2 sts; repeat from * across. Fasten off. STOCKING LEG: With larger hook and B, ch 43. Row 1 (Right Side): Sc in 2nd ch from hook and in each ch across; turn – 42 sc. Next Row: Ch 1, sc in each sc across; turn. Repeat last row until 10" from beginning, end wrong side row. Fasten off. HEEL: With right side facing skip 32 sc; join C; ch 1, sc in last 10 sc; bring other side of leg around and sc in first 10 sc; turn –20 sc. Next Row: Ch 1; draw up a loop next 2 sc, yo and draw through all 3 loops on hook – dec made; sc in each sc to last 2 sc; dec; turn –18 sc. Repeat last row to dec 1 st each end of every row until 4 sts remain. Work 1 row even. Now inc 1 st (inc = work 2 sc in a st) each end of every row until there are 20 sc. Fasten off. FOOT: With right side facing, skip first 10 sc of heel, join B in next sc; ch 1, sc in last 10 sc of heel, skip row ends of heel, [dec over next 2 sc of leg] twice, sc in next 14 sc, [dec] twice, skip row ends of heel, sc in remaining 10 sc of heel; turn –38 sc. Continue in sc, dec 1 st each end of every 6th row twice – 34 sts. Work even until foot measures 5" from last row of heel, end wrong side row, changing to C. Cut B. TOE-Next Row: With C, ch 1, dec, sc in next 13 sc, [dec] twice, sc in next 13 sts, dec; turn – 30 sts. Next Row: Ch 1, dec, sc in next 11 sc, [dec] twice, sc in next 11 sc, dec; turn – 26 sts. Next Row: Ch 1, dec, sc in next 9 sc, [dec] twice, sc in next 9 sc, dec; turn – 22 sts.
Holiday eBook from Red Heart Yarn
Find more crochet and knitting patterns, yarn inspiration and creative ideas at www.coatsandclark.com. 26
Next Row: Ch 1, dec, sc in next 7 sc, [dec] twice, sc in next 7 sc, dec; turn – 18 sts. Next Row: Ch 1, dec, sc in next 5 sc, [dec] twice, sc in next 5 sc, dec; turn – 14 sts. Next Row: Ch 1, dec, sc in next 3 sc, [dec] twice, sc in next 3 sc, dec; turn – 10 sts. Fasten off. FINISHING Holding right side of cuff against wrong side of leg, attach yarn and work slip st in each st across through both layers. Fasten off. Sew toe, foot, heel, leg and cuff seams. If heel rows have formed gaps in the fabric, weave matching yarn through sts on wrong side to close them. Turn cuff to right side. Hanging Loop With A, ch 13; sc in 2nd ch from hook and in each ch across. Fasten off. Fold in half and sew inside cuff at seam.
Leaf (Make 3) With smaller hook and a single strand of C, ch 8. Rnd 1: 3 Dc in 4th ch from hook, hdc in next 2 ch, sc in next ch, 3 sc in last ch; working across opposite side of ch, sc in next ch, hdc in next 2 ch, 3 dc in same ch as first 3 dc; join with a slip st in top of ch-3. Rnd 2: Ch 1, 3 sc in same st as joining, * sc in next st; ch 2, slip st in side loops of last sc made – picot made; [sc in next st, (sc, picot) all in next st] 3 times *, (2 sc, ch 3, slip st in 3rd ch from hook, sc) all in next sc; repeat from * to * once more; join to first sc. Fasten off. Berries (Make 4) With smaller hook and a single strand of B, ch 2; 8 sc in 2nd ch from hook; join with a slip st to first sc. Fasten off. With needle, weave yarn end through top loops of all sts; draw up tightly and secure. Sew leaves and berries to cuff as shown. Weave in ends.
Holiday eBook from Red Heart Yarn
Find more crochet and knitting patterns, yarn inspiration and creative ideas at www.coatsandclark.com. 27
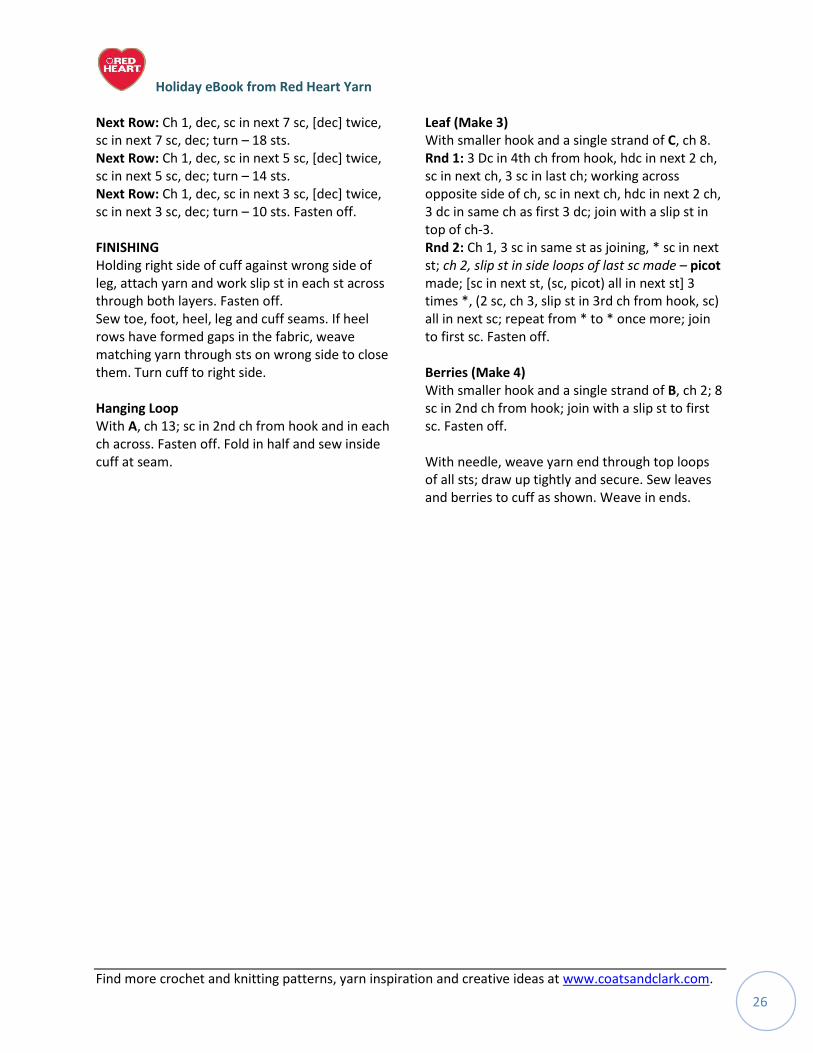
Trim the Tree
Pinwheel Garland
By: Mary Jane Protus for Red Heart Yarn
Garland measures 32½" long.
Materials:
RED HEART “Holiday”: 1 Ball each 9040 Red/Silver A, 6040 Green/Silver B, and 1040 White/Silver C.
Crochet Hooks: 4mm [US G-6].
Yarn needle.
Jingle bells. GAUGE: 14 sts = 4"; 7 rnds = 4" in dc. CHECK YOUR GAUGE. Use any size hook to obtain the gauge. GARLAND Center: With A, ch 4; join with a slip st in first ch to form a ring; ch 1, (sc, 4 hdc) all into ring, drop A, DO NOT FASTEN OFF; following the A sts, join B
with an sc in the ring, work 4 hdc into same ring, drop B, DO NOT FASTEN OFF. Rnd 1: Pick up A, work 2 hdc into each B st – 10 hdc A; drop A, pick up B, work 2 hdc in each A st – 30 hdc B, drop B. Rnd 2: Pick up A, 2 dc in next 10 hdc, hdc in next hdc, * hdc in next hdc, sc in next hdc, slip st in next hdc, ch 5 *; fasten off A leaving a long end to sew loop; pick up B, 2 hdc in next hdc; repeat from * to * across next 3 hdc; fasten off B leaving a long end to sew loop.
Make 9 more pieces with your choice of A+C, B+C, or A+B. Connecting Garland Pieces First Piece: Thread yarn needle with long end left after ch-5 and stitch into coaster near beginning of the chain to make a loop; secure yarn on wrong side. Repeat on opposite side of coaster. Join 2nd Piece: Thread yarn needle with long end left after ch-5 of 2nd piece, weave through a finished loop, stitch into coaster near beginning of this chain; secure yarn. Complete a loop on opposite side of coaster. Continue until all pieces are joined. Additional pieces can be added to make garland longer if desired. Jingle Bell Fringe: Thread three bells onto A; ch 1, pull first bell up to first ch, make a ch over bell, continue to ch for total of 13", pull 2nd bell up, ch 3, pull 3rd bell up, ch 2. Fasten off. Tie in bow around joining loops. Weave in ends.
Holiday eBook from Red Heart Yarn
Find more crochet and knitting patterns, yarn inspiration and creative ideas at www.coatsandclark.com. 28
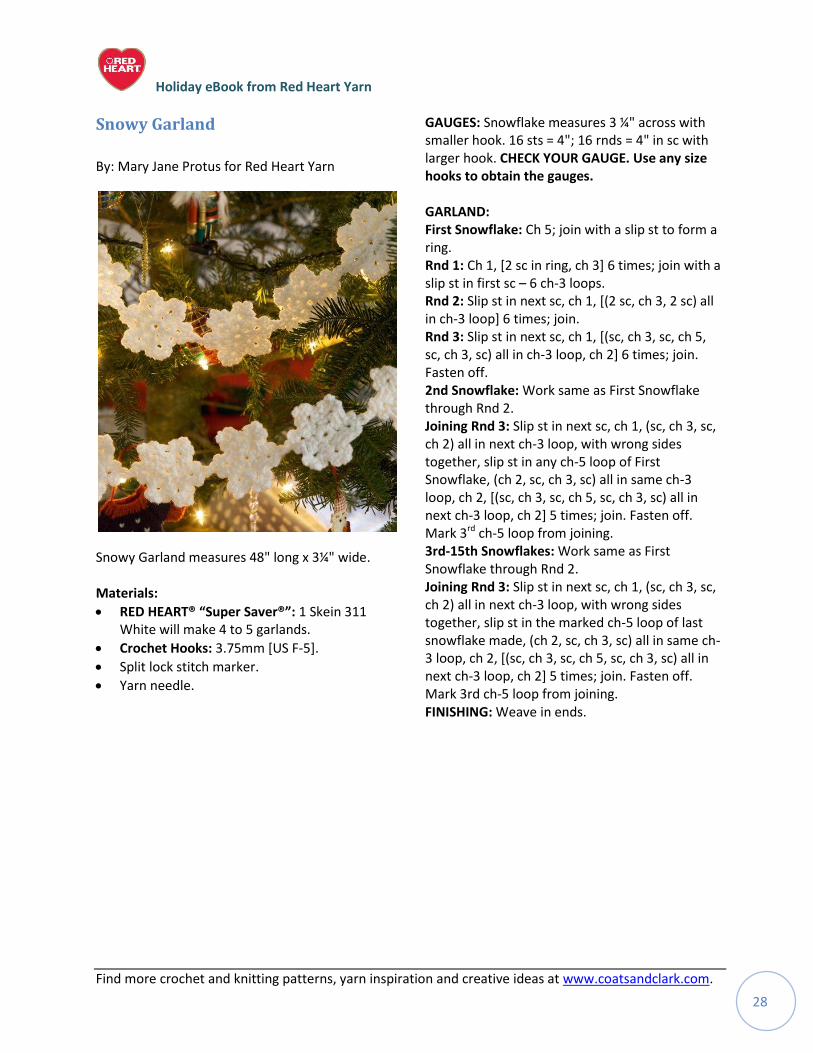
Snowy Garland
By: Mary Jane Protus for Red Heart Yarn
Snowy Garland measures 48" long x 3¼" wide. Materials:
RED HEART® “Super Saver®”: 1 Skein 311 White will make 4 to 5 garlands.
Crochet Hooks: 3.75mm [US F-5].
Split lock stitch marker.
Yarn needle.
GAUGES: Snowflake measures 3 ¼" across with smaller hook. 16 sts = 4"; 16 rnds = 4" in sc with larger hook. CHECK YOUR GAUGE. Use any size hooks to obtain the gauges. GARLAND: First Snowflake: Ch 5; join with a slip st to form a ring. Rnd 1: Ch 1, [2 sc in ring, ch 3] 6 times; join with a slip st in first sc – 6 ch-3 loops. Rnd 2: Slip st in next sc, ch 1, [(2 sc, ch 3, 2 sc) all in ch-3 loop] 6 times; join. Rnd 3: Slip st in next sc, ch 1, [(sc, ch 3, sc, ch 5, sc, ch 3, sc) all in ch-3 loop, ch 2] 6 times; join. Fasten off. 2nd Snowflake: Work same as First Snowflake through Rnd 2. Joining Rnd 3: Slip st in next sc, ch 1, (sc, ch 3, sc, ch 2) all in next ch-3 loop, with wrong sides together, slip st in any ch-5 loop of First Snowflake, (ch 2, sc, ch 3, sc) all in same ch-3 loop, ch 2, [(sc, ch 3, sc, ch 5, sc, ch 3, sc) all in next ch-3 loop, ch 2] 5 times; join. Fasten off. Mark 3rd ch-5 loop from joining. 3rd-15th Snowflakes: Work same as First Snowflake through Rnd 2. Joining Rnd 3: Slip st in next sc, ch 1, (sc, ch 3, sc, ch 2) all in next ch-3 loop, with wrong sides together, slip st in the marked ch-5 loop of last snowflake made, (ch 2, sc, ch 3, sc) all in same ch-3 loop, ch 2, [(sc, ch 3, sc, ch 5, sc, ch 3, sc) all in next ch-3 loop, ch 2] 5 times; join. Fasten off. Mark 3rd ch-5 loop from joining. FINISHING: Weave in ends.
Holiday eBook from Red Heart Yarn
Find more crochet and knitting patterns, yarn inspiration and creative ideas at www.coatsandclark.com. 29
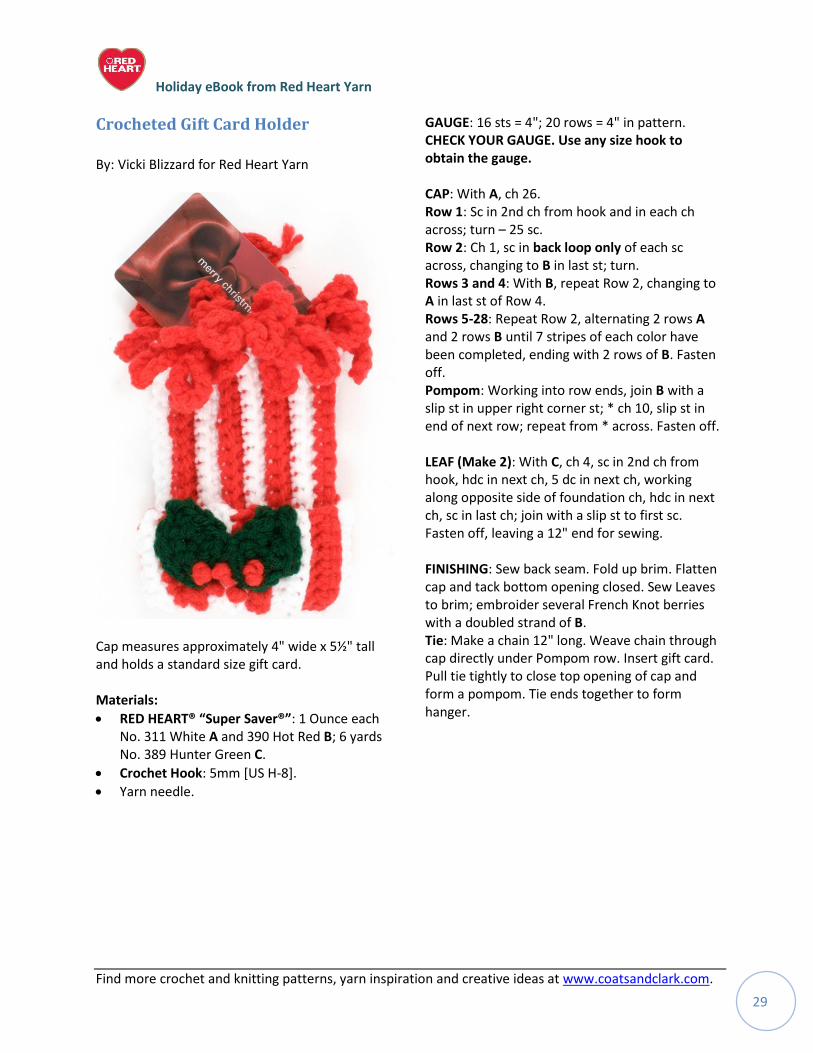
Crocheted Gift Card Holder
By: Vicki Blizzard for Red Heart Yarn
Cap measures approximately 4" wide x 5½" tall and holds a standard size gift card. Materials:
RED HEART® “Super Saver®”: 1 Ounce each No. 311 White A and 390 Hot Red B; 6 yards No. 389 Hunter Green C.
Crochet Hook: 5mm [US H-8].
Yarn needle.
GAUGE: 16 sts = 4"; 20 rows = 4" in pattern. CHECK YOUR GAUGE. Use any size hook to obtain the gauge. CAP: With A, ch 26. Row 1: Sc in 2nd ch from hook and in each ch across; turn – 25 sc. Row 2: Ch 1, sc in back loop only of each sc across, changing to B in last st; turn. Rows 3 and 4: With B, repeat Row 2, changing to A in last st of Row 4. Rows 5-28: Repeat Row 2, alternating 2 rows A and 2 rows B until 7 stripes of each color have been completed, ending with 2 rows of B. Fasten off. Pompom: Working into row ends, join B with a slip st in upper right corner st; * ch 10, slip st in end of next row; repeat from * across. Fasten off. LEAF (Make 2): With C, ch 4, sc in 2nd ch from hook, hdc in next ch, 5 dc in next ch, working along opposite side of foundation ch, hdc in next ch, sc in last ch; join with a slip st to first sc. Fasten off, leaving a 12" end for sewing. FINISHING: Sew back seam. Fold up brim. Flatten cap and tack bottom opening closed. Sew Leaves to brim; embroider several French Knot berries with a doubled strand of B. Tie: Make a chain 12" long. Weave chain through cap directly under Pompom row. Insert gift card. Pull tie tightly to close top opening of cap and form a pompom. Tie ends together to form hanger.
Holiday eBook from Red Heart Yarn
Find more crochet and knitting patterns, yarn inspiration and creative ideas at www.coatsandclark.com. 30
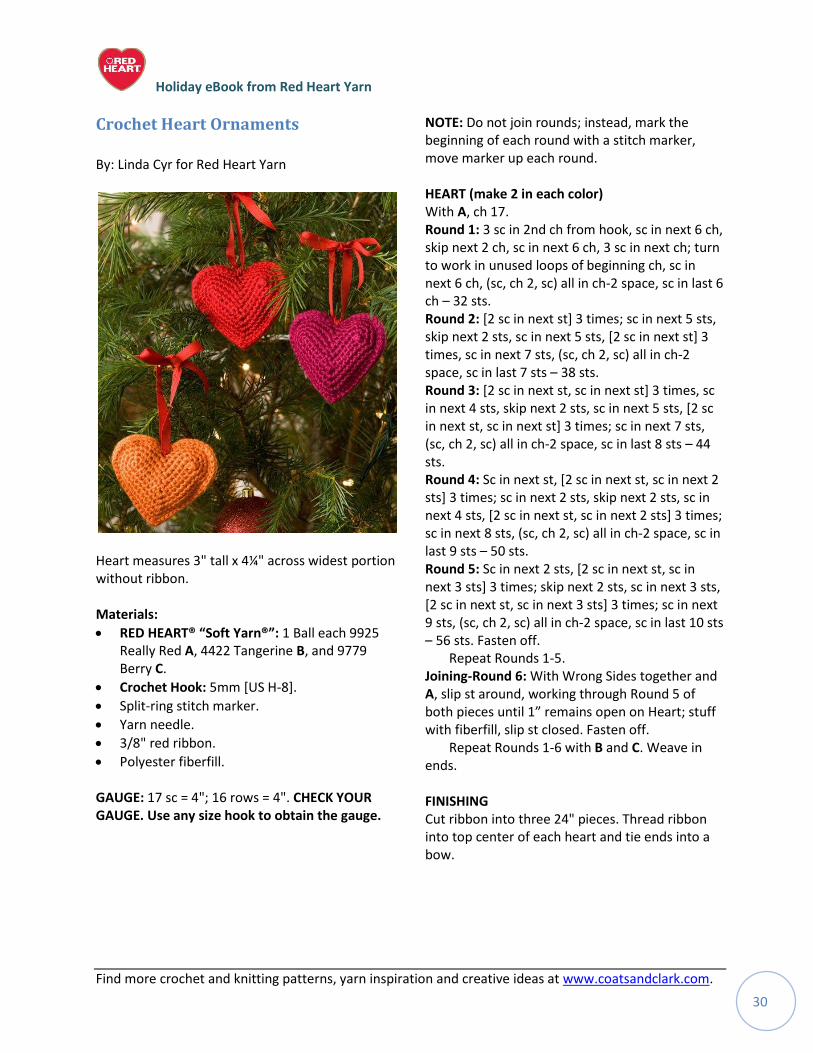
Crochet Heart Ornaments
By: Linda Cyr for Red Heart Yarn
Heart measures 3" tall x 4¼" across widest portion without ribbon. Materials:
RED HEART® “Soft Yarn®”: 1 Ball each 9925 Really Red A, 4422 Tangerine B, and 9779 Berry C.
Crochet Hook: 5mm [US H-8].
Split-ring stitch marker.
Yarn needle.
3/8" red ribbon.
Polyester fiberfill. GAUGE: 17 sc = 4"; 16 rows = 4". CHECK YOUR GAUGE. Use any size hook to obtain the gauge.
NOTE: Do not join rounds; instead, mark the beginning of each round with a stitch marker, move marker up each round. HEART (make 2 in each color) With A, ch 17. Round 1: 3 sc in 2nd ch from hook, sc in next 6 ch, skip next 2 ch, sc in next 6 ch, 3 sc in next ch; turn to work in unused loops of beginning ch, sc in next 6 ch, (sc, ch 2, sc) all in ch-2 space, sc in last 6 ch – 32 sts. Round 2: [2 sc in next st] 3 times; sc in next 5 sts, skip next 2 sts, sc in next 5 sts, [2 sc in next st] 3 times, sc in next 7 sts, (sc, ch 2, sc) all in ch-2 space, sc in last 7 sts – 38 sts. Round 3: [2 sc in next st, sc in next st] 3 times, sc in next 4 sts, skip next 2 sts, sc in next 5 sts, [2 sc in next st, sc in next st] 3 times; sc in next 7 sts, (sc, ch 2, sc) all in ch-2 space, sc in last 8 sts – 44 sts. Round 4: Sc in next st, [2 sc in next st, sc in next 2 sts] 3 times; sc in next 2 sts, skip next 2 sts, sc in next 4 sts, [2 sc in next st, sc in next 2 sts] 3 times; sc in next 8 sts, (sc, ch 2, sc) all in ch-2 space, sc in last 9 sts – 50 sts. Round 5: Sc in next 2 sts, [2 sc in next st, sc in next 3 sts] 3 times; skip next 2 sts, sc in next 3 sts, [2 sc in next st, sc in next 3 sts] 3 times; sc in next 9 sts, (sc, ch 2, sc) all in ch-2 space, sc in last 10 sts – 56 sts. Fasten off.
Repeat Rounds 1-5. Joining-Round 6: With Wrong Sides together and A, slip st around, working through Round 5 of both pieces until 1” remains open on Heart; stuff with fiberfill, slip st closed. Fasten off.
Repeat Rounds 1-6 with B and C. Weave in ends. FINISHING Cut ribbon into three 24" pieces. Thread ribbon into top center of each heart and tie ends into a bow.
Holiday eBook from Red Heart Yarn
Find more crochet and knitting patterns, yarn inspiration and creative ideas at www.coatsandclark.com. 31
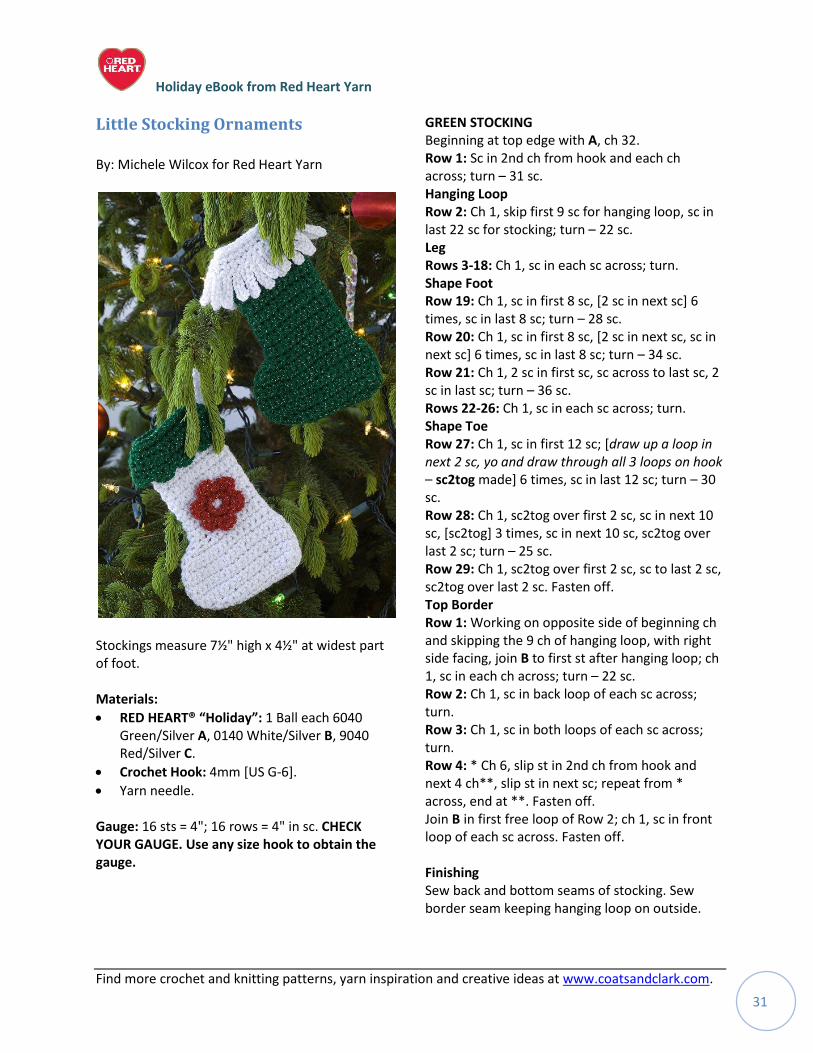
Little Stocking Ornaments
By: Michele Wilcox for Red Heart Yarn
Stockings measure 7½" high x 4½" at widest part of foot. Materials:
RED HEART® “Holiday”: 1 Ball each 6040 Green/Silver A, 0140 White/Silver B, 9040 Red/Silver C.
Crochet Hook: 4mm [US G-6].
Yarn needle. Gauge: 16 sts = 4"; 16 rows = 4" in sc. CHECK YOUR GAUGE. Use any size hook to obtain the gauge.
GREEN STOCKING Beginning at top edge with A, ch 32. Row 1: Sc in 2nd ch from hook and each ch across; turn – 31 sc. Hanging Loop Row 2: Ch 1, skip first 9 sc for hanging loop, sc in last 22 sc for stocking; turn – 22 sc. Leg Rows 3-18: Ch 1, sc in each sc across; turn. Shape Foot Row 19: Ch 1, sc in first 8 sc, [2 sc in next sc] 6 times, sc in last 8 sc; turn – 28 sc. Row 20: Ch 1, sc in first 8 sc, [2 sc in next sc, sc in next sc] 6 times, sc in last 8 sc; turn – 34 sc. Row 21: Ch 1, 2 sc in first sc, sc across to last sc, 2 sc in last sc; turn – 36 sc. Rows 22-26: Ch 1, sc in each sc across; turn. Shape Toe Row 27: Ch 1, sc in first 12 sc; [draw up a loop in next 2 sc, yo and draw through all 3 loops on hook – sc2tog made] 6 times, sc in last 12 sc; turn – 30 sc. Row 28: Ch 1, sc2tog over first 2 sc, sc in next 10 sc, [sc2tog] 3 times, sc in next 10 sc, sc2tog over last 2 sc; turn – 25 sc. Row 29: Ch 1, sc2tog over first 2 sc, sc to last 2 sc, sc2tog over last 2 sc. Fasten off. Top Border Row 1: Working on opposite side of beginning ch and skipping the 9 ch of hanging loop, with right side facing, join B to first st after hanging loop; ch 1, sc in each ch across; turn – 22 sc. Row 2: Ch 1, sc in back loop of each sc across; turn. Row 3: Ch 1, sc in both loops of each sc across; turn. Row 4: * Ch 6, slip st in 2nd ch from hook and next 4 ch**, slip st in next sc; repeat from * across, end at **. Fasten off. Join B in first free loop of Row 2; ch 1, sc in front loop of each sc across. Fasten off. Finishing Sew back and bottom seams of stocking. Sew border seam keeping hanging loop on outside.
Holiday eBook from Red Heart Yarn
Find more crochet and knitting patterns, yarn inspiration and creative ideas at www.coatsandclark.com. 32
WHITE STOCKING Stocking Work same as Green Stocking with B. Top Border Row 1: Working on opposite side of beginning ch and skipping the 9 ch of hanging loop, with right side facing, join A to first st after hanging loop; ch 1, sc in each ch across; turn – 22 sc. Row 2: Ch 1, sc in back loop of each sc across; turn. Rows 3-5: Ch 1, sc in each sc across; turn. Row 6: Slip st in next sc, * 3 sc in next sc, slip st in next 2 sc; repeat from * across. Fasten off. Join A in first free loop of Row 2; ch 1, sc in front loop of each sc across. Fasten off. Finishing Sew back and bottom seams of stocking. Sew border seam keeping hanging loop on outside. Flower With C ch 5; join with a slip st in first ch to form a ring. Rnd 1: Ch 1, 12 sc in ring. Rnd 2: * (Slip st, ch 1, 2 hdc) all in next sc, ch 1, slip st in next sc; repeat from * around; join with a slip st in first slip st. Fasten off. Sew in place.
Holiday eBook from Red Heart Yarn
Find more crochet and knitting patterns, yarn inspiration and creative ideas at www.coatsandclark.com. 33
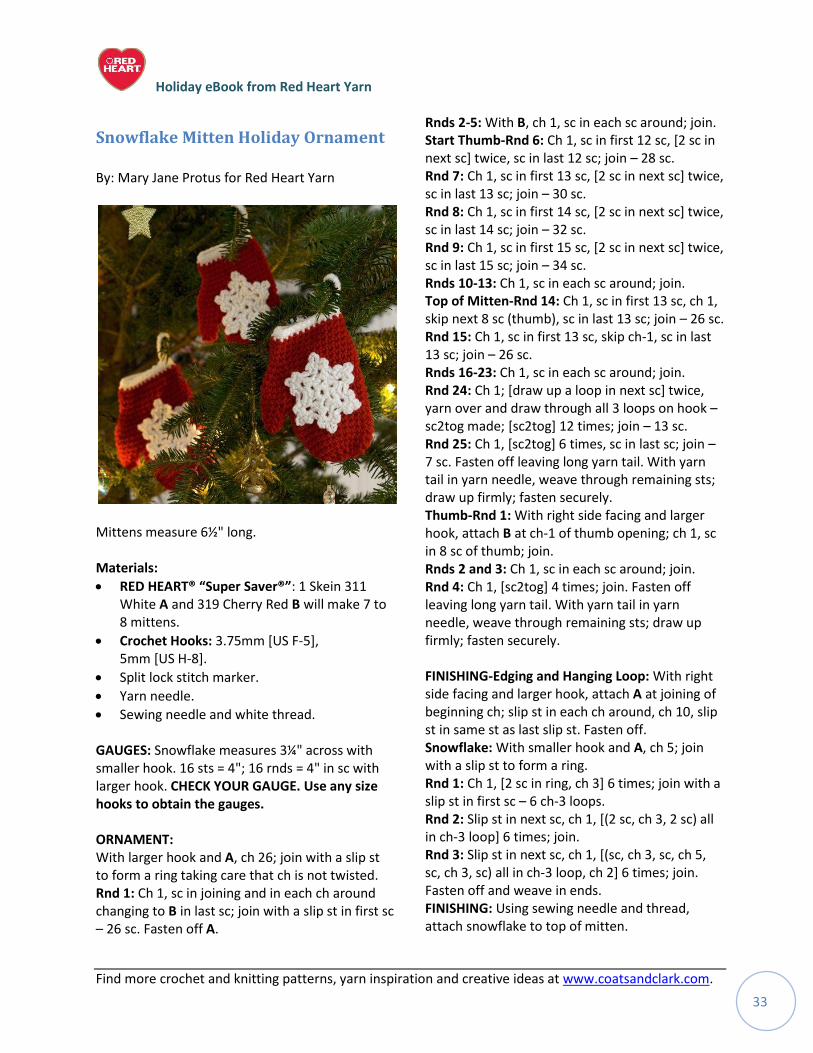
Snowflake Mitten Holiday Ornament
By: Mary Jane Protus for Red Heart Yarn
Mittens measure 6½" long. Materials:
RED HEART® “Super Saver®”: 1 Skein 311 White A and 319 Cherry Red B will make 7 to 8 mittens.
Crochet Hooks: 3.75mm [US F-5], 5mm [US H-8].
Split lock stitch marker.
Yarn needle.
Sewing needle and white thread. GAUGES: Snowflake measures 3¼" across with smaller hook. 16 sts = 4"; 16 rnds = 4" in sc with larger hook. CHECK YOUR GAUGE. Use any size hooks to obtain the gauges. ORNAMENT: With larger hook and A, ch 26; join with a slip st to form a ring taking care that ch is not twisted. Rnd 1: Ch 1, sc in joining and in each ch around changing to B in last sc; join with a slip st in first sc – 26 sc. Fasten off A.
Rnds 2-5: With B, ch 1, sc in each sc around; join. Start Thumb-Rnd 6: Ch 1, sc in first 12 sc, [2 sc in next sc] twice, sc in last 12 sc; join – 28 sc. Rnd 7: Ch 1, sc in first 13 sc, [2 sc in next sc] twice, sc in last 13 sc; join – 30 sc. Rnd 8: Ch 1, sc in first 14 sc, [2 sc in next sc] twice, sc in last 14 sc; join – 32 sc. Rnd 9: Ch 1, sc in first 15 sc, [2 sc in next sc] twice, sc in last 15 sc; join – 34 sc. Rnds 10-13: Ch 1, sc in each sc around; join. Top of Mitten-Rnd 14: Ch 1, sc in first 13 sc, ch 1, skip next 8 sc (thumb), sc in last 13 sc; join – 26 sc. Rnd 15: Ch 1, sc in first 13 sc, skip ch-1, sc in last 13 sc; join – 26 sc. Rnds 16-23: Ch 1, sc in each sc around; join. Rnd 24: Ch 1; [draw up a loop in next sc] twice, yarn over and draw through all 3 loops on hook – sc2tog made; [sc2tog] 12 times; join – 13 sc. Rnd 25: Ch 1, [sc2tog] 6 times, sc in last sc; join – 7 sc. Fasten off leaving long yarn tail. With yarn tail in yarn needle, weave through remaining sts; draw up firmly; fasten securely. Thumb-Rnd 1: With right side facing and larger hook, attach B at ch-1 of thumb opening; ch 1, sc in 8 sc of thumb; join. Rnds 2 and 3: Ch 1, sc in each sc around; join. Rnd 4: Ch 1, [sc2tog] 4 times; join. Fasten off leaving long yarn tail. With yarn tail in yarn needle, weave through remaining sts; draw up firmly; fasten securely. FINISHING-Edging and Hanging Loop: With right side facing and larger hook, attach A at joining of beginning ch; slip st in each ch around, ch 10, slip st in same st as last slip st. Fasten off. Snowflake: With smaller hook and A, ch 5; join with a slip st to form a ring. Rnd 1: Ch 1, [2 sc in ring, ch 3] 6 times; join with a slip st in first sc – 6 ch-3 loops. Rnd 2: Slip st in next sc, ch 1, [(2 sc, ch 3, 2 sc) all in ch-3 loop] 6 times; join. Rnd 3: Slip st in next sc, ch 1, [(sc, ch 3, sc, ch 5, sc, ch 3, sc) all in ch-3 loop, ch 2] 6 times; join. Fasten off and weave in ends. FINISHING: Using sewing needle and thread, attach snowflake to top of mitten.
Holiday eBook from Red Heart Yarn
Find more crochet and knitting patterns, yarn inspiration and creative ideas at www.coatsandclark.com. 34
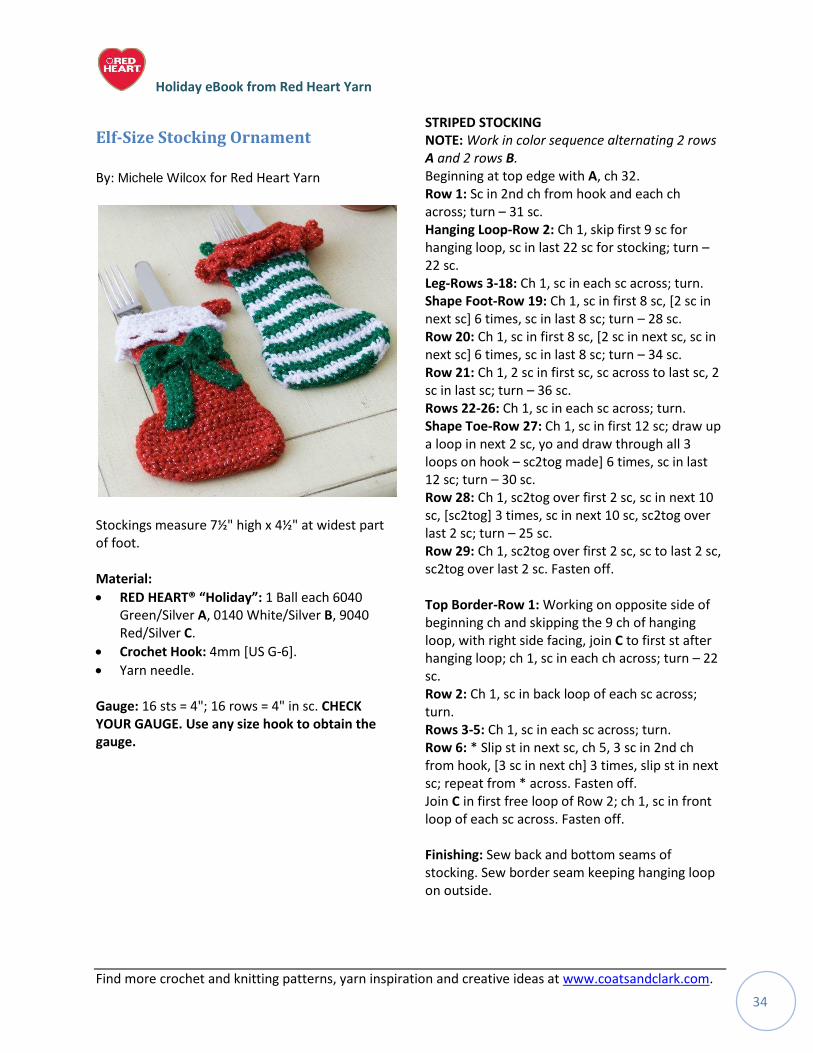
Elf-Size Stocking Ornament
By: Michele Wilcox for Red Heart Yarn
Stockings measure 7½" high x 4½" at widest part of foot. Material:
RED HEART® “Holiday”: 1 Ball each 6040 Green/Silver A, 0140 White/Silver B, 9040 Red/Silver C.
Crochet Hook: 4mm [US G-6].
Yarn needle. Gauge: 16 sts = 4"; 16 rows = 4" in sc. CHECK YOUR GAUGE. Use any size hook to obtain the gauge.
STRIPED STOCKING NOTE: Work in color sequence alternating 2 rows A and 2 rows B. Beginning at top edge with A, ch 32. Row 1: Sc in 2nd ch from hook and each ch across; turn – 31 sc. Hanging Loop-Row 2: Ch 1, skip first 9 sc for hanging loop, sc in last 22 sc for stocking; turn – 22 sc. Leg-Rows 3-18: Ch 1, sc in each sc across; turn. Shape Foot-Row 19: Ch 1, sc in first 8 sc, [2 sc in next sc] 6 times, sc in last 8 sc; turn – 28 sc. Row 20: Ch 1, sc in first 8 sc, [2 sc in next sc, sc in next sc] 6 times, sc in last 8 sc; turn – 34 sc. Row 21: Ch 1, 2 sc in first sc, sc across to last sc, 2 sc in last sc; turn – 36 sc. Rows 22-26: Ch 1, sc in each sc across; turn. Shape Toe-Row 27: Ch 1, sc in first 12 sc; draw up a loop in next 2 sc, yo and draw through all 3 loops on hook – sc2tog made] 6 times, sc in last 12 sc; turn – 30 sc. Row 28: Ch 1, sc2tog over first 2 sc, sc in next 10 sc, [sc2tog] 3 times, sc in next 10 sc, sc2tog over last 2 sc; turn – 25 sc. Row 29: Ch 1, sc2tog over first 2 sc, sc to last 2 sc, sc2tog over last 2 sc. Fasten off. Top Border-Row 1: Working on opposite side of beginning ch and skipping the 9 ch of hanging loop, with right side facing, join C to first st after hanging loop; ch 1, sc in each ch across; turn – 22 sc. Row 2: Ch 1, sc in back loop of each sc across; turn. Rows 3-5: Ch 1, sc in each sc across; turn. Row 6: * Slip st in next sc, ch 5, 3 sc in 2nd ch from hook, [3 sc in next ch] 3 times, slip st in next sc; repeat from * across. Fasten off. Join C in first free loop of Row 2; ch 1, sc in front loop of each sc across. Fasten off. Finishing: Sew back and bottom seams of stocking. Sew border seam keeping hanging loop on outside.
Holiday eBook from Red Heart Yarn
Find more crochet and knitting patterns, yarn inspiration and creative ideas at www.coatsandclark.com. 35
RED STOCKING Work same as Striped Stocking except in the following color sequence: Rows 1-8: C. Rows 9-12: A. Rows 10-29: C. Top Border-Rows 1-4: Work same as for Striped Stocking with B. Row 5: Ch 1, sc in first sc, * ch 4, skip 2 sc, sc next sc; repeat from * across; turn. Row 6: Ch 1, slip st in first sc, * 5 sc in ch-4 space, slip st in next sc; repeat from * across. Fasten off.
Join B in first free loop of Row 2; ch 1, sc in front loop of each sc across. Fasten off. Finishing: Sew back and bottom seams of stocking. Sew border seam keeping hanging loop on outside. Bow: With A, ch 51. Row 1: Sc in 2nd ch from hook and in each ch across; turn – 50 sc. Rows 2 and 3: Ch 1, sc in each sc across; turn. Fasten off. Tie piece into a bow and sew in place on Rows 9-12 as shown.
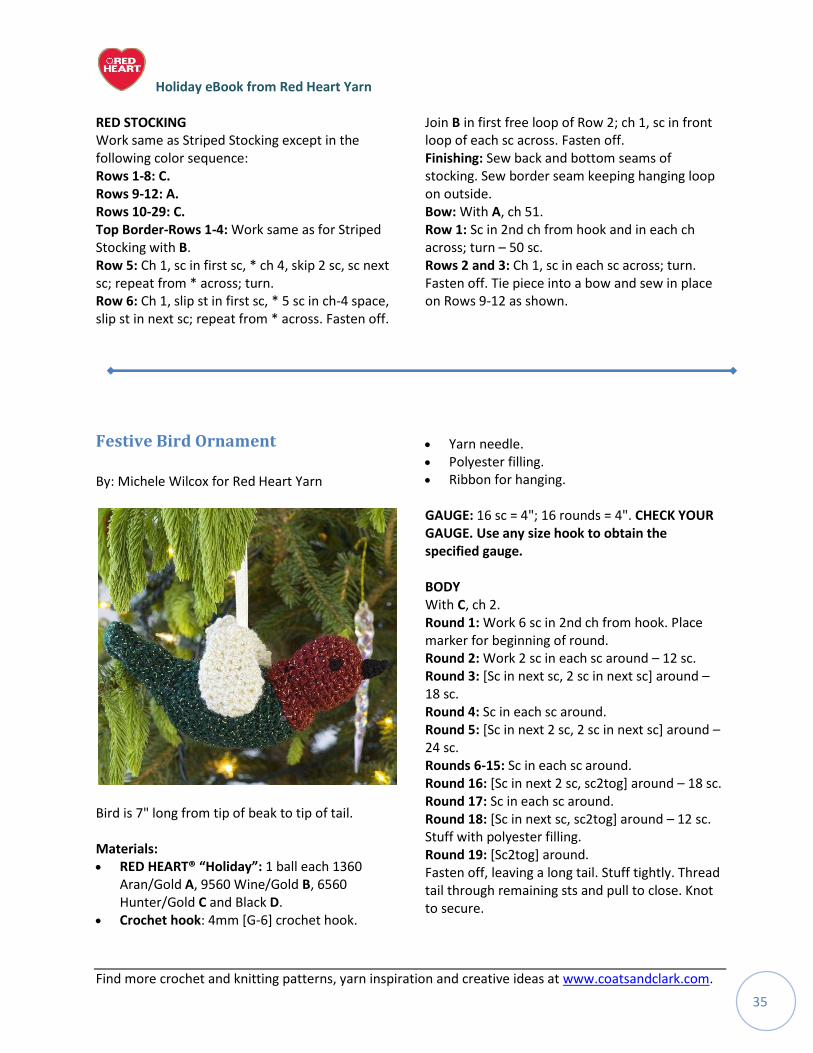
Festive Bird Ornament
By: Michele Wilcox for Red Heart Yarn
Bird is 7" long from tip of beak to tip of tail. Materials: RED HEART® “Holiday”: 1 ball each 1360
Aran/Gold A, 9560 Wine/Gold B, 6560 Hunter/Gold C and Black D.
Crochet hook: 4mm [G-6] crochet hook.
Yarn needle. Polyester filling. Ribbon for hanging. GAUGE: 16 sc = 4"; 16 rounds = 4". CHECK YOUR GAUGE. Use any size hook to obtain the specified gauge. BODY With C, ch 2. Round 1: Work 6 sc in 2nd ch from hook. Place marker for beginning of round. Round 2: Work 2 sc in each sc around – 12 sc. Round 3: [Sc in next sc, 2 sc in next sc] around – 18 sc. Round 4: Sc in each sc around. Round 5: [Sc in next 2 sc, 2 sc in next sc] around – 24 sc. Rounds 6-15: Sc in each sc around. Round 16: [Sc in next 2 sc, sc2tog] around – 18 sc. Round 17: Sc in each sc around. Round 18: [Sc in next sc, sc2tog] around – 12 sc. Stuff with polyester filling. Round 19: [Sc2tog] around. Fasten off, leaving a long tail. Stuff tightly. Thread tail through remaining sts and pull to close. Knot to secure.
Holiday eBook from Red Heart Yarn
Find more crochet and knitting patterns, yarn inspiration and creative ideas at www.coatsandclark.com. 36
HEAD With B, ch 2. Rounds 1-3: Work as for Body – 18 sc. Rounds 4-9: Sc in each sc around. Round 10: [Sc2tog] around – 9 sc. Round 11: Working in front loops only, 2 sc in each sc around – 18 sc. Round 12: Sc in next sc, hdc in next 2 sc, [2 hdc] in each of next 2 sc, hdc in next sc, [2 hdc] in each of next 2 sc, hdc in next 2 sc, sc in last 8 sc. Fasten off. Stuff tightly and sew onto Body. WING (Make 2) With A, ch 2. Round 1: Work 6 sc in 2nd ch from hook. Round 2: Work 2 sc in each sc around – 12 sc. Round 3: Sc in each sc around. Round 4: [Sc in next 3 sc, 2 sc in next sc] around – 15 sc. Round 5: Sc in each sc around. Round 6: [Sc in next 3 sc, sc2tog] around – 12 sc. Rounds 7-11: Sc across to last 2 sc, sc2tog – 7 sc. Fasten off, leaving a long tail. Thread tail through remaining sts and pull to close. Knot to secure.
TAIL With C, ch 6. Round 1: Work sc in 2nd ch from hook and in next 3 ch, 3 sc in last ch, turn to work along opposite side of foundation ch, sc in next 3 ch, 2 sc in last ch – 12 sc. Rounds 2-9: Sc in each sc around. Round 10: [Sc in next sc, 2 sc in next sc] around – 18 sc. Fasten off. Sew running stitches through both thicknesses at Round 4. Stuff lightly. Sew in place. BEAK With D, ch 4. Row 1: Sc in 2nd ch from hook, hdc in next ch, dc in last ch. Row 2: Ch 1, turn, sc in first 2 sts, slip st in last st. Fasten off. Fold in half and sew together. Sew in place. FINISHING Embroider eyes with French knot with D. Fold a length of ribbon in half and sew ends on Chirper for hanging. Weave in ends.
Holiday eBook from Red Heart Yarn
Find more crochet and knitting patterns, yarn inspiration and creative ideas at www.coatsandclark.com. 37
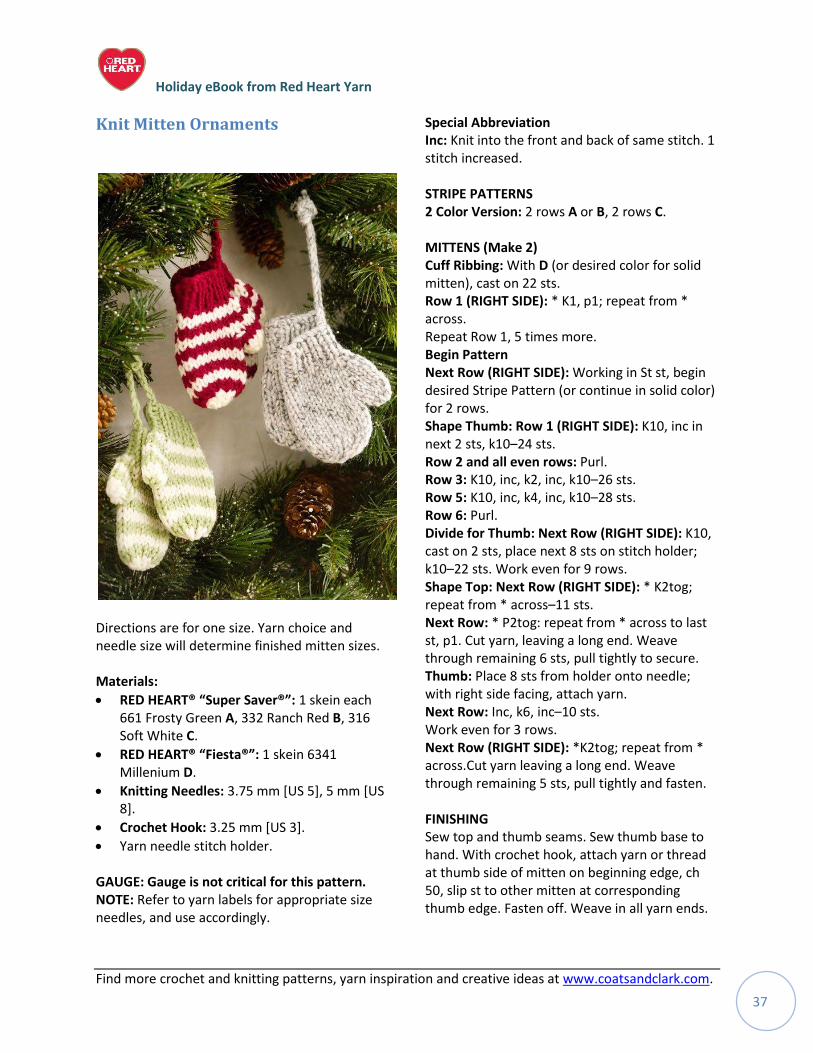
Knit Mitten Ornaments
Directions are for one size. Yarn choice and needle size will determine finished mitten sizes. Materials:
RED HEART® “Super Saver®”: 1 skein each 661 Frosty Green A, 332 Ranch Red B, 316 Soft White C.
RED HEART® “Fiesta®”: 1 skein 6341 Millenium D.
Knitting Needles: 3.75 mm [US 5], 5 mm [US 8].
Crochet Hook: 3.25 mm [US 3].
Yarn needle stitch holder. GAUGE: Gauge is not critical for this pattern. NOTE: Refer to yarn labels for appropriate size needles, and use accordingly.
Special Abbreviation Inc: Knit into the front and back of same stitch. 1 stitch increased. STRIPE PATTERNS 2 Color Version: 2 rows A or B, 2 rows C. MITTENS (Make 2) Cuff Ribbing: With D (or desired color for solid mitten), cast on 22 sts. Row 1 (RIGHT SIDE): * K1, p1; repeat from * across. Repeat Row 1, 5 times more. Begin Pattern Next Row (RIGHT SIDE): Working in St st, begin desired Stripe Pattern (or continue in solid color) for 2 rows. Shape Thumb: Row 1 (RIGHT SIDE): K10, inc in next 2 sts, k10–24 sts. Row 2 and all even rows: Purl. Row 3: K10, inc, k2, inc, k10–26 sts. Row 5: K10, inc, k4, inc, k10–28 sts. Row 6: Purl. Divide for Thumb: Next Row (RIGHT SIDE): K10, cast on 2 sts, place next 8 sts on stitch holder; k10–22 sts. Work even for 9 rows. Shape Top: Next Row (RIGHT SIDE): * K2tog; repeat from * across–11 sts. Next Row: * P2tog: repeat from * across to last st, p1. Cut yarn, leaving a long end. Weave through remaining 6 sts, pull tightly to secure. Thumb: Place 8 sts from holder onto needle; with right side facing, attach yarn. Next Row: Inc, k6, inc–10 sts. Work even for 3 rows. Next Row (RIGHT SIDE): *K2tog; repeat from * across.Cut yarn leaving a long end. Weave through remaining 5 sts, pull tightly and fasten. FINISHING Sew top and thumb seams. Sew thumb base to hand. With crochet hook, attach yarn or thread at thumb side of mitten on beginning edge, ch 50, slip st to other mitten at corresponding thumb edge. Fasten off. Weave in all yarn ends.
Holiday eBook from Red Heart Yarn
Find more crochet and knitting patterns, yarn inspiration and creative ideas at www.coatsandclark.com. 38
Hats, Scarves, and More
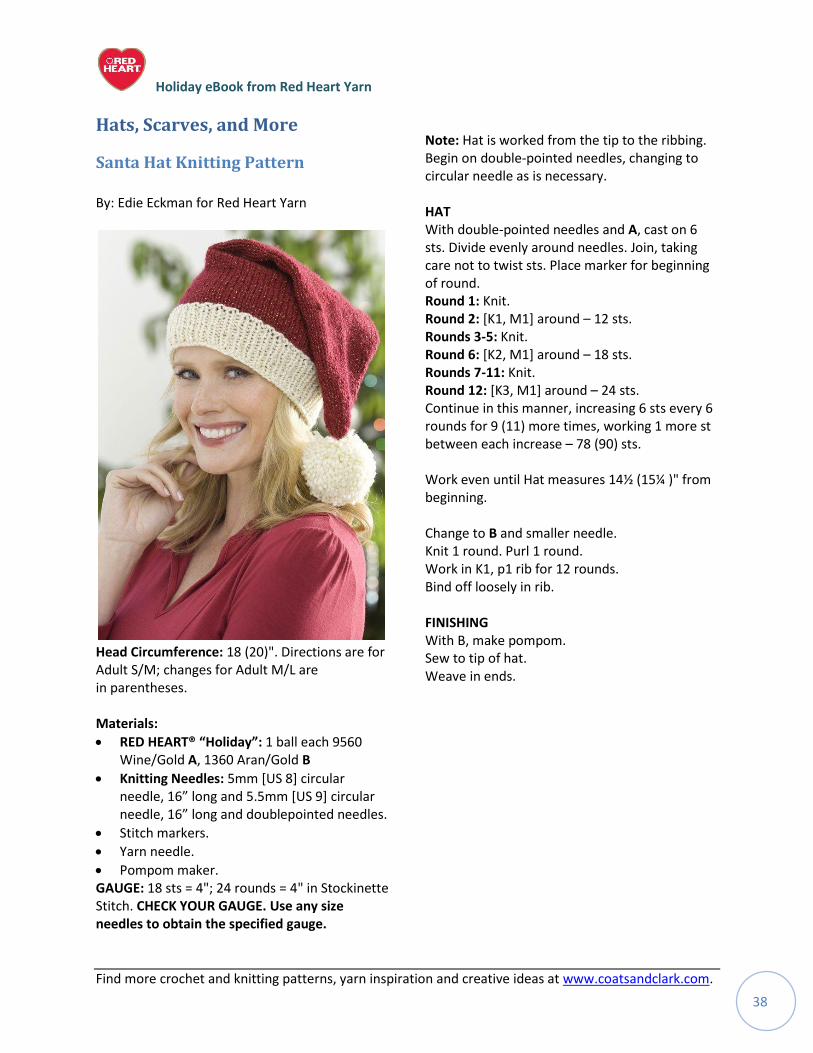
Santa Hat Knitting Pattern
By: Edie Eckman for Red Heart Yarn
Head Circumference: 18 (20)". Directions are for Adult S/M; changes for Adult M/L are in parentheses. Materials:
RED HEART® “Holiday”: 1 ball each 9560 Wine/Gold A, 1360 Aran/Gold B
Knitting Needles: 5mm [US 8] circular needle, 16” long and 5.5mm *US 9+ circular needle, 16” long and doublepointed needles.
Stitch markers.
Yarn needle.
Pompom maker. GAUGE: 18 sts = 4"; 24 rounds = 4" in Stockinette Stitch. CHECK YOUR GAUGE. Use any size needles to obtain the specified gauge.
Note: Hat is worked from the tip to the ribbing. Begin on double-pointed needles, changing to circular needle as is necessary. HAT With double-pointed needles and A, cast on 6 sts. Divide evenly around needles. Join, taking care not to twist sts. Place marker for beginning of round. Round 1: Knit. Round 2: [K1, M1] around – 12 sts. Rounds 3-5: Knit. Round 6: [K2, M1] around – 18 sts. Rounds 7-11: Knit. Round 12: [K3, M1] around – 24 sts. Continue in this manner, increasing 6 sts every 6 rounds for 9 (11) more times, working 1 more st between each increase – 78 (90) sts. Work even until Hat measures 14½ (15¼ )" from beginning. Change to B and smaller needle. Knit 1 round. Purl 1 round. Work in K1, p1 rib for 12 rounds. Bind off loosely in rib. FINISHING With B, make pompom. Sew to tip of hat. Weave in ends.
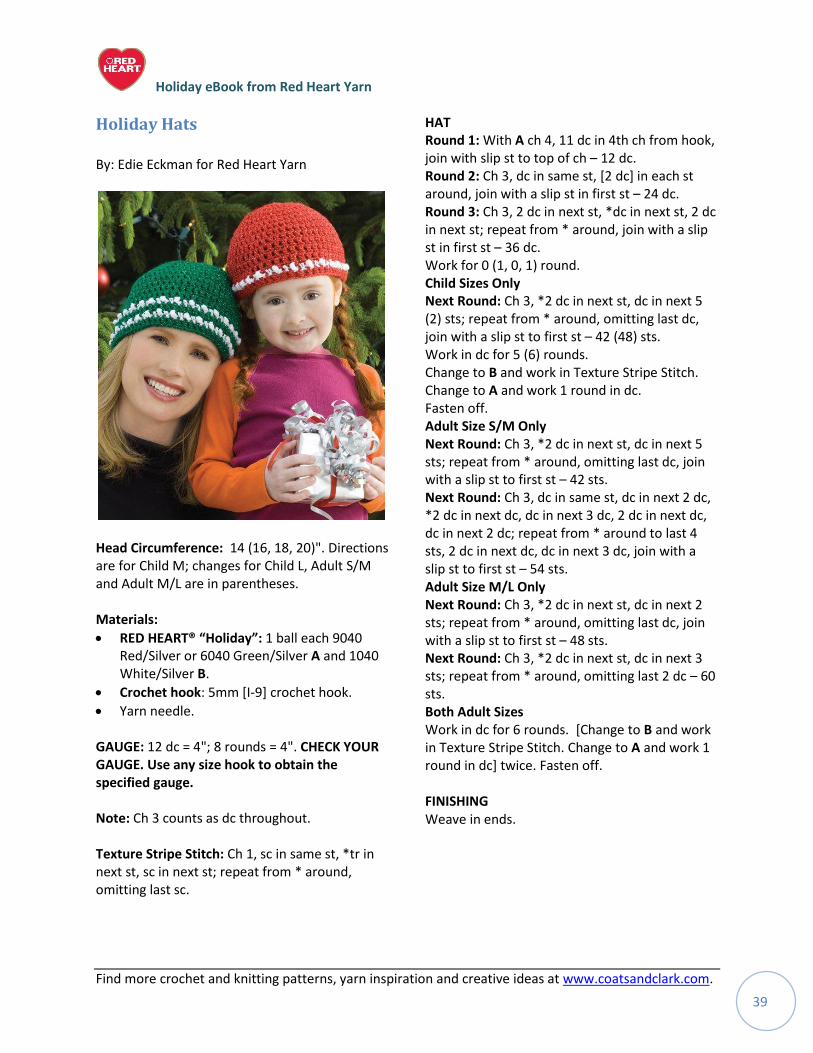
Holiday eBook from Red Heart Yarn
Find more crochet and knitting patterns, yarn inspiration and creative ideas at www.coatsandclark.com. 39
Holiday Hats
By: Edie Eckman for Red Heart Yarn
Head Circumference: 14 (16, 18, 20)". Directions are for Child M; changes for Child L, Adult S/M and Adult M/L are in parentheses. Materials:
RED HEART® “Holiday”: 1 ball each 9040 Red/Silver or 6040 Green/Silver A and 1040 White/Silver B.
Crochet hook: 5mm [I-9] crochet hook.
Yarn needle. GAUGE: 12 dc = 4"; 8 rounds = 4". CHECK YOUR GAUGE. Use any size hook to obtain the specified gauge. Note: Ch 3 counts as dc throughout. Texture Stripe Stitch: Ch 1, sc in same st, *tr in next st, sc in next st; repeat from * around, omitting last sc.
HAT Round 1: With A ch 4, 11 dc in 4th ch from hook, join with slip st to top of ch – 12 dc. Round 2: Ch 3, dc in same st, [2 dc] in each st around, join with a slip st in first st – 24 dc. Round 3: Ch 3, 2 dc in next st, *dc in next st, 2 dc in next st; repeat from * around, join with a slip st in first st – 36 dc. Work for 0 (1, 0, 1) round. Child Sizes Only Next Round: Ch 3, *2 dc in next st, dc in next 5 (2) sts; repeat from * around, omitting last dc, join with a slip st to first st – 42 (48) sts. Work in dc for 5 (6) rounds. Change to B and work in Texture Stripe Stitch. Change to A and work 1 round in dc. Fasten off. Adult Size S/M Only Next Round: Ch 3, *2 dc in next st, dc in next 5 sts; repeat from * around, omitting last dc, join with a slip st to first st – 42 sts. Next Round: Ch 3, dc in same st, dc in next 2 dc, *2 dc in next dc, dc in next 3 dc, 2 dc in next dc, dc in next 2 dc; repeat from * around to last 4 sts, 2 dc in next dc, dc in next 3 dc, join with a slip st to first st – 54 sts. Adult Size M/L Only Next Round: Ch 3, *2 dc in next st, dc in next 2 sts; repeat from * around, omitting last dc, join with a slip st to first st – 48 sts. Next Round: Ch 3, *2 dc in next st, dc in next 3 sts; repeat from * around, omitting last 2 dc – 60 sts. Both Adult Sizes Work in dc for 6 rounds. [Change to B and work in Texture Stripe Stitch. Change to A and work 1 round in dc] twice. Fasten off. FINISHING Weave in ends.

Holiday eBook from Red Heart Yarn
Find more crochet and knitting patterns, yarn inspiration and creative ideas at www.coatsandclark.com. 40
Holiday Scarves Trio
By: Heather Lodinsky for Red Heart Yarn
Scarf is 6" wide x 58" long. Materials:
RED HEART® “SuperSaver™” 1 skein each in 319 Cherry Red A, 316 Soft White B and 389 Hunter Green.
Crochet Hook: 6.5 mm [US K-101/2].
Yarn needle. GAUGE: 10 hdc = 4"; 8 rows = 4". CHECK YOUR GAUGE. Use any size hook to obtain gauge. SCARF Colorway #1 With A, ch 16. Row 1: Hdc in 3rd ch from hook (counts as first hdc), hdc in each ch across – 15 hdc. Row 2: Ch 2 (counts as hdc here and throughout), turn, skip first hdc, hdc in each st across – 15 hdc. Cut A and change to B and repeat Row 2 for 2 rows. Working as established, repeat 2 rows with A, 2 rows with B until piece measures 58” from beginning, end with 2 rows of A. Fasten off. Colorway #2: Work as for Colorway #1, beginning and ending with C, repeat 2 rows C and 2 rows B. Colorway #3: Work as for Colorway #1, beginning and ending with C, repeat 2 rows with C, 2 rows with B, 2 rows with A, 2 rows with B.
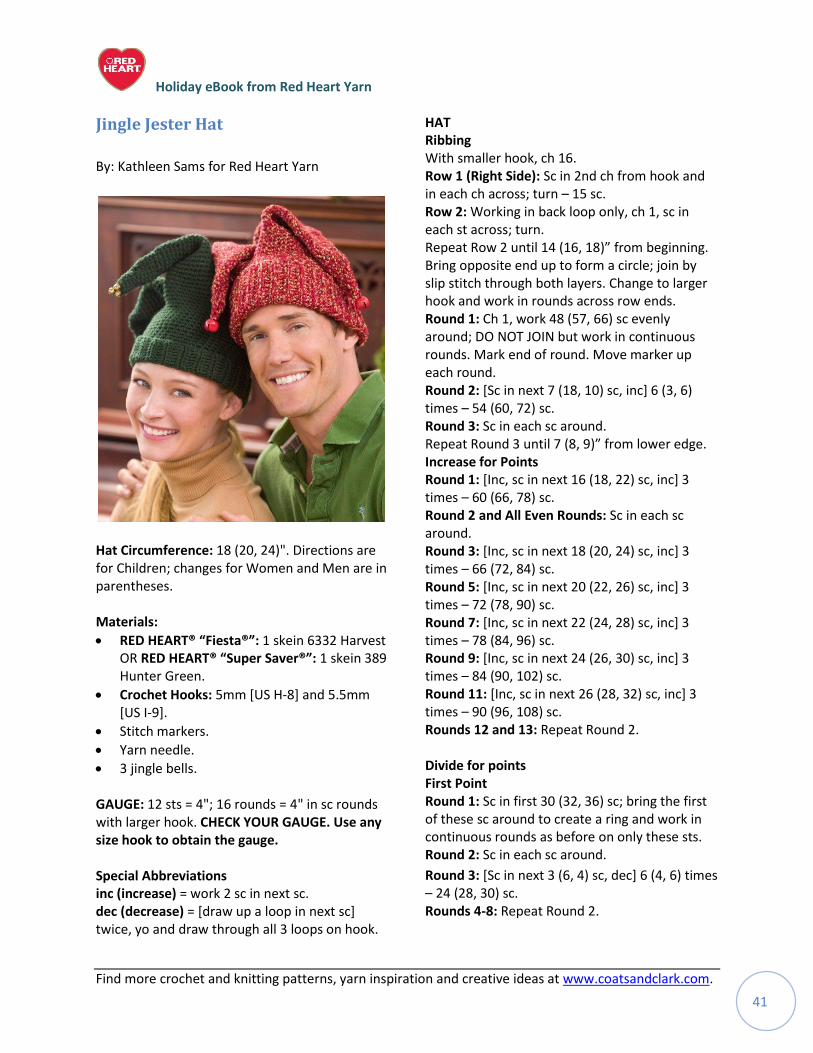
Holiday eBook from Red Heart Yarn
Find more crochet and knitting patterns, yarn inspiration and creative ideas at www.coatsandclark.com. 41
Jingle Jester Hat
By: Kathleen Sams for Red Heart Yarn
Hat Circumference: 18 (20, 24)". Directions are for Children; changes for Women and Men are in parentheses. Materials:
RED HEART® “Fiesta®”: 1 skein 6332 Harvest OR RED HEART® “Super Saver®”: 1 skein 389 Hunter Green.
Crochet Hooks: 5mm [US H-8] and 5.5mm [US I-9].
Stitch markers.
Yarn needle.
3 jingle bells. GAUGE: 12 sts = 4"; 16 rounds = 4" in sc rounds with larger hook. CHECK YOUR GAUGE. Use any size hook to obtain the gauge. Special Abbreviations inc (increase) = work 2 sc in next sc. dec (decrease) = [draw up a loop in next sc] twice, yo and draw through all 3 loops on hook.
HAT Ribbing With smaller hook, ch 16. Row 1 (Right Side): Sc in 2nd ch from hook and in each ch across; turn – 15 sc. Row 2: Working in back loop only, ch 1, sc in each st across; turn. Repeat Row 2 until 14 (16, 18)” from beginning. Bring opposite end up to form a circle; join by slip stitch through both layers. Change to larger hook and work in rounds across row ends. Round 1: Ch 1, work 48 (57, 66) sc evenly around; DO NOT JOIN but work in continuous rounds. Mark end of round. Move marker up each round. Round 2: [Sc in next 7 (18, 10) sc, inc] 6 (3, 6) times – 54 (60, 72) sc. Round 3: Sc in each sc around. Repeat Round 3 until 7 (8, 9)” from lower edge. Increase for Points Round 1: [Inc, sc in next 16 (18, 22) sc, inc] 3 times – 60 (66, 78) sc. Round 2 and All Even Rounds: Sc in each sc around. Round 3: [Inc, sc in next 18 (20, 24) sc, inc] 3 times – 66 (72, 84) sc. Round 5: [Inc, sc in next 20 (22, 26) sc, inc] 3 times – 72 (78, 90) sc. Round 7: [Inc, sc in next 22 (24, 28) sc, inc] 3 times – 78 (84, 96) sc. Round 9: [Inc, sc in next 24 (26, 30) sc, inc] 3 times – 84 (90, 102) sc. Round 11: [Inc, sc in next 26 (28, 32) sc, inc] 3 times – 90 (96, 108) sc. Rounds 12 and 13: Repeat Round 2. Divide for points First Point Round 1: Sc in first 30 (32, 36) sc; bring the first of these sc around to create a ring and work in continuous rounds as before on only these sts. Round 2: Sc in each sc around.
Round 3: [Sc in next 3 (6, 4) sc, dec] 6 (4, 6) times – 24 (28, 30) sc. Rounds 4-8: Repeat Round 2.
Holiday eBook from Red Heart Yarn
Find more crochet and knitting patterns, yarn inspiration and creative ideas at www.coatsandclark.com. 42
Round 9: [Sc in next 2 (5, 3) sc, dec] 6 (4, 6) times – 18 (24, 24) sc. Rounds10-14: Repeat Round 2. Round 15: [Sc in next 1 (2, 2) sc, dec] 6 times – 12 (18, 18) sc. Rounds 16-20: Repeat Round 2. Round 21: [Sc in next sc, dec] 4 (6, 6) times – 8 (12, 12) sc. Rounds 22-26: Repeat Round 2. Round 27: [Sc in next 0 (1, 1) sc, dec] 4 times – 4 (8, 8) sc. Women’s and Men’s Sizes Only-Rounds 28-32: Repeat Round 2. Round 33: [Dec] 4 times – 4 sc.
All Sizes: Fasten off leaving a long 12" tail for sewing ends and attaching jingle bells. 2nd Point Sc in next 30 (32, 36) sts of last long row; bring the first of these sc around to create a ring and work in continuous rounds as before. Complete as for First Point. 3rd Point Sc across last 30 (32, 36) sts and complete as for first 2 points. FINISHING Weave in ends. Sew jingle bells at tips of points. Turn ribbing up for cuff.
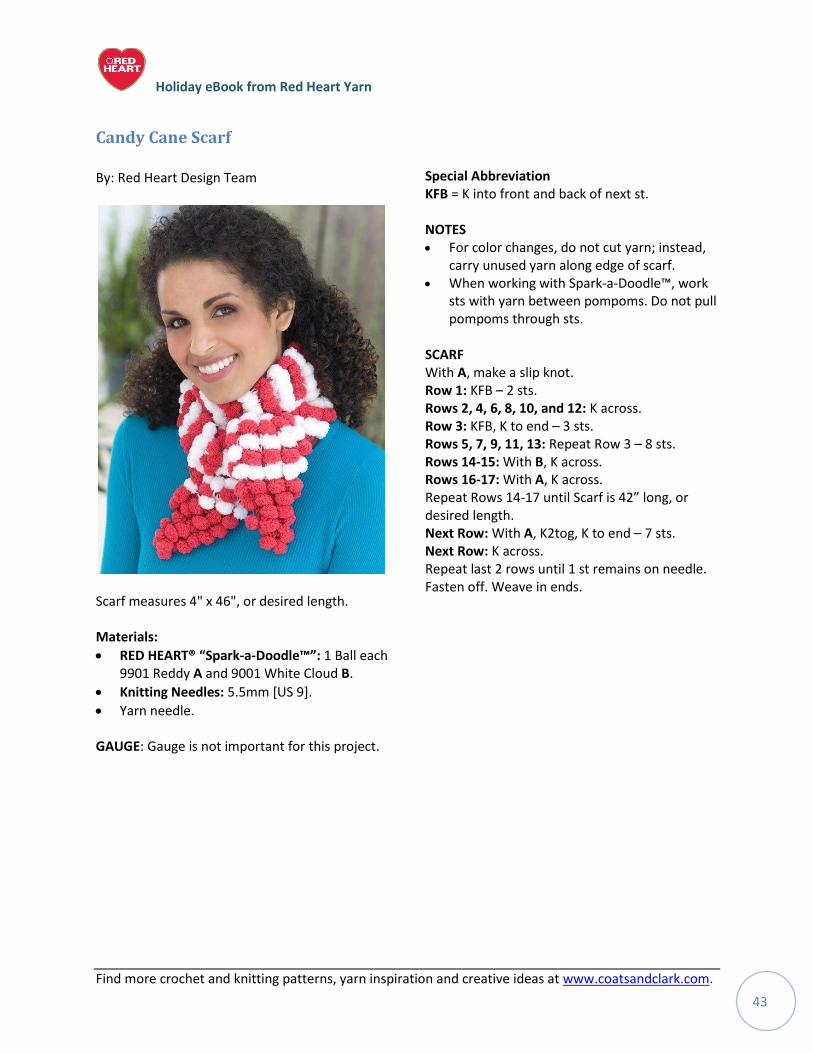
Holiday eBook from Red Heart Yarn
Find more crochet and knitting patterns, yarn inspiration and creative ideas at www.coatsandclark.com. 43
Candy Cane Scarf
By: Red Heart Design Team
Scarf measures 4" x 46", or desired length. Materials:
RED HEART® “Spark-a-Doodle™”: 1 Ball each 9901 Reddy A and 9001 White Cloud B.
Knitting Needles: 5.5mm [US 9].
Yarn needle.
GAUGE: Gauge is not important for this project.
Special Abbreviation KFB = K into front and back of next st. NOTES For color changes, do not cut yarn; instead,
carry unused yarn along edge of scarf. When working with Spark-a-Doodle™, work
sts with yarn between pompoms. Do not pull pompoms through sts.
SCARF With A, make a slip knot. Row 1: KFB – 2 sts. Rows 2, 4, 6, 8, 10, and 12: K across. Row 3: KFB, K to end – 3 sts. Rows 5, 7, 9, 11, 13: Repeat Row 3 – 8 sts. Rows 14-15: With B, K across. Rows 16-17: With A, K across. Repeat Rows 14-17 until Scarf is 42” long, or desired length. Next Row: With A, K2tog, K to end – 7 sts. Next Row: K across. Repeat last 2 rows until 1 st remains on needle. Fasten off. Weave in ends.
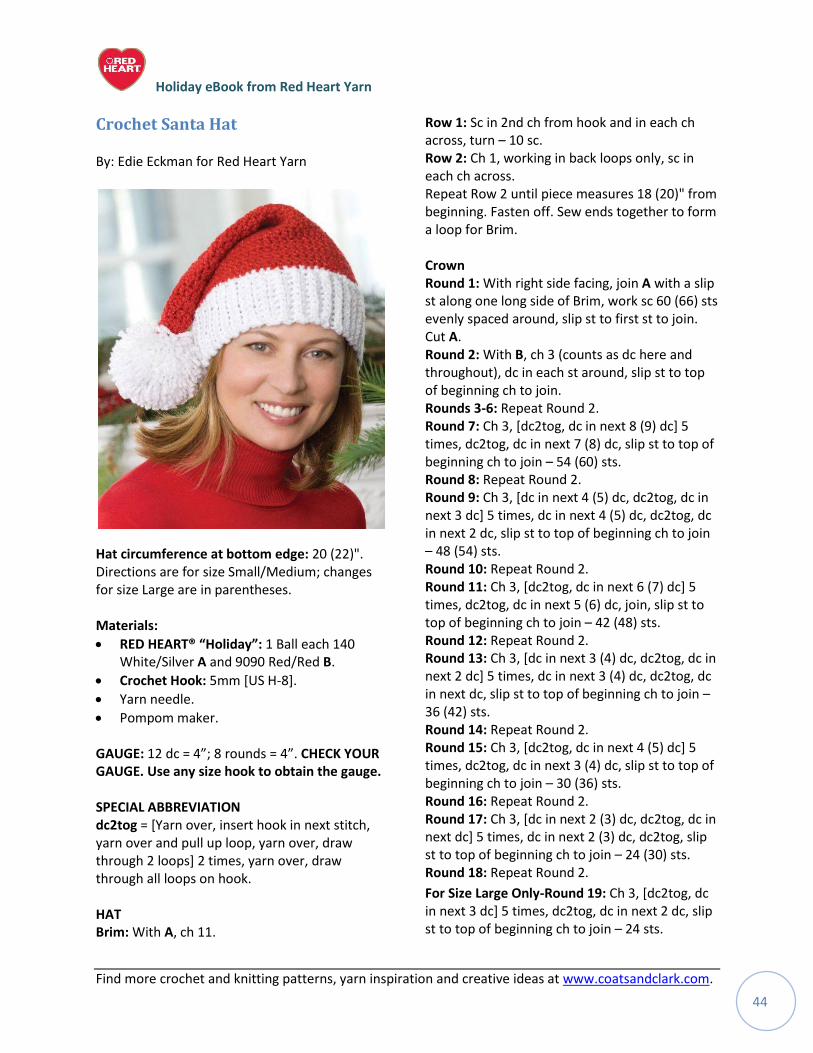
Holiday eBook from Red Heart Yarn
Find more crochet and knitting patterns, yarn inspiration and creative ideas at www.coatsandclark.com. 44
Crochet Santa Hat
By: Edie Eckman for Red Heart Yarn
Hat circumference at bottom edge: 20 (22)". Directions are for size Small/Medium; changes for size Large are in parentheses. Materials:
RED HEART® “Holiday”: 1 Ball each 140 White/Silver A and 9090 Red/Red B.
Crochet Hook: 5mm [US H-8].
Yarn needle.
Pompom maker. GAUGE: 12 dc = 4”; 8 rounds = 4”. CHECK YOUR GAUGE. Use any size hook to obtain the gauge. SPECIAL ABBREVIATION dc2tog = [Yarn over, insert hook in next stitch, yarn over and pull up loop, yarn over, draw through 2 loops] 2 times, yarn over, draw through all loops on hook. HAT Brim: With A, ch 11.
Row 1: Sc in 2nd ch from hook and in each ch across, turn – 10 sc. Row 2: Ch 1, working in back loops only, sc in each ch across. Repeat Row 2 until piece measures 18 (20)" from beginning. Fasten off. Sew ends together to form a loop for Brim. Crown Round 1: With right side facing, join A with a slip st along one long side of Brim, work sc 60 (66) sts evenly spaced around, slip st to first st to join. Cut A. Round 2: With B, ch 3 (counts as dc here and throughout), dc in each st around, slip st to top of beginning ch to join. Rounds 3-6: Repeat Round 2. Round 7: Ch 3, [dc2tog, dc in next 8 (9) dc] 5 times, dc2tog, dc in next 7 (8) dc, slip st to top of beginning ch to join – 54 (60) sts. Round 8: Repeat Round 2. Round 9: Ch 3, [dc in next 4 (5) dc, dc2tog, dc in next 3 dc] 5 times, dc in next 4 (5) dc, dc2tog, dc in next 2 dc, slip st to top of beginning ch to join – 48 (54) sts. Round 10: Repeat Round 2. Round 11: Ch 3, [dc2tog, dc in next 6 (7) dc] 5 times, dc2tog, dc in next 5 (6) dc, join, slip st to top of beginning ch to join – 42 (48) sts. Round 12: Repeat Round 2. Round 13: Ch 3, [dc in next 3 (4) dc, dc2tog, dc in next 2 dc] 5 times, dc in next 3 (4) dc, dc2tog, dc in next dc, slip st to top of beginning ch to join – 36 (42) sts. Round 14: Repeat Round 2. Round 15: Ch 3, [dc2tog, dc in next 4 (5) dc] 5 times, dc2tog, dc in next 3 (4) dc, slip st to top of beginning ch to join – 30 (36) sts. Round 16: Repeat Round 2. Round 17: Ch 3, [dc in next 2 (3) dc, dc2tog, dc in next dc] 5 times, dc in next 2 (3) dc, dc2tog, slip st to top of beginning ch to join – 24 (30) sts. Round 18: Repeat Round 2.
For Size Large Only-Round 19: Ch 3, [dc2tog, dc in next 3 dc] 5 times, dc2tog, dc in next 2 dc, slip st to top of beginning ch to join – 24 sts.
Holiday eBook from Red Heart Yarn
Find more crochet and knitting patterns, yarn inspiration and creative ideas at www.coatsandclark.com. 45
Round 20: Repeat Round 2. For Both Sizes-Next Round: Ch 3, [dc2tog, dc in next 2 dc] 5 times, dc2tog, dc in next dc, slip st to top of beginning ch to join – 18 sts. Next Round: Repeat Round 2. Next Round: Ch 3, [dc2tog, dc in next dc] 5 times, dc2tog, slip st to top of beginning ch to join – 12 sts. Next Round: Repeat Round 2.
Next Round: Ch 3, [dc2tog] 5 times, dc in next dc, slip st to top of beginning ch to join – 7 sts. Fasten off. Cut yarn, leaving a long tail. Thread tail through remaining sts and pull to close. Knot to secure. FINISHING With B, make pompom. Sew to tip of hat. Weave in ends.
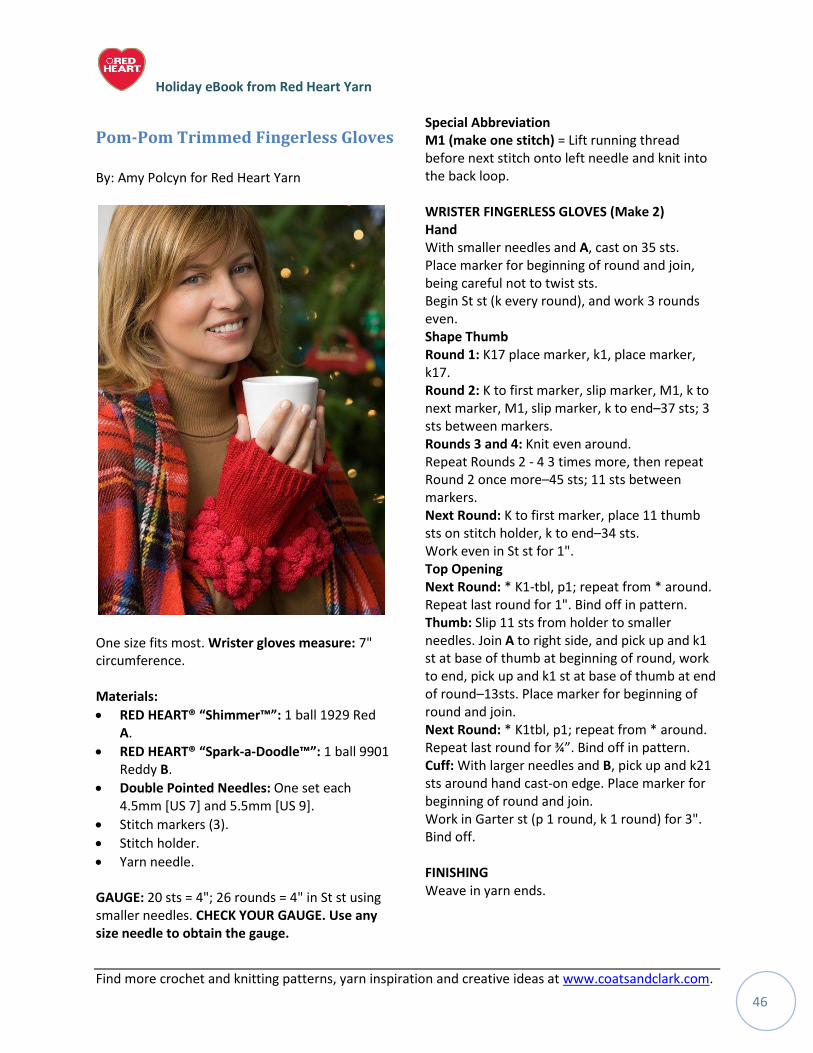
Holiday eBook from Red Heart Yarn
Find more crochet and knitting patterns, yarn inspiration and creative ideas at www.coatsandclark.com. 46
Pom-Pom Trimmed Fingerless Gloves
By: Amy Polcyn for Red Heart Yarn
One size fits most. Wrister gloves measure: 7" circumference. Materials:
RED HEART® “Shimmer™”: 1 ball 1929 Red A.
RED HEART® “Spark-a-Doodle™”: 1 ball 9901 Reddy B.
Double Pointed Needles: One set each 4.5mm [US 7] and 5.5mm [US 9].
Stitch markers (3).
Stitch holder.
Yarn needle. GAUGE: 20 sts = 4"; 26 rounds = 4" in St st using smaller needles. CHECK YOUR GAUGE. Use any size needle to obtain the gauge.
Special Abbreviation M1 (make one stitch) = Lift running thread before next stitch onto left needle and knit into the back loop. WRISTER FINGERLESS GLOVES (Make 2) Hand With smaller needles and A, cast on 35 sts. Place marker for beginning of round and join, being careful not to twist sts. Begin St st (k every round), and work 3 rounds even. Shape Thumb Round 1: K17 place marker, k1, place marker, k17. Round 2: K to first marker, slip marker, M1, k to next marker, M1, slip marker, k to end–37 sts; 3 sts between markers. Rounds 3 and 4: Knit even around. Repeat Rounds 2 - 4 3 times more, then repeat Round 2 once more–45 sts; 11 sts between markers. Next Round: K to first marker, place 11 thumb sts on stitch holder, k to end–34 sts. Work even in St st for 1". Top Opening Next Round: * K1-tbl, p1; repeat from * around. Repeat last round for 1". Bind off in pattern. Thumb: Slip 11 sts from holder to smaller needles. Join A to right side, and pick up and k1 st at base of thumb at beginning of round, work to end, pick up and k1 st at base of thumb at end of round–13sts. Place marker for beginning of round and join. Next Round: * K1tbl, p1; repeat from * around. Repeat last round for ¾”. Bind off in pattern. Cuff: With larger needles and B, pick up and k21 sts around hand cast-on edge. Place marker for beginning of round and join. Work in Garter st (p 1 round, k 1 round) for 3". Bind off. FINISHING Weave in yarn ends.
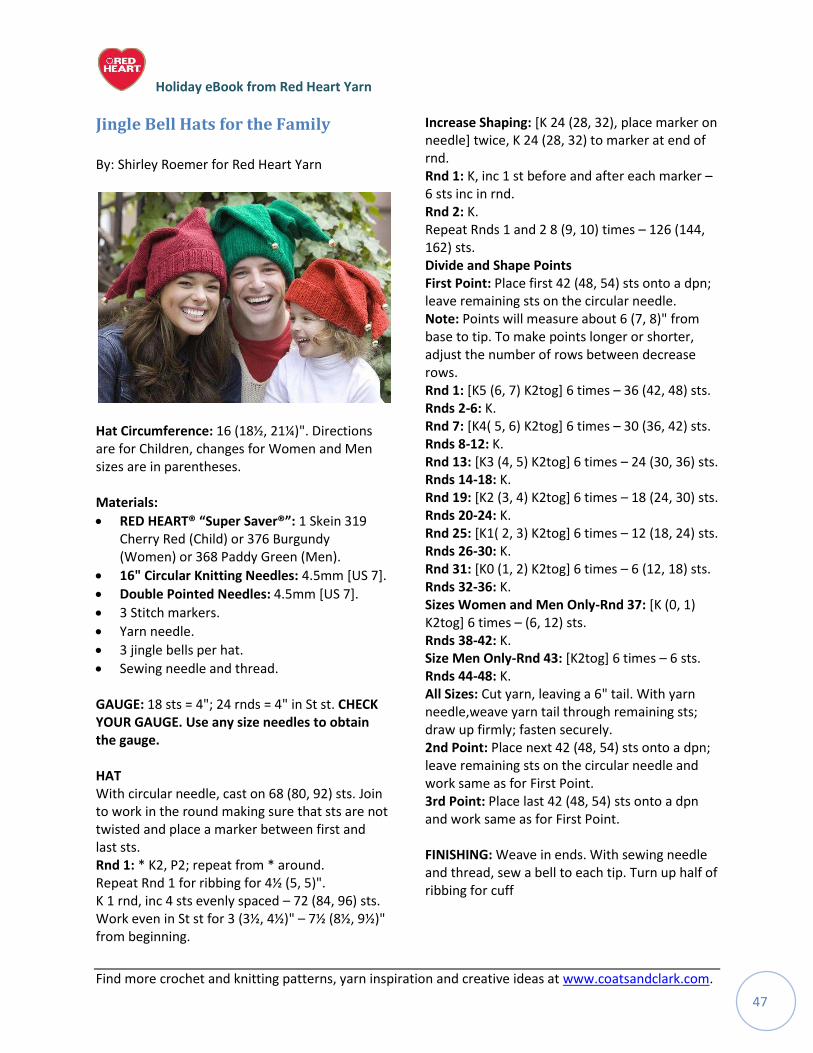
Holiday eBook from Red Heart Yarn
Find more crochet and knitting patterns, yarn inspiration and creative ideas at www.coatsandclark.com. 47
Jingle Bell Hats for the Family
By: Shirley Roemer for Red Heart Yarn
Hat Circumference: 16 (18½, 21¼)". Directions are for Children, changes for Women and Men sizes are in parentheses. Materials:
RED HEART® “Super Saver®”: 1 Skein 319 Cherry Red (Child) or 376 Burgundy (Women) or 368 Paddy Green (Men).
16" Circular Knitting Needles: 4.5mm [US 7].
Double Pointed Needles: 4.5mm [US 7].
3 Stitch markers.
Yarn needle.
3 jingle bells per hat.
Sewing needle and thread.
GAUGE: 18 sts = 4"; 24 rnds = 4" in St st. CHECK YOUR GAUGE. Use any size needles to obtain the gauge. HAT With circular needle, cast on 68 (80, 92) sts. Join to work in the round making sure that sts are not twisted and place a marker between first and last sts. Rnd 1: * K2, P2; repeat from * around. Repeat Rnd 1 for ribbing for 4½ (5, 5)". K 1 rnd, inc 4 sts evenly spaced – 72 (84, 96) sts. Work even in St st for 3 (3½, 4½)" – 7½ (8½, 9½)" from beginning.
Increase Shaping: [K 24 (28, 32), place marker on needle] twice, K 24 (28, 32) to marker at end of rnd. Rnd 1: K, inc 1 st before and after each marker – 6 sts inc in rnd. Rnd 2: K. Repeat Rnds 1 and 2 8 (9, 10) times – 126 (144, 162) sts. Divide and Shape Points First Point: Place first 42 (48, 54) sts onto a dpn; leave remaining sts on the circular needle. Note: Points will measure about 6 (7, 8)" from base to tip. To make points longer or shorter, adjust the number of rows between decrease rows. Rnd 1: [K5 (6, 7) K2tog] 6 times – 36 (42, 48) sts. Rnds 2-6: K. Rnd 7: [K4( 5, 6) K2tog] 6 times – 30 (36, 42) sts. Rnds 8-12: K. Rnd 13: [K3 (4, 5) K2tog] 6 times – 24 (30, 36) sts. Rnds 14-18: K. Rnd 19: [K2 (3, 4) K2tog] 6 times – 18 (24, 30) sts. Rnds 20-24: K. Rnd 25: [K1( 2, 3) K2tog] 6 times – 12 (18, 24) sts. Rnds 26-30: K. Rnd 31: [K0 (1, 2) K2tog] 6 times – 6 (12, 18) sts. Rnds 32-36: K. Sizes Women and Men Only-Rnd 37: [K (0, 1) K2tog] 6 times – (6, 12) sts. Rnds 38-42: K. Size Men Only-Rnd 43: [K2tog] 6 times – 6 sts. Rnds 44-48: K. All Sizes: Cut yarn, leaving a 6" tail. With yarn needle,weave yarn tail through remaining sts; draw up firmly; fasten securely. 2nd Point: Place next 42 (48, 54) sts onto a dpn; leave remaining sts on the circular needle and work same as for First Point. 3rd Point: Place last 42 (48, 54) sts onto a dpn and work same as for First Point. FINISHING: Weave in ends. With sewing needle and thread, sew a bell to each tip. Turn up half of ribbing for cuff
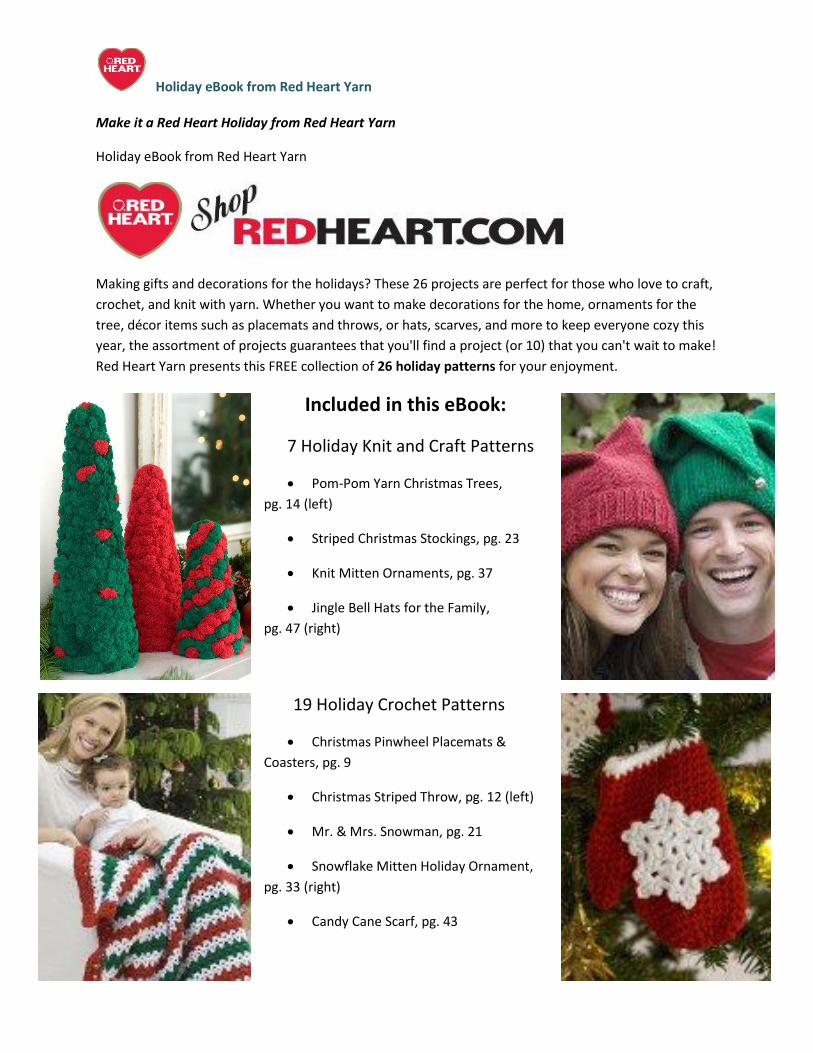
Holiday eBook from Red Heart Yarn
Make it a Red Heart Holiday from Red Heart Yarn
Holiday eBook from Red Heart Yarn
Making gifts and decorations for the holidays? These 26 projects are perfect for those who love to craft,
crochet, and knit with yarn. Whether you want to make decorations for the home, ornaments for the
tree, décor items such as placemats and throws, or hats, scarves, and more to keep everyone cozy this
year, the assortment of projects guarantees that you'll find a project (or 10) that you can't wait to make!
Red Heart Yarn presents this FREE collection of 26 holiday patterns for your enjoyment.
Included in this eBook:
7 Holiday Knit and Craft Patterns
Pom-Pom Yarn Christmas Trees,
pg. 14 (left)
Striped Christmas Stockings, pg. 23
Knit Mitten Ornaments, pg. 37
Jingle Bell Hats for the Family,
pg. 47 (right)
19 Holiday Crochet Patterns
Christmas Pinwheel Placemats &
Coasters, pg. 9
Christmas Striped Throw, pg. 12 (left)
Mr. & Mrs. Snowman, pg. 21
Snowflake Mitten Holiday Ornament,
pg. 33 (right)
Candy Cane Scarf, pg. 43