Hilo High School + 1 - MATE ROV Competition
20
1 Table of Contents: Team Members: (Left to Right) Pilot: Matt Takemoto (Consumer of all things edible) Co-pilot: Hirohisa Takato (The tall one) Team Captain: Erica Sampaga (Slave driver) Electronic Technician: Quintin Watanabe (Caffeine addict) Instructors: Mr. Darryl Watanabe, Mrs. Cindy Fong, Mrs. Kristine Takata, Ms. Mary Quijano, Mrs. Melalyn Kapali Hilo High School + 1 Mentors: Mr. Darryl Watanabe Mrs. Cindy Fong
Transcript of Hilo High School + 1 - MATE ROV Competition

1
Table of Contents:
Team Members: (Left to Right)
Pilot: Matt Takemoto (Consumer of all things edible) Co-pilot: Hirohisa Takato (The tall one) Team Captain: Erica Sampaga (Slave driver) Electronic Technician: Quintin Watanabe (Caffeine addict)
Instructors: Mr. Darryl Watanabe, Mrs. Cindy Fong, Mrs. Kristine Takata, Ms. Mary Quijano, Mrs. Melalyn Kapali
Hilo High School + 1
Mentors: Mr. Darryl Watanabe Mrs. Cindy Fong

2
Table of Contents
Abstract
Research Paper
Design Rational
Tool Design
Electronic Components
Electronic Specifications
Budget
Functional Block Diagram
Electrical Schematic
ROV Mechanical Drawings
Trouble Shooting
Future Improvements
Lessons Learned/Skills Gained
Community Service
Reflections
Works Cited
Thank you to our supporters
3
3, 4
4, 5
5-7
7, 8
7, 8
9
10
11
12, 13
14, 15
17
17
17
18
19
20
3
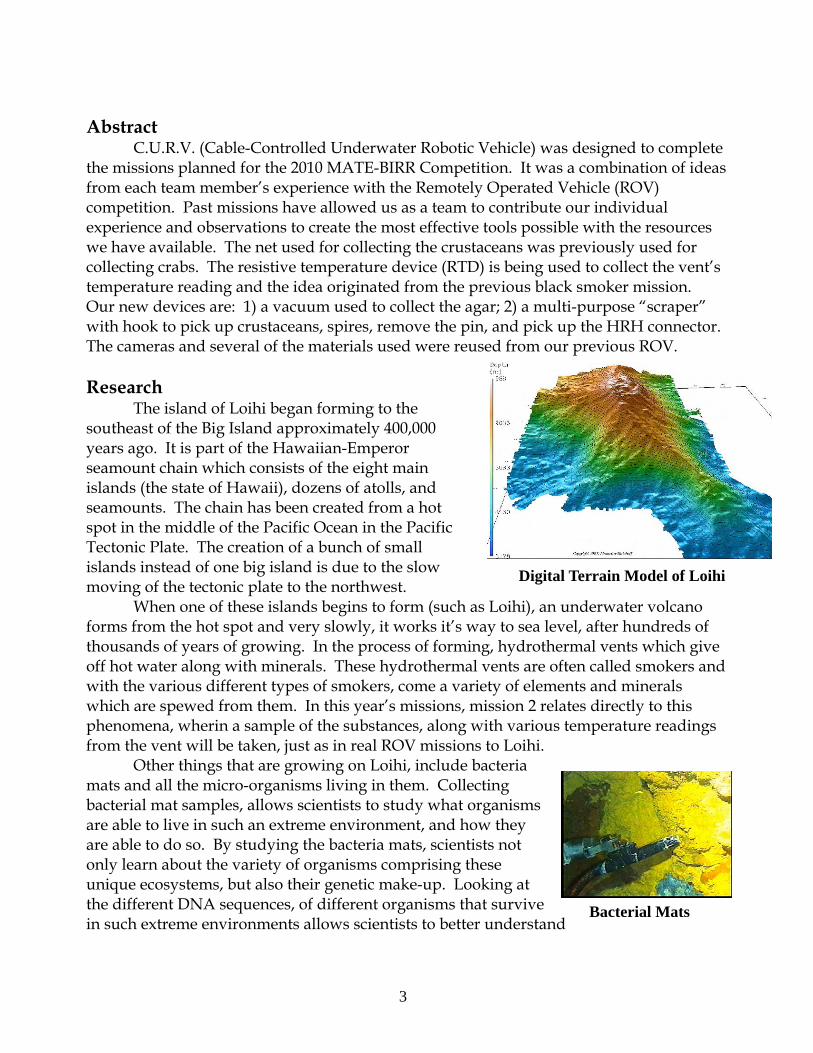
Bacterial Mats
Abstract C.U.R.V. (Cable-Controlled Underwater Robotic Vehicle) was designed to complete the missions planned for the 2010 MATE-BIRR Competition. It was a combination of ideas from each team member’s experience with the Remotely Operated Vehicle (ROV) competition. Past missions have allowed us as a team to contribute our individual experience and observations to create the most effective tools possible with the resources we have available. The net used for collecting the crustaceans was previously used for collecting crabs. The resistive temperature device (RTD) is being used to collect the vent’s temperature reading and the idea originated from the previous black smoker mission. Our new devices are: 1) a vacuum used to collect the agar; 2) a multi-purpose “scraper” with hook to pick up crustaceans, spires, remove the pin, and pick up the HRH connector. The cameras and several of the materials used were reused from our previous ROV. Research The island of Loihi began forming to the southeast of the Big Island approximately 400,000 years ago. It is part of the Hawaiian-Emperor seamount chain which consists of the eight main islands (the state of Hawaii), dozens of atolls, and seamounts. The chain has been created from a hot spot in the middle of the Pacific Ocean in the Pacific Tectonic Plate. The creation of a bunch of small islands instead of one big island is due to the slow moving of the tectonic plate to the northwest.
When one of these islands begins to form (such as Loihi), an underwater volcano forms from the hot spot and very slowly, it works it’s way to sea level, after hundreds of thousands of years of growing. In the process of forming, hydrothermal vents which give off hot water along with minerals. These hydrothermal vents are often called smokers and with the various different types of smokers, come a variety of elements and minerals which are spewed from them. In this year’s missions, mission 2 relates directly to this phenomena, wherin a sample of the substances, along with various temperature readings from the vent will be taken, just as in real ROV missions to Loihi.
Other things that are growing on Loihi, include bacteria mats and all the micro-organisms living in them. Collecting bacterial mat samples, allows scientists to study what organisms are able to live in such an extreme environment, and how they are able to do so. By studying the bacteria mats, scientists not only learn about the variety of organisms comprising these unique ecosystems, but also their genetic make-up. Looking at the different DNA sequences, of different organisms that survive in such extreme environments allows scientists to better understand
Digital Terrain Model of Loihi

4
evolution. This is related to this year’s missions of collecting a sample of agar, which is intended to simulate collecting a sample of the bacteria mat.
The mission mission involving collecting crustaceans from the back of a cave is the result of a fairly recent scientific discovery made during an ROV exploration of Loihi. In 1995, a new species of crustaceans from the Alvinocarididae family were discovered in the deep dark caves of Loihi. The crustaceans Genus was named Opaepele, while the Species was named Opaepele Loihi, after the caves in which the crustaceans were discovered in.
Hawaii Undersea Geo-Observatory (HUGO) is a device that is used to observe and collect data of Loihi’s activity off of an area known as the “Thousand Fingers Field”, which is then transferred to shore through optic fiber cables. The scientists, who created HUGO, hoped to be able to eventually monitor earthquakes, eruptions, geology, geophysics, biology, and the hydrothermal vents on Loihi’s summit. Unfortunately HUGO developed water proofing problems, as many underwater projects do. As a result the HUGO project is no longer functional and has been abandoned. This history is related to mission one, in which teams must connect the elevator to HUGO using the power/communications connector.
All the missions relate very well to the projects and research of the active volcano Loihi. Loihi, is giving scientists a chance to observe how the Hawaiian Emperor Chain isles were created and what else evolved along with their creation. Hawaii is unique; nowhere in the world can you find such a diverse environment with so many endemic and indigenous species, both above and below sea level. Loihi is rare and by observing it, scientists hope to learn why and how Hawaii is so unique, and what sets it apart from the world. ROV Design Rational Frame Construction and Design
C.U.R.V.’s frame consists of both PVC pipe and aluminum bars. The basic shape is a rectangular prism with dimensions 22 cm x 43 cm x 35 cm (h x l x w). Mission 2 involves steering into and collecting crustaceans from a simulated cave whose opening is 80 cm x 80 cm and we needed to limit the size of our ROV to allow maximum maneuverability.
The shape of our ROV was chosen because: 1) a geometric shape with right angles and straight edges are easier to work with and allows us to maximize our time; 2) allows the center of gravity to be near the physical center of the ROV; 3) makes buoyancy issues easier to control and fix; and 4) allows for easy placement and access to the tools and payload areas to complete the assigned mission missions.
PVC pipe was our primary material used to build the ROV because it’s affordable, widely available, easy to use and durable. Aluminum bars were used as mounting brackets as well as additional structural support. Holes were drilled to allow attachment of tools along the straight and flat edges. It provided the needed flexibility to place the tools and sensors where needed.
Opaepele Loihi Crustaceans

5
Propulsion Johnson-Mayfair 500 gallons per hour (GPH) bilge pump motors were used as thrusters on our ROV. Last year, we used the Bollard test to determine the amount of thrust from a 500 GPH motor, which had 4.89N forward and 3.56N backward and the 750 GPH motor, which had 8.5 N forward and 6.7 N backward. We needed to be able to more carefully control our ROVs maneuverability and decided that the lower thrust values would provide that precision necessary to control and complete our mission missions. Plastic foils where placed around the propellers to improve the thrust as well as protect them from getting tangled in the tether or any pool debris. Tool Design Mission 1: Resurrecting HUGO – Multi-purpose “scraper” with hook and funnel microphone Rational: Our ROV must be able to: 1) remove the cap from HUGO, 2) remove the pin from the elevator to release the high rate hydrophone (HRH), 3) move the HRH to the vibrating source, 4) transfer the power/communications connector from the elevator and insert it into HUGO. Originally, the team decided to use bicycle hooks to remove the pin, pick up the HRH, remove the cap, and move the connector. But we found these hooks heavy and bulky along with being difficult to use. After re-evaluating our strategy, it was decided to manufacture a multi-purpose scraper out of plexi-glass (see mission 2 for more details) and then run tests to see which design was the most effective.
The design had a hook with an angled opening to allow our pilot room for error yet get the pin and connector easily released. A cable tie was placed to prevent the HRH connector from slipping out when picked up. The scraper was originally constructed out of a piece of aluminum but changed to plexi-glass because we had difficulty viewing the target area through the aluminum (see pg 14 and 15 for more information and pictures).
A microphone was attached to the ROV to listen for the vibrations underwater. This was secured to a funnel that kept the microphone in place and made detecting the vibrations easier to hear. The funnel magnified them by capturing vibrations in the wide opening and sending them down the narrow aperture, similar to the way your ear works.
Figure 5.1 - Funnel with RTD and Microphone
Figure 5.2 - Plexi-glass scraper with hook

6
Mission 2: Collecting Crustaceans - Multi-purpose scraper tool and payload net. Rational: The mission requires: 1) entry into a cave, 2) touch the back wall, 3) collect three crustaceans, and 4) exit the cave without causing damage. The multi-purpose tool is used to scrape crustaceans from the floor and wall of the cave which are caught in the net. This reduces the need to surface multiple times and thereby use our time more efficiently. This design worked effectively and reliably through many trials. It also stayed within the boundaries of our basic K.I.S. (keep it simple) rule. The wide surface area of the scraper, made it harder to navigate. Mission 3: Temperature Readings - RTD (Resistance Thermal Device) and Spire Collection Rational: This mission requires: 1) collecting three different temperatures at different depth locations on a simulated vent, 2) collect a spire sample from the vent, and 3) create a graph of temperature vs. height. A RTD (1K ohm) is being used to determine the water temperature based on the resistance values of the RTD in ohm.
Originally to collect the spire sample, we made a “flexible compression ring” on the interior of a plastic shampoo bottle with both ends removed. However, we discovered during our practice sessions, we had difficulty locating and lining up to collect spires. Nearly all our tools are placed in the front. Keeping that in mind, we created a tool out of a four cm slice of green flotation foam noodle with plastic knives and a plexi-glass piece to stiffin it. We placed this tool in front, attaching it to the multi-purpose scraper, so the pilot could easily see it. The foam was reinforced with plastic forks and aluminum tape as it was a last minute on-deck adaptation. Mission 4: Bacterial Mat - Bilge Pump Vacuum Rational: This mission requires collecting a sample of agar that simulates a bacterial mat on the pool floor. Using a bilge pump as a suction device, accuracy is critical. The bilge pump is attached to a PVC elbow connector with eco-bond epoxy. Plastic mesh is placed on one end of a shampoo bottle tube that is cut on both ends and is used as our core collector. It is inserted into the PVC elbow. This allows us to use the bilge pump motor at full-speed to collect the sample into the core collector. Further, it is easy to retrieve when we return the ROV to the surface.
The challenge for the pilot is that he must straddle right above the sample, move the ROV straight down so that the bottle touches the bottom of the agar container and start the vacuum at the right moment.
Figure 6.2 Vacuum for Bacterial Mat
Figure 6.1 - Scraper with Spire Collection Tool Attached

7
Electronic Components Control System The electronic components allow us to control and navigate our ROV. This year, we integrated a new control system into our design by using an electromagnetic relays and a joystick. The relays were placed in a waterproof Otter box on the ROV which permitted a smaller and lighter tether. We used a joystick that is setup to send signals to the relays when activated (see Truth Table, Fig. 10.2). There are six overall relays used for maneuvering the ROV. Two additional relays were used solely to operate the bilge pump vacuum tool. Sensors
A Resistance Temperature Device (RTD) was used as the temperature sensor. This device measures the changes in resistance as the water temperature increases or decreases. Further, we created a calibration graph (shown below, Fig. 7.3) of resistance (ohms) versus water temperature (°C). This calibration graph allows us to convert measured fluctuations in water temperature as measured with the RTD. The resistance of the conductors in the 12-meter tether was taken into account by offsetting the measured values in the graph by the known amount of resistance in the tether.
Figure 7.1 - Relay Box
Figure 7.2 - RTD and Microphone
Figure 7.3: Temperature calibration graph

8
Microphone
A microphone will be used to determine which source on the bottom of the pool is emitting vibrations. Once this location is found, the ROV will pick up and move the HRH to that location. The exact item being used is an Electret microphone element with leads. The decision to use such a sensor was based upon a document, “Build a Hydrophone” by Kevin Hardy of Scripps Institution of Oceanography. Although a hydrophone was not built as planned, we used the suggested microphone. After soldering it into the system, the microphone was then sealed using eco-bond epoxy. A 5V voltage regulator was soldered onto the sensor system based on the microphone specifications. The microphone worked with limited success and we are still studying and developing another solution.
Cameras
Cameras were the last set of sensors is the most important for navigating and completing the mission missions. Two different types of cameras were used. The first set of cameras are the Vissior SC-420 commercial underwater cameras. There were water leakage issues that were resolved by adding more silicone sealant. The second type of camera that was used is a Sumas Media SMC-B32 wide angle camera. The field of view is 160 degrees and provides a good view of the tools mounted on front of the ROV through the pic is integrated. This camera was water-proofed by making a PVC pipe and piece of plexi-glass to create a housing.
Tether Wires
There are three sets of stranded Cat 5 cables and four 16 AWG power wires. All these wires were fed through the relay box, and then distributed according to the electrical schematics (Figure 11.1 – Electrical Schematic).
Figure 8.1: Complete ROV System

9
Budget Spreadsheet
Item Description Quantity Initial Cost Amount Donated Final Cost
500 GPH Bilge Pump Motors 5 $100 $0 $100
RTD 1 $2 $0 $2
Electret Microphone Element 1 $4 $0 $4
Funnel 1 $0.98 $0 $0.98
Netting 1 $5 Reused $0
Aluminum Strips 4 Scrap Scrap $0
Plexi-Glass Strip 1 Scrap Scrap $0
Otter Box 1 $20 $0 $20
PVC 3 m $5.20 $0 $5.20
PVC Fittings 8 $7.92 $0 $7.92
Cat 5 Cable 12 m $36 Reused $0
16 Gauge Wire 13 m $27.20 Reused $0
Electromagnetic Relays 12 $16.20 Reused $0
Vissior SC-420 Camera's 3 $60 Reused
$0
Sumas Media SMC-B32 Camera 1 $28.99 $0 $28.99
Rocker Switch 1 $10 Reused $0
Plastic Switch Box 1 $4.93 Reused $0
Cable Ties 1 $8 Reused $0
5 Minute Epoxy 1 $12 Reused $0
Aquarium Silicone Sealant 1 $10 Reused $0
Nuts Bag $5 $0 $5
Bolts Bag $5 $0 $5
Total: 49 $336.44 $77.44 $179 We are using supplies already on hand from previous years. This spreadsheet takes into account the costs of additional materials and supplies if known.

10
Battery 12v DC 25 Amp Fuse
Relay system Motors
Cameras
Voltage Regulator
Microphone
Monitors
Thermistor (RTD)
Ohm Meter
Control Switches
Figure 10.1: Functional Block Diagram
Figure 10.2: Truth Table for Joystick Control

11
Figure 11.1: Electrical Schematic

12
Mechanical Drawings
Front View
Top View
Back View

13
Bottom View
Right Side View

14
Troubleshooting Electronic:
One of the major electronic problems we had was our joystick controls. The relay switches on the relay board were incorrectly wired and resulted in a mix-up of the directional controls. This was eventually fixed by switching the connections in the joystick through the process of guess and check. Another problem occurred during one of our practices were some wires were touching causing the motors to stay on. This was a quick fix with the re-soldering and placement of electrical tape. Mechanical:
P Various issues that occurred with the mechanics of the ROV included problems with the tools buoyancy problems, problems with tool efficiency, and difficulties involving waterproofing. The design and efficiency of various tools have been a problem due to our erroneous assumption that the design formulated on land would work just as well underwater. Originally, it was planned that bicycle hooks would be used to complete the missions in mission one, but they were found to be too bulky and too heavy to manipulate underwater. As a result, we then began to work with plexi-glass, which we modeled into fishhook shapes at a variety of angles and lengths to achieve maximum efficiency.
Buoyancy was another obstacle that our team was presented with. We were able to solve this problem using 1 ½ inch PVC pipes which were cut to the lengths of 37 cm and 28 cm, and closed with PVC caps.
Another mechanical problem was that the slope of the metal sheet was at too great an angle to effectively scoop the crustaceans up, so we used a longer aluminum strip with a more gradual slope. Finally, a “multi-tool scraper” that was designed, which had a hook integrated in it and would reduce the need for the bulky bicycle hooks. We designed and tested a multitude of different designs. Originally, the hook was cut out of aluminum sheeting but we had difficulty seeing through it, hence the use of clear plexi-glass. It allowed our pilot to navigate without visual obstructions or placing of more cameras on the ROV.
During pool practices another tool that proved to be ineffective, was our spire collection tool. This tool was originally a shampoo bottle with two different sized rubber rings zip-tied to the inside of the shampoo bottle. A green flotation foam noodle was cut into approximately a four centimeter thick piece with it cut from the middle out once and attached to the scraper. It is attached to the scraper using nuts, bolts, washers, and a rectangular piece of black plexi-glass. The foam was then reinforced with plastic forks and aluminum tape because this was an on deck quick fix.
Figure 14.1: User control system
Figure 14.1: Original hook design

15
Photos of Prototype Tooling.
Figure 15.2: The metal prototype with three different hooks which, when tested proved the middle one’s design to be the most efficient.
Figure 15.5: The different plexi-glass hooks tested for efficiency.
Figure 15.1: First spire collection bottle with Camera angled to see if a spire was collected.
Figure 15.4: Bicycle hooks which were just removed from their aluminum holder (they were epoxied on). The black and blue hooks had different shapes.
Figure 15.3: Original scraper with steeper slope and shorter width.

16
Practice and Building Sessions.
First Pool Practice
Team’s funny picture
Quintin, Hirohisa, and Erica testing the different motors (500, 750, and 100 GPH) to find the most effective method
Erica, Quintin, and Matt working on scraper

17
Future Improvement For future improvement, starting earlier would always be an advantage for anyone,
giving more time to think the designs through even more thoroughly. With the time and effort put into thinking things through, the outcome would be more professionally done and there will be less trials and errors. With less trials and errors, fewer materials will be used and wasted. Being a more environmentally conscience team, we reused many of the parts from older ROVs. This also was done to save money, because funding was limited.
Lessons Learned/Skills Gained
Technical: Learning how to use the RTD’s to collect temperature readings; how to wire and use a microphone underwater to hear vibrations were key learning skills gained. Further, learning that the amount of wire we used could be reduced by the use of relays. Based on our past experiences by participating in the ROV competitions, we are finally at a point where we could experiment and try different tools to accomplish the mission missions. We scheduled our time to determine what we needed to be accomplished, and what we needed to get done. The team learned a lot of new skills and as continue to practice working on our design, construction, and electronic interests.
Interpersonal: When team members have different schedules, having everyone come together at every single meeting is a very hard mission to accomplish. Occasional minor procrastination was also a factor influencing how quickly missions were accomplished. These things are minor technicalities and are impossible to avoid when a team is such a diverse one. What we did learn was how to work together efficiently despite these problems, and also how to schedule and timeline a complex project with multiple steps effectively.
Community Service As part of our team’s community service project, assembling power distribution boxes to be used by new and returning ROV teams were constructed. To make these boxes, holes had to be drilled for the banana jack input holders and then solder a wire along all three holders. Outside of the plastic box, thicker wires were connected to copper terminals, which fit over the positive and negative connections on the battery. Another community service that was done was mentoring the Hilo Intermediate team after school. We helped them stay on mission and answered questions that they had.
Power Distribution Boxes
18
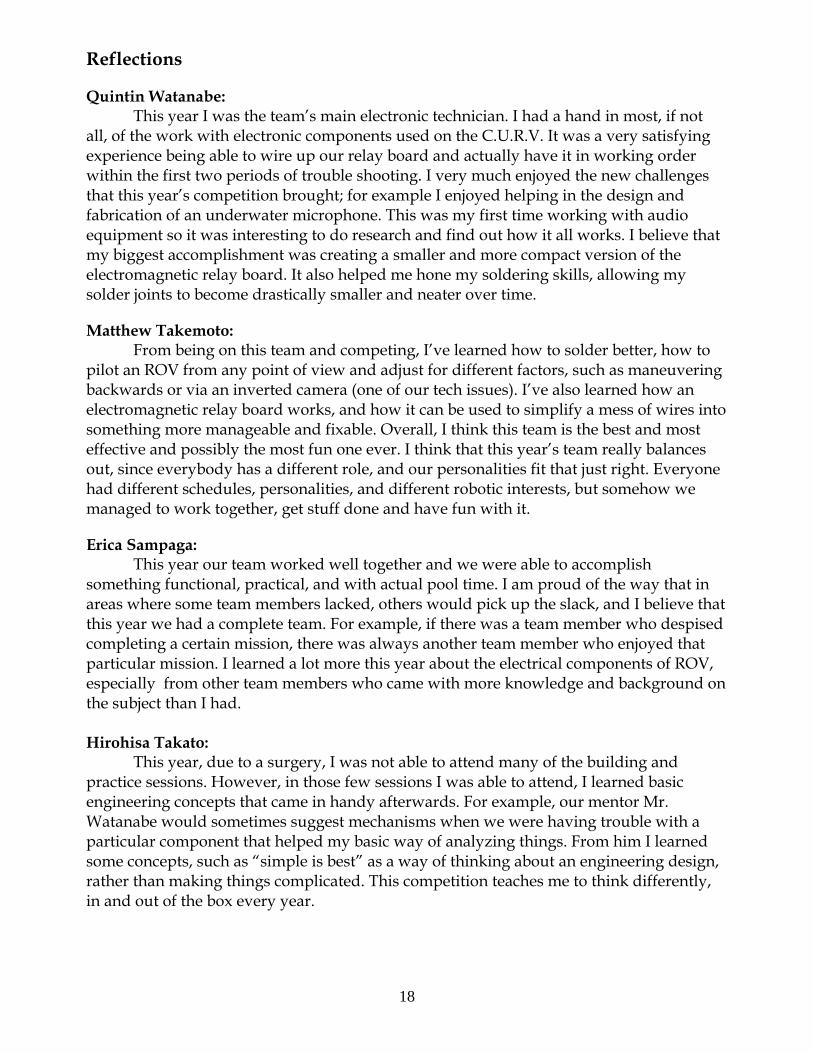
Reflections Quintin Watanabe:
This year I was the team’s main electronic technician. I had a hand in most, if not all, of the work with electronic components used on the C.U.R.V. It was a very satisfying experience being able to wire up our relay board and actually have it in working order within the first two periods of trouble shooting. I very much enjoyed the new challenges that this year’s competition brought; for example I enjoyed helping in the design and fabrication of an underwater microphone. This was my first time working with audio equipment so it was interesting to do research and find out how it all works. I believe that my biggest accomplishment was creating a smaller and more compact version of the electromagnetic relay board. It also helped me hone my soldering skills, allowing my solder joints to become drastically smaller and neater over time. Matthew Takemoto:
From being on this team and competing, I’ve learned how to solder better, how to pilot an ROV from any point of view and adjust for different factors, such as maneuvering backwards or via an inverted camera (one of our tech issues). I’ve also learned how an electromagnetic relay board works, and how it can be used to simplify a mess of wires into something more manageable and fixable. Overall, I think this team is the best and most effective and possibly the most fun one ever. I think that this year’s team really balances out, since everybody has a different role, and our personalities fit that just right. Everyone had different schedules, personalities, and different robotic interests, but somehow we managed to work together, get stuff done and have fun with it. Erica Sampaga:
This year our team worked well together and we were able to accomplish something functional, practical, and with actual pool time. I am proud of the way that in areas where some team members lacked, others would pick up the slack, and I believe that this year we had a complete team. For example, if there was a team member who despised completing a certain mission, there was always another team member who enjoyed that particular mission. I learned a lot more this year about the electrical components of ROV, especially from other team members who came with more knowledge and background on the subject than I had. Hirohisa Takato:
This year, due to a surgery, I was not able to attend many of the building and practice sessions. However, in those few sessions I was able to attend, I learned basic engineering concepts that came in handy afterwards. For example, our mentor Mr. Watanabe would sometimes suggest mechanisms when we were having trouble with a particular component that helped my basic way of analyzing things. From him I learned some concepts, such as “simple is best” as a way of thinking about an engineering design, rather than making things complicated. This competition teaches me to think differently, in and out of the box every year.

19
Works Cited "Giant Undersea Microbial Mat among Discoveries Revealed by Marine Life Census." Science
Daily: News & Articles in Science, Health, Environment & Technology. Web. 22 Apr. 2010. <http://www.sciencedaily.com/releases/2010/04/100418155440.htm>.
Homebuilt ROVS. Web 22 April 2010. <homebuiltrovs.com> "HUGO--The Hawai'i Undersea Geo-Observatory." SOEST | School of Ocean and Earth Science and
Technology. Web. 22 Apr. 2010. <http://www.soest.hawaii.edu/HUGO/>. "Hydrothermal Vents." College of Earth, Ocean, and Environment | The College of Earth, Ocean, and
Environment. Web. 22 Apr. 2010. <http://www.ceoe.udel.edu/deepsea/level-2/geology/vents.html>.
"ITIS Standard Report Page: Opaepele Loihi." Integrated Taxonomic Information System. Web. 22 Apr. 2010. <http://www.itis.gov/servlet/SingleRpt/SingleRpt?search_topic=TSN&search_value=659862>.
"Loihi Seamount." Wikipedia, the Free Encyclopedia. Web. 21 Apr. 2010. <http://en.wikipedia.org/wiki/Loihi_Seamount>.
Picture URLS Digital Terrain Model of Loihi: http://oceanexplorer.noaa.gov/explorations/02hawaii/background/plan/media/loihi_seamount_600.jpg Bacterial Mat: http://www.soest.hawaii.edu/HURL/images/slurp.jpg Crustaceans: http://oceanexplorer.noaa.gov/explorations/06fire/background/biology/nw_rota1_shrimp_220.jpg Underwater Camera’s: http://www.vissior.com/products/sc-420.html

20
Acknowledgements and Sponsors Thank you to all the teachers, parents, the crew down at Institute for Astronomy (IFA) for putting up with us, and to all of the following sponsors.