hikesaway - GO Outdoors navigate the board, a good rule, like closing a gate can make them progress...
14
hikes away ACTIVITY BOOK for The Scout Association THIS BOOK WILL HELP YOU EARN THIS BADGE GO Outdoors
Transcript of hikesaway - GO Outdoors navigate the board, a good rule, like closing a gate can make them progress...

hikesaway
ACTIVITY BOOKfor The Scout Association
THIS BOOK WILL HELP YOU
EARN THIS BADGE
GOOutdoors
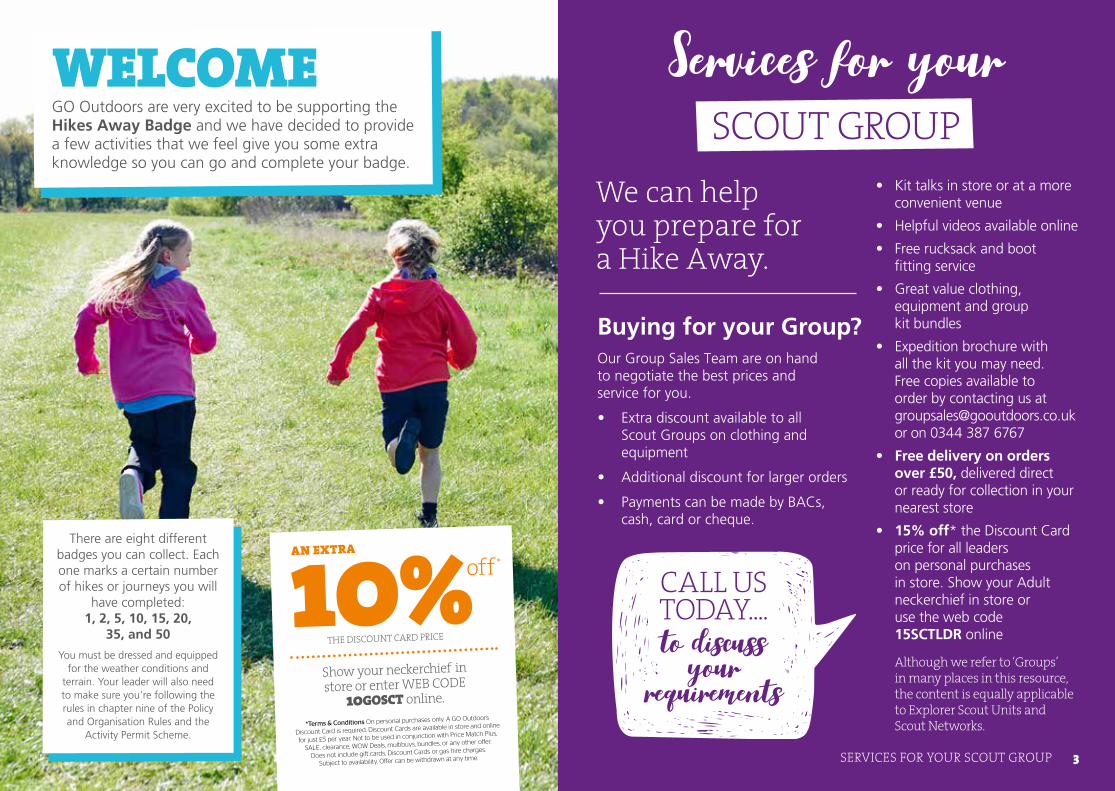
Buying for your Group?Our Group Sales Team are on hand to negotiate the best prices and service for you.
• Extra discount available to all Scout Groups on clothing and equipment
• Additional discount for larger orders
• Payments can be made by BACs, cash, card or cheque.
CALL US TODAY....to discuss
your requirements
We can help you prepare for a Hike Away.
Services for your SCOUT GROUP
WELCOMEGO Outdoors are very excited to be supporting the Hikes Away Badge and we have decided to provide a few activities that we feel give you some extra knowledge so you can go and complete your badge.
3SERVICES FOR YOUR SCOUT GROUP2
There are eight different badges you can collect. Each one marks a certain number of hikes or journeys you will
have completed: 1, 2, 5, 10, 15, 20,
35, and 50
You must be dressed and equipped for the weather conditions and
terrain. Your leader will also need to make sure you’re following the rules in chapter nine of the Policy and Organisation Rules and the
Activity Permit Scheme. 2
10% AN EXTRA
off*
THE DISCOUNT CARD PRICE
Show your neckerchief in store or enter WEB CODE
10GOSCT online.
*Terms & Conditions On personal purchases only. A GO Outdoors
Discount Card is required. Discount Cards are available in store and online
for just £5 per year. Not to be used in conjunction with Price Match Plus,
SALE, clearance, WOW Deals, multibuys, bundles, or any other offer.
Does not include gift cards, Discount Cards or gas hire charges.
Subject to availability. Offer can be withdrawn at any time.
• Kit talks in store or at a more convenient venue
• Helpful videos available online
• Free rucksack and boot fitting service
• Great value clothing, equipment and group kit bundles
• Expedition brochure with all the kit you may need. Free copies available to order by contacting us at [email protected] or on 0344 387 6767
• Free delivery on orders over £50, delivered direct or ready for collection in your nearest store
• 15% off* the Discount Card price for all leaders on personal purchases in store. Show your Adult neckerchief in store or use the web code 15SCTLDR online
Although we refer to ‘Groups’ in many places in this resource, the content is equally applicable to Explorer Scout Units and Scout Networks.
AND DESIGN A SIGN...
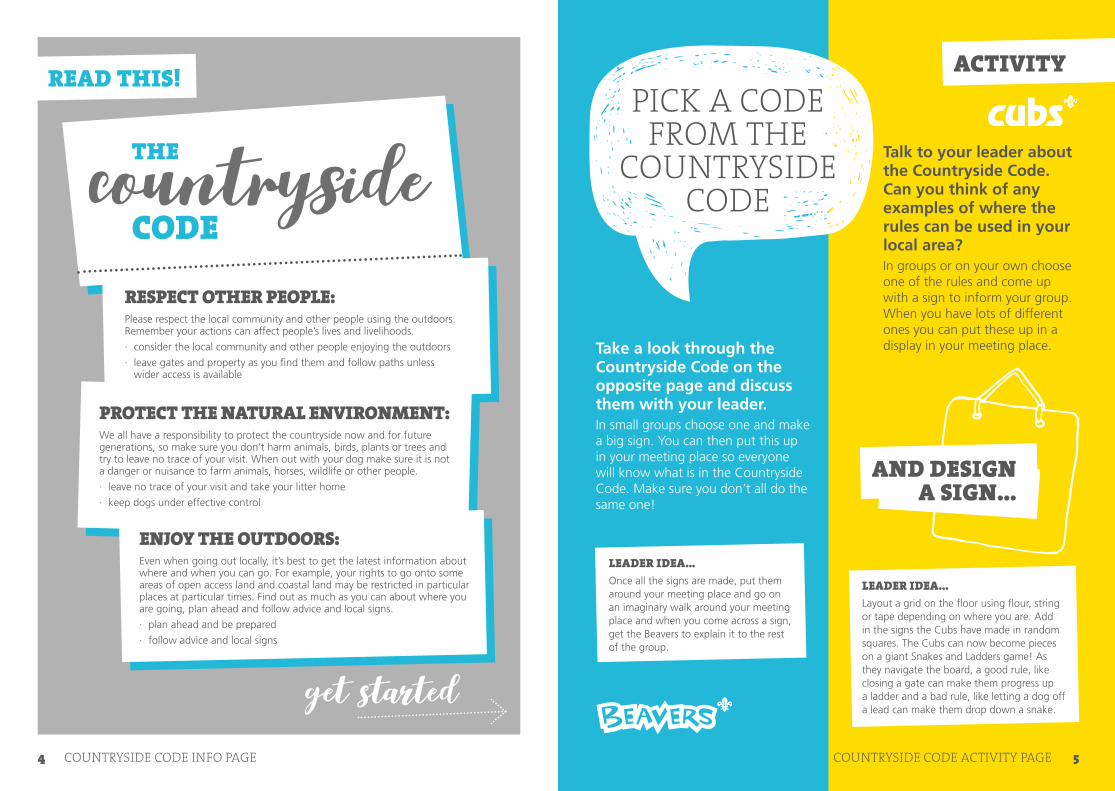
Take a look through the Countryside Code on the opposite page and discuss them with your leader. In small groups choose one and make a big sign. You can then put this up in your meeting place so everyone will know what is in the Countryside Code. Make sure you don’t all do the same one!
Talk to your leader about the Countryside Code. Can you think of any examples of where the rules can be used in your local area?In groups or on your own choose one of the rules and come up with a sign to inform your group. When you have lots of different ones you can put these up in a display in your meeting place.
LEADER IDEA...Once all the signs are made, put them around your meeting place and go on an imaginary walk around your meeting place and when you come across a sign, get the Beavers to explain it to the rest of the group.
LEADER IDEA...Layout a grid on the floor using flour, string or tape depending on where you are. Add in the signs the Cubs have made in random squares. The Cubs can now become pieces on a giant Snakes and Ladders game! As they navigate the board, a good rule, like closing a gate can make them progress up a ladder and a bad rule, like letting a dog off a lead can make them drop down a snake.
PICK A CODE FROM THE
COUNTRYSIDE CODE
ENJOY THE OUTDOORS:Even when going out locally, it’s best to get the latest information about where and when you can go. For example, your rights to go onto some areas of open access land and coastal land may be restricted in particular places at particular times. Find out as much as you can about where you are going, plan ahead and follow advice and local signs.
· plan ahead and be prepared
· follow advice and local signs
PROTECT THE NATURAL ENVIRONMENT:We all have a responsibility to protect the countryside now and for future generations, so make sure you don’t harm animals, birds, plants or trees and try to leave no trace of your visit. When out with your dog make sure it is not a danger or nuisance to farm animals, horses, wildlife or other people.
· leave no trace of your visit and take your litter home
· keep dogs under effective control
RESPECT OTHER PEOPLE: Please respect the local community and other people using the outdoors. Remember your actions can affect people’s lives and livelihoods.
· consider the local community and other people enjoying the outdoors
· leave gates and property as you find them and follow paths unless wider access is available
get started
READ THIS! ACTIVITY
4 5COUNTRYSIDE CODE ACTIVITY PAGECOUNTRYSIDE CODE INFO PAGE

Talk to your local council and see if there is a project you could do for your local area based around the countryside code. You could get involved with making new signs for local parks.
Think about your local area and see if there are any popular footpaths or public spaces. Could you do anything in one of these spaces to highlight the Countryside Code to others? You could plan a hike around a local country park and do a litter pick. As part of your Young Leaders’ Programme you could organise an activity for the younger groups. Maybe take them on a short hike and point out and discuss different parts of the Countryside Code
Your challenge is to come up with a poster for the Countryside Code and present it to the rest of your group. You can make it as colourful and creative as you like…
If you have access to a computer, you could make a presentation. Make sure you include lots of pictures to make it interesting - you could even take these yourselves.
USE A LOLLIPOP STICK AS A SIGNPOST!
CREATE A POSTER OR MAKE A
PRESENTATION TO EXPLAIN THE
COUNTRYSIDE CODE
Think about how it applies in your local area; have you been on any local footpaths where there are gates or had to follow yellow footpath signs across a farmers’ field?
take pictures of your local areas
ACTIVITY ACTIVITY
LITTER PICKALONG A TRAIL
get involved6 7COUNTRYSIDE CODE ACTIVITY PAGE
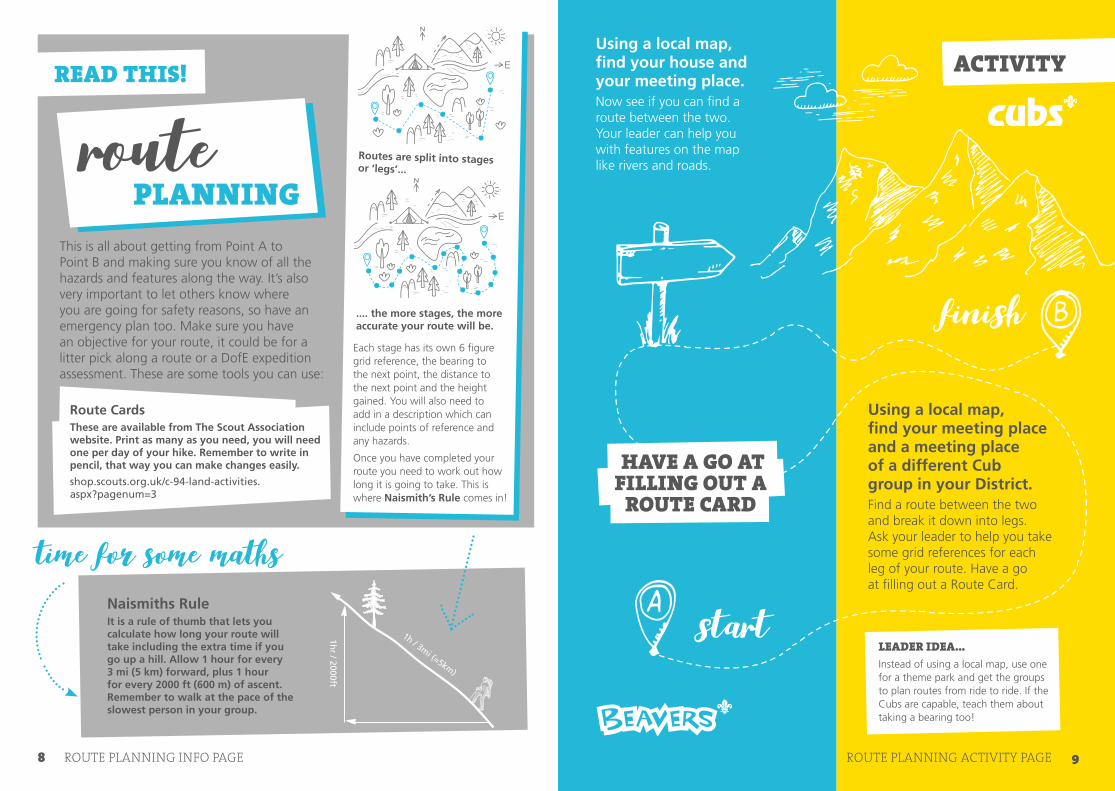
LEADER IDEA...Instead of using a local map, use one for a theme park and get the groups to plan routes from ride to ride. If the Cubs are capable, teach them about taking a bearing too!
Using a local map, find your house and your meeting place. Now see if you can find a route between the two. Your leader can help you with features on the map like rivers and roads.
Using a local map, find your meeting place and a meeting place of a different Cub group in your District.Find a route between the two and break it down into legs. Ask your leader to help you take some grid references for each leg of your route. Have a go at filling out a Route Card.
start
finish
HAVE A GO AT FILLING OUT A
ROUTE CARD
This is all about getting from Point A to Point B and making sure you know of all the hazards and features along the way. It’s also very important to let others know where you are going for safety reasons, so have an emergency plan too. Make sure you have an objective for your route, it could be for a litter pick along a route or a DofE expedition assessment. These are some tools you can use:
Each stage has its own 6 figure grid reference, the bearing to the next point, the distance to the next point and the height gained. You will also need to add in a description which can include points of reference and any hazards.
Once you have completed your route you need to work out how long it is going to take. This is where Naismith’s Rule comes in!
Route CardsThese are available from The Scout Association website. Print as many as you need, you will need one per day of your hike. Remember to write in pencil, that way you can make changes easily.
shop.scouts.org.uk/c-94-land-activities.aspx?pagenum=3
Naismiths RuleIt is a rule of thumb that lets you calculate how long your route will take including the extra time if you go up a hill. Allow 1 hour for every 3 mi (5 km) forward, plus 1 hour for every 2000 ft (600 m) of ascent. Remember to walk at the pace of the slowest person in your group.
time for some maths
1h / 3mi (=5km)
1h / 3mi
1hr / 2000ft
READ THIS!
Routes are split into stages or ‘legs’...
.... the more stages, the more accurate your route will be.
routePLANNING
ACTIVITY
8 9ROUTE PLANNING ACTIVITY PAGEROUTE PLANNING INFO PAGE

LOOK OUT FOR LANDMARKS
THERE ARE VARIOUS METHODS OF RECORDING THESE:
• Put some sticky back plastic on the outside of your map case and mark them on here against your map inside. At the end of the walk you can remove this.
• Carry a notebook with the features written down in order. Tick them off as you go by and note down the time too.
• As you get better at doing this, you can do it mentally.
PLAN A ROUTE IN YOUR LOCAL AREA WITH THE HELP OF
YOUR LEADER
LEADER IDEA...Make sure you plan an easy route; it could just be through a local village. When you come to walk your planned route, the Scouts can point out all the things on their Route Card such as hazards they may have identified, local landmarks and escape routes.
TIME OF YEAR In the summer you have longer days, but you also have increased heat, so you may have to slow down if you’re carrying lots of gear.
ESCAPE ROUTES At various points on your route you may need an escape to safety, this could be because of bad weather or the group’s ability to carry on with the hike. Make sure you have an easier alternative route.
ACCESS
Make sure you stick to public rights of way. If you need to stray off the path, make sure you have the land owners’ permission.
USE OF THE LAND It may be easier to walk up a hill and then follow the contour line around before heading back down. Make sure your route doesn’t go up and down hills unnecessarily.
ACTIVITY ACTIVITY
Along your route, pick out some features that you should notice from your map. These could be close objects such as crossing a footbridge or travelling along a linear feature such as a wall or railway line. Or they could be far off features, you may have an area of woodland that should be on the right hand side of the direction of travel.
FEATURE CHECKLIST
FEATURE LISTS ARE A GOOD WAY OF ROUGHLY
KNOWING WHERE YOU ARE AT ALL TIMES ALONG YOUR ROUTE.
THEY ARE REALLY USEFUL IF YOU BECOME TEMPORARILY MISPLACED; YOU CAN BACK
TRACK ALONG YOUR FEATURE LIST UNTIL YOU KNOW
WHERE YOU ARE AGAIN.
10 11ROUTE PLANNING ACTIVITY PAGE ROUTE PLANNING ACTIVITY PAGE

F R D N R O C C V A
M B V E U U J I N E
B I P K F R K T R U
E P D F L A C E S G
U L S S J V B H E N
O M O H O R Y T Y O
O U T S O L E N E T
V U K S N C E Y L R
N L B H I I K S E A
C A X H A Y V H T N
C R E H T A E L S D
OUTSOLE MIDSOLE INSOLE UPPER RAND LACES
SPOT THE FOOTWEAR
RELATED WORDSSTORE ACTIVITY...
Interactive kit talk about footwear and boot fitting
SHOCK ABSORBER EYELETS TONGUE CUFF LEATHER SYNTHETIC
READ THIS!
FITTING• Try them on and make sure your foot matches the shape of the boot and is comfortable. All boots are made differently so try lots on. Make sure you lace them up with the tongue centred!
• Find a slope and walk up it balancing on your toes, does your heel lift out of the boot? Too much heel lift could mean blisters but a little bit is fine.
• Walk back down the slope and try and push your toes to the front of the boot, do your toes hit the end of the boot? If they don’t that’s good, if they do…try a smaller size or different boot.
• Walk back up the slope, do you notice a crease on your toes where the boot flexes? If it’s painful, try another size or a different boot.
• Make sure you wear the boot indoors for a while to test them, you may notice something different to when you tried them on first time round.
CARE• Make sure you clean your boots after each use by washing them in water.
• Don’t dry your boots too quickly; let them dry naturally. If you need to put newspaper in, don’t over fill the boot otherwise it will become misshapen.
• Leather boots need to be waxed if they look dry, this keeps them supple.
• Fabric boots need to be treated every now and again with some sort of waterproofing, like you would do with your jacket.
OUTSOLE
SHOCK ABSORBER
UPPER
RAND
LACES
EYELETS
CHOOSING BOOTS• Lowland areas - get a lightweight boot. Mountains areas - get something a bit heavier as the fabrics will be thicker and can take more knocks.
• Choose between fabric or a leather boot.
• Do the bend test and the twist test to determine the strength of your boot.
footwearGUIDE
ACTIVITY
TONGUE
12 13FOOTWEAR ACTIVITY PAGEFOOTWEAR INFO PAGE
READ THIS!
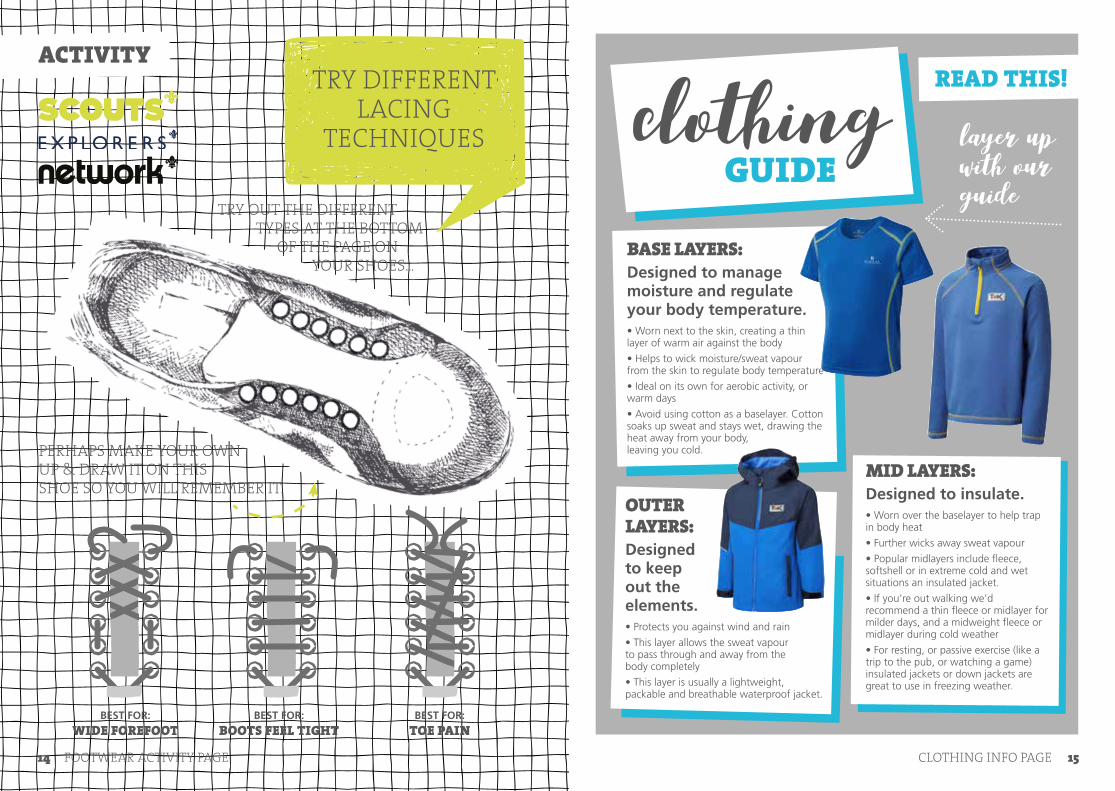
MID LAYERS:Designed to insulate.• Worn over the baselayer to help trap in body heat
• Further wicks away sweat vapour
• Popular midlayers include fleece, softshell or in extreme cold and wet situations an insulated jacket.
• If you’re out walking we’d recommend a thin fleece or midlayer for milder days, and a midweight fleece or midlayer during cold weather
• For resting, or passive exercise (like a trip to the pub, or watching a game) insulated jackets or down jackets are great to use in freezing weather.
BASE LAYERS: Designed to manage moisture and regulate your body temperature. • Worn next to the skin, creating a thin layer of warm air against the body
• Helps to wick moisture/sweat vapour from the skin to regulate body temperature
• Ideal on its own for aerobic activity, or warm days
• Avoid using cotton as a baselayer. Cotton soaks up sweat and stays wet, drawing the heat away from your body, leaving you cold.
clothingGUIDE
layer up with our guide
TRY DIFFERENT LACING
TECHNIQUES
TRY OUT THE DIFFERENT TYPES AT THE BOTTOM OF THE PAGE ON YOUR SHOES...
PERHAPS MAKE YOUR OWN UP & DRAW IT ON THIS SHOE SO YOU WILL REMEMBER IT.
BEST FOR:
WIDE FOREFOOTBEST FOR:
BOOTS FEEL TIGHTBEST FOR:
TOE PAIN
OUTER LAYERS:Designed to keep out the elements.• Protects you against wind and rain
• This layer allows the sweat vapour to pass through and away from the body completely
• This layer is usually a lightweight, packable and breathable waterproof jacket.
ACTIVITY
14 15CLOTHING INFO PAGEFOOTWEAR ACTIVITY PAGE

JEANS
FOOTBALL TOP
BASE LAYER
FLEECE
WALKING TROUSERS
HAT & GLOVES
WATERPROOF JACKET
SCHOOL TROUSERS
BLAZER
TRAINERS
WALKING BOOTS
INSULATED JACKET
WATERPROOF TROUSERS
DON’T TAKE:ITEM:
LOOK AT THE LIST OF ITEMS AND WRITE
DOWN WHETHER YOU WOULD TAKE THEM ON A HIKE
AWAY & WHY...
fleeces are ideal for milder days!
ACTIVITY ACTIVITY
TAKE
HELPFUL VIDEO...
A quick 60 second video about choosing a jacket can be found at:
gooutdoors.co.uk/ duke-of-edinburgh
1716 CLOTHING ACTIVITY PAGE CLOTHING ACTIVITY PAGE

HOW TO WASH YOUR GARMENT: 1. Wash your garment as per the instructions on the label. Wash them using a non-detergent or a specialised cleaner such as Nikwax Tech Wash or Grangers Performance Wash.
2. Let your garment let dry naturally, hang it up outside or over the bath/shower.
3. If your garment will allow it, tumble dry on a low heat or you can cover the garment with a towel and iron (no steam) on a low heat.
HOW TO REPROOF YOUR GARMENT: 1. Make sure your garment is clean. (See step 1 above).
2. Wash the garment for a second time with Nikwax Tx-Direct or Grangers Clothing Repel.
3. Let your garment let dry naturally, hang it up outside or over the bath/shower.
4. If your garment will allow it, tumble dry on a low heat or you can cover the garment with a towel and iron (no steam) on a low heat.
Make sure you clean your garment regularly to keep it working properly. Dirt or oils from your skin and affect the waterproof coating on the fabric.
If your garment is no longer beading water and is wetting out, you need to think about reproofing. You should be doing this every 4-6 months anyway depending on how much use it gets.
BEADING WATER LOOKS LIKE THIS
CHOOSE FROM:
BASE LAYER, MID LAYER OR OUTER LAYER
WHAT WOULD YOU WEAR
FOR EACH OF THESE WEATHER
CONDITIONS?
DRY, SUNNY AND CALM
COLD, SUNNY AND CALM
WINDY, COLD AND RAINY
LEADER IDEA...Split the group into smaller teams. Give them a bag of clothing and get them to pick out what they think they might need. You could make this harder by putting in some red herrings like jeans, or by changing the weather conditions. Get them to explain their choices.
RAINY AND WARM
WINDY, FREEZING AND SNOWING
ACTIVITY ACTIVITY
CARE FOR YOUR CLOTHING
STORE ACTIVITY...Kit talk on clothing. Try on the different layers and discuss what you would need in different weathers. Pick clothes from a pile and explain why you would wear them. Be careful, there may be some red herrings!
18 19CLOTHING ACTIVITY PAGE CLOTHING ACTIVITY PAGE

start
finish
SPLIT INTO TWO TEAMS.
PUT IDENTICAL PILES OF
CLOTHING AND EQUIPMENT ON
ONE SIDE OF THE ROOM.
EACH TEAM IS GIVEN A
RUCKSACK THEY HAVE TO PACK
FASTEST CORRECTLY PACKED BAG WINS
RUCKSACK RELAY!
move quickly !
1
4
2
3
STORE ACTIVITY...Play this in your own meeting place or in a store!
LEADER IDEA...Make it easier... Give them a packing list. Make it harder... Have a single pile that they have to compete for.
LITTER PICKALONG A TRAIL
READ THIS!
ALL ITEMS IN YOUR RUCKSACK SHOULD BE WATER PROOFED.
Put quick to reach items near the top. Things like waterproofs and a mid layer for rest stops.
Roll mat can be stowed below the lid.
Put smaller items in the top. Head torch, 1st aid kit, map and compass.
Any rubbish can go in a sealed bag in the pocket under the lid.
Side pockets can be useful for water bottles and snacks.
Place heavier items near the middle to maintain your centre of gravity. Food, cutlery, and cooking equipment.
Tent items can be attached to the bottom of the bag.
Sleeping bag and spare clothes at the bottom.
1. Load lifter strap
2. Adjustable back system
3. Lumbar support
4. Shoulder strap
5. Chest strap
6. Hip belt
rucksackGUIDE
1
2
4
3 6
5
ACTIVITY
20 21RUCKSACK ACTIVITY PAGERUCKSACK INFO PAGE

get a friend to help you
7.
8.
Lastly, do up your chest strap. This can be moved up and down the shoulder straps and should be in line with your armpit.
Test the fit by asking a friend to move the waist belt, you should move with it. There should also be no major gaps between the shoulder straps and your body.
1. 2. 3.
4.
5.6.
Add some weight to your rucksack.
Loosen all straps.
Adjust the back system to fit you. The waist belt should sit on the hips leaving the shoulder straps to sit comfortably on the shoulders making sure there are no gaps.
Use a friend to support the bag and do up the hip belt.
Tighten the shoulder straps.
Tighten the load adjusters to balance the weight of the bag. Angle should be between 30º and 60º. You can also adjust these on the move if your shoulders feel tired.
LEARN HOW TO FIT A
RUCKSACK
ACTIVITYACTIVITY
HELPFUL VIDEO...
A quick 60 second video about layering can be found at:
gooutdoors.co.uk/ duke-of-edinburgh
2322 RUCKSACK ACTIVITY PAGE RUCKSACK ACTIVITY PAGE
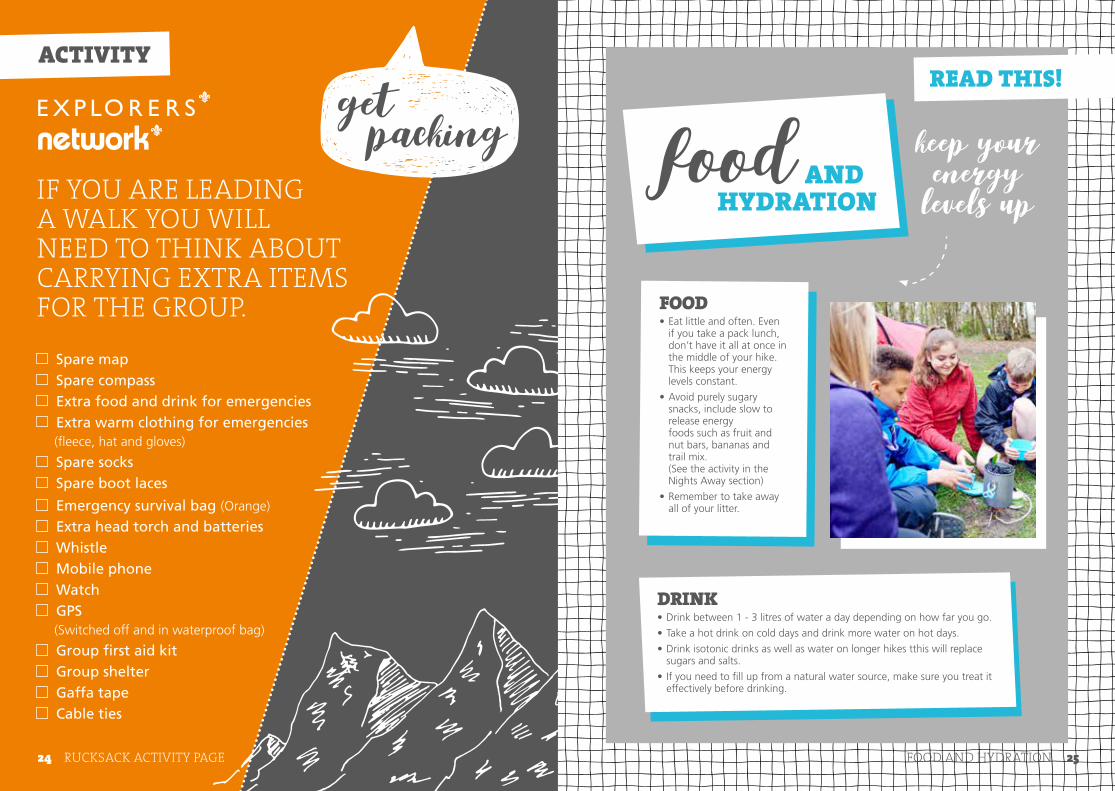
Spare map Spare compass Extra food and drink for emergencies Extra warm clothing for emergencies
(fleece, hat and gloves)
Spare socks Spare boot laces
Emergency survival bag (Orange)
Extra head torch and batteries Whistle Mobile phone Watch GPS
(Switched off and in waterproof bag)
Group first aid kit Group shelter Gaffa tape Cable ties
IF YOU ARE LEADING A WALK YOU WILL NEED TO THINK ABOUT CARRYING EXTRA ITEMS FOR THE GROUP.
ACTIVITY
keep your energy
levels up
READ THIS!
ANDHYDRATION
food
DRINK• Drink between 1 - 3 litres of water a day depending on how far you go.
• Take a hot drink on cold days and drink more water on hot days.
• Drink isotonic drinks as well as water on longer hikes tthis will replace sugars and salts.
• If you need to fill up from a natural water source, make sure you treat it effectively before drinking.
FOOD• Eat little and often. Even
if you take a pack lunch, don’t have it all at once in the middle of your hike. This keeps your energy levels constant.
• Avoid purely sugary snacks, include slow to release energy foods such as fruit and nut bars, bananas and trail mix. (See the activity in the Nights Away section)
• Remember to take away all of your litter.
get packing
24 RUCKSACK ACTIVITY PAGE 25FOOD AND HYDRATION

SOCKS
BOOTS
WALKING TROUSERS
WATERPROOF TROUSERS
BASE LAYERS
MID LAYERS
WATERPROOF JACKET
HAT
GLOVES
FIRST AID KIT
MAP
COMPASS
RUCKSACK
RUCKSACK LINER
WATER BOTTLE
EMERGENCY FOOD
HEAD TORCH
SURVIVAL BAG
SUNCREAM
HIKES AWAY KIT LIST:GO
Outdoors
PAY US A VISIT AND MEET OUR EXPERTS FOR HELP AND ADVICE
IN ONE OF OUR 61 STORES.
THE UK’S BIGGEST OUTDOOR STORES
3 4 5
2
617
1819 27
20
7
1398
1110
14
23
2226
25
21
24
16
15
12
2829
31
3530
34
48
333238
3736
54
59
5352 56
49
51
50
55
5758
60
61
44
4243
4745
46
4039
41
1
NORTHERN IRELAND 1 Newtownabbey
SCOTLAND 2 Inverness 3 Clydebank 4 Coatbridge 5 Edinburgh
NORTH WEST
6 Penrith 7 Blackburn 8 Wigan 9 Manchester 10 Warrington 11 Stockport 12 Chester 13 Liverpool 14 Stoke
NORTH EAST 15 Berwick-upon-Tweed 16 Newcastle 17 Stockton-on-Tees
NORTH 18 York 19 Pudsey 20 Wakefield 21 Doncaster
22 Scunthorpe 23 Sheffield 24 Hathersage 25 Lincoln 26 Hull 27 Leeds
MIDLANDS 28 Wolverhampton 29 Loughborough 30 Derby 31 Erdington – Birmingham 32 Kidderminster 33 Coventry 34 Shrewsbury 35 Nottingham
EAST 36 Peterborough 37 Norwich 38 Bedford
WALES 39 Swansea 40 Cardiff
SOUTH WEST 41 Gloucester 42 Swindon 43 Bristol 44 Taunton 45 Exeter 46 Plymouth 47 Poole
SOUTH EAST 48 Milton Keynes 49 Oxford 50 Southampton 51 Basingstoke 52 Colindale 53 Harlow 54 Colchester 55 Basildon 56 Thurrock 57 Canterbury 58 Chatham 59 Ipswich OPENS JUNE 2017 60 Tonbridge OPENS SEPTEMBER 2017 61 Reading OPENS AUTUMN 2017
26 HIKES AWAY KIT LIST 27STORE MAP