Heart Rate Monitor Model: HR-310€¦ · Heart Rate Monitor Model: HR-310 INSTRUCTION MANUAL...
32
Heart Rate Monitor Model: HR-310 INSTRUCTION MANUAL P H R S T / S / + M O D E S E T
Transcript of Heart Rate Monitor Model: HR-310€¦ · Heart Rate Monitor Model: HR-310 INSTRUCTION MANUAL...

Heart Rate Monitor
Model: HR-310
INSTRUCTION MANUAL
HR-310_B_M03_110516.pdf
P
HR
ST/ S/ +
MO
D
E S ET

2
CONTENTS
Before Using the UnitIntroduction .................................................................3Important Safety Information ......................................4Know Your Unit ...........................................................6
Main Unit .................................................................6LCD ..........................................................................7
Getting Started .............................................................8
Operating InstructionsClock / Alarm / Keypad Tone / Tap On Lens ............10Heart Rate Limits / Alert ...........................................13User Data ...................................................................16Wearing the Chest Belt ..............................................19Stopwatch ..................................................................21Backlight / Keypad Lock ...........................................23Batteries .....................................................................24
Care and MaintenanceUse in the Water .........................................................26Specifi cations .............................................................27FCC Statement ...........................................................28Limited Warranty .......................................................29

3
Before Using the Unit
INTRODUCTION
Thank you for purchasing the OMRON® HR-310 Heart Rate Monitor.
Fill-in for future referenceDATE PURCHASED: ___________
• Staple your purchase receipt here• Register your product online at
www.register-omron.com
The heart rate monitor can help ensure you receive the maximum benefi t from your exercise program. You can increase the effectiveness of your exercise program by monitoring and quantifying your results every step of the way.
Your HR-310 Heart Rate Monitor comes with the following components: • Heart Rate Monitor Watch • Chest Belt • Chest Belt Strap • 2 Lithium CR2032 Batteries
(1 Monitor Watch, 1 Chest Belt - installed) • Instruction Manual
SAVE THESE INSTRUCTIONS
4
IMPORTANT SAFETY INFORMATION
To assure the correct use of the product basic safety measures should always be followed including the warnings and cautions listed in this instruction manual.
SAFETY SYMBOLS USED IN THIS INSTRUCTION MANUAL
CAUTION
Indicates a potentially hazardous situation which, if not avoided, may result in minor or moderate injury to the user or patient or damage to the equipment or other property.
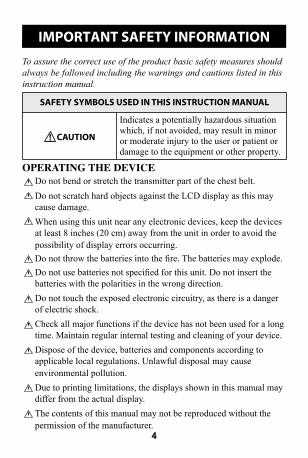
OPERATING THE DEVICE Do not bend or stretch the transmitter part of the chest belt. Do not scratch hard objects against the LCD display as this may cause damage. When using this unit near any electronic devices, keep the devices at least 8 inches (20 cm) away from the unit in order to avoid the possibility of display errors occurring. Do not throw the batteries into the fi re. The batteries may explode. Do not use batteries not specifi ed for this unit. Do not insert the batteries with the polarities in the wrong direction. Do not touch the exposed electronic circuitry, as there is a danger of electric shock. Check all major functions if the device has not been used for a long time. Maintain regular internal testing and cleaning of your device. Dispose of the device, batteries and components according to applicable local regulations. Unlawful disposal may cause environmental pollution. Due to printing limitations, the displays shown in this manual may differ from the actual display. The contents of this manual may not be reproduced without the permission of the manufacturer.
5
IMPORTANT SAFETY INFORMATION
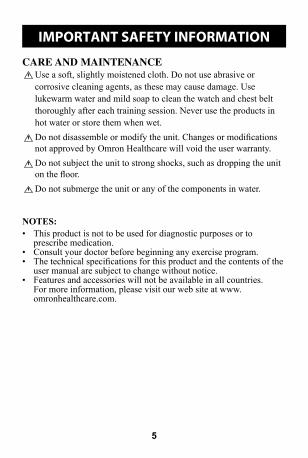
CARE AND MAINTENANCE Use a soft, slightly moistened cloth. Do not use abrasive or corrosive cleaning agents, as these may cause damage. Use lukewarm water and mild soap to clean the watch and chest belt thoroughly after each training session. Never use the products in hot water or store them when wet. Do not disassemble or modify the unit. Changes or modifi cations not approved by Omron Healthcare will void the user warranty. Do not subject the unit to strong shocks, such as dropping the unit on the fl oor. Do not submerge the unit or any of the components in water.
NOTES: • This product is not to be used for diagnostic purposes or to
prescribe medication. • Consult your doctor before beginning any exercise program.• The technical specifi cations for this product and the contents of the
user manual are subject to change without notice. • Features and accessories will not be available in all countries.
For more information, please visit our web site at www.omronhealthcare.com.

6
KNOW YOUR UNIT
Main Unit
1. Tap on lens screen (patent pending): Tap on it to view a display mode
2. HR: Enter HR mode; toggle heart rate displays 3. MODE: Switch to another display mode4. ST / SP / +: Start / stop stopwatch; change setting5. / : Turn on backlight; lock / unlock keypad 6. SET: Enter setting mode; clock setting displays
P
HR
ST/ S/ +
MO
D
E S ET
2
1
3
4
5
6

7
KNOW YOUR UNIT
LCD
1. walking / jogging / running activity level2. : Alarm is set; fl ashes when alarm is active3. AM / PM: 12-hour clock4. / : fl ashes when surpassed heart rate limit5. Time / heart rate6. : Indicates battery power is low7. : Stopwatch is shown or running8. : Keypad tone is turned off9. AVG: Average heart rate reading10. KCAL: Calorie unit11. % : Percentage heart rate reading12. / : Imperial height units (feet and inches)13. KGLB: Body weight unit14. CM: Metric height unit (centimeters)15. YR: Year of user’s birth16. : Keypad lock is turned on 17. : Tap on lens function is active18. : Heart rate is outside the set limits19. : Flashes when receiving heart rate signal
1
7 8
13 12
14 15 16 17
19 18
9 10 1 1
2
3
4
6 5

8
GETTING STARTED
IMPORTANT: To effectively use the watch when exercising i.e. to calculate your calories burned and fi tness index, you MUST set the heart rate limits and user data as shown in the relevant sections.
TURNING ON THE WATCH (1ST TIME USE ONLY)Press any key for 2 seconds to activate the LCD screen.
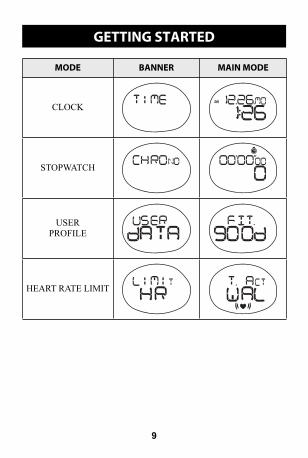
SWITCH OPERATION MODESPress MODE to switch between the 4 operation modes. Each main mode displays a banner screen telling you which mode you are entering. After 1 second the banner screen is automatically replaced by the main mode screen.
9
GETTING STARTED
MODE BANNER MAIN MODE
CLOCK
STOPWATCH
USERPROFILE
HEART RATE LIMIT

10
CLOCK / ALARM / KEYPAD TONE / TAP ON LENS
CLOCKTo set the clock:1. Press MODE to switch to clock
mode.
2. Press and hold SET until the fi rst setting fl ashes.
3. Press + to change the setting. Hold to speed through the options.
4. Press SET to confi rm and move onto the next setting. The setting sequence is: 12/24-hour format, hour, minute, year, day-month format, month and day.
To toggle between the 4 different clock displays:1. Press MODE to navigate to clock mode.
2. Press SET to scroll through the different screens.
Operating Instructions

11
CLOCK / ALARM / KEYPAD TONE / TAP ON LENS
ALARMTo set the daily alarm:1. Press MODE to navigate to clock
mode.
2. Press SET until you reach the alarm display.
3. Press and hold SET until the fi rst setting fl ashes.
4. Press + to change the setting. Hold to speed through the options.
5. Press SET to confi rm and move onto the next setting. The setting sequence is hours and minutes.
To turn the alarm sound OFF and reset it for the next day:Press any key.
To activate / deactivate the alarm:1. Press MODE to navigate to clock mode.
2. Press SET until you reach the alarm display.
3. Press + to toggle between alarm on or off. appears when the alarm is activated.

12
CLOCK / ALARM / KEYPAD TONE / TAP ON LENS
KEYPAD TONETo turn the keypad tone ON or OFF:1. Press MODE to navigate to the clock
mode.
2. Press SET until you reach the keypad tone display.
3. Press + to change the setting.
4. Press SET to confi rm.
TAP ON LENSThe tap on lens feature gives you easy access to 1 of 6 preset modes:
• Clock (TIME)• Instant percentage
heart rate, i.e., how hard the heart is working (%HR)• Stopwatch and current heart rate (STW HR)• Average heart rate (Avg HR)• Calories burned (kCAL)• Stopwatch (CHRONO)
To set the tap on lens preset mode: 1. Press MODE to navigate to the clock mode.
2. Press SET until you reach the tap on lens display and use + to select TOUCH ON.
3. Press and hold SET.
4. Press + to select 1 of the 6 modes and SET twice to confi rm.

13
CLOCK / ALARM / KEYPAD TONE / TAP ON LENS
To use the tap on lens:Simply tap with fi ngernail on the lens and your preset mode will display for 10 seconds before returning to the previous screen.
appears when the tap on lens feature is activated and fl ashes when the preset display is shown.
HEART RATE LIMITS / ALERT
To set lower and upper heart rate limits / alert:
1. Press MODE to switch to heart rate limit mode.
NOTE: To enter the user data setting mode, the stopwatch must be stopped.
2. Press and hold SET until the fi rst setting fl ashes.
3. Press + to change the setting. Hold to speed through the options.
4. Press SET to confi rm and move onto the next setting. The setting sequence is: Target activity (Walk, Jog or Run), lower heart rate limit, upper heart rate limit and alert ON / OFF.
NOTE: You need to set the target activity for automatic calculation of the lower and upper heart rate limit. If you change the target activity level, your upper / lower heart rate will automatically be updated.

14
HEART RATE LIMITS / ALERT
TARGET ACTIVITY
TARGET ACTIVITY
MHR % DESCRIPTION
WALK 65 - 78%
Health Maintenance: Low intensity training level. Good for those who want to strengthen their cardiovascular systems
JOG 65 - 85%
Aerobic Exercise: Increases strength and endurance. Works within body’s oxygen intake capability, burns more calories, can be maintained for a long period of time
RUN 78 - 90%
Anaerobic: Generates speed and power. Works at or above body’soxygen intake capability, builds muscle, and cannot be maintained for a long period of time
MAXIMUM / LOWER / UPPER HEART RATEBefore you begin any exercise program and to achieve maximum health benefi ts from your workout, it is important to know your:• Maximum heart rate (MHR)• Lower heart rate limit• Upper heart rate limit

15
HEART RATE LIMITS / ALERT
To manually calculate your own heart rate limits:
MHR MHR = 220-age
LOWER LIMITMHR x lower target activity %.E.g. Target activity is WALK:Lower limit = MHR x 65%
UPPER LIMITMHR x upper target activity %.E.g. Target activity is WALK: Upper limit = MHR x 78%
HEART RATE ALERTYou can set the heart rate alert in the heart rate mode to the following settings:
ICON DESCRIPTION
Heart rate sound alert is OFF
Heart rate sound alert is ON• 1 beep = you have gone below your lower zone limit• 2 beeps = you have gone above your upper zone limit
or fl ash when you have surpassed your heart rate limit.
NOTES: • Sound alert will only be activated if alert setting is ON and during
exercise (when stopwatch is running).• If the watch is kept idle without receiving a heart rate signal for 5
minutes, the heart rate mode will quit and return to clock mode.

16
USER DATA
To access the full benefi ts of this product, set up your user data before you exercise. This will automatically generate a fi tness index, and enable the watch to calculate the level of calories burned when exercising. This information helps you track your progress over time.
To set the user data:1. Press MODE to navigate to the user data
mode.
2. Press and hold SET until the fi rst setting fl ashes.
3. Press + to change the setting. Hold to speed through the options.
4. Press SET to confi rm and move onto the next setting. The setting sequence is: Activity level (ATH / HOB / LIT), gender (M / F), year of birth, month of birth, day of birth, height unit (feet or meters), height, weight unit (lbs or kg) and weight. Once data has been completed the fi tness index will display as FAIR, NORMAL or GOOD.
NOTE: You must enter your user data to enable the calorie count and fat burn features.
To view your fi tness index:Press MODE until you reach the user data display.

17
USER DATA
ACTIVITY LEVELThe activity level is based on your own self-assessment of the amount of exercise you regularly perform.
ACTIVITY LEVEL
DESCRIPTION
LITTLE Low - You do not usually participate in programmed recreation sports or exercise.
HOBBY
Medium - You are engaged in modest physical activity (such as golfi ng, horseback riding, table tennis, calisthenics, bowling, weight lifting or gymnastics) 2-3 times a week, totaling 1 hour per week.
ATHLETE
High - You actively and regularly participate in heavy physical exercise (such as running, jogging, swimming, cycling, or skipping rope) or engage in vigorous aerobic exercise (such as tennis, basketball or handball).
NOTE: You must enter the activity level to calculate the calories burned and fi tness index.
FITNESS INDEXThe watch will generate a fi tness index based on your aerobic fi tness. This index is dependent and limited by the body’s ability to deliver oxygen to the working muscles in training. It is often measured by maximum oxygen uptake (VO2 Max), which is defi ned as the highest amount of oxygen that can be utilized when exercising at an increasingly demanding level. The lungs, heart, blood, circulatory system, and working muscles are all factors in determined VO2 Max. The unit of VO2 Max is ml/kg min.

18
USER DATA
See the tables below for a rough guide to what your fi tness index means:
FITNESS INDEX FOR MEN
Ag
e
FAIR
NORMAL
GOOD
Fitness index
FITNESS INDEX FOR WOMEN
Age FAIR
NORMAL
GOOD
Fitness index

19
WEARING THE CHEST BELT
CHEST BELTThe chest belt counts your heartbeat and transmits this data to the watch.
1. Wet the conductive pads on the underside of the chest belt with a few drops of water or conductive gel to ensure solid contact.
2. Strap the chest belt across your chest making sure the belt sits snugly below your pectoral muscles.
TIPS• For accurate heart rate readings, make
sure the chest belt is placed above your heart.• Avoid areas with dense chest hair.• In dry, cold climates, it may take several minutes for the chest belt
to function steadily. This is normal and should improve with several minutes of exercise.
NOTE: If the watch is kept idle without receiving a heart rate signal for about 5 minutes, the heart rate mode will quit.

20
WEARING THE CHEST BELT
TRANSMISSION SIGNALThe chest belt and watch have a maximum transmission range of about 25 inches (62.5 cm).
ICON DESCRIPTION
Flashes when signal has been found
Appears when heart rate alert is ON
In the event that you experience a weak signal or your signal is disrupted by interference in the environment:
• Shorten the distance between the chest belt and watch.• Re-adjust the position of the chest belt.• Check the conductive pads are moist enough to ensure solid
contact.• Check the batteries. If they are low the range may be less.• When two or more people use the units nearby at the same time,
ensure there is more than 45 inches (112.5 cm) between them.
NOTE: Signal interference in the environment can be due to electromagnetic disturbances. These may occur near high voltage power lines, traffi c lights, overhead lines of electric railways, electric bus lines or trams, televisions, car motors, bike computers, some motor driven exercise equipment, cellular phones or when you walk through electric security gates. Under interference, the heart rate reading may become unstable and inaccurate.
21
STOPWATCH
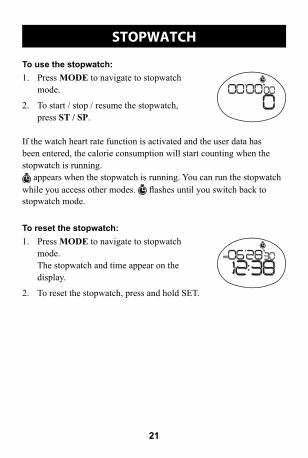
To use the stopwatch:1. Press MODE to navigate to stopwatch
mode.
2. To start / stop / resume the stopwatch, press ST / SP.
If the watch heart rate function is activated and the user data has been entered, the calorie consumption will start counting when the stopwatch is running.
appears when the stopwatch is running. You can run the stopwatch while you access other modes. fl ashes until you switch back to stopwatch mode.
To reset the stopwatch:1. Press MODE to navigate to stopwatch
mode. The stopwatch and time appear on the
display.
2. To reset the stopwatch, press and hold SET.

22
STOPWATCH
VIEW DATA AND CURRENT HEART RATE WHILE STOPWATCH IS RUNNINGPress HR to scroll through the following screen displays while the stopwatch is in use:
Percentage heart rate and current heart rate
Stopwatch and current heart rate
Average heart rate and current heart rate
Calories burned and current heart rate
PERCENTAGE HEART RATE READINGThe percentage heart rate reading is calculated from your current heart rate and MHR: The higher the percentage, the harder the heart is working. For example, when you reach 80-90% you should consider slowing down to a more comfortable exercise level.

23
BACKLIGHT / KEYPAD LOCK
To turn the backlight on for 3 seconds: Press . (Press again within the 3 seconds to extend the light for 3 more seconds.)
To turn the keypad lock ON or OFF:Press and hold .
appears when the keypad lock is ON.
NOTE: The backlight does not work when the low battery icon is shown and will return to normal once the batteries are replaced.

24
BATTERIES
The watch uses a CR2032 3V battery, which has already been installed. The battery warnings are:
DESCRIPTION
Continuous fl ashing The watch battery is low
Intermittent fl ashing The watch battery is too low to run the backlight
* The batteries typically last one year.
To assure the water resistance take the watch to a local jewelry store for battery replacement. Improper replacement will void the warranty.
IMPORTANT:Remember to set the profi les after every battery replacement or reset.

25
BATTERIES
The chest belt uses a CR2032 3V battery, which has already been installed. If the heart rate signals become unsteady or stop your chest belt battery may need replacing.To replace the chest belt battery:1. Using a coin, twist the battery door counter-clockwise until it
clicks out of place.
2. Replace the old battery and close the battery door by twisting it clockwise until it is fi rmly in place.

26
USE IN THE WATER
The watch is water-resistant up to 164 feet. The chest belt is splash proof, but should not be worn for underwater activities, as the heart rate transmission cannot occur under water. Refer to the table for proper use guidelines.
RAINSPLASHES
ETC
SHOWERING(WARM/
COOLWATERONLY)
LIGHTSWIMMING/ SHALLOW
WATER
SHALLOWDIVING/
SURFING/WATERSPORTS
SNORKELING/ DEEPWATERDIVING
Watch 164Feet/ 50M
OK OK OK NO NO
Chest Belt OK NO NO NO NO
IMPORTANT:• Ensure the buttons and battery compartment are secured and intact
before exposing the watch to excessive water.• Avoid pressing the buttons while in the water or during heavy
rainstorms, as this may cause water to enter the watch, leading to malfunction.
Care and Maintenance

27
SPECIFICATIONS
Model HR-310 (HBE-310-Z)Power Supply Monitor watch: 3 VDC (1 lithium battery CR2032)
Chest belt: 3 VDC (1 lithium battery CR2032)Clock Time format: 12 hr / 24 hr
Date format: D.M. / M.D.Year: 2005-2054 (auto-calendar)Alarm: Daily
Stopwatch Count-up timer: From 00'00''00 (min' sec'' 100th sec)to 99:59'59'' (hr: min' sec'')
Performance Tracking Heart rate (HR) alert: Sound / visualHR measuring range: 30-240 bpm (beats per minute)Lower HR settable range: 30-220 bpm (beats per minute)Upper HR settable range: 80-240 bpm (beats per minute)Calories calculation: 0-9,999kcal
Transmission Range: 25 inches (62.5 cm) – may decrease with low battery
Water Resistant Monitor watch: 164 feet (50 meters) not actuating keys
Chest belt: Splash proofOperating Environment temperature: 32°F to 104°F (0°C to 40°C)
humidity: 30 to 85% RHBattery Life Monitor watch: Approx. 1 year (when used for
measuring 30 minutes a day)Chest Belt: Approx. 1.5 years (when used for
measuring 30 minutes a day)Contents Heart Rate Monitor Watch, Chest Belt, Chest Belt Strap,
2 Lithium CR2032 Batteries (installed) and Instruction Manual
• Specifi cations are subject to change without notice.

28
FCC STATEMENT
NOTE:POTENTIAL FOR RADIO/TELEVISION INTERFERENCE (for U.S.A. only)This product has been tested and found to comply with the limits for a Class B digital device, pursuant to part 15 of the FCC rules.These limits are designed to provide reasonable protection against harmful interference in a residential installation. The product generates, uses, and can radiate radio frequency energy and, if not installed and used in accordance with the instructions, may cause harmful interference to radio communications. However, there is no guarantee that interference will not occur in a particular installation. If the product does cause harmful interference to radio or television reception, which can be determined by turning the product on and off, the user is encouraged to try to correct the interference by one or more of the following measures:• Reorient or relocate the receiving antenna.• Increase the separation between the product and the receiver.• Connect the product into an outlet on a circuit different from that to which the
receiver is connected.• Consult the dealer or an experienced radio/TV technician for help.
POTENTIAL FOR RADIO/TELEVISION INTERFERENCE (for Canada only)This digital apparatus does not exceed the Class B limits for radio noise emissions from digital apparatus as set out in the interference-causing equipment standard entitled “Digital Apparatus”, ICES-003 of the Canadian Department of Communications.Cet appareil numérique respecte les limites de bruits radioeléctriques applicables aux appareils numériques de Clase B prescrites dans la norme sur le materiel brouilleur: “Appareils Numériques”, ICES-003 édictée par le minister des communications.
Changes or modifi cations not expressly approved by the party responsible for compliance could void the user’s authority to operate the equipment.

29
LIMITED WARRANTY
Your OMRON® HR-310 Heart Rate Monitor, excluding the batteries, is warranted to be free from defects in materials and workmanship appearing within 1 year from the date of purchase, when used in accordance with the instructions provided with the unit. The above warranties extend only to the original retail purchaser.We will, at our option, repair or replace without charge any monitor covered by the above warranties. Repair or replacement is our only responsibility and your only remedy under the above warranties.To obtain warranty service contact Omron Healthcare’s Customer Service by calling 1-800-634-4350 for the address of the repair location and the return shipping and handling fee. Information for warranty service is available on our website at www.omronhealthcare.com.Enclose the Proof of Purchase. Include a letter, with your name, address, phone number, and description of the specifi c problem. Pack the product carefully to prevent damage in transit. Because of possible loss in transit, we recommend insuring the product with return receipt requested.THE FOREGOING IS THE SOLE WARRANTY PROVIDED BY OMRON IN CONNECTION WITH THIS PRODUCT, AND OMRON HEREBY DISCLAIMS ANY OTHER WARRANTIES, EXPRESS OR IMPLIED, INCLUDING IMPLIED WARRANTIES OF MERCHANTABILITY AND FITNESS FOR A PARTICULAR PURPOSE. IMPLIED WARRANTIES AND OTHER TERMS THAT MAY BE IMPOSED BY LAW, IF ANY, ARE LIMITTED IN DURATION TO THE PERIOD OF THE ABOVE EXPRESS WARRANTY.OMRON SHALL NOT BE LIABLE FOR LOSS OF USE OR ANY OTHER SPECIAL, INCIDENTAL, CONSEQUENTIAL OR INDIRECT COSTS, EXPENSES OR DAMAGES.This warranty provides you with specifi c legal rights, and you may have other rights that vary by jurisdiction. Because of special local requirements, some of the above limitations and exclusions may not apply to you.
FOR CUSTOMER SERVICEVisit our web site at: www.omronhealthcare.comCall toll free: 1-800-634-4350

30
NOTES

31
NOTES

Omron Healthcare, Inc.1925 West Field CourtLake Forest, IL 60045www.omronhealthcare.com
Copyright © 2011 Omron Healthcare, Inc.
Made in China
9063104-1B