NB1 Miniature Circuit Breaker NB1 -63 A Miniature Circuit ...

HOTMAC Flight Training Manual v20120305
Page 1 of 12
Heart of Texas Miniature Aircraft Club
Flight Training Manual
March 5, 2012

HOTMAC Flight Training Manual v20120305
Page 2 of 12
Welcome to the HOTMAC
Flight Instruction Program
Welcome to the multi-faceted and interesting hobby of "R/C model aircraft". You have
begun a journey that will fulfill you with a lifetime of learning. It can be as simple or complex as
the projects that you attempt to undertake. But, R/C club members seem to always have two
interests in common. They enjoy building good looking model airplanes, and they love to fly
them. Our flight training program attempts to ease the path toward attaining both of these goals.
It provides an opportunity for each newcomer to participate in a well structured R/C flying
instruction program which can effectively teach you how to prepare an airplane for its first flight
and teach you how to fly and most importantly to take off and land. This is a program which
strengthens the club, insures a much safer flying environment and is, obviously, a benefit for
beginning R/C enthusiasts.
To receive RC Flight Instruction from the HOTMAC instructors you must become a
member HOTMAC and the Academy of Model Aeronautics. See membership information on the
HOTMAC website: www.hotmacrc.org and the AMA website: www.modelaircraft.org.
Our Instructors realize that all student pilots do not have the same life experiences. Most
have had no previous flying or building experience and have no idea of the challenges which lie
ahead. It is only natural that there are some who arrive in a nervous and somewhat intimidated
frame of mind. Therefore, the instructor's initial challenge is to calm his student’s fears and
attempt to leave the student with a pleasant memory of his first R/C flying experience. A gentle
approach, a properly trimmed aircraft, an appropriate throttle setting and at a comfortable
altitude of 300 feet or more for those first flights will work to calm the student’s fears.
Once the student is reasonably capable of following the teacher’s instructions, the
operating altitude will be lowered to, a “one error” height of about 100 to 150 feet. Throughout
the program, Instructors will emphasize the importance of concentration and following the
"Student Progress Check List".
An instructor's primary assignment must always be to maintain a safe environment for his
students, other flyers and the spectators present at Speegleville Park. Your instructor will do
everything possible to prevent a mishap or loss of your plane. He will save many aircraft repairs
in the process. And he will offer his students an opportunity to learn to fly and to realize what
fun this hobby can be, especially as a solo flier. However, there are NO guarantees that a mishap
will not occur.
A student must accept the fact that his instructor is just another R/C enthusiast who has
learned to fly reasonably well and, although unpaid, is willing to go out of his way to assist
newcomers to R/C. If the student flies at least twice a week and applies themselves, they will
solo within a few weeks and experience no major accidents.
A student should also bear in mind that an instructor is not his personal mechanic or
employee. His instructor is a friend who expects his students to fly on a regular schedule, and to
try as hard as he does to see that each receives a Solo Certificate. Remember, we all go out to
the flying field to have a good time and the very best of those times come when we are flying
comfortably all by ourselves. The efforts to teach and to learn are worth every moment.
Remember, DO NOT FLY ALONE until your instructor says you are ready
and you have completed the “Student Solo Flight Check”!

HOTMAC Flight Training Manual v20120305
Page 3 of 12
Program Structure
LEVEL l
(A) Aircraft pre-flight inspection
(B) Introduction to flight
LEVEL II
(A) Straight & Level Flight, Left & Right Turns (at an altitude of approx 300’)
(B) Giant Circles - Left & Right (at an altitude of approx 300’)
LEVEL III
(A) Oval Pattern- Left & Right (should be offered at 200’ or less, unless noted.)
(B) Figure Eights/ Reverse Figure Eights
LEVEL IV
(A) Rectangular Pattern – Left & Right with Throttle
(B) Three Point Fly-over Figure Eight Pattern
(C) Traffic Pattern & Approach
LEVEL V
(A) Slow Flight (at safe altitude) & Stall Recovery
(B) Orientation and Basic Maneuvers (at safe altitude}
Loop, Climbing Turn, Roll, Stall Turn, Spin/Spiral Dive
(C) Taxi & Take off
LEVEL VI
(A) Trim Adjustments
(B) Normal Landings
C) Forced Landings & Emergency Procedures

HOTMAC Flight Training Manual v20120305
Page 4 of 12
Teaching Guide
LEVEL 1
Pre-flight inspection
All student aircraft must be thoroughly inspected prior
to the initial test flight by an Instructor or other
qualified R/C pilot and any deficiencies corrected. An
additional formal inspection will be required after any
modification or repair of the aircraft or at the request of
the student. While examining the aircraft the instructor
should discuss the reason for each portion of the
inspection and the remedy for any deficiencies found.
The importance of an ongoing inspection and
maintenance program should be emphasized. Prior to
each flight the instructor should call the students
attention to the items he is checking before take off,
such as carburetor setting, transmitter antenna
extension, trim settings, center of gravity, and control
movements and surface deflections. (See Preflight
Checklist)
Introduction to flight
Before a student's first serious flying lesson, a qualified
instructor should set down with him (transmitter in
hand) and discuss what "Left", "Right", "Up" & "A
Little" means plus the mechanical process of "The
Turn". "Left" always refers to both the student's left and
the left side of the aircraft. Conversely, a "Right"
command always requires that the student move the
control stick to his Right and toward the right side of
the aircraft.. An "Up" command asks the student to pull
the elevator control stick back (toward the bottom of
the transmitter
Smooth aileron turns of various radii, at a constant
altitude and over a pre-determined ground path can be
accomplished only with a considerable amount of
practice. A simple 1.2.3 starting point to initiate turns is
described next. (1) Bank the aircraft about 15°in the
direction of the turn with aileron . Allow the stick to
return to neutral. (2) Maintain altitude with the
application of small amounts of up elevator, as
required. (3) To complete the turn, allow the elevator to
return to neutral, level the wing with a brief decisive
stick movement in the opposite aileron direction and
allow the stick to return to neutral". "Smooth" will
come with practice.
Practicing transmitter stick movements on a simulator
(flown from the ground, not a cockpit view) will begin
the process of orienting the student to getting a feel for
a transmitter in their hands. Practice on a simulator is
highly encouraged as it speeds the learning process on
an actual R/C aircraft.
The use of a “buddy box” system is highly encouraged
whereby the “master” transmitter will be used by the
instructor and the “slave” is used by the student.
Control of the aircraft is transferred to the “slave” when
the instructor holds a switch on the “master”
transmitter. Upon release of the switch, control is
immediately returned to the “master” and the
instructor’s control.
A student should also know the basic parts and names
of an airplane and be able to describe basic flight theory
and how control surfaces direct an airplane.
Some good websites for this information is:
Palosrc.com - Beginners Guide to RC Flight
http://www.palosrc.com/index.php?option=com_conten
t&view=category&layout=blog&id=41&Itemid=50
AMA – Academy of Model Aeronautics Newcomer
Guide
http://www.modelaircraft.org/files/education/docs/newc
omerguide.pdf
LEVEL II
The first order of business of any flying session is to
check the trim of the aircraft, making certain that straight
and level flight is maintained (hands off) at the reduced
throttle setting required for that particular training flight.
Level II training should be flown at about 300’ high. This
is at least “two mistakes high”. This means the student
can make an error and a second error before the instructor
intervenes and “takes control” of the airplane. Instructors
do not take the aircraft from the student after one mistake
unless it is danger. Allow the student to learn from their
mistakes. The amount of maximum control surface
movement should always be set to fit the student's
comfort level.
Straight & level flight - Left & right turns
The student's initial flight experience should be enjoyed
at a comfortable altitude, restricted only by satisfactory
visibility. It is essential that during any and all training
sessions equal numbers of left and right turns be
included. Attempt 90° turns first with about a 15° wing
bank and concentrate on maintaining a constant
altitude. Then start to work on controlling the headings
and finally attempt to vary the size (radius) of the turns.
Giant Circles - Left & right
This is an exercise to prove that there is no way that one
can learn to fly mechanically from a book. Flying large
360° turns is not easy. Correcting for drift is even more
difficult. It requires the Pilot to constantly add
incremental control inputs (in all directions) in order to
follow the ground path which he wishes to follow.

HOTMAC Flight Training Manual v20120305
Page 5 of 12
Remember that Level II is only the first step in the
flying program and perfection is not required or
expected.
LEVEL III
Both level III and IV should be flown at an altitude of 200
ft. or less. That's a "One error & save" height. If one is to
successfully set an airplane down where he wants to, he
must be capable of following a predetermined ground
path.
Oval Pattern - Left & Right
The student will attempt to trace a ground path which
runs down the center line of the runway. At about 100'
beyond the end of the runway the path should turn
slowly 180° (away from the pit area and then run in the
opposite direction (parallel to the runway).
A second 180° turn is initiated at a point such that when
completed the aircraft if lines up with the runway center
line, at a point beyond the end of the runway. If
headings are missed or the aircraft drifts, attempt
corrections immediately. The airplane should never fly
the pilot.
Figure Eights
This is the single most demanding and beneficial
exercise in the entire program, requiring constant
control inputs and changing with every variation in
wind direction or velocity. Three ground points form a
triangle. The base of the triangle lies on the opposite
edge of the runway directly in front of the pilot and is
centered on him. The apex of the isosceles triangle is
the third point and is located directly in front of the
pilot. It marks the center intersection of a figure eight
flight path whose two lobes just touch the far side of the
runway at the first two points of our triangle. The
positioning of the triangle is fixed. However, the size
should be set to accommodate the student. Extremely
sharp turns should not be required and (for this
exercise) the shape of the eight is immaterial. The goal
is to be similar to the figure shown.
LEVEL IV
Rectangular Landing Pattern - Left & Right with
Throttle
This segment is a refinement of the "Oval Pattern" -
substituting two 90° turns for each 180° turn, the
introduction of throttle control and (at the instructors
discretion) rudder control. It introduces the left stick
and initiates the use of both hands in the process of
controlling the aircraft. As he flies the pattern, the
student will reduce or increase power as requested by
his instructor. Since rudder function is not absolutely
necessary to fly an aileron equipped model aircraft, its
introduction is left to the discretion of the instructor or
the student. From this point on the student will be
expected to maintain physical contact with both control
sticks when he is in control of the aircraft
Figure Eight/Reverse Figure Eights
Flying consistent figure eights, under various wind
conditions will require practice. Figure Eights are flown
at a consistent altitude and initial turn is “away” from
the flight line. Reverse Figure Eights will only be flown
once proficiency in Figure Eights is demonstrated.
Once the student has proven that he can nail the
"points", he's reached his immediate goal and can move
on to Level V.
Taxi & Take-Off
Any problem on the take-off must be resolved in a split
second. There is no time to ponder a solution. An
instructor (even with a buddy box) offers no guarantee.
Therefore the student should have emergency responses
firmly planned in advance. Here are a few suggestions.
(1) The escape route must be indelibly engraved in the
mind of the pilot. Taking off to the right? Turn Left!
Taking off to the left? Turn Right! (2) Assuming a take-
off to the right, start the procedure from a stationary
position on the center line of the runway. Advance the
throttle slowly. When the aircraft is holding the proper
heading, decisively advance the throttle to full power.
(3) From this point on only one directional correction
should be attempted. If any problem is encountered
before lift-off, chop the throttle and turn left. After lift-
off, if there is any type of emergency other than engine
failure, turn left and flyaway. If the take-off is
successful, fly down the entire length of the runway and

HOTMAC Flight Training Manual v20120305
Page 6 of 12
climb out at approx 15°. A take-off to the left is simply
reversed
It is not necessary to tie up a club field for taxi practice.
After a student's first successful "take-off", they should
be capable of practicing taxing by themselves in any
suitable area with the aircraft's wing removed.
LEVEL V
Slow Flight & Stall Recovery
The purpose off this exercise is to demonstrate that
"Slow" is not "Safe". An aircraft in "slow flight" is
operating at the lowest possible airspeed without losing
altitude and is on the very edge of the beginning of the
stall. Controls are normally very soft and ineffective
and the slightest turn requires immediate additional
power to avoid a complete stall. At a safe altitude, the
student should attempt to fly both straight and circular
flight paths in a "slow flight" mode. As he reduces the
throttle setting and slowly comes back on the control
stick (in order to maintain altitude), he will discover
that a delicate balance between throttle and elevator is
required to maintain true slow flight. He will also find
that coordinating the rudder with the ailerons of
considerable benefit in the turns. Flown properly, the
aircraft (with the stick full back) will experience partial
stalls in straight and level flight and probably a full stall
from a turn that is too tight or too slow. There is no
need to fear the stall at safe altitudes. The pilot needs
only to return the stick to neutral, allow the nose to
drop, add a little power, regain flying speed, level off
and climb back up to altitude to try again.
Orientation and Basic Maneuvers
There will be plenty of time in the future for the student
to practice and learn various aerobatic maneuvers. The
sole purpose of this segment is to offer the student an
opportunity to become disoriented and practice
recovery procedures. Since there is a certain amount of
unnecessary risk involved, both instructor and student
have the discretion on what maneuvers to include in
this portion of their training.
Traffic Pattern & Approach
The ground path is similar to the rectangular pattern
introduced in Level IV with the exception of perhaps a
longer approach. The maximum altitude should be
about 150'. Power is reduced during the cross-wind leg
on the final approach, at the discretion of the student or
instructor and the aircraft allowed to descend to
approximately 50'. Power should then be applied and
the aircraft returned to its original altitude along the
flight path. The aircraft should always pass over the
entire length of the runway. Remember, "No Slow
Flight" here. The aircraft should be trimmed so that (at
idle and with no control input) a reasonable rate of
decent and safe airspeed is maintained.
LEVEL VI
It is recommended that a concentrated effort be made to
complete this program within 10 days of the time that
Level VI is introduced. The student should make
arrangements with an instructor (or instructors) for
additional flying time as required.
Trim adjustments
This segment of the program should be flown at a safe
altitude and if a trainer system is not being employed,
great care should be exercised. The purpose is to allow
the student an opportunity to experience operating an
aircraft which is out of trim and resolve the problem.
The student will first be required to make minor trim
adjustments about both single and double axes. After
which major trim problems will be introduced by the
instructor and corrected
The Landings
If the instructor's have been doing their job and student
has been doing his, this last step to graduation should
be a piece of cake. As the "take-off', the first landings
(to be safe) require a little pre-planning. Planned escape
routes are most important and are identical to those
used for take-off emergencies. If anything unforeseen
occurs during the final approach or landing, one simply
initiates an "escape turn" and either flies or taxis away
to the opposite side of the runway. Remember, as long
as the airplane is under power, only a good approach is
acceptable. The best time to practice landings from bad
approaches is when a “dead stick” has occurred.
The first landing or two will probably be under the
verbal control of the instructor. The landing pattern and
approach will be identical to those already
accomplished, except about 50' lower. When the
instructor feels that the threshold of a safe landing has
been reached, rather than advising the student to add
power and go around, he will quietly suggest that the
student start the flair and hold the heading down the
runway until the aircraft rolls to a complete stop. Only
then is the flight complete.
Forced Landing Procedures (“Dead Stick”)
Engine failure on take-off and at altitude will be
replicated and landing approaches attempted. Teach the
concept of the “sweet spot” to capably land the aircraft
on the runway after a “dead stick”. The first maneuver
upon engine failure should be a quick turn to head for
the “sweet spot”. Before the flying session begins, the
instructor should be prepared to discuss wind velocity,

HOTMAC Flight Training Manual v20120305
Page 7 of 12
drift, penetration and flying speed as they relate to
recovery from sudden power loss. Special emphasis
should be placed on engine failure procedures during
climb-out. These exercises should be initiated at a
minimum altitude of 200' (including engine loss on take
off) and be terminated at the instructor's discretion.
Final Thoughts
There is plenty of information on the Web for R/C
subjects. Searches will return many sources for
information from beginning in R/C to designing and
building your own aircraft. There are also many
discussion forums on R/C subjects. Use the web, read
and study and practice to become the best that you can
be in this hobby. And of course you have many contacts
within from other HOTMAC members. Ask questions,
the HOTMAC members have an outstanding reputation
for helping newcomers and beginners.
HOTMAC Flight Training Manual v20120305
Page 8 of 12
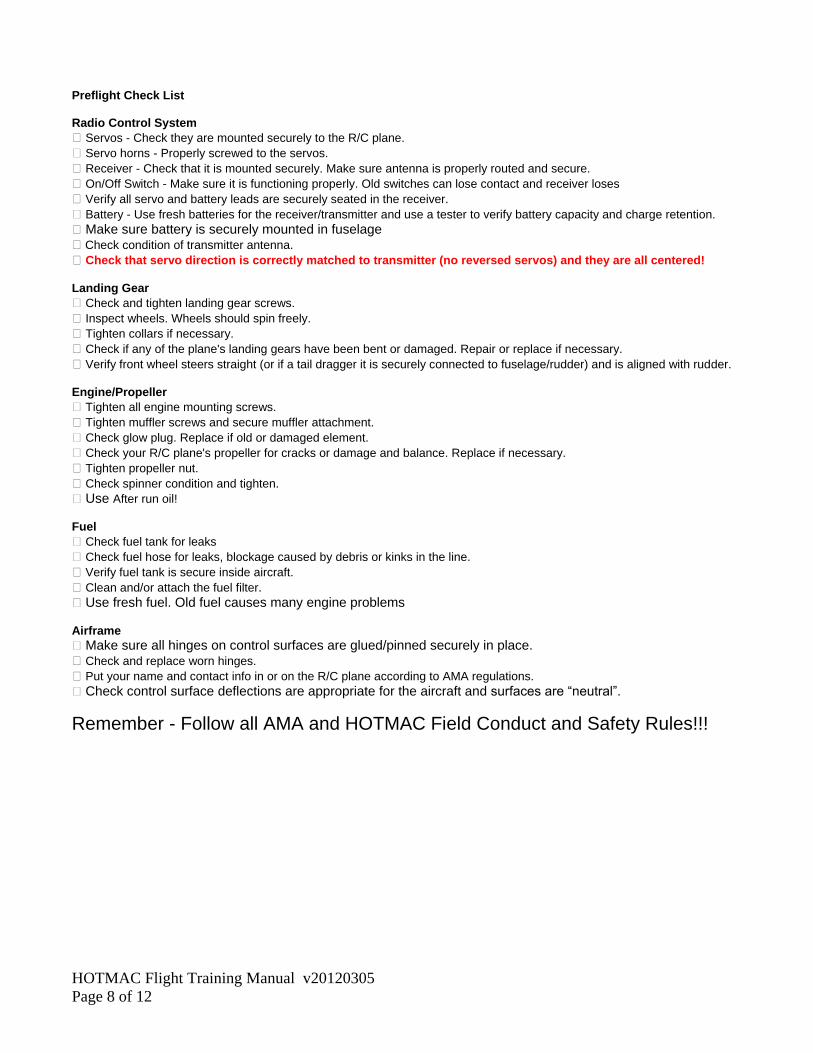
Preflight Check List Radio Control System
� Servos - Check they are mounted securely to the R/C plane.
� Servo horns - Properly screwed to the servos.
� Receiver - Check that it is mounted securely. Make sure antenna is properly routed and secure.
� On/Off Switch - Make sure it is functioning properly. Old switches can lose contact and receiver loses
� Verify all servo and battery leads are securely seated in the receiver.
� Battery - Use fresh batteries for the receiver/transmitter and use a tester to verify battery capacity and charge retention.
� Make sure battery is securely mounted in fuselage � Check condition of transmitter antenna.
� Check that servo direction is correctly matched to transmitter (no reversed servos) and they are all centered!
Landing Gear
� Check and tighten landing gear screws.
� Inspect wheels. Wheels should spin freely.
� Tighten collars if necessary.
� Check if any of the plane's landing gears have been bent or damaged. Repair or replace if necessary.
� Verify front wheel steers straight (or if a tail dragger it is securely connected to fuselage/rudder) and is aligned with rudder. Engine/Propeller
� Tighten all engine mounting screws.
� Tighten muffler screws and secure muffler attachment.
� Check glow plug. Replace if old or damaged element.
� Check your R/C plane's propeller for cracks or damage and balance. Replace if necessary.
� Tighten propeller nut.
� Check spinner condition and tighten.
� Use After run oil!
Fuel
� Check fuel tank for leaks
� Check fuel hose for leaks, blockage caused by debris or kinks in the line.
� Verify fuel tank is secure inside aircraft.
� Clean and/or attach the fuel filter.
� Use fresh fuel. Old fuel causes many engine problems
Airframe
� Make sure all hinges on control surfaces are glued/pinned securely in place. � Check and replace worn hinges.
� Put your name and contact info in or on the R/C plane according to AMA regulations.
� Check control surface deflections are appropriate for the aircraft and surfaces are “neutral”.
Remember - Follow all AMA and HOTMAC Field Conduct and Safety Rules!!!

HOTMAC Flight Training Manual v20120305
Page 9 of 12
HOTMAC
Student Progress Check List Student Name _______________________________ AMA #___________________
Date Description of Levels Practiced, Things Done Well, Things Needing Improvement

HOTMAC Flight Training Manual v20120305
Page 10 of 12
HOTMAC
Student Solo Flight Check List Student Name _______________________________ AMA #___________________ 1. Review Safety Rules and Field Conduct __________ 2. Frequency Control Procedures __________ 3. Assemble and Preflight Aircraft __________ 4. Start engine and tune. __________ 5. Perform Flight Maneuvers
A. Start & Taxi __________ B. Take off & Trim Aircraft __________ C. Rectangle Pattern (hold altitude & heading) __________
Left and Right D. Circles Left/Right __________ E. Horizontal Figure Eight/Reverse __________ F. Touch and Go __________ G. Emergency Landing (Throttle at idle) __________ H. Take off __________ I. Landing __________ J. Taxi Back and Shutdown __________ K. Secure Equipment __________
Instructor: Observe Student for SAFE operation - Was student aware of wind direction and did he/she compensate for it? Was student aware of position of the sun and did he/she avoid flying into its glare? Was student aware of other aircraft in the air and other pilots on the flight line? Was the student confident and in control of his aircraft at all times?
I certify that this student is qualified for unsupervised solo flight ________________________________________________________________ __________________
INSTRUCTOR DATE
________________________________________________________________ __________________
INSTRUCTOR DATE

HOTMAC Flight Training Manual v20120305
Page 11 of 12
Instructors Richard Moll (254) 495-3063
Jerry Hellums (254) 230-6002
Larry Garrett (254) 717-7929
Stephen Bird (281) 352-3964
C.C. Adams (254) 753-8832?

HOTMAC Flight Training Manual v20120305
Page 12 of 12
Preflight Set-ups/Assistance Tommy Armstrong (254) 666-9957
Bobby Hill (254) 662-3246