Healing Candida - intoxicatedonlife.com · Healing Candida with food ... and the work that went...
151
Healing Candida with food Recipes for a Candida Diet Compiled by Paula Miller, Whole Intentions © 2013 | All rights reserved. Healing Candida With Food | healingcandidawithfood.com
Transcript of Healing Candida - intoxicatedonlife.com · Healing Candida with food ... and the work that went...

Healing Candidaw i t h f o o d
Recipes for a Candida Diet
Compiled by Paula Miller, Whole Intentions
© 2013 | All rights reserved.Healing Candida With Food | healingcandidawithfood.com
Table of Contents(each chapter is a clickable link)
Introduction/Our Story...................................................................... 4Copyright........................................................................................... 6
PART ONE: THE PROBLEMWhat is Candida?............................................................................... 8Symptoms of Candida........................................................................ 9What Contributes to Candida?.......................................................... 10What Steps Should I Take?................................................................ 10 How Long to Heal?........................................................................... 11
PART TWO: THE DIETCandida’s Love Affair with Food........................................................ 13Foods to Avoid................................................................................... 14The Three Stage Diet.......................................................................... 16 Stage 1: M.E.V.Y..................................................................... 16 Stage 2: Low-Allergy Foods.................................................... 18 Stage 3: Re-Introduction......................................................... 22 Pep Talk................................................................................... 23
PART THREE: THE RECIPESBreakfast............................................................................................. 25Lunch................................................................................................. 37Soups & Salads................................................................................... 49Breads................................................................................................. 59Dinner................................................................................................ 66Vegetables/Side Dishes....................................................................... 87Desserts.............................................................................................. 95Beverages............................................................................................ 106Snacks................................................................................................. 107Condiments & Dips........................................................................... 115Dressings & Sauces............................................................................ 124Spice Mixes........................................................................................ 129DIY From Scratch............................................................................. 134
Ingredient Resources.......................................................................... 142Index.................................................................................................. 143

Therefore, whether you eat or drink, or whatever you do,
do all to the glory of God. 1 Corinthians 10:31

Introduction/Our Story
Hi, I’m Paula. Our candida journey, like most people’s, started long before we realized it. When my husband Travis and I were first married, we lived off Pasta-Roni, pizza, and liters of pop. It was a disgustingly carefree life.
Fast forward several years and the strange health problems Travis had were escalating. We grew tired of doctors shrugging their shoulders and suggesting it was ‘all in his head’. We began looking at alternative medicine and found a naturopath near us.
Travis was diagnosed with Lyme Disease and candida. Interestingly enough, once we heard “Lyme Disease”, we shoved candida to the back burner. According to our naturopath, everyone had candida. We brushed it aside and focused on the Lyme instead, going so far as to travel across country and spend 6 weeks at an alternative clinic for Lyme in 2008. While there, we learned Travis also had food allergies.
We jumped headfirst into the gluten-free world. Between the clinic and the diet change, Travis’s symptoms eased. . .for awhile anyway. We bought and devoured Nourishing Traditions and it soon became obvious that just eating gluten-free wasn’t the answer. Further research told us that many of the foods we ate, (i.e. carbs, starches, and even natural sugars) were feeding a common and underestimated problem called candida. Light bulb!
We started researching candida and what we discovered surprised us. We had to stop and really consider the foods we put in our mouths. Was this food good for us? Was it encouraging candida growth?
4
For a year we adhered to a candida-diet regime. Sugar and starch-laden dinner plates were exchanged for locally raised beef and steamed broccoli drizzled with butter and sprinkled with thyme (did anyone else just start drooling!).
Though there were a few ups and downs, Travis made progress. The turning point was about nine months later when he walked in the house and stated, “I don’t know what it is, but for the past few days I feel like a cloud has lifted off my brain. I just. . .feel better.”
When Travis and I started the candida diet, the concept of cooking from scratch took on a whole new meaning. I had a hard time finding recipes we could eat and spent hours upon hours browsing the internet and looking through old cookbooks.
I began to compile the recipes I found and in doing so discovered that there were many other candida sufferers looking for safe recipes. Like me, they didn’t have time to spend clicking, searching, and browsing for hours just to find a meal that would please their tastebuds as well as keep their candida at bay.
Healing Candida With Food is a compilation of recipes from my kitchen and the kitchens of families around the world who are finding their way back to healthy, simple foods that are wholly satisfying and completely safe for a candidian to eat. The best part is, the only time it took for you to have these recipes in your virtual hands is the time it took to download. :)
I hope you enjoy these tasty dishes, I hope they give you a nice variety to your palate and menu, and I hope they help totally.obliterate.your.candida.
If you have any questions, you can visit my blog, Whole Intentions, or contact me via email.
His, by Grace alone,
Introduction/Our Story
5

CopyrightAs with any other recipe you find and love, I encourage you to share. However, out of respect for the law, and the work that went into this ebook, I’d ask that you not give away the entire book, but will instead encourage others to purchase their own copy at healingcandidawithfood.com.
This entire publication is protected under the U.S. Copyright Act of 1976 and all other applicable international, federal, state and local laws, and all rights are reserved, including resale rights. You are not allowed to give or sell this book to anyone else without paying for it.
Any trademarks, service marks, product names or named features are assumed to be the property of their respective owners, and are used only for reference. There is no implied endorsement if I use one of these terms. Copyright © 2013 Paula Miller. All rights reserved worldwide.
One last thought. It is copyright infringement (and bad SEO practice) to post an entire recipe verbatim on a website. If you decide to post a recipe from this book, it is imperative that you write your own directions and credit the recipe owner (each recipe owner is listed under the title of each recipe) for the recipe itself. If you have questions about the appropriate use of recipes from this book on your website, please contact me.
cover photo courtesy of Diana @ My Humble Kitchen Sautéed Asparagus with Fresh Tarragon and Lemon http://myhumblekitchen.com
There are affiliate links in this ebook. Clicking on them helps keep this book available.
6

Part One:T H E P R O B L E M“Diagnosis is not the end,
but the beginning of practice.” Martin H. Fischer
7

Have you ever gone to the doctor for a specific issue (or multiple issues) and been told it’s all in your head? Or, have they listened to your concerns only to hand you a prescription for creams, drugs, steroids, and other quick fixes? Perhaps those treatments relieved your discomfort for a while - but has it come back? Have you suddenly realized that several years have gone by and you’re not any better?
Have you ever been on antibiotics? Have you taken the Pill? Do you have recurring vaginal yeast infections? Does your baby have a diaper rash that never goes away? Do you have psoriasis? Does your back, chest, or abdomen get dry red or white patches? Do you have a nail fungus? Do you struggle with jock itch? Does your little one have cradle cap or thrush? Are you moody and irritable? Do you have recurring diarrhea or constipation? Have you been diagnosed with IBS? Do you have a child considered autistic or labelled as ADHD or ADD?
Why all the questions? Because believe it or not, they all have something in common.
Candida.
I’m assuming that since you’re reading this, you probably already have a basic idea of what candida is. If not, let me lay it out for you in my favorite terms: layman’s terms.
Candida albicans is a toxic, yeast-like organism that everyone has in their digestive system. If it’s kept in balance by good bacteria, it’s generally harmless. However, when your immune system becomes weakened, candida mutates, takes over your body, and becomes a serious condition called systematic candidiasis or more commonly, candida. Sounds like a bad sci-fi movie, doesn’t it.
When candida starts to spread out of control, it begins to appear in different ways. Some are not visible: irritation, moodiness, ADHD, stomach and digestive issues, while others are seen quite obviously as skin rashes, thrush, yeast infections (in both men and women), diaper rash, cradle cap, athlete’s foot, jock itch, etc.
Candida is underrated. Like. . .a lot underrated. Not only does it cause an alarming number of symptoms, it’s also a pre-cursor to auto-immune diseases and some would go so far as to say cancer.
WHAT IS CANDIDA?
8

(this is not an exhaustive list - trust me, there’s more)
Most conventional doctors don’t know a lot about candida and often misdiagnose it or wave it aside as a fad. But there are other doctors, naturopaths, and herbalists who believe it is the root of many hard-to-diagnose chronic illnesses. These are the doctors I encourage you to see - those that get to the root of the problem instead of shoveling dirt on top of it.
SYMP TOMS OF CANDIDA“Symptoms, then are in reality nothing butthe cry from suffering organs.”Jean Martin Charcot, translated from French
ACNEANXIETY
ARTHRITISASTHMA
ATHLETES’ FOOTBRAIN FOG
COLD HANDS OR FEETCOLDSCOLIC
CONSTIPATIONCRADLE CAP
CRAVINGS FOR SWEETSCYSTS
DIABETESDIAPER RASH
DIARRHEADIZZINESS
ECZEMAFATIGUE
FOOD SENSITIVITIES OR REACTIONSHAY FEVER
HEADACHESHEART BURN
HEART PALPITATIONS
HYPOGLYCEMIA (LOW BLOOD SUGAR)
HYPOTHYROIDISMINSOMNIA
IRRITABILITYJOINT PAIN
LACK OF APPETITEMIGRAINES
MOOD SWINGSMUSCLE ACHES AND PAIN
PANIC ATTACKSPOOR MEMORY AND
CONCENTRATIONPRE-MENSTRUAL SYNDROME (PMS)
PSORIASISRASHES AND DRY RED OR WHITE
PATCHESRESPIRATORY PROBLEMS
SINUS CONGESTIONTHRUSH (WHITE COATING IN
MOUTH OR VAGINA)UTI (URINARY TRACT INFECTIONS)
9

ANTACIDSANTIBIOTICS
ANTI-INFLAMMATORY DRUGSANTI-ULCER MEDICATIONS
CARBOHYDRATESENVIRONMENTAL TOXINS
FOODS WITH STARCHFOODS WITH YEAST
HORMONE REPLACEMENT THERAPYORAL CONTRACEPTIVES
OVER-THE-COUNTER MEDICINESPRESCRIPTION DRUGS
RADIATIONSMOKINGSTEROIDS
SUGAR IN ALL FORMS
To find out if you have candida, take the Yeast Infection Evaluation Test which you can specialize for men, women, or children.
You’ve already taken the first step. If you’re reading this it’s because you’re ready to become proactive in your battle with candida. Changing your diet is one of THE most important steps you can take.
The other step, and just as important, is to start treating your candida with natural remedies and specific anti-candida supplements rather than creams, drugs, and prescriptions. In fact, those only encourage candida to grow.
A good healing protocol will be 80% diet and 20% supplements.
WHAT CONTRIBU TES TO CANDIDA?
“Sugar is a type of bodily fuel, yes, but your body runs about as well on it as a car would.” V.L. Allineare
“In order to change we must be sick and tired of being sick and tired.”Author Unknown
WHAT STEPS SHOULD I TAKE?
10

The ebook, Candida Crusher, written by naturopath Dr. Eric Bakker, who’s been treating candida for over 20 years, is the most comprehensive, yet easy to understand book I’ve read on candida. It’s filled with case studies, step-by-step instructions on herbal remedies and supplements, and an overall health guide that will tell you how to crush candida once and for all. I highly recommend it.
Disclaimer: Candida Crusher is a medical volume and contains anatomical photos that some readers may find objectionable.
This is a common question and it varies greatly from one source to another and from one person to another. Most often it depends on how long you’ve had candida and its severity. Some sources will say a minimum of four weeks while others say a month for every year you’ve been sick. They all agree however, that if you leave it unchecked, it will only get worse.
I’ve found Dr. Bakker’s estimation to be most accurate. He has seen literally thousands of patients heal from candida and estimates that it can take a few months to a year or more. In my own personal experience it took Travis and I between 9-12 months. Again, it depends on the severity of your candida and how closely you follow a healing protocol.
HOW LONG TO HEAL?
11
Part Two:T H E D I E T
“Preserve and treat food as you would your body, remembering that in
time food will be your body.” B.W. Richardson
12

Candida’s Love Affair with Food
Candida lives off the food you eat.
Let me rephrase that. Candida thrives off the foods you eat.
No, let me restate that – candida exuberantly proliferates off the foods you eat. Get the picture? There are a variety of natural ways to treat candida, and one of the best ways is by what goes in your mouth.
If you don’t feed candida what it needs to survive and multiply. . .it won’t.
I’ve read many candida books, and I’ve seen just as many recommended candida diets. One doctor will tell you that you can eat fruit and grains and it will only take you three weeks to heal. Others tell you that you’re limited to a ridiculously small amount of food choices and that it will take multiple years before you’re better.
Sadly the information about what to eat and what to avoid varies so greatly most candida sufferers are left frustrated and without answers. I know I was!
The 3-stage candida diet plan outlined in this book is based on Candida Crusher. After reading many candida diet versions out there, Dr. Bakker’s is the one that makes the most sense, seems the most doable, and is at the same time encouraging as he shares successful case histories from over two decades of experience. You’ll might want to read it to get a total picture of this diet and why there are 3-stages, but I’ll condense it the best I can here to help get you started.
13
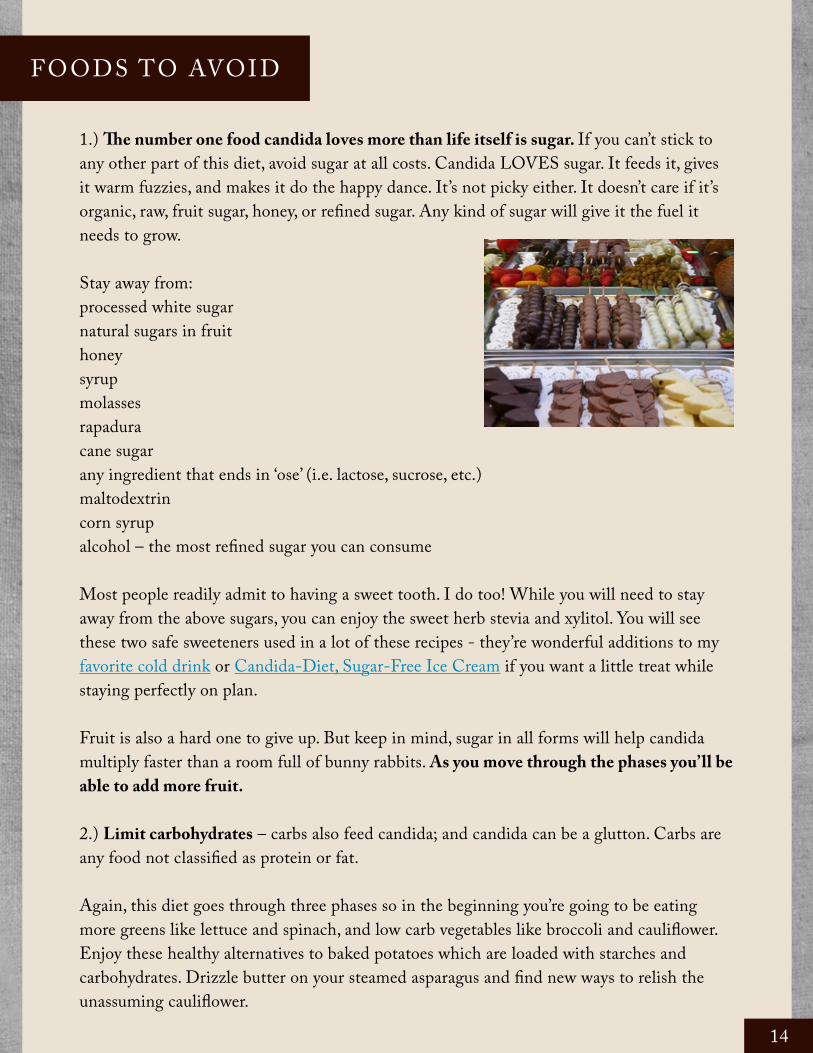
1.) The number one food candida loves more than life itself is sugar. If you can’t stick to any other part of this diet, avoid sugar at all costs. Candida LOVES sugar. It feeds it, gives it warm fuzzies, and makes it do the happy dance. It’s not picky either. It doesn’t care if it’s organic, raw, fruit sugar, honey, or refined sugar. Any kind of sugar will give it the fuel it needs to grow.
Stay away from:processed white sugarnatural sugars in fruithoneysyrupmolassesrapaduracane sugarany ingredient that ends in ‘ose’ (i.e. lactose, sucrose, etc.)maltodextrincorn syrupalcohol – the most refined sugar you can consume
Most people readily admit to having a sweet tooth. I do too! While you will need to stay away from the above sugars, you can enjoy the sweet herb stevia and xylitol. You will see these two safe sweeteners used in a lot of these recipes - they’re wonderful additions to my favorite cold drink or Candida-Diet, Sugar-Free Ice Cream if you want a little treat while staying perfectly on plan.
Fruit is also a hard one to give up. But keep in mind, sugar in all forms will help candida multiply faster than a room full of bunny rabbits. As you move through the phases you’ll be able to add more fruit.
2.) Limit carbohydrates – carbs also feed candida; and candida can be a glutton. Carbs are any food not classified as protein or fat.
Again, this diet goes through three phases so in the beginning you’re going to be eating more greens like lettuce and spinach, and low carb vegetables like broccoli and cauliflower. Enjoy these healthy alternatives to baked potatoes which are loaded with starches and carbohydrates. Drizzle butter on your steamed asparagus and find new ways to relish the unassuming cauliflower.
FOODS TO AVOID
14
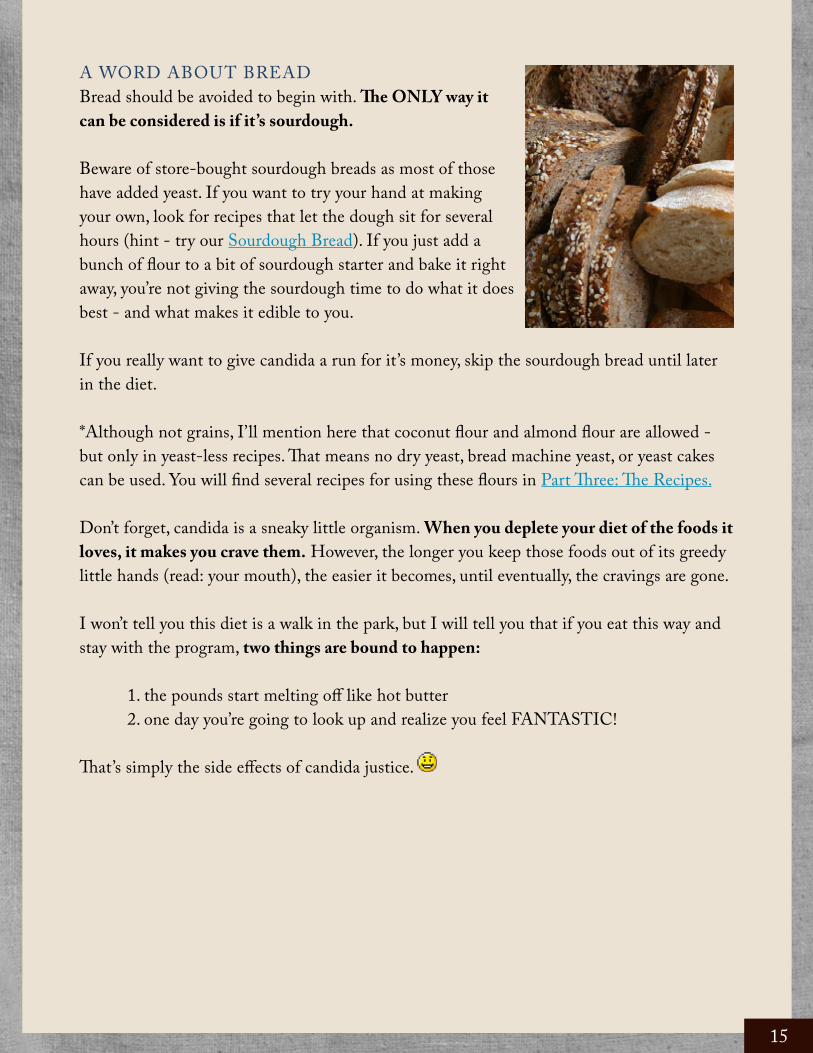
A WORD ABOUT BREADBread should be avoided to begin with. The ONLY way it can be considered is if it’s sourdough. Beware of store-bought sourdough breads as most of those have added yeast. If you want to try your hand at making your own, look for recipes that let the dough sit for several hours (hint - try our Sourdough Bread). If you just add a bunch of flour to a bit of sourdough starter and bake it right away, you’re not giving the sourdough time to do what it does best - and what makes it edible to you.
If you really want to give candida a run for it’s money, skip the sourdough bread until later in the diet.
*Although not grains, I’ll mention here that coconut flour and almond flour are allowed - but only in yeast-less recipes. That means no dry yeast, bread machine yeast, or yeast cakes can be used. You will find several recipes for using these flours in Part Three: The Recipes.
Don’t forget, candida is a sneaky little organism. When you deplete your diet of the foods it loves, it makes you crave them. However, the longer you keep those foods out of its greedy little hands (read: your mouth), the easier it becomes, until eventually, the cravings are gone.
I won’t tell you this diet is a walk in the park, but I will tell you that if you eat this way and stay with the program, two things are bound to happen:
1. the pounds start melting off like hot butter 2. one day you’re going to look up and realize you feel FANTASTIC!
That’s simply the side effects of candida justice.
15

The Three-Stage DietIf you’ve been on a very poor diet, I recommend first doing the 7-day Big Clean-Up plan. It will help your transition to Stage One by decreasing your physical and mental discomfort. You can find the details to the Big Clean-Up in Candida Crusher.
During all three stages I encourage you to purchase organic and/or non-GMO foods if at all possible. Look for meat that doesn’t have antibiotics (some will specify no added antibiotics or growth hormones, but that just means they didn’t add any. If the animals’s feed had it in there, then they have it in their meat and body fat. Antibiotics in any form are one of the biggest contributors to candida.
This stage is the ‘induction’. The acronym stands for
MeatEggsVegetablesYogurt It’s critical that you stick to this stage like the superglue you used to stick your fingers together when you were a kid. (C’mon - we all did that!)
In this stage you’re allowed to eat all meats and seafood, eggs, most all vegetables (except the ones high in starches like potatoes, sweet potato, carrots, pumpkin, peas, corn, and beets) and plain, natural unsweetened acidophilus yogurt. No other dairy is allowed unless it’s sour cream or cream cheese made from the yogurt. No fruits. Stevia and xylitol are the only allowed sweeteners.
You can have naturally fermented foods like kim-chi, sauerkraut, kefir, whey, and Bragg’s apple cider vinegar.
You will need to avoid all store-bought breads (they contain yeasts and sugars), but pure sourdough bread (no commercial yeast added) is okay. If you want to be a little stricter and really kick it into gear, I’d avoid even sourdough breads during these few weeks.
So how do you know if you should follow this stage for two or three weeks? Dr. Bakker says a bare minimum of two weeks, but preferably three. He suggests that when you don’t seem to be improving anymore, that’s when to move to Stage Two. I know, that doesn’t really make sense, but trust me, when you read Stage Two you’ll understand.
STAGE 1: M.E.V.Y. approx. 2-3 weeks
16

STAGE ONE ALLOWED FOODS
FATS ANIMAL FATS PROTEINalmond oil coconut oil
macadamia oil olive oil
palm oil/shorteningpeanut oilsesame oil
sunflower oilwalnut oil
butter or gheefat from meat and fish
lardbacon fat (from bacon with no
added sugar or nitrates)cod liver oil
eggsall meat
all poultryall fish
all shellfish
NUTS & SEEDS FRUIT HERBS & MISCalmonds
Brazil nutscashews (susceptible to mold)
chia seedshazelnuts
macadamia nutswalnuts
flax seed (flax meal)sunflower seedspumpkin seedssesame seedscoconut flouralmond flour
Make sure your nuts are properly soaked and dried for easier
digestion.
lemonslimes
all dried and fresh herbsnutritional yeast
mushrooms - ONLY if soaked overnight in extra virgin olive oil
and fresh garlic.
VEGETABLESasparagusartichoke
beans (green and wax)bok choy
bamboo shootsbroccoli
brussel sproutscabbage
cauliflowercelery
celery root (celeriac)cucumberseggplant
fennelgarlicginger
horseradishjicama
kohlrabileeksokra
onions greens (green leaf lettuce; head lettuce has no nutritional value, spinach, chard, collards, mus-tard greens, kale, radicchio,
endive, etc.)
peppers (all bell peppers)radishes
rutabagasscallions and green onions
sea vegetables (nori, kombu, wakame, etc.)
snow peas, snap peas, pea podsspaghetti squash
sprouts (bean, alfalfa, etc)summer squash
tomatoestomatillos
turnipswatercress
zucchini (courgette)
17
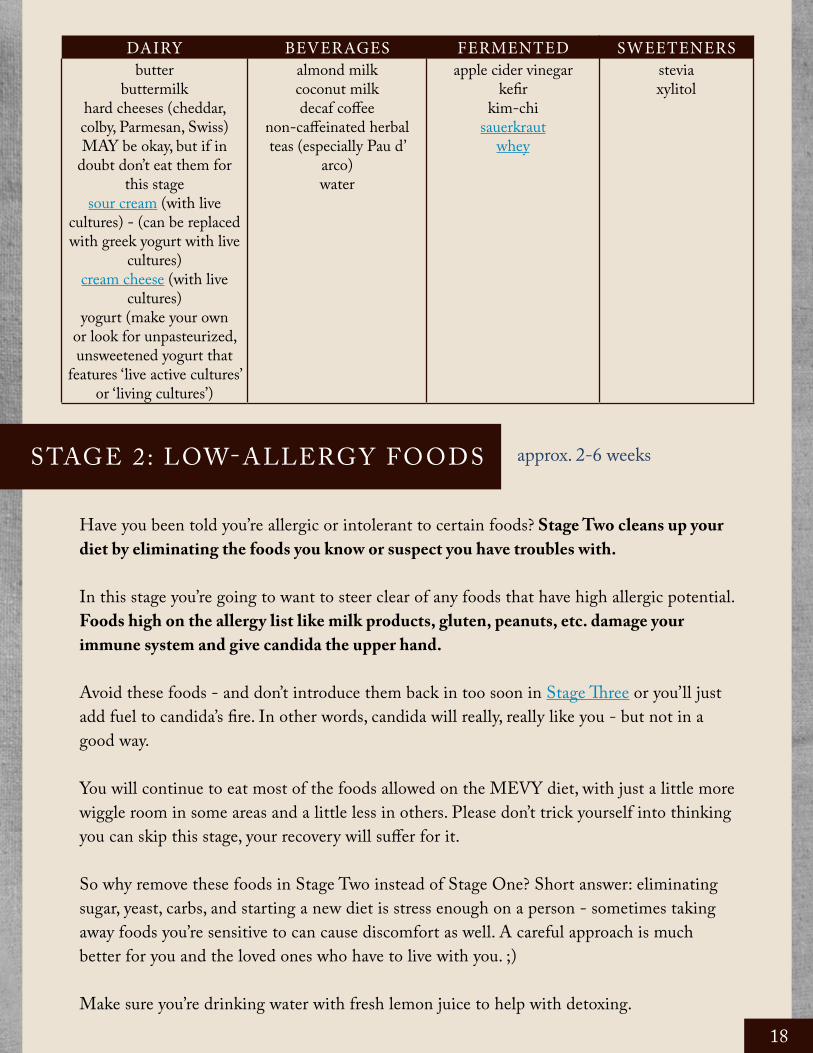
DAIRY BEVERAGES FERMENTED SWEETENERSbutter
buttermilkhard cheeses (cheddar, colby, Parmesan, Swiss) MAY be okay, but if in
doubt don’t eat them for this stage
sour cream (with live cultures) - (can be replaced with greek yogurt with live
cultures)cream cheese (with live
cultures)yogurt (make your own
or look for unpasteurized, unsweetened yogurt that
features ‘live active cultures’ or ‘living cultures’)
almond milkcoconut milkdecaf coffee
non-caffeinated herbal teas (especially Pau d’
arco)water
apple cider vinegar kefir
kim-chisauerkraut
whey
stevia xylitol
STAGE 2: LOW-ALLERGY FOODS approx. 2-6 weeks
Have you been told you’re allergic or intolerant to certain foods? Stage Two cleans up your diet by eliminating the foods you know or suspect you have troubles with.
In this stage you’re going to want to steer clear of any foods that have high allergic potential. Foods high on the allergy list like milk products, gluten, peanuts, etc. damage your immune system and give candida the upper hand.
Avoid these foods - and don’t introduce them back in too soon in Stage Three or you’ll just add fuel to candida’s fire. In other words, candida will really, really like you - but not in a good way.
You will continue to eat most of the foods allowed on the MEVY diet, with just a little more wiggle room in some areas and a little less in others. Please don’t trick yourself into thinking you can skip this stage, your recovery will suffer for it.
So why remove these foods in Stage Two instead of Stage One? Short answer: eliminating sugar, yeast, carbs, and starting a new diet is stress enough on a person - sometimes taking away foods you’re sensitive to can cause discomfort as well. A careful approach is much better for you and the loved ones who have to live with you. ;)
Make sure you’re drinking water with fresh lemon juice to help with detoxing.18
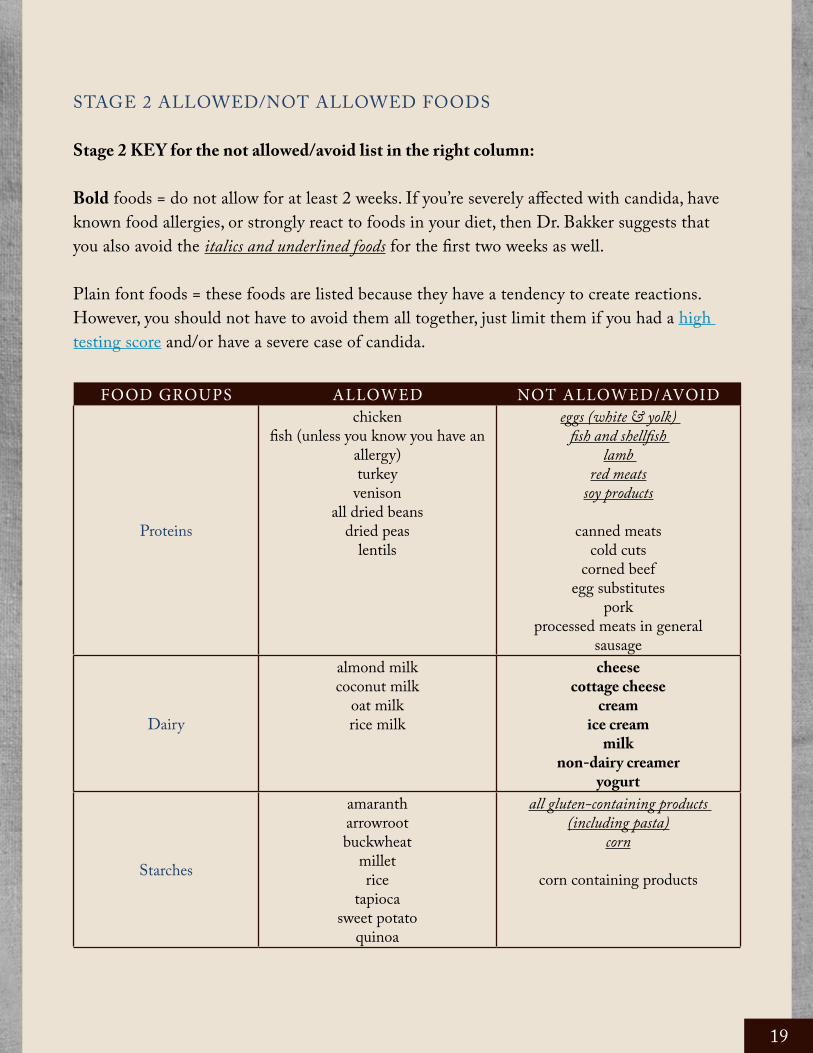
FOOD GROUPS ALLOWED NOT ALLOWED/AVOID
Proteins
chickenfish (unless you know you have an
allergy)turkey
venisonall dried beans
dried peaslentils
eggs (white & yolk) fish and shellfish
lamb red meats
soy products
canned meats cold cuts
corned beef egg substitutes
pork processed meats in general
sausage
Dairy
almond milkcoconut milk
oat milkrice milk
cheesecottage cheese
creamice cream
milknon-dairy creamer
yogurt
Starches
amarantharrowrootbuckwheat
milletrice
tapiocasweet potato
quinoa
all gluten-containing products (including pasta)
corn
corn containing products
STAGE 2 ALLOWED/NOT ALLOWED FOODS
Stage 2 KEY for the not allowed/avoid list in the right column:
Bold foods = do not allow for at least 2 weeks. If you’re severely affected with candida, have known food allergies, or strongly react to foods in your diet, then Dr. Bakker suggests that you also avoid the italics and underlined foods for the first two weeks as well.
Plain font foods = these foods are listed because they have a tendency to create reactions. However, you should not have to avoid them all together, just limit them if you had a high testing score and/or have a severe case of candida.
19
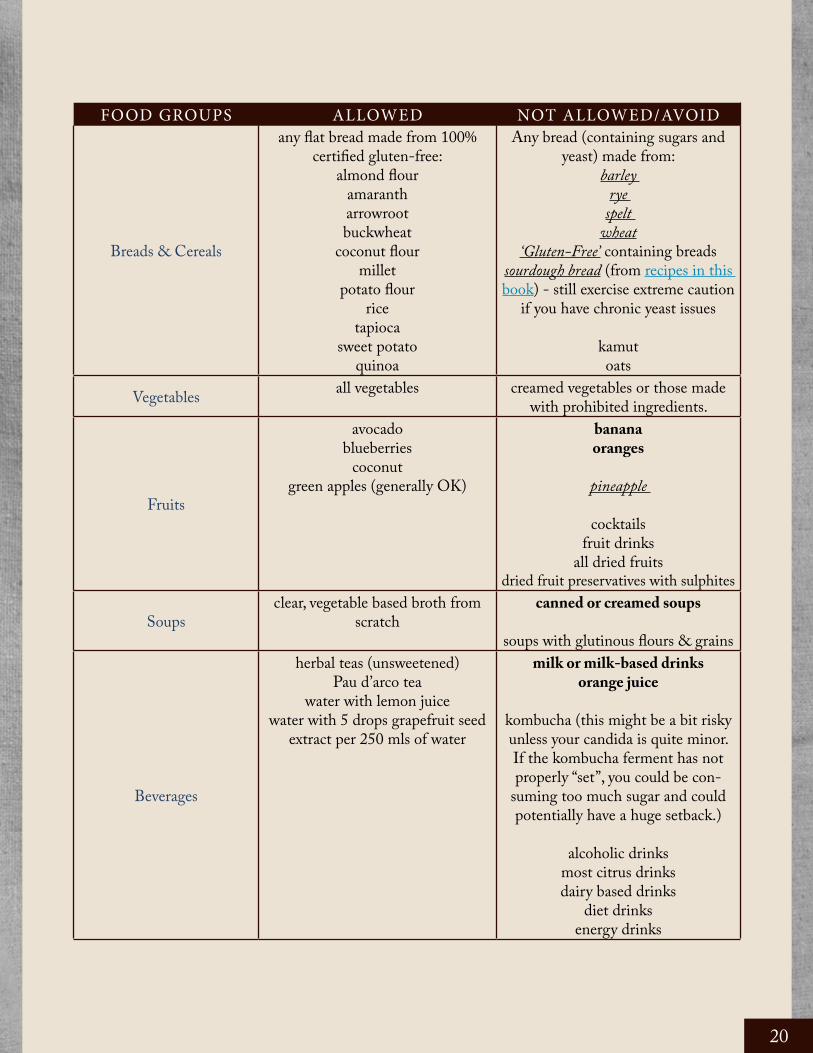
FOOD GROUPS ALLOWED NOT ALLOWED/AVOID
Breads & Cereals
any flat bread made from 100% certified gluten-free:
almond flouramarantharrowrootbuckwheat
coconut flourmillet
potato flourrice
tapiocasweet potato
quinoa
Any bread (containing sugars and yeast) made from:
barley rye
spelt wheat
‘Gluten-Free’ containing breadssourdough bread (from recipes in this book) - still exercise extreme caution
if you have chronic yeast issues
kamutoats
Vegetables all vegetables creamed vegetables or those made with prohibited ingredients.
Fruits
avocadoblueberries
coconutgreen apples (generally OK)
bananaoranges
pineapple
cocktailsfruit drinks
all dried fruitsdried fruit preservatives with sulphites
Soupsclear, vegetable based broth from
scratchcanned or creamed soups
soups with glutinous flours & grains
Beverages
herbal teas (unsweetened)Pau d’arco tea
water with lemon juicewater with 5 drops grapefruit seed
extract per 250 mls of water
milk or milk-based drinksorange juice
kombucha (this might be a bit risky unless your candida is quite minor. If the kombucha ferment has not properly “set”, you could be con-
suming too much sugar and could potentially have a huge setback.)
alcoholic drinksmost citrus drinksdairy based drinks
diet drinksenergy drinks
20

FOOD GROUPS ALLOWED NOT ALLOWED/AVOID
Oils & Fats
cold pressed oils, preferably in dark amber bottles:
coconut oil grape seed oil
linseed oilolive oil
oregano oilpalm oil/shortening
pumpkin oil sesame oil
sunflower oilwalnut oil
butter deep-fried foods
margarinessalad dressingsshortening/lardspreads (sugars)
vegetable oil blends
Nuts & Seeds
almondsbrazil nutschia seedshazelnutswalnutspecans
flax seed (flax meal)pumpkin seedssesame seeds
sunflowersquash seeds
nut/seed butter made with allowed ingredients - watch those sugars.
peanuts peanut butter
cacao powder
cashew nuts pistachios
hazelnut spread (sugar)
Sweeteners & Treats
steviaxylitol
in small amounts:brown rice syrupfruit sweeteners
chocolate
raw cacao powderall types of sugar:
brown sugarcane sugar
caster corn syrupDemerara dextrose fructoseglucose honeyicingmalt
maple syrupmolasses
white sugar
Herbs & Misc.
all dried and fresh herbs
nutritional yeast
mushrooms - ONLY if soaked overnight in extra virgin olive oil
and fresh garlic.21
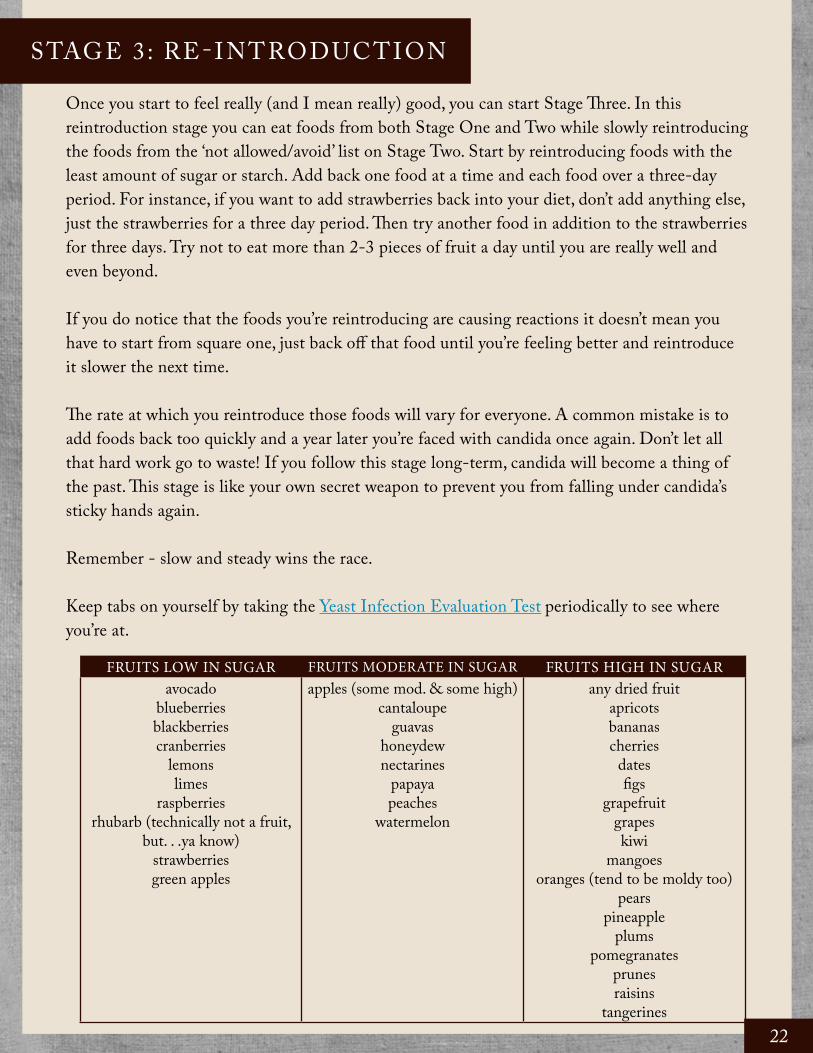
STAGE 3: RE- INTRODUCTIONOnce you start to feel really (and I mean really) good, you can start Stage Three. In this reintroduction stage you can eat foods from both Stage One and Two while slowly reintroducing the foods from the ‘not allowed/avoid’ list on Stage Two. Start by reintroducing foods with the least amount of sugar or starch. Add back one food at a time and each food over a three-day period. For instance, if you want to add strawberries back into your diet, don’t add anything else, just the strawberries for a three day period. Then try another food in addition to the strawberries for three days. Try not to eat more than 2-3 pieces of fruit a day until you are really well and even beyond.
If you do notice that the foods you’re reintroducing are causing reactions it doesn’t mean you have to start from square one, just back off that food until you’re feeling better and reintroduce it slower the next time.
The rate at which you reintroduce those foods will vary for everyone. A common mistake is to add foods back too quickly and a year later you’re faced with candida once again. Don’t let all that hard work go to waste! If you follow this stage long-term, candida will become a thing of the past. This stage is like your own secret weapon to prevent you from falling under candida’s sticky hands again.
Remember - slow and steady wins the race.
Keep tabs on yourself by taking the Yeast Infection Evaluation Test periodically to see where you’re at.
FRUITS LOW IN SUGAR FRUITS MODERATE IN SUGAR FRUITS HIGH IN SUGARavocado
blueberriesblackberriescranberries
lemonslimes
raspberriesrhubarb (technically not a fruit,
but. . .ya know)strawberriesgreen apples
apples (some mod. & some high) cantaloupe
guavashoneydewnectarines
papayapeaches
watermelon
any dried fruitapricotsbananascherries
datesfigs
grapefruitgrapeskiwi
mangoesoranges (tend to be moldy too)
pearspineapple
plumspomegranates
prunesraisins
tangerines22
Pep TalkOkay guys, before we go any further, I just want to take a few minutes to chat.
First of all, I want to emphasize that this diet is not a one-size-fits-all cure for candida. Foods that one person can handle in a specific stage, doesn’t mean everyone can.
For example, in Stage One sourdough bread is allowed. Some people will notice when they eat it their symptoms worsen, so for them, avoiding it for a longer period of time is wise. Others, who don’t have the same severity of candida, aren’t going to notice anything - and vise versa.
No diet, not even this one, is going to allow everyone with candida to eat all the same foods/stages at the same times. Listen to your body; how does it react to a certain food? How do you feel? Do your symptoms increase? Eventually you’ll know if you should be eating that food (even if it’s allowed in that particular stage), or if you should avoid it longer.
Don’t look at the food lists and say, “this is all I can eat?!” Look at it and say, “Wow, I can eat all of this!” Because trust me, someone, somewhere has had it worse than you. ;)
Food is important; leave no doubt in your mind, but I want to state again that of equal importance is the treating of candida with natural herbs and supplements. Don’t neglect either aspect. If you do, the road to healing will take much longer.
Remember that candida is like anything else: if you want better grades in school, a better attitude at work, a cleaner house, a happier marriage, or a candida-free body - then you have to do something about it or it’s not going to change.
Your commitment to any candida program will depend solely on that - your commitment. No one can force feed you the right foods or remind you to take your supplements. The only way anything makes it into your mouth is by the bend of your own elbow. :)
With that being said, enjoy this diet. These recipes are family-tested and approved. Enjoy them. Experiment with ingredients you’ve never tried. Have fun learning to cook in new ways. Appreciate ingredients that meld together to make something healing and delicious at the same time. Bon appetit!
23
Part Three:T H E R E C I P E S
“You can do a lot for your diet by eliminating foods that have mascots.”
Ted Spiker
24

Breakfast
EGG WRAPSby Paula @ Whole Intentions http://wholeintentions.com
Allowed on:Stage 1Stage 2 - *notes belowStage 3
The better way to wrap, snack, and indulge while staying on plan.
D I R E C T I O N SPreheat cast iron or non-stick frying pan and grease generously with coconut oil.Scramble several eggs together, depending on how many wraps you want and pour about 1/3 c. onto pan.Let cook several minutes and then flip. Repeat with remaining eggs.These can be cooled on a plate and then frozen for quick, healthy wraps.Fill with ingredients of your choice.
Note: Fill with sausage links (from Make-Ahead Baked Sausage) and onions and green peppers as pictured, or use in place of a taco shell or burrito. Try making them smaller and use as a hamburger bun or to make a cold chicken breast sandwich with Easy No-Fail Mayo.
I N G R E D I E N T Scoconut oileggs*
*For Stage 2:avoid eggs for the first two weeks.
t
t
t
t
t
t
tt
25

MAKE-AHEAD BAKED SAUSAGEby Trisha @ Intoxicated On Life http://intoxicatedonlife.com
Allowed on:Stage 1Stage 2 - *notes belowStage 3
D I R E C T I O N SLine a cookie sheet with parchment paper and squish the sausage into a big, thin rectangle (about 1/4-inch thick). Bake at 350 degrees and let it cook until done. Cut into nice breakfast-sausage-sized squares or links with a pizza cutter.
I N G R E D I E N T S2 lbs. sausage* (if you don’t have a good source of sausage with no added junk, use ground beef* with Homemade Sausage Seasoning).
*For Stage 2:avoid red meat for the first two weeks; you can replace with ground turkey.
t
t
t
t
t
POACHED EGGS IN SALSAby Paula @ Whole Intentions http://wholeintentions.com
Allowed on:Stage 1 - *notes belowStage 2 - *notes belowStage 3
A delicious and quick way to start your morning with a little pizzaz.
D I R E C T I O N SHeat your frying pan on medium heat and pour homemade salsa or marinara sauce into pan. Let it come to a good simmer and then crack a couple of eggs into it.Place a lid or plate on your pan and let the eggs cook until done to your likeness.You can serve the eggs by themselves, on approved toast, or over cooked millet*.
I N G R E D I E N T Seggs*salsa (or marinara sauce)
*For Stage 1:although *technically* sourdough recipes are allowed, it might be best to avoid them.no grains are allowed.
*For Stage 2:avoid eggs for the first two weeks. avoid sourdough recipes for the first two weeks.
t
t
t
t
t
t
t
t
t
26

CRUSTLESS SAUSAGE AND SPINACH QUICHEby Diana @ My Humble Kitchenhttp://myhumblekitchen.com
Allowed on:Stage 1 - *notes belowStage 2 - *notes belowStage 3
A crustless quiche is easy to make and you can create any sort of rendition according to what you have on hand.
D I R E C T I O N SPre-heat oven to 350 degrees.Heat 2 Tbs. coconut oil in a skillet or cast iron pan. Add the onion and sauté until transparent. Add the ground pork, oregano, chili powder, garlic, 1/2 tsp. salt, 1/4 tsp. pepper and sauté until the pork has cooked through.Add the Spanish chorizo sausage and sauté for an additional 5 minutes.Add 2 good handfuls of spinach and toss for an additional 3-5 minutes or until the spinach has wilted through. Set aside.In a large bowl, whisk 5 eggs. Then, add the cheese and contents of the sausage and spinach mixture. Add salt and pepper and mix well.Pour the egg and sausage mixture into a well greased pie pan and bake at 350 degrees for 30 minutes or until cooked through.
I N G R E D I E N T S1 onion, chopped1 lb. pastured ground pork*1 Tbs. dried oregano1/2 tsp. chili powder (to taste)2 garlic cloves, minced or pressed1/2 c. chopped Spanish chorizo sausage* (or ground beef* with Homemade Sausage Seasoning)1 c. shredded Pecorino Romano cheese* (or any other hard, aged cheese such as parmesan)5 farm fresh eggs*2 good handfuls of fresh spinachcoconut oilceltic sea salt and pepper to taste
*For Stage 1:hard cheeses only, but be cautious.
*For Stage 2:avoid red meat and eggs for the first two weeks.no dairy is allowed for the first two weeks; omit cheese
t
t
t
t
t
t
t
t
t
t
t
t
t
t
t
t
t
t
t
t
t
27

EASY BLT FRITTATAby Katie @ This Chick Cookshttp://thischickcooks.net
Allowed on:Stage 1 - *notes belowStage 2 - *notes belowStage 3
D I R E C T I O N SPreheat broiler.Cut bacon into small bits and brown over medium-high heat for 10 minutes, or until crisp. Drain fat.Reduce heat, add greens and cook for a few minutes, until wilted.Add egg, milk, salt, pepper and basil and continue cooking over medium. Place tomatoes on top. Occasionally lift edges to allow uncooked egg to run under. Cook until only the center is runny.Broil for 6-8 minutes or until egg is cooked through.
I N G R E D I E N T S4 slices nitrate-free bacon*1 c. of greens of your choice (kale, spinach, chard etc...)1 sliced tomato4 eggs*2 tsp. milk* 1/2 tsp. celtic sea salt1/4 tsp. pepper1 Tbs. fresh basil or 1 tsp. dried basiladditional basil for garnish if desired
*For Stage 1:no dairy allowed; use almond or coconut milk.
*For Stage 2:avoid red meat and eggs for the first two weeks.no dairy allowed for the first two weeks; use almond or coconut milk.
t
t
t
t
t
t
t
t
t
t
t
t
t
t
t
t
t
28

SOAKED BUCKWHEAT & YOGURT PANCAKESby Paula @ Whole Intentions http://wholeintentions.com
Allowed on:Stage 2 - *notes belowStage 3
D I R E C T I O N SCombine the yogurt, water, eggs, and honey with the buckwheat, millet, arrowroot, and tapioca flours. Refrigerate for 6-24 hours. The next morning, add the rest of the ingredients and stir until fully mixed.Spoon batter onto hot griddle. Let each pancake bake until bubbles form and pop and the edges begin to look dry. Flip with spatula and cook the other side until nicely browned.Serve with Homemade Maple Syrup.
Note: Because the flours are soaked, these may take a bit longer to brown.
I N G R E D I E N T S2 c. yogurt (with live cultures)* 2 c. water4 eggs*1/4 c. raw honey* OR 3 Tbs. xylitol OR stevia to taste1 c. buckwheat flour1 c. millet flour1 c. arrowroot1 c. tapioca flour
IN THE MORNING, ADD2 tsp. celtic sea salt4 tsp. baking powder2 tsp. baking soda1/2 c. coconut oil
*For Stage 2:no dairy is allowed for the first two weeks; replace the yogurt with coconut or almond milk and 1 Tbs. lemon juice (for soaking benefits). avoid eggs for the first two weeks and replace with Powdered Egg Replacer according to directions.avoid honey for the first two weeks and replace with xylitol or stevia.
t
t
t
t
t
t
t
t
t
t
t
t
t
t
t
t
t
t
t
29

EASY SOURDOUGH PANCAKESby Paula @ Whole Intentions http://wholeintentions.com
Allowed on:Stage 1 - *notes belowStage 2 - *notes belowStage 3
This makes a large enough batch to feed the kids’ bottomless pits and still have some to freeze for quick leftovers later, but you can easily halve or quarter this recipe if needed.
D I R E C T I O N SBring your pan or griddle to a nice hot temperature. Drop some coconut oil onto the pan and let it melt.Combine the starter and the eggs first. Depending on how thick this is, begin adding yogurt until it comes to the batter consistency your family prefers.Add the rest of the ingredients and whisk together. I just use a 1/2 cup measuring cup to pour it onto the griddles, but if you want to be more sophisticated about it, be my guest. ;)Pour batter onto griddle and flip just as edges start to get a dry appearance to them.Serve with Homemade Maple Syrup.
I N G R E D I E N T Scoconut oil8 Tbs. (more or less) Homemade Powdered Sugar OR stevia to taste6 c. sourdough starter*2 eggs*1 c. yogurt* (with live cultures)2 Tbs. cinnamon2 tsp. baking soda2 tsp. baking powder
*For Stage 1:although *technically* sourdough recipes are allowed, it might be best to avoid them.
*For Stage 2:avoid sourdough recipes for the first two weeks. avoid eggs for the first two weeks and replace with Powdered Egg Replacer according to directions. no dairy is allowed for the first two weeks; replace the yogurt with coconut or almond milk and 1 Tbsp. lemon juice (for soaking benefits).
t
t
t
t
t
t
t
t
t
t
t
t
t
t
t
t
t
30

OVEN BAKED COCONUT PANCAKESby Paula @ Whole Intentions http://wholeintentions.com
Allowed on:Stage 1Stage 2 - *notes belowStage 3
D I R E C T I O N SPreheat oven to 425 degrees.In a bowl whisk eggs, milk, and vanilla together. Add coconut flour, salt, and cinnamon and whisk well.Pour into greased 9x13 pan and bake for 20-25 min. Pancake will puff up in the oven and deflate when it’s taken out.Serve with Homemade Maple Syrup.
EGG-LESS FRENCH TOASTby Paula @ Whole Intentions http://wholeintentions.com
Allowed on:Stage 1 - *notes belowStage 2 - *notes belowStage 3
D I R E C T I O N SPreheat griddle to medium heat.In a shallow bowl combine milk, stevia, cinnamon, vanilla, and salt and stir. Dip both sides of each bread slice into the mixture.Melt butter on the griddle or skillet. Place bread on heated surface and cook each side to a light golden brown.Serve immediately.
I N G R E D I E N T S
I N G R E D I E N T S
8 eggs*1 c. coconut milk (or almond milk)2 tsp. vanilla extract (or 1 tsp. almond extract)6 Tbs. coconut flour1/2 tsp. celtic sea salt2 tsp. cinnamon, optional (can use pumpkin pie spice for a nice twist)
1/2 c. coconut or almond milkstevia to tastedash of cinnamon1/2 tsp. vanilla extract1 pinch celtic sea saltapproved bread*
*For Stage 2:avoid eggs for the first two weeks. Because eggs are crucial to this recipe, you will not be able to replace them.
*For Stage 1:although *technically* sourdough recipes are allowed, it might be best to avoid them. Try using Coconut Flour Bread.
*For Stage 2:avoid sourdough recipes for the first two weeks. Try using Coconut Flour Bread.
t
t
t
t
t
t
t
t
t
t
t
t
t
t
t
t
t
t
t
t
t
t
t
t
t
31

BAKED SOURDOUGH FRENCH TOASTby Paula @ Whole Intentions http://wholeintentions.com
Allowed on:Stage 1 - *notes belowStage 2 - *notes belowStage 3
D I R E C T I O N SGrease a 9×13 pan.Lay your slices of sourdough bread flat in the pan.Combine milk, eggs, honey (or stevia), vanilla, and cinnamon. Pour the mixture over bread and refrigerate overnight.The next morning, nearly all the liquid will be soaked into the bread. Sprinkle on a handful of blueberries or other fruit, if desired.Bake at 350 degrees for 40 minutes.Serve with Homemade Maple Syrup.
I N G R E D I E N T S10 slices of sourdough bread*1 1/2 c. milk*4 eggs* (these can not be replaced)2 Tbs. xylitol OR stevia to taste1 tsp. vanilla3/4 tsp. cinnamon1/2 c. blueberries*, optional
*For Stage 1:although *technically* sourdough recipes are allowed, it might be best to avoid them. Try using Coconut Flour Bread.no dairy allowed; use coconut or almond milk. blueberries are not allowed.
*For Stage 2:avoid sourdough recipes for the first two weeks. Try using Coconut Flour Bread.no dairy is allowed for the first two weeks; use coconut or almond milk. avoid eggs for the first two weeks. Because eggs are crucial to this recipe, you will not be able to replace them.
t
t
t
t
t
t
t
t
t
t
t
t
t
t
t
t
t
t
t
32

MUESLI PORRIDGEby Paula @ Whole Intentions http://wholeintentions.com
Allowed on:Stage 2 - *notes belowStage 3
D I R E C T I O N SBefore you go to bed, roll your oats groats if needed or use old-fashioned oats.Combine water, homemade yogurt, oats, millet, and buckwheat in a glass bowl. Cover with a lid and let sit out overnight at room temperature. In the morning, pour the mixture into a large, heavy sauce pan.Add the coconut flakes, nuts, and milk.Heat to a boil, then reduce to a simmer and stir until thick and creamy.
CREAM OF MILLETby Paula @ Whole Intentions http://wholeintentions.com
Allowed on:Stage 2 - *notes belowStage 3
D I R E C T I O N SBring water and salt to a boil, (or if using milk, barely bring to a boil).Gradually add grain of choice, stirring constantly with wire whisk until well-blended.Return to good simmer. Reduce the heat to low and let simmer for about 2-3 minutes or until thickened to your preference. Keep stirring frequently, especially if using milk.If desired, sprinkle with cinnamon and stevia.
I N G R E D I E N T S
I N G R E D I E N T S
3 c. warm water1/2 c. homemade yogurt*1 1/2 c. oat groats, rolled (or old-fashioned oatmeal)1/2 c. millet1/2 c. buckwheat1/2 c. coconut flakes, unsweetened1/2 c. soaked and dried nuts, chopped3 c. coconut or almond milk*xylitol or stevia to tastecinnamon to taste, optional
1 1/4 c. water or milk*1/8 tsp. celtic sea salt3 Tbs. your choice of coarsely ground millet, rice, buckwheat, amaranth, or quinoacinnamonxylitol (added while it ’s cooking so it will dissolve) or stevia to taste
*For Stage 2:no dairy is allowed for the first two weeks; replace the yogurt with 1 Tbsp. lemon juice (for soaking benefits) plus enough coconut or almond milk to make 1/2 c. Continue to use the 3 c. of milk listed later in the recipe.
*For Stage 2:no dairy is allowed for the first two weeks; if using milk use coconut or almond milk.
t
t
t
t
t
t
t
t
t
t
t
t
t
t
t
t
t
t
t
t
t
t
t
t
t
t
33

BREAKFAST PIZZAby Paula @ Whole Intentions http://wholeintentions.com
Allowed on:Stage 1 - *notes belowStage 2 - *notes belowStage 3
D I R E C T I O N SPreheat oven to 350 degrees.Prepare crust according to recipe.Spoon scrambled eggs over crust, followed by meat of choice, and other toppings.Bake for 12-15 minutes until toppings are fully heated.
I N G R E D I E N T Spizza crust (this can be Sourdough Pizza Crust*, Gluten Free Pizza Crust* or Egg Wraps*)scrambled eggs* Make-Ahead Baked Sausage* or nitrate-free bacon*onionsgreen pepperscheese*, optional
*For Stage 1:although *technically* sourdough recipes are allowed, it might be best to avoid them. Try using the Egg Wraps instead.hard cheeses only, but be cautious.
*For Stage 2:Sourdough Pizza Crust and Egg Wraps should be avoided for the first two weeks. Try using Gluten Free Pizza Crust instead.avoid red meat and eggs for the first two weeks.no dairy is allowed for the first two weeks; omit cheese.
t
t
t
t
t
t
t
t
t
t
t
t
t
t
t
34

SOURDOUGH ZUCCHINI MUFFINSby Paula @ Whole Intentions http://wholeintentions.com
Allowed on:Stage 1 - *notes belowStage 2 - *notes belowStage 3
Try these on-the-go muffins on the way to work and in your children’s lunch pails.
D I R E C T I O N SAbout 8-12 hours before you plan to make the muffins you’ll want to feed your starter with fresh-milled grain and water. In this recipe we aren’t adding more flour, just more wet ingredients so you’ll want to cut back a little on the amount of water you feed it.Preheat the oven to 425 degrees. Generously spray muffin tins or use muffin papers.Combine the sourdough, zucchini, and the other wet ingredients and mix thoroughly.Combine the dry ingredients in a separate bowl and then add the dry ingredients to the wet ingredients. Mix well.Fill each muffin cup nearly to the top.Bake for 20 minutes.
I N G R E D I E N T S4 c. sourdough starter*2 c. frozen zucchini, thawed and squeezed dry2 eggs*1/2 c. coconut oil2 tsp. pure vanilla extract2 tsp. baking soda1/2 tsp. celtic sea salt1/2 c. + 1 Tbs. Homemade Powdered Sugar OR stevia, to taste1 Tbs. cinnamon
*For Stage 1:although *technically* sourdough recipes are allowed, it might be best to avoid them.
*For Stage 2:avoid sourdough recipes for the first two weeks. avoid eggs for the first two weeks and replace with Powdered Egg Replacer according to directions.
t
t
t
t
t
t
t
t
t
t
t
t
t
t
t
t
t
t
t
35

COCONUT ALMOND MUFFINSby Paula @ Whole Intentions http://wholeintentions.com
Allowed on:Stage 2 - *notes belowStage 3
D I R E C T I O N SPreheat oven to 400 degrees.Liberally grease muffin pan with butter or coconut oil.If using xylitol, dissolve it in the coconut oil first, then combine with eggs, milk, salt, and vanilla and almond extracts.If using stevia, you can just combine all them all at the same time.Combine coconut flour and baking powder. Whisk dry ingredients into wet ingredients. Fold in coconut flakes and almonds. Fill muffin cups and bake for 15 minutes.
I N G R E D I E N T S6 eggs*1/4 c. coconut oil, melted1/4 c. coconut milk (or almond milk)3 Tbs. xylitol (dissolved first in coconut oil) OR 50 drops liquid stevia1/2 tsp. celtic sea salt1/2 tsp. vanilla extract1/4 tsp. almond extract1/2 c. coconut flour1/2 tsp. baking powder1/2 c. unsweetened coconut flakes2/3 c. chopped almonds (or other nut of choice)
*For Stage 2:avoid eggs for the first two weeks. Because eggs are crucial to this recipe, you will not be able to replace them.
t
t
t
t
t
t
t
t
t
t
t
t
t
t
t
t
t
t
t
36

Lunch
SPICY FISH FILETSby Marillyn @ Just Making Noisehttp://just-making-noise.blogspot.com
Allowed on:Stage 1Stage 2Stage 3
Tender, but with a slightly crispy edge. The sauce is sweet, salty, and spicy in just the right balance.
D I R E C T I O N SStart your grill. Mix ingredients of ginger sauce together and set aside.Cut the foil and line them with parchment paper of same size. Make shallow “boats”. Place a portion of fish on each “boat”. Top fish with ginger sauce and onions. Fold foil, with parchment paper, together at the center, then roll the ends in a packet. Cook packets on the grill for about 15-20 minutes (depending on how hot your grill is). It will be ready when it starts to get bubbly.
I N G R E D I E N T Sfish filets of choicesliced onions
GINGER SAUCEginger, finely choppedgarlic, finely choppedfermented soy sauce coconut oilsesame oilfresh lime juicedried chile peppersfresh ground black pepper
t
t
t
t
t
t
t
t
t
t
t
t
t
t
t
37

TUNA MELTSby Kristen @ Smithspirationshttp://smithspirations.com
Allowed on:Stage 1 - *see notes belowStage 2 - *see notes belowStage 3
Nutritious, tasty, and ready in minutes, these are a great solution to the dinner question when time is short and bellies are empty.
D I R E C T I O N SMix tuna, sour cream, and herbs together in a bowl. Add salt and pepper to taste if needed.Spread on bread slices. Top with a tomato slice or 2 T. salsa if desired. The grown-ups at our house go for the tomato or salsa option, and the littles usually skip it.Top each piece of bread with a slice of cheese.Place on a wire rack in a pan and bake at 400 for about 10-15 minutes, until the cheese is melted and lightly browned.
I N G R E D I E N T S2 cans tuna in extra virgin olive oil or plain water (try to avoid the varieties canned in broth or vegetable oil, as these both contain soy)1/4 c. sour cream* (Daisy is a good brand as it ’s just cultured cream)herbs to taste (1/4 c. fresh or 1 tsp. dried) fresh chives is a favorite of ours, but dried thyme makes a good addition too.8 slices sourdough bread*cheese slices* (hard cheeses like Cheddar are best)tomato slices or prepared salsa
t
t
t
t
t
t
t
t
t
*For Stage 1:only sour cream with live cultures is allowed or replace with Easy No-Fail Mayo or Eggless Mayo. Sourdough Bread is *technically* allowed, but it might be best if you can use Coconut Flour Bread instead.hard cheeses only, but be cautious.
*For Stage 2:no dairy is allowed for the first two weeks; replace the sour cream with Eggless Mayo and omit cheese.avoid sourdough bread for the first two weeks and use Coconut Flour Bread instead.
t
t
t
t
38

MEXI STYLE SALMON CAKESby Diana @ My Humble Kitchenhttp://myhumblekitchen.com
Allowed on:Stage 1 - *notes belowStage 2 - *notes belowStage 3
This is not your traditional salmon cake, but one that any member in your household will enjoy.
D I R E C T I O N SIn a large bowl, add the salmon and flake apart.Add the green onion, cilantro, garlic, bread crumbs, salt, cumin, lemon juice, and combine.Add the eggs and incorporate into the salmon mixture.With your hands, grab a handful of the mixture and form into patties. Press together well in your hands as the mixture may seem a bit crumbly.In a cast iron skillet or pan, add about 1” of coconut oil.Gradually, bring oil to cooking temperature over medium heat.Once the oil is hot, working in batches, cook the patties until browned on both sides. (About 3-4 minutes per side.)
I N G R E D I E N T S2 cans wild caught salmon, drained 1/2 c. diced green onion1/4 c. “packed” cilantro, chopped2 garlic cloves, pressed or minced1 1/2 c. bread crumbs*1/2 tsp. celtic sea salt1/2 tsp. cuminjuice of half a lemon2 eggs*, whiskedcoconut oil
t
t
t
t
t
t
t
t
t
t
t
t
t
t
t
t
t
*For Stage 1:although Sourdough Bread crumbs are *technically* allowed, it ’s best to avoid them if you can and use Coconut Flour Bread crumbs instead.
*For Stage 2:avoid eggs for the first two weeks.avoid sourdough bread crumbs for the first two weeks and use Coconut Flour Bread instead.
t
t
t
39

PAN ROASTED FISH WITH TOMATO CONFITby Lydia @ Divine Health From the Inside Outhttp://divinehealthfromtheinsideout.com
Allowed on:Stage 1Stage 2Stage 3
D I R E C T I O N SIn a skillet over medium heat, melt 2 Tbs. butter, ghee or coconut oil. As it begins to brown add the tomatoes and shallot. Cook the tomatoes for 10 to 15 minutes, stirring frequently, until most of the liquid is gone. Add the balsamic vinegar, herbs and garlic. Simmer the confit uncovered for at least 15 minutes or until it has thickened considerably, stirring occasionally. Season it with salt and pepper and take off the heat.Preheat the oven to 425 degrees. Season the fish with salt and pepper. In a large ovenproof skillet, heat 2 Tbsp. butter over medium high heat. Add the fish, skin side down (if it has any skin), and cook turning once, until firm about 2 minutes on each side. Transfer the skillet to the oven and cook the fish for 3 minutes longer. Serve the fish over some zucchini ‘pasta’ with basil butter and top with tomato confit!
I N G R E D I E N T S1 to 1 1/2 lbs. white fish filets such as halibut, cod or sole4 Tbs. butter, ghee, or coconut oil2 1/2 c. diced heirloom tomatoes (grape, pear or cherry would do as well)1 shallot, or half a small onion, chopped 3 Tbs. balsamic vinegarabout 1 Tbs. fresh herbs such as thyme, basil or oregano, minced3 to 4 cloves garlic, choppedceltic sea salt and pepper
t
t
t
t
t
t
t
t
t
t
t
t
t
40
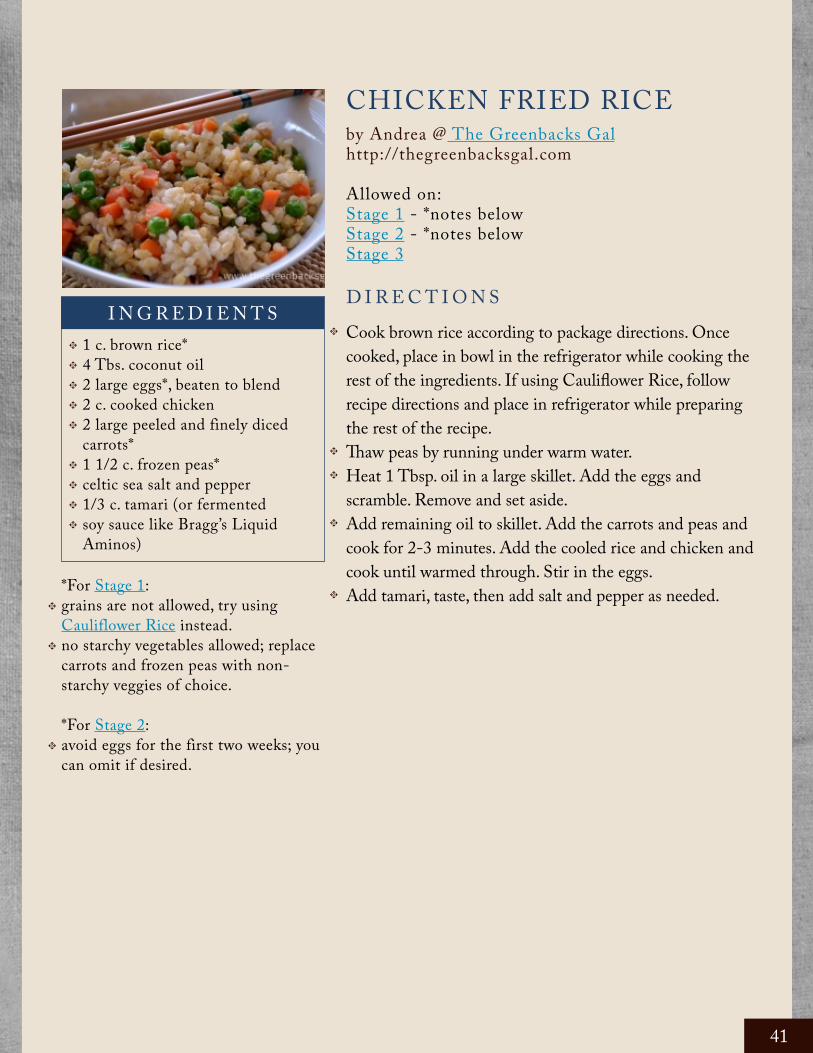
CHICKEN FRIED RICEby Andrea @ The Greenbacks Galhttp://thegreenbacksgal.com
Allowed on:Stage 1 - *notes belowStage 2 - *notes belowStage 3
D I R E C T I O N SCook brown rice according to package directions. Once cooked, place in bowl in the refrigerator while cooking the rest of the ingredients. If using Cauliflower Rice, follow recipe directions and place in refrigerator while preparing the rest of the recipe.Thaw peas by running under warm water.Heat 1 Tbsp. oil in a large skillet. Add the eggs and scramble. Remove and set aside.Add remaining oil to skillet. Add the carrots and peas and cook for 2-3 minutes. Add the cooled rice and chicken and cook until warmed through. Stir in the eggs. Add tamari, taste, then add salt and pepper as needed.
I N G R E D I E N T S1 c. brown rice*4 Tbs. coconut oil2 large eggs*, beaten to blend2 c. cooked chicken2 large peeled and finely diced carrots*1 1/2 c. frozen peas*celtic sea salt and pepper1/3 c. tamari (or fermented soy sauce like Bragg’s Liquid Aminos)
t
t
t
t
t
t
t
t
t
t
t
t
t
t*For Stage 1:grains are not allowed, try using Cauliflower Rice instead.no starchy vegetables allowed; replace carrots and frozen peas with non-starchy veggies of choice.
*For Stage 2:avoid eggs for the first two weeks; you can omit if desired.
t
t
t
41
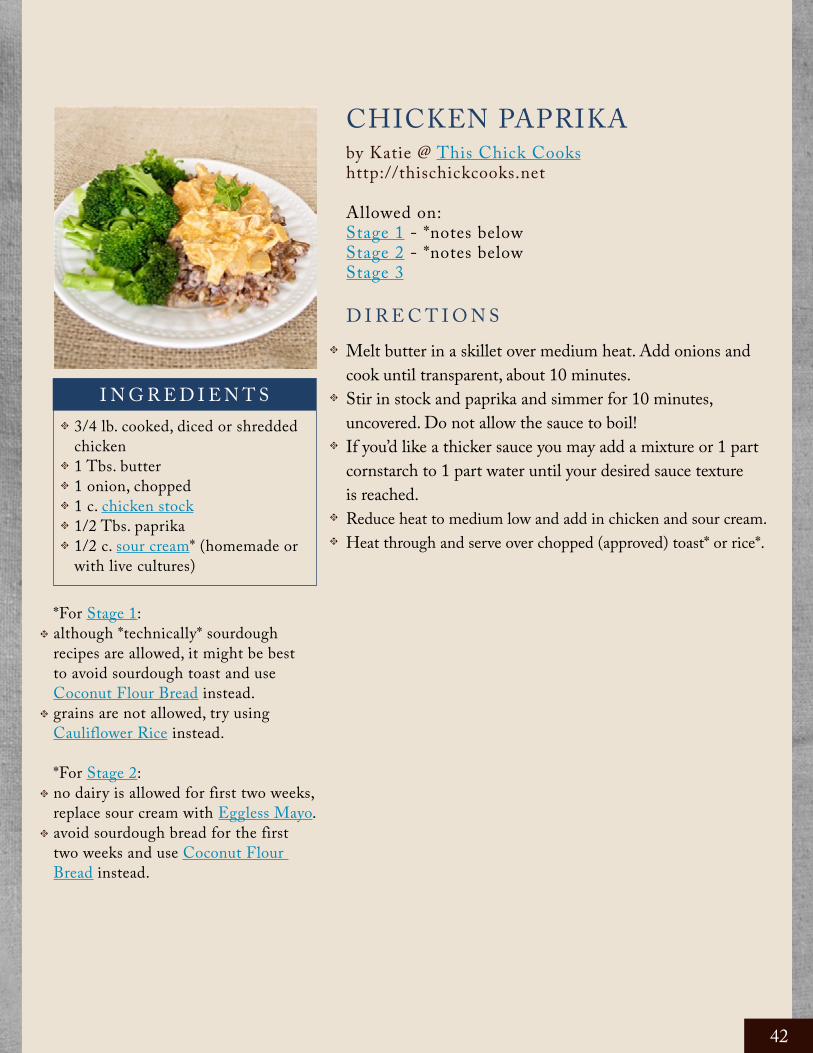
CHICKEN PAPRIKAby Katie @ This Chick Cookshttp://thischickcooks.net
Allowed on:Stage 1 - *notes belowStage 2 - *notes belowStage 3
D I R E C T I O N SMelt butter in a skillet over medium heat. Add onions and cook until transparent, about 10 minutes.Stir in stock and paprika and simmer for 10 minutes, uncovered. Do not allow the sauce to boil!If you’d like a thicker sauce you may add a mixture or 1 part cornstarch to 1 part water until your desired sauce texture is reached.Reduce heat to medium low and add in chicken and sour cream. Heat through and serve over chopped (approved) toast* or rice*.
I N G R E D I E N T S3/4 lb. cooked, diced or shredded chicken1 Tbs. butter 1 onion, chopped1 c. chicken stock1/2 Tbs. paprika1/2 c. sour cream* (homemade or with live cultures)
t
t
t
t
t
t
t
t
t
t
t
*For Stage 1:although *technically* sourdough recipes are allowed, it might be best to avoid sourdough toast and use Coconut Flour Bread instead.grains are not allowed, try using Cauliflower Rice instead.
*For Stage 2:no dairy is allowed for first two weeks, replace sour cream with Eggless Mayo.avoid sourdough bread for the first two weeks and use Coconut Flour Bread instead.
t
t
t
t
42

NEWARI/NEPALI TURMERIC FRIED CHICKENby Sara @ Your Thriving Familyhttp://yourthrivingfamily.com
Allowed on:Stage 1Stage 2Stage 3
D I R E C T I O N SMix all spices together in bowl.Cut chicken into 1” cubes and add to bowl. Cover the chicken with spices.Heat a deep pan on medium. Add the coconut oil to the pan and melt.When pan and oil are hot, add pieces of chicken. Do not over load, make in batches.Cook 2-3 minutes on each side.Check for doneness and place on paper towel to remove excess oil. (Don’t be scared, the towel will be BRIGHT yellow as a result of the turmeric.)
I N G R E D I E N T S4 tsp. ground garlic2 tsp. ground ginger2 tsp. ground cumin1 1/4 tsp. ground turmeric1/2 tsp. red chili powder1/4 tsp. black pepper2 1/2 tsp. celtic sea salt1 1/2 lbs. chicken4 Tbs. coconut oil
t
t
t
t
t
t
t
t
t
t
t
t
t
t
t
43

GRILLED CHICKEN FAJITASby Susan @ Learning and Yearninghttp://learningandyearning.com
Allowed on:Stage 1 - *notes belowStage 2 - *notes belowStage 3
D I R E C T I O N SCover the chicken with the marinade and refrigerate overnight, or at least four hours. Turn the chicken occasionally so that both sides get the marinade.Sear the chicken on both sides on a hot grill. Move to an area of the grill that has medium heat to continue cooking. Place onions and pepper halves on the grill and close the cover. Cook the vegetables until they are browned and tender, turning once. Cook the chicken for approximately 10 minutes per side (for boneless thighs – breasts may cook more quickly) until the temperature has reached 160 degrees. Allow to rest for several minutes after removing it from the grill and to allow the temperature to rise another 5 degrees.Slice the chicken, onions, and peppers into strips. Place on tortillas and top with your choice of cheese, lettuce, tomatoes, salsa, sour cream and guacamole.
I N G R E D I E N T SMARINADE1/2 c. freshly squeezed lemon juice4 Tbs. freshly squeezed lime juice6 Tbs. coconut oil1/3 c. chopped fresh parsley2 Tbs. chopped fresh oregano1 tsp. celtic sea salt4 minced cloves of garlic2 lbs. boneless chicken from pastured chickens (I prefer boneless thighs)
FAJITAthe chicken that has been marinating1 each red, yellow, and green peppers, cored and cut in half1 large red onion, peeled and sliced into 1/2” thick slicesshredded lettucechopped tomatoessalsashredded cheese*sour cream (with live cultures)*tortillas*
t
t
t
t
t
t
t
t
t
t
t
t
t
t
t
t
t
t
t
t
t
t
t
t
*For Stage 1:although *technically* Sourdough Tortillas are allowed, it ’s best to avoid them if you can.only use hard cheeses for fixings.
*For Stage 2:avoid sourdough recipes for the first two weeks.no dairy allowed for first two weeks; omit any cheese and sour cream.
photo credit: Kim Winey (http://kimwineyphoto.com)
t
t
t
t
44

CROCKPOT CHICKEN FAJITASby Stacy @ Stacy Makes Centshttp://stacymakescents.com
Allowed on:Stage 1 - *notes belowStage 2 - *notes belowStage 3
D I R E C T I O N SCombine sliced onion and peppers in the bottom of a greased crockpot.Lay chicken on top of veggies. Pour chicken broth over top. Sprinkle everything with cumin, salt, and chili powder. Give a nice squirt of lime juice over the top. Cover and cook on low for 4-8 hours (high for 4 hours) or until meat is shreddable. When meat is done, shred with two forks and stir back into juices. Serve meat mixture with slotted spoon on tortillas with your choice of fixings.
I N G R E D I E N T S1 yellow onion, sliced3 sweet peppers, sliced1 1/2 lbs. boneless chicken breast or thighs1/4 to 1/2 c. chicken broth depending on preference (leave this out if you prefer a drier fajita filling)1/2 tsp. celtic sea salt2 Tbs. cumin1 1/2 Tbs. chili powdersquirt of lime juicetortillas*fajita fixings*
t
t
t
t
t
t
t
t
t
t
t
t
t
t
*For Stage 1:although *technically* Sourdough Tortillas are allowed, it ’s best to avoid them if you can.only use sour cream with live cultures or hard cheeses for fixings.
*For Stage 2:avoid sourdough recipes for the first two weeks.no dairy allowed for first two weeks; omit any cheese and sour cream.
t
t
t
t
45

LENTILS & CARROTS WITH SWISS CHARDby Kelly @ The Nourishing Homehttp://thenourishinghome.com
Allowed on:Stage 2 - *notes belowStage 3
This recipe makes a delicious side dish, and it can easily convert to a light supper as well.
D I R E C T I O N SThe night before, rinse the lentils well, then cover them with water and allow them to soak overnight. The next day, drain and place them in a saucepan and cover with at least two inches of water above the lentils. Bring to a boil, cover and reduce heat to a gentle simmer. Cook about 15-25 minutes, until lentils reach desired consistency. Chop Swiss chard, separating the stems from the leaves.In a large skillet or wok, heat oil over medium heat. Add the chopped chard stems, onion, carrots and thyme. Season with salt and pepper.Cook, stirring occasionally, until the chard stems and carrots begin to soften (about 4-5 minutes).Add chopped chard leaves and cover to allow to wilt, making sure to stir occasionally (about 5 minutes).Add cooked lentils and stir to combine.Add a squeeze of fresh lemon juice, if desired.To make it a main meal, simply serve it with diced grilled chicken or steak and a side of buttered sourdough tortillas*, as shown above.
I N G R E D I E N T S2 c. soaked and cooked lentils 2 Tbs. coconut oil1 c. yellow onion, finely chopped1 c. organic carrots, thinly sliced (about 3-4 carrots)1 tsp. fresh organic thyme leavesceltic sea salt and freshly ground black pepper to taste1 1/2 bunches of organic Swiss Chard (about 12-14 large leaves)
t
t
t
t
t
t
t
t
t
t
t
t
t
t
t
t
t
*For Stage 2:avoid sourdough tortillas for the first two weeks.
t
46
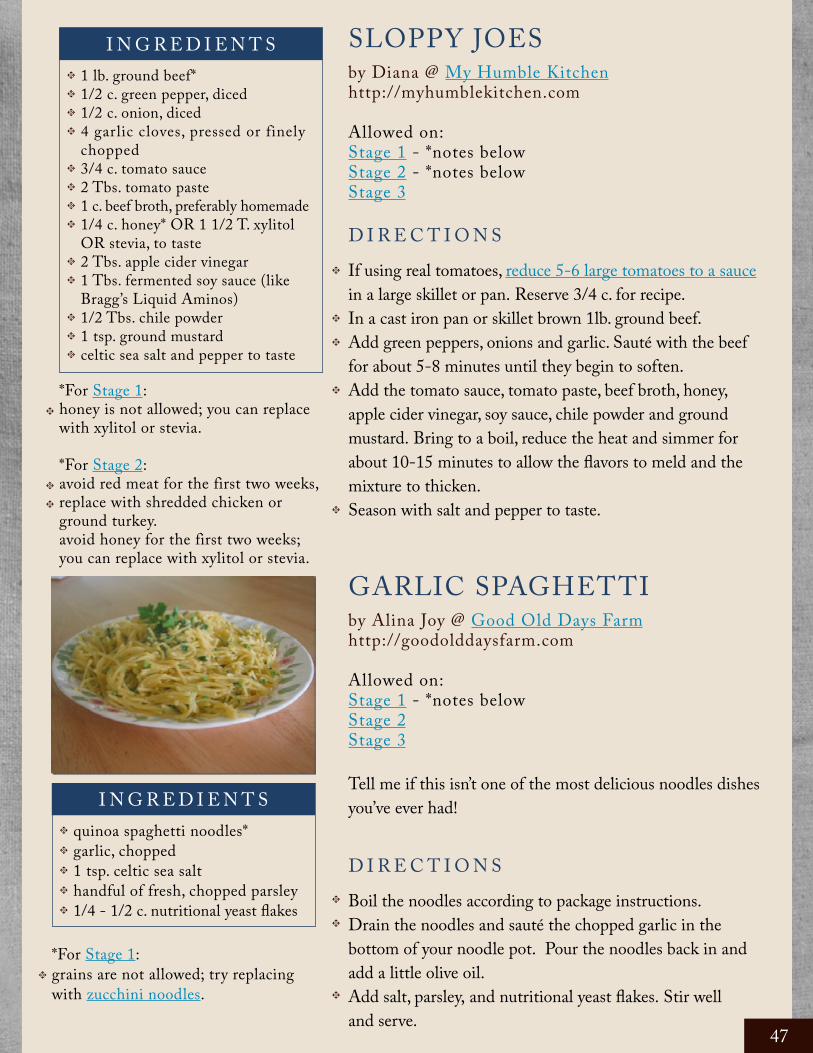
SLOPPY JOESby Diana @ My Humble Kitchenhttp://myhumblekitchen.com
Allowed on:Stage 1 - *notes belowStage 2 - *notes belowStage 3
D I R E C T I O N SIf using real tomatoes, reduce 5-6 large tomatoes to a sauce in a large skillet or pan. Reserve 3/4 c. for recipe.In a cast iron pan or skillet brown 1lb. ground beef.Add green peppers, onions and garlic. Sauté with the beef for about 5-8 minutes until they begin to soften.Add the tomato sauce, tomato paste, beef broth, honey, apple cider vinegar, soy sauce, chile powder and ground mustard. Bring to a boil, reduce the heat and simmer for about 10-15 minutes to allow the flavors to meld and the mixture to thicken.Season with salt and pepper to taste.
I N G R E D I E N T S1 lb. ground beef*1/2 c. green pepper, diced1/2 c. onion, diced4 garlic cloves, pressed or finely chopped3/4 c. tomato sauce2 Tbs. tomato paste1 c. beef broth, preferably homemade1/4 c. honey* OR 1 1/2 T. xylitol OR stevia, to taste2 Tbs. apple cider vinegar1 Tbs. fermented soy sauce (like Bragg’s Liquid Aminos)1/2 Tbs. chile powder1 tsp. ground mustardceltic sea salt and pepper to taste
t
t
t
t
t
t
t
t
t
t
t
t
t
t
t
t
t
t
*For Stage 1:honey is not allowed; you can replace with xylitol or stevia.
*For Stage 2:avoid red meat for the first two weeks, replace with shredded chicken or ground turkey.avoid honey for the first two weeks; you can replace with xylitol or stevia.
t
t
t
GARLIC SPAGHETTIby Alina Joy @ Good Old Days Farmhttp://goodolddaysfarm.com
Allowed on:Stage 1 - *notes belowStage 2Stage 3
Tell me if this isn’t one of the most delicious noodles dishes you’ve ever had!
D I R E C T I O N SBoil the noodles according to package instructions. Drain the noodles and sauté the chopped garlic in the bottom of your noodle pot. Pour the noodles back in and add a little olive oil. Add salt, parsley, and nutritional yeast flakes. Stir well and serve.
I N G R E D I E N T Squinoa spaghetti noodles*garlic, chopped1 tsp. celtic sea salthandful of fresh, chopped parsley1/4 - 1/2 c. nutritional yeast flakes
t
t
t
t
tt
t
t
*For Stage 1:grains are not allowed; try replacing with zucchini noodles.
t
47
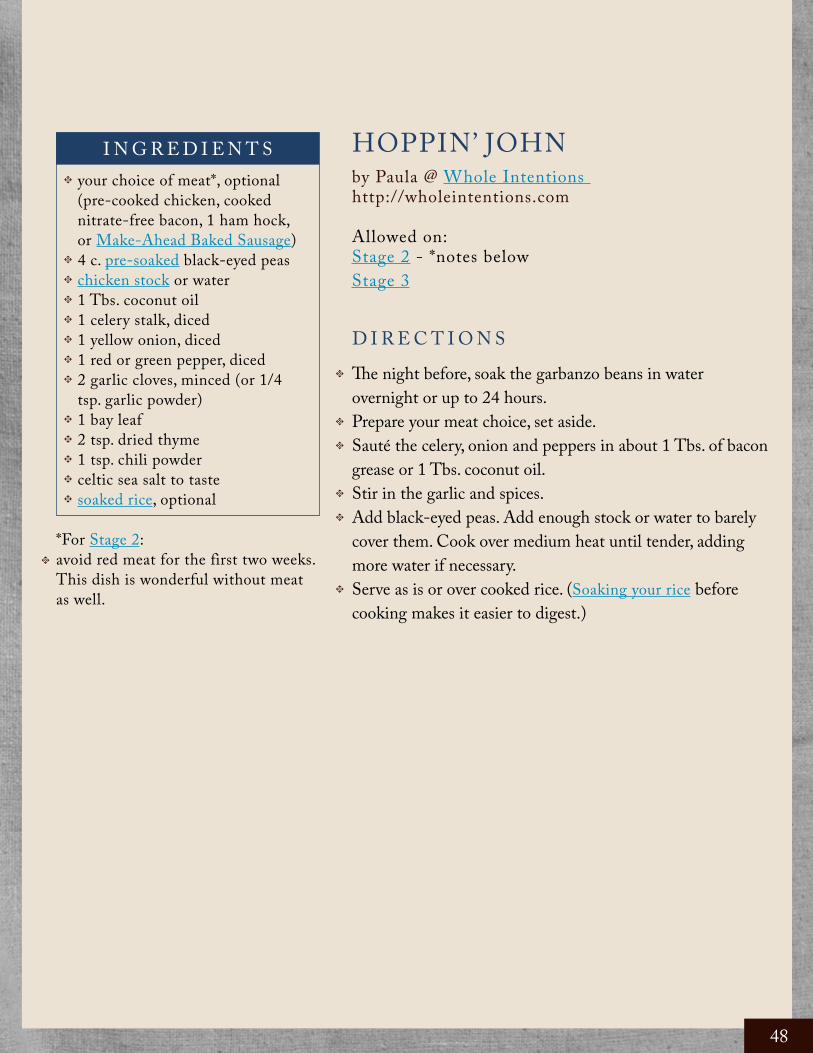
HOPPIN’ JOHNby Paula @ Whole Intentions http://wholeintentions.com
Allowed on:Stage 2 - *notes belowStage 3
D I R E C T I O N SThe night before, soak the garbanzo beans in water overnight or up to 24 hours. Prepare your meat choice, set aside.Sauté the celery, onion and peppers in about 1 Tbs. of bacon grease or 1 Tbs. coconut oil.Stir in the garlic and spices.Add black-eyed peas. Add enough stock or water to barely cover them. Cook over medium heat until tender, adding more water if necessary. Serve as is or over cooked rice. (Soaking your rice before cooking makes it easier to digest.)
I N G R E D I E N T Syour choice of meat*, optional (pre-cooked chicken, cooked nitrate-free bacon, 1 ham hock, or Make-Ahead Baked Sausage) 4 c. pre-soaked black-eyed peas chicken stock or water1 Tbs. coconut oil1 celery stalk, diced1 yellow onion, diced1 red or green pepper, diced 2 garlic cloves, minced (or 1/4 tsp. garlic powder)1 bay leaf 2 tsp. dried thyme 1 tsp. chili powder celtic sea salt to tastesoaked rice, optional
t
t
t
t
t
t
t
t
t
t
t
t
t
t
t
t
t
t
t
*For Stage 2:avoid red meat for the first two weeks. This dish is wonderful without meat as well.
t
48

Soups & SaladsBASIC BROTH SOUPby Paula @ Whole Intentions http://wholeintentions.com
Allowed on:Stage 1Stage 2 - *notes belowStage 3
A very easy and versatile soup. Mix up the meats and veggies to clean out the fridge.
D I R E C T I O N SHeat the broth into a large pot over medium heat. Add your pre-cooked meat of choice.Cut up your veggies and sauté in coconut oil until crisp tender, or however you like them. Add the veggies to the broth along with the salt, pepper, thyme, rosemary, basil, and oregano. Simmer until warmed through.
I N G R E D I E N T S6 c. homemade broth 1 lb. pre-cooked meat* (leftover chicken, fish, roast, or steak)1 Tbs. coconut oilany combination of vegetables, (i.e. 1 large onion, 2 stalks of celery, 1 leek, and 6+ cloves of garlic.)1 Tbs. celtic sea salt1 tsp. black pepper1/2 tsp. thyme1/2 tsp. rosemary1/2 tsp. basil1/2 tsp. oregano
t
t
t
t
t
t
t
t
t
t
t
t
t
t
*For Stage 2:avoid red meat for the first two weeks.t
49
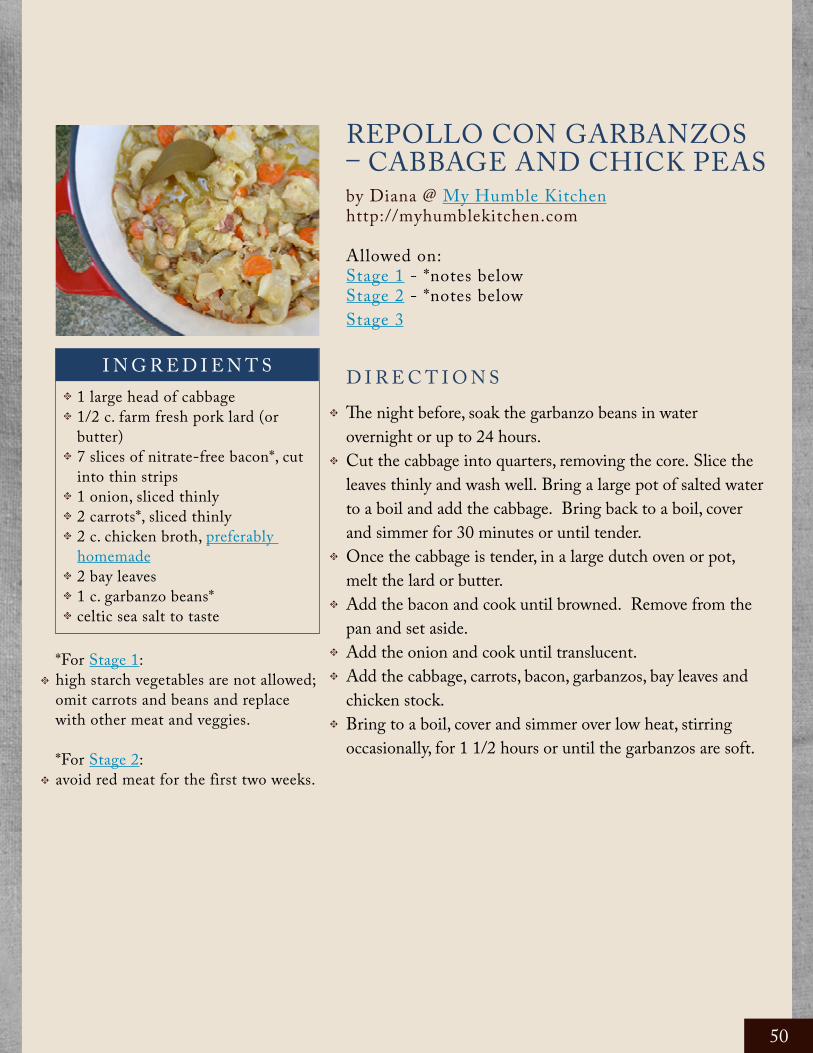
REPOLLO CON GARBANZOS – CABBAGE AND CHICK PEAS by Diana @ My Humble Kitchenhttp://myhumblekitchen.com
Allowed on:Stage 1 - *notes belowStage 2 - *notes belowStage 3
D I R E C T I O N SThe night before, soak the garbanzo beans in water overnight or up to 24 hours.Cut the cabbage into quarters, removing the core. Slice the leaves thinly and wash well. Bring a large pot of salted water to a boil and add the cabbage. Bring back to a boil, cover and simmer for 30 minutes or until tender.Once the cabbage is tender, in a large dutch oven or pot, melt the lard or butter.Add the bacon and cook until browned. Remove from the pan and set aside.Add the onion and cook until translucent.Add the cabbage, carrots, bacon, garbanzos, bay leaves and chicken stock.Bring to a boil, cover and simmer over low heat, stirring occasionally, for 1 1/2 hours or until the garbanzos are soft.
I N G R E D I E N T S1 large head of cabbage1/2 c. farm fresh pork lard (or butter)7 slices of nitrate-free bacon*, cut into thin strips1 onion, sliced thinly2 carrots*, sliced thinly2 c. chicken broth, preferably homemade2 bay leaves1 c. garbanzo beans*celtic sea salt to taste
t
t
t
t
t
t
t
t
t
t
t
t
t
t
t
t
*For Stage 1:high starch vegetables are not allowed; omit carrots and beans and replace with other meat and veggies.
*For Stage 2:avoid red meat for the first two weeks.
t
t
50

CREAMY DILL CUCUMBER SALADby April @ This Homeschool Lifehttp://thishomeschoollife.com
Allowed on:Stage 1Stage 2 - *notes belowStage 3
I remember eating this all summer long with my dad, it was one of his favorites. Cool and refreshing!
D I R E C T I O N SCombine all the ingredients except the vegetables you’ll be using.Slice the cucumbers or tomatoes and gently stir them into the sauce.Refrigerates well!
I N G R E D I E N T S1/2 c. sour cream* (with live cultures)1 tsp. dill weed1 Tbsp. apple cider vinegar1 tsp. minced dry onionstevia or xylitol to taste1/2 tsp. celtic sea salt1/4 tsp. pepper (optional)cucumbers (tomatoes work well too!)
t
t
t
t
t
t
t
t
t
t
*For Stage 2:dairy is not allowed for the first two weeks; omit the sour cream for a zestier sauce or replace with Eggless Mayo.
t
51
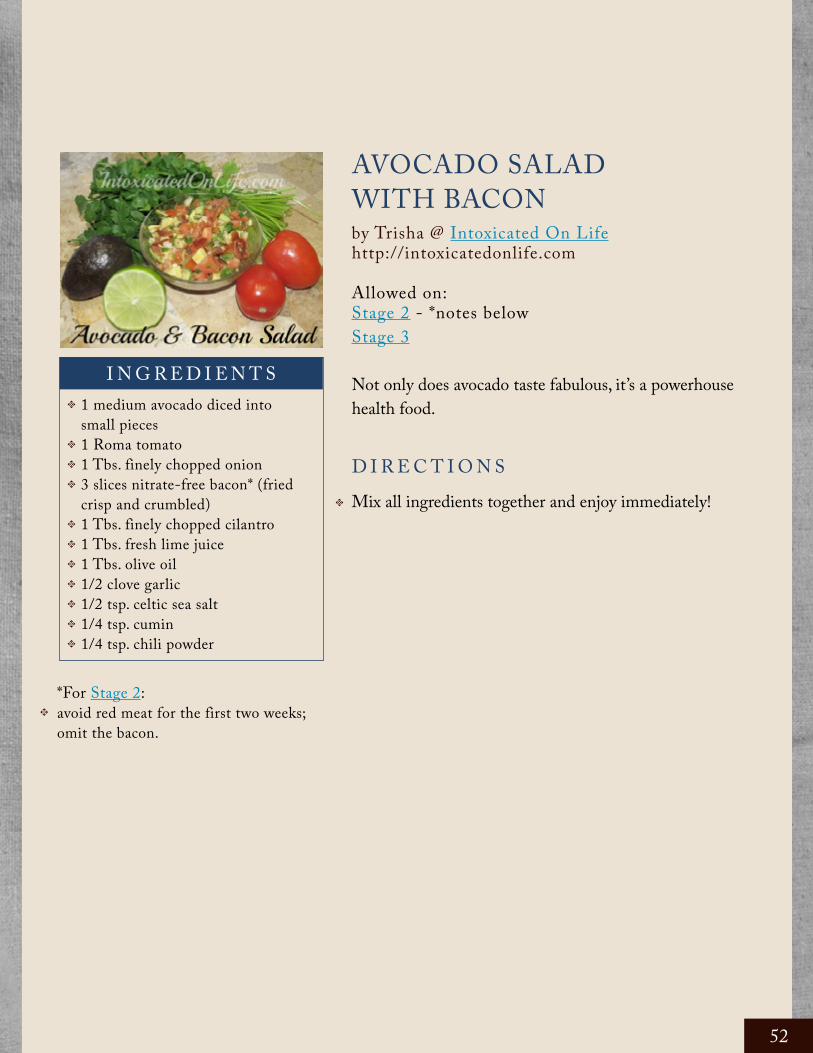
AVOCADO SALAD WITH BACONby Trisha @ Intoxicated On Life http://intoxicatedonlife.com
Allowed on:Stage 2 - *notes belowStage 3
Not only does avocado taste fabulous, it’s a powerhouse health food.
D I R E C T I O N SMix all ingredients together and enjoy immediately!
I N G R E D I E N T S1 medium avocado diced into small pieces1 Roma tomato1 Tbs. finely chopped onion3 slices nitrate-free bacon* (fried crisp and crumbled)1 Tbs. finely chopped cilantro1 Tbs. fresh lime juice1 Tbs. olive oil1/2 clove garlic1/2 tsp. celtic sea salt1/4 tsp. cumin1/4 tsp. chili powder
t
t
t
t
t
t
t
t
t
t
t
t
*For Stage 2:avoid red meat for the first two weeks; omit the bacon.
t
52
ITALIAN CABBAGE SALADby Paula @ Whole Intentions http://wholeintentions.com
Allowed on:Stage 1Stage 2Stage 3
D I R E C T I O N SPrepare all veggies by washing thoroughly.Place them in a large bowl and stir to evenly distribute them.Combine dressing in a small bowl and pour over vegetables. Toss lightly to coat everything.Chill for about 30 min.
GARDEN TUNA SALAD by Katie @ This Chick Cookshttp://thischickcooks.net
Allowed on:Stage 1 - *notes belowStage 3
D I R E C T I O N SCombine all ingredients and serve.
I N G R E D I E N T S
I N G R E D I E N T S
1/2 head of red or green cabbage (about 4 cups)1 green, red, or yellow pepper, sliced1 sweet onion, sliced1 cucumber, sliced1 Roma tomato, chopped large1 c. fresh broccoli1 c. fresh cauliflower florets
DRESSING1/4 c. olive oil1 tsp. lemon juice1 tsp. basil1 tsp. black pepper1 tsp. garlic salt (or 1/2 tsp. garlic powder and 1/2 tsp. celtic sea salt)
6 oz. can of tuna2/3 c. chopped and seeded cucumber1/2 c. shredded carrot*1/4 c. chopped green onions or chives (fresh)2 Tbs. homemade mayo1 Tbs. sour cream (with live cultures)1 Tbs. lemon juice
t
t
t
t
t
t
t
t
t
t
t
t
t
t
t
t
t
t
t
t
t
t
t
t
*For Stage 1:high starch vegetables are not allowed; omit carrots or replace with another vegetable.
t
53

GRILLED CHICKEN QUINOA SALAD WITH FRESH HERBS AND GOAT CHEESE by Lydia @ Divine Health From the Inside Outhttp://divinehealthfromtheinsideout.com
Allowed on:Stage 2 - *notes belowStage 3
D I R E C T I O N SPlace all the ingredients in a bowl, toss together and serve over a bed of lettuce, or by itself topped with some salsa. Yum!!
NOURISHING BROCCOLI SALADby Lydia @ Divine Health From the Inside Outhttp://divinehealthfromtheinsideout.com
Allowed on:Stage 1Stage 2 - *notes belowStage 3
D I R E C T I O N SMix all salad ingredients together and toss with the dressing. Let sit for 30 minutes for flavors to meld together.
I N G R E D I E N T S
I N G R E D I E N T S
2 heaping c. cooked quinoa2 c. cooked chicken, diced 1/2 c. red onion, diced1/2 c. cucumber, diced2 1/2 oz. goat cheese*, crumbled 4 Tbs. extra virgin olive oil2 Tbs. of lemon juicehandful of mint, mincedhandful of oregano, minced (or whatever fresh herbs you have on hand)
2 heads of broccoli, stem peeled and cut into small pieces, as well as florets cut into small pieces1/2 a red onion, sliced thin2-4 scallions, thinly sliced1/2 c. grass fed cheddar cheese*, cut into small slivers (it ’s important to use a hard cheese in this, as it will hold up well and not get soggy)8 pieces of bacon*, cooked crispy and crumbled
DRESSING1 c. sour cream*1 Tbs. lemon juice3 Tbs. olive oil2 Tbs. raw apple cider vinegar2 garlic cloves, minced1/3 c. minced fresh parsleysalt and pepper to taste
t
t
t
t
t
t
t
t
t
t
t
t
t
t
t
t
t
t
t
t
t
t
t
t
*For Stage 2:dairy is not allowed for the first two weeks; omit the goat cheese.
*For Stage 2:avoid red meat for the first two weeks; omit the bacondairy is not allowed for the first two weeks; omit the cheese and experiment with using Easy No-Fail Mayo or Eggless Mayo in place of the sour cream. Alternately, you can use the dressing without the sour cream for a zestier taste.
t
t
54
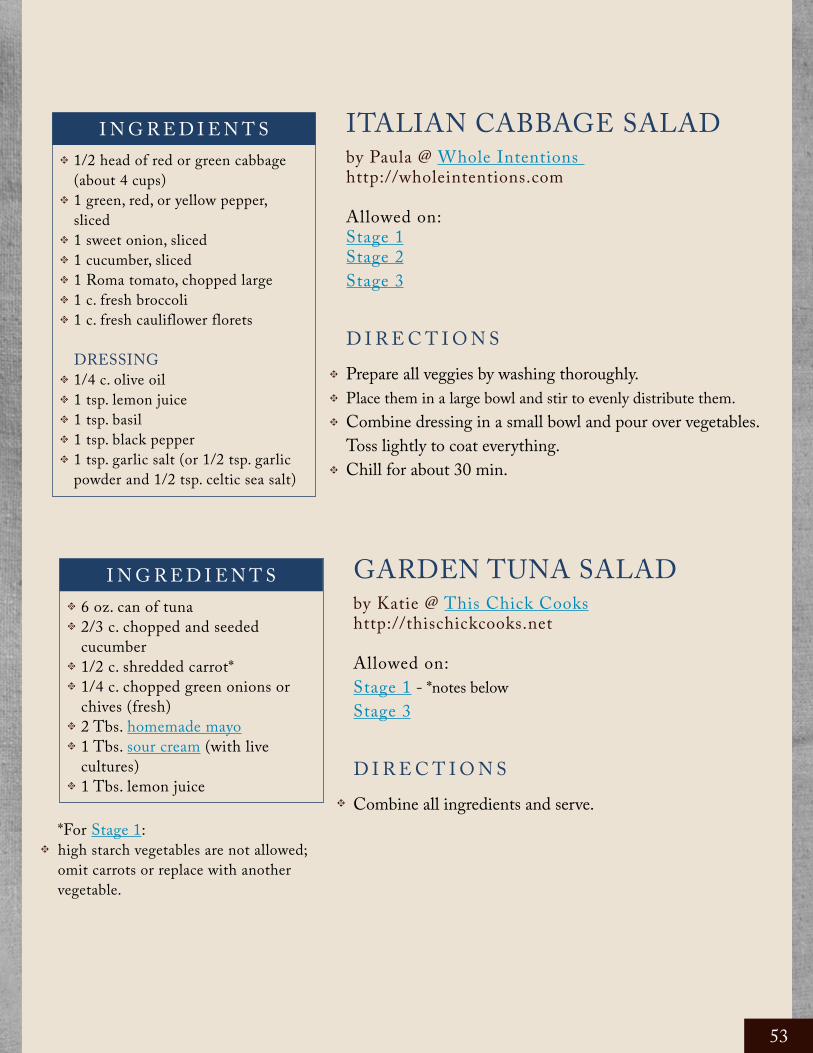
AVOCADO & ONION SALAD by Paula @ Whole Intentions http://wholeintentions.com
Allowed on:Stage 2Stage 3
D I R E C T I O N SCombine the dressing ingredients: olive oil, mustard, lemon juice, and stevia.Cut avocado lengthwise into two long halves still connected by the seed. Twist both halves until they separate. Remove the seed and cut each of the halves lengthwise again. Grip the edge of the skin on each quarter and peel it off, just as you would with a banana.Slice the sweet onion in half and then slice across the grain, per se.Arrange avocados and onion on a large platter then drizzle with dressing. Serve immediately.
I N G R E D I E N T S2 medium avocados, barely soft, peeled and thinly sliced1 large sweet onion, halved and thinly sliced
DRESSING1/3 c. olive oil1/4 c. mustard2 Tbs. lemon juicesprinkle of stevia, to taste
t
t
t
t
t
t
t
t
t
t
t
55

TOMATO & CUCUMBER SALAD by Stephanie @ The Cheapskate Cookhttp://thecheapskatecook.com
Allowed on:Stage 1 - *notes belowStage 2 - *notes belowStage 3
D I R E C T I O N SPlace tomatoes and cucumbers on a small platter or plate with tall sides.Drizzle veggies with olive oil and sprinkle with salt, pepper, and oregano, to taste.Allow salad to sit for a few minutes to soften the oregano (if using dried) and allow flavors to mingle.Serve as a side dish or a light meal with an approved bread* to soak up the juices.with dressing. Serve immediately.
I N G R E D I E N T S1-2 tomatoes, coarsely chopped, with seeds 1/2 – 1 cucumber, peeled and coarsely chopped, with seeds olive oilceltic sea saltpepperoregano, dried or fresh
t
t
t
t
t
t
t
t
t
t
*For Stage 1:although *technically* sourdough recipes are allowed, it might be best to avoid them and use Coconut Flour Bread instead.
*For Stage 2: avoid sourdough recipes for the first two weeks; use Coconut Flour Bread instead.
t
t
56
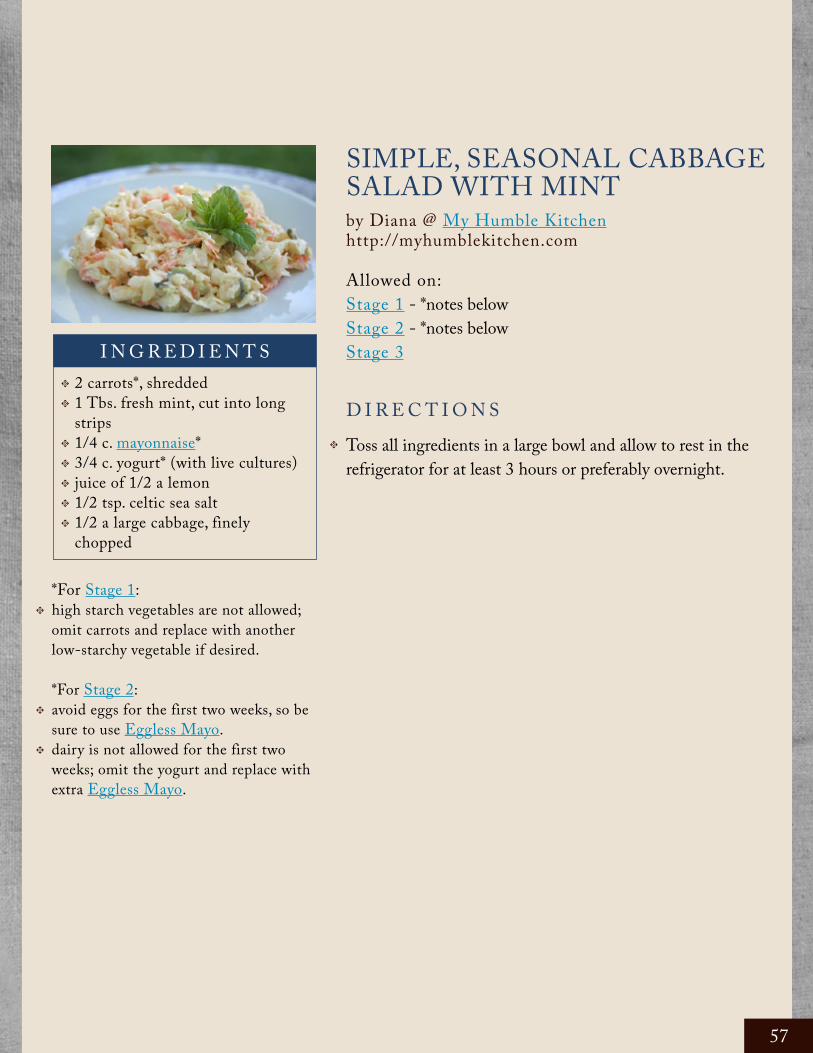
SIMPLE, SEASONAL CABBAGE SALAD WITH MINTby Diana @ My Humble Kitchenhttp://myhumblekitchen.com
Allowed on:Stage 1 - *notes belowStage 2 - *notes belowStage 3
D I R E C T I O N SToss all ingredients in a large bowl and allow to rest in the refrigerator for at least 3 hours or preferably overnight.
I N G R E D I E N T S2 carrots*, shredded1 Tbs. fresh mint, cut into long strips1/4 c. mayonnaise*3/4 c. yogurt* (with live cultures)juice of 1/2 a lemon1/2 tsp. celtic sea salt1/2 a large cabbage, finely chopped
t
t
t
t
t
t
t
t
*For Stage 1:high starch vegetables are not allowed; omit carrots and replace with another low-starchy vegetable if desired.
*For Stage 2: avoid eggs for the first two weeks, so be sure to use Eggless Mayo. dairy is not allowed for the first two weeks; omit the yogurt and replace with extra Eggless Mayo.
t
t
t
57

HILARY’S RICE SALADby Hilary @ Accidentally Greenhttp://accidentallygreen.com
Allowed on:Stage 2Stage 3
D I R E C T I O N SMix all ingredients together and refrigerate.
HILARY’S TEX-MEX RICE SALADby Hilary @ Accidentally Greenhttp://accidentallygreen.com
Allowed on:Stage 2Stage 3
D I R E C T I O N SMix all ingredients together and refrigerate.
I N G R E D I E N T S
I N G R E D I E N T S
1 15-oz. can black beans, rinsed and drained1 1/2 c. chopped tomatoes1 1/2 c. cooked brown rice1/2 c. chopped celery1/2 c. chopped green onions2 Tbs. chopped fresh cilantro or parsley (choose your herb based on your flavor preference)1/4 c. apple cider vinegar1/4 c. olive oilceltic sea salt and pepper, to taste
1 15-oz. can black beans, rinsed and drained1 1/2 c. chopped tomatoes1 1/2 c. cooked brown rice1 c. boneless, skinless chicken breast, cooked and diced1/2 c. chopped avocado1/2 c. chopped green onions2 Tbs. chopped fresh cilantro1/4 c. apple cider vinegar1/4 c. olive oilceltic sea salt and pepper, to taste
t
t
t
t
t
t
t
t
t
t
t
t
t
t
t
t
t
t
t
t
t
58

SOURDOUGH BREADby Paula @ Whole Intentionshttp://wholeintentions.com
Allowed on:Stage 1 - *notes belowStage 2 - *notes belowStage 3
You can use this dough for bread, rolls/buns, bread sticks/hotdog buns, pizza crust, etc. It’s the easiest bread I’ve ever made!
D I R E C T I O N SIn a large bowl, stir together water, whey, sourdough starter, and celtic sea salt.Add flour, slowly, stirring as you go just until it starts pulling away from the sides of the bowl. You’ll want it a bit wet as the flour will still soak up moisture as it sits. You do not have to knead.Cover loosely with a towel and place the bowl in the fridge. You can leave it here for a good day or so as it takes cold sourdough longer to ferment. Optionally, you can leave the dough out on the counter for a few hours before you place it in the fridge.Now you just use it when you want. Pull off whatever amount you need and shape into bread loaves (this will make 2 loaves), biscuits, bread sticks, or roll out onto greased pizza pan.
IF YOU’RE MAKING BREAD LOAVESShape dough into loaves and place in greased loaf pan or make into a free form round or long loaf and place on a baking sheet.Let the dough sit for about 2-3 hours or until it just about doubles. (Depends on the temperature of your house.) Preheat the oven to 400 degrees. Bring about 2 c. water to a boil in a small sauce pan and place the pan and water on the bottom rack of your oven (this helps the crust get nice and crunchy).
(continued on next page)
BreadsI N G R E D I E N T S
1 1/2 c. filtered water
Your choice of:A. 1 1/2 c. more filtered waterB. 1 1/2 c. whey (dough enhancer)C. 1 1/2 c. water + 1/4 tsp. absorbic acid crystals/citric (dough enhancer)D. 1 1/2 c. water + 1/8th tsp. powdered ginger (dough enhancer)
2 c. active sourdough starter (fed within the last 8 hours, ideally)2 T. celtic sea salt 6-7 cups flour
t
t
t
t
t
t
t
t
t
t
t
t
t
t
*For Stage 1:*technically* sourdough is allowed in Stage 1 as the majority of people can handle it, but each individual is different and their degree of candida affects them differently. Although it’s allowed, it might be best to avoid it when possible.
*For Stage 2:avoid sourdough recipes for the first two weeks.
t
t
59
D I R E C T I O N S ( C O N T I N U E D )Slice your loaf across the top diagonally, criss-cross, in a tic-tac-toe pattern, or anything really and place it in the oven. Bake for about 45 min. to 1 hour - until crust is nice and browned.
TO MAKE DINNER ROLLS/BUNSForm rolls/buns, place on cooking sheet.Let the dough sit for about 1-2 hours or until just about double. Preheat the oven to 350 degrees.If you want a crusty roll, bring about 2 c. water to a boil in a small sauce pan and place the pan and water on the bottom rack of your oven.Slice your buns across the top if you’d like, and place them in the oven. Bake for about 45 min. - until crust is nicely browned.
TO MAKE BREAD STICKS/HOTDOG BUNSForm bread sticks/buns and place on cooking sheet. You can have them separate or touching.Let the dough sit for about 1-2 hours or until about double in size. Preheat the oven to 350 degrees.You can slice your bread sticks if you’d like. Bake for about 30 min.
TO MAKE PIZZAGrease pizza pan and roll dough out to thickness desired. Let sit on counter for 30 min. to 1 hour.Preheat the oven to 425 degrees.Pre-bake your crust for about 10 minutes, put on your toppings and then bake another 10-15 minutes.
t
t
t
t
t
t
t
t
t
t
t
t
t
t
t
t
t
60
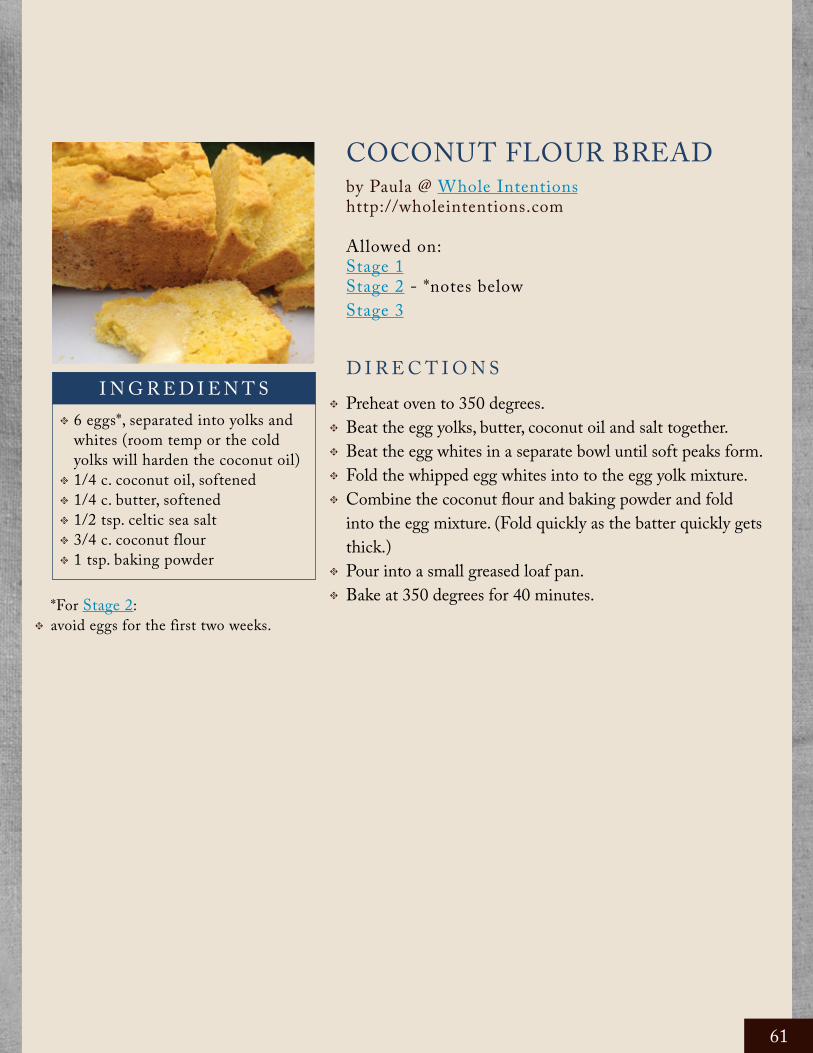
COCONUT FLOUR BREADby Paula @ Whole Intentionshttp://wholeintentions.com
Allowed on:Stage 1Stage 2 - *notes belowStage 3
D I R E C T I O N SPreheat oven to 350 degrees.Beat the egg yolks, butter, coconut oil and salt together. Beat the egg whites in a separate bowl until soft peaks form.Fold the whipped egg whites into to the egg yolk mixture.Combine the coconut flour and baking powder and fold into the egg mixture. (Fold quickly as the batter quickly gets thick.)Pour into a small greased loaf pan.Bake at 350 degrees for 40 minutes.
I N G R E D I E N T S6 eggs*, separated into yolks and whites (room temp or the cold yolks will harden the coconut oil)1/4 c. coconut oil, softened 1/4 c. butter, softened1/2 tsp. celtic sea salt3/4 c. coconut flour1 tsp. baking powder
t
t
t
t
t
t
t
t
t
t
t
t
t*For Stage 2:avoid eggs for the first two weeks.t
61

SOURDOUGH OAT BISCUITSby Kristen @ Smithspirationshttp://smithspirations.com
Allowed on:Stage 2 - *notes belowStage 3
D I R E C T I O N SPlan on starting your dough 12-24 hours before you want to bake them.Mix flour, oats, and salt in a medium glass mixing bowl till well combined.Cut in fat using a large fork, two knives, or a pastry blender. You want the mixture to be crumbly and the fat to be evenly distributed. Make a well in the center of the mixture.Combine the starter and the desired liquid together in another bowl or large measuring cup. Pour into the well in the dry mixture.Mix and fold just until no more dry flour is left. Cover the bowl and set it out to ferment for 12-24 hours. A longer ferment will result in tangier biscuits, but more of the health benefits of sourdough will have been set to work.When it’s time to bake, preheat your oven to 350. Butter a 9×13 baking dish.Gently scoop out the dough with a large spoon and drop into the pan. I dropped dough in portions slightly larger than a golfball, making about 18 biscuits. Don’t stir the dough during this process.Bake in the oven for about 30 minutes. Serve with butter or coconut oil and enjoy!
Note: These would make a great base for additional flavorings like herbs, cheese, or cinnamon.
I N G R E D I E N T S2 c. whole wheat flour1 c. old fashioned rolled oats1 tsp. celtic sea salt1/2 c. pastured lard, butter, or solid coconut oil (I used lard)1 c. sourdough starter1 c. dairy kefir*, thinned yogurt* (with live cultures), or buttermilk* (I used kefir; I also think that regular milk or water could also be substituted)
t
t
t
t
t
t
t
t
t
t
t
t
t
t
t
*For Stage 2: avoid sourdough recipes for the first two weeks.dairy is not allowed for the first two weeks; use water, almond milk, or coconut milk in place of the kefir, yogurt, or buttermilk.
t
t
62
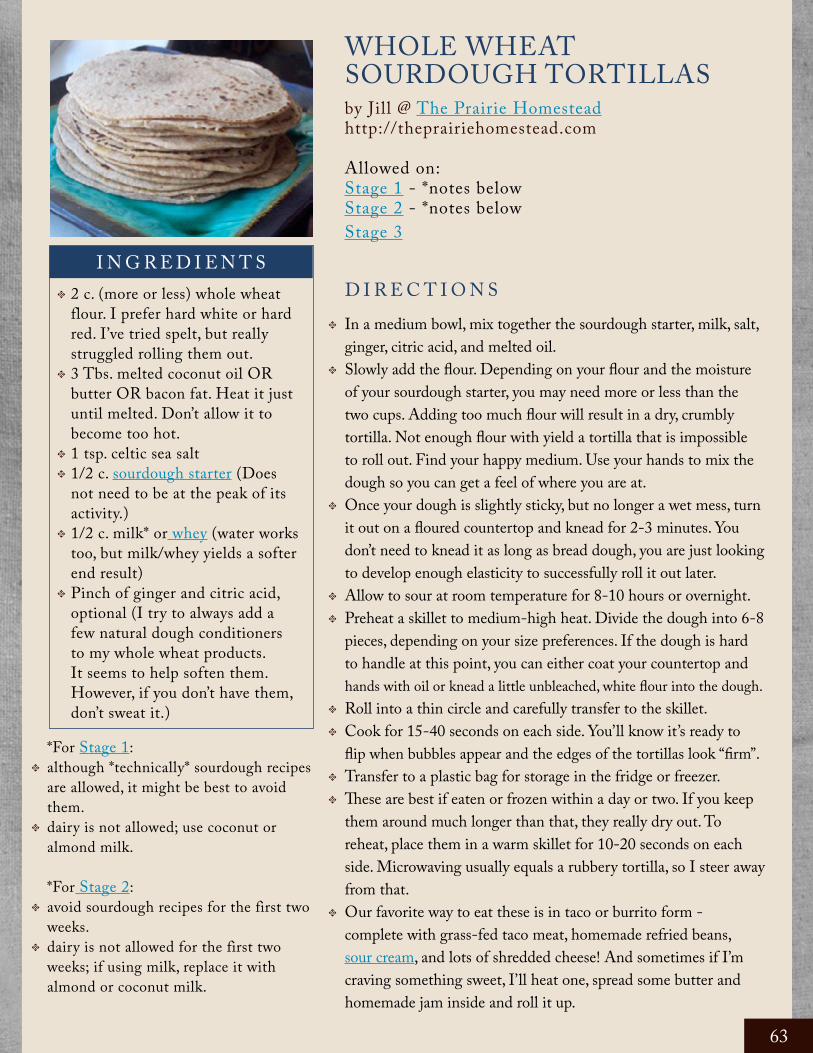
WHOLE WHEAT SOURDOUGH TORTILLASby Jill @ The Prairie Homesteadhttp://theprairiehomestead.com
Allowed on:Stage 1 - *notes belowStage 2 - *notes belowStage 3
D I R E C T I O N SIn a medium bowl, mix together the sourdough starter, milk, salt, ginger, citric acid, and melted oil.Slowly add the flour. Depending on your flour and the moisture of your sourdough starter, you may need more or less than the two cups. Adding too much flour will result in a dry, crumbly tortilla. Not enough flour with yield a tortilla that is impossible to roll out. Find your happy medium. Use your hands to mix the dough so you can get a feel of where you are at.Once your dough is slightly sticky, but no longer a wet mess, turn it out on a floured countertop and knead for 2-3 minutes. You don’t need to knead it as long as bread dough, you are just looking to develop enough elasticity to successfully roll it out later.Allow to sour at room temperature for 8-10 hours or overnight.Preheat a skillet to medium-high heat. Divide the dough into 6-8 pieces, depending on your size preferences. If the dough is hard to handle at this point, you can either coat your countertop and hands with oil or knead a little unbleached, white flour into the dough.Roll into a thin circle and carefully transfer to the skillet.Cook for 15-40 seconds on each side. You’ll know it’s ready to flip when bubbles appear and the edges of the tortillas look “firm”.Transfer to a plastic bag for storage in the fridge or freezer.These are best if eaten or frozen within a day or two. If you keep them around much longer than that, they really dry out. To reheat, place them in a warm skillet for 10-20 seconds on each side. Microwaving usually equals a rubbery tortilla, so I steer away from that.Our favorite way to eat these is in taco or burrito form - complete with grass-fed taco meat, homemade refried beans, sour cream, and lots of shredded cheese! And sometimes if I’m craving something sweet, I’ll heat one, spread some butter and homemade jam inside and roll it up.
I N G R E D I E N T S2 c. (more or less) whole wheat flour. I prefer hard white or hard red. I’ve tried spelt, but really struggled rolling them out.3 Tbs. melted coconut oil OR butter OR bacon fat. Heat it just until melted. Don’t allow it to become too hot.1 tsp. celtic sea salt1/2 c. sourdough starter (Does not need to be at the peak of its activity.)1/2 c. milk* or whey (water works too, but milk/whey yields a softer end result)Pinch of ginger and citric acid, optional (I try to always add a few natural dough conditioners to my whole wheat products. It seems to help soften them. However, if you don’t have them, don’t sweat it.)
t
t
t
t
t
t
t
t
t
t
t
t
t
t
t
t
*For Stage 1:although *technically* sourdough recipes are allowed, it might be best to avoid them.dairy is not allowed; use coconut or almond milk.
*For Stage 2: avoid sourdough recipes for the first two weeks.dairy is not allowed for the first two weeks; if using milk, replace it with almond or coconut milk.
t
t
t
t
63

GLUTEN FREE PIZZA CRUSTby Katie @ This Chick Cookshttp://thischickcooks.net
Allowed on:Stage 2Stage 3
D I R E C T I O N SMix together buckwheat flour, water and vinegar. Cover and leave out for 12-24 hours.Preheat oven to 425 with pizza stone in oven for 30 minutes.Stir in remaining ingredients until well mixed. The texture will be thinner than a standard crust.Scrape dough onto pizza stone and drizzle with a bit of oil. Carefully spread the dough out in a thin layer on the stone. Be extremely careful as the stone can burn you!Reduce oven heat to 400 and bake for 10 minutes.Top pizza with sauce and toppings and return to the oven, cooking crust directly on a lower oven rack, for 7-10 minutes.
I N G R E D I E N T S1 c. buckwheat flour1/2 c. water 1 Tbs. apple cider vinegar 1/4 c. arrowroot powder1/4 tsp. celtic sea salt1/4 tsp. baking soda1/8 tsp. garlic powder2 Tbs. coconut oil, warmed
t
t
t
t
t
t
t
t
t
t
t
t
t
t
t
t
64

<PM�UWZM�aW]�MI\��\PM�TM[[�ÆI^WZ#�\PM�TM[[�aW]�MI\��\PM�UWZM�ÆI^WZ�
Chinese Proverb
65

DinnerLEMON CAPER TILAPIA/CHICKEN by Tiffany @ Don’t Waste the Crumbshttp://dontwastethecrumbs.com
Allowed on:Stage 1 - *notes belowStage 2 Stage 3
D I R E C T I O N SIf using chicken breasts, pound out breasts between 2 pieces of plastic wrap until 1/2” thick. Set aside.Place quinoa in a fine-mesh strainer and using your hand, rub and agitate the quinoa while rinsing for two full minutes. Drain. Place rinsed quinoa, chicken stock, garlic and salt in a saucepan and bring to a rolling boil. Reduce heat to low, cover and cook for 15-20 minutes, until the quinoa is done. Turn off the heat and allow to sit covered while you continue to prepare and cook the chicken.Combine flour, cayenne pepper, salt and pepper in a shallow dish. Warm 1 tablespoon of butter and 1 tablespoon of coconut oil in a large skillet over medium heat until butter melts.Working with one piece at a time, lightly coat meat in flour, shake off excess and place in the skillet. Cook until meat is brown and cooked through, about 5 minutes per side. Remove to a plate and cover to keep warm. Repeat with another tablespoon of butter and olive oil and until all pieces of meat are cookedPlace capers into the skillet, and while smashing them lightly, cook for about 2 minutes. Stir in chicken broth and scrape any browned pieces from the bottom of the pan. Cook until reduced by half, about 2 minutes.
I N G R E D I E N T S1 c. quinoa*2 c. chicken stock1 garlic clove, smashed1/4 tsp. salt4 tilapia filets or 2 chicken breasts1/3 c. coconut or almond flour1/4 tsp. celtic sea salt1/4 tsp. black pepper4 Tbs. butter2-4 Tbs. coconut oil1/2 c. chicken stock2 lemons, zested and juiced (storing zest separate from juice)2 Tbs. capers, drained2 Tbs. fresh parsley, chopped (or 1 Tbs. dried)
t
t
t
t
t
t
t
t
t
t
t
t
t
t
t
t
t
t
t
t
t
t
*For Stage 1:no grains allowed; omit quinoat
66

GLUTEN FREE COCONUT-CRUSTED TILAPIAby Jaime @ Slightly Steadyhttp://slightlysteady.com
Allowed on:Stage 2 - *notes belowStage 3
D I R E C T I O N SFirst, rinse your fish fillets, and then pat them dry. Pour the oil into a frying pan and turn to medium heat. Set up your “dipping stations” – your flour, salt and pepper mixed in one shallow dish, your eggs in another, and your coconut in a third dish.Dredge the fish fillets one at a time in the flour; then, using a fork, dip both sides in the beaten egg until coated. Lastly dredge them in the coconut.Once the oil is hot, begin frying your fish, turning it over after the coconut has browned – a few minutes or so. (Note: the first batch will fry faster than successive batches, since the fish will absorb the heat from the oil and cool it a bit). Once both sides have browned, and the fish flakes easily with a fork, it’s done!
I N G R E D I E N T S4 thawed tilapia fillets (or any white fish you prefer)2 beaten eggs*1/2 c. of brown rice flour, almond meal, or a GF flour of your choice1/2 c. unsweetened coconut flakes or mealceltic sea salt and pepper to taste1/2 c. coconut oil for frying
t
t
t
t
t
t
t
t
t
t
t
t
*For Stage 2: no eggs allowed for the first two weeks.t
67
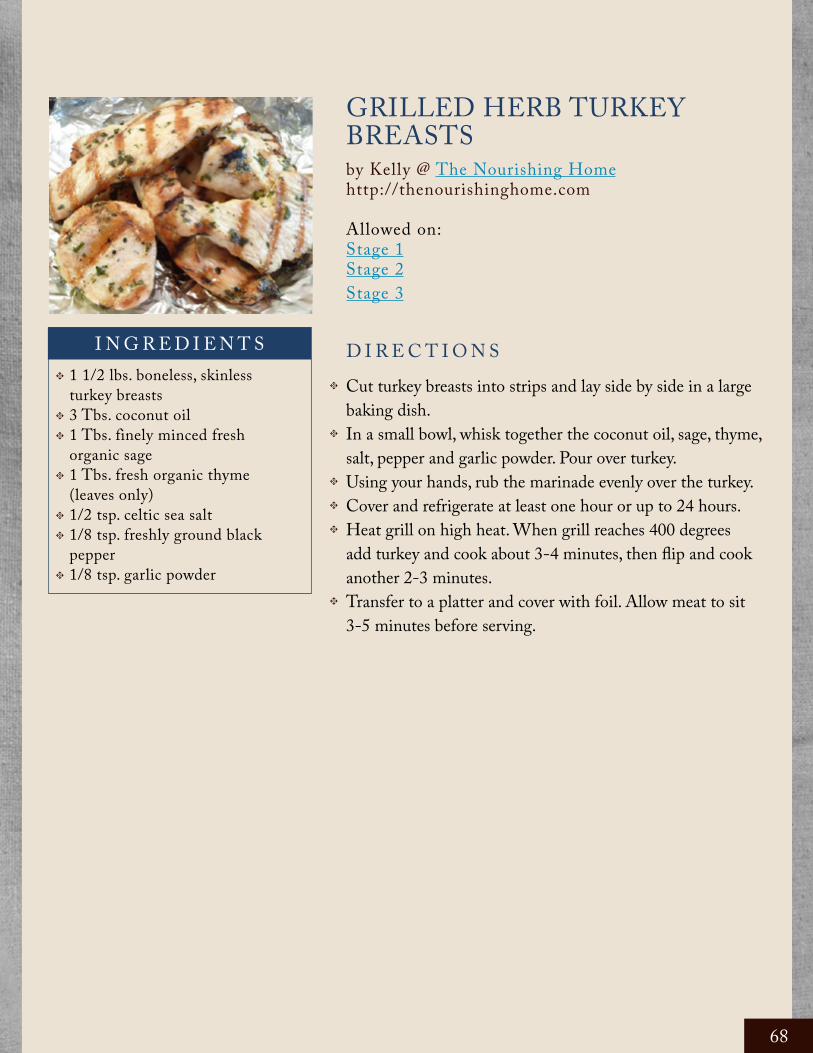
GRILLED HERB TURKEY BREASTSby Kelly @ The Nourishing Homehttp://thenourishinghome.com
Allowed on:Stage 1Stage 2Stage 3
D I R E C T I O N SCut turkey breasts into strips and lay side by side in a large baking dish.In a small bowl, whisk together the coconut oil, sage, thyme, salt, pepper and garlic powder. Pour over turkey.Using your hands, rub the marinade evenly over the turkey. Cover and refrigerate at least one hour or up to 24 hours.Heat grill on high heat. When grill reaches 400 degrees add turkey and cook about 3-4 minutes, then flip and cook another 2-3 minutes.Transfer to a platter and cover with foil. Allow meat to sit 3-5 minutes before serving.
I N G R E D I E N T S1 1/2 lbs. boneless, skinless turkey breasts3 Tbs. coconut oil1 Tbs. finely minced fresh organic sage1 Tbs. fresh organic thyme (leaves only)1/2 tsp. celtic sea salt1/8 tsp. freshly ground black pepper1/8 tsp. garlic powder
t
t
t
t
t
t
t
t
t
t
t
t
t
68
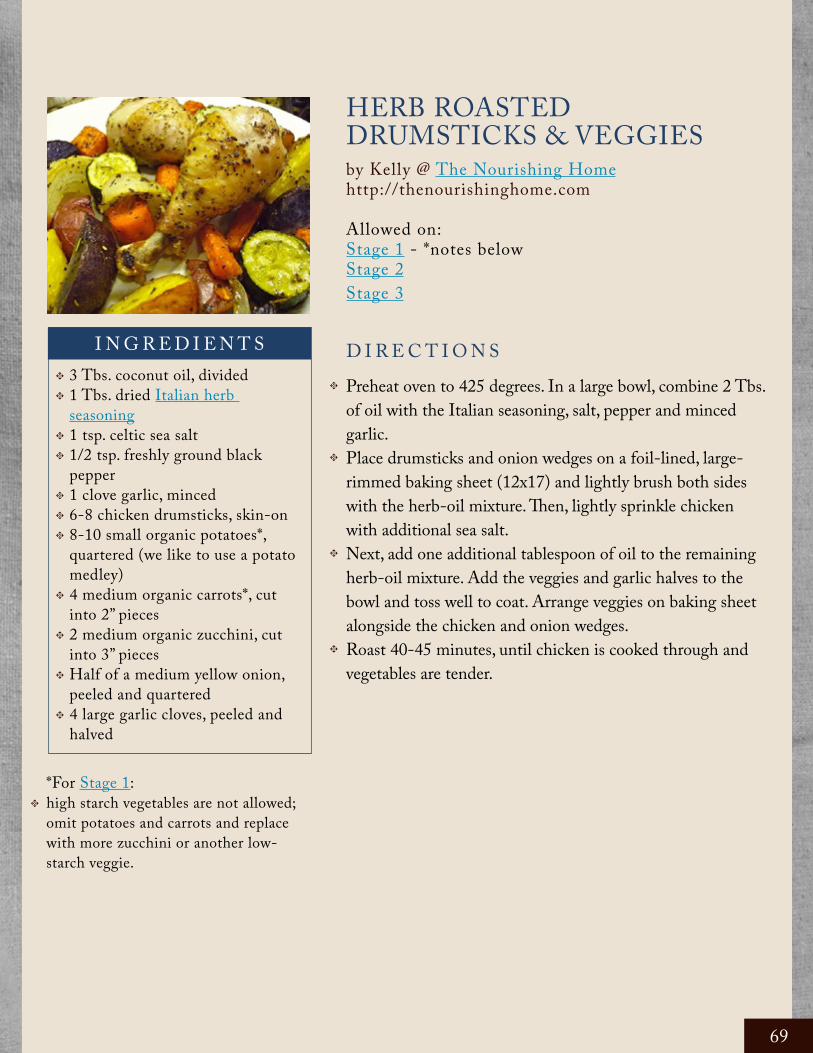
HERB ROASTED DRUMSTICKS & VEGGIESby Kelly @ The Nourishing Homehttp://thenourishinghome.com
Allowed on:Stage 1 - *notes belowStage 2Stage 3
D I R E C T I O N SPreheat oven to 425 degrees. In a large bowl, combine 2 Tbs. of oil with the Italian seasoning, salt, pepper and minced garlic. Place drumsticks and onion wedges on a foil-lined, large-rimmed baking sheet (12x17) and lightly brush both sides with the herb-oil mixture. Then, lightly sprinkle chicken with additional sea salt.Next, add one additional tablespoon of oil to the remaining herb-oil mixture. Add the veggies and garlic halves to the bowl and toss well to coat. Arrange veggies on baking sheet alongside the chicken and onion wedges.Roast 40-45 minutes, until chicken is cooked through and vegetables are tender.
I N G R E D I E N T S3 Tbs. coconut oil, divided1 Tbs. dried Italian herb seasoning1 tsp. celtic sea salt1/2 tsp. freshly ground black pepper1 clove garlic, minced6-8 chicken drumsticks, skin-on8-10 small organic potatoes*, quartered (we like to use a potato medley)4 medium organic carrots*, cut into 2” pieces2 medium organic zucchini, cut into 3” piecesHalf of a medium yellow onion, peeled and quartered4 large garlic cloves, peeled and halved
t
t
t
t
t
t
t
t
t
t
t
t
t
t
t
*For Stage 1:high starch vegetables are not allowed; omit potatoes and carrots and replace with more zucchini or another low-starch veggie.
t
69

COCONUT FRIED CHICKENby Paula @ Whole Intentions http://wholeintentions.com
Allowed on:Stage 1Stage 2Stage 3
D I R E C T I O N SHeat coconut oil in a deep frying pan until it starts to bubble and snaps if you sprinkle water on it.Combine coconut flour, salt, and pepper in dish.One at a time, wet each drumstick with water and shake off excess. Coat the drumstick with the flour mixture and lay in the heated oil. Repeat until pan is full.Let the drumsticks fry for about 5-8 min. Flip them over carefully with two forks and let them fry an additional 5-8 min.Lay the drumsticks in a 9×13 pan. Continue frying until the pan(s) are full.Bake at 300 degrees for about 1 – 1 1/2 hrs.
I N G R E D I E N T S24 chicken drumsticks1 c. coconut flour 1 tsp. salt1 tsp. pepper1 c.+ coconut oil for frying
t
t
t
t
t
t
t
t
t
t
t
70

LEMON-GARLIC ROASTED CHICKENby Kelly @ The Nourishing Homehttp://thenourishinghome.com
Allowed on:Stage 1Stage 2Stage 3
D I R E C T I O N SPreheat oven to 450 degrees. Cut each chicken breast in half to form four servings. (Add additional chicken breasts as needed to serve more individuals.)Squeeze the juice from 3-4 of the lemon quarters to obtain one tablespoon of lemon juice. Place lemon juice into a small bowl along with the oil and oregano. Combine well.On a 12x17-inch rimmed baking sheet, place the chicken breasts skin side up and drizzle with the oil mixture. Then add the garlic cloves and lemons; toss all ingredients together until well coated with the oil mixture. Season with salt and pepper. Be sure to squeeze a couple of the roasted lemon wedges over the roasted chicken before serving for an extra burst of lemony-goodness!Roast chicken, skin side up, until golden and cooked through, about 25-30 minutes.
Note: For a delicious variation, simply substitute one teaspoon of dried thyme in place of the dried oregano.
I N G R E D I E N T S2 split skin-on chicken breasts with ribs (about 2 lbs.)6 garlic cloves, peeled and smashed3 lemons, quartered2 Tbs. coconut oil1 Tbs. fresh-squeezed lemon juice1 tsp. dried oreganosea salt and fresh-ground black pepper
t
t
t
t
t
t
t
t
t
t
t
t
71

EASY GRILLED HERB CHICKENby Kelly @ The Nourishing Homehttp://thenourishinghome.com
Allowed on:Stage 1Stage 2Stage 3
D I R E C T I O N SCut each chicken breast in half lengthwise, to form two thinly-sliced breasts or cut breasts into strips (chicken tenders).In a medium bowl, whisk together oil and seasonings. Add chicken and use a fork to turn chicken over a few times to thoroughly coat with marinade.Tightly cover bowl. Place in refrigerator and allow to marinate at least one hour or overnight.When ready to cook, preheat grill and grill 2-3 minutes per side, until cooked through.
I N G R E D I E N T S1 lb. organic boneless, skinless chicken breasts, fat trimmed2 Tbs. coconut oil1/4 tsp. dried thyme1/4 tsp. dried rosemary 1/4 tsp. garlic powder1/2 tsp. celtic sea salt1/8 tsp. freshly ground black pepper
t
t
t
t
t
t
t
t
t
t
t
72
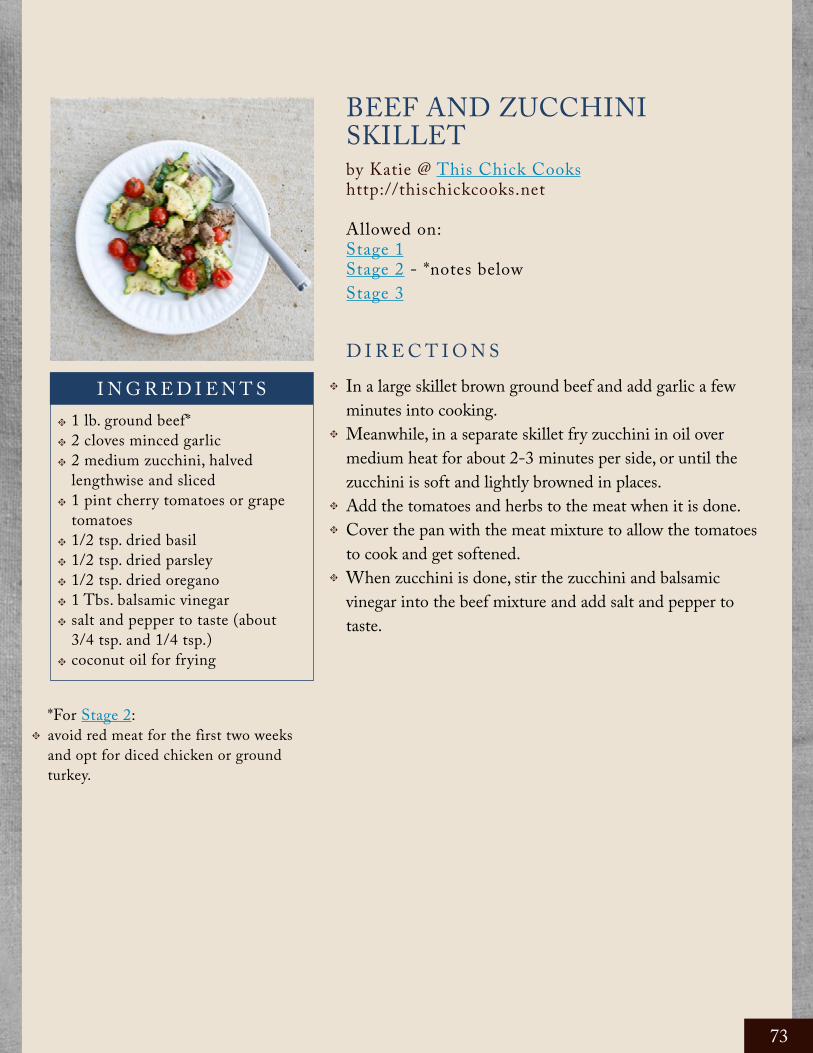
BEEF AND ZUCCHINI SKILLETby Katie @ This Chick Cookshttp://thischickcooks.net
Allowed on:Stage 1Stage 2 - *notes belowStage 3
D I R E C T I O N SIn a large skillet brown ground beef and add garlic a few minutes into cooking.Meanwhile, in a separate skillet fry zucchini in oil over medium heat for about 2-3 minutes per side, or until the zucchini is soft and lightly browned in places.Add the tomatoes and herbs to the meat when it is done. Cover the pan with the meat mixture to allow the tomatoes to cook and get softened.When zucchini is done, stir the zucchini and balsamic vinegar into the beef mixture and add salt and pepper to taste.
I N G R E D I E N T S1 lb. ground beef*2 cloves minced garlic 2 medium zucchini, halved lengthwise and sliced1 pint cherry tomatoes or grape tomatoes1/2 tsp. dried basil1/2 tsp. dried parsley1/2 tsp. dried oregano1 Tbs. balsamic vinegarsalt and pepper to taste (about 3/4 tsp. and 1/4 tsp.)coconut oil for frying
t
t
t
t
t
t
t
t
t
t
t
t
t
t
t
*For Stage 2:avoid red meat for the first two weeks and opt for diced chicken or ground turkey.
t
73
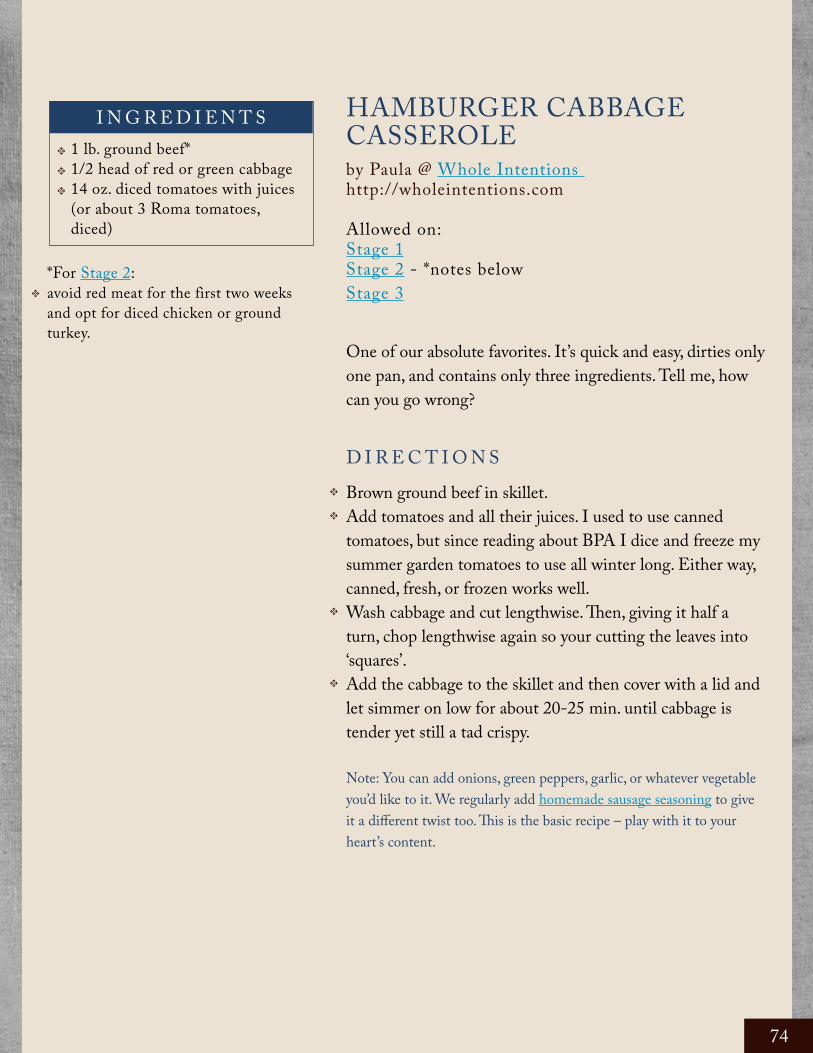
HAMBURGER CABBAGE CASSEROLEby Paula @ Whole Intentions http://wholeintentions.com
Allowed on:Stage 1Stage 2 - *notes belowStage 3
One of our absolute favorites. It’s quick and easy, dirties only one pan, and contains only three ingredients. Tell me, how can you go wrong?
D I R E C T I O N SBrown ground beef in skillet.Add tomatoes and all their juices. I used to use canned tomatoes, but since reading about BPA I dice and freeze my summer garden tomatoes to use all winter long. Either way, canned, fresh, or frozen works well.Wash cabbage and cut lengthwise. Then, giving it half a turn, chop lengthwise again so your cutting the leaves into ‘squares’.Add the cabbage to the skillet and then cover with a lid and let simmer on low for about 20-25 min. until cabbage is tender yet still a tad crispy.
Note: You can add onions, green peppers, garlic, or whatever vegetable you’d like to it. We regularly add homemade sausage seasoning to give it a different twist too. This is the basic recipe – play with it to your heart’s content.
I N G R E D I E N T S1 lb. ground beef*1/2 head of red or green cabbage14 oz. diced tomatoes with juices (or about 3 Roma tomatoes, diced)
t
t
t
t
t
t
t
*For Stage 2:avoid red meat for the first two weeks and opt for diced chicken or ground turkey.
t
74

BROCCOLI AND BEEF STIR FRYby Trisha @ Intoxicated On Life http://intoxicatedonlife.com
Allowed on:Stage 1Stage 2 - *notes belowStage 3
Delicious, easy, and perfect.
D I R E C T I O N SCut beef into thin strips.Coat beef in baking soda and let sit for 15 minutes.Combine the marinade ingredients and set aside.Rinse meat and pat dry.Pour marinade over beef and let set for 20 or more minutes.Steam the broccoli florets until tender, but don’t overcook them because you don’t want mushy broccoli in your stir fry.Drain broccoli and spray with cool water.Heat a large skillet or wok. Pour in 2 T. of oil.Add meat and let sit cooking for 1-2 minute before turning. Cook for 2-3 more minutes, until browned.Add the broccoli and stir until tender crisp.
I N G R E D I E N T S1 lb. beef* sirloin steak, boneless ribeye steak, or minute steak1 lb. broccoli florets (about 2 lbs. whole head broccoli, cut from the stalks into medium sized florets)baking soda
MARINADE1/4 c. coconut aminos2 Tbs. fresh lime juice1/2 tsp. garlic powder1/4 c. lard/tallow/coconut oil1/4 tsp. pure stevia extract1 tsp. fresh minced ginger (or 1/2 tsp. dried ginger spice)2 Tbs. lard/tallow/coconut oil for the fry pan
t
t
t
t
t
t
t
t
t
t t
t
t
t
t
t
t
t
t
t
t
*For Stage 2:avoid red meat for the first two weeks and opt for diced chicken or ground turkey.
t
75

INDIAN STUFFED PEPPERSby Paula @ Whole Intentions http://wholeintentions.com
Allowed on:Stage 1Stage 2 - *notes belowStage 3
D I R E C T I O N SBrown the ground beef with the onions, coriander, cumin, and cayenne pepper.Add the tomatoes (and juice) and salt and let simmer about 10 min.Wash peppers and cut in half vertically. Remove the seeds and ribs inside. Lay each pepper half in a 9×13 pan (you may need another small pan if you have larger peppers).Fill each pepper half with the beef mixture.Bake at 350 degrees F for 40 minutes.
SLOW-COOKED PEPPER STEAKby Jill @ Jill’s Home Remedieshttp://jillshomeremedies.com
Allowed on:Stage 1 - *notes belowStage 2 - *notes belowStage 3
This is a recipe I often double so I can send left overs in my husband’s lunch for a few days. He’s picky about left-overs, but likes this the next day.
D I R E C T I O N SBrown beef and place in crockpot. Combine soy sauce, onion, garlic, pepper and ginger in a bowl and pour over beef. Cook on low for a few hours (recipe says 5-6 hours, but I usually only do about 2 hours). Add tomatoes and green peppers and cook one hour longer on low. Serve over brown rice* or gluten free noodles*.
I N G R E D I E N T S
I N G R E D I E N T S
5 bell peppers1 lb. ground beef*1 medium onion, finely chopped2 tsp. ground coriander1 tsp. ground cumin1/2 tsp. cayenne pepper (or to taste)14 oz. diced tomatoes, keep the liquid (or about 3 Roma tomatoes, diced)salt, to taste
1 1/2 - 2 lbs. of steak*, cut in strips1/4 c. soy sauce (or Bragg’s Liquid Aminos)1/2 c. chopped onion1 garlic clove, minced1/4 tsp. pepper1/4 tsp. ground ginger4 tomatoes cut into 8ths or canned tomatoes (I use tomatoes I’ve canned from the garden)2 green peppers, cut into strips
t
t
t
t
t
t
t
t
t
t
t
t
t
t
t
t
t
t
t
t
t
t
t
t
t
t
*For Stage 2:avoid red meat for the first two weeks and opt for diced chicken or ground turkey.
*For Stage 1:grains are not allowed; you can use Cauliflower Rice or Zucchini Pasta with Basil Butter if you’d like.
*For Stage 2: avoid red meat for the first two weeks.
t
t
t
76
MARINATED BEEF TENDERLOINby Paula @ Whole Intentions http://wholeintentions.com
Allowed on:Stage 1 - *notes belowStage 2 - *notes belowStage 3
D I R E C T I O N SLay beef tenderloin in a shallow baking pan. Combine marinade and pour over beef. Cover and marinate in the refrigerator for 4-8 hours or overnight. Turn once so both sides get a chance to soak.Preheat oven to 325.When you are ready to cook them, turn on the broiler. Place tenderloins in a shallow baking pan and reserve the leftover marinade. Place pan under broiler and brown both sides. Turn off broiler and turn oven back to 325. Bake 1 1/2 hrs. or until meat thermometer is 140 degrees F. (Cooking time will vary depending on how thick the meat is. Watch thinner cuts of meat or they will become overdone.)When meat is nearly done, add arrowroot to marinade and heat to a boil. You can add more arrowroot if you like your gravy thicker.
I N G R E D I E N T S6 lb. beef tenderloin*
MARINADE1 c. homemade beef broth1/2 c. Bragg’s Liquid Aminos or coconut aminos 1/4 c. coconut oil1/4 c. water3 cloves garlic, crushed1 t. thyme1 t. pepper1 t. Tabasco sauce (optional) (read label carefully – may contain sugar) 1 Tbs. arrow root powder to thicken”
t
t
t
t
t
t
t
t
t
t
t
t
t
t
t
*For Stage 1:arrowroot is not allowed; omit.
*For Stage 2:avoid red meat for the first two weeks
t
t
77

SIMPLE GREEK-INSPIRED BEEF ROASTby Stephanie @ The Cheapskate Cookhttp://thecheapskatecook.com
Allowed on:Stage 1 - *notes belowStage 2 - *notes belowStage 3
D I R E C T I O N SPour half of the oil in the bottom of a large skillet and brown the roast on the skillet, using tongs to carefully flip it over and brown it on all sides.Place browned roast in the bottom of your slow cooker and add tomato juice, cloves, peppercorns, and cinnamon.Pour the rest of the oil into the skillet and sauté the onions until translucent.Pour the onions on top of the roast, scraping the sides of the skillet to get any extra oil or fat to add to the slow cooker.Cover and cook on low 6-8 hours. Add salt and pepper to taste and serve over brown rice*.
I N G R E D I E N T S3 lbs. beef roast*1/3 c. butter, or coconut oil3/4 c. onion, chopped6-7 whole cloves (or 1/2 tsp. ground cloves)5-6 peppercorns (or 1/8 tsp. pepper)1 two or three inch-long cinnamon stick (or 1/2 tsp. ground cinnamon) (sounds unusual but trust me – it’s good)1 1/2 – 2 c. tomato juice (I’ve successfully substituted diced tomatoes)salt and pepper, to taste
t
t
t
t
t
t
t
t
t
t
t
t
t
*For Stage 1:grains are not allowed; you can use Cauliflower Rice in place of brown rice if you’d like.
*For Stage 2: avoid red meat for the first two weeks.
t
t
78

MEXICAN PULLED BEEF WITH KALEby Lydia @ Divine Health From the Inside Outhttp://divinehealthfromtheinsideout.com
Allowed on:Stage 1 - *notes belowStage 2 - *notes belowStage 3 - *notes below
D I R E C T I O N SPlace roast in a large ziploc bag and add the cumin, chili powder, coriander, salt, cayenne and optional lime zest.Seal the bag and toss around shake and bake style until the meat is well coated.Meanwhile, add to the crockpot, sliced onions, garlic, mushrooms, tomato paste and beef stock. Place the roast on top of the veggies and turn the crockpot on low for 6-7 hours. This roast can be done in 6 1/2 hours, but can also be in there up to 10 if need be. If you are able, stir at least once or twice during the cooking time.One hour before finishing the roast, add in the thinly sliced kale. (If you want to hide the kale better, due to children that may revolt if they detect anything green, chop the kale very fine using a food processor and add it in, cook an additional 30 minutes). If you are going to be gone during the entire cooking time, you can go ahead and add up to 1/2 cup more stock to ensure it doesn’t dry out. I also like to add a good hunk of butter at the end of the cooking time; about half a stick.Once the roast is done, scoop out the pieces of meat into a large bowl. Using two forks pull the meat apart until it is all shredded. Add it back into the crockpot and stir well.
I N G R E D I E N T S3 lbs. grassfed chuck roast* (can be slightly more or less)1 - 6 oz. can organic tomato paste1 - 12 oz. package mushrooms*, sliced1 bunch organic kale, any variety you like, sliced in a chiffonade style (in long strips)2 medium onions, halved and sliced thin1 c. of homemade beef broth, plus additional stock as needed8-10 cloves garlic, minced1-2 jalapenos, minced, optional1-2 Tbs. lime zest, optional3 Tbs. ground cumin1 Tbs. chili powder1 Tbs. ground coriander1 Tbs. celtic sea salt (plus more to taste when served)cayenne pepper to taste
t
t
t
t
t
t
t
t
t
t
t
t
t
t
t
t
t
t
t
t
t
*For Stage 2: avoid red meat for the first two weeks.
*For all Stages:mushrooms are only allowed if they are soaked overnight in extra virgin olive oil and fresh garlic.
t
t
79
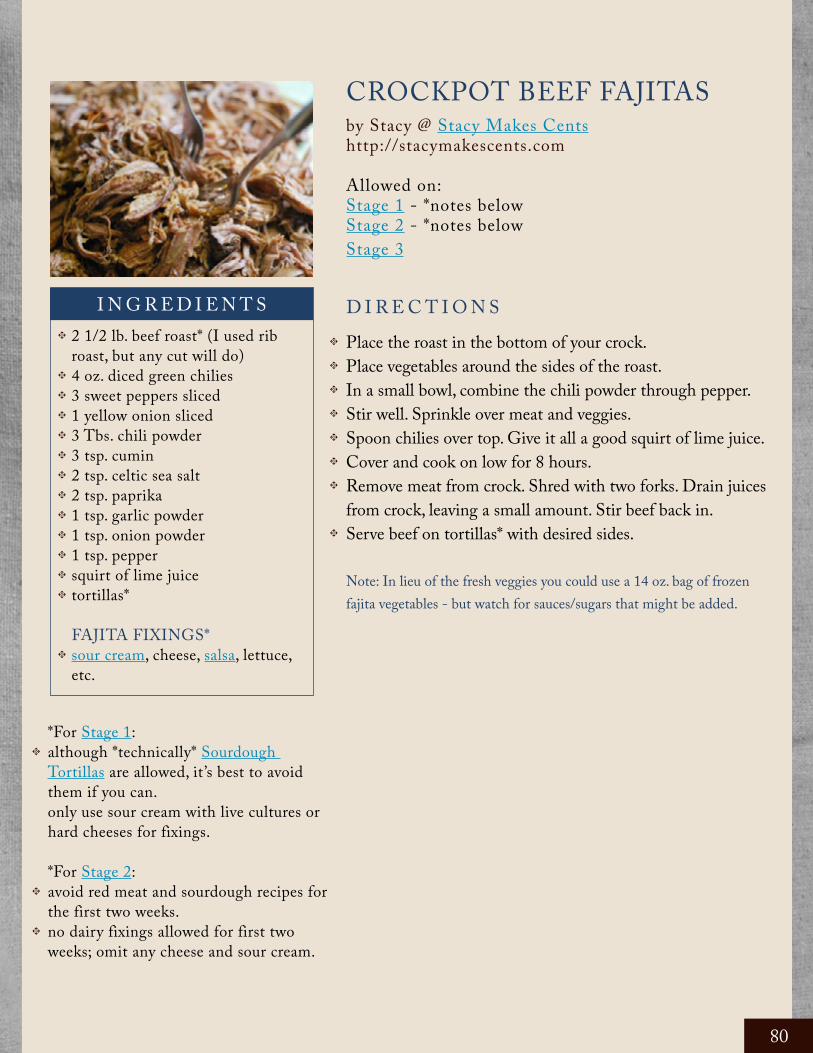
CROCKPOT BEEF FAJITASby Stacy @ Stacy Makes Centshttp://stacymakescents.com
Allowed on:Stage 1 - *notes belowStage 2 - *notes belowStage 3
D I R E C T I O N SPlace the roast in the bottom of your crock.Place vegetables around the sides of the roast.In a small bowl, combine the chili powder through pepper. Stir well. Sprinkle over meat and veggies.Spoon chilies over top. Give it all a good squirt of lime juice. Cover and cook on low for 8 hours.Remove meat from crock. Shred with two forks. Drain juices from crock, leaving a small amount. Stir beef back in.Serve beef on tortillas* with desired sides.
Note: In lieu of the fresh veggies you could use a 14 oz. bag of frozen fajita vegetables - but watch for sauces/sugars that might be added.
I N G R E D I E N T S2 1/2 lb. beef roast* (I used rib roast, but any cut will do)4 oz. diced green chilies3 sweet peppers sliced1 yellow onion sliced3 Tbs. chili powder3 tsp. cumin2 tsp. celtic sea salt2 tsp. paprika1 tsp. garlic powder1 tsp. onion powder1 tsp. peppersquirt of lime juicetortillas*
FAJITA FIXINGS*sour cream, cheese, salsa, lettuce, etc.
t
t
t
t
t
t
t
t
t
t
t
t
t
t
t
t
t
t
t
t
t
t
*For Stage 1: although *technically* Sourdough Tortillas are allowed, it ’s best to avoid them if you can.only use sour cream with live cultures or hard cheeses for fixings.
*For Stage 2:avoid red meat and sourdough recipes for the first two weeks.no dairy fixings allowed for first two weeks; omit any cheese and sour cream.
t
t
t
80

BACON WRAPPED VENISON TENDERLOINby Jill @ The Prairie Homesteadhttp://theprairiehomestead.com
Allowed on:Stage 1Stage 2 - *notes belowStage 3
It’s heaven on a fork people.
D I R E C T I O N SIn a baking pan (a 9×9 or a pie plate usually works for me), combine all of the ingredients except the tenderloin and bacon.Place the medallions in the marinade mixture. Turn them over once to coat, then allow to marinate for 2-6 hours in the refrigerator. (I try to flip them at least once during the process).When you are ready to cook them, remove from the mixture and discard the marinade.Wrap one slice of bacon around the edge of each medallion. Secure with a toothpick.Grill to your preference. For maximum flavor, I would advise NOT overcooking them.Remove from the grill. Allow to rest for 5 to 10 minutes before serving.
I N G R E D I E N T S1-2 lbs. venison tenderloin* (aka backstrap) cut into medallions that are around 1 inch thick. (Or use the beef equivalent)1 lb. bacon*1/4 c. water1/4 c. apple cider vinegar 1/8 c. Bragg Liquid Aminos 1 tsp. xylitol or stevia to taste2 tsp. garlic powder2 tsp. onion powder1/2 tsp. ground ginger
t
t
t
t
t
t
t
t
t
t
t
t
t
t
t
t
t
*For Stage 2: avoid red meat for the first two weeks.t
81

VENISON STIR-FRYby Paula @ Whole Intentions http://wholeintentions.com
Allowed on:Stage 1Stage 2 - *notes belowStage 3
D I R E C T I O N SPlace thawed steaks in frying pan and cook over medium heat. Sprinkle with salt and pepper or whatever seasonings you like. Cover pan.While the steaks are cooking, cut onions and peppers into strips. Throw them into the pan and cover again.After about 8 minutes, flip each steak over and season again. There should be enough liquids in the bottom of the pan to sauté the veggies, but if not, you can add just a touch of water or Bragg’s Liquid Aminos.Cook steaks to your preference and serve hot.
WHEN PIGS FLYby Virginia at GeorgetownMNhttp://georgetownmn.blogspot.com
Allowed on:Stage 1 - *notes belowStage 2 - *notes belowStage 3
This dish can be made both in the oven or on the grill so it’s pretty versatile.
D I R E C T I O N SPreheat oven to 350F.Lightly cook bacon, remove it from the pan before it becomes crispy.Cut chicken breasts into thirds. Starting at one end, wrap bacon around chicken strip and secure with a toothpick or by tucking in the ends. Place on a broiler pan and bake for 30 min. or until juices run clear. Top with a scant amount of cheese if desired.
I N G R E D I E N T S
I N G R E D I E N T S
2 lbs. venison steaks*, tenderloins, or stew meat, cut thin (can use beef, pork, or chicken as well)1 medium onion1 green bell pepper1 red bell pepperceltic sea saltpepperBragg’s Liquid Aminos, optional
3 chicken breasts9 strips of nitrate-free bacon*cheese*, optional
t
t
t
t
t
t
t
t
t
t
t
t
t
t
t
t
t
t
t
t
*For Stage 2: avoid red meat for the first two weeks.
*For Stage 1: hard cheeses only, but be cautious.
*For Stage 2: avoid red meat for the first two weeks.no dairy (cheese) allowed for the first two weeks.
t
t
t
82

SOUTHWESTERN BEAN MEDLEY IN THE CROCK POTby Emily @ Live Renewedhttp://liverenewed.com
Allowed on:Stage 2Stage 3
D I R E C T I O N SMix all ingredients except tomatoes and cilantro in 3 1/2 quart slow cooker (or whatever size you happen to have). Cover and cook on low 6 to 7 hours. Add tomatoes. Cover and cook for 1 hour. Sprinkle with cilantro.If you are going to use uncooked dried beans for this recipe, you need to make sure that you soak them ahead of time. I just soaked mine overnight and then put them in the crock pot with the rest of the ingredients the next morning. I also added some extra chicken broth to make sure the beans were cooked through.You could add salt, pepper, white pepper, garlic powder, onion powder, cayenne pepper and/or cumin to suit your tastes.
I N G R E D I E N T S14 oz. vegetable broth – (I used homemade chicken stock) 1 Tbs. chili powder1 tsp. ground cumin1 can black beans (rinsed and drained)1 can chickpeas (rinsed and drained)1 can white kidney beans or Great Northern beans 1/2 c. dried lentils1 c. diced tomatoes with greenchilieschopped fresh cilantro leaves
Note: If you want to use cooked beans in place of canned beans: 2/3 cup dry beans = 2 cups after cooking = 15 oz. can of beans.
t
t
t
t
t
t
t
t
t
t
t
t
t
t
83
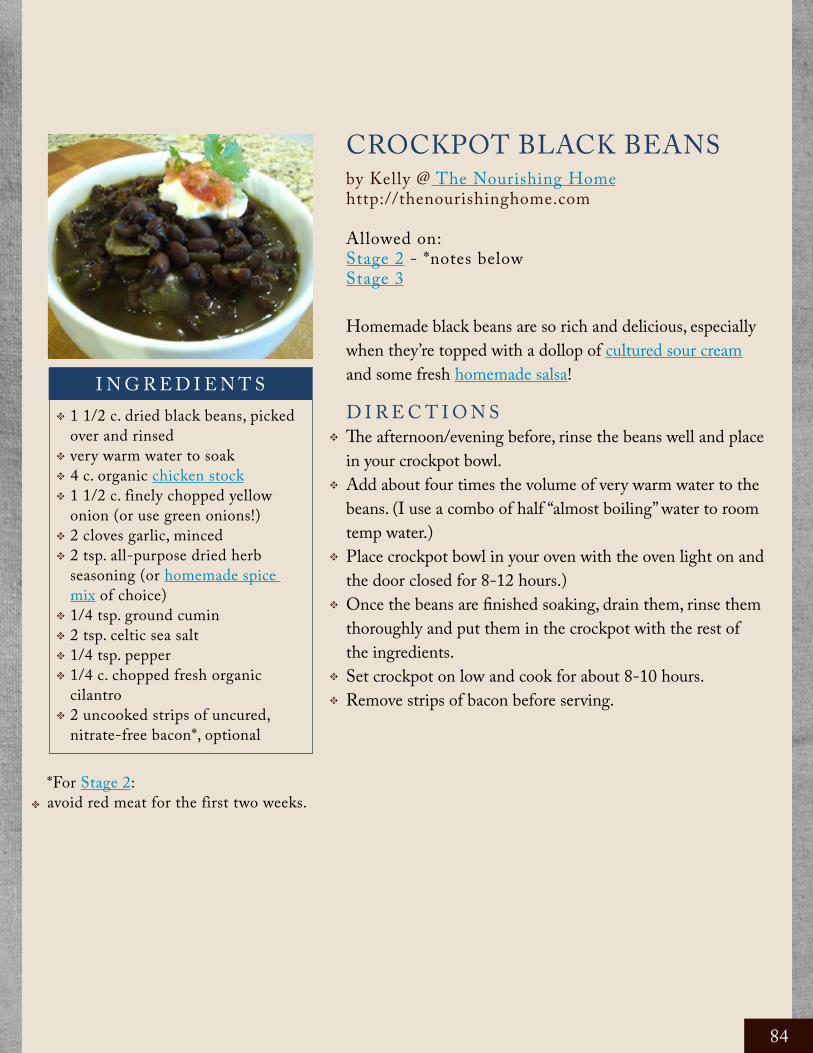
CROCKPOT BLACK BEANSby Kelly @ The Nourishing Homehttp://thenourishinghome.com
Allowed on:Stage 2 - *notes belowStage 3
Homemade black beans are so rich and delicious, especially when they’re topped with a dollop of cultured sour cream and some fresh homemade salsa!
D I R E C T I O N SThe afternoon/evening before, rinse the beans well and place in your crockpot bowl.Add about four times the volume of very warm water to the beans. (I use a combo of half “almost boiling” water to room temp water.)Place crockpot bowl in your oven with the oven light on and the door closed for 8-12 hours.)Once the beans are finished soaking, drain them, rinse them thoroughly and put them in the crockpot with the rest of the ingredients.Set crockpot on low and cook for about 8-10 hours.Remove strips of bacon before serving.
I N G R E D I E N T S1 1/2 c. dried black beans, picked over and rinsedvery warm water to soak4 c. organic chicken stock1 1/2 c. finely chopped yellow onion (or use green onions!)2 cloves garlic, minced2 tsp. all-purpose dried herb seasoning (or homemade spice mix of choice)1/4 tsp. ground cumin2 tsp. celtic sea salt1/4 tsp. pepper1/4 c. chopped fresh organic cilantro2 uncooked strips of uncured, nitrate-free bacon*, optional
t
t
t
t
t
t
t
t
t
t
t
t
t
t
t
t
t
*For Stage 2: avoid red meat for the first two weeks.t
84
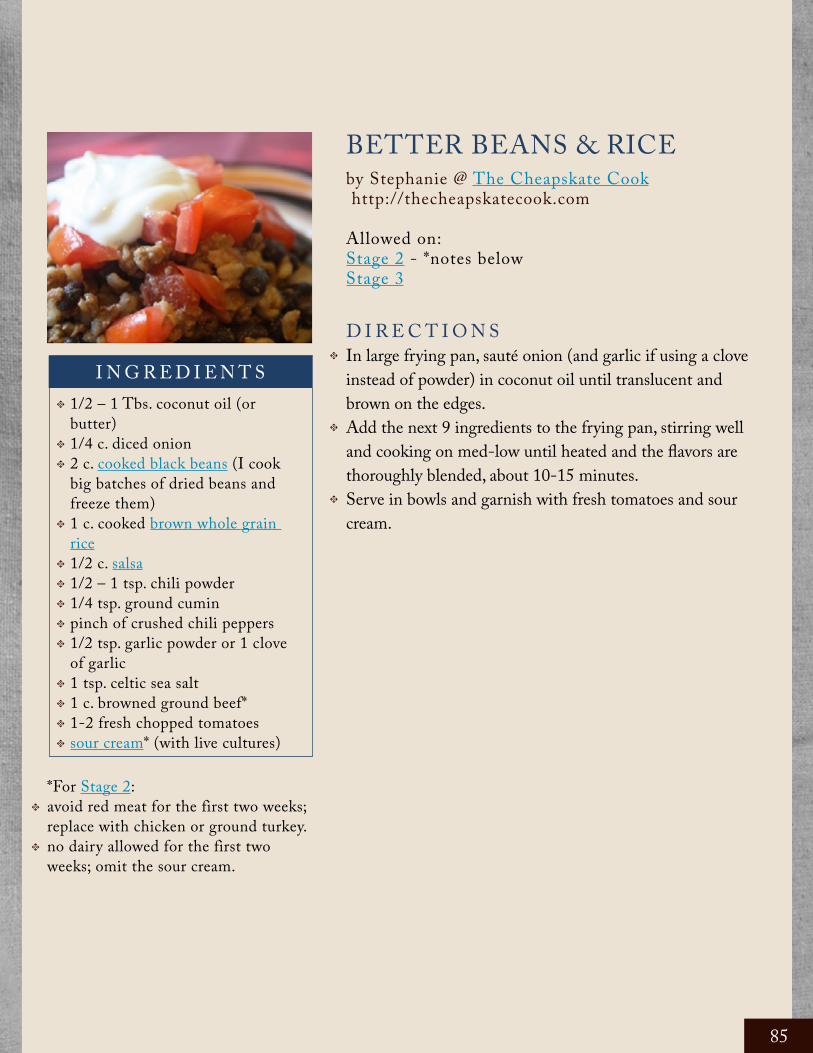
BETTER BEANS & RICEby Stephanie @ The Cheapskate Cook http://thecheapskatecook.com
Allowed on:Stage 2 - *notes belowStage 3
D I R E C T I O N SIn large frying pan, sauté onion (and garlic if using a clove instead of powder) in coconut oil until translucent and brown on the edges.Add the next 9 ingredients to the frying pan, stirring well and cooking on med-low until heated and the flavors are thoroughly blended, about 10-15 minutes.Serve in bowls and garnish with fresh tomatoes and sour cream.
I N G R E D I E N T S1/2 – 1 Tbs. coconut oil (or butter)1/4 c. diced onion2 c. cooked black beans (I cook big batches of dried beans and freeze them)1 c. cooked brown whole grain rice1/2 c. salsa1/2 – 1 tsp. chili powder1/4 tsp. ground cuminpinch of crushed chili peppers1/2 tsp. garlic powder or 1 clove of garlic1 tsp. celtic sea salt1 c. browned ground beef* 1-2 fresh chopped tomatoessour cream* (with live cultures)
t
t
t
t
t
t
t
t
t
t
t
t
t
t
t
t
*For Stage 2: avoid red meat for the first two weeks; replace with chicken or ground turkey.no dairy allowed for the first two weeks; omit the sour cream.
t
t
85

SIMPLE CROCKPOT ROAST & BEANSby Paula @ Whole Intentions http://wholeintentions.com
Allowed on:Stage 2 - *notes belowStage 3
D I R E C T I O N SThe night before, throw the kidney beans in the bottom of your crockpot and cover with 8 cups of water.Cover and let soak overnight.The next morning rinse the beans and return them to the crockpot. Add enough water to just cover the beans and then add 1 c. Bragg’s Liquid Aminos.Lay half of the onions and green pepper slices on top of the beans.Place the thawed roast on top of beans.Sprinkle the seasonings over the roast and beans, and then lay the remaining onions and green pepper slices on top.Cook on high for 8 hours.
I N G R E D I E N T S4-5 lb. chuck roast*, arm roast, rump roast, etc.4 c. dry kidney beans8 c. water to soakwater1 c. Bragg’s Liquid Aminos or Coconut Aminos1 onion, sliced1 green pepper, sliced2 garlic cloves, minced1 tsp. garlic salt1 tsp. oregano1 tsp. marjoram1 tsp. salt1 tsp. pepper
t
t
t
t
t
t
t
t
t
t
t
t
t
t
t
t
t
t
t
t
t
*For Stage 2: avoid red meat for the first two weeks.t
86
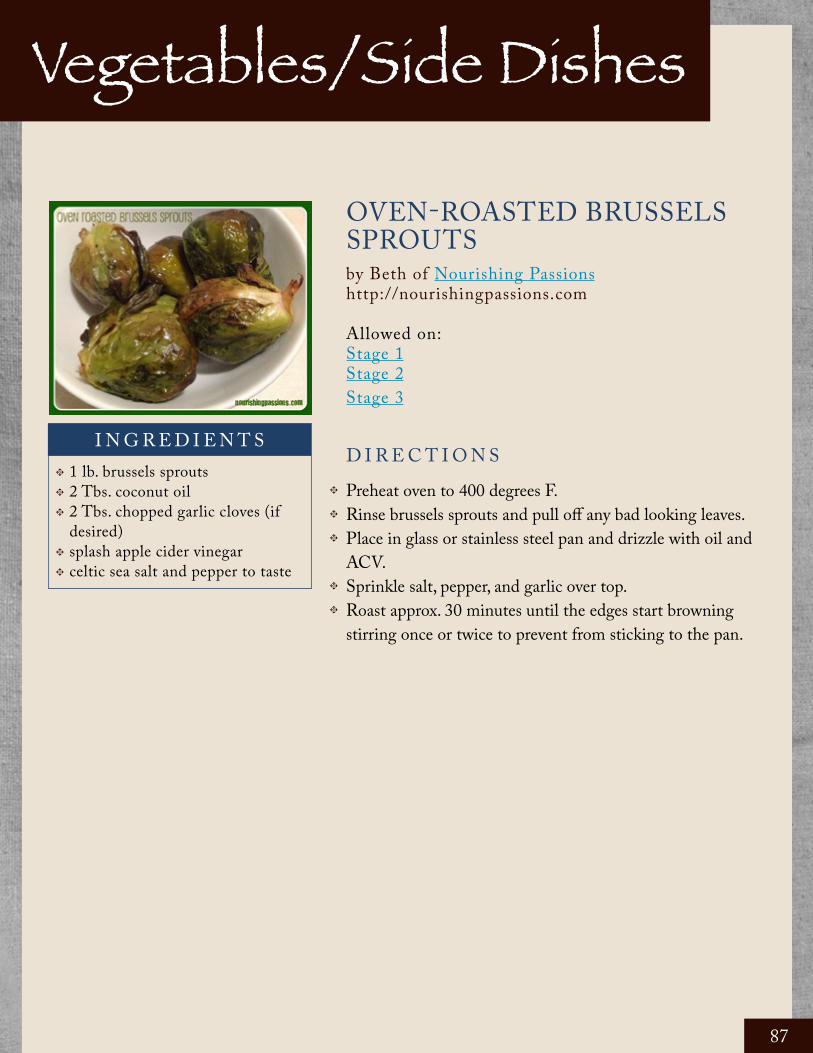
Vegetables/Side Dishes
OVEN-ROASTED BRUSSELS SPROUTSby Beth of Nourishing Passionshttp://nourishingpassions.com
Allowed on:Stage 1Stage 2Stage 3
D I R E C T I O N SPreheat oven to 400 degrees F.Rinse brussels sprouts and pull off any bad looking leaves.Place in glass or stainless steel pan and drizzle with oil and ACV.Sprinkle salt, pepper, and garlic over top.Roast approx. 30 minutes until the edges start browning stirring once or twice to prevent from sticking to the pan.
I N G R E D I E N T S1 lb. brussels sprouts2 Tbs. coconut oil2 Tbs. chopped garlic cloves (if desired)splash apple cider vinegarceltic sea salt and pepper to taste
t
t
t
t
t
t
t
t
t
t
87

ROASTED VEGETABLES WITH TOASTED ALMONDSby Paula @ Whole Intentions http://wholeintentions.com
Allowed on:Stage 1Stage 2Stage 3
D I R E C T I O N SPreheat oven to 450 degrees.Chop almonds (preferably soaked and dried) into large pieces and lay in a single layer on a small baking pan.Bake for about 10 minutes until just starting to brown. Remove from oven and set aside.Wash vegetables (thaw if frozen) and cut into nice-sized pieces if needed. If you’re doing a medley try to make them somewhat uniform so that they all cook evenly.Grease a glass 9x13 or jelly roll pan with either coconut oil or butter and lay veggies out in a single layer. Drizzle with oil or butter and season with a light sprinkling of salt, pepper, and thyme.Roast for about 20-30 minutes, thicker cut veggies will take longer, and thawed frozen veggies won’t take quite as long as they’ve been blanched before freezing. Stir a few times to coat them in oil/butter and to prevent sticking.They’re done when their colors are bright and they’re on the slightly crispy side.
I N G R E D I E N T Sany fresh or frozen low-starch vegetable:asparagus, green beans, cauliflower, broccoli, cabbage, zucchini, etc. or a medley of them allcoconut oil or butter, meltedceltic sea salt pepperthymealmonds, toasted lightly
t
t
t
t
t
t
t
t
t
t
t
t
t
t
t
88

JUDÍAS VERDES CON SALSA DE TOMATE (GREEN BEANS IN A TOMATO SAUCE)by Diana @ My Humble Kitchenhttp://myhumblekitchen.com
Allowed on:Stage 1Stage 2Stage 3
The perfect summer meal. Light, fresh, and seasonal.
D I R E C T I O N SIn a large pan, heat the oil. Add the onion and garlic and sauté until translucent.Add the green beans, cover and steam for 5-10 minutes.While the green beans are cooking, bring a pot of water to boil.Add the tomatoes to the large pot of boiling water and boil for 45 seconds.Remove the tomatoes and under cold water, slide their skins off.With your hands, literally crush the tomatoes into the pan of green beans releasing most of their juices.Break up the remaining tomatoes until they barely cover the green beans.Add salt to taste.Cover and simmer over medium heat for 20 – 25 minutes or until the tomato sauce has reduced to a thick sauce and the green beans are tender.
I N G R E D I E N T S1 lb. fresh green beans6 tomatoes1 onion, diced3 cloves garlic, sliced4 Tbs. coconut oilceltic sea salt to season
t
t
t
t
t
t t
t
t
t
t
t
t
t
t
89
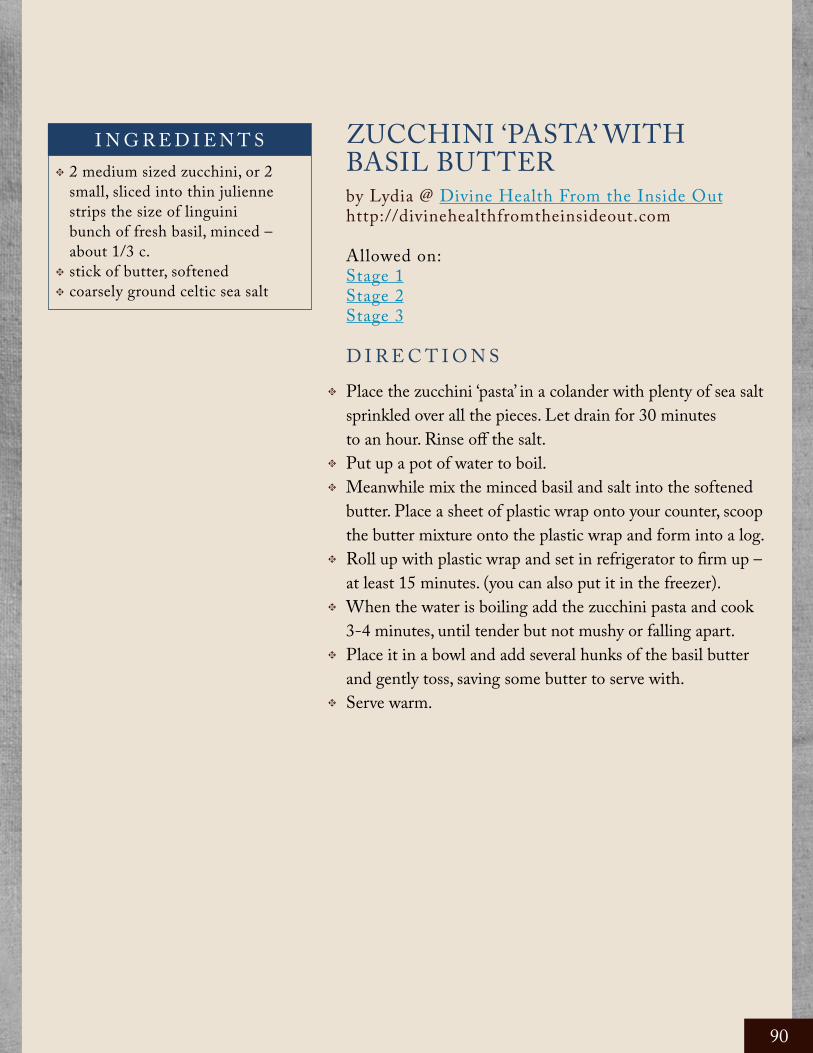
D I R E C T I O N SPlace the zucchini ‘pasta’ in a colander with plenty of sea salt sprinkled over all the pieces. Let drain for 30 minutesto an hour. Rinse off the salt. Put up a pot of water to boil. Meanwhile mix the minced basil and salt into the softened butter. Place a sheet of plastic wrap onto your counter, scoop the butter mixture onto the plastic wrap and form into a log. Roll up with plastic wrap and set in refrigerator to firm up – at least 15 minutes. (you can also put it in the freezer).When the water is boiling add the zucchini pasta and cook 3-4 minutes, until tender but not mushy or falling apart. Place it in a bowl and add several hunks of the basil butter and gently toss, saving some butter to serve with.Serve warm.
ZUCCHINI ‘PASTA’ WITH BASIL BUTTERby Lydia @ Divine Health From the Inside Outhttp://divinehealthfromtheinsideout.com
Allowed on:Stage 1Stage 2Stage 3
I N G R E D I E N T S2 medium sized zucchini, or 2 small, sliced into thin julienne strips the size of linguinibunch of fresh basil, minced – about 1/3 c.stick of butter, softenedcoarsely ground celtic sea salt
t
t
t
t
t
t
t
t
t
t
90

D I R E C T I O N SCut the head of cauliflower into chunks, removing the outer leafy layers and the core.Place the pieces in a food processor and process until it is the size of rice. Alternatively you could chop with a knife or shred with a box grater. Make sure you cut the cauliflower into small chunks before adding to the food processor or else it may not process consistently. You don’t want it to puree, but to be very miniscule pieces like rice.In a medium saucepan heat about 1/2 cup of chicken stock, or water and place the cauliflower in the pan with the lid on. Steam on medium heat for about 5-6 minutes. Check it for doneness. Top with lots of butter and sea salt.
STIR-FRIED GINGER BROCCOLIby Marillyn @ Just Making Noisehttp://just-making-noise.blogspot.com
Allowed on:Stage 1Stage 2Stage 3
D I R E C T I O N SWarm oil in pan. Add ginger and garlic. Sauté till lightly brown. Add broccoli and stir-fry lightly. Cover with a lid and let it “steam” for a few minutes till broccoli turns bright green (don’t overcook it! Keep it crunchy). Add sea salt and black pepper.
CAULIFLOWER RICE by Lydia @ Divine Health From the Inside Outhttp://divinehealthfromtheinsideout.com
Allowed on:Stage 1Stage 2Stage 3
I N G R E D I E N T S
I N G R E D I E N T S
1 big head of broccoli, choppedginger, finely choppedgarlic, finely choppedceltic sea saltblack peppercoconut oil
1 head of cauliflower
t
t
t
t
t
t
t
t
t
t
t
t
t
t
91

D I R E C T I O N SWash zucchini and cut off ends. Cut each zucchini into 1/4” slices.Place slices into a frying pan and add minced garlic. Cut butter into thin slices and lay on top of zucchini.Place a lid on frying pan and sauté over medium heat for about five minutes. Try not to stir it too often.Once the butter and water (cooks out of the zucchini) start to bubble and boil just a bit, remove from heat and leave the lid on. Let it sit for about ten minutes, letting the steam finish cooking them until they’re tender-crisp.
SAUTÉED ASPARAGUS WITH FRESH TARRAGON AND LEMONby Diana @ My Humble Kitchenhttp://myhumblekitchen.com
Allowed on:Stage 1 - *notes belowStage 2 - *notes belowStage 3
D I R E C T I O N SIn a large cast iron skillet add 2 Tbs. butter. Sauté the asparagus for 5-8 minutes until tender but firm to the bite.Add tarragon and lemon juice and sauté for an additional 2-3 minutes.Sprinkle with kosher sea salt and garnish with freshly grated manchego cheese*.
BUTTERY ZUCCHINI & GARLICby Paula @ Whole Intentions http://wholeintentions.com
Allowed on:Stage 1Stage 2Stage 3
I love zucchini – it ’s a low-maintenance, productive vegetable that ’s easy for the kids to spot and pick in the garden.
I N G R E D I E N T S
I N G R E D I E N T S
1 bunch asparagus, cut into 2” pieces2 Tbs. butter1 Tbs. freshly cut tarragon2 Tbs. freshly squeezed lemon juicelarge granule celtic sea salt to season
5 small zucchini3 cloves garlic, minced2 Tbs. butter (you can also use coconut oil)celtic sea salt and pepper to taste
t
t
t
t
t
t
t
t
t
t
t
t
t
t
t
t
t
t
*For Stage 1: hard cheeses only, but be cautious.
*For Stage 2: no cheese allowed for the first two weeks.
t
t
92

BUTTERY-HERBED BROWN RICEby Kelly @ The Nourishing Homehttp://thenourishinghome.com
Allowed on:Stage 2Stage 3
This is an easy, fast and tasty recipe.
D I R E C T I O N SIn a saucepan over medium heat, add precooked rice, chicken stock and seasonings.Bring to a gently simmer for about 3-5 minutes until rice reaches desired consistency.Remove from heat and stir in butter.
CHINESE GREEN BEANSby Paula @ Whole Intentions http://wholeintentions.com
Allowed on:Stage 1 - *notes belowStage 2Stage 3
D I R E C T I O N SSteam fresh green beans for about 5 minutes. Plunge them into cold water and drain.Sauté minced garlic in hot coconut oil for 30 seconds. Add green beans and continue to sauté for 5 minutes.Combine water, arrowroot, soy sauce, brown sugar, sesame oil, and red pepper in a small bowl. Stir well to dissolve the arrowroot.Pour arrowroot mixture over beans and stir until thoroughly coated and warmed through.Serve while hot.
I N G R E D I E N T S
I N G R E D I E N T S
2 1/2 c. of cooked soaked brown rice1/2 c. of chicken stock (homemade is best)1 tsp. fresh organic parsley, finely minced1/4 tsp. celtic sea salt1/8 tsp. fresh ground black pepper1/8 tsp. onion powder1-2 Tbs. butter
2 Tbs. coconut oil1 garlic clove, minced1 lb. fresh green beans2 Tbs. cold water2 tsp. arrowroot powder” 1 Tbs. Bragg’s Liquid Aminos or coconut aminostiny sprinkle stevia if desired1/2 tsp. sesame oil1/4 tsp. crushed red pepper flakes
t
t
t
t
t
t
t
t
t
t
t
t
t
t
t
t
t
t
t
t
t
t
t
t
t
*For Stage 1: arrowroot is not allowed; omit.t
93

LACTO-FERMENTED VEGGIESby Shannon @ Simply Smileshttp://simplysmiles.us
Allowed on:Stage 1 - *notes belowStage 2Stage 3
This is my basic recipe. Feel free to vary the veggies up! Sometimes I add in onion, carrots, shallots, whatever I have on hand that I would like to get rid of. A quick search online will give you hundreds of ideas and recipes for a variation on the above basic recipe.
D I R E C T I O N SIn a large ceramic bowl, mix all ingredients and allow to “marinate” for 20 minutes. The cabbage needs to wilt and create a salty brine. Spoon the cabbage into a mason jar (I use a quart-sized, wide-mouth). With each spoonful, press down firmly with a wooden spoon. The juice needs to rise to the top of the jar. Be sure to leave about one inch of space from the cabbage to the top of the jar. There will be some expansion while it is lacto-fermenting and you don’t want it to overflow out of the jar.Tighten lid and keep at room temperature for about three days before transferring to the refrigerator. You are able to eat your lacto-fermented veggies immediately, but the flavor gets even better as it “ages”.
I N G R E D I E N T S1 small cabbage (red, green or a mix), shredded1 apple (I have experimented with various apples and settled on green as my favorite), shredded1 1/2 Tbs. caraway seeds2 Tbs. Celtic sea salt
t
t
t
tt
t
t
t
*For Stage 1: no apples allowed; replace with other veggies.
t
94

Desserts
CHOCOLATE COCONUT NO-BAKE COOKIESby Jill @ The Prairie Homesteadhttp://theprairiehomestead.com
Allowed on:Stage 2 - *notes belowStage 3
D I R E C T I O N SIn a medium saucepan, combine the coconut oil, coconut milk, and honey.Boil for one minute. Remove from the heat. Stir in shredded coconut, oatmeal, cacao powder, vanilla, and peanut butter.Scoop onto a piece of waxed paper, or a very well-greased cookie sheet. You can make them any size that you would like, but I find a good size for my family is right around 1/4 cup of “dough” per cookie. Pat/smoosh into a circle, and allow to cool on the countertop for around an hour.Once they’ve hardened somewhat, carefully transfer and store in the refrigerator. These will not harden completely.
I N G R E D I E N T S1/2 c. coconut milk1/2 c. coconut oil1/2 c. honey*1 c. unsweetened, shredded coconut3 Tbs. raw cacao powder*2 c. quick oats 1 t. real vanilla 3 T. natural peanut butter*
t
t
t
t
t
t
t
t
t
t
t
t
*For Stage 2: avoid honey and raw cacao for the first two weeks.no peanut butter allowed for first two weeks and then use caution; replace with an allowed nut butter.
t
t
95

WHEAT-FREE REAL FOOD BROWNIESby Jaime @ Slightly Steadyhttp://slightlysteady.com
Allowed on:Stage 2 - *notes belowStage 3
Feel free to have more than one of these brownies. Look at all the eggs in this recipe! Seriously! It’s practically breakfast.
D I R E C T I O N SOver very low heat, melt together the cacao and coconut oil (stir constantly!). If you’re using xylitol, add it here and dissolve it with the cacao and coconut oil.Once it’s a smooth syrup, remove from heat and let cool.In another bowl, mix together eggs, raw sugar if you’re using that instead of xylitol, vanilla and salt. Add into the cacao mixture. Stir in coconut flour until there the lumps are gone. Pour into a greased 9×13 dish and bake at 350 degrees for about 35 minutes.
I N G R E D I E N T S2/3 c. coconut oil1 c. raw cacao powder*12 medium eggs* 2 c. raw sugar* 1 1/2 tsp. vanilla1 tsp. celtic sea salt1 c. coconut flour
t
t
t
t
t
t
t
t
t
t
t
t
*For Stage 2: avoid raw cacao and eggs for the first two weeks.avoid any sweeteners besides xylitol and stevia for the first two weeks; replace the raw sugar with xylitol dissolved in the warm coconut oil. Start out with maybe 1/2 cup of xylitol and increase to taste.
t
t
96

MIXED BERRY BREAKFAST BARS by Katie @ This Chick Cookshttp://thischickcooks.net
Allowed on:Stage 2 - *notes belowStage 3
D I R E C T I O N SPreheat oven to 400.Mix berries, sugar and applesauce in a pan and heat over medium.Meanwhile, make your crust by mixing shredded coconut, eggs, butter and salt. Then stir in the coconut flour until mixture is well combined. Butter a 5x7 pan and press half of the crust into the pan.Mix the water and the arrowroot and stir the mixture into the berries. Bring to a simmer and then remove from heat.Pour the berry mixture over the crust and crumble the remaining crust over the berries.Bake at 400 for 12-15 minutes. The top will be lightly golden.
I N G R E D I E N T SFILLING1/4 c. unsweetened applesauce*1/4 c. rapadura*2 Tbs. of arrowroot (plus 2 Tbs. water)1 1/2 c. berries* (I used half blueberries and half blackberries)
CRUST1/2 c. coconut flour (use a fork to remove any clumps)1/2 c. shredded coconut2 eggs1/4 c. butter, melted or you could use coconut oil1/4 tsp. celtic sea salt
t
t
t
t
t
t
t
t
t
t
t
t
t
t
t
t
*For Stage 2: only homemade applesauce with green apples is allowed.avoid sugars for the first two weeks; replace with maybe 2 Tbs. xylitol and a touch of stevia to taste.only blueberries are allowed from the berry family.
t
t
97
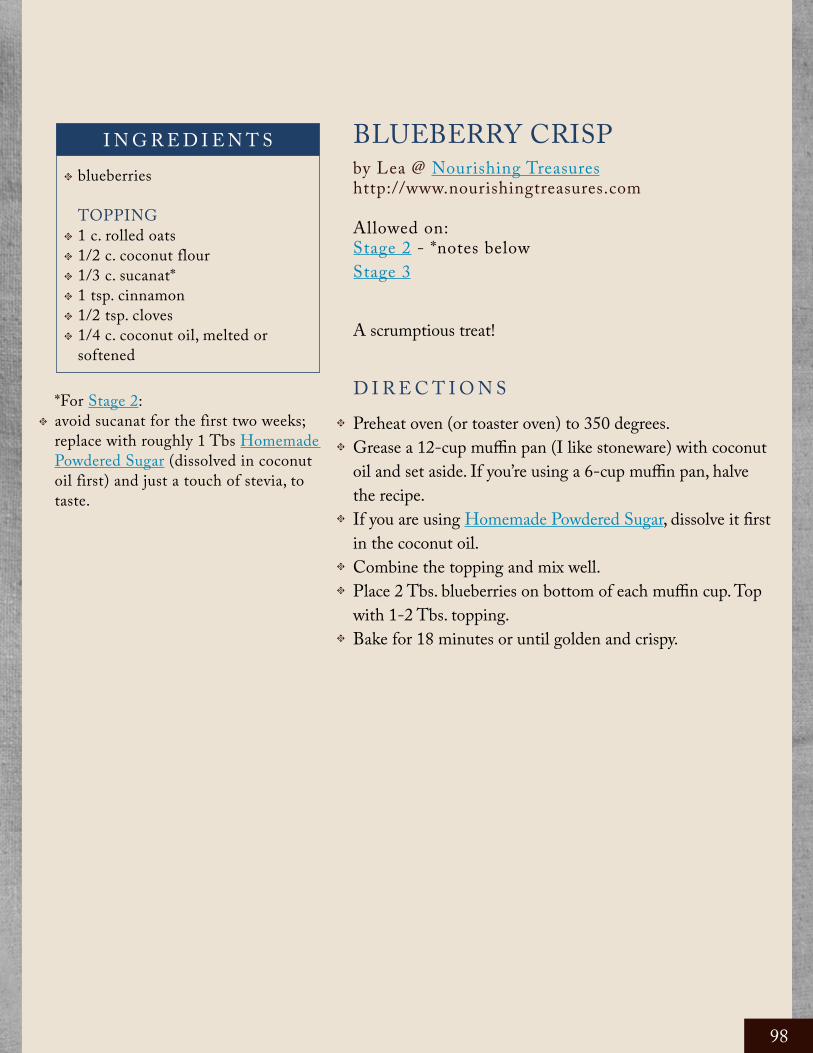
BLUEBERRY CRISPby Lea @ Nourishing Treasureshttp://www.nourishingtreasures.com
Allowed on:Stage 2 - *notes belowStage 3
A scrumptious treat!
D I R E C T I O N SPreheat oven (or toaster oven) to 350 degrees. Grease a 12-cup muffin pan (I like stoneware) with coconut oil and set aside. If you’re using a 6-cup muffin pan, halve the recipe.If you are using Homemade Powdered Sugar, dissolve it first in the coconut oil.Combine the topping and mix well.Place 2 Tbs. blueberries on bottom of each muffin cup. Top with 1-2 Tbs. topping.Bake for 18 minutes or until golden and crispy.
I N G R E D I E N T Sblueberries
TOPPING1 c. rolled oats 1/2 c. coconut flour1/3 c. sucanat* 1 tsp. cinnamon1/2 tsp. cloves1/4 c. coconut oil, melted or softened
t
t
t
t
t
t
t
t
t
t
t
t
t
*For Stage 2: avoid sucanat for the first two weeks; replace with roughly 1 Tbs Homemade Powdered Sugar (dissolved in coconut oil first) and just a touch of stevia, to taste.
t
98

A WHOLESOME LEMON ROULADEby Diana @ My Humble Kitchenhttp://myhumblekitchen.com
Allowed on:Stage 3
A perfect Christmas dessert made in 4 parts but oh so worth it! I would suggest making the lemon curd a day or even a week in advance as it keeps in the refrigerator for up to 3 weeks.
t
t
t
t
t
t
t
t
t
t
t
t
t
PA R T 1 - L E M O N C U R DThis makes 1lb. of lemon curd, but we only need 4 Tbs. for the lemon roulade. You can store the rest in the refrigerator, eat it like pudding, or use for more Lemon Roulades.
grated zest and juice of 3 lemons1/4 c. raw honey1 Tbs. arrowroot powder1 Tbs. water2 egg yolks4 Tbs. butter, room temperature
DIRECTIONSPut the grated zest and juice of 3 lemons into a pan with the honey. Bring to a boil, stirring until the honey has mixed in with the lemon juice.Mix to a paste 1 tablespoon of arrowroot powder with 1 tablespoon of water. Add to the lemon/honey mixture.Remove the pan from heat and beat in 2 egg yolks.Return to low heat and mix for about 2 minutes and then remove from the heat again.Gradually beat in 4 tablespoons of room temperature butter.Pour into a mason jar, or other sterilized jar, cover and seal.Let the curd cool, then chill.
(continued on next page)
99

t
t
t
t
t
t
t
t
t
t
t
t
t
t
t
t
t
t
t
t
t
t
t
PA R T 2 - L E M O N R O U L A D E S P O N G E4 eggs, separated1/4 c. raw honeyGrated zest of 2 lemons1 tsp. pure vanilla extract1/4 c. ground almonds3 Tbs. sifted coconut flour3 Tbs. xylitol, run through the blender until forms a powdered sugar (for dusting)
DIRECTIONSPreheat the oven to 375F. Grease a 13 x 9-inch jelly roll pan and line with parchment paper.In a large bowl, beat the egg yolks with 1/8 c. raw honey until light and foamy.Beat in the lemon zest and vanilla extract, then lightly fold in the ground almonds and coconut flour using a rubber spatula or large metal spoon.Beat the egg whites in a grease-free bowl until they form stiff, glossy peaks. Gradually beat in the remaining 1/8 c. of raw honey to form a stiff meringue.Fold in 1/3 of the meringue at a time into the egg yolk mixture. Do not overfold, just enough to incorporate.Pour into the prepared pan, level the surface, and bake for 10 minutes, or until risen and spongy to the touch.Cover loosely with parchment paper and a damp dish towel.Let the cake cool in the pan.
PA R T 3 - L E M O N C R E A M1 c. heavy cream4 Tbs. fresh lemon curd
DIRECTIONSWhip the cream in a stand mixer. Make sure you do not over whip and turn the cream into butter. I used my stand mixer and put my mixing bowl and whisk in the freezer before whipping.Lightly fold in the lemon curd.
PA R T 4 – A S S E M B LYSift the powdered xylitol sugar onto a piece of parchment paper.Turn the sponge onto it. Peel off the lining paper and spread the lemon curd cream over the surface of the sponge, leaving a border around the edge.Using the paper underneath as a guide, roll up the sponge from one of the long sides.Place on a serving platter with the seam underneath.
100

NATURALLY SWEETENED SOURDOUGH CHOCOLATE CAKEby Diana @ My Humble Kitchenhttp://myhumblekitchen.com
Allowed on:Stage 2 - *notes belowStage 3
D I R E C T I O N SMix the starter, milk, and flour in a large bowl. Let it sit overnight for a minimum of 8 hours. In a separate bowl or stand mixer on medium speed, beat together the honey, oil, vanilla, salt, baking soda and cacao.Add the eggs one at a time beating after each addition.Combine the flour mixture with the chocolate mixture and mix through until smooth.Pour the batter into an oiled and floured 9” round or 9” x 13” pan.Bake the cake for 30-40 minutes at 350F or until a toothpick inserted into the middle of the cake comes out clean.If turning the cake out onto a platter, remove the cake and let cool for 10 minutes. Immediately turn onto a wired rack to cool.Frost with Naturally Sweetened Chocolate Buttercream Frosting.
I N G R E D I E N T S1 c. sourdough starter* (make sure it ’s been fed and past the bubbly stage)1 c. raw/whole milk*8 1/2 oz. whole wheat pastry flour (I used freshly ground soft white berries)1 c. raw honey*1 c. coconut oil2 tsp. pure vanilla extract1 tsp. celtic sea salt1 1/2 tsp. baking soda2 1/4 oz. raw cacao powder*2 farm fresh eggs*
t
t
t
t
t
t
t
t
t
t
t
t
t
t
t
t
t
t
*For Stage 2: no dairy allowed for the first two weeks. avoid sourdough, honey, cacao powder, and eggs for first two weeks.
t
t
101

NATURALLY SWEETENED CHOCOLATE BUTTERCREAM ICING by Diana @ My Humble Kitchenhttp://myhumblekitchen.com
Allowed on:Stage 2 - *notes belowStage 3
An amazingly sweet, easy and delicious topping. This recipe makes enough to cover one 9” round.
D I R E C T I O N SBlend all ingredients by hand or mixer until smooth and to your desired consistency.
COCONUT FROSTING by Lisa @ Lisa Lately
Allowed on:Stage 1Stage 2Stage 3
D I R E C T I O N SCombine all ingredients. It gets super thick and creamy and is an awesome topping for oats or protein muffins. Thin to desired consistency.
I N G R E D I E N T S
I N G R E D I E N T S
1 c. unsweetened, softened butter4 Tbs. raw cacao powder*1/2 c. real maple syrup*1 tsp. pure vanilla extract2-4 Tbs. raw milk*, to thin to desired consistency
2 Tbs. coconut flourstevia to tastea dash of vanilla extract1/4 c. of unsweetened almond milk
t
t
t
t
t
t
t
t
t
t
t
t
*For Stage 2: avoid raw cacao and maple syrup for the first two weeks. Consider replacing the maple syrup with Homemade Maple Syrup later in the stage.no milk allowed for the first two weeks; try replacing with almond or coconut milk.
t
t
102
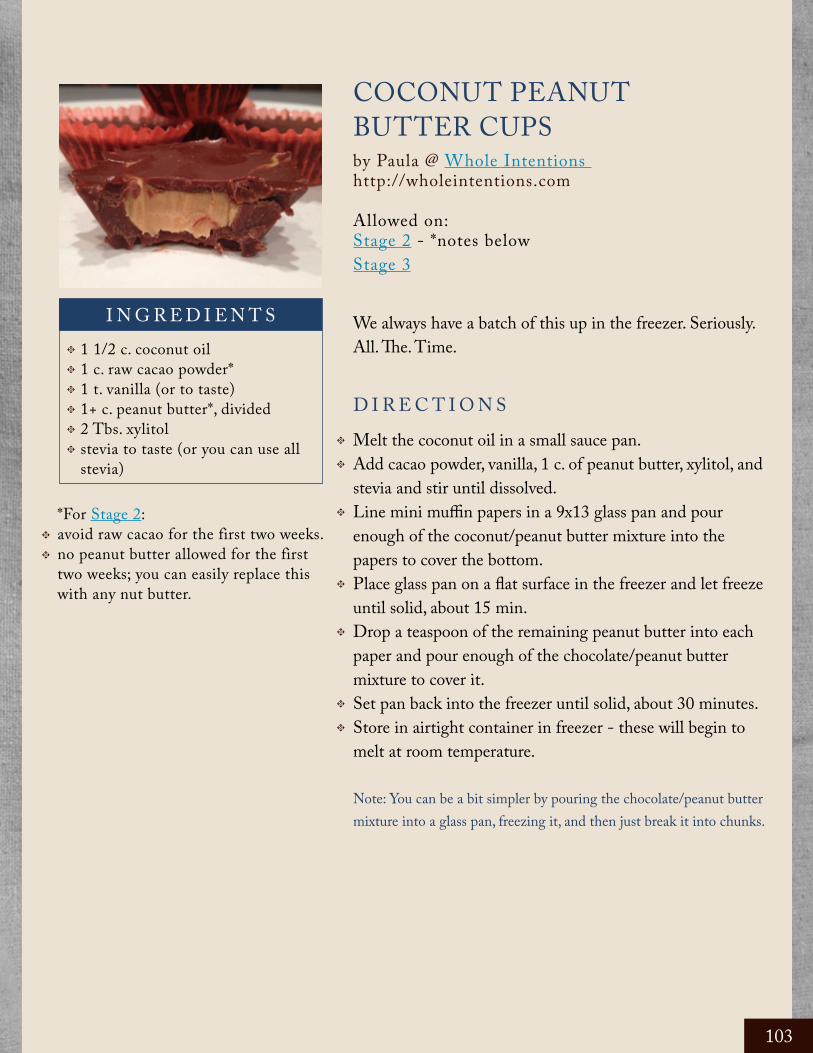
COCONUT PEANUT BUTTER CUPSby Paula @ Whole Intentions http://wholeintentions.com
Allowed on:Stage 2 - *notes belowStage 3
We always have a batch of this up in the freezer. Seriously. All. The. Time.
D I R E C T I O N SMelt the coconut oil in a small sauce pan.Add cacao powder, vanilla, 1 c. of peanut butter, xylitol, and stevia and stir until dissolved.Line mini muffin papers in a 9x13 glass pan and pour enough of the coconut/peanut butter mixture into the papers to cover the bottom. Place glass pan on a flat surface in the freezer and let freeze until solid, about 15 min.Drop a teaspoon of the remaining peanut butter into each paper and pour enough of the chocolate/peanut butter mixture to cover it.Set pan back into the freezer until solid, about 30 minutes.Store in airtight container in freezer - these will begin to melt at room temperature.
Note: You can be a bit simpler by pouring the chocolate/peanut butter mixture into a glass pan, freezing it, and then just break it into chunks.
I N G R E D I E N T S1 1/2 c. coconut oil1 c. raw cacao powder*1 t. vanilla (or to taste)1+ c. peanut butter*, divided2 Tbs. xylitolstevia to taste (or you can use all stevia)
t
t
t
t
t
tt
t
t
t
t
t
t
*For Stage 2: avoid raw cacao for the first two weeks.no peanut butter allowed for the first two weeks; you can easily replace this with any nut butter.
t
t
103

CHOCOLATE CHIA PUDDINGby Lea @ Nourishing Treasureshttp://www.nourishingtreasures.com
Allowed on:Stage 2 - *notes belowStage 3
D I R E C T I O N SCombine all ingredients in high powered blender (like a Vitamix) or food processor for 3-5 min. or until a thick, pudding consistency.
CHERRY CHOCOLATE ICE CREAMby Lea @ Nourishing Treasureshttp://www.nourishingtreasures.com
Allowed on:Stage 2 - *notes belowStage 3
D I R E C T I O N SCombine all ingredients in high powered blender (like a Vitamix) or food processor for 3-5 min. or until a thick, pudding consistency.
I N G R E D I E N T S
I N G R E D I E N T S
2 c. milk* (preferably raw)1/2 c. chia seeds3 Tbs. raw cacao powder*4 Tbs. sucanat*
2 c. milk* (I use raw milk with lots of cream)2 c. frozen cherries* (previously pitted and cut in half )1/3 c. sucanat*1/4 c. raw cacao powder*3 egg yolks*1 tsp. vanilla extract
t
t
t
t
t
t
t
t
t
t
t
t
*For Stage 2: avoid milk for the first two weeks and use almond or coconut milk.avoid raw cacao for the first two weeks.avoid sucanat for the first two weeks. You can replace it with about 1 Tbs. xylitol and a dash of stevia to taste.
*For Stage 2: no dairy is allowed for the first two weeks, use full fat coconut milk or almond milk instead.no cherries are allowed until Stage Three, replace with blueberries or almonds.avoid sucanat for the first two weeks. You can easily replace the sucanat with about 1 Tbs. of xylitol and a dash of stevia.avoid raw cacao for the first two weeks.avoid eggs for the first two weeks.
t
t
t
t
t
t
t
t
104

CANDIDA-DIET ICE CREAMby Paula @ Whole Intentions http://wholeintentions.com
Allowed on:Stage 1Stage 3
If I could, I would call this Weight-Melting-Healthy-Fat-Protein-Filled-Delicious-And-Good-For-You-Vanilla-Ice-Cream. But you know. . .
D I R E C T I O N SPlace eggs and vanilla in blender.Heat the coconut oil and butter until just melted and let cool a bit before adding to the blender.Blend until it’s a nice, deep yellow. (It will be a richer yellow if using farm fresh eggs.)Add stevia to taste. Add just a bit at a time; too much stevia will make it bitter.Pour the ice cream into a 9×9 glass pan. Snap the lid down and place the pan on a flat surface in your freezer. Let freeze approximately 6 hours. This ice cream freezes very solid.When your ice cream is frozen, take a knife and score the top into the size of pieces you want.When you’re ready to eat, take it out and let it sit on the counter for about 10-15 minutes. Once it has softened a bit you can take a knife and cut along the lines you scored across the top. This will make it easier to remove pieces the next time you have that craving. (However, you’ll still want to let it sit out awhile each time you take it out of the freezer).
I N G R E D I E N T S6 eggs3/4 c. coconut oil6 Tbs. of butter 1 1/2 t. vanilla extractstevia to taste
t
t
t
t
t
t
t
t
t
t
t
t
105
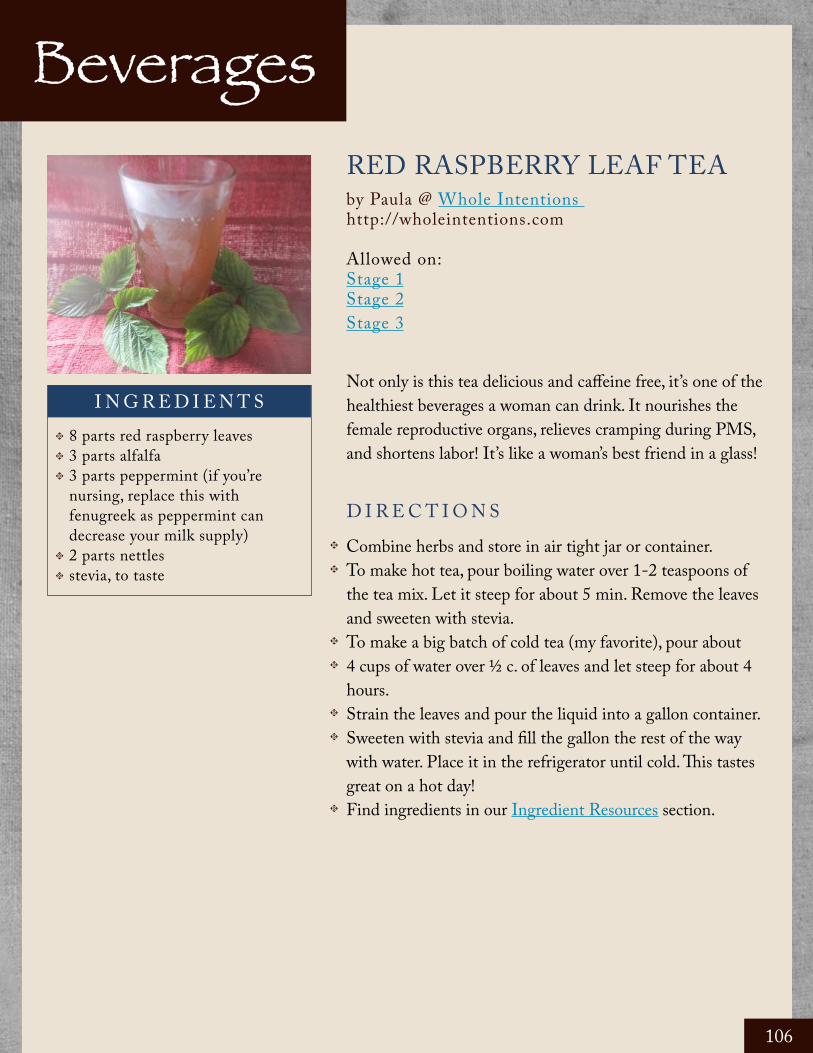
BeveragesRED RASPBERRY LEAF TEAby Paula @ Whole Intentions http://wholeintentions.com
Allowed on:Stage 1Stage 2Stage 3
Not only is this tea delicious and caffeine free, it’s one of the healthiest beverages a woman can drink. It nourishes the female reproductive organs, relieves cramping during PMS, and shortens labor! It’s like a woman’s best friend in a glass!
D I R E C T I O N SCombine herbs and store in air tight jar or container.To make hot tea, pour boiling water over 1-2 teaspoons of the tea mix. Let it steep for about 5 min. Remove the leaves and sweeten with stevia.To make a big batch of cold tea (my favorite), pour about 4 cups of water over ½ c. of leaves and let steep for about 4 hours.Strain the leaves and pour the liquid into a gallon container.Sweeten with stevia and fill the gallon the rest of the way with water. Place it in the refrigerator until cold. This tastes great on a hot day!Find ingredients in our Ingredient Resources section.
I N G R E D I E N T S8 parts red raspberry leaves3 parts alfalfa3 parts peppermint (if you’re nursing, replace this with fenugreek as peppermint can decrease your milk supply)2 parts nettlesstevia, to taste
t
t
t
t
t
t
t
t
t
t
t
t
106

GINGER-LEMON ICED TEAby Paula @ Whole Intentions http://wholeintentions.com(adapted f rom Trim Healthy Mama)
Allowed on:Stage 1Stage 2Stage 3
D I R E C T I O N SCombine all ingredients in a quart sized jar with ice and enjoy. Give it a nice swirl every so often as the ginger tends to settle to the bottom.
PUMPKIN NOT CHOCOLATEby Anne @ Authentic Simplicityhttp://authenticsimplicity.net
Allowed on:Stage 2 - *notes belowStage 3
D I R E C T I O N SIF YOU HAVE A VITAMIXPlace all ingredients in container. Blend on high until it begins to steam, about 3-4 minutes.
IF YOU DON’T HAVE A VITAMIXPlace all ingredients in a small saucepan on the stove. Whisk together over medium heat until it is blended and steaming. Use a stick blender (or jar blender) and blend until smooth and creamy.
I N G R E D I E N T S
I N G R E D I E N T S
4 c. water1 tsp. gingerjuice from 1/2 lemon (or lime)1 Tbs. ACVstevia
1 c. milk* (any kind)2 Tbs. pumpkin pureestevia, to taste (or 1-2 tsp. honey*)dash of cinnamondash of grated nutmegdash of gingersplash of vanilla
t
t
t
t
t
t
t
t
t
t
t
t
t
t
t
t
t
t
*For Stage 2: no dairy allowed for the first two weeks; use coconut or almond milk. avoid honey for the first two weeks.
t
t
107

WINTER WARMTH IN A MUGby Anne @ Authentic Simplicityhttp://authenticsimplicity.net
Allowed on:Stage 1 - *notes belowStage 2 - *notes belowStage 3
D I R E C T I O N SPlace all the ingredients in a quart-size saucepan and heat over medium heat, whisking constantly until it bubbles around the edges.You can vary the flavorings to suit your taste: add a little vanilla extract, or try some more exotic spices like ginger or cardamom.
I N G R E D I E N T S1 c. whole milk*1 Tbs. honey* (or to taste)1/8 tsp. cinnamondash of grated nutmeg
t
t
t
t
t
t
*For Stage 1: no milk allowed; replace with coconut or almond milk.
*For Stage 2: no dairy allowed for the first two weeks; use coconut or almond milk.avoid honey for the first two weeks; replace with stevia to taste.
t
t
t
108

Snacks
ROASTED CHICKPEAS THAT’LL ROCK YOUR WORLDby Katie @ This Chick Cookshttp://thischickcooks.net
Allowed on:Stage 2Stage 3
D I R E C T I O N SPreheat oven to 400.Mix all ingredients in a bowl and stir until well coated.Spread chickpeas on a baking pan and bake at 400 for about 20 minutes. Stir and continue baking for another 10-15 minutes, or until chickpeas are crispy.
I N G R E D I E N T S1 can chick peas (aka garbanzo beans) or about 1 2/3 c. cooked1 1/2 Tbs. coconut oil1/2 tsp. celtic sea salt1/2 tsp. paprikadash of cayenne1/4 tsp. cumin1/2 tsp. garlic powder
t
t
t
t
t
t
t
t
t
t
109

ROASTED PUMPKIN SEEDSby Katie @ This Chick Cookshttp://thischickcooks.net
Allowed on:Stage 1Stage 2Stage 3
D I R E C T I O N SRinse the seeds in a colander and try to remove most of the orange stringy stuff. I find it best to rub the seeds between my hands in a bowl of water to help get off the strings.To soak seeds: Place the seeds in a bowl and cover with water. Stir in about 1 1/2 teaspoons salt and soak on the counter for 12-24 hours.Drain out the soaking water and lay seeds on a towel to dry in a single layer for 12-24 hours, or until dry (mine ended up sitting for slightly longer to dry and turned out just fine).Mix together seeds, melted butter, salt and garlic powder and spread in a single layer on a baking sheet.Bake seeds at 300 for 45 minutes, stirring every 15 minutes. Seeds will be crispy and lightly golden when done.
I N G R E D I E N T S1 1/2 c. pumpkin seeds (from 2 small pie pumpkins or any pumpkin or squash)2 tsp. melted butter1 tsp. seasoned salt1/2 tsp. garlic powder
t
t
t
t
t
t
t
t
t
t
t
110
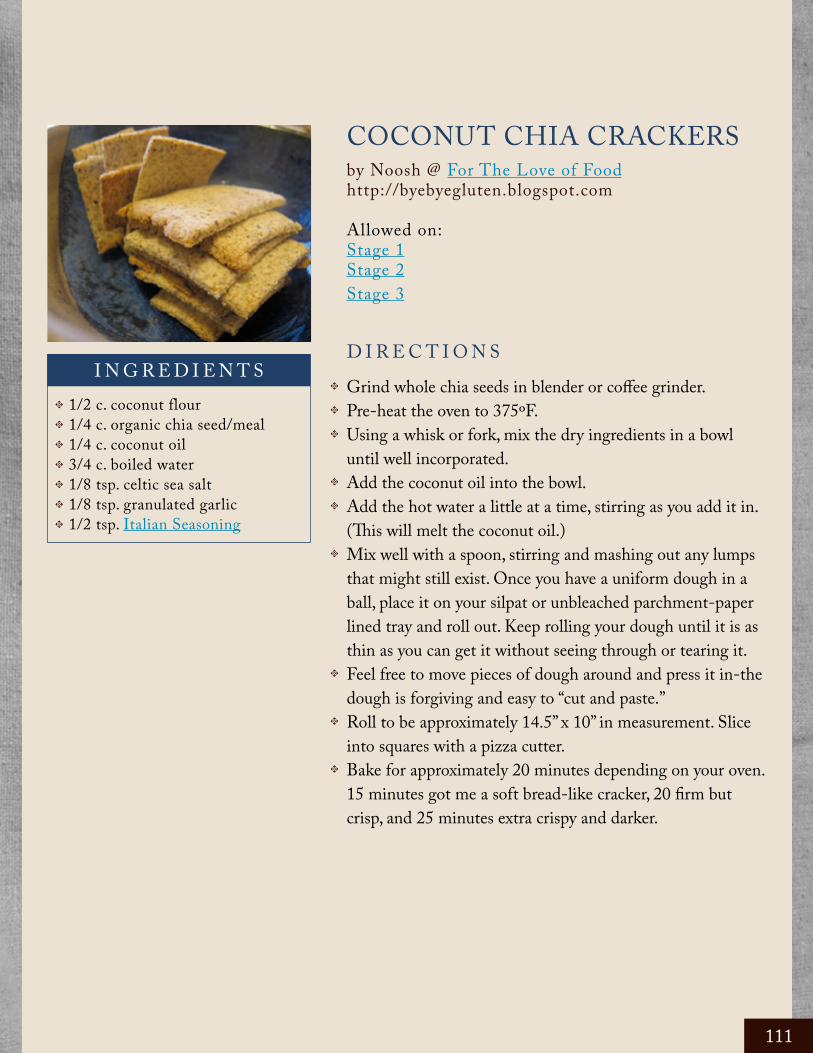
COCONUT CHIA CRACKERSby Noosh @ For The Love of Foodhttp://byebyegluten.blogspot.com
Allowed on:Stage 1Stage 2Stage 3
D I R E C T I O N SGrind whole chia seeds in blender or coffee grinder.Pre-heat the oven to 375ºF.Using a whisk or fork, mix the dry ingredients in a bowl until well incorporated.Add the coconut oil into the bowl.Add the hot water a little at a time, stirring as you add it in. (This will melt the coconut oil.)Mix well with a spoon, stirring and mashing out any lumps that might still exist. Once you have a uniform dough in a ball, place it on your silpat or unbleached parchment-paper lined tray and roll out. Keep rolling your dough until it is as thin as you can get it without seeing through or tearing it. Feel free to move pieces of dough around and press it in-the dough is forgiving and easy to “cut and paste.”Roll to be approximately 14.5” x 10” in measurement. Slice into squares with a pizza cutter.Bake for approximately 20 minutes depending on your oven. 15 minutes got me a soft bread-like cracker, 20 firm but crisp, and 25 minutes extra crispy and darker.
I N G R E D I E N T S1/2 c. coconut flour1/4 c. organic chia seed/meal1/4 c. coconut oil3/4 c. boiled water1/8 tsp. celtic sea salt1/8 tsp. granulated garlic1/2 tsp. Italian Seasoning
t
t
t
t
t
t
t
t
t
t
t
t
t
t
t
t
111

CROCKPOT APPLESAUCEby Paula @ Whole Intentions http://wholeintentions.com
Allowed on:Stage 2 - *notes belowStage 3
You can easily double this or halve it, depending on the size of your crockpot.
D I R E C T I O N SPlace the prepared apples in your crockpot. You can fill it all the way to the top since it cooks down to about half volume by the time it’s done.Add water, lemon juice (if desired), and spices. Cook on low for about 4-6 hours and on high for 8-10 hours. Again, if you’re cutting the recipe in half or you have a small crockpot, it may not take as long to cook.It’s done when you can stir it and it turns into applesauce. You can add more water for the consistency you desire.Add stevia, to your taste. Stir several times for it to get well dissolved before you add more.You can store it in the fridge or place in small jars and freeze (let the applesauce cool to room temp first).
I N G R E D I E N T S8-10 large green apples*, cored, peeled, and cut into large chunks1/2 c. - 3/4 c. water1 Tbs. lemon juice, optional (this prevents the applesauce from turning brown)1 1/2 tsp. cinnamona pinch of nutmeg, optionalstevia to taste
t
t
t
t
t
t
t
t
t
t
t
t
*For Stage 2: only green apples are allowed - they are tarter so they’re lower in sugar content.
t
112

S TA G E O N Esourdough or Coconut Chia Crackers with salsa, dip, cheddar cheese slices, almond butter, or spread with homemade sour cream and tomatoesa slice of hard cheese wrapped in deli turkey (watch for those in solutions or with added sugars)a chunk of hard cheese wrapped in sourdough dough and baked for about 20 min. at 350 degrees F.yogurt with chopped almonds, stevia, and a dash of vanillaspiced almonds (use the same spices as Chick Peas That’ll Rock Your World)pumpkin seedsdeviled eggs made with Easy No-Fail MayoCoconut Flour Bread or Whole Wheat Sourdough Tortillas with almond butter, or spread with butter and sprinkled with stevia and cinnamonpre-bake a sourdough or gluten free pizza crust, brush with butter and sprinkle with garlic powder, salt, and Italian Seasonings. Bake for about 10-15 min at 350 and cut into thin breadsticks.
S TA G E T W Osourdough or Coconut Chia Crackers with salsa, dip or almond butter.spiced almonds or Chick Peas That’ll Rock Your Worldpumpkin seedsCoconut Flour Bread or Whole Wheat Sourdough Tortillas with almond butter, or spread with butter and sprinkled with stevia and cinnamonpre-bake a sourdough or gluten free pizza crust, brush with butter and sprinkle with garlic powder, salt, and Italian Seasonings. Bake for about 10-15 min at 350 and cut into thin breadsticks.a small bowl of blueberries sprinkled with unsweetened coconut flakes, chopped almonds, and steviasliced green apple with almond butterCoconut Peanut Butter Cups
S TA G E T H R E Eall of the abovefresh fruit (very limited) and yogurtcottage cheese with sliced green apples, stevia, cinnamon, and almonds
More Snack Ideas
t
t
t
t
t
t
t
t
t
t
t
t
t
t
t
t
t
t
t
t
113

Food is an important part of a
balanced diet. Fran Lebowitz
114

Condiments & Dips
HOMEMADE KETCHUP: FERMENTED AND SUGAR-FREEby Paula @ Whole Intentions http://wholeintentions.com
Allowed on:Stage 1Stage 2Stage 3
D I R E C T I O N SCombine all ingredients in a medium saucepan over medium heat. Whisk until smooth.When mixture comes to a boil, reduce heat and simmer for 20 min., stirring often.Remove pan from heat and cover until cool. Chill in a covered glass container.Pour ketchup in a glass jar, leaving about 1 inch of space from the top.Screw a lid on and leave it at room temperature for two days before refrigerating.
I N G R E D I E N T S6 oz. tomato paste1/4 c. apple cider vinegar1/4 c. water1 Tbs. whey 1 tsp. salt1/4 tsp. onion powder1/8 tsp. garlic powderxylitol and stevia to taste
t
t
t
t
t
t
t
t
t
t
t
t
t
115

WHEY, SOUR CREAM, & CREAM CHEESEby Paula @ Whole Intentions http://wholeintentions.com
Allowed on:Stage 1 - *notes belowStage 2 - *notes belowStage 3
D I R E C T I O N SPlace a large tea bag, cheesecloth, or tea towel inside a half gallon size jar. (Make sure you don’t use softener when you wash your tea bag because it creates a film and won’t let the whey drip through. Plus you might have odd tasting whey.) Pour the yogurt or kefir into the tea bag.Pull the tea bag about half way up the jar and secure the material with a metal ring or rubber band. Make sure the tea bag is pulled up far enough that the whey can drip out and the tea bag won’t be sitting in it. Put the jar in the fridge and let it drip for about 24 hours.It’s up to you when you’re done dripping. The yogurt/kefir that’s left in the cheesecloth is now a delicious, creamy sour cream, or if you want to let it drip longer and become even thicker, a nutritious cream cheese. You choose the consistency you want.The whey is a nutritious liquid that can be added to sourdough bread as a dough enhancer. Search ‘uses for whey’ on any search engine and you’ll come up with a long list of other uses.You can use the sour cream or cream cheese in any recipe just as you would store-bought.The cream cheese/sour cream will last for about 1 month in the refrigerator and the whey is good for 6 months.
I N G R E D I E N T Syogurt or kefirlarge jar or bowllarge tea bag, cheese cloth, or tea towel
t
t
t
t
t
t
t
t
t
t
*For Stage 1: only yogurt or kefir with live cultures is allowed in Stage One recipes. Likewise, the only sour cream or cream cheeses allowed is made from yogurt with live cultures.
*For Stage 2: sour cream and cream cheese are not allowed for the first two weeks in any recipe; however, whey is acceptable.
t
t
116
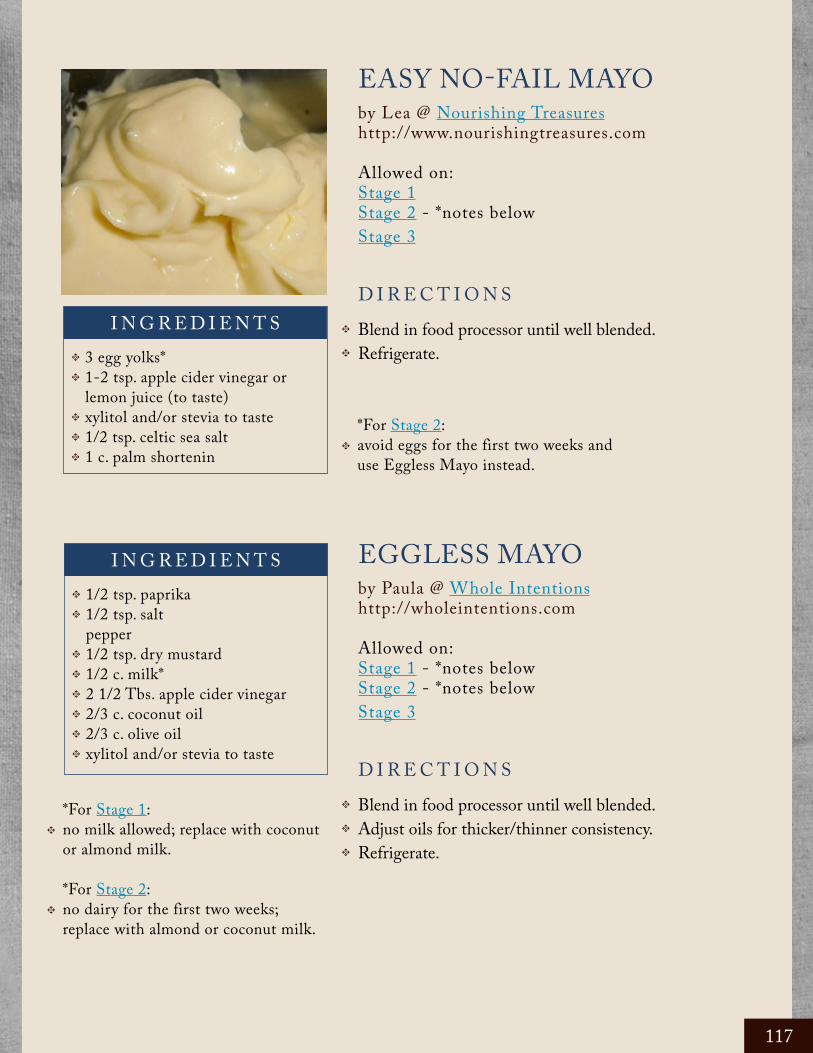
EASY NO-FAIL MAYOby Lea @ Nourishing Treasureshttp://www.nourishingtreasures.com
Allowed on:Stage 1Stage 2 - *notes belowStage 3
D I R E C T I O N SBlend in food processor until well blended.Refrigerate.
EGGLESS MAYOby Paula @ Whole Intentions http://wholeintentions.com
Allowed on:Stage 1 - *notes belowStage 2 - *notes belowStage 3
D I R E C T I O N SBlend in food processor until well blended.Adjust oils for thicker/thinner consistency.Refrigerate.
I N G R E D I E N T S
I N G R E D I E N T S
3 egg yolks*1-2 tsp. apple cider vinegar or lemon juice (to taste)xylitol and/or stevia to taste1/2 tsp. celtic sea salt1 c. palm shortenin
1/2 tsp. paprika1/2 tsp. saltpepper1/2 tsp. dry mustard1/2 c. milk* 2 1/2 Tbs. apple cider vinegar2/3 c. coconut oil2/3 c. olive oilxylitol and/or stevia to taste
t
t
t
t
t
t
t
t
t
t
t
t
t
t
t
t
t
t
*For Stage 2: avoid eggs for the first two weeks and use Eggless Mayo instead.
*For Stage 1: no milk allowed; replace with coconut or almond milk.
*For Stage 2: no dairy for the first two weeks; replace with almond or coconut milk.
t
t
t
117

FRESH SALSAby Paula @ Whole Intentions http://wholeintentions.com
Allowed on:Stage 1 Stage 2Stage 3
Makes about 2 cups of salsa.
D I R E C T I O N SChop tomatoes. Peeling or deseeding first is optional.Combine all ingredients. Refrigerate for 2 to 4 hours to blend flavors.If you want your salsa to last longer or be more nutritious, continue to make it Fermented Salsa.
I N G R E D I E N T S2 large or 6 Roma tomatoes 2 Tbs. apple cider vinegar 1 finely chopped small onion 2 small cloves garlic, minced 1 jalapeno peppers (or other hot pepper), finely chopped 1/2 green pepper, finely chopped 2 to 3 Tbs. minced fresh cilantro or a dash of dried (to your taste preference) juice of 1 lime (optional) dash of cumin dash of oregano salt and pepper
t
t
t
t
t
t
t
t
t
t
tt
t
t
118
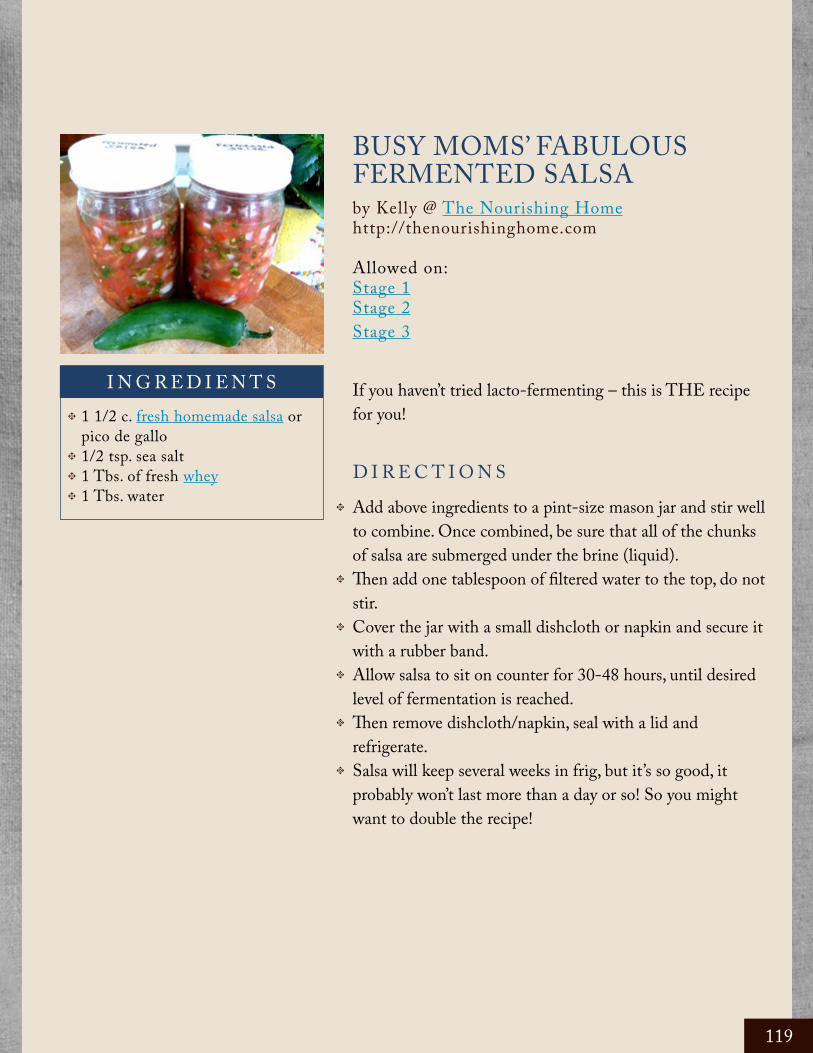
BUSY MOMS’ FABULOUS FERMENTED SALSAby Kelly @ The Nourishing Homehttp://thenourishinghome.com
Allowed on:Stage 1 Stage 2Stage 3
If you haven’t tried lacto-fermenting – this is THE recipe for you!
D I R E C T I O N SAdd above ingredients to a pint-size mason jar and stir well to combine. Once combined, be sure that all of the chunks of salsa are submerged under the brine (liquid).Then add one tablespoon of filtered water to the top, do not stir.Cover the jar with a small dishcloth or napkin and secure it with a rubber band.Allow salsa to sit on counter for 30-48 hours, until desired level of fermentation is reached.Then remove dishcloth/napkin, seal with a lid and refrigerate.Salsa will keep several weeks in frig, but it’s so good, it probably won’t last more than a day or so! So you might want to double the recipe!
I N G R E D I E N T S1 1/2 c. fresh homemade salsa or pico de gallo1/2 tsp. sea salt1 Tbs. of fresh whey1 Tbs. water
t
t
t
tt
t
t
t
t
t
119
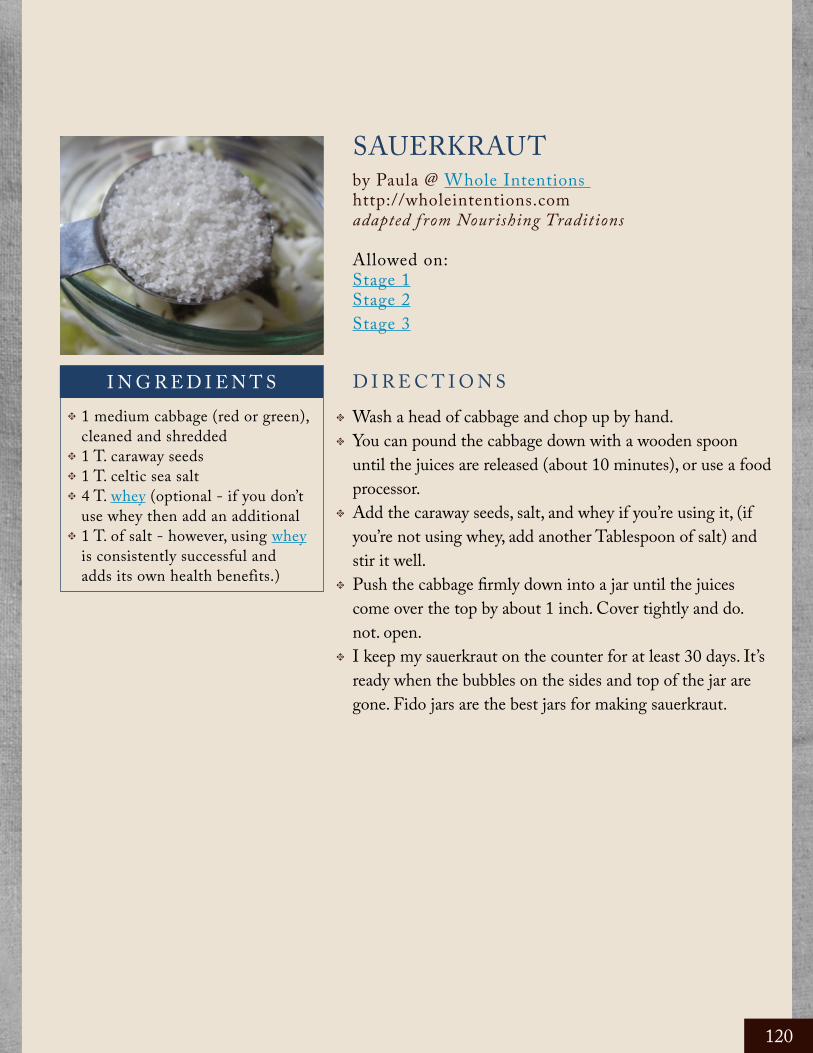
SAUERKRAUTby Paula @ Whole Intentions http://wholeintentions.comadapted f rom Nourishing Traditions
Allowed on:Stage 1 Stage 2Stage 3
D I R E C T I O N SWash a head of cabbage and chop up by hand.You can pound the cabbage down with a wooden spoon until the juices are released (about 10 minutes), or use a food processor. Add the caraway seeds, salt, and whey if you’re using it, (if you’re not using whey, add another Tablespoon of salt) and stir it well.Push the cabbage firmly down into a jar until the juices come over the top by about 1 inch. Cover tightly and do. not. open.I keep my sauerkraut on the counter for at least 30 days. It’s ready when the bubbles on the sides and top of the jar are gone. Fido jars are the best jars for making sauerkraut.
I N G R E D I E N T S1 medium cabbage (red or green), cleaned and shredded1 T. caraway seeds1 T. celtic sea salt4 T. whey (optional - if you don’t use whey then add an additional 1 T. of salt - however, using whey is consistently successful and adds its own health benefits.)
t
t
t
t
t
t
t
t
t
t
120
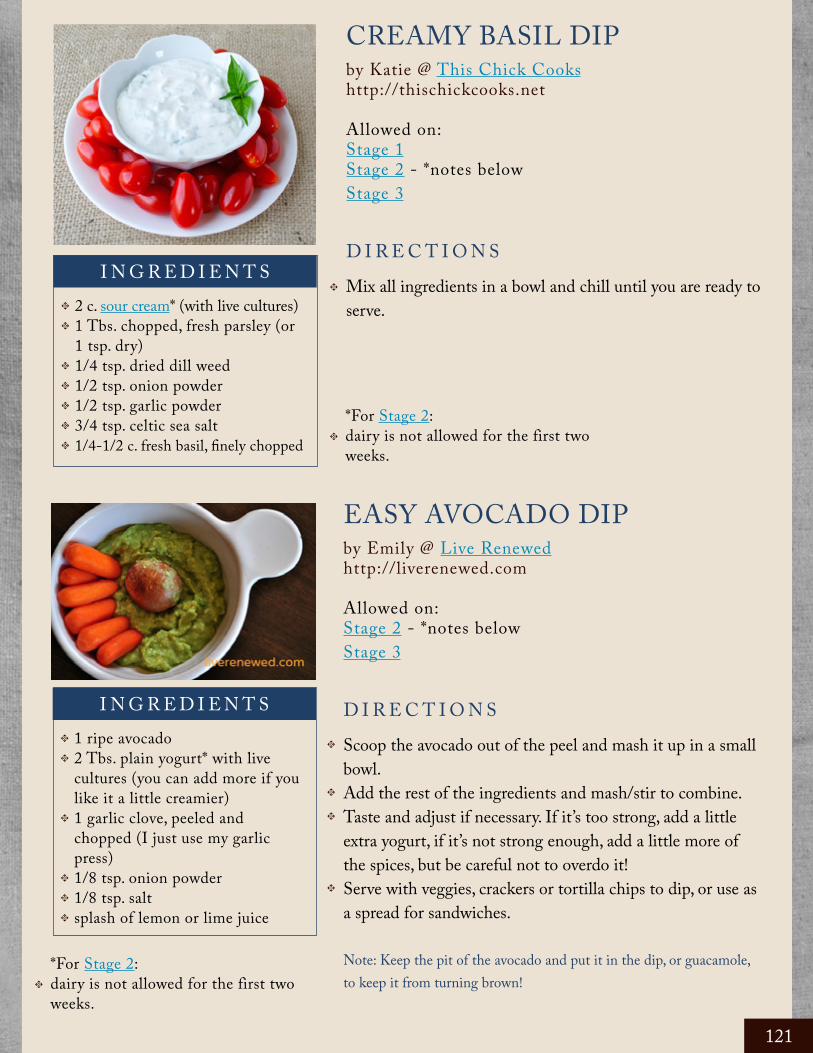
CREAMY BASIL DIPby Katie @ This Chick Cookshttp://thischickcooks.net
Allowed on:Stage 1 Stage 2 - *notes belowStage 3
D I R E C T I O N SMix all ingredients in a bowl and chill until you are ready to serve.
EASY AVOCADO DIPby Emily @ Live Renewedhttp://liverenewed.com
Allowed on: Stage 2 - *notes belowStage 3
D I R E C T I O N SScoop the avocado out of the peel and mash it up in a small bowl.Add the rest of the ingredients and mash/stir to combine. Taste and adjust if necessary. If it’s too strong, add a little extra yogurt, if it’s not strong enough, add a little more of the spices, but be careful not to overdo it!Serve with veggies, crackers or tortilla chips to dip, or use as a spread for sandwiches.
Note: Keep the pit of the avocado and put it in the dip, or guacamole, to keep it from turning brown!
I N G R E D I E N T S
I N G R E D I E N T S
2 c. sour cream* (with live cultures)1 Tbs. chopped, fresh parsley (or 1 tsp. dry)1/4 tsp. dried dill weed1/2 tsp. onion powder 1/2 tsp. garlic powder3/4 tsp. celtic sea salt1/4-1/2 c. fresh basil, finely chopped
1 ripe avocado2 Tbs. plain yogurt* with live cultures (you can add more if you like it a little creamier)1 garlic clove, peeled and chopped (I just use my garlic press)1/8 tsp. onion powder1/8 tsp. saltsplash of lemon or lime juice
t
t
t
t
t
t
t
t
t
t
t
t
t
t
t
t
t
t
*For Stage 2: dairy is not allowed for the first two weeks.
*For Stage 2: dairy is not allowed for the first two weeks.
t
t
121

EASY ROASTED RED PEPPER DIPby Anjanette @ Raising the Barrshttp://raisingthebarrs.com
Allowed on:Stage 1 Stage 2 - *notes belowStage 3
D I R E C T I O N SWrap your (whole) red peppers in foil and roast at 350 degrees for about half an hour in either the oven – or to avoid heating the house – a toaster oven.Peppers should be starting to soften and be easy to peel.Peel the peppers, remove seeds and stem, and cut them into at least 4 pieces each (to make them easier to process).Combine peppers and the rest of the ingredients in your food processor and process until consistency is smooth.Serve with raw veggies or Coconut Chia Crackers.
I N G R E D I E N T S2 med. red bell peppers4 cloves of garlic, peeled & minced8 oz. softened Cream Cheese* small bunch of parsley1/2 tsp. salt
t
t
t
t
t
t
t
t
t
t
*For Stage 2: dairy is not allowed for the first two weeks.
t
122

BLACK BEAN HUMMUSby Emily @ Live Renewedhttp://liverenewed.com
Allowed on:Stage 2 - *notes belowStage 3
D I R E C T I O N SAdd the ingredients to a blender or food processor and puree until smooth, adding water as needed to achieve desired consistency. I usually don’t add any water, but a tablespoon or two should be enough. I prefer my blender because I think it’s smoother that way, but you have to add the beans slowly to the blender, otherwise it will be to thick.This tastes best after it’s been refrigerated for a while and the flavors can blend together. So I usually make it the night before and refrigerate overnight. So yummy with, crackers, carrots or other veggies, or spread on sandwiches.
I N G R E D I E N T S1 can black beans, drained (or 1 2/3 c. Soaked and Cooked Beans)1 can garbanzo beans or chickpeas (or 1 2/3 c. Soaked and Cooked Beans)2 Tbs. olive oil1/4 c. lemon juice1/4 c. plain yogurt* with live cultures (I use homemade yogurt)2 cloves of garlic, roughly chopped3 tsp. cuminsea salt and pepper to taste (more needed if using cooked dried beans)water as needed
t
t
t
t
t
t
t
t
t
t
t
*For Stage 2: dairy is not allowed for the first two weeks.
t
123

Dressings & Sauces
FRENCH SALAD DRESSINGby Paula @ Whole Intentions http://wholeintentions.com
Allowed on:Stage 1Stage 2Stage 3
D I R E C T I O N SPour homemade ketchup, apple cider vinegar, water, salt, onion powder, and garlic powder into blender. Blend well.VERY, VERY slowly pour the olive oil in. If you pour it in less than 2 minutes, you’re going too fast. The slower you pour the more the ingredients can emulsify and your end product will not separate in the refrigerator.Add xylitol or stevia a little bit at a time and keep blending and tasting until it is sweetened to your liking. Your dressing should be a nice, bright orange color.
Note: Because this dressing includes olive oil, it does thicken when refrigerated. To solve this, I simply let it set on the counter for a bit or run warm tap water over it to warm it up.
I N G R E D I E N T S1/2 c. homemade ketchup1/4 - 1/2 c. apple cider vinegar1/4 c. water1 tsp. celtic sea salt1/4 tsp. onion powder1/4 tsp. garlic powderxylitol or stevia to taste3/4 c. olive oil
t
t
t
t
t
t
t
t
t
t
124

HONEY, THAT’S LIME DRESSINGby Marillyn @ Just Making Noisehttp://just-making-noise.blogspot.com
Allowed on:Stage 1 - *notes belowStage 2 - *notes belowStage 3
This stuff is so delicious! I feel like I am dressing up my salad with a bit of sunshine...
D I R E C T I O N SMix lime juice with olive oil and optional flax oil.Whisk in 1 Tbs. raw honey. Add more honey if sweetness is desired.Pour into bottle and shake well. Drizzle over a salad with grilled chicken.
I N G R E D I E N T S1/3 c. fresh lime (or lemon) juice1/3 c. extra virgin olive oil1 tsp. cold-pressed flax oil (optional)1 Tbs. or more raw honey*one glass bottle
t
t
t
t
t
t
t
t
*For Stage 1: honey is not allowed; replace with xylitol or a touch of stevia to taste.
* For Stage 2: honey is not allowed for the first two weeks; replace with xylitol or a touch of stevia to taste.
t
t
125

RANCH DRESSING/DIPby Paula @ Whole Intentions http://wholeintentions.com
Allowed on:Stage 1 - *notes belowStage 2 - *notes belowStage 3
D I R E C T I O N SCombine mayo, sour cream, and milk.Add the spices to combine, tasting/adjusting as you go.Let sit in fridge for at least 30 minutes to allow the flavors to meld.Will last up to 1 week in refrigerator.
SIMPLE OIL & VINEGAR DRESSINGby Stephanie @ The Cheapskate Cook http://thecheapskatecook.com
Allowed on:Stage 1Stage 2Stage 3
D I R E C T I O N SPour all ingredients on top of your salad.Toss salad together, combining the dressing ingredients.
I N G R E D I E N T S
I N G R E D I E N T S
3/4 c. homemade mayonnaise* 1/4 c. sour cream* (with live cultures)3/4 c. milk*1/2 tsp. dried dill 1/2 tsp. parsley 1/2 tsp. chives 1/4 - 1/2 tsp. garlic powder1/4 tsp. onion powder1/8 tsp. paprika1/8 tsp. celtic sea salt 1/8 tsp. pepper
drizzle of olive oilsmaller drizzle of some kind of vinegar (I like balsamic or apple cider)salt and pepper to tasteoptional: squirt of lemon or lime juice
t
t
t
t
t
t
t
t
t
t
t
t
t
t
t
t
t
t
t
t
t
*For Stage 1:no dairy allowed, replace milk with coconut or almond milk.
*For Stage 2: no dairy allowed for the first two weeks.avoid eggs for the first two weeks; you may want to use Eggless Mayo.
t
t
t
126

GLUTEN FREE PIZZA SAUCEby Paula @ Whole Intentions http://wholeintentions.com
Allowed on:Stage 1Stage 2Stage 3
Makes enough for 2 crusts.
D I R E C T I O N SWhisk ingredients together.Will keep in refrigerator for about 1 week.
FRESH MARINARA SAUCEby Paula @ Whole Intentions http://wholeintentions.com
Allowed on:Stage 1Stage 2Stage 3
Makes 4 cups.
D I R E C T I O N SBoil a large sauce pan of water. Drop the tomatoes in for about 30 seconds. Remove with tongs and allow to cool. Peel the skins off and discard. Place peeled tomatoes in a large bowl and crush/squish with your hands. Discard any stems/cores. Finely chop the onions, green peppers, and celery, and mince the garlic cloves or just place large chunks in a food processor and give it a couple whirls. Add to the tomatoes.Add basil, oregano, bay leaf, salt, and pepper to tomatoes.Simmer over low heat until reduced by one third to one half, about 2 hours, stirring occasionally. Blend with an immersion blender if you would like it a little less chunky.
I N G R E D I E N T S
I N G R E D I E N T S
6 oz. tomato paste1 c. water1 Tbs. dried onion1 Tbs. basil2 tsp. onion powder3/4 tsp. garlic powder3/4 tsp. celtic sea salt1/2 tsp. oregano1/4 tsp. pepper
approx. 2 lbs. fresh tomatoes2 garlic cloves, minced1/2 lg. onion, finely chopped1/2 green pepper, finely chopped2 stalks celery, finely chopped1 Tbs. dry basil or 2 Tbs. fresh basil finely chopped1 tsp. dried oregano leaves or 1 Tbs. fresh oregano, finely chopped1 bay leaf3/4 tsp. salt1/3 tsp. pepper
t
t
t
t
t
t
t
t
t
t
t
t
t
t
t
t
t
t
t
t
t
t
t
t
t
t
t
127

BBQ SAUCEby Paula @ Whole Intentions http://wholeintentions.com
Allowed on:Stage 1 - *notes belowStage 2 - *notes belowStage 3
D I R E C T I O N SBring to boil over medium heat. Simmer, uncovered, for 7-10 min.
TERIYAKI SAUCEby Paula @ Whole Intentions http://wholeintentions.com
Allowed on:Stage 1Stage 2Stage 3
D I R E C T I O N SHeat all ingredients just enough until xylitol dissolves. Use as marinate for chicken, beef, or pork for at least 4 hrs. Can be refrigerated up to 5 days.
I N G R E D I E N T S
I N G R E D I E N T S
1 c. ketchup*2 tsp. water1/4 tsp. garlic powder1/4 tsp. onion powder1/4 tsp. salt1/4 tsp. pepper1/8 tsp. cayenne pepper
1 c. Bragg’s Liquid Aminos or coconut aminos1/4 c. fresh lemon juice (1 lemon)1/4 c. xylitol1 tsp. ginger1/4 tsp. onion powder1/4 tsp. garlic powder
t
t
t
t
t
t
t
t
t
t
t
t
t
t
t
t
t
*For Stage 1 and Stage 2:make sure to use homemade ketchup as store varieties contain sugar.
t
128

Spice Mixes
HOMEMADE SAUSAGE SEASONINGby Paula @ Whole Intentions http://wholeintentions.com
Allowed on:Stage 1Stage 2Stage 3
D I R E C T I O N SCombine and store in airtight container.Add 1 1/3 Tbs. to one pound ground beef.Use as you would use sausage in any recipe.
I N G R E D I E N T S8 Tbs. celtic sea salt1 c. + 2 Tbs. pepper8 Tbs. nutmeg4 Tbs. sage
t
t
t
t
t
t
t
129

ITALIAN SEASONINGby Jaime @ Slightly Steadyhttp://slightlysteady.com
Allowed on:Stage 1Stage 2Stage 3
This one is super easy to adjust quantities, because everything is in equal amounts. You can make as much or as little as you’d like – but since this is a popular seasoning in our house, I make a large amount and keep it in a mason jar so that I don’t have to do this very often.
D I R E C T I O N SMix all ingredients well; store in an airtight container to preserve flavor.
SOUTHWESTERN RUBby Jaime @ Slightly Steadyhttp://slightlysteady.com
Allowed on:Stage 1Stage 2Stage 3
D I R E C T I O N SCombine, and rub into the skin of your meats before smoking or grilling it.Store in an airtight container to preserve flavor.
I N G R E D I E N T S
I N G R E D I E N T S
1 part basil1 part marjoram1 part oregano1 part rosemary1 part thyme
1/4 c. chili powder1 Tbs. onion powder1 Tbs. cumin2 tsp. real salt1 1/2 tsp. oregano1 tsp. garlic powder1 tsp. ground red pepper
t
t
t
t
t
t
t
t
t
t
t
t
t
t
t
130
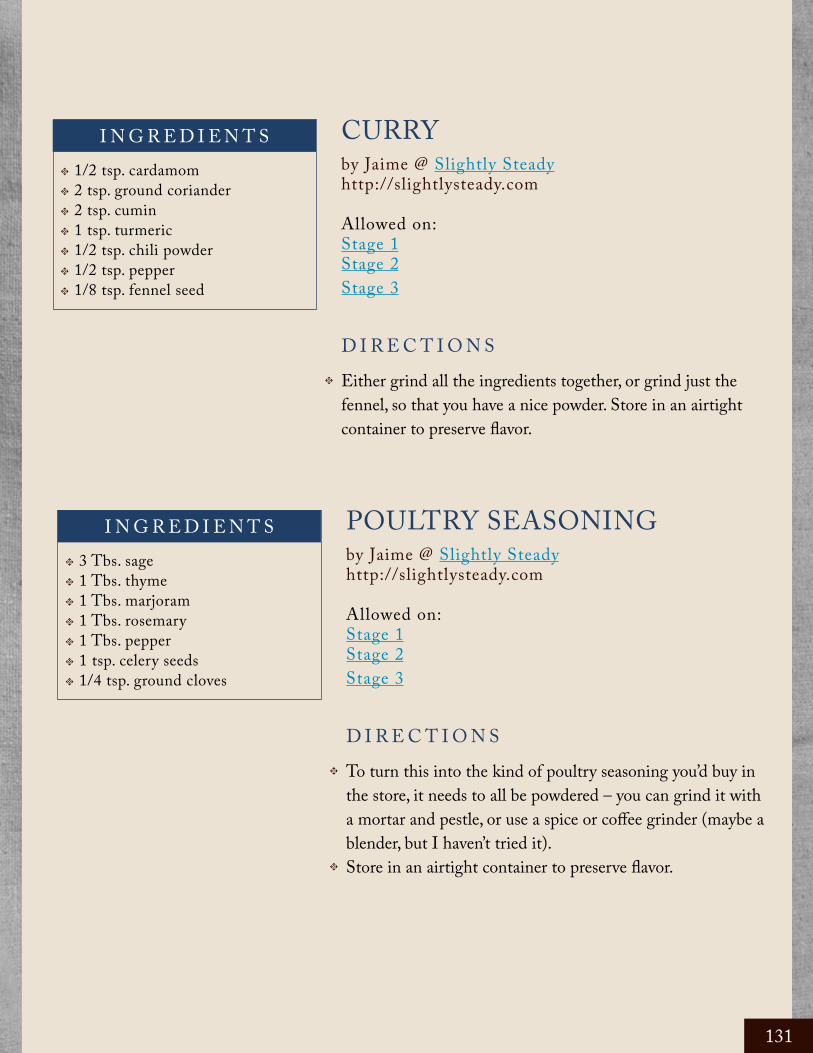
CURRYby Jaime @ Slightly Steadyhttp://slightlysteady.com
Allowed on:Stage 1Stage 2Stage 3
D I R E C T I O N SEither grind all the ingredients together, or grind just the fennel, so that you have a nice powder. Store in an airtight container to preserve flavor.
POULTRY SEASONINGby Jaime @ Slightly Steadyhttp://slightlysteady.com
Allowed on:Stage 1Stage 2Stage 3
D I R E C T I O N STo turn this into the kind of poultry seasoning you’d buy in the store, it needs to all be powdered – you can grind it with a mortar and pestle, or use a spice or coffee grinder (maybe a blender, but I haven’t tried it). Store in an airtight container to preserve flavor.
I N G R E D I E N T S
I N G R E D I E N T S
1/2 tsp. cardamom2 tsp. ground coriander2 tsp. cumin1 tsp. turmeric1/2 tsp. chili powder1/2 tsp. pepper1/8 tsp. fennel seed
3 Tbs. sage1 Tbs. thyme1 Tbs. marjoram1 Tbs. rosemary1 Tbs. pepper1 tsp. celery seeds1/4 tsp. ground cloves
t
t
t
t
t
t
t
t
t
t
t
t
t
t
t
t
t
131

CHINESE FIVE SPICE BLENDby Jaime @ Slightly Steadyhttp://slightlysteady.com
Allowed on:Stage 1Stage 2Stage 3
D I R E C T I O N SGrind all the spices together until you reach your desired consistency. Keep in an airtight container to preserve flavor.
HAMBURGER SEASONING {COMPARED TO MCCORMICK GRILLMATES}by April of Holistic Homemakinghttp://www.holistichomemaking.org
Allowed on:Stage 1Stage 2Stage 3
D I R E C T I O N SMix all ingredients until well-combined.Add 1-2 Tbsp per pound of meet prior to cooking. Mix thoroughly and cook meat as usual.Store leftover seasoning in airtight container.
I N G R E D I E N T S
I N G R E D I E N T S
1 part cinnamon1 part cloves1 part fennel1 part anise1 part szechuan peppercorns
1/4 tsp. chili powder1/2 tsp. onion powder1/2 tsp. garlic powder1/2 tsp. xylitol1/2 to 1 tsp. ground black pepper1 + 1/4 tsp. sea salt 1 Tbs. paprika
t
t
t
t
t
t
t
t
t
t
t
t
t
t
t
t
t
132

HOMESTEAD HERB MEAT RUBby Jill @ The Prairie Homesteadhttp://theprairiehomestead.com
Allowed on:Stage 1Stage 2Stage 3
D I R E C T I O N SMix everything together and grind to a fine powder in a coffee grinder. If you don’t have a grinder, then use a mortar and pestle or even just use the spices as-is. However, the finer the rub, the better it seems to absorb into the meat.After it’s ground, sprinkle generously on your (preferably grassfed!) meat and rub in thoroughly with your fingers.Allow the meat to sit for 30 minutes or so. If you don’t have time to wait, then slap those babies directly on the grill.Not only is this rub heavenly on beef steaks, it also makes perfect poultry and pork chops.
TACO SEASONINGby Paula @ Whole Intentions http://wholeintentions.com
Allowed on:Stage 1Stage 2Stage 3
D I R E C T I O N SMix all ingredients until well-combined.Store in airtight container.
Note: 2 heaping Tbs. equals 1 taco seasoning package.
I N G R E D I E N T S
I N G R E D I E N T S
2 tsp. dried rosemary2 tsp. dried thyme2 tsp. dried minced onion1 1/2 tsp. garlic powder1/2 tsp. sea salt3/4 tsp. black pepper
4 Tbs. chili powder1 tsp. garlic powder1 tsp. onion powder1/2 tsp. red pepper flakes1 tsp. oregano2 tsp. paprika2 T. cumin1 Tbs. salt, heaping1 Tbs. pepper, heaping
t
t
t
t
t
t
t
t
t
t
t
t
t
t
t
t
t
t
t
t
t
133

DIY From Scratch
HOMEMADE STEVIA SYRUPby Jaime @ Slightly Steadyhttp://slightlysteady.com
Allowed on:Stage 1Stage 2Stage 3
Perfect for adding to tea, coffee, lemonade, smoothies, fruit crisps and cobblers, pie fillings, homemade yogurts and kefirs, your morning oatmeal—if it won’t miss the added bulk of sugar (some recipes do need that 1 cup of sugar, because it fills out the recipe), stevia syrup will work. There are even recipes for baked goods that use only stevia (or mostly stevia) as the sweetener. It’s up to 200 times sweeter than sugar, so you only need a tiny bit—it won’t add too much liquid to your recipes.
I N G R E D I E N T S3 c. of distilled (purified) water3 c. of chopped stevia leaves and stems (loosely packed)
t
t
t
t
t
t
D I R E C T I O N SPlace the chopped leaves in a glass container and add 1 c. of the water. Cover tightly and let sit for 24 hours. Test for sweetness. If it isn’t sweet enough, give it another 12 to 24 hours. Don’t get greedy with the sweetness. I was tempted to do it, too. “If letting it sit longer makes it sweeter, I’ll let it sit all week!” Not a good idea, evidently. Ever had something sweetened with stevia that had a funky, bitter aftertaste? It’s because someone got greedy. Don’t let it sit any longer than 48 hours—and less is more!Strain it into a pan (ceramic is best), add the remaining two cups of water, and bring to a simmer. Let simmer for 20 minutes; cool. It becomes a very earthy green color, but that just means more nutrients. Don’t worry, it won’t dye your food.This needs to be refrigerated, and it will last at least a few weeks in the fridge. To keep the batches coming even when your lil’ stevia guy goes into slow winter growth mode, dry leaves when you have an abundance, and use the dried leaves to make fresh batches of syrup. The strength probably won’t be identical, so check it a few times during steeping.Stevia powder is another option—and it’s a bit simpler, too. Just dry the leaves and then grind them with a mortar and pestle, or a coffee grinder if you have one. The powder will work just like the syrup does—provided you don’t mind the green color and the texture of the powder in your food and drink (which I do, hence the syrup).
134
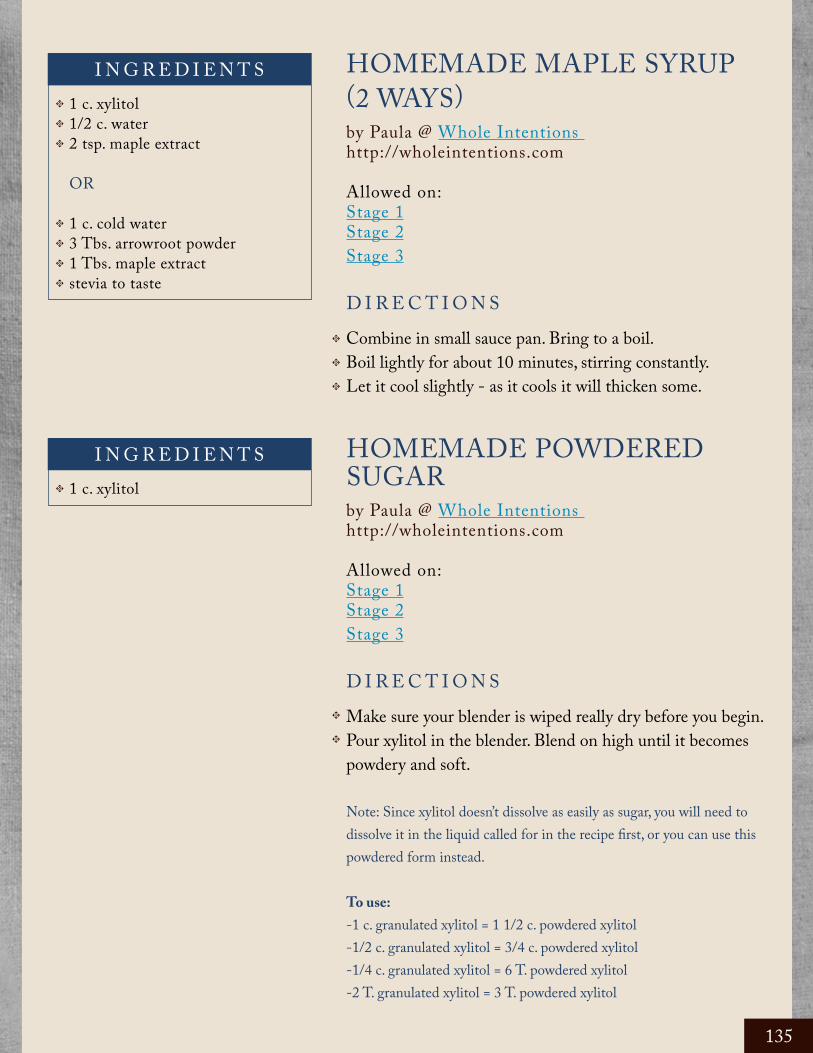
HOMEMADE MAPLE SYRUP (2 WAYS)by Paula @ Whole Intentions http://wholeintentions.com
Allowed on:Stage 1Stage 2Stage 3
D I R E C T I O N SCombine in small sauce pan. Bring to a boil.Boil lightly for about 10 minutes, stirring constantly. Let it cool slightly - as it cools it will thicken some.
HOMEMADE POWDERED SUGARby Paula @ Whole Intentions http://wholeintentions.com
Allowed on:Stage 1Stage 2Stage 3
D I R E C T I O N SMake sure your blender is wiped really dry before you begin. Pour xylitol in the blender. Blend on high until it becomes powdery and soft.
Note: Since xylitol doesn’t dissolve as easily as sugar, you will need to dissolve it in the liquid called for in the recipe first, or you can use this powdered form instead.
To use: -1 c. granulated xylitol = 1 1/2 c. powdered xylitol-1/2 c. granulated xylitol = 3/4 c. powdered xylitol-1/4 c. granulated xylitol = 6 T. powdered xylitol-2 T. granulated xylitol = 3 T. powdered xylitol
I N G R E D I E N T S
I N G R E D I E N T S
1 c. xylitol 1/2 c. water2 tsp. maple extract
OR
1 c. cold water3 Tbs. arrowroot powder1 Tbs. maple extractstevia to taste
1 c. xylitol
t
t
t
t
t
t
t
t
t
t
t
t
t
135

POWDERED EGG REPLACERby Paula @ Whole Intentions http://wholeintentions.com(popular online recipe - author unknown)
Allowed on:Stage 2Stage 3
D I R E C T I O N SMix all well.Store in airtight container. When measuring, press powder firmly into measuring spoon.
To use:-1 & 1/2 tsp powder + 2 Tbs water = 1 egg.-1/2 tsp powder + 1 Tbs water = 1 egg yolk.
SIMPLE TOMATO SAUCEby Kailyn @ A New England Lifehttp://kshippee.blogspot.com
Allowed on:Stage 1 - *notes belowStage 2Stage 3
D I R E C T I O N SDrop the tomatoes into boiling water for 30 seconds and then into ice water. The skins practically fall right off !Chop the tomatoes and add them and all the other ingredients to a saucepan on the stove and let it simmer till its good and cooked. You can add arrowroot* if you want a thicker sauce but I just left mine as is. Store it in the fridge, just like you would an open jar of store bought sauce.
I N G R E D I E N T S
I N G R E D I E N T S
1 c. potato starch3/4 c. tapioca flour2 Tbs. baking powder
6 tomatoes1 red onion minced3 cloves of garlic minced1 pinch of sugar1 pinch of saltseasonings to taste (basil, oregano, rosemary, fennel seed etc.)
t
t
t
t
t
t
t
t
t
t
t
t
t
t
t
*For Stage 1: arrowroot is not allowed; omit.t
136

HOMEMADE CHICKEN STOCK/BROTHby Paula @ Whole Intentions http://wholeintentions.com(f rom Nourishing Traditions)
Allowed on:Stage 1Stage 2Stage 3
D I R E C T I O N SIf using a whole chicken, cut off the wings and remove the neck, fat glands, and gizzards. Cut chicken into several pieces. Or throw in 2-3 lbs. chicken bones. Be sure to break some of the bones in half so the bone marrow and minerals can seep out.Place chicken pieces or just bones into a large stock pot with 4 qts. of water, vinegar, onions, carrots, and celery. Let stand 30 min. to 1 hr. Do not heat water.Bring water to a boil and skim off the scum that rises to the top. If this scum is left in the stock it will ruin the flavor. Reduce heat, cover and simmer for 6-8 hrs. (The longer you cook the stock, the richer and more flavorful. I’ve let it go for 24 hours.) About 10 min. before cooking time is done, add parsley.Strain the stock, removing the chicken pieces, vegetables, and bones. Let them cool and remove the meat for other uses. (I usually freeze the vegetables and meat for chicken soup.)Pour the stock into a large container and refrigerate. Later, you can skim off the layer of fat that forms on top. Pour remaining stock into pint jars (equivalent to 14 oz. cans), leaving at least 1 inch space, and freeze.
I N G R E D I E N T S1 whole chicken OR 2-3 lbs. chicken parts, i.e. necks, backs, wings OR 3-4 lbs. of chicken bones, broken to let marrow seep out (adds flavor and minerals)gizzards from one chicken, optional2-4 chicken feet, optional (makes it gelatinous)4 qts. water2 T. apple cider vinegar1 lg. onion, coarsely chopped2 carrots, peeled, coarsely chopped3 celery stalks, coarsely chopped1 bunch parsley
t
t
t
t
t
t
t
t
t
t
t
t
t
t
t
137

SIMPLE SOAKED BROWN RICEby Kelly @ The Nourishing Homehttp://thenourishinghome.com
Allowed on:Stage 2Stage 3
D I R E C T I O N SAdd above ingredients to a medium ceramic (or glass) mixing bowl and thoroughly combine.Cover the bowl and place it in a warm area of your kitchen for 12-24 hours.After soaking time is completed, drain mixture using a fine-mesh strainer and gently rinse.Place drained rice in medium saucepan and add approximately 1 3/4 cups water. Bring to a boil. Then, immediately cover and reduce heat until you achieve a gentle simmer.Cook approximately 25-40 minutes until rice has absorbed the liquid and reached the consistency you desire.
I N G R E D I E N T S1 c. of organic brown rice1 tsp. raw apple cider vinegar (or lemon juice)2 c. warm filtered water1/8 tsp. Celtic sea salt
t
t
t
t
t
t
t
t
t
138

SOAKING BEANSby Paula @ Whole Intentions http://wholeintentions.com
Allowed on:Stage 2Stage 3
If you want to use soaked beans in place of canned beans in a recipe then use this measurement: 2/3 cup dry beans = 2 cups after cooking = 15 oz. can of beans.
D I R E C T I O N SPut beans in a glass gallon jar or large bowl and cover with at least 4 cups of water. Stir in acidic liquid.Cover and let sit on the counter for 12-24 hours (even 36 hrs is okay). You might see little sprouts by then, and that’s perfectly okay.Drain and rinse the beans until all the scum is washed away. Pour the beans in a large pot with fresh water, bring to a boil, and skim away any additional foam that may come to the top.Turn down the heat to a simmer, add 4 crushed garlic cloves (optional), and cook until the beans are soft (about 4-8 hours). You can also put them in a crockpot and let them simmer all day.Freeze in freezer bags for quick meals at a later date!
I N G R E D I E N T S2 c. beans (kidney, pinto, white, etc)4 c. water2 Tbs. acidic liquid (whey, lemon juice, or apple cider vinegar) per cup of water.4 garlic cloves, optional
t
t
t
t
t
t
t
t
t
t
t
139

PECANS OR WALNUTSD I R E C T I O N SSoak pecans/walnuts (with celtic sea salt) and filtered water and let sit for at least seven hours or overnight.Drain and spread out on a baking sheet or dehydrator,Bake at no warmer than 150 degrees for 12-24 hours and turn often until they are crispy.Store pecans in an airtight container, but make sure to store walnuts in the fridge as they tend to go rancid easier. Large half-gallon glass jars work great for storage.
MACADAMIA NUTS, ALMONDS, AND HAZELNUTSD I R E C T I O N SSoak nuts with celtic sea salt and filtered water and let sit for at least seven hours or overnight.Drain and spread out on a baking sheet or dehydrator,Bake at no warmer than 150 degrees for 12-24 hours and turn often until they are crispy.Store in an airtight container, but make sure to store walnuts in the fridge as they tend to go rancid easier. Large half-gallon glass jars work great for storage.
I N G R E D I E N T S
I N G R E D I E N T S
4 c. pecans or walnuts2 tsp. celtic sea salt12 c. water
4 c. nuts1 tsp. celtic sea salt12 c. water
t
t
t
t
t
t
t
t
t
t
t
t
t
t
SOAKED & DRIED NUTSAllowed on:Stage 1 Stage 2 Stage 3
by Paula @ Whole Intentions http://wholeintentions.com
140
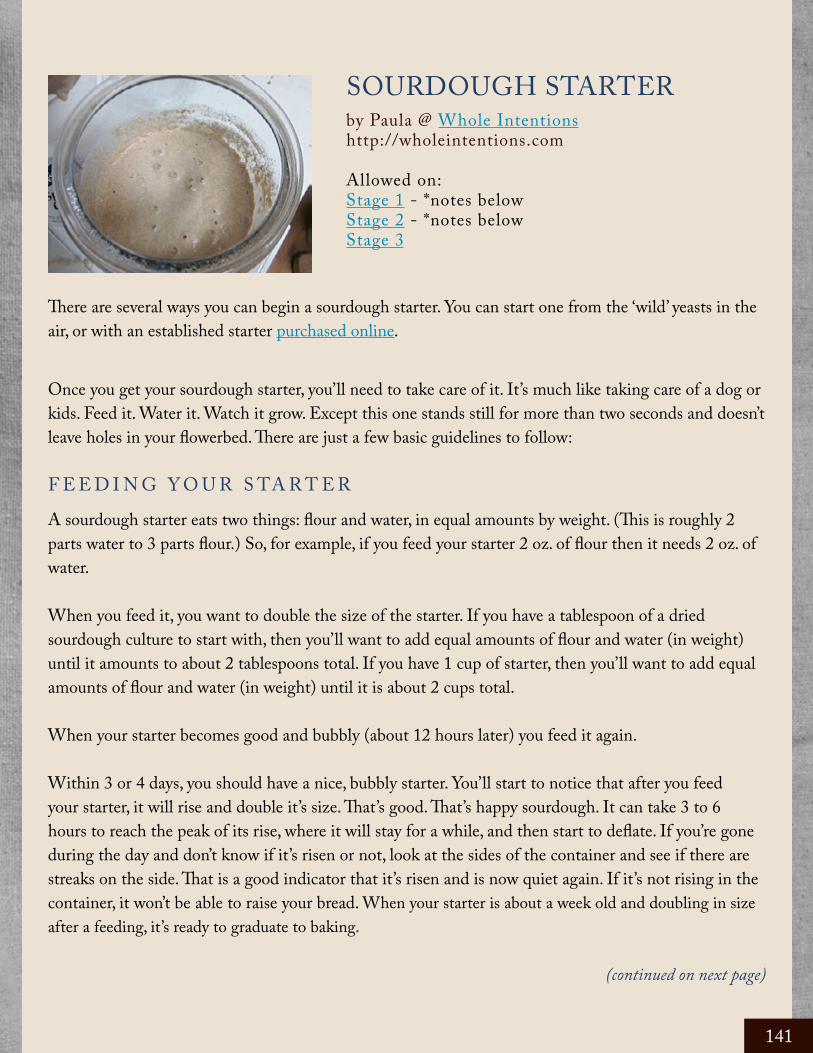
SOURDOUGH STARTERby Paula @ Whole Intentions http://wholeintentions.com
Allowed on:Stage 1 - *notes belowStage 2 - *notes belowStage 3
There are several ways you can begin a sourdough starter. You can start one from the ‘wild’ yeasts in the air, or with an established starter purchased online.
Once you get your sourdough starter, you’ll need to take care of it. It’s much like taking care of a dog or kids. Feed it. Water it. Watch it grow. Except this one stands still for more than two seconds and doesn’t leave holes in your flowerbed. There are just a few basic guidelines to follow:
F E E D I N G Y O U R S TA R T E RA sourdough starter eats two things: flour and water, in equal amounts by weight. (This is roughly 2 parts water to 3 parts flour.) So, for example, if you feed your starter 2 oz. of flour then it needs 2 oz. of water.
When you feed it, you want to double the size of the starter. If you have a tablespoon of a dried sourdough culture to start with, then you’ll want to add equal amounts of flour and water (in weight) until it amounts to about 2 tablespoons total. If you have 1 cup of starter, then you’ll want to add equal amounts of flour and water (in weight) until it is about 2 cups total.
When your starter becomes good and bubbly (about 12 hours later) you feed it again.
Within 3 or 4 days, you should have a nice, bubbly starter. You’ll start to notice that after you feed your starter, it will rise and double it’s size. That’s good. That’s happy sourdough. It can take 3 to 6 hours to reach the peak of its rise, where it will stay for a while, and then start to deflate. If you’re gone during the day and don’t know if it’s risen or not, look at the sides of the container and see if there are streaks on the side. That is a good indicator that it’s risen and is now quiet again. If it’s not rising in the container, it won’t be able to raise your bread. When your starter is about a week old and doubling in size after a feeding, it’s ready to graduate to baking.
(continued on next page)
141
t
t
t
S T O R I N G Y O U R S TA R T E RYou can keep your starter at room temperature or in the refrigerator. There are pros and cons to each method.
1.) If you keep your sourdough starter in the refrigerator, you’ll only need to feed it once a month because it’s in a sort of ‘dormant’ state. Make sure you bring it out and let it warm to room temperature before feeding it. Then stick it back in the fridge with a lid. (Don’t fill more than half full and keep the lid loose to let gases escape.) If you’re going to use the starter in the next few days, leave it out and feed it every 12 hours or so.
If you’re not a big baker, or you’re going on vacation, this is probably the better option. I mark my calendar to help remind me when it’s feeding time.
2.) If you keep your sourdough starter at room temperature, you’ll need to feed it about every 12 hours.
At some point you may be feeding your starter more than you’re using it and you’ll feel like starter is coming out your ears. When you get to this point you have a couple of options. dump half of the starter down the drain before feeding it again. (I know many people do this, but I just can’t get over the feeling that I’m wasting it.) instead of dumping half of it, use it for a simple recipe like pancakes, biscuits, pizza crust, etc. and continue feeding the other half. make a batch of sourdough bread dough and keep it in the fridge, tearing off what you need as you need it. Keep the starter in the fridge as explained in option 1.
142

Ingredient Resources
ALMOND FLOURJust Almonds iHerb
BRAGG’S LIQUID AMINOS OR COCONUT AMINOSiHerb
CELTIC SEA SALTThe Bulk Herb Store
COCONUT FLOUR Tropical Traditions
COCONUT OILTropical Traditions
KEFIR GRAINSCultures For Health
NUTRITIONAL YEAST FLAKES iHerb
PALM SHORTENINGTropical Traditions
RED RASPBERRY LEAF TEA (look for Mama’s Red Raspberry Brew or the individual herbs)The Bulk Herb Store
SOURDOUGH STARTERCultures For Health
STEVIA iHerb
YOGURT STARTERCultures For Health
SUGAR CONVERSION CHARThttp://www.drjacobkeyzernd.com/sweet_calc.htm
(These are the companies I buy many of my ingredients. This page does contains some affiliate links. When someone clicks on those links and buys something from the retailer, I earn a commission that does not cost you anything. This helps support my family. Thank you.)
143

IndexSTAGE ONEBREAKFASTEgg WrapsMake-Ahead Baked SausagePoached Eggs in SalsaCrustless Sausage & Spinach QuicheEasy BLT FrittataEasy Sourdough PancakesOven Baked Coconut PancakesBaked Sourdough French ToastEgg-Less French ToastBreakfast PizzaSourdough Zucchini MuffinsCoconut Almond Muffins
LUNCHSpicy Fish FiletsTuna MeltsMexi Style Salmon CakesPan Roasted Fish with Tomato ConfitChicken Fried RiceChicken PaprikaNewari/Nepali Turmeric Fried ChickenGrilled Chicken FajitasCrockpot Chicken FajitasSloppy JoesGarlic Spaghetti
SOUPS & SALADSBasic Broth SoupRepollo Con Garbanzos – Cabbage and Chick PeasCreamy Dill Cucumber Salad Italian Cabbage SaladGarden Tuna SaladNourishing Broccoli SaladTomato & Cucumber Salad
Simple, Seasonal Cabbage Salad with Mint
BREADSSourdough BreadCoconut Flour Bread Sourdough Oat BiscuitsWhole Wheat Sourdough Tortillas
DINNERLemon Caper Tilapia/ChickenGrilled Herb Turkey BreastsHerb Roasted Drumsticks & VeggiesCoconut Fried ChickenLemon-Garlic Roasted ChickenEasy Grilled Herb ChickenBeef and Zucchini SkilletHamburger Cabbage CasseroleBroccoli and Beef Stir Fry Indian Stuffed PeppersSlow-Cooked Pepper SteakMarinated Beef TenderloinSimple Greek-Inspired Beef RoastMexican Pulled Beef with KaleCrockpot Beef FajitasBacon Wrapped Venison TenderloinVenison Stir-FryWhen Pigs Fly
VEGETABLES/SIDE DISHESOven-Roasted Brussels SproutsRoasted Vegetables with Toasted AlmondsJudías Verdes Con Salsa de Tomate (Green Beans in a Tomato Sauce)Zucchini ‘Pasta’ with Basil ButterStir-Fried Ginger BroccoliCauliflower RiceSautéed Asparagus with Fresh Tarragon and LemonButtery Zucchini & GarlicChinese Green BeansLacto-Fermented Veggies
144

STAGE ONE (CONT )DESSERTSCoconut FrostingCandida-Diet Ice Cream
BEVERAGESRed Raspberry Leaf TeaGinger-Lemon Iced Tea Winter Warmth in a Mug
SNACKSRoasted Pumpkin SeedsCoconut Chia Crackers
CONDIMENTS & DIPHomemade Ketchup: Fermented and Sugar-FreeWhey, Sour Cream, & Cream CheeseEasy No-Fail MayoEggless Mayo Fresh SalsaBusy Moms’ Fabulous Fermented SalsaSauerkrautCreamy Basil DipEasy Roasted Red Pepper Dip
DRESSINGS & SAUCESFrench Salad DressingHoney, That’s Lime Dressing Ranch Dressing/DipSimple Oil & Vinegar Dressing Gluten Free Pizza SauceFresh Marinara SauceBBQ SauceTeriyaki Sauce
SEASONING MIXESHomemade Sausage SeasoningItalian SeasoningSouthwestern RubCurryPoultry SeasoningChinese Five-Spice Blend
Hamburger Seasoning {compared to McCormick Grillmates}Homestead Herb RubTaco Seasoning
DIY FROM SCRATCHHomemade Stevia SyrupHomemade Maple SyrupHomemade Powdered SugarSimple Tomato SauceHomemade Chicken Stock/BrothSoaking BeansSoaked & Dried NutsSourdough Starter
STAGE TWOBREAKFASTEgg WrapsMake-Ahead Baked SausagePoached Eggs in SalsaCrustless Sausage & Spinach QuicheEasy BLT FrittataSoaked Buckwheat & Yogurt PancakesEasy Sourdough PancakesOven Baked Coconut PancakesBaked Sourdough French ToastEgg-Less French ToastMuesli PorridgeCream of MilletBreakfast PizzaSourdough Zucchini MuffinsCoconut Almond Muffins
LUNCHSpicy Fish FiletsTuna MeltsMexi Style Salmon CakesPan Roasted Fish with Tomato ConfitChicken Fried Rice Chicken PaprikaNewari/Nepali Turmeric Fried ChickenGrilled Chicken Fajitas
145

STAGE TWO (CONT )Crockpot Chicken FajitasLentils & Carrots with Swiss ChardSloppy JoesGarlic SpaghettiHoppin’ John
SOUPS & SALADSBasic Broth SoupRepollo Con Garbanzos – Cabbage and Chick PeasCreamy Dill Cucumber SaladAvocado Salad with BaconItalian Cabbage SaladGrilled Chicken Quinoa Salad with Fresh Herbs and Goat Cheese Nourishing Broccoli SaladAvocado & Onion SaladTomato & Cucumber SaladSimple, Seasonal Cabbage Salad with MintHilary’s Rice SaladHilary’s Tex-Mex Rice Salad
BREADSSourdough BreadCoconut Flour BreadSourdough Oat BiscuitsWhole Wheat Sourdough TortillasGluten Free Pizza Crust
DINNERLemon Caper Tilapia/ChickenGluten Free Coconut-Crusted Tilapia Grilled Herb Turkey BreastsHerb Roasted Drumsticks & VeggiesCoconut Fried ChickenLemon-Garlic Roasted ChickenEasy Grilled Herb ChickenBeef and Zucchini SkilletHamburger Cabbage CasseroleBroccoli and Beef Stir FryIndian Stuffed PeppersSlow-Cooked Pepper SteakMarinated Beef Tenderloin
Simple Greek-Inspired Beef RoastMexican Pulled Beef with KaleCrockpot Beef FajitasBacon Wrapped Venison TenderloinVenison Stir-FryWhen Pigs FlySouthwestern Bean Medley in the Crock Pot Crockpot Black BeansBetter Beans & Rice Simple Crockpot Roast & Beans
VEGETABLES/SIDE DISHESOven-Roasted Brussels SproutsRoasted Vegetables with Toasted AlmondsJudías Verdes Con Salsa de Tomate (Green Beans in a Tomato Sauce)Zucchini ‘Pasta’ with Basil ButterStir-Fried Ginger BroccoliCauliflower RiceSautéed Asparagus with Fresh Tarragon and LemonButtery Zucchini & GarlicButtery-Herbed Brown RiceChinese Green BeansLacto-Fermented Veggies
DESSERTSChocolate Coconut No-Bake CookiesWheat-Free Real Food BrowniesMixed Berry Breakfast BarsBlueberry CrispNaturally Sweetened Chocolate Buttercream IcingCoconut FrostingCoconut Peanut Butter Cups
146

STAGE TWO (CONT )Chocolate Chia PuddingCherry Chocolate Ice Cream
BEVERAGESRed Raspberry Leaf TeaGinger-Lemon Iced TeaPumpkin Not ChocolateWinter Warmth in a Mug
SNACKSRoasted Chickpeas That’ll Rock Your WorldRoasted Pumpkin SeedsCoconut Chia CrackersCrockpot Applesauce
CONDIMENTS & DIPHomemade Ketchup: Fermented and Sugar-FreeWhey, Sour Cream, & Cream CheeseEasy No-Fail MayoEggless MayoFresh SalsaBusy Moms’ Fabulous Fermented SalsaSauerkrautCreamy Basil DipEasy Avocado DipEasy Roasted Red Pepper DipBlack Bean Hummus
DRESSINGS & SAUCESFrench Salad DressingHoney, That’s Lime Dressing Ranch Dressing/DipSimple Oil & Vinegar DressingGluten Free Pizza SauceFresh Marinara SauceBBQ SauceTeriyaki Sauce
SEASONING MIXESHomemade Sausage SeasoningItalian SeasoningSouthwestern Rub
CurryPoultry SeasoningChinese Five-Spice BlendHamburger Seasoning {compared to McCormick Grillmates}Homestead Herb RubTaco Seasoning
DIY FROM SCRATCHHomemade Stevia SyrupHomemade Maple SyrupHomemade Powdered SugarPowdered Egg ReplacerSimple Tomato SauceHomemade Chicken Stock/BrothSimple Soaked Brown RiceSoaking BeansSoaked & Dried NutsSourdough Starter
STAGE THREEBREAKFASTEgg WrapsMake-Ahead Baked SausagePoached Eggs in SalsaCrustless Sausage & Spinach QuicheEasy BLT FrittataSoaked Buckwheat & Yogurt PancakesEasy Sourdough PancakesOven Baked Coconut PancakesBaked Sourdough French ToastEgg-Less French ToastMuesli PorridgeCream of MilletBreakfast PizzaSourdough Zucchini MuffinsCoconut Almond Muffins
LUNCHSpicy Fish FiletsTuna MeltsMexi Style Salmon Cakes
147

STAGE THREE (CONT )Pan Roasted Fish with Tomato ConfitChicken Fried RiceChicken PaprikaNewari/Nepali Turmeric Fried ChickenGrilled Chicken FajitasCrockpot Chicken FajitasLentils & Carrots with Swiss ChardSloppy JoesGarlic SpaghettiHoppin’ John
SOUPS & SALADSBasic Broth SoupRepollo Con Garbanzos – Cabbage and Chick PeasCreamy Dill Cucumber SaladAvocado Salad with BaconItalian Cabbage SaladGarden Tuna SaladGrilled Chicken Quinoa Salad with Fresh Herbs and Goat CheeseNourishing Broccoli SaladAvocado & Onion SaladTomato & Cucumber SaladSimple, Seasonal Cabbage Salad with MintHilary’s Rice SaladHilary’s Tex-Mex Rice Salad
BREADSSourdough BreadCoconut Flour BreadSourdough Oat BiscuitsWhole Wheat Sourdough TortillasGluten Free Pizza Crust
DINNERLemon Caper Tilapia/ChickenGluten Free Coconut-Crusted TilapiaGrilled Herb Turkey BreastsHerb Roasted Drumsticks & VeggiesCoconut Fried ChickenLemon-Garlic Roasted ChickenEasy Grilled Herb Chicken
Beef and Zucchini SkilletHamburger Cabbage CasseroleBroccoli and Beef Stir FryIndian Stuffed PeppersSlow-Cooked Pepper SteakMarinated Beef TenderloinSimple Greek-Inspired Beef RoastMexican Pulled Beef with KaleCrockpot Beef FajitasBacon Wrapped Venison TenderloinVenison Stir-FryWhen Pigs FlySouthwestern Bean Medley in the Crock PotCrockpot Black BeansBetter Beans & RiceSimple Crockpot Roast & Beans
VEGETABLES/SIDE DISHESOven-Roasted Brussels SproutsRoasted Vegetables with Toasted AlmondsGluten Free Roasted AsparagusJudías Verdes Con Salsa de Tomate (Green Beans in a Tomato Sauce)Zucchini ‘Pasta’ with Basil ButterStir-Fried Ginger BroccoliCauliflower RiceSautéed Asparagus with Fresh Tarragon and LemonButtery Zucchini & GarlicButtery-Herbed Brown RiceChinese Green BeansLacto-Fermented Veggies
DESSERTSChocolate Coconut No-Bake CookiesWheat-Free Real Food BrowniesMixed Berry Breakfast BarsBlueberry CrispA Wholesome Lemon RouladeNaturally Sweetened Sourdough Chocolate CakeNaturally Sweetened Chocolate Buttercream IcingCoconut FrostingCoconut Peanut Butter Cups
148

STAGE THREE (CONT )Chocolate Chia PuddingCherry Chocolate Ice CreamCandida-Diet Ice Cream
BEVERAGESRed Raspberry Leaf TeaGinger-Lemon Iced TeaPumpkin Not ChocolateWinter Warmth in a Mug
SNACKSRoasted Chickpeas That’ll Rock Your WorldRoasted Pumpkin SeedsCoconut Chia CrackersCrockpot Applesauce
CONDIMENTS & DIPHomemade Ketchup: Fermented and Sugar-FreeWhey, Sour Cream, & Cream CheeseEasy No-Fail MayoEggless MayoFresh SalsaBusy Moms’ Fabulous Fermented SalsaSauerkrautCreamy Basil DipEasy Avocado DipEasy Roasted Red Pepper DipBlack Bean Hummus
DRESSINGS & SAUCESFrench Salad DressingHoney, That’s Lime Dressing Ranch Dressing/DipSimple Oil & Vinegar DressingGluten Free Pizza SauceFresh Marinara SauceBBQ SauceTeriyaki Sauce
SEASONING MIXESHomemade Sausage SeasoningItalian Seasoning
Southwestern RubCurryPoultry SeasoningChinese Five-Spice BlendHamburger Seasoning {compared to McCormick Grillmates}Homestead Herb RubTaco Seasoning
DIY FROM SCRATCHHomemade Stevia SyrupHomemade Maple SyrupHomemade Powdered SugarPowdered Egg ReplacerSimple Tomato SauceHomemade Chicken Stock/BrothSimple Soaked Brown RiceSoaking BeansSoaked & Dried NutsSourdough Starter
149

Alphabetical ListingA Wholesome Lemon Roulade Avocado & Onion Salad Avocado Salad with Bacon Bacon Wrapped Venison Tenderloin Baked Sourdough French Toast Basic Broth SoupBBQ Sauce Beef and Zucchini Skillet Better Beans & RiceBlack Bean Hummus Blueberry Crisp Breakfast Pizza Broccoli and Beef Stir Fry Busy Moms’ Fabulous Fermented Salsa Buttery-Herbed Brown Rice Buttery Zucchini & GarlicCandida-Diet Ice Cream Cauliflower Rice Cherry Chocolate Ice Cream Chicken Fried RiceChicken Paprika Chinese Five-Spice BlendChinese Green Beans Chocolate Chia PuddingChocolate Coconut No-Bake CookiesCoconut Almond Muffins Coconut Chia Crackers Coconut Flour BreadCoconut Fried Chicken Coconut Frosting Coconut Peanut Butter CupsCream of MilletCreamy Basil Dip Creamy Dill Cucumber SaladCrockpot Applesauce
Crockpot Beef Fajitas Crockpot Black Beans Crockpot Chicken FajitasCrustless Sausage & Spinach Quiche Curry Easy Avocado Dip Easy BLT Frittata Easy Grilled Herb ChickenEasy No-Fail Mayo Easy Roasted Red Pepper Dip Easy Sourdough Pancakes Egg WrapsEgg-Less French Toast Eggless MayoFrench Salad DressingFresh Marinara SauceFresh Salsa Garden Tuna SaladGarlic SpaghettiGinger-Lemon Iced TeaGluten Free Coconut-Crusted Tilapia Gluten Free Pizza Crust Gluten Free Pizza Sauce Grilled Chicken FajitasGrilled Chicken Quinoa Salad with Fresh Herbs and Goat CheeseGrilled Herb Turkey BreastsHamburger Cabbage Casserole Hamburger Seasoning {compared to McCormick Grillmates}Herb Roasted Drumsticks & Veggies Hilary’s Rice SaladHilary’s Tex-Mex Rice SaladHomemade Chicken Stock/BrothHomemade Ketchup: Fermented
and Sugar-FreeHomemade Powdered SugarHomemade Sausage SeasoningHomemade Stevia Syrup Homestead Herb RubHomemade Maple SyrupHoney, That’s Lime Dressing Hoppin’ JohnIndian Stuffed PeppersJudías Verdes Con Salsa de Tomate (Green Beans in a Tomato Sauce)Italian Cabbage Salad Italian SeasoningLacto-Fermented VeggiesLemon Caper Tilapia/ChickenLemon-Garlic Roasted Chicken Lentils & Carrots with Swiss ChardMake-Ahead Baked SausageMarinated Beef TenderloinMexican Pulled Beef with Kale Mexi Style Salmon Cakes Mixed Berry Breakfast Bars Muesli PorridgeNaturally Sweetened Chocolate Buttercream Icing Naturally Sweetened Sourdough Chocolate Cake Newari/Nepali Turmeric Fried ChickenNourishing Broccoli Salad Oven Baked Coconut PancakesOven-Roasted Brussels Sprouts Pan Roasted Fish with Tomato Confit Poached Eggs in SalsaPoultry SeasoningPowdered Egg Replacer
150

Alphabetical ListingPumpkin Not ChocolateRanch Dressing/Dip Red Raspberry Leaf TeaRepollo Con Garbanzos – Cabbage and Chick Peas Roasted Chickpeas That’ll Rock Your WorldRoasted Pumpkin Seeds Roasted Vegetables with Toasted Almonds Sauerkraut Sautéed Asparagus with Fresh Tarragon and Lemon Simple Crockpot Roast & Beans Simple Greek-Inspired Beef RoastSimple Oil & Vinegar DressingSimple, Seasonal Cabbage Salad with Mint Simple Soaked Brown Rice Simple Tomato Sauce Sloppy JoesSlow-Cooked Pepper SteakSoaked Buckwheat & Yogurt PancakesSoaked & Dried Nuts Soaking BeansSourdough Bread Sourdough Oat Biscuits Sourdough StarterSourdough Zucchini MuffinsSouthwestern Bean Medley in the Crock Pot Southwestern RubSpicy Fish FiletsStir-Fried Ginger Broccoli Taco SeasoningTeriyaki SauceTomato & Cucumber Salad
Tuna MeltsVenison Stir-Fry Wheat-Free Real Food BrowniesWhen Pigs Fly Winter Warmth in a Mug Whey, Sour Cream, & Cream Cheese Whole Wheat Sourdough Tortillas Zucchini ‘Pasta’ with Basil Butter
151