Head and Neck Surgery - Michigan Medicine · Head and Neck Surgery . What You Need to Know Before...
16
Head and Neck Surgery What You Need to Know Before You Go Home Nursing Unit 4B
Transcript of Head and Neck Surgery - Michigan Medicine · Head and Neck Surgery . What You Need to Know Before...

Head and Neck Surgery What You Need to Know Before You
Go Home
Nursing Unit 4B

Nursing Unit 4B
Head and Neck Reference Guide
Welcome to the University of Michigan Hospital!
We are glad you have chosen us for your care.
The purpose of this booklet is to provide patients who are having head and
neck surgery important information that they will need when they go home.
We will review this information with you and your family members in detail
before you are discharged.
The booklet also includes some suggestions about how to prepare yourself and
your home before you come to the hospital. Being prepared ahead of time will
help your discharge go smoothly and your recovery at home much more
comfortable.
Please keep this booklet in a convenient location to use as a reference when you
return home.
Important Contact Information:
Clinic: 734 936-0827
Mon-Fri 8:00 AM—5:00 PM
After Hours: 734 936-6267, ask to speak to the resident on call for
Otolaryngology
Remember: every patient is a unique case. It is important that you discuss
specifics about your surgery with your surgical team and nursing staff before
you leave the hospital.

Nursing Unit 4B
Head and Neck Reference Guide
Table of Contents:
Before Your surgery ………………………………………………….…. 4
Your Hospital Stay…………………………………………………….…..4
When you Return Home…………………………………………….……5
Caring for a Tracheostomy …………………………………………….. 6
Caring for a Stoma……………………………………………..…………. 9
Caring for your Incision Care ………………………………………......10
Other Wound Care……………………………………………………..… 11
Tube Feeding ………………………………………………………..…… 12
Medications ……………………………………………………..…………13
Jackson Pratt Drains (JP) …………………………………..……………14
Mouth Care ………………………………………………..……………….15
Communication………………………………….………………………..15
Support Resources for patients …………..…………………………...15
Equipment for Home …………………………………………………….16

4 Nursing Unit 4B
Head and Neck Reference Guide
Before your surgery • Choose a “clean” area in your home to store the medical supplies you will need
during your recovery.
• Prepare a hand sanitizer and have soap and water readily available. You must have clean hand to care for yourself.
• If you are having a total laryngectomy, order a medical-alert tag (example: “I am a neck breather” or “I have a permanent stoma”).
• Contact your local emergency services to let them know about your situation. Tell them that if you call 911, they should send a response unit right away. You may not be able to talk to them.
• Check your smoke detectors. Your sense of smell may not be as sensitive as before surgery.
• Plan to have a family member present with you as much as possible the first few days you are home. You will need this person to help you learn how to care for yourself after you get home.
• Prepare dry erase boards, notebooks, pens and pencils. Communicating after surgery may be difficult and frustrating.
• If you use alcohol regularly or suffer from depression talk with your doctor before surgery. Alcohol use and depression may affect your recovery.
Your Hospital Stay What should I bring to the hospital? During the first few days, you will be most comfortable in hospital gowns. As you begin to feel better, you may want your own slippers and bathrobe, chap stick, personal hygiene items and notebooks for writing messages. The hospital does not have pajama bottoms. What can I expect during my hospital stay? Immediately after your surgery you will move to the Post Anesthesia Recovery Unit (PACU). After the major effects of anesthesia will wear off, you will move to your

5 Nursing Unit 4B
Head and Neck Reference Guide
room. You may still be very sleepy but the nurses will monitor you very closely. • Even while sleepy, you will need to do deep breathing exercises to help prevent
pneumonia and increase lung capacity. • After the surgery the nurses will suction you at least every hour for up to 24-48
hours. Suctioning is passing a small catheter (tube) into your breathing tube to stimulate coughing and clear secretions.
• Most patients receive a blood thinner shot twice a day to help prevent blood clots.
• On the first day after surgery, we expect you to get out of bed and walk. Moving around is important to prevent complications.
• A Physical Therapist will work with you if needed, and help get you stronger.
• With certain types of reconstructive surgery, your room may need to be kept at a higher temperature than usual to improve healing.
• You will stay in the hospital for several days. Your healthcare team will discuss all plans with you daily.
How will I care for myself at home?
• We recommend that a family member stay with you as much as possible during the
first days at home.
• If you go home with a Tracheostomy or stoma, your portable suction machine and obturator (if applicable) will go with you wherever you go.
• Do not use Kleenex because the lint it carries can irritate your airway.
• Always clean your hands with soap and water before and after doing Tracheostomy/stoma care and suctioning.
• At discharge, we will give you one day of supplies to take home. While you are in the hospital the Discharge Planner will work with you and your local Visiting Nurses Service to make arrangements for getting you the supplies you will need on an ongoing basis.
• Do not lift, push or pull more than 10 pounds (a gallon of milk) for 6-8 weeks. (unless your doctor may give you different instructions).

6 Nursing Unit 4B
Head and Neck Reference Guide
• Follow the exercises the Physical Therapist gave you.
• Try to avoid constipation as much as possible. Inactivity and certain medications can cause constipation in people after surgery. Because you will not be able to bear down to have a bowel movement, try and keep your stool as soft as possible.
• Wear your medical alert tag.
• Do not swim. Tracheostomy/stoma patients cannot hold their breath and are not able to swim. Take precautions in the shower or bath.
• If you have a Tracheostomy remember to take your obturator with you at all times. You will need it to put a Tracheostomy back in.
• Notify your doctor if you have:
o Increase redness or swelling at the incision site
o Wound edges that are coming apart
o Sudden bruising
o Increase in pain
o Temperature more than101
Caring for a Tracheostomy
© National Heart, Lung, and Blood Institute

7 Nursing Unit 4B
Head and Neck Reference Guide
Suctioning: Take several deep breaths
before during and after each suction. 1. Wash your hands. 2. Prepare supplies (get saline, gauze,
suction machine and catheter ready). 3. Turn on suction machine. 4. Take some deep breaths. 5. Squirt 3-5cc saline in Tracheostomy.
6. Cough. 7. Insert catheter until you feel resistance or
hear sound. 8. Cover vent and twist catheter coming out.
This should last less than 10 seconds. 10. Repeat steps 1-9 until airway is clear. 11. If you are unable to clear airway remove and clean your inner cannula. If you still get no relief call 9-1-1.
Cleaning: Do this 3 times a day. 1. Wash hands.
2. Prepare supplies (get saline, gauze, suction machine and catheter ready).
3. Cough/suction to clear any secretions.
4. Using fingers to support Tracheostomy, remove inner cannula.
o If you have a disposable inner cannula replace it with new one.
o If you have a non-disposable inner cannula clean it with a brush and hydrogen peroxide, then rinse with water till clean. Dry the cannula with gauze only. Do not use Kleenex! Lint from the Kleenex can irritate your airway.
Clear your airway several times a day even if you do not feel congested.
© Susan Gilbert, CMI

8 Nursing Unit 4B
Head and Neck Reference Guide
5. Replace the inner cannula.
6. Clean around the base of the Tracheostomy with a solution made of half normal saline and half peroxide.
7. Tracheostomy ties should have enough slack so that you can put one finger between the ties and your neck.
Filters: Wear a Tracheostomy bibs to prevent too much dust, smoke, and fumes that make breathing difficult. You can buy the bibs at medical supply stores. Wear a “shower shield” or a baby bib with the plastic side out to prevent water from entering your airway when you shower. Humidity: To keep mucous thin and easy to cough out use your moist air mask at night, or anytime your secretions are thick and you are at home. If you are away from your moist air mask, put a couple drops of normal saline into your Tracheostomy or moisten your Tracheostomy bib. You can also increase what you drink, but check with the doctor first.
Tracheostomy Supplies
Non– Disposable Shiley &
Obturator

9 Nursing Unit 4B
Head and Neck Reference Guide
Caring for a Stoma If you have a stoma your nose and mouth are not connected to your lungs. Your stoma is now your airway.
Suctioning: always take several deep breaths before during and after each suction. 1. Wash hands. 2. Prepare supplies (get saline, gauze, suction machine and catheter ready). 3. Turn on suction machine. 4. Take some deep breaths. 5. Squirt 3-5cc saline into stoma. 6. Cough. 7. Stick the catheter in until you feel resistance or hear sound. 8. Cover vent on tubing and twist catheter while coming out. This should last less than
10 seconds 10. May need to repeat steps 1-9. 11. If you are unable to clear airway, look inside the stoma. Try to remove any visible crusted mucus with hemostats. (that you received at
Jackson Metal Trach
& Obturator
©SEER

10 Nursing Unit 4B
Head and Neck Reference Guide
discharge). If you still have no relief call 9-1-1.
Cleaning: Do this 3 times a day. 1. Wash hands. 2. Prepare all supplies. 3. Cough or suction to clear any secretions. 4. Clean around stoma with a solution made of half hydrogen peroxide and half water.
Use hemostats to remove crusts. Do not double dip into the solution. Note: To avoid bleeding, do not remove any crusts until they loosen or you softened them with normal saline.
5. Using your penlight (given to you at discharge) look inside. Does it appear pink and moist? Your stoma should look like the inside of your mouth. If not, repeat steps 1-5 as needed.
Filters: Wear a bib to prevent excessive dust, smoke, and fumes that can you’re
your breathing hard. You can buy bibs at a medical supply store. To prevent water from entering your airway when you shower use a “shower shield” (a cover made specifically for a Tracheostomy/stoma), or you can use a bib with plastic side out.
Humidity: Use your moist air mask at night to keep mucous thin and easy to
cough. Also, use the mask anytime your secretions are thick and you are at home. You can also increase the amount you drink but check with the doctor first! If you are away from your moist air mask, put a couple drops of normal saline into your Tracheostomy or moisten your Tracheostomy bib.
Clear your airway several times a day, even if you do not feel congested.
Keep in mind: Whatever you make wet you should make dry. (in other words: dry the stoma
completely after cleaning.)

11 Nursing Unit 4B
Head and Neck Reference Guide
Caring for Your Incision
If sutures/staples are present: Clean 3 times daily or as often as your doctor or nurse order. Make a solution with half hydrogen peroxide and half water. Clean the incision site with Q-tips or gauze. Loosen and remove any crusts that have formed. Keep area clean and dry. Use ointments only as directed by your doctor.
If no sutures: clean the incision site three time per day as often as your doctor or nurse order. Cleanse with soap and water and pat dry If crust develops make a solution of half hydrogen peroxide and half water
and clean with Q-tips or gauze. If Steri-Strips are in place at discharge: Leave the steri-strips in place. They will begin to tatter and loosen but do not remove them unless your doctor tells you to do so. The edges can be cut as they loosen and curl. Your doctors will advise you as to whether or not you can shower when steri-strips are in place.
Other Wound Care Tissue Graft Donor Site: the area of the body where skin or tissue was removed from for grafting to another area.
• Do not remove the clear dressing. The dressing will naturally come off.
• As the clear dressing loosens you can trim the edges with scissors, unless your doctors tells you otherwise.
• The dressing usually comes completely off one to two weeks after surgery.
• If you have an arm splint or leg cast, it should stay in place for 6 weeks after
Partial neck incision with staples

12 Nursing Unit 4B
Head and Neck Reference Guide
surgery, unless directed your doctor tells you otherwise.
• Tissue Graft Site: the area where skin or tissue was moved to from another area of the body. This tissue could be skin, muscle or bone.
• Make sure to avoid any bumping or jarring movements over the next one to two weeks so the new blood supply has a chance to develop.
• Protect the area from extreme cold.
• Before you leave the hospital we will give you specific instructions on how to care for your wound.
Tube Feeding There are several ways to provide tube feeding. The type of surgery you had determines which type of tube you will use.
• Dobhoff Tube: This tube is placed through your nose into your stomach
• Gastrostomy Tube (G TUBE): a tube placed directly into your stomach
• Jejunostomy Tube (J TUBE): a tube placed through your stomach into your intestine
• Tracheostomyeoesophageal Site (TEP TUBE) Red rubber tube placed through the stoma into another smaller hole. (This opening is also where a speaking prosthesis will be placed at a post-operative appointment) If the tube comes out try to put it back into the small hole into stoma. Then secure it and call the doctor. If you are unable to replace it go to your emergency room. Quick replacement is important to prevent the small opening from closing.
The dietician will give you additional information on Tube Feeding
Tube Feeding Instructions
1. Start with a clean work surface and assemble your supplies (formula, feeding bag and tubing, water, 30-60 cc syringe).
Do not smoke and limit contact to second-hand smoke! Smoking can delay your healing and add to complications.

13 Nursing Unit 4B
Head and Neck Reference Guide
2. Be sure you start your tube feeding in a seated upright position. Your head should be above your stomach.
3. Wash hands.
4. Check tube for placement. Each tube should be marked with ink (or a stitch) at the point where it is inserted into the body. Make sure tube is in right place. If it does not seem to be correctly positioned call your doctor or visiting nurse.
5. Flush the tube with 30cc of water.
6. Close the roller clamp on the feeding bag.
7. Shake up the can of tube feeding pour it into the bag.
8. Attach the feeding tubing and place the bag above your stomach level. (Some patients place it on a nail in the wall)
9. Open the roller clamp and adjust the rate as tolerated
After feeding:
1. Flush your feeding tube with 30 cc water. After you detach the feeding bag and rinse it out as directed.
2. To prevent nausea, vomiting and aspiration, you must sit with your head and chest above your stomach during the feeding and for 30-60 minutes afterwards.
Medications
Take only medications approved by your doctor.
Try to get all medications in a liquid form. If the medication(s) does not come in a liquid form, your local pharmacist can tell you if it is okay to crush a medication or open a capsule to dilute it. Not all medications can be crushed or diluted. Talk with your doctor about ways to take medications that cannot be taken in liquid form.
14 Nursing Unit 4B
Head and Neck Reference Guide
Steps for taking Medications: 1. Wash hands 2. Prepare medications by mixing them with 30cc of water.
• If the medication comes as a liquid, you must still mix it with water.
• If the medication is in pill form, crush it into fine powder and mixed with water (if allowed as noted above).
• If the medication comes in a capsule, open the capsule and empty the contents into 30 cc of water. (if allowable as noted above).
3. Check the placement of the feeding tube. 4. Flush the tube with 30cc water. 5. Draw up the medications with syringe. 6. Slowly insert them into the tube. Be sure to be sitting upright. 7. Flush with 30cc water. 8. Clamp off tube.
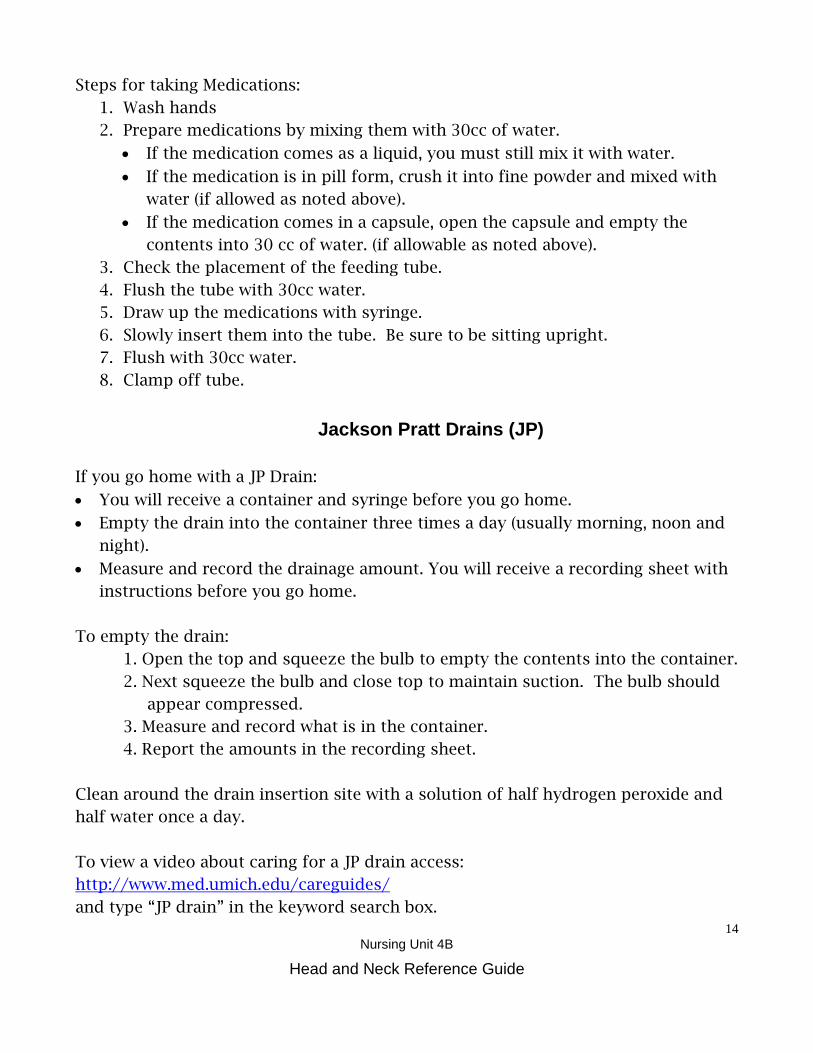
Jackson Pratt Drains (JP)
If you go home with a JP Drain:
• You will receive a container and syringe before you go home.
• Empty the drain into the container three times a day (usually morning, noon and night).
• Measure and record the drainage amount. You will receive a recording sheet with instructions before you go home.
To empty the drain:
1. Open the top and squeeze the bulb to empty the contents into the container. 2. Next squeeze the bulb and close top to maintain suction. The bulb should
appear compressed. 3. Measure and record what is in the container. 4. Report the amounts in the recording sheet.
Clean around the drain insertion site with a solution of half hydrogen peroxide and half water once a day. To view a video about caring for a JP drain access: http://www.med.umich.edu/careguides/ and type “JP drain” in the keyword search box.
15 Nursing Unit 4B
Head and Neck Reference Guide
Mouth Care Mouth care routines vary by the type of surgery you have. We will talk with you about your routine during your hospital stay.
Communication Patients with Tracheostomy can talk only when the cuff is deflated. Your doctor will decide when it would be possible to deflate the cuff. In most cases this is not possible right after surgery. Most patients communicate by writing, picture boards or dry erase boards until the cuff can be deflated. Patients with a stoma can communicate with a dry erase board or pen & paper until they can regain the use of their voice. Your doctor and Speech Pathologist will talk with you more about ways of communication. What Resources Are Available to Support Patients and Families?
• Social Workers are staff members that help families cope with emotional or
social difficulties related to the hospital stay. Social workers also assist with
counseling, general information, and referrals to community agencies.
• Discharge Planners arrange for continuing therapy and nursing needs after the
patient leaves the hospital. They also may arrange placement in rehabilitation or
extended care facilities if needed.
• The UMHS Guest Assistance Program (GAP) provides financial assistance for
transportation, parking, meals, and lodging for family members who qualify. .
• The Head and Neck support group meets on the third Tuesday of every month 2:00 PM in the Walter Work Conference Room in the Taubman Center. Contact the clinic for more information, 734 936-0827.
• Spiritual Care providers respond around the clock to patients and families who
need spiritual counseling, anointing, emergency baptism, crisis intervention and
other supportive measures.
In most cases, a JP drain will be removed when the amount of drainage is less than 30cc’s over 24 hours.

16 Nursing Unit 4B
Head and Neck Reference Guide
Disclaimer: This document contains information and/or instructional materials developed by Michigan Medicine for the typical patient with your condition. It may include links to online
content that was not created by Michigan Medicine and for which Michigan Medicine does not assume responsibility. It does not replace medical advice from your health care provider because your experience may differ from that of the typical patient. Talk to your health care provider if
you have any questions about this document, your condition or your treatment plan.
Author: Krystyn Voris, RN Last Revised by: M. Aranda, BSN, RN
Patient Education by Michigan Medicine is licensed under a Creative Commons Attribution-
NonCommercial-ShareAlike 3.0 Unported License. Last Revised 04/2017
• The Unit Clerk, is another important ally and can provide directions, parking slip
validation, and make other arrangements.
• The Unit Host is on the unit during day and early evening hours. The Host works
to promote comfort and meet many of the practical needs of patients and
families.
• The Bedside Registered Nurse remains your best, first contact. The RN will help
put you in touch with any of the supportive resources listed above.
Equipment for Home A discharge planner will take care of arranging the supplies you will need at home. Catheter: After each use, rinse out the catheter with water until it is free of mucous. Store the catheter in a clean plastic bag until ready to use again. With proper care you can reuse the catheter many times. Portable Suction Machine: You will go home with a portable suction machine. It has a rechargeable battery. Take the machine with you every time you leave your house. We will give you more information about how to use and care for the machine before you go home.
Image provided by DeVilbiss Healthcare LLC, Somerset, PA USA