HD 1080 Car Camcorder - QQLinx · before using your HD 1080 Car Camcorder for the first time....
32
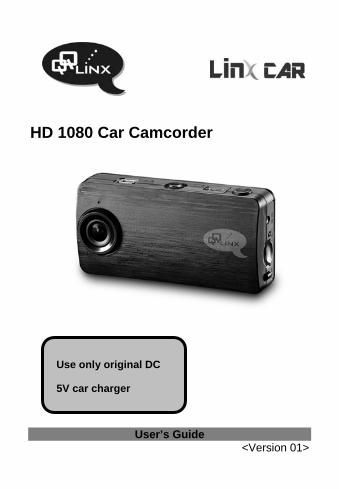
HD 1080 Car Camcorder Use only original DC 5V car charger User’s Guide <Version 01>
Transcript of HD 1080 Car Camcorder - QQLinx · before using your HD 1080 Car Camcorder for the first time....
HD 1080 Car Camcorder
Use only original DC
5V car charger
User’s Guide <Version 01>
- 1 -
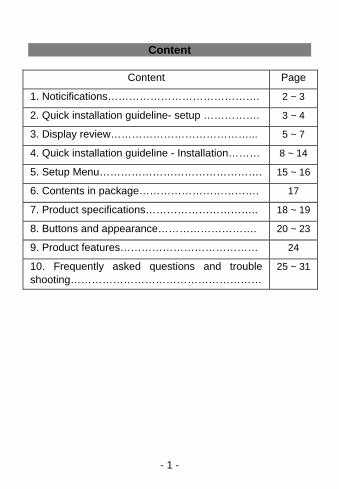
Content
Content Page
1. Noticifications……………………………………. 2 ~ 3
2. Quick installation guideline- setup ……………. 3 ~ 4
3. Display review…………………………………... 5 ~ 7
4. Quick installation guideline - Installation……… 8 ~ 14
5. Setup Menu………………………………………. 15 ~ 16
6. Contents in package……………………………. 17
7. Product specifications………………………….. 18 ~ 19
8. Buttons and appearance………………………. 20 ~ 23
9. Product features………………………………… 24
10. Frequently asked questions and trouble shooting………………………………………………
25 ~ 31
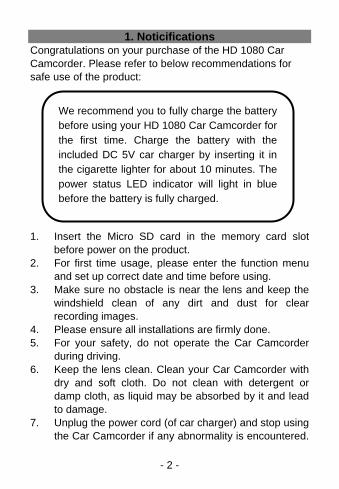
1. Noticifications Congratulations on your purchase of the HD 1080 Car Camcorder. Please refer to below recommendations for safe use of the product:
We recommend you to fully charge the battery before using your HD 1080 Car Camcorder for the first time. Charge the battery with the included DC 5V car charger by inserting it in the cigarette lighter for about 10 minutes. The power status LED indicator will light in blue before the battery is fully charged.
1. Insert the Micro SD card in the memory card slot before power on the product.
2. For first time usage, please enter the function menu and set up correct date and time before using.
3. Make sure no obstacle is near the lens and keep the windshield clean of any dirt and dust for clear recording images.
4. Please ensure all installations are firmly done. 5. For your safety, do not operate the Car Camcorder
during driving. 6. Keep the lens clean. Clean your Car Camcorder with
dry and soft cloth. Do not clean with detergent or damp cloth, as liquid may be absorbed by it and lead to damage.
7. Unplug the power cord (of car charger) and stop using the Car Camcorder if any abnormality is encountered.
- 2 -

Do not attempt to disassemble or repair by yourself. 8. If any problem with the product is found, please
contact with QQLinx’s customer service center, return the Car Camcorder (with included accessories) to the dealer where you bought your product, or deliver it to QQLinx maintenance department for inspection.
2. Quick installation guideline-Setup < Step 1: Insert the micro SD card >
Insert the micro SD card in the memory card slot until it “clicks” into the slot as illustrated below:
Remove the memory card:
Press the card gently downward, the memory will be released from the slot.
- 3 -
- 4 -
Note: 1. The Car Camcorder supports micro SD/SDHC
32GB memory card. 2. Insert the memory card in correct direction,
otherwise the Car Camcorder or the memory card may be damaged.
3. If the memory card cannot be detected by your Car Camcorder, please remove and re-insert the memory card, or replace with a new memory card.
<Step 2: Setup date and time>
For first time usage, please enter the function menu and set up correct date and time before using. See page 15 for more setup information.
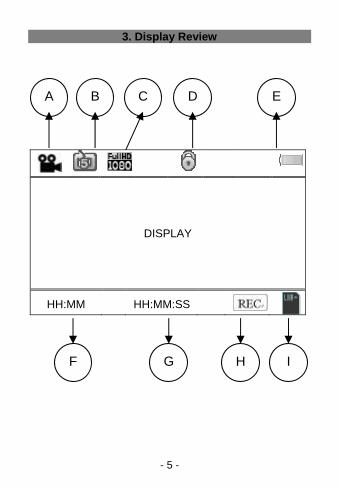
3. Display Review
- 5 -
DISPLAY
HH:MM HH:MM:SS
A
F
B C D E
G H I
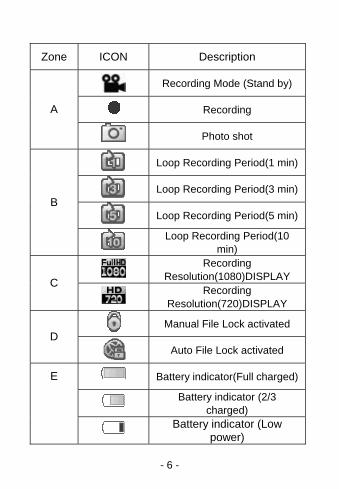
Zone ICON Description
Recording Mode (Stand by)
Recording A
Photo shot
Loop Recording Period(1 min)
Loop Recording Period(3 min)
Loop Recording Period(5 min)
B
Loop Recording Period(10
min)
Recording
Resolution(1080)DISPLAY C
Recording
Resolution(720)DISPLAY
Manual File Lock activated
D
Auto File Lock activated
Battery indicator(Full charged)
Battery indicator (2/3
charged)
E
Battery indicator (Low
power)
- 6 -
- 7 -
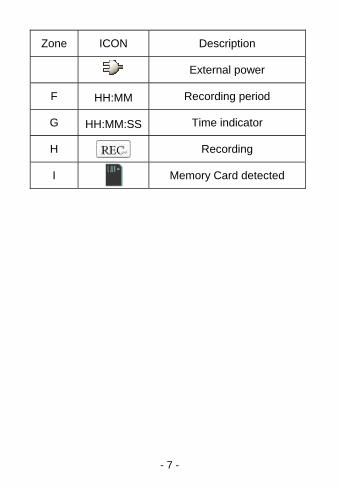
Zone ICON Description
External power
F HH:MM Recording period
G HH:MM:SS Time indicator
H Recording
I
Memory Card detected

4. Quick Installation Guideline- Installation < Holder Installation>
- 8 -
Top screw knob
Top screw Knob (Knob 1)
Screw knob for Global axis (Knob 2)
Latch
Sucking Disc Clean the windshield with clean cloth where the Car
Camcorder is to be attached. Attach the suck disc to the preferred position on the
windshield and push the latch toward yourself to fix it firmly.
< Main unit Installation >
Attach knob1 to Car Camcorder’s rear cover by screwing it.
Rotate the global axis to adjust a best recording angle, setup the Car Camcorder by locking knob2 firmly. (Facing the global joint, turn knob2 clockwise to screw tight it and counterclockwise to loosen it.)
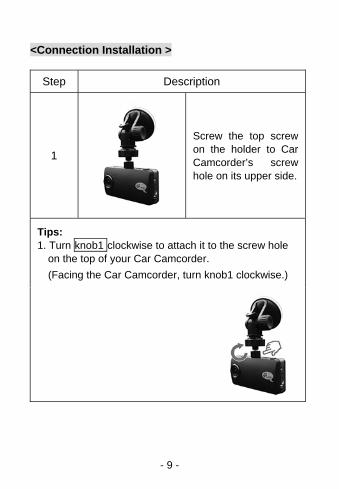
<Connection Installation >
Step Description
1
Screw the top screw on the holder to Car Camcorder’s screw hole on its upper side.
Tips: 1. Turn knob1 clockwise to attach it to the screw hole
on the top of your Car Camcorder.
(Facing the Car Camcorder, turn knob1 clockwise.)
- 9 -

Step Description
2
Move your Car Camcorder to a proper location, press the plastic sucker on the preferred position on the windshield, then push out the latch to fix your Car Camcorder on the windshield.
Tips: 1. Clean the windshield where the Car Camcorder is to
be attached with soft, clean cloth. 2. Ensure that there is no dirt and debris in the sucking
disc by cleaning it with soft cloth if necessary. 3. Attach the sucking disc to the windshield and push
the latch out side to fix it firmly at the location you prefer to attach it.
Note: In most cases, you can attach your Car Camcorder at center or rightward position behind the rearview mirror. You can choose other location as long as it does not hinder safe driving.
- 10 -

Step Description
3
Release knob2 slightly, fine tune the shooting angle of your Car Camcorder to find a best angle of recording, and then turn knob2 clockwise to fix it.
Tips: 1. Turn on your Car Camcorder
without connecting the car charger, let the Car Camcorder stay in standby mode.
2. Refer to the picture showed in the display, adjust the holder’s global joint to get a best shooting angle.
Recommended shooting Angle:
1. Bottom of the display must cover both ends of your car’s front.
2. Center of the display must align with the one of your car.
Turn knob2 clockwise to lock it after above adjustments are done successfully.
- 11 -

Step Description
4
Insert one end of the cable of car charger to your Car Camcorder’s USB power input and the other to the cigarette lighter. (Hide the cables in your car if possible)
Tips: 1. Insert the DC jack of your car charger to the DC
input of your Car Camcorder. 2. Loop the car charger cable around the connection
rod of your rearview mirror or the holder. 3. After 1 and 2, fix and hide the car charger cable in
the car interior, for example, the seams along the door frame, or under the carpet. (You can use a coin or a card to fix the cable in the seams in the car interior)
- 12 -

4. Insert the charger’s lighter connector into the cigarette lighter; the installation is completed.
< Cabling of your Car Camcorder >
- 13 -
- 14 -
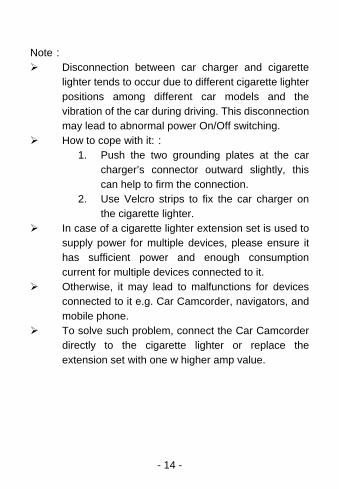
Note: Disconnection between car charger and cigarette
lighter tends to occur due to different cigarette lighter positions among different car models and the vibration of the car during driving. This disconnection may lead to abnormal power On/Off switching.
How to cope with it:: 1. Push the two grounding plates at the car
charger’s connector outward slightly, this can help to firm the connection.
2. Use Velcro strips to fix the car charger on the cigarette lighter.
In case of a cigarette lighter extension set is used to supply power for multiple devices, please ensure it has sufficient power and enough consumption current for multiple devices connected to it.
Otherwise, it may lead to malfunctions for devices connected to it e.g. Car Camcorder, navigators, and mobile phone.
To solve such problem, connect the Car Camcorder directly to the cigarette lighter or replace the extension set with one w higher amp value.

- 15 -
5. Setup Menu
Main Option Sub options Content
Playback Mode
Video Review Photo Review
Resolution 1920x1080 1280x720
Loop recording 1 min / 3 min / 5 min/ 10 min
Sound recording ON / OFF
G-sensor sensitivity Level
OFF / Low / Normal / High
Power off Delay Instant power off / 15 sec / 30 sec
Recording Mode setup
Motion Detection ON / OFF
Capture Mode Setting
Image Size
3M 2048x1536 5M 2592x1944 8M 3264x2448 12M 4032x3024
Time Setup Year/ Month/ Day Hr / Min / Sec
LCD Display Always on / 30 sec / 60 sec
System Setting
Beep Sound ON / OFF

- 16 -
Format YES / NO
Shake Power-ON Sensitivity
OFF / Low / Normal / High
Shaking Power-ON Rec. Time
1 min/ 3 min/ 5 min
Language
English / Simplified Chinese / Traditional Chinese
Default setting Cancel / Confirm
Firmware version
Back Back

6. Contents in Package 1. Main Unit x 1 5.User’s Manual x 1
- 17 -
2. Cigarette power x 1 3. Camcorder Holder x 1
6. Quick Installation Guide x 1
4.8GB micro SD Memory card x 1
- 18 -
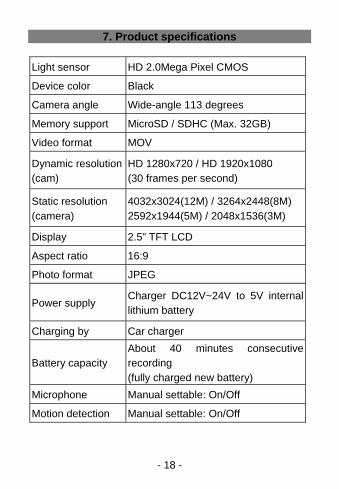
7. Product specifications
Light sensor HD 2.0Mega Pixel CMOS
Device color Black
Camera angle Wide-angle 113 degrees
Memory support MicroSD / SDHC (Max. 32GB)
Video format MOV
Dynamic resolution (cam)
HD 1280x720 / HD 1920x1080 (30 frames per second)
Static resolution (camera)
4032x3024(12M) / 3264x2448(8M) 2592x1944(5M) / 2048x1536(3M)
Display 2.5” TFT LCD
Aspect ratio 16:9
Photo format JPEG
Power supply Charger DC12V~24V to 5V internal lithium battery
Charging by Car charger
Battery capacity About 40 minutes consecutive recording (fully charged new battery)
Microphone Manual settable: On/Off
Motion detection Manual settable: On/Off
- 19 -
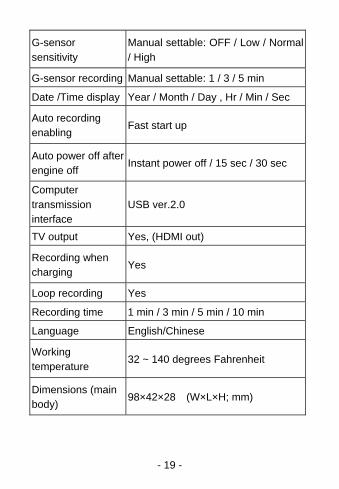
G-sensor sensitivity
Manual settable: OFF / Low / Normal / High
G-sensor recording Manual settable: 1 / 3 / 5 min
Date /Time display Year / Month / Day , Hr / Min / Sec
Auto recording enabling
Fast start up
Auto power off after engine off
Instant power off / 15 sec / 30 sec
Computer transmission interface
USB ver.2.0
TV output Yes, (HDMI out)
Recording when charging
Yes
Loop recording Yes
Recording time 1 min / 3 min / 5 min / 10 min
Language English/Chinese
Working temperature
32 ~ 140 degrees Fahrenheit
Dimensions (main body)
98×42×28 (W×L×H; mm)
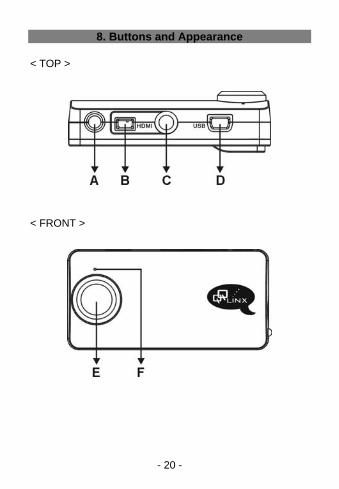
8. Buttons and Appearance < TOP > < FRONT >
- 20 -

< SIDE > < BOTTOM >
< DISPLAY >
- 21 -

- 22 -
Description:
Mark Description Content
A Reserved N/A
B HDMI output Output video via HDMI real time
C Holder base Connect with sucking disc
D USB 1. Power supply 2. Connect to PC
E Lens 6G Lens (2M sensor)
F Microphone Sound recording
G Reset Default setting
H Memory card slot
For micro SD card
I Power ON/OFF switch
J File lock button
Recording Mode:Manual file lock Standby mode::Photo shot Menu mode::Down
K Display Button
Recording Mode : Display ON/OFF Menu mode::UP

- 23 -
Mark Description Content
L Record buttonStandby mode : Recording ON/ OFF Menu mode:Enter/ Confirm
M Mode button Enter Menu Mode In Menu mode, the button is for options select
N LED Indicator
Stand by:Red light up Recording:Red light flashing Charging:Green light up Full charged:Green light off Ex. When the Red light flashing and green light up, means “recording and charging”
O Speaker Sound output

- 24 -
9. Product Features HD 1080 Resolution 113 Degree wide angle lens 6G Lens 2M Sensor CMOS 2.5”LCD Explosion-proof high-temperature rechargeable
lithium battery Photograph resolution up to 4032x3024 Fast recording activation after power up Delayed auto power off after engine turned off Motion detect recording Non-stop recording by recording while charging Auto recording when car engine power up Auto power off when car engine power off Video/Photo playback Loop recording (For 1 min/ 3 min/ 5 min/ 10 min) Support upto 32GB SDHC micro memory card Universal car charger 12V~24V Built-in MIC for synchronized AV recording Date and time display HDMI output Language:English /
Simplified / Traditional Chinese FCC Certificate approval Made in Taiwan
- 25 -
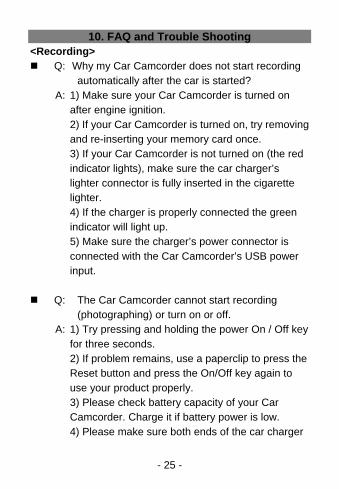
10. FAQ and Trouble Shooting <Recording> Q: Why my Car Camcorder does not start recording
automatically after the car is started? A: 1) Make sure your Car Camcorder is turned on
after engine ignition. 2) If your Car Camcorder is turned on, try removing
and re-inserting your memory card once. 3) If your Car Camcorder is not turned on (the red
indicator lights), make sure the car charger’s lighter connector is fully inserted in the cigarette lighter.
4) If the charger is properly connected the green indicator will light up.
5) Make sure the charger’s power connector is connected with the Car Camcorder’s USB power input.
Q: The Car Camcorder cannot start recording
(photographing) or turn on or off. A: 1) Try pressing and holding the power On / Off key
for three seconds. 2) If problem remains, use a paperclip to press the
Reset button and press the On/Off key again to use your product properly.
3) Please check battery capacity of your Car Camcorder. Charge it if battery power is low.
4) Please make sure both ends of the car charger
- 26 -
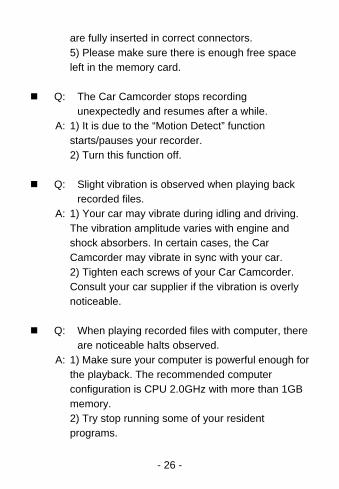
are fully inserted in correct connectors. 5) Please make sure there is enough free space
left in the memory card. Q: The Car Camcorder stops recording
unexpectedly and resumes after a while. A: 1) It is due to the “Motion Detect” function
starts/pauses your recorder. 2) Turn this function off.
Q: Slight vibration is observed when playing back
recorded files. A: 1) Your car may vibrate during idling and driving.
The vibration amplitude varies with engine and shock absorbers. In certain cases, the Car Camcorder may vibrate in sync with your car.
2) Tighten each screws of your Car Camcorder. Consult your car supplier if the vibration is overly noticeable.
Q: When playing recorded files with computer, there
are noticeable halts observed. A: 1) Make sure your computer is powerful enough for
the playback. The recommended computer configuration is CPU 2.0GHz with more than 1GB memory.
2) Try stop running some of your resident programs.
- 27 -
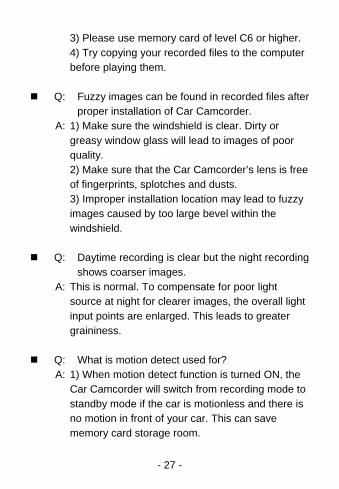
3) Please use memory card of level C6 or higher. 4) Try copying your recorded files to the computer
before playing them. Q: Fuzzy images can be found in recorded files after
proper installation of Car Camcorder. A: 1) Make sure the windshield is clear. Dirty or
greasy window glass will lead to images of poor quality.
2) Make sure that the Car Camcorder’s lens is free of fingerprints, splotches and dusts.
3) Improper installation location may lead to fuzzy images caused by too large bevel within the windshield.
Q: Daytime recording is clear but the night recording
shows coarser images. A: This is normal. To compensate for poor light
source at night for clearer images, the overall light input points are enlarged. This leads to greater graininess.
Q: What is motion detect used for?
A: 1) When motion detect function is turned ON, the Car Camcorder will switch from recording mode to standby mode if the car is motionless and there is no motion in front of your car. This can save memory card storage room.
- 28 -
2) It is recommended to leave this function in off mode, as certain delay time is required to switch back to recording mode and events occurred during the delay time may be missed from recording.
Q: How can I use the motion detection function?
A: 1) Open the motion detection menu, turn on this function, and exit the menu.
2) Disconnect the external power supply (Powered via the embedded battery only).
3) Restart your Car Camcorder and the recording function will be activated automatically when any motion in front of your car is detected.
4) Recording will be stopped in 10 sec if no motion in front of your car is detected.
Q: Can recording continue after the memory card is
full? A: 1) There are four options available for loop
recording: 1, 3, 5, and 10 minutes. 2) The default setup is 5 minutes. When there is
insufficient memory space left to save the recording file, the oldest one is purged to give space for the current one.
3) You don’t need to worry about memory space insufficiency. This won’t happen.
- 29 -
Q: The memory card is set to the highest speed and a “speed too slow” message still appears.
A: 1) Meanings of “High Speed” vary among the memory card’s suppliers, as memory write and read speed changes with card formatting.
2) If the problem remains after the card is formatted with your Car Camcorder, please format your micro SD card with a computer in “normal mode” instead of “fast format mode”.
Q: The included memory card cannot be used.
A: 1) Please format the included memory card with a computer.
2) If recording still fails, please return the card to the original supplier for inspection.
- 30 -
<Installation> Q: How can I retrieve recording files from my Car
Camcorder to a computer? A: 1) Remove the memory card from the Car
Camcorder and insert it in your computer’s card reader. (The drive code of your reader varies.)
2) Insert the included USB cable in the USB ports of your Car Camcorder (USB slot) and computer (USB slot) respectively. You can start accessing data in the card when the Car Camcorder prompts with message “Computer connected”.
Please do not remove the Car Camcorder from the windshield as the plastic sucking disc may attract dirt and dust that leads to poor connection to the glass.
Q: What do the light indicators stand for?
A: Please refer to Column N on Page 23 of this guide Q: How can I connect multiple devices e.g. navigator,
Car Camcorder and mobile phone to the cigarette lighter?
A: Please connect them through an optional one-to-many lighter extension.
- 31 -
Q: How can I attach the holder to the windshield glass?
A: 1) Clean the windshield where the Car Camcorder is to be attached.
2) Adjust your Car Camcorder‘s recording angle and fix it properly.
3) Please do not remove the Car Camcorder from the windshield as the sucking disc may attract dirt and dust and lead to poor connection to the glass.
4) If the plastic sucker does not connect to the glass firmly, rinse it with water and detergent. Then try to connect with the windshield again after it is fully dried. (Please refer to Page 8 of this Guide.)
Technical Support: Thank you very much for your support for purchasing our product, if you have any technical question, please contact our customer service.