HAIR CUTTER SHAVE - cdn.fit-z.com fileHAIR CUTTER SHAVE Bedienungsanleitung Modell 87813...
52
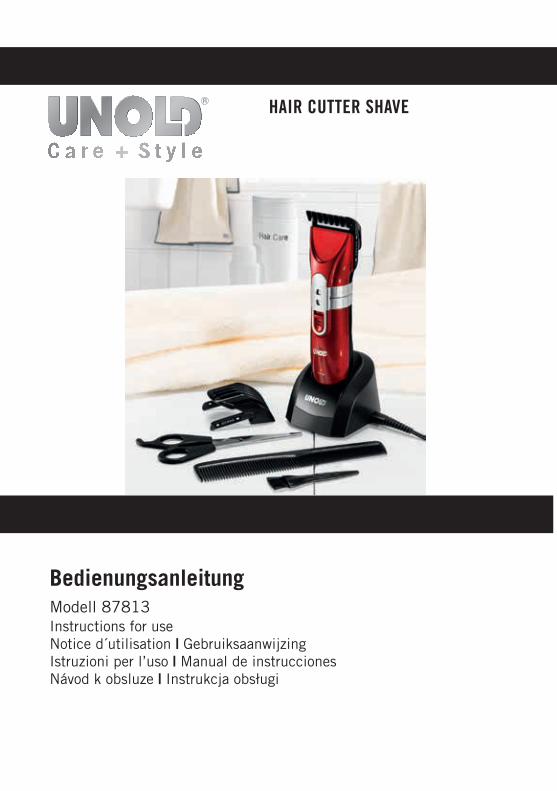
HAIR CUTTER SHAVE Bedienungsanleitung Modell 87813 Instructions for use Notice d´utilisation | Gebruiksaanwijzing Istruzioni per l’uso | Manual de instrucciones Návod k obsluze | Instrukcja obsługi
Transcript of HAIR CUTTER SHAVE - cdn.fit-z.com fileHAIR CUTTER SHAVE Bedienungsanleitung Modell 87813...
HAIR CUTTER SHAVE
BedienungsanleitungModell 87813Instructions for use Notice d´utilisation | Gebruiksaanwijzing Istruzioni per l’uso | Manual de instrucciones Návod k obsluze | Instrukcja obsługi

Impressum:
Bedienungsanleitung Modell 87813
Stand: März 2015 /nr
Copyright ©
Mannheimer Straße 4
68766 Hockenheim
Telefon +49 (0) 62 05/94 18-0
Telefax +49 (0) 62 05/94 18-12
E-Mail [email protected]
Internet www.unold.de

INHALTSVERZEICHNIS
Bedienungsanleitung Modell 87813Technische Daten ................................... 7Symbolerklärung ..................................... 7Für Ihre Sicherheit .................................. 7Vor dem Benutzen .................................. 9Laden .................................................... 9Bedienen - Haarschneider ....................... 10Bedienen - Haartrimmer .......................... 11Reinigen und Pflegen .............................. 12Garantiebestimmungen ........................... 13Entsorgung / Umweltschutz ..................... 13Informationen für den Fachhandel ............ 14Service-Adressen .................................... 14Bestellformular ....................................... 51
Instructions for use Model 87813Technical Specifications .......................... 15Explanation of symbols ............................ 15For your safety ........................................ 15Before first use ....................................... 17Charging ................................................ 17Clipper operation .................................... 18Beard trimmer operation .......................... 19Cleaning and care ................................... 20Guarantee Conditions .............................. 21Waste Disposal / Environmental Protection ........................ 21Service .................................................. 14
Notice d´utilisation Modèle 87813Spécification technique .......................... 21Explication des symboles ......................... 22Pour votre sécurité .................................. 22Avant l‘utilisation .................................... 23Chargement ........................................... 23Utilisation - couper les cheveux ................ 24Utilisation - tondre les cheveux ................ 24Nettoyage et entretien ............................. 25Conditions de Garantie ............................ 26Traitement des déchets / Protection de l’environnement .................. 26Service .................................................. 14
Gebruiksaanwijzing Model 87813Technische gegevens .............................. 26Verklaring van de symbolen ...................... 27Voor uw veiligheid ................................... 27Vóór het gebruik ..................................... 28Laden .................................................... 28Bediening – haartondeuse ....................... 29Bediening – haartrimmer ......................... 29Reiniging en onderhoud .......................... 30Garantievoorwaarden ............................... 31Verwijderen van afval / Milieubescherming ................................. 31Service .................................................. 14
Istruzioni per l’uso Modello 87813Dati tecnici ........................................... 31Significato dei simboli ............................ 32Per la vostra sicurezza ............................. 32Prima dell’utilizzo ................................... 33Ricarica ................................................. 33Utilizzo – Rasoio per capelli ..................... 34Utilizzo – Trimmer per barba .................... 34Pulizia e cura ......................................... 35Norme die garanzia ................................. 36Smaltimento / Tutela dell’ambiente .......... 36Service .................................................. 14
Manual de instrucciones Modelo 87813Datos técnicos ....................................... 36Explicación de los símbolos ..................... 37Para su seguridad ................................... 37Puesta en servicio ................................... 38Carga..................................................... 38Corta-pelos............................................. 38Utilizzo – Trimmer per barba .................... 39Limpieza y cuidado ................................. 40Condiciones de Garantia .......................... 41Disposición/Protección del medio ambiente ..................................... 41Service .................................................. 14
Návod k obsluze Modelu 87813Technické údaje .................................... 41Vysvětlení symbolů .................................. 42Pro Vaši bezpečnost ................................ 42Před použitím ......................................... 43Nabíjení ................................................ 43Obsluha – zastřihávač vlasů ..................... 43Obsluha – zastřihávač chloupků ............... 44Čištění a péče ........................................ 45Záruční podmínky ................................... 45Likvidace / Ochrana životného prostředí ... 45Service .................................................. 14
Instrukcja obsługi Model 87813Dane techniczne ..................................... 46Objaśnienie symboli ................................ 46Dla bezpieczeństwa użytkownika .............. 46Przed użyciem ........................................ 47Ładowanie ............................................. 48Obsługa - strzyżarka do włosów ................ 48Obsługa - strzyżarka do włosów ................ 49Czyszczenie i konserwacja ....................... 49Warunki gwarancji................................... 50Utylizacja / ochrona środowiska ................ 50Service .................................................. 14

4
EINZELTEILE
D Ab Seite 71 Aufsteckkamm klein2 Aufsteckkamm groß3 Schere4 Gerät mit Scherkopf
5 Kamm
6 Reinigungsbürste/-öl
7 Zuleitung mit Steckernetzteil
8 Ladestation
GB Page 151 Comb attachment, small2 Comb attachment, big3 Scissors
4 Appliance5 Comb6 Cleaning brush/-oil7 Lead cable with mains
adapter8 Charger
4
12
3
5
6
7
8

5
EINZELTEILE
F Page 211 Petit peigne amovible2 Grand peigne amovible3 Ciseaux
4 Appareil
5 Peigne
6 Brosses de nettoyage/huile
7 Cordon avec bloc d’alimentation
8 Station de charge
NL Pagina 261 Opzetkam klein2 Opzetkam groot3 Schaar4 Haar- en baardtondeuse5 Kam6 Reinigingsborstel/-olie7 Snoer met
voedingsapparaat8 Laadstation
I Pagina 311 Pettine distanziatore
piccolo2 Pettine distanziatore
grande3 Forbici4 Rasoio per barba e
capelli
5 Pettine6 Spazzola/Olio
7 Cavo con spina di rete
8 Stazione di ricarica
ES Página 361 Peine guía pequeño
2 Peine guía grande
3 Tijeras
4 Equipo5 Peine6 Cepillo/Aceite7 Cable de alimentación
con conector8 Estación de carga
CZ Strany 411 Nástrčný hřeben malý
2 Nástrčný hřeben velký3 Nůžky4 Zastřihávač vlasů a
vousů5 Hřeben
6 Čistící kartáček/Olej
7 Přívod s napojením do sítě
8 Nabíjecí stanice
PL Strony 461 Mała nasadka
grzebieniowa2 Duża nasadka
grzebieniowa
3 Nożyczki
4 Trymer do włosów i brody
5 Grzebień
6 Szczoteczka do czyszczenia/Olej
7 Przewód doprowadzający z zasilaczem
8 Ładowarka

6
D Ab Seite 71 Einstellrad zum
Ausdünnen/Effilieren2 Einstellrad für
Aufsteckkamm3 EIN/AUS-Schalter
GB Page 151 Adjustment slider for
thinning2 Adjustment slider for
comb attachment3 EIN/AUS [ON/OFF]
switch
F Page 211 Curseur de réglage pour
éclaircir/effiler2 Curseur de réglage pour
peigne amovible
3 Interrupteur EIN/AUS [MARCHE/ARRÊT]
NL Pagina 261 Instelwiel voor het
uitdunnen/effileren2 Instelwiel voor opzetkam3 AAN/UIT-schakelaar
I Pagina 311 Rotella di impostazione
per sfoltire2 Rotella di impostazione
per pettine distanziatore3 Interruttore EIN/AUS
ES Página 361 Ruedecilla de ajuste
para el entresacado2 Ruedecilla de ajuste
para peine guía3 Interruptor principal
CZ Strany 411 Nastavovací kolečko pro
protenčování/seřezávání2 Nastavovací kolečko pro
nástrčný hřeben3 Spínač ZAP/VYP
PL Strony 461 Kółko nastawcze do
przerzedzania włosów2 Kółko nastawcze nasadki
grzebieniowej3 Przycisk WŁ./WYŁ.
1
2
3
EINZELTEILE

7
SYMBOLERKLÄRUNG
BEDIENUNGSANLEITUNG MODELL 87813
TECHNISCHE DATEN
Dieses Symbol kennzeichnet eventuelle Gefahren, die Verletzungen nach sich ziehen können oder zu Schäden am Gerät führen.
Dieses Symbol weist auf Gefahren bei Betrieb in oder in der Nähe von mit Wasser gefüllten Behältnissen hin.
Leistung: 3 Watt, 100–240 V~, 50/60 Hz, 800 mAAbmessungen: Ca. 17,5 x 4,8 x 4,5 cmGewicht: Ca. 0,16 kg (inkl. Akku, ohne Zubehör)Kabellänge: Ca. 1,8 mLadezeit: Akku ca. 8 StundenAkku: 2 x 1,2 V AA, NiMHEine Akkuladung reicht für: Ca. 45 Minuten BetriebSchutzklasse: II Ausstattung: Cordless, mit Akku, 5 mögliche Schnittlängen, EIN/AUS-
Schalter, Ladeanzeige, Effilier-Funktion
Zubehör: 2 Aufsteckkämme 6–32 mm, Reinigungsbürste, Pflegeöl, Kamm, Schere, Bedienungsanleitung, Ladestation
Änderungen und Irrtümer in Ausstattungsmerkmalen, Technik, Farben und Design vorbehalten
FÜR IHRE SICHERHEIT
1. Bitte lesen Sie die folgenden Anweisungen und bewahren Sie diese auf.
2. Das Gerät kann von Kindern ab 8 Jahren und von Personen mit verringerten physischen, sensorischen oder mentalen Fähigkeiten oder Mangel an Erfahrung und/oder Wissen benutzt werden, wenn sie beaufsichtigt werden oder bezüglich des sicheren Gebrauchs des Gerätes unterwiesen wurden und die daraus resultierenden Gefahren verstanden haben. Das Gerät ist kein Spielzeug. Das Säubern und die Wartung des Geräts dürfen von Kindern nur unter Aufsicht durchgeführt werden.
3. Kinder unter 3 Jahren sollten dem Gerät fernbleiben oder durchgehend beaufsichtigt werden.
4. Kinder sollten beaufsichtigt werden, um sicherzustellen, dass sie nicht mit dem Gerät spielen.

8
5. Ladestation nur an Wechselstrom gemäß Typenschild anschließen.6. Dieses Gerät darf nicht mit einer externen Zeitschaltuhr oder einem Fernbe-
dienungssystem betrieben werden. 7. Das Gerät darf nicht in Wasser oder eine andere Flüssigkeit eingetaucht
werden. Schützen Sie das Gerät vor Nässe.8. Benutzen Sie das Gerät, wenn es ans Stromnetz angeschlossen ist, aus
Sicherheitsgründen nie in der Nähe oder in einer gefüllten Badewanne oder Waschbecken bzw. anderen mit Wasser gefüllten Gefäßen.
9. Schützen Sie das Gerät vor Nässe, insbesondere wenn es sich in der Lade-station befindet. Es besteht Gefahr eines Stromschlages!
10. Solange sich der Stecker in der Steckdose befindet, ist die Ladestation in der Nähe von Wasser eine Gefahr.
11. Strecken Sie die Zuleitung der Ladestation immer auf die ganze Länge aus, um Schäden durch Überhitzung zu vermeiden.
12. Achten Sie darauf, dass die Zuleitung nicht über scharfe oder spitze Gegen-stände gelegt wird, um Schäden an der Zuleitung zu vermeiden.
13. Legen Sie keine metallischen Gegenstände auf die Ladestation, um Schä-den an der Ladestation zu vermeiden.
14. Ziehen Sie die Zuleitung der Ladestation nur am Stecker aus der Steckdose, ziehen Sie nie direkt am Kabel.
15. Wenn das Gerät aufgeladen ist, ziehen Sie den Netzstecker der Zuleitung aus der Steckdose.
16. Das Gerät ist ausschließlich für die Eigenanwendung im privaten Haushalt bestimmt, nicht jedoch für den gewerblichen Bedarf.
17. Das Gerät darf nicht draußen benutzt werden.18. Verwenden Sie das Gerät nicht auf eingecremter Haut, da es sonst zu Hau-
tirritation kommen kann.19. Wenn die Haut durch Akne oder eine Erkrankung gereizt ist, dürfen Sie das
Gerät ebenfalls nicht verwenden.20. Das Gerät ist nur für menschliches Haar geeignet. Verwenden Sie es nicht
auf Kunsthaar oder an Tieren.21. Achten Sie darauf, mit dem Gerät nicht in die Nähe der Augen zu kommen.22. Aus hygienischen Gründen sollte das Gerät nur von einer Person verwendet
werden.23. Betreiben Sie das Gerät nicht in der Nähe von Wärmequellen. 24. Schalten Sie das Gerät aus, bevor Sie es zur Seite legen.25. Nach Gebrauch oder vor dem Reinigen bitte immer das Gerät ausschalten
und abkühlen lassen. 26. Versuchen Sie nie, die Messer des Scherkopfes selbst zu schärfen. Wenn
der Scherkopf stumpf ist, ersetzen Sie diesen bitte.27. Verwenden Sie das Gerät nur für die in dieser Anleitung beschriebenen Zwe-
cke.28. Das Gerät darf nicht mit Zubehör anderer Hersteller oder Marken benutzt
werden, um Schäden zu vermeiden.

9
29. Öffnen Sie auf keinen Fall das Gehäuse des Gerätes. Es besteht Gefahr durch einen Stromschlag.
30. Prüfen Sie regelmäßig das Gerät, den Stecker und die Zuleitung auf Ver-schleiß oder Beschädigungen. Bei Beschädigung des Anschlusskabels oder anderer Teile senden Sie das Gerät bitte zur Überprüfung und/oder Repa-ratur an unseren Kundendienst. Unsachgemäße Reparaturen können zu erheblichen Gefahren für den Benutzer führen und führen zum Ausschluss der Garantie.
Achtung: Der Scherkopf besteht aus scharfen, spitzen Teilen. Um Verletzungen zu vermeiden, gehen Sie bitte vorsichtig damit um!
Benutzen Sie das Gerät aus Sicherheitsgründen nie in der Nähe oder in einer gefüllten Badewanne oder Waschbecken bzw. anderen mit Wasser gefüllten Gefäßen. Wenn das Gerät in einem Badezimmer verwendet wird, ist nach Gebrauch der Stecker zu ziehen, da die Nähe von Wasser eine Gefahr darstellt, auch wenn das Gerät ausgeschaltet ist.
Der Hersteller übernimmt keine Haftung bei fehlerhafter Montage, bei unsachgemäßer oder fehlerhafter Verwendung oder nach Durchführung von Reparaturen durch nicht autorisierte Dritte.
VOR DEM BENUTZEN
1. Entfernen Sie alle Verpackungsmaterialien und Transportsicherungen. Hal-ten Sie Kinder wegen der Erstickungsgefahr von den Verpackungsmateria-lien fern.
2. Setzen Sie den Scherkopf ein.3. Wenn Sie den Aufsteckkamm benutzen möchten, stecken Sie diesen auf
das Gerät auf. Halten Sie mit einer Hand das Gerät fest und stecken Sie mit der anderen Hand den gewünschten Aufsteckkamm auf. Der Kamm muss hörbar einrasten, erst dann sitzt der Kamm richtig auf dem Gerät.
4. Laden Sie vor dem ersten Benutzen die Akkus des Gerätes vollständig auf. Weitere Hinweise zum Aufladen entnehmen Sie dem nächsten Kapitel „Laden“.
LADEN
1. Verbinden Sie die Zuleitung mit der Ladestation.2. Stecken Sie das Steckernetzteil der Zuleitung in eine Steckdose.3. Vergewissern Sie sich, dass das Gerät ausgeschaltet ist.4. Achten Sie bitte darauf, dass die Ladestation stabil steht.5. Verbinden Sie den Klinkenstecker der Zuleitung mit der Buchse an der
Ladestation.6. Stellen Sie das ausgeschaltete Gerät in die Ladestation. Achten Sie darauf,
dass das Gerät richtig eingesetzt ist, da dieses sonst nicht richtig aufgeladen werden kann.
7. Die rote Kontrollleuchte am Gerät leuchtet auf und zeigt an, dass das Gerät geladen wird.

10
8. Um Schäden am Akku zu vermeiden, sollte das Gerät nicht länger als 12 Stunden aufgeladen werden.
9. Bitte beachten Sie, dass die rote Kontrollleuchte nicht erlischt, wenn das Gerät fertig geladen ist.
10. Je nach Anwendung und Haareigenschaften können Sie das Gerät ca. 45 Minuten nutzen, bevor es wieder aufgeladen werden muss. Die maximale Kapazität des Akkus wird erst nach mehreren Ladevorgängen erreicht.
11. Laden Sie das Gerät erst dann wieder auf, wenn die Akkus vollständig leer sind. So bleibt die volle Leistungsfähigkeit der Akkus länger erhalten.
12. Sie können das Gerät auch direkt mit der mitgelieferten Zuleitung betreiben, falls die Akkus einmal vollständig leer sind, Sie aber die Rasur noch zu Ende bringen möchten. Stecken Sie die Zuleitung an der Buchse an der Unterseite des Gerätes an und stecken Sie dann das Steckernetzteil in eine Steckdose.
13. Achtung: Schließen Sie das Gerät nie ans Stromnetz an, wenn kein Akku eingelegt ist!
BEDIENEN - HAARSCHNEIDER
1. Bereiten Sie das Gerät wie in den Kapiteln „Vor dem ersten Benutzen“ und „Laden“ beschrieben, vor.
2. Achten Sie bitte darauf, dass die Haut und die Haare sauber und trocken sind, bevor Sie mit dem Schneiden beginnen. Außerdem sollten die Haare gekämmt sein, um die Haarwuchsrichtung erkennen zu können.
3. Prüfen Sie, ob der gewünschte Aufsteckkamm aufgesteckt ist.4. Über das Einstellrad (2) kann die gewünschte Haarlänge in fünf Stufen
eingestellt werden.Stufe Gewünschte Haarlänge in mm
Kleiner Aufsteckkamm Großer Aufsteckkamm
1 18 322 15 293 12 264 9 235 6 20
5. Beginnen Sie mit der längsten Einstellung und führen Sie ggf. einen Probeschnitt an einer verdeckten Körperstelle durch.
6. Schalten Sie das Gerät an dem EIN/AUS-Schalter ein.7. Setzen Sie das Gerät mit dem Aufsteckkamm auf die Haut, arbeiten Sie
dabei nach Möglichkeit immer gegen die Haarwuchsrichtung.8. Kürzen Sie die Haare auf die gewünschte Länge. Wenn die Haare sehr lang
sind, empfiehlt es sich, diese vorher mit der Schere zu kürzen. Hierfür sind im Lieferumfang eine Schere und ein Kamm enthalten.

11
9. Halten Sie beim Kürzen der Haare mit dem Gerät immer kurz inne und prüfen Sie das Ergebnis. So vermeiden Sie, zu viel Haar abzuschneiden.
10. Möchten Sie die Haare ausdünnen, können Sie die Effilier-Funktion verwenden. Schieben Sie den Schalter (3) am Gerät nach rechts. Sie können nun das Gerät wie gewohnt benutzen, die Haare werden beim Schneiden nun ausgedünnt. Um die Funktion wieder auszuschalten, schieben Sie den Schalter wieder nach links.
11. Sollten sich Haare im Scherkopf verfangen haben, schalten Sie das Gerät bitte aus und reinigen Sie den Scherkopf, wie im Kapitel „Reinigen und Pflegen“, beschrieben.
12. Wenn Sie mit dem Haareschneiden fertig sind, schalten Sie das Gerät am EIN/AUS-Schalter aus.
13. Reinigen Sie das Gerät nach jeder Benutzung.
BEDIENEN - HAARTRIMMER
Bitte arbeiten Sie immer gegen die Haarwuchsrichtung, um ein optimales Ergebnis zu erzielen. Wenn Sie die entsprechende Hautpartie mit der freien Hand spannen, gelingt die Rasur leichter. Nach der Rasur empfehlen wir, die enthaarten Körperpartien mit einer milden Körperlotion einzucremen, um Hautirritationen zu vermeiden. Wenn Sie sehr empfindliche Haut haben, oder empfindliche Körperstellen enthaaren, empfehlen wir nur einmal mit dem Gerät über diese Stelle zu fahren, um Hautirritationen zu vermeiden. Bereiten Sie das Gerät wie in den Kapiteln „Vor dem ersten Benutzen“ und „Laden“ beschrieben, vor. 1. Ziehen Sie den Aufsteckkamm vom Gerät ab, indem Sie ihn gerade vom
Gerät abziehen.2. Achten Sie bitte darauf, dass die Haut sauber und trocken ist, bevor Sie mit
der Rasur beginnen.3. Schalten Sie das Gerät am EIN/AUS-Schalter ein.4. Setzen Sie das Gerät auf die Haut, arbeiten Sie dabei nach Möglichkeit
immer gegen die Haarwuchsrichtung. Üben Sie keinen Druck auf das Gerät aus.Beine: Rasieren Sie beginnend von den Fußknöcheln nach oben entgegen der Haarwuchsrichtung.Arme: Hier gelingt die Rasur am besten, wenn Sie von der Arm-Außenseite nach innen rasieren.Achseln: Halten Sie den Arm soweit nach oben, wie es geht, um die Hautpartie zu straffen. Rasieren Sie die betreffende Stelle mit Hin- und Herbewegungen.Intimbereich: Sehr lange Haare können Sie mit dem Aufsteckkamm vorschneiden. Stecken Sie hierfür den Aufsteckkamm auf das Gerät.

12
Straffen Sie ggf. die zu rasierende Hautpartie und fahren Sie langsam mit dem Gerät entgegen der Haarwuchsrichtung über die Haut.Bartkonturen: Kürzen die Haare vorsichtig entsprechend der von Ihnen gewünschten Kontur.
5. Achten Sie darauf, dass der Scherkopf immer Kontakt mit der Haut hat. Wenn Sie die zu rasierende Hautpartie mit der anderen Hand spannen, gelingt das Rasieren leichter.
6. Sollten sich Haare im Scherkopf verfangen haben, schalten Sie das Gerät bitte aus und reinigen Sie den Scherkopf, wie im Kapitel „Reinigen und Pflegen“, beschrieben.
7. Wenn Sie mit dem Haareschneiden fertig sind, schalten Sie das Gerät am EIN/AUS-Schalter aus.
8. Reinigen Sie das Gerät nach jeder Benutzung.9. Bitte achten Sie darauf, direkt nach der Rasur keine alkoholhaltigen Pflege-
mittel auf die Haut aufzutragen, da diese zu Hautreizungen führen können. Alkoholfreie, milde Pflegelotionen oder Pflegecremes können Sie selbstver-ständlich direkt nach der Rasur verwenden.
REINIGEN UND PFLEGEN
Achtung: Der Scherkopf besteht aus scharfen, spitzen Teilen. Um Verletzungen zu vermeiden, gehen Sie bitte vorsichtig damit um!Schalten Sie das Gerät am EIN/AUS-Schalter aus und ziehen Sie ggf. das Steckernetzteil aus der Steckdose.
1. Tauchen Sie das Gerät zum Reinigen nie in Wasser oder eine andere Flüssigkeit ein. Achten Sie darauf, dass kein Wasser in das Gehäuse des Gerätes eindringen kann.
2. Reinigen Sie das Gerät und das Zubehör nie in der Geschirrspülmaschine.3. Verwenden Sie keine kratzenden Schwämme, Scheuermittel, Stahlwolle,
metallischen Gegenstände, Desinfektionsmittel oder heißen Reinigungsmit-tel, da diese zu Beschädigungen führen können.
4. Wischen Sie das Gerät mit einem weichem, feuchtem Tuch ab. Reinigen des Scherkopfes:5. Schalten Sie das Gerät aus und ziehen Sie ggf. das Steckernetzteil aus der
Steckdose. Ziehen Sie den Aufsteckkamm vom Gerät ab. 6. Entnehmen Sie den Scherkopf, indem Sie diesen vorsichtig nach hinten
drücken.7. Reinigen Sie den Scherkopf und das Geräteinnere mit dem mitgelieferten
Pinsel.8. Bitte klopfen Sie nicht auf den Scherkopf, da dieser sonst beschädigt
werden kann.9. Sie können nun den Scherkopf unter handwarmem Wasser ausspülen.
Trocknen sie ihn anschließend mit einem weichen, fusselfreien Tuch.
13
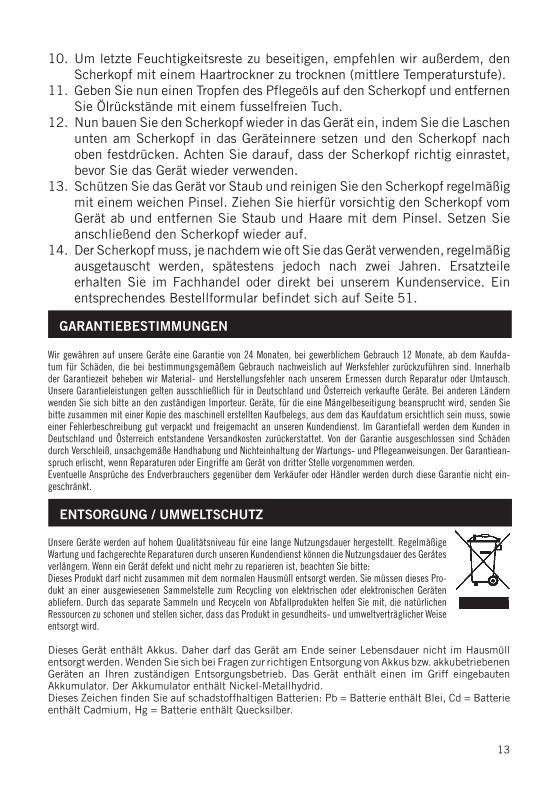
10. Um letzte Feuchtigkeitsreste zu beseitigen, empfehlen wir außerdem, den Scherkopf mit einem Haartrockner zu trocknen (mittlere Temperaturstufe).
11. Geben Sie nun einen Tropfen des Pflegeöls auf den Scherkopf und entfernen Sie Ölrückstände mit einem fusselfreien Tuch.
12. Nun bauen Sie den Scherkopf wieder in das Gerät ein, indem Sie die Laschen unten am Scherkopf in das Geräteinnere setzen und den Scherkopf nach oben festdrücken. Achten Sie darauf, dass der Scherkopf richtig einrastet, bevor Sie das Gerät wieder verwenden.
13. Schützen Sie das Gerät vor Staub und reinigen Sie den Scherkopf regelmäßig mit einem weichen Pinsel. Ziehen Sie hierfür vorsichtig den Scherkopf vom Gerät ab und entfernen Sie Staub und Haare mit dem Pinsel. Setzen Sie anschließend den Scherkopf wieder auf.
14. Der Scherkopf muss, je nachdem wie oft Sie das Gerät verwenden, regelmäßig ausgetauscht werden, spätestens jedoch nach zwei Jahren. Ersatzteile erhalten Sie im Fachhandel oder direkt bei unserem Kundenservice. Ein entsprechendes Bestellformular befindet sich auf Seite 51.
Unsere Geräte werden auf hohem Qualitätsniveau für eine lange Nutzungsdauer her ge stellt. Regelmäßige Wartung und fachge rechte Reparaturen durch unseren Kunden dienst können die Nutzungsdauer des Gerätes verlängern. Wenn ein Gerät defekt und nicht mehr zu reparieren ist, beachten Sie bitte:Dieses Produkt darf nicht zusammen mit dem normalen Hausmüll entsorgt werden. Sie müssen dieses Pro-dukt an einer ausgewiesenen Sammelstelle zum Recycling von elektrischen oder elektronischen Geräten ab liefern. Durch das separate Sammeln und Recyceln von Abfallprodukten helfen Sie mit, die natürlichen Ressourcen zu schonen und stellen sicher, dass das Produkt in gesundheits- und umweltverträglicher Weise entsorgt wird.
GARANTIEBESTIMMUNGEN
ENTSORGUNG / UMWELTSCHUTZ
Wir gewähren auf unsere Geräte eine Garantie von 24 Monaten, bei gewerblichem Gebrauch 12 Monate, ab dem Kaufda-tum für Schäden, die bei bestimmungsgemäßem Gebrauch nachweislich auf Werksfehler zurückzuführen sind. Innerhalb der Garantiezeit beheben wir Material- und Herstellungsfehler nach unserem Ermessen durch Reparatur oder Umtausch. Unsere Garantieleistungen gelten ausschließlich für in Deutschland und Österreich verkaufte Geräte. Bei anderen Ländern wenden Sie sich bitte an den zuständigen Importeur. Geräte, für die eine Mängelbeseitigung beansprucht wird, senden Sie bitte zusammen mit einer Kopie des maschinell erstellten Kauf belegs, aus dem das Kaufdatum ersichtlich sein muss, sowie einer Fehlerbeschreibung gut verpackt und freigemacht an unseren Kundendienst. Im Garantiefall werden dem Kunden in Deutschland und Österreich entstandene Versandkosten zurückerstattet. Von der Garantie ausgeschlossen sind Schäden durch Verschleiß, unsachgemäße Handhabung und Nichteinhaltung der Wartungs- und Pflegeanweisungen. Der Garantiean-spruch erlischt, wenn Reparaturen oder Eingriffe am Gerät von dritter Stelle vorgenommen werden.Eventuelle Ansprüche des Endverbrauchers gegenüber dem Verkäufer oder Händler werden durch diese Garantie nicht ein-geschränkt.
Dieses Gerät enthält Akkus. Daher darf das Gerät am Ende seiner Lebensdauer nicht im Hausmüll entsorgt werden. Wenden Sie sich bei Fragen zur richtigen Entsorgung von Akkus bzw. akkubetriebenen Geräten an Ihren zuständigen Entsorgungsbetrieb. Das Gerät enthält einen im Griff eingebauten Akkumulator. Der Akkumulator enthält Nickel-Metallhydrid.Dieses Zeichen finden Sie auf schadstoffhaltigen Batterien: Pb = Batterie enthält Blei, Cd = Batterie enthält Cadmium, Hg = Batterie enthält Quecksilber.

14
Hiermit erklärt die UNOLD AG, dass sich der Haarschneider 87813 in Übereinstimmung mit den grundlegenden Anforderungen der europäischen Richtlinie für elektromagnetische Verträglichkeit (2004/108/EC und der Niederspannungsrichtlinie (2006/95/EC) befindet.
Die Übereinstimmung mit den Regularien bezieht sich auf den Tag der Erstellung dieser Erklärung.
Hockenheim, 14.5.2013
UNOLD AG, Mannheimer Straße 4, 68766 Hockenheim
SERVICE-ADRESSEN
Mannheimer Straße 468766 Hockenheim
KundendienstTel. +49 (0) 62 05/94 18-27Fax +49 (0) 62 05/94 18-22E-Mail [email protected] Internet www.unold.de
Sie möchten innerhalb der Garantiezeit ein Gerät zur Reparatur einsenden? Auf unserer Internetseite www.unold.de/ruecksendung können Sie sich einen Rücksendeschein ausdrucken, um damit das Paket kostenlos bei der Post abzugeben (nur für Einsendungen aus Deutschland und Österreich).
DEUTSCHLAND
SCHWEIZMENAGROS SARoute der Servion CH - 1083 Mezières Telefon +41 (0) 21 9 03 01-15 Telefax +41 (0) 21 9 03 01-11 E-Mail [email protected] www.menagros.ch
ÖSTERREICHReparaturabwicklung, Ersatzteile:ESC Electronic Service Center GmbHMolitorgasse 15A-1110 WienTelefon +43 (0) 1/9 71 70 59Telefax +43 (0) 1/9 71 70 59E-Mail [email protected]
POLEN„Quadra-net“ Sp. z o.o.Skadowa 561-888 Poznan Skadowa 5Internet www.quadra-net.pl
TSCHECHIENbefree.cz s.r.o.Škroupova 150537 01 ChrudimTelefon +42 0 46 46 01 881E-Mail [email protected]
INFORMATIONEN FÜR DEN FACHHANDEL

15
INSTRUCTIONS FOR USE MODEL 87813
TECHNICAL SPECIFICATIONS
FOR YOUR SAFETY
EXPLANATION OF SYMBOLS
Please read the following instructions and keep them on hand for later reference. 1. This appliance is not intended for This appliance can be used by children
aged from 8 years and above and persons with reduced physical, sensory or mental capabilities or lack of experience and knowledge if they have been given supervision or instruction concerning use of the applicance in a safe way and understand the hazards involved. Children shall not play with the appliance. Cleaning and user maintenance shall not be made by children without supervision.
2. Children of less than 3 years should be kept away unless continuously supervised.
This symbol denotes a possible hazard which could cause injury or damage to the appliance.
This symbol alerts to hazards if the appliance is operated in containers filled with water, or in the vicinity of containers filled with water.
Power rating: 3 W, 100–240 V~, 50/60 Hz, 800 mADimensions: Approx. 17.5 x 4.8 x 4.5 cmWeight: Approx. 0,16 kg (incl. accumulators, w/o accessories)Cable length: Approx. 1,8 mCharging time: Accumulators: approx. 8 hoursAccumulators: 2 x 1,2 V AA, NiMHOperating time per accumulator charge: Approx. 45 minutesDegree of protection:
II
Equipment: Cordless with accumulators, thinning features, 5 cutting lengths, EIN/AUS [ON/OFF] switch, indicator light
Accessories: 2 comb attachments 6 – 32 mm, cleaning brush, care oil, comb, scissors, charger, instruction manual, charger
Equipment features, technology, colours and design are subject to change without notice.

16
3. Children should be supervised in order to ensure that they do not play with the appliance.
4. Connect the charger only to an AC power supply with the voltage indicated on the rating plate.
5. Do not operate this appliance with an external timer or remote control system.
6. The appliance may never be immersed in water or other liquids. Keep the appliance dry.
7. Protect the appliance from humidity, when charging it, to prevent electric shock.
8. As long as the charger is connected to the wall socket, it is dangerous near water.
9. Unroll the charger‘s lead cable completely to avoid damage caused by overheating.
10. Never trail the lead cable over sharp and pointed objects to avoid damages on the lead cable.
11. Do not place any metal objects on the charger to avoid damage to the charger.12. Always disconnect the charger‘s lead cable from the wall socket pulling on
the plug, never on the cable.13. After charging the appliance, unplug the cable of the mains adapter from
the wall socket.14. The appliance is intended for domestic use only, not for commercial use.15. The appliance is not intended for outdoor use.16. Do not use the appliance after having applied creams or body lotions, as this
may lead to skin irritation.17. Do not use the appliance if your skin is irritated due to acne or other skin
problems.18. The appliance is appropriate for human body hair only. Do not use on
artificial hair or animals.19. Avoid any contact of the appliance with the eyes.20. For hygienic reasons, the appliance should only be used by one person.21. Do not operate the appliance near any heat source. 22. Disconnect the appliance before depositing.23. Always disconnect the appliance after use and before cleaning and let it
cool off. 24. Never try to sharpen the knives of the shaving head on your own. Replace
the shaving head if it is worn.25. Use the appliance only for the intended purposes indicated in this manual.26. Do not use the appliance with accessories of other manufacturers or brands,
to prevent damage.27. Never open the casing of the appliance to prevent electric shock.28. Check the appliance, the wall socket and the lead cable regularly for wear
or damage. If the lead cable or other parts show damage, please send the

17
appliance to our aftersales service for inspection and repair. Unauthorised repairs can constitute serious risks for the user and void the warranty.
Attention: The shaving head has sharp and pointed parts. Handle with care in order to avoid injuries!
For security reasons never use the appliance close to or in a bathtub or washbasin or any other container filled with water when connected to the mains. If the appliance is used in a bathroom, unplug it from the wall socket after use, since nearby water presents a danger even when the appliance is switched off.
The manufacturer will not be liable in the event of incorrect assembly, improper or incorrect use or if repairs are carried out by unauthorized third parties.
BEFORE FIRST USE
1. Remove all packaging materials and any transport safety devices. Keep packaging material out of reach of children. Danger of suffocation!
2. Insert the shaving head.3. When you want to use the comb attachment, attach it to the appliance. Hold
the appliance with one hand and attach the desired comb with the other. The comb has to latch into place to be firmly connected to the appliance.
4. Before first use, charge the accumulators completely. For more information about how to charge the appliance see the next chapter „Charging“.
CHARGING
1. Connect the lead cable to the charger.2. Connect the mains adapter to the wall socket.3. Make sure that the appliance is disconnected.4. Put the appliance in the charger ensuring it is switched off. Make sure
that the appliance is correctly inserted as otherwise it will not be charged properly.
5. Make sure that the charger is placed firmly.6. Connect the jack of the lead cable to the plug socket on the charger.7. The red indicator light on the appliance lights up, indicating that the
appliance is being charged.8. To avoid damage to the accumulators, the appliance should not be charged
for more than 12 hours. 9. Please note that the red indicator light does not turn off once the appliance
is charged.10. Depending on the application and the hair characteristics the appliance can
be used 45 minutes before needing to be recharged. The maximum capacity of the accumulators is only achieved after being charged several times.

18
CLIPPER OPERATION
1. Prepare the appliance as described in the chapter „Before first use“ and „Charging“.
2. Make sure that skin and hair are clean and dry before you start using the appliance. The hair should furthermore be combed in order to recognise the direction of hair growth.
3. Check if the desired comb is attached to the appliance.4. The adjustment wheel (2) allows adjusting the desired hair length to five
positions.
Pos. Desired hair length in mmComb attachment, small Comb attachment, big
1 18 322 15 293 12 264 9 235 6 20
5. Start with the longest adjustment and, if necessary, carry out a test cut at a hidden part of the body.
6. Switch the appliance on pushing the button EIN/AUS [ON/OFF].7. Place the comb on the skin and work against the direction of hair growth,
if possible.8. Cut the hair to the desired length. It is recommended to shorten long hair
with scissors first. Therefore scissors and comb are included in the supply.9. While cutting your hair with the appliance, stop from time to time and check
the result to ensure that you do not shorten your hair too much.10. In case you want to thin out your hair, use the thin-out feature. Push the
switch (3) to the right. Now you can use the appliance as usual, but your hair will only be thinned out. To switch this feature off, push the switch to the left again.
11. If hair gets caught in the shaving head, switch the appliance off and clean the shaving head as described in the chapter „Cleaning and care“.
11. Only charge the appliance when the accumulators are completely empty. This ensures that the performance of the accumulators lasts longer.
12. You may also connect the lead cable directly to the appliance, when the accumulators are completely empty and you have not yet finished shaving. Connect the lead cable to the plug socket in the lower part of the appliance and connect the mains adapter to the wall socket.
13. Attention: Never connect the appliance to the mains without the accumulators inserted.

19
12. After finishing the hair cut, switch the appliance off pushing the button EIN/AUS [ON/OFF].
13. Clean the appliance after every use.
BEARD TRIMMER OPERATION
To obtain perfect results, always work against the direction of hair growth. Shaving will be easier if you tense the skin of the part you want to shave with your free hand. After shaving we recommend to cream the depilated parts with a mild body lotion in order to avoid skin irritation. If you have sensitive skin or depilate sensitive parts, we recommend you to treat these parts only once in order to avoid skin irritation.1. Prepare the appliance as described in the chapter „Before first use“ and
„Charging“. 2. Detach the comb attachment pulling it off the appliance.3. Make sure that the skin is clean and dry before you start using the appliance.4. Start with the longest adjustment and, if necessary, carry out a test cut at a
hidden part of the body.5. Switch the appliance on pushing the button EIN/AUS [ON/OFF].6. Place the appliance on the skin and work against the direction of hair
growth, if possible. Do not use pressure on the appliance.Legs: Shave your legs starting from the ankle and moving upwards against the direction of hair growth.Arms: The best results can be achieved when working from the outside of the arm to the inside.Underarms: Put your arm up as far as you can in order to tighten the skin. Shave the area moving the appliance backwards and forwards.Intimate area: With long hair use the comb attachment to do a pre-cut attaching the accessory to the appliance. If necessary, tighten the area you want to shave and move the appliance slowly over the skin against the direction of hair growth.Contour trimming: Carefully cut the hair according to the desired contour.
7. Make sure that the shaving head is always in contact with the skin. Shaving will be easier, when you tense the skin with your free hand.
8. If hair gets caught in the shaving head, switch the appliance off and clean the shaving head as described in the chapter „Cleaning and care“.
9. After finishing the hair cut, switch the appliance off pushing the button EIN/AUS [ON/OFF].
10. Clean the appliance after every use.11. Directly after shaving do not use any care products that contain alcohol as
these may cause skin irritation. Use mild care lotions or creams instead.

20
CLEANING AND CARE
Attention: The shaving head has sharp and pointed parts. Handle with care in order to avoid injuries!Always switch the appliance off using the EIN/AUS [ON/OFF] switch before disconnecting the mains adapter from the wall socket.
1. Never immerse the appliance or the lead cable in water or other liquids to clean them. Make sure that no water penetrates the casing of the appliance.
2. Never clean the appliance and the accessories in the dishwasher.3. Do not use any scrubbing sponges, abrasive agents, steel wool, metal objects,
disinfectants or hot cleaning agents, since they can damage the appliance.4. Clean the appliance with a soft, damp cloth. Cleaning the shaving head:5. Switch the appliance off using the EIN/AUS [ON/OFF] switch before
disconnecting the mains adapter from the wall socket. Detach the comb attachment from the appliance.
6. Remove the shaving head pushing it carefully backwards.7. Clean the shaving head and the inside of the appliance with the brush
provided.8. Please do not knock the shaving head as this may damage it.9. Rinse the shaving head with lukewarm water drying it thoroughly with a soft
fluff-free cloth afterwards.10. In order to eliminate residual moisture we additionally recommend to dry
the shaving head with a hair dryer (medium temperature adjustment).11. Put a drop of care oil onto the shaving head and remove excessive oil with
a fluff-free cloth. 12. Reattach the shaving head to the appliance inserting the clips on the bottom
side into the appliance and pressing it upwards into place. Make sure that the shaving head latches into place properly before using the appliance again.
13. Protect the appliance from dust and regularly clean the shaving head with a soft brush detaching it carefully from the appliance and removing dust and hair using the brush. Reattach the shaving head.
14. Depending on the frequency of usage, the shaving head has to be replaced regularly, but at the latest after two years. Specialist shops and our after-sales service offer the corresponding replacement parts. The corresponding order form can be found on page 51.

21
Puissance : 3 Watt, 100–240 V~, 50/60 Hz, 800 mADimensions : Env. 17,5 x 4,8 x 4,5 cmPoids : Env. 0,16 kg (accumulateurs compris, sans accessoire)Longueur de cordon : Env. 1,8 mDurée de chargement : Accus : env. 8 heuresAccus : 2 x 1,2 V AA, NiMHUn chargement d‘accumulateursuffit pour : Env. 45 minutes de fonctionnementIndice de protection : II
Caractéristiques : Sans fil, avec accumulateurs, fonction effilage, 5 longueurs de coupe différentes, interrupteur EIN/AUS [MARCHE/ARRÊT], avec affichage du charge
Accessoires : Peignes amovibles 6 à 32 mm, brosses de nettoyage, huile de soin, peigne, ciseaux, station de charge, notice d‘utilisation
Modifications et erreurs des caractéristiques de l‘équipement, de la technique, des couleurs et du design réservées
Our appliances are produced on a high quality level for a long lifetime. Regular maintenance and expert repairs by our after-sales service can extend the useful life of the appliance. If an appliance is defective and repair is not possible we ask you to follow the following instructions for disposal.
Do not dispose this appliance together with your standard household waste. Please bring this product to an approved collection point for recycling of electric and electronic products.
By separate collection and disposal of waste products you help to protect natural resources and ensure, that the product is disposed in an adequate way to protect health and environment.
WASTE DISPOSAL / ENVIRONMENTAL PROTECTION
GUARANTEE CONDITIONS
We guarantee our appliances for 24 months, or in case of commercial use for 12 months, from the date of purchase in case of defects that occur during normal use and are demonstrably due to a factory fault. Within the warranty period we will remedy defective materials or workmanship through repair or replacement, at our option. Our warranty terms apply only to appliances sold in Germany and Austria. For other countries, please contact the responsible importer. In the event of a claim for remedy of defects, please send the appliance to our after sales service, properly packaged and postage paid, together with a copy of the automatically generated sales receipt, which must show the date of purchase, and a description of the defect. If the defect is covered by the warranty, the customer will be reimbursed for the shipping costs. The warranty does not cover damage from normal wear, improper handling and failure to comply with the maintenance and care instructions. The warranty is void if repairs or modifications are made to the appliance by third parties.Any claims of the end consumer vis-à-vis the retailer are not limited by this warranty.
This appliance contains accumulators. For this reason, the appliance must not be disposed of in the household waste. If you have any question concerning the correct disposal of accumulators or accumulator-operated appliances, please contact your local disposal contractor. The appliance contains accumulators, which are installed in the handle. The accumulators contain nickel metal hydride.You may find the following sign on contaminant-laden accumulators: Pb = contains lead, Cd = contains cadmium, Hg = contains mercury.
NOTICE D´UTILISATION MODÈLE 87813
SPÉCIFICATION TECHNIQUE

22
EXPLICATION DES SYMBOLES
Ce symbole indique les dangers susceptibles de provoquer des blessures ou des endom-magements de l’appareil.
Ce symbole signale des dangers lors de l‘utilisation dans ou à proximité de réservoirs remplis d‘eau.
POUR VOTRE SÉCURITÉ
Veuillez lire attentivement les instructions qui suivent et les ranger soigneusement. 1. L‘appareil peut être utilisé par des enfants en dessous de 8 ans et des personnes aux capacités
physiques, sensorielles ou mentales réduites ou manquant d‘expérience et/ou de connaissances s‘ils sont surveillés ou instruits au niveau de l‘utilisation sûre de l‘appareil et ont compris les dangers qui en résultent. L‘appareil n‘est pas un jouet. Le nettoyage et l‘entretien de l‘appareil peuvent être réalisés par des enfants uniquement sous surveillance.
2. Les enfants en dessous de 3 ans doivent être tenus éloignés de l‘appareil ou surveiller en permanence.
1. Les enfants ne devront pas être laissés sans surveillance et ne devront pas jouer avec l’appareil. 2. Raccordez la station de charge uniquement à un courant alternatif compatible aux indications
de la plaque signalétique.3. Cet appareil n’est pas prévu pour être commandé par une minuterie ou un interrupteur à distance. 4. L’appareil ne devra jamais être plongé dans de l’eau ou dans un autre liquide. Protégez l’appareil
de l’humidité.5. Pour des raisons de sécurité, n’utilisez jamais l‘appareil à proximité d’une baignoire pleine, d’un
lavabo ou tout autre récipient rempli d‘eau lorsqu’il est branché au réseau électrique.6. Protégez l‘appareil de l‘humidité lorsqu’il se trouve sur la station de charge. Danger de décharge
électrique !7. Tant que la fiche se trouve dans la prise secteur, la station de charge à proximité de l‘eau est
une source de danger.8. Étendez toujours le cordon de la station de charge sur toute sa longueur pour éviter les dégâts
dus à la surchauffe.9. Pour éviter d’endommager le cordon, assurez-vous qu‘il n‘entre pas en contact avec des objets
pointus ou acérés.10. Ne posez aucun objet métallique sur la station de charge afin d’y éviter les dégâts.11. Retirez le cordon de la prise secteur de la station de charge en tirant uniquement sur la fiche,
ne tirez jamais sur le câble.12. Lorsque l‘appareil est chargé, retirez la fiche du cordon de la prise secteur.13. L‘appareil est destiné exclusivement à l’utilisation personnelle dans le ménage et non à une
utilisation professionnelle.14. L‘appareil ne doit pas être utilisé à l‘extérieur.15. Ne pas utilisez l’appareil sur une peau enduite de crème, cela pourrait provoquer des irritations
cutanées.16. Ne pas utiliser l’appareil sur la peau irritée, souffrant d’acné ou d’autre maladie cutanée.17. L’appareil est destiné uniquement aux cheveux et aux poils humains. Ne l’utilisez pas sur les
cheveux synthétiques ou sur les animaux.18. Veillez à ne pas rapprocher l’appareil des yeux.19. Pour des raisons hygiéniques, l‘appareil ne devrait être utilisé que par une seule et unique
personne.20. Ne pas utiliser l’appareil à proximité de sources de chaleur. 21. Éteignez l‘appareil avant de le mettre de côté.22. Veuillez toujours éteindre l’appareil et le laisser refroidir après l’utilisation ou avant de le nettoyer.

23
23. N’essayer jamais d’aiguiser vous-même les lames de la tête de tonte. Lorsque la tête de tonte émoussée, veuillez la remplacer.
24. Utilisez l‘appareil uniquement pour l‘emploi décrit dans cette notice.25. N’utilisez pas l’appareil avec des accessoires d’autres fabricants ou marques, afin d’éviter de
l’endommager.26. N’ouvrez jamais le boîtier de l’appareil. Risque d’électrocution.27. Contrôlez régulièrement l’état de l’appareil, de la fiche électrique et du cordon (usure,
détériorations). En cas d’usure ou de détérioration du cordon ou d’autres éléments, veuillez retourner l’appareil à notre service clientèle pour le faire contrôler et réparer. Toute intervention inappropriée peut s’avérer dangereuse pour l’utilisateur et entraînera l’annulation de la garantie.
Attention : La tête de tonte est composée de pièces acérées et pointues. Soyez prudent afin d’éviter les blessures !
Pour des raisons de sécurité, n’utilisez jamais l‘appareil à proximité d’une baignoire pleine, d’un lavabo ou tout autre récipient rempli d‘eau. Si l‘appareil est utilisé dans une salle de bain, la prise doit être débranchée après chaque utilisation. en effet, l‘eau représente un danger dans le cas contraire, et ce même si l‘appareil est éteint.
Le fabricant n’est nullement responsable en cas de montage non conforme, d‘utilisation irrégulière ou non conforme ou suite à l’exécution de réparations par des tiers non autorisés.
AVANT L‘UTILISATION
1. Retirez tous les emballages et les sécurités pour le transport. Tenir le matériel d‘emballage hors de portée des enfants afin d’éviter le danger de suffocation.
2. Insérez la tête de tonte.3. Si vous désirez utiliser le peigne amovible, mettez le sur l‘appareil. Tenez fermement l’appareil
avec une main et insérez le peigne amovible désiré avec l’autre main. L’enclenchement audible du peigne indique que la fixation s‘est effectuée correctement.
4. Chargez complètement les accumulateurs de l‘appareil avant la première utilisation. Vous trouverez d’autres indications concernant le chargement dans le chapitre « Chargement ».
CHARGEMENT
1. Raccordez le cordon avec la station de charge.2. Mettez le bloc d’alimentation du cordon dans la prise secteur.3. Assurez-vous que l‘appareil est éteint.4. Posez l’appareil éteint dans la station de charge. Veillez à ce que l‘appareil y soit introduit
correctement, sinon il ne pourra pas se charger.5. Veillez à la stabilité de la station de charge.6. Raccordez la prise jack du cordon avec la douille de la station de charge.7. Le voyant de contrôle rouge de l’appareil s‘illumine et indique que l’appareil se recharge.8. Afin d’éviter les dégâts à les accumulateurs, l‘appareil ne devra charger plus de 12 heures
d‘affilée. 9. Attention, le voyant de contrôle rouge ne s‘éteint pas lorsque l‘appareil a fini de charger.10. Selon les applications et la nature des poils et des cheveux, vous pouvez utiliser l’appareil env.
45 minutes avant de devoir le recharger. L’accumulateur atteindra sa capacité maximale après avoir été rechargé plusieurs fois.
11. Rechargez l’appareil uniquement lorsque l’accu est entièrement vide. Ainsi, vous préserverez la puissance de l’accumulateur plus longtemps.
12. Au cas où les accumulateurs seraient complètement vides et que vous aimeriez terminer le rasage, vous pouvez aussi utiliser directement l‘appareil avec le cordon fourni. Placez le cordon dans la douille de la partie inférieure de l‘appareil puis branchez le bloc d’alimentation dans une prise secteur.
13. Attention : Ne branchez jamais l‘appareil au réseau électrique s’il ne contient pas d’accu !
24
UTILISATION - COUPER LES CHEVEUX
1. Préparez l’appareil comme décrit dans les chapitres « Avant l‘utilisation »et « Chargement ». 2. Veillez à ce que la peau et les cheveux soient propres et secs avant de commencer de couper.
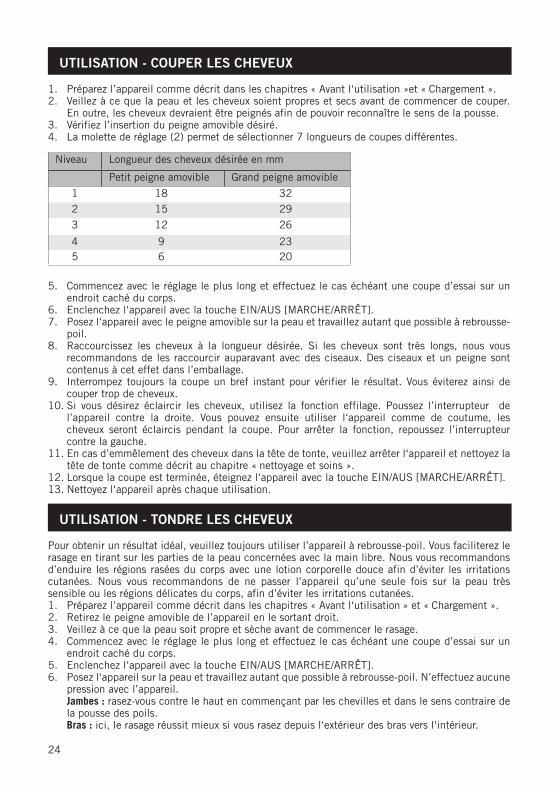
En outre, les cheveux devraient être peignés afin de pouvoir reconnaître le sens de la pousse.3. Vérifiez l’insertion du peigne amovible désiré.4. La molette de réglage (2) permet de sélectionner 7 longueurs de coupes différentes.
Niveau Longueur des cheveux désirée en mm
Petit peigne amovible Grand peigne amovible
1 18 322 15 29
3 12 26
4 9 235 6 20
5. Commencez avec le réglage le plus long et effectuez le cas échéant une coupe d’essai sur un endroit caché du corps.
6. Enclenchez l‘appareil avec la touche EIN/AUS [MARCHE/ARRÊT].7. Posez l‘appareil avec le peigne amovible sur la peau et travaillez autant que possible à rebrousse-
poil.8. Raccourcissez les cheveux à la longueur désirée. Si les cheveux sont très longs, nous vous
recommandons de les raccourcir auparavant avec des ciseaux. Des ciseaux et un peigne sont contenus à cet effet dans l’emballage.
9. Interrompez toujours la coupe un bref instant pour vérifier le résultat. Vous éviterez ainsi de couper trop de cheveux.
10. Si vous désirez éclaircir les cheveux, utilisez la fonction effilage. Poussez l’interrupteur de l’appareil contre la droite. Vous pouvez ensuite utiliser l‘appareil comme de coutume, les cheveux seront éclaircis pendant la coupe. Pour arrêter la fonction, repoussez l’interrupteur contre la gauche.
11. En cas d’emmêlement des cheveux dans la tête de tonte, veuillez arrêter l‘appareil et nettoyez la tête de tonte comme décrit au chapitre « nettoyage et soins ».
12. Lorsque la coupe est terminée, éteignez l‘appareil avec la touche EIN/AUS [MARCHE/ARRÊT].13. Nettoyez l‘appareil après chaque utilisation.
UTILISATION - TONDRE LES CHEVEUX
Pour obtenir un résultat idéal, veuillez toujours utiliser l’appareil à rebrousse-poil. Vous faciliterez le rasage en tirant sur les parties de la peau concernées avec la main libre. Nous vous recommandons d’enduire les régions rasées du corps avec une lotion corporelle douce afin d’éviter les irritations cutanées. Nous vous recommandons de ne passer l’appareil qu’une seule fois sur la peau très sensible ou les régions délicates du corps, afin d’éviter les irritations cutanées.1. Préparez l’appareil comme décrit dans les chapitres « Avant l‘utilisation » et « Chargement ». 2. Retirez le peigne amovible de l’appareil en le sortant droit.3. Veillez à ce que la peau soit propre et sèche avant de commencer le rasage.4. Commencez avec le réglage le plus long et effectuez le cas échéant une coupe d’essai sur un
endroit caché du corps.5. Enclenchez l‘appareil avec la touche EIN/AUS [MARCHE/ARRÊT].6. Posez l‘appareil sur la peau et travaillez autant que possible à rebrousse-poil. N’effectuez aucune
pression avec l’appareil.Jambes : rasez-vous contre le haut en commençant par les chevilles et dans le sens contraire de la pousse des poils.Bras : ici, le rasage réussit mieux si vous rasez depuis l‘extérieur des bras vers l‘intérieur.

25
NETTOYAGE ET ENTRETIEN
Attention : La tête de tonte est composée de pièces acérées et pointues. Soyez prudent afin d’éviter les blessures !Éteignez l’appareil depuis l’interrupteur EIN/AUS [MARCHE/ARRÊT] et retirez le bloc d’alimentation de la prise secteur.
1. Pour le nettoyage, ne plongez jamais l’appareil dans de l’eau ou autres liquides. Veillez à ce que l‘eau ne pénètre pas dans le boîtier de l‘appareil.
2. Ne nettoyez jamais l‘appareil et ses accessoires dans le lave-vaisselle.3. N’utilisez pas d’éponges grattantes, de produits à récurer, de paille de fer, d‘objets métalliques,
de désinfectants ou de produits de nettoyage très chauds, sous peine de dégradations.4. Essuyez l’appareil avec un chiffon humide et doux. Nettoyage de la tête de tonte :5. éteignez l’appareil depuis l’interrupteur et retirez le bloc d’alimentation de la prise secteur.
Retirez le peigne amovible de l’appareil. 6. Retirez tête la de tonte en appuyant précautionneusement contre l’arrière.7. Nettoyez la tête de tonte et l’intérieur de l‘appareil avec le pinceau livré.8. Veuillez ne pas taper sur la tête de tonte, car cela pourrait l’endommager.9. Maintenant, vous pouvez rincer la tête de tonte sous l’eau tiède. Séchez-la ensuite avec un
chiffon doux ne peluchant pas.10. En outre, nous vous recommandons de sécher consciencieusement la tête de tonte avec un
sèche-cheveux (niveau moyen de température) afin d’éliminer les restes d’humidité.11. Mettez une goutte d’huile de soin sur la tête de tonte et retirez les résidus gras avec un chiffon
ne peluchant pas. 12. Remettez la tête de tonte dans l’appareil en fixant les languettes se trouvant sous la tête de tonte
à l’intérieur de l‘appareil et en pressant fermement la tête de tonte contre le haut. Veillez à ce que la tête de tonte soit vraiment enclenchée avant de réutiliser l‘appareil.
13. Protégez l‘appareil de la poussière et, si nécessaire, nettoyez régulièrement la tête de tonte avec un pinceau doux. À cet effet, retirez précautionneusement la tête de tonte de l’appareil et éliminez la poussière, les poils et les cheveux avec le pinceau. Finalement, replacez la tête de tonte.
14. La tête de tonte doit être régulièrement remplacée selon la fréquence des utilisations, toutefois tous les deux ans au plus tard. Vous obtiendrez les pièces de rechange dans votre commerce spécialisé ou directement auprès de notre service après-vente. Vous trouverez le formulaire de commande correspondant à la page 51.
Aisselles : Levez les bras autant que vous le pouvez pour bien tendre la peau. Rasez les endroits concernés avec des mouvements de va-et-vient.Zone intime : vous pouvez précouper les très longs poils à l’aide du peigne amovible. À cet effet, placez le peigne amovible sur l‘appareil. Tendez le cas échéant l‘endroit de la peau à raser et conduisez lentement l‘appareil sur la peau dans le sens inverse de la pousse des poils.Contours de la barbe : raccourcissez les poils précautionneusement en fonction du contour désiré.
7. Veillez à ce que la tête de rasage soit toujours contact avec la peau. Vous faciliterez le rasage en tendant les parties de peau à raser avec l’autre main.
8. En cas d’emmêlement des cheveux dans la tête de tonte, veuillez arrêter l‘appareil et nettoyez la tête de tonte comme décrit au chapitre « nettoyage et soins ».
9. Lorsque la coupe est terminée, éteignez l‘appareil avec la touche EIN/AUS [MARCHE/ARRÊT].10. Nettoyez l‘appareil après chaque utilisation.11. Veillez à n‘appliquer aucun produit de soin alcoolisé sur la peau, car cela pourrait provoquer des
irritations cutanées. Naturellement, vous pouvez utiliser des produits sans alcool, des lotions ou des crèmes de soins douces directement après le rasage.

26
CONDITIONS DE GARANTIE
TRAITEMENT DES DÉCHETS / PROTECTION DE L’ENVIRONNEMENT
Nos appareils sont produits selon un standard élevé de qualité pour une longue durée d’utilisation. Un entretien régulier et des réparations compétentes par notre service après-vente prolongent cette durée d’utilisation. Si néanmoins l’appareil est endommagé et ne peut plus être réparé, veuillez suivre les in-structions suivantes.Ne jamais disposer ce produit avec les dégâts de ménage. Apportez ce produit à une station de collection pour récupération de produits électriques et électroniques. Par la collection séparée vous aidez à protéger les ressources naturelles et prenez soin, que le produit est démonté sans risque pour la santé et l’environnement.
Les défauts de l’appareil qui se produisent malgré l’utilisation correcte suite à une faute de l‘usine et dont nous sommes informés immédiatement après qu’ils soient constatés dans les 24 mois après la livraison aux preneur final, seront réparés gratuitement. Notre garantie n’est valide que pour les appareils vendus en Allemagne et en Autriche. Dans tout autre pays veuillez contacter l’importateur. Veuillez envoyer à notre adresse les appareils, pour lesquels vous réclamez une suppression de défauts, avec le bon d’achat montrant la date d’achat, port payé et proprement emballé. Les coûts de transport seront rem-boursés en cas de garantie en Allemagne et en Autriche. Les défauts causés par usure, utilisation incorrecte ou non-respect des instructions de maintenance sont exclus. Notre obligation de garantie cesse, si de réparations ou des interventions sont accomplies par des tiers. Cette garantie n’affecte pas les droits du consommateur contre le commerçant.
Cet appareil contient des accumulateurs. Pour cette raison, ne jetez pas l’appareil avec les déchets ménagers à la fin de sa durée de fonctionnement. Adressez-vous à votre entreprise d’élimination des déchets pour une élimination correcte des accumulateurs ou des appareils fonctionnant avec des accumulateurs. L‘appareil est équipé d’un accumulateur monté dans la poignée. Cet accumulateur contient du nickel-hydrure métallique.Vous trouverez ces références sur les piles et accumulateurs contenant des substances polluantes : Pb = contenant du plomb, cd = contenant du cadmium, Hg = contenant du mercure.
GEBRUIKSAANWIJZING MODEL 87813
TECHNISCHE GEGEVENS
Vermogen: 3 W, 100–240 V~, 50/60 Hz, 800 mAAfmetingen: Ca. 17,5 x 4,8 x 4,5 cmGewicht: Ca. 0,16 kg (incl. accu, zonder toebehoren)Snoerlengte: Ca. 1,8 mLaadtijd: Accu: ca. 8 uurAccu: 2 x 1,2 V AA, NiMHEen acculadingis voldoende voor: Ca. 45 minuten bedrijfBeschermklasse: II
Uitrusting: Snoerloos met accu, effileer-functie, 5 snijlengtes instelbaar, AAN/UIT-schakelaar met laadindicatie
Toebehoren: 2 opzetkammen 6-32 mm, reinigingsborstel, onderhoudsolie, kam, schaar, laadstation gebruiksaanwijzing
Wijzigingen en vergissingen in de uitrustingskenmerken, techniek, kleuren en design voorbehouden

27
Lees de volgende aanwijzingen a.u.b. door en bewaar ze goed. 1. Het apparaat kan door kinderen van 8 jaar en ouder gebruikt worden en door personen met
beperkte fysieke, sensorische of mentale vaardigheden of met gebrek aan ervaring en/of kennis, mits zij onder toezicht staan of instructies over het gebruik van dit apparaat hebben gekregen en de hieruit resulterende gevaren begrepen hebben. Het apparaat is geen speelgoed. Het apparaat mag uitsluitend door kinderen gereinigd en onderhouden worden, indien deze onder toezicht staan.
2. Kinderen onder de 3 jaar moeten verwijderd worden gehouden van het apparaat of permanent onder toezicht staan.
1. Kinderen moeten onder toezicht gehouden worden om te voorkomen dat ze met het apparaat gaan spelen.
2. Sluit het laadstation uitsluitend aan op wisselstroom overeenkomstig het typeplaatje.3. Dit apparaat mag niet met een externe tijdschakelklok of een afstandsbedienings-systeem
worden gebruikt. 4. Het apparaat mag nooit in water of andere vloeistoffen worden gedompeld. Bescherm het
apparaat tegen vocht.5. Gebruik het apparaat, wanneer dit op het stroomnet is aangesloten, uit veiligheidsredenen nooit
in de nabijheid van of in een gevulde badkuip of wastafel of ander waterhoudend object.6. Bescherm het apparaat tegen vocht, als dit zich in het laadstation bevindt. Er bestaat risico op
elektrische schok!7. Zolang de netstekker van het laadstation zich in de contactdoos bevindt, kan de nabijheid van
water gevaar opleveren.8. Strek het snoer van het laadstation altijd over de hele lengte uit om schade door oververhitting
te voorkomen.9. Let erop dat het snoer niet met scherpe of spitse voorwerpen in contact komt om schade aan het
snoer te voorkomen.10. Plaats geen metalen voorwerpen op het laadstation om schade aan het laadstation te voorkomen.11. Trek het snoer van het laadstation altijd aan de aansluitstekker uit het stopcontact, nooit aan
het snoer zelf.12. Trek de netstekker van het snoer uit de contactdoos zodra het apparaat is opgeladen.13. Het apparaat is uitsluitend bedoeld voor eigen gebruik in de huishouding, echter niet voor
beroepsmatig gebruik.14. Het apparaat mag niet in de openlucht gebruikt worden.15. Gebruik het apparaat niet op met crème ingesmeerde huid, omdat dit tot huidirritaties kan
leiden.16. Gebruik het apparaat ook niet, als uw huid door acne of een aandoening is geïrriteerd.17. Het apparaat is alleen geschikt voor menselijk haar. Gebruik het apparaat niet op kunstmatig
haar of bij dieren.18. Let erop dat u met het apparaat niet in de nabijheid van de ogen komt.19. Om hygiënische redenen moet het apparaat liefst maar door één persoon worden gebruikt.20. Gebruik het apparaat niet in de buurt van warmtebronnen. 21. Schakel het apparaat uit voordat u dit weglegt.
VOOR UW VEILIGHEID
VERKLARING VAN DE SYMBOLEN
Dit symbool wijst op eventuele gevaren die letsel tot gevolg kunnen hebben of tot schade aan het apparaat leiden.
Dit symbool attendeert op gevaren tijdens het gebruik of in de nabijheid van met water gevulde bakken.

28
22. Schakel het apparaat na het gebruik of voor het reinigen altijd uit en laat het apparaat afkoelen. 23. Probeer nooit de messen in de scheerkop zelf te slijpen. Als de messen bot zijn, vervang dan de
scheerkop.24. Gebruik het apparaat niet voor andere doeleinden dan in deze gebruiksaanwijzing beschreven.25. Het apparaat mag niet met toebehoren van andere fabrikanten of merken worden gebruikt om
schade te voorkomen.26. Open in geen geval de behuizing van het apparaat. Er bestaat risico op letsel door elektrische
schok.27. Controleer het apparaat, de stekker en het snoer regelmatig op slijtage en beschadigingen. Stuur
het apparaat in geval van beschadigingen van de voedingskabel of andere onderdelen a.u.b. voor controle en/of reparatie aan onze klantenservice. Ondeskundig uitgevoerde reparaties kunnen aanzienlijke gevaren voor de gebruiker veroorzaken en leiden tot het vervallen van de garantie.
Attentie: De scheerkop bestaat uit scherpe, spitse delen. Om verwondingen te voorkomen, ga er voor.zichtig mee om!
Gebruik het apparaat uit veiligheids-redenen nooit in de nabijheid van of in een gevulde badkuip of wastafel of ander waterhoudend object. Als de apparaat in een badkamer gebruikt wordt, na het gebruik van de droger de stekker uit het stopcontact trekken, omdat de nabijheid van water een gevaar vormt, ook als de apparaat uitgeschakeld is.
De fabrikant is niet aansprakelijk, indien het apparaat verkeerd gemonteerd, ondeskundig of foutief gebruikt of door niet geautoriseerde derden gerepareerd werd.
VÓÓR HET GEBRUIK
1. Verwijder alle verpakkingsmaterialen en transportbeveiligingen. Houd kinderen uit de buurt van de verpakkingsmaterialen vanwege het gevaar voor verstikking.
2. Zet de scheerkop in het apparaat.3. Als u de opzetkam wilt gebruiken, zet deze op het apparaat (zie afbeelding). Houd het apparaat
met één hand vast en steek met de andere hand de gewenste opzetkam op het apparaat. De kam moet hoorbaar inklikken, anders zit de kam niet goed vast op het apparaat.
4. Laad, voordat u het apparaat voor het eerst gebruikt, de accu’s volledig op. Meer informatie m.b.t. het opladen vindt u in het volgende hoofdstuk “Laden”.
LADEN
1. Verbind het snoer met het laadstation.2. Steek het voedingsapparaat van het snoer in een stopcontact.3. Overtuigt u er zich van dat het apparaat uitgeschakeld is.4. Plaats het uitgeschakelde apparaat in het laadstation. Let er op dat het apparaat op de juiste
manier is geplaatst omdat dit anders niet correct kan worden geladen.5. Let er op dat het laadstation stevig staat.6. Verbind de klinkstekker van het snoer met de bus aan het laadstation.7. Het rode controlelampje op het apparaat licht op en geeft aan dat het apparaat geladen wordt.8. Om schade aan de accu te voorkomen, laad het apparaat niet langer dan 12 uur op. 9. Neem in acht dat het rode controlelampje niet uitgaat, wanneer het apparaat volledig geladen is.10. Afhankelijk van het gebruik en de eigen-schappen van het haar kunt u het apparaat ca. 45
minuten gebruiken voordat dit moet worden herladen. De maximale capaciteit van de accu wordt pas na meerdere keren opladen bereikt.
11. Herlaad het apparaat pas dan als de accu’s helemaal leeg zijn. Zo wordt de volle capaciteit van de accu’s langer bewaard.
12. U kunt het apparaat ook direct met het meegeleverde snoer gebruiken, indien de accu’s eens volledig leeg zouden zijn, maar u het scheren nog wilt beëindigen. Steek het snoer in de bus aan de onderzijde van het apparaat en steek dan het voedingsapparaat in een stopcontact.
13. Attentie: Sluit het apparaat nooit op het stroomnet aan als er zich geen accu in het apparaat bevindt!

29
BEDIENING – HAARTONDEUSE
1. Bereid het apparaat voor zoals in de hoofdstukken “Vóór het gebruik” en “Laden” beschreven. 2. Let er op dat huid en haar schoon en droog zijn voordat u met het knippen begint. Bovendien
moet het haar gekamd zijn om de groeirichting van het haar te kunnen herkennen.3. Controleer of de gewenste opzetkam is opgezet op het apparaat.4. Via het instelwiel (2) kan de gewenste haarlengte in 7 standen worden ingesteld.
Stand Gewenste haarlengte in mm
Kleine opzet-kam Grote opzet-kam
1 18 322 15 29
3 12 26
4 9 235 6 20
5. Begin met de langste instelling en probeer indien nodig op een verborgen plek of deze instelling juist is.
6. Schakel het apparaat aan de AAN/UIT-knop in.7. Zet het apparaat met de opzetkam op de huid, werk daarbij naar mogelijkheid altijd tegen de
groeirichting van het haar in.8. Kort de haren in op de gewenste lengte. Wanneer de haren zeer lang zijn, is het raadzaam om
deze eerst met een schaar in te korten. Hiervoor zijn een schaar en een kam bij de levering inbegrepen.
9. Houd bij het inkorten van de haren met het apparaat steeds even op en controleer het resultaat. Op deze manier voorkomt u te veel haar af te knippen.
10. Wanneer u het haar wilt uitdunnen, kunt u de effileerfunctie gebruiken. Schuif de schakelaar (3) op het apparaat naar rechts. U kunt het apparaat nu zoals gewoonlijk gebruiken, het haar wordt bij het knippen nu uitgedund. Om de functie weer uit te schakelen, schuif de schakelaar weer naar links.
11. Als haren in de scheerkop blijven hangen, schakel het apparaat uit en reinig de scheerkop zoals in het hoofdstuk “Reiniging en onderhoud” beschreven.
12. Als u klaar bent met het knippen, schakel het apparaat aan de AAN/UIT-knop uit.13. Reinig het apparaat na elk gebruik.
BEDIENING – HAARTRIMMER
Werk altijd tegen de groeirichting van het haar in om een optimaal resultaat te behalen. Het scheren lukt makkelijker wanneer u het betreffende huidgedeelte met uw vrije hand strak trekt. Wij aanbevelen om na het scheren de onthaarde lichaamsdelen met een milde bodymilk in te smeren om huidirritaties te voorkomen. Indien u zeer gevoelige huid hebt of gevoelige lichaamsdelen wilt ontharen, raden wij aan om deze delen maar één keer met het apparaat te behandelen om huidirritaties te voorkomen.1. Bereid het apparaat voor zoals in de hoofdstukken “Vóór het gebruik” en “Laden” beschreven. 2. Trek de opzetkam van het apparaat door deze recht van het apparaat af te trekken.3. Let er op dat de huid schoon en droog is voordat u met het scheren begint.4. Begin met de langste instelling en probeer indien nodig op een verborgen plek of deze instelling
juist is.5. Schakel het apparaat aan de AAN/UIT-knop in.6. Zet het apparaat op de huid, werk daar-bij naar mogelijkheid altijd tegen de groeirichting van het
haar in. Oefen geen druk op het apparaat uit.Benen: Scheer beginnend vanaf de enkels naar boven tegen de groeirichting van het haar in.Armen: Hier bereikt u het beste resultaat wanneer u van de buitenzijde naar de binnenzijde van de arm scheert.

30
REINIGING EN ONDERHOUD
Attentie: De scheerkop bestaat uit scherpe, spitse delen. Om verwondingen te voorkomen, ga er voorzichtig mee om!Schakel het apparaat met de AAN/UIT-knop uit en trek indien nodig het voedingsapparaat uit het stopcontact.
1. Dompel het apparaat voor het reinigen nooit in water of een andere vloeistof. Let erop dat geen water de behuizing van het apparaat binnendringen kan.
2. Reinig het apparaat en het toebehoren nooit in de vaatwasser.3. Gebruik geen krassende sponsen, schuurmiddelen, staalwol, metalen voorwerpen, hete
reinigingsmiddelen of desinfectiemiddelen omdat deze tot beschadigingen kunnen leiden.4. Veeg het apparaat met een zachte, vochtige doek af. Reiniging van de scheerkop:5. Schakel het apparaat uit en trek indien nodig het voedingsapparaat uit het stopcontact. Trek de
opzetkam van het apparaat. 6. Neem de scheerkop eruit door deze voorzichtig naar achteren te drukken.7. Reinig de scheerkop en het binnenste van het apparaat met de meegeleverde kwast.8. Tik niet op de scheerkop omdat deze daardoor zou kunnen worden beschadigd.9. U kunt nu de scheerkop onder handwarm water uitspoelen. Droog de scheerkop dan met een
zachte pluisvrije doek af.10. Om restvochtigheid te verwijderen aanbevelen wij bovendien om de scheerkop met een haardroger
te drogen (gemiddelde temperatuur).11. Doe nu een druppel onderhoudsolie op de scheerkop en verwijder olieresten met een pluisvrije
doek. 12. Monteer nu de scheerkop weer in het apparaat door de lussen onderaan de scheerkop in het
binnenste van het apparaat te plaatsen en de scheerkop naar boven vast te drukken. Let er op dat de scheerkop goed inklikt voordat u het apparaat weer gebruikt.
13. Bescherm het apparaat tegen stof en reinig de scheerkop regelmatig met een zachte kwast. Trek hiervoor de scheerkop voorzichtig van het apparaat en verwijder stof en haren met de kwast. Zet de scheerkop dan weer op het apparaat.
14. De scheerkop moet, al naargelang hoe vaak u het apparaat gebruikt, regelmatig worden vervangen, echter uiterlijk na twee jaar. Reserveonderdelen zijn in de vakhandel verkrijgbaar of direct bij onze klantenservice. U vindt het betreffende bestelformulier op pagina 51.
Oksels: Houd uw arm zover mogelijk omhoog om de huid te spannen. Scheer de betreffende delen door het apparaat heen en weer te bewegen.Schaamstreek: Zeer lange haren kunt u met de opzetkam vooraf knippen. Zet hiervoor de opzetkam op het apparaat. Trek indien nodig de te scheren huidgedeeltes strak en beweeg het apparaat tegen de groeirichting van het haar in langzaam over de huid.Baardcontouren: Kort de haren voorzichtig in overeenkomstig de gewenste contouren.
7. Let erop dat de scheerkop steeds contact met de huid heeft. Het scheren lukt makkelijker wanneer u het te scheren huidgedeelte met uw andere hand strak trekt.
8. Als haren in de scheerkop blijven hangen, schakel het apparaat uit en reinig de scheerkop zoals in het hoofdstuk “Reiniging en onderhoud” beschreven.
9. Als u klaar bent met het scheren, schakel het apparaat aan de AAN/UIT-knop uit.10. Reinig het apparaat na elk gebruik.11. Let er op dat u direct na het scheren geen alcohol bevattende verzorgingsproducten op de huid
gebruikt omdat deze tot huidirritaties kunnen leiden. Milde verzorgende lotions of crèmes zonder alcohol kunt u natuurlijk direct na het scheren gebruiken.

31
Onze apparaten zijn geproduceerd met een hoge qualiteit voor een lange gebruik. Regelmatige onderhoud en vakkundig reparaties door onze klantenservice verlengt de gebruiksduur. Wanneer het apparat defekt is en kan niet meer gerepareerd worden, let op de volgende instructies.Dit product mag niet samen met het normale huishoudelijke afval worden afgevoerd. U dient dit product bij een voor het recycleren van elektrische of elektronische apparaten aangewezen verzamelplaats in te leveren. Door het separaat inzamelen en recycleren van afvalproducten helpt u mee bij het zuinig omgaan met de natuurlijke hulpbronnen en zorgt u ervoor dat het product op een gezondheids- en milieuvriendelijke manier afgevoerd wordt.
GARANTIEVOORWAARDEN
VERWIJDEREN VAN AFVAL / MILIEUBESCHERMING
Wij geven op onze apparaten een garantietermijn van 24 maanden, gerekend vanaf de dag van aanschaf. Deze garantie geldt voor schade, die bij correct gebruik aantoonbaar is veroorzaakt door een fout in de productie. Binnen de garantietermijn verhelpen wij materiaal- en productiefouten door herstelling of vervanging naar onze keuze.Onze garantie is slechts geldig voor in Duitsland en Oostenrijk verkopte apparaten. In andere landen a.u.b. de importeur aan-spreken. Apparaaten, waarvoor garantie in aanspraak wordt genomen, moeten ons samen met een kopie van de machineel gegenereerde kassabon waaruit de koopdatum duidelijk wordt, alsmede een beschrijving van de fout goed verpakt aan onze klantenservice worden toegezonden, porto betaald. Als er sprake van garantie is, worden de verzendingskosten in Duitsland en Oostenrijk aan de klant vergoed. De garantie dekt geen schade veroorzaakt door slijtage, onbehoorlijk gebruik/foutieve han-delingen en niet-naleving van de onderhouds- en reinigingsaanwijzingen. Het recht op garantie vervalt, wanneer reparaties of manipulaties aan het apparaat door derden worden doorgevoerd. Eventuele rechten van de eindgebruiker t.o.v. de verkoper of distributeur worden door deze garantie niet aangetast.
Dit apparaat bevat accu’s. Daarom mag het apparaat aan het einde van zijn gebruiksduur niet samen met de huishoudelijke afval worden verwijderd. Neem bij vragen over de correcte afvoer van accu’s resp. van door accu’s aangedreven apparaten contact op met het verantwoordelijke afvalbedrijf. Het apparaat bevat een in de greep ingebouwde accu. De accu bevat nikkel-metaalhydride.Dit teken vindt u op schadelijke stoffen bevattende batterijen: Pb = batterij bevat lood, Cd = batterij bevat cadmium, Hg = batterij bevat kwik.
ISTRUZIONI PER L’USO MODELLO 87813
DATI TECNICI
Potenza: 3 W, 100–240 V~, 50/60 H, 800 mADimensioni: 17,5 x 4,8 x 4,5 cm ca.Peso: 0,16 kg (batteria compresa, senza accessori) ca.Lunghezza cavo: 1,8 m ca.Tempo di ricarica: Batteria ca. 10-12 oreBatteria: 2 x 1,2 V AA, NiMHUna ricarica basta per: 45 minuti circa di funzionamentoClasse di isolamento: II
Dotazione: Cordless con batteria, funzione di sfoltimento, 5 possibili lunghezze di taglio, interruttore di accensione/spegnimento con visualizzazione livello di carica
Accessori: 2 pettini distanziatori 6-32 mm, spazzola per pulizia, olio per manutenzione, pettine, forbici, stazione di carica, istruzioni d’uso
Con riserva di modifiche ed errori relativi a caratteristiche delle dotazioni, tecnica, colore e design

32
Si raccomanda di leggere e conservare le presenti istruzioni. 1. L‘apparecchio può essere utilizzato da bambini a partire dagli 8 anni di età e da persone
che presentano ridotte capacità fisiche, sensoriali o mentali o che difettano della necessaria esperienza e/o conoscenze solo se adeguatamente sorvegliati o addestrati sull‘uso in sicurezza dell‘apparecchio e se a conoscenza dei rischi correlati. L‘apparecchio non è un giocattolo. La pulizia e la manutenzione dell‘apparecchio possono essere effettuate da bambini soltanto sotto sorveglianza.
2. L‘apparecchio deve essere tenuto fuori dalla portata dei bambini di età inferiore a 3 anni oppure questi devono essere sorvegliati costantemente.
1. I bambini devono essere sorvegliati, onde evitare che giochino con l’apparecchio. 2. Collegare la stazione di carica solo a una presa di corrente alternata con tensione corrispondente
a quella indicata sulla targhetta dati.3. Questo apparecchio non deve essere usato né con orologi programmabili esterni, né con sistemi
di comando a distanza. 4. Non immergere per nessun motivo l’apparecchio in acqua o in altri liquidi. Proteggere
l’apparecchio dall’umidità.5. Per ragioni di sicurezza l’apparecchio, se collegato alla corrente, non deve essere utilizzato vicino
o all’interno di una vasca da bagno, di lavandini o di recipienti contenenti acqua. 6. Proteggere l’apparecchio dall’umidità, in particolare quando si trova nella stazione di ricarica.
Pericolo di scossa elettrica!7. Finché la spina si trova nella presa di corrente, la stazione di carica è pericolosa se si trova vicino
all’acqua.8. Tendere sempre il cavo della stazione di ricarica in tutta la sua lunghezza, onde evitare danni
dovuti al surriscaldamento.9. Assicurarsi che il cavo non venga posto su oggetti appuntiti o taglienti, onde evitare danni al
cavo di alimentazione.10. Non appoggiare oggetti metallici sulla stazione di carica, onde evitare danni alla stazione stessa.11. Per estrarre la spina dalla presa, tirare sempre la spina, mai il cavo di alimentazione. 12. Quando l’apparecchio è carico, estrarre la spina dalla presa di corrente.13. L‘apparecchio è destinato esclusivamente all‘uso domestico e non è idoneo a un impiego
professionale.14. L’apparecchio non è idoneo all’utilizzo all’aperto.15. Non utilizzare l’apparecchio sulla pelle appena trattata con crema, onde evitare irritazioni
cutanee.16. L’apparecchio non deve essere utilizzato sul pelli irritate a causa di acne o disturbi cutanei.17. L’apparecchio è idoneo solo per il corpo umano. Non utilizzare su peli o capelli artificiali o su
animali.18. Evitare il contatto con gli occhi.19. Per motivi igienici, l’apparecchio deve essere utilizzato solo da una persona.20. L’apparecchio non deve essere utilizzato nelle vicinanze di fondi di calore. 21. Spegnere l’apparecchio prima di riporlo.22. Spegnere sempre l’apparecchio e lasciarlo asciugare dopo il suo utilizzo o prima di pulirlo.
PER LA VOSTRA SICUREZZA
SIGNIFICATO DEI SIMBOLI
Questo simbolo segnala possibili pericoli in grado di provocare lesioni a persone o danni all‘apparecchio.
Questo simbolo segnala pericoli in caso di funzionamento in o vicino a contenitori pieni d‘acqua.

33
23. Non cercare di affilare le lame della testina da soli. Se la testina è smussata, si raccomanda di sostituirla.
24. Utilizzare l’apparecchio solo per gli scopi menzionati nelle presenti istruzioni.25. L’apparecchio non deve essere utilizzato con accessori di altre marche o produttori, onde evitare
il danneggiamento dello stesso.26. Durante il funzionamento, non aprire per nessun motivo il corpo dell’apparecchio. Pericolo di
scossa elettrica.27. Verificare con regolarità che l’apparecchio, la spina e il cavo non siano usurati o danneggiati.
Nel caso in cui il cavo di connessione o altre parti siano danneggiati, inviarli per il controllo o la riparazione al nostro servizio clienti. Le riparazioni effettuate da persone non competenti possono esporre l‘utilizzatore a gravi pericoli e comportano l’esclusione dalla garanzia.
Attenzione: la testina è costituita da parti affilate e appuntite. Onde evitare ferimenti, si raccomanda di procedere con la dovuta cautela!
Per ragioni di sicurezza l’apparecchio non deve essere utilizzato vicino o all’interno di una vasca da bagno, di lavandini o di recipienti contenenti acqua. Si si utilizza l’apparecchio capelli in una stanza da bagno, dopo l‘utilizzo staccare la spina perché la vicinanza di acqua rappresenta un pericolo, anche se il phon è spento.
Il produttore non si assume alcuna responsabilità per un utilizzo inappropriato o scorretto oppure in seguito a riparazioni effettuate da officine o persone non autorizzate.
PRIMA DELL’UTILIZZO
1. Rimuovere tutto il materiale di imballaggio e le eventuali protezioni di trasporto. Tenere lontani i bambini dai materiali di imballaggi: pericolo di soffocamento.
2. Inserire la testina.3. Quando si vuole utilizzare il pettine distanziatore, infilarlo sull’apparecchio. Tenere con una
mano l’apparecchio e infilare il pettine distanziatore desiderato con l’altra mano. Il pettine deve incastrarsi con un clic. Solo allora l’accessorio è correttamente inserito.
4. Prima di utilizzare l’apparecchio per la prima volta, caricare completamente la batteria. Ulteriori informazioni sulla ricarica sono riportate nel seguente capitolo “Ricarica”.
RICARICA
1. Collegare il cavo alla stazione di ricarica.2. Inserire la spina di rete del cavo nella presa di corrente.3. Accertarsi che l’apparecchio sia spento.4. Inserire l’apparecchio scarico nella stazione di ricarica. Accertarsi che l’apparecchio sia
correttamente inserito, altrimenti l’apparecchio non si ricarica.5. Accertarsi che la stazione di carica sia in posizione stabile.6. Collegare il connettore jack del cavo alla scatola della stazione di ricarica.7. La spia di controllo rossa dell’apparecchio si illumina e indica che l‘apparecchio è in fase di
ricarica.8. Per evitare che la batteria si danneggi, si sconsiglia di ricaricare l’apparecchio per più di 12 ore
consecutive. 9. Si ricorda che la spia rossa di controllo non si spegne quando l’apparecchio è carico.10. A seconda dell’applicazione e delle caratteristiche pilifere, l’apparecchio può essere utilizzato
per circa 45 minuti prima di dover essere ricaricato. La capacità massima della batteria viene raggiunta solo dopo diverse procedure di ricarica.
11. Ricaricare l’apparecchio solo quando la batteria è completamente scarica. In questo modo la potenza completa della batteria è garantita più a lungo.
12. È possibile anche utilizzare l’apparecchio con il cavo in dotazione, qualora la batteria sia completamente scarica ma l’operazione di depilazione non sia ancora conclusa. Inserire il cavo nella base dell’apparecchio e la spina di rete nella presa di corrente.
13. Attenzione: non collegare mai l’apparecchio alla corrente se all’interno non c’è la batteria!

34
UTILIZZO – RASOIO PER CAPELLI
1. Preparare l’apparecchio come descritto nei capitoli “Prima dell’utilizzo” e “Ricarica”. 2. Accertarsi che la cute e i capelli siano asciutti e puliti prima di iniziare con la rasatura. Inoltre i
capelli devono essere pettinati per poter riconoscerne la direzione di crescita.3. Accertarsi che sia inserito il pettine distanz-iatore desiderato.4. Mediante la rotellina (2) è possibile impostare la lunghezza di capelli desiderata in base a sette
livelli.
Livello Lunghezza dei capelli desiderata in mm
Pettine distanziatore piccolo Pettine distanziatore grande
1 18 322 15 29
3 12 26
4 9 235 6 20
5. Iniziare con la lunghezza maggiore ed effet-tuare possibilmente un taglio di prova su una parte coperta del corpo.
6. Accendere l‘apparecchio premendo l‘inter-ruttore EIN/AUS.7. Appoggiare l’apparecchio con il pettine inserito sulla cute, procedendo possibil-mente sempre in
direzione contraria alla crescita del capello.8. Effettuare la rasatura in base alla lunghezza desiderata. Se i capelli sono molto lunghi, si
consiglia di accorciarli prima con le forbici. Per questo motivo nella confezione sono comprese anche le forbici e il pettine.
9. Durante la rasatura effettuare frequenti interruzioni per verificare il risultato. In questo modo si evita di tagliare troppo i capelli.
10. Se si desidera sfoltire i capelli, utilizzare la funzione di sfoltimento. Spostare l’interruttore (3) dell’apparecchio verso destra. Continuare a usare l’apparecchio come di consueto. Con questa funzione i capelli vengono solo sfoltiti. Per disattivare la funzione, spostare nuovamente l’interruttore verso sinistra.
11. Se dei peli dovessero rimanere incastrati nella testina, spegnere l’apparecchio e pulire la testina come descritto nel capitolo “Pulizia e manutenzione”.
12. A rasatura ultimata, spegnere l‘apparecchio premendo l‘interruttore EIN/AUS.13. Pulire l’apparecchio dopo ogni utilizzo!
UTILIZZO – TRIMMER PER BARBA
Si raccomanda di procedere sempre contropelo, se si desidera ottenere un risultato ottimale. Tendendo la pelle da rasare con la mano libera, la rasatura è più semplice. Dopo la rasatura consigliamo di trattare le parti depilate con una lozione per il corpo delicata onde evitare irritazioni cutanee. In caso di pelle molto sensibile o se si intende rasare parti del corpo delicate, consigliamo di passare con l’apparecchio solo una volta, onde evitare irritazioni cutanee.1. Preparare l’apparecchio come descritto nei capitoli “Prima dell’utilizzo” e “Ricarica”.2. Togliere il pettine distanziatore estraendolo dall’apparecchio.3. Accertarsi che la cute sia pulita e asciutta prima di procedere con la rasatura.4. Iniziare con la lunghezza maggiore ed effettuare possibilmente un taglio di prova su una parte
coperta del corpo.5. Accendere l‘apparecchio premendo l‘interruttore EIN/AUS.6. Appoggiare l’apparecchio sulla pelle, procedendo possibilmente sempre contropelo. Non
esercitare pressione sull’apparecchio.Gambe: rasare partendo dalle caviglie verso l’alto procedendo contropelo.Braccia: qui la rasatura consente di avere i risultati migliori se si effettua la rasatura partendo dall’esterno del braccio verso l’interno.

35
PULIZIA E CURA
Attenzione: la testina è costituita da parti affilate e appuntite. Onde evitare ferimenti, si raccomanda di procedere con la dovuta cautela!Spegnere l’apparecchio premendo l’interruttore EIN/AUS e togliere la spina dalla presa di corrente.
1. Non immergere l’apparecchio in acqua né in altri liquidi per effettuare le operazioni di pulizia. Accertarsi che nel corpo dell‘apparecchio non entri acqua.
2. L’apparecchio e gli accessori non devono essere lavati in lavastoviglie.3. Non utilizzare spugne o sostanze abrasive, lana d‘acciaio, oggetti metallici, disinfettanti o
detergenti caldi, poiché questi possono danneggiare l’apparecchio.4. Pulire l‘apparecchio con un panno morbido e umido. Pulizia della testina:5. Spegnere l’apparecchio e togliere la spina dalla presa di corrente. Togliere il pettine distanziatore
dall’apparecchio. 6. Estrarre la testina, esercitando con attenzione una leggera pressione all’indietro.7. Pulire la testina e l’interno dell’apparecchio con il pennello in dotazione.8. Non picchiettare la testina, che altrimenti rischia di danneggiarsi.9. La testina può essere pulita con acqua tiepida. Asciugare quindi la testina con un panno morbido
senza pilucchi.10. Per eliminare gli ultimi residui di umidità consigliamo inoltre di asciugare la testina con un phon
(temperatura media).11. Versare una goccia d’olio sulla testina e rimuovere i residui di olio con un panno senza pilucchi. 12. Inserire nuovamente la testina nell’apparecchio infilando le linguette sotto alla testina all’interno
dell’apparecchio e premere bene la testina verso l’alto. Assicurarsi che la testina sia correttamente inserita prima di riutilizzare l’apparecchio.
13. Proteggere l’apparecchio dalla polvere e pulire regolarmente la testina con un pennello morbido. Estrarre con attenzione la testina dall’apparecchio e rimuovere la polvere e i peli con il pennello. Riporre la testina.
14. Sostituire la testina in base alla frequenza d’uso dell’apparecchio, al più tardi tuttavia entro due anni. I pezzi di ricambio sono disponibili nei negozi specializzati o direttamente presso il nostro servizio clienti. L’apposito modulo d’ordine è a pagina 51 delle istruzioni d’uso.
Ascella: tenere il braccio alzato per tendere la pelle interessata. Rasare la parte interessata con movimenti in avanti e indietro.Parti intime: i peli molto lunghi possono essere tagliati prima con il pettine. Applicare il pettine distanziatore sull’apparecchio. Tendere eventualmente la pelle da rasare e passare l’apparecchio contropelo.Contorni barba: tagliare la barba con cautela in base ai contorni desiderati.
7. Accertarsi che la testina sia sempre a contatto con la pelle. Tendendo la pelle da rasare con l’altra mano, la rasatura risulta più facile.
8. Se dei peli dovessero rimanere incastrati nella testina, spegnere l’apparecchio e pulire la testina come descritto nel capitolo “Pulizia e manutenzione”.
9. A rasatura ultimata, spegnere l‘apparecchio premendo l‘interruttore EIN/AUS.10. Pulire l’apparecchio dopo ogni utilizzo!11. Si raccomanda di non applicare sulla pelle appena rasata alcun prodotto alcolico, poiché ciò può
comportare irritazioni cutanee. Le lozioni o le creme delicate senza contenuto alcolico possono essere utilizzate subito dopo la rasatura.

36
I nostri apparecchi vengono prodotti rispettando un elevato standard qualitativo per una lunga durata di utilizzo. Una corretta manutenzione e riparazioni adeguate a cura dal nostro servizio clienti possono prolungare la durata di utilizzo del prodotto. Se un apparecchio è difettoso e non più riparabile, per il suo smaltimento si presti attenzione ai punti che seguono.Questo prodotto non deve essere smaltito unitamente ai comuni rifiuti domestici. Consegnare il prodotto a un centro di raccolta per il riciclaggio dei rifiuti elettrici o elettronici.Con la raccolta differenziata dei rifiuti e dei prodotti riciclabili è possibile contribuire alla tutela delle risorse naturali e far smaltire il prodotto nel rispetto dell’ambiente e della salute.
NORME DIE GARANZIA
SMALTIMENTO / TUTELA DELL’AMBIENTE
I nostri prodotti sono garantiti per 24 mesi dalla data di acquisto per i guasti manifestatisi durante un utilizzo conforme alle disposizioni e attribuibili in modo dimostrabile a difetti di fabbricazione. Nel periodo di garanzia porremo rimedio ai difetti materiali e di produzione secondo la nostra valutazione, procedendo alla riparazione o alla sostituzione dell’apparecchio. Le nostre prestazioni di garanzia valgono esclusivamente per gli apparecchi venduti in Germania e Austria. In tutti gli altri casi rivolgersi all‘importatore. Gli apparecchi per i quali si richiede la riparazione di guasti ci devono essere inviati con spedizione affrancata e debitamente imballati, unitamente a una copia del documento di acquisto redatto a macchina dal quale risulti la data di vendita, nonché la descrizione del guasto. In caso di garanzia al cliente verranno rimborsati i costi di spedizione sostenuti. Sono esclusi dalla garanzia i guasti dovuti all’usura, all’uso inappropriato o al mancato rispetto delle regole di manutenzione. Il diritto di garanzia decade qualora siano state effettuate riparazioni o interventi da parte di terzi. Eventuali diritti del consumatore finale verso il venditore o negoziante non vengono limitati dalla presente garanzia.
L’apparecchio è dotato di batteria. Per questo motivo, alla fine della sua durata di vita l’apparecchio non deve essere smaltito tra i rifiuti domestici. In caso di domande sul corretto smaltimento delle batterie e degli apparecchi a batteria, consultare l’azienda di smaltimento competente. L’apparecchio contiene una batteria montata nel manico. La batteria contiene ibrido metallo-nickel.Sulle batterie nocive sono riportati i seguenti simboli: Pb = la batteria contiene piombo, Cd = la batteria contiene cadmio, Hg = la batteria contiene mercurio.
MANUAL DE INSTRUCCIONES MODELO 87813
DATOS TÉCNICOS
Potencia: 3 W, 100–240 V~, 50/60 Hz, 800 mADimensiones: Aprox.17,5 x 4,8 x 4,5 cmPeso: Aprox. 0,16 kg (incl. acumuladores, sin accesorios)Longitud del cable: Aprox. 1,8 mTiempo de carga: Aprox. 8 horasPilas recargables: 2 x 1,2 V AA, NiMHAutonomía: Aprox. 45 minutosClase de protección: II
Prestaciones: Inalámbrico con acumuladores, función de entresacado, ajustable a 5 longitudes, interruptor principal con indicador del nivel de carga
Accesorios: 2 peines guía de 6–32 mm, cepillo limpiador, aceite de mantenimiento, peine, tijeras, estación de carga, manual de instrucciones
Salvo modificaciones y errores a nivel de las características de equipamiento, la tecnología, los colores y el diseño
37
Por favor lea y guarde las siguientes instrucciones. 1. Este aparato puede ser manejado por niños a partir de 8 años y por personas con capacidad
física, sensorial o mental reducida o carentes de experiencia y/o conocimientos siempre que estén supervisados o hayan sido correspondientemente instruidos en el manejo seguro de dicho aparato y comprendan los peligros que conlleva. Este aparato no es ningún juguete. Los niños solo pueden llevar a cabo la limpieza y el mantenimiento del mismo si están supervisados por un adulto.
2. Mantenga vigilados o alejados del aparato a los niños menores de 3 años.1. Los niños deberían vigilarse para garantizar que no jueguen con el equipo. 2. Conecte la estación de carga siempre a corriente alterna de acuerdo con las indicaciones en la
placa indicadora.3. Este equipo no debe operarse mediante temporizador externo ni sistema de mando a distancia. 4. No sumerja el equipo en agua u otros líquidos. Proteja el equipo contra la humedad.5. Por razones de seguridad, no utilice el equipo cerca o dentro de bañeras o lavabos u otros
recipientes llenos de agua cuando está conectado a la red.6. Proteja el equipo de la humedad cuando se encuentre en la estación de carga. ¡Existe peligro
por descarga eléctrica!7. Mientras el conector esté conectado a la toma de corriente, la estación de carga supone un
peligro si está cerca del agua.8. Desenrolle el cable de alimentación de la estación de carga completamente para evitar daños
por el sobrecalentamiento.9. Para evitar daños en el cable de alimentación, procure no tender el cable por objetos cortantes
o puntiagudos.10. No coloque ningún objeto metálico en la estación de carga para evitar dañarla.11. Al desconectar el cable de alimentación de la estación de carga, siempre tire del conector del
cable de alimentación, nunca del propio cable.12. Una vez cargado el equipo, desconecte el conector de la toma de corriente.13. El equipo está diseñado exclusivamente para el uso doméstico, no comercial.14. El equipo no debe utilizarse en el exterior.15. No utilice el equipo después de haberse puesto loción corporal, ya que puede provocar irritaciones
cutáneas.16. Tampoco debe utilizar este equipo, si la piel está irritada por el acné u otras enfermedades17. El equipo es apto sólo para el vello humano. No debe utilizarse en el pelo artificial o en animales.18. Evite el contacto del equipo con los ojos.19. Por razones higiénicas, no comparta este equipo con otras personas.20. No utilice el equipo cerca de fuentes de calor. 21. Desconecte el equipo antes de depositarlo.22. Después de utilizar el equipo y antes de limpiarlo, desconéctelo y deje que se enfríe. 23. No intente nunca afilar las cuchillas del cabezal de corte. Si las cuchillas están desafiladas,
cambie el cabezal de corte.24. Utilice el equipo sólo para los usos previstos en el presente manual.25. Para evitar daños, el equipo no debe utilizarse con accesorios de otros fabricantes o marcas.26. No abra la carcasa del equipo bajo ningún concepto. Existe peligro por descarga eléctrica.
PARA SU SEGURIDAD
EXPLICACIÓN DE LOS SÍMBOLOS
Este símbolo advierte de posibles riesgos que pueden traer consigo lesiones personales o daños al aparato.
Questo simbolo segnala pericoli in caso di funzionamento in o vicino a contenitori pieni d‘acqua.

38
27. Compruebe regularmente si el equipo, el conector o el cable de alimentación presentan señales de desgaste o daños. Si detecta daños en el cable de alimentación u otras piezas, envíe el equipo a nuestro servicio técnico para su debida comprobación y/o reparación. Las reparaciones inapro-piadas pueden causar situaciones peligrosas para el usuario y llevan a la extinción de la garantía.
Atención: El cabezal de corte se compone de piezas afiladas y puntiagudas. ¡Para evitar lesiones, manéjelos con sumo cuidado!
Por razones de seguridad, no utilice el equipo cerca o dentro de bañeras o lavabos u otros recipientes llenos de agua. Si el equipo se utiliza en un cuarto de baño, hay que retirar el enchufe después de su uso, ya que la proximidad del agua supone un peligro incluso cuando el equipo está desconectado.
El fabricante no es responsable en caso de montaje erróneo, uso inapropiado o equivocado o después de haber sido efectuadas reparaciones por terceros no autorizados.
PUESTA EN SERVICIO
1. Retire todo el material de embalaje y los seguros de transporte. Mantenga los materiales de embalaje fuera del alcance de los niños. ¡Peligro de asfixia!
2. Coloque el cabezal de corte.3. Si desea utilizar el peine guía, colóquelo en el equipo. Sujete el equipo con una mano y coloque
el peine guía deseado con la otra. El peine debe encastrar audiblemente para estar fijamente unido al equipo.
4. Cargue las pilas completamente antes de usar el equipo por primera vez. Encontrará más detalles acerca de la carga en el siguiente capítulo „Carga“.
CARGA
1. Conecte el cable de alimentación con la estación de carga.2. Conecte el conector de red a la toma de corriente.3. Asegúrese de que el equipo esté desconectado.4. Coloque el equipo apagado en la estación de carga. Compruebe que el equipo esté insertado
correctamente, ya que de lo contrario no se cargará adecuadamente.5. Compruebe que la estación de carga esté colocada firmemente.6. Conecte la clavija jack del cable de alimentación al enchufe jack de la estación de carga.7. El piloto de control rojo del equipo se ilumina e indica que el equipo se está cargando.8. Para evitar dañar la pila, el equipo no debería cargarse durante más de 12 horas. 9. Observe que el piloto rojo no se apagará cuando se haya completado la carga del equipo.10. Según la aplicación y las características del vello podrá utilizar el equipo durante unos 45
minutos antes de tener que volver a cargarlo. La capacidad máxima de los acumuladores se alcanzará después de varias cargas.
11. Sólo vuelva a cargar el equipo cuando los acumuladores estén completamente vacíos para mantener los acumuladores a pleno rendimiento durante más tiempo.
12. En caso de que los acumuladores se hayan vaciado completamente y no haya terminado el rasurado aún, también podrá operar el equipo directamente con el cable de alimentación suministrado. Conecte el cable de alimentación al enchufe en la parte inferior del equipo y conecte el conector a la toma de corriente.
13. Atención: Nunca conecte el equipo a la red sin haber insertado los acumuladores.
CORTA-PELOS
1. Prepare el equipo tal y como se describe en los capítulos „Puesta en servicio“ y „Carga“. 2. La piel y el pelo deben estar limpios y secos antes de cortarlo. Asimismo debe estar peinado para
poder reconocer la dirección de crecimiento.3. Compruebe si está colocado el peine guía deseado.

39
4. Mediante la ruedecilla de ajuste (2) podrá ajustar la longitud del corte deseada en siete posiciones.
Pos. Longitud de corte deseada en mm
Peine guía pequeño Peine guía grande
1 18 322 15 29
3 12 26
4 9 235 6 20
5. Empiece con el corte más largo y realice un corte de prueba en una parta no visible del cuerpo, si fuera necesario.
6. Desconecte el equipo pulsando la tecla EIN/AUS [CONEXIÓN/DESCONEXIÓN].7. Coloque el equipo sobre la piel y muévalo, siempre que sea posible, en sentido contrario al
crecimiento del pelo.8. Corte el pelo a la longitud deseada. Con el pelo muy largo recomendamos cortarlo previamente
con las tijeras. Para tal fin se incluyen unas tijeras y un peine.9. Al cortar el pelo interrumpa el corte de vez en cuando para comprobar el resultado. Así evita un
corte excesivamente corto.10. Para entresacar pelo, utilice la función de entresacado. Mueva el interruptor corredizo (3) hacia
la derecha. Utilice el equipo como de costumbre y el pelo simplemente se entresacará. Para volver a desactivar la función de entresacado, vuelva a mover el interruptor corredizo hacia la izquierda.
11. En el caso de que hubieran quedado atrapados pelos en el cabezal de corte, desconecte el equipo y limpie el cabezal de corte como se describe en el capítulo „Limpieza y mantenimiento“.
12. Una vez finalizad o el corte, desconecte el equipo mediante el interruptor principal.13. Limpie el equipo después de cada utilización.
UTILIZZO – TRIMMER PER BARBA
Para obtener los mejores resultados, utilice el equipo siempre en el sentido contrario al crecimiento del vello. El rasurado es más fácil tensando la piel con la mano libre. Después del rasurado recomendamos tratar las partes depiladas con una loción corporal suave para evitar irritaciones de la piel. Si tiene piel sensible o depila partes sensibles, recomendamos pasar el equipo sólo una vez para evitar irritaciones de la piel.1. Prepare el equipo tal y como se describe en los capítulos „Puesta en servicio“ y „Carga“. 2. Retire el peine guía del equipo tirando del mismo.3. La piel debe estar limpia y seca antes del rasurado.4. Empiece con el corte más largo y realice un corte de prueba en una parta no visible del cuerpo,
si fuera necesario.5. Desconecte el equipo pulsando la tecla EIN/AUS [CONEXIÓN/DESCONEXIÓN].6. Coloque el equipo sobre la piel y muévalo, siempre que sea posible, en sentido contrario al
crecimiento del pelo. No ejerza presión con el equipo.Piernas: afeite desde los tobillos hacia arriba trabajando siempre en el sentido contrario al crecimiento del vello.Brazos: conseguirá los mejores resultados si afeita los brazos desde el exterior hacia el interior.Axilas: estire el brazo hacia arriba para tensar la parte a afeitar. Afeite la parte correspondiente realizando un movimiento de vaivén.Zonas íntimas: podrá precortar el vello largo utilizando el peine guía. Coloque el accesorio en el equipo. Tense la parte a depilar y pase el equipo lentamente por la piel en el sentido contrario al crecimiento del vello.Contornos de barba: defina el contorno de barba deseado.
7. Procure que el cabezal de corte siempre esté en contacto con la piel. La depilación es más fácil tensando la piel con la mano libre.

40
Atención: El cabezal de corte se compone de piezas afiladas y puntiagudas. ¡Para evitar lesiones, manéjelos con sumo cuidado!Desconecte el equipo mediante el interruptor principal y desconecte el conector de la toma de corriente.
1. No sumerja el equipo en agua u otros líquidos para limpiarlo. Tenga cuidado para que no se filtre agua en la carcasa del equipo.
2. Nunca limpie el equipo ni los accesorios en el lavavajillas.3. No utilice estropajos, agentes limpiadores abrasivos, lana de acero, objetos metálicos,
desinfectantes o agentes limpiadores calientes, ya que pueden dañar el equipo.4. Limpie la carcasa del equipo con un paño suave y humedecido. Limpiar el cabezal de corte:5. Desconecte el equipo mediante el interruptor principal y desconecte el conector de la toma de
corriente. Retire el peine guía del equipo. Retire el cabezal de corte presionándolo suavemente hacia atrás.Limpie el cabezal de corte y el interior del equipo con el pincel suministrado.No golpee el cabezal de corte para no dañarlo.Ahora podrá limpiar el cabezal de corte en agua tibia. Sáquelo con un paño suave no hilachoso.Para eliminar restos de humedad recomendamos secar el cabezal de corte adicionalmente con un secador de pelo (a temperatura media).Trate el cabezal de corte con una gota de aceite de mantenimiento, retirando los excesos de aceite con un paño no hilachoso. Vuelva a colocar el cabezal de corte en el equipo insertando las pestañas de la parte inferior del cabezal de corte en el interior del equipo y fijando el cabezal de corte presionándolo hacia arriba. Asegúrese de que el cabezal de corte encastre correctamente antes de volver a utilizar el equipo.
6. Proteja el equipo contra el polvo y limpie el cabezal de corte regularmente utilizando un pincel suave. Para ello, separe el cabezal de corte del equipo y elimine el polvo y los pelos con el pincel. Vuelva a colocar el cabezal de corte.
7. Según la frecuencia con la que utiliza el equipo, deberá reemplazar el cabezal de corte regularmente, pero como máximo cada dos años. Obtendrá los repuestos en las tiendas especializadas o directamente en nuestro servicio técnico de postventa. Encontrará el formulario de pedido correspondiente en la página 51.
LIMPIEZA Y CUIDADO
8. En el caso de que hubieran quedado atrapados pelos en el cabezal de corte, desconecte el equipo y limpie el cabezal de corte como se describe en el capítulo „Limpieza y mantenimiento“.
9. Una vez finalizad o el corte, desconecte el equipo mediante el interruptor principal.10. Limpie el equipo después de cada utilización.11. No utilice productos de aseo que contienen alcohol inmediatamente después del depilado para
evitar irritaciones cutáneas. No obstante, podrá utilizar lociones o cremas suaves.

41
Nuestros aparatos se fabrican con un alto nivel de calidad por un largo período de uso. El mantenimiento regular y las reparaciones de tipo técnico a través de nuestro servicio al cliente pueden prolongar la dura-ción del aparato. Cuando un aparato está defectuoso y ya no puede repararse, por favor considere en la dis-posición final los siguientes puntos: Este producto no puede ser eliminado junto a la basura domiciliaria. Usted debe entregar este producto a un lugar oficial para el reciclaje de aparatos eléctricos o electrónicos. Mediante la clasificación por separado y el reciclaje de productos residuales, Usted contribuye a proteger los recursos naturales y asegura que el producto sea eliminado de forma salubre y acorde con el medio ambiente.
CONDICIONES DE GARANTIA
DISPOSICIÓN/PROTECCIÓN DEL MEDIO AMBIENTE
Otorgamos garantía de 24 meses sobre nuestros aparatos a partir de la fecha de compra por daños que durante su uso com-prabadamente tengan que ver con errores de fábrica. Dentro del período de garantía, solucionamos errores de material y de fabricación a consideración nuestra mediante reparación o cambio. Nuestros servicios de garantía son válidos únicamente para los aparatos que han sido vendidos en Alemania y Austria. Para todos los demás casos diríjase por favor al importador correspondiente. Aquellos aparatos que se presentan para eliminar errores, por favor enviarlos junto a una copia del compro-bante de compra extendido a máquina, del cual debe desprenderse la fecha de compra, así como una breve descripción de las deficiencias, apropiadamente embalado y con los sellos correspondientes a nuestro servicio al cliente. En caso de garantía, los gastos de envío serán restituidos al cliente. Aquellos daños causados por desgaste están excluidos de la garantía, así como manipulación incorrecta, e incumplimiento de las condiciones de mantenimiento y cuidado. El de-recho a garantía expira si las reparaciones o mantenimiento son realizadas por terceros. Todo reclamo del consumidor final ante el vendedor, comerciante no se ve afectado por esta garantía.
Este equipo contiene acumuladores y no debe desecharse con la basura doméstica después de finalizar su ciclo vital. Si tiene preguntas acerca de la eliminación correcta de los acumuladores o de equipos alimentados por acumuladores, consulte con la empresa encargada de la eliminación de residuos de su región. El equipo dispone de unos acumuladores integrados en el mango que contiene níquel e hidruro metálico.Encontrará las siguientes indicaciones en las baterías y acumuladores que contienen sustancias tóxicas: Pb = contiene plomo, Cd = contiene cadmio, Hg = contiene mercurio.
NÁVOD K OBSLUZE MODELU 87813
TECHNICKÉ ÚDAJE
Výkon: 3 W, 100–240 V~, 50/60 Hz, 800 mARozměry: Cca. 17,5 x 4,8 x 4,5 cmHmotnost: Cca. 0,16 kg (vč. baterie, bez příslušenství)Délka kabelu: Cca. 1,8 mDílka nabájení Baterie: cca 8 hodinBaterie 2 x 1,2 V AA, NiMHJedno nabití bateriestačí na Cca. 45 minut provozuStupeň ochrany: II
Vybavení: Funkce seřezávání /efilování/, 5 možných délek sestřihu, spínač ZAP/VYP se světelnou kontrolkou nabíjení
Příslušenství: 2 nástrčné hřebeny 6–32 mm, čistící kartáček, olej pro údržbu, hřeben, nůžky, nabíjecí stanice, návod k obsluze
Je vyhrazeno právo na omyly a změny vybavení, techniky, barev a designu.

42
Následující pokyny si přečtěte a uložte. 1. Přístroj může být používán dětmi od 8 let a osobami se sníženými fyzickými, smyslovými nebo
duševními schopnostmi nebo s nedostatkem zkušeností a/nebo nedostatkem znalostí, pokud jsou pod dohledem nebo pokud byly poučeny o bezpečném používání přístroje a porozuměly z něj vyplývajícím rizikům. Přístroj není hračka. Čištění a údržbu přístroje smí provádět děti pouze pod dohledem.
2. Děti do 3 let by se neměly k přístroji přibližovat nebo být pod trvalým dohledem.1. Děti mají být pod dohledem, aby bylo zajištěno, že si s přístrojem nehrají. 2. Nabíjecí stanici zapojte pouze na střídavý proud dle typového štítku.3. Tento přístroj nesmí být provozován s externími spínacími hodinami nebo systémem dálkového
ovládání. 4. Přístroj nesmí být namáčen do vody či jiné kapaliny. Přístroj chraňte před vlhkostí.5. Z bezpečnostních důvodů nepoužívejte přístroj, je-li zapojen do sítě, v blízkosti naplněné vany
nebo umyvadla popř. jiných vodou naplněných nádob. 6. Přístroj chraňte před vlhkostí, pokud se nachází v nabíjecí stanici. Hrozí nebezpečí zasažení
proudem!7. Dokud je zástrčka v zásuvce, je nabíjecí stanice poblíž vody nebezpečná.8. Přívod nabíjecí stanice vždy roztáhněte po celé délce, abyste předešli poškozením přehřátím.9. Dbejte na to, aby nebyla přívodní šňůra položena přes ostré či špičaté předměty, abyste zamezili
poškození přívodu.10. Na nabíjecí stanici nepokládejte kovové předměty, abyste zabránili jejímu poškození.11. Přívod nabíjecí stanice vytahujte za zásuvky vždy za zástrčku, nikdy netahejte za kabel.12. Je-li přístroj nabitý, vytáhněte zástrčku přívodní šňůry ze zásuvky.13. Přístroj je určen výhradně pro vlastní použití v domácnostech, není však určen k živnostenským
účelům.14. Přístroj se nesmí používat venku.15. Přístroj nepoužívejte na nakrémovanou pokožku, protože by mohlo dojít k jejímu podráždění.16. Přístroj rovněž nesmíte používat, je-li pokožka narušena akné nebo jiným onemocněním.17. Přístroj je urče pouze na chloupky. Nepou-žívejte jej na umělé vlasy či zvířecí srst.18. Dávejte pozor, aby se přístroj nedostal do blízkosti očí.19. Z hygienických důvodů by přístroj měla používat jen jedna osoba.20. Přístroj neprovozujte v blízkosti zdrojů tepla. 21. Než přístroj odložíte, vypněte jej.22. Po použití a před čištěním přístroj prosím vždy vypněte a nechte vychladnout. 23. Nikdy se sami nepokoušejte brousit nože holící hlavy. Je-li holící hlava tupá, pak ji vyměňte.24. Přístroj používejte jen k účelům popsaným v návodu.25. Přístroj nesmí být používán s příslušenstvím jiných značek, aby se předešlo jeho poškození.26. V žádném případě neotevírejte kryt přístroje. Hrozí nebezpečí zasažení proudem.27. Pravidelně u přístroje, zástrčky a přívodu kontrolujte opotřebení a poškození. Při poškození
přívodního kabelu nebo jiných součástí zašlete prosím přístroj ke kontrole a opravě našemu zákaznickému servisu. Neodborné opravy mohou vést ke vzniku závažných nebezpečí pro uživatele a ke ztrátě záruky.
PRO VAŠI BEZPEČNOST
VYSVĚTLENÍ SYMBOLŮ
Tento symbol označuje případná ohrožení, která mohou způsobit poranění nebo poškození přístroje.
Tento symbol upozorňuje na nebezpečí při provozu nebo v blízkosti vodou naplněných nádob.

43
Pozor: Holící hlava se skládá z ostrých, špičatých částí. Abyste zabránili poraněním, zacházejte s nimi opatrně!
Z bezpečnostních důvodů nepoužívejte přístroj v blízkosti naplněné vany nebo umyvadla popř. jiných vodou napl-něných nádob. Když se přístroj používá v koupelně, je po použití nutné vytáhnout zástrčku, protože blízkost vody představuje riziko i v případě, že přístroj je vypnutý.
Výrobce nepřebírá žádné ručení při chybné montáži, neodborném nebo chybném použití nebo po provedení opravy neautorizovanými třetími osobami.
PŘED POUŽITÍM
NABÍJENÍ
1. Odstraňte všechen obalový materiál popř. přepravní zajištění. Kvůli nebezpečí udušení udržujte děti v bezpečné vzdálenosti od obalových materiálů.
2. Nasaďte stříhací hlavu.3. Chcete-li použít nástrčný hřeben, nasaďte jej na přístroj. Jednou rukou přístroj pevně přidržte
a druhou rukou nasaďte požadovaný nástrčný hřeben. Hřeben musí slyšitelně zaskočit, až poté hřeben na přístroji správně drží.
4. Před prvním použitím nabijte kompletně baterii přístroje. Další informace k nabíjení si prosím pročtěte v následující kapitola „Nabíjení“.
1. Propojte přívodní šňůru s nabíjecí stanicí.2. Zastrčte napojení přívodu do sítě do zásuvky. 3. Ujistěte se, že je přístroj vypnutý.4. Postavte vypnutý přístroj do nabíjecí stanice. Dbejte na to, aby byl přístroj správně nasazen,
protože jinak by nemohl být správně nabit.5. Dejte pozor na to, aby nabíjecí stanice stála stabilně.6. Propojte malý konektor přívodu se zásuvkou na nabíjecí stanici.7. Kontrolka na přístroji se rozsvítí a indikuje, že přístroj je nabíjen. 8. Abyste předešli škodám na baterii, neměli byste přístroj nabíjet déle než 12 hodin. 9. Zohledněte prosím, že červená kontrolka zhasne, je-li přístroj nabit.10. V závislosti na druhu použití a typu chloupků můžete přístroj používat cca 45 minut, než je třeba
jej znovu nabít. Maximální kapacita baterie je dosažena až po několika dobitích. 11. Přístroj znovu nabíjejte až tehdy, je-li baterie zcela vybitá. Tak zůstane déle zachována plná
výkonnost baterie.12. Přístroj můžete používat přímo s dodávaným přívodním vedením, pokud jsou baterie zcela vybité,
ale vy potřebujete dokončit holení. Zastrčte přívod do zdířky ve spodní straně přístroje, a pak zastrčte síťové připojení do zásuvky.
13. Pozor: Přístroj nikdy nezapojujte do sítě, pokud není vložena baterie!
OBSLUHA – ZASTŘIHÁVAČ VLASŮ
1. Přístroj připravte, jak je popsáno v kapitole „Před prvním použitím“ a v kapitole „Nabíj-ení“. 2. Dbejte prosím na to, aby byla pokožka i vlasy čisté a suché, než se stříháním začnete. Kromě toho
by vlasy měly být pročesané, aby bylo možno rozpoznat směr jejich růstu.3. Zkontrolujte, zda je nasazen požadovaný nástrčný nůž.4. Přes stavěcí kolečko (2) může být nastavena délka vlasů v sedmi stupních.

44
OBSLUHA – ZASTŘIHÁVAČ CHLOUPKŮ
Pro dosažení optimálního výsledku postupujte prosím proti směru růstu chloupků. Pokud volnou rukou napnete kůži odpovídajícím způsobem, povede se vám holení snadněji. Po holení doporučujeme nakrémovat oholené partie jemným tělovým mlékem pro zamezení podráždění pokožky. Máte-li velmi citlivou pokožku, nebo depilujete citlivé tělesné partie, doporučujeme projet přístrojem přes tato místa jen jednou, abyste zamezili podráždění pokožky.1. Přístroj připravte, jak je popsáno v kapitole „Před prvním použitím“ a v kapitole „Nabíjení“. 2. Nástrčný hřeben sundejte z přístroje tím, že jej přímo stáhnete z přístroje.3. Dbejte prosím na to, aby byla pokožka čistá a suchá, než s holením začnete.4. Začněte s nejdelším nastavením a proveďte případně zkušební střih na skrytém místě. 5. Přístroj zapněte tlačítkem „ZAP/VYP“.6. Přístroj s nástrčným hřebenem přiložte k pokožce, postupujte přitom dle možností vždy proti
růstu chloupků. Na přístroj netlačte.7. Nohy: Holte počínaje od kotníků směrem proti růstu chloupků.8. Paže: Zde se holení nejlépe daří začínáte-li na vnější straně paže a postupujete směrem dovnitř.9. Podpaží: Ruku držte tak vysoko, jak jen to jde, abyste holené partie pokožky co nejvíce natáhli.
Požadované místo oholte pohybem tam a zpět.10. Intimní oblasti: Velmi dlouhé chloupky můžete předstříhat nástrčným hřebenem. Za tímto
účelem nasaďte na přístroj nástrčný hřeben. Napněte případně partie pokožky určené k holení a jeďte přístrojem po pokožce pomalu proti směru chloupků.
11. Kontury vousů: Opatrně vousy zkraťte do požadované kontury.12. Dbejte na to, aby měla holící hlava stálý kontakt s pokožkou. Pokud volnou rukou napnete kůži
na holených místech, je holení snadnější.13. Pokud vlasy ulpívají ve střihací hlavě, přístroj prosím vypněte a hlavu vyčistěte, jak je popsáno v
kapitole „Čištění a údržba“.14. Pokud jste se stříháním hotovi, přístroj vypněte pomocí tlačítka ZAP/VYP.15. Přístroj vyčistěte po každém použití.16. Zohledněte prosím, abyste bezprostředně po holení nenanášeli na pokožku prostředky obsahující
alkohol, protože ten by mohl vést k podráždění pokožky. Bezalkoholovou jemnou pleťovou vodu nebo krém můžete samozřejmě použít bezprostředně po holení.
Stupeň Požadovaná délka vlasů v mm
Malý nástrčný hřeben Velký nástrčný hřeben
1 18 322 15 29
3 12 26
4 9 235 6 20
5. Začněte s nejdelším nastavením a proveďte případně zkušební střih na skrytém místě. 6. Přístroj zapněte tlačítkem „ZAP/VYP“.7. Přístroj s nástrčným hřebenem přiložte k pokožce, postupujte přitom dle možností vždy proti
růstu chloupků.8. Vlasy zkraťte na požadovanou délku. Jsou-li vlasy příliš dlouhé, doporučuje se zkrátit je předem
nůžkami. Za tímto účelem jsou součástí dodávky nůžky a hřeben.9. Při zkracování vlasů vždy přístroj na chvíli zastavte a zkontrolujte výsledek. Tak zabráníte
nadměrnému zkrácení vlasů.10. Chcete-li vlasy sestřihat, můžete využít funkci seřezávání. Posuňte spínač (3) na přístroji doprava.
Nyní můžete přístroj používat tak, jak jste zvyklí, nyní jsou vlasy při stříhání seřezávány. Abyste funkci opět vypnuli, posuňte spínač opět doleva.
11. Pokud vlasy ulpívají ve střihací hlavě, přístroj prosím vypněte a hlavu vyčistěte, jak je popsáno v kapitole „Čištění a údržba“.
12. Pokud jste se stříháním hotovi, přístroj vypněte pomocí tlačítka ZAP/VYP.13. Přístroj vyčistěte po každém použití.

45
ČIŠTĚNÍ A PÉČE
Výrobce nepřebírá žádné ručení při chybné montáži, neodborném nebo chybném použití nebo po provedení opravy neautorizovanými třetími osobami.Přístroj vypněte pomocí spínače ZAP/VYP a zástrčku příp. vytáhněte ze zásuvky.
1. V žádném případě neponořujte přístroj do vody či jiné kapaliny. Dejte pozor, aby voda nevnikla dovnitř do spotřebiče.
2. Přístroj a jeho příslušenství nikdy nemyjte v myčce nádobí.3. Nepoužívejte žádné houby s možností poškrábání, abrazivní prostředky, ocelovou vatu, kovové
předměty, desinfekční prost-ředky nebo horké čistící prostředky , protože tyto mohou vést k poškození.
4. Přístroj otřete měkkým navlhčeným hadříkem. Čištění střihací hlavy:5. Přístroj vypněte a zástrčku příp. vytáhněte ze zásuvky. Z přístroje sejměte nástrčný hřeben. 6. Odeberte střihací hlavu tím, že ji opatrně stisknete směrem dozadu.7. Střihací hlavu a vnitřní prostor přístroje vyčistěte společně dodaným kartáčkem.8. Na střihací hlavu neklepejte, protože by mohlo dojít k jejímu poškození.9. Střihací hlavu nyní můžete opláchnout pod středně teplou vodou. Následně ji důkladně osušte
měkkou textilií nepouštějící vlákna .10. Pro odstranění zbytkové vlhkosti doporučujeme střihací hlavu vysušit pomocí fénu (střední
teplotní stupeň).11. Nyní kápněte na střihací hlavu kapku oleje pro údržbu a zbytky oleje odstraňte hadříkem
nepouštějícím vlákna. 12. Nyní střihací hlavu opět nasaďte na přístroj tak, že jazýčky dole na střihací hlavě nasadíte dovnitř
přístroje a střihací hlavu zatlačíte nahoru. Dbejte na to, aby střihací hlava správně zaskočila ještě předtím, než přístroj znova použijete.
13. Přístroj chraňte před prachem a pravidelně čistěte střihací hlavu měkkým štětcem. Za tímto účelem opatrně sejměte střihací hlavu z přístroje a pomocí štětce odstraňte chloupky a prach. Následně střihací hlavu opět nasaďte.
14. Střihací hlava musí být v závislosti na tom, jak často je přístroj používán, pravidelně měněna, nejpozději však po dvou letech. Náhradní díly obdržíte ve specializovaných obchodech nebo přímo u našeho zákaznického servisu. Odpovídající formulář najdete na straně 51.
ZÁRUČNÍ PODMÍNKY
Na naše přístroje poskytujeme záruku v trvání 24 měsíců od data koupě výrobku, záruka se vztahuje na poškození, která prokazatelne vznikla při správném použití v důsledku výrobních vad. Po dobu záruky budeme odstraňovat materiální i výrobní vady opravou nebo výměnou podle našeho uvážení. Poskytnutí záruky výhradně platí pro zařízení prodány v Německu i Rak-ousku. V jiných zemích se obrat’te prosím na kompetentní dovozce. Přístroje, na které bylo uplatňováno odstranění vad, zašlete prosím s mechanicky vyhotovenou kopií nákupního dokladu, ze kterého musí být bezpodmínečně patrný datum nákupu i s popisem vad, přístroj musí být bezpečně zabalen a nafrankován na náš záruční servis. V připadě opravněné záruky jsou ku-pujícím vraceny poštovní poplatky. Tato záruka se nevztahuje na poškození způsobená opotřebením, nesprávným zacházením a nedodržováním návodů k údržbě a obsluze. Záruční doba zaniká, když opravy nebo manipulace s přístrojem byly provedeny třetí osobou. Eventuální nároky zákazníka vůči prodejci/obchodníku nejsou touhle zárukou omezeny.
LIKVIDACE / OCHRANA ŽIVOTNÉHO PROSTŘEDÍ
Naše vyrobené přístroje mají vysoce kvalitní standard pro zajišt’ění jejich dlouhé životnosti. Pravidel-né údržby i opravy odborně provedeny naším prodejním servisem mohou mít vliv na prodloužení provozní životnosti přístroje. Když je přístroj vadný a už ho nelze opravit, neopomeňte prosím:
Toto zařízení nepatří do běžného domovního odpadku, ale musí být předáno do autorizované sběrny pro recyklování elektrických nebo elektronických zařízení.
Separátní sběr a recyklování odpadních produktů umožňuje šetření přírodních zdrojů a zajišt’uje, aby byly odpady likvidovány způsobem, který je pro zdraví a kologii přijatelný.

46
Tento přístroj obsahuje baterie. Proto se přístroj na konci své životnosti nesmí likvidovat spolu s domovním odpadem. V případě otázek ke správné likvidaci baterií popř. přístrojů obsahujících baterie se obraťte na příslušnou instituci zabývající se touto likvidací. Přístroj obsahuje baterii zabudovanou v rukojeti. Baterie obsahuje nikl-metal hybrid.Na bateriích obsahujících škodlivé látky najdete toto označení: Pb = baterie obsahuje olovo, Cd = baterie obsahuje kadmium, Hg = baterie obsahuje rtuť.
INSTRUKCJA OBSŁUGI MODEL 87813
DANE TECHNICZNE
Moc: 3 W, 100–240 V~, 50/60 Hz, 800 mAWymiary: Ok. 17,5 x 4,8 x 4,5 cmCiężar: Ok. 0,16 kg (łącznie z akumulatorem, bez akcesoriów)Długość kabla: Ok. 1,8 mCzas ładowania: Akumulator: ok. 8 godzinAkumulator: 2 x 1,2 V AA, NiMHJeden cykl ładowaniawystarcza na: Ok. 45 minut użytkowaniaStopień ochrony: II
Wyposażenie: Urządzenie bezprzewodowe z akumulatorem, 5 poziomów długości włosów, przycisk WŁ./WYŁ. ze wskaźnikiem stanu naładowania
Akcesoria: 2 nasadki grzebieniowe 6 –32 mm, szczoteczka do czyszczenia, olej smarujący, grzebień, nożyczki, ładowarka, instrukcja obsługi
Zmiany i błędy w opisie wyposażenia, technice, kolorach i konstrukcji są zastrzeżone.
Prosimy przeczytać poniższe instrukcje i zachować je. 1. Urządzenie może być używane przez dzieci w wieku powyżej 8 lat lub osoby o ograniczonej
sprawności fizycznej, sensorycznej czy umysłowej lub nie posiadające doświadczenia i/lub wiedzy, jeśli są one nadzorowane lub zostały przeszkolone w zakresie bezpiecznego użytkowania urządzenia i zrozumiały wynikające z tego niebezpieczeństwa. Urządzenie nie jest zabawką. Dzieci mogą czyścić i konserwować urządzenie tylko pod nadzorem.
2. Do urządzenia nie dopuszczać dzieci w wieku poniżej 3 lat lub nadzorować je przez cały czas.3. Nie dopuścić, aby dzieci bawiły się urządzeniem. 4. Podłączać ładowarkę tylko do źródła prądu przemiennego o wartości podanej na tabliczce
znamionowej.5. To urządzenie nie nadaje się do użytku w połączeniu z zegarem sterującym lub systemem
zdalnego sterowania. 6. Nie zanurzać urządzenia w wodzie lub innej cieczy. Chronić urządzenie przed wilgocią.
DLA BEZPIECZEŃSTWA UŻYTKOWNIKA
OBJAŚNIENIE SYMBOLI
Symbol ten oznacza ewentualne niebezpieczeństwa, które mogą prowadzić do obrażeń lub uszkodzenia urządzenia.
Symbol ten wskazuje na niebezpieczeństwo podczas pracy w pobliżu zbiorników napełnionych wodą.

47
7. Ze względów bezpieczeństwa nigdy nie używać urządzenia podłączonego do sieci elektrycznej w pobliżu lub w wannie napełnionej wodą, umywalce lub innych naczyniach napełnionych wodą.
8. Chronić urządzenie przed wilgocią, gdy znajduje się ono w ładowarce. Istnieje niebezpieczeństwo porażenia prądem!
9. Gdy wtyczka jest podłączona do gniazdka, ładowarka znajdująca się w pobliżu wody stanowi potencjalne zagrożenie.
10. Zawsze wyciągać przewód doprowadzający ładowarki na całej długości, aby uniknąć szkód wskutek przegrzania.
11. Zwrócić uwagę na to, aby przewód doprowadzający nie był położony na ostrych lub spiczastych przedmiotach, aby uniknąć uszkodzenia przewodu.
12. Nie kłaść na ładowarkę żadnych metalowych przedmiotów, aby uniknąć uszkodzenia ładowarki.13. Podczas wyciągania wtyczki z gniazdka ciągnąć tylko za wtyczkę przewodu doprowadzającego
ładowarki, a nie za kabel.14. Gdy urządzenie jest naładowane, wyciągnąć wtyczkę przewodu doprowadzającego z gniazdka.15. Urządzenie jest przeznaczone wyłącznie do użytku domowego, a nie komercyjnego.16. Nie używać urządzenia na wolnym powietrzu.17. Nie używać urządzenia na skórze posmarowanej kremem, gdyż może dojść do podrażnienia skóry.18. Nie używać urządzenia na skórze z trądzikiem lub na podrażnionej skórze.19. To urządzenie przeznaczone jest wyłącznie do przycinania ludzkich włosów. Nie używać urządzenia
do przycinania sztucznych włosów lub włosów zwierzęcego pochodzenia.20. Nie używać urządzenia w pobliżu oczu.21. Ze względów higienicznych urządzenie powinno być używane tylko przez jedną osobę.22. Nie używać urządzenia w pobliżu źródeł ciepła. 23. Wyłączyć urządzenie przed jego odłożeniem na bok.24. Po zakończeniu używania lub przed rozpoczęciem czyszczenia wyłączyć urządzenie i pozostawić
do schłodzenia. 25. Nigdy nie ostrzyć samodzielnie noży w głowicy golącej. Gdy głowica goląca stępi się, wymienić
ją na nową.26. Używać urządzenia wyłącznie do celów opisanych w tej instrukcji obsługi.27. Nie używać urządzenia w połączeniu z akcesoriami innych producentów lub innych marek.28. Nie otwierać obudowy urządzenia. Istnieje niebezpieczeństwo porażenia prądem.29. Regularnie sprawdzać urządzenie, wtyczkę i przewód doprowadzający pod kątem oznak zużycia lub
uszkodzeń. W przypadku uszkodzenia kabla instalacyjnego lub innych części odesłać urządzenie w celu sprawdzenia i/lub naprawy do naszego serwisu klienta. Nieprawidłowo przeprowadzone naprawy mogą prowadzić do powstania znacznych zagrożeń dla użytkownika i prowadzą do utraty gwarancji.
Uwaga: Głowica goląca zbudowana jest z ostrych, spiczastych części. Aby uniknąć obrażeń, należy się z nią ostrożnie obchodzić!
Ze względów bezpieczeństwa nigdy nie używać urządzenia w pobliżu lub w wannie napełnionej wodą, umywalce lub innych naczyniach napełnionych wodą. Gdy urządzenie używana jest w łazience, po użyciu należy wyjąć wtyczkę z gniazdka, gdyż bliskość wody stwarza niebezpieczeństwo także wtedy, gdy urządzenie jest wyłączona.
Producent nie przejmuje odpowiedzialności za nieodpowiednie bądź wadliwe użytkowanie lub po przeprowadzeniu napraw poprzez nieautoryzowany serwis bądź niekompetentne osoby.
PRZED UŻYCIEM
1. Usunąć wszystkie materiały opakowaniowe i zabezpieczenia transportowe. Przechowywać materiały opakowaniowe z dala od dzieci ze względu na niebezpieczeństwo uduszenia.
2. Włożyć głowicę golącą.3. Jeżeli używana ma być nasadka grzebieniowa, nałożyć ją na urządzenie (patrz rysunek).
Przytrzymać urządzenie jedną ręką, a drugą nałożyć wybraną nasadkę grzebieniową. Nasadka musi zatrzasnąć się w słyszalny sposób, dopiero wtedy jest ona osadzona w prawidłowy sposób na urządzeniu.
4. Przed pierwszym użyciem naładować całkowicie akumulatory urządzenia. Dalsze wskazówki odnośnie ładowania patrz rozdział „Ładowanie“.

48
ŁADOWANIE
1. Połączyć przewód doprowadzający z ładowarką.2. Podłączyć zasilacz przewodu doprowad-zającego do gniazdka sieciowego.3. Upewnić się, że urządzenie jest wyłączone.4. Włożyć wyłączone urządzenie do ładowarki. Zwrócić uwagę na prawidłowe włożenie urządzenia,
inaczej nie zostanie ono prawidłowo naładowane.5. Zwrócić uwagę na stabilne ustawienie ładowarki.6. Podłączyć wtyk jack przewodu doprowadzającego do gniazdka w ładowarce.7. Czerwona kontrolka na urządzeniu zapala się, sygnalizując ładowanie urządzenia.8. Aby uniknąć uszkodzenia akumulatora, nie należy ładować urządzenia przez dłużej niż 12 godzin. 9. Zwrócić uwagę na to, że czerwona kontrolka nie gaśnie w chwili, gdy urządzenie jest całkowicie
naładowane.10. W zależności od użycia i właściwości włosów urządzenie może być używane przez ok. 45 minut,
zanim konieczne będzie jego ponowne naładowanie. Maksymalna pojemność akumulatora osiągnięta zostaje dopiero po kilku cyklach ładowania.
11. Ładować urządzenie ponownie dopiero wtedy, gdy akumulator jest całkowicie wyczerpany. W ten sposób zachowana zostaje na dłużej pełna wydajność akumulatora.
12. Urządzenie może być używane w połączeniu z dostarczonym przewodem doprowadzającym, gdy akumulator jest wyczerpany, ale golenie nie zostało jeszcze zakończone. Włożyć przewód doprowadzający do gniazdka w dolnej części urządzenia, a potem włożyć zasilacz do gniazdka sieciowego.
13. Uwaga: Nigdy nie podłączać urządzenia do prądu bez włożonego akumulatora!
OBSŁUGA - STRZYŻARKA DO WŁOSÓW
1. Przygotować urządzenie jak w sposób opisany w rozdziałach „Przed użyciem“ i „Ładowanie“. 2. Przed rozpoczęciem strzyżenia zwrócić uwagę na to, aby skóra i włosy były czyste i suche.
Uczesać włosy, aby możliwe było rozpoznanie kierunku wzrostu włosów.3. Sprawdzić, czy nałożona jest odpowiednia nasadka grzebieniowa.4. Za pomocą kółka nastawczego (2) możliwe jest ustawienie 7 poziomów długości włosów.
Poziom Żądana długość włosów w mm
Mała nasadka grzebieniowa Duża nasadka grzebieniowa1 18 322 15 293 12 264 9 235 6 20
5. Rozpocząć strzyżenie w najdłuższym ustawieniu i ewentualnie wykonać strzyżenie próbne niewidocznej partii włosów.
6. Włączyć urządzenie przyciskiem WŁ./WYŁ.7. Przystawić urządzenie z nasadką grzebie-niową do skóry, przesuwając je w miarę możliwości
zawsze w kierunku przeciwnym do kierunku wzrostu włosów.8. Skrócić włosy na żądaną długość. Gdy włosy są bardzo długie, zaleca się ich uprzednie przycięcie
nożyczkami. W tym celu w zestawie znajdują się nożyczki i grzebień.9. Podczas strzyżenia zawsze na chwilę przerwać strzyżenie i sprawdzić wynik. W ten sposób można
uniknąć obcięcia zbyt dużej ilości włosów.10. Do przerzedzania włosów służy funkcja przerzedzania. Przesunąć przełącznik (3) na urządzeniu w
prawa stronę. Używać urządzenia w normalny sposób, włosy są podczas strzyżenia przerzedzane. Aby wyłączyć funkcję przerzedzania, przesunąć przełącznik z powrotem w lewa stronę.
11. Jeżeli włosy zaplączą się w głowicy golącej, wyłączyć urządzenie i wyczyścić głowicę golącą w sposób opisany w rozdziale „Czyszczenie i pielęgnacja“.
12. Po zakończeniu strzyżenia wyłączyć urządzenie naciskając przycisk WŁ./WYŁ.13. Czyścić urządzenie po każdym użyciu.

49
OBSŁUGA - STRZYŻARKA DO WŁOSÓW
Włosy należy zawsze golić w kierunku przeciwnym do kierunku wzrostu włosów, aby uzyskać optymalny wynik golenia. Napięcie golonej partii skóry wolną ręką ułatwia golenie. Po zakończeniu golenia posmarować skórę łagodnym balsamem do ciała, aby uniknąć podrażnienia skóry. W przypadku wrażliwej skóry lub podczas golenia wrażliwych części ciała zalecamy przesuwać urządzenie po skórze tylko jeden raz, aby uniknąć podrażnienia skóry.1. Przygotować urządzenie jak w sposób opisany w rozdziałach „Przed użyciem“ i „Ładowanie“. 2. Zdjąć z urządzenia nasadkę grzebieniową.3. Przed rozpoczęciem golenia zwrócić uwagę na to, aby skóra była czysta i sucha.4. Rozpocząć strzyżenie w najdłuższym usta-wieniu i ewentualnie wykonać strzyżenie próbne
niewidocznej partii włosów.5. Włączyć urządzenie przyciskiem WŁ./WYŁ.6. Przystawić urządzenie do skóry, przesuwając je w miarę możliwości zawsze w kierunku przeciwnym
do kierunku wzrostu włosów. Nie wywierać nacisku na urządzenie.Nogi: Rozpocząć golenie od kostek do góry w kierunku przeciwnym do kierunku wzrostu włosów.Ramiona: Rozpocząć golenie od zewnętrznej strony ramion do wewnątrz.Pachy: Unieść ramię jak najbardziej do góry, aby napiąć skórę pod pachami. Golić skórę pod pachami ruchami tam i z powrotem.Obszar intymny: Bardzo długie włosy można najpierw skrócić nasadką grzebieniową. W tym celu nałożyć na urządzenie nasadkę grzebieniową. Napiąć ewentualnie partię skóry i powoli przesuwać urządzenie po skórze w kierunku przeciwnym do kierunku wzrostu włosów.Kształtowanie brody: Ostrożnie skrócić włosy w żądany sposób.
7. Zwrócić uwagę na to, aby głowica goląca zawsze miała kontakt ze skórą. Napięcie golonej partii skóry drugą ręką ułatwia golenie.
8. Jeżeli włosy zaplączą się w głowicy golącej, wyłączyć urządzenie i wyczyścić głowicę golącą w sposób opisany w rozdziale „Czyszczenie i pielęgnacja“.
9. Po zakończeniu strzyżenia wyłączyć urządzenie naciskając przycisk WŁ./WYŁ.10. Czyścić urządzenie po każdym użyciu.11. Bezpośrednio po zakończeniu golenia nie nanosić na skórę żadnych środków pielęgnacyjnych
zawierających alkohol, gdyż mogą one prowadzić do podrażnienia skóry. Po zakończeniu golenia skórę można posmarować łagodnym, pozbawionym alkoholu balsamem lub kremem pielęg-nacyjnym.
Uwaga: Głowica goląca zbudowana jest z ostrych, spiczastych części. Aby uniknąć obrażeń, należy się z nią ostrożnie obchodzić!Wyłączyć urządzenie naciskając przycisk WŁ./WYŁ. i ewentualnie wyciągnąć zasilacz z gniazdka.
1. Nigdy nie zanurzać urządzenia do czyszczenia w wodzie lub innej cieczy. Zwrócić uwagę na to, aby do wnętrza urządzenia nie przedostała się woda.
2. Nigdy nie czyścić urządzenia i akcesoriów w zmywarce do naczyń.3. Nie używać szorstkich gąbek, środków do szorowania, wełny stalowej, metalowych przedmiotów,
środków odkażających lub gorących środków do czyszczenia, gdyż mogą one prowadzić do uszkodzenia urządzenia.
4. Wycierać urządzenie miękką, wilgotną ściereczką. Czyszczenie głowicy golącej:5. Wyłączyć urządzenie i ewentualnie wyciągnąć zasilacz z gniazdka sieciowego. Zdjąć nasadkę
grzebieniową z urządzenia. Zdjąć głowicę golącą, ostrożnie wciskając ją do tyłu.Wyczyścić głowicę golącą i wnętrze urządzenia przy użyciu pędzelka znajdującego się w zestawie.Nie ostukiwać głowicy golącej, gdyż może to prowadzić do jej uszkodzenia.Głowica goląca może zostać opłukana pod bieżącą, letnią wodą. Na zakończenie osuszyć ją przy użyciu miękkiej ściereczki nie pozostawiającej kłaczków.Aby usunąć z głowicy golącej wszelkie pozostałości wilgoci, zalecamy wysuszenie jej dodatkowo suszarką do włosów (średnia temperatura).
CZYSZCZENIE I KONSERWACJA

50
Nasze urządzenia wyprodukowane zostały na wysokim poziomie do długiego użytkowania. Regularna kons-erwacja i fachowe naprawy poprzez nasz serwis mogą wydłużyć pracę urządzenia. W razie kiedy urządzenie jest uszkodzone i nie nadaje się do naprawy, proszę przestrzegać zaleceń:Ten produkt nie może być zutylizowany razem z normalnymi odpadami domowymi. Muszą Państwo dostarczyć ten produkt do zbiorczego punktu recyklingowego dla urządzeń elektrycznych i elektronicznych.Poprzez oddzielne zbieranie i recykling odpadów pomagają Państwo chronić naturalne zasoby i sprawiają, że ten produkt będzie zutylizowany w sposób bezpieczny dla zdrowia i środowiska naturalnego.
WARUNKI GWARANCJI
UTYLIZACJA / OCHRONA ŚRODOWISKA
Udzielamy na nasze produkty 24 miesięcznej gwarancji od daty zakupu (warunkiem jest zachowanie faktury zakupu lub para-gonu) na szkody, które przy użytkowaniu zgodnym z przeznaczeniem wskazują na wadę fabryczną. W czasie trwania gwarancji usuniemy wady materiałowe bądź fabryczne zgodnie z naszym osądem poprzez naprawę lub wymianę.Gwarancja udzielana jest na produkty sprzedawane na terenie Polski, Niemiec i Austrii. W innych krajach proszę zwrócić się do właściwego Importera. Urządzenia, w których wymagane jest usunięcie wady, proszę przesłać razem z kopią faktury zakupu, na której musi być widoczna data zakupu, z załączonym opisem wady, w oryginalnym pudełku, dobrze zapakowane i na własny koszt na adres serwisu. Gwarancja nie obejmuje szkód wynikających ze zużycia, użytkowania niezgodnie z przeznaczeniem i nieprzestrzegania wskazówek dotyczących konserwacji i pielęgnacji. Roszczenie gwarancji wygasa, jeżeli naprawa bądź otwarcie przedmiotu będą przeprowadzone przez stronę trzecią. Ewentualne roszczenia użytkownika końcowego wobec sprze-dawcy/dealera nie są ograniczone tą gwarancją.
To urządzenie zawiera akumulatory. Po zakończeniu żywotności urządzenia nie wolno go wyrzucać do odpadów i śmieci z gospodarstw domowych. W razie zapytań odnośnie prawidłowej utylizacji akumulatorów lub urządzeń zawierających akumulatory prosimy zwrócić się do odpowiedniego zakładu utylizacji odpadów. Urządzenie zawiera akumulator wbudowany w uchwycie urządzenia. Jest to akumulator niklowo-metalowo-wodorowy.Ten symbol znajduje się na bateriach zawierających szkodliwe substancje:: Pb = bateria zawiera ołów, Cd = bateria zawiera kadm, Hg = bateria zawiera rtęć.
Nanieść na głowicę golącą jedną kroplę oleju smarującego i usunąć jego nadmiar ściereczką nie pozostawiającą kłaczków. Nałożyć głowicę golącą z powrotem na urządzenie, kierując wypustki w dolnej części głowicy golącej do środka urządzenia i wyciskając głowicę do góry. Przed ponownym użyciem urządzenia zwrócić uwagę na to, aby głowica goląca prawidłowo zatrzasnęła się w urządzeniu.
6. Chronić urządzenie przed kurzem i czyścić głowicę golącą regularnie za pomocą miękkiego pędzelka. W tym celu ostrożnie zdjąć głowicę golącą z urządzenia i oczyścić ją z kurzu i włosów za pomocą pędzelka. Na zakończenie ponownie nałożyć głowicę golącą.
7. Głowicę golącą należy regularnie wymieniać w zależności od częstotliwości użycia urządzenia, najpóźniej jednak po dwóch latach. Części zamienne do nabycia w sklepach lub bezpośrednio w naszym serwisie klienta. Odpowiedni formularz zamówieniowy znajduje się na stronie 51.

51
Stück Art.-Nr. Bezeichnung
8781340 Aufsteckkamm klein
8781345 Aufsteckkamm groß
Scherkopf
8781390 Netzteil
Bitte senden Sie das ausgefüllte Bestellformular an:
Abteilung ServiceMannheimer Straße 468766 Hockenheim
BESTELLUNG / ORDER 87813
Anrede /Title
TelefonPhone No.
Vorname /First name
Name /Surname
TelefaxFax No.
Straße/Nr. /Street/No.
PLZ/Ort /City
Telefon +49 (0) 62 05/94 18-27Telefax +49 (0) 62 05/94 18-22E-Mail [email protected] Internet www.unold.de
Preise nur gültig bei Bestellungen direkt aus Deutschland. Bei Bestellungen aus anderen Ländern wenden Sie sich bitte direkt an unseren Kundenservice oder Ihren Händler. Preise verstehen sich inkl. Versand und gesetzl. MwSt.
BESTELLFORMULAR

Aus dem Hause