
Guide to EPAFs with Banner HR - University of the Pacific Guide 5.30.2013...you want to pay this...
40
Guide to EPAFs with Banner HR Published by Department of Human Resources
Transcript of Guide to EPAFs with Banner HR - University of the Pacific Guide 5.30.2013...you want to pay this...

Guide to EPAFs with Banner HR
Published by
Department of Human Resources

Acknowledgements
The Department of Human Resources gratefully acknowledges many individuals for their contributions to the design of EPAF.
Kalpesh Sheth Carl Navarro Ana Orellano
Information Technology
Leticia Corona Joanne Carvana
Patrice Coss Cari Keller
Human Resources
A special thanks and appreciation goes out to Jane Lewis in Human Resources for her leadership in designing and delivering the EPAF training program and
documentation. Also, many thanks to the Departments who participated in our Test Pilot Group.

Table of Contents
Part 1: Introduction 1.1 EPAF Defined
1.2 Advantages of EPAF 1.3 EPAF Access 1.4 EPAF Support: How to Get Help
Part 2: Select a New EPAF
Part 3: EPAFs for Student Assignments 2.1 7 Steps to Create a Student EPAF
Part 4: EPAFs for Faculty and Staff Assignments 3.1 7 Steps to Create a Faculty or Staff EPAF
Part 5: EPAF Originator Summary 4.1 Current Tab
4.2 History Tab
Part 6: Approving EPAFs 5.1 Approving, Acknowledging, and Returning EPAFs
Part 7: Approval Categories
Part 8: Routing Queue
Part 9: Comments
Part 10: Examples of EPAFs
Part 11: Setting up a Default Routing Queue
Part 12: Job Change Reasons
Part 13: Error Messages
Part 14: E-Classes
Part 15: Proxies

1 Introduction
1.1 EPAF Defined An Electronic Personnel Action Form, called EPAF, is an online form originated by the department to communicate an employment decision about an employee to the Payroll Department. All employment decisions require the attention of Human Resources, and require the employees’ Human Resources Information System (HRIS) file to be updated. The department is required to fill out a form that specifies the nature and details of the employment decision.
Common examples of employment decisions requiring an EPAF include:
• Hire a new employee • Transfer an employee from one department to another • Give an employee a pay or merit increase • Change the labor distribution of the employee’s job • Add an assignment to the employee’s job records There are many more Job Change Reasons. Refer to a complete list in the Appendix of this guide.
Each job change must be approved on various levels. All EPAFs require department and division approval. Each EPAF is assigned an “Approval Category” that determines the required levels of approval. The final approval of the EPAF is through the Payroll Department, and the EPAF is applied to the employee’s job record. If there are any problems with the EPAF, a designated Approver can select Return for Correction and require the originator to correct or recreate the EPAF.
The EPAF must be completed, approved, and applied in a timely manner so the employees’ job record can be updated. Timely completion of an EPAF is essential to help the Payroll Department pay an employee accurately and on time. For a complete EPAF Submission Schedule, log onto (put link to payroll calendar here)
1.2 Advantages of EPAF:
Accountability for data entry is shifted to the originator Speed and efficiency of the process is increased Less opportunity for data entry errors Ability to track a transaction through the approval queue Scanning documents instead of mailing them Speed of processing

1.3 EPAF Access In order to access, create, or originate EPAFs, a user must confirm that they have signed the Confidentiality Agreement and completed the FERPA Training. Once the application is processed and approved, the user can follow these steps to access EPAF: Log into Inside Pacific, select the Administrative Tab, Administrative Services Tab, and then Employee Tab. Select EPAF Main Menu.
1.4 EPAF Support
Q: What information should I have available when originating an EPAF?
A: You should know:
the employee’s Banner ID number; which Approval Category to use; the position number (six-character code) on which action is being taken; the date the action or change (hire, promotion, leave, etc.) will occur; if it’s a change, the elements of the employee’s record that are changing
(example: salary, E-class); and who will approve this request in the department and the University.
Q: What if I don’t have an employee’s Banner ID? How do I start the EPAF?
A: You can query the employee’s name in the ID field. Their new nine-digit Banner
ID will then be displayed in the field. For a new hire, contact the appropriate
Human Resources for the employee’s Banner ID. Human Resources must first set
up the person in Banner, or you will not be able to hire them.

Q: What is the Query Date on the EPAF and what do I enter in this field?
A: Getting your Query Date right is one of the keys to EPAF success! In general,
the Query Date is the date the action or change needs to occur on the employee’s
personnel record. Please note that effective dates must occur after the employee’s
Last Paid Date, so refer to the payroll calendar when entering a Query Date. If your effective date in the body of the EPAF does not match your Query Date, you
may encounter an error and have to start over. Examples:
New Hire: If this EPAF initiates the hiring of a new employee, use the first day of work as the Query Date.
Salary Increase / Title Change: Use the effective date of the change as the Query Date. Use actual date of change in Personnel Date Field.
Labor Distribution Change: Use the effective date of the change as the
Query Date. If the Labor Distribution should have changed in a previous pay period, use the first day of the current pay period as the Query Date. Use actual date of change in Personnel Date Field. Note that you will have to do a Labor Redistribution for the previous pay period(s).
Employment Termination: If the EPAF is generated to terminate employment, use the last day that the employee should receive pay as the Query Date. A job can be terminated on an employee’s last paid date.
End Job Assignment: Use the last day the employee will work in the job as the Query Date.
Promotion/Transfer: Use the first day the employee will work in the new job
as the Query Date.
One Time Payment/Recurring: Use the first day of the pay period for which
you want to pay this employee as the Query Date.

Q: What do the different date fields in the EPAF mean?
A: The different date fields are as follows:
Job Begin Date: The date the employee begins or began in this job. If updating an existing record, use Current Value in the New Value field.
Job Effective Date: The date the change in the EPAF will take effect. The effective date cannot be before the Last Paid Date (indicated at the top of the EPAF). For a new hire, enter the employee’s start date.
Personnel Date: The actual date the job change occurred. This may be different from the effective date if an EPAF is not completed within the pay period of the job change.
2 Select New EPAF For a new EPAF, select “New EPAF”. If you are an Approver and need to check if you have EPAFs to approve, select “EPAF Approver Summary”. If you are the Originator of an EPAF, select “EPAF Originator Summary” to view all your EPAFs.
EPAF Approver Summary
EPAF Originator Summary
New EPAF
EPAF Proxy Records
Act as a Proxy
After accessing EPAF, follow the Steps to Creating an EPAF for Student, Staff or Faculty Assignments in the sections that follow.

3 EPAFs for Student Assignments The following pages describe the steps required to originate and submit an EPAF for a Student Assignment:
Step 1: New EPAF Person Selection Step 2: Job Selection Step 3: Main Job Information Step 4: Labor Distribution / FOAP Step 5: Approval Routing Queue Step 6: Comments Step 7: Save & Submit
Step 1 and 2 are the foundations of the EPAF. All of the other steps can be modified during the EPAF creation process or after an EPAF has been returned for correction – except Steps 1 and 2. So, it’s important to be accurate.
Step 1: New EPAF Person Selection Begin by searching for the employee for whom the EPAF is being created. If the person is already an employee of the University, simply type his or her ID# into the ID field. If it is not known if the person is an employee, then search the employee data base. Note: All Pacific students will already be assigned a Pacific ID number and you must use the existing number, do not create a new one. Next, input the Query Date. Determine the Query Date by following general guidelines: If this EPAF creates a new assignment for a new-hire or re-hire, use the start date of employment. For all other EPAFs, use the first day of the pay period in which the Payroll Department is accepting EPAFs. If this EPAF terminates an assignment, use the last day of the employee’s final pay period. Approval Category The Approval Category determines which employment decision most appropriately fits the required EPAF approval. There are several general types of EPAFs. The body of the EPAF populates based upon the selected Approval Category. The Approval Category also determines which levels are required for EPAF approval. Select the Approval Category that most appropriately fits the type of EPAF that is being created.

Step 2: Job Selection New Job – Type in a new position number and suffix if the EPAF creates a brand new assignment for the employee. The suffix differentiates one job from another within the same position number of the job type. Suffix 01 is used only if second job has the same index. Click “Go” or “All Jobs” to see all jobs for this employee in your Org. Existing Job – Clink on the link of the existing job if the EPAF modifies or continues an existing job in the employee’s record.
Step 3: Main Job Information Step 3 offers many fields for data entry depending on the Approval Category selected in Step 1. Please see the Appendix of this guide for specific reference for many common types of EPAFs:
• Student Position, Account, and Suffix Numbers • Student New Hires • Student Assignments • Student Retro Salary Adjustment • Student Assignment Termination • Student Salary Increase

Step 4: Labor Distribution/FOAP Step 4 determines how the labor for this position will be charged within Business & Finance. The FOAP is a four-part numeric sequence that includes a Fund, Organization, Account, and Program number New Effective Date: MM/DD/YYYY 05/30/2013
COA
Index Fund Organization
Account
Program
Activity Location
Project
Cost
Percent
Encumbrance Override End Date
1
BCPF
110001
10856
6005
108525
100.00
All student assignments and new hire EPAFs populate a generic FOAP, and the labor distribution is attached to the position number. The Account number automatically populates with the correlation to the position number entered so it does not need to be retyped. Work Study assignments are charged with a labor distribution split: 25% to the department and 75% to a Federal Work Study grant.

Step 5: Routing Queue Step 5 determines the individuals who approve the EPAF. Routing Queue Approval Level User Name Required
Action 10 - (HIRMGR) Hiring Manager
Approve
60 - (UNVBUD) University Budget
Approve
70 - (HRAPPR) Human Resources
Approve
80 - (PAYROL) Payroll
FYI
90 - (APPLY) HR Apply
Apply
Not Selected
Not Selected
Not Selected
Not Selected
Not Selected
Not Selected
Not Selected
Not Selected
Save and Add New Row s
Each required Approval Level populates within the EPAF based upon the Approval Category selected in Step 1. However, the originator must select the individual User Name for each level: Example: (HIRMGR) Hiring Manager – Using the magnifying glass search icon, select the most appropriate Approver from the available users. There are three possible Required Actions:
Approve The individual is required to “approve” the EPAF. The EPAF cannot be approved at a higher level until is it is approved at lower levels.
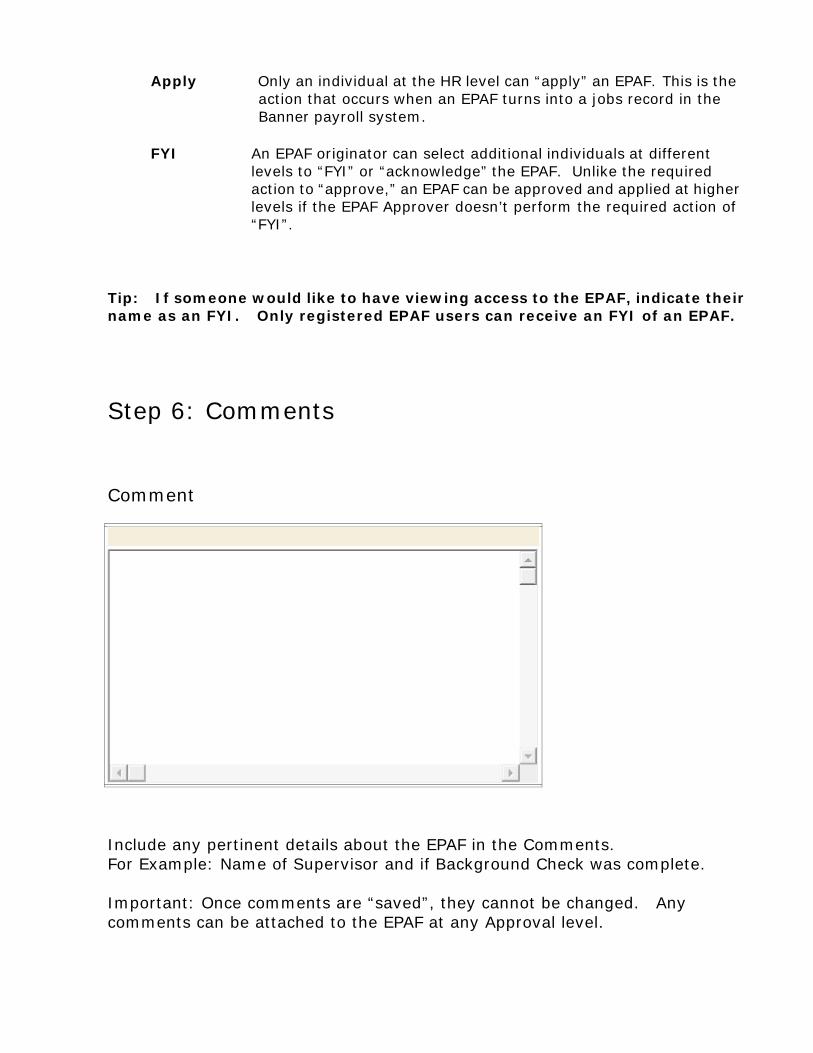
Apply Only an individual at the HR level can “apply” an EPAF. This is the action that occurs when an EPAF turns into a jobs record in the Banner payroll system.

FYI An EPAF originator can select additional individuals at different levels to “FYI” or “acknowledge” the EPAF. Unlike the required action to “approve,” an EPAF can be approved and applied at higher levels if the EPAF Approver doesn’t perform the required action of “FYI”.
Tip: If someone would like to have viewing access to the EPAF, indicate their name as an FYI. Only registered EPAF users can receive an FYI of an EPAF.
Step 6: Comments
Comment
Include any pertinent details about the EPAF in the Comments. For Example: Name of WTE Supervisor and if Background Check was complete. What about estimated Hours/week that the student will work? Important: Once comments are “saved”, they cannot be changed. Any comments can be attached to the EPAF at any Approval level.
Step 7: Save and Submit To complete the EPAF, click Save then Submit. If there are any data validity issues within the EPAF, Banner will display two types of messages:

ERROR Error messages will not allow the EPAF to progress to the approval levels. Errors must be corrected. Read the details provided, and correct the errors as indicated.
Warning Warning messages simply deliver information, and allow the
EPAF to progress successfully. Usually, warning messages inform the originator, approvers, and payroll department about budget issues associated with the job.
When an EPAF is Successfully Applied, the originator will receive a confirmation E-mail. If an EPAF is Returned for Correction, the originator will receive an alert E-mail. The originator must log into the EPAF Originator Summary to view, void, update, or re-submit the EPAF.
4 Faculty and Staff Assignments The following pages describe the steps required to originate and submit an EPAF for Faculty or Staff Assignments:
Step 1: New EPAF Person Selection Step 2: Job Selection Step 3: Main Job Information Step 4: Labor Distribution/ FOAP Step 5: Approval Routing Queue Step 6: Comments Step 7: Save & Submit
Step 1 and 2 are the foundations of the EPAF. All of the other steps can be modified during the EPAF creation process or after an EPAF has been returned for correction – except Steps 1 and 2. So, it’s important to be accurate.
Step 1: New EPAF Person Selection Begin by searching for the employee for whom the EPAF is being created. If the person is already an employee of the University, simply type his or her ID# into the ID field. If it is not known if the person is an employee, then search the employee data base.

Next, input the Query Date. Determine the Query Date by following general guidelines: If this EPAF creates a new assignment for a new-hire or re-hire, use the start date of employment. For all other EPAFs, use the first day of the pay period in which the Payroll Department is accepting EPAFs. If this EPAF terminates an assignment, use the last day of the employee’s final pay period. The Personnel Date will always reflect the true date of employment change. Query Date Next, input the Query Date. Determine the Query Date by following these general guidelines: New Hire
If this EPAF initiates the hiring of a new employee, use the first day of work as the Query Date. For faculty, use the first day of the pay period for which they will be paid.
Salary Increase / FOAP Change / Title Change
Use the effective date of the change as the Query Date (usually the first day of the pay period). Important: Even if the EPAF is for a retroactive chance to an existing job, use the first day of the current pay period as the Query Date.
Assignment Termination
If the EPAF terminates the employee’s assignment (not employment), use the last day of work as the Query Date.
Employment Termination
If the intent of the EPAF is to terminate the faculty or staff member’s employment with UOP, use the last day that the employee should receive pay as the Query Date.
Transfer If an employee is transferring from one department to another, two EPAFs are required:
1. Termination of Assignment – terminates the current position. Use the last day worked on the current assignment as the Query Date.
2. Staff Assignment Transfer – creates a new assignment. Use the start date of the new assignment as the Query Date.
Note: To avoid a break in service, the date of assignment termination must be exactly the day before the initiation of the new assignment (even if these days fall on a holiday or weekend). Approval Category The Approval Category determines which employment decision most appropriately fits the required EPAF approval. There are several general types of EPAFs. The body of the EPAF populates based upon the selected Approval Category. The Approval Category also

determines which levels are required for EPAF approval. Select the Approval Category that most appropriately fits the type of EPAF that is being created.
Step 2: Job Selection New Job – Type in a new position number and suffix if the EPAF creates a brand new assignment for the employee. The suffix differentiates one job from another within the same position number of the job type. Suffix 01 is used only if second job has the same index. Click “Go” or “All Jobs” to see all jobs for this employee in your Org. Existing Job – Clink on the link of the existing job if the EPAF modifies or continues an existing job in the employee’s record. About Position Numbers: The position number connects the job to the budgeted FOAP. In most cases, each job has its own unique position number. However, multiple employees can have jobs under a shared or pooled position number if these employees are part-time, on the same payroll, and are paid out of the same FOAP. This is the case with stipends and part-time faculty assignments. Position numbers are created by the budget management function. Contact your HR Rep if a new position number needs to be created. Suffix: If an employee has more than one assignment under the same position number, assign a suffix that is not connected to an existing job. To ensure this, click on All Jobs, under Existing Jobs. Survey the jobs in the employee’s record, and assign a suffix not in use. For example, if 00 and 01 have been used, assign suffix 02 to the newly created job. Existing Jobs: Click on the link of the existing job if the EPAF modifies or continues an existing job in the employee’s record.
Step 3: Main Job Information Step 3 offers many fields for data entry depending on the Approval Category selected in Step 1. Please see the Appendix of this guide for specific reference for many common types of EPAFs:

Faculty New Hire Employee E-Class Transfer Staff Assignments Staff/Faculty Retro Adjustment Staff/Faculty Stipend Staff/Faculty Salary Increase
Step 4: Labor Distribution/FOAP Step 4 determines how the labor for this position will be charged within Business & Finance. The FOAP is a four-part numeric sequence that includes a Fund, Organization, Account, and Program number.
New Effective Date: MM/DD/YYYY
COA
Index Fund Organization
Account
Program
Activity
Location
Project
Cost
Percent
Encumbrance Override End Date
1
FITM
110001
30045
6052
300800
100.00
Tota
l: 100.
00
All student assignments and new hire EPAFs populate a generic FOAP, and the labor distribution is attached to the position number. The Account number automatically populates with the correlation to the position number entered so it does not need to be retyped.

Step 5: Routing Queue Step 5 determines the individuals who approve the EPAF.
Routing Queue
Approval Level User Name Required
Action 10 - (HIRMGR) Hiring Manager
Approve
60 - (UNVBUD) University Budget
Approve
70 - (HRAPPR) Human Resources
Approve
80 - (PAYROL) Payroll
FYI
90 - (APPLY) HR Apply
Apply
Not Selected
Not Selected
Not Selected
Not Selected
Not Selected
Not Selected
Not Selected
Not Selected
Save and Add New Row s
Each required Approval Level populates within the EPAF based upon the Approval Category selected in Step 1. However, the originator must select the individual User Name for each level: Example: (HIRMGR) Hiring Manager – Using the magnifying glass search icon, select the most appropriate Approver from the available users. There are three possible Required Actions:
Approve The individual is required to “approve” the EPAF. The EPAF cannot be approved at a higher level until is it is approved at lower levels.
Apply Only an individual at the HR level can “apply” an EPAF. This is the action that occurs when an EPAF turns into a jobs record in the Banner payroll system.
FYI An EPAF originator can select additional individuals at different levels to “FYI” or “acknowledge” the EPAF. Unlike the required action to “approve,” an EPAF can be approved and applied at higher levels if the EPAF Approver doesn’t perform the required action of “FYI”.
Tip: If someone would like to have viewing access to the EPAF, indicate their name as an FYI. Only registered EPAF users can receive an FYI of an EPAF.
Step 6: Comments
Comment
Include any pertinent details about the EPAF in the Comments. For Example: Name of Supervisor and if Background Check was complete. Important: Once comments are “saved”, they cannot be changed. Any comments can be attached to the EPAF at any Approval level.

Step 7: Save and Submit To complete the EPAF, click Save then Submit. If there are any data validity issues within the EPAF, Banner will display two types of messages:
ERROR Error messages will not allow the EPAF to progress to the approval levels. Errors must be corrected. Read the details provided, and correct the errors as indicated.
Warning Warning messages simply deliver information, and allow the
EPAF to progress successfully. Usually, warning messages inform the originator, approvers, and payroll department about budget issues associated with the job.
When an EPAF is Successfully Applied, the originator will receive a confirmation E-mail. If an EPAF is Returned for Correction, the originator will receive an alert E-mail. The originator must log into the EPAF Originator Summary to view, void, update, or re-submit the EPAF.
5 EPAF Originator Summary Log into Inside Pacific, select the Administrative Tab, Administrative Services Tab, and then Employee Tab. Select EPAF Main Menu. The EPAF Originator Summary lists EPAFs that the Originator (or Hiring Manager) has created, voided, saved, or submitted. It also contains EPAFs that have been Returned for Correction and require the Originator’s attention.

To access the Originator Summary, select “EPAF Originator Summary”. If you are an Approver and need to check if you have EPAFs to approve, select “EPAF Approver Summary”. If you are the Originator of an EPAF, select “EPAF Originator Summary” to view all your EPAFs. Within the EPAF Originator Summary, there are two tabs: Current and History.
5.1 Current Tab The Current Tab is similar to an “inbox” for the EPAF Originator. Waiting Status If an EPAF has been created and saved (but not submitted), it remains with the Waiting status and can be found in the Originator Summary. Returned for Correction Status If an EPAF contains an error or incorrect data, instead of approving it, an Approver will return it for correction. To view a returned EPAF, click on the employee’s name. Usually, the Approver will note the reason for the return under the Comments of the EPAF. The EPAF Originator has two options: Void or

Update. Example: Click Void to void the EPAF. This will permanently inactivate the EPAF. Click Update to make any changes to the EPAF. TIP: Only the Originator can make changes to the EPAF. If the Originator makes changes, he or she must save and submit the EPAF to send it through the Approval Queue. The EPAF must be re-approved on all levels. 5.2 History Tab All EPAFs created by the Originator are stored in the History tab. To check the status of an EPAF, in the EPAF Originator Summary, click the History tab, and notice the Transaction Status of the EPAF. 6 Approving EPAFS The EPAF Approver Summary contains EPAFs that the need to be approved and sent on.
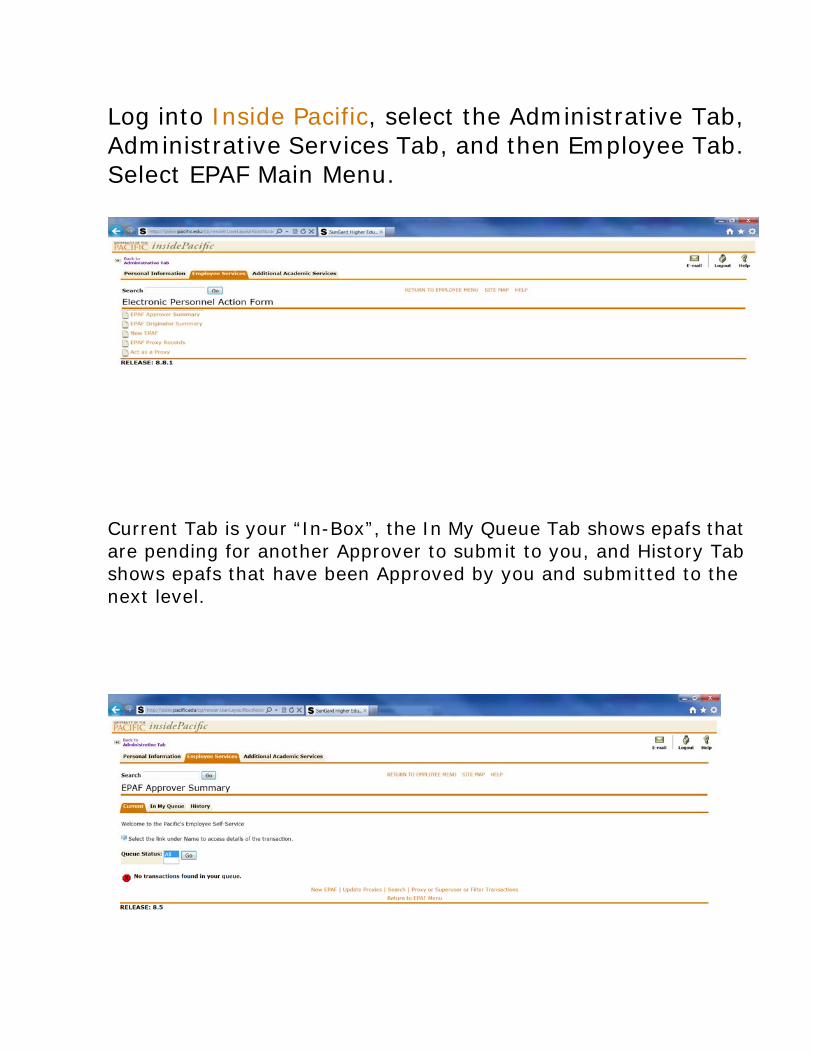
Log into Inside Pacific, select the Administrative Tab, Administrative Services Tab, and then Employee Tab. Select EPAF Main Menu.
Current Tab is your “In-Box”, the In My Queue Tab shows epafs that are pending for another Approver to submit to you, and History Tab shows epafs that have been Approved by you and submitted to the next level.
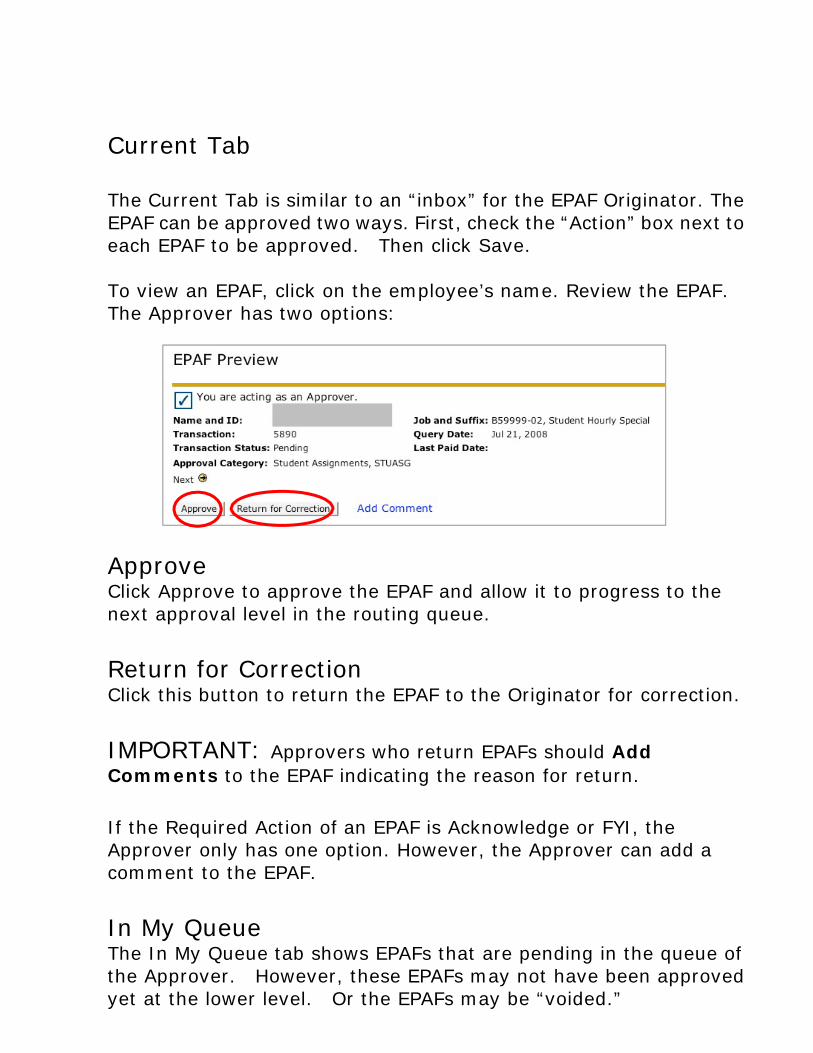
Current Tab The Current Tab is similar to an “inbox” for the EPAF Originator. The EPAF can be approved two ways. First, check the “Action” box next to each EPAF to be approved. Then click Save. To view an EPAF, click on the employee’s name. Review the EPAF. The Approver has two options: Approve Click Approve to approve the EPAF and allow it to progress to the next approval level in the routing queue. Return for Correction Click this button to return the EPAF to the Originator for correction. IMPORTANT: Approvers who return EPAFs should Add Comments to the EPAF indicating the reason for return. If the Required Action of an EPAF is Acknowledge or FYI, the Approver only has one option. However, the Approver can add a comment to the EPAF. In My Queue The In My Queue tab shows EPAFs that are pending in the queue of the Approver. However, these EPAFs may not have been approved yet at the lower level. Or the EPAFs may be “voided.”

History Tab The History tab shows EPAFs that have been approved or acknowledged by the Approver. TIP: You may click on the Search to find EPAFs by 988#, Employee Name, EPAF Transaction Number, and more. When an EPAF is Successfully Applied to Banner Payroll, the originator will receive a confirmation E-mail and the Approver will be able to view that it is complete. If an EPAF is Returned for Correction, the originator will receive an alert e-mail. The originator must log into the EPAF Originator Summary to view, void, update, or re-submit the EPAF. 7 Approval Categories There are several general types of EPAFs. The body of the EPAF populates based upon the selected Approval Category. The Approval Category also determines which levels are required for EPAF approval.

Select the Approval Category from the drop-down menu with this consideration:
Select the category most appropriately fits the job change of EPAF that is being created.
For example, if the reason for the EPAF is to add a position for a student, select approval category STK Add a Job.
A) EPAF Payroll Options:
DPT Student – Student employees whose positions are charged 100% to the department index. FWS Student – Student employees whose positions are charged 25% to department index and 75% to Federal Work-Study Grant. PWS Student – Student employees whose positions are charged 25% to department and 75% to the University Grant. T/C – Temp-Casual employees who are part-time and are not students of the University. Graduate Assistants – Student employees who are awarded a stipend and units for their graduate work. Staff – Semi-Monthly administrative (exempt or non-exempt)

employees. Faculty – Full-time or Part-time Faculty. Also additional assignments for either of the FT or PT employees.
B) EPAF Approval Types: Add a Job – Select this type of EPAF only if the employee is currently working on campus in another position or if you are extending their current position. New Hire – Select this type of EPAF if you are hiring this employee for the first time on campus. Rehire – Select this type of EPAF if you are rehiring this employee who has been terminated on Banner Payroll. Labor Distribution – Select this type of EPAF if you are going to add an Activity Code to the employee’s current position or are changing the labor distribution of the existing job. Job Termination – Select this EPAF to terminate an employee’s assignment. Salary Change – Select this EPAF to change only the salary or hourly rate of an existing assignment. Earn Code – Select this EPAF to change the Earnings Code on an existing employee’s position.

8 Routing Queue The Routing Queue determines the individuals who approve the EPAF. 10 – (HIRMGR) Hiring Manager 15 – (PI) Principle Investigator 20 – (DPTHED) Department Head 30 – (BUDMGR) Budget Manager 35 – (GRANTS) Grants 40 – (VPDEAN) Vice President/Dean 45 – (GRADOF) Graduate Office 49 – (ACDANA) Academic Budget Analyst 50 – (ACDBUD) Academic Budget Office 51 – (ACDADM) Academic Budget Admin 55 – (FINAID) Financial Aid 60 – (UNVBUD) University Budget Office 70 – (HRAPPR) Human Resources 80 – (PAYROL) Payroll 90 – (APPLY) HR Apply 99 – (SUPER) Super User Each required Approval Level populates within the EPAF based upon the Approval Category. However the Originator must select the User Name for each level. Important: In some cases the Originator may select himself as the Hiring Manager as well.

There are three possible RequiredActions:
Approve The individual is required to “approve” the EPAF. The EPAF cannot be approved at a higher level until is it is approved at lower levels.
Apply Only an individual at the payroll level can “apply” an
EPAF. This is the action that occurs when an EPAF is converted into a jobs record in the payroll system. Always select the same individual who approves an EPAF at the Payroll Level (90) to Apply (99) the EPAF.
FYI An EPAF originator can select additional individuals at different levels to “FYI” or “acknowledge” the EPAF. Unlike the required action to “approve,” an EPAF can be approved and applied at higher levels if the EPAF Approver does not perform the required action of “FYI.”
TIP: If someone would like to have viewing access to the EPAF, indicate their name as an FYI. Only registered EPAF users can receive an FYI of a

9 Comments The Comment field allows the Originator to input any text to add information and clarification to the EPAF. This information should be included in the comment field, for example: Stipend EPAF:
Specifically detail total payment amount, number of payments, individual
payment amount, and payment start/end dates. Faculty EPAFs: Include course number and amount of units. For part time faculty, also include course dates. Retro / Adjustment EPAFs: Indicate reason for late EPAF. Specifically include what job change the EPAF initiates and the true effective date. Also indicate if back-pay is owed to employee. Transfer: For E-Class Transfers, enter the E-Class from which they are transferring, as well as their new E-Class. 10 Examples of EPAFs To ensure that this employee is technically a New Hire, click on All Jobs. If no assignments are listed, then enter the position number suffix and then Select. If there are any assignments listed, then exit this EPAF and select another EPAF accordingly. Important Query Date on any EPAF: This date is the date the employee will begin their new or renewed position.

The Student/Temp-Casual/Graduate Assistant New Hire Form looks
something like this example:
New hire or Rehire Student, GA or T/C Stockton
Item Current Value New Value Employee Status: (Not Enterable) A
New Value fields must be entered
Employee Class Code: (Not Enterable) SS
Home COAS: (Not Enterable) 1
Home Organization:
Distribution COA: (Not Enterable) 1
Distribution Orgn:
District Code: 99, Stockton Student Employee
Current Hire Date: MM/DD/YYYY Location Code: 1, Stockton
Campus Code: 1, Stockton
I9 Form Indicator: Not Selected
I9 Date: MM/DD/YYYY
I9 date must be entered
I9 Expiration Date: MM/DD/YYYY Job Begin Date: MM/DD/YYYY Jobs Effective Date: MM/DD/YYYY Contract Type: Not selected
New Hire positions are Primary
Personnel Date: MM/DD/YYYY Job Status: (Not Enterable) A
Title: Employee Class Code:
Job Change Reason: Not Selected
Regular Rate:
List Hourly Rate
Assign Salary: List Hourly Rate
Hours per Pay: (Not Enterable) 1.0
Step: (Not Enterable) 0

FTE: FTE is “1”
Factor: (Not Enterable) 24
Pays: (Not Enterable) 24 * Hrly rate x Factor = Annual Salary
Annual Salary:
Supervisor ID: WTE Supervisor ID
Supervisor Position: WTE Supervisor position #
Supervisor Suffix: (Not Enterable) 00
Contract Begin Date: MM/DD/YYYY Contract End Date: MM/DD/YYYY New Effective Date: MM/DD/YYYY 04/19/2013
Labor Distribution will populate below
COA Index Fund Organization
Account Program
Activity Location
Project
Cost Percent
Encumbrance Override End Date
1
ACHM
110001
10111
6052
101030
100.00
Total:
100.00
Default from Index Save and Add New Row s
NBAJOBS Termination: Fill in Values to term position

Item Current Value New Value Job End Date: MM/DD/YYYY Jobs Effective Date: MM/DD/YYYY Personnel Date: MM/DD/YYYY Job Status: (Not Enterable) T
Job Change Reason: (Not Enterable) JOBEN
EPAFs for Faculty and Staff Assignments The Faculty and Staff Assignments forms are used to create new or extend assignments for current Faculty and Staff employees. Important Query Date on any EPAF: This date is the date the employee will begin their new or renewed position.
The Faculty/Staff Assignment Form looks something like this example:
Secondary Job: Staff or Faculty
Item Current Value New Value Job Begin Date: MM/DD/YYYY
Enter Date when first hired
Jobs Effective Date: MM/DD/YYYY Enter Date of new assignment
Personnel Date: MM/DD/YYYY Enter Date of first work day
Job Status: (Not Enterable) A
Title: Job Change Reason: Not Selected

Step: (Not Enterable) 0
Regular Rate: Hrly rate or Salary Rate
Assign Salary: Hrly rate or Salary Rate
Hours per Pay: Factor: Pays: Annual Salary: * Contract Type: Not selected
Usually Secondary
Non-Exempt Staff are paid Hourly Exempt Staff are paid on Voucher Faculty are paid either per pay period or on Voucher *Either can be paid for a number of pay periods equal to the Annual Salary
NBAJOBS Termination: Fill in Values to term position
Item Current Value New Value Job End Date: MM/DD/YYYY Jobs Effective Date: MM/DD/YYYY Personnel Date: MM/DD/YYYY Job Status: (Not Enterable) T
Job Change Reason: (Not Enterable) JOBEN
11 Setting Up a Default Routing Queue A Default Routing Queue allows the user to customize the routing queue for every Approval Category, or type of EPAF, that he or she creates. Follow these steps to customize and save Default Routing Queues:
1. Under Employee Tab in Inside Pacific, select EPAF Menu 2. Select EPAF Originator Summary

3. Select Default Approval Queue 4. Select the specific Approval Category from drop-down list 5. Fill in the open data fields, using the magnifying glass search
function, for each required approval level
12 Job Change Reasons Although you may see a long list of Job Change Reasons, here are a few most frequently used Banner Names: ADJOB Additional Job on Campus AMI Annual Merit Increase AWARD One-Time Award BACKG No Background Check CPTRN Campus Transfer DEVLE Faculty Development Leave DPFWS Change from FWS position to DPT position DPTRN Department Transfer ECLS Change of E-Class ECSAL E-Class/Salary Change EQADJ Equity Adjustment ERNCD Change of Earn Code FACPR Faculty Promotion to Tenure Track FAREH Faculty Rehire FTPT Full-time to Part-time FWSDP Change from DPT position to FWS position FRTCH Index Change on Grant GRTEN End of Grant Funding GTREW Grant Renewed HONOR Honorarium HOSAL Housing Allowance INCPO Incorrect Position INTER Interim Position JOBEN Job Ends LBDST Labor Distribution Change LEAVE On Leave MERIT Merit Increase

NEWH New Hire Employee NOI9 I-9 Information Incomplete ONEPY One-Time Pay POSRE Position Renewed PRCLS Promotion/Reclassification PROMO Promotion PTFT Part-time to Full-time REHIR Staff Re-Hire RESGN Employee Resigned SALCH Salary Change SALCO Salary Correction SS Summer Session STUHR Student New Hire STURH Student Rehire TERM Employee Terminated TRANS Transfer WSOVR FWS Overage 13 Errors Messages Once you submit the EPAF, if there are any issues within the EPAF, the screen will show one of two message types: Warning – Warnings simple deliver information to the user, but will still allow the EPAF to process successfully. Error – Error messages will not allow the EPAF to progress to the approval levels. Errors must be corrected. These errors indicate the following: *ERROR* ID is not defined as an employee – Establish Employee Record Employee must first be entered in Banner by HR *ERROR* Job Begin Date cannot be after Employee’s Termination Date Employee must first be activated in Banner with correct EPAF *ERROR* New Effective Date cannot be after Employee’s Terminate Date

Employee is terminated on Banner Payroll and must first be activated in Banner with correct EPAF
*ERROR* Begin Date must equal the first Jobs Detail Effective Date
Employee has worked in this position before and the very first date must be entered in the Job Begin Date
*ERROR* Date cannot be prior to the Base Job Begin Date *ERROR* Effective Date must be greater than Last Paid Date
These errors mean that the action being initiated has an effective date prior to the last paid date on this job record. Review and Correct
*ERROR* Rate times factor times pays does not equal Annual Salary This error means that the Annual Salary divided by the number of pays does not equal the Assigned Salary. Try using four numbers past the decimal on the Assigned Salary and check the number of pays
*ERROR* Employee already has a Primary Job
Change the Contract Type from Primary to Secondary Job in the body of the epaf
*ERROR* The future dated Job record must be deleted before ending Job
Remove future date in EPAF – Job Term 1JBTRM by putting a dash (-) in the Job End Date
*ERROR* Date cannot be after the Base Job End Date of ______ Pay correction could not take place because the job was ended. Please use new EPAF to rehire employee to make the pay change

14 Employee E-Classes (E-Class) Please refer to the E-Classes below for your employee(s) E-Class Description AA Administrator FT Exempt BB Administrator PT Exempt CC Faculty FT Exempt 9-10 Months DD Faculty FT Exempt 11-12 Months EE Faculty PT Exempt Less than 50% FTE FF Faculty PT Exempt Less than 100% but at least 50% FTE/9 months JJ Staff FT Exempt KK Staff PT Exempt NN Staff FT Non-Exempt OO Staff FT Non-Exempt PP Staff PT Non-Exempt SN Student Non-Resident SS Student UU Union FT Non-Exempt VV Union PT Non-Exempt WW Staff TC Non-Exempt XN Grad Assist – Non-Resident XR Grad Student – Resident (SF) XX GA Non-Exempt YY Stipend Pay Only

15 Proxies
1. Go to Electronic Personnel Action Form under the Employee Tab. 2. Select EPAF Proxy Records.
ElectronicPersonnelActionForm
EPAF Approver Summary
EPAF Originator Summary
New EPAF
EPAF Proxy Records
Act as a Proxy
3. Select the Approval Level for which you wish to designate a Proxy
Approver from the Drop down Menu. Click Go.
EPAFProxyRecords
Approval Level: Human Resources, HRAPPR Go
Name Remove Add
Not Selected
4. From the Name drop down menu, select the individual to designate
as the Proxy Approver.
5. Check “Add” next to the individual’s name, then click Save.
Important: When designating a Proxy Approver, be advised that the proxy must have security access at the designated approval level. He or she must have completed the Confidentiality Agreement and FERPA Certificate.

Act as a Proxy Approver
1. Go to Electronic Personnel Action Form under the Employee tab. 2. Select Act as a Proxy.
ElectronicPersonnelActionForm
EPAF Approver Summary
EPAF Originator Summary
New EPAF
EPAF Proxy Records
Act as a Proxy
3. Select the individual you wish to Proxy For with the with the drop down
menu. 4. Submitted From Date and Submitted To Date: Leave blank if you
want to see all EPAFs that require this individual’s approval. Or input submission date parameters.
5. Click Go.
ProxyorSuperuserorFilterTransactions
Act as a proxy or a superuser and enter the following criteria to filter transactions. Proxy For: Self
Act as a Superuser:
Submitted From Date: MM/DD/YYYY
Submitted To Date: MM/DD/YYYY
Transactions Per Page: 25
Go

6. You will have access to approve, acknowledge, or return EPAFs at the approval level for which you have been designated by the EPAF Approver.
Important:
1. You must have security access at the levels for which you will approve and you must be a designated proxy by the original approver in order to see their EPAFs.
Emails: When does the system send e-mails regarding EPAF statuses? The originator of the EPAF will receive an automatically generated email when the EPAF has been applied or returned for correction. How do I know if my EPAF has been returned for correction? You should receive an email notification should your EPAF be returned. You can check your Originator Summary and view its Current tab to see any EPAFs that may have been returned to you for correction. The Approver who sent it back to you should always comment on the correction needed. How do I know if my EPAF has been applied? A status of “Completed” indicates that all approvals have been obtained and that HR has applied the EPAF.


![Processing Employees Using epaf – Originator Handbook · 2019-05-18 · 2016 [PROCESSING EMPLOYEES USING EPAF – ORIGINATOR HANDBOOK] 1 | Page Contents . What you need before you](https://static.fdocuments.us/doc/165x107/5f78809d3f93b22ab9481ad3/processing-employees-using-epaf-a-originator-handbook-2019-05-18-2016-processing.jpg)


![PROCESSING EMPLOYEES USING EPAF – ApproverS ...2012 [PROCESSING EMPLOYEES USING EPAF – APPROVERS & FYI HANDBOOK] What you need before you start: EPAF Training, Complete Banner](https://static.fdocuments.us/doc/165x107/6047374deef85b6f7b09a965/processing-employees-using-epaf-a-approvers-2012-processing-employees-using.jpg)
