Group 1: Animals Through the Months. January I initially cropped the background photo and made the...
38
Group 1: Animals Through the Months
-
Upload
helena-voice -
Category
Documents
-
view
213 -
download
0
Transcript of Group 1: Animals Through the Months. January I initially cropped the background photo and made the...

Group 1: Animals Through the Months


January
I initially cropped the background photo and made the resolution smaller so the other pictures could fit on it.
Then I used the magnetic lasso and magic eraser tools to erase the backgrounds from the other images of the cats and MLK Jr., then copied the images to the background.
After that I replaced some people's heads with cats and used blurring effects to make the faces seem like they belonged.
I then cropped the entire picture and added "January" as the title.
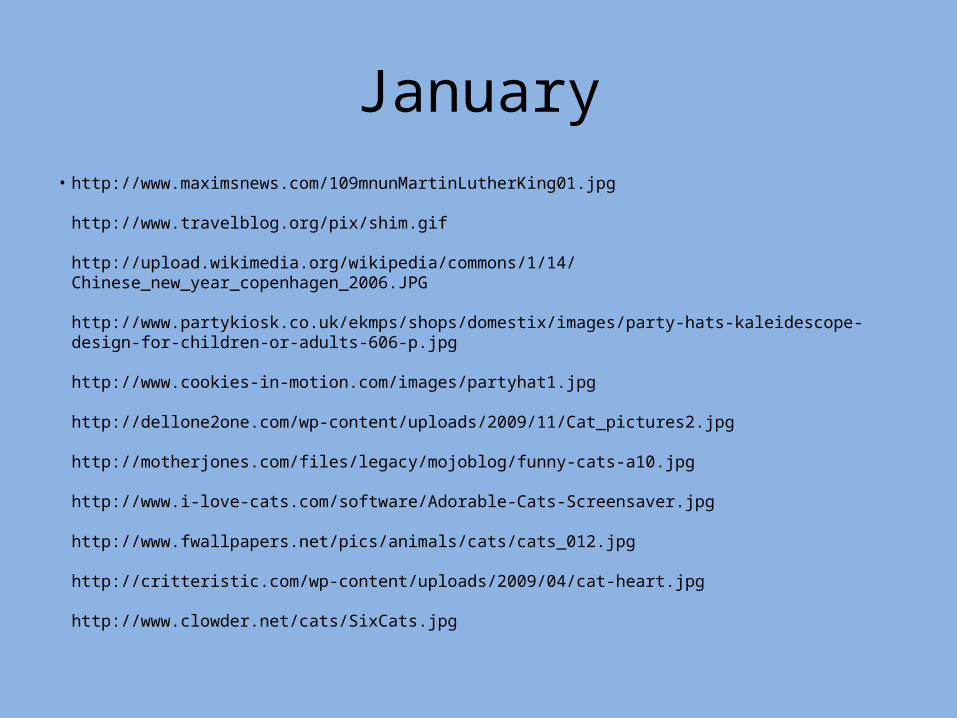
January• http://www.maximsnews.com/109mnunMartinLutherKing01.jpg
http://www.travelblog.org/pix/shim.gif
http://upload.wikimedia.org/wikipedia/commons/1/14/Chinese_new_year_copenhagen_2006.JPG
http://www.partykiosk.co.uk/ekmps/shops/domestix/images/party-hats-kaleidescope-design-for-children-or-adults-606-p.jpg
http://www.cookies-in-motion.com/images/partyhat1.jpg
http://dellone2one.com/wp-content/uploads/2009/11/Cat_pictures2.jpg
http://motherjones.com/files/legacy/mojoblog/funny-cats-a10.jpg
http://www.i-love-cats.com/software/Adorable-Cats-Screensaver.jpg
http://www.fwallpapers.net/pics/animals/cats/cats_012.jpg
http://critteristic.com/wp-content/uploads/2009/04/cat-heart.jpg
http://www.clowder.net/cats/SixCats.jpg


February
I cropped the snakes and hearts of their backgrounds using the magnetic lasso tool and then copied them to the main picture with the forest background. Then I used the lasso tool to crop the pictures behind branches.
For Layer 7, I merged it (the snake) and another layer, with the heart, in order to be able to move them behind the branch as a unit. I also used the brush tool to color the heart.

February• http://s338.photobucket.com/albums/n430/spicecomments/hearts/00217.gif
http://www.pixabella.com/wp-content/uploads/2009/05/pink-clipart-hearts.pnghttp://www.wwtt.org/HEART1.gifhttp://www.pixabella.com/wp-content/uploads/2009/03/red-clipart-love-heart.pnghttp://snohomishcounty.redcross.org/images/heart.jpghttp://www.pixabella.com/wp-content/uploads/2009/05/clip-art-red-heart-shaped-border.pnghttp://amolife.com/image/images/stories/Miscellaneous/open_your_heart_to_love_1.jpghttp://www.manywallpapers.com/d/1987/-/heart-roses-ground_1600_x_1200.jpghttp://www.healthspablog.org/wp-content/uploads/2010/07/Heart-Attack.jpghttp://www.antipixel.com/blog/archives/images/yakushima/yakushima_forest_day1_lg.jpghttp://partmule.com/blog16/wp-content/uploads/2007/07/rattle-snake-coiled.jpghttp://www.treehugger.com/Snake-Charmer.jpghttp://www.impactlab.com/wp-content/uploads/2010/06/venomous-snakes-for-sale-rc-snake1.jpg


March
I cropped out pictures of monkeys, hats, and beer to get rid of their backgrounds. Then I inserted them into the bar background.
The monkey and the beer layers in the front were merged after cropping so that the two figures would be able to be moved to wherever I needed them to go in the future without having to reconnect the hand to the beer again.
I blurred some of the images so they would appear more natural in the image, including the monkey sitting at the table in the front right side; I blurred him, the table, and the beer so he wouldn't pop out as much and it seemed like the focus would not be on him.

March• http://2.bp.blogspot.com/_RdMygo1BQuw/SFOvsOnI2fI/AAAAAAAAAe8/LL387A0yRXc/s400/beer.jpg
http://thinkingnectar.com/wp-content/uploads/2009/02/monkeys_think.jpg
http://3.bp.blogspot.com/_gV17nEYbBjA/TCIRa2xXcXI/AAAAAAAAAOI/znVZeTmNvEM/s1600/monkey300.jpg
http://www.warriorsage.com/blog/wp-content/uploads/2009/02/monkey.gif
http://www.weblo.com/asset_images/large/MonkeysForSale.com_4798af1e1313a.jpg
http://www.softpedia.com/screenshots/Cheerful-Monkeys-Screensaver_1.jpg
http://www.nicphillips.com/nicspicks/images/stories/sovino1.jpg
http://www.konteaki-furniture.co.uk/images/cotswold_oak_end_table.jpg
http://stores.advancedinteriordesigns.com/catalog/Nevo%2520Bar%2520Table.jpg
http://blog.timesunion.com/saratogaseen/files/2008/04/beer.jpg
http://images.halloweencostumeideas.com/felt-leprechaun-hat.jpg
http://www.livinglocurto.com/wp-content/uploads/2009/03/shamrock.jpg
http://www.caufields.com/productimages/stpat/Images/30742.jpg
http://us.123rf.com/400wm/400/400/kreefax/kreefax0902/kreefax090200014/4401912-young-man-wearing-suit-with-green-bow-tie-and-green-novelty-hat-for-st-patrick-s-day-isolated.jpg


April• 1. I used the paint bucket tool to change the sky to blue instead of white. Then, I changed
the hue, saturation, and lightness of the picture to make the colors more vivid. 2. I used the magnetic lasso tool to select the rabbit and the move tool to move rabbit to grass image. I then free tranformed it so that it was angled a little to fit the image better. 3. I used the magnetic lasso tool to select the white Easter bunny, used move tool to move onto grass image, free transformed it and then horizontally flipped it. 4. Next I took the eraser tool and adjusted brush size and lowered opacity to erase edges of both rabbits so that they would blend better.5. I then used the magnetic lasso tool to select some easter eggs and move them onto the picture repeatedly placing them around the realist rabbit. 6. I added a text box that said "April 20100" in an arch, and changed the text color to yellow.7. I used the magnetic lasso to cut easter lily out, move tool to move it next to the word. I also rotated it and flipped it.8. Then I simply used the eraser tool again try to blend the images together as much as possible..9. Lastly, I added a calendar to the center of the image using the polygonal lasso and the move tool, since the group's theme is animal themed calendar.

April• 1. http://lh5.ggpht.com/_LMatyeHnKXY/SNwRZxxxJYI/AAAAAAAAA4k/bZaz4kyy3Ec/IMG_1295.jpg
2. http://images.fanpop.com/images/image_uploads/Bunny-rabbit-bunny-rabbits-604546_470_353.jpg
3. http://scrapetv.com/News/News%20Pages/Future/images/easter-bunny.jpg 4. http://blog.laurenkreps.com/storage/easter-eggs-2.jpg?__SQUARESPACE_CACHEVERSION=1270157340364
5. http://3.bp.blogspot.com/_-yWNMWcLo-Q/SeE_immh8QI/AAAAAAAABnQ/gC9zplrgbz0/s400/wild+easter+lily
6. http://2.bp.blogspot.com/_vGgulG2Zn6Y/THTjyrOBXyI/AAAAAAAAF7w/ENf-GsQB_tc/s1600/A4+Blank+April+2011+Calendar+printable.jpg
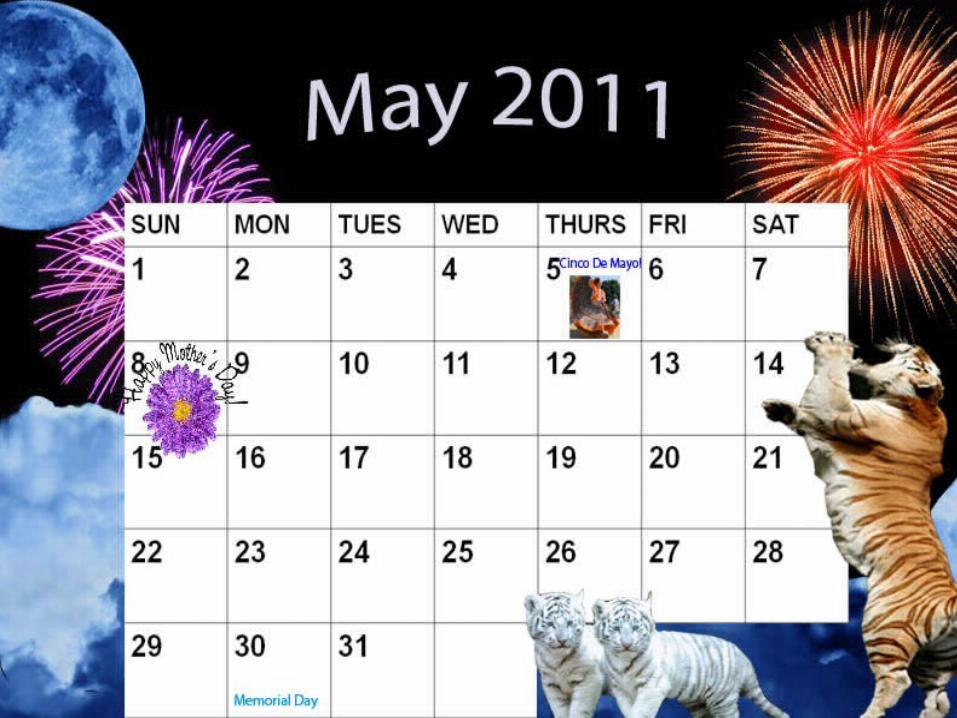
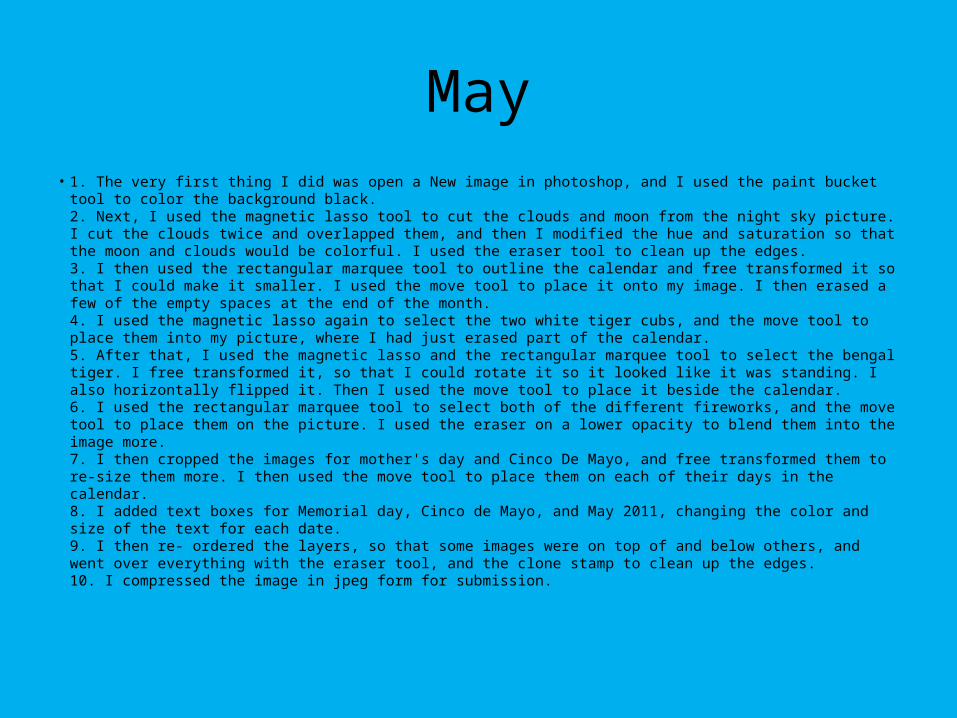
May• 1. The very first thing I did was open a New image in photoshop, and I used the paint bucket tool to color
the background black.2. Next, I used the magnetic lasso tool to cut the clouds and moon from the night sky picture. I cut the clouds twice and overlapped them, and then I modified the hue and saturation so that the moon and clouds would be colorful. I used the eraser tool to clean up the edges. 3. I then used the rectangular marquee tool to outline the calendar and free transformed it so that I could make it smaller. I used the move tool to place it onto my image. I then erased a few of the empty spaces at the end of the month. 4. I used the magnetic lasso again to select the two white tiger cubs, and the move tool to place them into my picture, where I had just erased part of the calendar. 5. After that, I used the magnetic lasso and the rectangular marquee tool to select the bengal tiger. I free transformed it, so that I could rotate it so it looked like it was standing. I also horizontally flipped it. Then I used the move tool to place it beside the calendar. 6. I used the rectangular marquee tool to select both of the different fireworks, and the move tool to place them on the picture. I used the eraser on a lower opacity to blend them into the image more.7. I then cropped the images for mother's day and Cinco De Mayo, and free transformed them to re-size them more. I then used the move tool to place them on each of their days in the calendar.8. I added text boxes for Memorial day, Cinco de Mayo, and May 2011, changing the color and size of the text for each date. 9. I then re- ordered the layers, so that some images were on top of and below others, and went over everything with the eraser tool, and the clone stamp to clean up the edges. 10. I compressed the image in jpeg form for submission.
May
• http://www.ourbrisbane.com/files/gallery/user-submitted/IMG_3676_1_1.JPG
http://www.smartbizconnection.com/posters_d_animaux_animals_files/image002.jpg
http://www.robertprice.co.uk/robblog/images/eastbourne_fireworks_2005_2.jpg
http://2.bp.blogspot.com/_3J3xyLUMKUE/TBbjm1l6gSI/AAAAAAAAB1I/obzkpXn-ayw/s1600/fireworks.gif
http://score.rims.k12.ca.us/score_lessons/special_events/cinco_de_may/Cinco%20de%20Mayp.jpg
http://www.orkut-scrapping.com/img/Mothers-Day/motherday002.gif
http://3.bp.blogspot.com/_vGgulG2Zn6Y/THTc2ynNUJI/AAAAAAAAF64/XmcqdMe_Gg4/s1600/A5+Blank+Calendar+May+2011+printable.jpg
http://www1.sulekha.com/mstore/mrsmuffet/albums/default/1_72-night-sky-600.jpg


June1. Added two text boxes with "June 2011" and "Happy Aquarium Month!" I also added Ocean day to the 8th.2. I used the rectangular marquee tool, erased the top of the calendar, and then one of the empty boxes of the calendar.3. Next I used the magnetic lasso to select the flag, used the eraser to clean up the edges, and then free transformed it on an angle to move onto the 14 which is flag day. I also added "flag day" in text on that date in purple. 4. Next, I used the rectangular marquee tool to select the 23rd. I then took the paint bucket tool and made the 23rd background pink because it is National Pink Day. I also added text saying "National Pink Day" in Vertical direction. 5. I then used the magnetic lasso to select all the fish, and free transformed them, then used the move tool to place them in various locations in the calendar. By right clicking on some images i was able to blend them using highlighting and shadows, as with the yellow and puffer fish.6. After adding all the fish I went back over the image with the eraser to tidy up the edges.
7. Lastly, I used the sponge tool to saturate the top of the image, and desaturate the bottom. I used the burn tool to darken the shadows toward the bottom to add some depth to the image.

June
• http://actualdownload.com/pictures/screenshot/simaquarium-tank-5-12346.jpg
• http://3.bp.blogspot.com/_vGgulG2Zn6Y/THTdI3qh4fI/AAAAAAAAF68/ZXGFsDXewus/s1600/A6+Blank+Calendar+June+2011+printable.jpg
• http://lavenderprophets.files.wordpress.com/2009/04/rainbow_flag.jpg
• http://www.learning-graph.com/look-and-tell.htm
• http://www.photoshoppix.com/coppermine/displayimage/album=20/pos=0.html
• http://www.beachwallpapers.in/wallpaper/yellow-fish/
• http://www.desicolours.com/fancy-fish-world/26/07/2008
• http://puffer-fish-screensaver.smartcode.com/screenshot.html

July• In this image, I have chosen to show birds enjoying the month of July. The image depicts a family having a picnic at dusk. They stop to watch fireworks and, while the table is unattended, birds
swoop in to try out their food. Below I list the steps I took to incorporate these two topics (birds and July) into my image.• • 1. Design a concept. I formulated a concept and then sketched it out on paper and created a list of images I needed to complete the design.• • 2. I took my camera to the local park and took some pictures for the background.• • 3. I searched the Internet for the remaining images, recording urls as I went.• • 4. I began the writeup with the information I had up to this point.• • 5. Documentation of images:
The image of the ground, pond, and picnic table were taken by me on September 22, 2010, at Upper Merion Township Park.
Bald eagle flying— http://tinyurl.com/27xgob5•
Hawk eating— http://tinyurl.com/2ajjau7•
Crow eating— http://tinyurl.com/24nhkuy
Flag— http://tinyurl.com/28no2pd
Family silhouette— http://tinyurl.com/2brhvkl
Fireworks 1 (used twice)— http://tinyurl.com/27kv5fh
Fireworks 2— http://tinyurl.com/2484gal
Plate (used three times)— http://tinyurl.com/23xsjcy
Hotdog-soda-fries (used twice)— http://tinyurl.com/2a97nmo
Hotdog— http://tinyurl.com/2aqtc6c
Corn on the cob— http://commons.wikimedia.org/wiki/File:VegCorn.jpg
July• 6. I reduced background photo resolution to 72 pdi.• • 7. I adjusted brightness in the image to change the look from bright daylight
to dusk. Selected the upper portion (more distant) and made additional adjustments darker so that the foreground is lighter.• • 8. I removed township building and filled in with trees. Removed some street lights, cars, and other background clutter. (rubber stamp tool)• • 9. I extended the peninsula farther beyond the picnic table to provide a space
for the human family to stand to watch the fireworks. (rubber stamp tool)• • 10. I softened the edges of the shadows to make it look more like moonlight. (smudge tool)• • 11. I cut out the flag using the magic wand tool and inverting the selection then pasted it into a new layer. I cleaned up the edges with the eraser tool and then used liquefy reshape the left side of
the flag and the free transform to size the flag. I changed the opacity of the layer and used the paint brush to make a flag pole.• • 12. I selected and cut out the image of the family and pasted it into a new layer. Then I cleaned up the edges with the eraser tool and decreased the opacity
of the layer.• • 13. I added each of the two fireworks images by dragging them into the document individually and placing them on their own layers. I selected their backgrounds with the magic wand. Then I
sampled the dark blue of the sky on the project background and used the paint bucket to recolor each of the fireworks backgrounds. Then I blended them in with the eraser on low opacity. I made a copy of fireworks 1 and changed its color balance to make that one look more pink.
• • 14. I selected the eagle, hawk, and crow using the magic wand, adjusting the tolerance and adding to the selection until all of the background was selected. I then inverted the selection, copied them,
and pasted them each into a new layer of my project. On the hawk I removed the grass around the feet and had to “build them out” considerably using the rubber stamp tool due to missing parts that were covered by grass.
• • 15. I typed July on a new layer and created a shadow behind it. • • 16. I selected and the plate, corn on the cob, and hotdog-soda-fries using the lasso and use the magic wand to select the hotdog. I pasted them each into a new layer of my project, cleaned up their
edges and softened them with eraser on a low opacity. Then I lowered the brightness on each because this image is depicting a night scene.• • 17. I saved the image size down to 8 x 6, resampling to keep the resolution at
72 dpi.• • 18. From the original psd document I saved a jpeg down to 9 x 6.75 inches to fit onto a PowerPoint slide. Then I used Save for Web & Devices to further compress the file, adjusting the quality and
the blur. Then I resaved this jpeg as my final.• • 19. Lastly I made final updates to this writeup and submitted the project on WebCT.


August• In this image, I have chosen to show horses enjoying the month of August. The image depicts three scenes of summer pastimes that horses and even humans enjoy. From left to right the scenes
depict Rest and Relaxation, Play at the Beach, and Summer Love. The three scenes are intended to have an equal value. They are more of a collage than one picture and therefore the horse images are relatively the same size rather that sizing them to portray distance and depth to the picture.
• • Below I list the steps I took to incorporate these two topics (horses and August pastimes) into my image.• • 1. Design a concept. I formulated a concept and then sketched it out on paper and created a list of images I needed to complete the design.• • 2. I selected a background picture to represent the pasture from a group of photos I took earlier in September at Upper Merion Township Park.• • 3. I searched the Internet for the remaining images, recording urls as I went.• • 4. I began the write-up with the information I have up to this point.• • 5. Documentation of images:• • Pasture Background was taken by me on September 22, 2010, at Upper Merion Township Park.• • Beach Background:• • http://www.memorable-beach-vacations.com/image-files/florida-cocoa-beach-surf-birds-searching-food-640w-2352ce-80.jpg• • or http://tinyurl.com/2fawoux• • • Two horses with heads together:• • http://www.freecaliforniawallpaper.com/images/animal/horse/horse10_wp.jpg• • • White horse at the beach:• • http://desktop.qkype.com/wallpapers/animals_343/horses_352/beautiful_white_horse_desktop_wallpaper_35827.jpg• • or http://tinyurl.com/25n2lcx

August
• • Horse lying down: http://tinyurl.com/36jag38• • • 6. Resized the Pasture background photo to 8 x 6 inches and resampled while changing the resolution to 72 dpi. I then saved the image as AUGUST-Image 2 –
This is now my project document.• • 7. Removed extraneous items from the background (pasture) and from the beach image using the Rubber Stamp tool.• • 7. Added the beach image on a separate layer to the pasture image. Double clicked pasture layer to make it into a regular layer and moved the beach layer
behind the pasture layer.• • 8. Created a temporary layer called Guides on which I will draw guides for sectioning the background for the three scenes. Turned on the rulers and set a
Photoshop guide at the center of the page. Drew guides for erasing the center of the Pasture image.• • 9. Used the eraser to remove a portion of the pasture and to make a section of the beach image visible. • • 10. Selected horse images using the Lasso tool and pasted each into a separate layer in the project. Cleaned up the edges using the eraser tool and adjusted
their brightness.• • 11. Added the text (AUGUST) in its own layer using the Text tool and placed a drop shadow behind it. • • 12. Deleted the guides layer.• • 13. Completed the write-up.• • 14. Saved the completed image as a jpg file and then used Save for Web & Devices to further compress the file, adjusting the quality and the blur. Then I resaved
this jpeg as my final.• • 15. Lastly I made final updates to this write-up and submitted the project on WebCT.
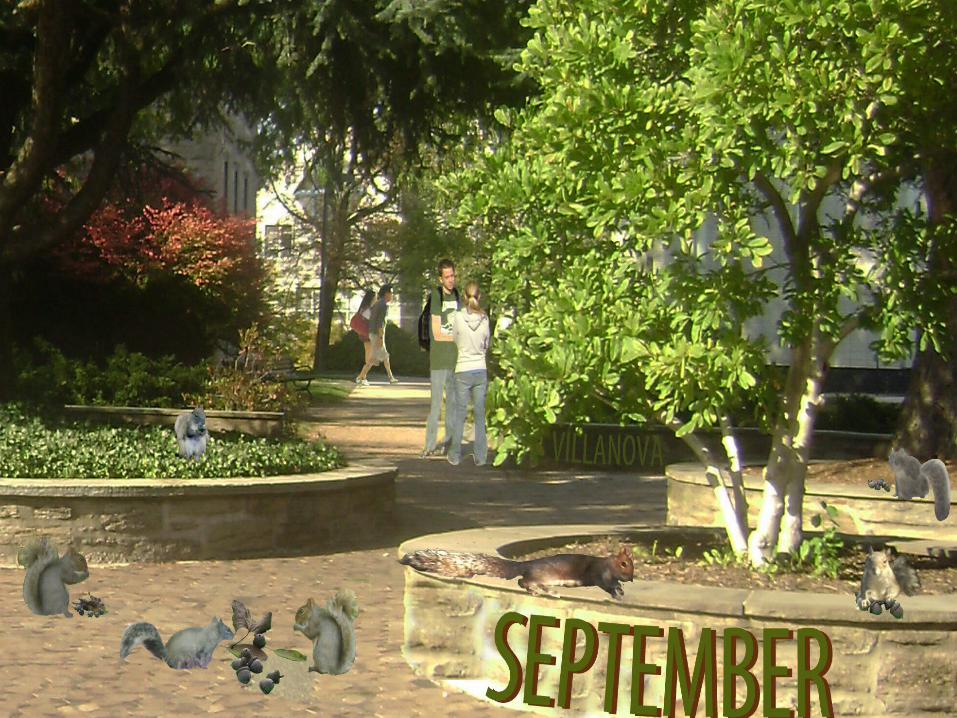

September• In this image, I have chosen to depict a nice September afternoon on the campus of Villanova University; squirrels are playing and collecting food for the winter ahead and students
have returned to campus for the fall semester. • • Below I list the steps I took to incorporate these two topics (squirrels storing up food for the winter and September back to school) into my image.• • 1. Design a concept. I formulated a concept and then sketched it out on paper and created a list of images I needed to complete the design.• • 2. I traveled to Villanova University on a quiet Sunday of fall break to photograph a background scene for my project and to catch Villanova squirrels in their fall activities.• • 3. I photographed a few acorns on a green cloth (green screen) to incorporate into the image. I removed the green using the magic wand and the eraser tools leaving the
acorns. (Lesson learned: Removing the green was more difficult than I had anticipated because the acorns were on top of the green creating shadows that modified the shades of the color. My husband, a producer for film and video, was amused and reminded me to put objects in front of the green screen in the future.)
• • 4. I began the write-up with the information I have up to this point.• • 5. Documentation of images:• • Villanova Background was taken by me on October 10, 2010, at Villanova University.• • Students 1 and Students 2 were taken by me on October 10, 2010, at villanova University.
All squirrel photos were taken by me on October 10, 2010, at Villanova University.
All acorn photos were taken by me on October 25, 2010, on a green cloth laid on my driveway in King of Prussia.• • 6. Cropped the portion of the campus photo I wanted to use for my background image, copied and pasted it into a new Photoshop document.• • 7. Selected student images 1 and 2 from campus photos using the lasso tool and pasted copies of the selections into my project document. I cleaned up their edges using the
eraser tool. Student image 1 needed touch up work because the male student had been resting his hand/arm on the big iron gate near Falvey and his hand was positioned in an unnatural way. I removed a portion of his real arm after reconstructing the majority of a new arm in a bent position across his chest.
• • 8. Extracted squirrel images from numerous photos on Villanova campus using the lasso tool and the eraser tool to clean up the edges. Pasted them into the project
document and adjusted their contrast and brightness to help them stand out more. Their coloring varies due to individual differences and due to lighting conditions in the original images. I liked that aspect of the images so I left it in.

September• 9. Selected the green background on acorn/leaf images with the magic wand tool and
the “add to selection” option and adjusting the tolerance. Then used “inverse” to select the acorns and leaves. I pasted them into the project document in various locations and cleaned up their edges with the eraser tool.
• • 10. Added text (SEPTEMBER) and (VILLANOVA) in their own layers using the Text
tool and placed a drop shadow behind the month. • • 11. Created a document with smaller/low resolution versions of the original
photos for your reference and saved it as a pdf file.• • 11. Completed the write-up.• • 12. Saved the completed image as a lower resolution psd file (keeping the layers)
and as a jpg file.• • 13. Lastly I made final updates to this write-up and submitted the project on
WebCT along with the writeup and a pdf document containing the original pictures.


October
Creating the October one was tons of fun!! I used the selection tool, move, free transform, and rotate to get the pictures exactly where I wanted them. I cut out an eye mask for Halloween and placed it on the polar bears eyes and erased the 2 holes, so the bears actually eyes would come through. The other two bears on the bottom were scaled down in size and made to look like they were in the water as well by using the cloning stamp and the healing band-aid. The bear on the right with the pumpkin in its mouth, I decided to use the blend tool and play around with a few buttons (dissolve, etc.) and I made it look like the bear was underneath the water. I then decided to place a tiny cartoon bear on the pumpkin using select and move, and then i used the cloning stamp and eraser to perfect it. The two identical pumpkins I rotated and put in the water as if they were floating, by using the blend tool again. I finished off the image with the text tool for the word October on top because my group has decided to place the month in the picture somewhere.

October
image1:http://www.ivillage.com/messageboards
image2: http://www.dearteddybear.com/index.php/teddybear/All_Occasions-15_Bear_Bones
image3:http://www.eyeheartglasses.com/2008/10/mask-glasses-linda-farrow/
image4: http://polarbearnews.com/2008/page/3
image5: http://blogs.dixcdn.com/inpictures/?tag=california
image6: http://www.upi.com/News_Photos/gallery/Animals-at-the-Zoo/150/3


November
My image three is the month of November with Freedom Fighter Tom the Turkeys. At first my background was a 2010 November calendar but I blended and dissolved and lightened to freedom fighter turkeys with guns and an American flag "fighting for their freedom". I cropped and cut out, and erased extra scraps of a cartoon turkey very scared for the Holidays! I strategically placed him under the last Thursday of the month. I finished the image with a "battle turkey" with a quote underneath that said "Unlike some soldiers, Tom didn't mind pulling Thanksgiving duty." All of my images were a lot of fun to blend and work with for my last image for the groups Pictorial Essay.

November
1. http://deathby1000papercuts.com/2009/11/thanksgiving-turkey-pardon-ceremony-gone-bad/
2. http://deafcactusnews.blogspot.com/2009_10_25_archive.html
3. http://antzfxway.com/2009/12/26/design-calendar-2010/
4. http://www.soldiersperspective.us/

December
In putting together my image for my group pictorial essay, I brought together several different layers. The tools I used frequently during this process was the, selection tool, move tool, eraser tool, magnetic lasso, text tool, clone stamp, paint brush, and I changed the levels of saturation. My background I decided to have the two white dogs in a holiday setting, I then selected, cropped, and moved the picture of the dog with the present, and the two sleeping dogs. After detailed zooming to blend and perfect the image, I realized it was not enough, and I thought the perfect touch would be to place Professor Papalaskari's face on the teddy bear (I inserted her face in jpeg format for the best quality), I cropped and moved a santa hat to her head, and placed the festive words "ho, ho, ho" on her hat. Here and there I painted and blended, using clone stamp, the paint brush, and the band-aid tool. Because the group has decided to place the months on each of our 12 images, I bolded and made mine red, and placed the word "December" at the top of the page.

December
picture1:http://animals.desktopnexus.com/wallpaper/1405/
picture2:http://www.flash-screen.com/free-wallpaper/dog-wallpaper_693.html
picture3:http://pearlssentimentaljourney.blogspot.com/2008/12/christmas-has-gone-to-cats-n-dogs.html
picture4:Mary Papalaskari's Villanova ID Photo
picture5:http://www.freakingnews.com/Santa-Hat-Pictures--1731.asp

THE END