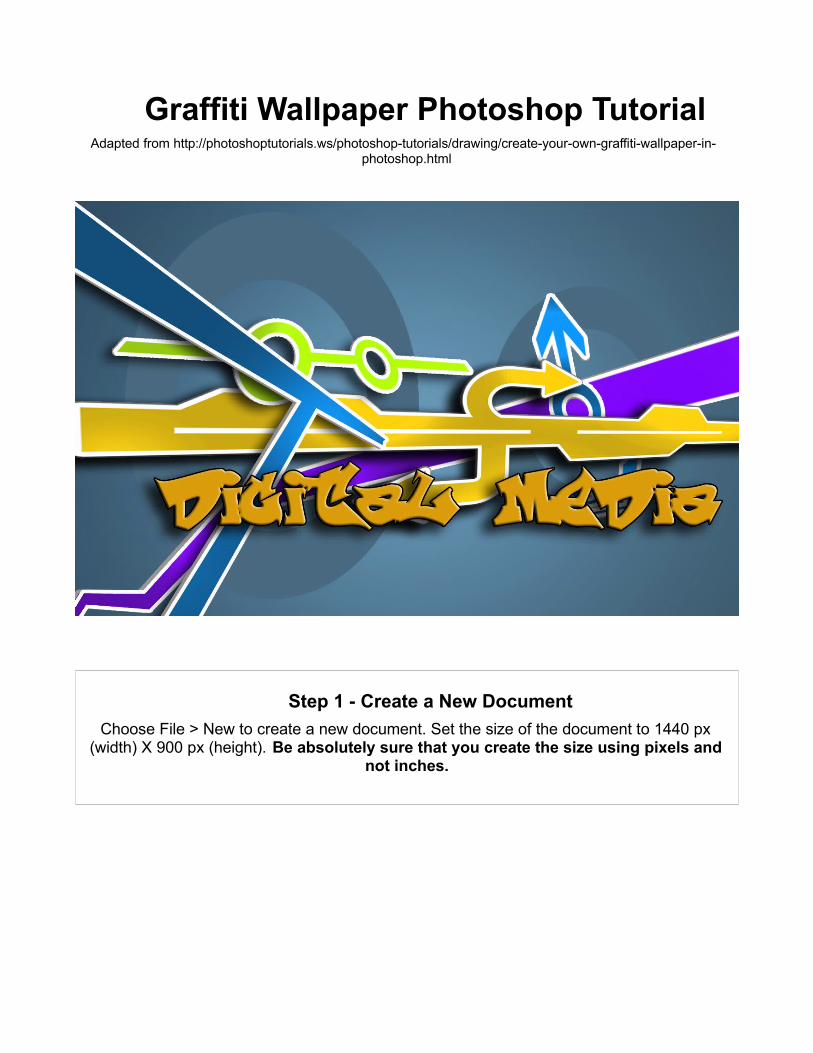
Graffiti Wallpaper Photoshop Tutorial
25
Graffiti Wallpaper Photoshop Tutorial Adapted from http://photoshoptutorials.ws/photoshop-tutorials/drawing/create-your-own-graffiti-wallpaper-in- photoshop.html Step 1 - Create a New Document Choose File > New to create a new document. Set the size of the document to 1440 px (width) X 900 px (height). Be absolutely sure that you create the size using pixels and not inches.
Transcript of Graffiti Wallpaper Photoshop Tutorial
Graffiti Wallpaper Photoshop TutorialAdapted from http://photoshoptutorials.ws/photoshop-tutorials/drawing/create-your-own-graffiti-wallpaper-in-
photoshop.html
Step 1 - Create a New DocumentChoose File > New to create a new document. Set the size of the document to 1440 px
(width) X 900 px (height). Be absolutely sure that you create the size using pixels and not inches.
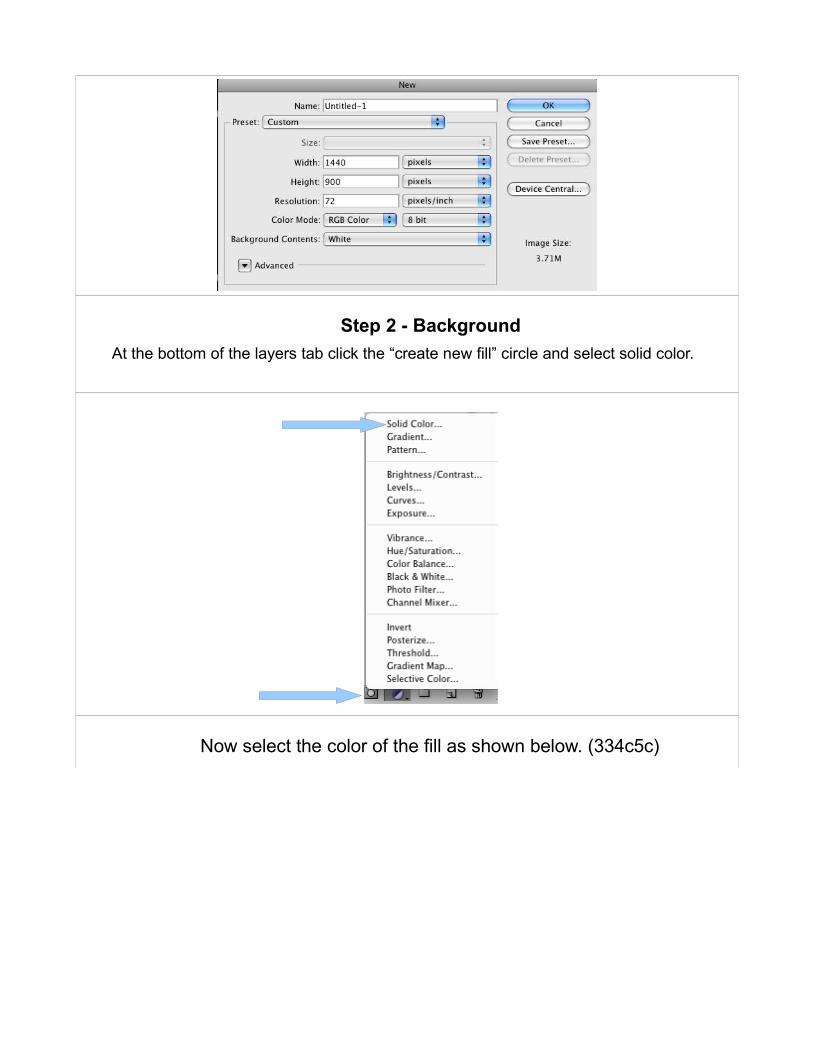
Step 2 - BackgroundAt the bottom of the layers tab click the “create new fill” circle and select solid color.
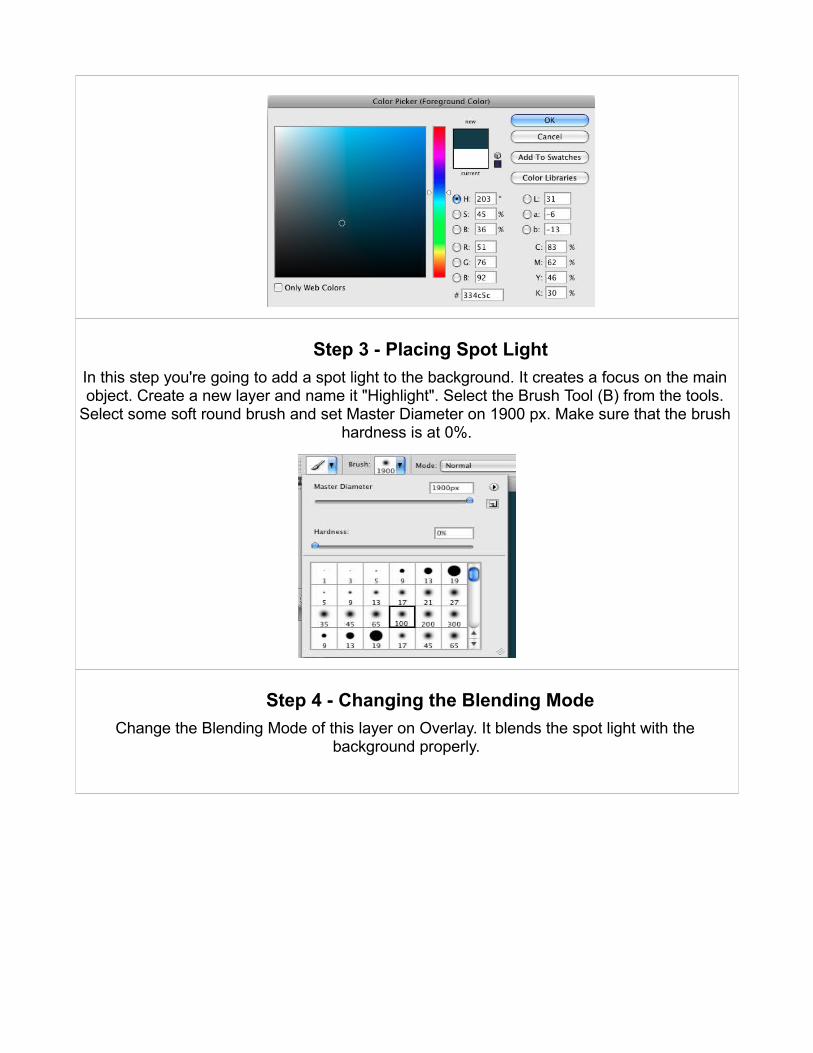
Now select the color of the fill as shown below. (334c5c)
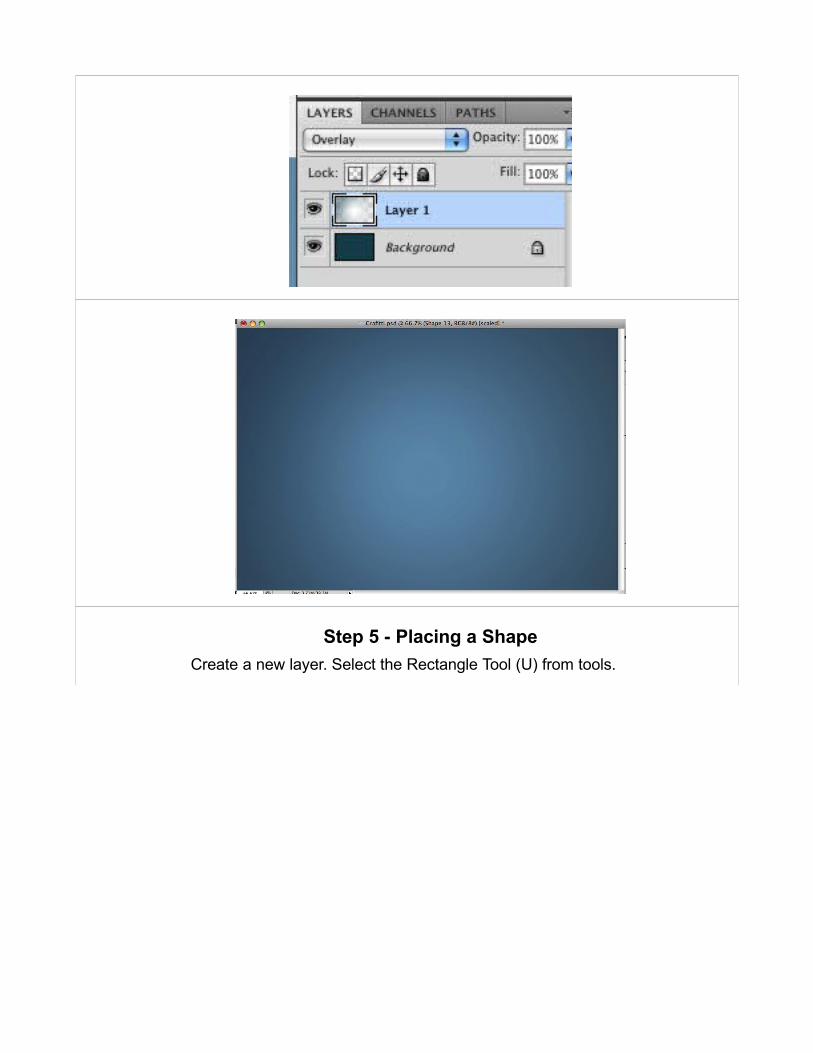
Step 3 - Placing Spot LightIn this step you're going to add a spot light to the background. It creates a focus on the main object. Create a new layer and name it "Highlight". Select the Brush Tool (B) from the tools.
Select some soft round brush and set Master Diameter on 1900 px. Make sure that the brush hardness is at 0%.
Step 4 - Changing the Blending ModeChange the Blending Mode of this layer on Overlay. It blends the spot light with the
background properly.
Step 5 - Placing a ShapeCreate a new layer. Select the Rectangle Tool (U) from tools.
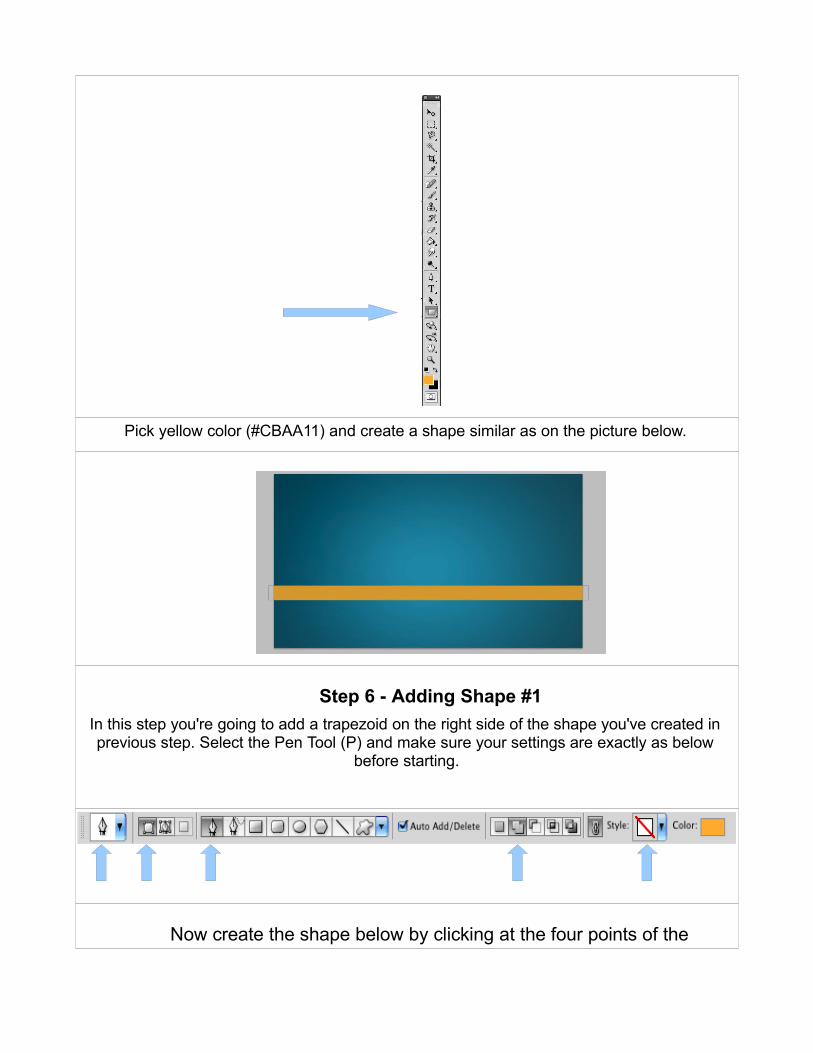
Pick yellow color (#CBAA11) and create a shape similar as on the picture below.
Step 6 - Adding Shape #1In this step you're going to add a trapezoid on the right side of the shape you've created in previous step. Select the Pen Tool (P) and make sure your settings are exactly as below
before starting.
Now create the shape below by clicking at the four points of the
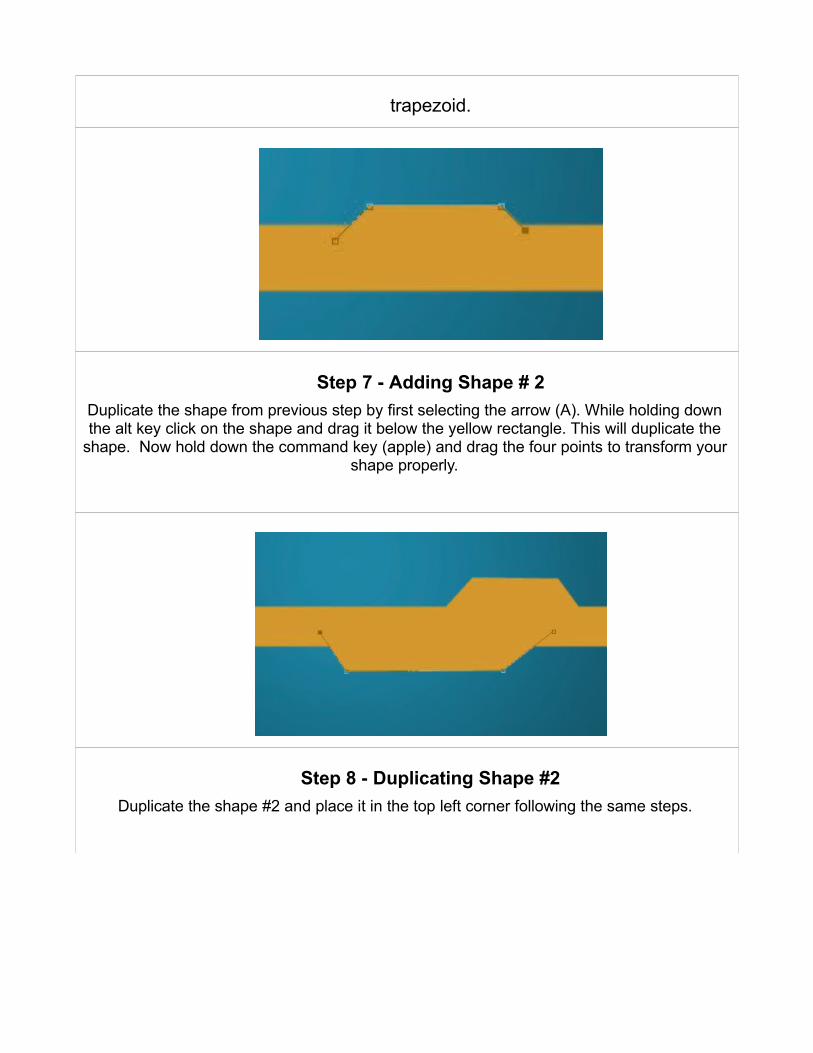
trapezoid.
Step 7 - Adding Shape # 2Duplicate the shape from previous step by first selecting the arrow (A). While holding down the alt key click on the shape and drag it below the yellow rectangle. This will duplicate the
shape. Now hold down the command key (apple) and drag the four points to transform your shape properly.
Step 8 - Duplicating Shape #2Duplicate the shape #2 and place it in the top left corner following the same steps.
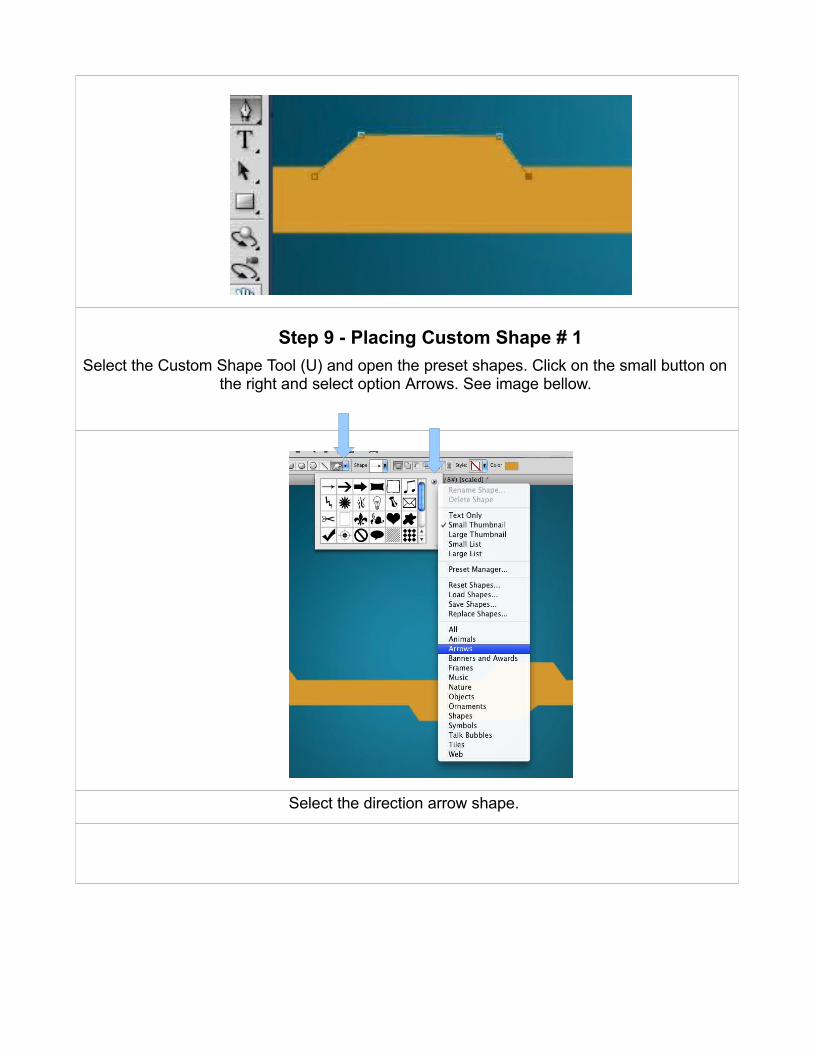
Step 9 - Placing Custom Shape # 1Select the Custom Shape Tool (U) and open the preset shapes. Click on the small button on
the right and select option Arrows. See image bellow.
Select the direction arrow shape.
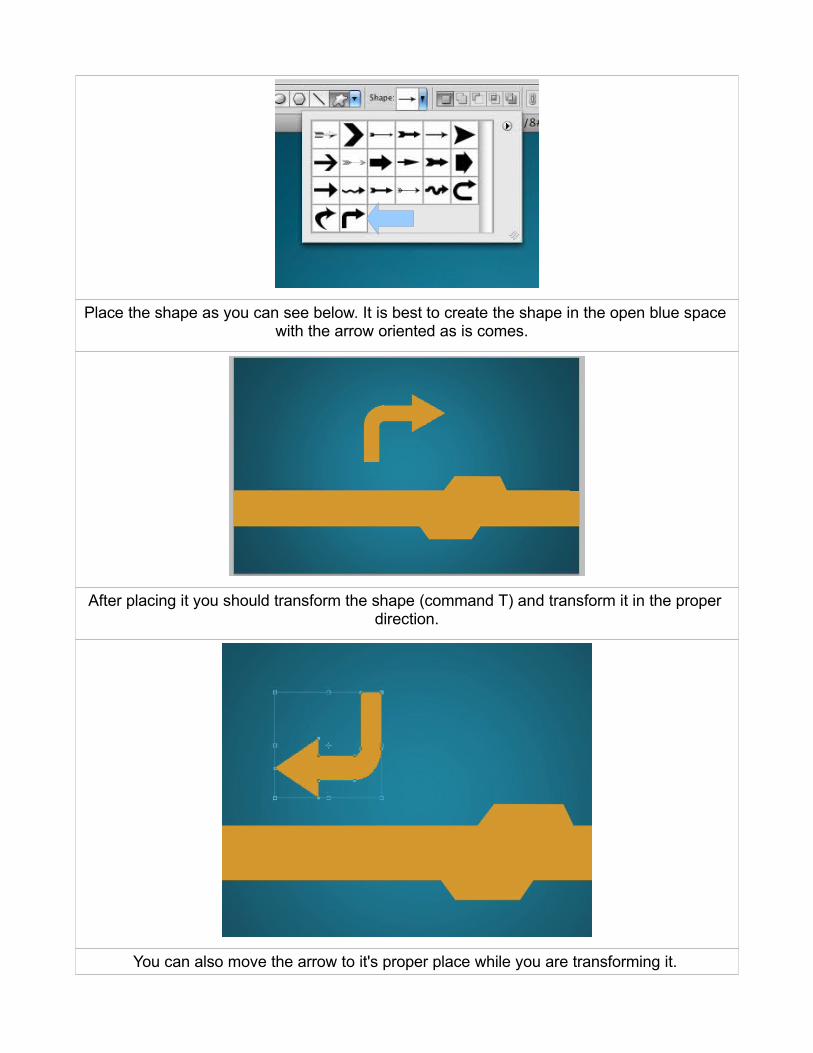
Place the shape as you can see below. It is best to create the shape in the open blue space with the arrow oriented as is comes.
After placing it you should transform the shape (command T) and transform it in the proper direction.
You can also move the arrow to it's proper place while you are transforming it.
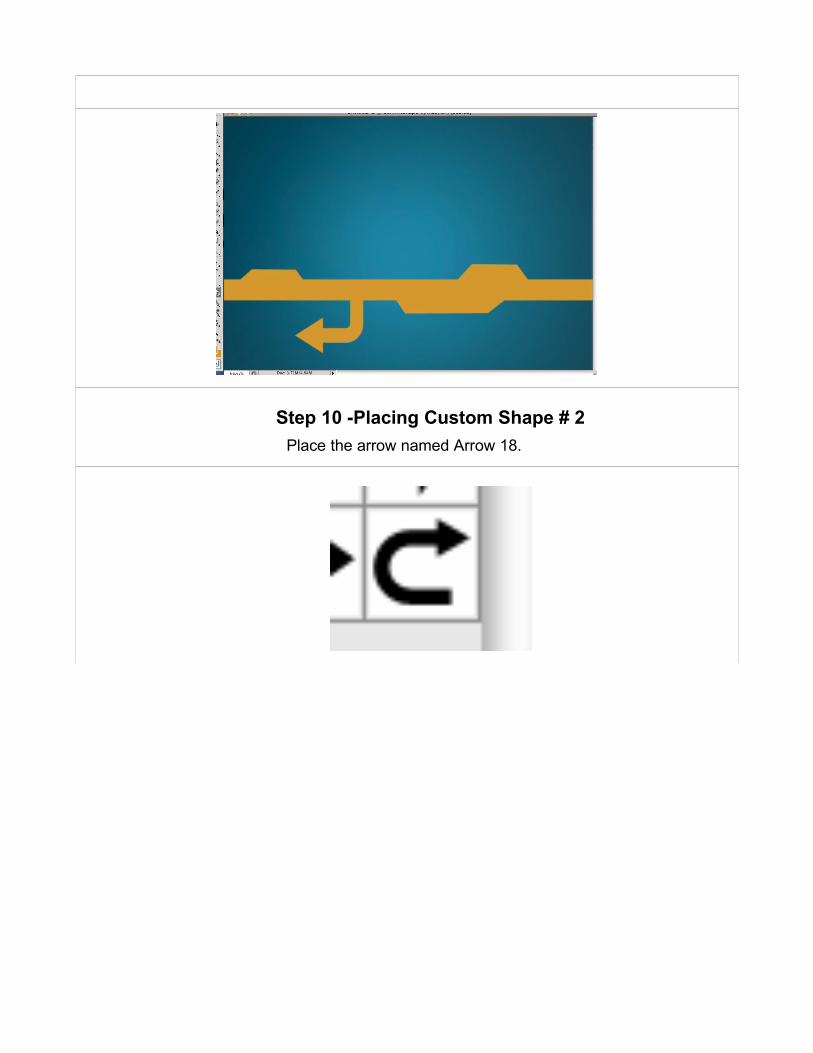
Step 10 -Placing Custom Shape # 2Place the arrow named Arrow 18.
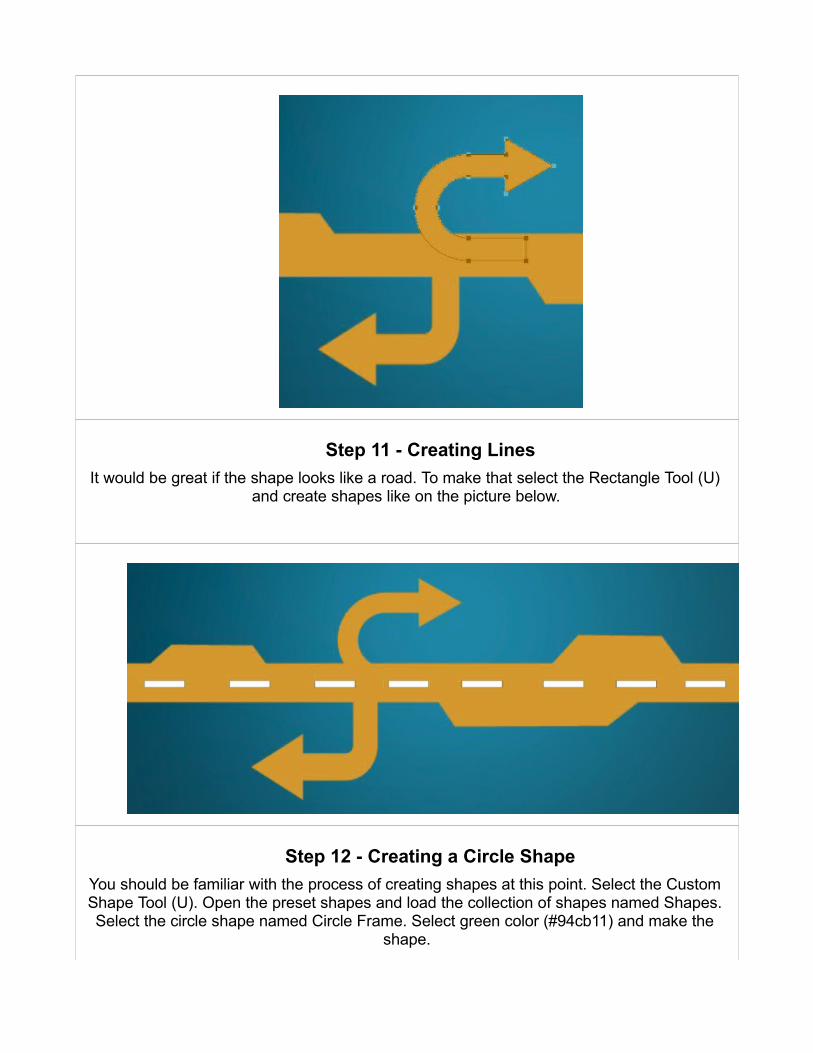
Step 11 - Creating LinesIt would be great if the shape looks like a road. To make that select the Rectangle Tool (U)
and create shapes like on the picture below.
Step 12 - Creating a Circle ShapeYou should be familiar with the process of creating shapes at this point. Select the Custom Shape Tool (U). Open the preset shapes and load the collection of shapes named Shapes. Select the circle shape named Circle Frame. Select green color (#94cb11) and make the
shape.
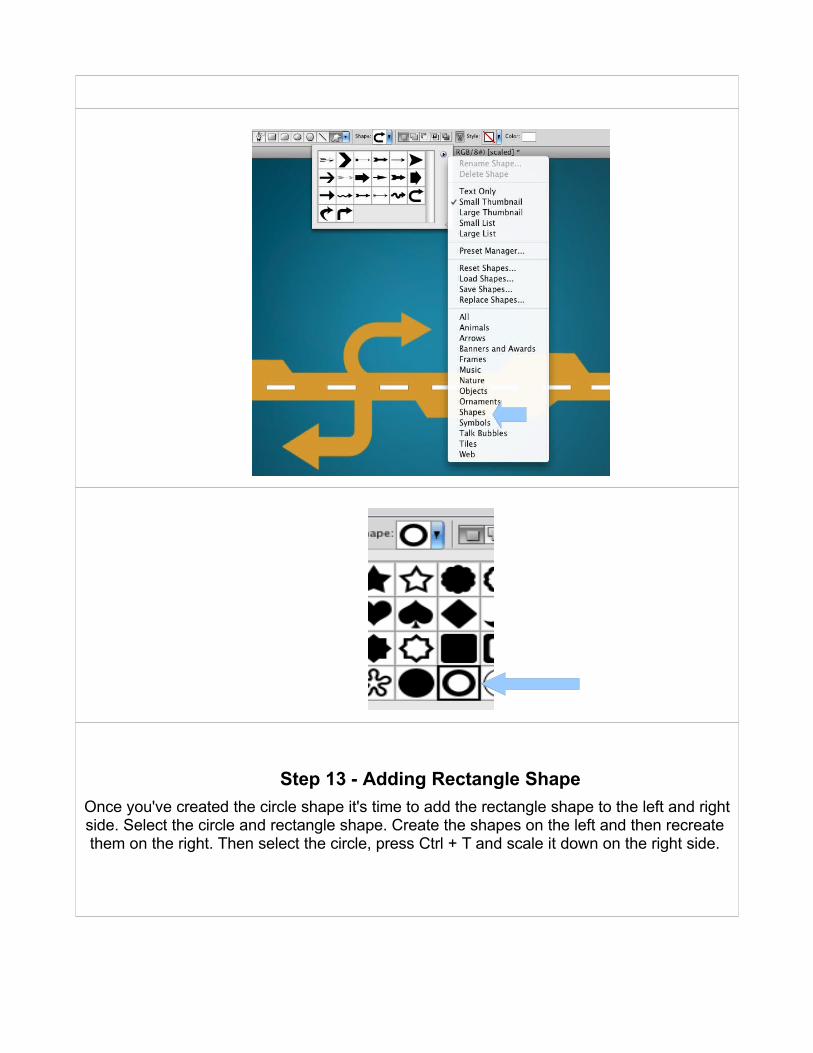
Step 13 - Adding Rectangle Shape Once you've created the circle shape it's time to add the rectangle shape to the left and right side. Select the circle and rectangle shape. Create the shapes on the left and then recreate them on the right. Then select the circle, press Ctrl + T and scale it down on the right side.
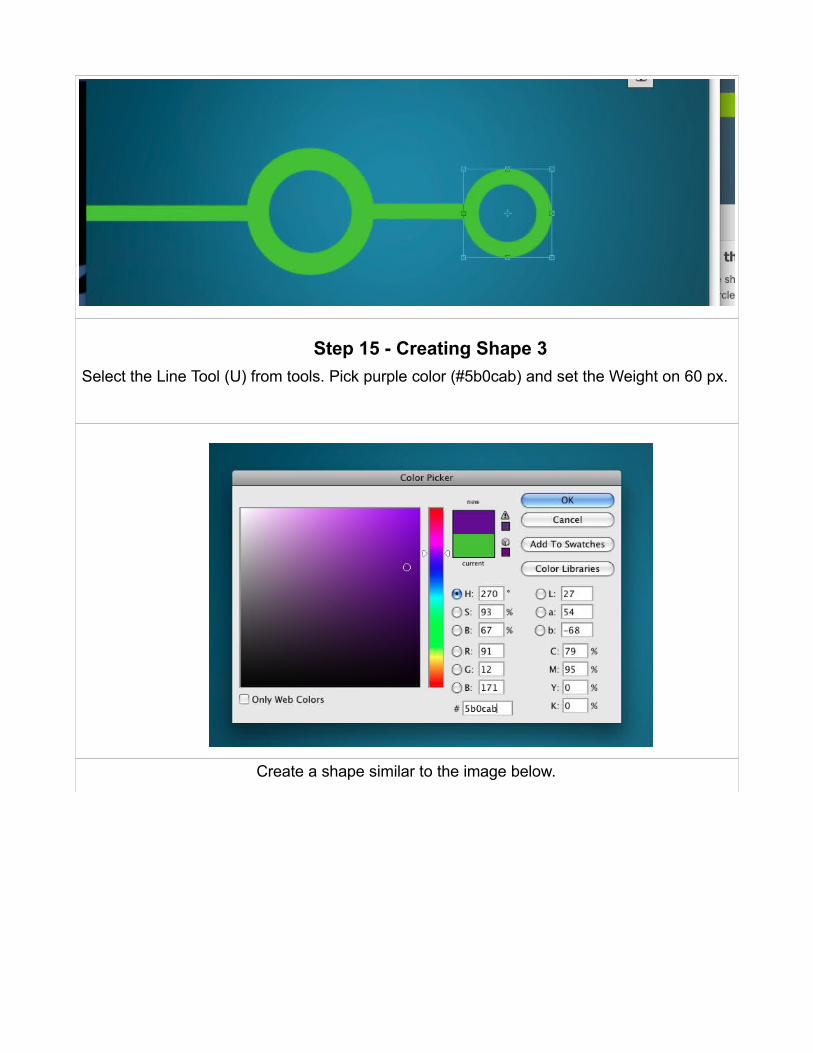
Step 15 - Creating Shape 3Select the Line Tool (U) from tools. Pick purple color (#5b0cab) and set the Weight on 60 px.
Create a shape similar to the image below.
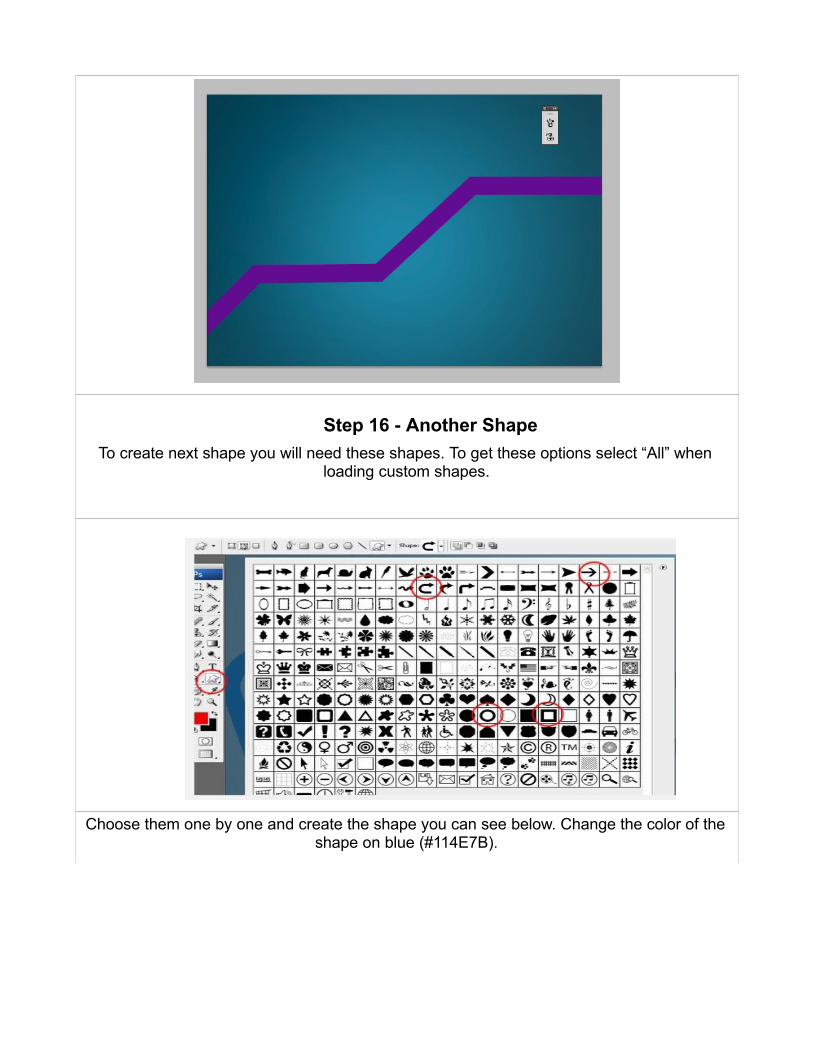
Step 16 - Another ShapeTo create next shape you will need these shapes. To get these options select “All” when
loading custom shapes.
Choose them one by one and create the shape you can see below. Change the color of the shape on blue (#114E7B).
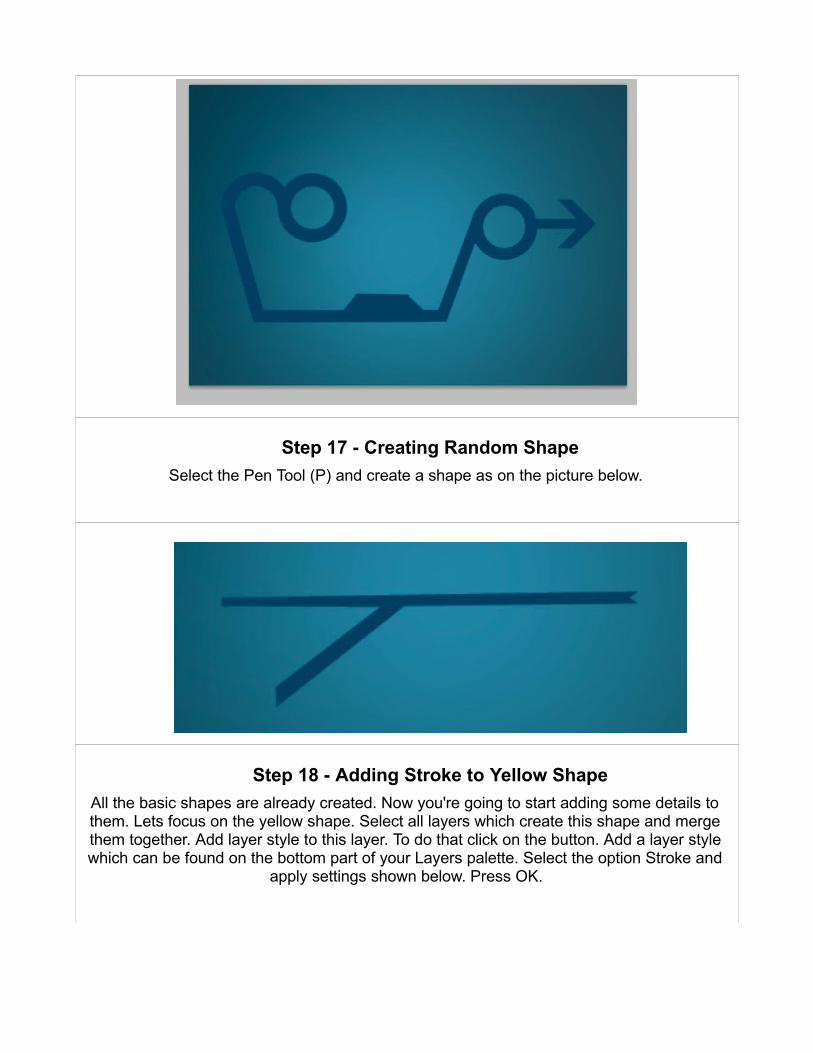
Step 17 - Creating Random ShapeSelect the Pen Tool (P) and create a shape as on the picture below.
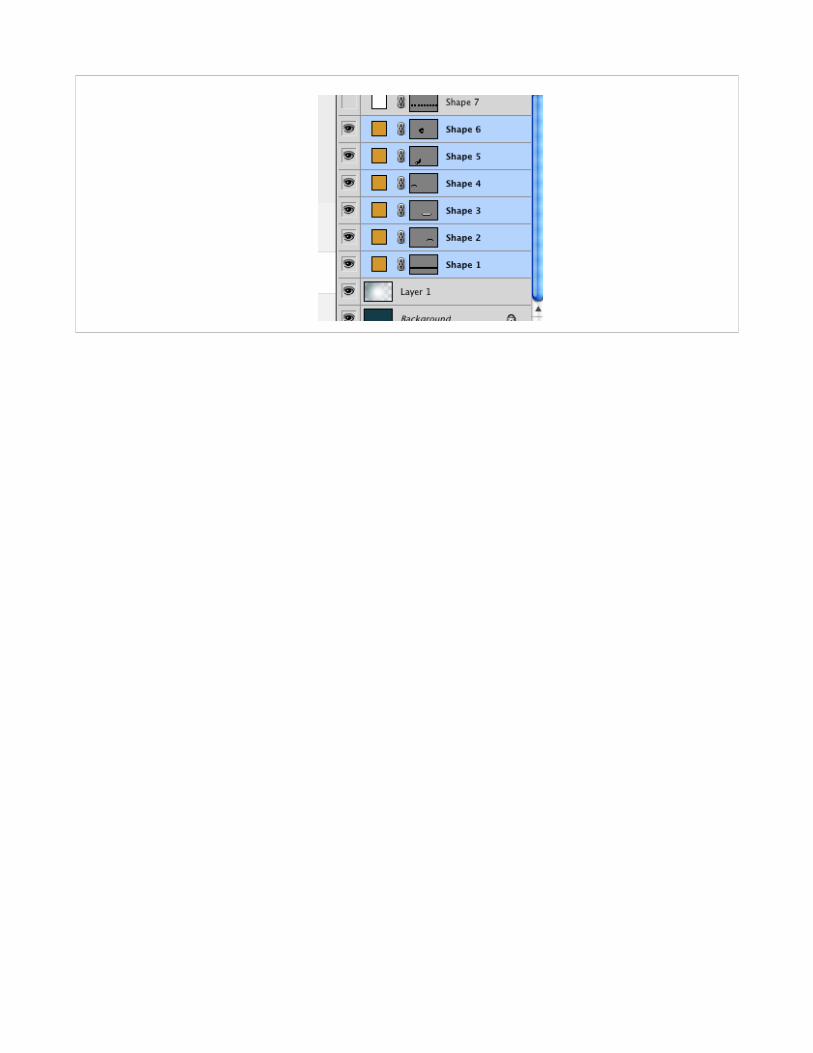
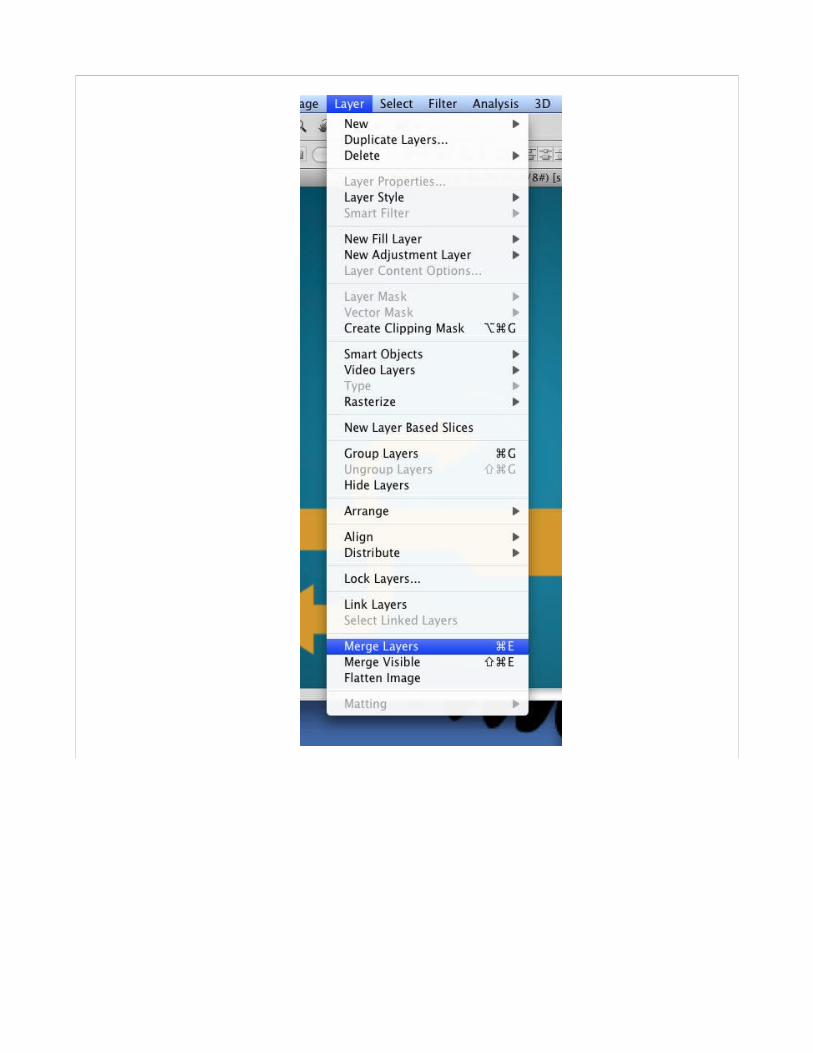
Step 18 - Adding Stroke to Yellow ShapeAll the basic shapes are already created. Now you're going to start adding some details to them. Lets focus on the yellow shape. Select all layers which create this shape and merge them together. Add layer style to this layer. To do that click on the button. Add a layer style which can be found on the bottom part of your Layers palette. Select the option Stroke and
apply settings shown below. Press OK.
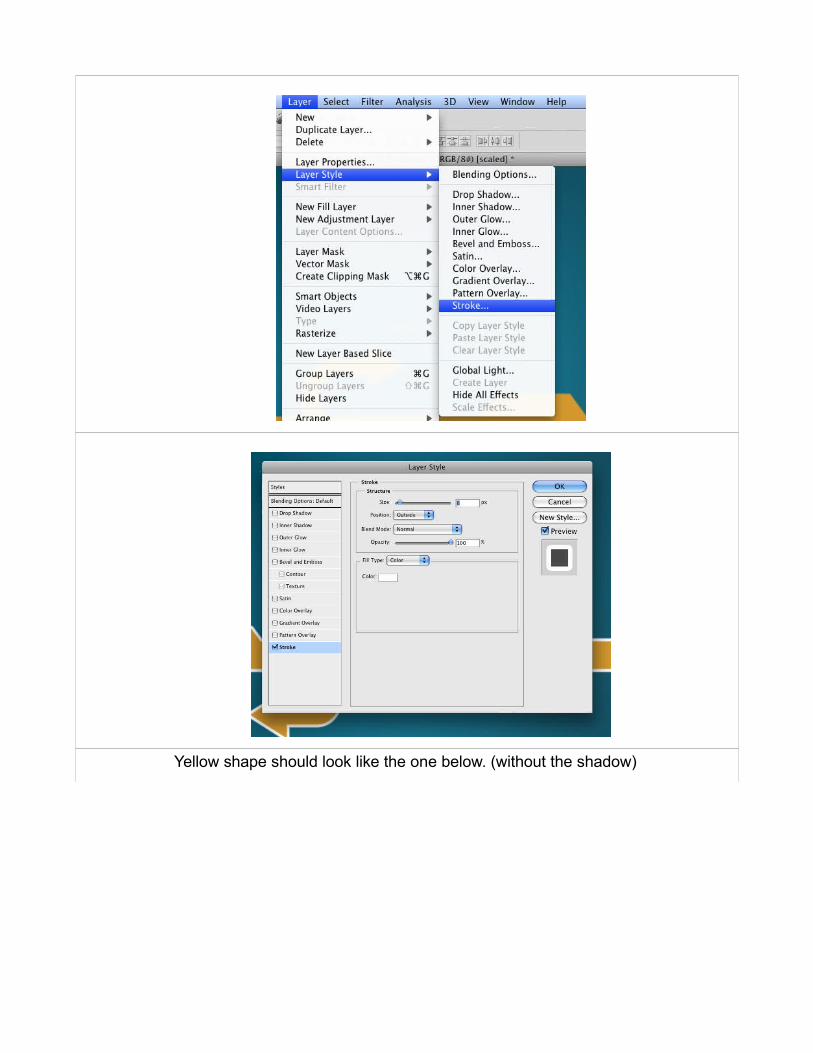
Yellow shape should look like the one below. (without the shadow)
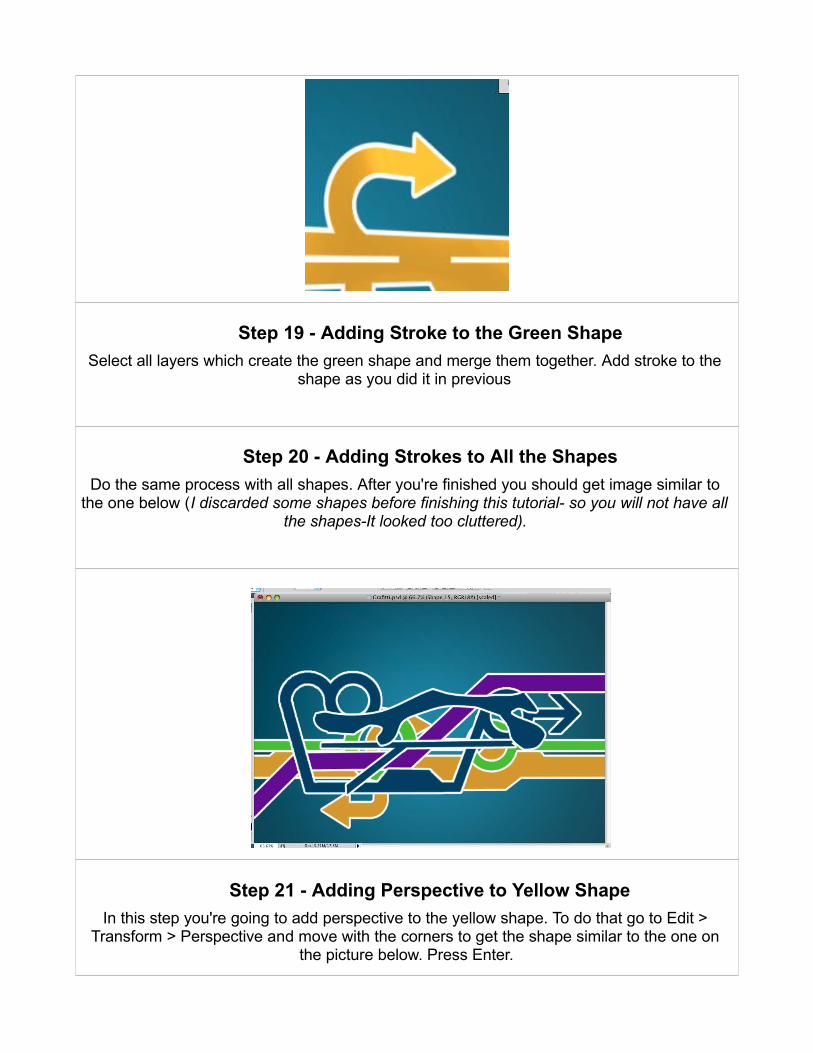
Step 19 - Adding Stroke to the Green ShapeSelect all layers which create the green shape and merge them together. Add stroke to the
shape as you did it in previous
Step 20 - Adding Strokes to All the ShapesDo the same process with all shapes. After you're finished you should get image similar to
the one below (I discarded some shapes before finishing this tutorial- so you will not have all the shapes-It looked too cluttered).
Step 21 - Adding Perspective to Yellow ShapeIn this step you're going to add perspective to the yellow shape. To do that go to Edit >
Transform > Perspective and move with the corners to get the shape similar to the one on the picture below. Press Enter.
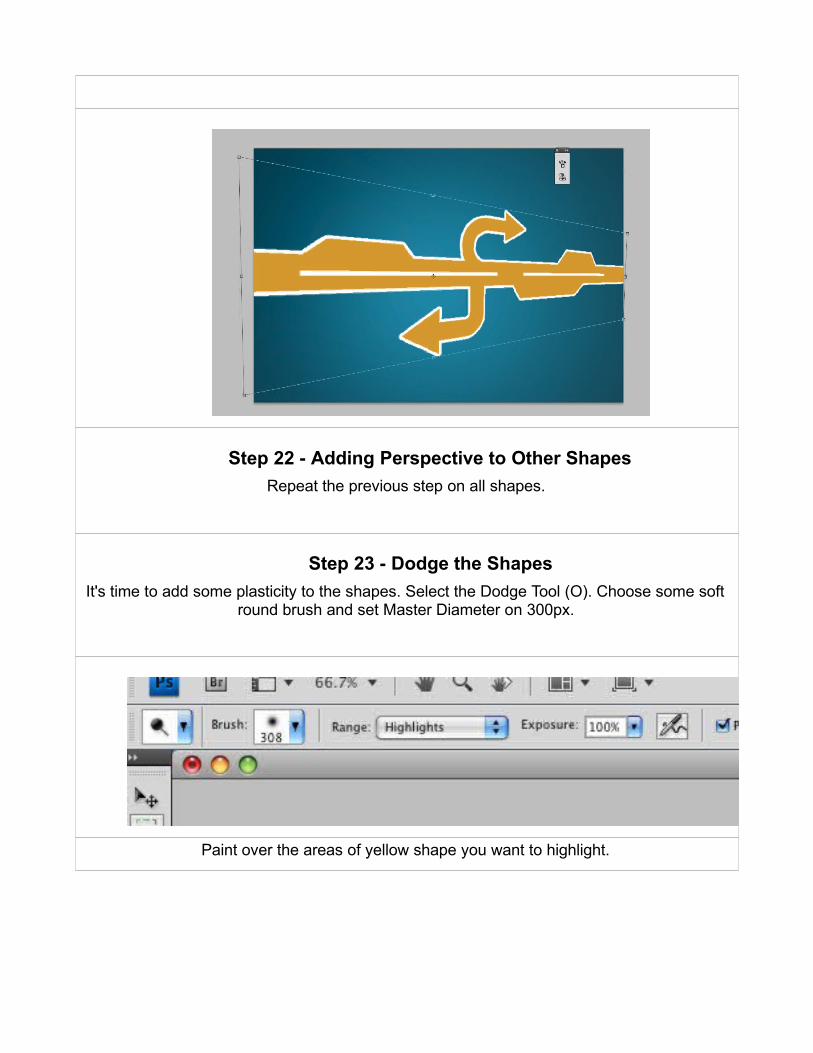
Step 22 - Adding Perspective to Other ShapesRepeat the previous step on all shapes.
Step 23 - Dodge the ShapesIt's time to add some plasticity to the shapes. Select the Dodge Tool (O). Choose some soft
round brush and set Master Diameter on 300px.
Paint over the areas of yellow shape you want to highlight.
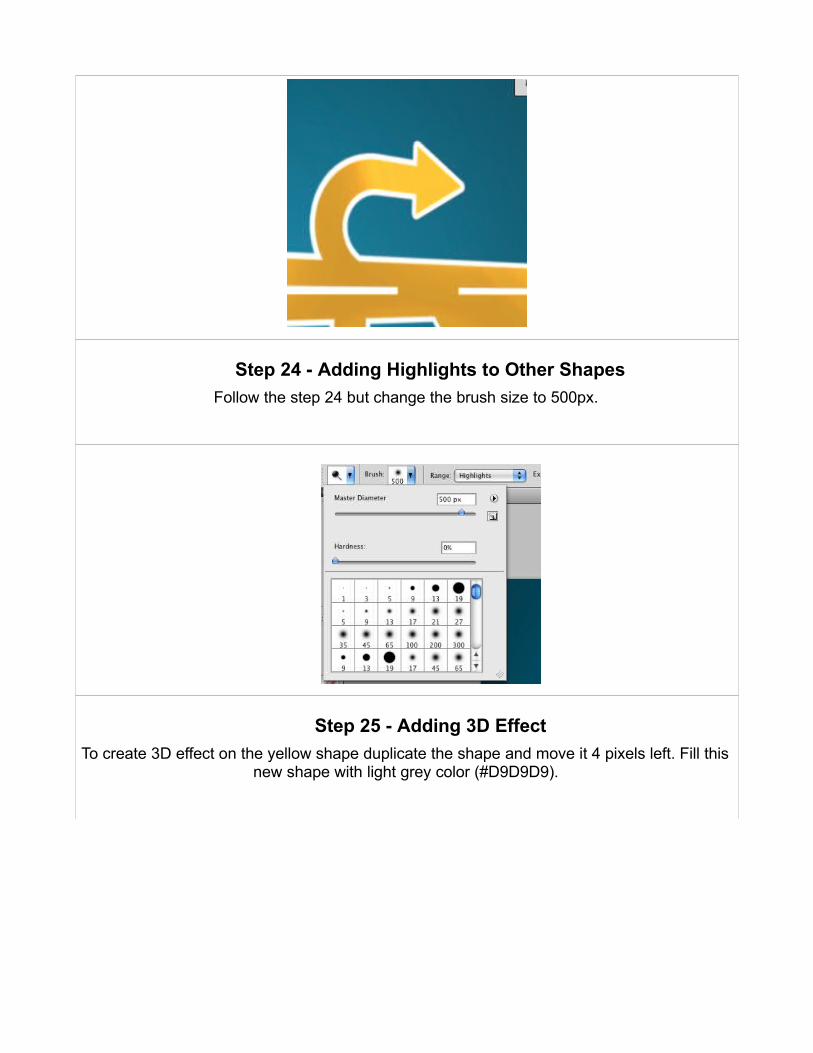
Step 24 - Adding Highlights to Other ShapesFollow the step 24 but change the brush size to 500px.
Step 25 - Adding 3D EffectTo create 3D effect on the yellow shape duplicate the shape and move it 4 pixels left. Fill this
new shape with light grey color (#D9D9D9).
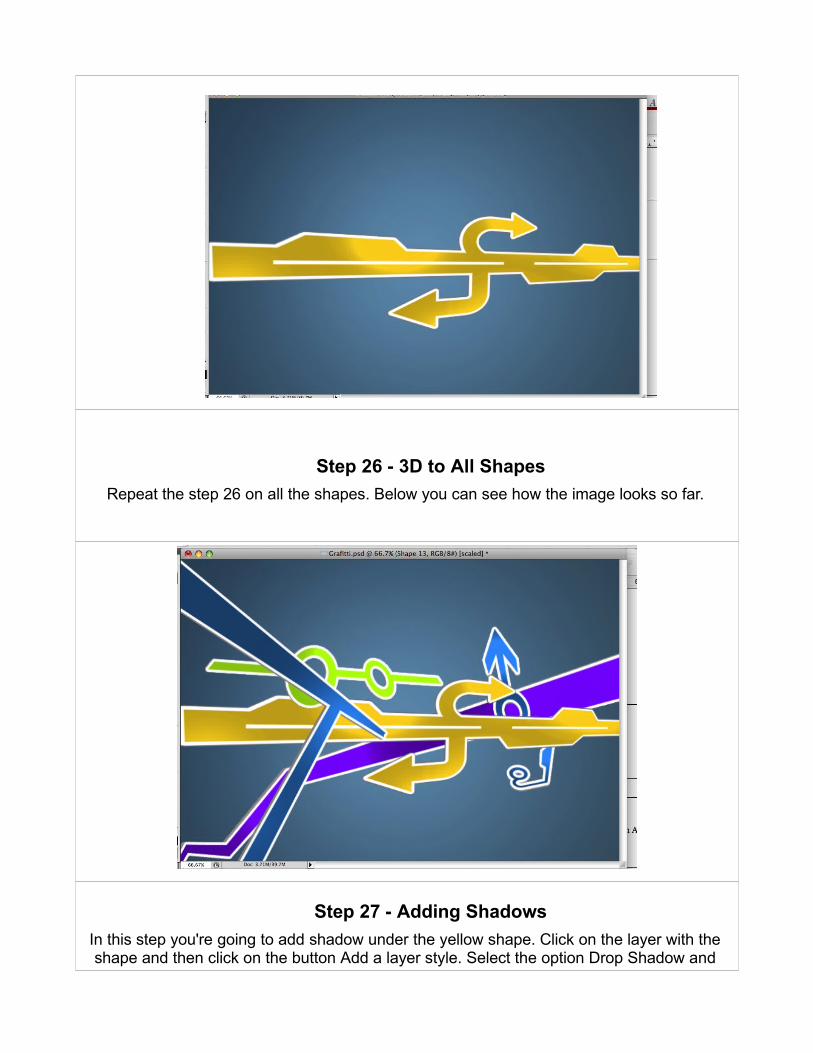
Step 26 - 3D to All ShapesRepeat the step 26 on all the shapes. Below you can see how the image looks so far.
Step 27 - Adding ShadowsIn this step you're going to add shadow under the yellow shape. Click on the layer with the shape and then click on the button Add a layer style. Select the option Drop Shadow and
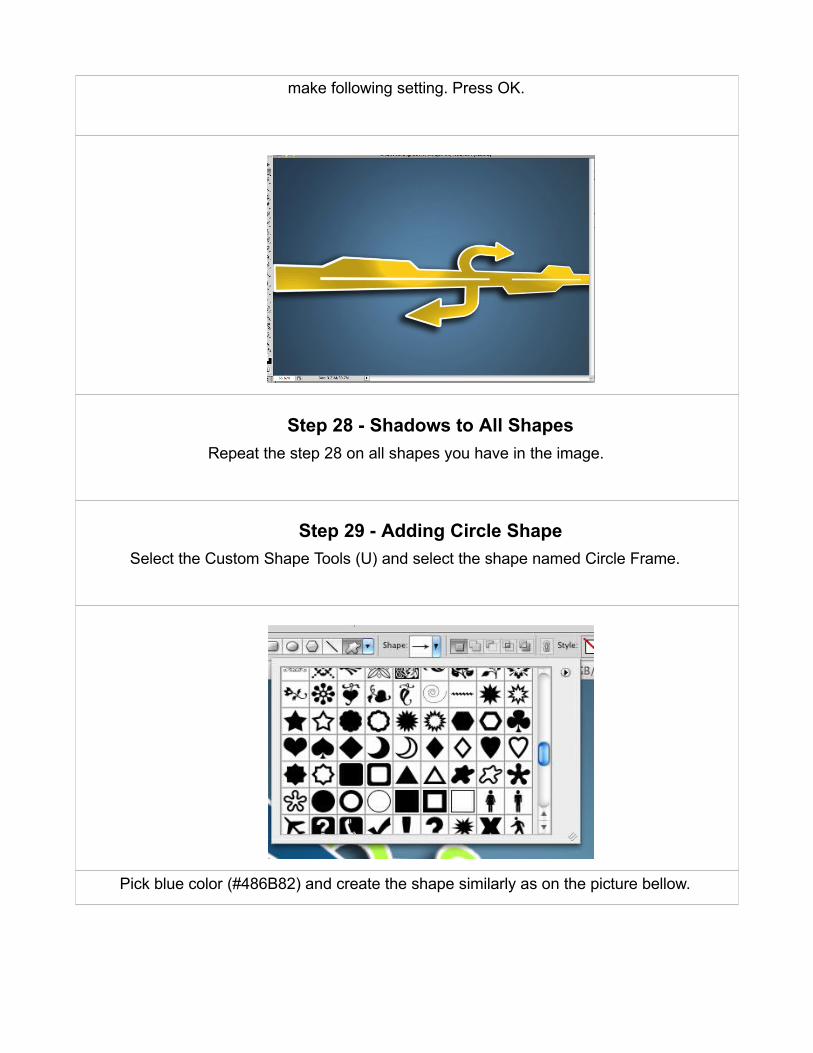
make following setting. Press OK.
Step 28 - Shadows to All ShapesRepeat the step 28 on all shapes you have in the image.
Step 29 - Adding Circle ShapeSelect the Custom Shape Tools (U) and select the shape named Circle Frame.
Pick blue color (#486B82) and create the shape similarly as on the picture bellow.
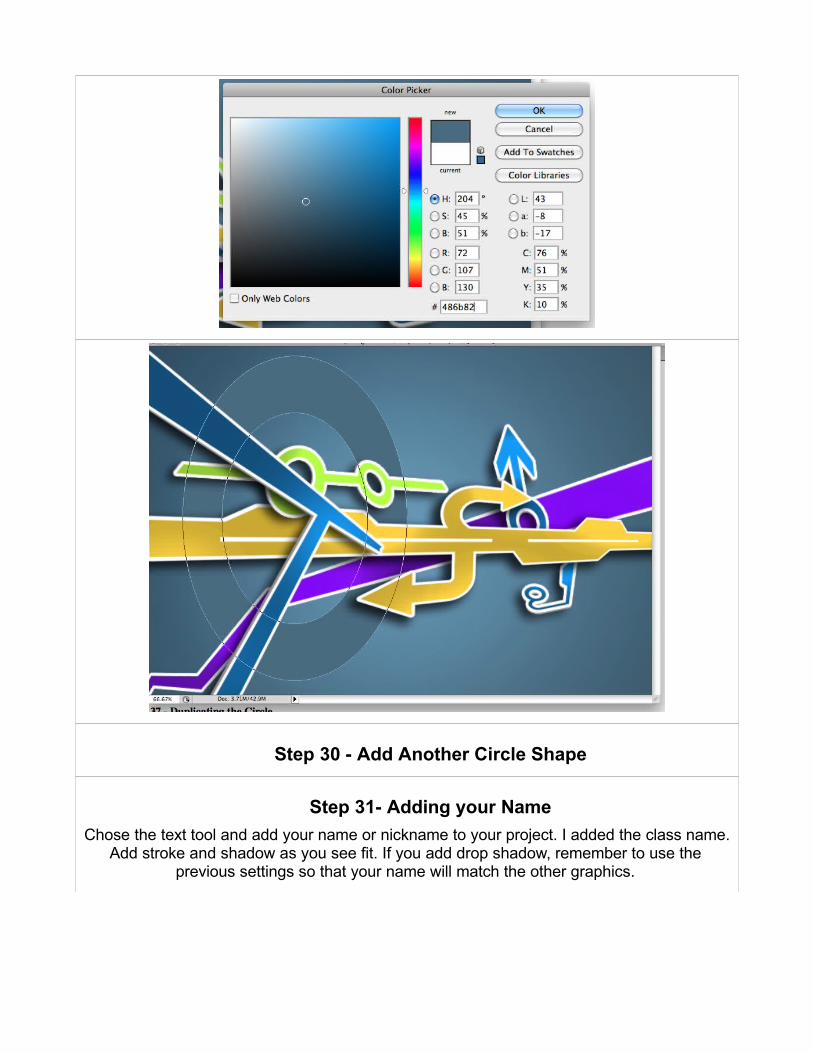
Step 30 - Add Another Circle Shape
Step 31- Adding your Name Chose the text tool and add your name or nickname to your project. I added the class name.
Add stroke and shadow as you see fit. If you add drop shadow, remember to use the previous settings so that your name will match the other graphics.

Finished Project: