GR-LIDE - · PDF fileGR-LIDE-UM August 2016, Version 1.6 3 1. Introduction This document...
19
. GRLIDE LEON IDE plugin for Eclipse 2016 User's Manual The most important thing we build is trust GR-LIDE GR-LIDE-UM 1 www.cobham.com/gaisler August 2016, Version 1.6
Transcript of GR-LIDE - · PDF fileGR-LIDE-UM August 2016, Version 1.6 3 1. Introduction This document...
.
GRLIDE
LEON IDE plugin for Eclipse
2016 User's Manual
The most important thing we build is trust
GR-LIDE
GR-LIDE-UM 1 www.cobham.com/gaislerAugust 2016, Version 1.6

GR-LIDE-UMAugust 2016, Version 1.6
2 www.cobham.com/gaisler
Table of Contents1. Introduction .............................................................................................................................. 3
1.1. Tools ............................................................................................................................. 31.2. Supported Operating Systems ............................................................................................ 3
2. Windows installation .................................................................................................................. 42.1. Installed versions ............................................................................................................. 42.2. Reinstalling or upgrading .................................................................................................. 42.3. PATH environment variable .............................................................................................. 42.4. Running the installer ........................................................................................................ 4
2.4.1. GRMON and TSIM professional ............................................................................. 63. Linux installation ....................................................................................................................... 7
3.1. Tools ............................................................................................................................. 73.2. Path .............................................................................................................................. 73.3. Installing LEON IDE ....................................................................................................... 7
4. Quick start ................................................................................................................................ 84.1. Starting Eclipse ............................................................................................................... 84.2. Create a new project ........................................................................................................ 84.3. Build project ................................................................................................................... 94.4. Debug configurations ....................................................................................................... 94.5. Launching .................................................................................................................... 104.6. Results ......................................................................................................................... 11
5. Leon Integrated Development Environment .................................................................................. 125.1. Compatibility ................................................................................................................ 125.2. General Eclipse information ............................................................................................ 12
5.2.1. Workspaces ........................................................................................................ 125.2.2. Perspectives ........................................................................................................ 125.2.3. Debugging ......................................................................................................... 125.2.4. Projects ............................................................................................................. 125.2.5. Create a new file ................................................................................................. 125.2.6. Import existing files ............................................................................................. 12
5.3. Compiling .................................................................................................................... 135.4. Build configurations ....................................................................................................... 135.5. Toolchains .................................................................................................................... 13
5.5.1. Creating a RTEMS project .................................................................................... 135.5.2. Creating an eCos project ...................................................................................... 14
5.6. Compile properties ......................................................................................................... 145.6.1. Hardware options ................................................................................................ 145.6.2. Libraries ............................................................................................................ 145.6.3. Link map ........................................................................................................... 15
5.7. Launch settings ............................................................................................................. 155.8. Launch time out ............................................................................................................ 15
6. Software update ....................................................................................................................... 177. FAQ / TROUBLESHOOTING ................................................................................................... 18

GR-LIDE-UMAugust 2016, Version 1.6
3 www.cobham.com/gaisler
1. Introduction
This document describes the installation of Cobham Gaisler development tools and the basic usage of the Eclipseenvironment. On Windows the tools can be installed by an installer which contains all the tools including evalu-ation versions of GRMON and TSIM. Professional versions can be installed separately.
1.1. Tools
The following tools are included in the installer:
• Eclipse with C Development environment for SPARC / LEON• Evaluation version of GRMON – a debug monitor for the LEON processor• Evaluation version of TSIM – a SPARC architecture simulator• Bare C cross-compiler for the LEON processor• RTEMS 4.10 cross-compiler for LEON/ERC32• Source code for Newlib and RTEMS• A Java Runtime Environment (JRE) needed to run Eclipse and GrmonRCP• HASP License device driver for the GRMON and TSIM USB hardware license key
1.2. Supported Operating Systems
The installer and all tools included are supported on Windows XP Service Pack 3 and Windows 7. The tools arealso available for Linux at Cobham Gaisler web page – http://www.gaisler.com/.
GR-LIDE-UMAugust 2016, Version 1.6
4 www.cobham.com/gaisler
2. Windows installation
2.1. Installed versions
The installer contains a README.txt file that lists the version of the different packages.
2.2. Reinstalling or upgrading
Updates will be available from Cobham Gaisler web page at http://www.gaisler.com/. These can be installed byremoving the corresponding folder and unpacking the downloaded package in the c:/opt folder.
2.3. PATH environment variable
It is required to add the location where you have installed GRTools to a PATH variable.
The PATH environment variable specify locations to search for commands and makes it possible to run a com-mand without specifying the full path. The installer will add all installed tools to the PATH environment variable.This makes it possible to use e.g. grmon-eval.exe instead of c:\opt\grmon-eval\win32\grmon-eval.exe
If there are two tools with the same name both installed in the PATH environment variable Windows will usethe one found first in the PATH. This can cause troubles if both the evaluation and professional version of a toolis installed.
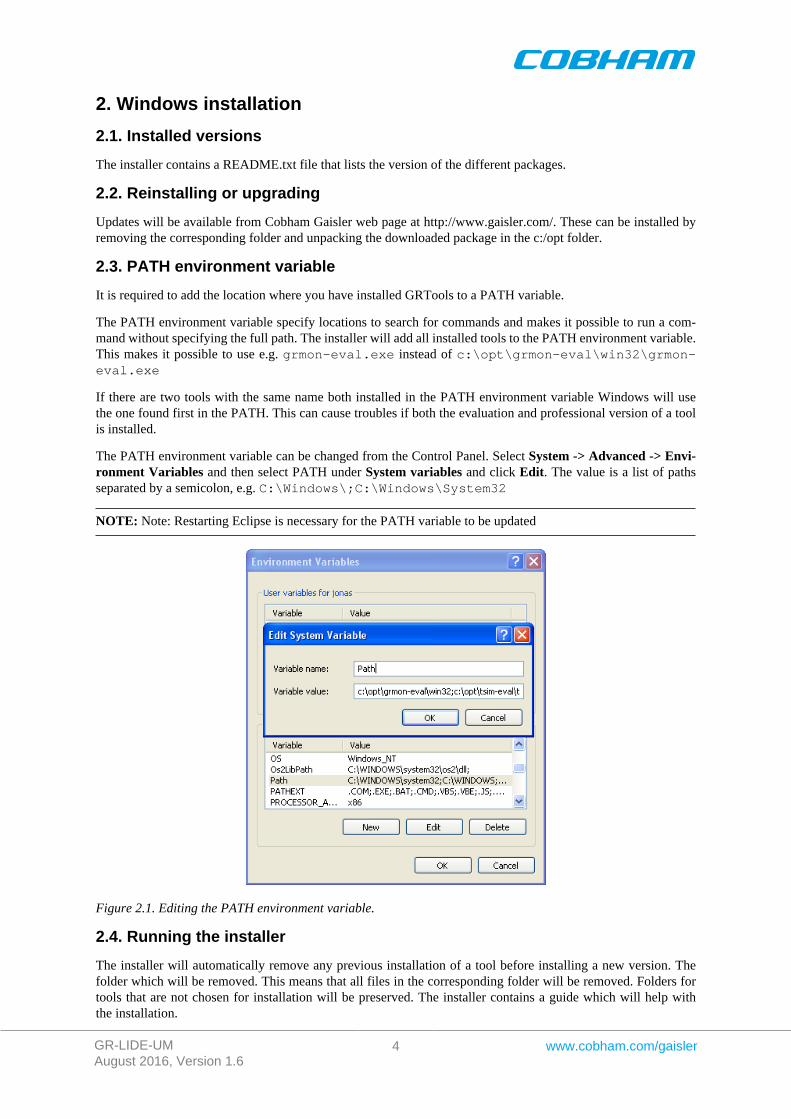
The PATH environment variable can be changed from the Control Panel. Select System -> Advanced -> Envi-ronment Variables and then select PATH under System variables and click Edit. The value is a list of pathsseparated by a semicolon, e.g. C:\Windows\;C:\Windows\System32
NOTE: Note: Restarting Eclipse is necessary for the PATH variable to be updated
Figure 2.1. Editing the PATH environment variable.
2.4. Running the installer
The installer will automatically remove any previous installation of a tool before installing a new version. Thefolder which will be removed. This means that all files in the corresponding folder will be removed. Folders fortools that are not chosen for installation will be preserved. The installer contains a guide which will help withthe installation.
GR-LIDE-UMAugust 2016, Version 1.6
5 www.cobham.com/gaisler
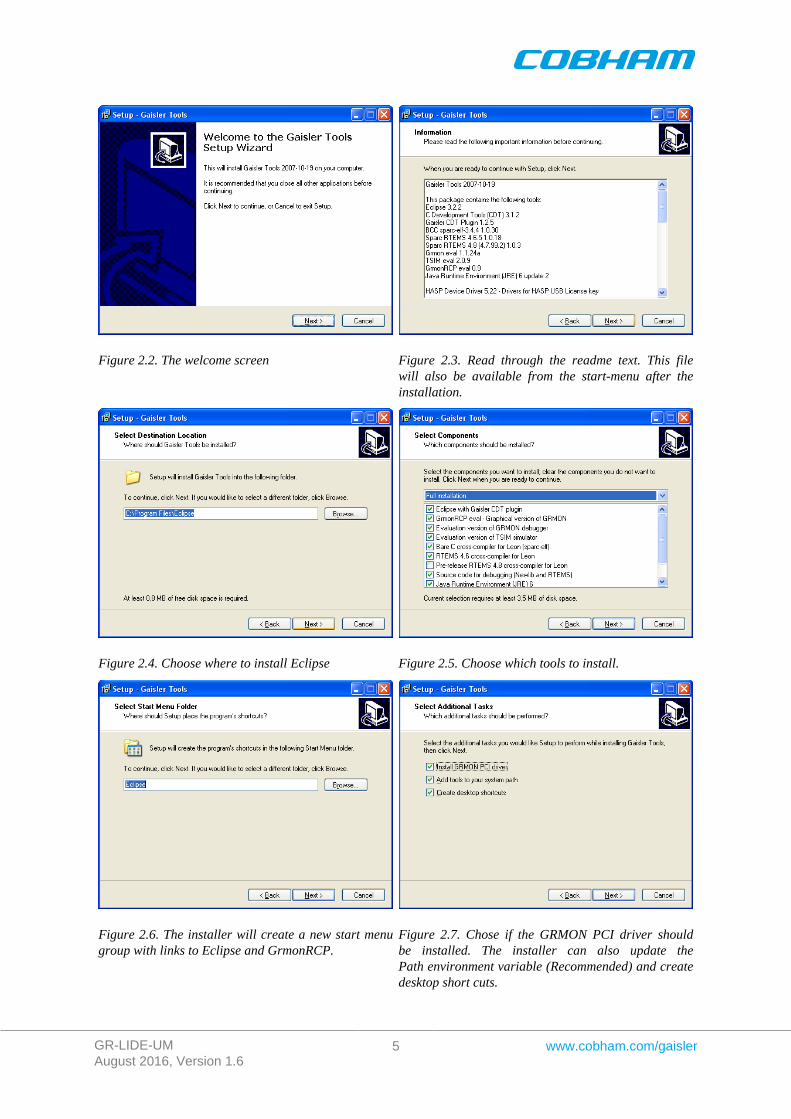
Figure 2.2. The welcome screen Figure 2.3. Read through the readme text. This filewill also be available from the start-menu after theinstallation.
Figure 2.4. Choose where to install Eclipse Figure 2.5. Choose which tools to install.
Figure 2.6. The installer will create a new start menugroup with links to Eclipse and GrmonRCP.
Figure 2.7. Chose if the GRMON PCI driver shouldbe installed. The installer can also update thePath environment variable (Recommended) and createdesktop short cuts.

GR-LIDE-UMAugust 2016, Version 1.6
6 www.cobham.com/gaisler
Figure 2.8. Summary of what is going to be installed Figure 2.9. A progress will be shown during theinstallation
Figure 2.10. When the installation is finished there is anoption to start Eclipse
2.4.1. GRMON and TSIM professional
It is recommended to install the tools to C:\opt. The installer will set up the PATH environment variable to preferthe professional version if installed there. If the tools are installed anywhere else either the PATH environmentvariable needs to be updated or the full path must be specified in Eclipse. See Section 2.3 for information on howto update the PATH environment variable. See Section 5.7 for how to use the professional tools in Eclipse.
GR-LIDE-UMAugust 2016, Version 1.6
7 www.cobham.com/gaisler
3. Linux installation
3.1. Tools
The tools can be downloaded seperately from the Cobham Gaisler web page - http://www.gaisler.com/. Followthe installation manual included in each tool in order to properly install them.
3.2. Path
For the tools to work it is required to create a path to the location of the folder for each of the added tools. The easiestway to do this is to edit the .bashrc file located in the home directory. Simply add export PATH=$PATH:/opt/PATH/TO/TOOL; at the end of the document. The path is then created each time you start the terminal.
3.3. Installing LEON IDE
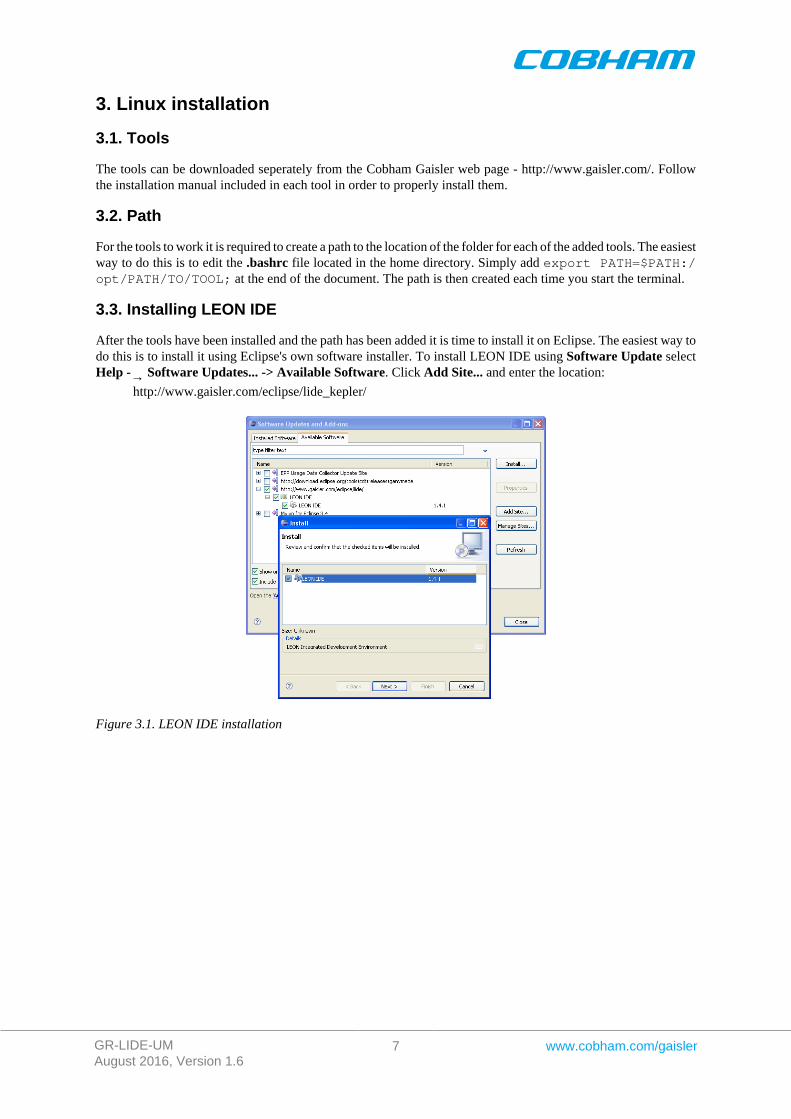
After the tools have been installed and the path has been added it is time to install it on Eclipse. The easiest way todo this is to install it using Eclipse's own software installer. To install LEON IDE using Software Update selectHelp -→ Software Updates... -> Available Software. Click Add Site... and enter the location:
http://www.gaisler.com/eclipse/lide_kepler/
Figure 3.1. LEON IDE installation

GR-LIDE-UMAugust 2016, Version 1.6
8 www.cobham.com/gaisler
4. Quick start
LEON IDE is a plug-in for the Eclipse C Development Tooling or CDT. CDT is a C / C++ development environ-ment for Eclipse. LEON IDE extends the CDT environment to include support for development and debuggingusing the tools provided by Cobham Gaisler.
4.1. Starting Eclipse
The first time you start Eclipse a welcome screen will appear. Click the x to close it.
Figure 4.1. Eclipse welcome screen
4.2. Create a new project
To create a new project select File -> New -> C Project enter a Project name, select Hello World ANSI C Projectand choose the SPARC Bare C Toolchain. Click Next to get to the configuration page, and then click Finish tocreate the project.
Figure 4.2. New Bare C project Figure 4.3. Bare C settings Figure 4.4. Bare C configurations

GR-LIDE-UMAugust 2016, Version 1.6
9 www.cobham.com/gaisler
This quick start guide only includes instructions for creating a SPARC Bare C project, for information regardingthe available toolchains and their respective specifics see Section 5.5
Eclipse will by default only show the tool chains which are detected as installed.
NOTE: Note: If the toolchains does not show up and only show up when you untoggle the Show project typesand toolchains only if they are supported on the platform the path has not been set up properly.
4.3. Build project
Go to Project->Build all to build your project.
4.4. Debug configurations
Open the debug configurations by selecting Run->Debug configurations.
To create a new LEON Debugger right click the LEON C/C++ Application field then click New.
Figure 4.5. New LEON C/C++ Application
Select the Debugger tab and click New to create a target.
GR-LIDE-UMAugust 2016, Version 1.6
10 www.cobham.com/gaisler
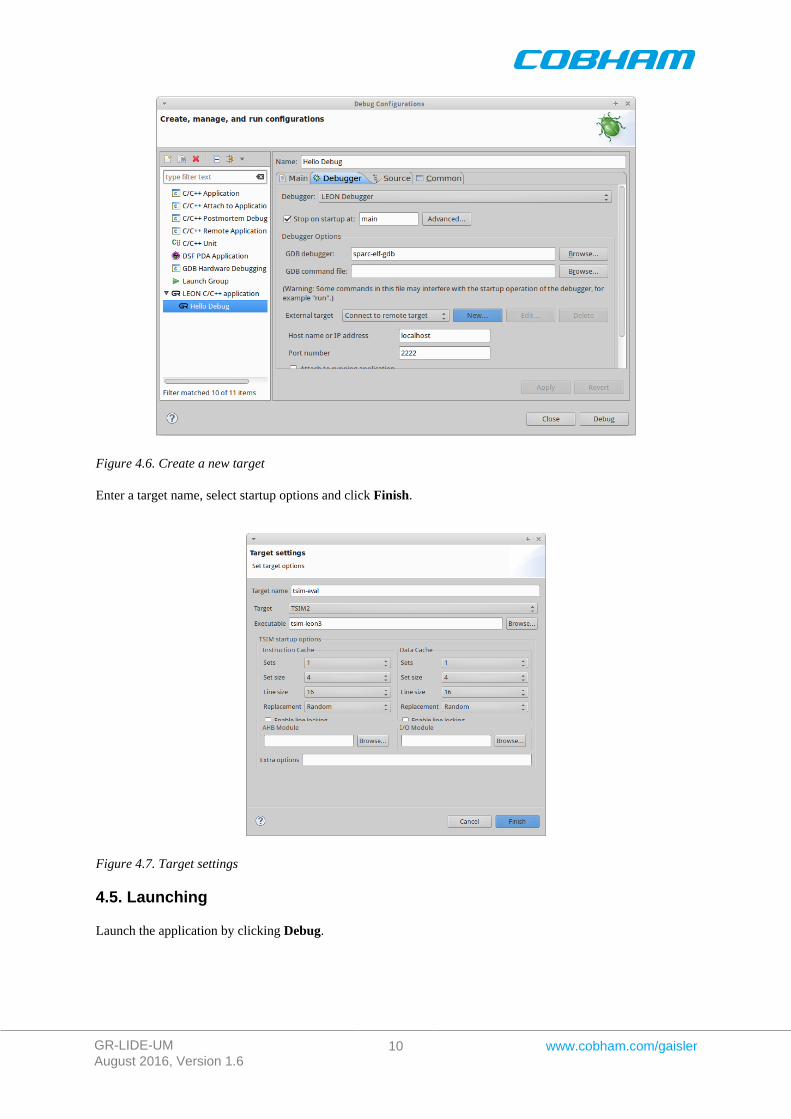
Figure 4.6. Create a new target
Enter a target name, select startup options and click Finish.
Figure 4.7. Target settings
4.5. Launching
Launch the application by clicking Debug.
GR-LIDE-UMAugust 2016, Version 1.6
11 www.cobham.com/gaisler
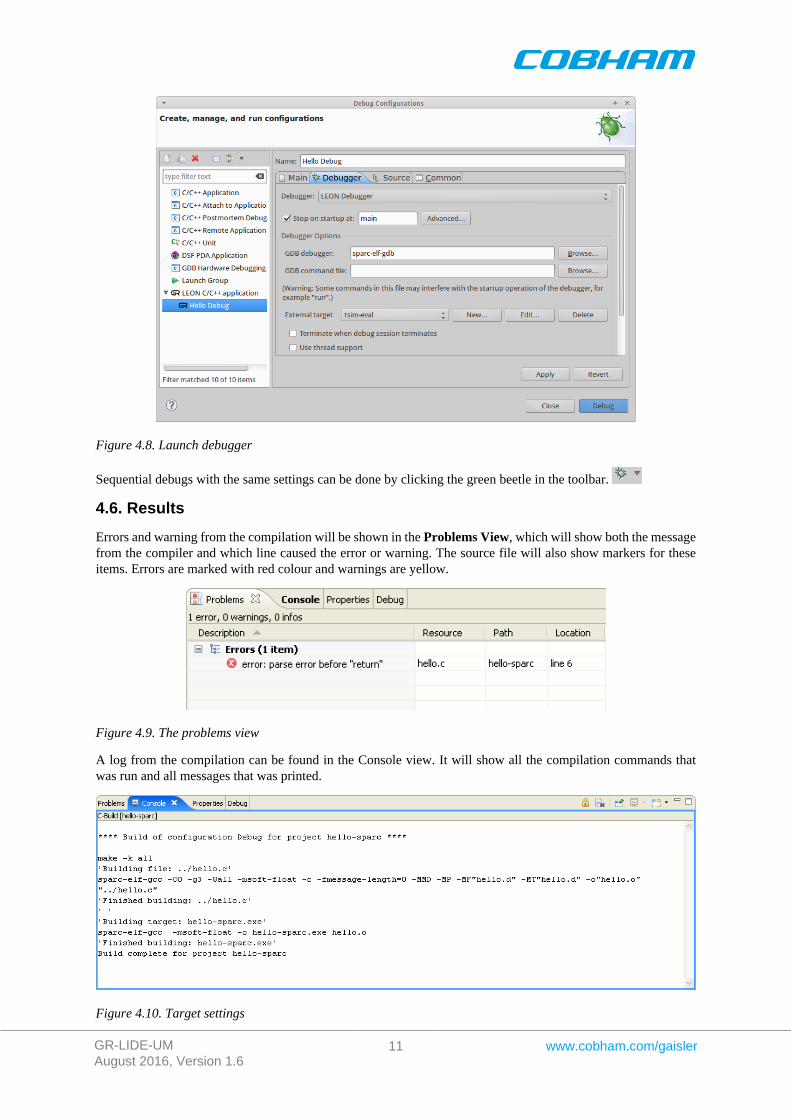
Figure 4.8. Launch debugger
Sequential debugs with the same settings can be done by clicking the green beetle in the toolbar.
4.6. Results
Errors and warning from the compilation will be shown in the Problems View, which will show both the messagefrom the compiler and which line caused the error or warning. The source file will also show markers for theseitems. Errors are marked with red colour and warnings are yellow.
Figure 4.9. The problems view
A log from the compilation can be found in the Console view. It will show all the compilation commands thatwas run and all messages that was printed.
Figure 4.10. Target settings
GR-LIDE-UMAugust 2016, Version 1.6
12 www.cobham.com/gaisler
5. Leon Integrated Development Environment
5.1. Compatibility
LEON IDE 1.6.0 is compatible with Eclipse Kepler.
5.2. General Eclipse information
5.2.1. Workspaces
Eclipse uses a workspace to store the projects and all settings. When Eclipse is launched it will ask whichworkspace to use. The default path will be C:\Workspace. Note that this path cannot contain spaces as this willconfuse the Eclipse plug-in and some of the debugging tools.
5.2.2. Perspectives
Eclipse divides each task into different perspectives. There are among others one perspective for C / C++ develop-ment and one for debugging. Each perspective will preserve the layout of all open views. The last used perspectivewill be saved when exiting Eclipse and will be restored the next time Eclipse is started. To switch to the C/C++perspective go to Window -> Open Perspective -> Other... then select C/C++ and click OK.
5.2.3. Debugging
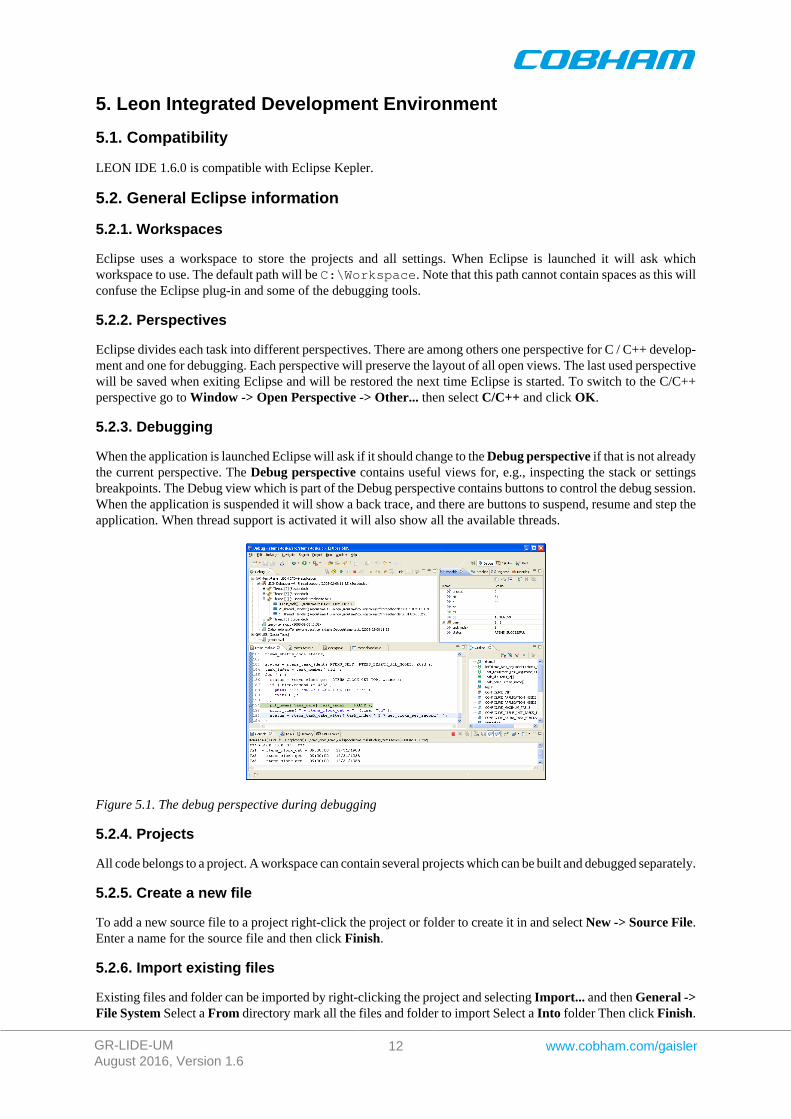
When the application is launched Eclipse will ask if it should change to the Debug perspective if that is not alreadythe current perspective. The Debug perspective contains useful views for, e.g., inspecting the stack or settingsbreakpoints. The Debug view which is part of the Debug perspective contains buttons to control the debug session.When the application is suspended it will show a back trace, and there are buttons to suspend, resume and step theapplication. When thread support is activated it will also show all the available threads.
Figure 5.1. The debug perspective during debugging
5.2.4. Projects
All code belongs to a project. A workspace can contain several projects which can be built and debugged separately.
5.2.5. Create a new file
To add a new source file to a project right-click the project or folder to create it in and select New -> Source File.Enter a name for the source file and then click Finish.
5.2.6. Import existing files
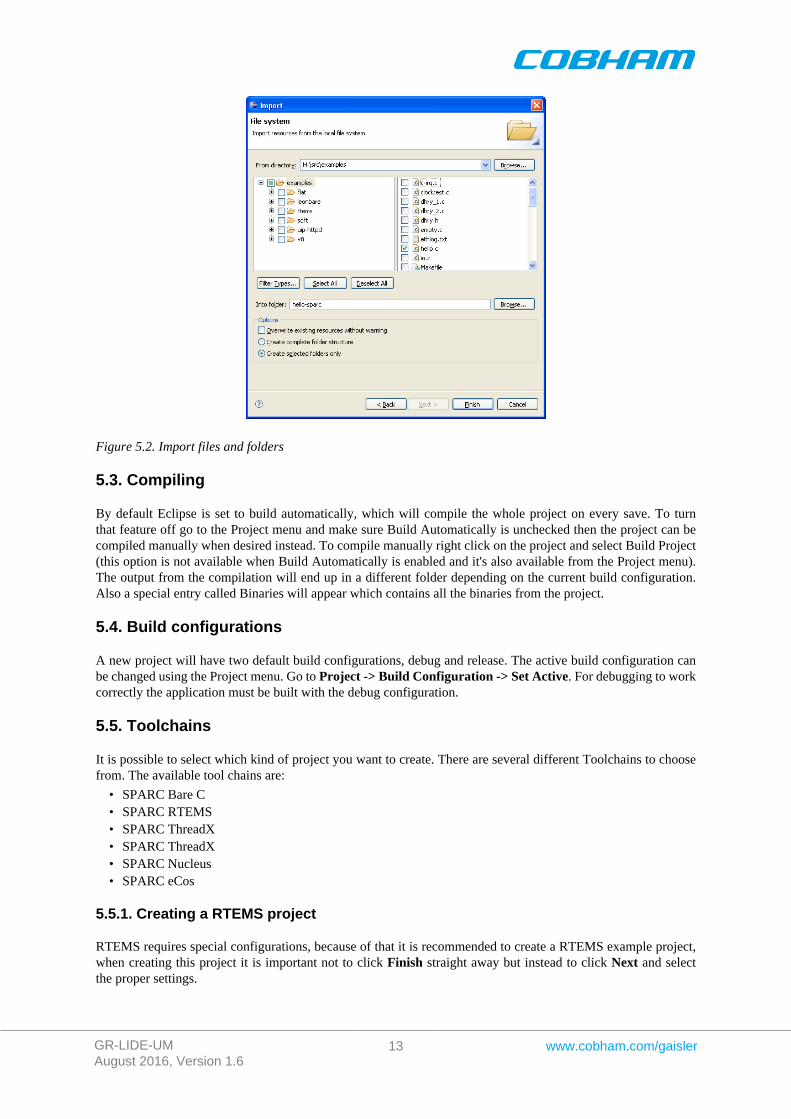
Existing files and folder can be imported by right-clicking the project and selecting Import... and then General ->File System Select a From directory mark all the files and folder to import Select a Into folder Then click Finish.
GR-LIDE-UMAugust 2016, Version 1.6
13 www.cobham.com/gaisler
Figure 5.2. Import files and folders
5.3. Compiling
By default Eclipse is set to build automatically, which will compile the whole project on every save. To turnthat feature off go to the Project menu and make sure Build Automatically is unchecked then the project can becompiled manually when desired instead. To compile manually right click on the project and select Build Project(this option is not available when Build Automatically is enabled and it's also available from the Project menu).The output from the compilation will end up in a different folder depending on the current build configuration.Also a special entry called Binaries will appear which contains all the binaries from the project.
5.4. Build configurations
A new project will have two default build configurations, debug and release. The active build configuration canbe changed using the Project menu. Go to Project -> Build Configuration -> Set Active. For debugging to workcorrectly the application must be built with the debug configuration.
5.5. Toolchains
It is possible to select which kind of project you want to create. There are several different Toolchains to choosefrom. The available tool chains are:
• SPARC Bare C• SPARC RTEMS• SPARC ThreadX• SPARC ThreadX• SPARC Nucleus• SPARC eCos
5.5.1. Creating a RTEMS project
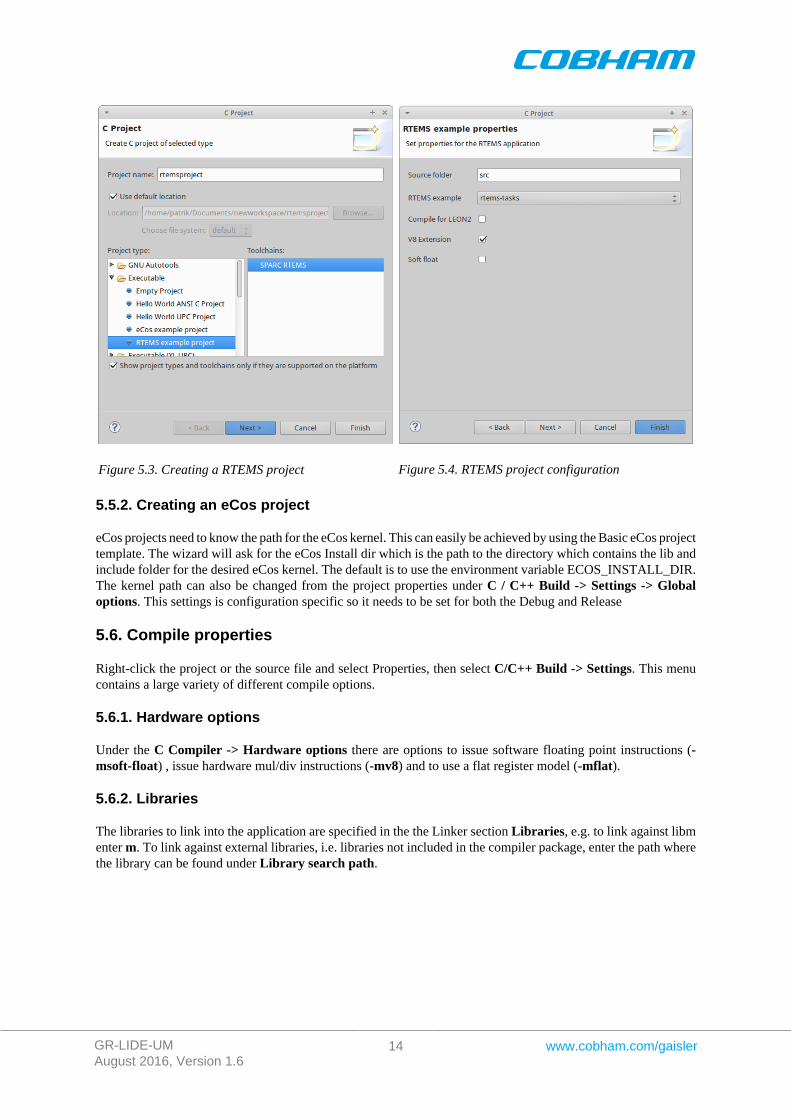
RTEMS requires special configurations, because of that it is recommended to create a RTEMS example project,when creating this project it is important not to click Finish straight away but instead to click Next and selectthe proper settings.
GR-LIDE-UMAugust 2016, Version 1.6
14 www.cobham.com/gaisler
Figure 5.3. Creating a RTEMS project Figure 5.4. RTEMS project configuration
5.5.2. Creating an eCos project
eCos projects need to know the path for the eCos kernel. This can easily be achieved by using the Basic eCos projecttemplate. The wizard will ask for the eCos Install dir which is the path to the directory which contains the lib andinclude folder for the desired eCos kernel. The default is to use the environment variable ECOS_INSTALL_DIR.The kernel path can also be changed from the project properties under C / C++ Build -> Settings -> Globaloptions. This settings is configuration specific so it needs to be set for both the Debug and Release
5.6. Compile properties
Right-click the project or the source file and select Properties, then select C/C++ Build -> Settings. This menucontains a large variety of different compile options.
5.6.1. Hardware options
Under the C Compiler -> Hardware options there are options to issue software floating point instructions (-msoft-float) , issue hardware mul/div instructions (-mv8) and to use a flat register model (-mflat).
5.6.2. Libraries
The libraries to link into the application are specified in the the Linker section Libraries, e.g. to link against libmenter m. To link against external libraries, i.e. libraries not included in the compiler package, enter the path wherethe library can be found under Library search path.
GR-LIDE-UMAugust 2016, Version 1.6
15 www.cobham.com/gaisler
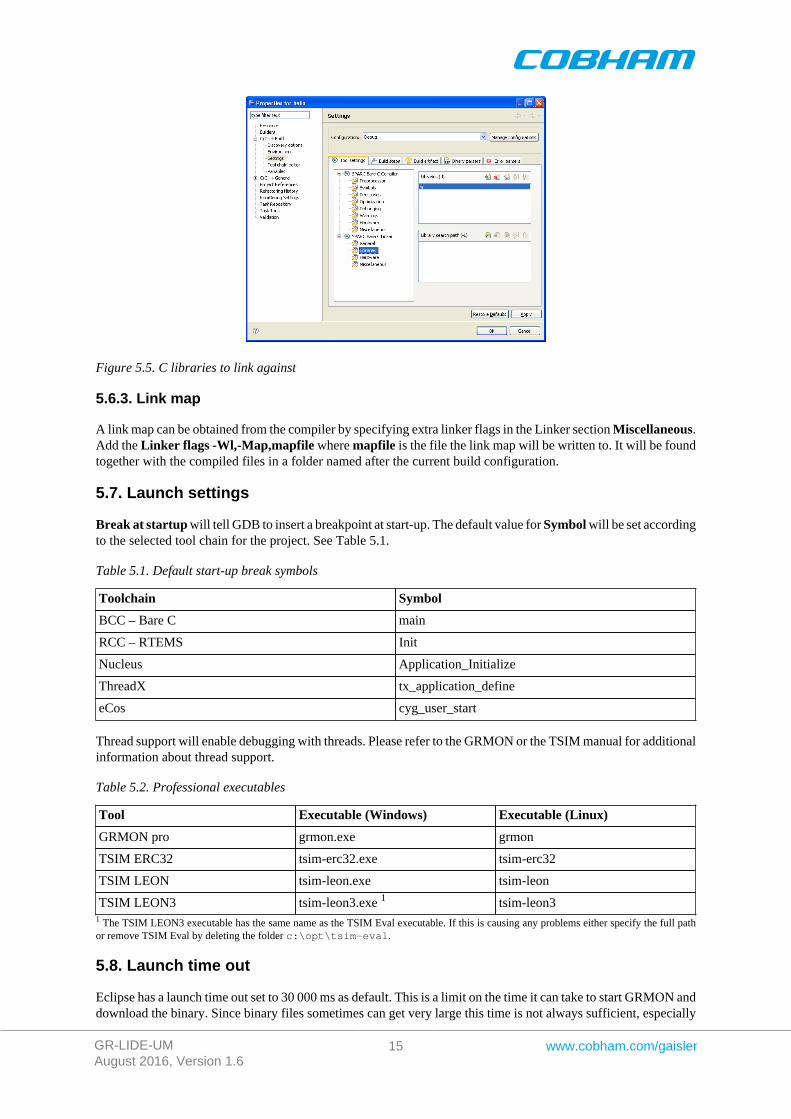
Figure 5.5. C libraries to link against
5.6.3. Link map
A link map can be obtained from the compiler by specifying extra linker flags in the Linker section Miscellaneous.Add the Linker flags -Wl,-Map,mapfile where mapfile is the file the link map will be written to. It will be foundtogether with the compiled files in a folder named after the current build configuration.
5.7. Launch settings
Break at startup will tell GDB to insert a breakpoint at start-up. The default value for Symbol will be set accordingto the selected tool chain for the project. See Table 5.1.
Table 5.1. Default start-up break symbols
Toolchain Symbol
BCC – Bare C main
RCC – RTEMS Init
Nucleus Application_Initialize
ThreadX tx_application_define
eCos cyg_user_start
Thread support will enable debugging with threads. Please refer to the GRMON or the TSIM manual for additionalinformation about thread support.
Table 5.2. Professional executables
Tool Executable (Windows) Executable (Linux)
GRMON pro grmon.exe grmon
TSIM ERC32 tsim-erc32.exe tsim-erc32
TSIM LEON tsim-leon.exe tsim-leon
TSIM LEON3 tsim-leon3.exe 1 tsim-leon31 The TSIM LEON3 executable has the same name as the TSIM Eval executable. If this is causing any problems either specify the full pathor remove TSIM Eval by deleting the folder c:\opt\tsim-eval.
5.8. Launch time out
Eclipse has a launch time out set to 30 000 ms as default. This is a limit on the time it can take to start GRMON anddownload the binary. Since binary files sometimes can get very large this time is not always sufficient, especially
GR-LIDE-UMAugust 2016, Version 1.6
16 www.cobham.com/gaisler
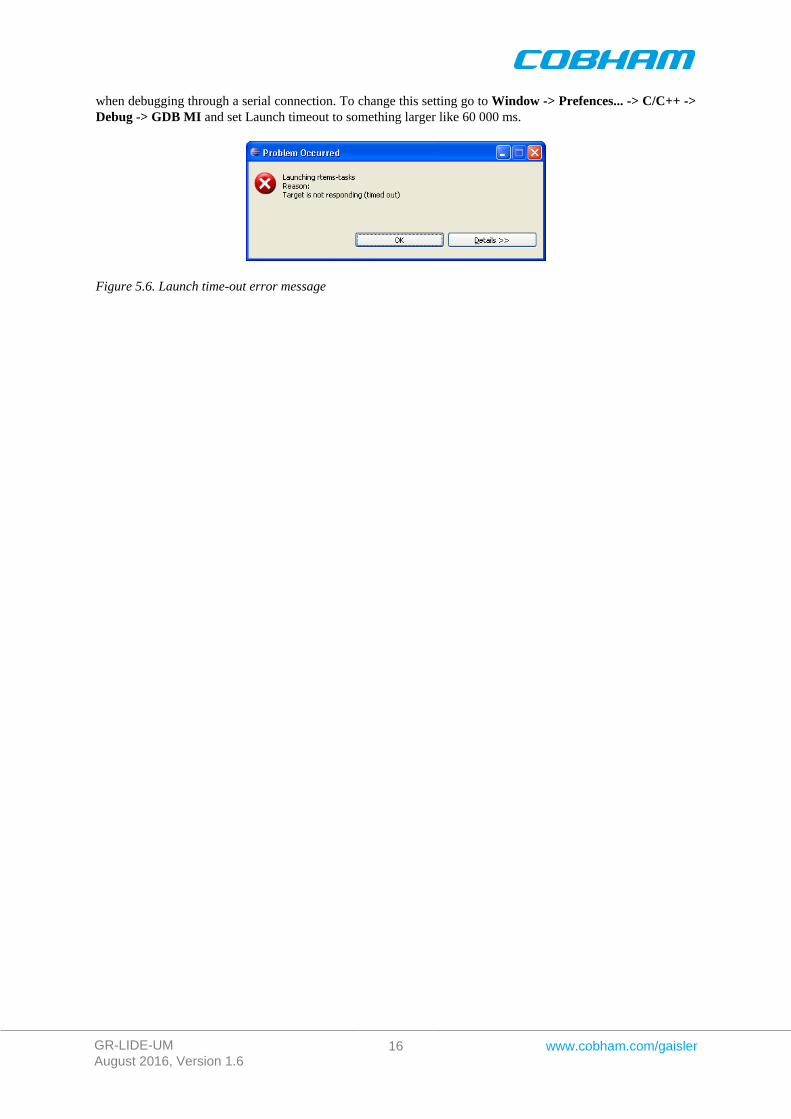
when debugging through a serial connection. To change this setting go to Window -> Prefences... -> C/C++ ->Debug -> GDB MI and set Launch timeout to something larger like 60 000 ms.
Figure 5.6. Launch time-out error message
GR-LIDE-UMAugust 2016, Version 1.6
17 www.cobham.com/gaisler
6. Software update
Since LEON IDE is built upon the Eclipse framework it can use the Software Update feature available in Eclipse.
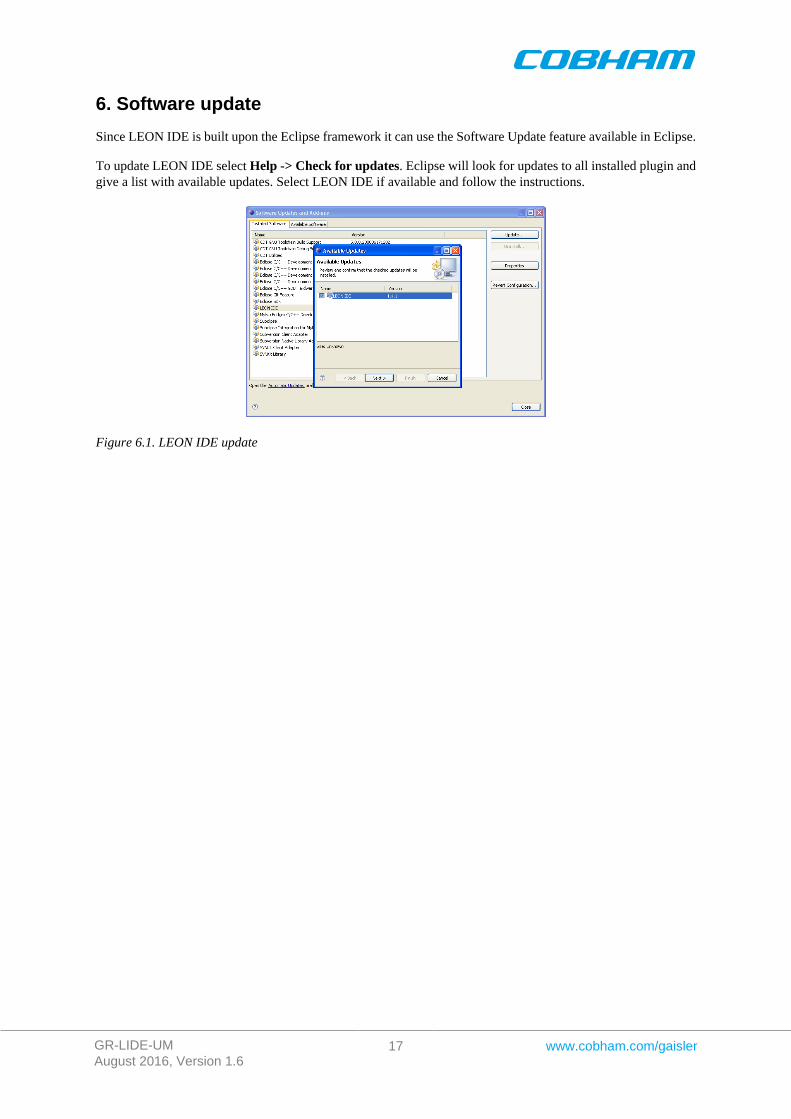
To update LEON IDE select Help -> Check for updates. Eclipse will look for updates to all installed plugin andgive a list with available updates. Select LEON IDE if available and follow the instructions.
Figure 6.1. LEON IDE update
GR-LIDE-UMAugust 2016, Version 1.6
18 www.cobham.com/gaisler
7. FAQ / TROUBLESHOOTINGQ: Open Declaration doesn't work. I only get “file not found” or “symbol not found”.A: This is because Eclipse defaults to using gcc for the indexing. To fix it open the project preferences and
select C/C++ build → Discovery options. Change the following for both Debug and Release: Set “Dis-covery profile scope” to “Configuration-wide” and set “Compiler invocation command” to the compilerused (sparc-rtems-gcc, sparc-elf-gcc...). After a recompile the index will be updated and “Open Declara-tion” should work.
Q: I try to run GRMON command with the monitor command, but it only works the first time.A: Eclipse tries to be smart and sends all output from the target to a separate console window. When you
run the GDB monitor command the output goes to that console window instead of the GDB console andEclipse will automatically select it. To run a new command select the GDB console again by clicking onthe GDB process or using the console selection button.
Q: How do I issue a TSIM monitor command from within ECLIPSE?A: In Eclipse open the GDB debugger console through the console dropdown. Issue a “monitor <tsim-com-
mand>”. The output of the monitor command will appear in the console of the application being debugged.Q: I get the error message: "error creating session localhost:2222: Bad file descriptor". What am I doing
wrong?A: This error message is usually caused by GRMON or TSIM not being able to launch correctly. Make sure
that your launch configuration settings are correct and that GRMON or TSIM is launched with the rightsettings.
Q: After creating a C project with the rtems-hello.c code, building the project always generate a warning: Er-ror launching external scanner info generator (gcc -E -P -v -dD C:/workspace/.metadata/.plugins/org.eclipse.cdt.make.core/specs.c)
A: It is a problem with Eclipse which we haven't found any workaround for. The warning is completelyharmless.
Q: When the debug sessions start the following messages are printed (or similar): No symbol "auto" in cur-rent context. monitor symbol C:\workspace\rtems-tasks\Debug\rtems-tasks Previous frame identi-cal to this frame (corrupt stack?) The target endianness is set automatically (currently big endian)
A: These are just informational messages from GDB and can be ignored.
GR-LIDE-UMAugust 2016, Version 1.6
19 www.cobham.com/gaisler
Cobham Gaisler ABKungsgatan 12411 19 GothenburgSwedenwww.cobham.com/[email protected]: +46 31 7758650F: +46 31 421407
Cobham Gaisler AB, reserves the right to make changes to any products and services describedherein at any time without notice. Consult Cobham or an authorized sales representative to verify thatthe information in this document is current before using this product. Cobham does not assume anyresponsibility or liability arising out of the application or use of any product or service described herein,except as expressly agreed to in writing by Cobham; nor does the purchase, lease, or use of a productor service from Cobham convey a license under any patent rights, copyrights, trademark rights, or anyother of the intellectual rights of Cobham or of third parties. All information is provided as is. There is nowarranty that it is correct or suitable for any purpose, neither implicit nor explicit.
Copyright © 2015 Cobham Gaisler AB