
Google SketchUp/Unity Tutorial Basics - cs.bowiestate.edu 590-477 Unity Tutorial.pdf · Google...
16
COSC 590/477 – Virtual Reality and Its Principles Fall 2018 1/16 Google SketchUp/Unity Tutorial Basics Software used: Google SketchUp Unity Visual Studio 1) In Google SketchUp, select and delete the man to create a blank scene. 2) Select the Lines tool and draw a square with the bottom left corner of it placed at the origin. ‐ Make sure that each of the square’s borders are parallel to the green and red axes.
Transcript of Google SketchUp/Unity Tutorial Basics - cs.bowiestate.edu 590-477 Unity Tutorial.pdf · Google...
COSC 590/477 – Virtual Reality and Its Principles Fall 2018
1/16
Google SketchUp/Unity Tutorial Basics
Software used: Google SketchUp Unity Visual Studio
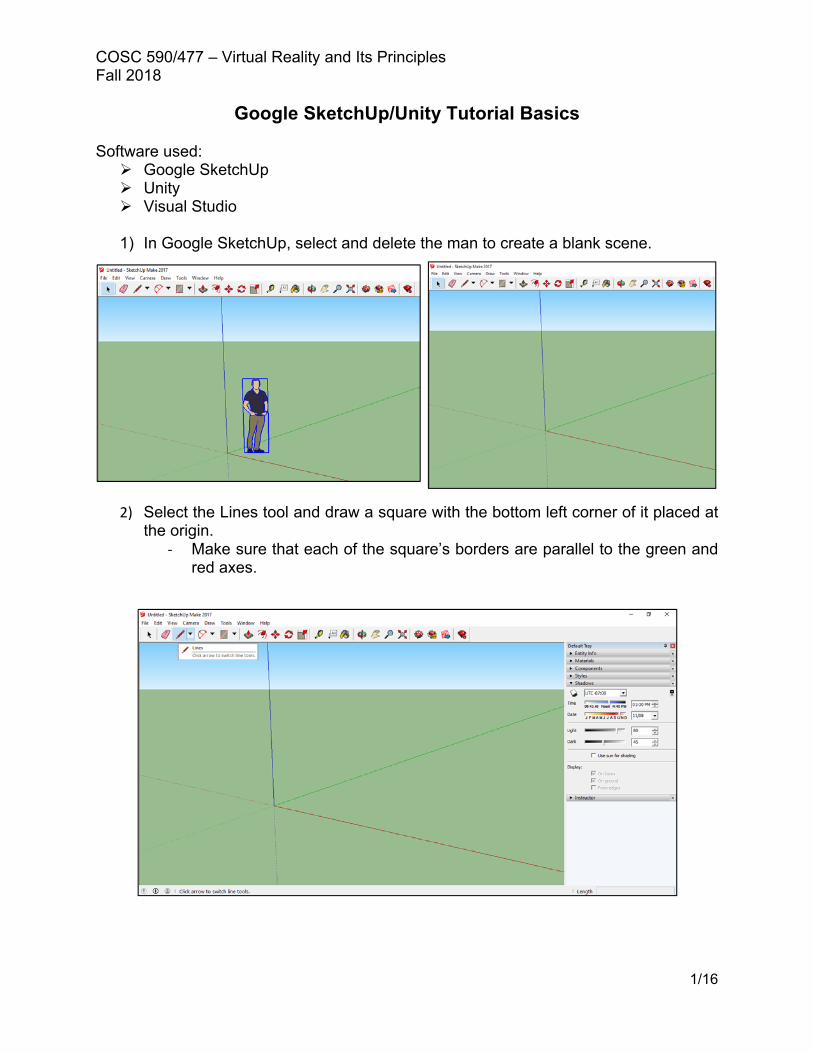
1) In Google SketchUp, select and delete the man to create a blank scene.
2) Select the Lines tool and draw a square with the bottom left corner of it placed at
the origin. ‐ Make sure that each of the square’s borders are parallel to the green and
red axes.
COSC 590/477 – Virtual Reality and Its Principles Fall 2018
2/16
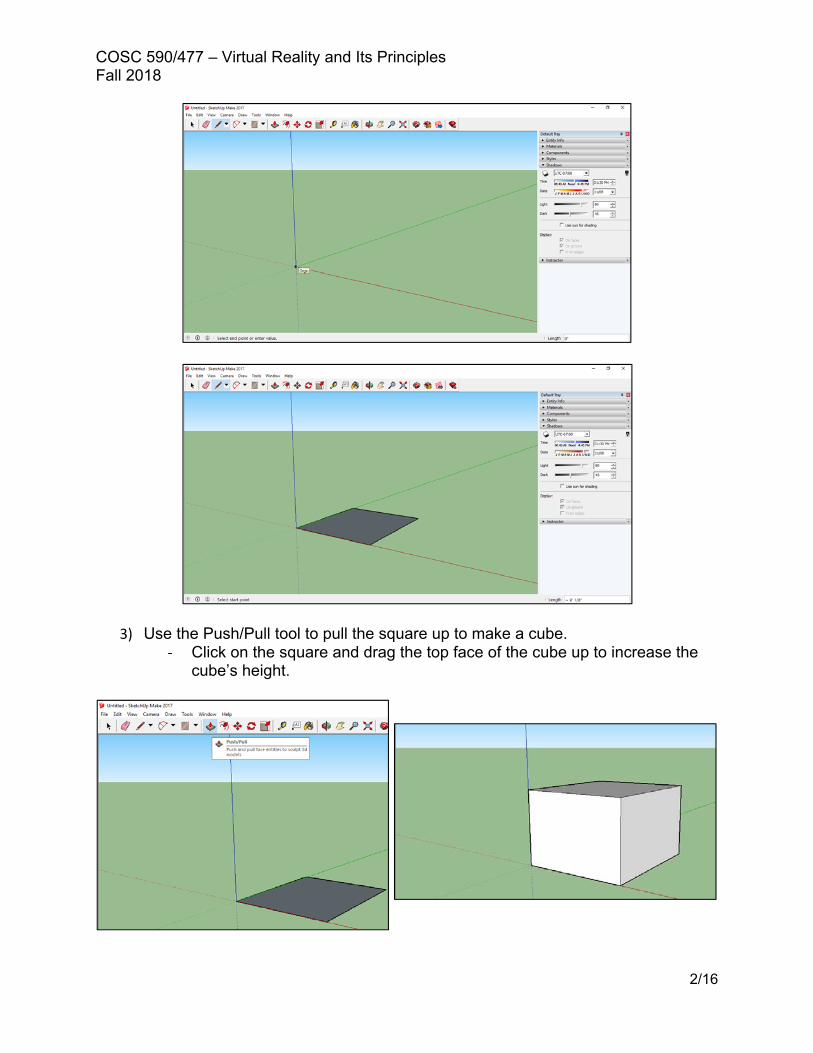
3) Use the Push/Pull tool to pull the square up to make a cube. ‐ Click on the square and drag the top face of the cube up to increase the
cube’s height.
COSC 590/477 – Virtual Reality and Its Principles Fall 2018
3/16
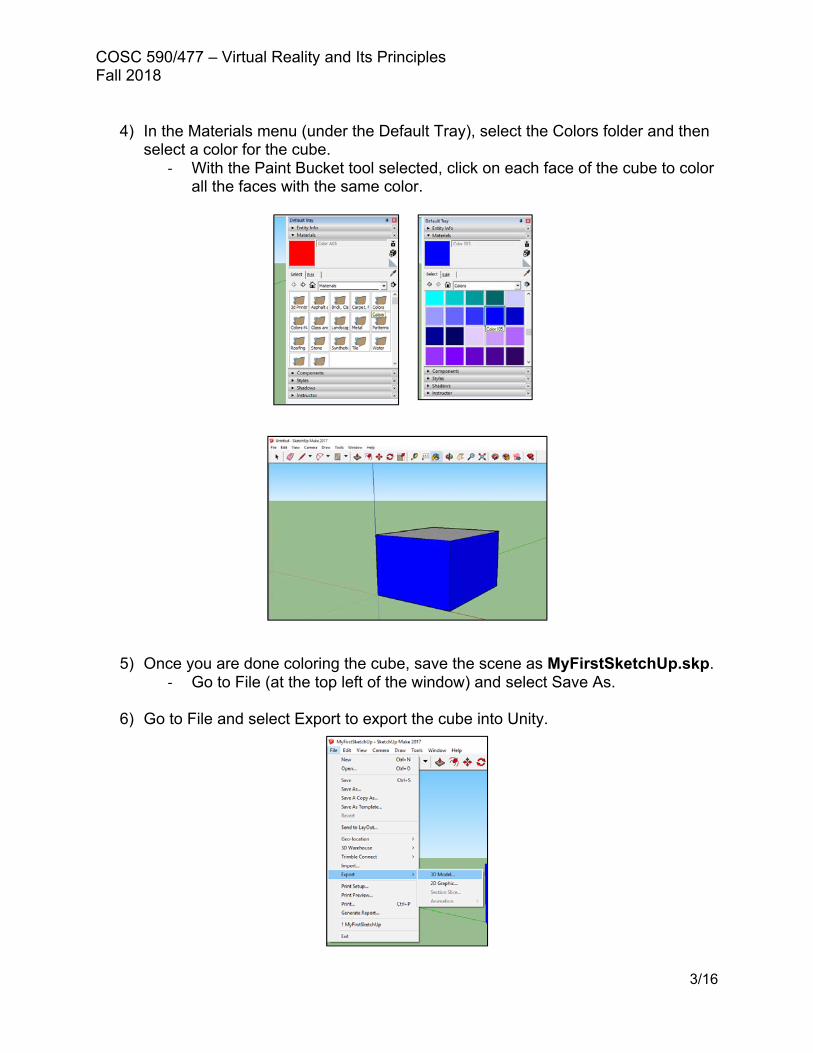
4) In the Materials menu (under the Default Tray), select the Colors folder and then
select a color for the cube. ‐ With the Paint Bucket tool selected, click on each face of the cube to color
all the faces with the same color.
5) Once you are done coloring the cube, save the scene as MyFirstSketchUp.skp. ‐ Go to File (at the top left of the window) and select Save As.
6) Go to File and select Export to export the cube into Unity.
COSC 590/477 – Virtual Reality and Its Principles Fall 2018
4/16
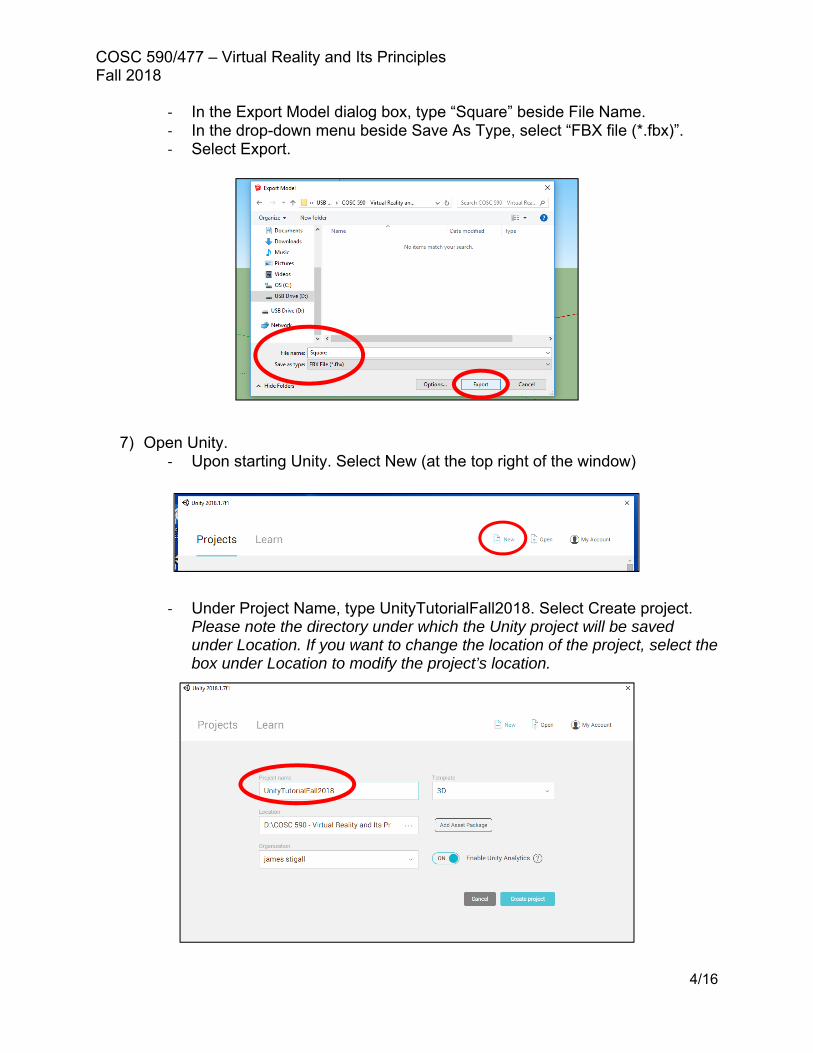
‐ In the Export Model dialog box, type “Square” beside File Name. ‐ In the drop-down menu beside Save As Type, select “FBX file (*.fbx)”. ‐ Select Export.
7) Open Unity. ‐ Upon starting Unity. Select New (at the top right of the window)
‐ Under Project Name, type UnityTutorialFall2018. Select Create project. Please note the directory under which the Unity project will be saved under Location. If you want to change the location of the project, select the box under Location to modify the project’s location.
COSC 590/477 – Virtual Reality and Its Principles Fall 2018
5/16
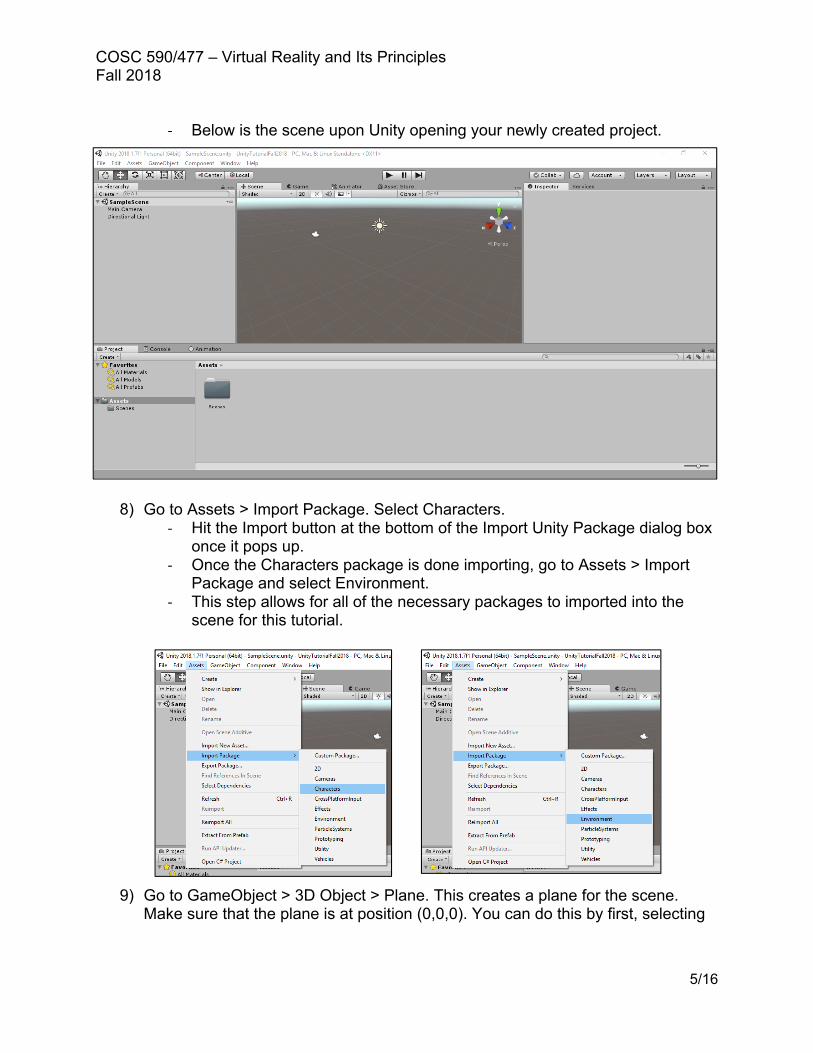
‐ Below is the scene upon Unity opening your newly created project.
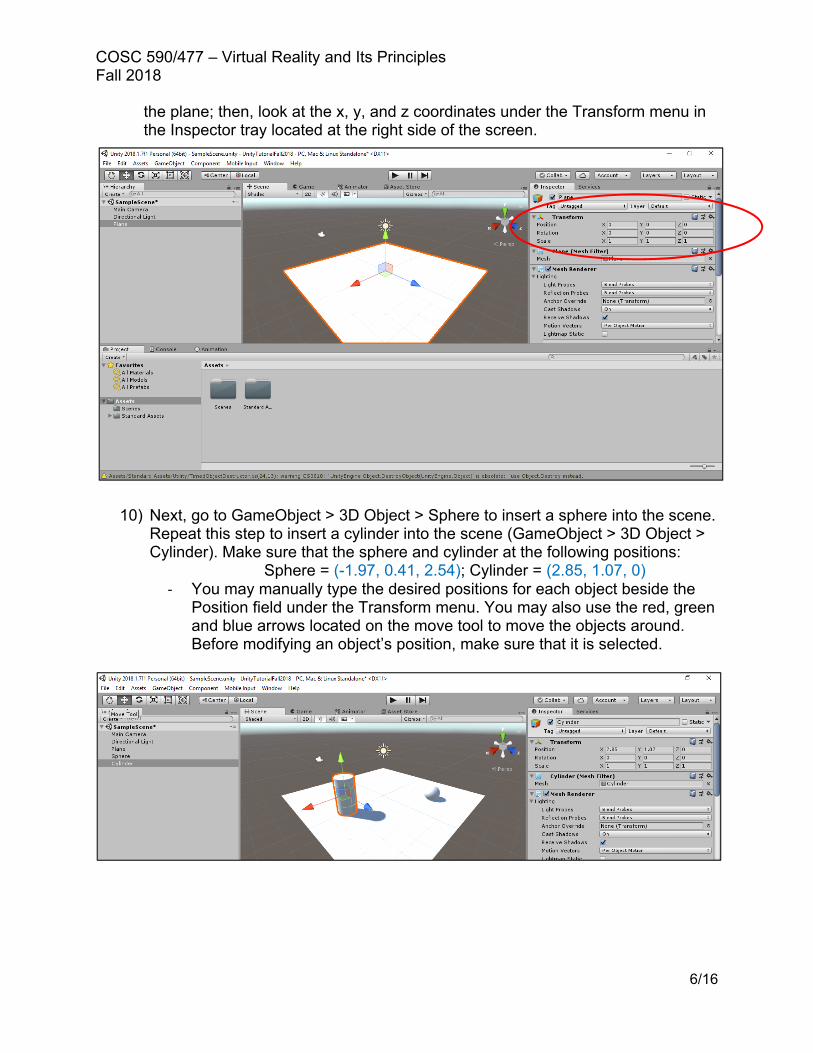
8) Go to Assets > Import Package. Select Characters.
‐ Hit the Import button at the bottom of the Import Unity Package dialog box once it pops up.
‐ Once the Characters package is done importing, go to Assets > Import Package and select Environment.
‐ This step allows for all of the necessary packages to imported into the scene for this tutorial.
9) Go to GameObject > 3D Object > Plane. This creates a plane for the scene. Make sure that the plane is at position (0,0,0). You can do this by first, selecting
COSC 590/477 – Virtual Reality and Its Principles Fall 2018
6/16
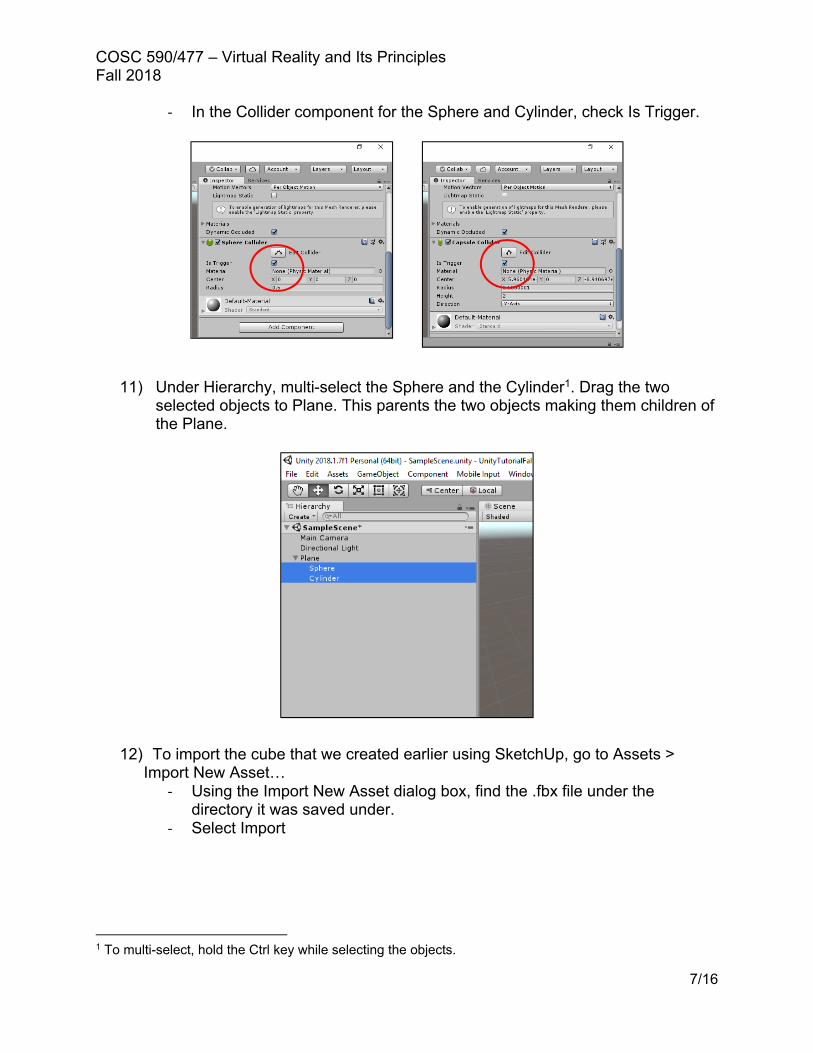
the plane; then, look at the x, y, and z coordinates under the Transform menu in the Inspector tray located at the right side of the screen.
10) Next, go to GameObject > 3D Object > Sphere to insert a sphere into the scene. Repeat this step to insert a cylinder into the scene (GameObject > 3D Object > Cylinder). Make sure that the sphere and cylinder at the following positions:
Sphere = (-1.97, 0.41, 2.54); Cylinder = (2.85, 1.07, 0) ‐ You may manually type the desired positions for each object beside the
Position field under the Transform menu. You may also use the red, green and blue arrows located on the move tool to move the objects around. Before modifying an object’s position, make sure that it is selected.
COSC 590/477 – Virtual Reality and Its Principles Fall 2018
7/16
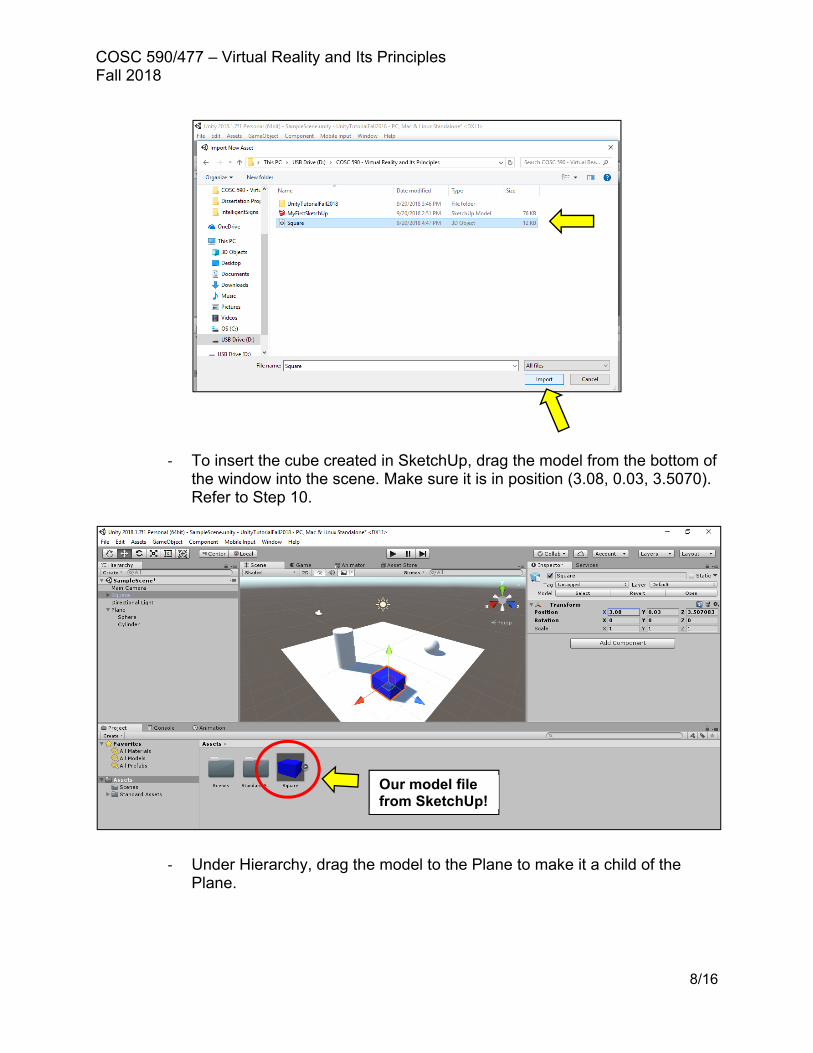
‐ In the Collider component for the Sphere and Cylinder, check Is Trigger.
11) Under Hierarchy, multi-select the Sphere and the Cylinder1. Drag the two selected objects to Plane. This parents the two objects making them children of the Plane.
12) To import the cube that we created earlier using SketchUp, go to Assets >
Import New Asset… ‐ Using the Import New Asset dialog box, find the .fbx file under the
directory it was saved under. ‐ Select Import
1 To multi-select, hold the Ctrl key while selecting the objects.
COSC 590/477 – Virtual Reality and Its Principles Fall 2018
8/16
‐ To insert the cube created in SketchUp, drag the model from the bottom of the window into the scene. Make sure it is in position (3.08, 0.03, 3.5070). Refer to Step 10.
‐ Under Hierarchy, drag the model to the Plane to make it a child of the Plane.
Our model file from SketchUp!

COSC 590/477 – Virtual Reality and Its Principles Fall 2018
9/16
13) Under the model (Under Hierarchy), select Mesh1. Under Inspector, select Add Component. In the drop-down menu under Add Component, go to Physics and select Mesh Collider. This adds a collider to our model.
‐ In the Mesh Collider component, check Convex, then Is Trigger (make sure there is a checkmark besides Convex and Is Trigger).
COSC 590/477 – Virtual Reality and Its Principles Fall 2018
10/16
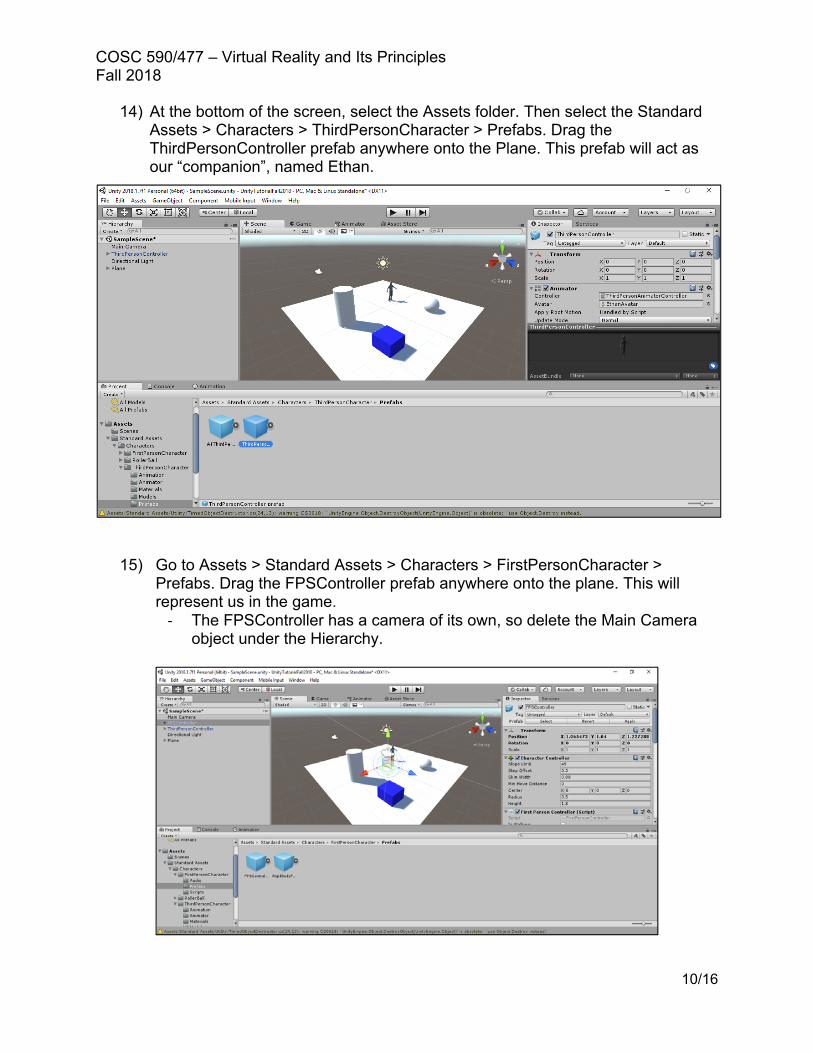
14) At the bottom of the screen, select the Assets folder. Then select the Standard Assets > Characters > ThirdPersonCharacter > Prefabs. Drag the ThirdPersonController prefab anywhere onto the Plane. This prefab will act as our “companion”, named Ethan.
15) Go to Assets > Standard Assets > Characters > FirstPersonCharacter > Prefabs. Drag the FPSController prefab anywhere onto the plane. This will represent us in the game. ‐ The FPSController has a camera of its own, so delete the Main Camera
object under the Hierarchy.
COSC 590/477 – Virtual Reality and Its Principles Fall 2018
11/16
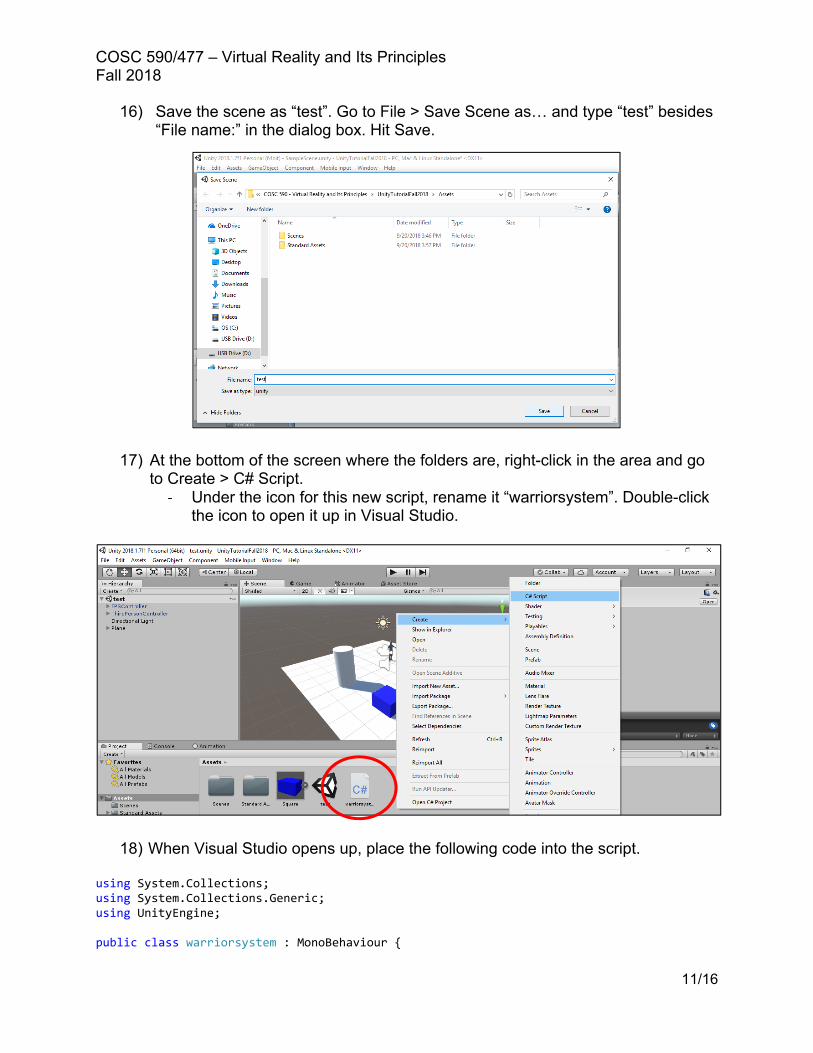
16) Save the scene as “test”. Go to File > Save Scene as… and type “test” besides “File name:” in the dialog box. Hit Save.
17) At the bottom of the screen where the folders are, right-click in the area and go to Create > C# Script.
‐ Under the icon for this new script, rename it “warriorsystem”. Double-click the icon to open it up in Visual Studio.
18) When Visual Studio opens up, place the following code into the script.
using System.Collections; using System.Collections.Generic; using UnityEngine; public class warriorsystem : MonoBehaviour {

COSC 590/477 – Virtual Reality and Its Principles Fall 2018
12/16
int points = 0; bool enter = true; // Use this for initialization void Start () { } // Update is called once per frame void Update () { } // What to do on collision private void OnTriggerEnter(Collider other) { if (enter) { if (other.gameObject.name == "Sphere") { points = points + 3; Debug.Log("You've collided with an object. Points: " + points); } else if (other.gameObject.name == "Cylinder") { points = points + 2; Debug.Log("You've collided with an object. Points: " + points); } else if (other.gameObject.name == "Mesh1") { points = points ‐ 5; Debug.Log("You've collided with an object. Points: " + points); } else { Debug.Log("You've collided with an object. Points: " + points); } } } }
19) Back in Unity, make sure that the scene is saved (by either hitting Ctrl + S or by selecting Save under the File menu).
20) Play the scene by either hitting Ctrl + P or by clicking on the Play button above
the scene.

COSC 590/477 – Virtual Reality and Its Principles Fall 2018
13/16
21) Navigate throughout the scene (using the up, down, left, right arrow keys on the keyboard), without falling off the Plane!!! Notice the Console at the bottom of the scene. Each time you collide with the Sphere or the Cylinder, you gain points. Each time you collide with our Square model from SketchUp, you lose points.
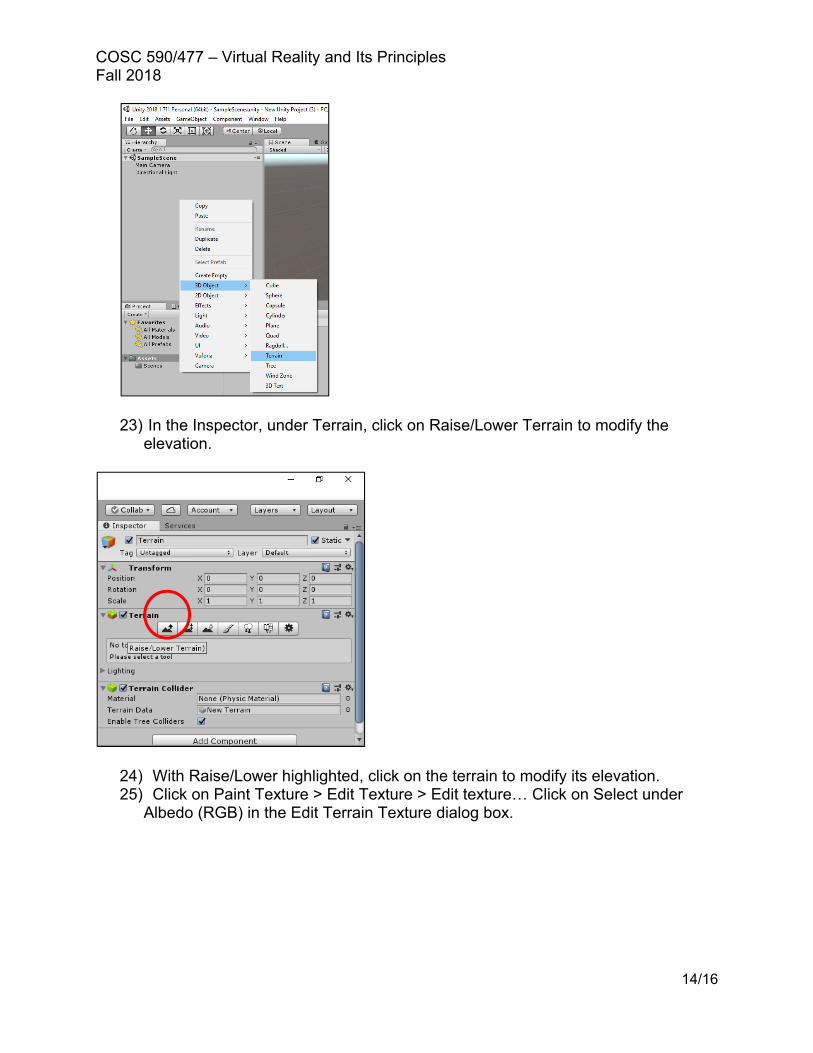
22) Right-click in the Hierarchy and select 3D > Terrain.
COSC 590/477 – Virtual Reality and Its Principles Fall 2018
14/16
23) In the Inspector, under Terrain, click on Raise/Lower Terrain to modify the
elevation.
24) With Raise/Lower highlighted, click on the terrain to modify its elevation. 25) Click on Paint Texture > Edit Texture > Edit texture… Click on Select under
Albedo (RGB) in the Edit Terrain Texture dialog box.

COSC 590/477 – Virtual Reality and Its Principles Fall 2018
15/16
26) Slide the Terrain under the Plane object using the Move tool (the red, blue, and
green arrows).

COSC 590/477 – Virtual Reality and Its Principles Fall 2018
16/16
27) Click on the FPSController object in the Hierarchy. In the Inspector, under First
Person Controller (script), click on Footstep sounds, then click on Element 1 (or Element 0, if you like) to change the footstep sounds of our character.
28) Again, play the scene and navigate throughout the environment. Notice that you able to jump off of the plane (but not be able to get back on it).
29) (Optional) Unity automatically generates a skybox; however, you may modify it by going to Create > Material. Under the drop-down menu for Shader, select Skybox > 6 Sided to create a skybox.


![Google SketchUp Basics for K-12 Educationsketchup-basics.wikispaces.com/file/view/EDU_SketchUpBasics.pdf · [4]:: Google SketchUp is an ex-tremely powerful 3d modeling tool. SketchUp](https://static.fdocuments.us/doc/165x107/5aae0ef87f8b9a25088bc80a/google-sketchup-basics-for-k-12-educationsketchup-4-google-sketchup-is-an-ex-tremely.jpg)

![Google SketchUp Basics for K-12 Education - PC\|MACimages.pcmac.org/.../Documents/EDU_SketchUp_Basics.pdf[4]:: Google SketchUp is an ex- tremely powerful 3d modeling tool. SketchUp](https://static.fdocuments.us/doc/165x107/5abade497f8b9a441d8c25bb/google-sketchup-basics-for-k-12-education-pc-4-google-sketchup-is-an-ex-.jpg)


